DIY scrap wood picture holder - no fuss quick and easy to make

DIY scrap wood picture holder using reclaimed barn wood. How to make an easy picture frame using items from the Dollar Tree. Hanging picture holder easy craft project.

Needing a quick & easy picture holder using reclaimed wood? This DIY craft might be what you are looking for.

Impact-Site-Verification: 99a15790-1f3a-44b3-ba5a-bb281f07e613

This scrap wood picture holder was insanely easy to make. While I love painting there was no painting, no drying times, no staining, literally no fuss! I had it up and holding pictures within minutes.

I’ve been redecorating our master bedroom on a shoe string budget. From the paint to the décor my goal is to spend less than $100 to redo our bedroom. This DIY craft most definitely fits into the budget since I only had to pay for the photo prints (they were a whopping .09 a piece).

I can’t wait to get our room all finished up and show you guys how it turns out but for now I will show you the DIY picture holder I made to go along with the rest of my frugal décor in our room.

Affiliate Disclosure. Some of the links on this website are affiliate links, which means that I may earn a small commission if you click on the link or make a purchase using the link. If you make a purchase you will not be charged anything additional.

—-> Check out more scrap wood projects, click here <—-

Here’s what you need to make your own DIY RECLAIMED WOOD PICTURE FRAME HOLDER

  • a piece of reclaimed wood

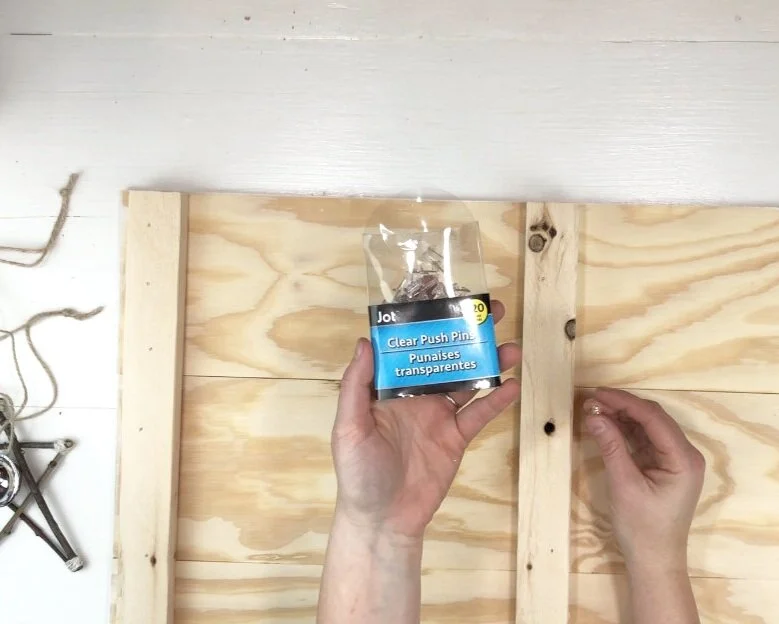
  • clips like these (I got mine from the Dollar Tree in the office supplies section)

  • hammer

  • hanging hardware of choice

Click here to learn how to attach a sawtooth hanger. It’s super simple especially if you have a piece of painter’s tape.

1.GATHER MATERIALS

I didn’t have any sawtooth hangers so I used some fancy picture hanging hardware and it required a drill.

DIY scrap wood picture holder using reclaimed barn wood. How to make an easy picture frame using items from the Dollar Tree. Hanging picture holder easy craft project.

2. LAY OUT YOUR PHOTOS

To be sure I had the spacing right I laid my 4x6 photos out on my reclaimed wood. I just eyeballed this but if you want yours to be perfect and exact you can use your tape measure to perfect your spacing.

3. HAMMER IN THE CLIPS

The clips I used already had nails attached to them. They were a little difficult to hammer in to the wood though. I am fairly certain, since the clips I used were in the office department of the store, that they were made to push into a cork board and not wood. But hey, it worked!

DIY scrap wood picture holder using reclaimed barn wood. How to make an easy picture frame using items from the Dollar Tree. Hanging picture holder easy craft project.

4. ATTACH HANGING HARDWARE

If you need a visual on how to attach a sawtooth hanger check out this post. I used my Ryobi drill to screw in my hardware but a drill isn’t completely necessary, a screwdriver will work too it’s just not as quick and easy.

DIY scrap wood picture holder using reclaimed barn wood. How to make an easy picture frame using items from the Dollar Tree. Hanging picture holder easy craft project.

5. ADD YOUR PICTURES & HANG ON THE WALL

This reclaimed wood photo holder is going in our master bedroom so I tried to choose photos that were good ones of both my husband and myself.

DIY scrap wood picture holder using reclaimed barn wood. How to make an easy picture frame using items from the Dollar Tree. Hanging picture holder easy craft project.

I hope you found this tutorial both simple and motivating to use up some scrap pieces of wood that you may have lying around. Let me know if you have any questions in the comments below.

Check out more posts below. Happy Crafting!

DIY patriotic tiered tray fireworks display

Patriotic crafts for the 4th of July. How to make your own wood firecrackers. DIY 4th of July firework craft for tiered tray decor. Rustic farmhouse style decorations for summer.

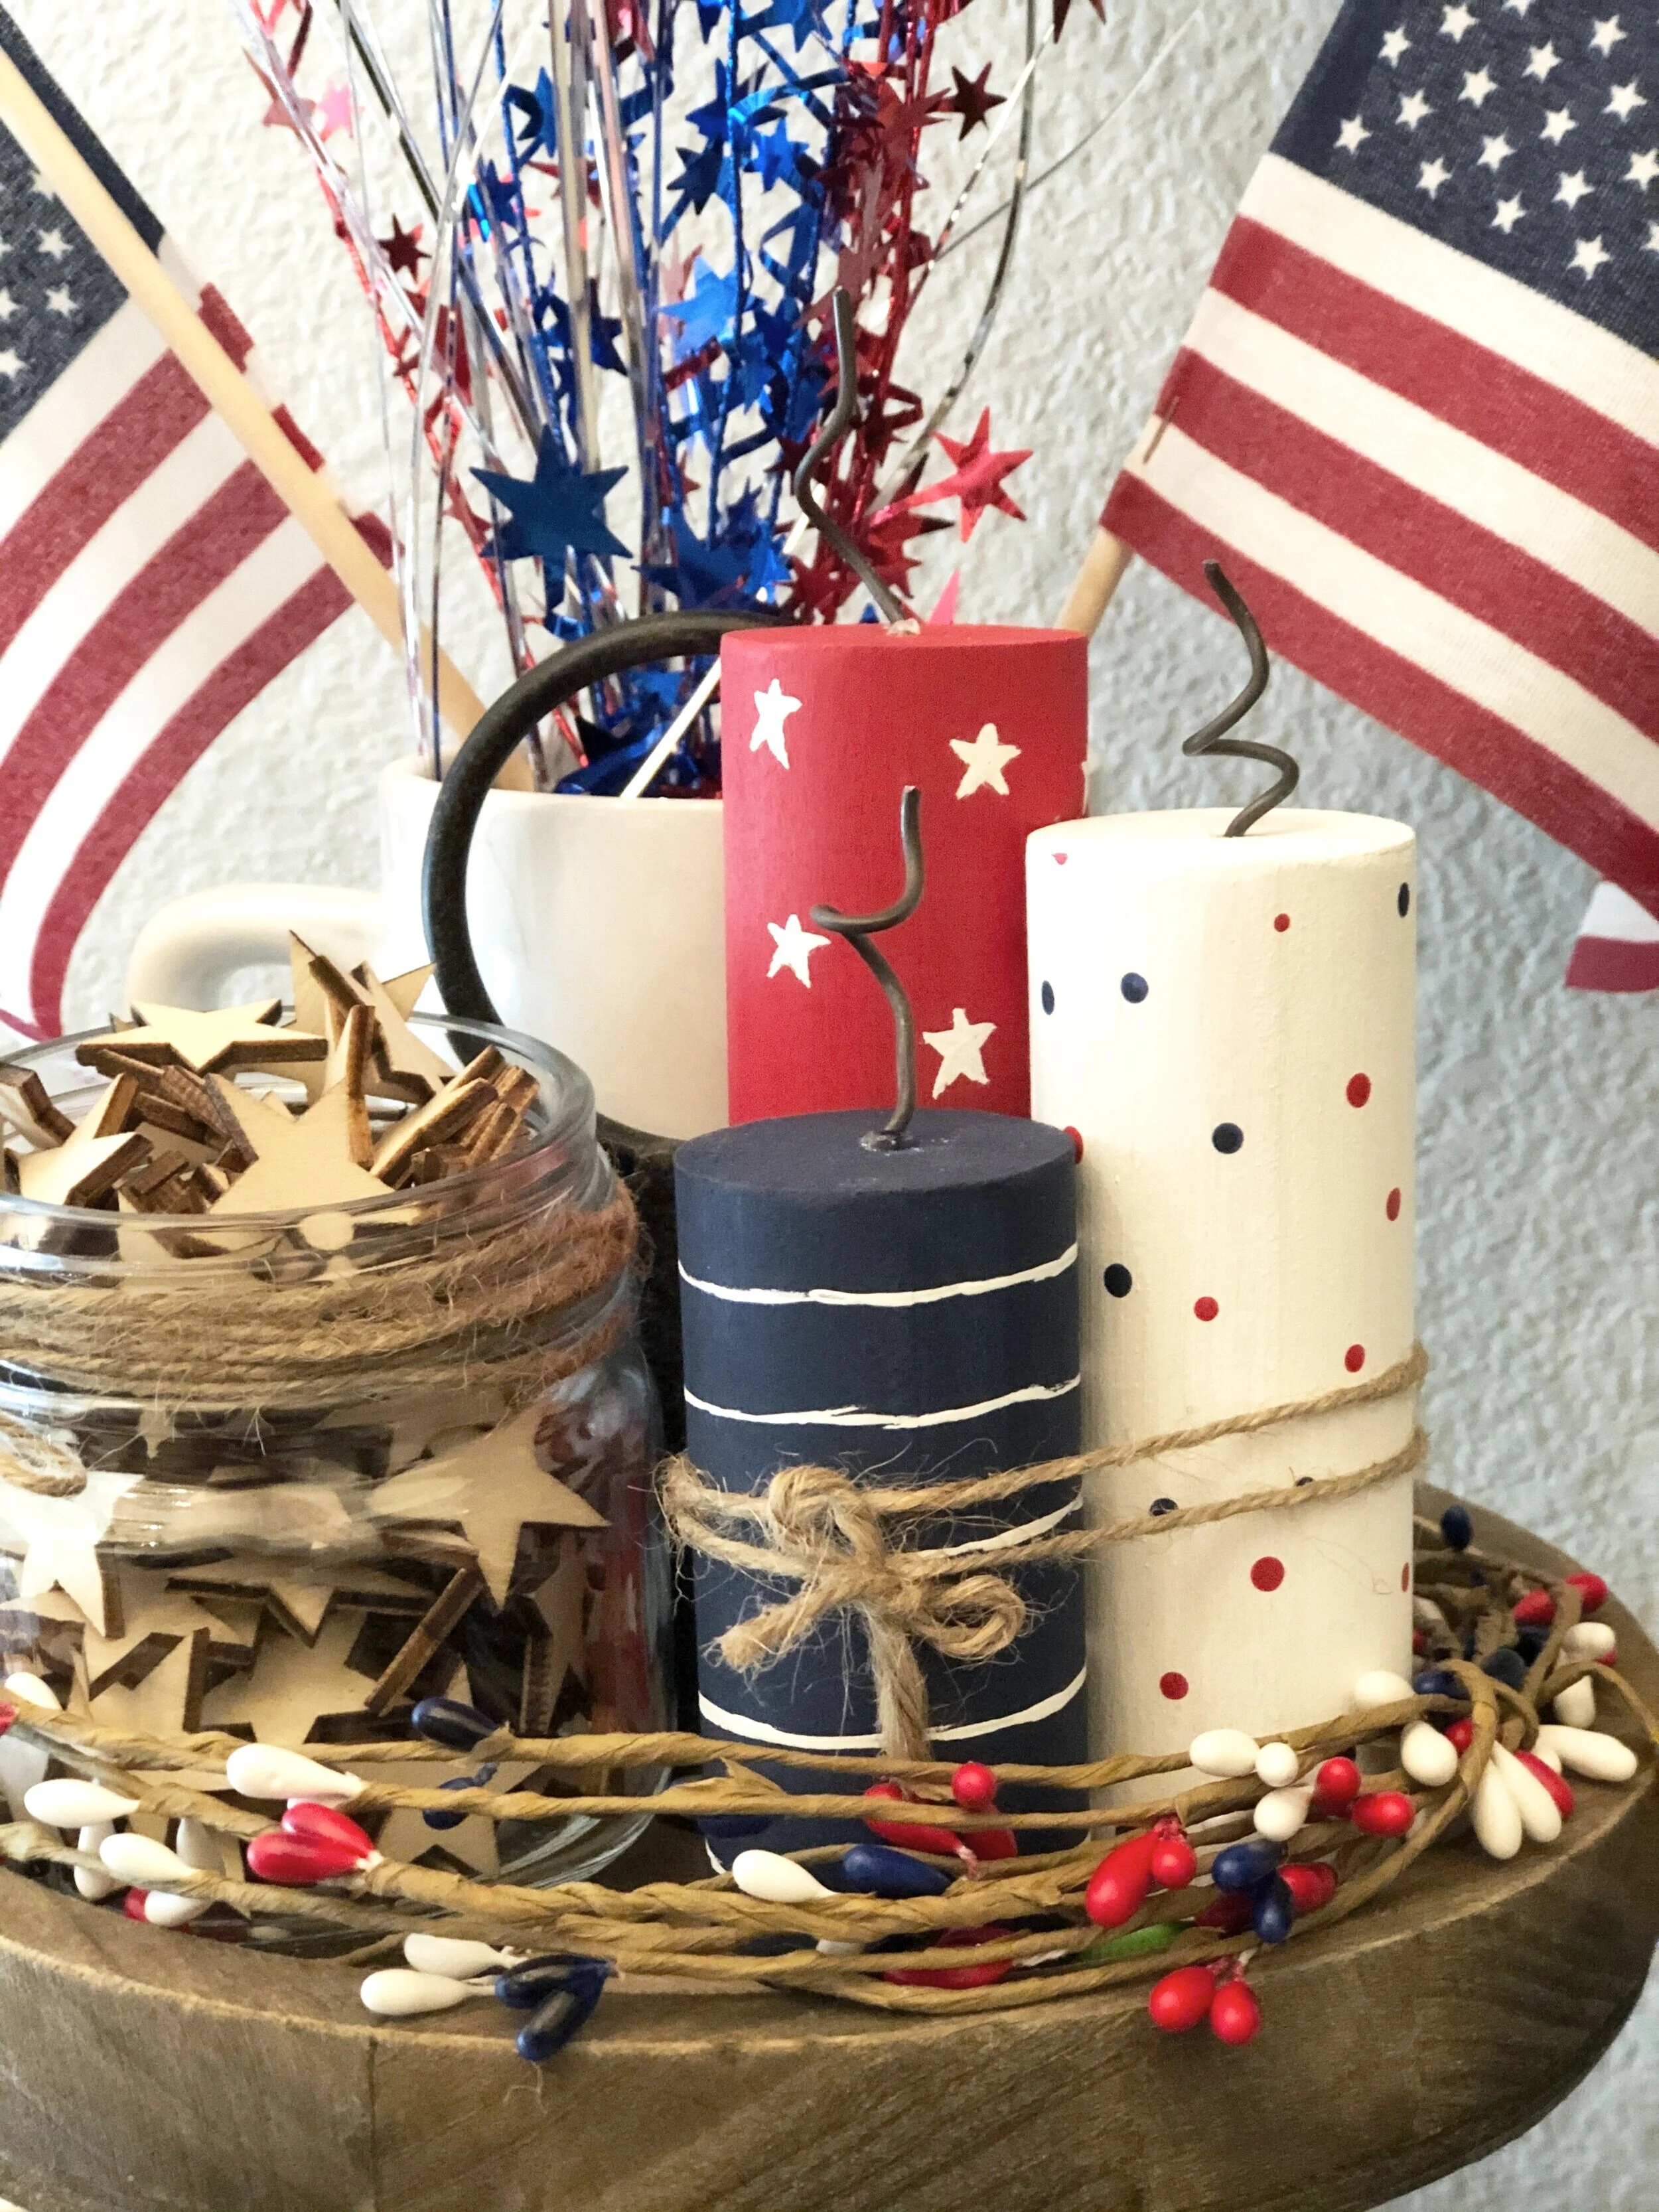
How to make Fourth of July firecrackers from a scrap piece of wood dowel rod

Looking for an idea to fill up your 4th of July themed tiered tray? These little mini firecrackers are so easy to DIY and make a big impression on those rustic displays.

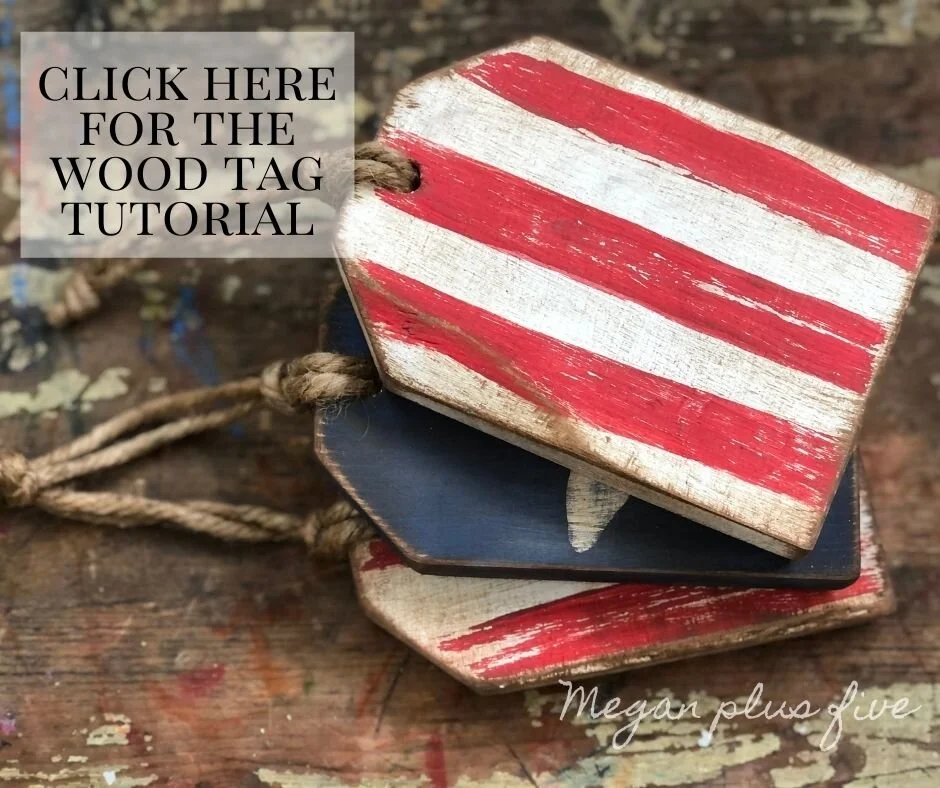
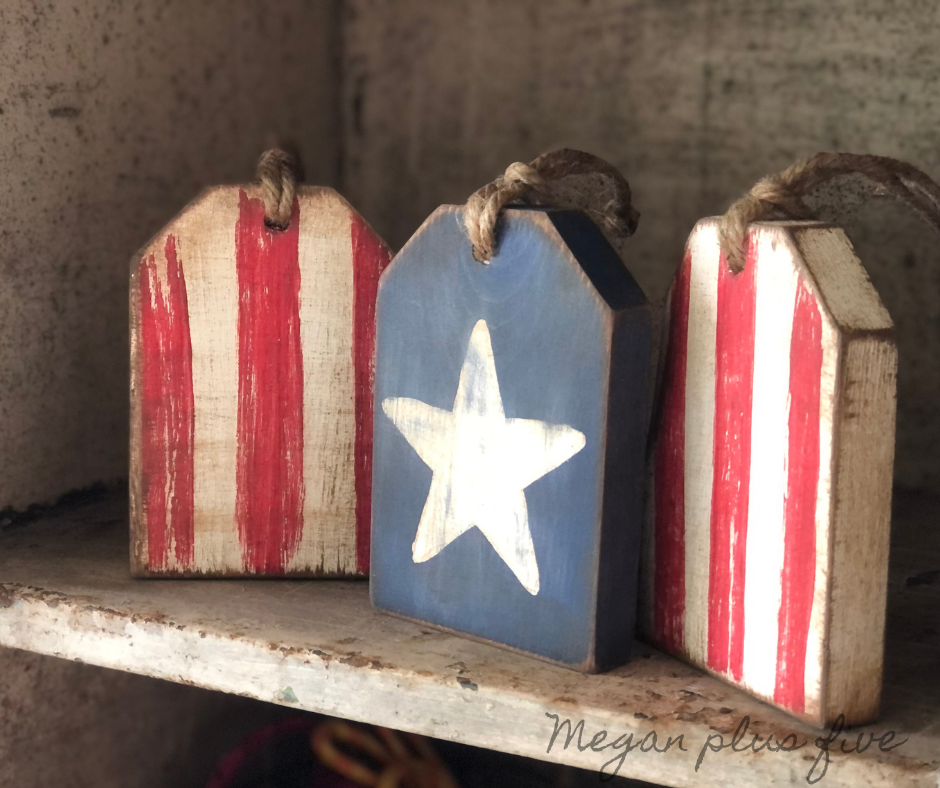
Along with these red, white, and blue fireworks I made these star & stripes patriotic themed wood tags to go with my farmhouse tray too.

I love everything about these little hand painted firecrackers. I love how uneven the white lines are on the smallest blue firework. I love how the polka dots are so dainty on the mid sized white firework. And I love how varied and primitive the stars look on the largest red firework. I think they look so perfect on my coffee bar tiered tray for the 4th of July.

Affiliate Disclosure. Some of the links on this website are affiliate links, which means that I may earn a small commission if you click on the link or make a purchase using the link. If you make a purchase you will not be charged anything additional.

Patriotic crafts for the 4th of July. How to make your own wood firecrackers. DIY 4th of July firework craft for tiered tray decor. Rustic farmhouse style decorations for summer.

Here’s what you need

1.CUT & DRILL A HOLE

I used an old dowel rod for my mini firecrackers. The previous owners of our 120+ year old home had used this thick dowel rod to hold curtains in what is now my craft studio. I couldn’t just toss out a perfectly good dowel rod like that so I put it up in the garage till I found a project to use it on. This patriotic craft was it!

Patriotic crafts for the 4th of July. How to make your own wood firecrackers. DIY 4th of July firework craft for tiered tray decor. Rustic farmhouse style decorations for summer.

I cut the dowel to approx 3”, 4” and 5” pieces. This does NOT have to be exact. If you think those are too tall or not tall enough adjust your dowel pieces to fit your needs. I used a tiny drill bit to make a hole in the top of each wood dowel piece. This will vary by the size wire you use.

2. PAINT EACH DOWEL

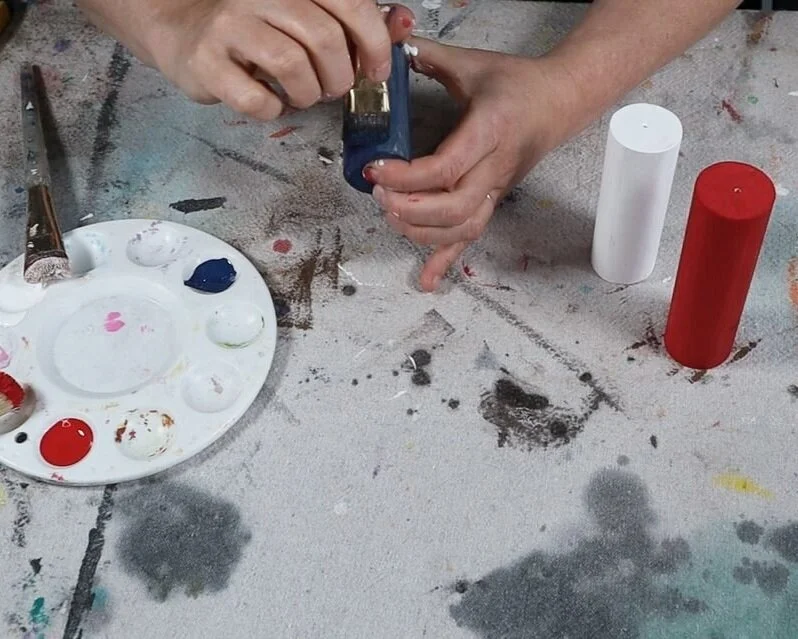
I chose to use the colors: bright red, English blue, and white for my patriotic colors. Any blue, red, or white will work though. I painted the smallest firework blue, the middle firework white, and the tallest firework red.

Patriotic crafts for the 4th of July. How to make your own wood firecrackers. DIY 4th of July firework craft for tiered tray decor. Rustic farmhouse style decorations for summer.

I added 2 coats to the red and white fireworks and 3 coats of paint to the blue firework. The blue didn’t seem to have as great of coverage so a third coat was needed. To speed up the drying time I used my handy heat gun.

3. ADD POLKA DOTS

I added polka dots to the white medium sized firecracker. I took a small detail artist brush then lightly dipped the wood end of the brush in red paint. I gently dotted red dots all of the firecracker.

Patriotic crafts for the 4th of July. How to make your own wood firecrackers. DIY 4th of July firework craft for tiered tray decor. Rustic farmhouse style decorations for summer.

After I was happy with how many red polka dots were on the firecracker I wiped the end of the paint brush off then did the same thing but with blue polka dots.

Patriotic crafts for the 4th of July. How to make your own wood firecrackers. DIY 4th of July firework craft for tiered tray decor. Rustic farmhouse style decorations for summer.

4. PAINT THIN STRIPES

Just like with the patriotic wood tags I free handed the stripes on the blue firecracker. I actually love how uneven these turned out. They look hand painted and not super crisp (which I love crisp lines on lettered wood signs but for this craft I really wanted a handmade look). I have an artist brush that I have trimmed to a point to use for crafts when I need a thinner brush.

Patriotic crafts for the 4th of July. How to make your own wood firecrackers. DIY 4th of July firework craft for tiered tray decor. Rustic farmhouse style decorations for summer.

Jut like with the polka a dots I lightly dipped the tip of my brush this time into the white paint. Then I semi steadily and slowly painted stripes going horizontally around the blue firecracker.

Patriotic crafts for the 4th of July. How to make your own wood firecrackers. DIY 4th of July firework craft for tiered tray decor. Rustic farmhouse style decorations for summer.

5. PAINT LITTLE STARS

I could have used my Cricut to make perfect stars but I wasn’t going for perfect with this 4th of July craft. I wanted primitive looking stars and I’m so happy with how they turned out. I used the same artist paint brush that I used for the stripes to paint the stars. I lightly dipped the tip of my brush into the white acrylic paint then painted the stars super old school like crisscrossing my lines then filling the middle in.

Patriotic crafts for the 4th of July. How to make your own wood firecrackers. DIY 4th of July firework craft for tiered tray decor. Rustic farmhouse style decorations for summer.

I tried to paint the stars so that they didn’t look identical.

6. GLUE IN WIRE WICKS

I didn’t realize my glue gun wasn’t really in the camera frame when I did this step so you can’t see it in the pic. I trimmed down the wire pieces as I went to get the perfect size for each firecracker wick. I used my precise tipped hot glue gun to add a tiny bit of glue to the bottom end of the wire pieces, working on one firecracker at a time. Then I quickly placed the wire piece in the drilled hole in the top of the firecracker.

Patriotic crafts for the 4th of July. How to make your own wood firecrackers. DIY 4th of July firework craft for tiered tray decor. Rustic farmhouse style decorations for summer.

7. WRAP WITH TWINE

After paint and hot glue were dry I placed the three firecrackers together. Then I took a piece of jute/twine and wrapped it around the firecracker bundle a few times and tied it off with a little bow.

Patriotic crafts for the 4th of July. How to make your own wood firecrackers. DIY 4th of July firework craft for tiered tray decor. Rustic farmhouse style decorations for summer.

Oh my goodness I LOVE how this little wooden bundle of firecrackers turned out!

Patriotic crafts for the 4th of July. How to make your own wood firecrackers. DIY 4th of July firework craft for tiered tray decor. Rustic farmhouse style decorations for summer.

Check out the other handmade pieces of my farmhouse 4th of July coffee bar tray below

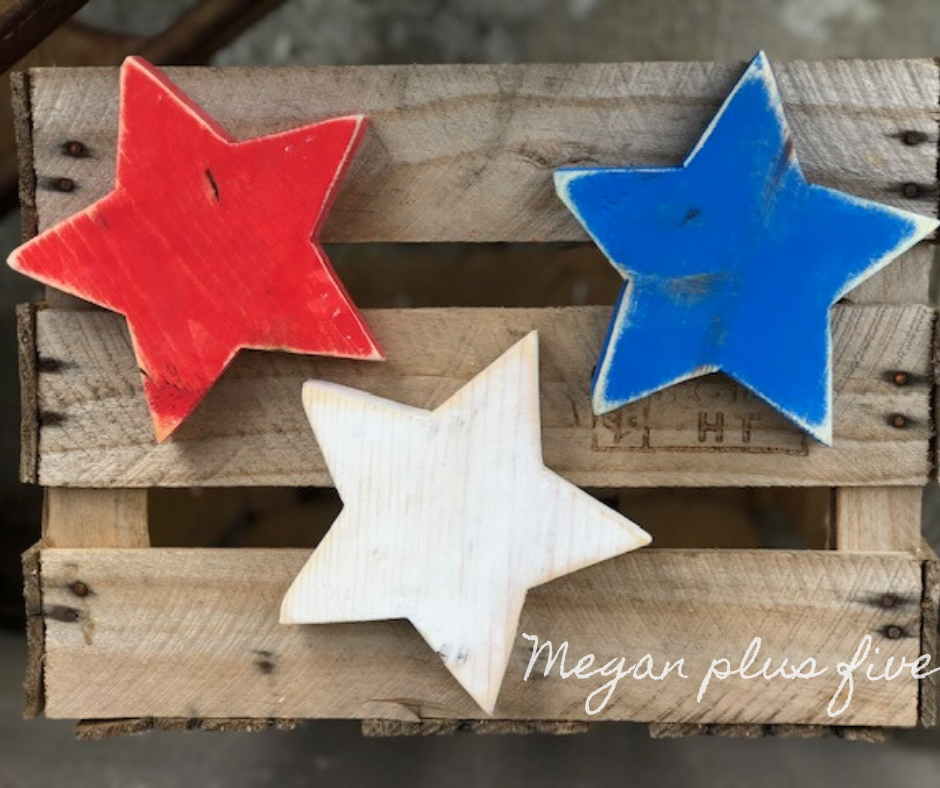
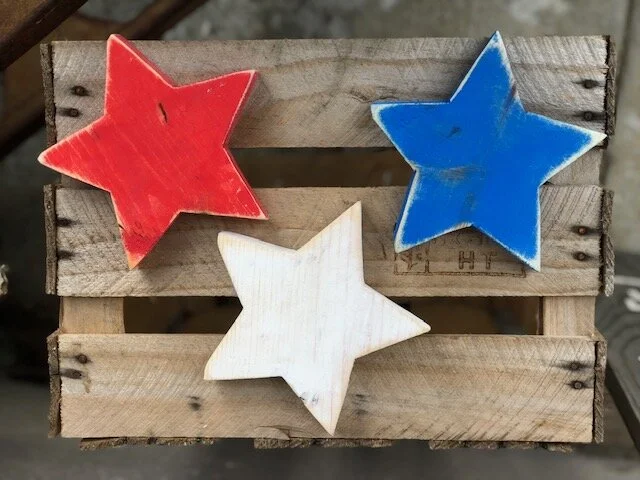
Free standing wood stars

DIY 4th of July wood tags

DIY wood tags for Fourth of July made from a 1x4. Tiered tray rustic farmhouse wooden tags for the 4th of July. Red white and blue patriotic farmhouse rustic DIY decorations for coffee bar.

Easy 4th of July wood tags for rustic decor

I love those little wood tags. They are oh so cute and fit perfectly on a farmhouse style tiered tray. You can literally create these wooden tags for any occasion or season AND they are SO cheap to make! Especially if you have scrap pieces of 1x4’s around.

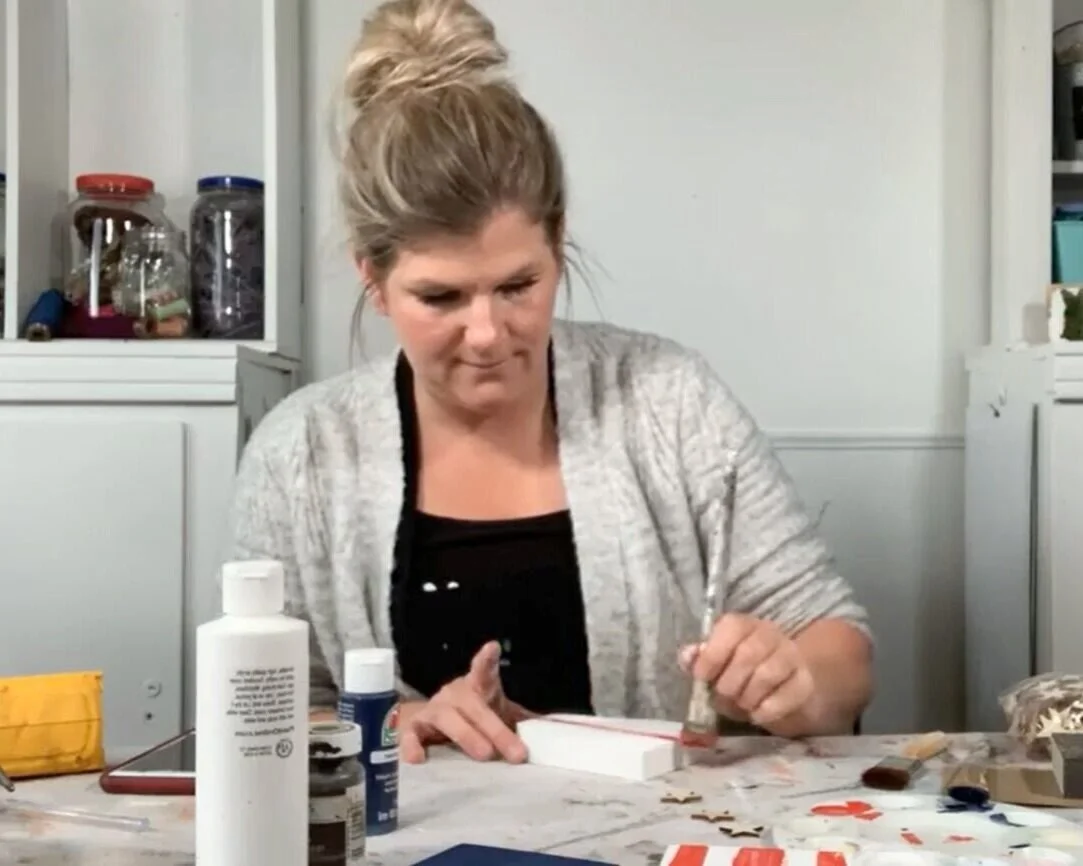
For my 4th of July themed coffee bar I told myself to get an early start because I would totally put it off and not make all the things in time to both share with you all AND get my display up in time to enjoy it for the holiday. So I got my butt in gear, cut myself some wooden tags, put on some makeup & real clothes and went live on my Facebook page while I made these little wooden patriotic tags.

DIY wood tags for Fourth of July made from a 1x4. Tiered tray rustic farmhouse wooden tags for the 4th of July. Red white and blue patriotic farmhouse rustic DIY decorations for coffee bar.

Affiliate Disclosure. Some of the links on this website are affiliate links, which means that I may earn a small commission if you click on the link or make a purchase using the link. If you make a purchase you will not be charged anything additional.

DIY wood tags for Fourth of July made from a 1x4. Tiered tray rustic farmhouse wooden tags for the 4th of July. Red white and blue patriotic farmhouse rustic DIY decorations for coffee bar.

Here’s what you need to make Fourth of July wood tags

1.PAINT THE WOOD TAGS

Since these are patriotic themed wood tags I went with the colors red, white, and blue.

I painted two of the tags all white, when the first coat was dry I painted a second coat on them. Sorry for the grainy pic I took snips for my fb live I did to create these.

DIY wood tags for Fourth of July made from a 1x4. Tiered tray rustic farmhouse wooden tags for the 4th of July. Red white and blue patriotic farmhouse rustic DIY decorations for coffee bar.

Then I painted the third wood tag blue. I used an English blue and not a true blue so it would tie in better with my rustic farmhouse looking home décor.

DIY wood tags for Fourth of July made from a 1x4. Tiered tray rustic farmhouse wooden tags for the 4th of July. Red white and blue patriotic farmhouse rustic DIY decorations for coffee bar.

2. PAINT RED STRIPES

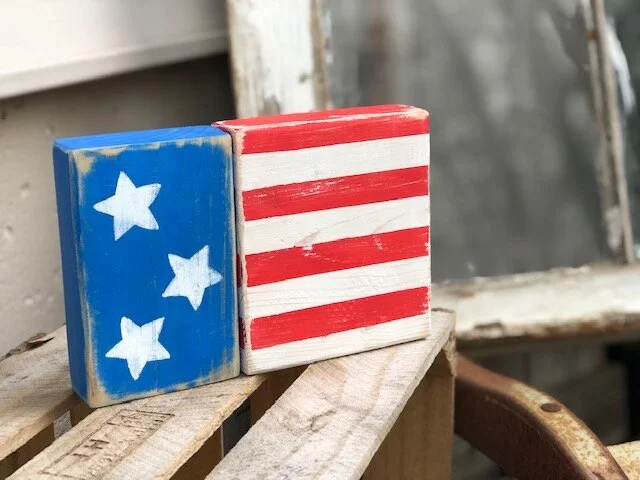
Unlike my chunky 2x4 wood flag where I used tape and got a cleaner look I just eyeballed the stripes on these wood tags and was happy enough lol! But if you want a little cleaner lined look to your stripes you can use masking or painters tape to make the lines a little straighter, even, and more crisp.

I painted 3 stripes on each wood tag. One down the center then one stripe on either side of the center stripe.

DIY wood tags for Fourth of July made from a 1x4. Tiered tray rustic farmhouse wooden tags for the 4th of July. Red white and blue patriotic farmhouse rustic DIY decorations for coffee bar.

3. ADD A STAR

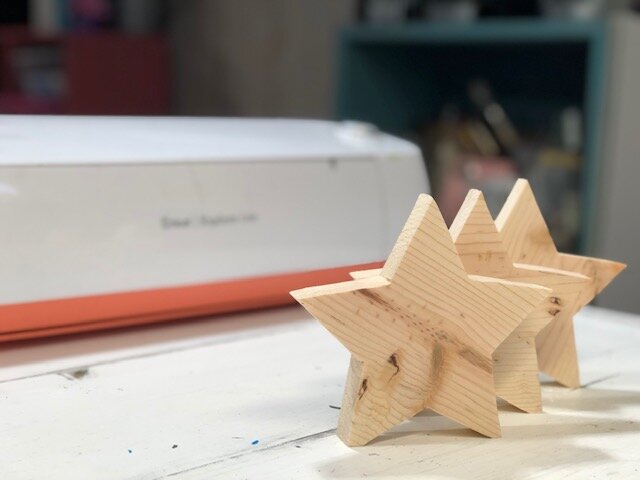
You can free hand this, use an adhesive stencil, a cardstock stencil, or trace a wood cutout of a star like I did. I had a leftover star from a Christmas ornament that I didn’t use so naturally I put it with the rest of my hoarded craft supplies. I centered it on my wood tag then traced around it with a pencil.

DIY wood tags for Fourth of July made from a 1x4. Tiered tray rustic farmhouse wooden tags for the 4th of July. Red white and blue patriotic farmhouse rustic DIY decorations for coffee bar.

I took a small paint brush and painted a thin coat of white acrylic paint. After that was dry I painted a second coat over it.

DIY wood tags for Fourth of July made from a 1x4. Tiered tray rustic farmhouse wooden tags for the 4th of July. Red white and blue patriotic farmhouse rustic DIY decorations for coffee bar.

To help speed up drying time I used my heat gun. This tool was so inexpensive and comes in handy all the time!

DIY wood tags for Fourth of July made from a 1x4. Tiered tray rustic farmhouse wooden tags for the 4th of July. Red white and blue patriotic farmhouse rustic DIY decorations for coffee bar.

4. DISTRESS THE WOOD TAGS

If I was not in my house I would have used my sander for this step. But since I was inside I used 150 grit sandpaper. I focused on the edges and corners and lightly went over the fronts of each wood tag.

DIY wood tags for Fourth of July made from a 1x4. Tiered tray rustic farmhouse wooden tags for the 4th of July. Red white and blue patriotic farmhouse rustic DIY decorations for coffee bar.

5. ANTIQUING WAX

If you’ve read some of my other posts you might know that I LOVE antiquing wax for my distressed pieces. This stuff is so good and gives pieces such a primitive look.

If you want a more in-depth tutorial on how to use ANTIQUING WAX I created an entire post on how I use it on my craft projects.

DIY wood tags for Fourth of July made from a 1x4. Tiered tray rustic farmhouse wooden tags for the 4th of July. Red white and blue patriotic farmhouse rustic DIY decorations for coffee bar.

6. ADD TWINE TO YOUR WOOD TAG

The last step is to add a piece of twine to your wood tags. I went with a thicker jute for my tags since the hole I drilled in the 1x4 tags was on the larger side.

DIY wood tags for Fourth of July made from a 1x4. Tiered tray rustic farmhouse wooden tags for the 4th of July. Red white and blue patriotic farmhouse rustic DIY decorations for coffee bar.

That’s it! These wooden tags are so easy to create for your rustic 4th of July decorations. If you have any questions leave them in the comments below.

DIY wood tags for Fourth of July made from a 1x4. Tiered tray rustic farmhouse wooden tags for the 4th of July. Red white and blue patriotic farmhouse rustic DIY decorations for coffee bar.

Happy Crafting and be sure to check out more DIY craft tutorials below.

Leaning rustic front porch 'oh hello' sign + FREE SVG

How to make a rustic farmhouse style front porch sign. DIY oh hello leaning porch sign using your Cricut or Silhouette cutting machine plus free svg.

Leaning rustic front porch 'oh hello' sign + FREE SVG

Make your own unique rustic farmhouse leaning porch sign… bonus I’m giving you the same SVG I used for this tutorial for you to use for free!

65227969-C2CD-46D3-9B4D-87FB064CBF8D.jpeg

DIY rustic leaning porch sign

The other day I shared with you how I turned a rusty old metal locker / cabinet into a storage for our muddy shoes on our sunporch. I had picked up that rusted gem at a local antique store for just $20! I had no idea when I bought that chipped old farmhouse looking piece that it would actually serve our home double duty!

Affiliate Disclosure. Some of the links on this website are affiliate links, which means that I may earn a small commission if you click on the link or make a purchase using the link. If you make a purchase you will not be charged anything additional.

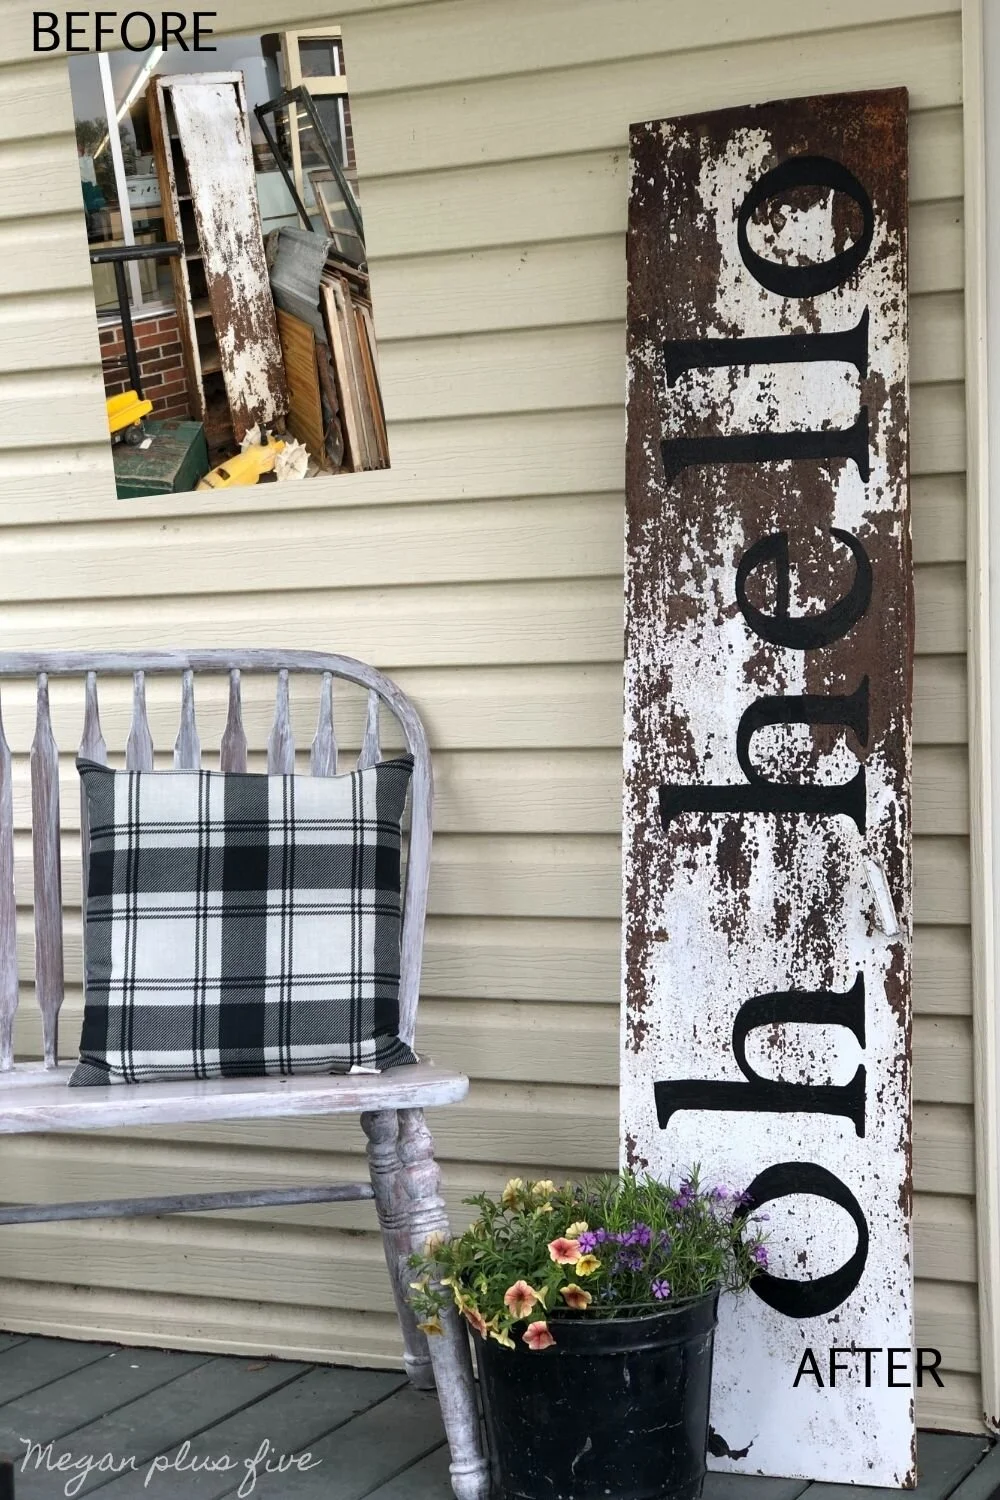
Here’s what the metal cabinet looked like when I picked it up from the antique store.

How to make a rustic farmhouse style front porch sign. DIY oh hello leaning porch sign using your Cricut or Silhouette cutting machine plus free svg.

And here’s what I repurposed it into. So perfect for our family’s muddy shoes on the sunporch!

How to make a rustic farmhouse style front porch sign. DIY oh hello leaning porch sign using your Cricut or Silhouette cutting machine plus free svg.

Since one of the pins on the door was gone I removed the door from the cabinet all together. I wasn’t sure what I was going to do with the door but I knew if I put it on a shelf in the garage it would sit there for a long time because honestly I’d forget it was there. So I did some head scratching and thought I could turn it into a super cute painted sign. And so I did!

How to paint your own farmhouse style welcome sign for your front porch

Here’s what I used

How to make a rustic farmhouse style front porch sign. DIY oh hello leaning porch sign using your Cricut or Silhouette cutting machine plus free svg.

1. CUT OUT LETTERS

You can grab the same oh hello SVG that I used in my free resource library. That’s where I keep all of my printables, cut files, and more for my readers to use free of charge <3!

I opted to use a cardstock stencil on this metal porch sign. I was afraid if I used a sticky back stencil (like used on this other leaning porch sign) would remove a lot of the paint and rust that was already on the metal door.

I uploaded the SVG into Cricut Design Space then sized it so that it would fit on the 12”x59” door. I sized mine so that it was about 10”x50” or so then I had to break up the oh hello SVG so that I could cut it out. This is easy, just take a square and slice the letters out so now you have individual sections instead of one single image, I hope that makes sense. Here’s what my SVG looked like after I sliced it and deleted the duplicate slices (I changed the colors so you could see them better).

How to make a rustic farmhouse style front porch sign. DIY oh hello leaning porch sign using your Cricut or Silhouette cutting machine plus free svg.

To cut them out I used 12”x12” cardstock. If my cut image was larger than 12” I just butted two pieces together and taped the seam. Click Click here to see how I do this on another projectto see how I do this on another project.

2. ARRANGE LETTERS & TRACE

After my letters were cut out I decided which end I wanted to be the top…then I did opposite of that lol I placed my door on one side of my table then went to the other side to arrange my letters, total facepalm moment. But that’s ok it turned out SO CUTE even with that mess up. I left more blank space toward the bottom of the sign so that I would have room to place a plant at the base if I wanted without hiding the first letter. Here’s a great still shot from my video lol!!

How to make a rustic farmhouse style front porch sign. DIY oh hello leaning porch sign using your Cricut or Silhouette cutting machine plus free svg.

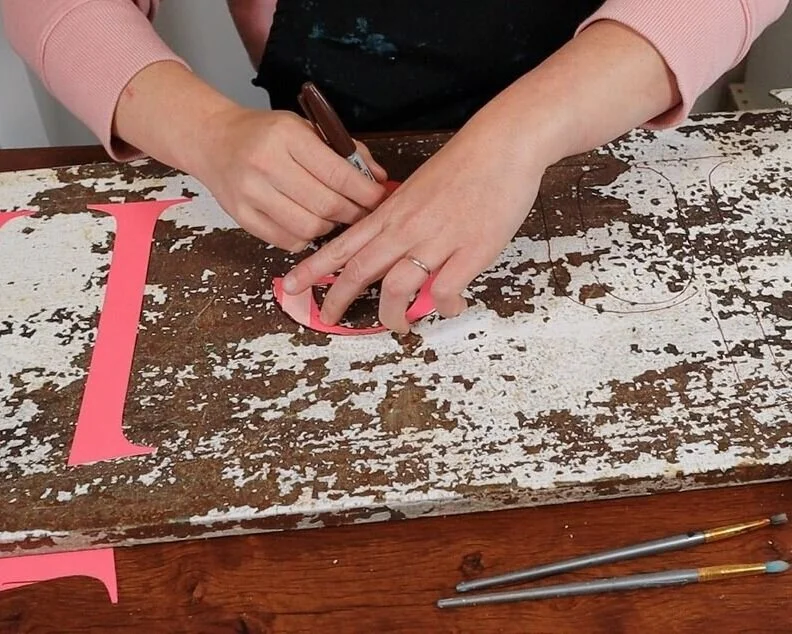
I started tracing with a pen but that just wasn’t cutting it so then I found the nearest sharpie and used that. It was brown but the black paint covered it perfectly!

How to make a rustic farmhouse style front porch sign. DIY oh hello leaning porch sign using your Cricut or Silhouette cutting machine plus free svg.

3. PAINT

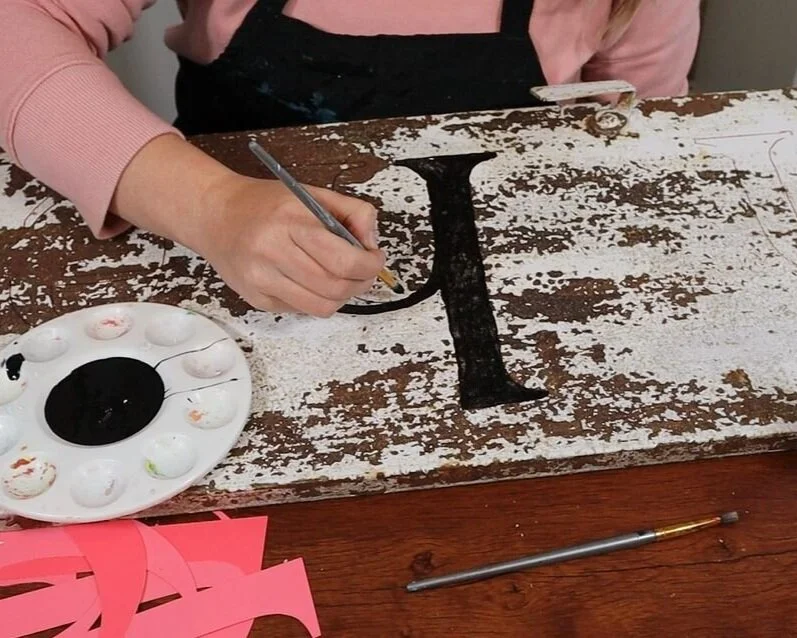
I had a bottle of old outdoor paint, like 3 years old, and used that to paint my sign. I used a small round tipped brush to outline the letters but also fill them in as I went along.

How to make a rustic farmhouse style front porch sign. DIY oh hello leaning porch sign using your Cricut or Silhouette cutting machine plus free svg.

4. DRY

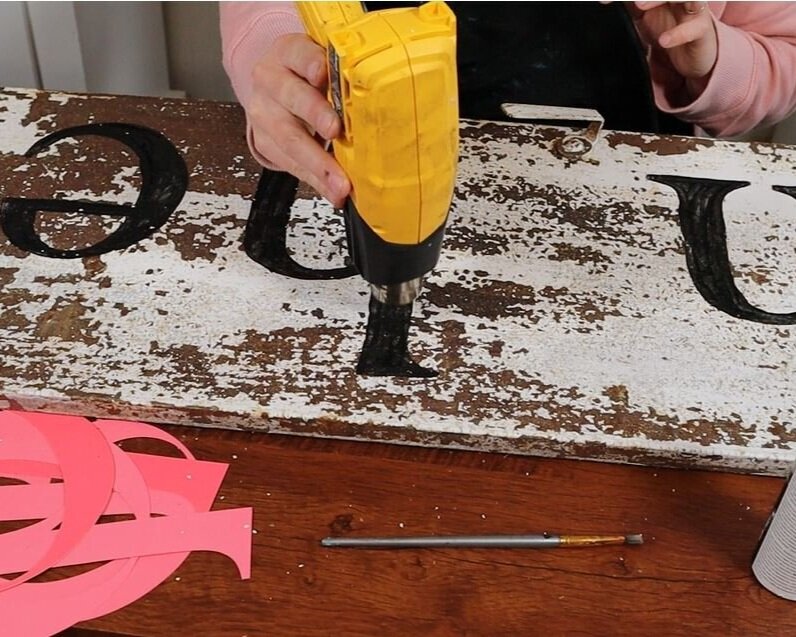
Like with most of the DIYs I do for around my house I needed this one to be quick and easy. I’m a busy momma to four girls and we had a movie to catch at the theatre so I used my heat gun to speed up the dry time.

How to make a rustic farmhouse style front porch sign. DIY oh hello leaning porch sign using your Cricut or Silhouette cutting machine plus free svg.

5. 2ND COAT OF PAINT

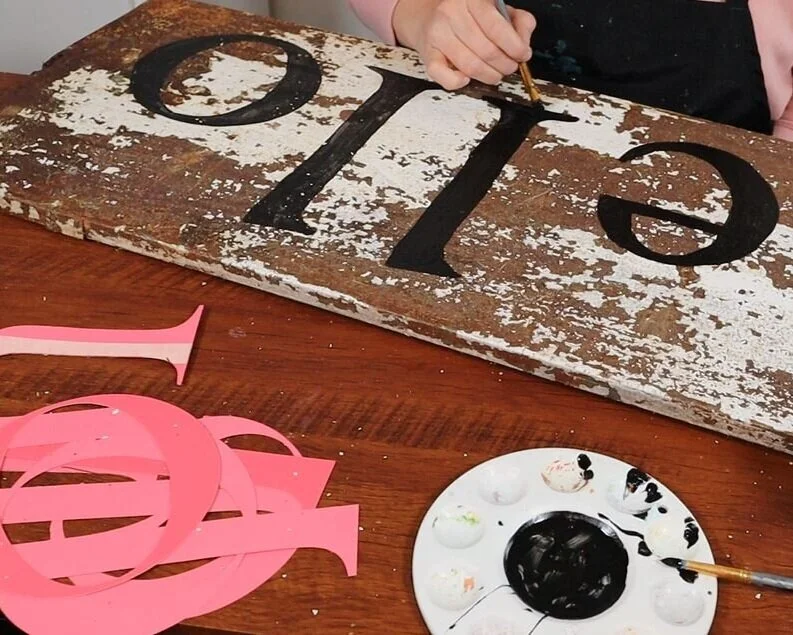
I thought maybe one coat of paint would do it but it wasn’t quiet enough coverage so I painted a second coat. This went much faster than the first coat. Then I used my heat gun to dry it again.

How to make a rustic farmhouse style front porch sign. DIY oh hello leaning porch sign using your Cricut or Silhouette cutting machine plus free svg.

I’m super impatient so I put my sign out as soon as that second coat was dry.

How to make a rustic farmhouse style front porch sign. DIY oh hello leaning porch sign using your Cricut or Silhouette cutting machine plus free svg.

I just LOVE how this old porch sign turned out! I still can’t believe it turned out so stinking good! I had no plans for that door when I bought that cabinet but I’m so glad I made use of it instead of it just sitting on a shelf collecting even more dust in the garage.

I hope you enjoyed this crafty tutorial. If you have any questions please leave them in the comments below.

Happy Crafting!

More posts you’ll love

DIY hello sunshine stained wood sign + FREE SVG

DIY how to stencil on wood sign painting tutorial. How to make a hello sunshine lettered sign for summer. Using oramask stencil film to paint wood signs without paint bleed. free svg to use with cricut for sign making.

DIY STENCILED HELLO SUNSHINE SIGN

Make this simple and chic hello sunshine sign to display with your warm weathered décor. I used my old school Cricut Explore to make this wood sign but you can use any vinyl cutting machine you have. Be sure to grab the FREE SVG in my free resource library to make this exact design (find the link below;) )

Affiliate Disclosure. Some of the links on this website are affiliate links, which means that I may earn a small commission if you click on the link or make a purchase using the link. If you make a purchase you will not be charged anything additional.

Here’s what you need

Want to learn more techniques for painting wood signs? CLICK HERE to check out my list of DIY sign painting tutorials for the most crisp clean lines for your lettered painted signs.

The type of stenciling I used for this wood HELLO SUNSHINE sign is called REVERSE STENCILING. I also used this stenciling technique on this BLESS OUR NEST wood sign. I love this technique when I’m only using two colors, the base color and the letter color. It gives super crisp lines and is really quick to do.

1.CUT THE STENCIL

Upload the HELLO SUNSHINE SVG into Cricut Design Space (or the program you are using with your fancy cutting machine). Then add a square to the canvas. Size the square so it’s about the same size as the wood base you are using. I sized mine to 7.25” then resized the HELLO SUMMER SVG till I was happy with the size of that. This process isn’t a must, you can just cut the SVG out without a square around it BUT adding this square does make centering your design much easier when you go to stencil the design.

DIY how to stencil on wood sign painting tutorial. How to make a hello sunshine lettered sign for summer. Using oramask stencil film to paint wood signs without paint bleed. free svg to use with cricut for sign making.

Once you happy with the size select both the SVG and the square and center them. After they are centered and still both selected use the Cricut SLICE feature to slice the SVG out of the square.

DIY how to stencil on wood sign painting tutorial. How to make a hello sunshine lettered sign for summer. Using oramask stencil film to paint wood signs without paint bleed. free svg to use with cricut for sign making.

Now you should have 3 images. You will only need the square that has the circle cut out of it so delete the two other circle images.

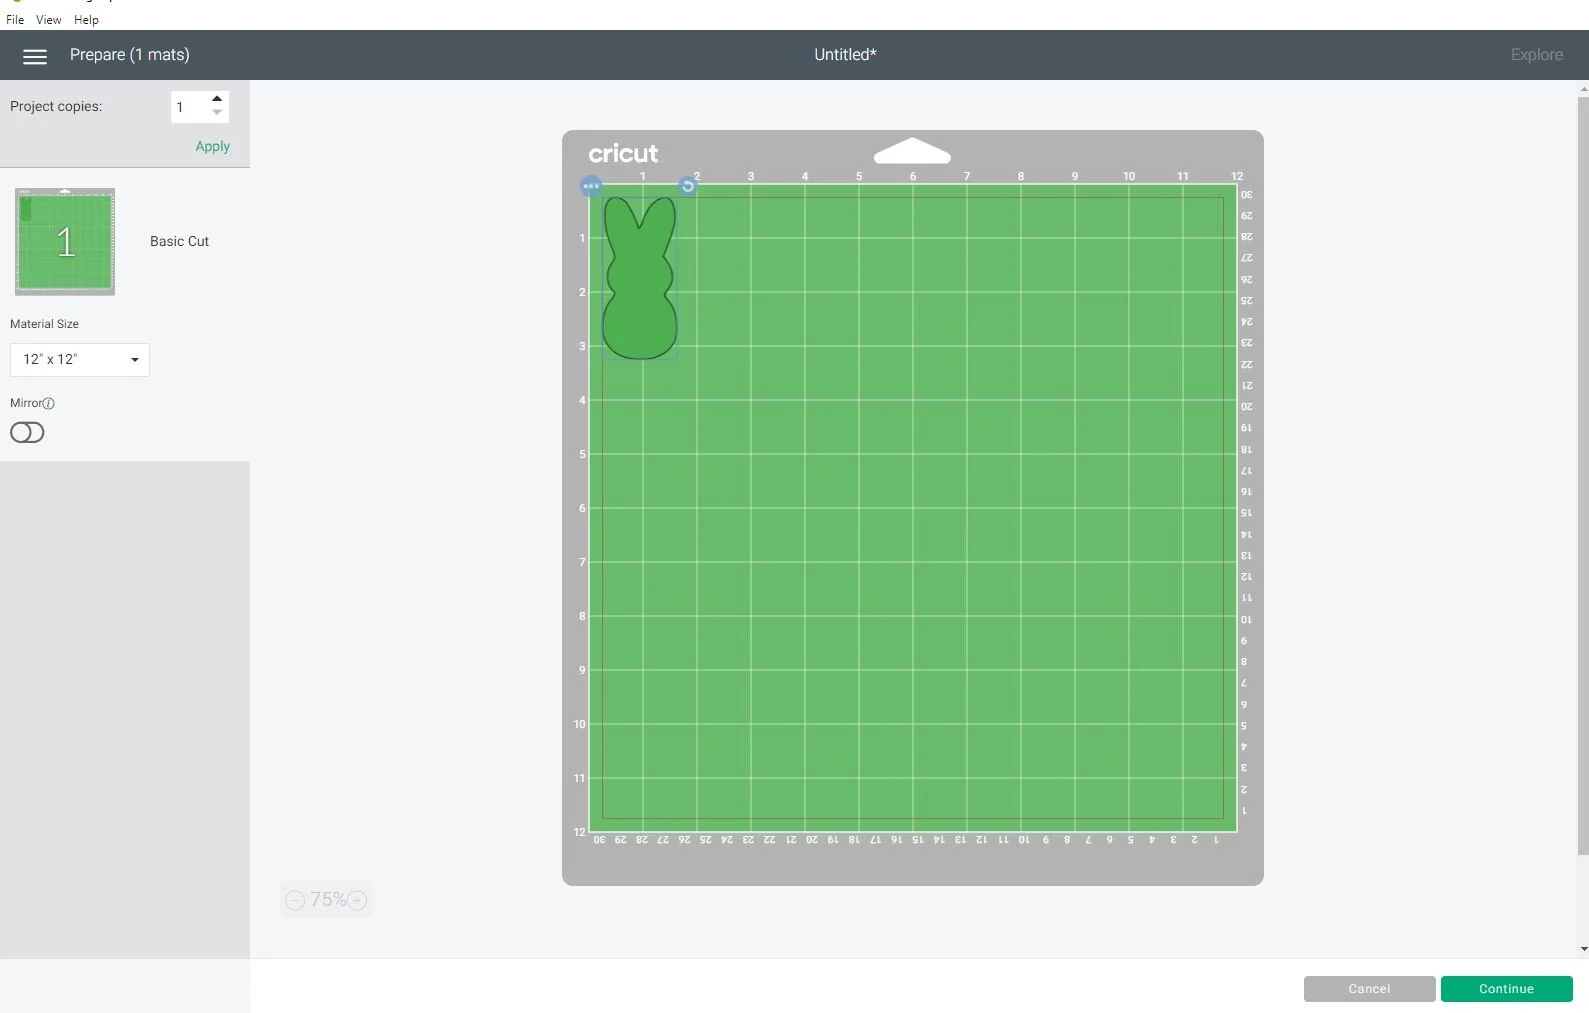
This is what your canvas should look like when you are ready to hit MAKE IT in Cricut Design Space.

DIY how to stencil on wood sign painting tutorial. How to make a hello sunshine lettered sign for summer. Using oramask stencil film to paint wood signs without paint bleed. free svg to use with cricut for sign making.

I used ORAMASK STENCIM FILM and the Cricut GREEN cutting mat. I set my machine dial to cut vinyl.

2. APPLY THE STENCIL

When weeding this design you want to weed out the CIRCLE and the MIDDLE PIECES from the letters.

DIY how to stencil on wood sign painting tutorial. How to make a hello sunshine lettered sign for summer. Using oramask stencil film to paint wood signs without paint bleed. free svg to use with cricut for sign making.

Use transfer tape to easily transfer the image onto your wood base. I’ve used LOTS of different transfer tapes and this brand is one of my favorites.

PRO TIP: you can reuse your transfer tape over and over again. As long as it is still tacky and fits the design you want to transfer you can use it. I often use my transfer tape 3-4 times before getting a new piece.

DIY how to stencil on wood sign painting tutorial. How to make a hello sunshine lettered sign for summer. Using oramask stencil film to paint wood signs without paint bleed. free svg to use with cricut for sign making.

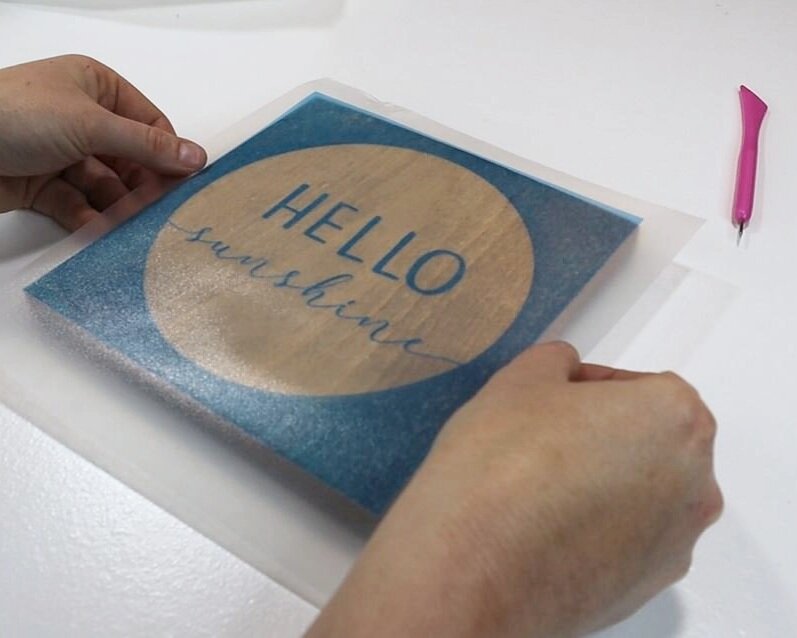
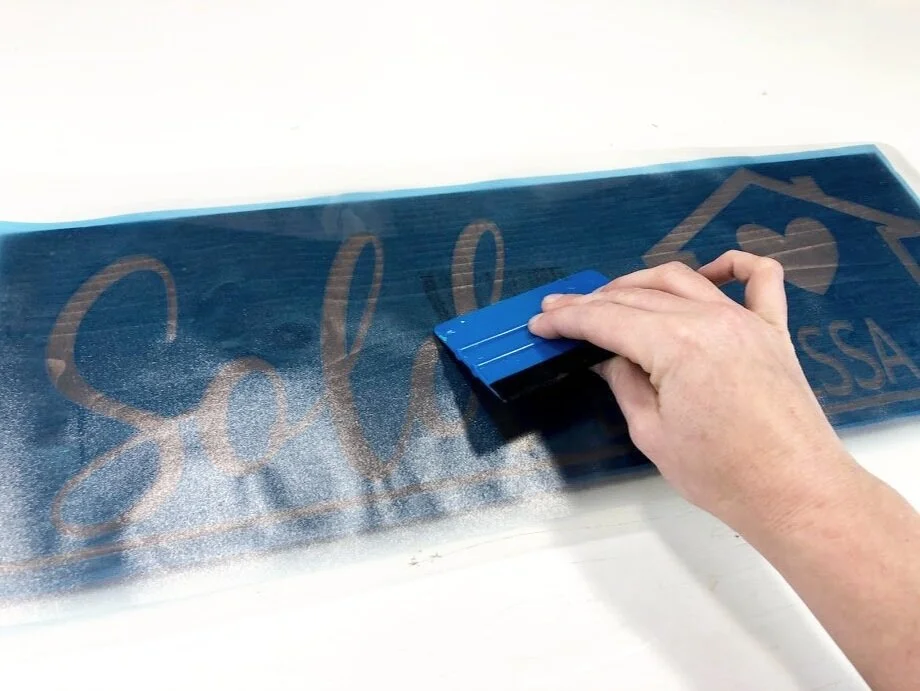
Align your stencil then press down using your hand and a vinyl squeegee. Working from the middle and then out press out the air bubbles.

DIY how to stencil on wood sign painting tutorial. How to make a hello sunshine lettered sign for summer. Using oramask stencil film to paint wood signs without paint bleed. free svg to use with cricut for sign making.

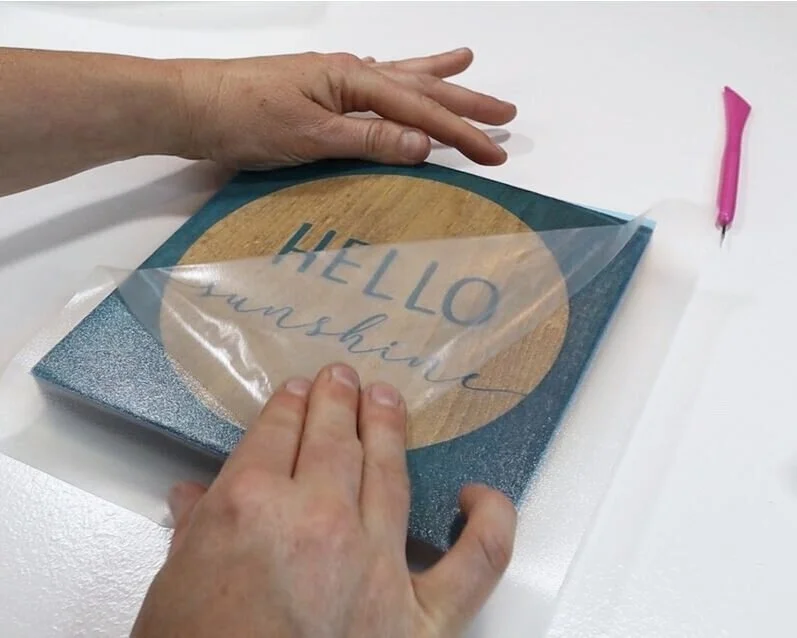
Now, roll your transfer tape off your design. Be sure to go slow, especially with this design as it has delicate lines that can rip easily.

DIY how to stencil on wood sign painting tutorial. How to make a hello sunshine lettered sign for summer. Using oramask stencil film to paint wood signs without paint bleed. free svg to use with cricut for sign making.

3. SEAL THE STENCIL

This step isn’t an absolute must but you’ve already worked this hard why ruin it with paint bleed? I always hate myself when I skip this step so just save yourself from a kick in the butt later and seal your stencil before you paint ;)!

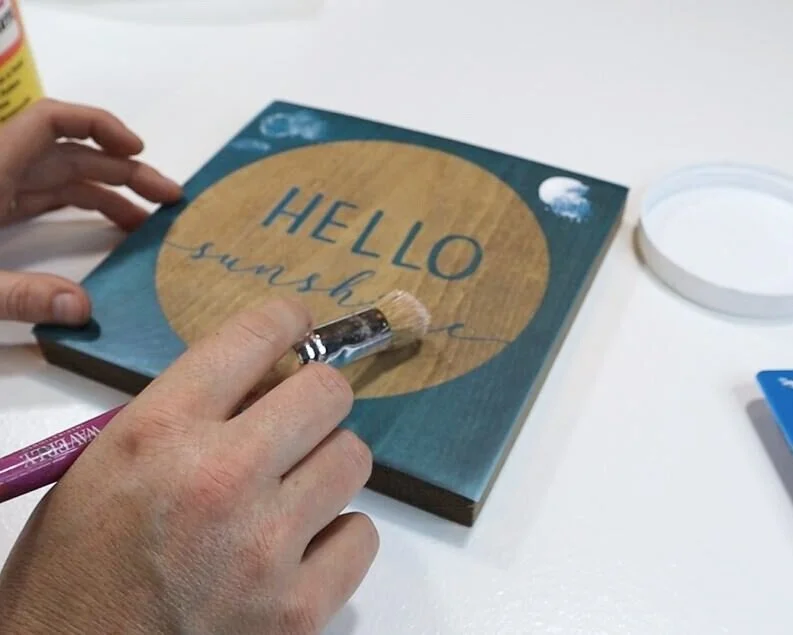
Paint a SUPER THIN layer of matte finish mod podge all over your design. Essentially what you are doing is filling in all of those tiny little air bubbles that you can’t see that are between your stencil and your wood base with a clear layer. This keeps your paint from filling in those air bubbles, aka: paint bleed.

DIY how to stencil on wood sign painting tutorial. How to make a hello sunshine lettered sign for summer. Using oramask stencil film to paint wood signs without paint bleed. free svg to use with cricut for sign making.

Be sure you are painting the thinnest of thin layers when doing this step. If it’s too thick your paint will peel up with your stencil when you remove it…again speaking from LOTS of sign making experience lol! Then let that dry completely before moving on to the next step.

DIY how to stencil on wood sign painting tutorial. How to make a hello sunshine lettered sign for summer. Using oramask stencil film to paint wood signs without paint bleed. free svg to use with cricut for sign making.

4. PAINT YOUR DESIGN

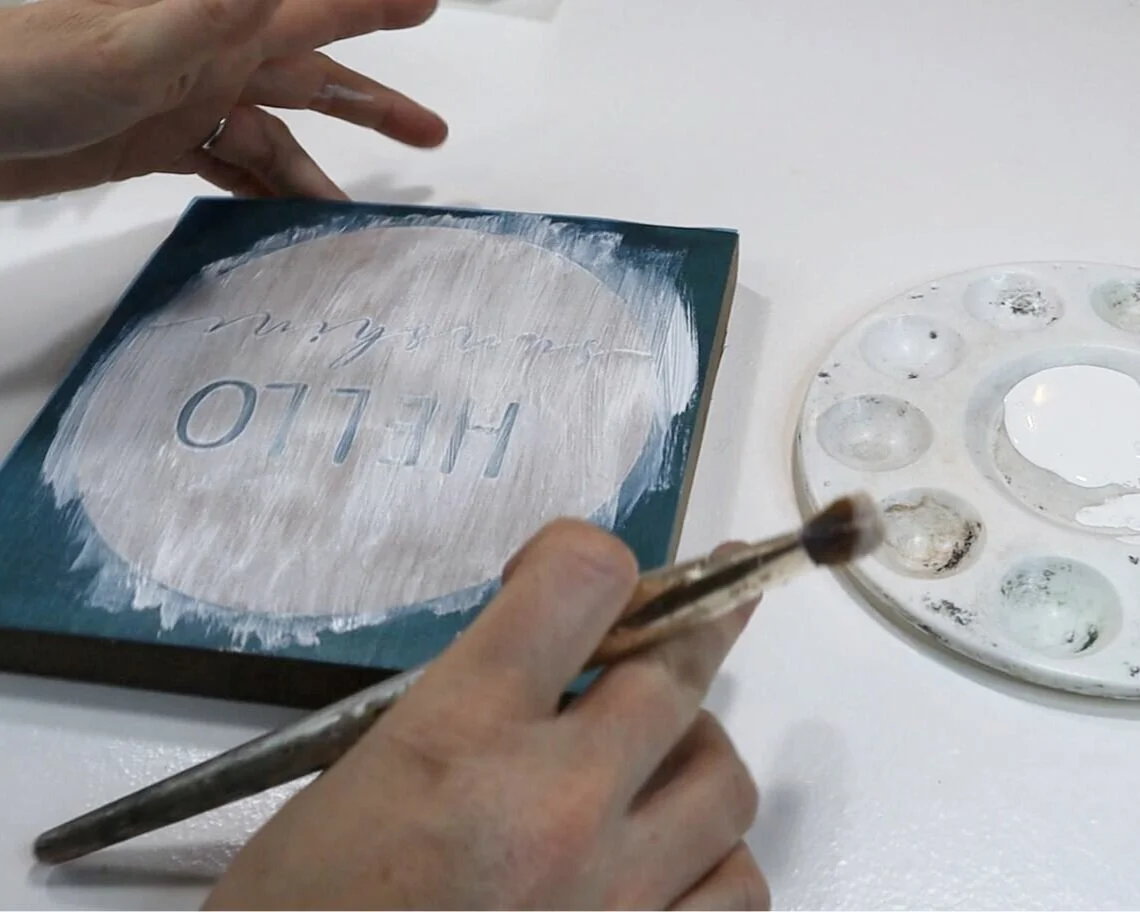
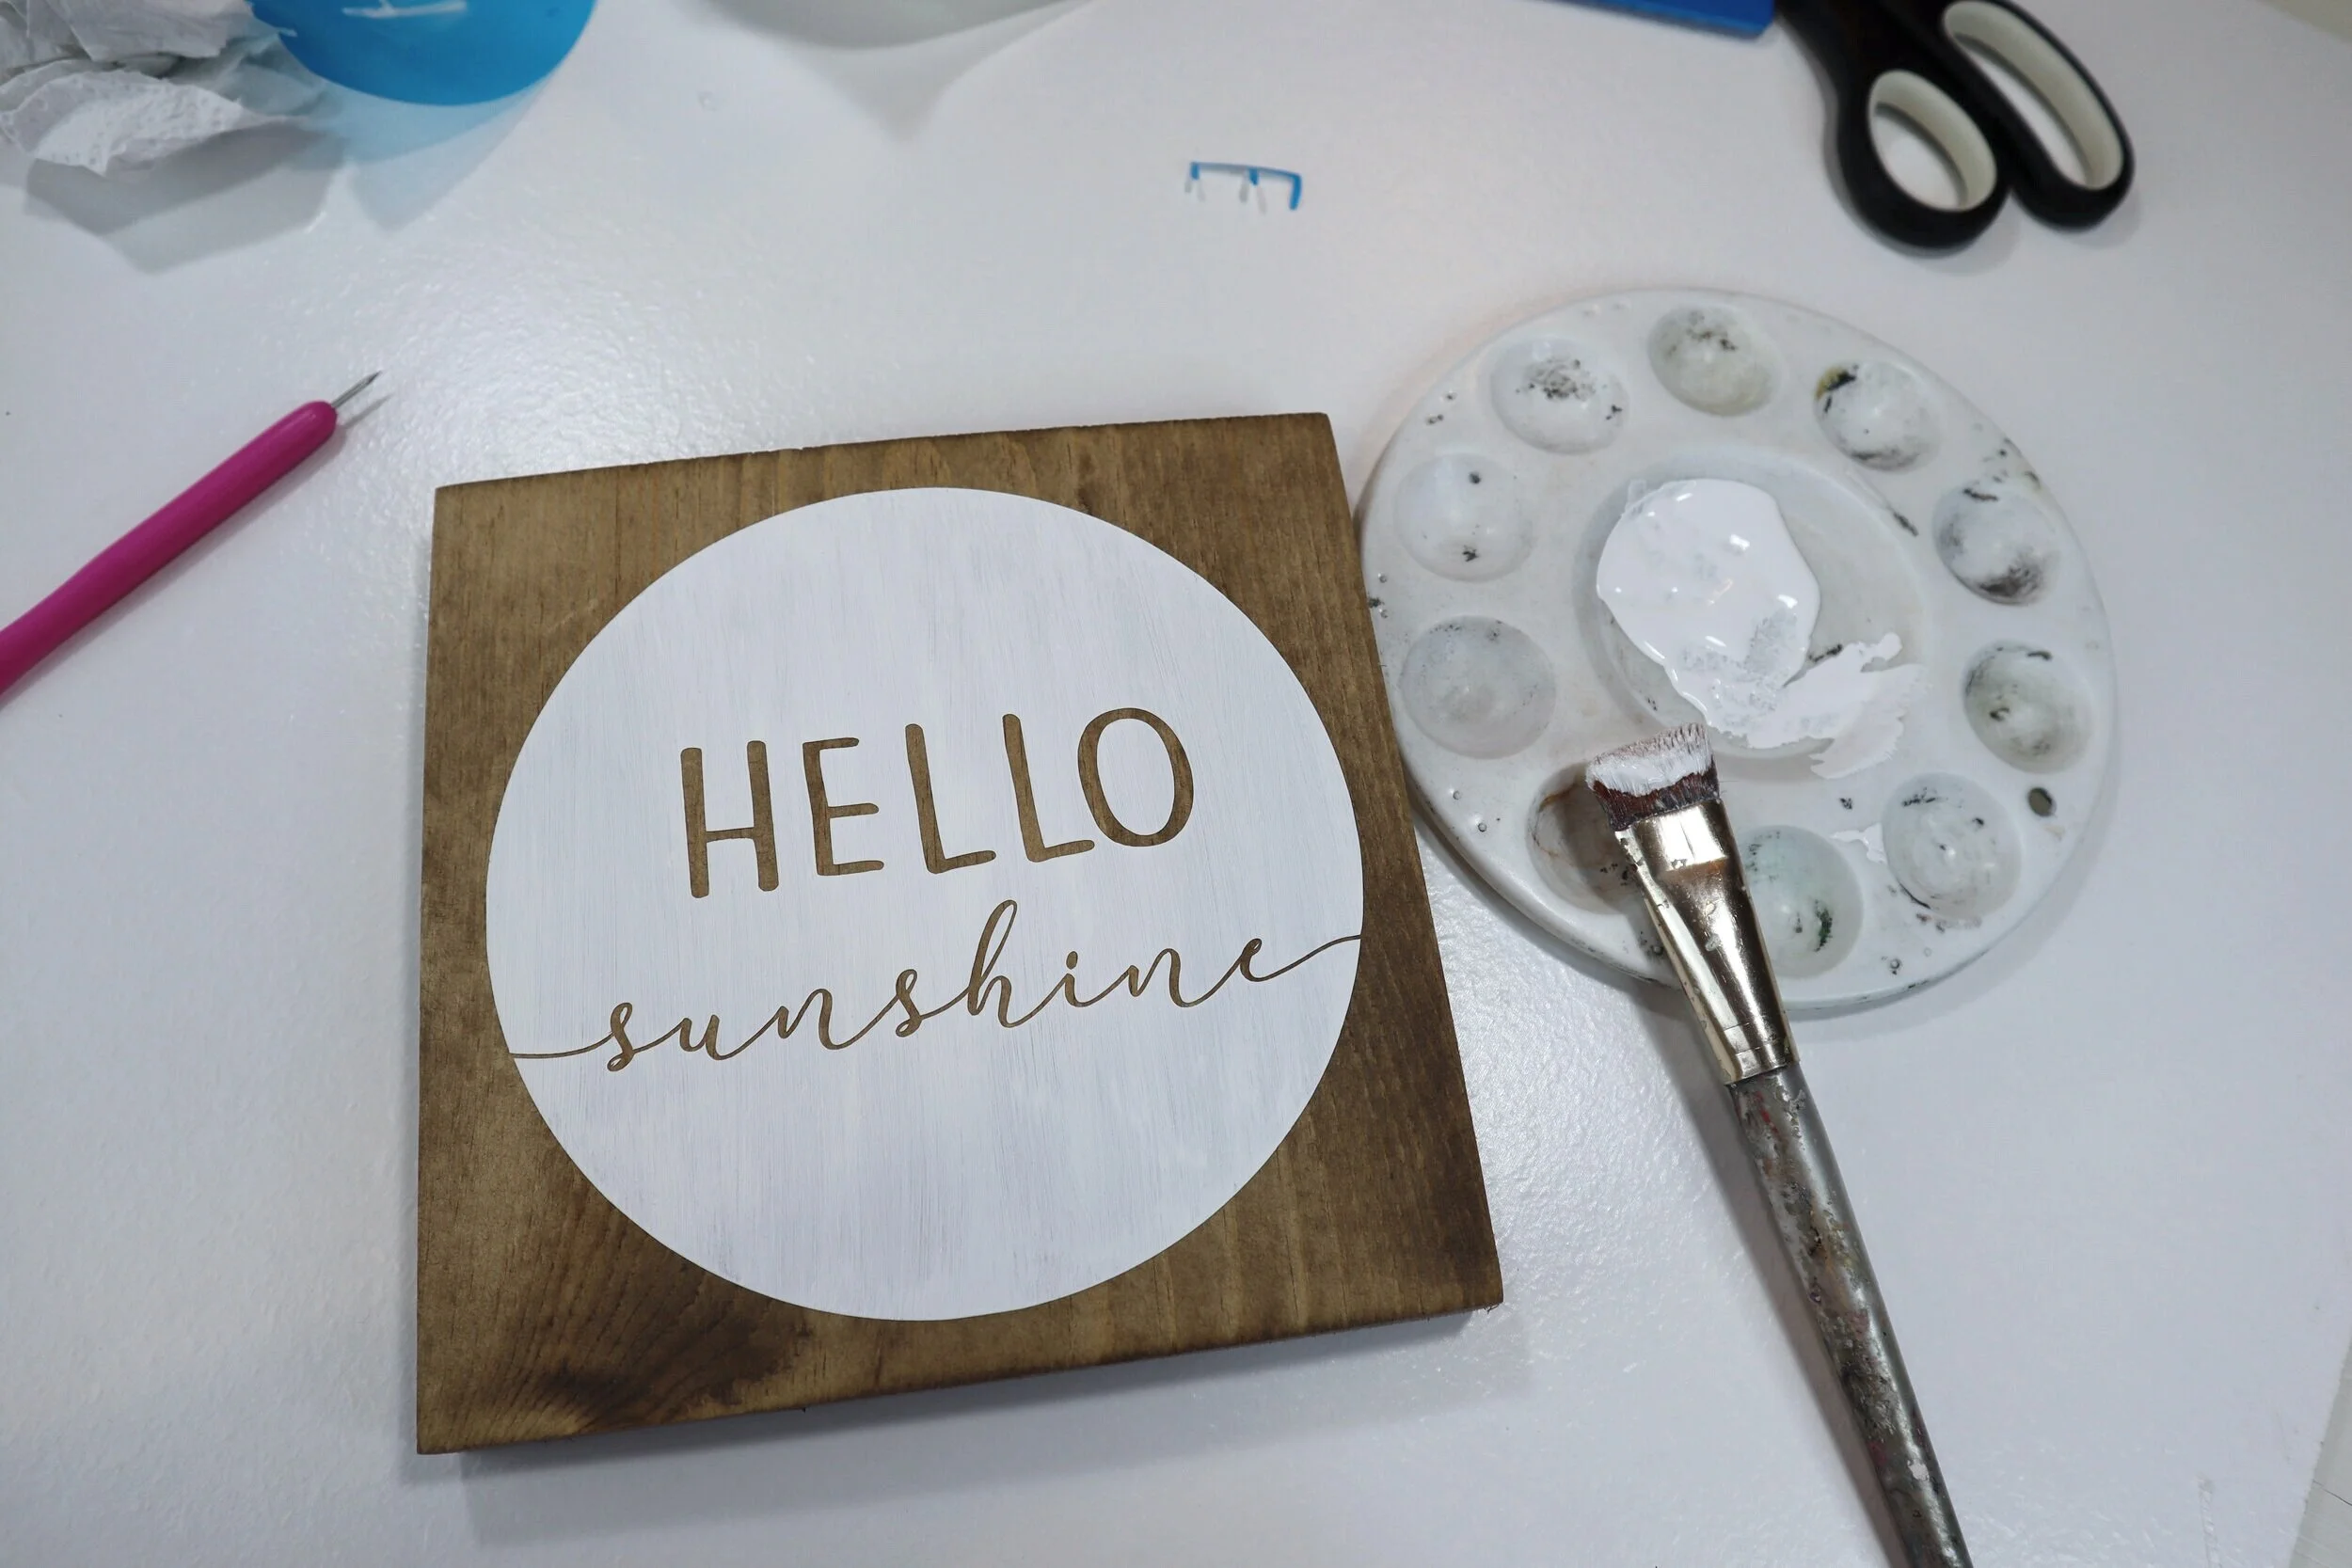
After your mod podge seal has dried you can paint your design. The lighter the color the more layers you will likely need to cover your design completely. For your first layer of paint you want to paint it on thin enough so that you see the wood grain through the paint. I used white acrylic paint for this project and painted 3 coats total.

DIY how to stencil on wood sign painting tutorial. How to make a hello sunshine lettered sign for summer. Using oramask stencil film to paint wood signs without paint bleed. free svg to use with cricut for sign making.

After you apply the first layer wait for it to dry completely before moving on to the second coat. If you need a third layer of paint repeat the drying process again then paint the third layer.

5. PEEL UP YOUR STENCIL

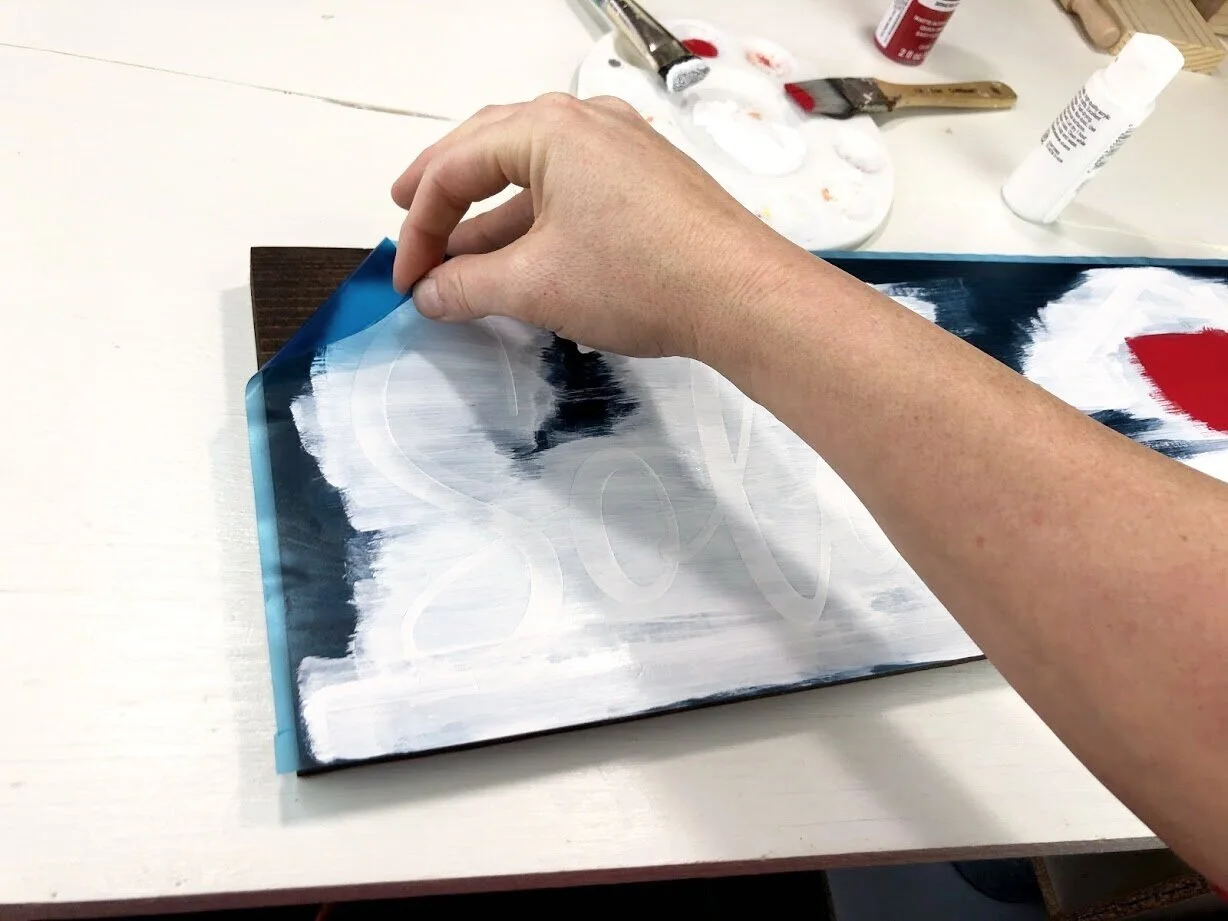
After your happy with the paint coverage it’s time to peel up the oramask stencil film. I personally peel my stencils up while my paint is still wet but some prefer to peel after their paint has dried, both ways work. Grab one corner of the stencil and peel it off toward the opposite corner.

DIY how to stencil on wood sign painting tutorial. How to make a hello sunshine lettered sign for summer. Using oramask stencil film to paint wood signs without paint bleed. free svg to use with cricut for sign making.

Then using your weeding tool CAREFULLY peel up the lettering inside of the circle. I ended up grabbing a sewing pin for this as my weeding tool was a little too large for the job.

DIY how to stencil on wood sign painting tutorial. How to make a hello sunshine lettered sign for summer. Using oramask stencil film to paint wood signs without paint bleed. free svg to use with cricut for sign making.

Let your sign sit and dry completely before displaying in your home with the rest of your summer decorations.

DIY how to stencil on wood sign painting tutorial. How to make a hello sunshine lettered sign for summer. Using oramask stencil film to paint wood signs without paint bleed. free svg to use with cricut for sign making.

I just love how this little sign turned out! It’s so simple and it can be displayed with both spring and summer décor. I extra love double duty decorations!

If you have any questions about this DIY craft tutorial or any others on my blog please reach out.


Check out more sign painting tutorials below. Happy Crafting!!

Dollar Tree moss bunny peeps on wood + FREE SVG

EASY SPRING CRAFT

DIY spring Easter Dollar Tree craft, easy and simple peep bunny craft made out of sheet moss. Frugal Easter craft for spring using your Cricut or vinyl cutting machine. Scrap wood craft project

DIY DOLLAR TREE SHEET MOSS BUNNIES + FREE SVG

Need an easy & inexpensive spring or Easter craft? This little moss bunny sign will fit in perfectly with your farmhouse or rustic decorations! And it won’t break the bank!

I love the Dollar Tree and I also love my Cricut machine. So when I can make projects combining the two it’s like fireworks in my craft room! Today I made little moss peep bunny cutouts using both my Dollar Tree find and the help of my never fail me Cricut machine. Be sure to check out this DOLLAR TREE BOOK STACK if you love this spring dollar store craft.

DIY spring Easter Dollar Tree craft, easy and simple peep bunny craft made out of sheet moss. Frugal Easter craft for spring using your Cricut or vinyl cutting machine. Scrap wood craft project

This spring Easter craft was super easy, crazy quick and it represents my gaggle of girls. I am a momma to four daughters so I wanted there to be four little moss bunny peeps to represent them <3 !! It just so happened to work out perfectly that I had a 10” piece of scrap wood I originally made for a different craft over a year ago {yes I’m one of those craft hoarder ladies} to use for this simple DIY. So there was no need to cut, paint, or stain anything today at least.

Affiliate Disclosure. Some of the links on this website are affiliate links, which means that I may earn a small commission if you click on the link or make a purchase using the link. If you make a purchase you will not be charged anything additional.

DIY spring Easter Dollar Tree craft, easy and simple peep bunny craft made out of sheet moss. Frugal Easter craft for spring using your Cricut or vinyl cutting machine. Scrap wood craft project

1. WOOD BASE

I used a piece of scrap wood from another project. It was already cut, stained, and painted so I didn’t need to do that for this project. If you want to know how to get that distressed wood look check out this DIY sign painting post.

2. CARDSTOCK BUNNY

I used my Cricut to cut out a cardstock template. You can grab the same SVG I used from my FREE RESOURCE LIBRARY. That is my personal library where I share all of my free printables, SVG cut files, and patterns. This is a much easier way for my readers to get access to my freebies rather than filtering through emails or worse deleting an email that contains a file you needed.

DIY spring Easter Dollar Tree craft, easy and simple peep bunny craft made out of sheet moss. Frugal Easter craft for spring using your Cricut or vinyl cutting machine. Scrap wood craft project

You will only need ONE cardstock bunny no matter how many bunnies you plan on cutting out of the sheet moss.

If you are new to the Cricut world be sure to check out my post on the top 10 supplies & accessories you need to get started using your Cricut cutting machine.

2. TRACE

I flipped my sheet of moss upside down on my craft surface. Then I traced around it using a dark colored permanent thick marker. I tried doing this with a pen but it didn’t work out so great so I grabbed the closest thing to me I could find that would work, a permanent marker. This was a little tricky only because the moss backing is so uneven but since I’m not a perfectionist it worked just fine.

DIY spring Easter Dollar Tree craft, easy and simple peep bunny craft made out of sheet moss. Frugal Easter craft for spring using your Cricut or vinyl cutting machine. Scrap wood craft project

I tried to fit all four bunnies on one side of the sheet so I could make the most of my $1 find lol!

3. CUT THE MOSS BUNNIES OUT

Using a pair of regular scissors I cut the peep bunnies out of the moss sheet. Some of the moss fell off in some pieces leaving it looking a little bare in spots but don’t worry if that happens to you. You can fix that at the very end.

DIY spring Easter Dollar Tree craft, easy and simple peep bunny craft made out of sheet moss. Frugal Easter craft for spring using your Cricut or vinyl cutting machine. Scrap wood craft project

4. GLUE

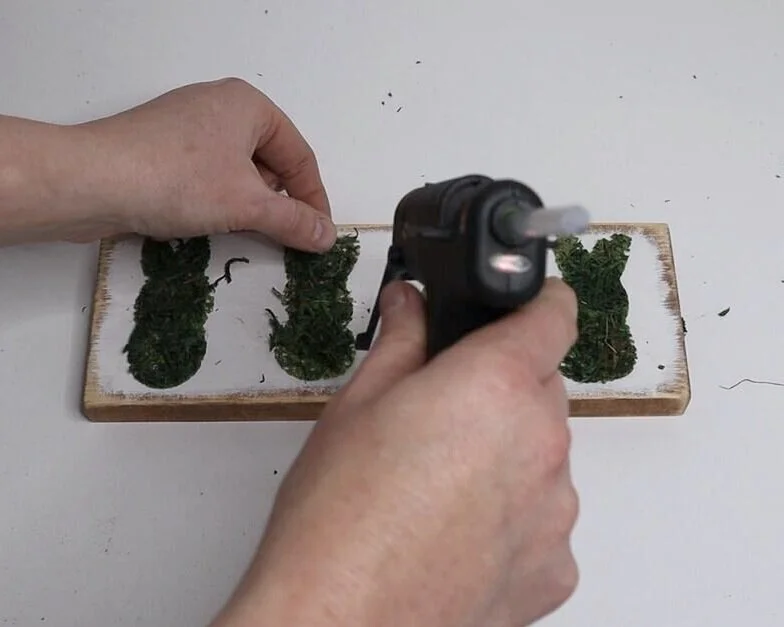
Before I glued my moss bunnies down I placed them on my piece of wood so I could make adjustments before they were glued down.

DIY spring Easter Dollar Tree craft, easy and simple peep bunny craft made out of sheet moss. Frugal Easter craft for spring using your Cricut or vinyl cutting machine. Scrap wood craft project

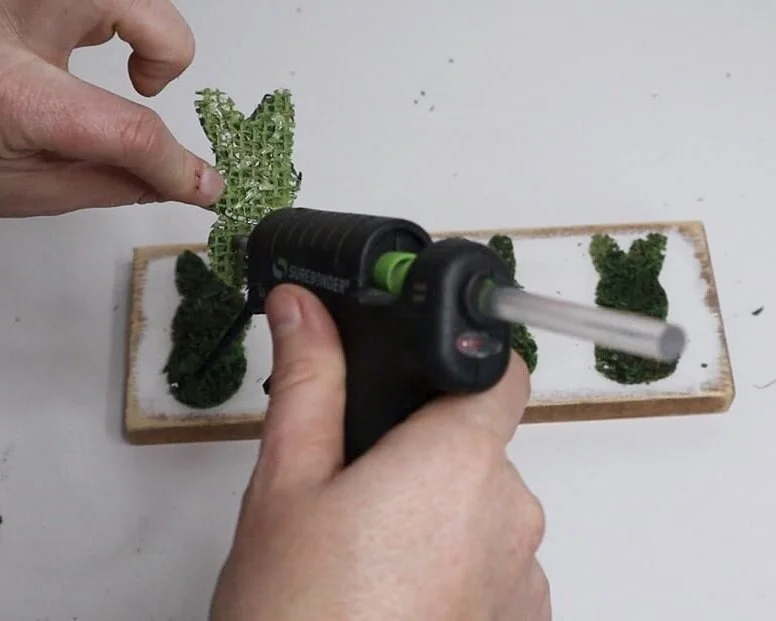
Then I used my fine tipped hot glue gun to glue them in place.

DIY spring Easter Dollar Tree craft, easy and simple peep bunny craft made out of sheet moss. Frugal Easter craft for spring using your Cricut or vinyl cutting machine. Scrap wood craft project

For the little areas that were bare I glue some leftover moss in those spots. You couldn’t even tell once I was finished that I had to add moss.

DIY spring Easter Dollar Tree craft, easy and simple peep bunny craft made out of sheet moss. Frugal Easter craft for spring using your Cricut or vinyl cutting machine. Scrap wood craft project

That’s it! So quick and easy. Click here for more DIY DOLLAR TREE CRAFTS.

DIY spring Easter Dollar Tree craft, easy and simple peep bunny craft made out of sheet moss. Frugal Easter craft for spring using your Cricut or vinyl cutting machine. Scrap wood craft project

Let me know if you have any questions in the comments below.

DIY farmhouse Dollar Tree bookstack + FREE SVG

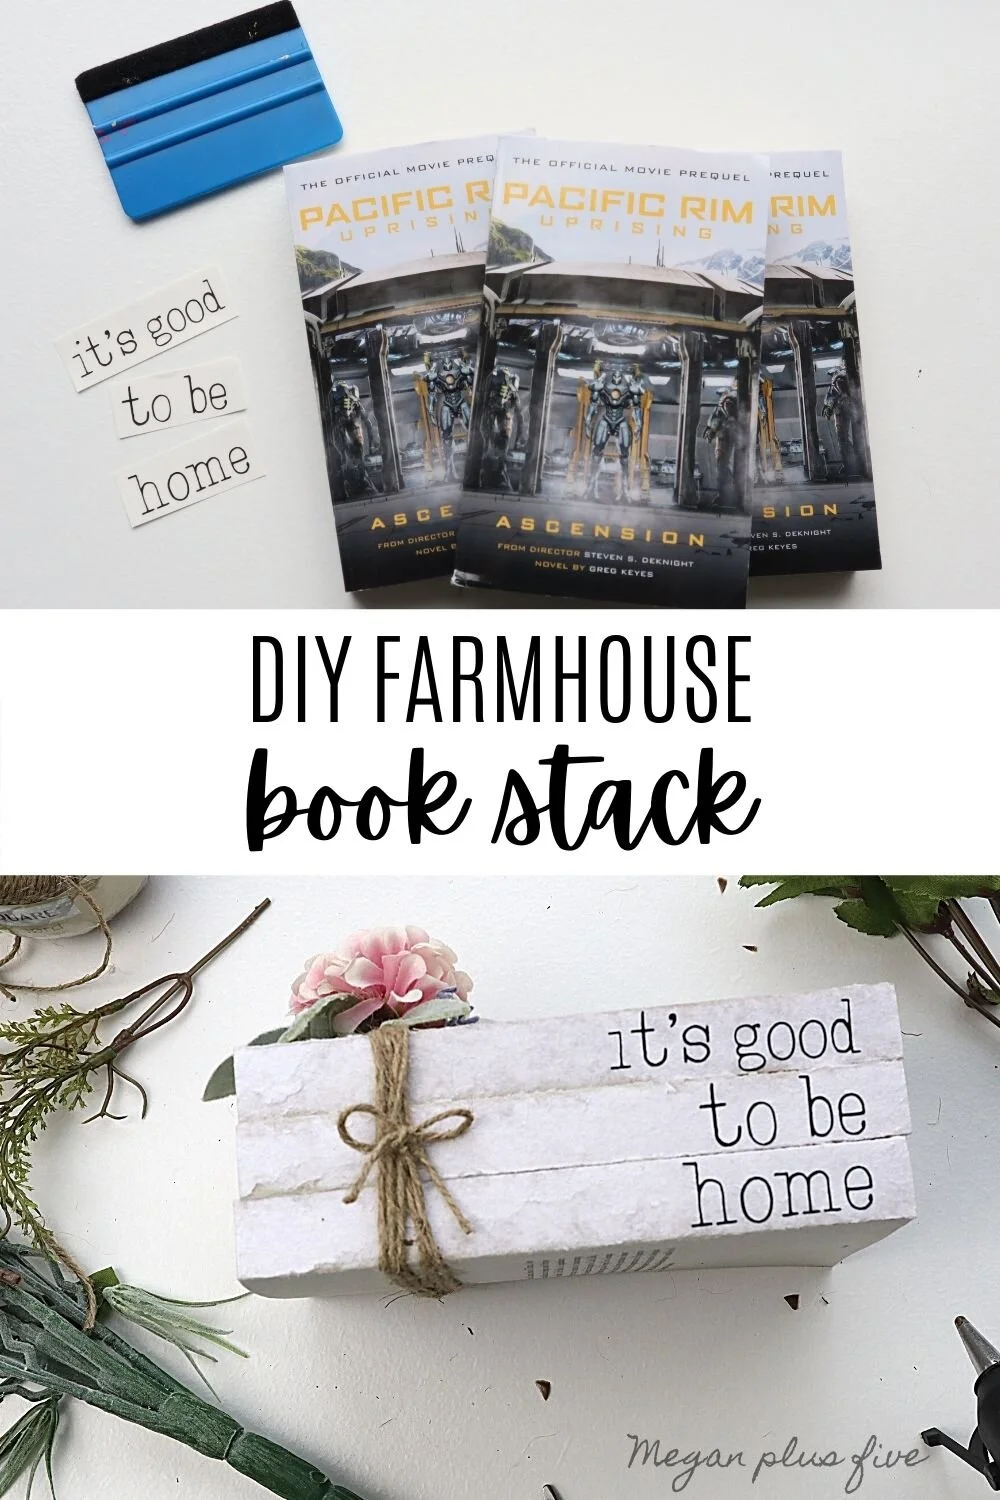
DIY farmhouse book stack using real book and vinyl decals from your Cricut cutting machine. Make your own simple rustic book stack easy & simple from Dollar Tree books.

DIY FARMHOUSE BOOK STACK

Farmhouse book stacks are such an easy craft to DIY especially if you are just starting out in the crafting world. This is one of those craft projects you can do in less than 30 minutes start to finish. You don’t even have to wait for paint to dry. Don’t get me wrong I LOVE painting but it is so nice to do projects once in a while that have almost that instant satisfaction like this one does.

There are many different variations of ways to making these book stacks too. I chose to make the most simple stack out there but you can also paint them, you can make them out of wood instead of using real books, you can stamp them, or like in this craft tutorial you can use vinyl decals. No matter what rustic farmhouse book stack you choose to make it is sure to turn out gorgeous!

If you love this farmhouse craft be sure to check out these tiered tray mini farmhouse signs.

Affiliate Disclosure. Some of the links on this website are affiliate links, which means that I may earn a small commission if you click on the link or make a purchase using the link. If you make a purchase you will not be charged anything additional.

IMG_0190.jpgDIY farmhouse book stack using real book and vinyl decals from your Cricut cutting machine. Make your own simple rustic book stack easy & simple from Dollar Tree books.

how to make your own book stack using Dollar Tree books & your Cricut cutting machine

DIY farmhouse book stack using real book and vinyl decals from your Cricut cutting machine. Make your own simple rustic book stack easy & simple from Dollar Tree books.

Here’s what you need

1. CUT OUT DECALS

You can get the SVG I used to make my book stack in my free resource library. In Cricut Design Space I adjusted the height of the words so that they would fit on the spine of the books. Also want to note that I left my words on lock mode so that the width adjusted with the height if that makes sense. My book spines measured around .75” with the covers on so I made my decals .69”. That size seemed to be perfect for my book stack.

DIY farmhouse book stack using real book and vinyl decals from your Cricut cutting machine. Make your own simple rustic book stack easy & simple from Dollar Tree books.

I cut my words out on black matte finish vinyl using my Cricut cutting machine and green cutting mat. Then I weeded my design using an exacto knife.

2. REMOVE THE OUTER COVER & PAGES

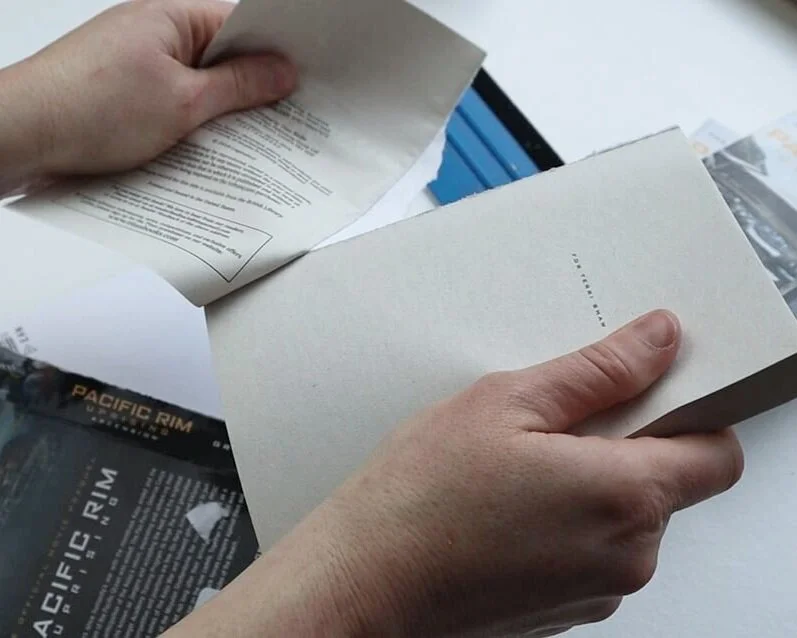
This is super easy! to get that rustic look of your books you just need to remove the cover, the shiny spine of the book, and the first few pages. They will rip right off. Something I also did was rip out a few extra pages so that I can use them to make some Easter bunny garland out of them. You want to do this with all three books.

DIY farmhouse book stack using real book and vinyl decals from your Cricut cutting machine. Make your own simple rustic book stack easy & simple from Dollar Tree books.

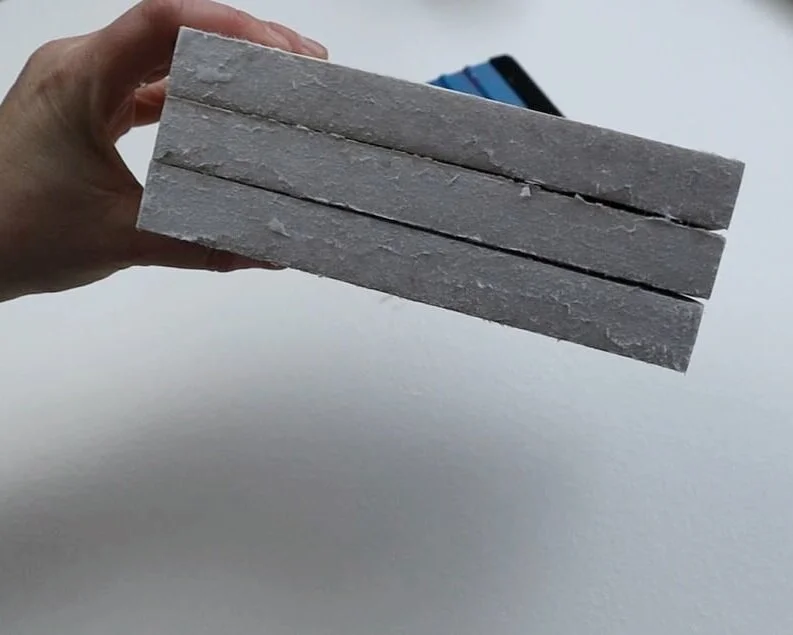
This is what my stack looked like after I removed the covers. There is still paper and it’s not completely smooth but that was the look I was going for. I could have kept peeling or taken a sanding sponge to it but I like this look.

DIY farmhouse book stack using real book and vinyl decals from your Cricut cutting machine. Make your own simple rustic book stack easy & simple from Dollar Tree books.

3. APPLY THE DECALS

When you get to this step be sure you take your time. This word decal has super skinny lines so it’s easy to mess up especially if you’re moving too quickly. I actually messed mine up a little and lost the dot to my “i”. I ended up having to recut just the dot but if I was more focused I wouldn’t have lost that tiny guy. A little behind the scenes while I was making this book stack…I had 5 kids, 15 baby chicks, 4 baby ducks, 2 dogs, and a cat all in my craft room while making these lol! We most definitely have that beautiful chaos going on 24/7 in our home. We had just picked up our new feathered babies the day before so their temporary home while they grow is in bins with heat lamps over them on my craft table.

DIY farmhouse book stack using real book and vinyl decals from your Cricut cutting machine. Make your own simple rustic book stack easy & simple from Dollar Tree books.

I used my favorite clear transfer tape to transfer the decals on the spines of my books. I didn’t measure or get super exact with this. I just eyeballed it and that worked great. I used my trusty blue vinyl squeegee to help press my decals down so that they were good and adhered to the sides of the books.

DIY farmhouse book stack using real book and vinyl decals from your Cricut cutting machine. Make your own simple rustic book stack easy & simple from Dollar Tree books.

Then I slowly removed the transfer tape. Be sure to go super slow on this step.

DIY farmhouse book stack using real book and vinyl decals from your Cricut cutting machine. Make your own simple rustic book stack easy & simple from Dollar Tree books.

4. TWINE

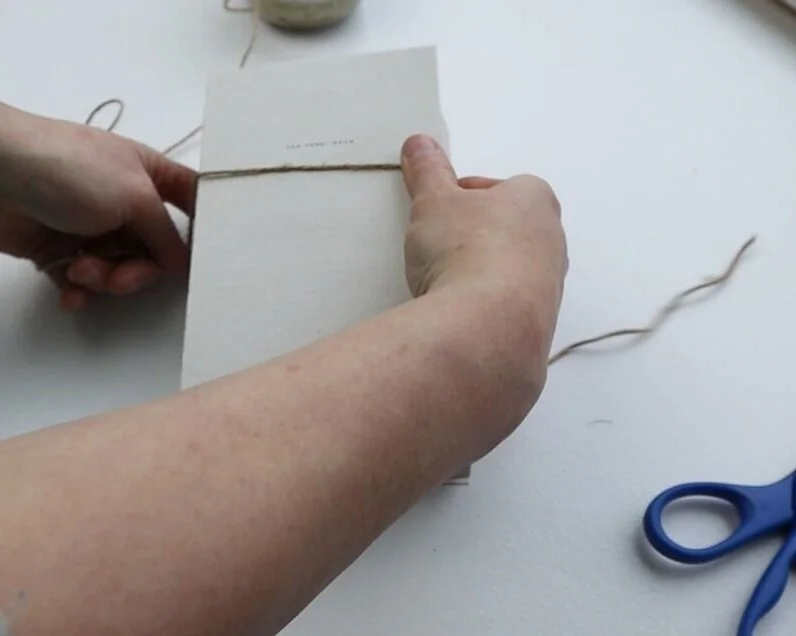
Stack your farmhouse books in order then take some twine and wrap it around your books. I chose to tie a bow on the spine side but you can also do this on the top. I did glue some lambs ear and flowers to the top of mine but I didn’t like it at all. So I removed those. They came off pretty easy because I glued them to the twine and not the page itself.

DIY farmhouse book stack using real book and vinyl decals from your Cricut cutting machine. Make your own simple rustic book stack easy & simple from Dollar Tree books.

Look at that before and after. So pretty!!!

DIY farmhouse book stack using real book and vinyl decals from your Cricut cutting machine. Make your own simple rustic book stack easy & simple from Dollar Tree books.

That’s it! Such and EASY rustic home décor DIY project! I hope you enjoyed this crafty tutorial. If you have any questions about this craft or any other projects on my blog comment below or message me in the about section.

Check out more DIY crafts below

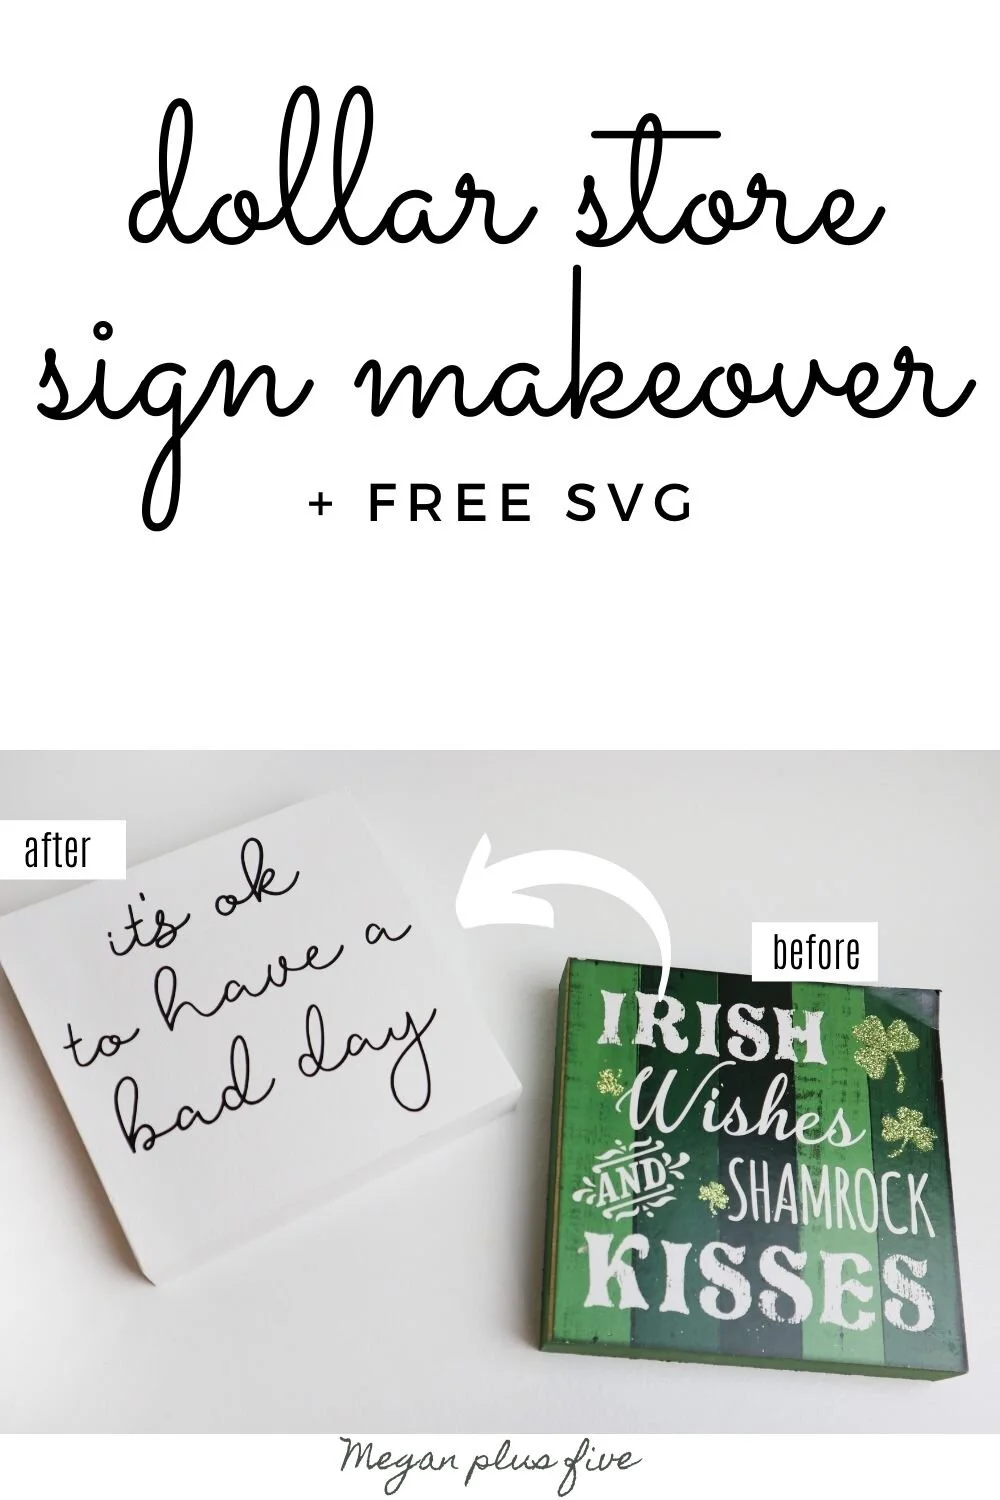
Dollar Tree mini St. Patrick's Day sign makeover + FREE SVG

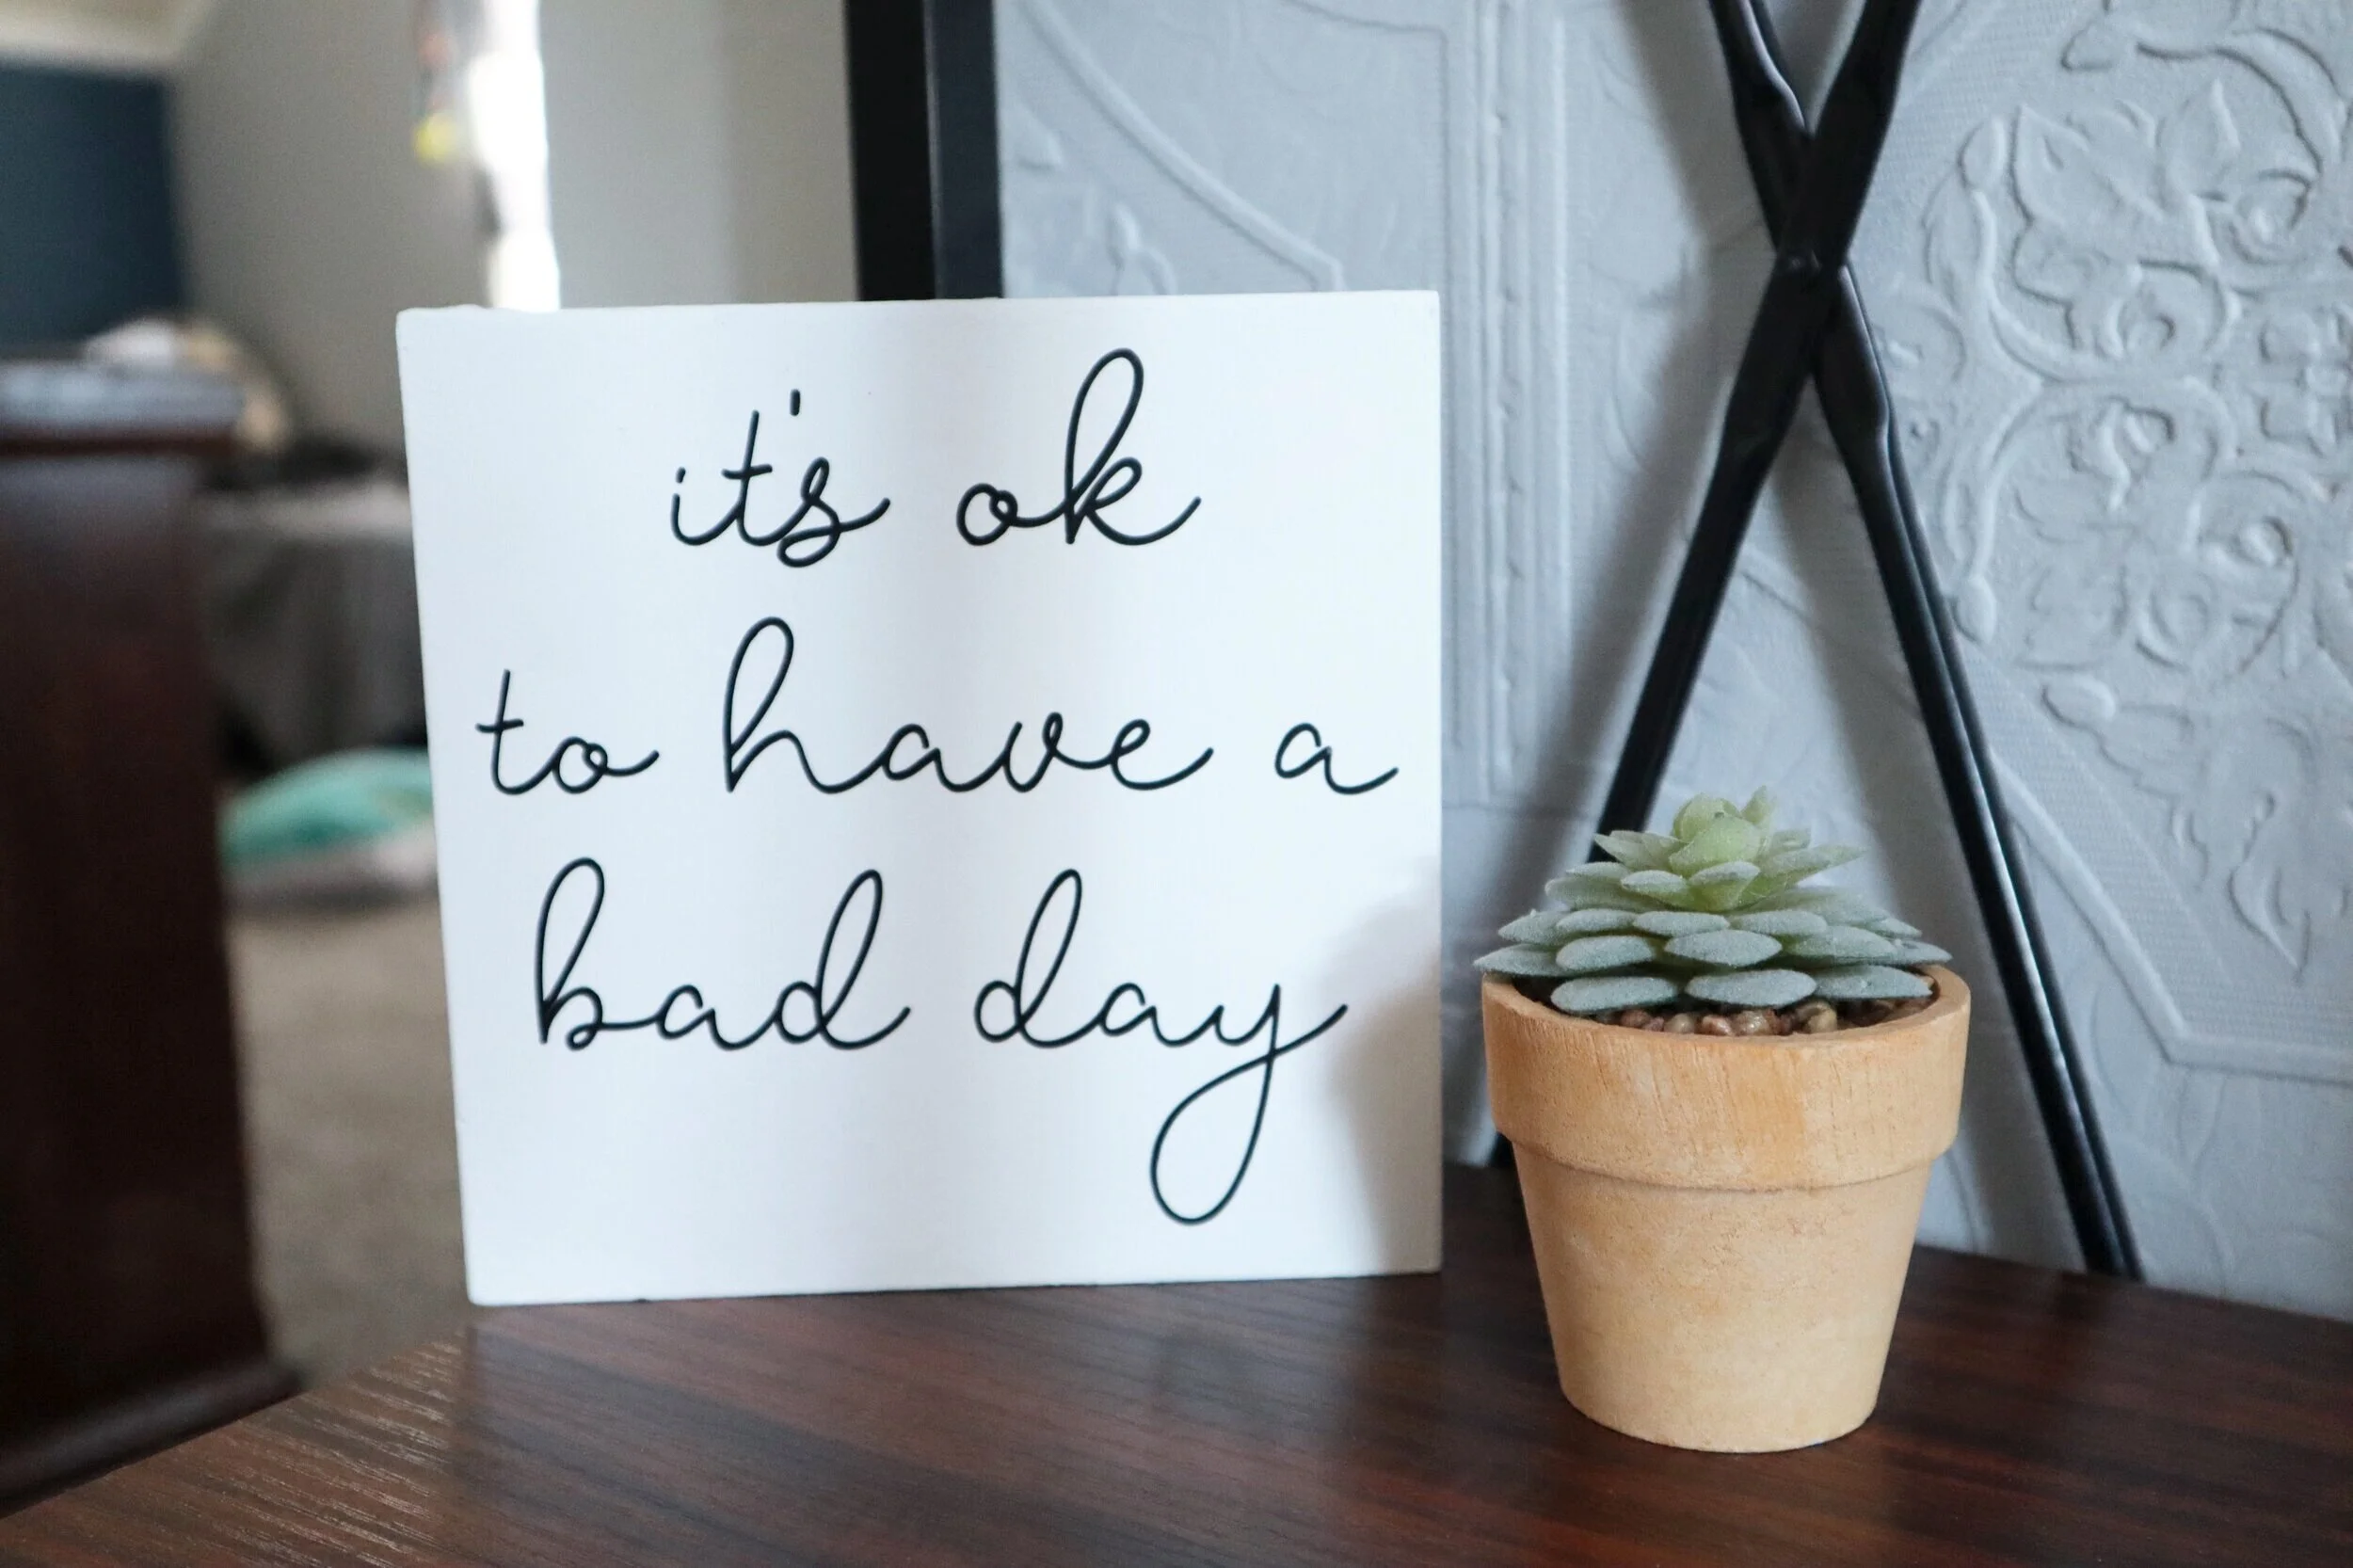
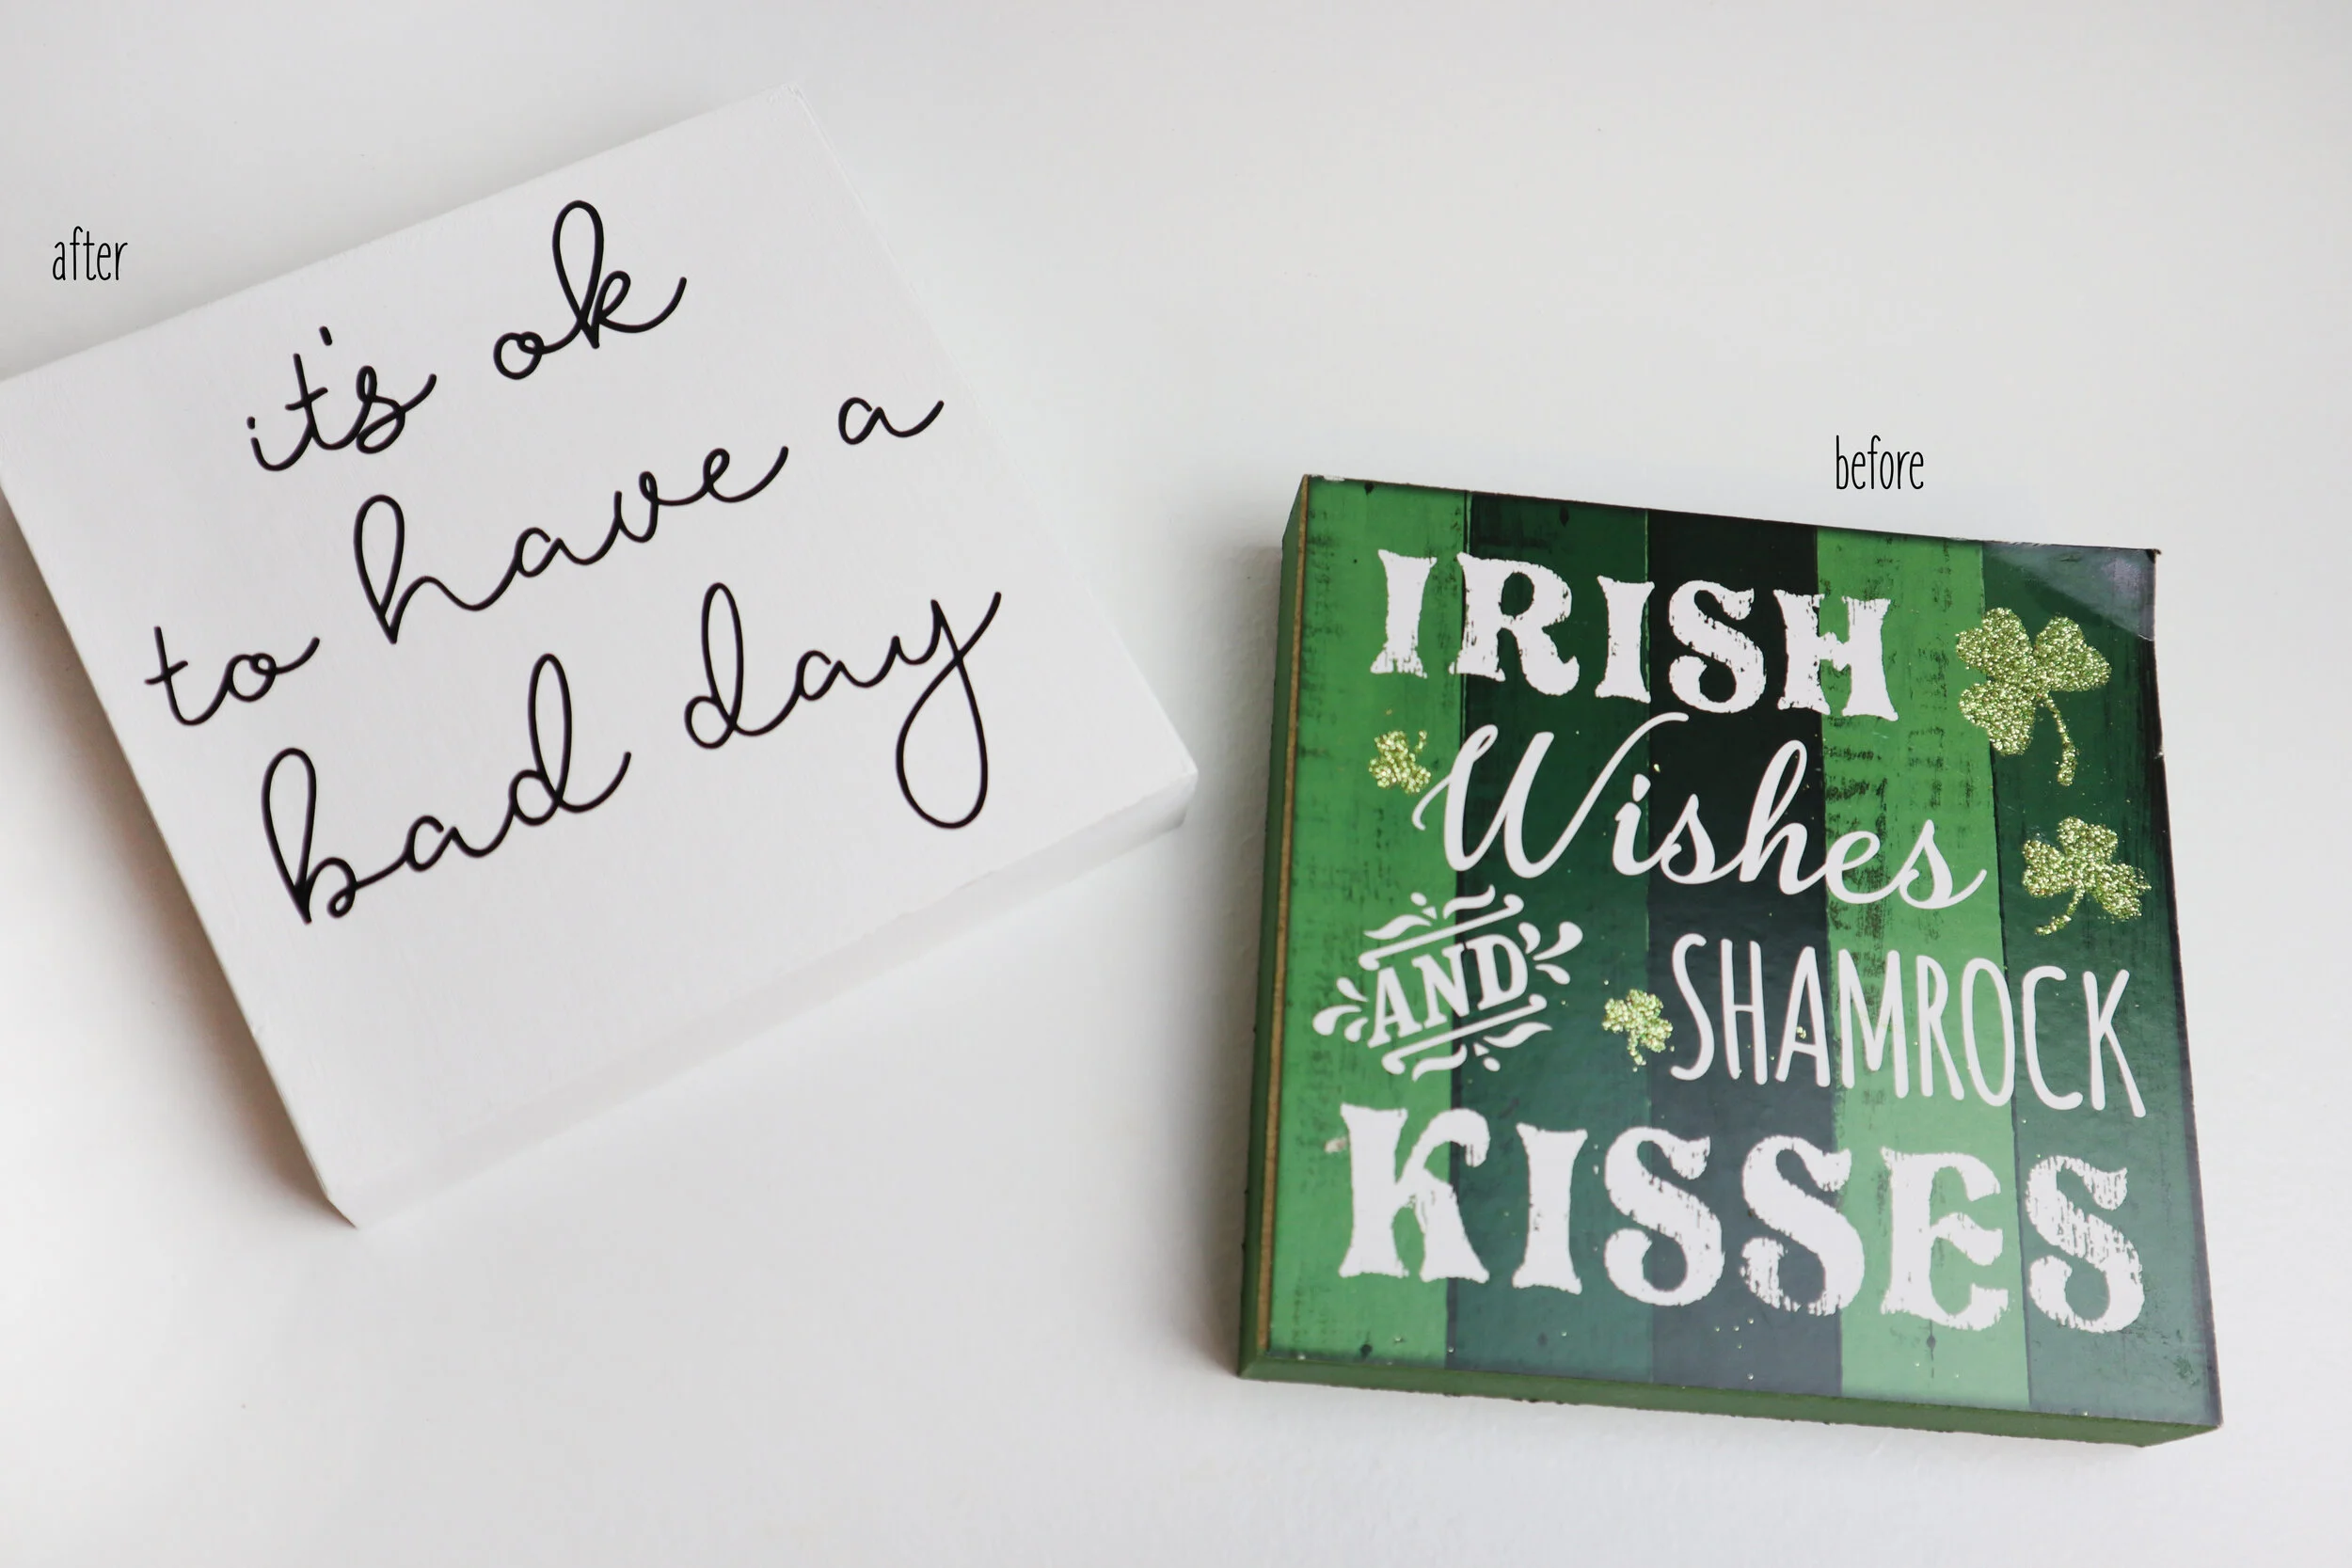
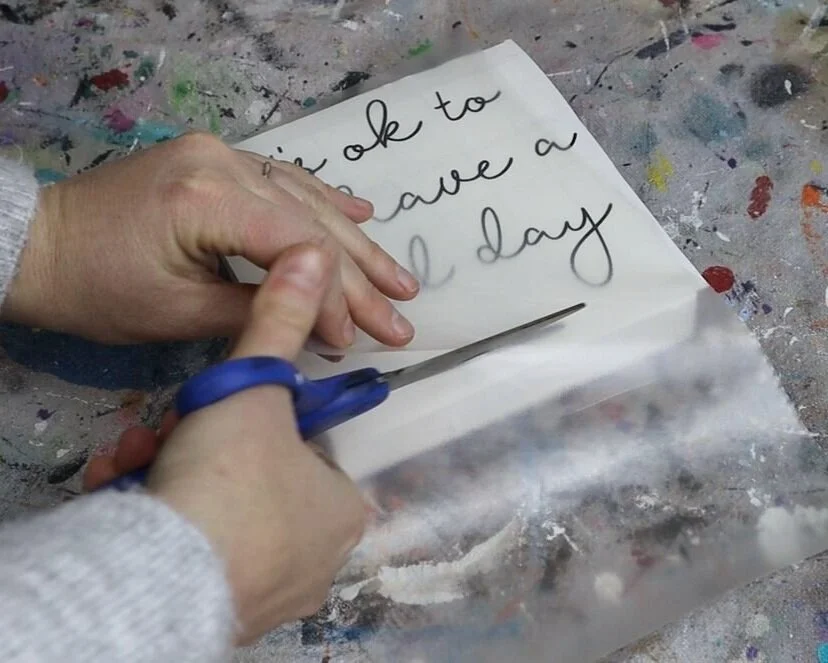
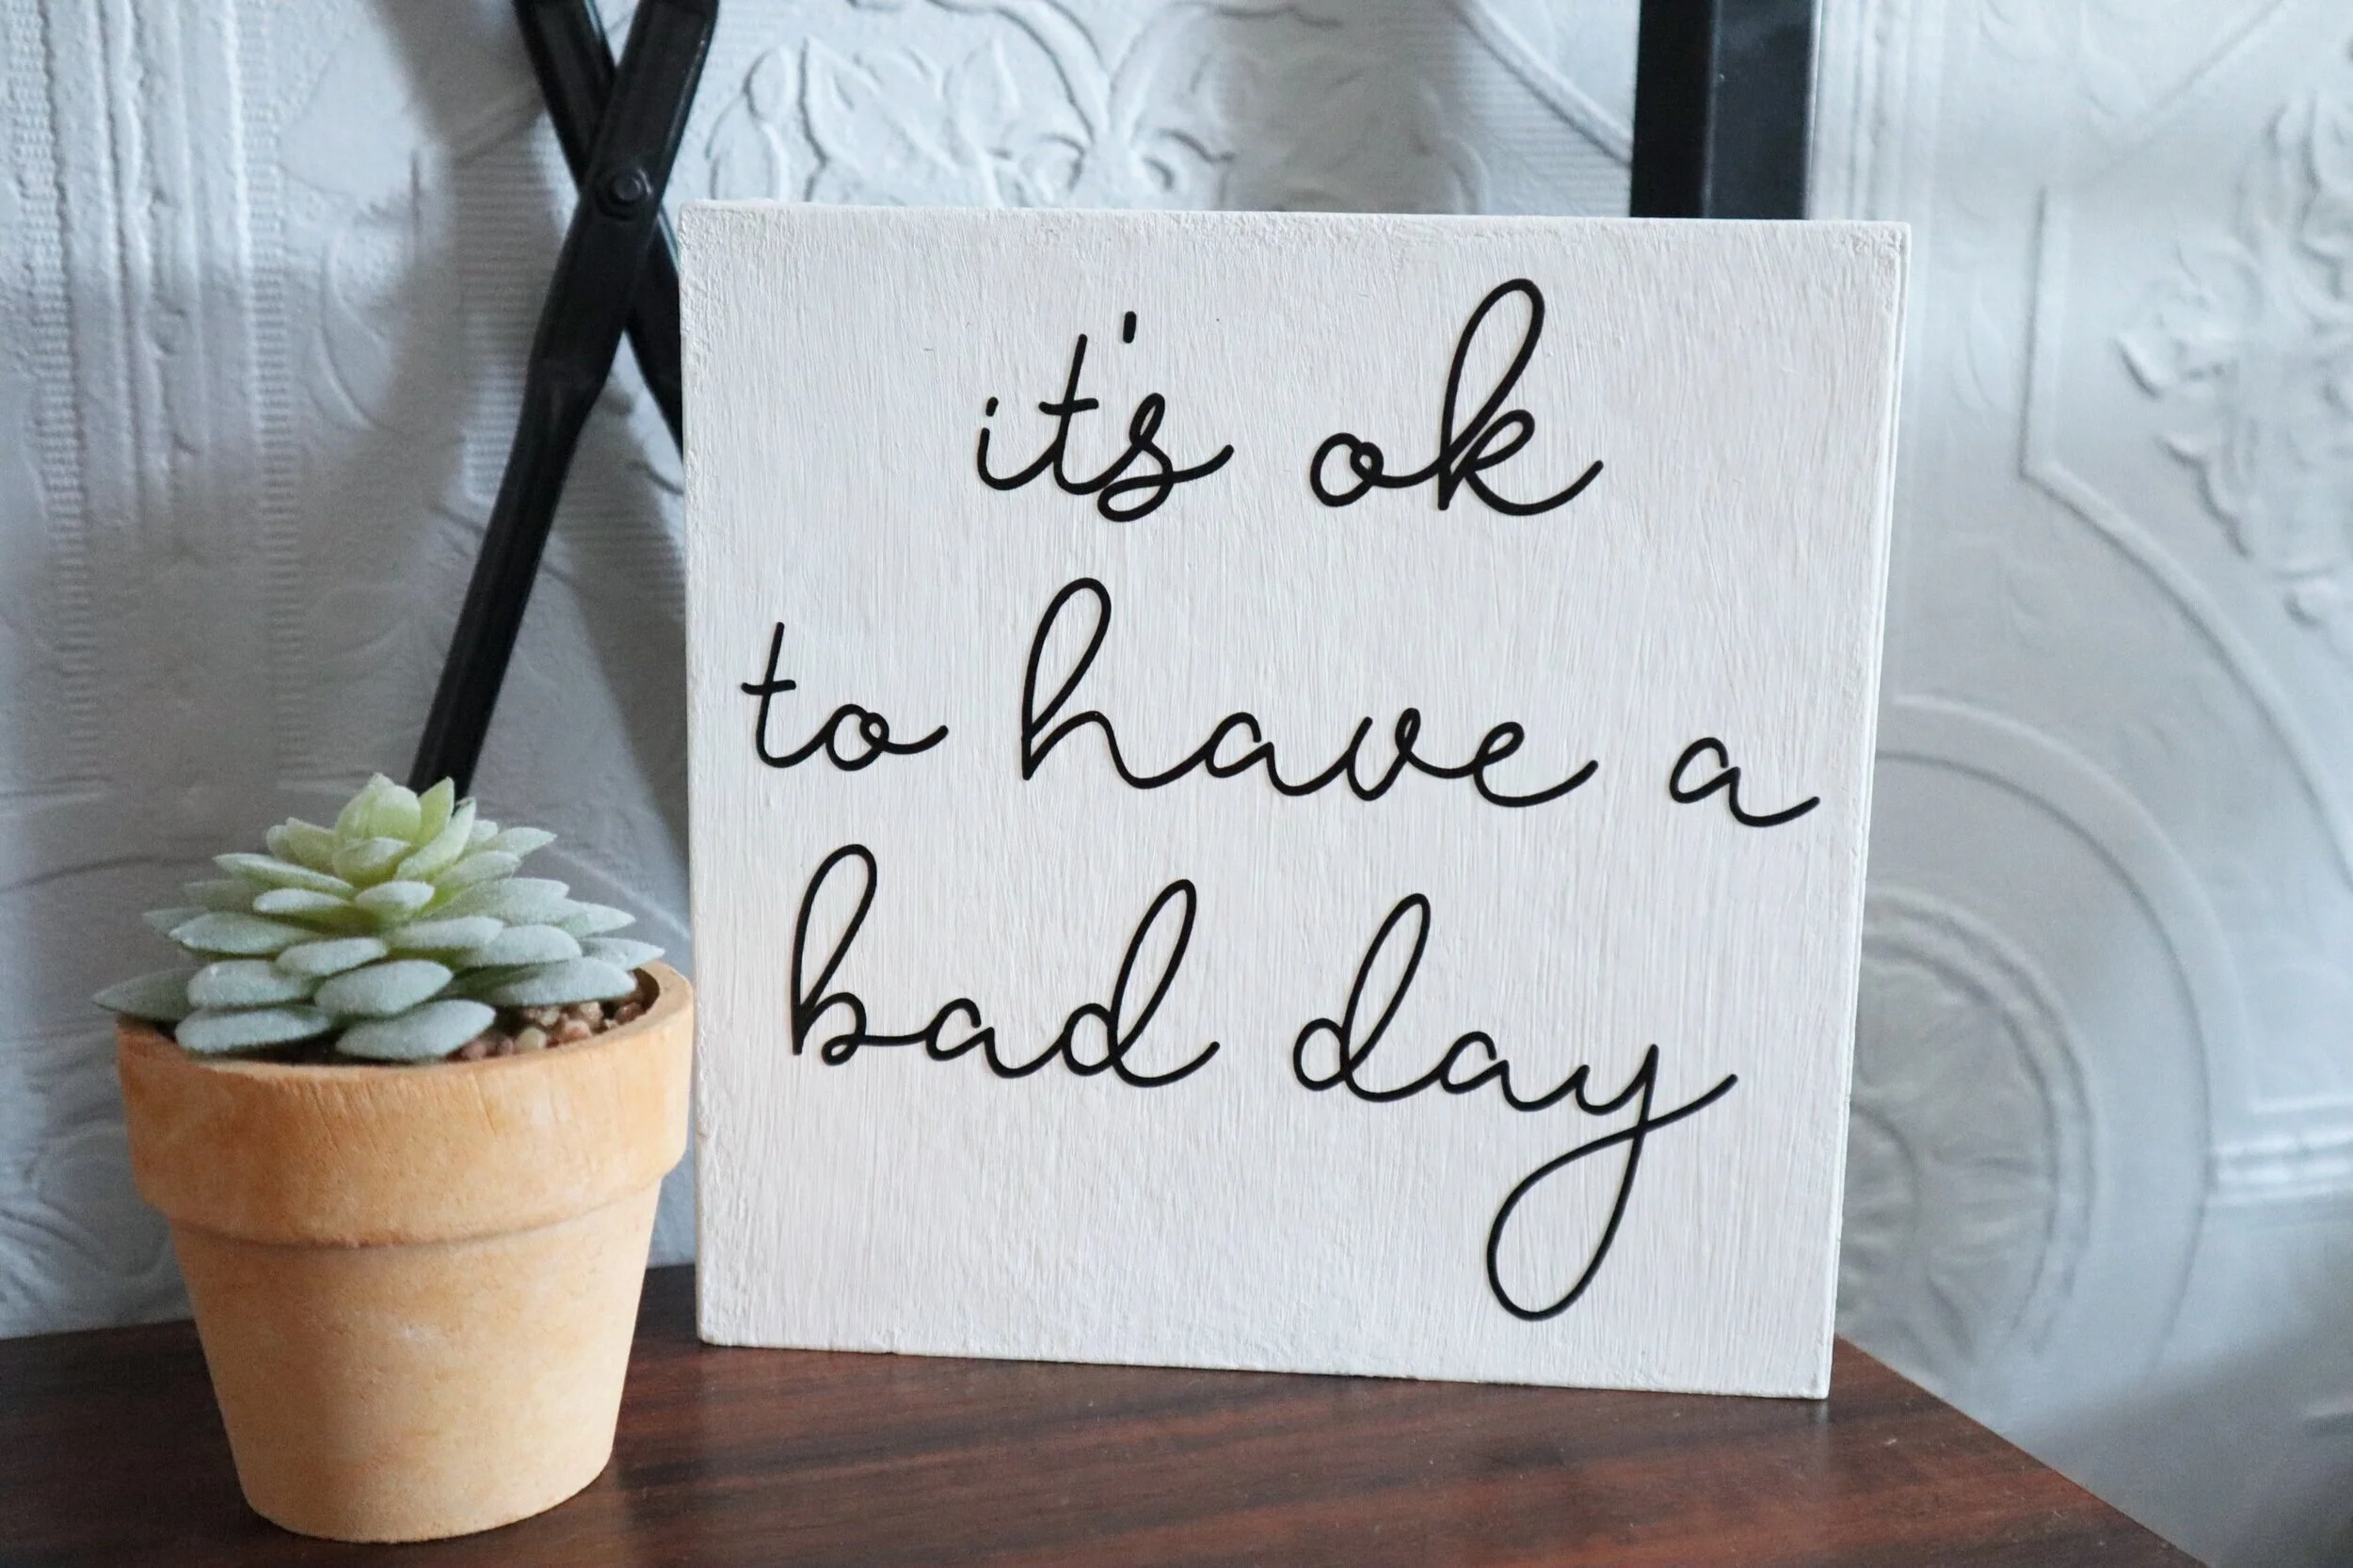
DIY dollar store sign makeover. How to give a dollar tree seasonal free standing faux wood sign a more modern look using your Cricut. DIY vinyl decal using your Cricut 'it's ok to have a bad day' diy sign.

I’ve been working on this little cozy space my girls have claimed in our new home, well it’s actually 100+ year old home but it’s new to us. It’s their play/reading area/hangout zone but I really wanted this space to look like it had more purpose than that. I wanted to create a space that screamed (in a super sweet polite kind of way ;)) “you are loved, you are beautiful, and your heart is amazing, daughter” kind of vibe.

While I’m creating this darling daughter you are loved space I want to share with you not just how I DIY-ed it all but I also want to share with you the same exact cut files and printables I used so you can use them too if you want. You can find all of my freebies in my FREE RESOURCE LIBRARY.

Affiliate Disclosure. Some of the links on this website are affiliate links, which means that I may earn a small commission if you click on the link or make a purchase using the link. If you make a purchase you will not be charged anything additional.

DIY dollar store sign makeover. How to give a dollar tree seasonal free standing faux wood sign a more modern look using your Cricut. DIY vinyl decal using your Cricut 'it's ok to have a bad day' diy sign.

Total transparency here… AFTER I wrote this post (meaning I had already finished the sign, took all the pictures, uploaded everything, pushed publish on the post and posted it to social media) I realized a big UH OH moment! I had added the word to too many times to the “it’s ok to have a bad day” quote. HUGE facepalm to myself. But I have since fixed my error, and honestly though how fitting of a mistake for this project. It really is ok to have a bad day ;)!

DIY dollar store sign makeover. How to give a dollar tree seasonal free standing faux wood sign a more modern look using your Cricut. DIY vinyl decal using your Cricut 'it's ok to have a bad day' diy sign.

Since I’m a frugal kind of momma I extra love how affordable this sign was to make. While I love using my power tools I didn’t use any to make this sign. I actually bought an already made sign from the Dollar Tree and gave that a little makeover. I spent less than $2 to make this small free standing sign using my Cricut and I want to show you how you can make your own without power tools too.

DIY FREE STANDING SIGN + FREE SVG

See the picture below…I wasn’t going to completely retake every single photo so you see my mistake, it’s ok to to have a bad day lol!!

DIY dollar store sign makeover. How to give a dollar tree seasonal free standing faux wood sign a more modern look using your Cricut. DIY vinyl decal using your Cricut 'it's ok to have a bad day' diy sign.

Here’s what I used

1. CUT & WEED THE DECAL

I used my Cricut to cut out my vinyl decal. I used StarCraft vinyl in matte black but honestly it’s not my favorite. I highly recommend ORACAL 651 (or 631 if you have it since this project is for indoor use). I bought the StarCraft thinking I would love it as much as 651 but sadly I don’t.

Grab the SVG for FREE here.

2. SAND

A drop cloth is a must for this if you don’t want glitter everywhere. I usually always lay down a drop cloth when I crafting. It doesn’t make for a super gorgeous backdrop for my tutorials BUT it keeps my surface clean AND I can throw it in the washer when I’m done.

DIY dollar store sign makeover. How to give a dollar tree seasonal free standing faux wood sign a more modern look using your Cricut. DIY vinyl decal using your Cricut 'it's ok to have a bad day' diy sign.

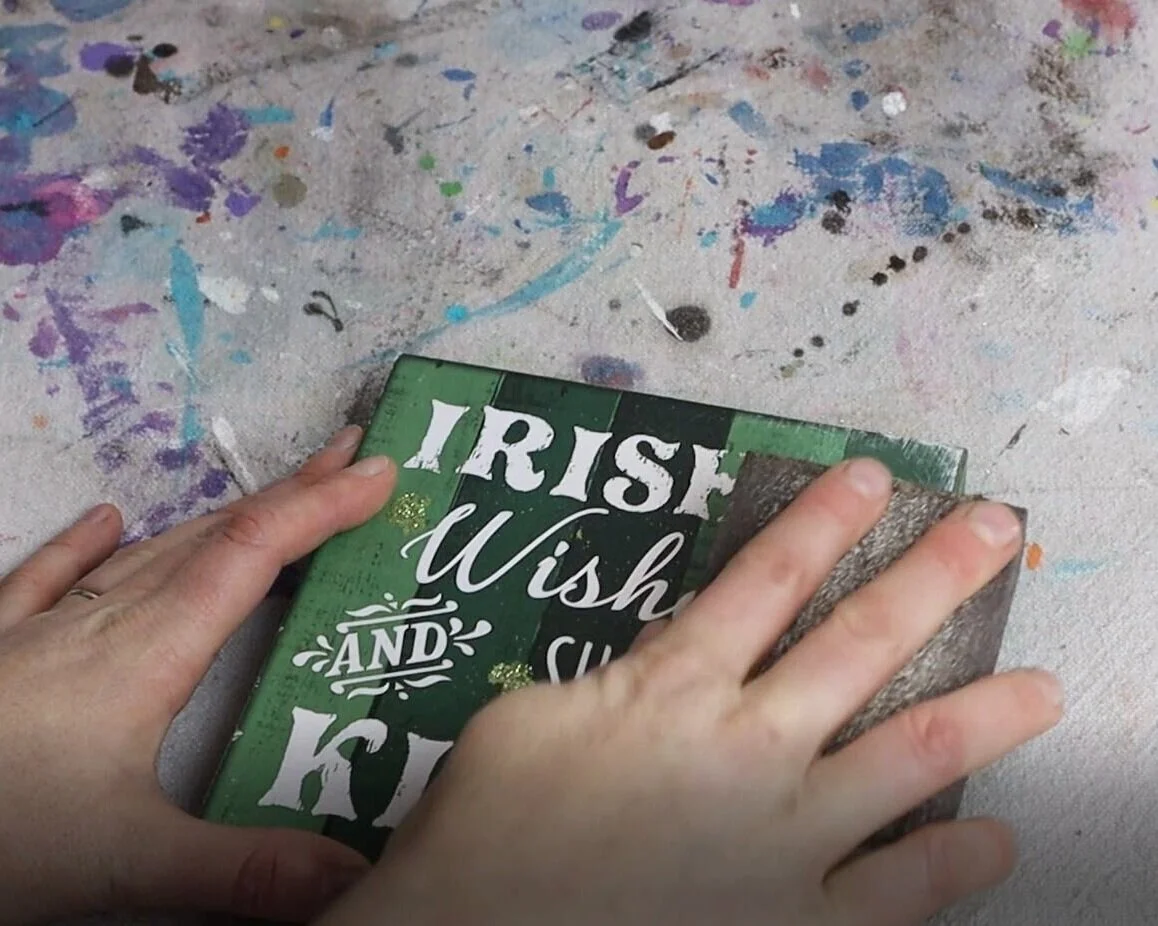
I used a sanding sponge to remove all of the glitter from the Dollar Tree sign first. This surprisingly comes off easily. Then I wiped it down with a paper towel to get all to the sanded stuff off of my sign.

DIY dollar store sign makeover. How to give a dollar tree seasonal free standing faux wood sign a more modern look using your Cricut. DIY vinyl decal using your Cricut 'it's ok to have a bad day' diy sign.

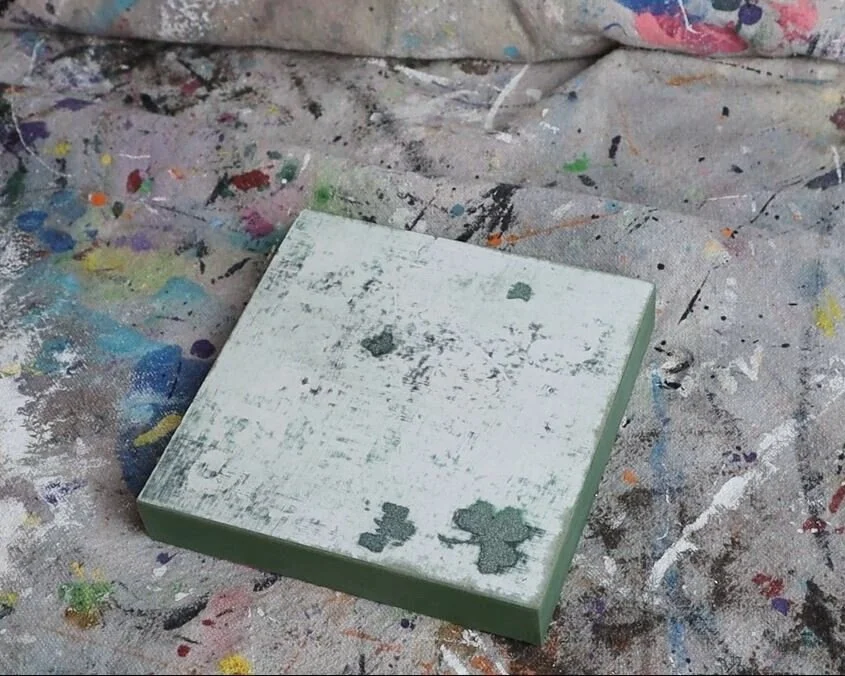
This is what my sign looked like once I sanded it down. I could have sanded more but this much was good enough:)! You mainly want to get all of the glitter off because paint won’t cover over glitter smoothly.

3. PAINT

Then I painted my little sign. This took quite a few coats, 3 actually. I did thin layers so that they would dry smooth and fast. Acrylic paint is what I used but if you want better coverage with less coats chalk paint is a great option too. Be sure to let your paint dry fully between coats.

DIY dollar store sign makeover. How to give a dollar tree seasonal free standing faux wood sign a more modern look using your Cricut. DIY vinyl decal using your Cricut 'it's ok to have a bad day' diy sign.

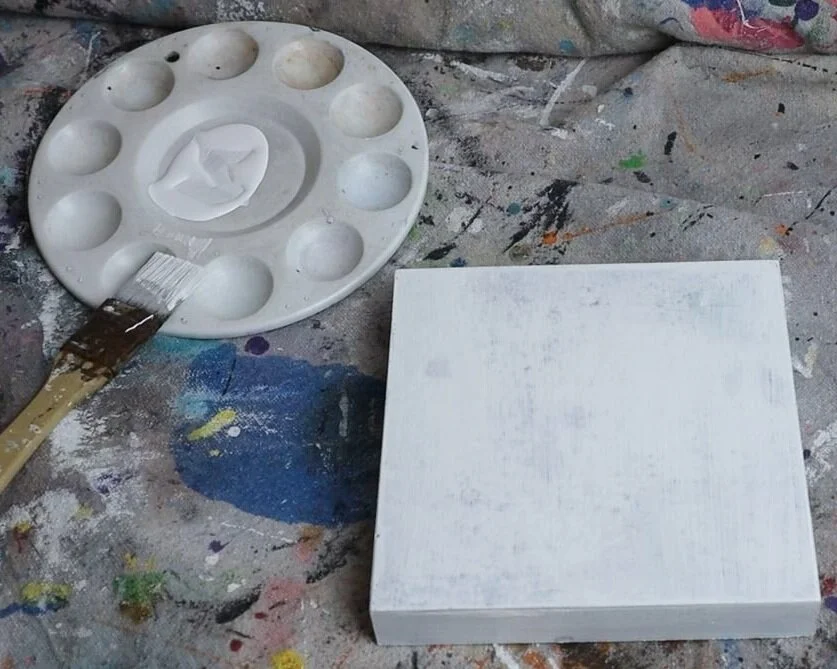
Here’s what my sign base looked like after the first coat of white acrylic paint.

DIY dollar store sign makeover. How to give a dollar tree seasonal free standing faux wood sign a more modern look using your Cricut. DIY vinyl decal using your Cricut 'it's ok to have a bad day' diy sign.

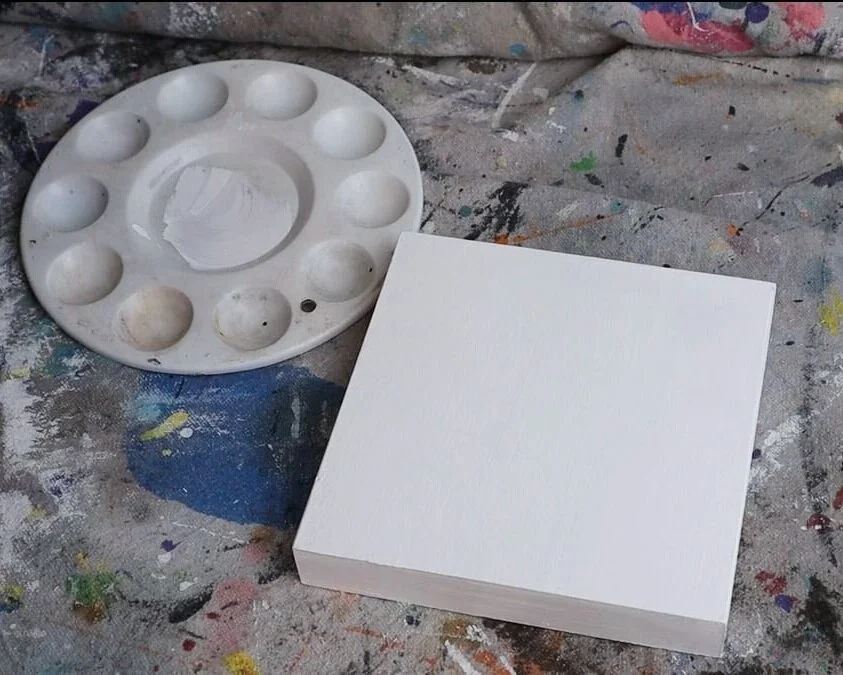
And this is what it looked like after I painted the 3rd coat of white acrylic paint.

4. APPLY THE DECAL

I let my sign base dry overnight before applying my vinyl decal. You just want to be sure your sign is completely dry, vinyl will NOT stick to wet paint. It will peel up and the paint will be stuck to the backside of the vinyl and it will be a mess to fix…trust me I’ve been there and it’s not fun.

DIY dollar store sign makeover. How to give a dollar tree seasonal free standing faux wood sign a more modern look using your Cricut. DIY vinyl decal using your Cricut 'it's ok to have a bad day' diy sign.

I used my favorite clear transfer tape to apply my decal on to my dollar store base.

DIY dollar store sign makeover. How to give a dollar tree seasonal free standing faux wood sign a more modern look using your Cricut. DIY vinyl decal using your Cricut 'it's ok to have a bad day' diy sign.

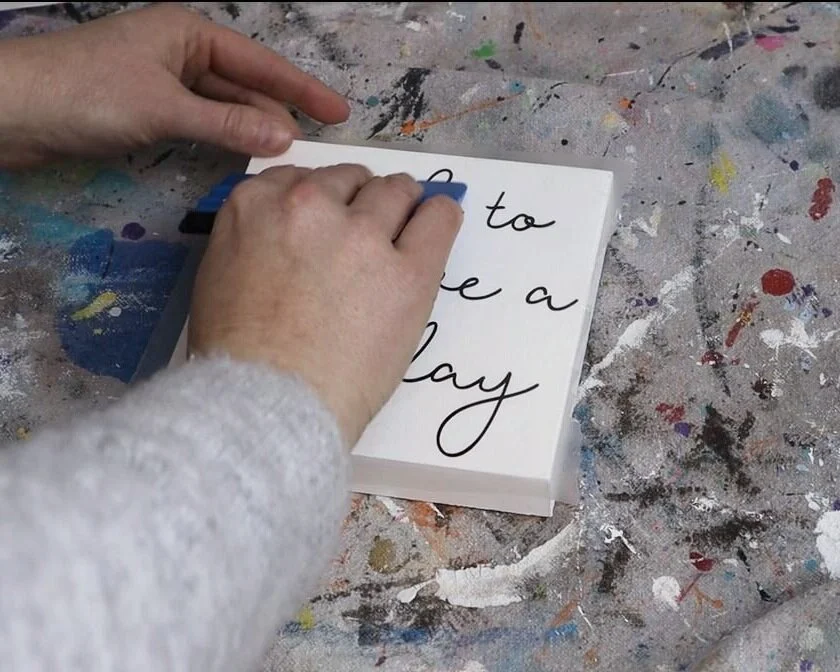
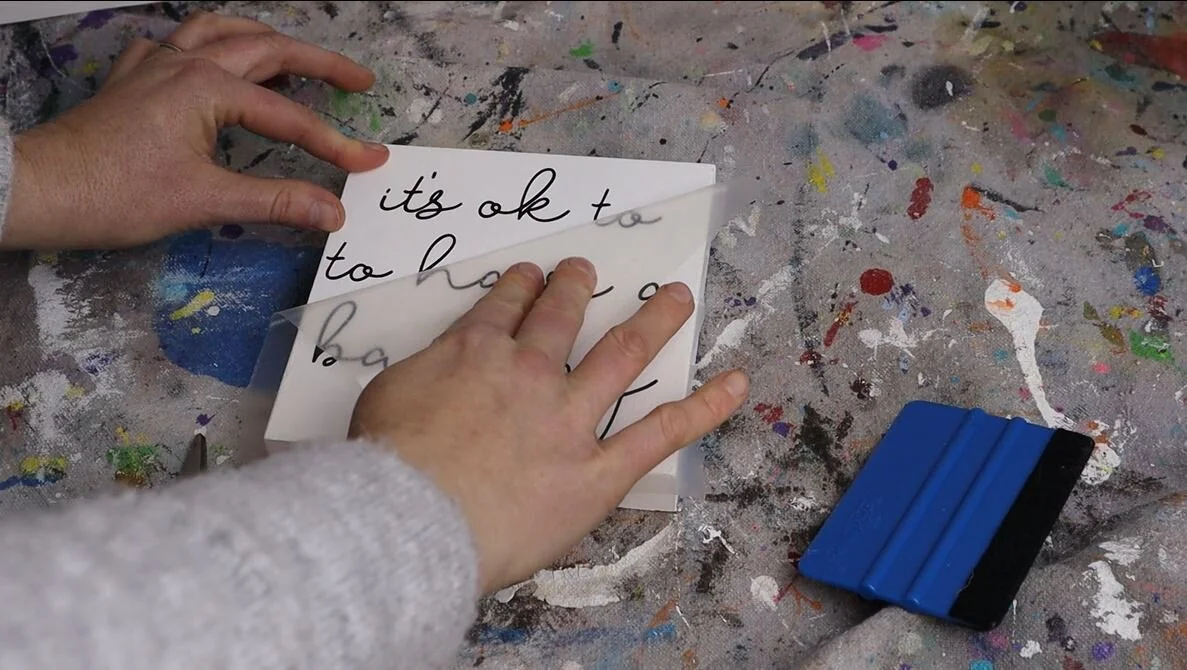
After I was happy with the placement I pressed it down using my trusty blue vinyl squeegee then slowly rolled the transfer tape off of my decal. Be sure when you do this to go VERY SLOW. It’s really easy to go too fast and rip your vinyl. A vinyl squeegee isn’t a must but it does make the job easier. If you don’t have one you an use a library or rewards card.

DIY dollar store sign makeover. How to give a dollar tree seasonal free standing faux wood sign a more modern look using your Cricut. DIY vinyl decal using your Cricut 'it's ok to have a bad day' diy sign.

Then found the perfect spot for it on this industrial ladder tiered shelf I scored off of Amazon. BTW this one is SUPER easy to put together if you’re looking for an easy to assemble tiered shelf. I have bought some DIY shelfs before that were total nightmares…this one was a dream to assemble!

DIY dollar store sign makeover. How to give a dollar tree seasonal free standing faux wood sign a more modern look using your Cricut. DIY vinyl decal using your Cricut 'it's ok to have a bad day' diy sign.

I hope you enjoyed this DIY craft tutorial. If you have any questions please let me know in the comments below. Happy Crafting!

Check out more Cricut craft projects below

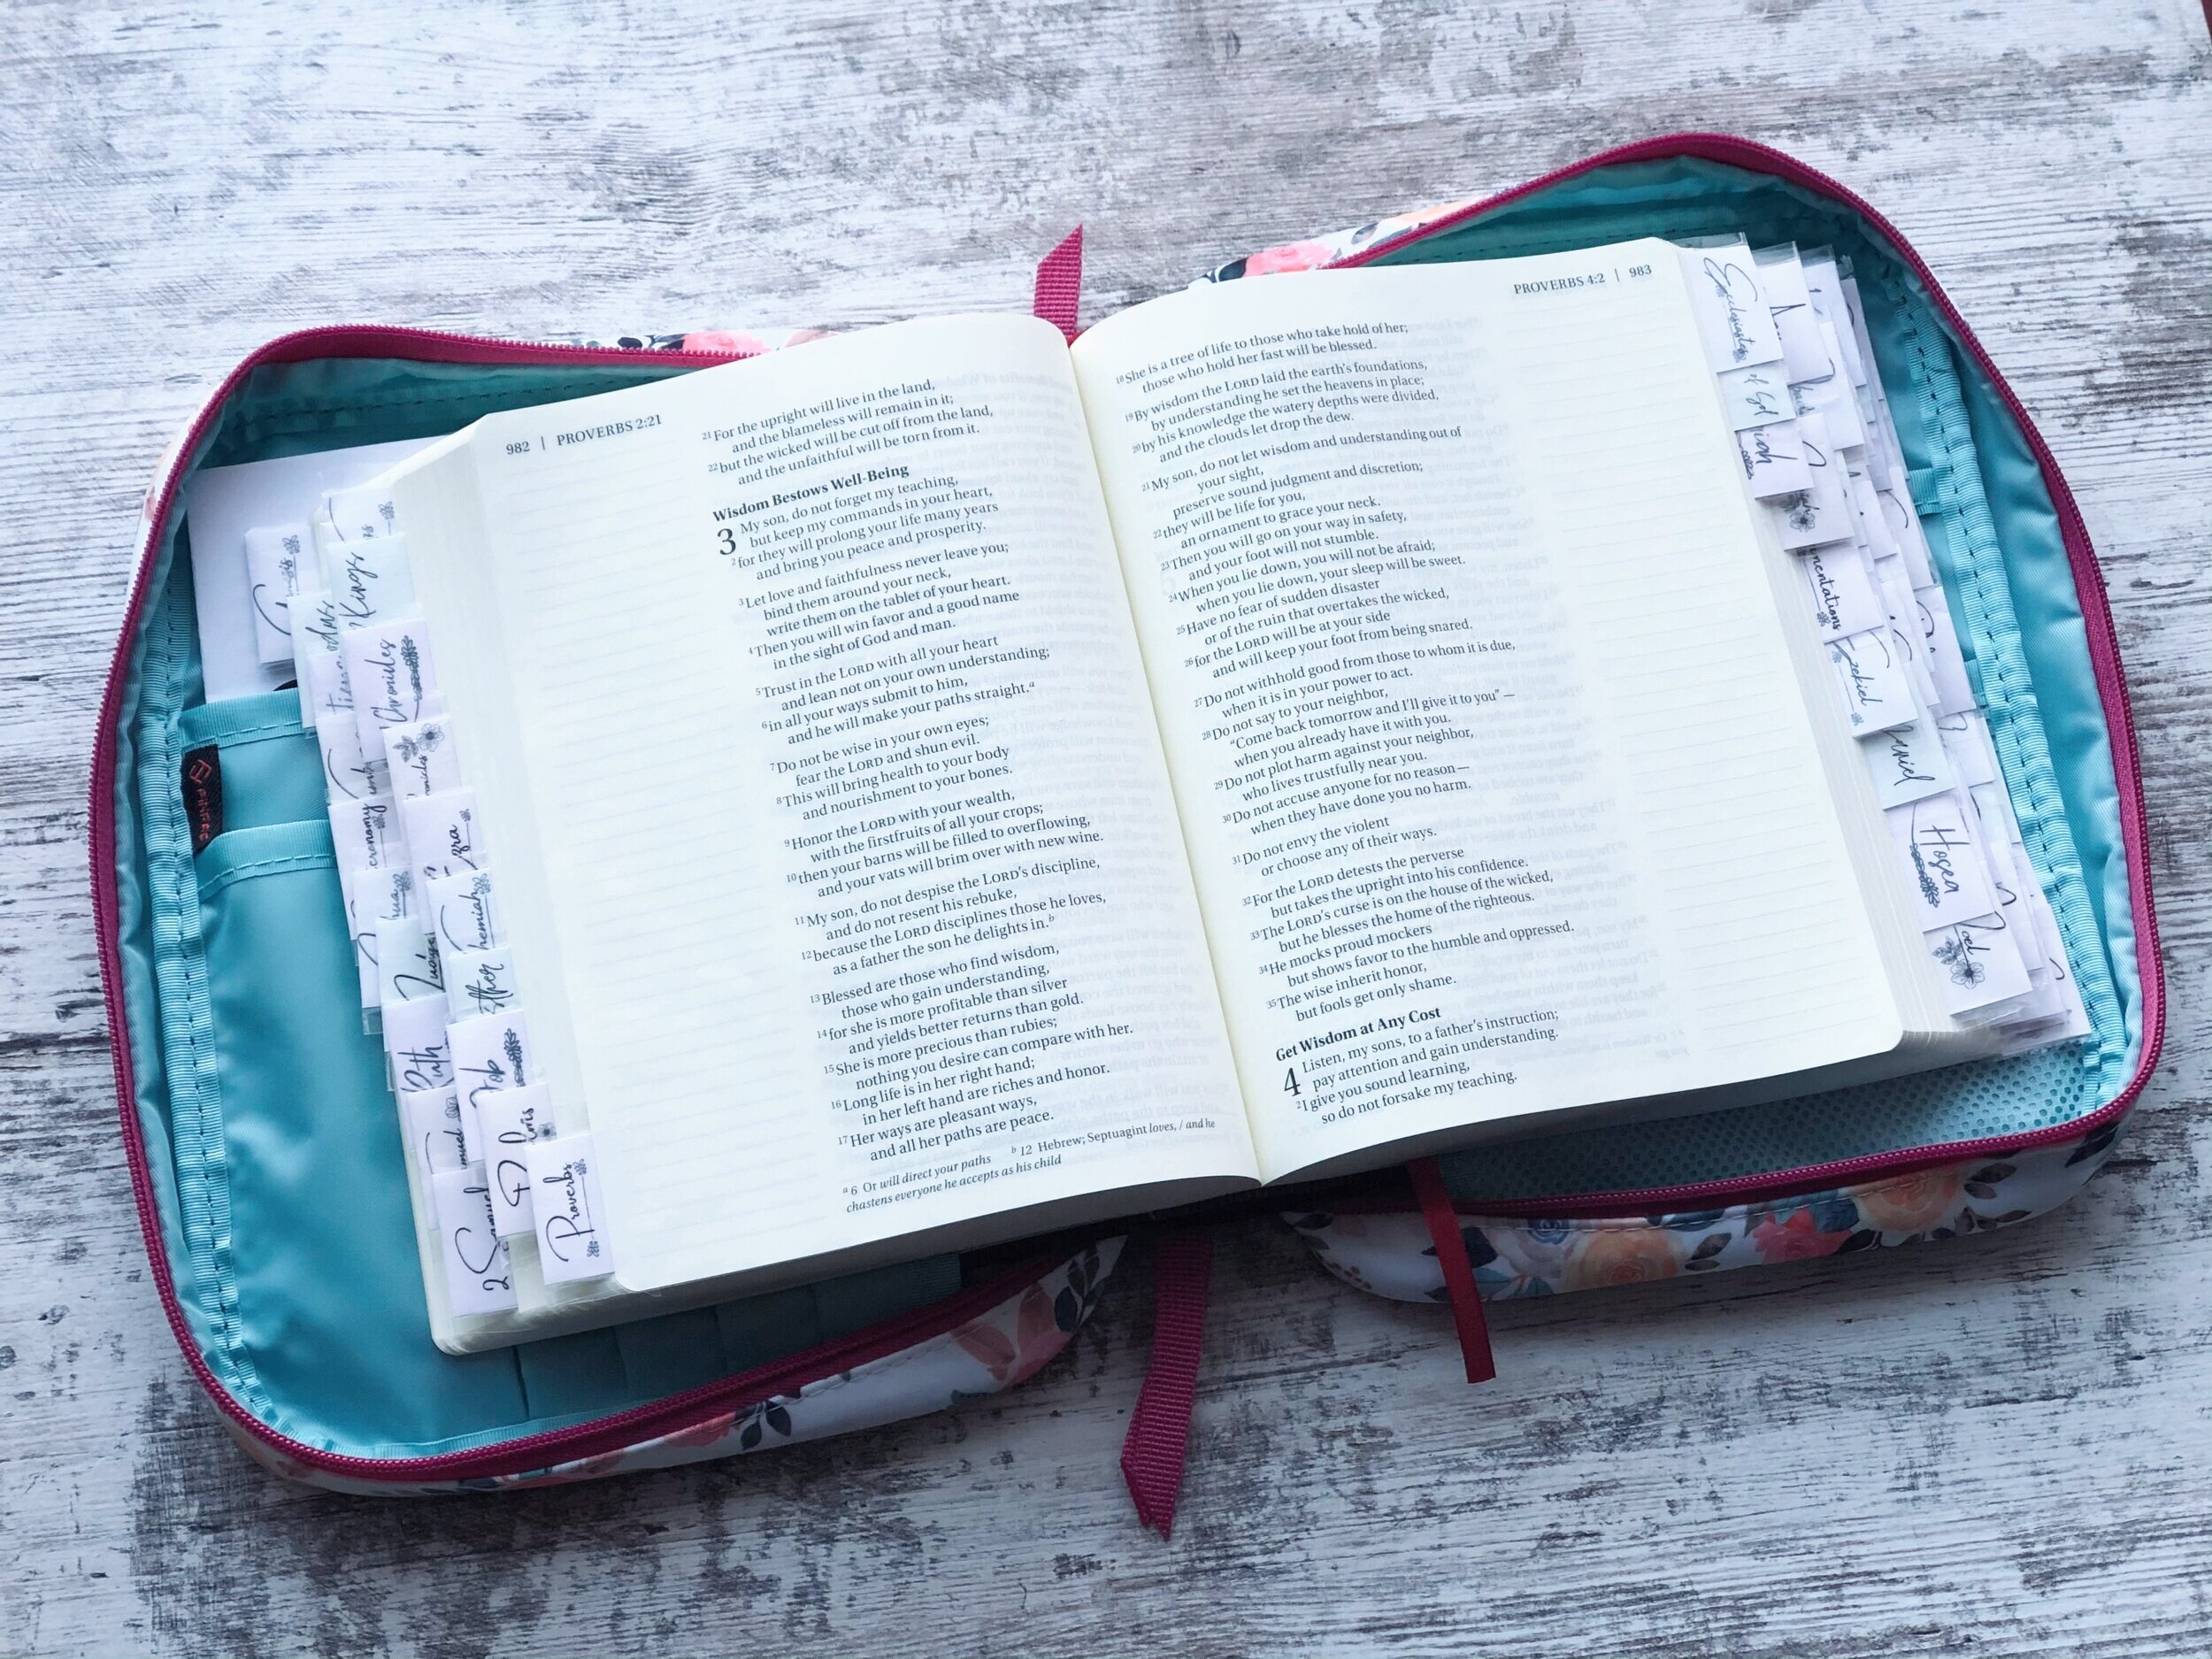
DIY bible tabs + FREE printable

DIY bible tab printable. How to make your own bible tabs cheap and easy. Frugal mom printable. Pretty bible tab printable that are free to use.

Printable bible tabs

Make your own easy diy bible tabs at home. Print them from any home printer see how to make them yourself.

Need a free bible tab printable? I was looking all over Pinterest for DIY bible tabs and didn’t really find exactly what I was looking for with my budget. Then it hit me ‘Megan, why don’t you just make your own?!’ And so I did.

DIY bible tab printable. How to make your own bible tabs cheap and easy. Frugal mom printable. Pretty bible tab printable that are free to use.

These are permanent bible tabs, so if you want something you can change out you can still use my bible tab printable you’ll just want to attach it using a different technique.

Affiliate Disclosure. Some of the links on this website are affiliate links, which means that I may earn a small commission if you click on the link or make a purchase using the link. If you make a purchase you will not be charged anything additional.

Of course my main goal for these bible tabs is functional but I also wanted them to be pretty. I went for a more minimal theme with them. I used muted colors on the tabs with varied cursive fonts, simple florals and accent lines. Some of the tabs I’ve seen are gorgeous but they are a little hard to read with the busy prints that are on them.

Most of the DIY bible tabs I’ve come across were going to cost me more money than I wanted to spend. I wanted to use materials I already had at home. I have already spent more money than I realized on new bibles, covers, and bible friendly markers for me and my girls so buying bible tab labels just seemed a little overload when it was something I could do myself.

MAKE YOUR OWN BIBLE TAB LABLES

Here’s what you need

This free download comes in two parts: pages 1&2 and page 3. Because the file is print quality it is larger than normal files that I upload and the fact that it’s three pages and not one. So be sure you click to download all three pages.

DIY bible tab printable. How to make your own bible tabs cheap and easy. Frugal mom printable. Pretty bible tab printable that are free to use.

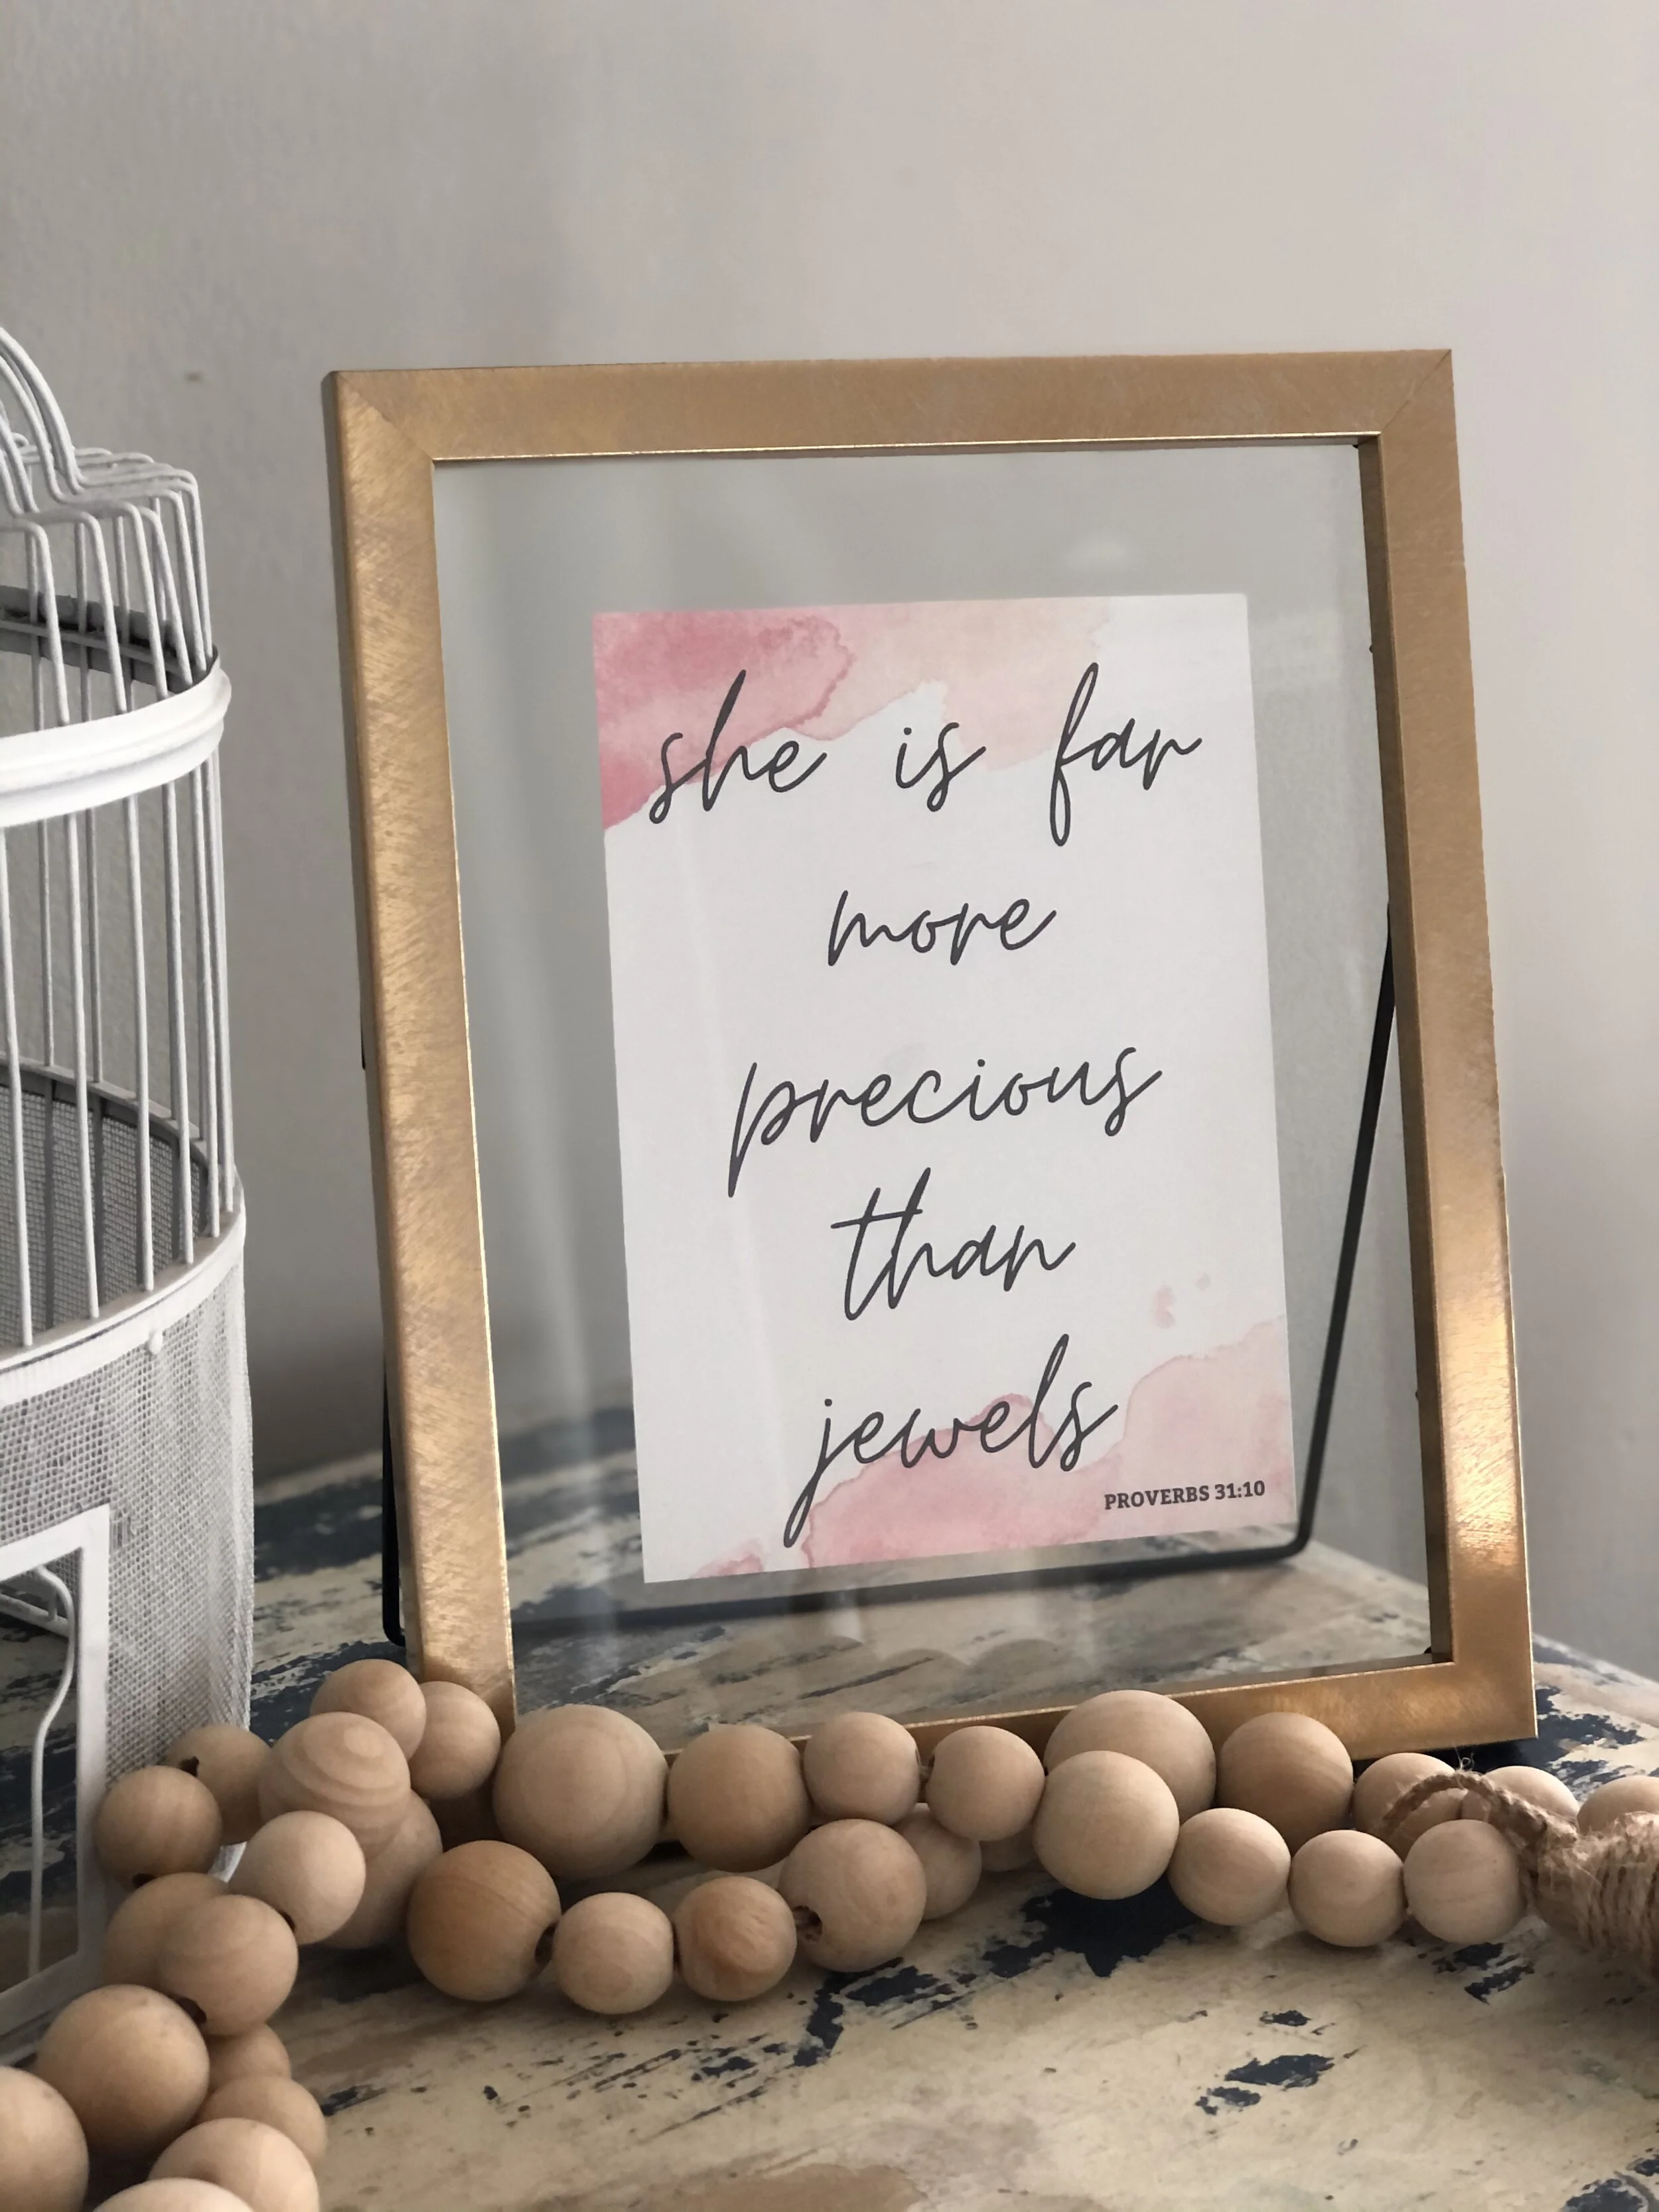
I used Canva.com to create my labels in. Then I printed them off on my simple hp home printer. I also used these same tools create and print this FREE PROVERBS 31 PRINTABLE to put in my girl’s lounge area.

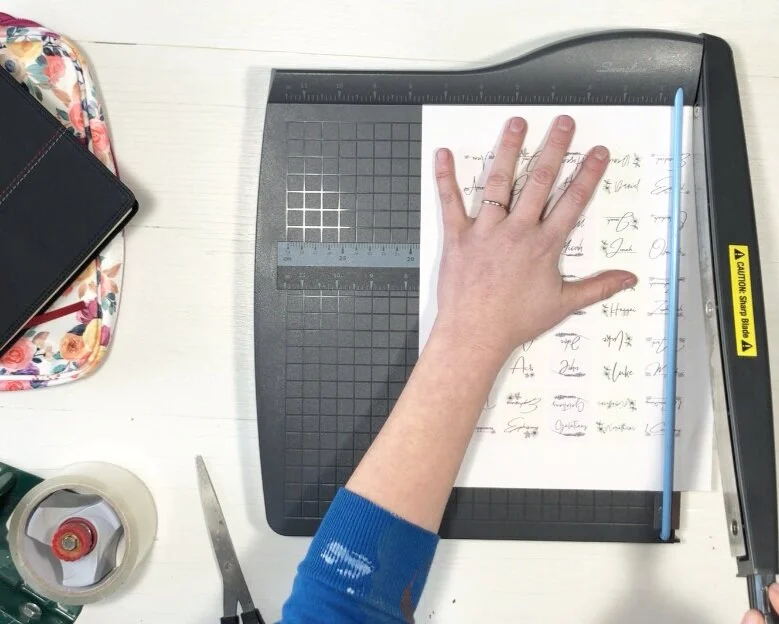
After I had all three pages of tabs printed off I used my Swingline paper cutter to cut and separate all the little tabs. Having this inexpensive tool has made my life so much easier! I never realized how often I needed to cut straight lines till I had this office tool.

{side note…don’t mind my paint stained sweatshirt. I had been painting earlier that day and I always try to wear old paint clothes because as you can see I tend to be slightly messy sometimes when I paint}

DIY bible tab printable. How to make your own bible tabs cheap and easy. Frugal mom printable. Pretty bible tab printable that are free to use.

I made muted colored squares to go around each of the labels so that they are much easier to cut.

DIY bible tab printable. How to make your own bible tabs cheap and easy. Frugal mom printable. Pretty bible tab printable that are free to use.

To make it easier to find my printed bible tabs I put them in alphabetical order…well kinda, I grouped them in order. Then I started in Genesis and worked my way to the end of the bible adding tabs. You can certainly do yours differently but I wanted to easily find things and know the order in which to find them so I thought this was the best way to do that for me.

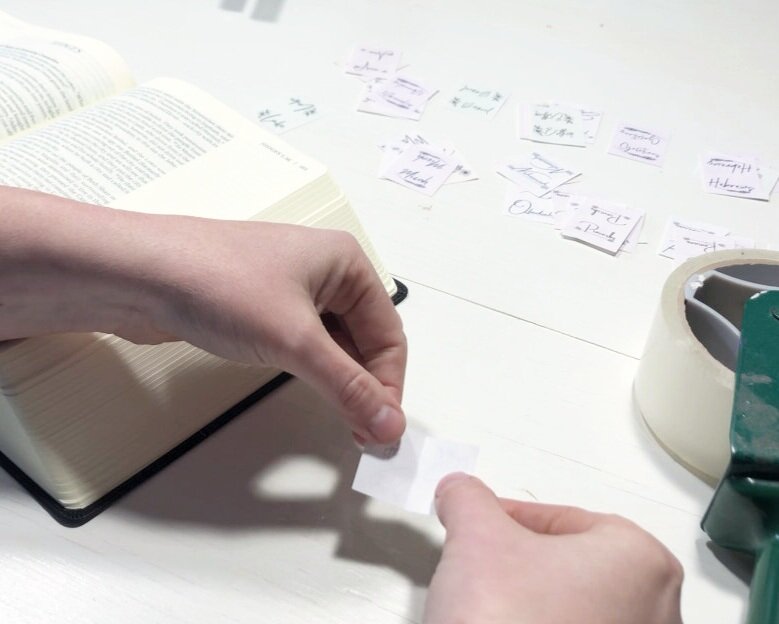
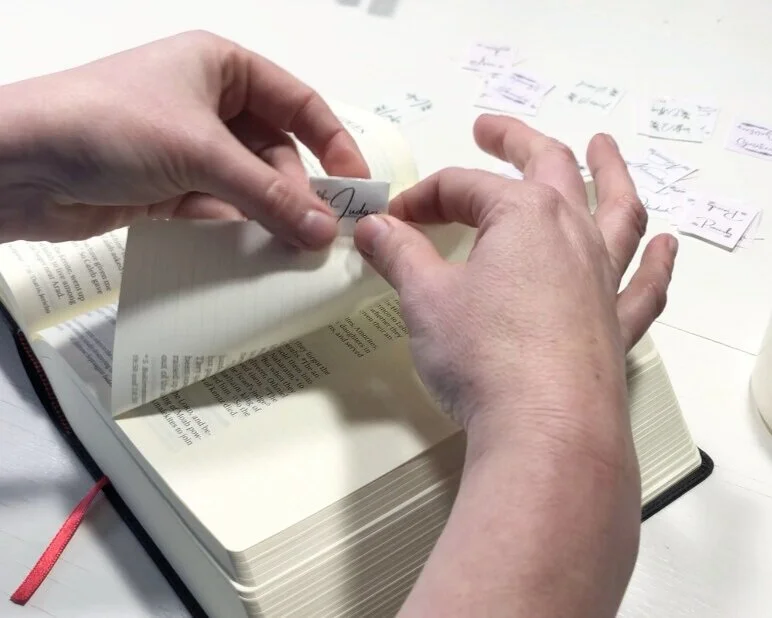
These tabs are double sided. To apply them the easiest way fold the tab in half first then open it back up. This way you will have a crease already on the tab making it easier to fold over once it’s on your bible.

DIY bible tab printable. How to make your own bible tabs cheap and easy. Frugal mom printable. Pretty bible tab printable that are free to use.

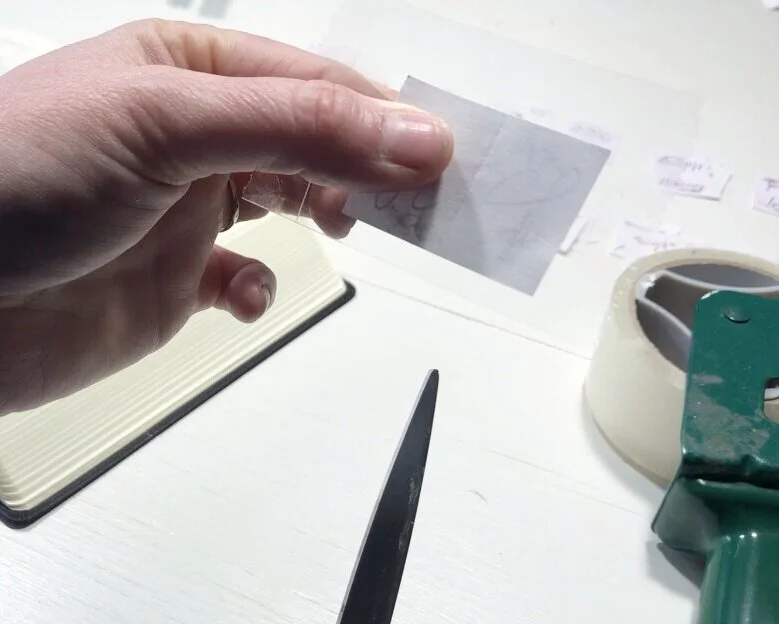
I used packaging tape but you can use whatever tape you prefer. I know this tape isn’t ideal but it’s what I had on hand and it acts as a laminator so the tabs won’t rip off easily. I took a piece of tape then placed my unfolded tab face down on the sticky side.

DIY bible tab printable. How to make your own bible tabs cheap and easy. Frugal mom printable. Pretty bible tab printable that are free to use.

Then I trimmed off the extra excess tape around my bible tab. I left just enough so I could attach it to my bible page.

DIY bible tab printable. How to make your own bible tabs cheap and easy. Frugal mom printable. Pretty bible tab printable that are free to use.

This part was a little tricky and honestly I probably should have taken more time to get these on there so they were precise. But then again I’m not really a precise, perfect kind of girl so this process fit me perfectly! I eyeballed my tabs and stuck them on their coordinating book of the bible. I placed them on the backside of the page first.

DIY bible tab printable. How to make your own bible tabs cheap and easy. Frugal mom printable. Pretty bible tab printable that are free to use.

Then I pressed the bible tab over so that the page was sandwiched in between.

DIY bible tab printable. How to make your own bible tabs cheap and easy. Frugal mom printable. Pretty bible tab printable that are free to use.

I placed all of my tabs on the right side of the books of the bible. So if a book started on the left side I still placed the bible tab on the right hand side. You don’t have to do this but I did so that I wasn’t having to flip to find which side of the tab the book started on. Just a little way to keep myself slightly organized.

DIY bible tab printable. How to make your own bible tabs cheap and easy. Frugal mom printable. Pretty bible tab printable that are free to use.

I am so glad I took the time to add these DIY tabs to my bible. This will make it so much easier when I’m in the word at church and at home. I’ve been doing a weekly bible study using this prayer journal for women. Not only is it gorgeous but there was a lot of thought put into the content.

DIY bible tab printable. How to make your own bible tabs cheap and easy. Frugal mom printable. Pretty bible tab printable that are free to use.

I hope this affordable bible tab option works for your needs. If you have any questions let me know in the comments below.

Happy Crafting!
Humorous wood sign for mom - mom's shit list sign + FREE SVG

How to stencil on wood using your Cricut. DIY mom's shit list wood sign free SVG. How to paint a lettered wood sign step by step tutorial with pictures.

Humorous wood sign for mom - mom's shit list sign + FREE SVG

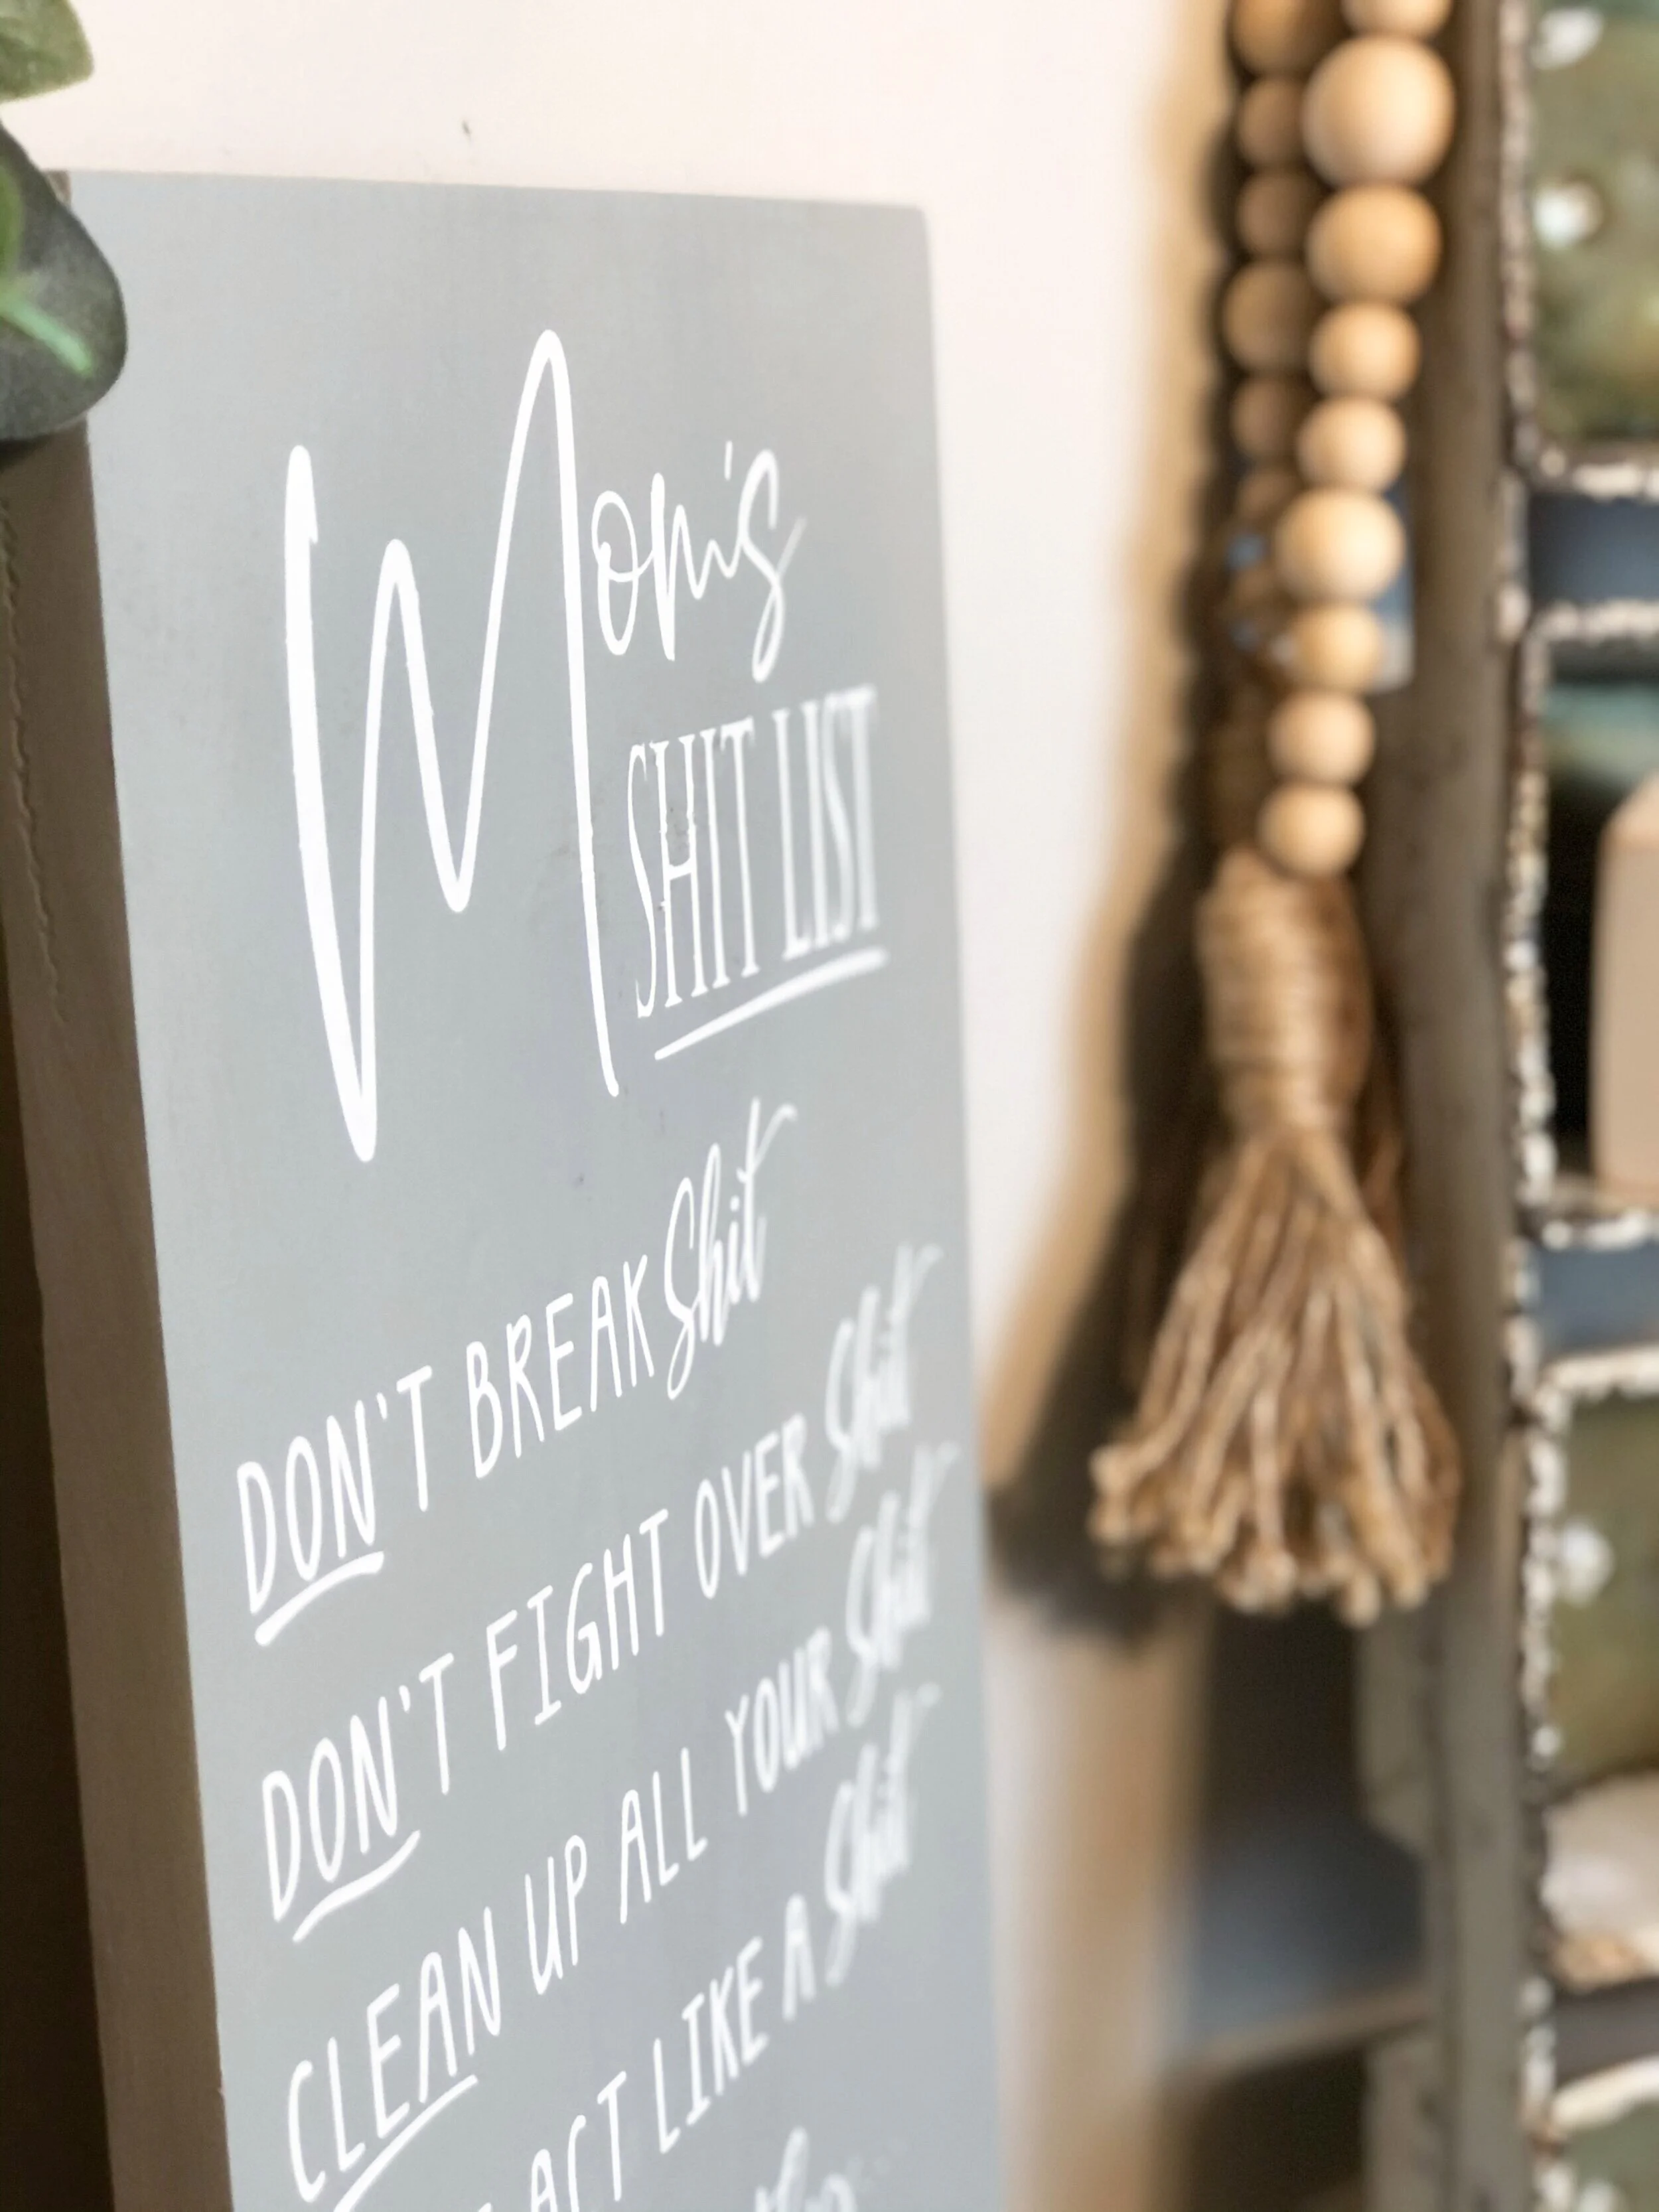
Learn how to stencil and make a humorous sign for you or another fellow mom with a sense of humor. BONUS grab the FREE SVG for this MOM’S SHIT LIST SIGN in my resource library (find the link below).

How to stencil on wood using your Cricut. DIY mom's shit list wood sign free SVG. How to paint a lettered wood sign step by step tutorial with pictures.

Oh boy does this sign ring so much truth. I’m a Christian lady BUT also cuss a little.. well, sometimes a lot or at least more than I should. And I think that’s ok.

My friend asked me to make this funny sign and of course I said a big YES! Probably because I can relate so much to it but also, because I really wanted to share the SVG with all of my fellow SVG loving crafters that read my blog.

Affiliate Disclosure. Some of the links on this website are affiliate links, which means that I may earn a small commission if you click on the link or make a purchase using the link. If you make a purchase you will not be charged anything additional.

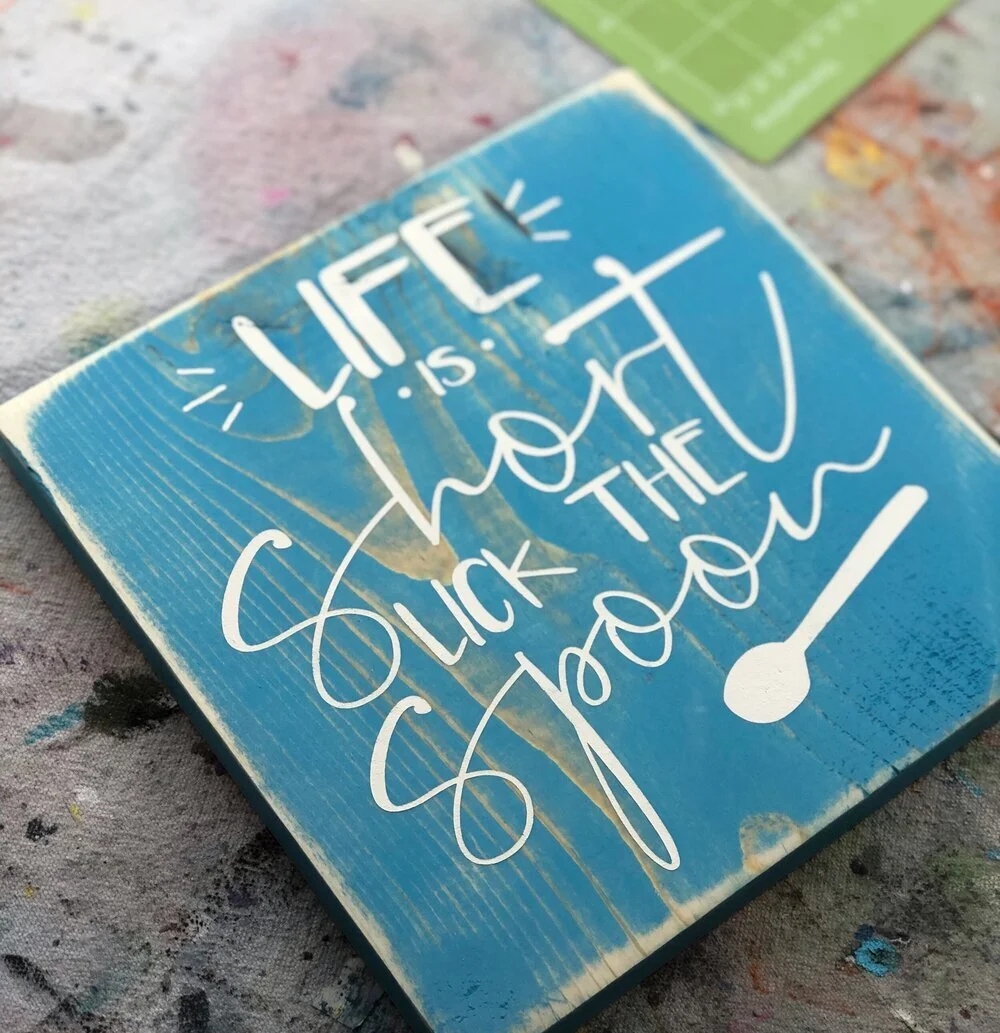
A couple months back I also made another humorous sign for her: life is short lick the spoon (which I also shared the SVG for in my library for you to use for free). She always has great ideas on what she wants me to make her:)!!

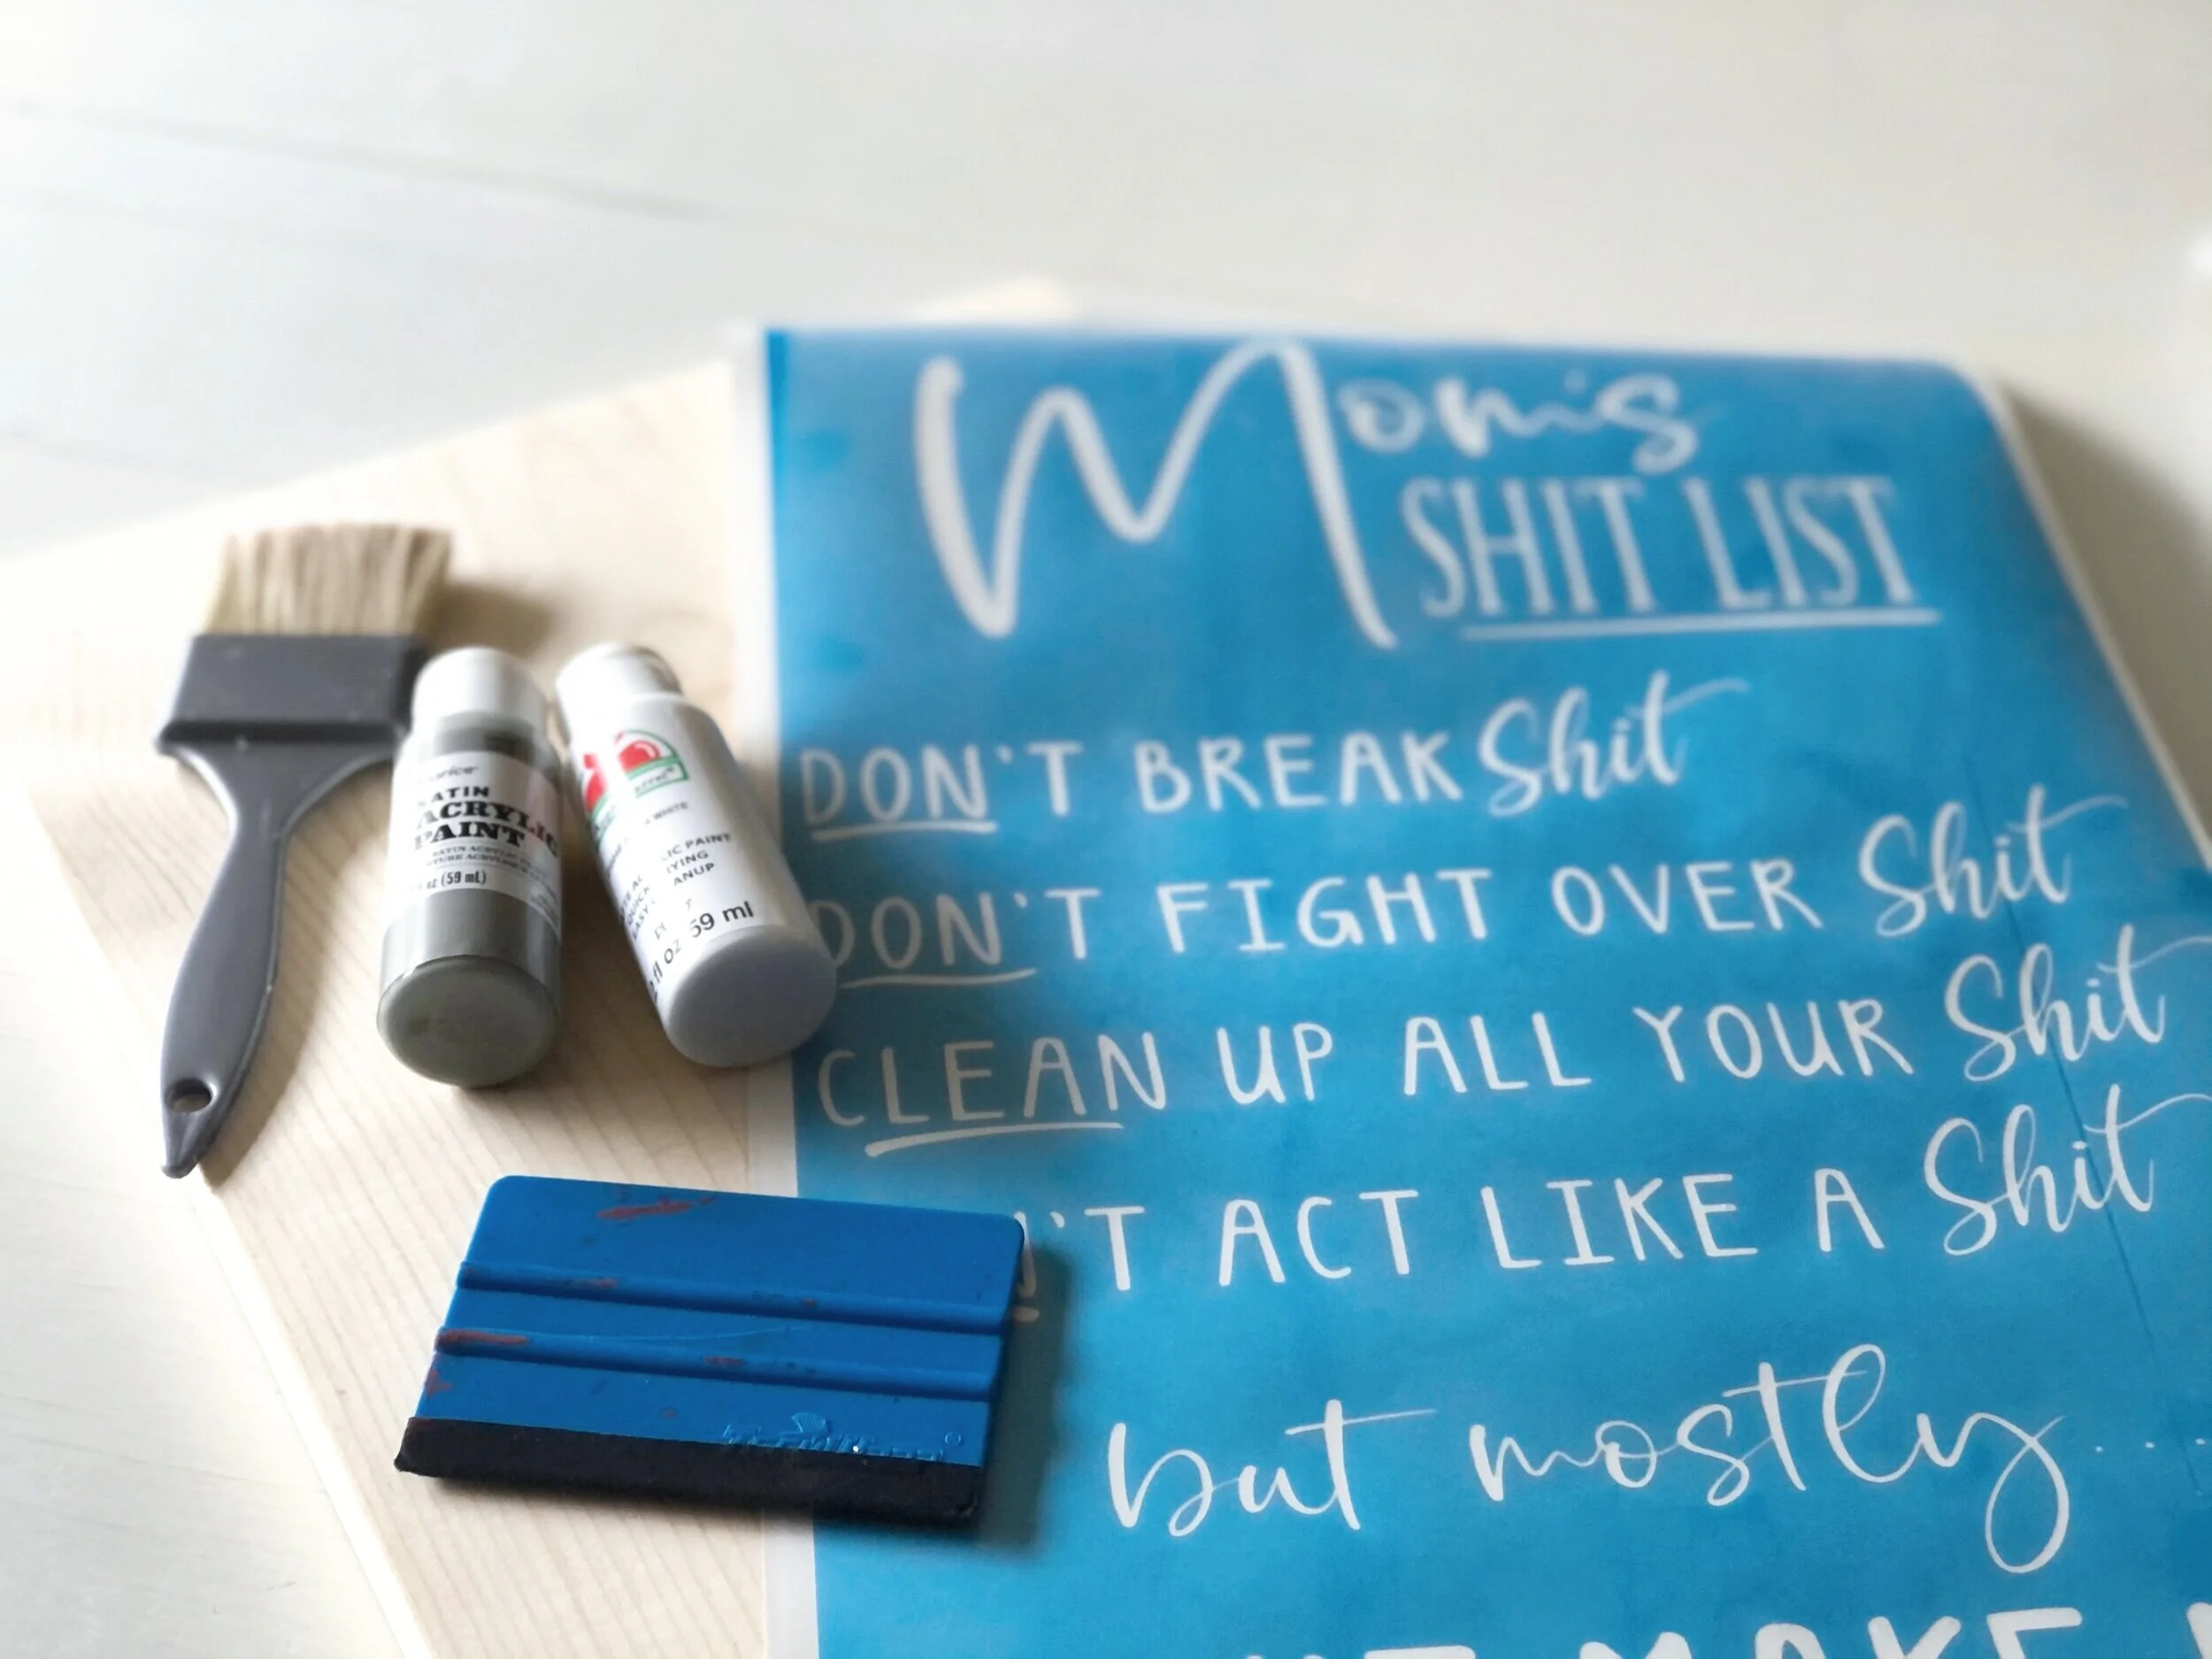
Ok so here’s what you need to make your own Mom’s shit list wood sign.

BONUS: you can get this EXACT file I made for FREE in my password protected resource library. Just click on the button below and it will take you there. These files are for free PERSONAL use only.

HOW TO MAKE A HUMOROUS STENCILED WOOD SIGN FOR MOM

HERE’S WHAT YOU NEED:

If you’re new to the world of fancy cutting machines aka vinyl cutters aka a Cricut or Silhouette be sure to check out my post on 10 must have supplies & accessories to get you started when you’re new to using a Cricut. Also if you plan on using a LOT of stencil film and you want to save some money $$ be sure to read this post on where to buy ORAMASK 813 stencil material in bulk to save you TONS of money.

How to stencil on wood using your Cricut. DIY mom's shit list wood sign free SVG. How to paint a lettered wood sign step by step tutorial with pictures.

STENCILING ON WOOD- THE NO PAINT BLEED METHOD

1. CUT & SAND THE BASE

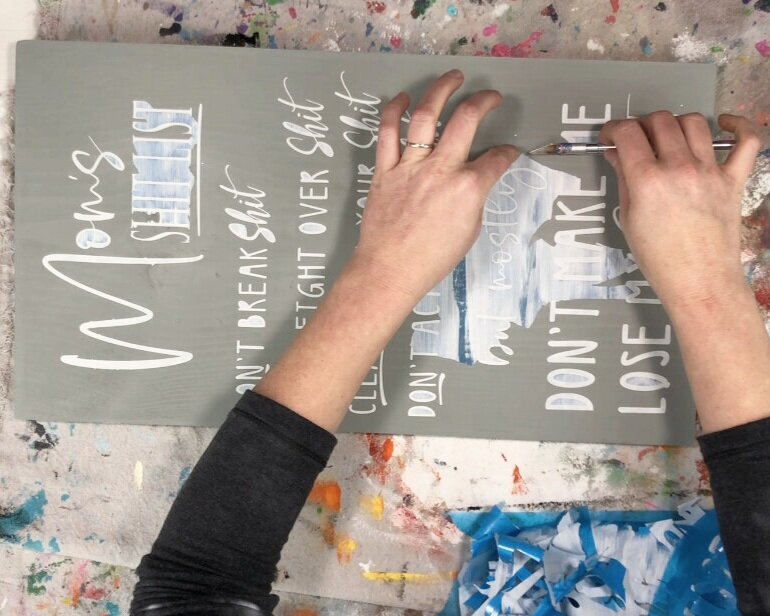
The first thing I did was cut and sand my wooden base. I used a 1x12 to make my sign out of. If you are new to the lumber world a 1x12 doesn’t actually measure 12” wide, it’s more like 11.25” or in my case it was 11”. I cut my wood to 20” then sanded it semi smooth with 120 grit sandpaper using my Ryobi cordless sander. I LOVE this little light weight sander and the fact that it’s not corded so I can move around with it without tripping on cords or trying to find a plugin close by.

2. PAINT THE BASE

How to stencil on wood using your Cricut. DIY mom's shit list wood sign free SVG. How to paint a lettered wood sign step by step tutorial with pictures.

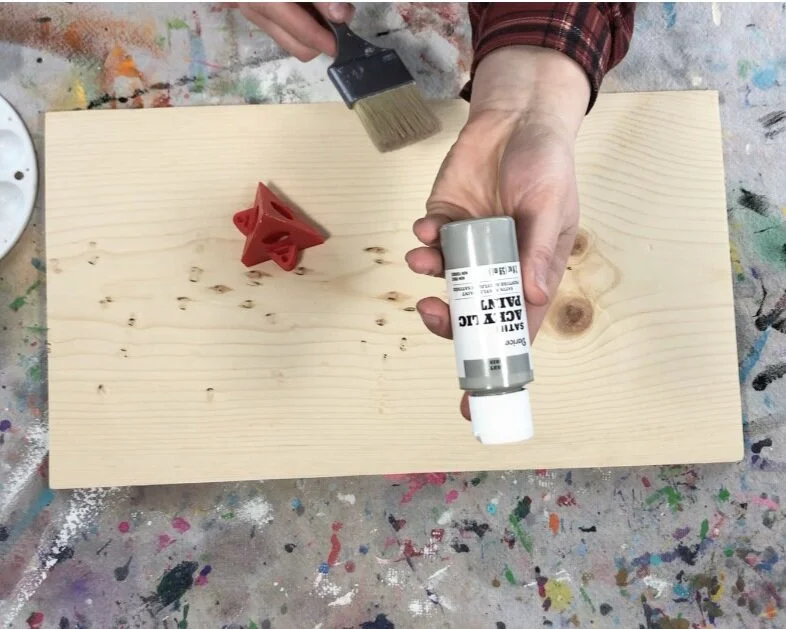
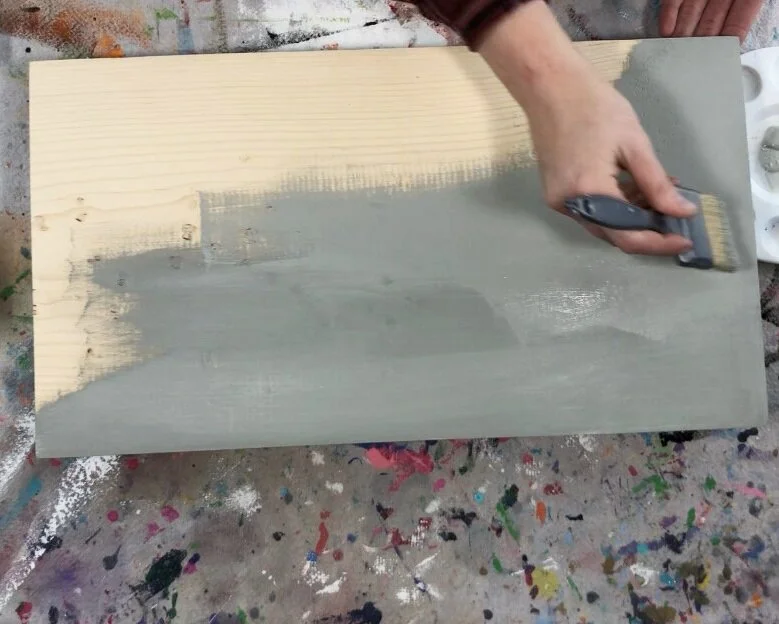
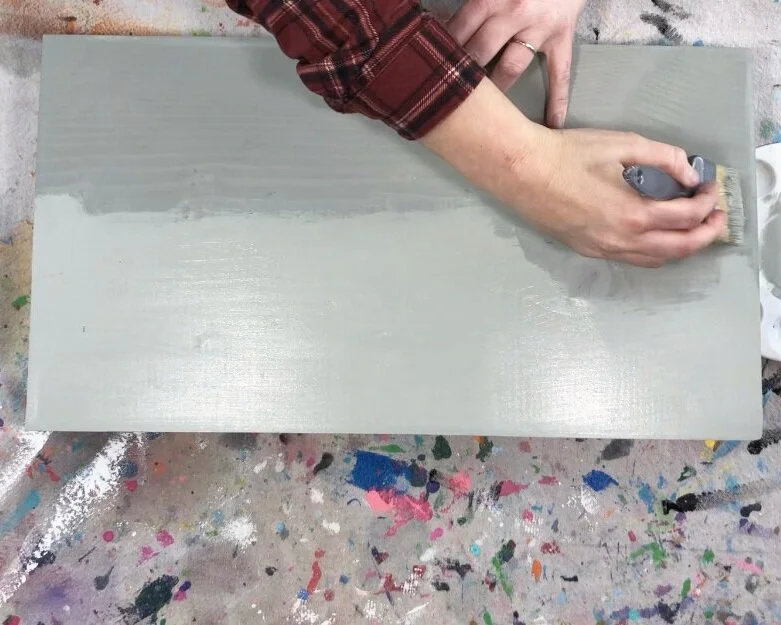
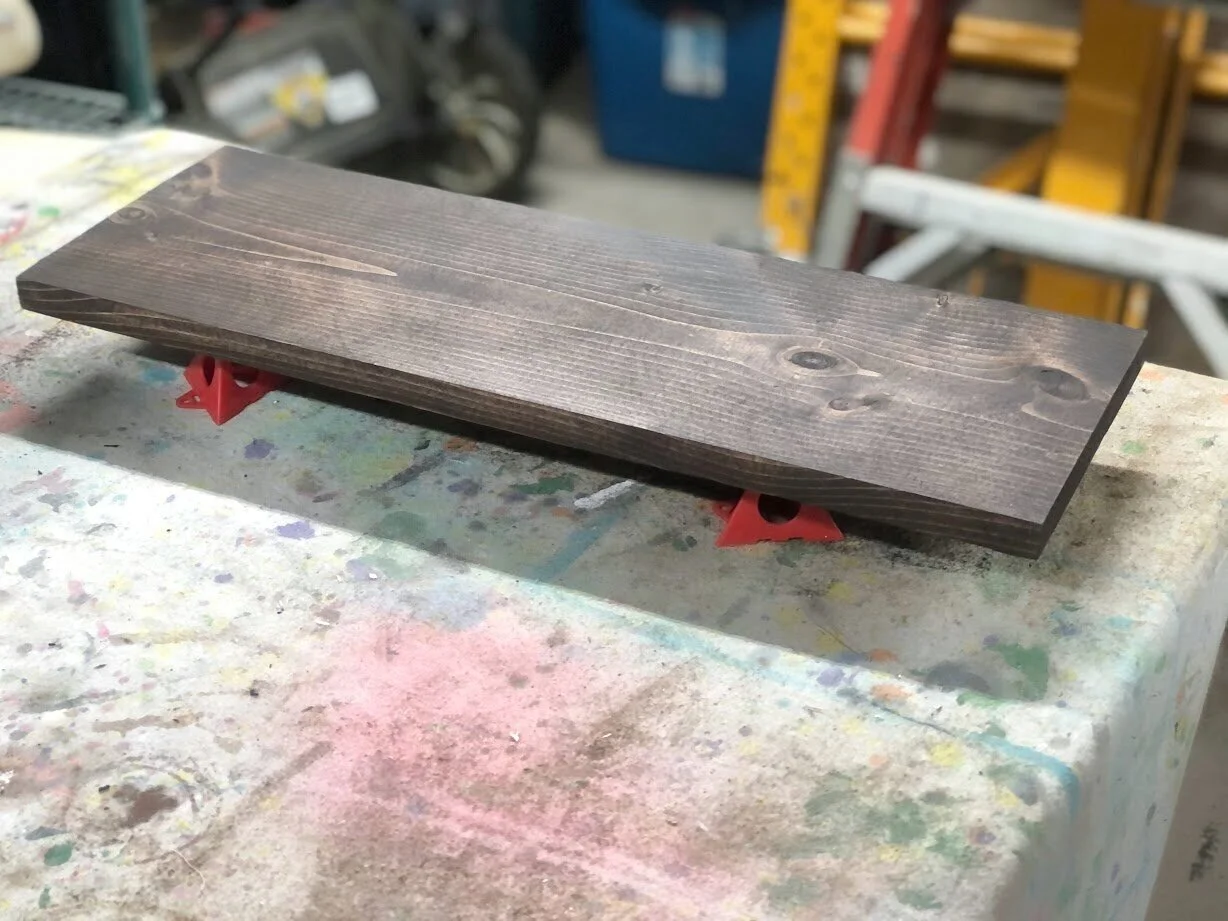
For this sign my friend requested a gray painted background with white lettering. I painted a really THIN coat of gray acrylic paint on my base. I used these awesome paint stands to keep my board up and off of my work surface. I can’t believe I’ve been painting wood signs for YEARS and didn’t have these until recently! They are something that I didn’t even know I needed till I used them.

How to stencil on wood using your Cricut. DIY mom's shit list wood sign free SVG. How to paint a lettered wood sign step by step tutorial with pictures.

Once the first layer of paint was dry I went back a painted a second THIN layer of paint. Usually you just need two coats, or sometimes even just one if you’re using black. But if you aren’t happy with the coverage you can go back after the second coat is dry and paint a third coat of thin paint on there.

How to stencil on wood using your Cricut. DIY mom's shit list wood sign free SVG. How to paint a lettered wood sign step by step tutorial with pictures.

I let my base dry for 24 hours. Not because it needed to dry that long but because I’m a momma to four girls, am a mompreneur {a momma with a business ;) }, and trying my best to school my girls at home right now (thanks to you know what). Sometimes we are just walking hot messes around here lol!

3. CUT & WEED THE STENCIL

I used my trusty Cricut to cut my stencil on ORAMASK 813 STENCILM FILM. I have been using a Cricut for a loooooong long time, back when they had key pads and you didn’t use a computer and Design Space to do all the amazing things they can do now. Since my design was large I used a 24” GREEN cutting mat to cut my stencil on. You can use my same MOM’S SHIT LIST SVG here in my free resource library. It’s password protected so you’ll need to fill out the boxes to get the password. Once you are on the resource library page scroll down till you see the photo of the Mom’s shit list sign design. Click on it and the SVG will pop up in another window, you can save it to your computer from there then upload it into whatever program you are using to cut your design.

How to stencil on wood using your Cricut. DIY mom's shit list wood sign free SVG. How to paint a lettered wood sign step by step tutorial with pictures.

3. APPLY THE STENCIL

I applied my stencil to my wood base using clear transfer tape. I LOVE and swear by this clear transfer tape. I have used MANY different types trying to find the right one for me and this one was it.

How to stencil on wood using your Cricut. DIY mom's shit list wood sign free SVG. How to paint a lettered wood sign step by step tutorial with pictures.

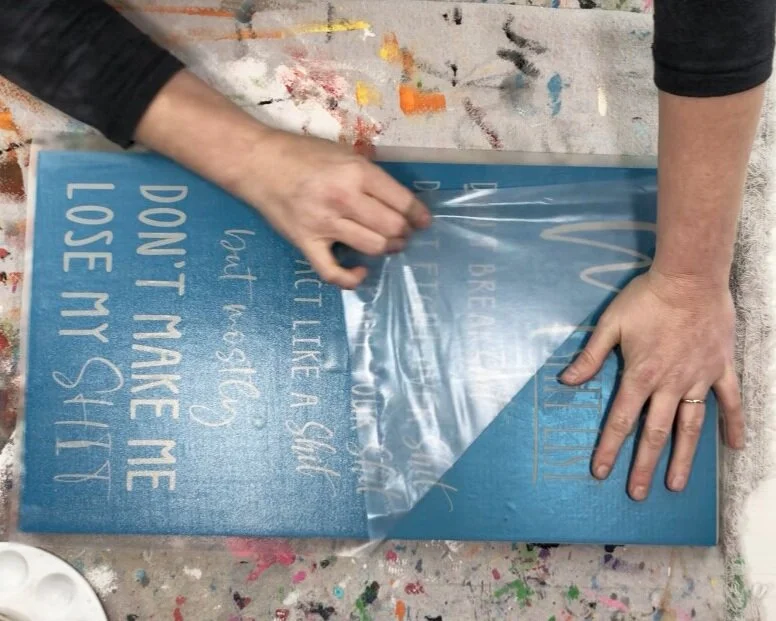
Using a vinyl squeegee I pressed out any air bubbles then slowly rolled the transfer tape off of my design. Rolling vs pulling the transfer tape off is KEY. If you pull it up and off of your stencil your stencil will likely come up and off of your wood base too. Take your time on this step, if you don’t I promise you will kick yourself and possibly a lot of curse words will come out lol! Just speaking from experience here.

How to stencil on wood using your Cricut. DIY mom's shit list wood sign free SVG. How to paint a lettered wood sign step by step tutorial with pictures.

After the transfer tape is off I carefully press out all of the air bubbles again using my vinyl squeegee.

How to stencil on wood using your Cricut. DIY mom's shit list wood sign free SVG. How to paint a lettered wood sign step by step tutorial with pictures.

4. SEAL THE STENCIL

Sealing the stencil is KEY to no paint bleed. If you take just one thing away from this tutorial let THIS TIP be IT! I have built a business on painting wooden signs and this is by far the most important step I take to having crisp clean no paint bleed lines.

How to stencil on wood using your Cricut. DIY mom's shit list wood sign free SVG. How to paint a lettered wood sign step by step tutorial with pictures.

How do you seal a stencil? It’s simple, use a light hand (I’m talking SUPER LIGHT) and paint your stencil using the same color that you painted your background. Let it dry. What this does is it fills in all of those tiny little bitty air holes that you can’t see. It may look like there aren’t any air holes but trust me they are there. Your paint will find them and you’ll spend hours trying to fix the mess…again, speaking from experience.

Let that dry completely.

5. PAINT THE DESIGN

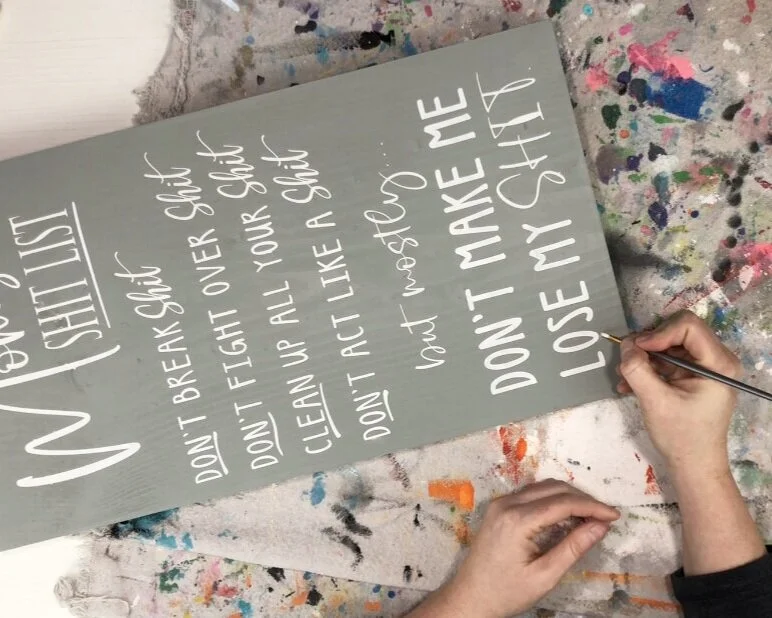
After the sealing is dry I painted my design color. My friend requested white lettering so I used white acrylic paint for the job. I painted a SUPER THIN layer of white paint using a stiff-ish paint brush. You want to be able to see the base color through your paint. You can use those stenciling brushes but I have found a paint brush like this works much better than any stenciling brush I have ever used.

How to stencil on wood using your Cricut. DIY mom's shit list wood sign free SVG. How to paint a lettered wood sign step by step tutorial with pictures.

Once the first layer of paint was dry I went back over my design and paint a second THIN layer of white paint.

How to stencil on wood using your Cricut. DIY mom's shit list wood sign free SVG. How to paint a lettered wood sign step by step tutorial with pictures.

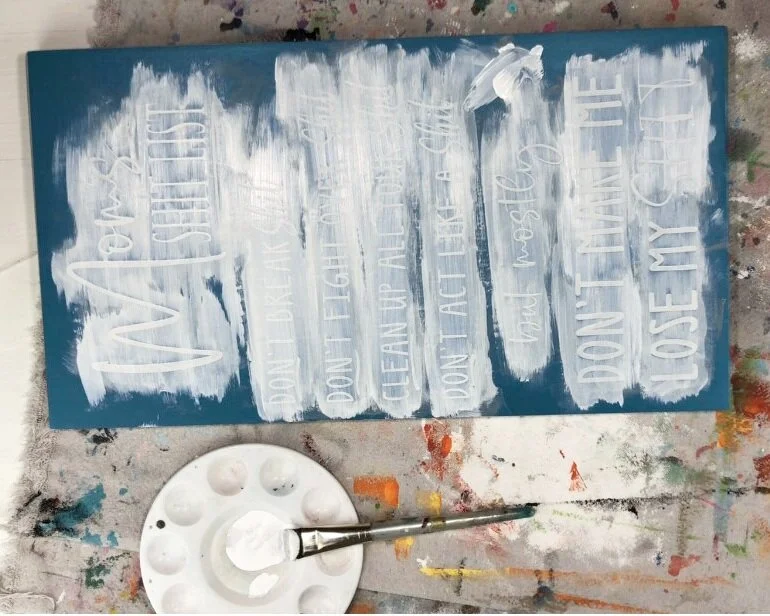
Here’s what my stencil looked like when I was finished painting the second layer of paint.

How to stencil on wood using your Cricut. DIY mom's shit list wood sign free SVG. How to paint a lettered wood sign step by step tutorial with pictures.

6. PEEL UP THE STENCIL

Everyone does this step differently. Some wait till their paint is dry and others peel while their paint is still wet. I have found that peeling up my stencil while my paint is still wet works best for me. But if you find that doesn’t work for you change it up:). I encourage my readers to do like I did and do trial and error if something doesn’t work change it up until you get the perfect way it works for you.

How to stencil on wood using your Cricut. DIY mom's shit list wood sign free SVG. How to paint a lettered wood sign step by step tutorial with pictures.

I use an xacto knife to help get up all the bigger pieces of stencil film that didn’t come off initially.

How to stencil on wood using your Cricut. DIY mom's shit list wood sign free SVG. How to paint a lettered wood sign step by step tutorial with pictures.

Then I go in with a sewing pin, I know super fancy tools lol, and pick out all of the little middle pieces. This works better than the xacto knife in these areas because an xacto knife tends to gauge the wood and scratch the paint since it’s usually a tight area to work in.

How to stencil on wood using your Cricut. DIY mom's shit list wood sign free SVG. How to paint a lettered wood sign step by step tutorial with pictures.

7. FIX ERRORS

Since I don’t sand my boards down to complete smoothness I will get tiny amounts of paint bleed where there are divots in the wood. You can certainly sand those out but I personally keep those spots because I feel like it adds a lot more character to the piece. Those spots are minimal and totally fixable.

If there’s a lot of paint I will use my xacto knife to lightly scrape off excess paint. Then I go in with a fine tipped paint brush and paint over the area with the background color. Let dry. That’s it! It’s super easy to fix those small areas of paint bleed mistakes.

How to stencil on wood using your Cricut. DIY mom's shit list wood sign free SVG. How to paint a lettered wood sign step by step tutorial with pictures.

If you want to take a deep dive into the sign painting world and know EVERYTHING I know about making wood signs you need my LETTERED SIGN PAINTER’S COURSE. I teach you all I know. All the mistakes, trials and errors, and SUCCESS I’ve had with sign making has led me to create a course for people just like you who need to know how to paint signs but need to know EXACTLY what to do to get there. Where to buy all their materials, what paints to use, what brushes to use, how to make stencils, how to do it all in the sign painting world.

I will go in depth on all of the topics and so much more.

How to stencil on wood using your Cricut. DIY mom's shit list wood sign free SVG. How to paint a lettered wood sign step by step tutorial with pictures.

I know my friend is loving her new sign. I think she said she was gifting it to her daughter, what a fun gift!

Let me know if you have any questions in the comments below. Be sure to check out more of my DIY sign painting tutorials.

Happy Crafting!

HOW TO STENCIL WOOD SIGNS- using adhesive stencils

DIY painted wood sign using your Cricut. How to get crisp lines when stenciling using stencil film.

HOW TO STENCIL WOOD SIGNS TO GET STRAIGHT CLEAN LINES WITH NO PAINT BLEED

Have you struggled with getting those super straight crisp lines when making your painted lettered wood signs?

Oh girl, I have been there too! I began my sign painting journey when the youngest of my 4 daughters was a brand new baby. Let me tell ya the trials and errors seemed to be never ending! I was using a dinosaur of a Cricut machine, the Cricut Expression (I’m sure most people haven’t even heard of that one lol!!). My budget for materials was basically non existent so I was using what I had on hand to make stencils : cardstock and shelf liner paper. Eventually I started ordering vinyl and stencil film online as my business and my skills grew. The one BIG change to my sign painting game… ORAMASK STENCIL FILM.

Affiliate Disclosure. Some of the links on this website are affiliate links, which means that I may earn a small commission if you click on the link or make a purchase using the link. If you make a purchase you will not be charged anything additional.

DIY painted wood sign using your Cricut. How to get crisp lines when stenciling using stencil film.

While I am glad now that I had all of those issues in the beginning with paint bleed, my stencil material not sticking down, sticky residue left behind, paint peel up… at the time I was not. I just wanted to turn out successful painted signs. I would get so frustrated I wanted to cry or throw my project across the room or sometimes even both.

DIY painted wood sign using your Cricut. How to get crisp lines when stenciling using stencil film.

What I didn’t realize at that time was that all of tears and days of wanting to throw my projects out the window were actually setting me up for something much bigger than making a sale to help pay off debt. Those early days were teaching me how to do it all the wrong way so I could learn how to do it the right way AND how I can teach others what I know.

So paint bleed no more! Now my lines are crisp and clean each and every time I make a hand painted wood sign. And I love that I can share with you how you too can have super crisp lettering on your wooden signs.

If you’re new to the Cricut world be sure to check out my post on the 10 must have supplies & accessories you need when you’re just starting out using your cutting machine.

I do use a couple different techniques to achieve my perfectly crisp lines. Here are some of my sign painting projects below. I walk you through every tutorial on how I made each sign. To read them in full detail either click on the picture or click on a link below it.

My top 4 products to sign painting success:

  1. ORAMASK STENCIL FILM

  2. VINYL SQUEEGEE

  3. CLEAR TRANSFER TAPE

  4. XACTO KNIFE

If you plan to make a lot of stenciled wood signs buying your materials in bulk will save you SO MUCH MONEY. This is one tip I wish I would have known about sooner. My profit margins would have been a lot bigger if I knew where I could buy my oramask stencil film in large quantities for a fraction of the price. Click HERE to see where I buy my stencil film for sign painting.

1. DIY WOOD SIGN: MINI STENCILED SIGN WITH DISTRESSED EDGING

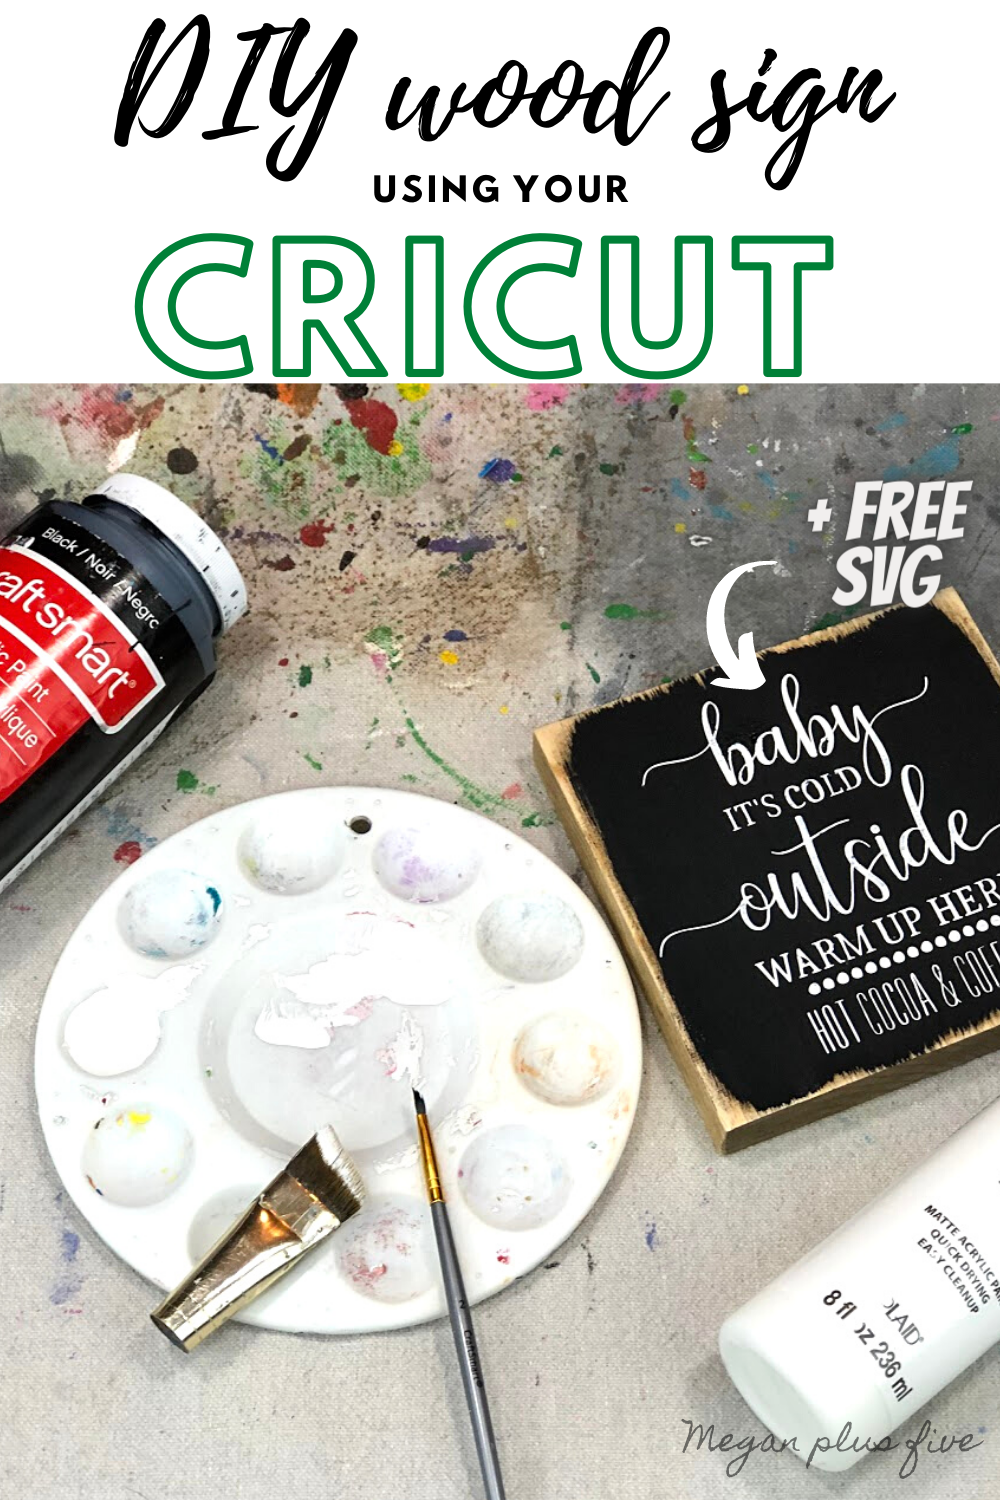
This was such a cute little sign I put up on my coffee bar this winter. You can read the tutorial HERE for the Baby it’s cold outside warm up here hot cocoa & coffee wood sign.

2. DIY WOOD SIGN: MODERN FARMHOUSE STYLE ROUND LAST NAME ESTABLISHED SIGN

This round last name established sign has to be one of my favorite signs I’ve ever written a tutorial for. This was a sign I made for our realtor after we bought our home. The amount of work she put into making it the best experience for us was amazing. I really wanted to gift her something super personal and gorgeous. You can read the full tutorial HERE DIY wooden round last name established sign.

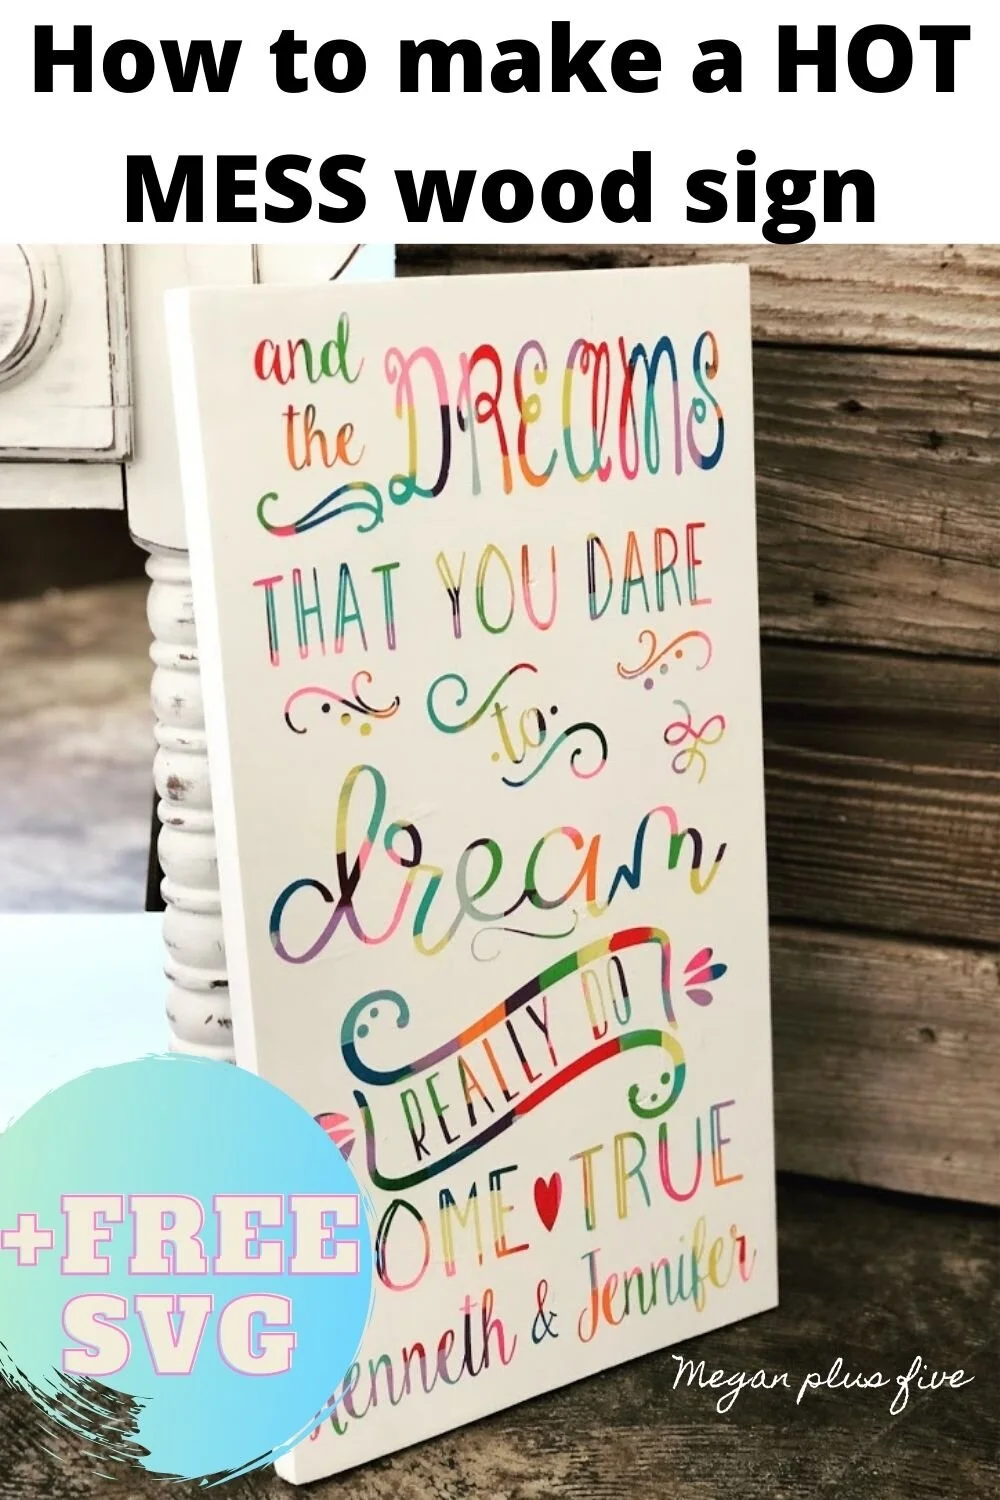
3. DIY WOOD SIGN: COLORFUL HOT MESS METHOD

This was such a fun sign to make. Usually the HOT MESS method is seen done on a canvas, or it was when I made this sign. See all those crisp colorful lines? Yup, all thanks to Oramask stencil film. You can read the full tutorial HERE hot mess painted wood sign.

4. DIY WOOD SIGN: BLESS OUR NEST REVERSE STENCIL METHOD

I love this reverse stencil method for when I only using two different colors of paint. It’s quick and easy! You can read the full tutorial HERE bless our nest wood sign reverse stencil method.

5. DIY WOOD SIGN: LARGER THAN MAT LAUNDRY SIGN

Larger than mat projects don’t have to be intimidating. Learn how I made this big laundry room sign that exceeds the boundaries of my Cricut cutting mat. You can read the full tutorial HERE make your own easy laundry room sign using your Cricut.

6. DIY WOOD SIGN: STAINED BACKGROUND WITH PAINTED LETTERING

This was a fun project that a friend of mine asked me to make for her. The aqua stain color on this piece was a great way for her to add a pop of color to her gallery wall in her kitchen. Read the full tutorial HERE life is good lick

7. DIY WOOD SIGN: FRAMED LEANING PORCH SIGN

Oh my goodness I was SO in love with this framed it’s Halloween witches sign I made for my front porch! You can read the full tutorial Here DIY leaning Halloween porch sign.

I hope you enjoyed these sign painting tips to make your sign painting journey successful. If you have any questions please let me know in the comments below. Happy Crafting!

Hobby Lobby picture frame makeover

DIY Hobby Lobby clearance picture frame makeover. How to use Dollar Tree office clips to makeover an old picture frame.

EASY CLEARANCE PICTURE FRAME MAKEOVER

I love browsing the clearance aisles. Idk what it is about a good buy but it sure does give this momma a feeling of accomplishment lol! Even if what I find isn’t exactly what I’m looking for it’s usually affordable enough to buy it up and give it a little makeover.

Affiliate Disclosure. Some of the links on this website are affiliate links, which means that I may earn a small commission if you click on the link or make a purchase using the link. If you make a purchase you will not be charged anything additional.

Like these cute floating cubby shelves I picked up at Big Lots. They were nothing close to the color I wanted but the bones were good. With a little paint, my Cricut and some vinyl those boy themed shelves took little effort to transform into boho floating shelves for my girl’s bedroom.

DIY Hobby Lobby clearance picture frame makeover. How to use Dollar Tree office clips to makeover an old picture frame.

When I found this almost outdated looking frame at Hobby Lobby for $5.49 I wasn’t loving the look it had BUT again, it had good bones so I bought it.

CLEARANCE FIND HOBBY LOBBY PICTURE FRAME MAKEOVER

Here’s what the frame looked like when I bought it. I mean, it’s cute because I actually really do love that old lady old fashioned style. But I bought this to put in my girl’s hallway/lounge area and this would totally clash as is.

DIY Hobby Lobby clearance picture frame makeover. How to use Dollar Tree office clips to makeover an old picture frame.

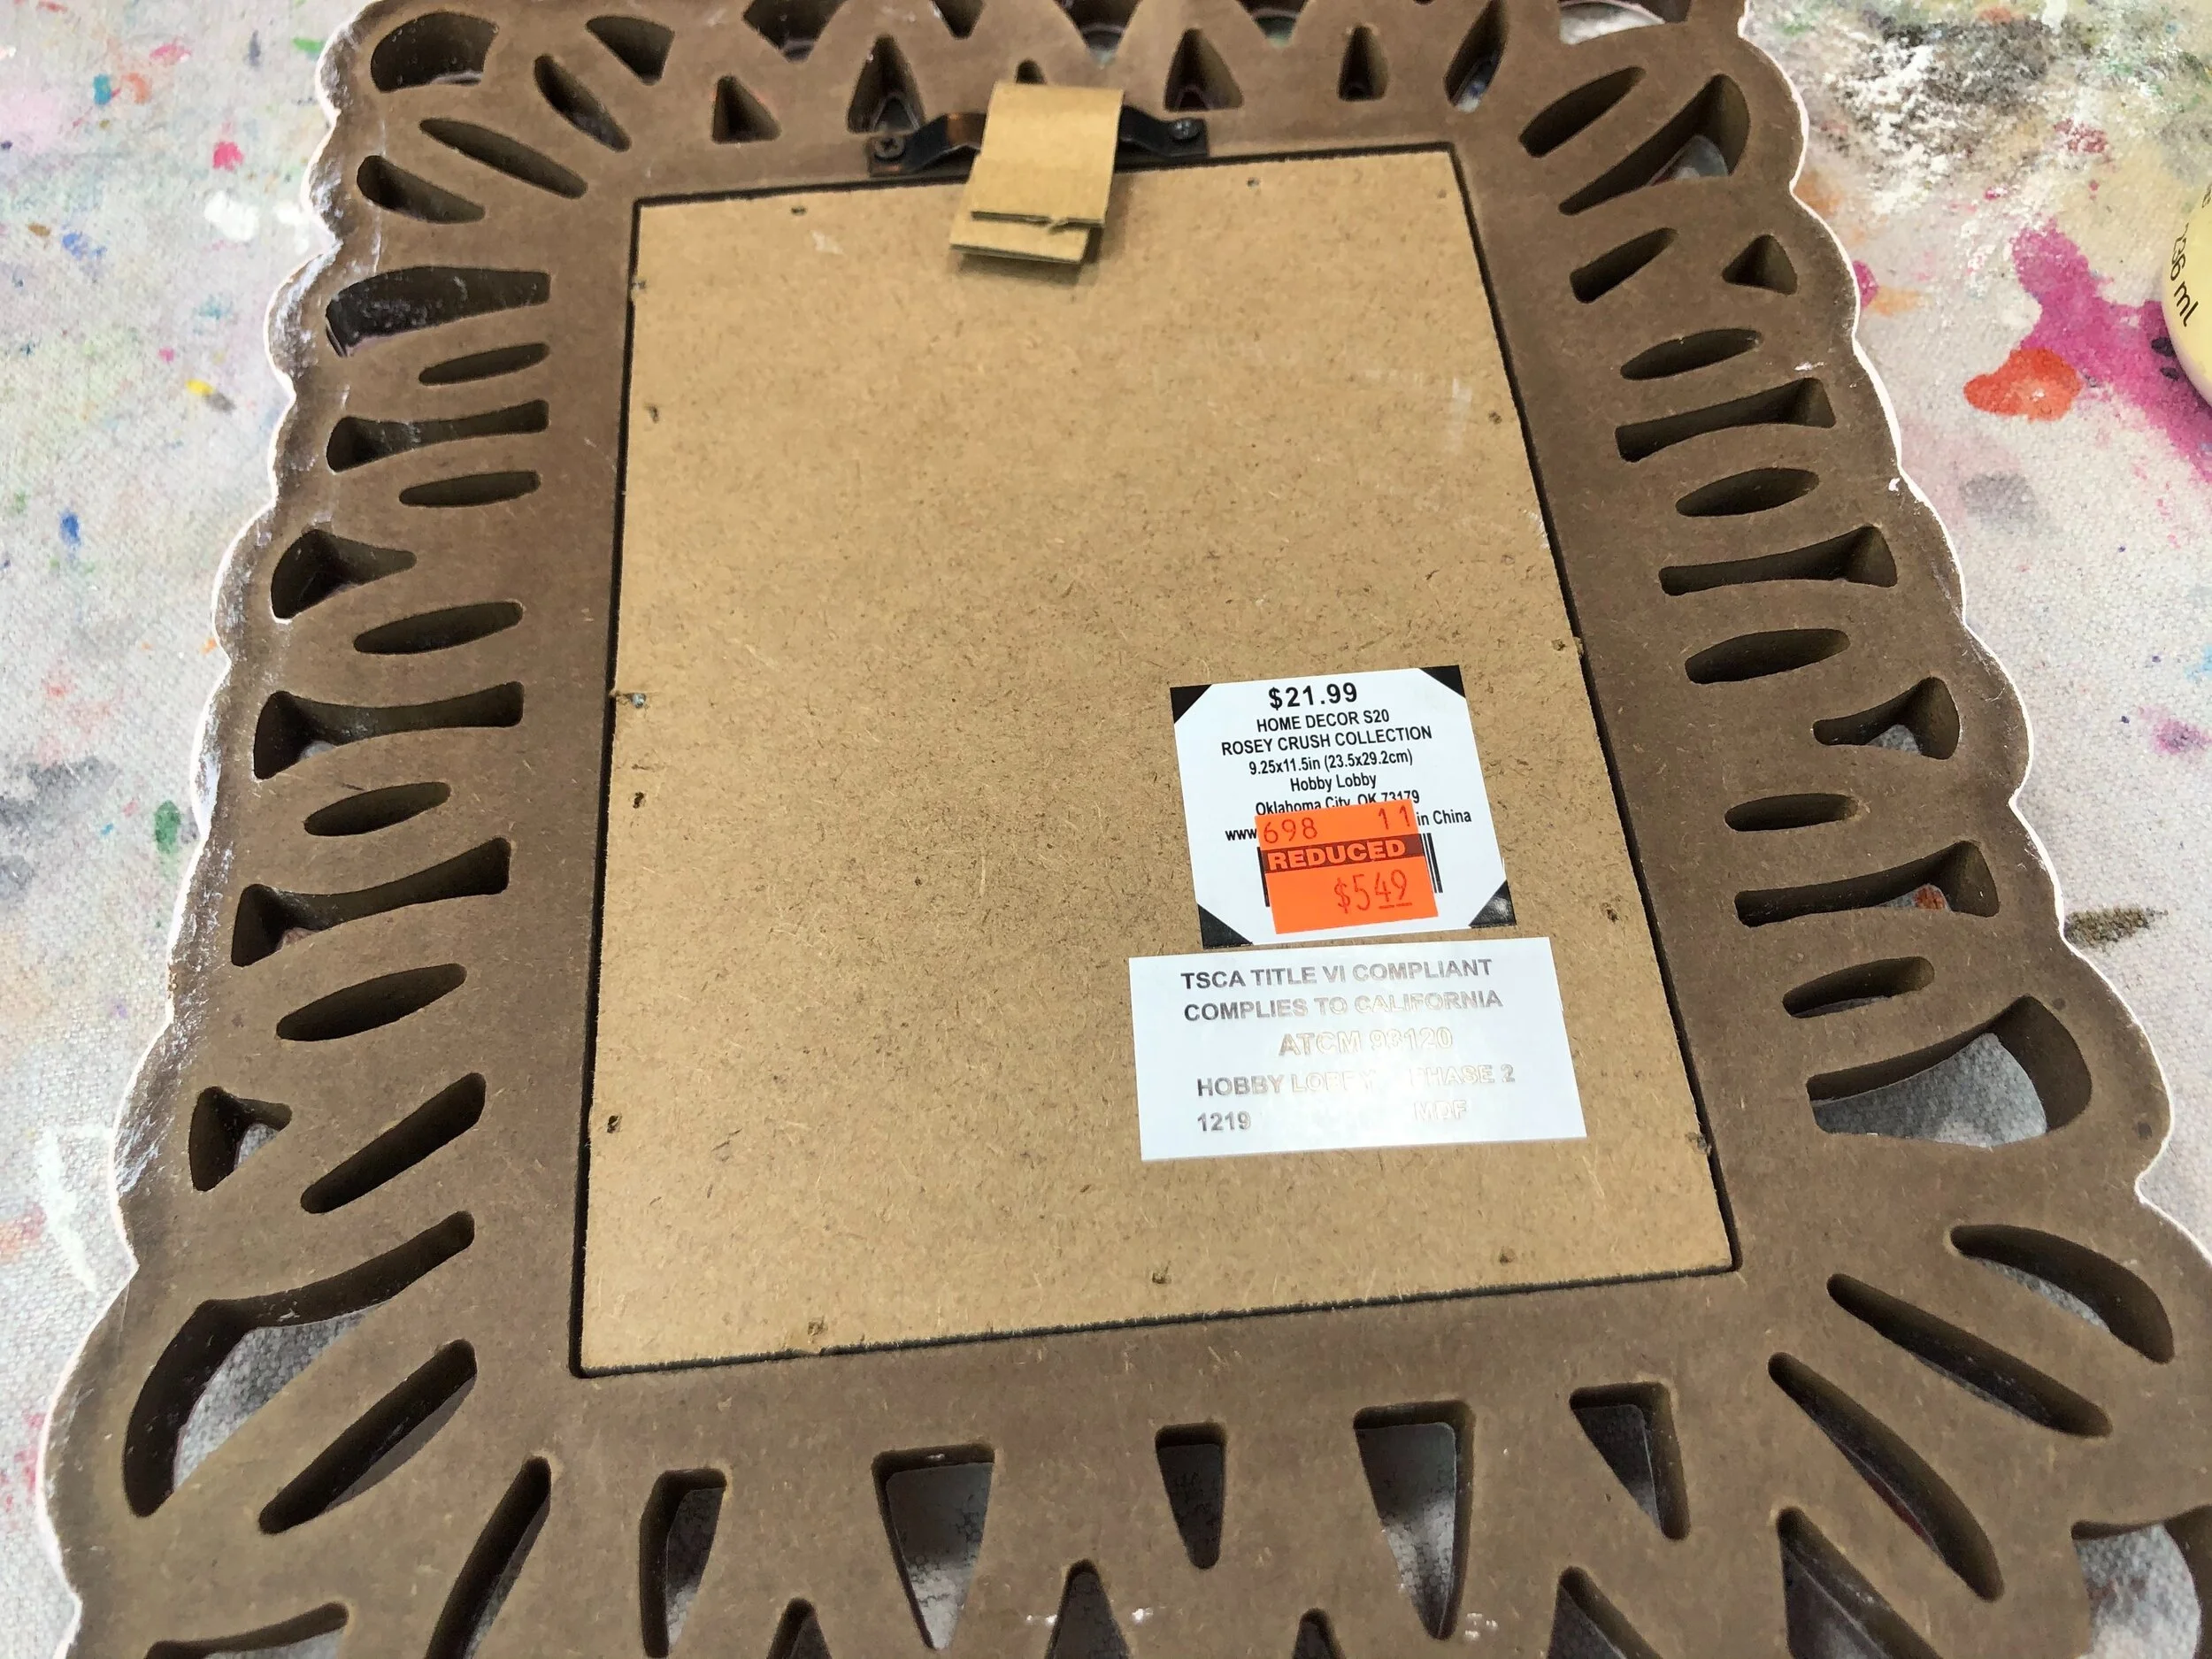
I couldn’t believe this frame was $22! And this is why I love strolling the aisles of the craft stores.

DIY Hobby Lobby clearance picture frame makeover. How to use Dollar Tree office clips to makeover an old picture frame.

This was such an easy craft!

Here’s what I used

1.PAINT THE FRAME

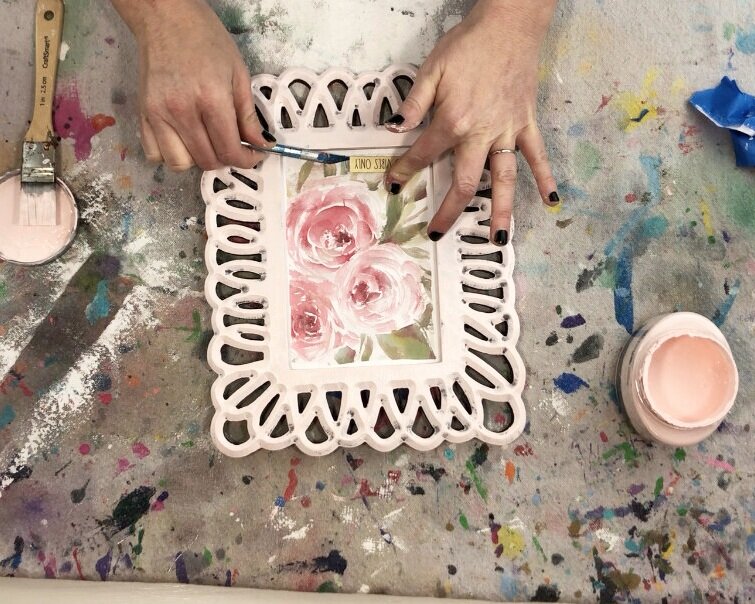
The first thing I did was paint the frame. I wasn’t totally sold on painting over the florals at this point so I wanted to paint the frame first to see how it looked.

I used a paint sample of Valspar pink paint that I found at my local home improvement store. It’s more of a peachy pink color, super soft but not too girly.

DIY Hobby Lobby clearance picture frame makeover. How to use Dollar Tree office clips to makeover an old picture frame.

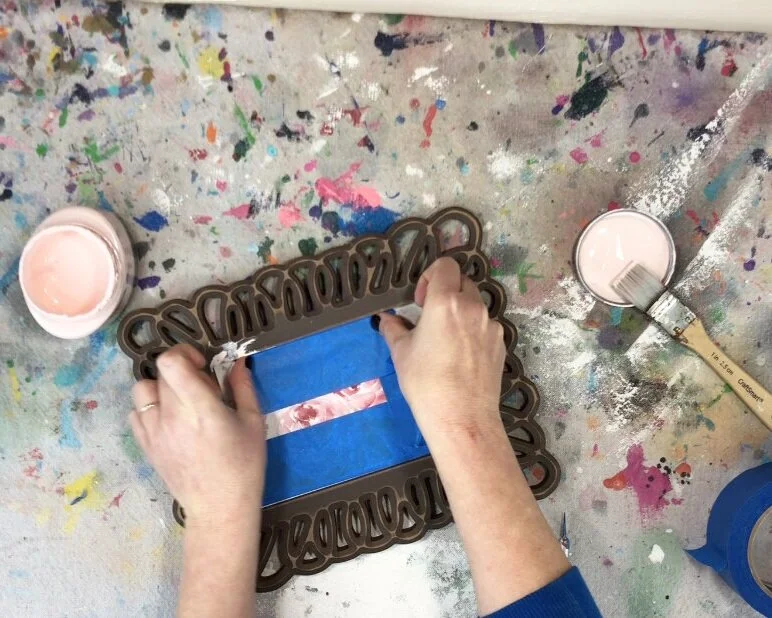
I started painting and realized I forgot to tape off my edges which is why you can see the pink paint along the edges of the frame while I’m taping it off with my wide painters tape.

DIY Hobby Lobby clearance picture frame makeover. How to use Dollar Tree office clips to makeover an old picture frame.

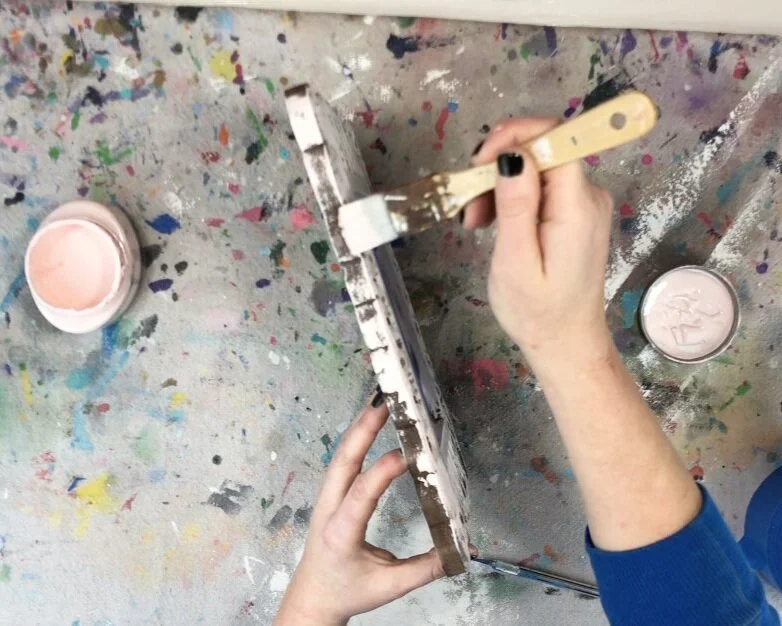
I used a dry 1” paint brush (is my FAVORITE CRAFTY PAINTBRUSH to use) and painted a thin layer of pink paint all over the front and sides of the frame.

DIY Hobby Lobby clearance picture frame makeover. How to use Dollar Tree office clips to makeover an old picture frame.

I didn’t worry about painting inside the cutouts and I painted lightly so that the dark on the frame would show through in some spots.

DIY Hobby Lobby clearance picture frame makeover. How to use Dollar Tree office clips to makeover an old picture frame.

Once the first coat of paint was dry I painted a second coat on my frame.

DIY Hobby Lobby clearance picture frame makeover. How to use Dollar Tree office clips to makeover an old picture frame.

2. PAINT THE INSIDE

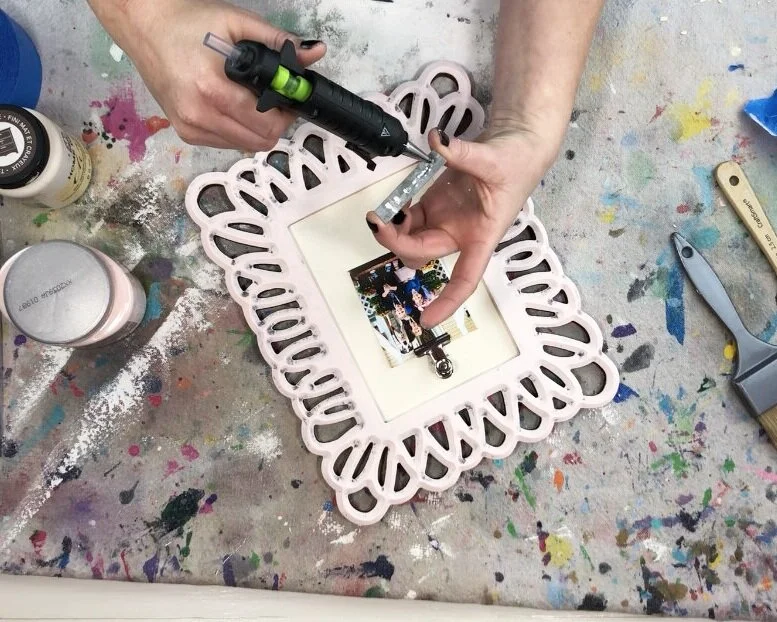
After the frame was all dry and the painters tape taken off I removed the little good vibes only decal using my xacto knife. It actually came off pretty easily. I wasn’t sure if I was going to keep it so I set it aside instead of tossing it in the trash.

DIY Hobby Lobby clearance picture frame makeover. How to use Dollar Tree office clips to makeover an old picture frame.

I used chalk paint, the color sheepskin, to paint the frame. I would have preferred white but I didn’t have that on hand so I made do with what I had in my craft room. Sheep skin chalk paint it was!

DIY Hobby Lobby clearance picture frame makeover. How to use Dollar Tree office clips to makeover an old picture frame.

I painted on a super thin layer, just enough to still be able to see the floral print through the paint.

DIY Hobby Lobby clearance picture frame makeover. How to use Dollar Tree office clips to makeover an old picture frame.

After that was dry I paint a second layer of the chalk paint. I used my handy heat gun to help the paint dry a little faster.

DIY Hobby Lobby clearance picture frame makeover. How to use Dollar Tree office clips to makeover an old picture frame.

3. ADD THE ACCENT & PICTURE CLIP

Once my paint was totally dry I used hot glue gun to attach the picture hanging clip and the good vibes only metal decal.

I arranged them on the frame before I glued them down to be sure I was happy with it.

DIY Hobby Lobby clearance picture frame makeover. How to use Dollar Tree office clips to makeover an old picture frame.

I just love how this frame turned out!

DIY Hobby Lobby clearance picture frame makeover. How to use Dollar Tree office clips to makeover an old picture frame.

I hope you enjoyed this frugal crafty makeover. Let me know if you have any questions in the comments below.

Happy Crafting!

DIY hot mess method for a wood sign

Hot mess painting method DIY craft tutorial. How to make a hot mess wood sign or canvas using a stencil and your Cricut cutting machine. Easy hot mess painting instructions.

MAKE YOUR OWN HOT MESS STENCILED SIGN

Have you seen the HOT MESS paint method? It’s not a look everyone loves but there are a lot of people out there who are in total love with this colorful way of stenciling.

A couple years ago my cousin got married and I was asked to make her a special personalized gift for her wedding shower. I had never done the hot mess canvas method before so this was totally new to me. But it worked great and I want to share with you how I stenciled her wood sign using that technique.

Hot mess painting method DIY craft tutorial. How to make a hot mess wood sign or canvas using a stencil and your Cricut cutting machine. Easy hot mess painting instructions.

I made this before I was a serious craft blogger so I don’t have step by step pictures but I will explain how to do the whole hot mess process below.

Affiliate Disclosure. Some of the links on this website are affiliate links, which means that I may earn a small commission if you click on the link or make a purchase using the link. If you make a purchase you will not be charged anything additional.

—-> New to Cricut? Read my post on the top 10 accessories and supplies you need to get started using your vinyl cutting machine<—-

If you want to save money on ORAMASK STENCIL FILM for you Cricut or other vinyl cutting machine be sure to check out this post on where I buy my stencil film in bulk. It saves me TONS of money on my hand painted wood signs.

DIY HOT MESS SIGN PAINT METHOD

Here’s what you’ll need

1. PAINT

The first thing you want to do is paint your base (whether that be a canvas or a piece of wood like I’m using) all different colors. You can get as creative as you want with this. My cousin is really into The Wizard of Oz so I used all the colors of the rainbow for her hot mess wood sign.

Hot mess painting method DIY craft tutorial. How to make a hot mess wood sign or canvas using a stencil and your Cricut cutting machine. Easy hot mess painting instructions.

Usually I like to use reusable brushes but for this I used sponge brushes because I had so many different colors to paint.

I randomly painted different colors of acrylic paint until my wood was completely covered in colorful brush strokes. The lighter colors I had to apply a couple of coats for them to be seen. Then I let it dry.

2. APPLY THE STENCIL

I used my Cricut cutting machine to cut out my stencil. This is a REVERSE STENCIL METHOD so I weeded out the background and left the letters. CLICK HERE to learn more about REVERSE STENCILING on wood signs.
How to apply the stencil: Place your transfer tape sticky side down onto your stencil. Rub out any air bubbles with your vinyl squeegee. Remove the paper backing. Then place your stencil onto your canvas/wood base. Rub again with your vinyl squeegee. Remove your transfer tape.

3. SEAL YOUR STENCIL

After I pushed out any air bubbles I sealed my stencil with matte finish mod podge. This is key to having zero paint bleed. I let that dry.

Hot mess painting method DIY craft tutorial. How to make a hot mess wood sign or canvas using a stencil and your Cricut cutting machine. Easy hot mess painting instructions.

4. PAINT

After my matte finish mod podge was dry I painted over the entire sign with white chalk paint.

You can use acrylic paint for this but in my opinion chalk paint is better for this particular project because it has great coverage.

I painted one really thing layer, you can still see the stencil and colors through my paint and that is exactly what you want for the first layer. Then I let that dry completely.

Hot mess painting method DIY craft tutorial. How to make a hot mess wood sign or canvas using a stencil and your Cricut cutting machine. Easy hot mess painting instructions.

Be sure you aren’t applying your chalk paint too thick. If chalk paint is applied in too thick of layers it will crack as it dries. For some projects that will look good but not typically on a painted wood sign like this hot mess method.

After the chalk paint dried I painted a second thin layer on top of that. Then I used an xacto knife to peel up my stencil.

Hot mess painting method DIY craft tutorial. How to make a hot mess wood sign or canvas using a stencil and your Cricut cutting machine. Easy hot mess painting instructions.

This isn’t a project I would typically hang in my own home but I do love how colorful it is! And how it looks kinda polished but also a hot mess at the same time which is a great description of my life with four daughters.

Hot mess painting method DIY craft tutorial. How to make a hot mess wood sign or canvas using a stencil and your Cricut cutting machine. Easy hot mess painting instructions.

I hope you enjoyed this sign painting tutorial. If you have any questions please ask them in the comments below.

Want to know all of my sign painting secrets? Get them here —-> SIGN PAINTING E-COURSE <——

DIY sold by realtor sign + FREE SVG

DIY sold by realtor sign using your Cricut or Silhouette cutting machine. Use this free SVG to make a realtor sold by sign photo opp prop. DIY painted wood sign for a real estate agent gift.

DIY SOLD BY REALTOR SIGN + FREE SVG

Learn how to make your own sold by realtor sign + grab my FREE to use SVG in my resource library

Create a personalized SOLD BY (insert name here) sign for your realtor. Or if you’re a realtor create one for yourself.

These are wonderful and unique additions to the house selling world. You can gift them to your favorite realtor use them for a photo prop, or hang them in your office to give it a personalized and cozy touch.

Affiliate Disclosure. Some of the links on this website are affiliate links, which means that I may earn a small commission if you click on the link or make a purchase using the link. If you make a purchase you will not be charged anything additional.

DIY sold by realtor sign using your Cricut or Silhouette cutting machine. Use this free SVG to make a realtor sold by sign photo opp prop. DIY painted wood sign for a real estate agent gift.

A realtor friend of mine reached out to me and asked me to make her a personalized SOLD BY MELISSA sign and of course I said yes! Her mom is also a realtor and the person who sold us our beautiful old home. I made her this gorgeous thank you gift, a ROUND LAST NAME SIGN, she made the whole home buying process seamless for us.

I was excited when her realtor daughter messaged me asking for a personalized realtor sign for herself. And excited to share the SVG I used with you to use for free. You can find the SVG in my free resource library. This is where I keep all of my free printables, cut files, and more.

HOW TO MAKE YOUR OWN SOLD BY REALTOR SIGN

What you’ll need

1. CUT & STAIN THE WOOD BASE

The first thing I did was cut and stain my wooden base. I made my SOLD BY realtor sign from a 1x8 (which actually measures 7.5” not 8” if you are new to using lumber to make things). I cut it to measure 21”. I thought was a good size for photo opps.

DIY sold by realtor sign using your Cricut or Silhouette cutting machine. Use this free SVG to make a realtor sold by sign photo opp prop. DIY painted wood sign for a real estate agent gift.

CLICK HERE TO LEARN HOW TO STAIN A PIECE OF WOOD

Then I stained it in KONA using my lint free rags. Even though it was a 1 hour dry stain I let my sign dry for 24 hours and used these super helpful paint stand gems I found on Amazon.

DIY sold by realtor sign using your Cricut or Silhouette cutting machine. Use this free SVG to make a realtor sold by sign photo opp prop. DIY painted wood sign for a real estate agent gift.

2. CUT & APPLY THE STENCIL

After the stain was COMPLETELY DRY I cut out my stencil and applied it to my wood base.

PRO TIP: stencil material will not adhere to a wet surface. It doesn’t matter if it is slightly wet or super wet, it’s not going to stick down. Think of it like a sticker, essentially that is what a stencil is except you remove it.

DIY sold by realtor sign using your Cricut or Silhouette cutting machine. Use this free SVG to make a realtor sold by sign photo opp prop. DIY painted wood sign for a real estate agent gift.

I applied my clear transfer tape to the front of my stencil then removed the paper backing from the backside of the stencil.

DIY sold by realtor sign using your Cricut or Silhouette cutting machine. Use this free SVG to make a realtor sold by sign photo opp prop. DIY painted wood sign for a real estate agent gift.

Then I placed the stencil stick side down onto my wood base. Once I was happy with the placement of the stencil I used my vinyl squeegee to press out any air bubbles.

DIY sold by realtor sign using your Cricut or Silhouette cutting machine. Use this free SVG to make a realtor sold by sign photo opp prop. DIY painted wood sign for a real estate agent gift.

I removed the clear transfer tape from my stencil, leaving the stencil adhered to my wood base. When you do this it’s best to start from one corner of the sign then roll it toward the opposite corner SLOWLY. Don’t go too fast, this can cause a fat mistake and leave you cursing your sign and possibly ruining your entire day lol! Seriously, this has happened to me LOTS of times and after that my day just went downhill from there.

3. REMOVE AIR BUBBLES & SEAL THE STENCIL

I used my vinyl squeegee to help press out any noticeable air bubbles.

Then I sealed my stencil with matte finish mod podge

DIY sold by realtor sign using your Cricut or Silhouette cutting machine. Use this free SVG to make a realtor sold by sign photo opp prop. DIY painted wood sign for a real estate agent gift.

I painted on a SUPER THIN layer of the matte finish mod podge. This fills in all of the tiny little air bubbles that you can’t really tell that are there BUT once you peel your stencil up you see where they were because your paint has bled into all of those little spots.

This is what my stencil looked like once I was done applying the mod podge.

DIY sold by realtor sign using your Cricut or Silhouette cutting machine. Use this free SVG to make a realtor sold by sign photo opp prop. DIY painted wood sign for a real estate agent gift.

4. PAINT THE STENCIL

After the mod podge was dry I painted my stencil. I chose white for the lettering and the house image and red for the heart.

I painted a SUPER THIN coat of white paint on the entire stencil, even the heart that I will paint red later.

You want to see the wood grain through your paint.

DIY sold by realtor sign using your Cricut or Silhouette cutting machine. Use this free SVG to make a realtor sold by sign photo opp prop. DIY painted wood sign for a real estate agent gift.

It didn’t take long for that to dry then I painted second coat of white and painted the heart red.

DIY sold by realtor sign using your Cricut or Silhouette cutting machine. Use this free SVG to make a realtor sold by sign photo opp prop. DIY painted wood sign for a real estate agent gift.

5. PEEL UP THE STENCIL

I will almost always peel my stencil up while the paint is still wet. Some people wait for their paint to dry but I’ve found my projects turn out better when I peel the stencil up with wet paint.

Start from one corner and peel toward the opposite corner.

DIY sold by realtor sign using your Cricut or Silhouette cutting machine. Use this free SVG to make a realtor sold by sign photo opp prop. DIY painted wood sign for a real estate agent gift.

Then I used a sewing pin to peel up all the little middle pieces.

DIY sold by realtor sign using your Cricut or Silhouette cutting machine. Use this free SVG to make a realtor sold by sign photo opp prop. DIY painted wood sign for a real estate agent gift.

6. LET DRY

After I removed my stencil I let it dry completely and then sealed it with some clear matte finish spray.

DIY sold by realtor sign using your Cricut or Silhouette cutting machine. Use this free SVG to make a realtor sold by sign photo opp prop. DIY painted wood sign for a real estate agent gift.

I hope you enjoyed this sign painting tutorial. If you did be sure to sign up for my SIGN PAINTING COURSE teaching you EVERYTHING I know about sign making without the headache and stress it can be when you are first learning how to paint wood signs.

Dollar store Christmas star makeover

DIY dollar store Christmas decor. Christmas decorations on a budget. How to make a rustic farmhouse style star using twine or just and a wire star form.

The dollar stores are really outdoing themselves lately with their Christmas selections. I have found so many great finds there to either add to my Christmas décor OR give a bit of a makeover then add it to my Christmas decorations.

I found this little wire star at the Dollar General last night and since it was just $1 I snagged it up to take it home and give it a little makeover. Frugal living just runs through my veins. If you like this budget friendly Christmas DIY you will probably love these DIY TWIG STARS that basically costs $0 to make.

Affiliate Disclosure. Some of the links on this website are affiliate links, which means that I may earn a small commission if you click on the link or make a purchase using the link. If you make a purchase you will not be charged anything additional.

DIY dollar store Christmas decor. Christmas decorations on a budget. How to make a rustic farmhouse style star using twine or just and a wire star form.

I was originally going to wrap the wire star form in twine but that turned out hideous lol! It was bulky and just plain ugly. So I thought instead to remove the middle pieces and then wrap it and it turned out so simple but perfect for my Christmas decorations.

DOLLAR STORE STAR MAKEOVER

Here’s what you’ll need

DISCLOSURE: not responsible for any damages caused. Please craft at your own risk :)

1. REMOVE THE MIDDLE WIRE

This was actually harder than I thought it would be. I had to try and cut it with all my might then bend it away in pieces.

DIY dollar store Christmas decor. Christmas decorations on a budget. How to make a rustic farmhouse style star using twine or just and a wire star form.

2. WRAP THE STAR

Then I cut a long piece of twine and just wrapped and wrapped and wrapped till I got back to the starting point. Around the corners of the wire star I added hot glue to reinforce the frame then wrapped it in twine.

DIY dollar store Christmas decor. Christmas decorations on a budget. How to make a rustic farmhouse style star using twine or just and a wire star form.

When I got to the very end I secured it in place with hot glue.

3. REMOVE THE FRZZIES

My star had a ton of frizz to it from wrapping and wrapping. So I used my lighter to remove those. I just lightly waved my lighter over the areas that I wanted the frizz gone and was sure to blow as soon as it touched the star so it wouldn’t catch fire.

DIY dollar store Christmas decor. Christmas decorations on a budget. How to make a rustic farmhouse style star using twine or just and a wire star form.

That’s it! Quick and easy dollar store Christmas makeover craft.

DIY dollar store Christmas decor. Christmas decorations on a budget. How to make a rustic farmhouse style star using twine or just and a wire star form.

I hope you enjoyed this crafty tutorial. If you have any questions please leave them in the comments below.

Interchangeable Christmas pallet sign

DIY twig stars for Christmas pallet sign. Interchangeable Christmas home decor on a budget. How to make easy and simple reversible home décor for the holidays. Make a sign from twigs.

INTERCHANGEABLE WINTER PALLET SIGN

I love decorating for the holidays. Especially Christmas. Now that I have a bigger home to decorate I’m finding it a little challenging to do AND keep it in budget. I have always had the heart of a frugal women so spending an arm and a leg to put up Christmas décor just wasn’t happening.

That’s why in the fall I made this lightweight faux pallet sign. It’s a blank pallet style sign that I can change out with the seasons. It’s a big statement type piece that I prop up on my dining room hutch. I love this so much. Best of all the planks I used to make this sign were left over from this plank wall project.

I really tried hard to spend minimal funds for Christmas decorating. So, for Christmas I had this great idea to make stars from twigs I had in the backyard. And they turned out so cute! I want to make more!!

Affiliate Disclosure. Some of the links on this website are affiliate links, which means that I may earn a small commission if you click on the link or make a purchase using the link. If you make a purchase you will not be charged anything additional.

DIY twig stars for Christmas pallet sign. Interchangeable Christmas home decor on a budget. How to make easy and simple reversible home décor for the holidays. Make a sign from twigs.

I made 2 smaller twig stars and 1 medium sized star. You can see how I made my twig stars click here.

I was so glad I snagged up a package of silver bells from the Dollar Tree prior to making this craft because without them I don’t think it would have turned out so cute or looked as festive for Christmas.

DIY twig stars for Christmas pallet sign. Interchangeable Christmas home decor on a budget. How to make easy and simple reversible home décor for the holidays. Make a sign from twigs.

Here’s what I used

1. PLACE THE DECORATIONS

The first thing I did was place my twig stars and bells on my pallet sign to see where I wanted them.

DIY twig stars for Christmas pallet sign. Interchangeable Christmas home decor on a budget. How to make easy and simple reversible home décor for the holidays. Make a sign from twigs.

2. MEASURE

Next I measured out how much jute I would need to hang my decorations from the backside of my sign. I doubled the amount of jute since I was looping it and hanging it from the backside.

DIY twig stars for Christmas pallet sign. Interchangeable Christmas home decor on a budget. How to make easy and simple reversible home décor for the holidays. Make a sign from twigs.

3. ADD THE JUTE

The stars were easy to add the jute to. I just fed the jute through the top of each twig star. The bells were a little more difficult. I wanted to see the snowflakes that were on the bottom side of the bells so I had to hang them sideways.

DIY twig stars for Christmas pallet sign. Interchangeable Christmas home decor on a budget. How to make easy and simple reversible home décor for the holidays. Make a sign from twigs.

I fed the jute through one side of the bell and then out the other side and tied the two ends of the jute together.

DIY twig stars for Christmas pallet sign. Interchangeable Christmas home decor on a budget. How to make easy and simple reversible home décor for the holidays. Make a sign from twigs.

4. HANG

I hung my twig stars and silver bells from the backside of my pallet sign. I just kina eyeballed where I wanted them to be. Placed a pushpin there and pushed it in as far as I could get it.

DIY twig stars for Christmas pallet sign. Interchangeable Christmas home decor on a budget. How to make easy and simple reversible home décor for the holidays. Make a sign from twigs.

Then I looped where I had tied the jute ends together around the pushpin and draped it over to the front side of the pallet sign.

DIY twig stars for Christmas pallet sign. Interchangeable Christmas home decor on a budget. How to make easy and simple reversible home décor for the holidays. Make a sign from twigs.

I prop my pallet sign up on my dining room hutch, which one day I need to make time to give a makeover and I will most definitely post the before and after for you to see on here:)!!

DIY twig stars for Christmas pallet sign. Interchangeable Christmas home decor on a budget. How to make easy and simple reversible home décor for the holidays. Make a sign from twigs.

Happy crafting!

Check out more below

Easy Christmas stars from twigs

How to make stars from twigs for Christmas. Make cheap and frugal Christmas decor using sticks from your yard. Twine/jute twig stars easy craft tutorial for simple rustic looking farmhouse home decor.

CHRISTMAS STARS MADE FROM TWIGS- EASY TUTORIAL

Have you made stars from twigs? This Christmas decoration was super quick, easy, and best of all basically FREE!

If you’ve read any of my content you know how I love a good frugal DIY craft. Especially during the holidays when finances can be a little tighter. Like this easy and incredibly inexpensive Christmas tree I spruced up. I fits in perfectly with my rustic décor.

If you have access to twigs, a glue gun, and some jute/bakers twine you can make this twig star Christmas craft.

Affiliate Disclosure. Some of the links on this website are affiliate links, which means that I may earn a small commission if you click on the link or make a purchase using the link. If you make a purchase you will not be charged anything additional.

HOW TO MAKE CHRISTMAS STARS FROM TWIGS

Here’s what you need

How to make stars from twigs for Christmas. Make cheap and frugal Christmas decor using sticks from your yard. Twine/jute twig stars easy craft tutorial for simple rustic looking farmhouse home decor.

1. GATHER TWIGS

If you don’t have a yard to gather twigs from, or if you don’t have trees in your yard, take a stroll through the local park and you will most definitely find enough twigs to use.

For these mini stars you’ll want to find twigs that are thin, not thick.

2. CUT

I used wire cutters for this step but garden snips will work too.

How to make stars from twigs for Christmas. Make cheap and frugal Christmas decor using sticks from your yard. Twine/jute twig stars easy craft tutorial for simple rustic looking farmhouse home decor.

I cut 4 pieces of twigs that were the same size and 1 piece that was about 2/3 or so the size of longer twigs. I just eyeballed this, it doesn’t have to be exact.

How to make stars from twigs for Christmas. Make cheap and frugal Christmas decor using sticks from your yard. Twine/jute twig stars easy craft tutorial for simple rustic looking farmhouse home decor.

3. MAKE A STAR

Just like when you were a kid making stars that’s exactly how you are going to make these stars.

Make an upside-down V.

How to make stars from twigs for Christmas. Make cheap and frugal Christmas decor using sticks from your yard. Twine/jute twig stars easy craft tutorial for simple rustic looking farmhouse home decor.

Then make an X with the other two long pieces.

How to make stars from twigs for Christmas. Make cheap and frugal Christmas decor using sticks from your yard. Twine/jute twig stars easy craft tutorial for simple rustic looking farmhouse home decor.

Then put the smallest twig going across the top.

How to make stars from twigs for Christmas. Make cheap and frugal Christmas decor using sticks from your yard. Twine/jute twig stars easy craft tutorial for simple rustic looking farmhouse home decor.

I had to carefully move them around till I was happy with the placement of my twig star.

4. GLUE

I had already preheated my glue gun prior to this step so it would be ready when I was. I added a SMALL DAB of hot glue wherever the twigs touched. You don’t want a ton of glue, just enough to keep it in place for now.

How to make stars from twigs for Christmas. Make cheap and frugal Christmas decor using sticks from your yard. Twine/jute twig stars easy craft tutorial for simple rustic looking farmhouse home decor.

5. WRAP

After my glue was dry I wrapped each star point in a silver and white bakers twine. I added a tiny drop of glue then put the end of my bakers twine on it till it was dry.

How to make stars from twigs for Christmas. Make cheap and frugal Christmas decor using sticks from your yard. Twine/jute twig stars easy craft tutorial for simple rustic looking farmhouse home decor.

Then I wrapped the end till I was happy with how it looked.

How to make stars from twigs for Christmas. Make cheap and frugal Christmas decor using sticks from your yard. Twine/jute twig stars easy craft tutorial for simple rustic looking farmhouse home decor.

Then I cut the bakers twine and added another tiny drop of glue to hold it in place.

How to make stars from twigs for Christmas. Make cheap and frugal Christmas decor using sticks from your yard. Twine/jute twig stars easy craft tutorial for simple rustic looking farmhouse home decor.

That’s it. Nothing crazy complicated. I will warn ya, it can get a little frustrating if your kiddos are yelling at one another in the other room and your twigs keep moving out of place from the slightest touch lol! That totally happened a few times to me when I was making these stars for my frugal Christmas décor.

How to make stars from twigs for Christmas. Make cheap and frugal Christmas decor using sticks from your yard. Twine/jute twig stars easy craft tutorial for simple rustic looking farmhouse home decor.

I hope you enjoyed this crafty tutorial. If you have any questions please leave them in the comments below.

Happy Crafting!

Check out more DIY crafts below

Making leaf art with your kids

Leaf art with kids. Fun and easy leaf people and leaf turkeys for kids to make with their parents. Fun outdoor fall craft project to do with kids of all ages.

MAKING LEAF ART WITH YOUR KIDDOS

Whoa what a school year this has turned out to be for all of our kiddos. I know that virtual learning can be a lot of screen time but it also means that we get to have a lot of creative fun time with our kids too.

While we are learning at home I’m trying to plan fun things to do for the older kids and also things that will keep daughter #4 busy too since we are doing pre-k at home instead of the traditional pre-k we’ve always done. Today we made art. And not just any art, we made people and animals with leaves and other nature items.

Affiliate Disclosure. Some of the links on this website are affiliate links, which means that I may earn a small commission if you click on the link or make a purchase using the link. If you make a purchase you will not be charged anything additional.

Leaf art with kids. Fun and easy leaf people and leaf turkeys for kids to make with their parents. Fun outdoor fall craft project to do with kids of all ages.

CLICK HERE for more KIDS PROJECTS

And it was SO FUN!

We’ve done something similar before, painting with nature click here to see how fun that turned out. But today we didn’t break out any paints. We just used the colors (and the option for markers for faces) that we found in the things that God gave to our backyard.

The older girls actually enjoyed it way more than my pre-k girl did which completely surprised me. I figured they would think it was “baby-ish” but they fully enjoyed this crafty project.

Making leaf art with your kids

STEP 1

Gather pieces of nature. We took a small basket outside and filled it with all kind of things (I purposefully didn’t take a big basket out there because I knew they would fill it FULL lol! The small one was more than enough materials for them to create with)

  • colorful leaves

  • twigs

  • some pine cone looking things

  • blades of grass

  • berries

  • vines

  • and whatever else the kiddos want to grab

STEP 2

Bring it inside and set up a place where the kids can get messy. We used our dining room table and since we weren’t painting I didn’t mess with putting a drop cloth down.

I brought out our metal bin of glues, squeeze glue bottles and glue sticks, washable markers for if they wanted to add faces or anything their imaginations could think of, kid friendly scissors, and copy paper.

Leaf art with kids. Fun and easy leaf people and leaf turkeys for kids to make with their parents. Fun outdoor fall craft project to do with kids of all ages.

STEP 3

I helped my preschooler at first, showing her how we could create a Thanksgiving Day turkey out of the leaves and although she thought that was really cool she just wanted to glue whatever, and most importantly wherever to her piece of paper.

We took a round leaf and glued it down first

Then we took longer more oblong looking leaves and glued them behind the round leaf for the Turkey feathers.

Leaf art with kids. Fun and easy leaf people and leaf turkeys for kids to make with their parents. Fun outdoor fall craft project to do with kids of all ages.

My pre-k girl wanted to use a piece of bark for the head so that’s what we used.

Leaf art with kids. Fun and easy leaf people and leaf turkeys for kids to make with their parents. Fun outdoor fall craft project to do with kids of all ages.

For the gobble we glued a small skinny leaf like thing down and pushed it up so it was under the bark head.

Leaf art with kids. Fun and easy leaf people and leaf turkeys for kids to make with their parents. Fun outdoor fall craft project to do with kids of all ages.

For the legs we just added a second stem from another leaf and glue it in place using a glue stick.

The most important step of all though is to just enjoy this crafty art time with your kids. Let them make a mess. Let them create. Let them make mistakes and not feel like they have to be perfect.

Here are a few finished leaf art pictures my girls made. I LOVE them! They were so creative and really took time to enjoy the whole process of this leaf art project. I can’t wait to do the next just for fun creative activity with them.

Leaf art with kids. Fun and easy leaf people and leaf turkeys for kids to make with their parents. Fun outdoor fall craft project to do with kids of all ages.

If you enjoy this craft with your kiddos be sure to check out this post on painting with nature.

Leaf art with kids. Fun and easy leaf people and leaf turkeys for kids to make with their parents. Fun outdoor fall craft project to do with kids of all ages.

Baby it's cold outside warm up with hot cocoa & coffee DIY sign wood sign + free SVG

DIY baby it's cold outside warm up here hot cocoa & coffee bar wood sign. Free SVG for winter coffee bar sign. How to stencil on wood with no paint bleed. DIY wood sign painted stenciled sign with acrylic paint and oramask stencil film.

Winter coffee bar sign + free SVG

We bought a 120 yr old house over the summer. It’s a much bigger house than we’ve ever lived in AND I have space for an actual coffee bar now!! I’m so excited to decorate it for the winter & Christmas season.

DIY baby it's cold outside warm up here hot cocoa & coffee bar wood sign. Free SVG for winter coffee bar sign. How to stencil on wood with no paint bleed. DIY wood sign painted stenciled sign with acrylic paint and oramask stencil film.

I thought long and hard about how I would decorate my new rustic looking coffee bar and I opted for a winter hot cocoa & coffee theme instead of just decorating it for the Christmas season. That way I can keep my display up longer.

I also made this cute mini wood rolling pin to go on my winter coffee bar and I have a FREE SVG to go with it too.

If you’re just now starting out on your journey into the world of fancy cutting machines (aka a Cricut, Silhouette, or any other brand) be sure to read this post 10 MUST HAVE SUPPLIES & ACCESSORIES TO GET YOU STARTED WITH YOUR CRICUT.

Here’s what I used to make my mini wood winter sign

DIY baby it's cold outside warm up here hot cocoa & coffee bar wood sign. Free SVG for winter coffee bar sign. How to stencil on wood with no paint bleed. DIY wood sign painted stenciled sign with acrylic paint and oramask stencil film.


1.CUT & WEED THE STENCIL

The SVG I used for this sign can be found in my FREE resource library click here, or you can purchase the SVG here. I uploaded it into Cricut Design Space and adjusted it to fit perfectly onto my 5.5”x5.5” wood pine base.

DIY baby it's cold outside warm up here hot cocoa & coffee bar wood sign. Free SVG for winter coffee bar sign. How to stencil on wood with no paint bleed. DIY wood sign painted stenciled sign with acrylic paint and oramask stencil film.

I cut my stencil out on ORAMASK 813 STENCIL FILM. I know, my mat is very loved lol! You can definitely tell I get a lot of use out of my craft supplies.

DIY baby it's cold outside warm up here hot cocoa & coffee bar wood sign. Free SVG for winter coffee bar sign. How to stencil on wood with no paint bleed. DIY wood sign painted stenciled sign with acrylic paint and oramask stencil film.

Typically I suggest using an xacto knife to weed stenciled designs but since this design is so small with lots of lettering I am using a sewing pin instead. This isn’t my go to but for small designs it works much better than an xacto knife.

DIY baby it's cold outside warm up here hot cocoa & coffee bar wood sign. Free SVG for winter coffee bar sign. How to stencil on wood with no paint bleed. DIY wood sign painted stenciled sign with acrylic paint and oramask stencil film.

2. PAINT THE BASE

After my stencil was cut and weeded I painted my wood piece. I used matte finish black acrylic paint for this and my rusty but trusty 1” paint brush. This brush is one of my FAVORITE paint brushes! It may look like a hot mess but it paints beautifully!

DIY baby it's cold outside warm up here hot cocoa & coffee bar wood sign. Free SVG for winter coffee bar sign. How to stencil on wood with no paint bleed. DIY wood sign painted stenciled sign with acrylic paint and oramask stencil film.

I wanted this to look a little more rustic without having to take my sander to it. Instead of a painting all the way to the edges of the wood base I left a slight border around it and I made it super uneven to give it an even more farmhouse-y look. Then I let it dry completely.

3. APPLY THE STENCIL

After my base coat was completely dry I applied my stencil. Be sure when you do this step that your paint is TOTALLY dry. If it’s not the stencil film will peel up the base coat and it will be an ugly mess.

DIY baby it's cold outside warm up here hot cocoa & coffee bar wood sign. Free SVG for winter coffee bar sign. How to stencil on wood with no paint bleed. DIY wood sign painted stenciled sign with acrylic paint and oramask stencil film.

I cut my stencil so it would perfectly fit on my wood base that way I wouldn’t have to stress about centering it and making it all even.

DIY baby it's cold outside warm up here hot cocoa & coffee bar wood sign. Free SVG for winter coffee bar sign. How to stencil on wood with no paint bleed. DIY wood sign painted stenciled sign with acrylic paint and oramask stencil film.

I aligned the stencil on the base and used my vinyl squeegee to press out all the air bubbles. PRO TIP: work from the middle out to press out air bubbles.

DIY baby it's cold outside warm up here hot cocoa & coffee bar wood sign. Free SVG for winter coffee bar sign. How to stencil on wood with no paint bleed. DIY wood sign painted stenciled sign with acrylic paint and oramask stencil film.

Then I removed my stencil film. This removes best when you roll it away from your stencil vs trying to peel it up and off of your stencil.

DIY baby it's cold outside warm up here hot cocoa & coffee bar wood sign. Free SVG for winter coffee bar sign. How to stencil on wood with no paint bleed. DIY wood sign painted stenciled sign with acrylic paint and oramask stencil film.

4. SEAL THE STENCIL

Sealing your stencil isn’t 100% necessary but it does help to keep the paint bleed to a minimum. I use MATTE FINISH MOD PODGE for this.

DIY baby it's cold outside warm up here hot cocoa & coffee bar wood sign. Free SVG for winter coffee bar sign. How to stencil on wood with no paint bleed. DIY wood sign painted stenciled sign with acrylic paint and oramask stencil film.

I paint a super thin coat of mod podge onto my exposed areas of my stencil. Making sure I am almost pushing the mod podge into the stencil creases. Then I let it dry completely. Again, use a SUPER THIN COAT of mod podge if you do this step.

DIY baby it's cold outside warm up here hot cocoa & coffee bar wood sign. Free SVG for winter coffee bar sign. How to stencil on wood with no paint bleed. DIY wood sign painted stenciled sign with acrylic paint and oramask stencil film.

5.PAINT THE STENCIL

After my mod podge was dry I painted the exposed areas of my stencil with white acrylic paint.

DIY baby it's cold outside warm up here hot cocoa & coffee bar wood sign. Free SVG for winter coffee bar sign. How to stencil on wood with no paint bleed. DIY wood sign painted stenciled sign with acrylic paint and oramask stencil film.

I let the first coat dry then I painted a second coat.

DIY baby it's cold outside warm up here hot cocoa & coffee bar wood sign. Free SVG for winter coffee bar sign. How to stencil on wood with no paint bleed. DIY wood sign painted stenciled sign with acrylic paint and oramask stencil film.

Be sure when you do this step that you paint SUPER THIN layers. If your paint layers are too thick then your paint will peel up with you peel up your stencil.

6. PEEL UP THE STENCIL

Everyone is different but for me I always peel up my stencil while my paint is still wet. This method has worked for me on the THOUSANDS of signs I have painted so this is the method that I always recommend.

DIY baby it's cold outside warm up here hot cocoa & coffee bar wood sign. Free SVG for winter coffee bar sign. How to stencil on wood with no paint bleed. DIY wood sign painted stenciled sign with acrylic paint and oramask stencil film.

Start from one corner and peel toward the opposite corner.

Then use your sewing pin or an xacto knife to take out all of the little middle pieces. If you accidently get paint on your base paint no worries. When the paint is all dry just take a paint brush and paint over all of the little mistakes.

DIY baby it's cold outside warm up here hot cocoa & coffee bar wood sign. Free SVG for winter coffee bar sign. How to stencil on wood with no paint bleed. DIY wood sign painted stenciled sign with acrylic paint and oramask stencil film.

7. TOUCH UP

When the paint is all dry just take a paint brush and paint over all of the little mistakes.

After my sign was dry I put it up on my coffee bar even though it was almost 11pm lol!! No wonder my pic turned out super blah and yellow with the lighting . That’s ok!

DIY baby it's cold outside warm up here hot cocoa & coffee bar wood sign. Free SVG for winter coffee bar sign. How to stencil on wood with no paint bleed. DIY wood sign painted stenciled sign with acrylic paint and oramask stencil film.

Let me know what you think in the comments below.

Check out more DIY sign painting projects

DIY dowel rod snowman ornament DAY 8

DIY Christmas ornaments to make with kids. Easy snowman (snowmen) Christmas tree hanging ornament to make from a dowel rod. How to paint a snowman on a Christmas ornament easy craft tutorial.

This DIY Christmas ornament is SUPER EASY! Similar to the square snowmen ornaments I made last year. Only this time they are round and they have cute rosy cheeks like these mason jar snowmen I showed how to make on my blog. There are differences of course but all three of these snowmen are so adorable.

If you are a craft-aholic like myself, then you probably hang on to EVERYTHING. The dowels I’m using for this snowman ornament were actually leftover stems from a larger version of these 2x4 wood pumpkins. Really, I probably should have tossed these scraps BUT then I wouldn’t have been inspired to create this Christmas ornament tutorial to share here on my blog.

DIY Christmas ornaments to make with kids. Easy snowman (snowmen) Christmas tree hanging ornament to make from a dowel rod. How to paint a snowman on a Christmas ornament easy craft tutorial.

See more of my 30 DAYS OF DIY CHRISTMAS ORNAMENTS here

Here’s what you need to make a dowel rod snowman ornament

DIY Christmas ornaments to make with kids. Easy snowman (snowmen) Christmas tree hanging ornament to make from a dowel rod. How to paint a snowman on a Christmas ornament easy craft tutorial.

This ornament is so fun, easy and a wonderful Christmas craft to make with the kids. Don’t sweat it if they don’t come out perfect. Lord knows when we craft with our kids it’s never about the perfection, rather it’s about the memories and bond you’re building with your children.

1.PAINT

The first thing I did was paint the dowel rod piece all white, including the top and bottom. I let the first coat dry then I applied a second coat for a little more coverage then I let that coat dry before moving on to step 2.

DIY Christmas ornaments to make with kids. Easy snowman (snowmen) Christmas tree hanging ornament to make from a dowel rod. How to paint a snowman on a Christmas ornament easy craft tutorial.

2. CHEEKS

Because I want the nose to go over the cheek I painted the snowman’s cheeks first. This takes a TINY amount of paint, like a teeny tiny amount. I lightly tapped the tip of my paint brush into the pink paint then into the white paint, but less white paint than pink paint on my brush.

DIY Christmas ornaments to make with kids. Easy snowman (snowmen) Christmas tree hanging ornament to make from a dowel rod. How to paint a snowman on a Christmas ornament easy craft tutorial.

Then I made swirly circles with my brush. I probably should have used a round tipped brush for this but I grabbed a pointy tipped one and just didn’t want to hunt for a new brush so I went with it. It worked but not as good as it could have with a round tipped brush.

I kept added white and pink paint to the cheeks till I was happy with the way they looked.

3. NOSE

After the cheeks were dry I painted on an orange nose. I used the same pointy brush for this. I made a sideways triangle then filled it in with orange paint. I added a tiny bit of black paint to give it a little depth.

DIY Christmas ornaments to make with kids. Easy snowman (snowmen) Christmas tree hanging ornament to make from a dowel rod. How to paint a snowman on a Christmas ornament easy craft tutorial.

4.EYES & MOUTH

Using the same brush I painted on irregular looking circles for the eyes and for the mouth in black. I really tried to make them look like coal.

DIY Christmas ornaments to make with kids. Easy snowman (snowmen) Christmas tree hanging ornament to make from a dowel rod. How to paint a snowman on a Christmas ornament easy craft tutorial.

After the black paint was dry I used the end of my paint brush to make accent dots on the eyes and mouth.

DIY Christmas ornaments to make with kids. Easy snowman (snowmen) Christmas tree hanging ornament to make from a dowel rod. How to paint a snowman on a Christmas ornament easy craft tutorial.

5. SCREW EYE AND JUTE

I screwed the hanger (screw eye) into the top of my snowman ornament to hang it. Then I added a piece of jute to hang it from the Christmas tree.

DIY Christmas ornaments to make with kids. Easy snowman (snowmen) Christmas tree hanging ornament to make from a dowel rod. How to paint a snowman on a Christmas ornament easy craft tutorial.

I hope you enjoyed this crafty Christmas ornament tutorial. Let me know if you have any questions in the comments below.

Don’t forget to pin the image below to save for later :)!

DIY Christmas ornaments to make with kids. Easy snowman (snowmen) Christmas tree hanging ornament to make from a dowel rod. How to paint a snowman on a Christmas ornament easy craft tutorial.

Happy Crafting!

Check out more Christmas posts below