Dollar Tree moss bunny peeps on wood + FREE SVG

EASY SPRING CRAFT

DIY spring Easter Dollar Tree craft, easy and simple peep bunny craft made out of sheet moss. Frugal Easter craft for spring using your Cricut or vinyl cutting machine. Scrap wood craft project

DIY DOLLAR TREE SHEET MOSS BUNNIES + FREE SVG

Need an easy & inexpensive spring or Easter craft? This little moss bunny sign will fit in perfectly with your farmhouse or rustic decorations! And it won’t break the bank!

I love the Dollar Tree and I also love my Cricut machine. So when I can make projects combining the two it’s like fireworks in my craft room! Today I made little moss peep bunny cutouts using both my Dollar Tree find and the help of my never fail me Cricut machine. Be sure to check out this DOLLAR TREE BOOK STACK if you love this spring dollar store craft.

DIY spring Easter Dollar Tree craft, easy and simple peep bunny craft made out of sheet moss. Frugal Easter craft for spring using your Cricut or vinyl cutting machine. Scrap wood craft project

This spring Easter craft was super easy, crazy quick and it represents my gaggle of girls. I am a momma to four daughters so I wanted there to be four little moss bunny peeps to represent them <3 !! It just so happened to work out perfectly that I had a 10” piece of scrap wood I originally made for a different craft over a year ago {yes I’m one of those craft hoarder ladies} to use for this simple DIY. So there was no need to cut, paint, or stain anything today at least.

Affiliate Disclosure. Some of the links on this website are affiliate links, which means that I may earn a small commission if you click on the link or make a purchase using the link. If you make a purchase you will not be charged anything additional.


DIY spring Easter Dollar Tree craft, easy and simple peep bunny craft made out of sheet moss. Frugal Easter craft for spring using your Cricut or vinyl cutting machine. Scrap wood craft project

1. WOOD BASE

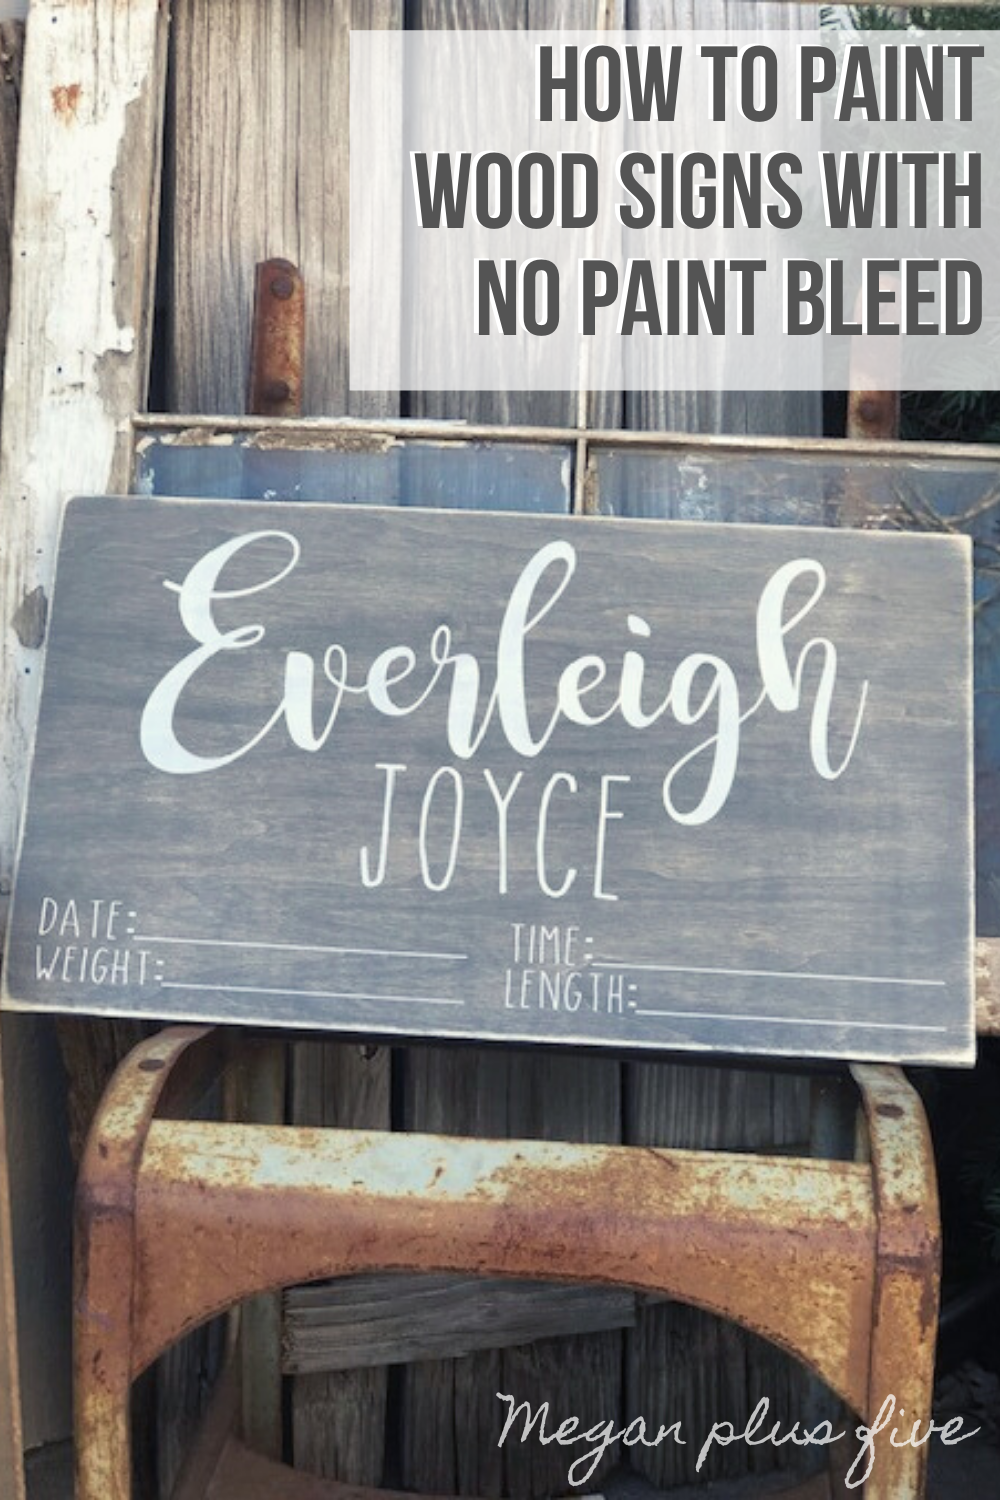
I used a piece of scrap wood from another project. It was already cut, stained, and painted so I didn’t need to do that for this project. If you want to know how to get that distressed wood look check out this DIY sign painting post.

2. CARDSTOCK BUNNY

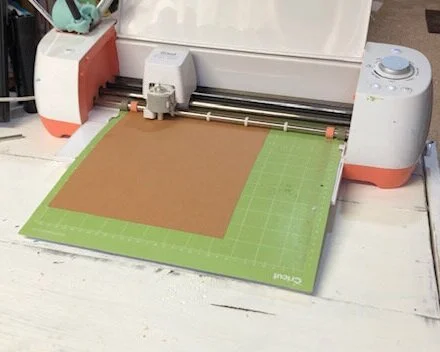
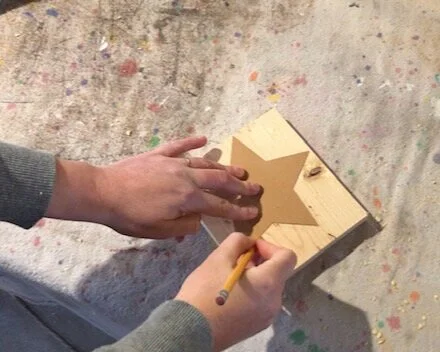
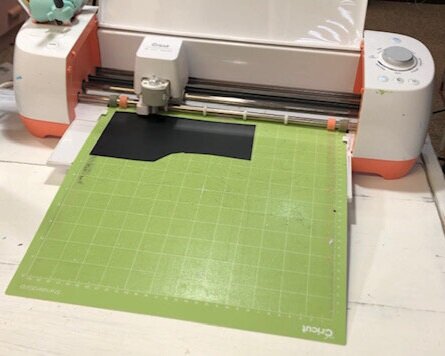
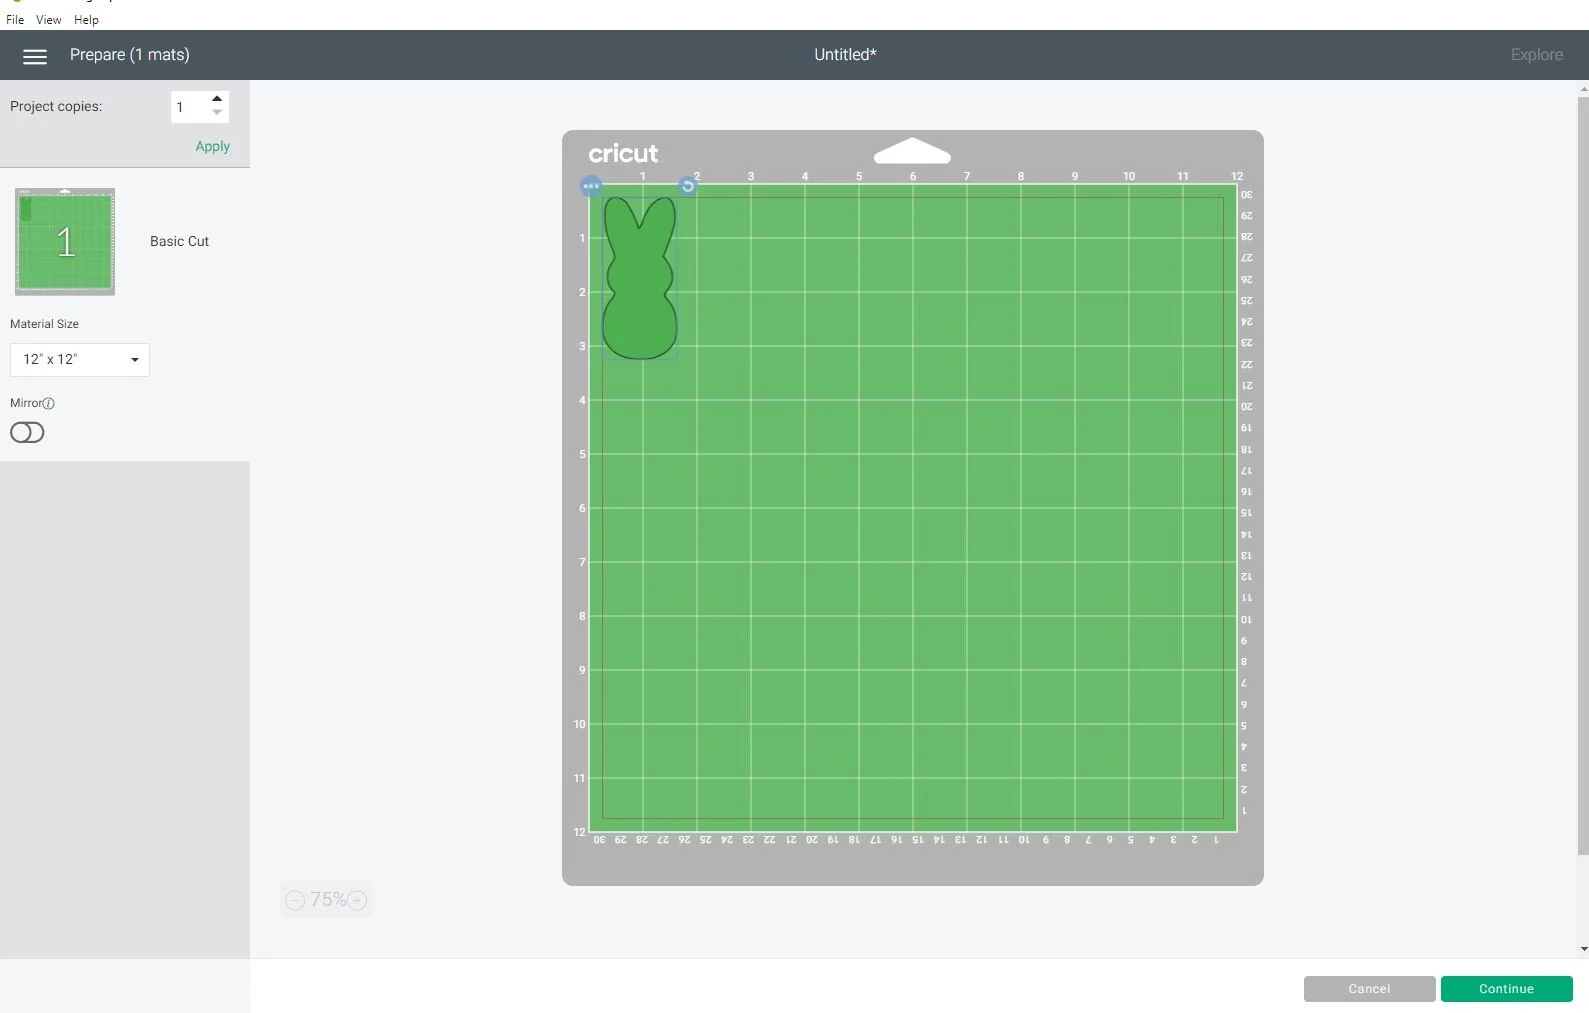
I used my Cricut to cut out a cardstock template. You can grab the same SVG I used from my FREE RESOURCE LIBRARY. That is my personal library where I share all of my free printables, SVG cut files, and patterns. This is a much easier way for my readers to get access to my freebies rather than filtering through emails or worse deleting an email that contains a file you needed.
DIY spring Easter Dollar Tree craft, easy and simple peep bunny craft made out of sheet moss. Frugal Easter craft for spring using your Cricut or vinyl cutting machine. Scrap wood craft project

You will only need ONE cardstock bunny no matter how many bunnies you plan on cutting out of the sheet moss.

If you are new to the Cricut world be sure to check out my post on the top 10 supplies & accessories you need to get started using your Cricut cutting machine.

2. TRACE

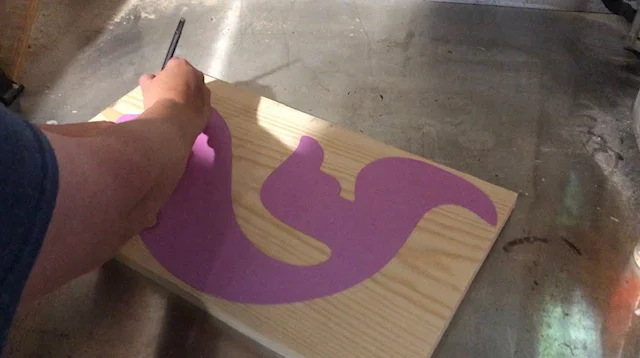
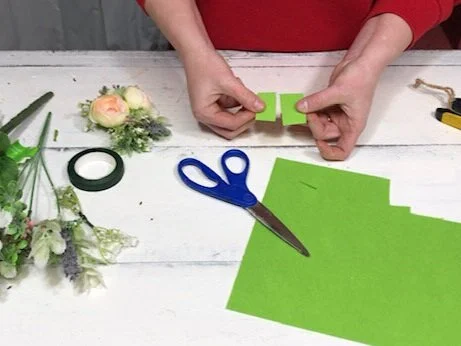
I flipped my sheet of moss upside down on my craft surface. Then I traced around it using a dark colored permanent thick marker. I tried doing this with a pen but it didn’t work out so great so I grabbed the closest thing to me I could find that would work, a permanent marker. This was a little tricky only because the moss backing is so uneven but since I’m not a perfectionist it worked just fine.

DIY spring Easter Dollar Tree craft, easy and simple peep bunny craft made out of sheet moss. Frugal Easter craft for spring using your Cricut or vinyl cutting machine. Scrap wood craft project

I tried to fit all four bunnies on one side of the sheet so I could make the most of my $1 find lol!

3. CUT THE MOSS BUNNIES OUT

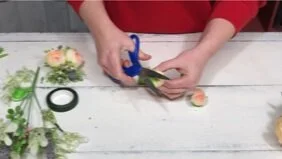
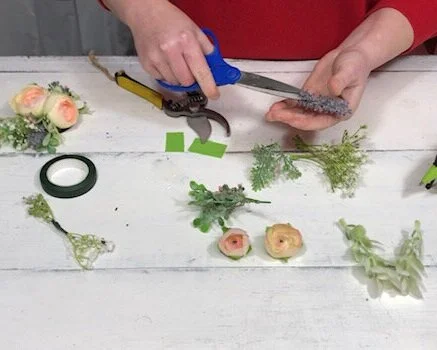
Using a pair of regular scissors I cut the peep bunnies out of the moss sheet. Some of the moss fell off in some pieces leaving it looking a little bare in spots but don’t worry if that happens to you. You can fix that at the very end.

DIY spring Easter Dollar Tree craft, easy and simple peep bunny craft made out of sheet moss. Frugal Easter craft for spring using your Cricut or vinyl cutting machine. Scrap wood craft project

4. GLUE

Before I glued my moss bunnies down I placed them on my piece of wood so I could make adjustments before they were glued down.

DIY spring Easter Dollar Tree craft, easy and simple peep bunny craft made out of sheet moss. Frugal Easter craft for spring using your Cricut or vinyl cutting machine. Scrap wood craft project

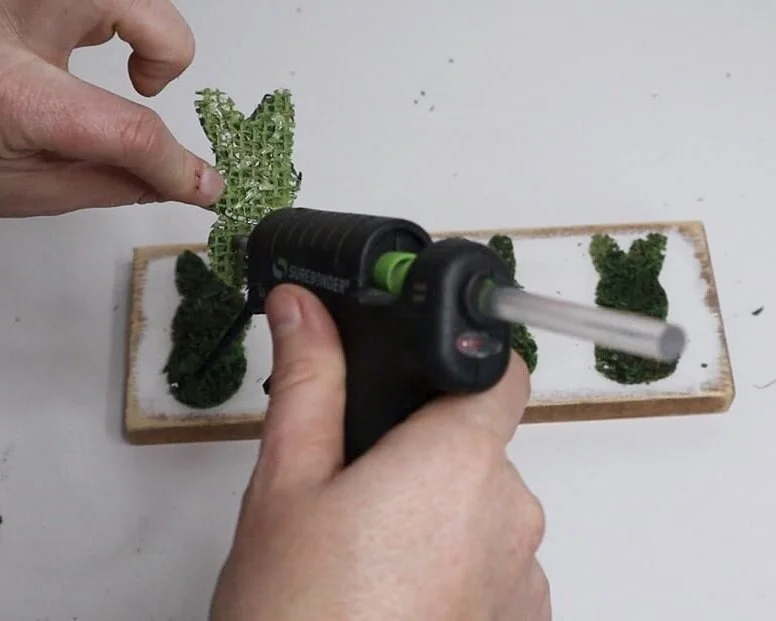
Then I used my fine tipped hot glue gun to glue them in place.
DIY spring Easter Dollar Tree craft, easy and simple peep bunny craft made out of sheet moss. Frugal Easter craft for spring using your Cricut or vinyl cutting machine. Scrap wood craft project

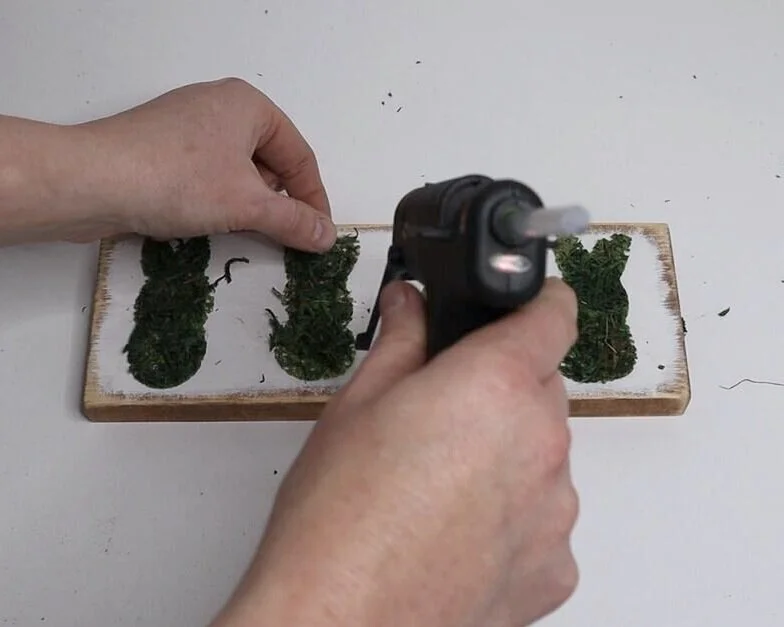
For the little areas that were bare I glue some leftover moss in those spots. You couldn’t even tell once I was finished that I had to add moss.
DIY spring Easter Dollar Tree craft, easy and simple peep bunny craft made out of sheet moss. Frugal Easter craft for spring using your Cricut or vinyl cutting machine. Scrap wood craft project

That’s it! So quick and easy. Click here for more DIY DOLLAR TREE CRAFTS.

DIY spring Easter Dollar Tree craft, easy and simple peep bunny craft made out of sheet moss. Frugal Easter craft for spring using your Cricut or vinyl cutting machine. Scrap wood craft project

Let me know if you have any questions in the comments below.

DIY bible tabs + FREE printable

DIY bible tab printable. How to make your own bible tabs cheap and easy. Frugal mom printable. Pretty bible tab printable that are free to use.

Printable bible tabs

Make your own easy diy bible tabs at home. Print them from any home printer see how to make them yourself.

Need a free bible tab printable? I was looking all over Pinterest for DIY bible tabs and didn’t really find exactly what I was looking for with my budget. Then it hit me ‘Megan, why don’t you just make your own?!’ And so I did.

DIY bible tab printable. How to make your own bible tabs cheap and easy. Frugal mom printable. Pretty bible tab printable that are free to use.

These are permanent bible tabs, so if you want something you can change out you can still use my bible tab printable you’ll just want to attach it using a different technique.

Affiliate Disclosure. Some of the links on this website are affiliate links, which means that I may earn a small commission if you click on the link or make a purchase using the link. If you make a purchase you will not be charged anything additional.

Of course my main goal for these bible tabs is functional but I also wanted them to be pretty. I went for a more minimal theme with them. I used muted colors on the tabs with varied cursive fonts, simple florals and accent lines. Some of the tabs I’ve seen are gorgeous but they are a little hard to read with the busy prints that are on them.

Most of the DIY bible tabs I’ve come across were going to cost me more money than I wanted to spend. I wanted to use materials I already had at home. I have already spent more money than I realized on new bibles, covers, and bible friendly markers for me and my girls so buying bible tab labels just seemed a little overload when it was something I could do myself.

MAKE YOUR OWN BIBLE TAB LABLES

Here’s what you need

This free download comes in two parts: pages 1&2 and page 3. Because the file is print quality it is larger than normal files that I upload and the fact that it’s three pages and not one. So be sure you click to download all three pages.

DIY bible tab printable. How to make your own bible tabs cheap and easy. Frugal mom printable. Pretty bible tab printable that are free to use.

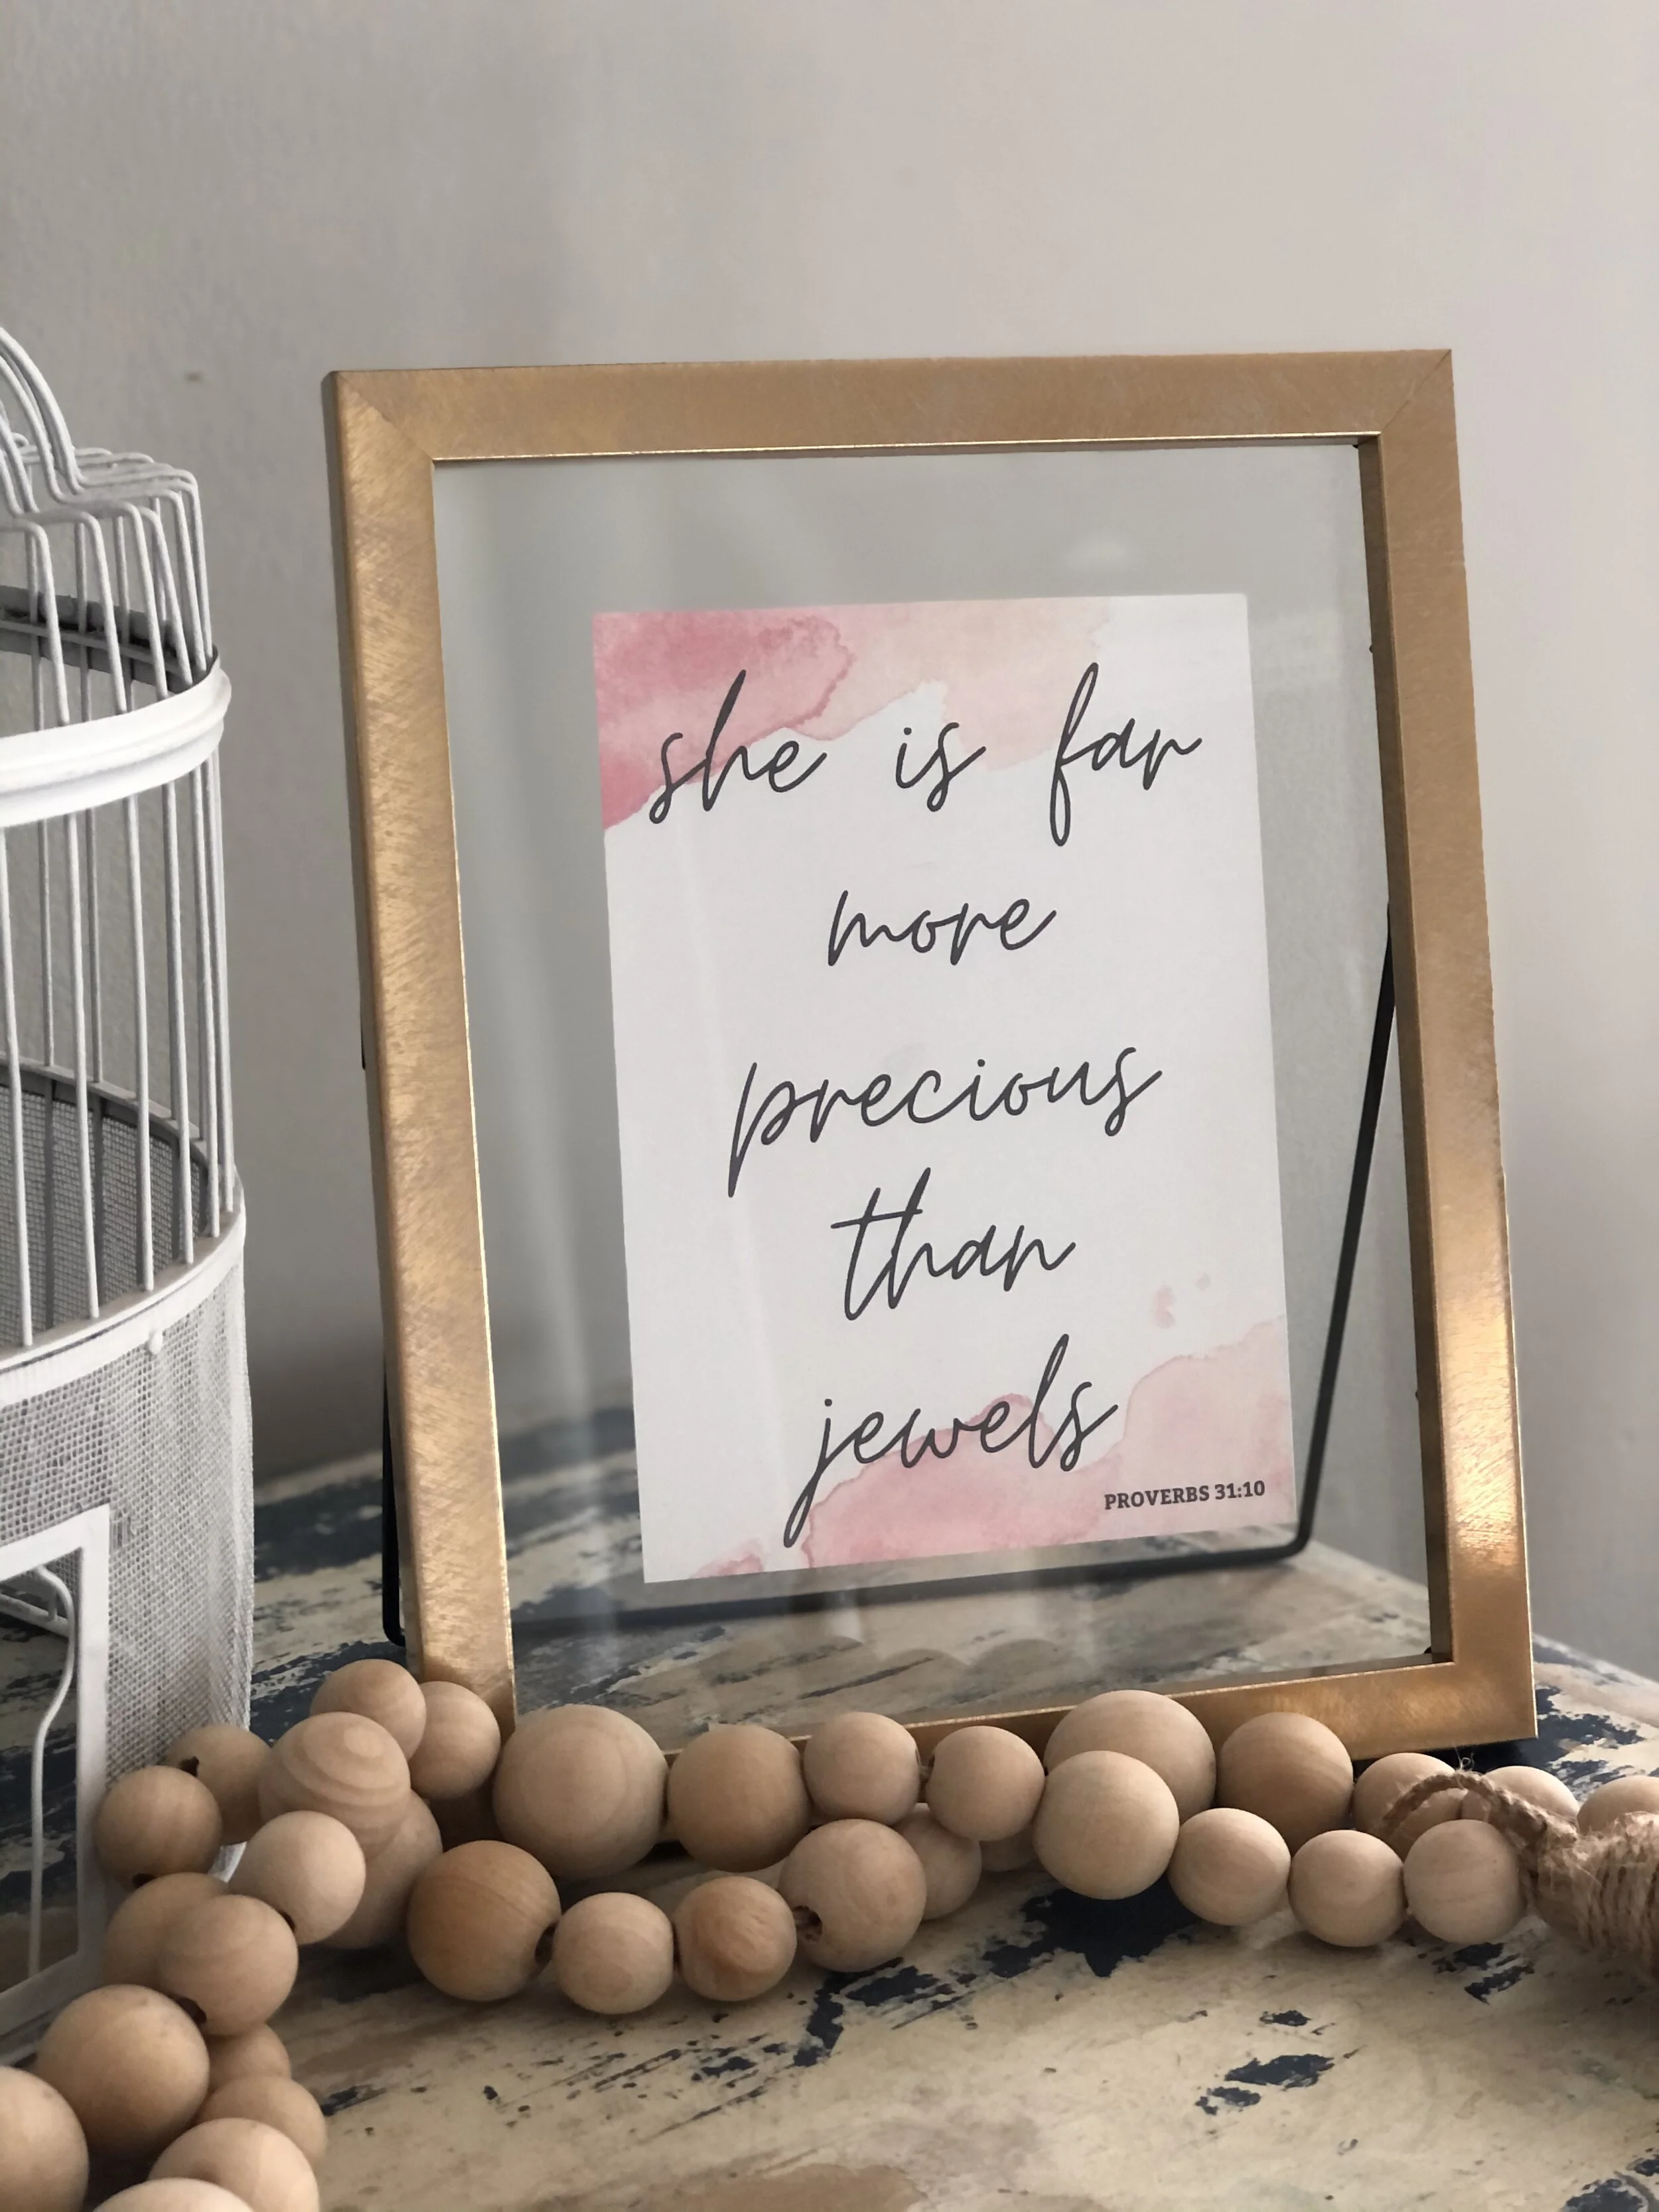
I used Canva.com to create my labels in. Then I printed them off on my simple hp home printer. I also used these same tools create and print this FREE PROVERBS 31 PRINTABLE to put in my girl’s lounge area.

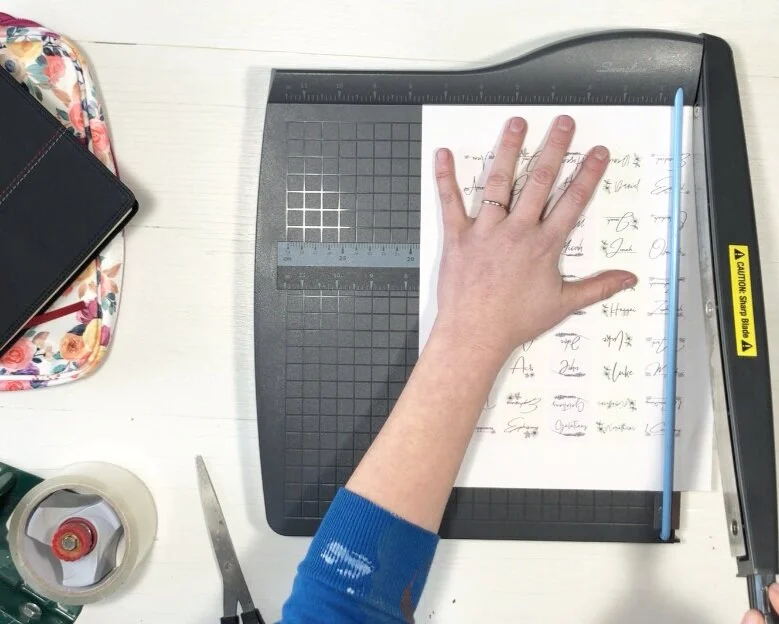
After I had all three pages of tabs printed off I used my Swingline paper cutter to cut and separate all the little tabs. Having this inexpensive tool has made my life so much easier! I never realized how often I needed to cut straight lines till I had this office tool.

{side note…don’t mind my paint stained sweatshirt. I had been painting earlier that day and I always try to wear old paint clothes because as you can see I tend to be slightly messy sometimes when I paint}

DIY bible tab printable. How to make your own bible tabs cheap and easy. Frugal mom printable. Pretty bible tab printable that are free to use.

I made muted colored squares to go around each of the labels so that they are much easier to cut.

DIY bible tab printable. How to make your own bible tabs cheap and easy. Frugal mom printable. Pretty bible tab printable that are free to use.

To make it easier to find my printed bible tabs I put them in alphabetical order…well kinda, I grouped them in order. Then I started in Genesis and worked my way to the end of the bible adding tabs. You can certainly do yours differently but I wanted to easily find things and know the order in which to find them so I thought this was the best way to do that for me.

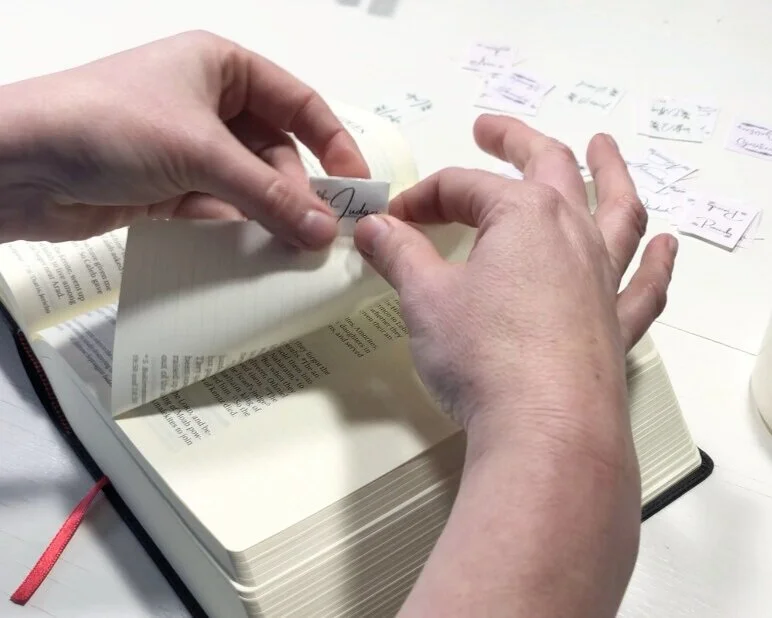
These tabs are double sided. To apply them the easiest way fold the tab in half first then open it back up. This way you will have a crease already on the tab making it easier to fold over once it’s on your bible.

DIY bible tab printable. How to make your own bible tabs cheap and easy. Frugal mom printable. Pretty bible tab printable that are free to use.

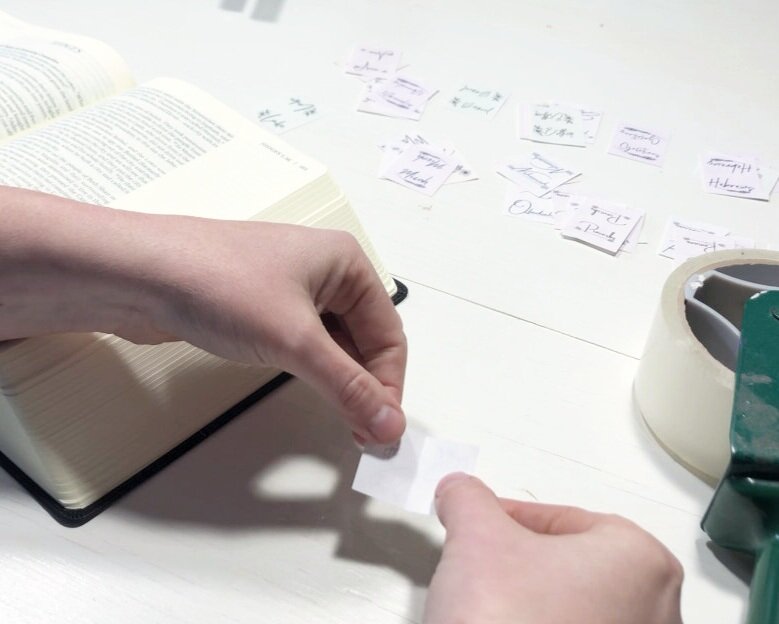
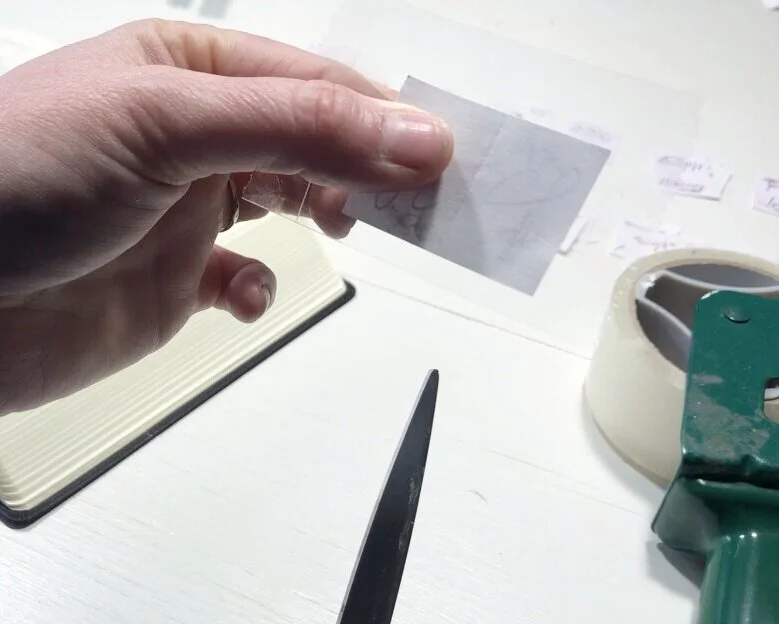
I used packaging tape but you can use whatever tape you prefer. I know this tape isn’t ideal but it’s what I had on hand and it acts as a laminator so the tabs won’t rip off easily. I took a piece of tape then placed my unfolded tab face down on the sticky side.

DIY bible tab printable. How to make your own bible tabs cheap and easy. Frugal mom printable. Pretty bible tab printable that are free to use.

Then I trimmed off the extra excess tape around my bible tab. I left just enough so I could attach it to my bible page.

DIY bible tab printable. How to make your own bible tabs cheap and easy. Frugal mom printable. Pretty bible tab printable that are free to use.

This part was a little tricky and honestly I probably should have taken more time to get these on there so they were precise. But then again I’m not really a precise, perfect kind of girl so this process fit me perfectly! I eyeballed my tabs and stuck them on their coordinating book of the bible. I placed them on the backside of the page first.

DIY bible tab printable. How to make your own bible tabs cheap and easy. Frugal mom printable. Pretty bible tab printable that are free to use.

Then I pressed the bible tab over so that the page was sandwiched in between.

DIY bible tab printable. How to make your own bible tabs cheap and easy. Frugal mom printable. Pretty bible tab printable that are free to use.

I placed all of my tabs on the right side of the books of the bible. So if a book started on the left side I still placed the bible tab on the right hand side. You don’t have to do this but I did so that I wasn’t having to flip to find which side of the tab the book started on. Just a little way to keep myself slightly organized.

DIY bible tab printable. How to make your own bible tabs cheap and easy. Frugal mom printable. Pretty bible tab printable that are free to use.

I am so glad I took the time to add these DIY tabs to my bible. This will make it so much easier when I’m in the word at church and at home. I’ve been doing a weekly bible study using this prayer journal for women. Not only is it gorgeous but there was a lot of thought put into the content.

DIY bible tab printable. How to make your own bible tabs cheap and easy. Frugal mom printable. Pretty bible tab printable that are free to use.

I hope this affordable bible tab option works for your needs. If you have any questions let me know in the comments below.

Happy Crafting!

Baby it's cold outside warm up with hot cocoa & coffee DIY sign wood sign + free SVG

DIY baby it's cold outside warm up here hot cocoa & coffee bar wood sign. Free SVG for winter coffee bar sign. How to stencil on wood with no paint bleed. DIY wood sign painted stenciled sign with acrylic paint and oramask stencil film.

Winter coffee bar sign + free SVG

We bought a 120 yr old house over the summer. It’s a much bigger house than we’ve ever lived in AND I have space for an actual coffee bar now!! I’m so excited to decorate it for the winter & Christmas season.

DIY baby it's cold outside warm up here hot cocoa & coffee bar wood sign. Free SVG for winter coffee bar sign. How to stencil on wood with no paint bleed. DIY wood sign painted stenciled sign with acrylic paint and oramask stencil film.

I thought long and hard about how I would decorate my new rustic looking coffee bar and I opted for a winter hot cocoa & coffee theme instead of just decorating it for the Christmas season. That way I can keep my display up longer.

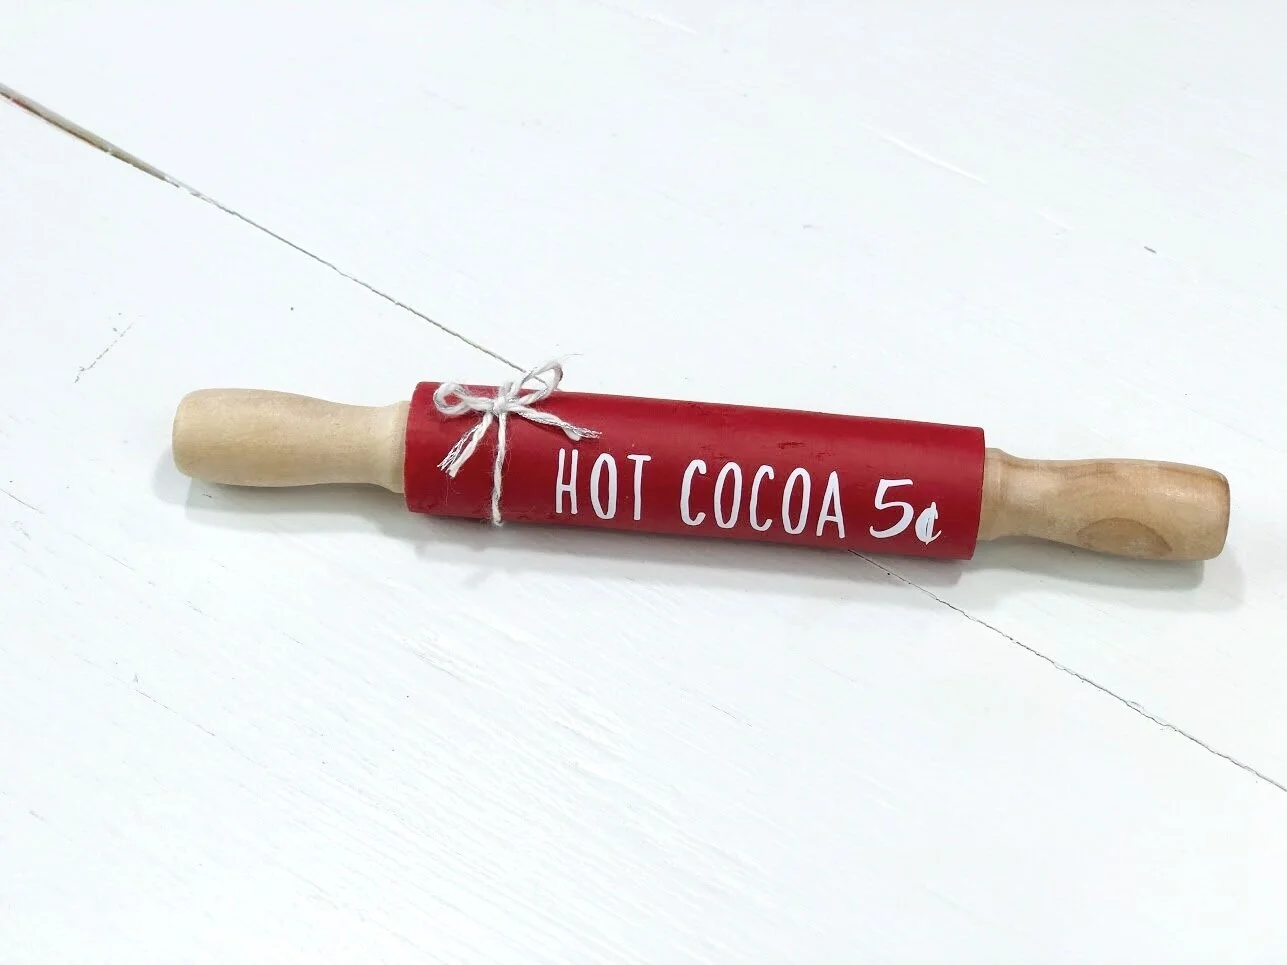
I also made this cute mini wood rolling pin to go on my winter coffee bar and I have a FREE SVG to go with it too.

If you’re just now starting out on your journey into the world of fancy cutting machines (aka a Cricut, Silhouette, or any other brand) be sure to read this post 10 MUST HAVE SUPPLIES & ACCESSORIES TO GET YOU STARTED WITH YOUR CRICUT.

Here’s what I used to make my mini wood winter sign

DIY baby it's cold outside warm up here hot cocoa & coffee bar wood sign. Free SVG for winter coffee bar sign. How to stencil on wood with no paint bleed. DIY wood sign painted stenciled sign with acrylic paint and oramask stencil film.


1.CUT & WEED THE STENCIL

The SVG I used for this sign can be found in my FREE resource library click here, or you can purchase the SVG here. I uploaded it into Cricut Design Space and adjusted it to fit perfectly onto my 5.5”x5.5” wood pine base.

DIY baby it's cold outside warm up here hot cocoa & coffee bar wood sign. Free SVG for winter coffee bar sign. How to stencil on wood with no paint bleed. DIY wood sign painted stenciled sign with acrylic paint and oramask stencil film.

I cut my stencil out on ORAMASK 813 STENCIL FILM. I know, my mat is very loved lol! You can definitely tell I get a lot of use out of my craft supplies.

DIY baby it's cold outside warm up here hot cocoa & coffee bar wood sign. Free SVG for winter coffee bar sign. How to stencil on wood with no paint bleed. DIY wood sign painted stenciled sign with acrylic paint and oramask stencil film.

Typically I suggest using an xacto knife to weed stenciled designs but since this design is so small with lots of lettering I am using a sewing pin instead. This isn’t my go to but for small designs it works much better than an xacto knife.

DIY baby it's cold outside warm up here hot cocoa & coffee bar wood sign. Free SVG for winter coffee bar sign. How to stencil on wood with no paint bleed. DIY wood sign painted stenciled sign with acrylic paint and oramask stencil film.

2. PAINT THE BASE

After my stencil was cut and weeded I painted my wood piece. I used matte finish black acrylic paint for this and my rusty but trusty 1” paint brush. This brush is one of my FAVORITE paint brushes! It may look like a hot mess but it paints beautifully!

DIY baby it's cold outside warm up here hot cocoa & coffee bar wood sign. Free SVG for winter coffee bar sign. How to stencil on wood with no paint bleed. DIY wood sign painted stenciled sign with acrylic paint and oramask stencil film.

I wanted this to look a little more rustic without having to take my sander to it. Instead of a painting all the way to the edges of the wood base I left a slight border around it and I made it super uneven to give it an even more farmhouse-y look. Then I let it dry completely.

3. APPLY THE STENCIL

After my base coat was completely dry I applied my stencil. Be sure when you do this step that your paint is TOTALLY dry. If it’s not the stencil film will peel up the base coat and it will be an ugly mess.

DIY baby it's cold outside warm up here hot cocoa & coffee bar wood sign. Free SVG for winter coffee bar sign. How to stencil on wood with no paint bleed. DIY wood sign painted stenciled sign with acrylic paint and oramask stencil film.

I cut my stencil so it would perfectly fit on my wood base that way I wouldn’t have to stress about centering it and making it all even.

DIY baby it's cold outside warm up here hot cocoa & coffee bar wood sign. Free SVG for winter coffee bar sign. How to stencil on wood with no paint bleed. DIY wood sign painted stenciled sign with acrylic paint and oramask stencil film.

I aligned the stencil on the base and used my vinyl squeegee to press out all the air bubbles. PRO TIP: work from the middle out to press out air bubbles.

DIY baby it's cold outside warm up here hot cocoa & coffee bar wood sign. Free SVG for winter coffee bar sign. How to stencil on wood with no paint bleed. DIY wood sign painted stenciled sign with acrylic paint and oramask stencil film.

Then I removed my stencil film. This removes best when you roll it away from your stencil vs trying to peel it up and off of your stencil.

DIY baby it's cold outside warm up here hot cocoa & coffee bar wood sign. Free SVG for winter coffee bar sign. How to stencil on wood with no paint bleed. DIY wood sign painted stenciled sign with acrylic paint and oramask stencil film.

4. SEAL THE STENCIL

Sealing your stencil isn’t 100% necessary but it does help to keep the paint bleed to a minimum. I use MATTE FINISH MOD PODGE for this.

DIY baby it's cold outside warm up here hot cocoa & coffee bar wood sign. Free SVG for winter coffee bar sign. How to stencil on wood with no paint bleed. DIY wood sign painted stenciled sign with acrylic paint and oramask stencil film.

I paint a super thin coat of mod podge onto my exposed areas of my stencil. Making sure I am almost pushing the mod podge into the stencil creases. Then I let it dry completely. Again, use a SUPER THIN COAT of mod podge if you do this step.

DIY baby it's cold outside warm up here hot cocoa & coffee bar wood sign. Free SVG for winter coffee bar sign. How to stencil on wood with no paint bleed. DIY wood sign painted stenciled sign with acrylic paint and oramask stencil film.

5.PAINT THE STENCIL

After my mod podge was dry I painted the exposed areas of my stencil with white acrylic paint.

DIY baby it's cold outside warm up here hot cocoa & coffee bar wood sign. Free SVG for winter coffee bar sign. How to stencil on wood with no paint bleed. DIY wood sign painted stenciled sign with acrylic paint and oramask stencil film.

I let the first coat dry then I painted a second coat.

DIY baby it's cold outside warm up here hot cocoa & coffee bar wood sign. Free SVG for winter coffee bar sign. How to stencil on wood with no paint bleed. DIY wood sign painted stenciled sign with acrylic paint and oramask stencil film.

Be sure when you do this step that you paint SUPER THIN layers. If your paint layers are too thick then your paint will peel up with you peel up your stencil.

6. PEEL UP THE STENCIL

Everyone is different but for me I always peel up my stencil while my paint is still wet. This method has worked for me on the THOUSANDS of signs I have painted so this is the method that I always recommend.

DIY baby it's cold outside warm up here hot cocoa & coffee bar wood sign. Free SVG for winter coffee bar sign. How to stencil on wood with no paint bleed. DIY wood sign painted stenciled sign with acrylic paint and oramask stencil film.

Start from one corner and peel toward the opposite corner.

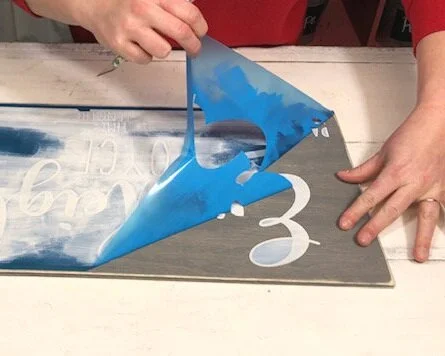
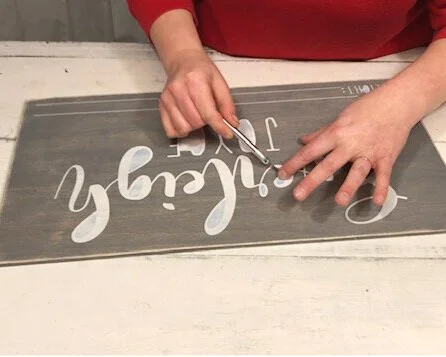
Then use your sewing pin or an xacto knife to take out all of the little middle pieces. If you accidently get paint on your base paint no worries. When the paint is all dry just take a paint brush and paint over all of the little mistakes.

DIY baby it's cold outside warm up here hot cocoa & coffee bar wood sign. Free SVG for winter coffee bar sign. How to stencil on wood with no paint bleed. DIY wood sign painted stenciled sign with acrylic paint and oramask stencil film.

7. TOUCH UP

When the paint is all dry just take a paint brush and paint over all of the little mistakes.

After my sign was dry I put it up on my coffee bar even though it was almost 11pm lol!! No wonder my pic turned out super blah and yellow with the lighting . That’s ok!

DIY baby it's cold outside warm up here hot cocoa & coffee bar wood sign. Free SVG for winter coffee bar sign. How to stencil on wood with no paint bleed. DIY wood sign painted stenciled sign with acrylic paint and oramask stencil film.

Let me know what you think in the comments below.

Check out more DIY sign painting projects

Dollar Tree Christmas Tree rustic decoration

DIY Dollar Tree farmhouse Christmas tree. What to do with the mini Christmas trees from the dollar tree. Easy way to use the cheap Christmas trees from the dollar store. Rustic farmhouse Christmas decor on a budget.

Have you been to the Dollar Tree lately? I don’t get there as often as I’d like but I did get a chance to stop in last night and WOW their Christmas supply gets better and better every year!

They have these cute Charlie Brown looking Christmas trees this year and I just couldn’t leave the store without buying a couple of them.

Affiliate Disclosure. Some of the links on this website are affiliate links, which means that I may earn a small commission if you click on the link or make a purchase using the link. If you make a purchase you will not be charged anything additional.

DIY Dollar Tree farmhouse Christmas tree. What to do with the mini Christmas trees from the dollar tree. Easy way to use the cheap Christmas trees from the dollar store. Rustic farmhouse Christmas decor on a budget.

This DIY was SUPER easy! It was almost mess free and it was ready to put on the shelf in just a matter of minutes from taking it out of the plastic Dollar Tree bag.

EASY DOLLAR TREE CHRISTMAS TREE DIY

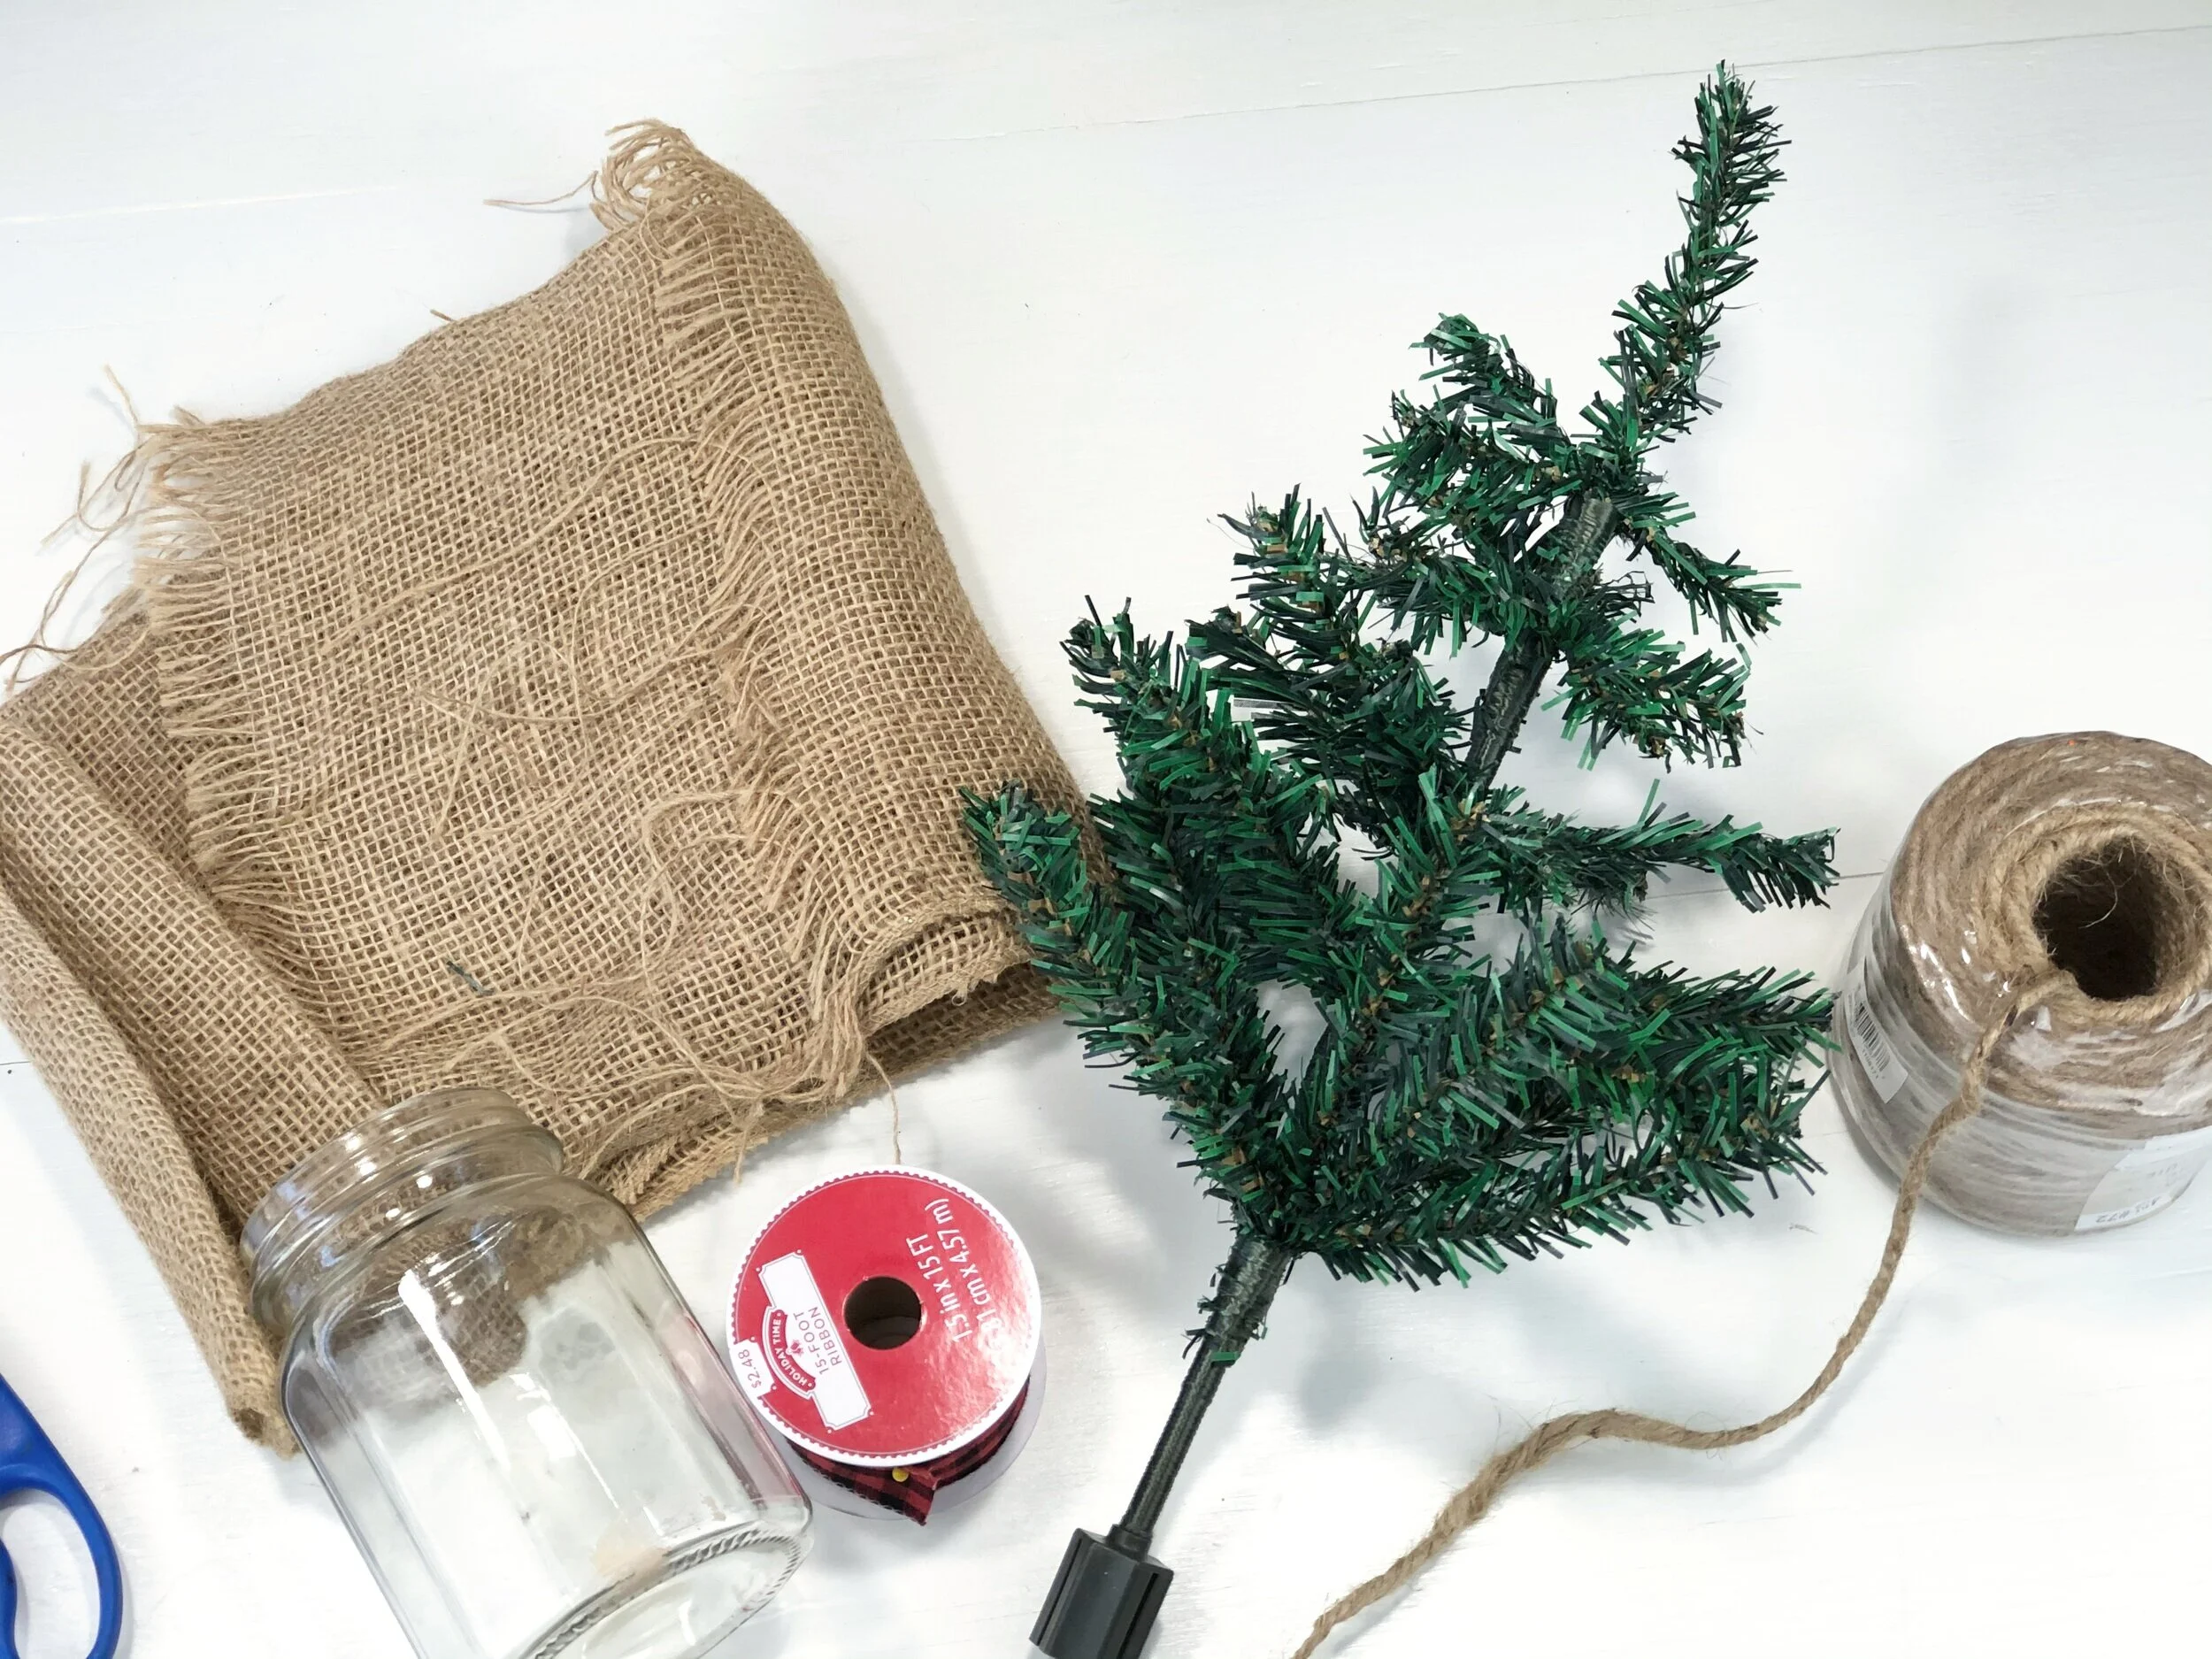
Here’s what I used

DIY Dollar Tree farmhouse Christmas tree. What to do with the mini Christmas trees from the dollar tree. Easy way to use the cheap Christmas trees from the dollar store. Rustic farmhouse Christmas decor on a budget.

I had everything except for the Christmas tree on hand which was awesome because when I bought the tree I had no idea what exactly I was going to do with it. Which is usually how I shop for my projects lol!

1. CUT THE BURLAP TO SIZE

I used a piece of scrap burlap I had from years ago (I don’t throw anything away lol). I placed my old jar on the burlap, pulled the burlap up over the glass so I’d know how big of a piece I’d need.

DIY Dollar Tree farmhouse Christmas tree. What to do with the mini Christmas trees from the dollar tree. Easy way to use the cheap Christmas trees from the dollar store. Rustic farmhouse Christmas decor on a budget.

Then I cut that into a circle. I just eyeballed this. Also, this glass used to hold craft supplies and since I was covering it I didn’t think I needed to give it a bath first.

2. ADD TWINE

DIY Dollar Tree farmhouse Christmas tree. What to do with the mini Christmas trees from the dollar tree. Easy way to use the cheap Christmas trees from the dollar store. Rustic farmhouse Christmas decor on a budget.

I didn’t get super fancy with this at all. I cut off a piece of twine I thought would be long enough to tie around the bottom lip of the glass then then pulled it tight and tied it in a bow.

DIY Dollar Tree farmhouse Christmas tree. What to do with the mini Christmas trees from the dollar tree. Easy way to use the cheap Christmas trees from the dollar store. Rustic farmhouse Christmas decor on a budget.

3. ADD THE TREE

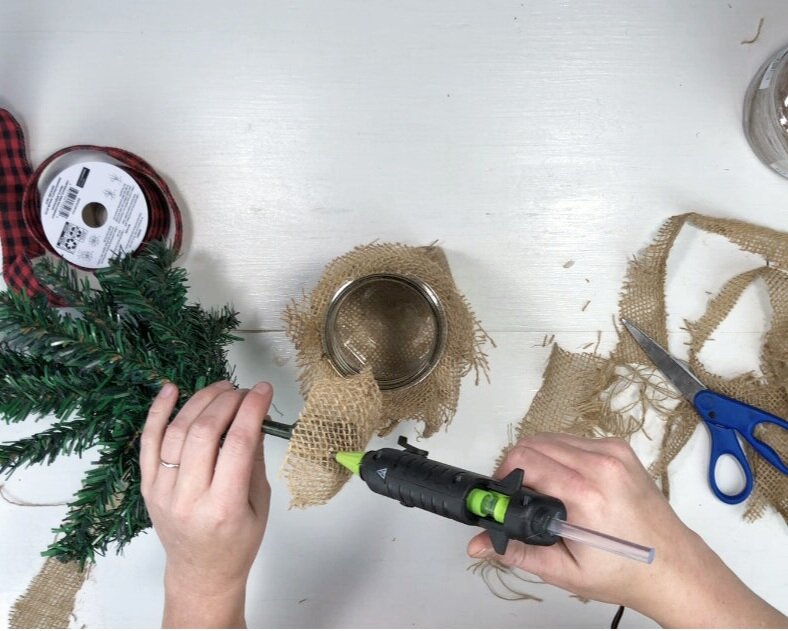
I didn’t want to mess with stuffing anything into the jar to hold the tree up so instead I hot glued it in. This took a bit of trial and error before I finally got it to stick right.

What worked for me was taking a piece of the discarded burlap and hot gluing it to the bottom of the tree.

DIY Dollar Tree farmhouse Christmas tree. What to do with the mini Christmas trees from the dollar tree. Easy way to use the cheap Christmas trees from the dollar store. Rustic farmhouse Christmas decor on a budget.

Then I added more hot glue to the bottom of the burlap and stuck the tree in the glass jar. I held it there till the glue was dry. It didn’t budge after that!

DIY Dollar Tree farmhouse Christmas tree. What to do with the mini Christmas trees from the dollar tree. Easy way to use the cheap Christmas trees from the dollar store. Rustic farmhouse Christmas decor on a budget.

4. LIGHTS

My tree was looking kind of sad so I found some lights I had bought from the Dollar Tree over the summer and strung them on the tree. They are battery operated so I just stuck the battery pack into the glass jar to hide it.

DIY Dollar Tree farmhouse Christmas tree. What to do with the mini Christmas trees from the dollar tree. Easy way to use the cheap Christmas trees from the dollar store. Rustic farmhouse Christmas decor on a budget.

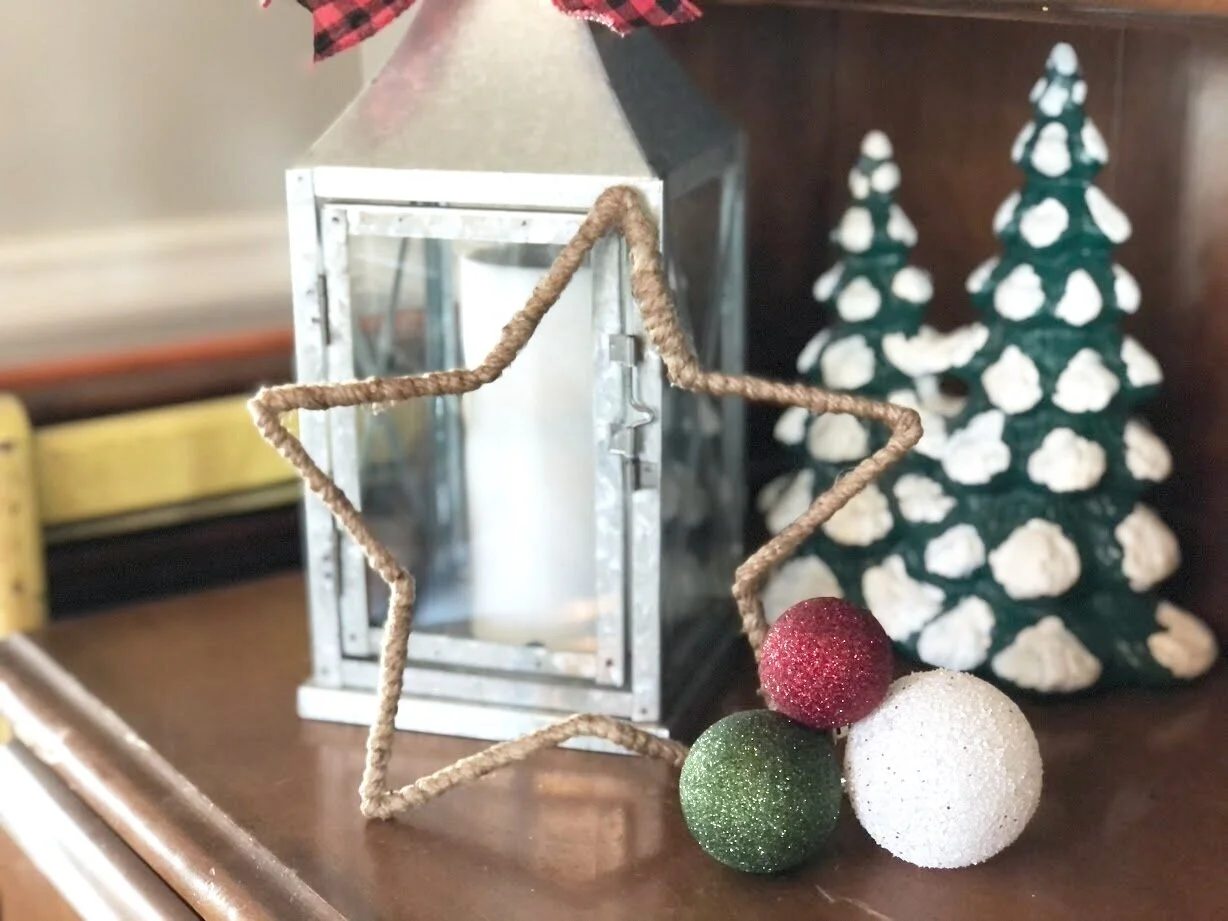
That’s it! It turned out SOOOOO CUTE! And so crazy easy! It’s nice to do a craft sometimes where the results are kinda instant and you don’t have to wash out any paint brushes or clean up hardly anything.

DIY Dollar Tree farmhouse Christmas tree. What to do with the mini Christmas trees from the dollar tree. Easy way to use the cheap Christmas trees from the dollar store. Rustic farmhouse Christmas decor on a budget.

I can’t wait to get more of my Christmas decorations made for my new house! Let me know if you have any questions about this DIY in the comments below.

Happy Crafting!

Check out more Christmas DIY tutorials below


Flying bat sign, easy DIY sign for Halloween

DIY flying bat sign using your Cricut cutting machine. How to make cardstock flying bats for Halloween. Easy and simple rustic Halloween Decor for your farmhouse style

DIY - Super simple Halloween sign

This year I decorated for Halloween instead of my typical fall only décor. My girls are loving it! One piece they have especially loved, and I must say I do too, is my flying bat sign I made. It was so crazy simple to make too!

The best part of this wooden Halloween sign is that once Halloween is over I can simply take the bats off and replace them with something else.

If you love this DIY be sure to check out this framed Halloween sign I made for my front porch…p.s. it has a FREE SVG to use ;)!

Affiliate Disclosure. Some of the links on this website are affiliate links, which means that I may earn a small commission if you click on the link or make a purchase using the link. If you make a purchase you will not be charged anything additional.

The Best Machine for DIY Projects

MAKE YOUR OWN FLYING BAT SIGN

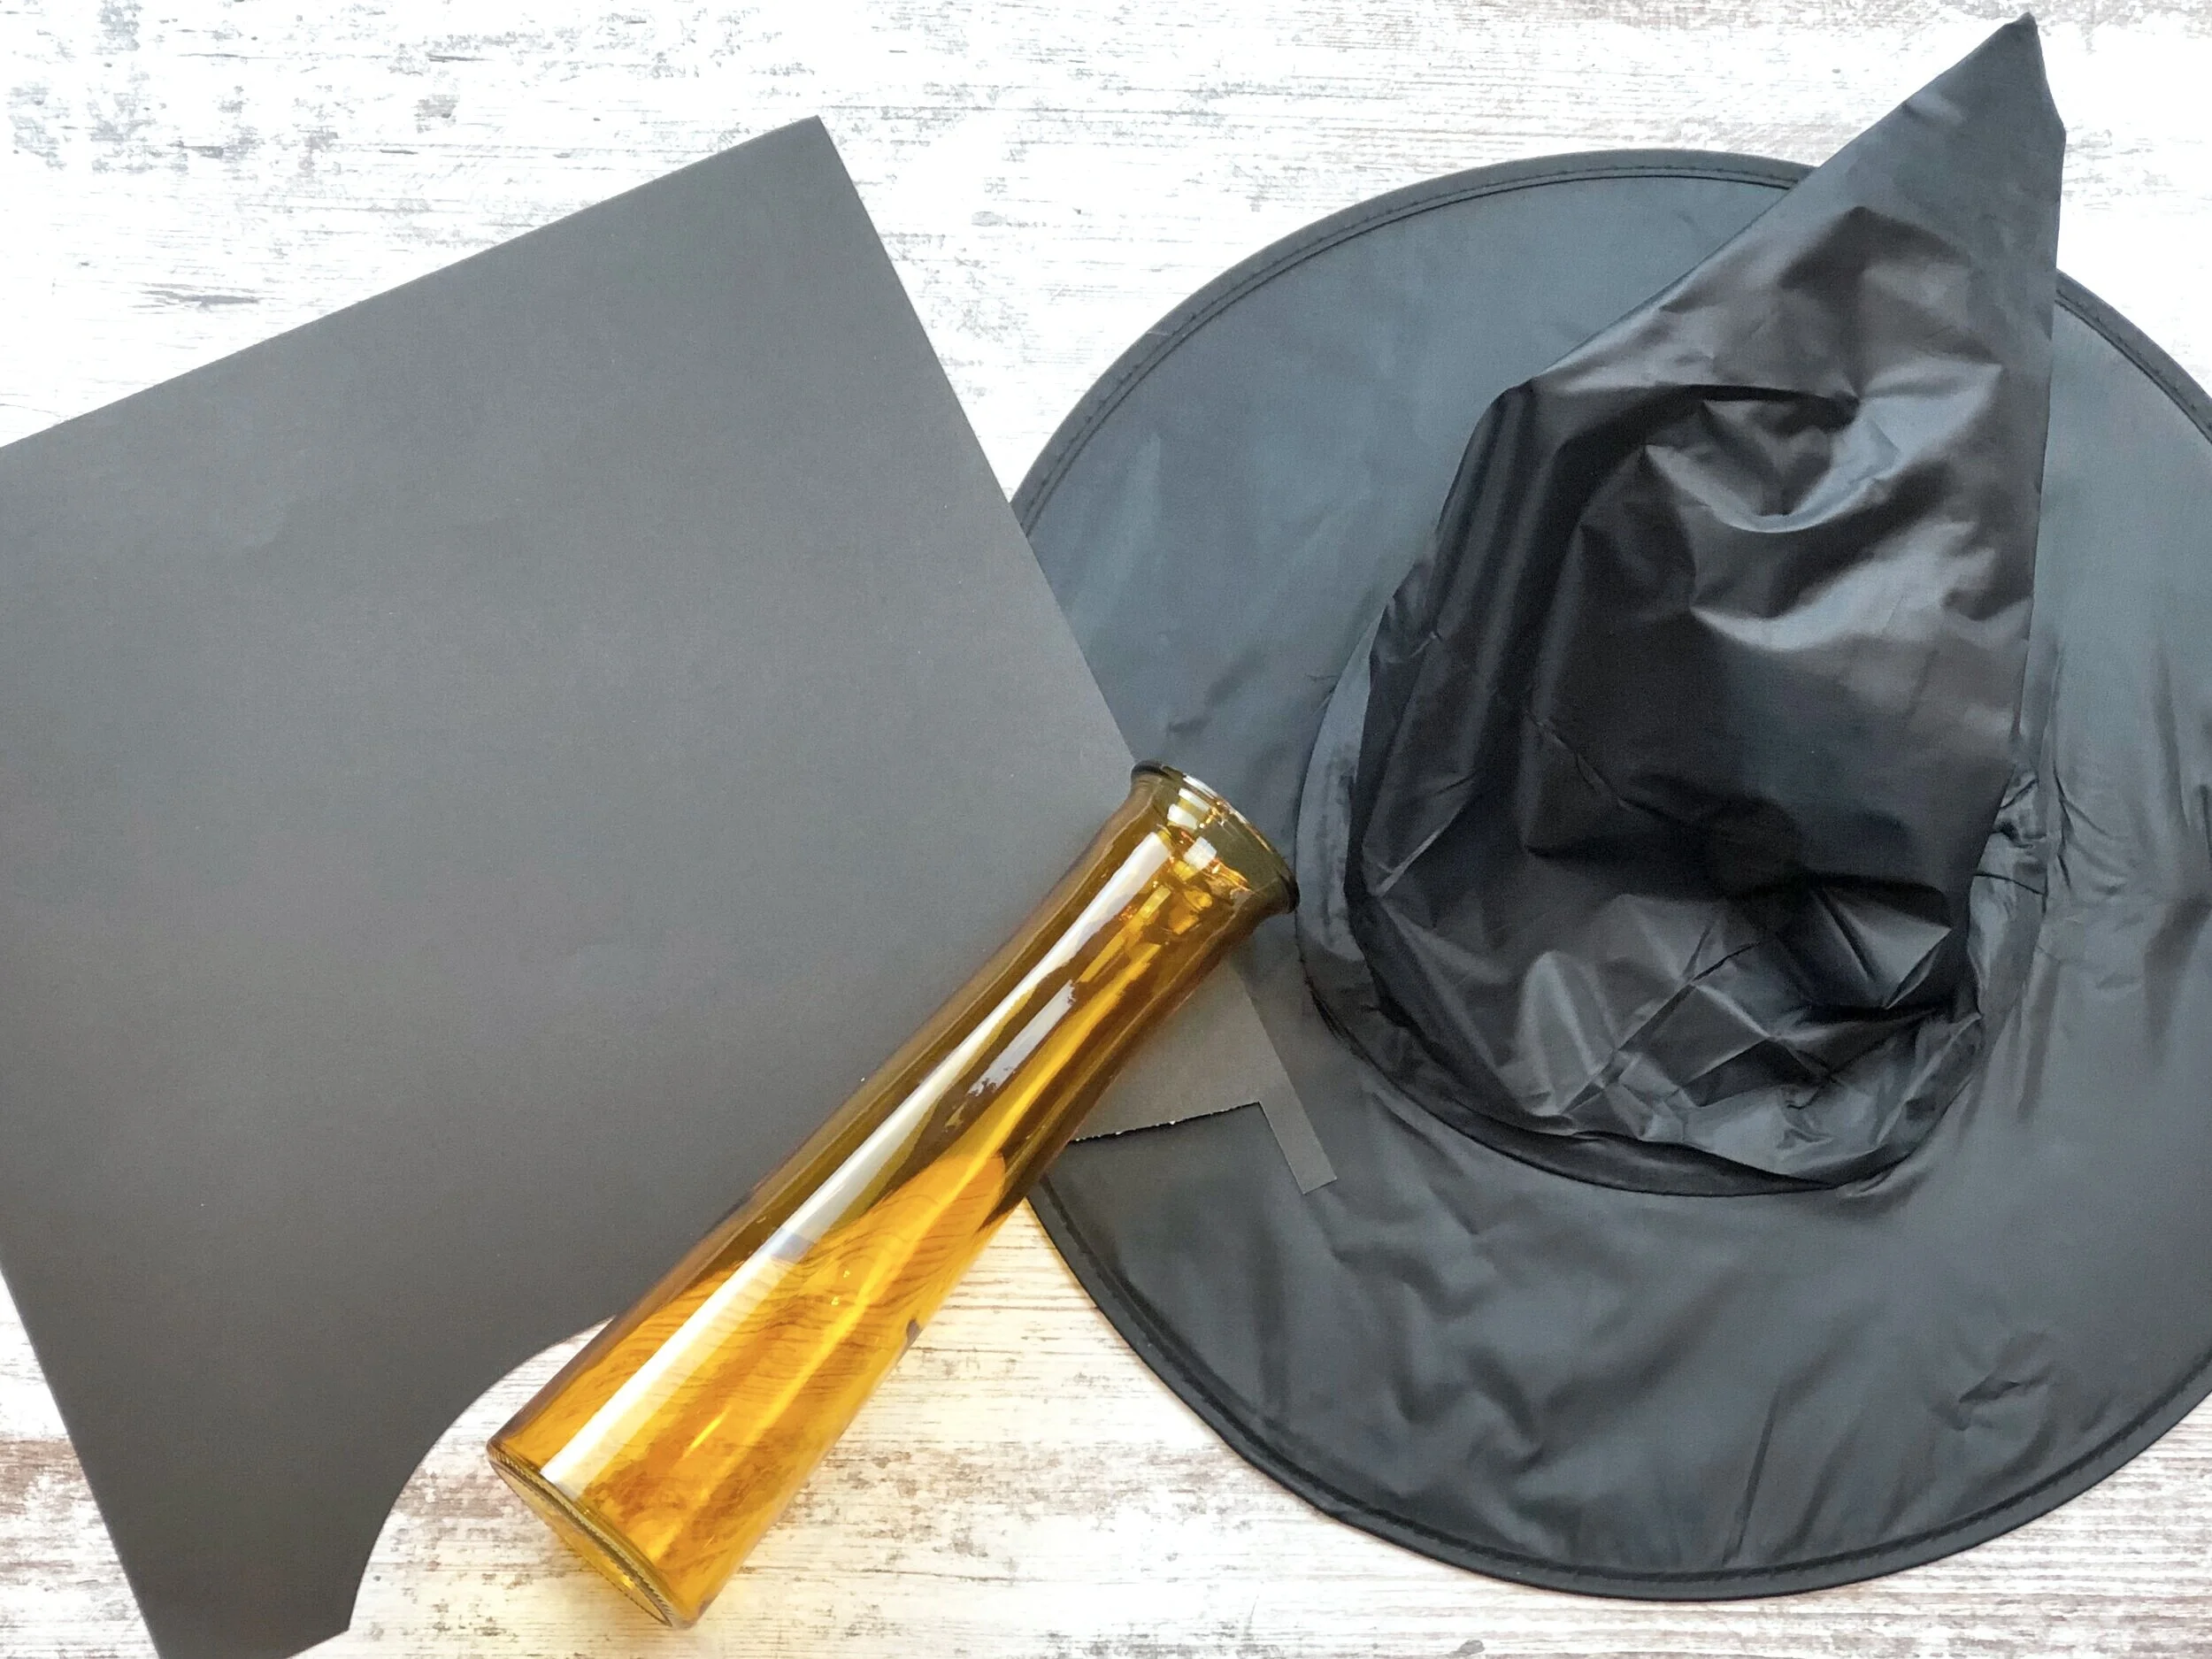
Here’s what you’ll need

If you’re new to the Cricut crafting world be sure to check out my post on 10 must have supplies and accessories when starting out using a Cricut cutting machine.

1. CUT OUT CARDSTOCK BATS

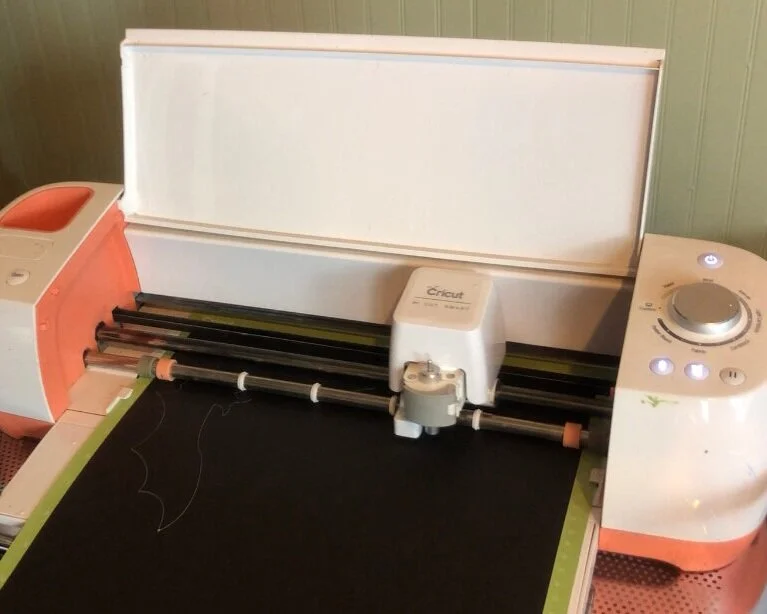
I used my older model Cricut Explore to cut out my cardstock bats. If you have Cricut Access you can use the Cricut image, click here for the link.

DIY flying bat sign using your Cricut cutting machine. How to make cardstock flying bats for Halloween. Easy and simple rustic Halloween Decor for your farmhouse style

2. REMOVE THE BAT CUT OUTS FROM YOUR GREEN CUTTING MAT

It’s easier to flip the cardstock facedown on your table then slowly roll the mat away from the material you’ve just cut.

DIY flying bat sign using your Cricut cutting machine. How to make cardstock flying bats for Halloween. Easy and simple rustic Halloween Decor for your farmhouse style

3. ARRANGE THE BATS

Before you put tape on the back of them decide where you want them to go. This took me entirely too long lol!

DIY flying bat sign using your Cricut cutting machine. How to make cardstock flying bats for Halloween. Easy and simple rustic Halloween Decor for your farmhouse style

4. MAKE THE BATS FLY

Give the bats some movement by gently curving their wings upward. I used a pencil to curl the wings up so they didn’t have creases.

DIY flying bat sign using your Cricut cutting machine. How to make cardstock flying bats for Halloween. Easy and simple rustic Halloween Decor for your farmhouse style

5. TAPE THE BATS DOWN

I used double sided tape to temporarily tape them to my wooden pallet style sign.

DIY flying bat sign using your Cricut cutting machine. How to make cardstock flying bats for Halloween. Easy and simple rustic Halloween Decor for your farmhouse style

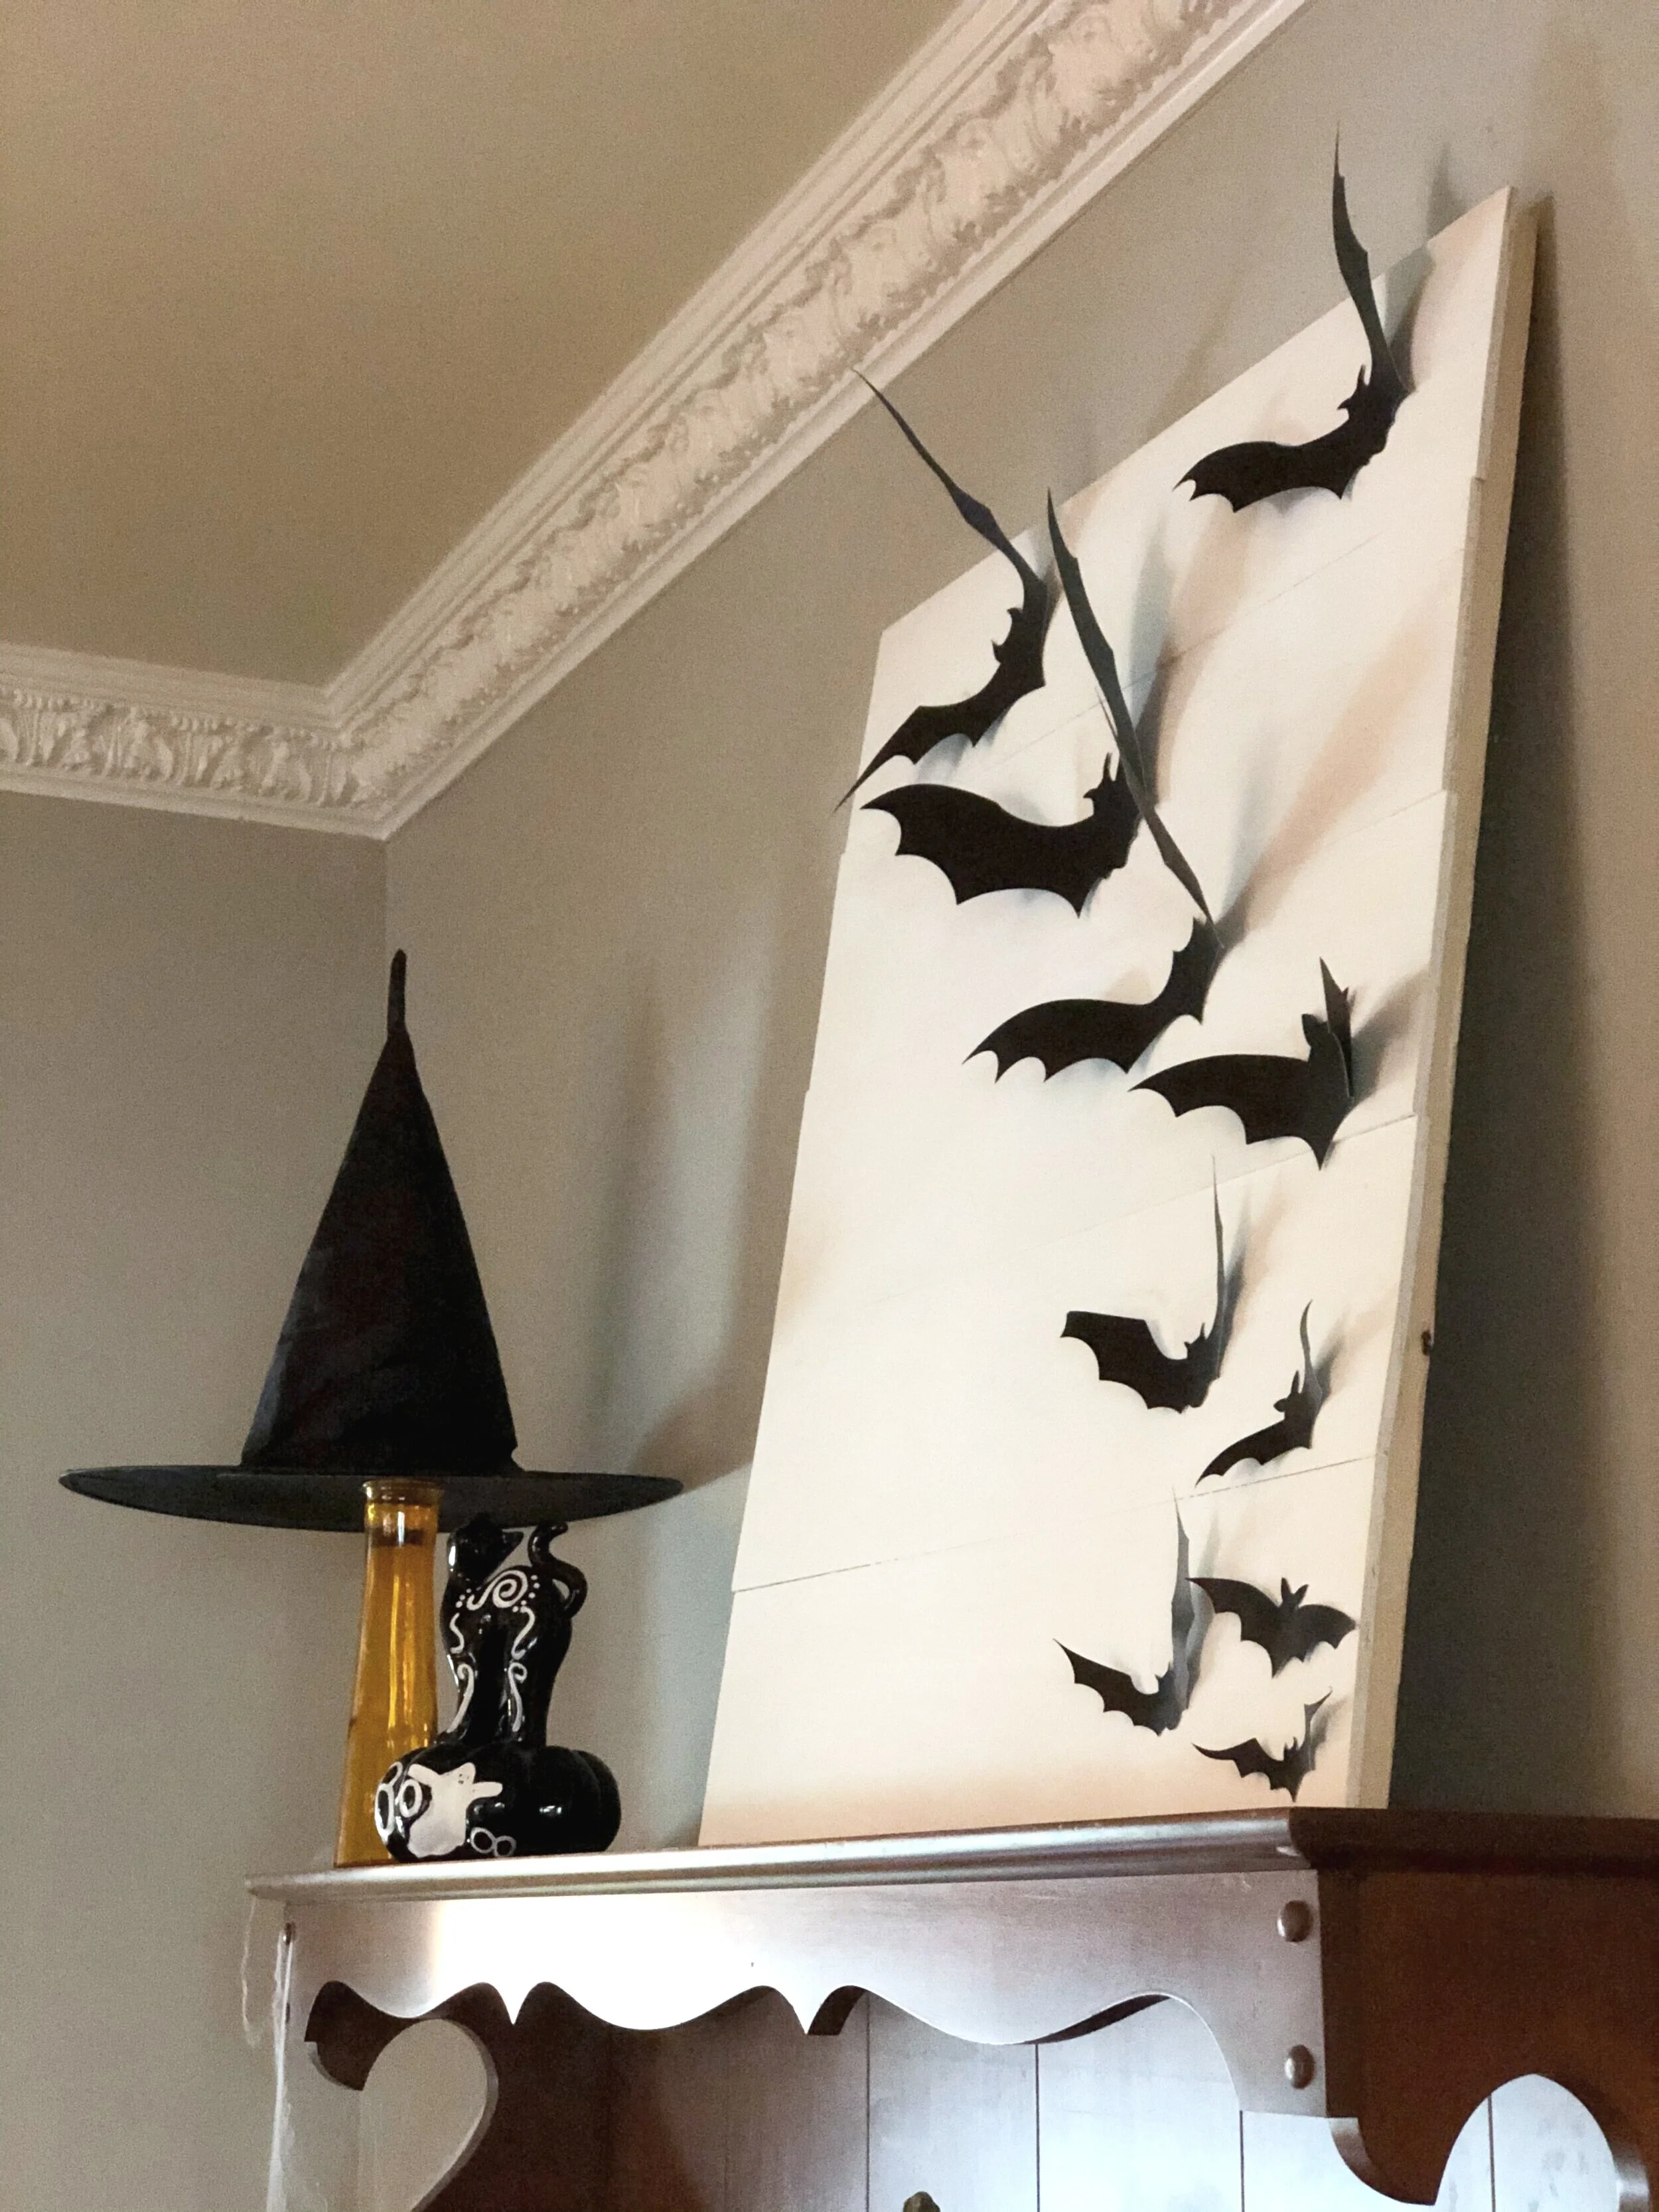
This is seriously my favorite piece in the house for Halloween! It’s crazy simple but it gives the spooky décor a little something extra ya know?! I love it!

DIY flying bat sign using your Cricut cutting machine. How to make cardstock flying bats for Halloween. Easy and simple rustic Halloween Decor for your farmhouse style

I hope you loved this simple decoration to add to your own home for the Halloween season. Let me know if you have any questions in the comments below.

Happy Crafting!

Check out more of my Halloween & fall craft tutorials

Rustic It's Halloween Witches framed leaning porch sign + FREE SVG

DIY Halloween framed leaning porch sign for your fall rustic farmhouse home decor. How to paint a Halloween front porch sign. It's Halloween witches large Halloween sign

Rustic It's Halloween Witches framed leaning porch sign + FREE SVG

Make your own vertical rustic farmhouse leaning porch sign for Halloween. Bonus: grab the It’s Halloween Witches FREE SVG in my free to use resource library

It’s Halloween Witches! YES! I can’t believe how amazing this painted sign turned out. It has all the gorgeous elements of farmhouse basics but a not so common (on a porch sign) Halloween saying…which makes me extra love it! I could have went with a basic cutesy saying like “boo” or “trick or treat” but I wanted my porch sign to have just a bit of sass to it! And it totally does and fits my family SO well. We are a bit sarcastic and sassy lol!

DIY Halloween framed leaning porch sign for your fall rustic farmhouse home decor. How to paint a Halloween front porch sign. It's Halloween witches large Halloween sign

Affiliate Disclosure. Some of the links on this website are affiliate links, which means that I may earn a small commission if you click on the link or make a purchase using the link. If you make a purchase you will not be charged anything additional.

And I kept the back of it blank, well I went ahead and painted it white, so I could make it a reversible fall leaning sign later on. I’m all about getting double use out of my décor. I’m a momma of 4, double sided or dual purpose décor is wonderful in my world. Less to store and less to change out when the seasons change.

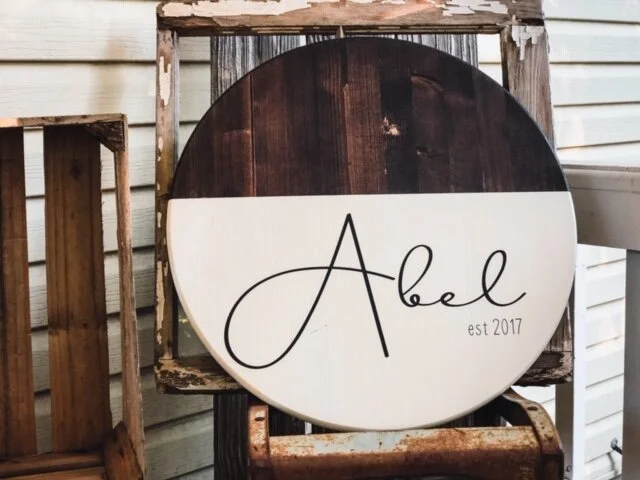
I have actually had this piece of 1x10 pine hanging around forever! I stained it when I stained this round wood base for this last name sign a couple years ago and am just now getting around to creating on them. Life of a mom and entrepreneur! Here’s what it looked like before I smothered it in creativity. Just a blank stained piece of wood. You can’t see it in this pic but it had a ton of scratches and some gouges on it from being moved around so much in my craft room over the last couple of years.

DIY Halloween framed leaning porch sign for your fall rustic farmhouse home decor. How to paint a Halloween front porch sign. It's Halloween witches large Halloween sign

If you don’t already have a Cricut I HIGHLY recommend getting one. I still create on my old Cricut Explore and create some pretty awesome projects to share with the world ;) Cricut newbie? Read this post on 10 supplies and accessories you need to get started with your cutting machine.

Side note… If you need the checkered rug that’s on my porch get this one. I looked for hours trying to find the exact one and this one is perfect. I don’t have OCD but I really specifically wanted one that had the same stripe on the top and bottom so that it looked even and this one was the only one I came across that that did in the size that I needed it.

How to make a rustic farmhouse leaning Halloween porch sign you will love

Here’s what you’ll need

1.PAINT THE BASE

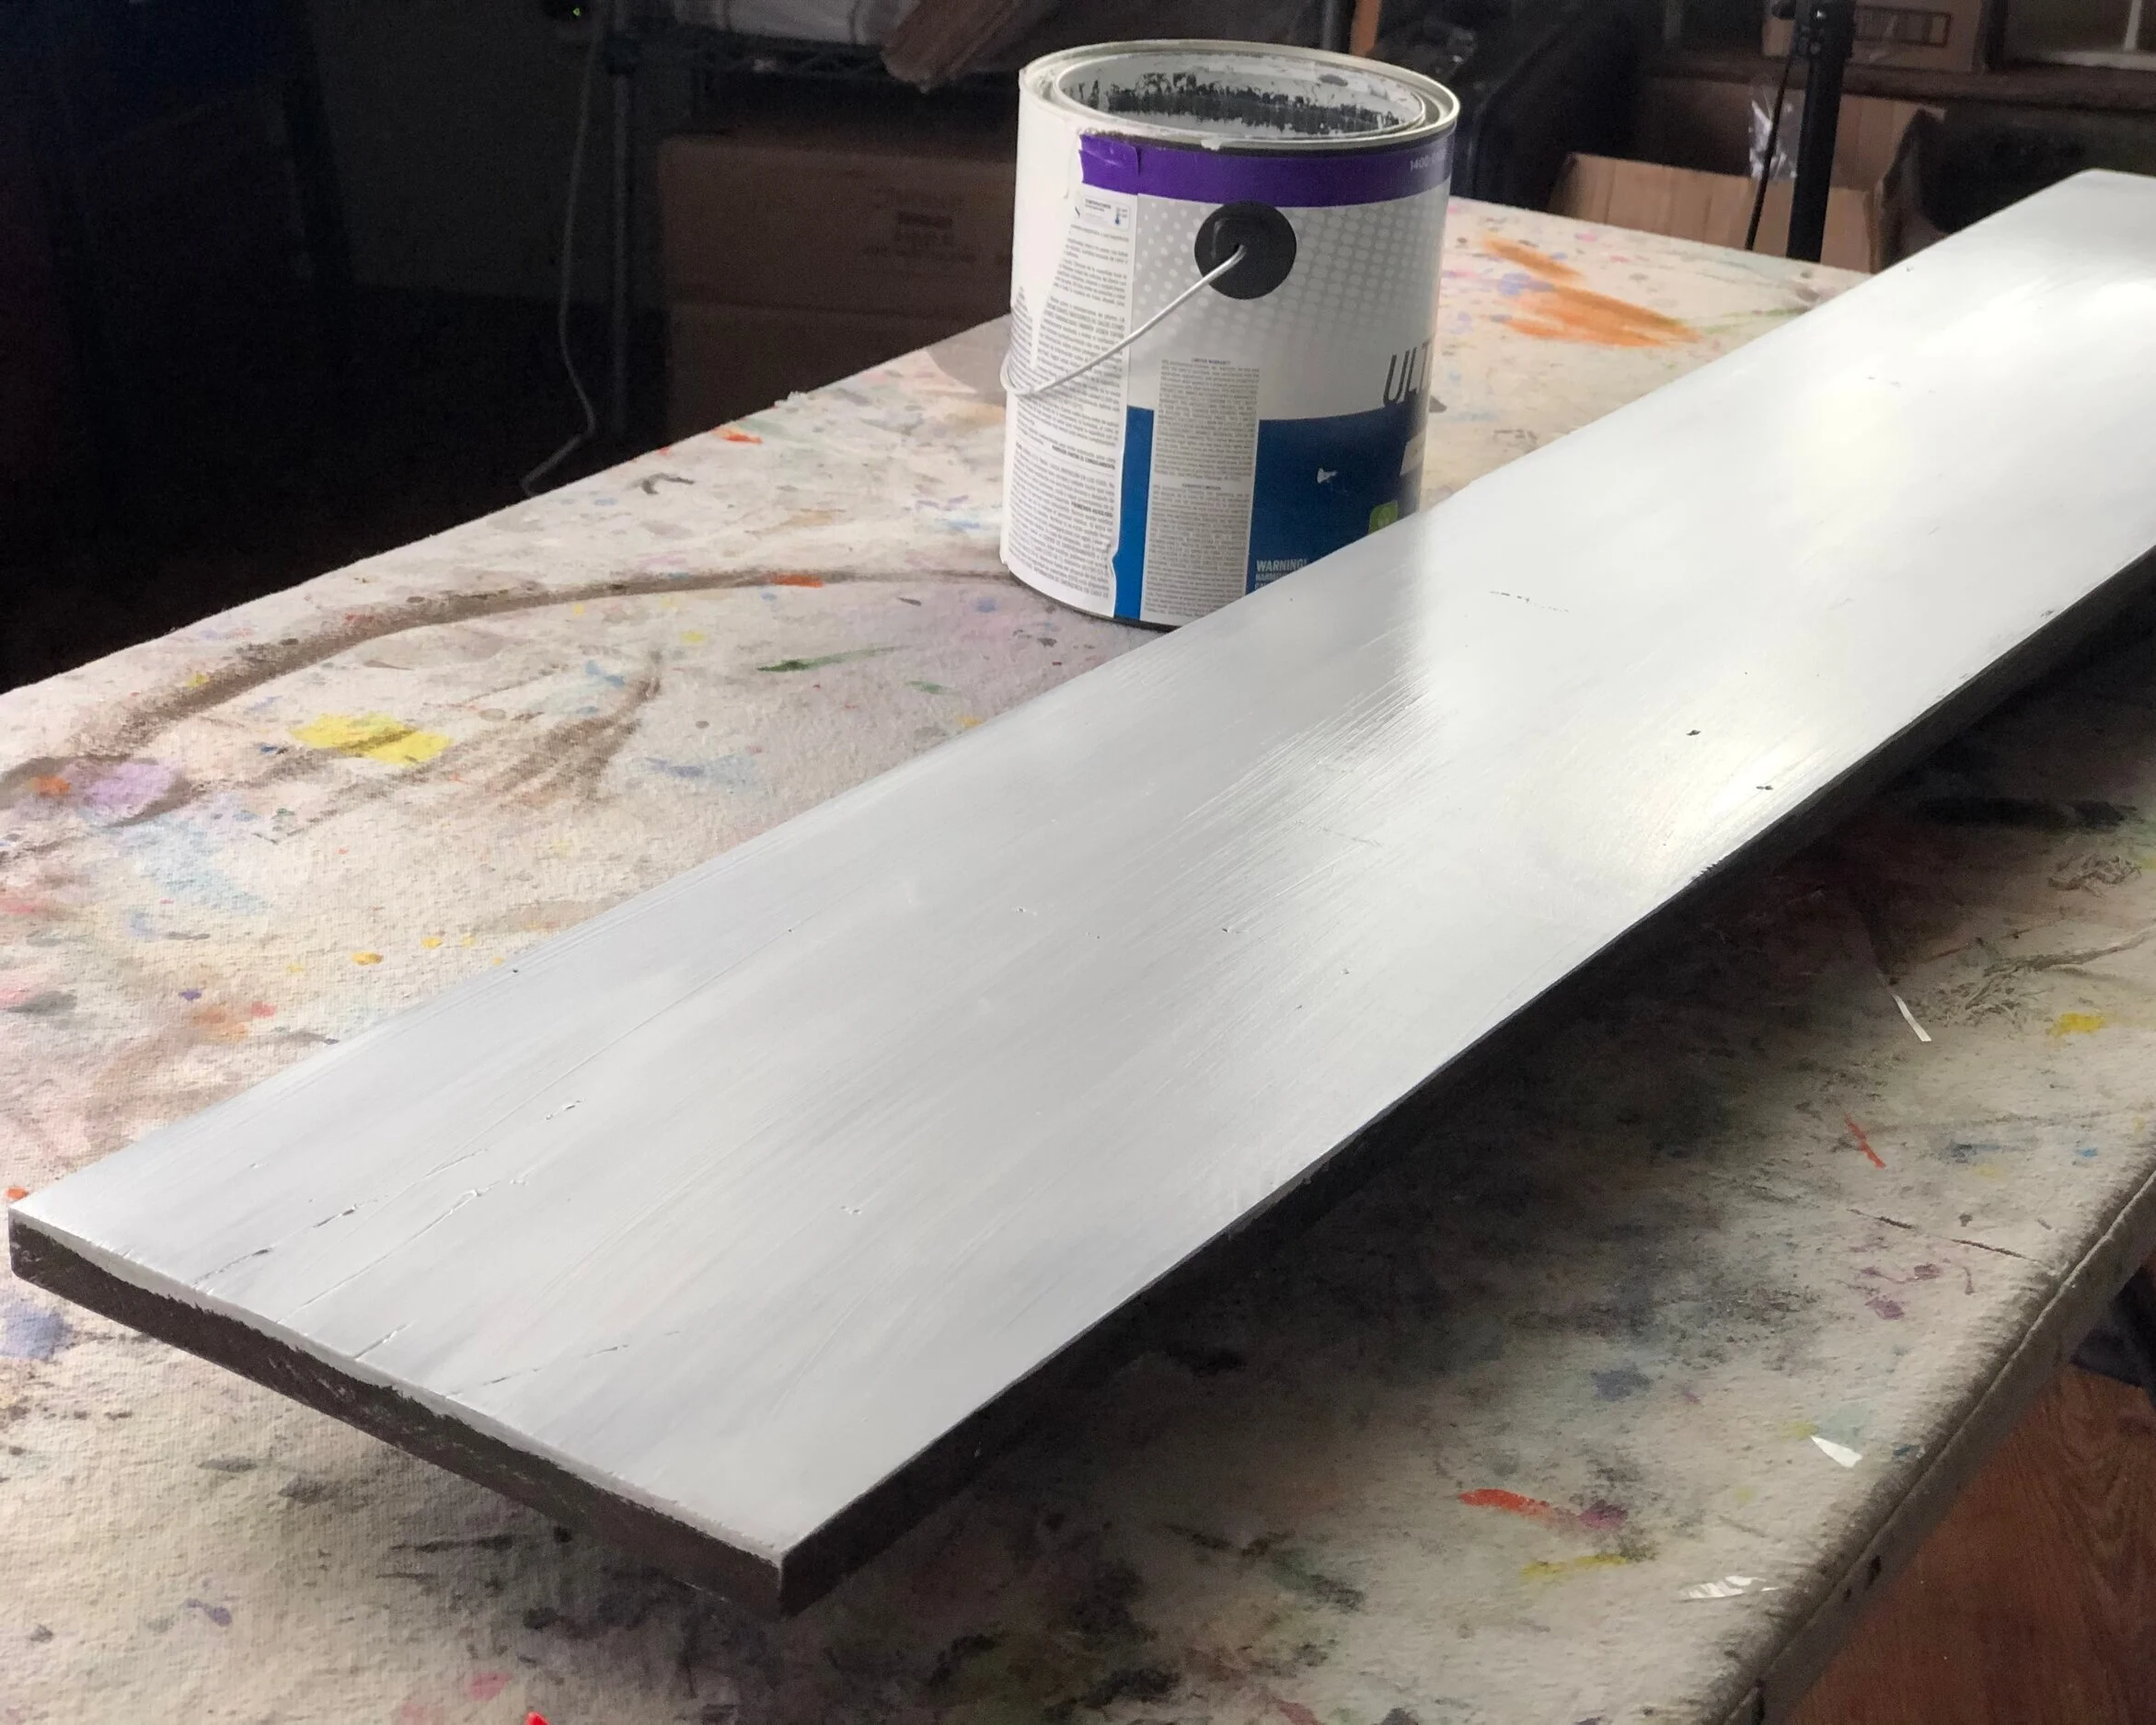
I chose to use a board that was already stained. This is not a must but I do like that the stain peaks through the sanded bits of my sign. I painted my wood sign with two coats of white wall paint. You can use acrylic paint too. I didn’t have white acrylic to use so I used the wall paint instead and it works just as great.

DIY Halloween framed leaning porch sign for your fall rustic farmhouse home decor. How to paint a Halloween front porch sign. It's Halloween witches large Halloween sign

After my first coat was dry I applied a second coat of white paint then let that completely dry.

DIY Halloween framed leaning porch sign for your fall rustic farmhouse home decor. How to paint a Halloween front porch sign. It's Halloween witches large Halloween sign

2. APPLY THE STENCIL

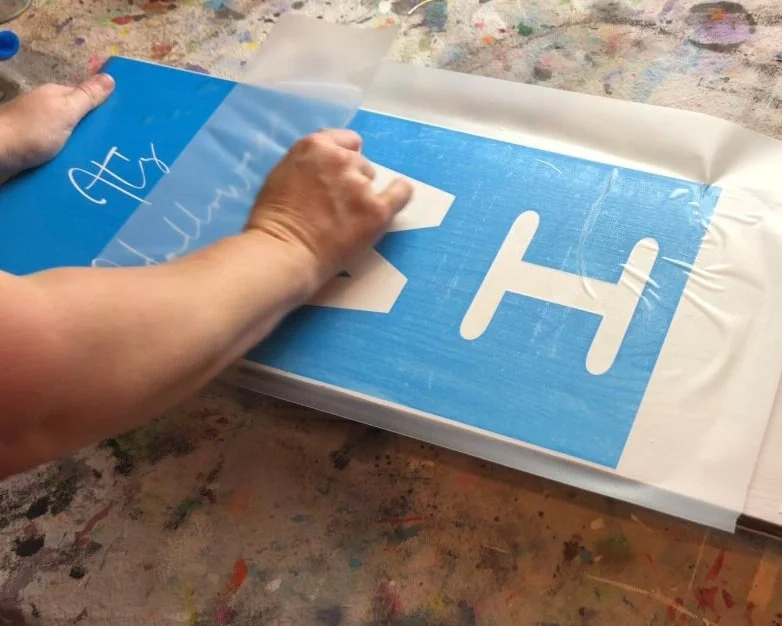
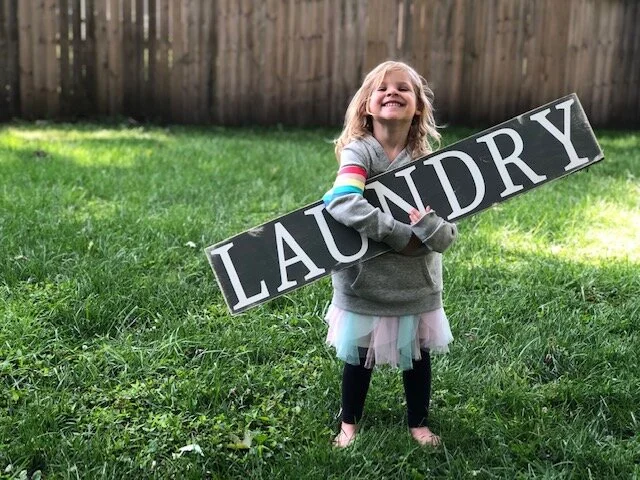
I cut my stencils out on my Cricut then weeded the letters out with a sewing pin. If you want to know how to make a reverse stencil sign be sure to check out this laundry sign tutorial.

DIY Halloween framed leaning porch sign for your fall rustic farmhouse home decor. How to paint a Halloween front porch sign. It's Halloween witches large Halloween sign

Because this sign was so large I had to break it up into three separate pieces in Design Space.

DIY Halloween framed leaning porch sign for your fall rustic farmhouse home decor. How to paint a Halloween front porch sign. It's Halloween witches large Halloween sign

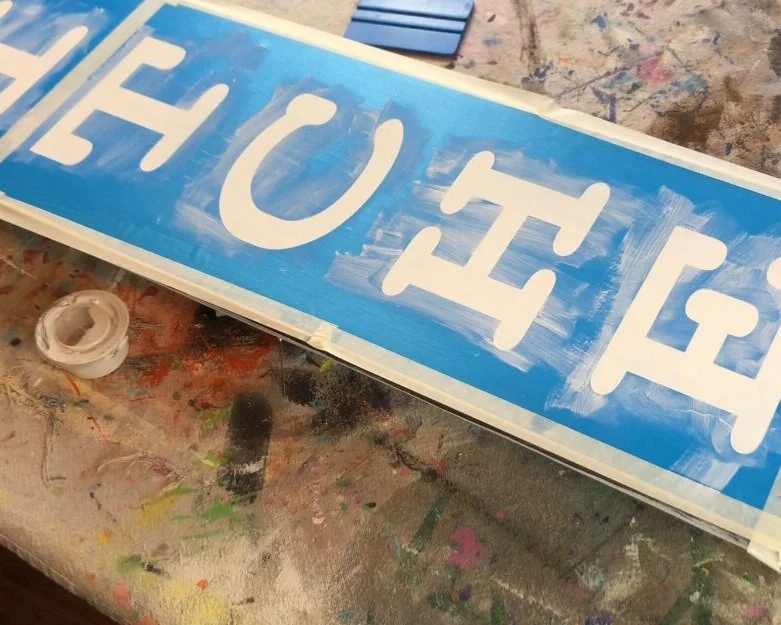
I added masking tape to the sides and the seams where the stencils touch just in case I got paint a little too far outside of the stencil I wouldn’t have a big mess to clean up.

3.PAINT THE STENCIL

I used acrylic paint to paint the lettering of my stencil. The first thing I did was seal my stencil so that I would get minimal to no paint bleed. This isn’t a must but it does help to get super crisp lines.

DIY Halloween framed leaning porch sign for your fall rustic farmhouse home decor. How to paint a Halloween front porch sign. It's Halloween witches large Halloween sign

I just painted of paint on the lettering. I painted IT’S and WITCHES with black acrylic paint and HALLOWEEN with orange acrylic paint.

DIY Halloween framed leaning porch sign for your fall rustic farmhouse home decor. How to paint a Halloween front porch sign. It's Halloween witches large Halloween sign

4. PEEL UP THE STENCIL

I always peel up my stencils while my paint is wet. I started with the small lettering first then worked my way down the wood sign.

DIY Halloween framed leaning porch sign for your fall rustic farmhouse home decor. How to paint a Halloween front porch sign. It's Halloween witches large Halloween sign

I used a sewing pin to lift out all the little middle pieces

DIY Halloween framed leaning porch sign for your fall rustic farmhouse home decor. How to paint a Halloween front porch sign. It's Halloween witches large Halloween sign

If you love this tutorial be sure to check out how to make these super cute Halloween wood tags

5.CUT & STAIN THE FRAME

After my sign was dry I measured a 1x2 and cut pieces for my frame. Here’s what it looked like once I got my pieces cut and stained.

I had 2 pieces that were cut at 52” and 2 pieces that were cut at 10.75”.

DIY Halloween framed leaning porch sign for your fall rustic farmhouse home decor. How to paint a Halloween front porch sign. It's Halloween witches large Halloween sign

Before I attached my framed pieces to my Halloween sign I distressed the 1x2’s with my sander and 120 grit sandpaper

DIY Halloween framed leaning porch sign for your fall rustic farmhouse home decor. How to paint a Halloween front porch sign. It's Halloween witches large Halloween sign

7. ATTACH THE FRAME

I attached the two long side pieces first. I used a little bit of wood glue then used my Ryobi brad nailer to attach them to the sign.

DIY Halloween framed leaning porch sign for your fall rustic farmhouse home decor. How to paint a Halloween front porch sign. It's Halloween witches large Halloween sign

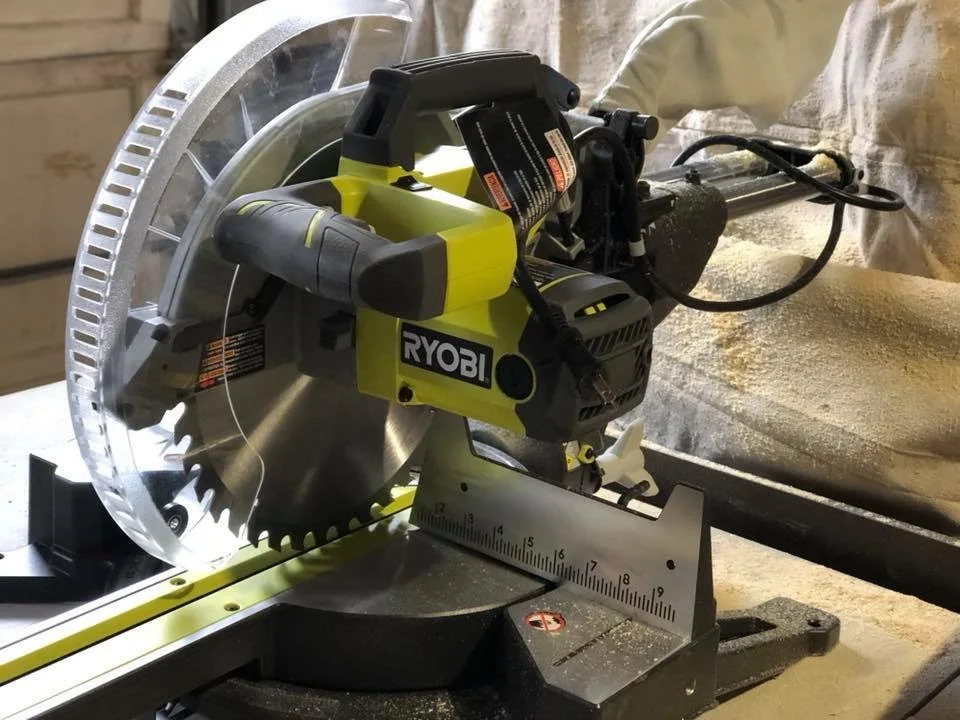
Don’t worry if you miss cut your wood frame pieces. I do this ALL the time. Just use your miter saw to square it up after you get them attached.

DIY Halloween framed leaning porch sign for your fall rustic farmhouse home decor. How to paint a Halloween front porch sign. It's Halloween witches large Halloween sign

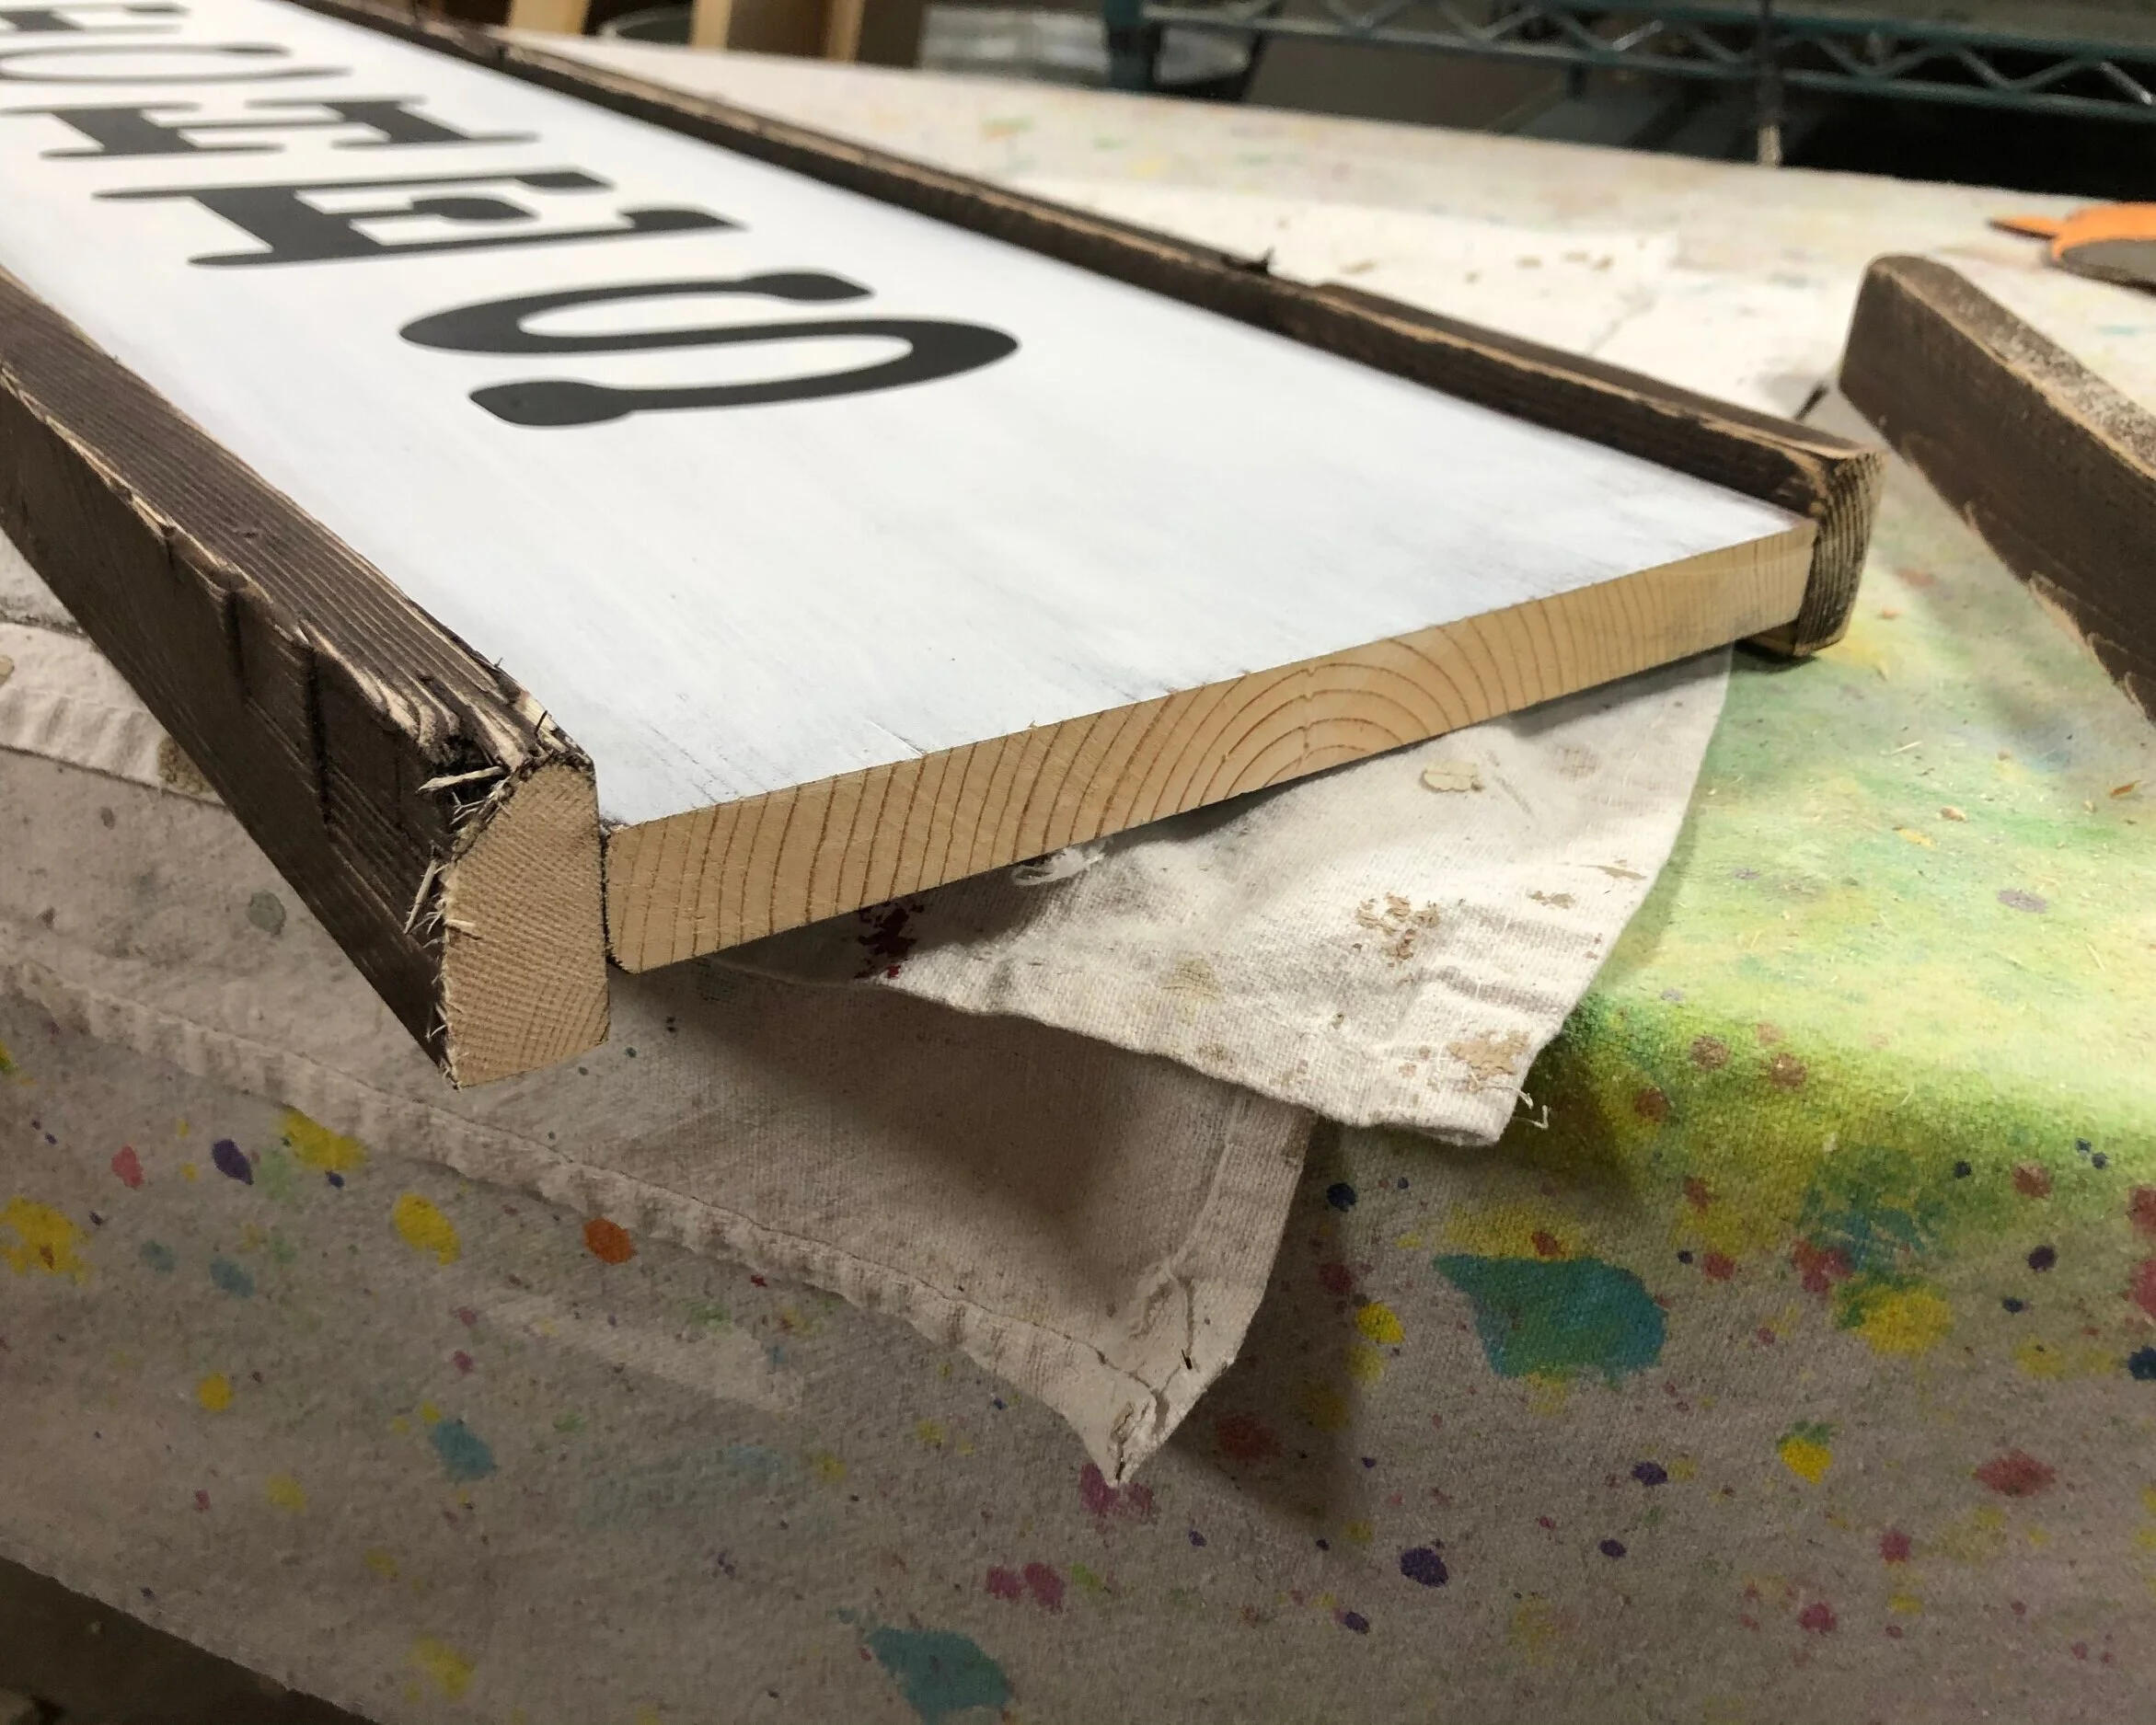
Here’s what my sign looked like once I got the side frame pieces attached. I framed the sign so that the sign would be in the middle of the framed pieces instead of flush with the back. You can also see where I used my miter saw to cut off the uneven parts.

DIY Halloween framed leaning porch sign for your fall rustic farmhouse home decor. How to paint a Halloween front porch sign. It's Halloween witches large Halloween sign

I did the same thing for the top and bottom pieces. Added the wood glue, my husband says to apply it in a squiggle line, idk if this is really how you’re supposed to do it or if he’s just messing with me lol but whatever it is this seems to work.

DIY Halloween framed leaning porch sign for your fall rustic farmhouse home decor. How to paint a Halloween front porch sign. It's Halloween witches large Halloween sign

8.SEAL THE FINISHED SIGN

If you want to protect your sign from the elements I recommend sealing it with an outdoor sealant like this one. I did not do this step because I plan to paint a fall themed stencil on the other side of this Halloween porch sign. But after I finish the other side I’ll seal it with the outdoor spray.

DIY Halloween framed leaning porch sign for your fall rustic farmhouse home decor. How to paint a Halloween front porch sign. It's Halloween witches large Halloween sign

Then you’re all done. I hope you enjoyed this DIY craft tutorial :)! If you have any questions please ask them in the comments below.

Happy crafting!

DIY craft kits- learn how to make your own

How to put together a DIY craft kit. Learn how to make your own craft kits, to sell, gift, or make just for fun. What goes into a DIY craft kit?

HOW TO PUT TOGETHER DIY CRAFT KITS

My best tips for creating DIY craft kits and how to package them for shipping

Craft kits are all the rage right now. I know when I started selling DIY craft kits for adults it took a little bit of trial and error for me to get them just right. I wasn’t sure what I should include, what I should leave out, how I should package the craft kits for shipping, and how I should write the instructions.

Affiliate Disclosure. Some of the links on this website are affiliate links, which means that I may earn a small commission if you click on the link or make a purchase using the link. If you make a purchase you will not be charged anything additional.

If you found this post helpful be sure to check out my post on HOW TO SHIP MASON JARS WITHOUT BREAKING.

How to put together a DIY craft kit. Learn how to make your own craft kits, to sell, gift, or make just for fun. What goes into a DIY craft kit?

Over time I have not just figured out how to package them and what to include in them I have MASTERED it! And I want to share with you what I’ve learned so you can spread some crafty love and ship DIY craft kits too.

There really is no better time than now to send DIY craft kits to loved ones.

It gives people something to do, something to keep their mind off of the craziness of the world, and something to bring them joy!

If you are thinking about gifting someone a DIY craft kit, or maybe you want to start selling them I am here to share with you what I’ve learned over the years. My small business specializes in DIY CRAFT KITS. I can’t even begin to tell you how many I have sold even just this year. It seems like I’ve been making craft kits in my sleep these last few months lol!

But seriously, I have learned so much since the first DIY craft kit I boxed up and shipped out. Now, I have perfected my craft kits, gotten tons of amazing feedback from my customers and can’t wait to share so here I go…

Ps… We just moved and I have yet to find where to put all the things so things are a bit untidy lol! I almost didn’t post pictures/take a video of me showing what I put in my DIY craft kits but then I said to myself ‘Megan! Girl, this is real life, show the mess’ so here I am showing my mess of a crafting space.

How to put together a DIY CRAFT KIT. Learn what to put inside a craft kit to ship or gift to someone. What materials and supplies goes into a DIY craft kit, learn what to add.

1.KEEP IT SIMPLE

The very first thing is to decide what kind of craft you will putting together. Try to keep this simple. Something that seems easy, and may look easy too, but that is actually complex with a ton of steps might leave your recipient feeling frustrated. People love things they can accomplish relatively easily so keep it simple:)!

How to put together a DIY craft kit. Learn how to make your own craft kits, to sell, gift, or make just for fun. What goes into a DIY craft kit?

2. INSTRUCTIONS

Every good craft kit will come with written AND picture instructions. Something that my customers have raved to me about is that my instructions are clear and easy to follow.

My biggest tip for writing DIY craft kit instructions is to write them out like you were writing the instructions for a 6th grader to follow. That is in no way an insult either. If a middle schooler can understand what you are writing then an adult can too.

I know for myself, I don’t like instructions that are super politically correct anyway. I write my craft kit printables just how I would say them if my customer were standing in front of me. I also include pictures and a link where they can find my tutorial online.

How to put together a DIY craft kit. Learn how to make your own craft kits, to sell, gift, or make just for fun. What goes into a DIY craft kit?

3. WHAT TO INCLUDE

Here’s where I struggled a little in the beginning with my DIY craft kits. I wasn’t sure what I should include and what I should leave out.

Do I include every little thing? Brushes? Paints? Sandpaper? All the things? Really this is up to you. For me, I have some craft kits that include everything my customers need and other craft kits that just include the bases (the wood, canvas or any other type of base). I have a good mix of both in my shop and truthfully get the most orders for my hand cut craft blanks that don’t include any supplies.

Here are the absolute musts that you need to include in your DIY craft kits

  • CRAFT BASE- this is a must. Examples of the base are: wood, stretch canvas, rocks, basically what your recipient will be crafting on.

  • INSTRUCTIONS

Optional items to send in your DIY craft kits

You will need to decide how easy you want your craft kit to be for your recipient. Since I am in the business of selling DIY craft kits I do offer a variety of kits that range from blanks only to full on everything is included craft kits.

4. PACKAGING

If you aren’t shipping your craft kit then all you’ll need to do is put everything in a pretty bag with some tissue paper. But if you plan to ship your DIY craft kit to someone then you’ll need to do a little more work than that. Here’s how I package my craft kits up for shipping:

How to put together a DIY CRAFT KIT. Learn what to put inside a craft kit to ship or gift to someone. What materials and supplies goes into a DIY craft kit, learn what to add.

-I place all of my base pieces in a clear bag or wrap them in paper if they are too big to fit in the bags I carry.

How to put together a DIY CRAFT KIT. Learn what to put inside a craft kit to ship or gift to someone. What materials and supplies goes into a DIY craft kit, learn what to add.

-Then I place all the other materials in a separate bag and I leave a little air inside the bag, but not too much, so that the bag acts as it’s own cushion. That way the supplies don’t get smashed up during transit.

How to put together a DIY CRAFT KIT. Learn what to put inside a craft kit to ship or gift to someone. What materials and supplies goes into a DIY craft kit, learn what to add.

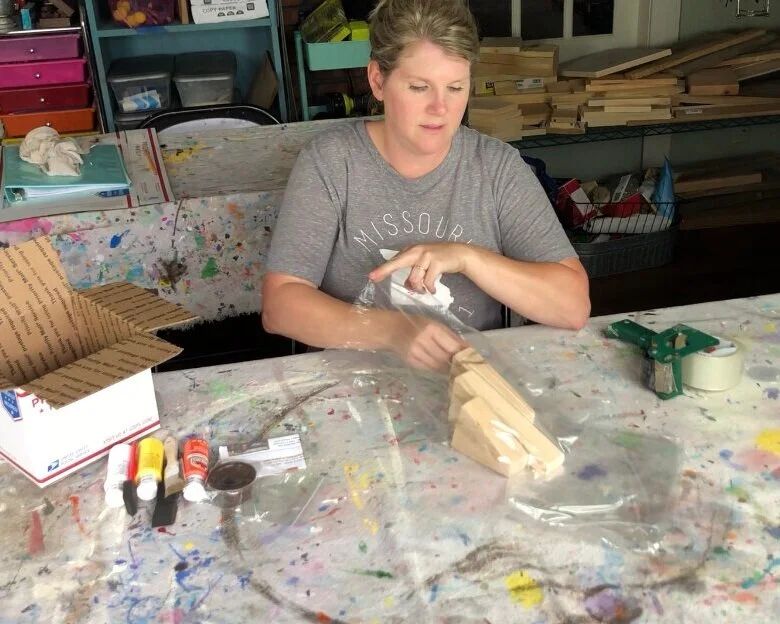
After everything is in a bag I place them inside a shipping box. I ship all of my packages via USPS and if I’m shipping anything over a pound it gets shipped USPS priority mail. I order all of my boxes in bulk online from the USPS website and have them delivered right to my door. It’s a wonderful thing to take advantage of!

Here are the plastic bags I use. I have never ordered from Ebay before but this was the closest thing I could find to what I use. They are cotton candy bags. Fun fact, my husband and I used to own a cotton candy machine and we would go set up at different locations, flea markets, auctions and things to make ends meet. Boy am I glad those days are behind us! We had thousands of these bags leftover after we hung up the towel on that and my husband had the genius idea to use them for packaging orders!

How to put together a DIY CRAFT KIT. Learn what to put inside a craft kit to ship or gift to someone. What materials and supplies goes into a DIY craft kit, learn what to add.

{So cute my 5th daughter, the furry one, made an appearance this snapshot!}

Most of the time I don’t have any extra space in the shipping box but if I do I will add either bags of air, thin packaging paper, or bubble wrap.

A little tip…if you order a LOT from online businesses like I do you likely have a TON of packaging materials. You can reuse those! I save all of the packaging materials that come in my packages so that I can reuse them for my online orders. There is no need to throw away perfectly good items when you can easily reuse them for their intended purpose:)!

Let me know if you have any questions about putting together a DIY CRAFT KIT in the comments below.

Halloween wood tags, how to DIY your own set of cute spooky mini tags

DIY Halloween wood tags, how to make your own rustic mini wood tags for your tiered tray decor. DIY craft kit for adults

DIY WOOD TAGS FOR HALLOWEEN

I just love these adorable rustic wood tags! Since they are so small they make such perfect little accents to your décor. Especially these Halloween wood tags. I made these adorable little guys and placed them in my Halloween porch décor. Oh my goodness they look so cute with all the orange, black, and rustic-ey decorations!

If you love this tutorial be sure to check out these mini wooden fall signs

If you don’t have all the tools/materials to make these little wooden tags from scratch you can grab a DIY CRAFT KIT HERE.

Affiliate Disclosure. Some of the links on this website are affiliate links, which means that I may earn a small commission if you click on the link or make a purchase using the link. If you make a purchase you will not be charged anything additional.

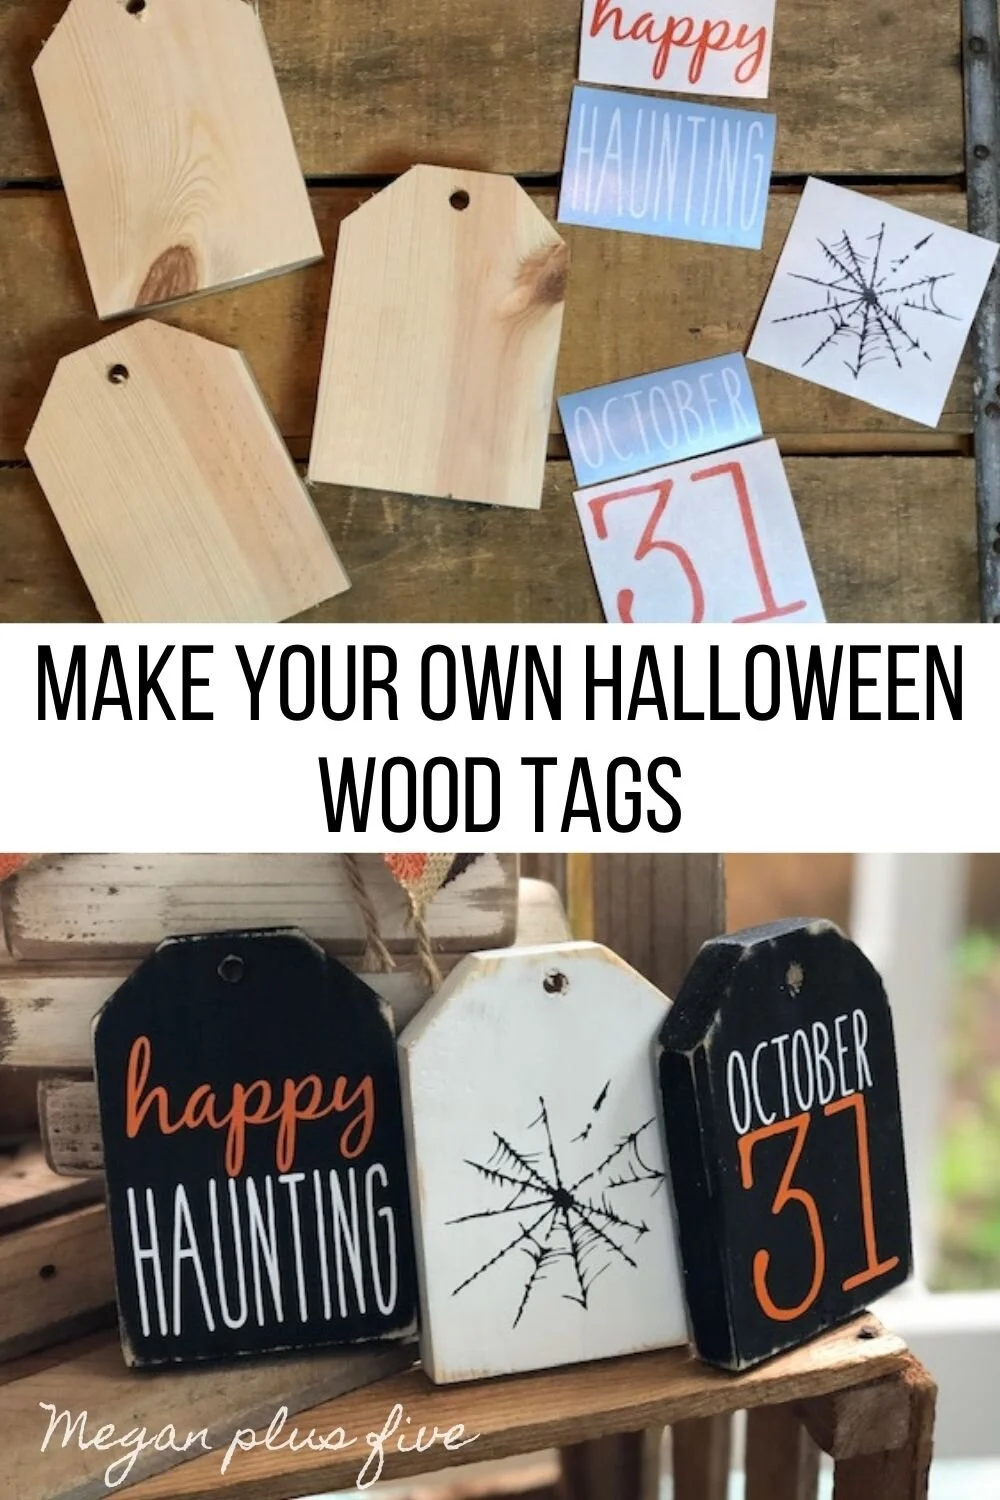
This DIY HALLOWEEN CRAFT KIT COMES WITH

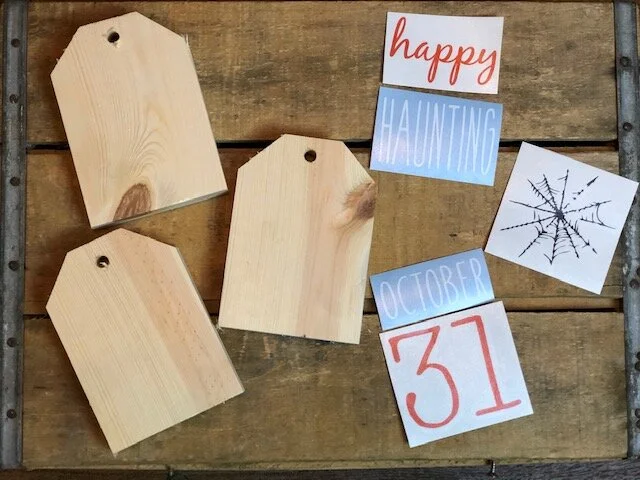
  • 3 precut and lightly sanded 5” wood tags

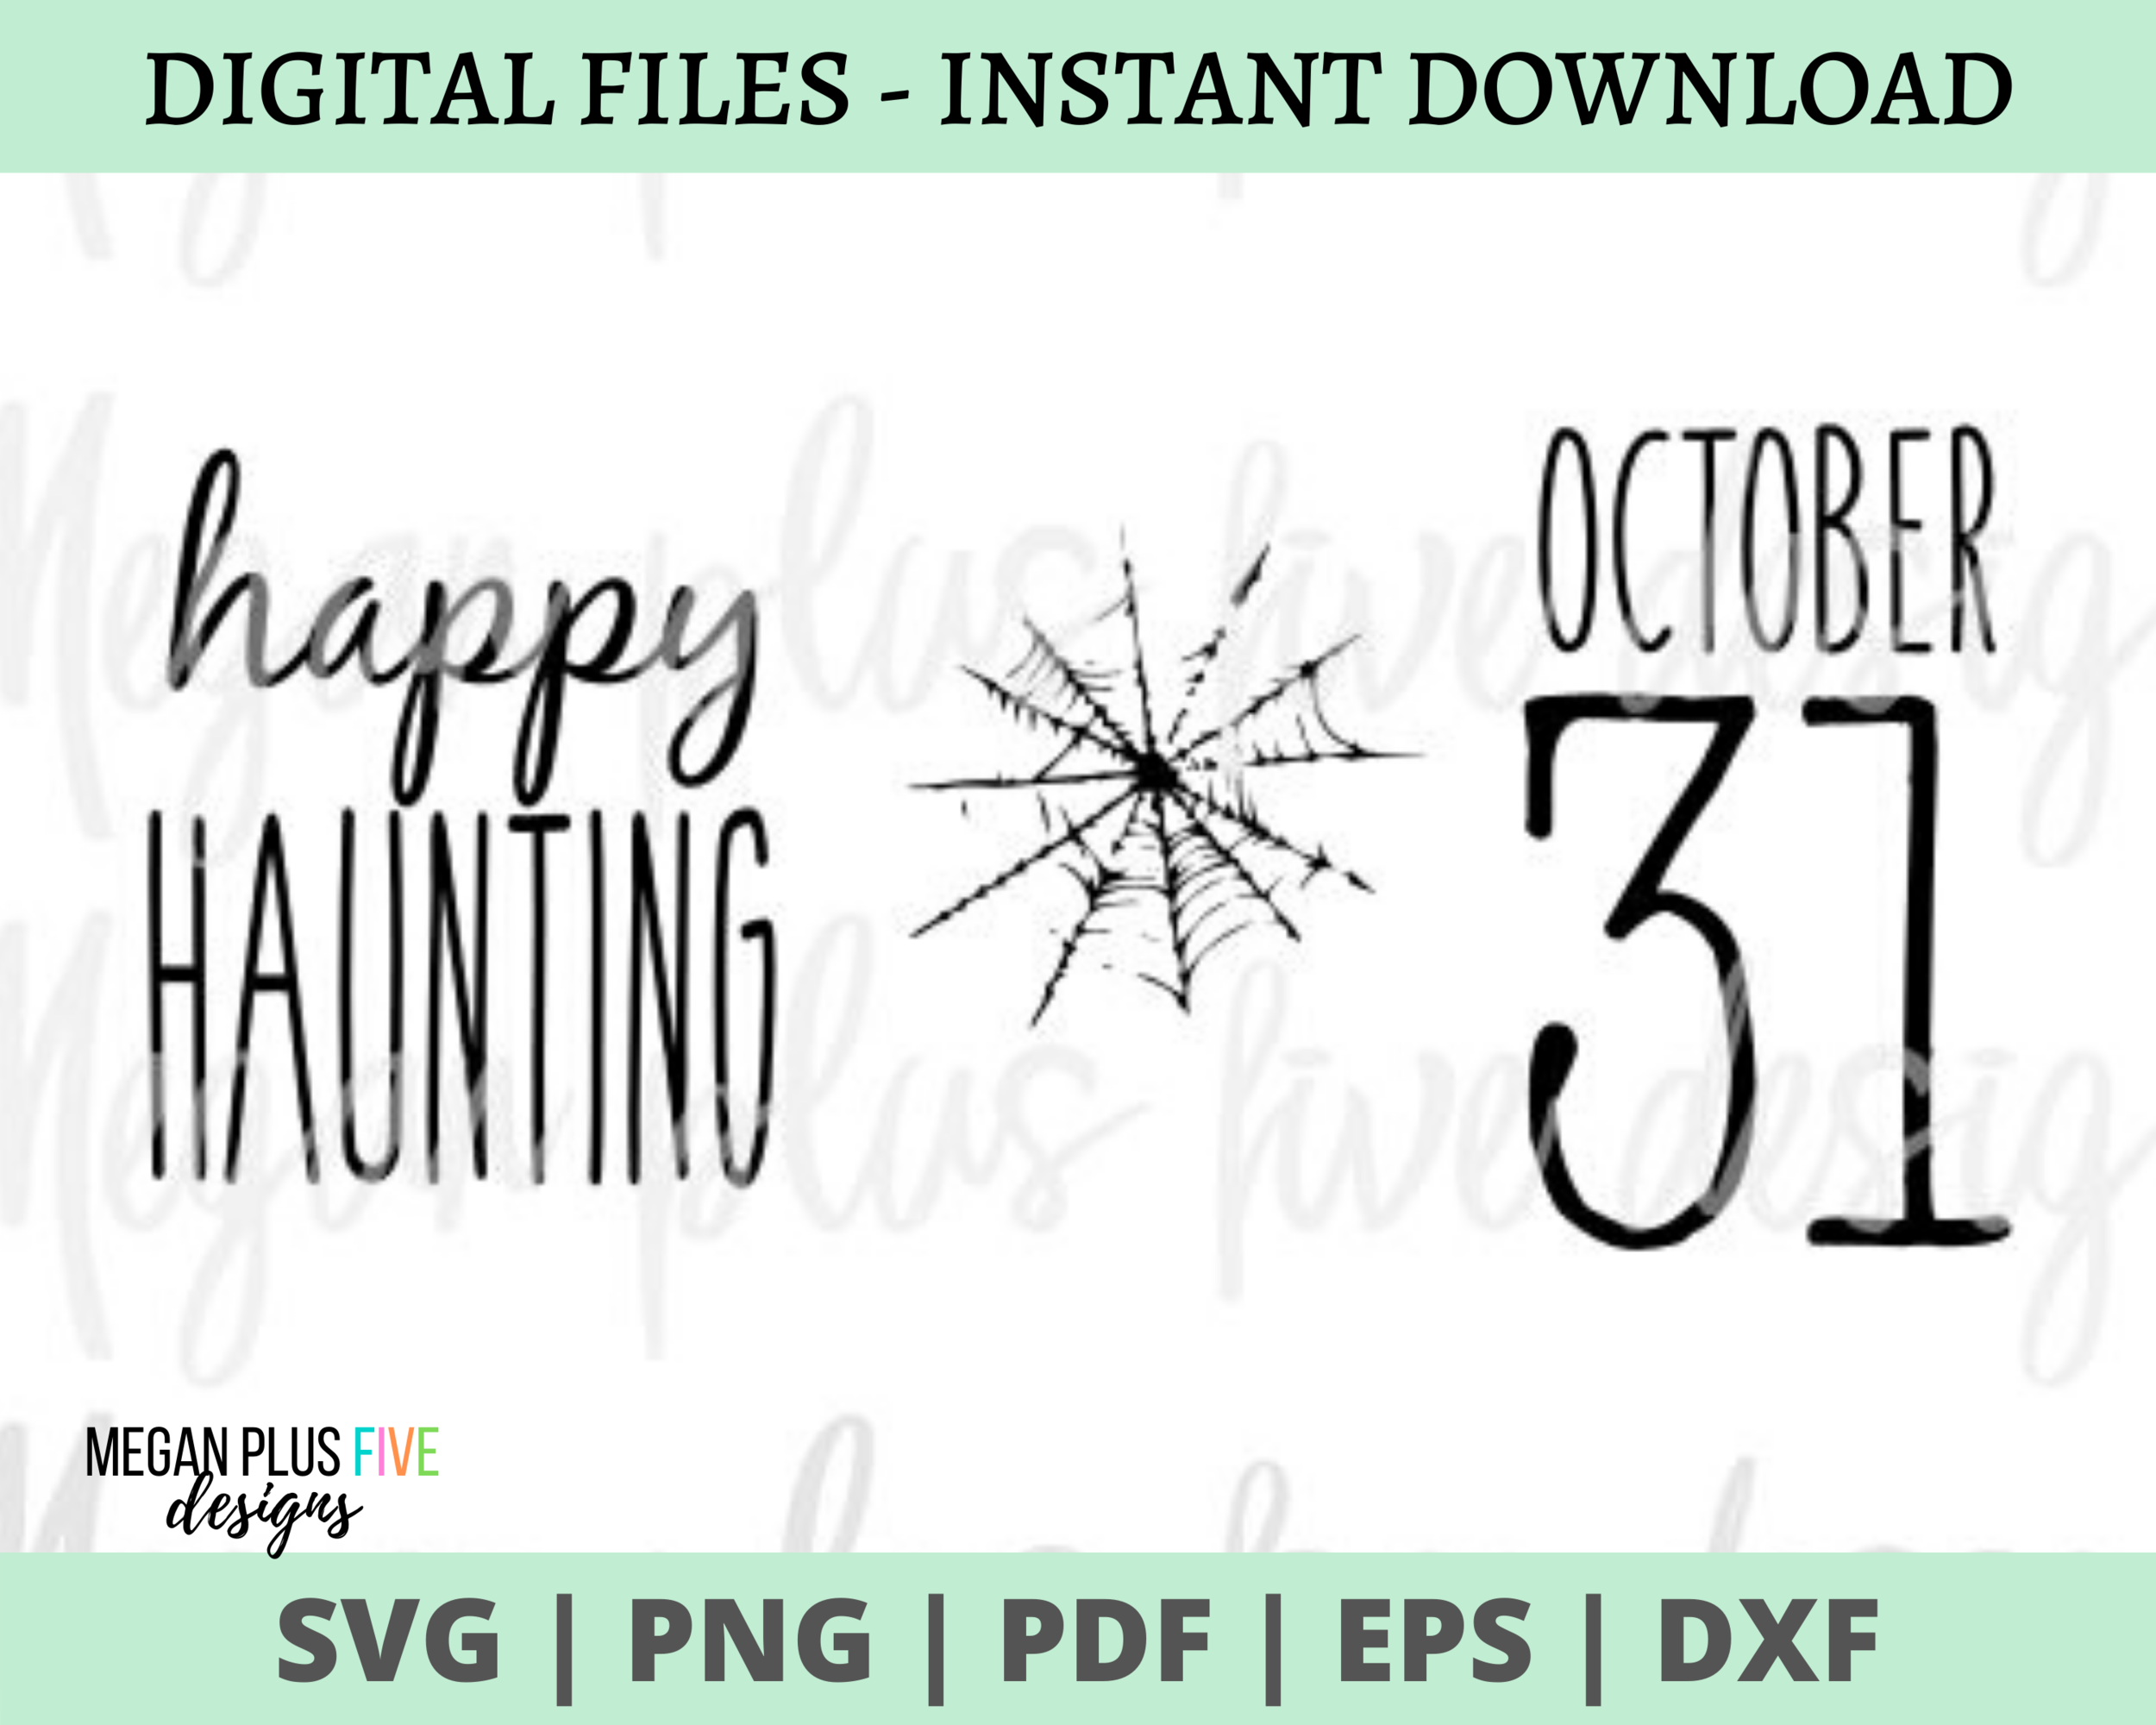
  • professional outdoor grade vinyl cut outs

    • HAPPY HAUNTING

    • spider web image

    • OCTOBER 31

  • detailed picture instructions

  • ****paint and brushes are NOT included

DIY Halloween wood tags, how to make your own rustic mini wood tags for your tiered tray decor. DIY craft kit for adults

If you don’t need a DIY CRAFT KIT here’s what you’ll need

DIY HALLOWEEN WOODEN TAGS. CRAFT KIT FOR ADULTS FOR FALL. HOW TO MAKE YOUR OWN MINI WOOD TAGS FROM 1X4

Want to know how I make my wood tags? Click here to read my post on DIY MINI WOOD TAGS, it also includes a video tutorial.

After you have your wood pieces cut out, sanded and your vinyl decals cut, weeded, and transfer tape applied you can start on the steps below.

If you want to learn how to cut out your own wood tags read this post. If you are new to Cricut, or the world of fancy cutting machines in general, check out my post on the 10 must have accessories and supplies to get for a Cricut newbie

1. PAINT

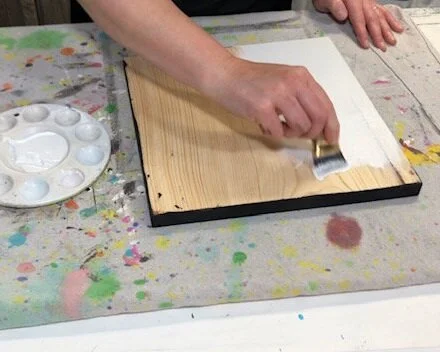
Paint 2 of your wood tags black, one coat will be fine for this, and 1 of your wood tags white, this will need 2-3 coats. Let dry. Letting your wood tags dry completely is a MUST. If your paint is still wet when you move on to the next step your vinyl will not stick to it.

DIY Halloween wood tags, how to make your own rustic mini wood tags for your tiered tray decor. DIY craft kit for adults

2. DISTRESS

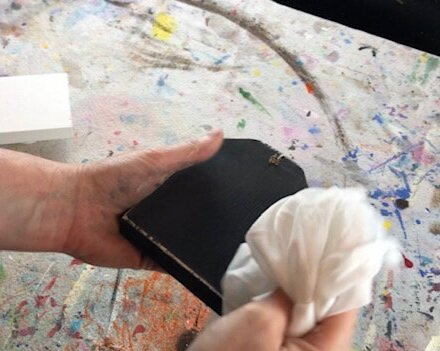
Using a piece of sandpaper distress the edges. You’ll want to focus on the edges and any area that you think would have a natural wear to it.

DIY Halloween wood tags, how to make your own rustic mini wood tags for your tiered tray decor. DIY craft kit for adults

Then wipe with a lint free cloth.

DIY Halloween wood tags, how to make your own rustic mini wood tags for your tiered tray decor. DIY craft kit for adults

3. APPLY DECALS

Be extra sure that your paint is completely dry before you start this step. Vinyl does not stick to wet paint.

Using your vinyl squeegee, a plastic rewards card will also work for this step, rub the front of your Halloween themed vinyl decal.

DIY Halloween wood tags, how to make your own rustic mini wood tags for your tiered tray decor. DIY craft kit for adults

Flip it over and do the same thing on the backside.

DIY Halloween wood tags, how to make your own rustic mini wood tags for your tiered tray decor. DIY craft kit for adults

Then peel the paper backing away from the clear transfer tape, your design should stay attached to the clear transfer tape.

DIY Halloween wood tags, how to make your own rustic mini wood tags for your tiered tray decor. DIY craft kit for adults

Flip your vinyl decal sticky side down onto your wood tag. Don’t push it onto the wood tag until you are happy with the placement, then press it down. Use your vinyl squeegee for this step. Then remove the clear transfer tape.

DIY Halloween wood tags, how to make your own rustic mini wood tags for your tiered tray decor. DIY craft kit for adults

Start on one corner then slowly peel your way to the opposite corner. If your decal comes off with the transfer tape just press it back down and slowly roll the transfer tape away from the decal again. Be sure you take your time during this process, especially if you are new to the decal game.

DIY Halloween wood tags, how to make your own rustic mini wood tags for your tiered tray decor. DIY craft kit for adults

BLACK TAG: HAPPY HAUNTING decal

BLACK TAG: OCTOBER 31 decal

WHITE TAG: SPIDER WEB IMAGE decal

DIY Halloween wood tags, how to make your own rustic mini wood tags for your tiered tray decor. DIY craft kit for adults

4. TWINE

Add some twine to make them even more adorable! Feed the twine through the hole in the top middle of the tag. Then tie the two twine ends together.

You’re all done! I hope you enjoyed this DIY craft tutorial. If you have any questions please ask in the comments below.

DIY Halloween wood tags, how to make your own rustic mini wood tags for your tiered tray decor. DIY craft kit for adults

Happy Crafting!

Classic farmhouse tiered tray signs

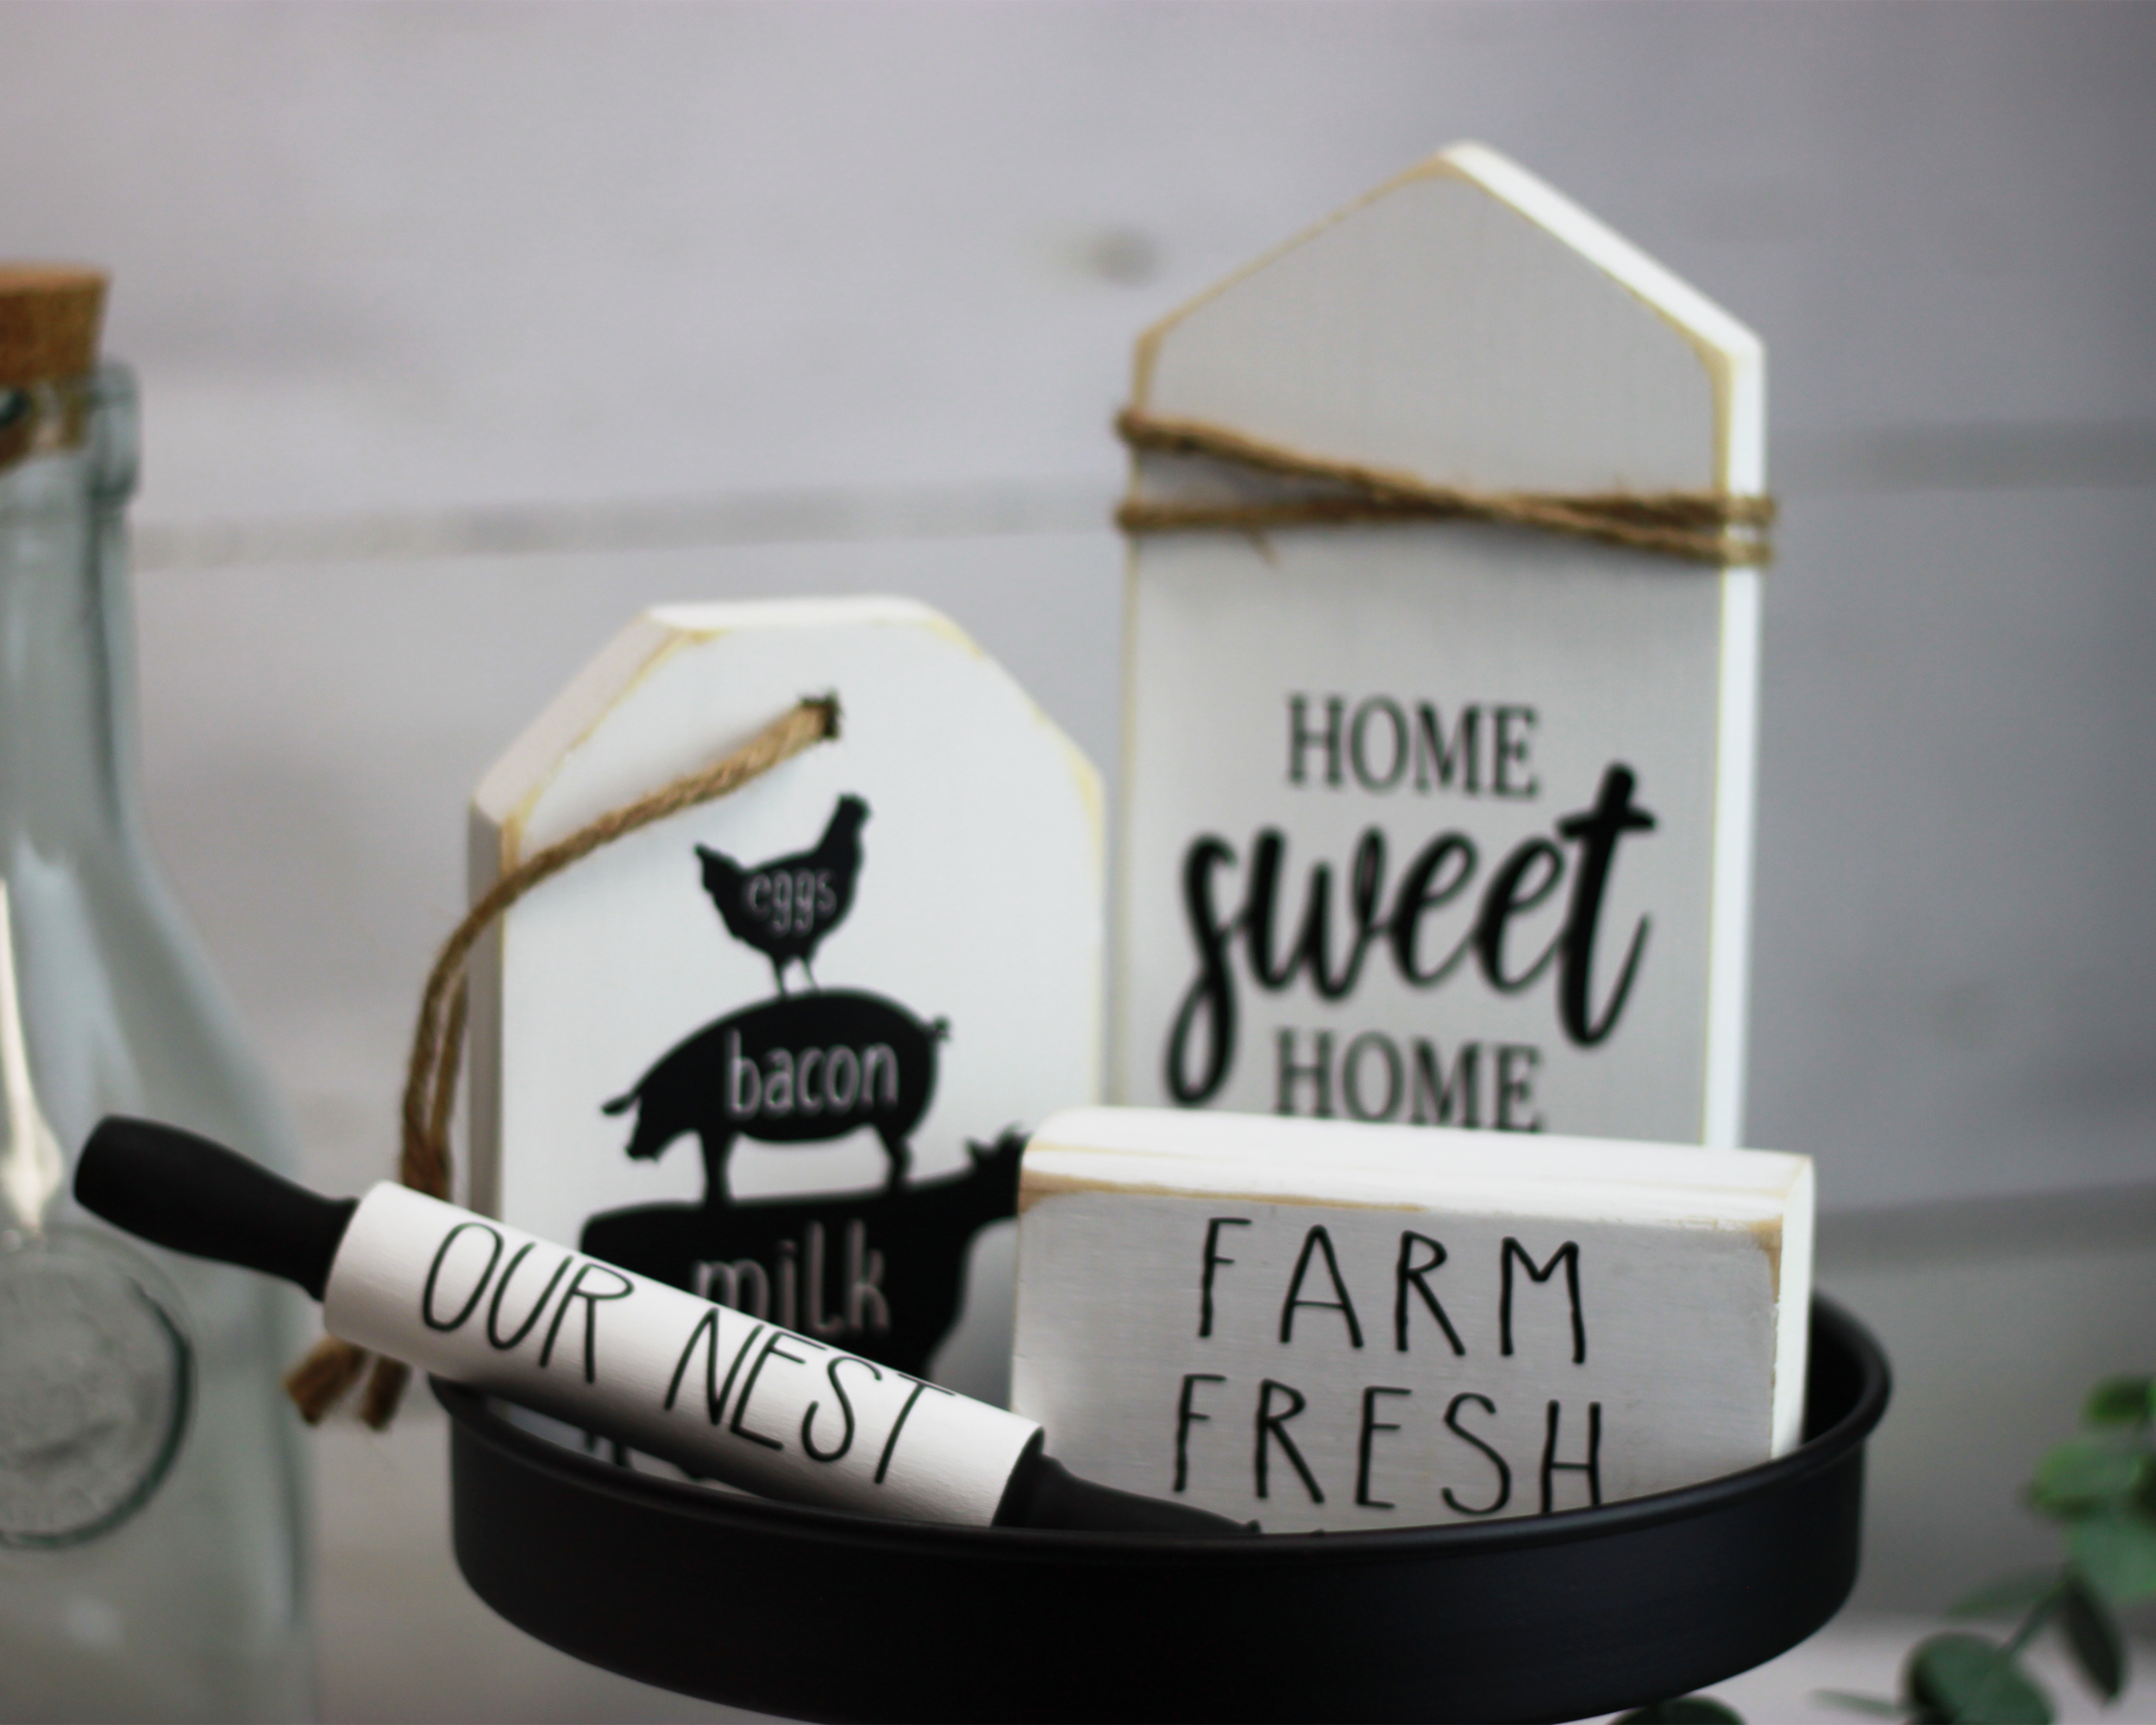
Tiered tray signs for rustic home decor. Classic style mini wood signs in white and black. Sign bundle comes with home sweet home, farm animal trio of chicken pig and cow on a rustic wood tag, mini rolling pin our nest, and farm fresh.

Tiered tray sign bundle for your CLASSIC looking farmhouse decor

I am loving this tiered tray decor that’s all the rage right now. There are so many different seasons, holidays, and themes you can do. Or you can keep it super classy and simple with the classic black and white farmhouse colors. There is so much you can do with these simple color scheme. You can keep it black and white or add a couple rustic pieces that will give it a pop of color here and there. I love how versatile it is!

Affiliate Disclosure. Some of the links on this website are affiliate links, which means that I may earn a small commission if you click on the link or make a purchase using the link. If you make a purchase you will not be charged anything additional.

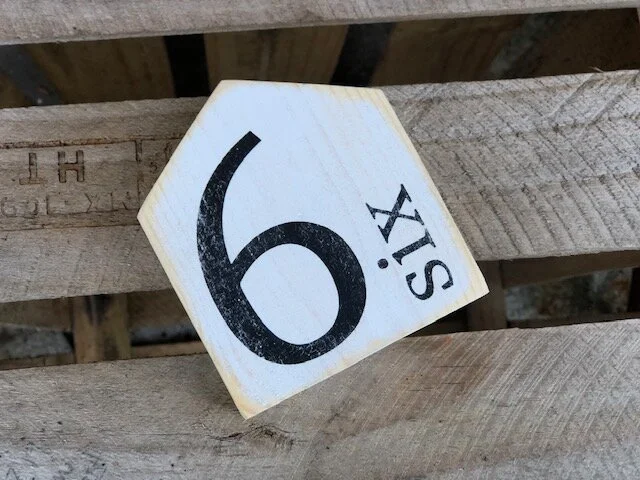
If you LOVE this crafty post be sure to check out how I made a mini house family number sign. Instead of using vinyl like I did on these rustic farmhouse mini signs I painted it instead.

Tiered tray signs for rustic home decor. Classic style mini wood signs in white and black. Sign bundle comes with home sweet home, farm animal trio of chicken pig and cow on a rustic wood tag, mini rolling pin our nest, and farm fresh.

If you’re in to the rustic farmhouse style how can you not love a mini wooden tag that has farm animals on it?! This one is probably my favorite of all the bundled pieces. I absolutely LOVE chickens! Well of course cows and pigs too but chickens are really my favorite farm animal! Every time I see one, whether that be a real life chicken or a picture of one, I smile! They are just too cute!

TIERED TRAY RUSTIC SIGNS

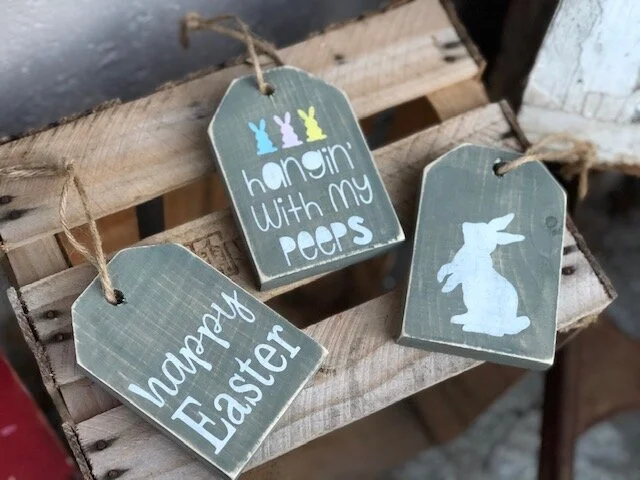
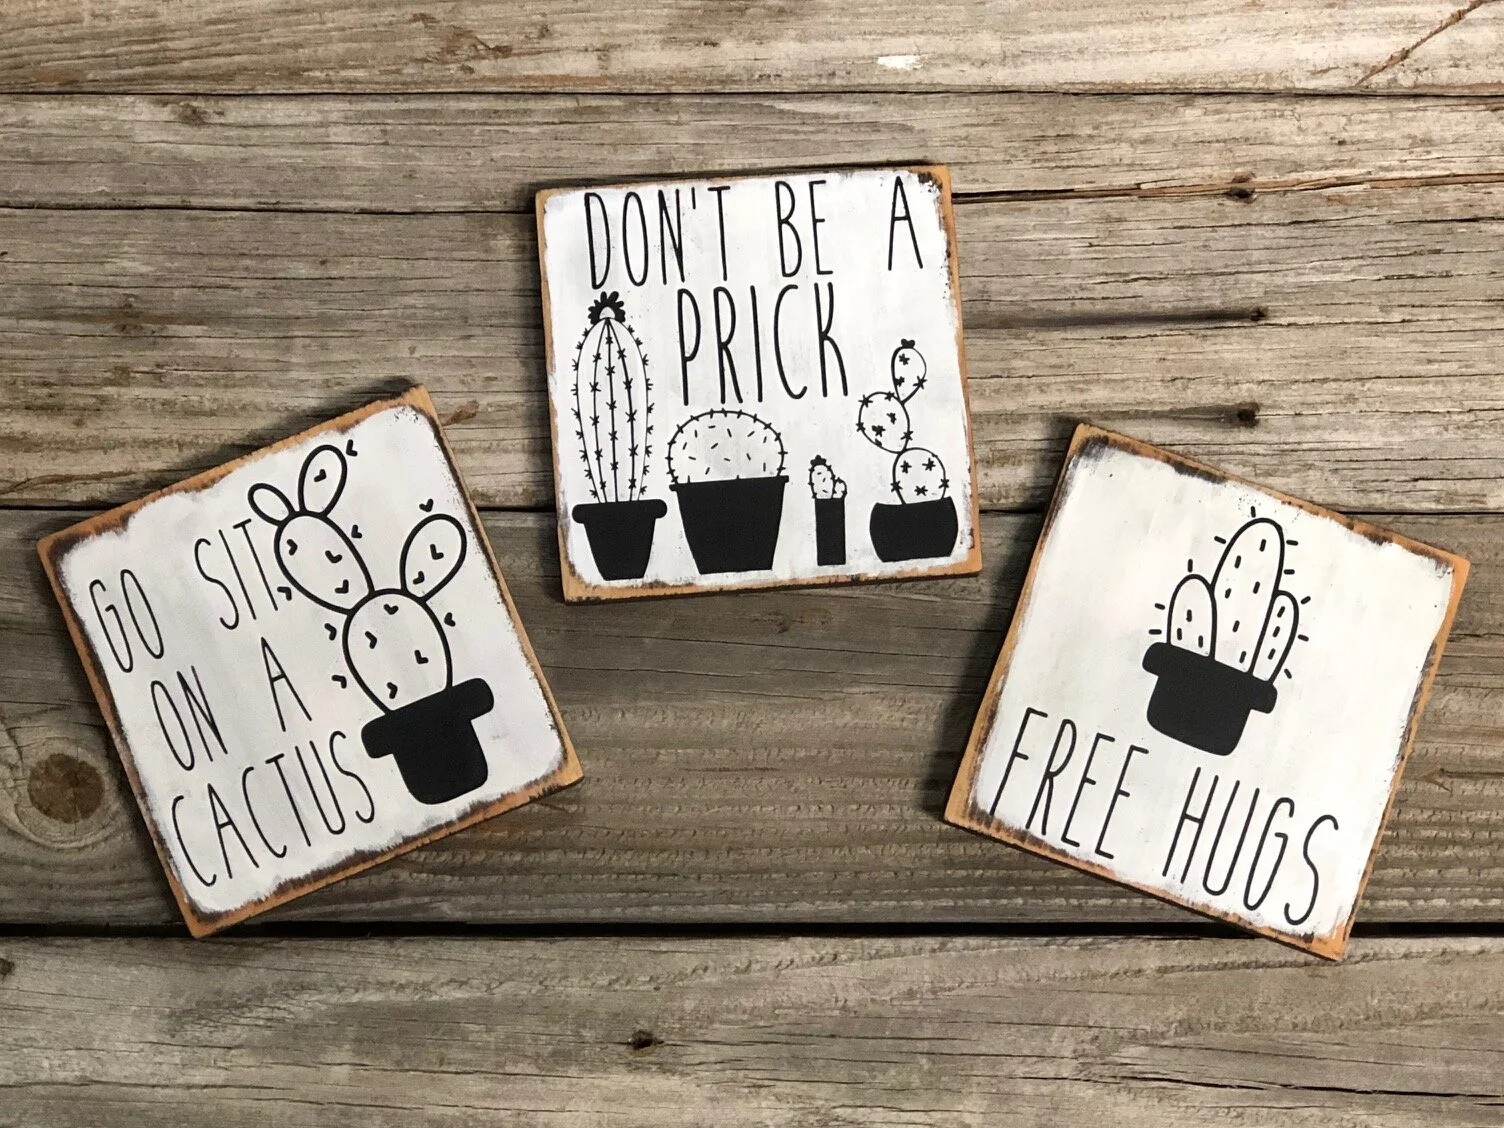
For this tiered tray bundle I incorporated different sizes and shapes to these farmhouse pieces mix it up a bit. I typically create identical bases for my handmade sign pieces, like these hilarious rustic looking cactus signs. Another example are these Easter mini wood tags. They come in a set of 3 but they are all the same sized wood base. While they are super cute I am really loving the mix and match look of the different sized and styled bases of these classic farmhouse tiered tray signs.

Here are the sign bases I used:

Since they are all different sizes and shapes they truly work perfectly for the tiered tray signs.

Tiered tray signs for rustic home decor. Classic style mini wood signs in white and black. Sign bundle comes with home sweet home, farm animal trio of chicken pig and cow on a rustic wood tag, mini rolling pin our nest, and farm fresh.

Unlike most of my signs I actually chose to use vinyl on them instead of painting the entire design. I have been one BUSY momma this year so I’ve been adding more simple designs and styles to my shop line up. I guess I always thought using vinyl was “cheating” in the sign making game but I have no regrets using the vinyl on these designs. They are quick to make, priced at a more affordable price point, and I can get them out to my customers even faster because it takes SO much LESS time to create.

While stenciling designs will always be my preferred method for making signs I do love how these vinyled signs turned out. So much that I have plans to add even more in my shop!

You can grab the FARM FRESH design in my FREE RESOURCE LIBRARY.

Want your own set but don’t want to make them? You can purchase your handmade signs from my shop, click here —-> CLASSIC FARMHOUSE STYLE TIERED TRAY SIGNS

Tiered tray signs for rustic home decor. Classic style mini wood signs in white and black. Sign bundle comes with home sweet home, farm animal trio of chicken pig and cow on a rustic wood tag, mini rolling pin our nest, and farm fresh.

If you are a DIY-er and want to make your own rustic farmhouse style tiered tray signs here’s what I recommend you use.

New to Cricut? Check out these 10 must haves to get you started on your crafty journey

I don’t have a full on tutorial on how I made these signs they were really pretty simple to make since there wasn’t any stenciling involved. Stenciling is a WAY more involved process. But this process is super easy.

Here’s how I made my rustic tiered tray signs

  1. Paint each wood base white. Let dry. Paint a second coat. Let dry.

  2. Once dry distress the edges. Wipe with a dry lint free cloth.

  3. Cut out your designs using your Cricut, or other cutting machine.

  4. Weed your designs using your xacto knife.

  5. Apply your transfer tape and remove paper backing from your designs.

  6. Place your designs on your wood bases. Rub with your vinyl squeegee and remove your transfer tape.

  7. Add any twine accents.

  8. Place on your tiered tray and enjoy!

It’s really that simple! No messing with paint bleed. No fuss with drying time between stenciling paint coats. No stress about paint peel up. I really enjoyed how quick and easy these DIY mini wood signs were!

I hope you enjoyed this crafty tutorial. If you have any questions please feel free to ask in the comments section below.

Happy Crafting!

See how I make my mini wood tags. Don’t have the power tools to create the tags from scratch? Grab the unfinished wood tags here.

REVERSE STENCIL, the NO paint bleed method

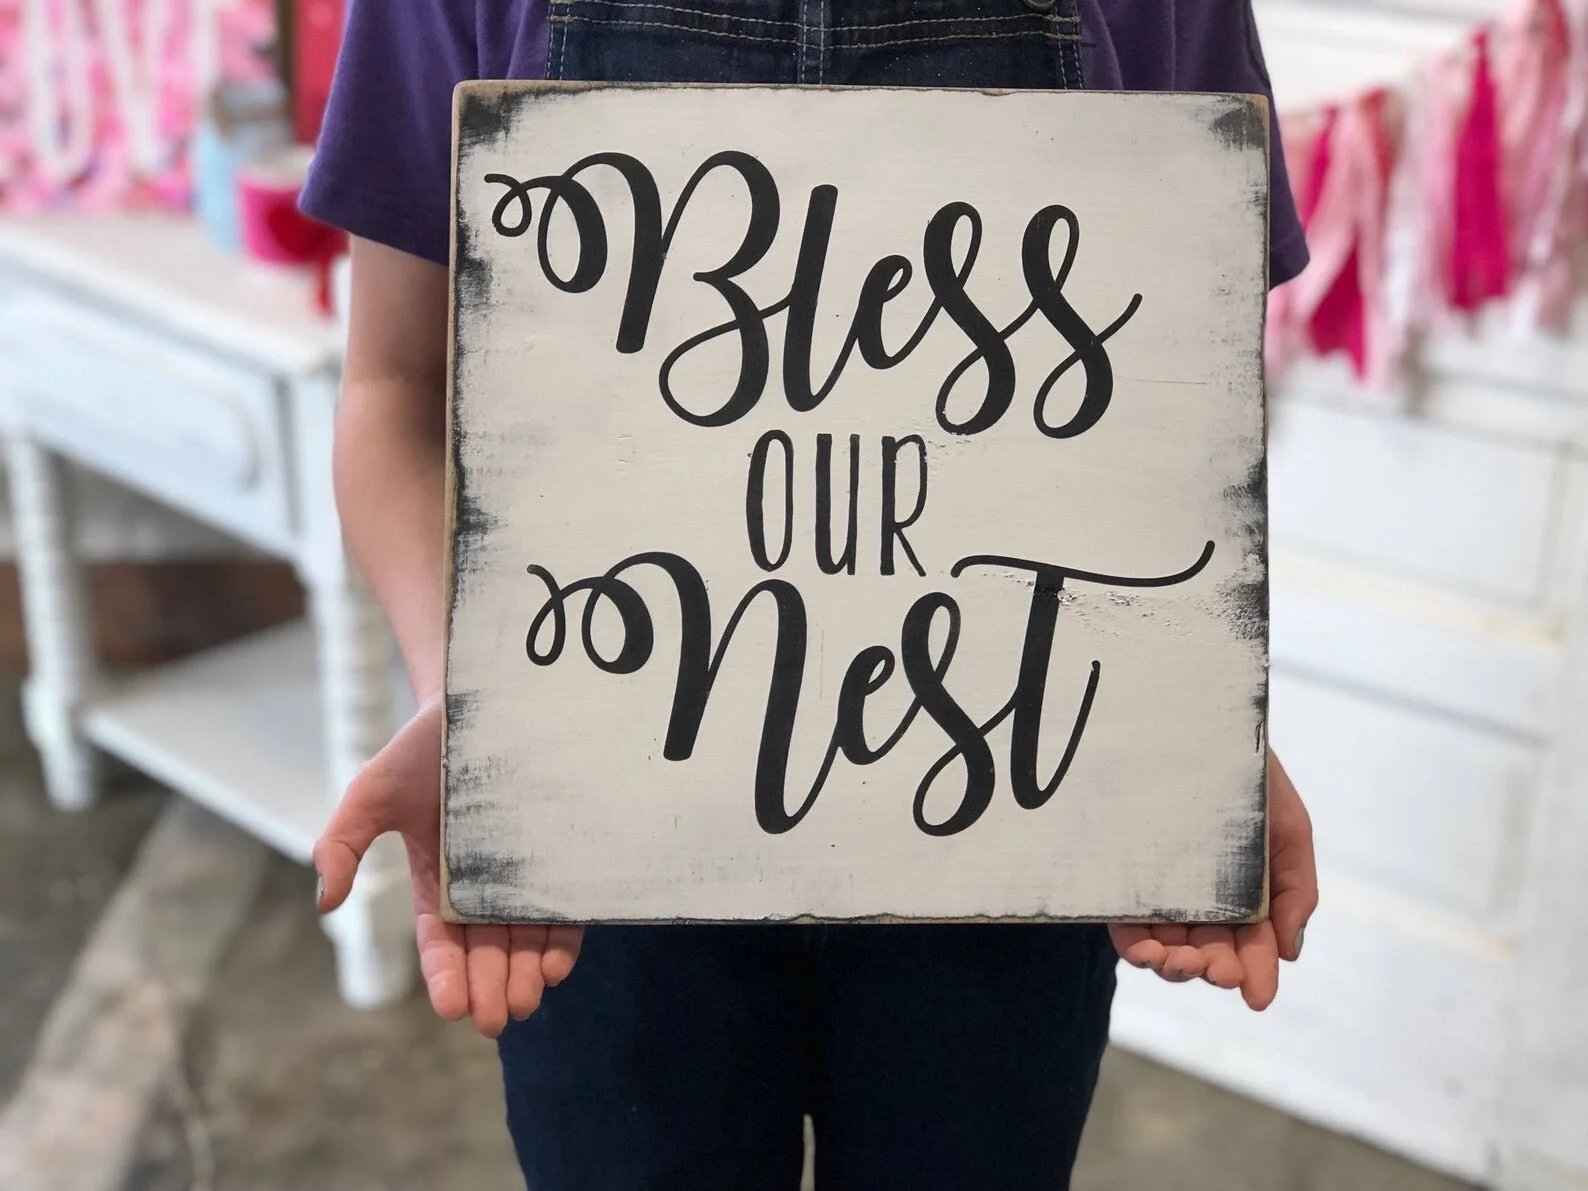
DIY wood sign, how to paint a reverse stenciled wooden sign. Make your own rustic wooden sign using your Cricut. Bless our nest wooden sign to hang with your farmhouse style decor. How to stencil on wood, a sign painting tutorial with video.

How to paint a REVERSE STENCIL wood sign, easy tutorial plus video

Have you tried stenciling wood signs but keep running into issues like paint bleed or your paint peeling up? I completely understand your frustration when that happens when painting signs. I have been there and am so glad I learned how to paint signs without these issues now AND I’m happy I get to show you how to paint wood signs without the headache.

One of the easiest methods to stenciling painted wood signs is the REVERSE STENCIL METHOD. It’s the method I suggest people start with when they are just learning how to paint signs. No matter if you are wanting to learn how to paint signs for a hobby or you are wanting to start your own momma side hustle this is THE sign painting tutorial you need to start with. I don’t want to overwhelm you with too much sign painting lingo but this is also referred to as the PVPP method. Or in other words, Paint Vinyl Paint Peel. But I like to call it a reverse stencil because that just sounds better to me ;).

DIY REVERSE STENCIL WITH YOUR CRICUT, the NO paint bleed method

Affiliate Disclosure. Some of the links on this website are affiliate links, which means that I may earn a small commission if you click on the link or make a purchase using the link. If you make a purchase you will not be charged anything additional.

After making thousands of hand painted wood signs for my own business I think I’ve pickex up a thing or two about how to paint signs and I am so excited to be sharing my tips, tricks, and techniques with you. So hopefully you don’t make the same mistakes that I did starting out.

If you have a Cricut or Silhouette cutting machine you can purchase the SVG FILE for BLESS OUR NEST here. If you’re just getting started with your Cricut I highly recommend you read this list of 10 things you need to get started with your Cricut. .

If you’re planning to make lots of signs like I do you may want to consider ordering stencil film in bulk to save some money. Here’s how I save 40% on my Oramask 813 stencil film.

Watch the video below or keep scrolling to read the written sign making tutorial.

1. CUT AND WEED YOUR DESIGN

The first thing you want to do is cut your design out. I use my Cricut to do this on Oramask 813 stencil film. After having issues with pretty much any other kind of “stenciling” material, I have found this stuff truly works and does the job it was made to do. Using things like shelf liner, aka contact paper, and oracal 631 they can cause so many issues and a giant headache. So now I just stick to what works and Oramask 813 works! Instead of weeding out the letters like you would on a typical stencil you will actually weed out the background, leaving the letters.

Bless our nest wood sign, how to paint a sign with no paint bleed. Reverse stencil method is perfect for new sign painters to get their feet wet in the sign painting world. Grab your FREE wooden sign svg for stenciling. Make your own rustic bless ou…

2. PAINT YOUR LETTER COLOR

I know this is going to sound super backwards BUT you want to paint your wood sign base whatever color you want your lettering to be. I have to add that if you are wanting your lettering/design to be multi colored this method will not work. But, if you want one solid color like the design I’m showing here this reverse stencil method is perfect. Let your paint dry.

DIY sign painting tutorial. How to make a reverse stenciled sign. Painting a wood sign with no paint bleed, paint peel up, crisp lines.

3. APPLY YOUR STENCIL

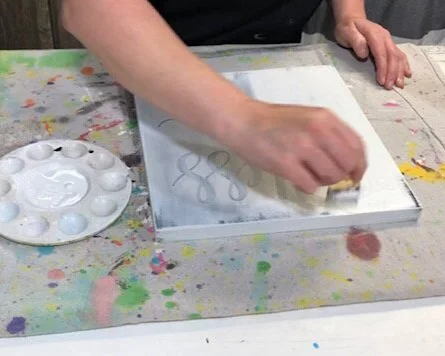
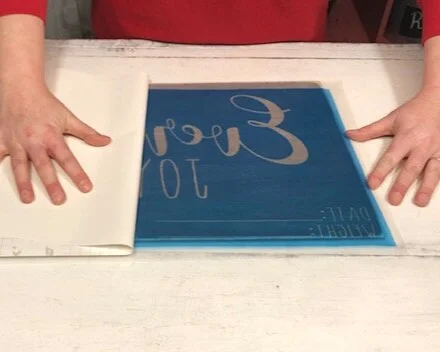
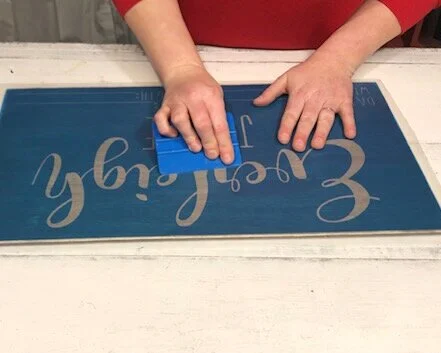
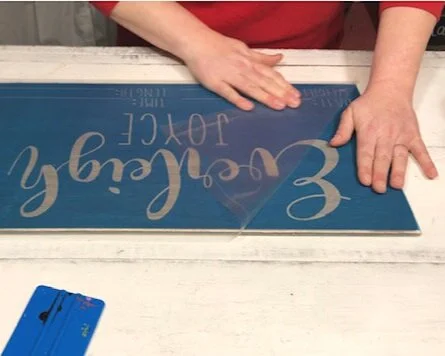
After your letter color paint is dry you want to apply your stencil. This can be tricky to get on there straight at first. If it makes it easier you can measure or use tape as a guide line. Place your transfer tape over your design, use your vinyl squeegee to gently remove any air. Flip your stencil over and carefully remove the paper backing. Go slow you don’t want to rip your design. After you’ve removed the paper backing place your stencil down on your wood sign base sticky side down. Use your vinyl squeegee to remove any air bubbles then remove the transfer tape from your design, leaving your stencil film on your wood sign base.

DIY sign painting tutorial. How to make a reverse stenciled sign. Painting a wood sign with no paint bleed, paint peel up, crisp lines.
DIY sign painting tutorial. How to make a reverse stenciled sign. Painting a wood sign with no paint bleed, paint peel up, crisp lines.DIY sign painting tutorial. How to make a reverse stenciled sign. Painting a wood sign with no paint bleed, paint …
DIY sign painting tutorial. How to make a reverse stenciled sign. Painting a wood sign with no paint bleed, paint peel up, crisp lines.

4. SEAL YOUR STENCIL

This is THE STEP to do if you want ZERO PAINT BLEED. I don’t know about you but I’m a busy momma and business owner and I don’t have time to daintily paint around stencils then cross my fingers that it won’t bleed. Nope! Instead, I seal my stencils with the same color that is under the stencil. So in this case I sealed my stencil with black paint. You want to paint a SUPER THIN layer of paint over your stencil. Be sure it’s a thin layer, this step does not need a lot of paint.

DIY sign painting tutorial. How to make a reverse stenciled sign. Painting a wood sign with no paint bleed, paint peel up, crisp lines.

5. PAINT THE BACK

This step isn’t a must but I always finish the backside of all of my signs. It gives my signs a more polished look. When the sealing step is dry just flip your sign over and paint the back the same color you are going to paint the front. I just do one layer of paint for this step. I also paint a layer of paint on the sides while I’m on this step.

DIY sign painting tutorial. How to make a reverse stenciled sign. Painting a wood sign with no paint bleed, paint peel up, crisp lines.

6. PAINT THE FRONT

Once the front is dry flip your sign over and paint a SUPER THIN layer of whatever color you would like your background color of your sign to be. Let that dry completely. After the first layer is dry you can add a second layer if you’d like more coverage.

DIY sign painting tutorial. How to make a reverse stenciled sign. Painting a wood sign with no paint bleed, paint peel up, crisp lines.

7. PEEL UP YOUR STENCIL

While your paint is still WET peel up your stencil. I find that a sharp xacto knife works perfectly for this step. It easily gets under the stencil film without damaging your wood sign so you can lift the stencil up and off your wood base.

DIY sign painting tutorial. How to make a reverse stenciled sign. Painting a wood sign with no paint bleed, paint peel up, crisp lines.

8. FINISH

Let your sign dry completely. You can leave it as is or your can sand around the edges to give it a more distressed look like the Bless our Nest wood sign I made.

DIY sign painting tutorial. How to make a reverse stenciled sign. Painting a wood sign with no paint bleed, paint peel up, crisp lines.

I hope you enjoyed this sign painting tutorial and it helps you on your sign painting journey. As with all of my tutorials, if you have any questions please leave them below in the comments.

Easily attach hanging hardware to your signs

How to attach hanging hardware to wood signs. Easily add a sawtooth hanger to your handpainted signs.

Attach your own sawtooth hanger to your wood signs

Even if you’ve never used a hammer in your entire life you can quickly pick up this new skill to attach hanging hardware to your signs. You might enjoy this so much that you start using other tools. Not that long ago a hammer was pretty much the only tool I knew how to operate. I was deathly afraid of all power tools but over time I have grown a love, really an obsession, for them and now use power tools daily. You can read more about what power tools I recommend for crafty people and about how I’ve overcome that very real fear that a miter saw would completely chop me in half. Thank goodness that fear is behind me so I can make amazing projects and share them with you.

Affiliate Disclosure. Some of the links on this website are affiliate links, which means that I may earn a small commission if you click on the link or make a purchase using the link. If you make a purchase you will not be charged anything additional. This is just a way I can help add to our family finances to raise our four daughters. Please know I would never recommend a product or service I do not totally stand behind.

When you’re done reading this tutorial be sure to check out my other tips for sign painting. Like how to save money on stencil film for sign painting, how to build a pallet style sign, and these 6 must haves for stenciling wooden signs.

HOW TO ADD YOUR OWN HANGING HARDWARE TO YOUR HOME DECOR

Here’s what you need

1. MEASURE

Flip your sign so that you have the front facing down. Be sure you have it so you are working on the top and not the bottom of the sign. Measure to find the middle of the wood sign and make a mark with a pencil.

How to attach a sawtooth hanger to a wood sign. Add your own hanging hardware to your handmade wood signs quick and easy.

2. PLACE YOUR HARDWARE

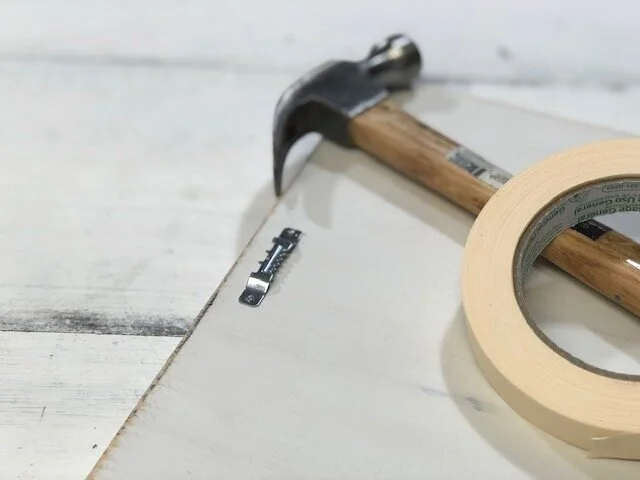
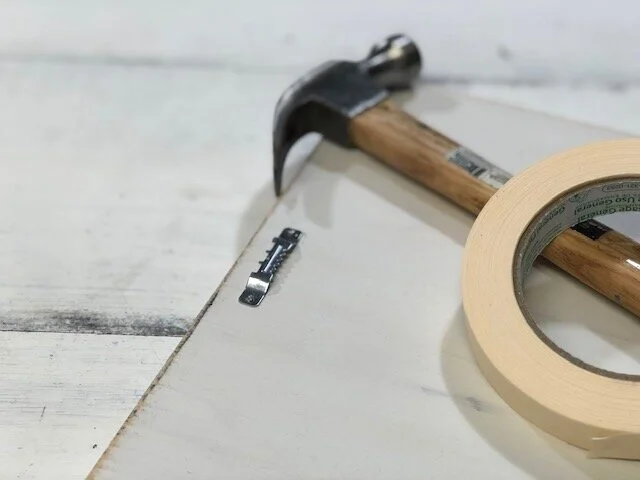
Attach a piece of tape to the front of your sawtooth hanger, masking tape works great for this but you can use regular scotch tape if that’s all you have. Then place it evenly where you made your pencil mark. The tape helps hold down the hardware so it doesn’t move around when attaching it to your sign.

How to attach a sawtooth hanger to a wood sign. Quick and easy way to put hanging hardware on a sign to hang. Use masking tape to hold your sawtooth hanger in place before you hammer it down.

3. HAMMER YOUR NAILS IN

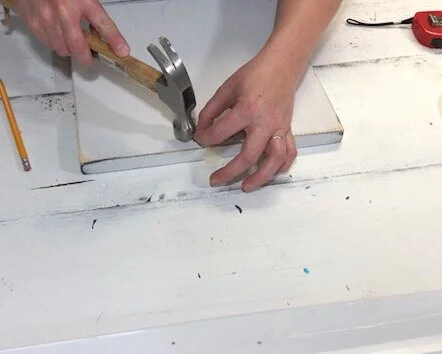
Once you have you masking tape holding your sawtooth hanger in place you can hammer your nails in. Hold your nail steady with one hand and lightly tap it with the hammer using your other hand. It doesn’t take much force to drive these small nails in so take your time. If you hammer too hard you can smash your sawtooth hanger and then have to replace it with a new sawtooth hanger. After you have one nail in do the same for the second nail. Then remove the masking tape.

How to attach a sawtooth hanger to a wood sign. Quick and easy way to put hanging hardware on a sign to hang. Use masking tape to hold your sawtooth hanger in place before you hammer it down.

Now you’re ready to hang your sign up on your wall and enjoy it! Let me know if you have any questions in the comments below.

How to attach a sawtooth hanger to a wood sign. Quick and easy way to put hanging hardware on a sign to hang. Use masking tape to hold your sawtooth hanger in place before you hammer it down.

New to cricut? 10 must have supplies and accessories you need to get started with your CRICUT

10 must  haves to get started using your cricut. What you should buy when you are just starting out using your Cricut cutting machine. Tips to using a Cricut  when you are new to vinyl cutting.

What are the must have craft supplies to use with your Cricut?

Welcome to the CRICUT world! I know when you first get your machine it can be SUPER overwhelming. With all the amazing projects that are out there it’s so hard to figure out what you should buy. Are you going to be paper crafting? Vinyl crafting? T-shirt making? Sign making? SOOOOOO many things to decide. But no matter which path your crafty heart wants to take these 10 craft accessories and supplies will set you up for success.

And it doesn’t matter which machine you use, an Explore or a Maker, these craft supplies will work perfectly with both Cricut cutting machines. I personally use a Cricut explore for both my personal and my business life. I have yet to upgrade to the Cricut Maker although I would LOVE to! I just can’t bring myself to spend that money when I have a Cricut machine, actually two because I found them both on a good sale, that works perfectly fine.

 Affiliate Disclosure. Some of the links on this website are affiliate links, which means that I may earn a small commission if you click on the link or make a purchase using the link. If you make a purchase you will not be charged anything additional.

See one of my latest videos on how I used my CRICUT to create a rustic sign with no paint bleed.

If you get to a point where you are crafting like crazy you might want to look into where you can buy things you use often in bulk. Here’s how I save lots of money on stencil film for my handmade business.

10 supplies you need to start creating with your Cricut

Here’s what you need to get started using your CRICUT

  1. CRICUT CUTTING MATS

  2. XACTO KNIFE

  3. VINYL SQUEEGEE

  4. CARDSTOCK

  5. SCISSORS

  6. ASSORTED VINYL

  7. TRANSFER TAPE

  8. GLUE TAPE

  9. MARKERS

  10. CRICUT ACCESS/DESIGN SPACE

1. CRICUT CUTTING MATS

These are a must have no matter what type of project you are planning to cut out using your Cricut machine. Cricut has several different mat options and thankfully they are color coded to make crafting even easier for us.

I personally use a green mat for most of my DIY craft projects but I also have a purple and pink mat on hand for when I need them. Here’s a project I used my CRICUT PURPLE MAT to cut out faux leather hair bows for my youngest daughter’s Valentine’s Day cards. It worked great for that type of material.

2. XACTO KNIFE

You must have an xacto knife to use with your Cricut projects. This is my most versatile tool I have in my craft room. I actually prefer using an xacto knife when weeding my designs vs using a Cricut weeding tool. And they are super inexpensive and you can pick one up almost anywhere. You can also use this to cut tiny spots in a design that your Cricut may have slipped on during the cutting process.

3. VINYL SQUEEGEE

This is typically used when applying vinyl but you can also use them to smooth out paper projects too. There are several different sizes when buying these squeegees. I use my vinyl squeegee mostly for making my wooden signs but I use it for other non vinyl projects as well.

4. CARDSTOCK

Cardstock is a must have to keep in any craft room in my opinion. Of course it’s great to create beautiful cards but cardstock has a purpose beyond that too. It is so much thicker than regular paper that it’s great for using for patterns. I use cardstock all the time to cut out different shapes to trace on to wood then I cut them out using my scroll saw. Check out these adorable pumpkins I made using my Cricut and my scroll saw. I also used cardstock to help make this light up fairy jar.

I highly recommend stocking up when the big box craft stores have their cardstock sales. This is what I do. Having crafting little girls we go through a LOT of cardstock every year.

5. SCISSORS

This is just a must have for crafting in general. But I do suggest having a different pair of scissors for the different materials you will be using. One for paper crafts. One for heat transfer vinyl. One for regular vinyl. One for fabric, etc. Unless you have kids then, pretty much all of the scissors for good for all the things ;)!

6. ASSORTED VINYL

Vinyl, there are several different options here. I won’t go super deep about their differences in this post but you can use vinyl for many different projects: t-shirt designs, decals on cars and cups, sign making, labeling your pantry and so much more. You can buy bundles of different types of vinyl. This is a great way to have something on hand just in case you have the crafty need to create something that requires a certain type of vinyl.

  • HTV- used on fabric and comes with its own transfer sheet

  • ORACAL 651- permanent grade vinyl that is suitable for outdoors up to 6 years

  • ORACAL 631- removable vinyl typically used wall decals

  • ORAMASK 813- translucent blue material used for stenciling

7. TRANSFER TAPE

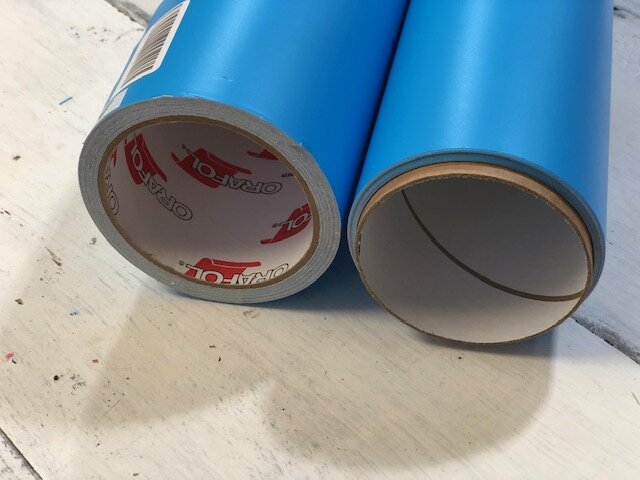
Transfer tape is generally great for vinyl type projects. It is a carrier sheet to get your vinyl design off of its paper backing and onto the base you are placing it on. I know it can be really difficult deciding which transfer tape will be the exact one you should use, I have battled with this myself. Here are couple things to know, a stronger high tack transfer tape is best for permanent grade vinyl. It takes a stronger tack to lift the vinyl up off of the paper backing. Stenciling material can be removed from its paper backing a little easier since the grip on that isn’t as strong as a permanent grade vinyl. Here’s what I recommend:

8. GLUE TAPE

This is a must if you are doing any kind of paper crafting. Glue tape is quick and easy and gives a better overall finish than using wet glues. There are several different options for glue tape out there. Just like with anything they range from super inexpensive to a little more expensive.

9. MARKERS

Instead of making a cut project with your Cricut you can also WRITE with your Cricut using these Cricut pens. You can do all kinds of projects with these markers including making personalized coloring sheets for your kiddos. I don’t know about the new Cricut Maker but the older Explore, which is what I use to create all of my crafty projects, you use a pen adapter to use these with your machine.

10. CRICUT ACCESS/ CRICUT DESIGN SPACE

Cricut Access is a must if you plan on creating projects at least once a month. I have had it for what seems like forever and I can’t tell you how much time and money it has saved me over the years, and with four kids that is a big winner for those reasons alone! With the Cricut Access membership plan you get access to THOUSANDS of images, fonts, ready made projects, and you also get a discount when you order products from the Cricut website. And a bonus because you can add your discount to their sale prices! WOOHOO!

Although there is SO MUCH MORE I’d love to share these are my top 10 supplies and accessories you need to start creating with your Cricut. If you have anything you’d add or anything you have questions about please leave a comment below.

DIY paint stick wall hanging, with FREE printable

How to make interchangable printed wall art at home using paint sticks. DIY stir stick wall art. Print from home computer to make beautiful and rustic wall hangings for cheap. DIY farmhouse stir stick decor.

MAKE RUSTIC INTERCHANGEABLE WALL ART USING PAINT STIR STICKS AND A PRINTER AT HOME

Paint sticks don’t sound like the kind of thing you would purposely hang on your wall as part of your décor. Well think again! They are actually PERFECT to use to make interchangeable hanging frames. AND they are SO cheap to make which makes this crafty DIY even better! With a little bit of paint, magnetic tape,printable and some twine you can transform your own stir sticks into a farmhouse style picture frame.

Affiliate Disclosure. Some of the links on this website are affiliate links, which means that I may earn a small commission if you click on the link or make a purchase using the link. If you make a purchase you will not be charged anything additional.

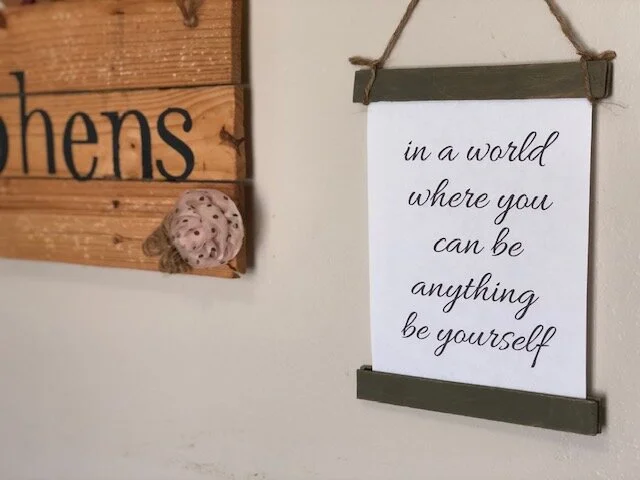
BONUS grab my FREE printable to use for your own wall hanging. I love being a girl mom x4 but it for sure has it’s moments of hard conversations. One of those hard convos I had recently is the sole purpose to creating this printed wall hanging. I had plans to make these stir stick decorations but I wasn’t really planning to hang this exact piece. I was going to do something a little patriotic to tie in with this repurposed drawer into an American flag instead I chose to showcase a saying that would sink in a little deeper for my girls. When they read it I hope it sets in even deeper that they are perfect just the way they are.

If you like easy to make signs check out this super simple free standing wood sign. All you need is a printer and some mod podge and of course a piece of wood ;).

How to make interchangable printed wall art at home using paint sticks. DIY stir stick wall art. Print from home computer to make beautiful and rustic wall hangings for cheap. DIY farmhouse stir stick decor.

Here’s how you can make your own affordable rustic wall hanging

Here’s what you’ll need

Helpful tools

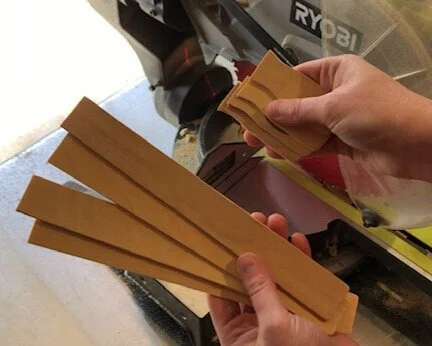
ONE- The first thing I did was cut the ends off of all of my paint sticks. You can keep these on if you want but I like the look of them cut off better. I used my miter saw to do this.

How to make interchangable printed wall art at home using paint sticks. DIY stir stick wall art. Print from home computer to make beautiful and rustic wall hangings for cheap. DIY farmhouse stir stick decor.

TWO- I painted the blank side of my paint sticks gray. I really wanted to stain them in gray but honestly I didn’t want the mess so instead I painted a thin layer then took a paper towel and wiped it off. This gives a faux stained look.

How to make interchangable printed wall art at home using paint sticks. DIY stir stick wall art. Print from home computer to make beautiful and rustic wall hangings for cheap. DIY farmhouse stir stick decor.

THREE- I attached a strip of magnetic tape to the insides, the side I didn’t paint, of each paint stick. To save on tape I cut a strip in half length wise for one top and one bottom stick. I’d never used this stuff before this project and so far I’m impressed with how well it works.

How to make interchangable printed wall art at home using paint sticks. DIY stir stick wall art. Print from home computer to make beautiful and rustic wall hangings for cheap. DIY farmhouse stir stick decor.

FOUR- I printed off my printable from my home computer and trimmed about 1/4” off of each long edge with my paper trimmer (if you don’t have one you NEED to get one lol they are so inexpensive and save so much time and stress from not having straight cut lines when you need them). Then I sandwiched the printable between the paint sticks at the top and bottom.

How to make interchangable printed wall art at home using paint sticks. DIY stir stick wall art. Print from home computer to make beautiful and rustic wall hangings for cheap. DIY farmhouse stir stick decor.

FIVE- To keep this stir stick wall art interchangeable I loosely tied my twine hanger to the ends of the top sides. This way if I want to change it out or if somehow a spaghetti noodle gets flung on to it, which can totally happen with four kids let’s be real, I can easily slip off the twine remove the old print add a new one and slip the twine loop back on. Super simple and easy!@

How to make your own paint stick wall hanging. DIY stir stick wall art for rustic home decor. Print your own wall art for farmhouse home decor.
Rustic home decor for cheap. Make your own printable wall art using paint sticks.

Like with all of my crafty tutorials if you have any questions please feel free to ask away:)!

Happy Crafting!

DIY 2x4 chunky wood flag

DIY CHUNKY WOOD FLAG, make your own wood flag from scrap 2x4 lumber. How to make a wood flag using 2x4 and 2x6. Easy American flag tutorial.

HOW TO MAKE A PRIMITIVE AMERICAN FLAG

I love a good scrap wood project. That was the inspiration behind this DIY chunky wood flag. I have shelves full of scrap pieces of wood in my workshop, aka my garage lol! I just can’t bring myself to toss out perfectly good pieces of future projects. I had been wanting to make one of these 2x4 flags for a while now and since we are all on lockdown I thought now would be the perfect time to make one and share the DIY with you all.

I didn’t just use a 2x4 to create this wooden flag. I also used a scrap piece of 2x6 that we have loads of leftover from a bunkbed project we made for our four daughters. And when I say we I really mean that my husband made because I pretty much just stood there and handed him things as he needed them.

If you don’t have all the tools to make this project happen grab your DIY CRAFT KIT HERE

Affiliate Disclosure. Some of the links on this website are affiliate links, which means that I may earn a small commission if you click on the link or make a purchase using the link. If you make a purchase you will not be charged anything additional.

How to make a 2x4 American flag. DIY chunky wooden flag for your primitive rustic home decor. This tutorial will show you how to paint and distress your own wood flag to tie in with your 4th of July, Independence Day, farmhouse style decorations.

Be sure to check out a few of my other 4th of July patriotic themed projects: RAG WREATH, LEANING PORCH SIGN, and this HANGING WOOD FLAG

MAKE YOUR OWN RUSTIC WOOD AMERICAN FLAG

Here’s what you’ll need

Helpful tools

How to make a 2x4 American flag. DIY chunky wooden flag for your primitive rustic home decor. This tutorial will show you how to paint and distress your own wood flag to tie in with your 4th of July, Independence Day, farmhouse style decorations.

ONE- If you didn’t grab a DIY craft kit the first thing you want to do is cut your wood pieces. Use your miter saw to cut the 2x4 to 5.5” and the 2x6 to 5”. You will place the 2x6 on it’s side so that it stands 5.5” tall. Use your sander to give them a quick sanding. I use a cordless Ryobi sander and really love it! Then wipe all the sawdust off with a lint free cloth.

How to make a 2x4 American flag. DIY chunky wooden flag for your primitive rustic home decor. This tutorial will show you how to paint and distress your own wood flag to tie in with your 4th of July, Independence Day, farmhouse style decorations.

TWO- Paint the 2x4 completely blue. You will have to wait for the front to dry before you can start painting the back. Since this is a dark color one coat should be enough but you can paint a second coat if you aren’t happy with the coverage.

How to make a 2x4 American flag. DIY chunky wooden flag for your primitive rustic home decor. This tutorial will show you how to paint and distress your own wood flag to tie in with your 4th of July, Independence Day, farmhouse style decorations.

THREE- Paint the 2x6 completely white. Wait for the front to dry before you paint the back. After all sides have dried you’ll want to paint a second coat of white paint to get a good coverage. Let dry.

How to make a 2x4 American flag. DIY chunky wooden flag for your primitive rustic home decor. This tutorial will show you how to paint and distress your own wood flag to tie in with your 4th of July, Independence Day, farmhouse style decorations.

FOUR- Take your cardstock star cutout and trace around it with a pencil in three places on the front side. I staggered mine because I like that look but you can place yours wherever you’d like. Try to trace lightly so that it’s easier to paint over. Using a small paint brush paint inside the star outline. A thin layer works best so you don’t have streaking. Paint a second layer once that layer is dry.

How to make a 2x4 American flag. DIY chunky wooden flag for your primitive rustic home decor. This tutorial will show you how to paint and distress your own wood flag to tie in with your 4th of July, Independence Day, farmhouse style decorations.

FIVE- After your white block is totally dry you can start painting on your stripes. To get even stripes you want to use masking tape. Be sure your block is standing at 5.5” tall before you start applying your tape. If you are using .75” masking tape you will want to start at the top and apply a piece of tape all the way around but apply your tape so that it hangs off the top slightly. This way you aren’t left with a super thin stripe on the bottom. This first piece of tape is called your spacer piece.

How to make a 2x4 American flag. DIY chunky wooden flag for your primitive rustic home decor. This tutorial will show you how to paint and distress your own wood flag to tie in with your 4th of July, Independence Day, farmhouse style decorations.

Then take another piece of tape and apply it directly below your spacer piece. Remove your spacer piece and then apply it directly below that second piece of tape. You will do this the whole way down your 2x6. This is what it should look like when you’re done.

How to make a 2x4 American flag. DIY chunky wooden flag for your primitive rustic home decor. This tutorial will show you how to paint and distress your own wood flag to tie in with your 4th of July, Independence Day, farmhouse style decorations.

SIX- This step isn’t 100% necessary but it does help with reducing paint bleed. Take your white paint brush and paint a super thin layer of paint where the tape and the wood meet, the seam. Let dry.

How to make a 2x4 American flag. DIY chunky wooden flag for your primitive rustic home decor. This tutorial will show you how to paint and distress your own wood flag to tie in with your 4th of July, Independence Day, farmhouse style decorations.

SEVEN- Where the wood is exposed paint that red. Let dry then paint a second coat. While the paint is still wet peel up all the tape. Let dry.

How to make a 2x4 American flag. DIY chunky wooden flag for your primitive rustic home decor. This tutorial will show you how to paint and distress your own wood flag to tie in with your 4th of July, Independence Day, farmhouse style decorations.

EIGHT- After your blocks are dry you’ll want to distress them. Take a piece of sandpaper, or your orbit sander, and distress both blocks. You want to focus on the edges and then lightly go over the front, back, and sides. When you’re finished distressing you want to wipe the dust off with a lint free cloth.

How to make a 2x4 American flag. DIY chunky wooden flag for your primitive rustic home decor. This tutorial will show you how to paint and distress your own wood flag to tie in with your 4th of July, Independence Day, farmhouse style decorations.

Enjoy your new American flag décor! Like with all of my DIY projects if you have any questions please feel free to ask.

How to make a 2x4 American flag. DIY chunky wooden flag for your primitive rustic home decor. This tutorial will show you how to paint and distress your own wood flag to tie in with your 4th of July, Independence Day, farmhouse style decorations.

Free standing wood stars using your Cricut

How to use your Cricut to make wood star cutouts. Learn how to make templates with your vinyl cutting machine to cut shapes and letters out of wood.

One thing I never thought I’d be doing is using my Cricut to help me cut out shapes and letters from pine boards. When I got my very first Cricut machine about a decade ago I always thought I’d just be using my new fancy cutting machine to cut paper and make decorations for my kid’s birthday parties. That’s was the case for the first few years. But now my Cricut craft horizon has been broadened and I’m using it for more than I could have dreamed!

Pairing this wonderful little machine of magic with my power tools has been a GAME CHANGER for my crafting abilities. And it can be for you too!

If you’re not totally comfortable using power tools I totally understand and know it’s a very real fear. I was in that same boat not that long ago and slowly was able to put that fear behind me. Here’s a list a power tools that I recommend all lady crafters get. I started off small, mastering the handheld sander, this thing can be SUPER intimidating, then worked my way up to being able to using all the power tools with no hesitation.

Affiliate Disclosure. Some of the links on this website are affiliate links, which means that I may earn a small commission if you click on the link or make a purchase using the link. If you make a purchase you will not be charged anything additional.

USE YOUR CRICUT TO HELP YOU CUT OUT WOOD PROJECTS

Here’s what I used:

The first thing I did was decide how big I wanted my wooden stars to be. I always have scraps of 1x6 boards so I decided 5.4” at the star’s widest would be a good size. I opened up my Cricut app on my computer and added a simple star from the shapes section.

I highlighted it and clicked on the width, since that had the biggest number, and changed it to 5.4”. I left the image locked so that it would be proportionate.

I set my image to cut. Added a piece of cardstock to my green mat and set my blade to light cardstock then hit cut. I also want to add that you can use an older machine like I’m using. I have yet to buy a Cricut Maker, even though I would LOVE to have one but my Cricut Explore is getting everything done for now.

How to use your Cricut to make wood star cutouts. Learn how to make templates with your vinyl cutting machine to cut shapes and letters out of wood.

After my cardstock template was cut out I used that to help me cut out the a wood star from a piece of pine.

How to use your Cricut to make wood star cutouts. Learn how to make templates with your vinyl cutting machine to cut shapes and letters out of wood.

I traced around the star using a pencil then used my Ryobi scroll saw to cut the shape. If you’ve never used a scroll saw it’s a lot like using a sewing machine. Don’t go too fast or you will not get as precise of a cut.

How to use your Cricut to make wood star cutouts. Learn how to make templates with your vinyl cutting machine to cut shapes and letters out of wood.

When I’m cutting out shapes that have lots of angles I don’t do one continuous cut. I cut till I get to an angle then back out. Then make another cut from the opposite side to meet at that angle point. This is just works for me, I know everyone is different so you'll have to find your own rhythm.

How to use your Cricut to make wood star cutouts. Learn how to make templates with your vinyl cutting machine to cut shapes and letters out of wood.

I hope you can use this new information to help you explore all the possibilities of what your Cricut can do. You can take it so much further than just card making and vinyl projects.

How to use your Cricut to make wood star cutouts. Learn how to make templates with your vinyl cutting machine to cut shapes and letters out of wood.

Like with all of my tutorials if you have any questions please ask away. I am happy to try and answer :)! Click here to check out how I finished my wood star cutouts.

Reusable oil spray bottles + FREE SVG file

DIY labeled reusable oil spray bottles. How to make your own pam spray bottles for vegetable and olive oil for the kitchen. Plus a FREE svg file to download. Great small project to use for Cricut. Labeling kitchen with vinyl.

The days of buying cooking oil spray bottles are over. I don’t know about you but I really dislike buying Pam at the grocery store, actually it’s never name brand because I’m super frugal and have a big family to feed lol! Buying that spray always feels like such a fat waste of money and in our house cooking oil spray doesn’t last very long anyway so we are always running out at the worst time. Yes, using a paper towel with oil on it will get the job done but sometimes it would just be one less thing to stress about when you go to pull it out of the cabinet only to find one of the oldest of the four daughters put it back in there with barely a squirt left in it.

So I got on Amazon and found some heavy duty looking spray bottles that looked perfect to hold our veggie and olive oils.

Even though you can totally tell which one is which I thought it would still be a good idea to label them. I figured it would at least save me from having the same conversation a couple times a week as to what one is olive oil and what one is vegetable oil.

I really like the skinny type fonts but since the labels are going on oil bottles I thought a thicker font would work much better. If a little oil gets under the vinyl decals of a thin font they will come off super easy. If you want to use the same SVG I used you can get it here in my FREE RESOURCE LIBRARY.

Reusable oil spray bottle for the kitchen. Vegetable and olive oil mister bottles to refill. Never buy pam spray again instead buy glass bottles and make your own reusable spray bottles for kitchen oils. Plus svg vinyl decals.

Watch my video on my YouTube channel or keep scrolling for the written/photo tutorial

DIY labeled reusable oil spray bottles. How to make your own pam spray bottles for vegetable and olive oil for the kitchen. Plus a FREE svg file to download. Great small project to use for Cricut. Labeling kitchen with vinyl.

1. Cut out your vinyl decal. I used my Cricut Explore set on the vinyl cut setting and the green cutting mat. I used Oracal 651, permanent outdoor grade vinyl, in black matte finish. I measured out the length of the spray bottles I was applying it to and made it a little shorter in length. I keep most all of my scraps of vinyl in a plastic tote just for projects like this. You never know when you’ll need a small piece of vinyl lol!

DIY labeled reusable oil spray bottles. How to make your own pam spray bottles for vegetable and olive oil for the kitchen. Plus a FREE svg file to download. Great small project to use for Cricut. Labeling kitchen with vinyl.

2. I like using an xacto knife to weed my vinyl projects. You can use a fancy vinyl picker like this one but I think these are a little more difficult to hold than a simple xacto knife. Be sure when you weed your design you are weeding out the background, not the letter themselves.

DIY labeled reusable oil spray bottles. How to make your own pam spray bottles for vegetable and olive oil for the kitchen. Plus a FREE svg file to download. Great small project to use for Cricut. Labeling kitchen with vinyl.

3. I completely forgot to wash the bottles before applying the decals but I was sure to wash them before I added the oil to them ;). You want to wipe down the area of the bottle you are applying the decal to with isopropyl alcohol. This will remove any dirt or oil and allow for the best adhesion of the vinyl.

DIY labeled reusable oil spray bottles. How to make your own pam spray bottles for vegetable and olive oil for the kitchen. Plus a FREE svg file to download. Great small project to use for Cricut. Labeling kitchen with vinyl.

4. Apply transfer tape to the front of your decal. Use your vinyl squeegee to remove any air bubbles then peel the paper backing off of your vinyl decal.

DIY labeled reusable oil spray bottles. How to make your own pam spray bottles for vegetable and olive oil for the kitchen. Plus a FREE svg file to download. Great small project to use for Cricut. Labeling kitchen with vinyl.

5. Place your vinyl decal where you would like it to go on your glass spray bottle. I like to hover it over where I’m thinking about placing it first. Once you place vinyl down, especially small decals like these, it’s really difficult to get them to come up without ruining them.

DIY labeled reusable oil spray bottles. How to make your own pam spray bottles for vegetable and olive oil for the kitchen. Plus a FREE svg file to download. Great small project to use for Cricut. Labeling kitchen with vinyl.

6. When you have your decal where you want it to go place it down gently starting from the middle and work your way out. This will help to keep the air bubbles to a minimum. Use your vinyl squeegee to remove any air bubbles you see then peel the transfer tape off of your vinyl decal.

DIY labeled reusable oil spray bottles. How to make your own pam spray bottles for vegetable and olive oil for the kitchen. Plus a FREE svg file to download. Great small project to use for Cricut. Labeling kitchen with vinyl.

7. Fill your bottles with oil and enjoy!

DIY labeled reusable oil spray bottles. How to make your own pam spray bottles for vegetable and olive oil for the kitchen. Plus a FREE svg file to download. Great small project to use for Cricut. Labeling kitchen with vinyl.

I know we are going to get A LOT of use out of these reusable oil spray bottles!

If you have any questions please ask away:)!

How to make your own corsage with faux flowers

DIY corsage made with faux flowers. How to make a corsage for little girls with fake flowers from Walmart. Silk flower easy corsage for spring, prom, weddings, father daughter dance.

DIY YOUR OWN CORSAGE WITH FAKE FLOWERS

Real corsages are gorgeous! But they can be a little pricey, especially for being a small part of the fancy attire. Our small town held a father daughter dance and I really wanted my girls to feel extra special and wear a corsage. Since my husband was taking three of our four daughters I figured it would be more cost effective if I ordered them from a big chain grocery florist. I looked online and they were $20+ per corsage plus $20 for my husbands boutonniere. A total of $80 for accent flowers…that was not in the budget. What I did instead was take a trip to our local Walmart and picked out some inexpensive flowers, hair ties, and floral tape. I spent a total of $13 and everyone got a beautiful corsage/boutonniere to wear to the fancy daddy daughter dance.

Affiliate Disclosure. Some of the links on this website are affiliate links, which means that I may earn a small commission if you click on the link or make a purchase using the link. If you make a purchase you will not be charged anything additional. This is just a way I can help add to our family finances to raise our four daughters. Please know I would never recommend a product or service I do not totally stand behind.

I’ll be honest, I tried to make one for the oldest of the four daughters when she was in the first grade and it turned out awful! I used a real flower that was WAY too big and it seriously looked like a Pinterest fail! This time around I extra crossed my fingers they would turn out as a win and thank goodness they did! The girls got SO MANY C0MPLIMENTS on them at the dance.

How to make your own corsage using faux flowers. DIY fake flower wrist corsage tutorial using spring florals. Father daughter dance flowers.

DIY FLOWER CORSAGE

Here’s what I used

  • faux round roses

  • faux babies breath

  • faux spring flower bunch

  • green floral tape

  • felt

  • scissors

  • wire cutters

  • black hair tie (pony tail holder)

  • hot glue gun

  • gorilla glue hot glue sticks

Make this DIY even more inexpensive by visiting your local DOLLAR TREE. They have a great floral selection depending on the season.

How to make your own faux flower corsage. Pony tail holder wrist corsage DIY using fake flowers, super inexpensive to make. Spring flower corsage to make for weddings, father daughter dance, or prom.

I found everything I needed at Walmart. I already had the glue, glue gun, and felt on hand so I didn’t need to pick those up. I also had a ton of supplies left over. I used some in their hair for little accents and then still had some left over. I couldn’t believe it cost around $3 per corsage to make. That beats $20/ wrist corsage any day!

1. I cut a rectangle that was smaller than the width of one of my daughter’s wrist. This is what I glued my flowers to. Then, I cut a second rectangle that was a little smaller than the first rectangle.

DIY corsage made with faux flowers. How to make a corsage for little girls with fake flowers from Walmart. Silk flower easy corsage for spring, prom, weddings, father daughter dance.

2. I picked out 2 main flowers for the corsages. I used these gorgeous round roses I found at my local Walmart that were about $3 per stem. I used 2 per corsage and 1 for my husband’s boutonniere. I made these round roses the focal point and added the other flowers as accents. I pulled the round rose flower heads off of their stems then I cut them flush at the bottom of the flower so that the bottom side of the flower was flat.

DIY corsage made with faux flowers. How to make a corsage for little girls with fake flowers from Walmart. Silk flower easy corsage for spring, prom, weddings, father daughter dance.

3. I started layering the flowers that surrounded the main flowers. This took me a little while to get the flowers where I wanted them to go. I used a combination of baby’s breath, lavender, and a spring flower bunch. I had to trim them up here and there, so don’t be afraid to do that too. This will keep your corsage from being gigantic. See the picture below, I had to trim down the lavender stems so that they wouldn’t be so long. I did this carefully making sure I wasn’t removing too much.

DIY corsage made with faux flowers. How to make a corsage for little girls with fake flowers from Walmart. Silk flower easy corsage for spring, prom, weddings, father daughter dance.

4. I attached the accent flower stems together. Basically I made double ended floral stems. I tried to make them somewhat similar in size in both length and width so that the corsage wasn’t lopsided. I didn’t make them identical, I used different accent flowers on each end but was sure to incorporate baby’s breath on each end. Then I wrapped the middle of the double ended floral stem in green floral tape to keep them together.

DIY corsage made with faux flowers. How to make a corsage for little girls with fake flowers from Walmart. Silk flower easy corsage for spring, prom, weddings, father daughter dance.

5. I placed them on the bigger rectangle to see where exactly I wanted to place them before I started gluing anything down. This is the time to trim your felt down if you need to.

DIY corsage made with faux flowers. How to make a corsage for little girls with fake flowers from Walmart. Silk flower easy corsage for spring, prom, weddings, father daughter dance.

6. Then I used my glue gun to glue everything down to the felt. I first glued down the double ended floral stem I made. Let that dry so that it gets secure. Then I glued down the main focal point flowers, the round roses.

DIY corsage made with faux flowers. How to make a corsage for little girls with fake flowers from Walmart. Silk flower easy corsage for spring, prom, weddings, father daughter dance.

7. Fill in the gaps. After I got the roses glued down and the glue dried I added in more accent flowers where I thought the corsage was bare. I even cut off single leaves, this spring bunch I picked up had the most beautiful soft lambs ear like leaves. I added in several of those leaves where I thought they would look good. I attached some to the sides of the roses. I also did this with the baby’s breath. Before I glued them down I was sure to double check I liked that placement. A tiny dab of glue is all you need for these little pieces.

DIY corsage made with faux flowers. How to make a corsage for little girls with fake flowers from Walmart. Silk flower easy corsage for spring, prom, weddings, father daughter dance.

8. Once I was happy with how it look and the glue was dry I flipped it over and added a thick hair tie. While recording this tutorial I actually attached my hair tie the wrong way. For the most comfort I suggest gluing on the hair tie so that the corsage lays vertically against the wrist. So you would want to attach your hair tie so that it would sit on the rectangle horizontally. Once that glue dries glue the second rectangle on top of the hair tie so that the hair tie is sandwiched in-between the two pieces of felt. This will make it really secure and will be difficult for the elastic to come off.

DIY corsage made with faux flowers. How to make a corsage for little girls with fake flowers from Walmart. Silk flower easy corsage for spring, prom, weddings, father daughter dance.

I hope you enjoyed this inexpensive tutorial. Like with all of my posts, if you have any questions at all please don’t hesitate to ask.

DIY corsage made with faux flowers. How to make a corsage for little girls with fake flowers from Walmart. Silk flower easy corsage for spring, prom, weddings, father daughter dance.

Happy crafting!

How I made super girly dinosaurs for my daughter's bedroom

Make your little girl's dinosaur room dreams come true. How to spray paint cheap plastic dinosaurs to make them girly. DIY girl themed dinosaur bedroom for your daughter.

DIY GIRLY DINOSAURS

My youngest daughter is obsessed with dinosaurs. But she’s also really into things that are sparkly, pink, and super girly! While we were taking a wonderful stroll around Hobby Lobby we came across this adorable dino display. It was full of these really cool signs, garland, figurines, and more. The only thing was that everything was dark blue, orange, dark green, red. Which are great colors but her favorites are pink, mint, purple, light green…and glitter lol! Hobby Lobby didn’t have any dinosaur décor in those colors. One of the things she really really really loved were these ceramic dinos. Again, they were in the typical “boy” colors. So I thought ‘Megan, just buy some plastic ones and paint them’. So I did just that!

Affiliate Disclosure. Some of the links on this website are affiliate links, which means that I may earn a small commission if you click on the link or make a purchase using the link. If you make a purchase you will not be charged anything additional. This is just a way I can help add to our family finances to raise our four daughters. Please know I would never recommend a product or service I do not totally stand behind.

Make your little girl's dinosaur room dreams come true. How to spray paint cheap plastic dinosaurs to make them girly. DIY girl themed dinosaur bedroom for your daughter.

See, super adorable dinosaur décor but it doesn’t really go with glittery unicorns and magical butterflies.

The next day we took a trip to our local Walmart to find some inexpensive dinosaurs and spray paint. My sweet girl was so excited! She got to pick which dinosaurs she wanted AND she got to pick the colors. It was so cute watching her little face light up choosing things for her room.

She picked out three different dinosaurs and chose the colors light pink, mint green, and white.

Make super girly dinosaurs for your daughter’s bedroom

Here’s what you’ll need

ONE- The first thing I did was place a push pin in each dinosaur foot. Since the dinosaurs are hard plastic it was a little difficult to get them in.

Make your little girl's dinosaur room dreams come true. How to spray paint cheap plastic dinosaurs to make them girly. DIY girl themed dinosaur bedroom for your daughter.

TWO- Shake the can really well then spray a layer of paint on each dinosaur. I bought the “fancy” spray paint, as I like to call it, because it has primer already in it. It’s cheaper and easier in the long run to just buy the more expensive spray paint so you have less layers to paint and it takes less time to finish your project.

Make your little girl's dinosaur room dreams come true. How to spray paint cheap plastic dinosaurs to make them girly. DIY girl themed dinosaur bedroom for your daughter.

THREE- Let that layer completely dry. I let mine dry overnight just to be sure it was fully dry.

FOUR- Spray a second layer on each dinosaur.

FIVE- Let your dinosaurs dry. Since I used gloss spray paint it seemed to take the dinosaurs a long time for the second layer to dry. I let them sit for a full 48 hours before taking the pushpins out of their feet. Because my daughter will be playing with them I am letting them cure for 30 days.

Make your little girl's dinosaur room dreams come true. How to spray paint cheap plastic dinosaurs to make them girly. DIY girl themed dinosaur bedroom for your daughter.

Seriously, these are the CUTEST dinosaurs!!

Make your little girl's dinosaur room dreams come true. How to spray paint cheap plastic dinosaurs to make them girly. DIY girl themed dinosaur bedroom for your daughter.

I have plans to make her MANY more girly dinosaur decorations for her room soon. One that will include some glitter too!

I hope this inspires you to create some adorable dino décor for your own little girl. If you do GIRL UP your dinos I’d love to see what you come up with! As with all of my DIY posts if you have any questions please ask away. I’m always happy to help.

DIY painted baby name and stats sign

How to stencil a wood sign with NO paint bleed. Using mod podge to paint wooden signs is a good way to get perfectly crisp lines. Make your own personalized baby gift sign using your cricut. DIY baby stats sign.

DIY painted baby name sign with newborn stats

A couple weeks ago a sweet friend of mine from grade school messaged and asked me to help in creating a wreath she’s having made for her very first baby! Of course I said YES! I am just so happy for her as she’s waited a very long time to become a mom and was so honored she asked me to be apart of something she will be hanging in her precious daughter’s room. She sent me all the details she wanted for the sign part of the wreath and I recreated something similar personalized just for her little one.

Affiliate Disclosure. Some of the links on this website are affiliate links, which means that I may earn a small commission if you click on the link or make a purchase using the link. If you make a purchase you will not be charged anything additional. This is just a way I can help add to our family finances to raise our four daughters. Please know I would never recommend a product or service I do not totally stand behind.

I created my template in CRICUT DESIGN SPACE and of course used my Cricut to cut it out. By the way, I have an older style Cricut and still create AMAZING projects with it, although I’d love a Maker just to have one I don’t need one to make all the wonderful things I share on my crafty blog. I often see others get discouraged because they can’t afford the newest machine out there but you can find GREAT deals on older style machines and they do just as much as the newer models :)! If you’re just getting started using your Cricut read this list of 10 things you need to get you started on your Cricut crafting journey.

If you want a more in-depth teaching on SIGN PAINTING you need to get on my list for my DIY SIGN PAINTERS E-COURSE. Click here to get on the list so you’re first to know when it opens back up.

When you’re all finished up reading this tutorial and need help attaching hanging hardware be sure to read this post on how to easily and quickly attach a sawtooth hanger to wood signs

How to paint wood signs with no paint bleed

Here’s what you’ll need

Helpful tools

How to stencil wood signs without paint bleed. Make your own painted wood signs for baby. Personalized baby shower gift with baby's name and stats on it.

For this tutorial I’m focusing on the painting techniques of making a personalized baby sign. CLICK HERE for my tutorial on how to stain wood.

ONE- Start with a pre-stained wood base. See my video on how to stain wood click here. Be sure you are allowing your stained base to dry for at least 24 hours prior to stenciling on it. Stencils will not adhere to a base that isn’t fully dry.

TWO- Apply your stencil. To do this you need transfer tape. Transfer tape allows us to take a stencil and apply it in one whole piece without a headache, we LOVE whoever invented this product! Place your transfer tape sticky side down onto your stencil. Gently push out any air bubbles on the front with your hands, then flip it ver and use your vinyl squeegee and rub the back of it. Slowly remove the paper backing leaving the stencil (blue part) and the clear transfer tape still intact.

How to stencil a wood sign with NO paint bleed. Using mod podge to paint wooden signs is a good way to get perfectly crisp lines. Make your own personalized baby gift sign using your cricut. DIY baby stats sign.

THREE- Flip your stencil over and position it on your wood base. Once you are happy with the placement working from the middle of the stencil out press it down with your hands. Then use your vinyl squeegee and do the same thing.

How to stencil a wood sign with NO paint bleed. Using mod podge to paint wooden signs is a good way to get perfectly crisp lines. Make your own personalized baby gift sign using your cricut. DIY baby stats sign.

FOUR- After you’ve pressed down your stencil you can remove your transfer tape. I’ve found the easiest way to do this is to roll your transfer tape off of your stencil. Start from one corner and slowly roll is off. You can reuse your transfer tape over and over again. I like to place my used transfer tape back on the roll I cut it off of and use it for the next project.

How to stencil a wood sign with NO paint bleed. Using mod podge to paint wooden signs is a good way to get perfectly crisp lines. Make your own personalized baby gift sign using your cricut. DIY baby stats sign.

FIVE- If you have any gaps/air bubbles use an xacto knife to remove those. Use an xacto knife to make a small slit in the stencil film where the gap/air bubble is. This will make the stencil film lay flat.

How to stencil a wood sign with NO paint bleed. Using mod podge to paint wooden signs is a good way to get perfectly crisp lines. Make your own personalized baby gift sign using your cricut. DIY baby stats sign.

SIX- Tape off any area that you don’t want to get paint on, like the sides of your stencil. It is a lot easier to take the time to tape this off than it is to try to clean off paint where you don’t want it.

How to stencil a wood sign with NO paint bleed. Using mod podge to paint wooden signs is a good way to get perfectly crisp lines. Make your own personalized baby gift sign using your cricut. DIY baby stats sign.

SEVEN- Using MATTE FINISH MOD PODGE seal your stencil. You do this by taking a DRY paint brush, dipping it into a little bit of the mod podge, and brushing it in all directions on the exposed areas of your stencil. Be sure you are painting on a VERY THIN LAYER of mod podge. This step is KEY to the no paint bleed painted sign. The mod podge is filling in all of those tiny air bubbles that you can’t see. Let this dry, usually this takes just a couple of minutes.

How to stencil a wood sign with NO paint bleed. Using mod podge to paint wooden signs is a good way to get perfectly crisp lines. Make your own personalized baby gift sign using your cricut. DIY baby stats sign.

EIGHT- I highly recommend using either flat or eggshell finish for your paint. Gloss paint tends to pull up when you remove the stencil. Using a different DRY paint brush paint on your first THIN layer of paint. You want to see the base color/wood grain through the paint.

How to stencil a wood sign with NO paint bleed. Using mod podge to paint wooden signs is a good way to get perfectly crisp lines. Make your own personalized baby gift sign using your cricut. DIY baby stats sign.

NINE- After your first layer is completely dry you can paint on a second thin layer of paint. The first layer should dry VERY fast.

How to stencil a wood sign with NO paint bleed. Using mod podge to paint wooden signs is a good way to get perfectly crisp lines. Make your own personalized baby gift sign using your cricut. DIY baby stats sign.

TEN- After you’re done painting on the second layer of paint on your stencil you can immediately pull up your stencil. I prefer to do this step while the paint is still wet. Use an xacto knife to remove all the small stencil pieces.

How to stencil a wood sign with NO paint bleed. Using mod podge to paint wooden signs is a good way to get perfectly crisp lines. Make your own personalized baby gift sign using your cricut. DIY baby stats sign.

Let your sign dry then you’re ready to use it. I hope that you found this DIY SIGN PAINTING TUTORIAL helpful. If you did I’d LOVE to hear your feedback:)!! If you have any questions please feel free to ask.

How to stencil a wood sign with NO paint bleed. Using mod podge to paint wooden signs is a good way to get perfectly crisp lines. Make your own personalized baby gift sign using your cricut. DIY baby stats sign.

How to rust your own mason jar lids

How to rust your own mason jar lids inside. Easy recipe for rusting canning jar lids for your rustic country chic home decorations and craft projects.

Rusty mason jar lids are GORGEOUS! I love them but they can be so hard to find. If you can’t find them easily they can take forever to naturally rust in the elements outside, like months and months of time. But if you’re impatient like me you don’t have to wait for nature to work her magic on your brand new mason jar rings. You can rust them yourself in your kitchen using ingredients you probably already have!

Affiliate Disclosure. Some of the links on this website are affiliate links, which means that I may earn a small commission if you click on the link or make a purchase using the link. If you make a purchase you will not be charged anything additional. This is just a way I can help add to our family finances to raise our four daughters. Please know I would never recommend a product or service I do not totally stand behind.

Yes, you read that right. You can rust up your own canning jar lids right on your kitchen counter in about a week!! I know that the method I’m sharing today isn’t the only way to get this done, and thank goodness it’s not because there shouldn’t just be one way to do things. This is just my preferred way to rust my own mason jar lids.

Here are a couple of projects I made using this same technique to rust mason jar lids

DIY RUSTY PUMPKIN FROM MASON JAR RINGS

DIY RUSTED MASON JAR RING PERSONALIZED ORNAMENT

Check out the video below or keep scrolling to read the written/picture tutorial.

Get instant access to all of my FREE printables, files, and more. Click here to get your password to my FREE RESOURCE LIBRARY.

Here’s what you’ll need to rust your own mason jar lids at home

HOW TO RUST YOUR OWN MASON JAR LIDS INSIDE THE QUICK AND EASY WAY

ONE- You will need a glass bowl. I use glass because it doesn’t break down like other materials such as plastic or metal. Glass is wonderful! I start by filling the bottom of the glass bowl with salt. I DO NOT MEASURE THIS. If you were hoping for a recipe with exact measurements this tutorial might not be for you. I just add enough salt to cover the bottom of the bowl lol.

How to rust your own mason jar lids inside. Easy recipe for rusting canning jar lids for your rustic country chic home decorations and craft projects.

TWO- Pour in some distilled white vinegar. I just eyeball this as well. You want enough to completely cover the mason jar lids once you put those in the bowl (that will happen in just a couple steps).

How to rust your own mason jar lids inside. Easy recipe for rusting canning jar lids for your rustic country chic home decorations and craft projects.

THREE- Give your ingredients a good stir. I use a popsicle stick for this and I stir till the salt starts to dissolve.

How to rust your own mason jar lids inside. Easy recipe for rusting canning jar lids for your rustic country chic home decorations and craft projects.

FOUR- Add in your mason jar rings. You can add in as many that will fit in to your bowl.

How to rust your own mason jar lids inside. Easy recipe for rusting canning jar lids for your rustic country chic home decorations and craft projects.

FIVE- Now add enough vinegar to your bowl so that your mason jar rings are completely submerged.

How to rust your own mason jar lids inside. Easy recipe for rusting canning jar lids for your rustic country chic home decorations and craft projects.

SIX- Now sprinkle some salt on top. I’m not sure if this step makes a huge difference but I do this just for good measure lol!

How to rust your own mason jar lids inside. Easy recipe for rusting canning jar lids for your rustic country chic home decorations and craft projects.

SEVEN- Let the mason jar lids sit for 24 hours. After 24 hours has passed take them out and let them dry on a towel. Once they are dry place them back into the salt & vinegar mixture.

How to rust your own mason jar lids inside. Easy recipe for rusting canning jar lids for your rustic country chic home decorations and craft projects.

EIGHT- Repeat step 7 for at least a week. After just a couple days you will start to notice the canning lids turning color and they will look like they have scratch like marks on them. This is exactly what you want to see happening. The longer you do the soaking/drying process the rustier your mason jar lids will get. You’ll also notice that the salt/vinegar solution is changing from a clear to a really gross color/consistency, this is supposed to happen too.

How to rust your own mason jar lids inside. Easy recipe for rusting canning jar lids for your rustic country chic home decorations and craft projects.

NINE- Once you’re happy with the rust on your canning jar lids you are all done and you can discard of the salt/vinegar mixture. I don’t rinse mine off after I just simply let them dry then use them or place them in my rusty mason jar plastic bin for safe keeping till I need them.

How to rust your own mason jar lids inside. Easy recipe for rusting canning jar lids for your rustic country chic home decorations and craft projects.