DIY 4th of July painted wood stars

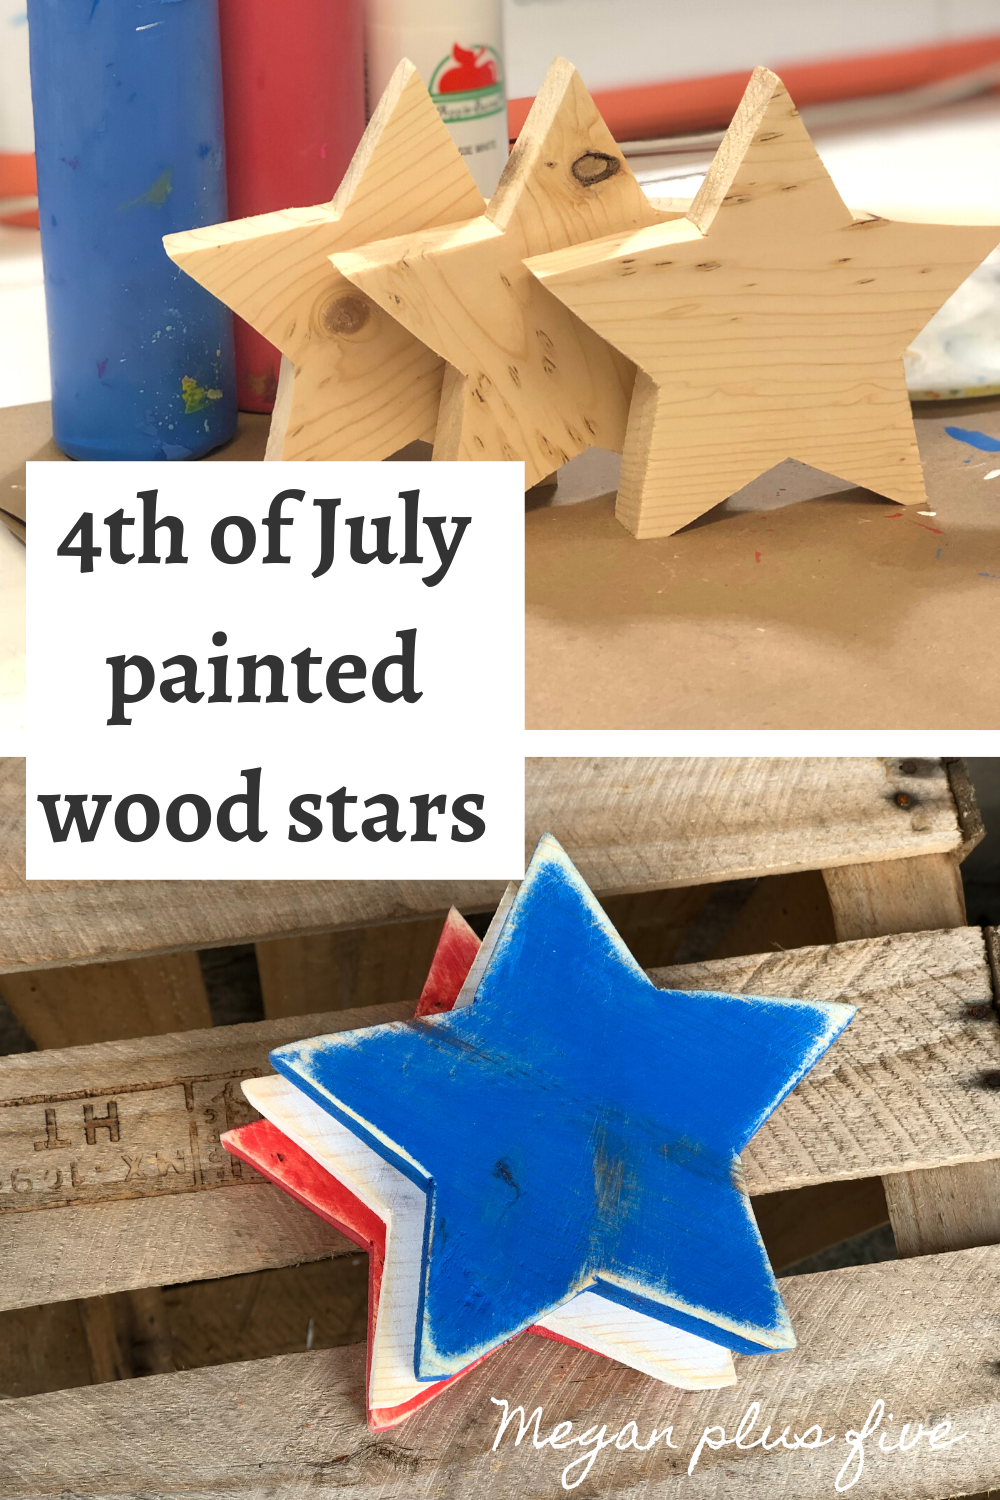
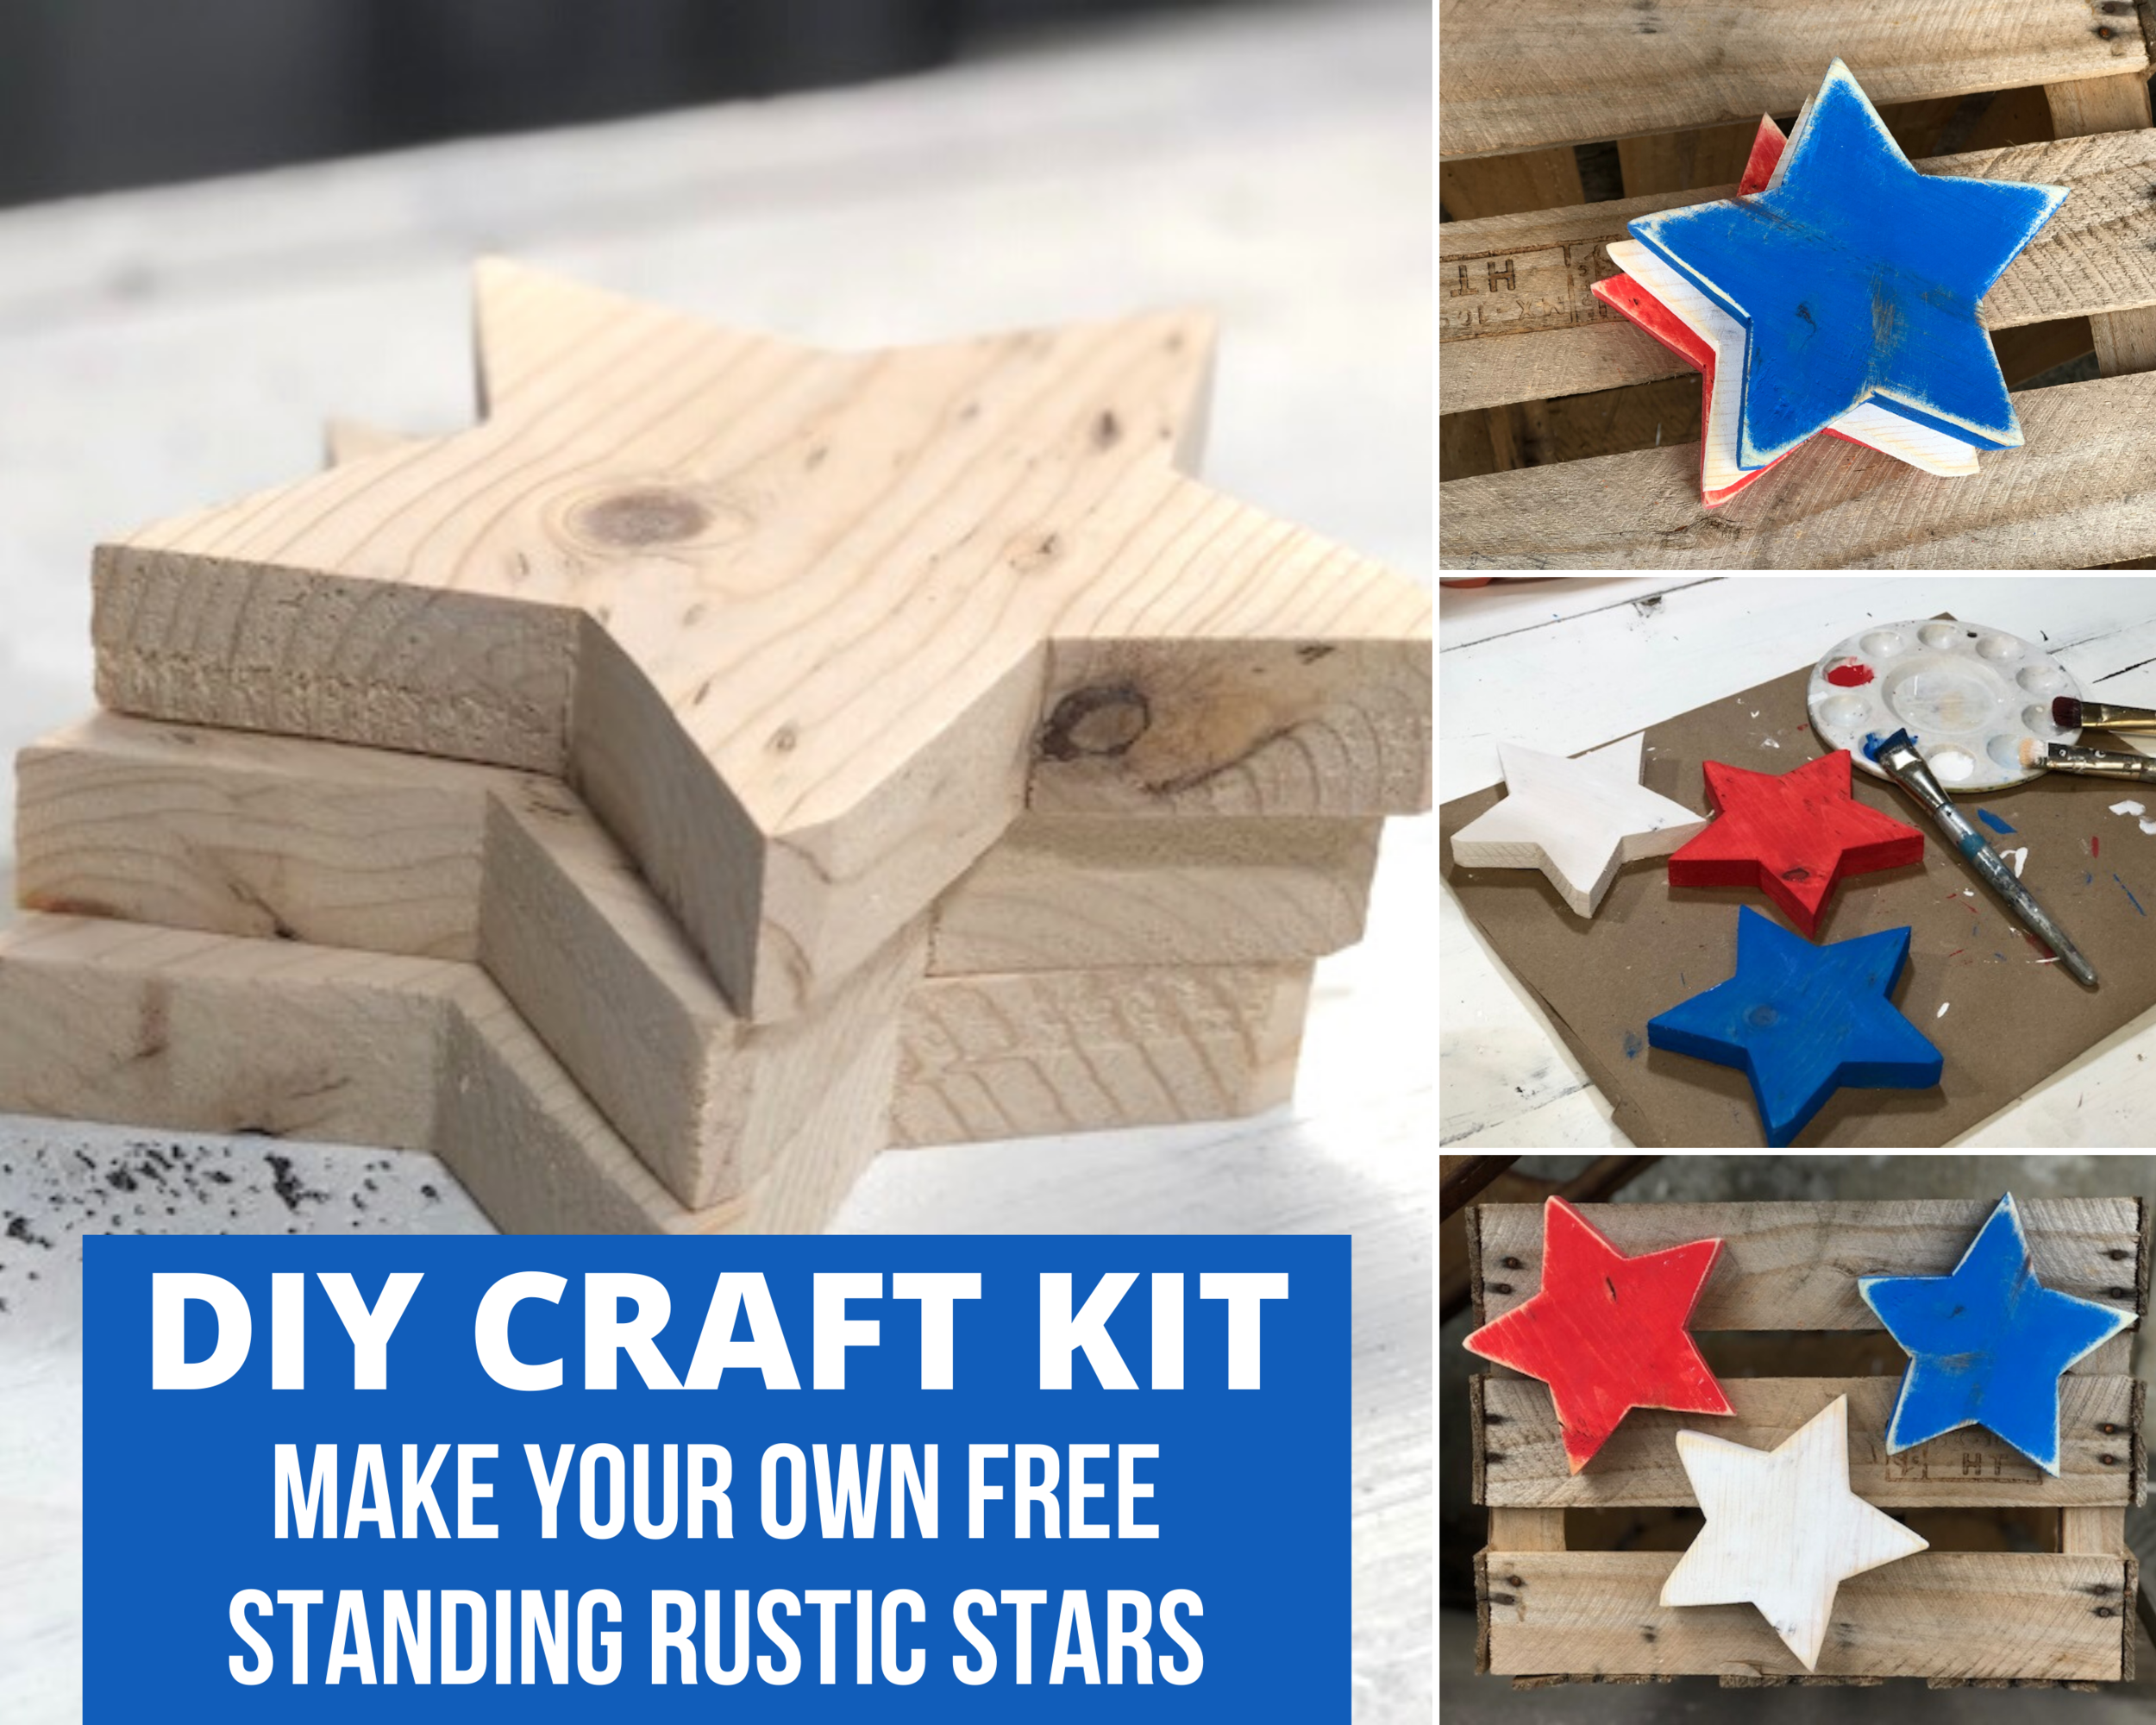
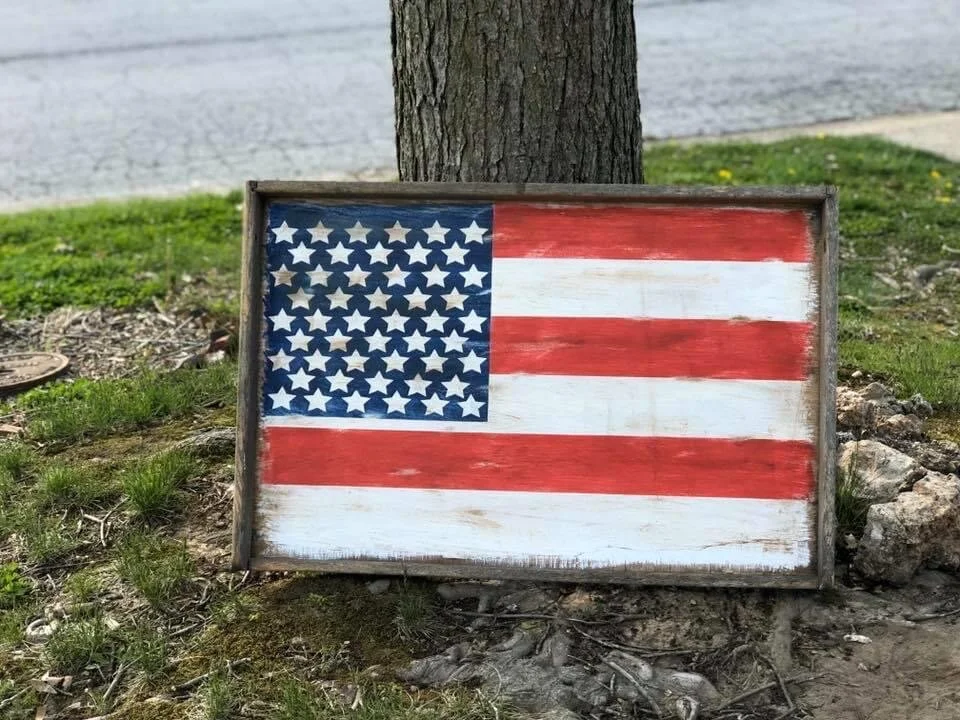
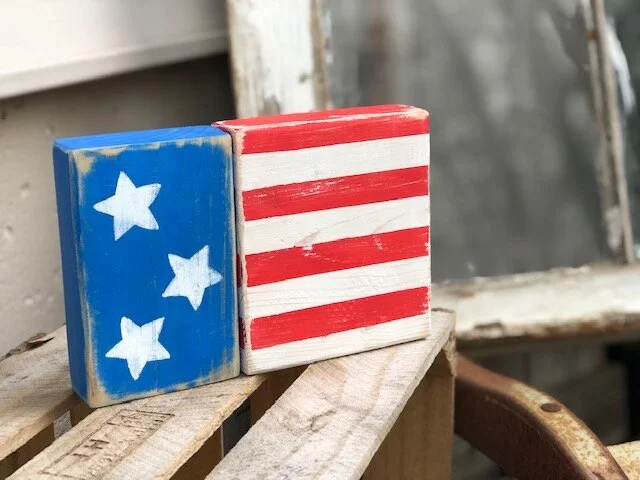
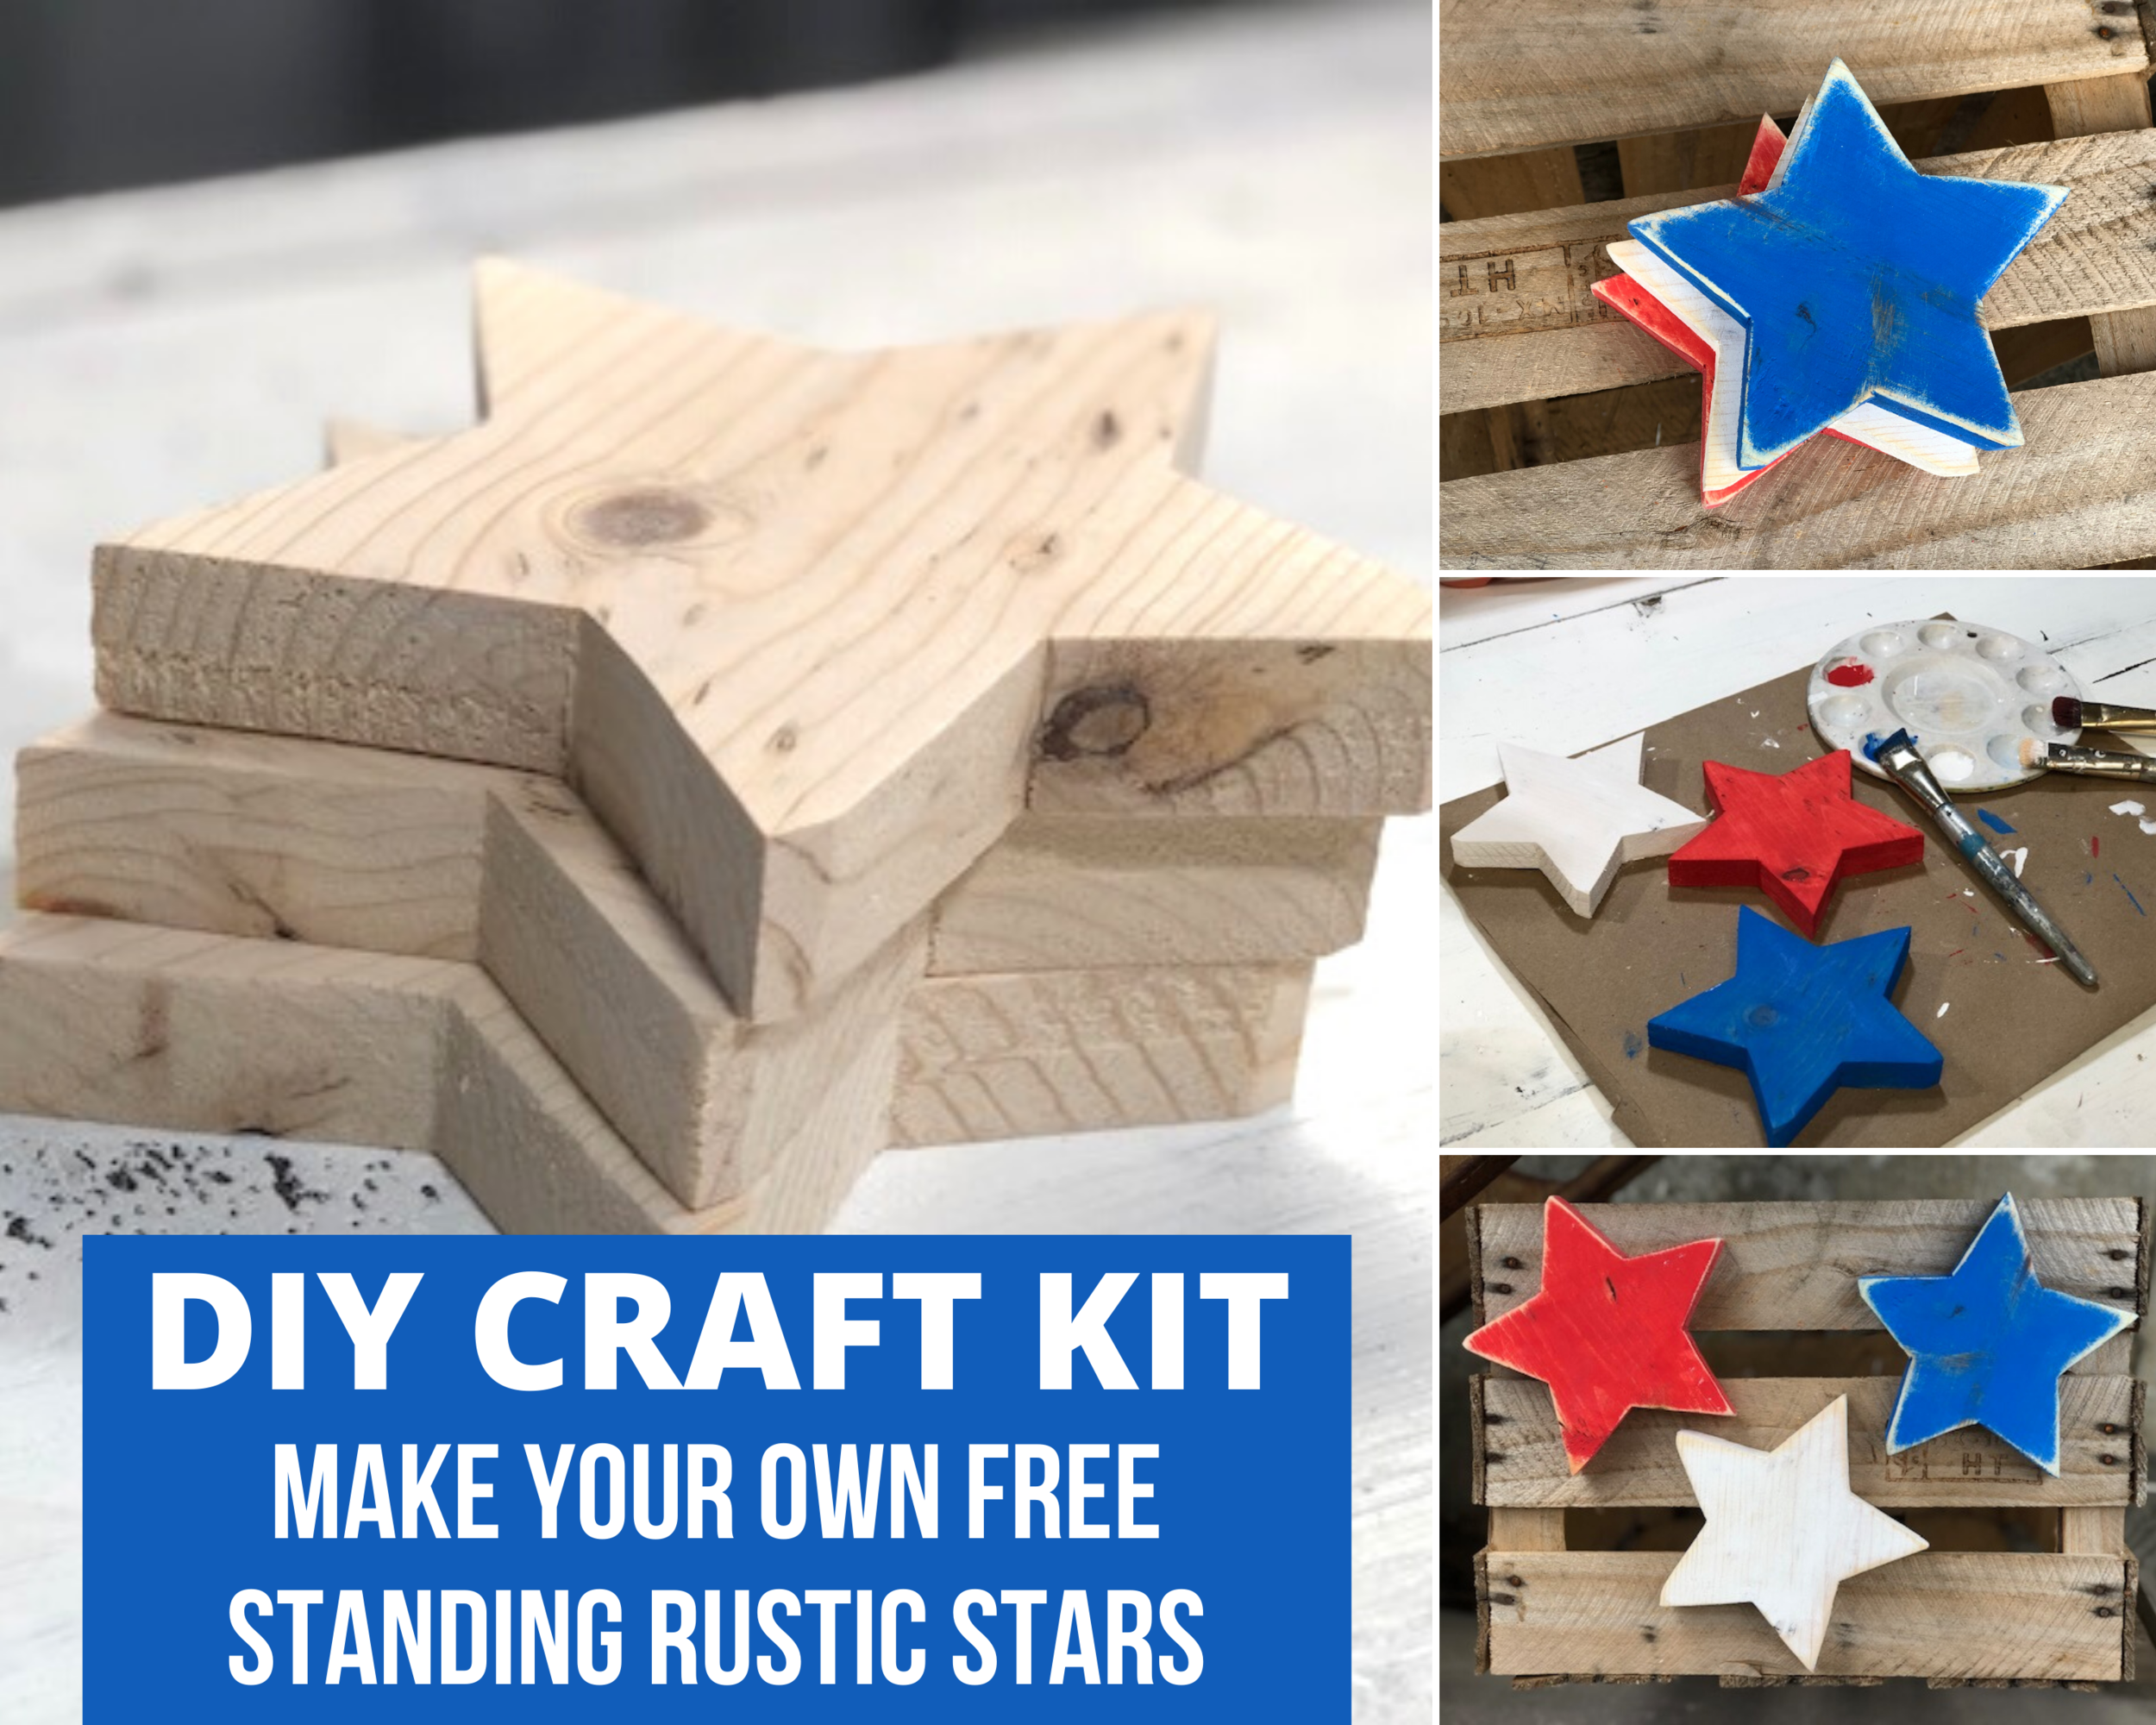
4th of July painted wood stars. How to paint and distress wooden stars for your Independence Day decor. DIY craft kit for adults. DIY farmhouse style decorations for your patriotic decor.

HOW TO PAINT FREE STANDING RUSTIC WOOD STARS FOR YOUR INDEPENDENCE DAY DECOR

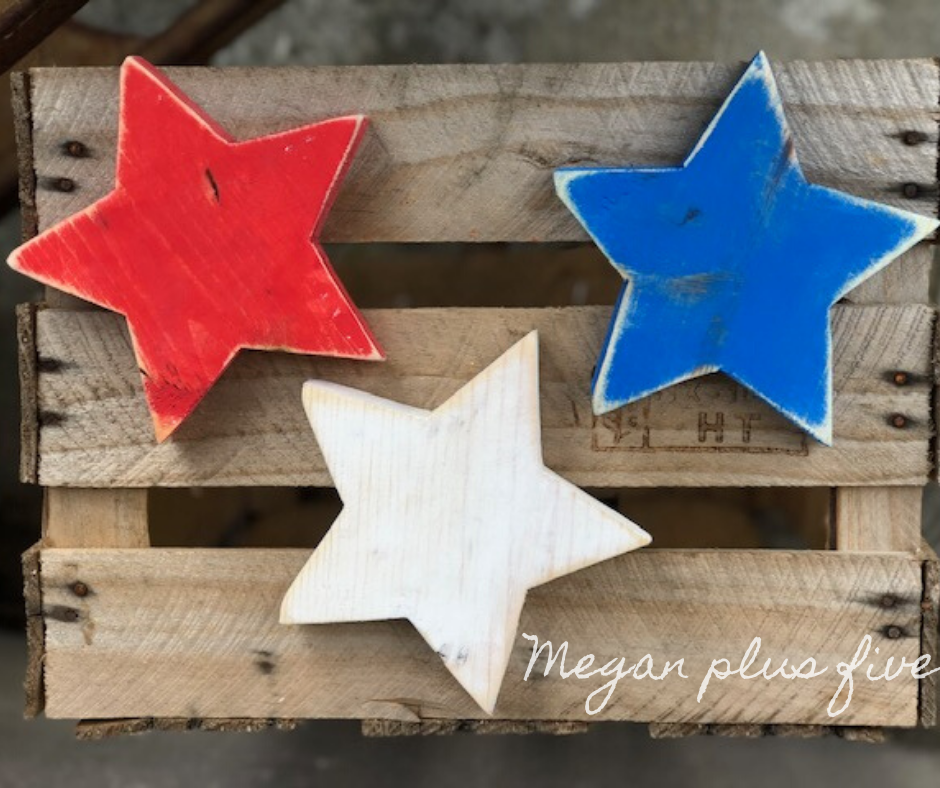
These DIY wooden stars are sure to tie in perfectly with your patriotic décor. Whether your red, white, and blue decorations are seasonal or you leave them up all year round you'll definitely want to add these adorable wood stars.

Affiliate Disclosure. Some of the links on this website are affiliate links, which means that I may earn a small commission if you click on the link or make a purchase using the link. If you make a purchase you will not be charged anything additional.

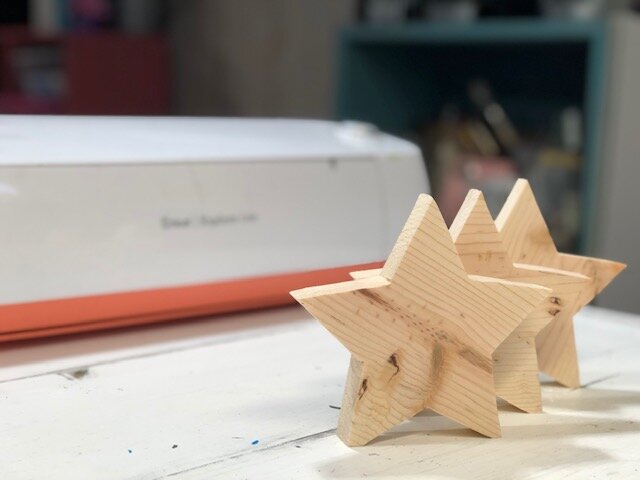
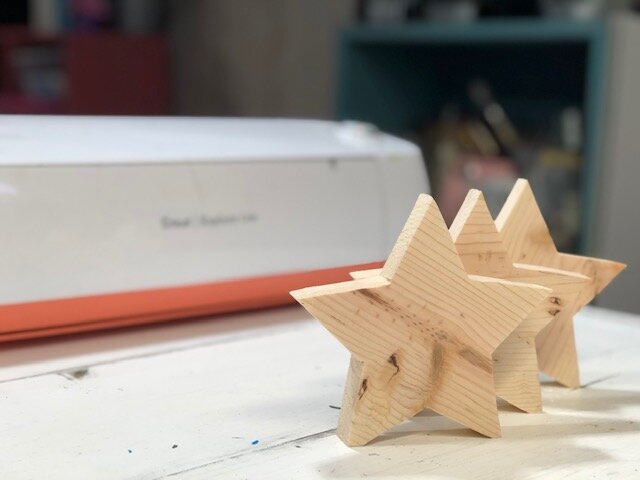
These are especially a perfect project for those scrap pieces leftover from other DIY projects. Click here to see how I cut these out using my Cricut machine and Ryobi scroll saw. If you don’t have all the tools to make this craft happen or just don’t have the time you can grab your DIY craft kit here.

Watch the how to video below or keep scrolling for the written rustic 4th of July stars tutorial

4th of July painted wood stars. How to paint and distress wooden stars for your Independence Day decor. DIY craft kit for adults. DIY farmhouse style decorations for your patriotic decor.

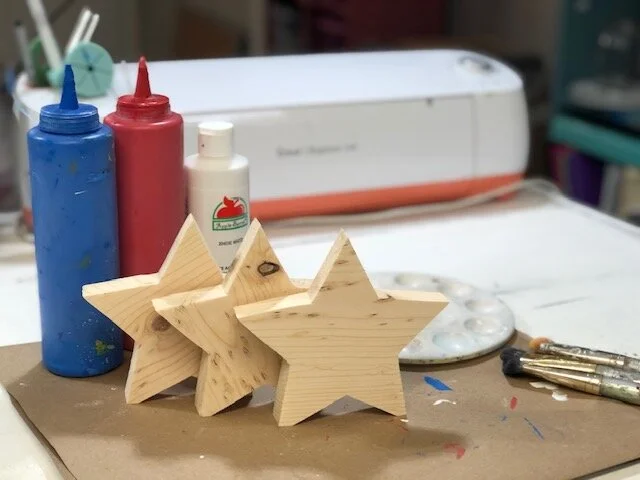
Here’s what you’ll need:

4th of July painted wood stars. How to paint and distress wooden stars for your Independence Day decor. DIY craft kit for adults. DIY farmhouse style decorations for your patriotic decor.

These little rustic wooden stars are SUPER EASY to paint. I am actually thinking about making a few more and staining them instead of using paint. But for now I’ll admire the red, white, and blue ones.

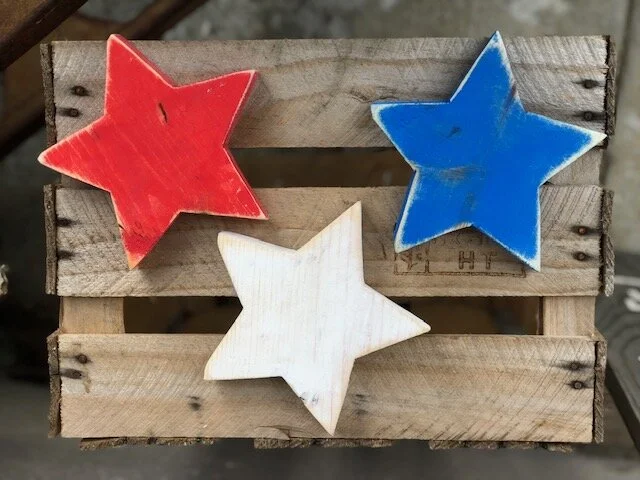
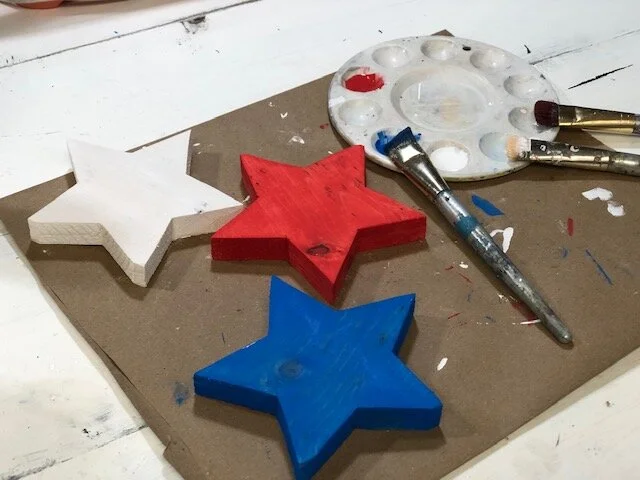
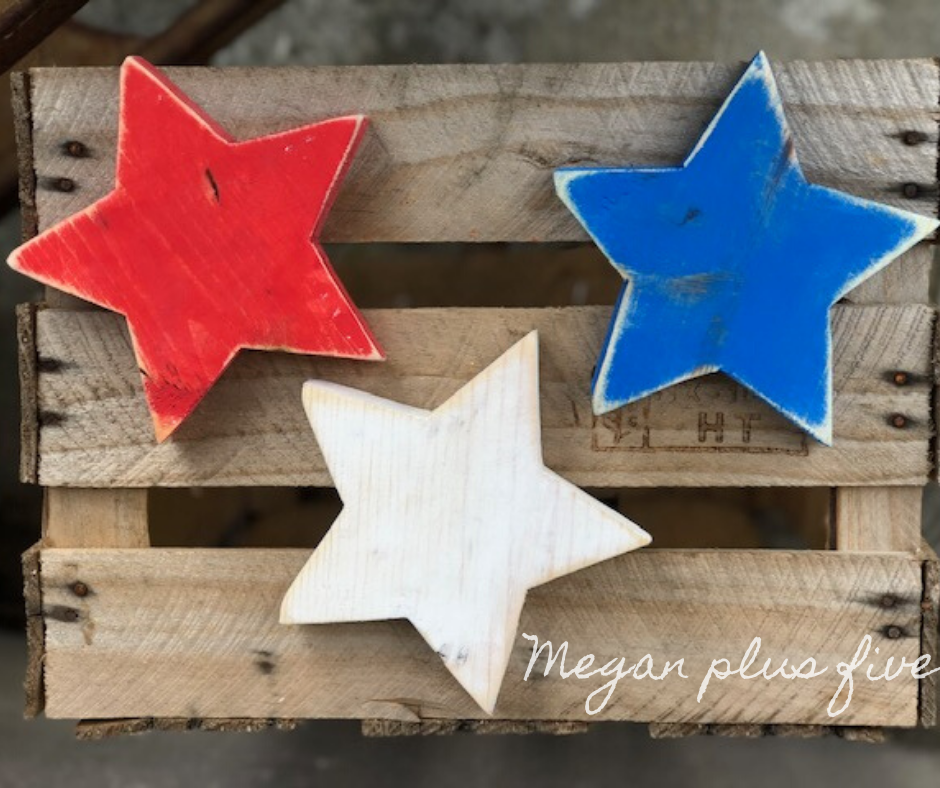
ONE- Paint a thin layer of RED, WHITE, or BLUE paint on each star. Let dry. After the first coat is dry go back and add a second layer of paint on each of the three stars. Let dry.

wood+star15.jpg4th of July painted wood stars. How to paint and distress wooden stars for your Independence Day decor. DIY craft kit for adults. DIY farmhouse style decorations for your patriotic decor.
4th of July painted wood stars. How to paint and distress wooden stars for your Independence Day decor. DIY craft kit for adults. DIY farmhouse style decorations for your patriotic decor.

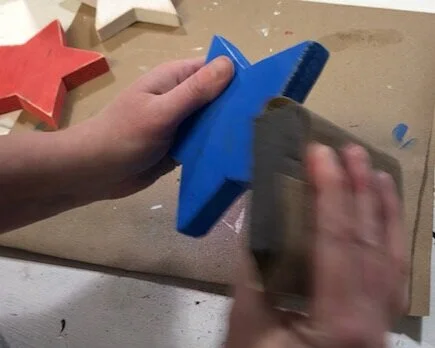
TWO- Once your stars are completely dry use your sandpaper to distress them. Focus on the edges, corners and lightly on the front/back of each wood star. I use 100-150 grit sandpaper when sanding these by hand. If I use my orbit sander I use 120 grit.
4th of July painted wood stars. How to paint and distress wooden stars for your Independence Day decor. DIY craft kit for adults. DIY farmhouse style decorations for your patriotic decor.

THREE- Use a lint free cloth to remove all the dust from sanding the wood stars. You can finish them off with a polycrylic spray or wax. I didn’t use antiquing wax on these but if you wanted to make them extra rustic try using these techniques for dark wax.

4th of July painted wood stars. How to paint and distress wooden stars for your Independence Day decor. DIY craft kit for adults. DIY farmhouse style decorations for your patriotic decor.

Free standing wood stars using your Cricut

How to use your Cricut to make wood star cutouts. Learn how to make templates with your vinyl cutting machine to cut shapes and letters out of wood.

One thing I never thought I’d be doing is using my Cricut to help me cut out shapes and letters from pine boards. When I got my very first Cricut machine about a decade ago I always thought I’d just be using my new fancy cutting machine to cut paper and make decorations for my kid’s birthday parties. That’s was the case for the first few years. But now my Cricut craft horizon has been broadened and I’m using it for more than I could have dreamed!

Pairing this wonderful little machine of magic with my power tools has been a GAME CHANGER for my crafting abilities. And it can be for you too!

If you’re not totally comfortable using power tools I totally understand and know it’s a very real fear. I was in that same boat not that long ago and slowly was able to put that fear behind me. Here’s a list a power tools that I recommend all lady crafters get. I started off small, mastering the handheld sander, this thing can be SUPER intimidating, then worked my way up to being able to using all the power tools with no hesitation.

Affiliate Disclosure. Some of the links on this website are affiliate links, which means that I may earn a small commission if you click on the link or make a purchase using the link. If you make a purchase you will not be charged anything additional.

USE YOUR CRICUT TO HELP YOU CUT OUT WOOD PROJECTS

Here’s what I used:

The first thing I did was decide how big I wanted my wooden stars to be. I always have scraps of 1x6 boards so I decided 5.4” at the star’s widest would be a good size. I opened up my Cricut app on my computer and added a simple star from the shapes section.

I highlighted it and clicked on the width, since that had the biggest number, and changed it to 5.4”. I left the image locked so that it would be proportionate.

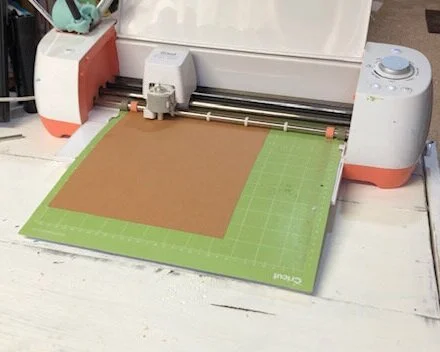
I set my image to cut. Added a piece of cardstock to my green mat and set my blade to light cardstock then hit cut. I also want to add that you can use an older machine like I’m using. I have yet to buy a Cricut Maker, even though I would LOVE to have one but my Cricut Explore is getting everything done for now.

How to use your Cricut to make wood star cutouts. Learn how to make templates with your vinyl cutting machine to cut shapes and letters out of wood.

After my cardstock template was cut out I used that to help me cut out the a wood star from a piece of pine.

How to use your Cricut to make wood star cutouts. Learn how to make templates with your vinyl cutting machine to cut shapes and letters out of wood.

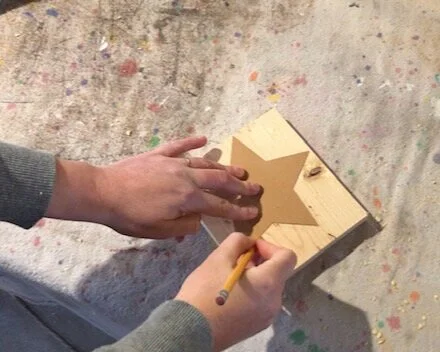
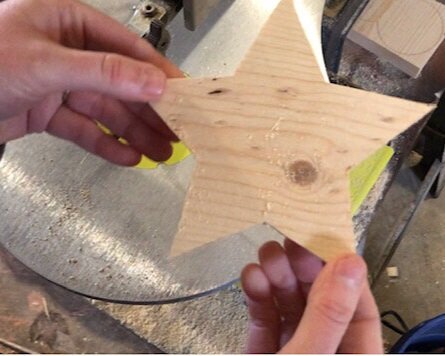
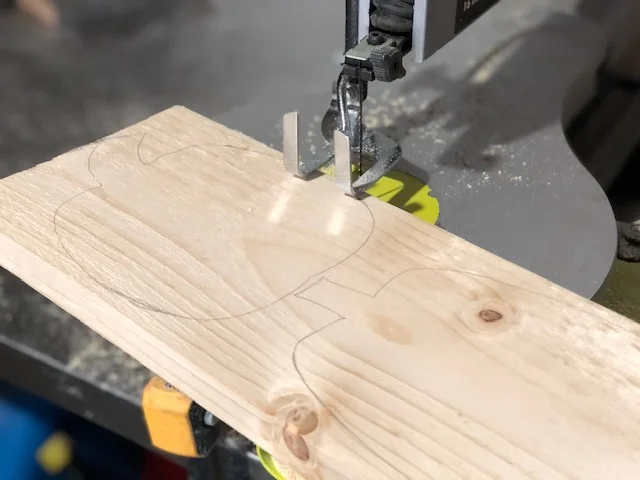
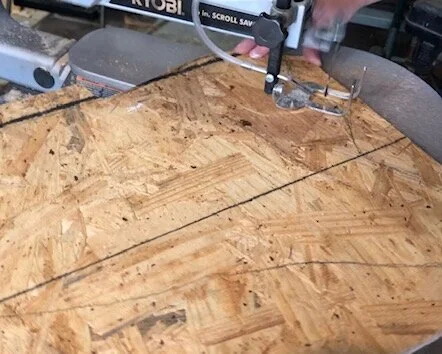
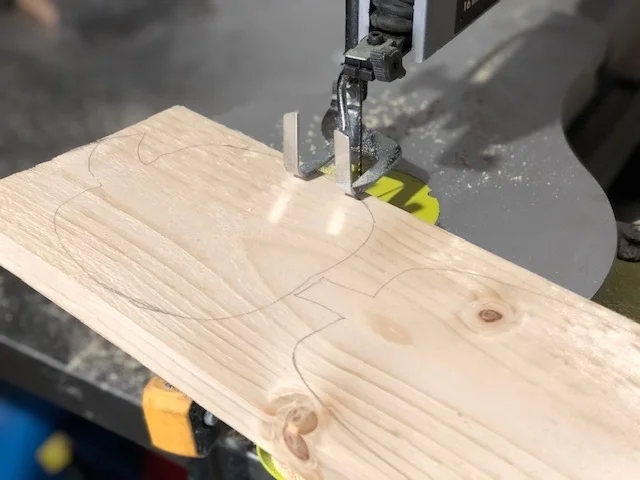
I traced around the star using a pencil then used my Ryobi scroll saw to cut the shape. If you’ve never used a scroll saw it’s a lot like using a sewing machine. Don’t go too fast or you will not get as precise of a cut.

How to use your Cricut to make wood star cutouts. Learn how to make templates with your vinyl cutting machine to cut shapes and letters out of wood.

When I’m cutting out shapes that have lots of angles I don’t do one continuous cut. I cut till I get to an angle then back out. Then make another cut from the opposite side to meet at that angle point. This is just works for me, I know everyone is different so you'll have to find your own rhythm.

How to use your Cricut to make wood star cutouts. Learn how to make templates with your vinyl cutting machine to cut shapes and letters out of wood.

I hope you can use this new information to help you explore all the possibilities of what your Cricut can do. You can take it so much further than just card making and vinyl projects.

How to use your Cricut to make wood star cutouts. Learn how to make templates with your vinyl cutting machine to cut shapes and letters out of wood.

Like with all of my tutorials if you have any questions please ask away. I am happy to try and answer :)! Click here to check out how I finished my wood star cutouts.

DIY mini Easter wooden tags

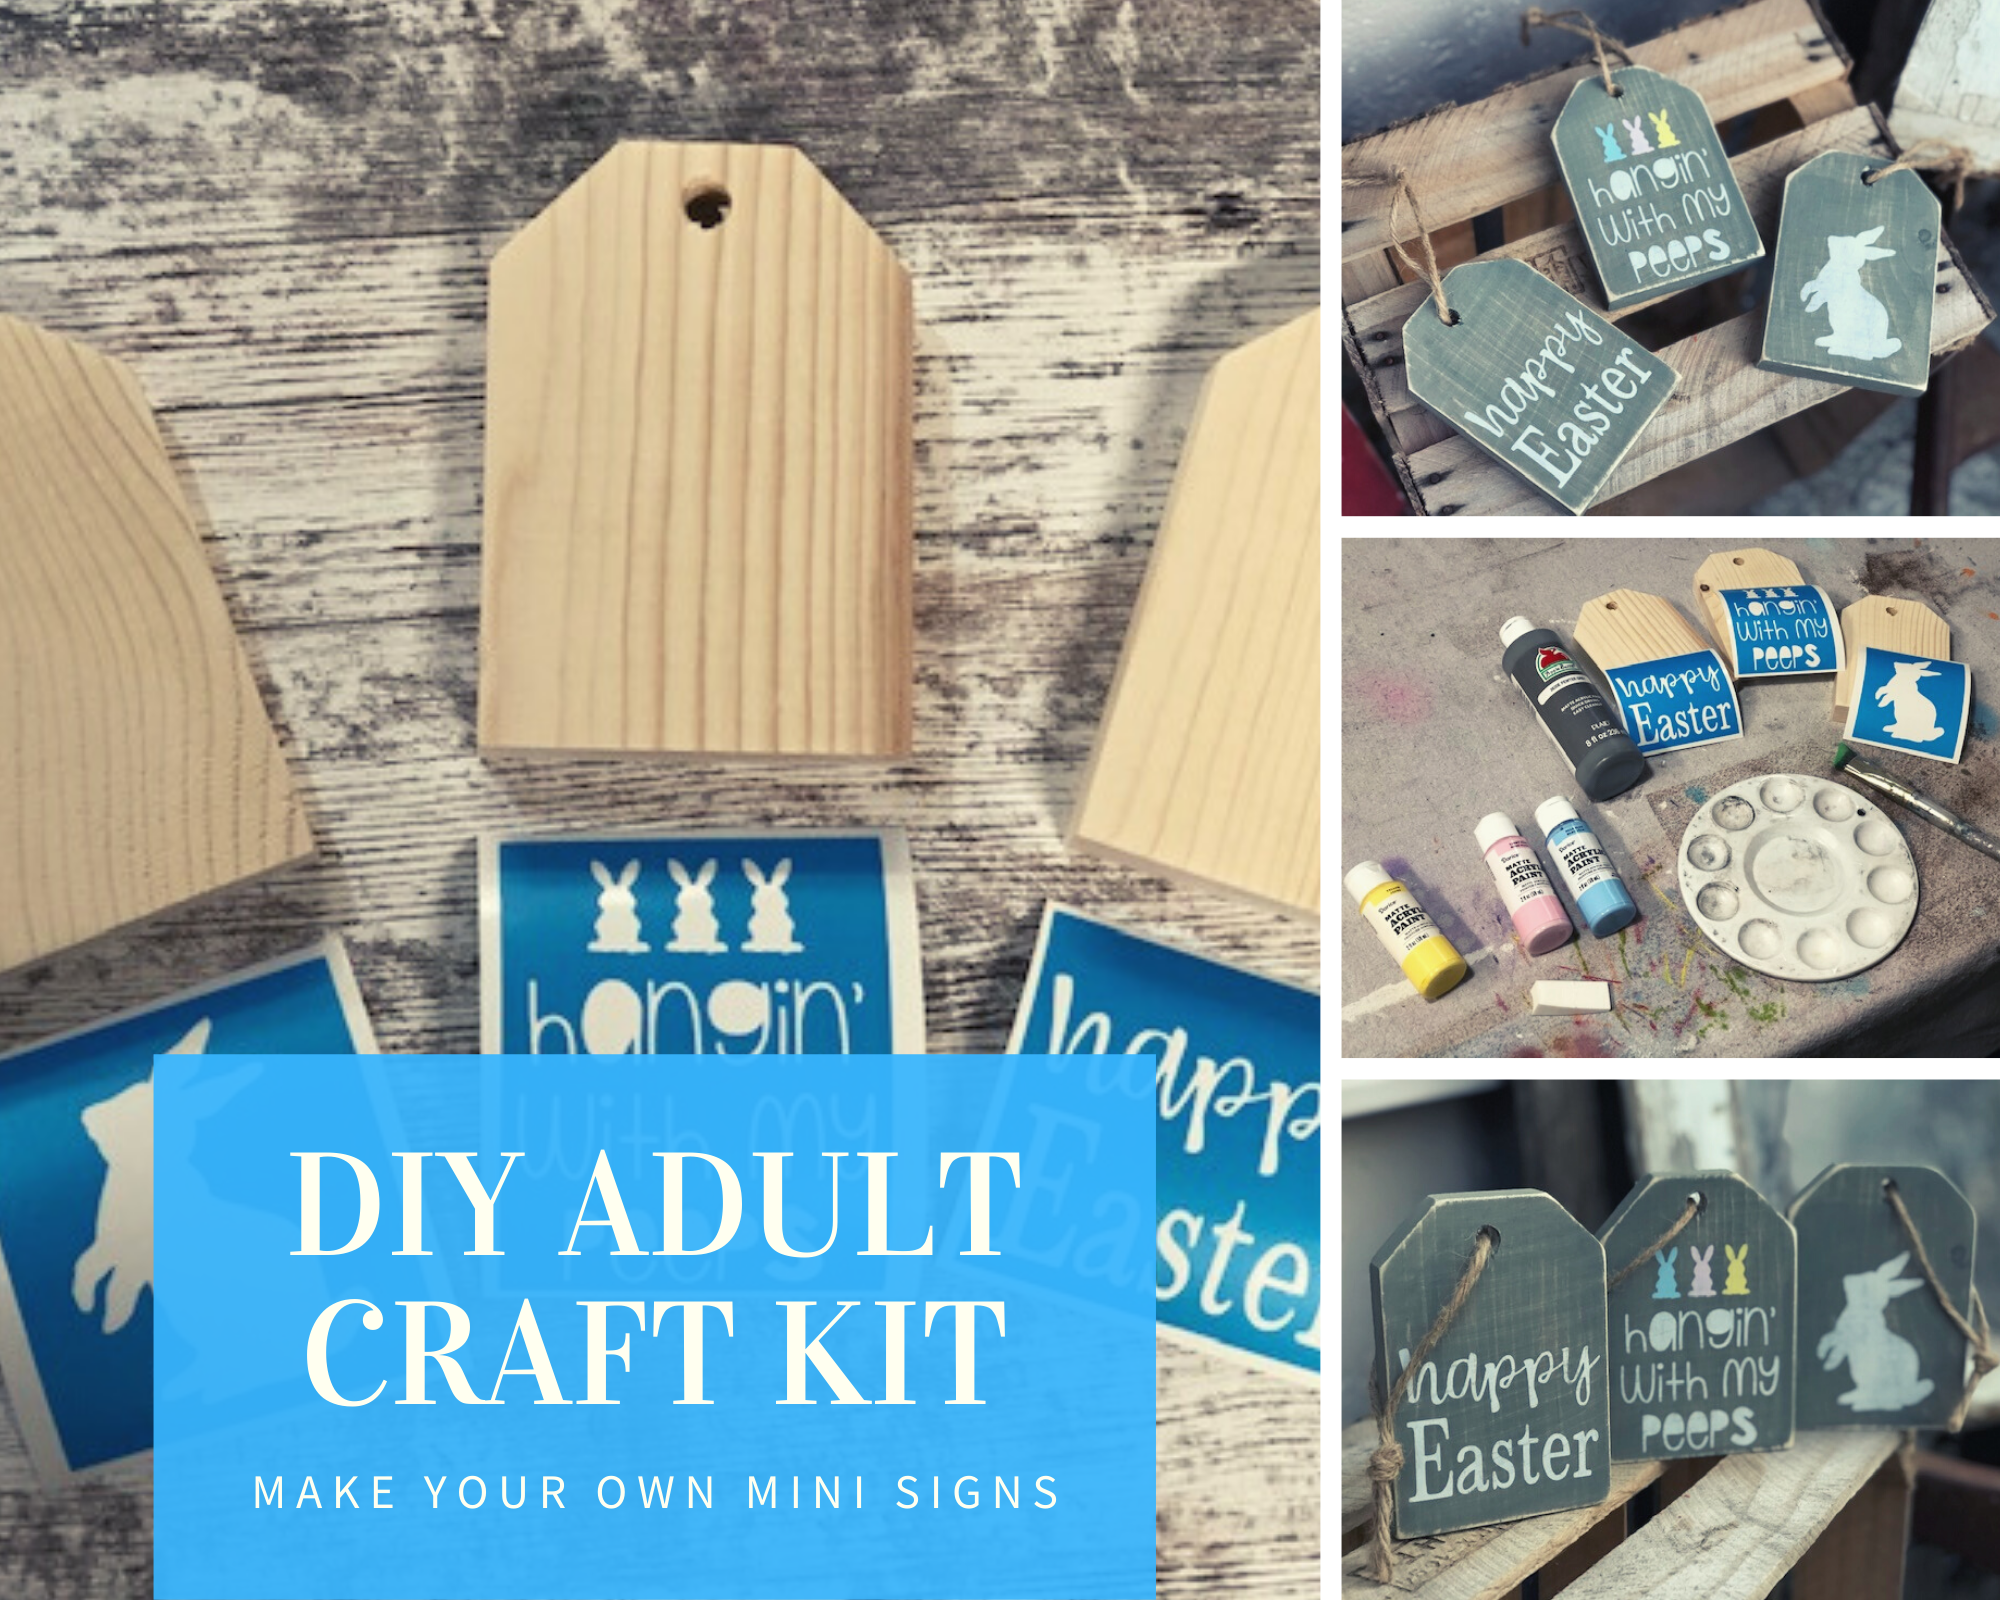
DIY mini wood tags for Easter. How to use your Cricut to make wood signs for Easter. Make your own farmhouse tray mini signs for spring.

MAKE YOUR OWN RUSTIC WOOD TAGS FOR EASTER

DIY mini wood tags for Easter. How to use your Cricut to make wood signs for Easter. Make your own farmhouse tray mini signs for spring.

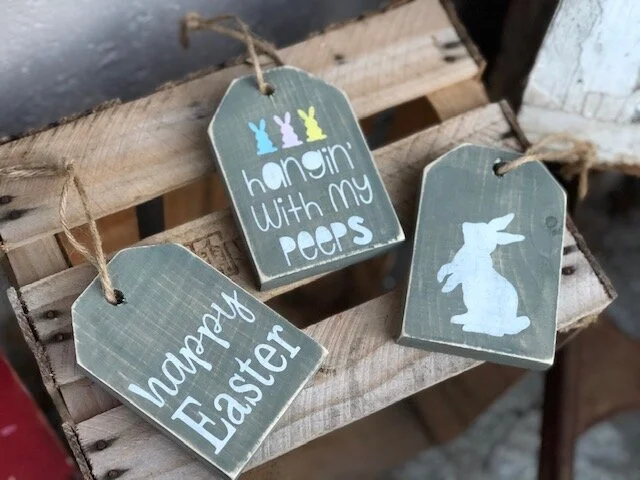
I can’t believe how popular these little wood tags for Easter are! I keep selling out of this spring DIY craft kit almost daily. Since the entire country is basically on lockdown this kit is giving people a much needed creative outlet. I am SO happy to be able to provide this joy to so many around our nation, especially at a time like this.

Affiliate Disclosure. Some of the links on this website are affiliate links, which means that I may earn a small commission if you click on the link or make a purchase using the link. If you make a purchase you will not be charged anything additional.

In this crafty tutorial I’m going to show you how to stencil these wood tags for Easter. If you’re wanting a tutorial on how to cut wood tags you’ll want to go here. I share the measurements, angles, and even the drill bit size to make the twine hole in the middle.

DIY RUSTIC WOOD TAGS FOR EASTER

Here’s what you’ll need


Other helpful tools I used

If you love these rustic wood spring tags be sure to check out this super easy Dollar Tree moss bunny craft.

Cutting your wood pieces

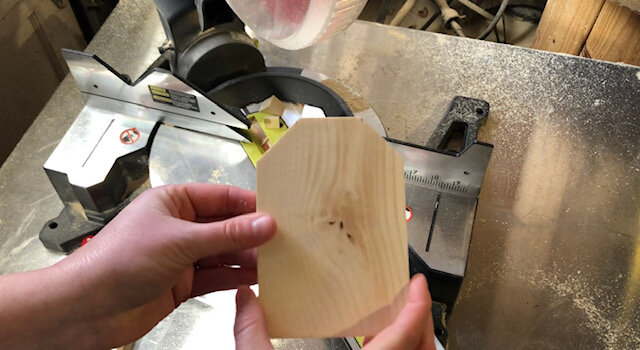
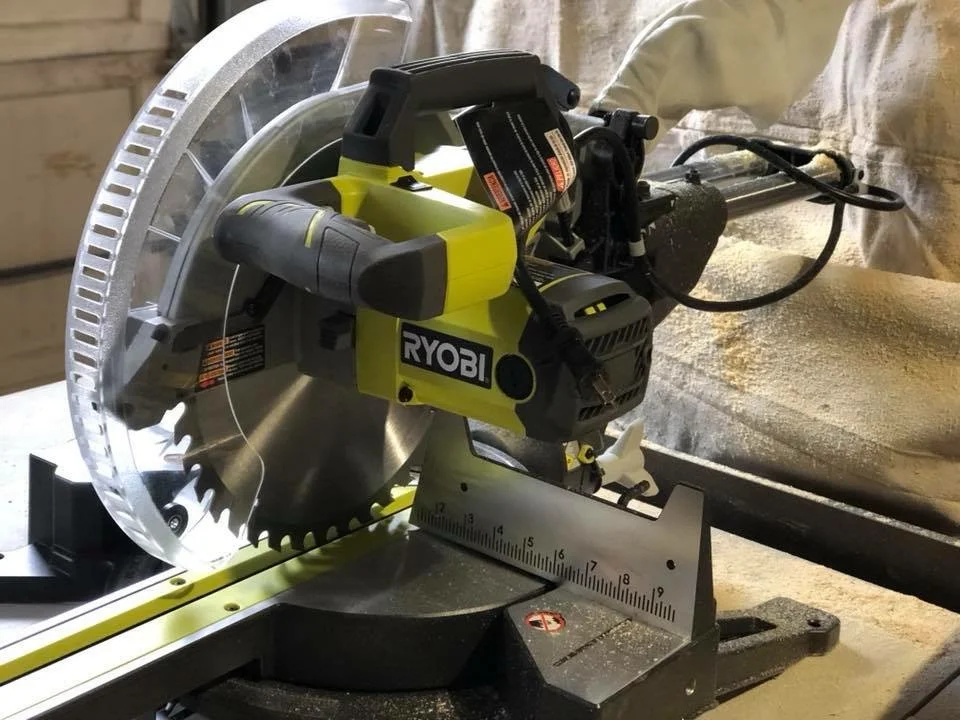
  1. First you want to cut out your wood tags. I used my Ryobi miter saw to do this. Cut a 1x4 in to 3 5” long pieces. On the top of each 5” piece measure in 1” and make a mark. Set your miter saw to 45 degrees, line it up with your 1” mark and cut. Flip your tag over and do the same to the other side. 

  2. Now drill a hole in the middle of the top of each piece. This is for your twine holder to go through.

  3. After you have that done give each piece a quick sanding. You don’t have to get crazy with this, it’s not a fine piece of furniture. I use 120 grit sandpaper for this and that’s it. Just enough to take off that shine it has when you get it from the lumberyard.

    WATCH THE VIDEO OF HOW I MADE THESE USING MY MITER SAW

Stencils

You can use any cutting machine to create your Easter themed stencils. I use my Cricut Explore to make all of mine. If you have and are using a Cricut you can get the HANGIN’ WITH MY PEEPS image to use here. You can use my FREE SVG’s for the bunny image & happy Easter cutting files here. I use Oramask stenciling film to make my stencils. While it is a little more expensive than other materials I have found it works the absolute best for stenciling.

Painting (the fun part!)

First a thin layer of gray paint on each wood tag. Be sure it is a thin layer, you will still be able to see the wood grain through the paint. After the first thin layer is dry you can paint a second thin layer. You don’t want more than two layers of base paint on your wooden tags, or any painted wood sign. Too much paint will cause issues when stenciling with base paint peel up, which can be impossible to fix sometimes and honestly it just plain sucks to have to go back and fix.

DIY mini wood tags for Easter. How to use your Cricut to make wood signs for Easter. Make your own farmhouse tray mini signs for spring. Fun rustic Easter and spring craft for adults.

2. After your base paint is completely dry you can apply your stencils to all three wood blanks. Apply your transfer tape to your stencils (if you bought my DIY CRAFT KIT this step has already been done for you). Peel the paper backing from your stencil/transfer tape. Go slow.  Place your stencils sticky side down on the front of your painted wood tag. The front is just whichever side you prefer best ;). Using your vinyl squeegee, if you don’t have one you can use a plastic store rewards card, and rub the stencil to that it adheres to the wood. Slowly peel the transfer tape away from the wood leaving your stencil attached to the wood. I find that it works best when I roll the transfer tape away, check out this DIY PAINTED WOOD SIGN TUTORIAL for  a closer look at how to do this.

3. Use masking tape to tape off the edges of your stencil so you don’t get paint on areas of the wood tags that you don’t want paint on.

DIY mini wood tags for Easter. How to use your Cricut to make wood signs for Easter. Make your own farmhouse tray mini signs for spring. Fun rustic Easter and spring craft for adults.

4. Using one end of one of the sponges dip it in the white paint. You need very little paint, the more paint you use the more paint bleed you will likely have. Dab your sponge onto the exposed areas of your stencil. The coverage should be VERY faint. Let that dry and repeat up to three times. You don’t want to apply more than three coats as this could cause issues with paint peel up where you just stenciled. If you want the cute little bunnies to be different colors paint them white first then finish them with two layers of your preferred paint color. I painted mine in pink, blue, and yellow. Giving them a white base first will allow the colors to really pop if you are painting on a dark base.

DIY mini wood tags for Easter. How to use your Cricut to make wood signs for Easter. Make your own farmhouse tray mini signs for spring. Fun rustic Easter and spring craft for adults.

5. Peel up your stencils and tape. Using an xacto knife helps to remove the middle piece of the stencils.

DIY mini wood tags for Easter. How to use your Cricut to make wood signs for Easter. Make your own farmhouse tray mini signs for spring. Fun rustic Easter and spring craft for adults.

Distressing

After your paint completely dries from stenciling you can start distressing your wood Easter tags. I LOVE this technique because it’s super easy and quick. Using sand paper or your sander give a quick sanding to the edges, corners, and lightly on the front of each wooden tag. Wipe off and dust.

DIY mini wood tags for Easter. How to use your Cricut to make wood signs for Easter. Make your own farmhouse tray mini signs for spring. Fun rustic Easter and spring craft for adults.

Adding twine

Probably the easiest step is adding the twine. Decide how long you would like your twine hangers to be. I think I measured mine at 12” or so. You’ll need 3 pieces, one for each wood tag. Feed one piece of twine through the hole in one of the wood tags then tie it in a knot.

DIY mini wood tags for Easter. How to use your Cricut to make wood signs for Easter. Make your own farmhouse tray mini signs for spring. Fun rustic Easter and spring craft for adults.

You’re ready to display your Easter wood tags in your home. I know it may seem like a lot of steps written out but really these are super easy and quick to DIY once you get going on them.

DIY mini wood tags for Easter. How to use your Cricut to make wood signs for Easter. Make your own farmhouse tray mini signs for spring. Fun rustic Easter and spring craft for adults.

Like with all of my DIY tutorials if you have any questions please reach out. Leave a comment below or send me a message on one of my social media pages. You can find my links at the top.

Happy Crafting!

DIY easy wood tags using your miter saw

1x4 craft projects to make at home. How to make mini wood tags for tiered trays for that perfect farmhouse style. Easy wooden tags using your miter saw,

How to make farmhouse style wood tags using your miter saw

These little tags are SOOOOOO easy to make! If you can operate a miter saw then you can make these wood tags. They tie in perfectly with farmhouse décor and make adorable accent pieces to those tiered trays that are all over Pinterest. And you can make your own for a fraction of the cost! Even cheaper if you are using scrap wood like I like to do when I make little projects for my home.

Affiliate Disclosure. Some of the links on this website are affiliate links, which means that I may earn a small commission if you click on the link or make a purchase using the link. If you make a purchase you will not be charged anything additional.

This tutorial is quick. Like less than 2 minutes kind of quick if you watch the video tutorial over on my YouTube channel. Check it out below or keep scrolling for the written tutorial.

After you’re done reading this DIY go see what I did with these wood tags for St. Patrick’s Day

Here’s what you need to make your own rustic wood tags

Can you tell I LOVE my Ryobi tools?! Seriously though, if you are having trouble deciding what kind of tools you need as a craft you need to read this post about POWER TOOLS FOR CRAFTERS. In it I cover the basics of what you need and explain a little about them.

Easy wood tags for your country chic decor

ONE-

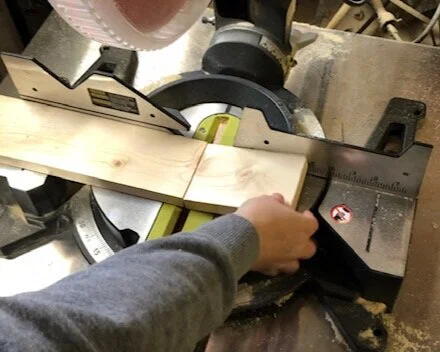
The first thing you need to do is measure out your 1x4 and cut it at 5”. I just used my miter saw side ruler for this. I made mine in a set of 3 but you can make as many as you’d like.

1x4 craft projects to make at home. How to make mini wood tags for tiered trays for that perfect farmhouse style. Easy wooden tags using your miter saw,

TWO-

Swivel your miter saw so that it is set at 45 degrees. Be sure it locks in place, I extra lock mine in place using the manual lock on my saw.

1x4 craft projects to make at home. How to make mini wood tags for tiered trays for that perfect farmhouse style. Easy wooden tags using your miter saw,

THREE-

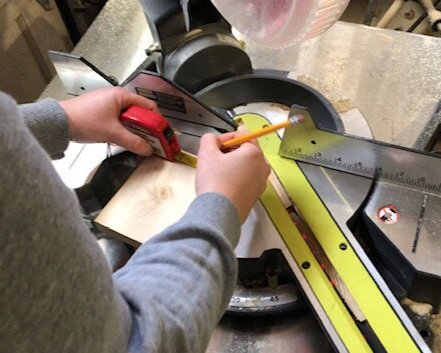
On the top right hand side of each tag measure in 1” and put a little mark. So that you don’t have to mess with moving your angle to cut on the other side flip your piece of wood over and make a mark 1” on the other side.

1x4 craft projects to make at home. How to make mini wood tags for tiered trays for that perfect farmhouse style. Easy wooden tags using your miter saw,

FOUR-

Line your laser up with that 1” dot you made and cut. If you don’t have a laser on your saw you can line your blade up while it’s not in motion. Side note…I’ve really glad I splurged for this fancier saw to make projects like this even easier. I almost didn’t get it just to save a few dollars but some things are worth every penny, just like this saw ;)!!

1x4 craft projects to make at home. How to make mini wood tags for tiered trays for that perfect farmhouse style. Easy wooden tags using your miter saw,

FIVE-

Flip your wood tag over and do the same thing to the other corner. Isn’t that so much easier than moving the degree of the blade?!

1x4 craft projects to make at home. How to make mini wood tags for tiered trays for that perfect farmhouse style. Easy wooden tags using your miter saw,

SIX-

To make a hole in the top for a piece of twine to go through you just need to drill a hole large enough for the size twine you’re using. I used a 5/8” drill bit to drill mine. I measured in 1.75” from one side, not where I cut the corner off because that would not give an accurate middle mark. Tip- place a scrap piece of wood under the wood that you’re drilling to save the surface underneath from getting damaged.

1x4 craft projects to make at home. How to make mini wood tags for tiered trays for that perfect farmhouse style. Easy wooden tags using your miter saw,

SEVEN-

Last, finish them off by giving them a quick sanding. I don’t ever get too crazy with this step on my projects. I typically just use 120 grit sandpaper all over and call it a day.

1x4 craft projects to make at home. How to make mini wood tags for tiered trays for that perfect farmhouse style. Easy wooden tags using your miter saw,

That’s it! SUPER EASY miter saw craft. As with all of my posts if you have any question please feel free to reach out and ask away.

1x4 craft projects to make at home. How to make mini wood tags for tiered trays for that perfect farmhouse style. Easy wooden tags using your miter saw,

DIY mini St. Patrick's Day wood tags

DIY St. Patrick's Day wood tags, how to paint mini wood signs. Using Ryobi tools and a Cricut  to create handmade wood signs

DIY MINI WOOD TAGS FOR ST. PATRICK’S DAY

If you’ve been reading my blog you might know that my four daughters have been asking me to decorate more for the holidays…including St. Patrick’s Day decorations. Yes, that is a holiday they think I should decorate for too lol! So they win. I’ve truly been making an effort to have a more festive home even though daughter #4 totally rearranges everything.

Affiliate Disclosure. Some of the links on this website are affiliate links, which means that I may earn a small commission if you click on the link or make a purchase using the link. If you make a purchase you will not be charged anything additional.

I have been eyeing these adorable mini wood tags on Pinterest for forever now. They are CUTE! They tie in with pretty much anything. You can add these wood tags to a wreath, to a welcome sign, on the mantle (I really wish we had one but I’ll just have to make a faux mantle one of these days) or my favorite- to a tiered tray. Those trays are seriously rustic home décor overload! I love them!! I need to add one to my coffee bar soon.

If you’re looking for fun green holiday themed to make with the kiddos try this easy St. Patrick’s Day suncatcher.

To make this completely from scratch at home you’ll need a few power tools. But, if you don’t have power tools to DIY this craft from start to finish you can grab a DIY CRAFT KIT here. I haven’t always been super comfortable using power tools, actually I was deathly afraid of them not too long ago. Now that I’m over my power tool phobia here’s what I recommend for DIY crafters.

DIY St. Patrick’s Day Wood Tags

Here’s what you’ll need

If you’d like the same file I used to create this set of 3 mini wood St. Patrick’s Day tags you can get my Cricut file here. It’s in my FREE resource library. It’s where I keep all of my FREEBIES like files, printables, patterns, and more. You’ll need the password because I like to keep it a little bit secret but no worries it’s super easy to get. Jut fill out the prompt and you'll get instant access.

DIY craft kit for adults. How to make mini wood tags for St. Patrick's Day using your Cricut. How to stenicil wood signs for spring.

Watch the video or keep scrolling for step by step written/photo instructions for these wood St. Patrick’s Day tags.

Cutting your wood pieces

  1. First you want to cut out your wood tags. I used my Ryobi miter saw to do this. Cut a 1x4 in to 3 5” long pieces. On the top of each 5” piece measure in 1” and make a mark. Set your miter saw to 45 degrees, line it up with your 1” mark and cut. Flip your tag over and do the same to the other side.

  2. Now drill a hole in the middle of the top of each piece. This is for your twine holder to go through.

  3. After you have that done give each piece a quick sanding. You don’t have to get crazy with this, it’s not a fine piece of furniture. I use 120 grit sandpaper for this and that’s it. Just enough to take off that shine it has when you get it from the lumberyard.

    WATCH THE VIDEO OF HOW I MADE THESE USING MY MITER SAW

Stencils

You can use any cutting machine to create your stencils. I use my Cricut Explore to make all of mine. If you use a Cricut you can get my cutting file here. I use Oramask stenciling film to make my stencils. While it is a little more expensive than other materials I have found it works the absolute best for stenciling.

Painting (the fun part!)

  1. First a thin layer of white paint on each wood tag. Be sure it is a thin layer, you will still be able to see the wood grain through the paint. After the first thin layer is dry you can paint a second thin layer. You don’t want more than two layer of base paint on your wooden tags, or any painted wood sign. Too much paint will cause issues when stenciling with base paint peel up, which can be impossible to fix sometimes and honestly it just plain sucks to have to go back and fix.

DIY craft kit for adults. How to make mini wood tags for St. Patrick's Day using your Cricut. How to stenicil wood signs for spring.

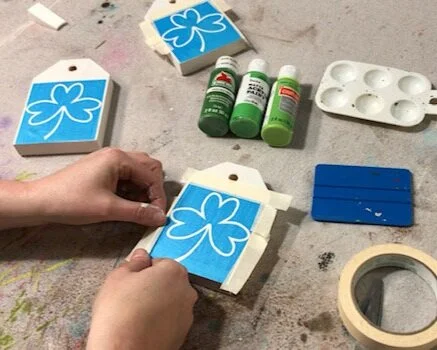
2. After your base paint is completely dry you can apply your stencils to all three wood blanks. Apply your transfer tape to your stencils (if you bought my DIY CRAFT KIT this step has already been done for you). Peel the paper backing from your stencil/transfer tape. Go slow. Place your stencils sticky side down on the front of your painted wood tag. The front is just whichever side you prefer best ;). Using your vinyl squeegee, if you don’t have one you can use a plastic store rewards card, and rub the stencil to that it adheres to the wood. Slowly peel the transfer tape away from the wood leaving your stencil attached to the wood. I find that it works best when I roll the transfer tape away, check out this DIY PAINTED WOOD SIGN TUTORIAL for a closer look at how to do this.

DIY craft kit for adults. How to make mini wood tags for St. Patrick's Day using your Cricut. How to stenicil wood signs for spring.

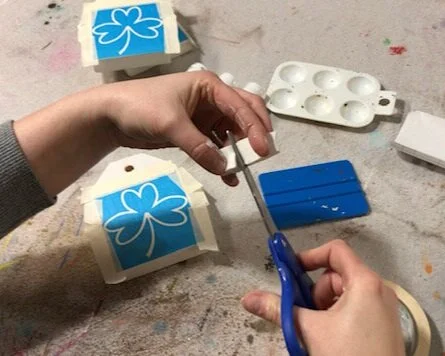
3. Use masking tape to tape off the edges of your stencil so you don’t get paint on areas of the wood tags that you don’t want paint on.

DIY craft kit for adults. How to make mini wood tags for St. Patrick's Day using your Cricut. How to stenicil wood signs for spring.


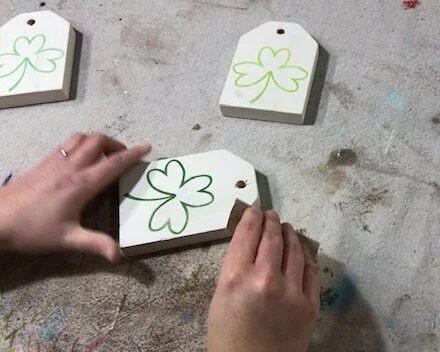
4. Cut your stenciling sponge in half so you can use it in all three paint colors without mixing the colors.

DIY craft kit for adults. How to make mini wood tags for St. Patrick's Day using your Cricut. How to stenicil wood signs for spring.

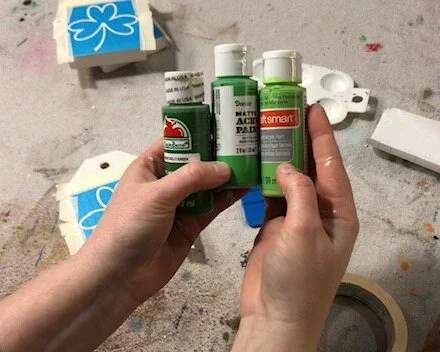
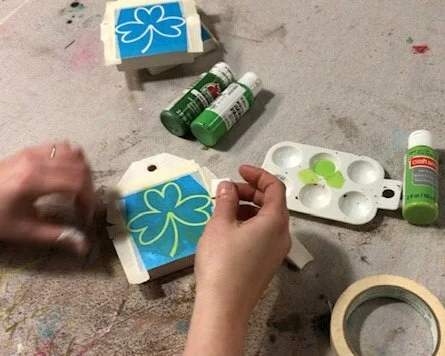
5. Using one end of one of the sponges dip it in the lightest color of green. You need very little paint, the more paint you use the more paint bleed you will likely have. Dab your sponge onto one of your wood blocks where the clover is exposed on the wood. The coverage should be VERY faint. Let that dry and repeat up to three times. You don’t want to apply more than three coats as this could cause issues with paint peel up where you just stenciled.

DIY craft kit for adults. How to make mini wood tags for St. Patrick's Day using your Cricut. How to stenicil wood signs for spring.

6. Peel up your stencil and tape. Using an xacto knife helps to remove the middle piece of the clover.

DIY craft kit for adults. How to make mini wood tags for St. Patrick's Day using your Cricut. How to stenicil wood signs for spring.

7. Repeat steps 5 & 6 for your other two wood tag bases.

8. Let them dry.

How to make mini wood tags for St. Patrick's Day. Easy tutorial to make mini wooden tags for spring using your Cricut.

Distressing

After your paint completely dries from stenciling you can start distressing your wood St. Patrick’s Day tags. I LOVE using antiquing wax for this process. Antiquing wax comes in a several different colors but my favorite its definitely the regular antiquing wax. Learn more about how to transform your DIY farmhouse style crafts with antiquing wax.

  1. Using sand paper or your sander give a quick sanding to the edges, corners, and lightly on the front of each wooden tag. Wipe off and dust.

DIY craft kit for adults. How to make mini wood tags for St. Patrick's Day using your Cricut. How to stenicil wood signs for spring. How to distress handpainted wood signs using sandpaper.

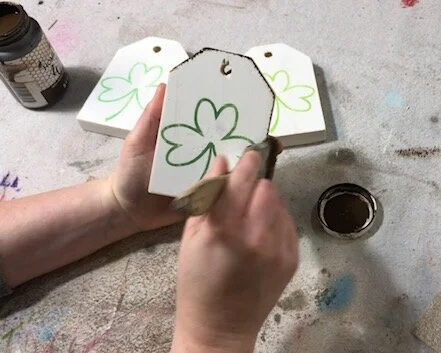
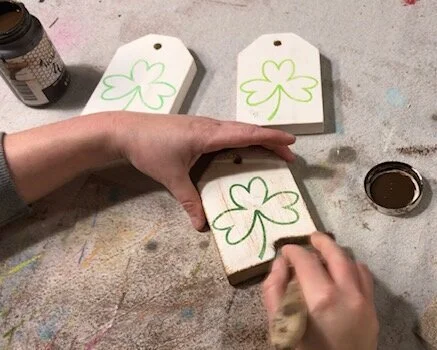
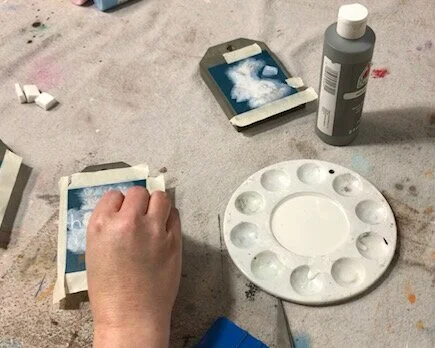
2. Take your chip brush and lightly dip it into your antiquing wax. Dab off the excess, a little wax goes a very long way. Much like you did with the sandpaper, focus on brushing the wax on the edges, corners, and lightly on the front of your wooden tags.
DIY craft kit for adults. How to make mini wood tags for St. Patrick's Day using your Cricut. How to stenicil wood signs for spring. How to apply antiquing wax to wood.

Adding twine

Probably the easiest step is adding the twine. Decide how long you would like your twine hangers to be. I think I measured mine at 12” or so. You’ll need 3 pieces, one for each wood tag. Feed one piece of twine through the hole in one of the wood tags then tie it in a knot.

DIY craft kit for adults. How to make mini wood tags for St. Patrick's Day using your Cricut. How to stenicil wood signs for spring.

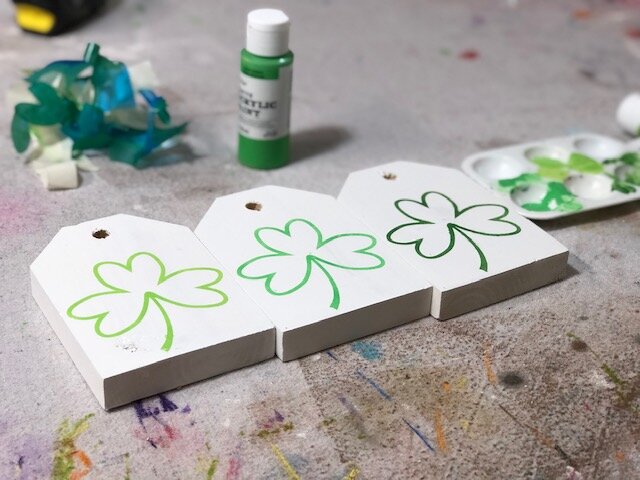
You’re ready to display your St. Patrick’s Day wood tags in your home. I know it may seem like a lot of steps written out but really these are super easy and quick to DIY once you get going on them.

Like with all of my DIY tutorials if you have any questions please reach out. Leave a comment below or send me a message on one of my social media pages. You can find my links at the top.

Happy Crafting!

Do you love freebies? Don’t forget to check out my FREE RESOURCE LIBRARY. It’s where I keep all of my FREE printables, files, and more. Go here to get instant access to my library

DIY cute ghost yard stake

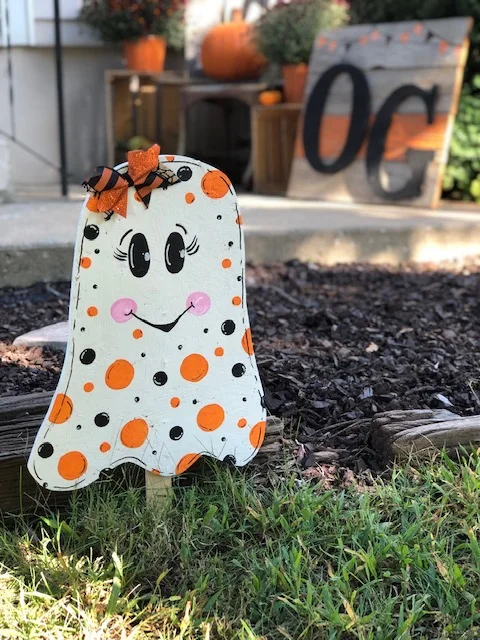
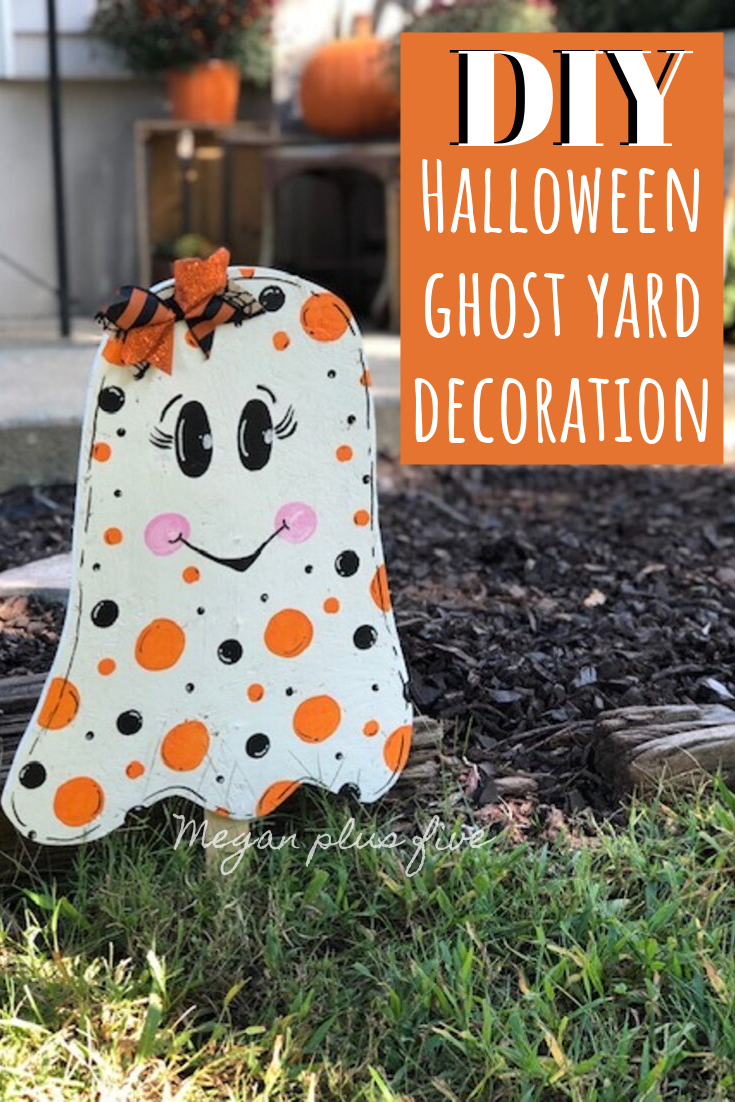
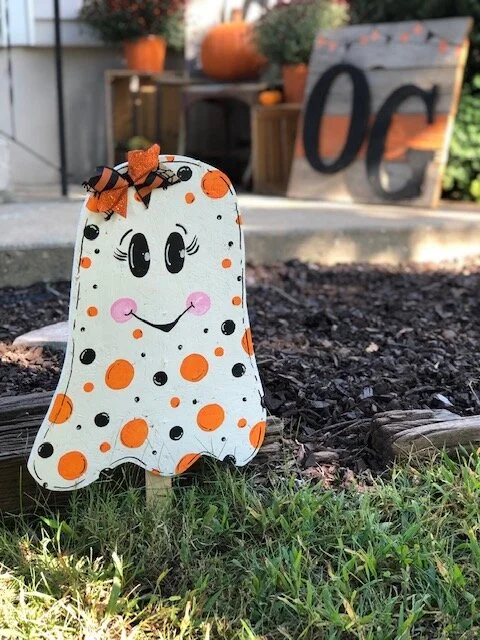
DIY Halloween ghost yard decoration. How to make a cute wood ghost easy with your scroll saw.

How to make a super cute ghost for your outdoor Halloween decorations

Between my online business and being a mom to four little girls I seriously don’t know where I find the time to make things for myself but I do lol! Like this cute outdoor ghost stake I HAD to make for our front yard. I had been slacking the last couple years with holiday decorating. Usually I go all out but lately I just hadn’t been up to it. So for this fall I decided I was getting back in my holiday décor groove! And this adorable little ghost is just one small part of my DIY fall/Halloween decorations. Check out this DIY PALLET SIGN I made, it’s actually a school spirit sign but with our school colors it ties in perfectly with our fall décor!

Affiliate Disclosure. Some of the links on this website are affiliate links, which means that I may earn a small commission if you click on the link or make a purchase using the link. If you make a purchase you will not be charged anything additional. This is just a way I can help add to our family finances to raise our four daughters. Please know I would never recommend a product or service I do not totally stand behind.

And this fun witch’s brew coffee mug I made using my Cricut and some vinyl. And just one more… this rusty pumpkin I made from mason jar lids. So cute!


Real quick…if you have ever wanted to learn how to paint wood signs, the way the PROs do, you don’t want to miss my COMPLETE GUIDE TO SIGN PAINTING. It is a whole course that you complete on your time. I am teaching you EVERYTHING I know without you having to go through the headache and expense of trial and error. If you’ve struggled with paint bleed, designs not lining up, paint peel up, sticky residue left behind you are in for a treat! Click on the image below or go here for more info.


DIY CUTE WOOD GHOST CUTOUT

If you don’t want to read the tutorial you can scroll to the bottom to watch the video tutorial or go here to watch it on my crafty YouTube channel.

Here’s what you’ll need

Fist you want to draw the outline of your ghost onto the wood you’re using. We had some leftover OSB so that’s what I used. I also used this same OSB wood to make this pallet sign on the letter cutouts. We had made triple loft beds for the older three girls and WAY overbought for the project lol! So now we have a full sheet and a half still left over.

DIY cute Halloween ghost decoration for your yard. How to make an adorable wooden ghost for fall

Then cut out your design on your scroll saw. Honestly this probably would have been much easier if I used a jig saw BUT this is what I had to use and it still worked pretty good to get the job done.

DIY cute Halloween ghost decoration for your yard. How to make an adorable wooden ghost for fall

Once you have it all cut out give it a quick sanding to knock down the rough edges. I used a 120 grit sandpaper on my Ryobi sander.

DIY cute Halloween ghost decoration for your yard. How to make an adorable wooden ghost for fall

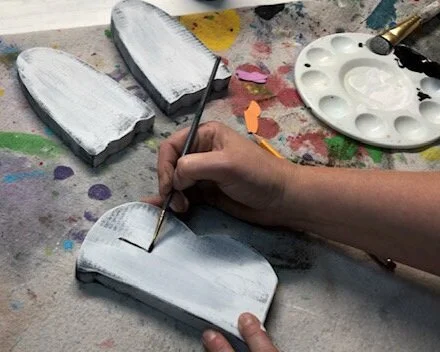
Then paint your ghost cutout all white. I didn’t paint the back of mine and I really wish I would have. I used a leftover paint we had in our garage but you can use acrylic for yours if that’s what you have.

DIY cute Halloween ghost decoration for your yard. How to make an adorable wooden ghost for fall

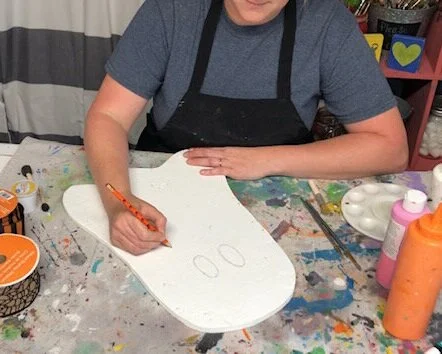
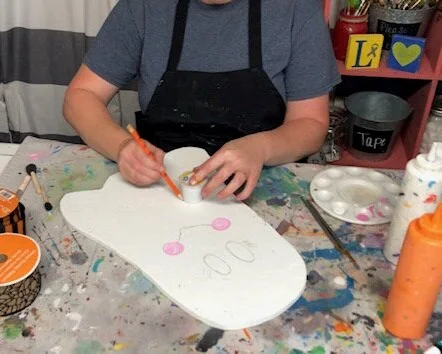
After your white base coat is dry on your wood ghost you can start doing the artsy stuff :)! I like to sketch out my design before I start painting. This way if I make a mistake it’s much easier to fix it vs painting it, messing up big time, then wanting to throw it across the floor lol! I sketched out eyes, eyebrows, eyelashes, mouth, and then I used an off brand K-cup to draw my circles for the large polk-a-dots. {actually I painted the cheeks before I traced the circles but if I was thinking I would have traced those first}

DIY cute Halloween ghost decoration for your yard. How to make an adorable wooden ghost for fall

To paint the cheeks you need pink and white paint and I also used a stencil brush but you can use a round brush for this step. Dip your brush into the pink paint then dip one side into the white, but just a little bit of white. Then swirl it around in a circle at the corner of each side of the mouth. Add more white if you need just a little more highlight in there.

DIY cute Halloween ghost decoration for your yard. How to make an adorable wooden ghost for fall

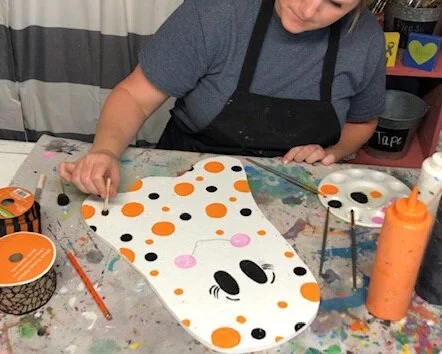
Then paint the other facial details, except for the mouth. Somehow I forgot to paint the eyelashes so I did mine later but you can go ahead and paint those now too. I used a round brush for the eye painting and a fine flat brush for the finer details.

DIY cute Halloween ghost decoration for your yard. How to make an adorable wooden ghost for fall

Now paint all the polk-a-dots. I used orange and black for my dots. I painted the large ones in with a paint brush. I used a medium sized round sponge brush {black dots}, a small sponge brush {orange dots}, and the wood end of the small brush for even smaller dots . I didn’t plan any of these out too much, just kind of scattered them wherever they looked best.

DIY cute Halloween ghost decoration for your yard. How to make an adorable wooden ghost for fall

When the cheeks are dry you can paint the mouth of your wood ghost using black paint and a fine paint brush.

DIY cute Halloween ghost decoration for your yard. How to make an adorable wooden ghost for fall

Add the white features to the eyes. I used a white paint pen and made a curved line on one side of each eye {be sure you are making them on the same side of each eye} and I added a dot towards the outside of the other side of the eye then a little accent dot right above that dot.

DIY cute Halloween ghost decoration for your yard. How to make an adorable wooden ghost for fall

Using a paint pen I made a long dash line all the way around my ghost and I also added dashes on each circle. For the outline and all of the orange circles I used a black paint pen. For all the black circles I used a white paint pen. Btw….isn’t my little helper just the cutest?!! This is daughter #4 <3

DIY cute Halloween ghost decoration for your yard. How to make an adorable wooden ghost for fall

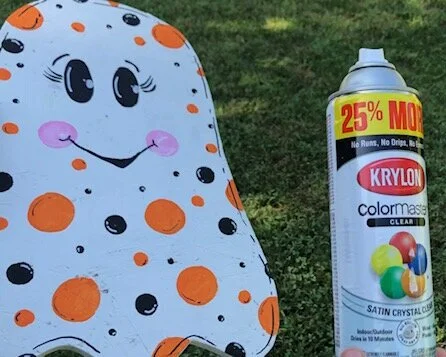
Since this will be outside I sprayed mine with this indoor/outdoor clear satin Krylon sealant.

DIY cute Halloween ghost decoration for your yard. How to make an adorable wooden ghost for fall

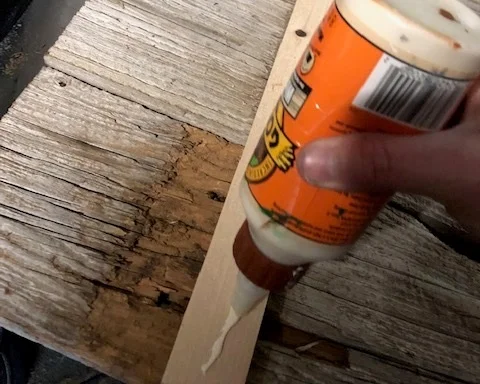
Attach your stake part to the back of your ghost using Gorilla wood glue and a brad nailer. I really like this Ryobi one I use. My husband has one that I would use before I got my own and omg what a world of difference. You can read more about why I chose to go with Ryobi power tools here for my crafty business.

DIY cute Halloween ghost decoration for your yard. How to make an adorable wooden ghost for fall

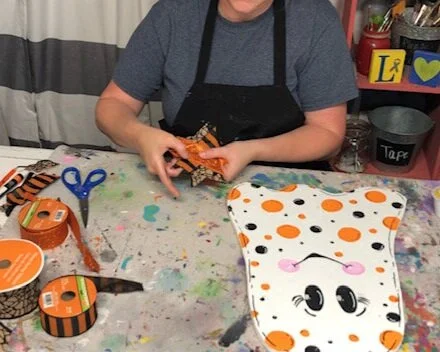
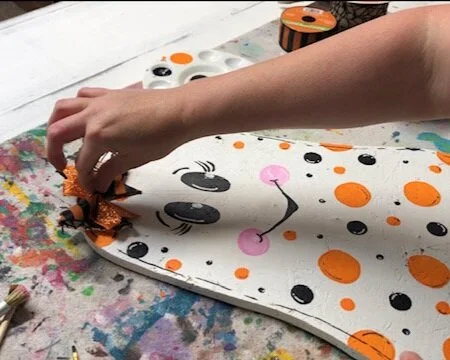
I made a super simple pinwheel bow to make my wood ghost a little more girly. These are also super adorable bows to make for your little girls to wear in their hair. We have tons of these that I’ve made over the years for my own four little girls. Then attach the bow with hot glue.

DIY cute Halloween ghost decoration for your yard. How to make an adorable wooden ghost for fall

Once the hot glue is totally dry you can stick your wood ghost in the yard. I absolutely LOVE the way this little cutie turned out! Even when our girls got off the bus they got so excited because she is just sooooooo darn adorable!

I have a few more of these wood yard decorations to make so be on the look out for a DIY CANDY CORN and a DIY FRANKENSTEIN wood stakes.

Let me know below what you think of this DIY HALLOWEEN CRAFT.

DIY cute Halloween ghost decoration for your yard. How to make an adorable wooden ghost for fall

Watch the full crafty tutorial below

DIY CRAFT KIT how to paint your free standing BOO wood cutouts

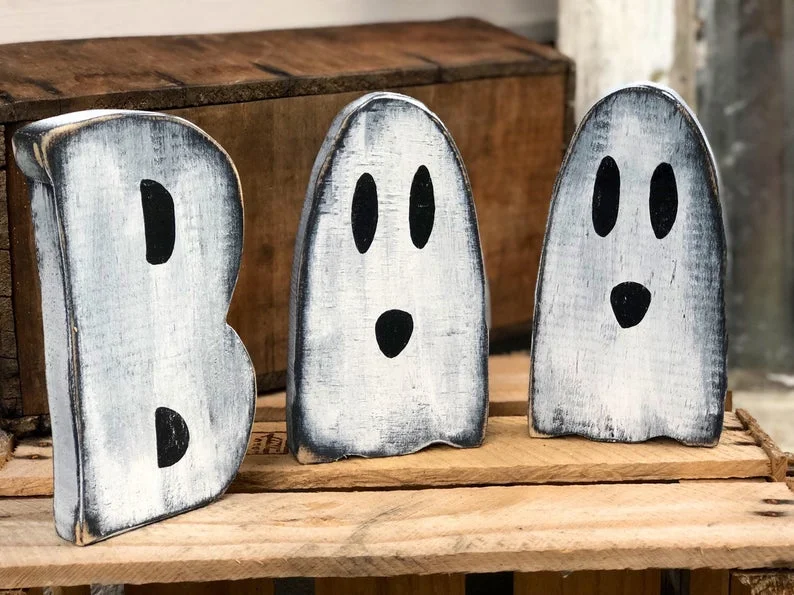
how to paint your diy craft kit, BOO wood letters. DIY craft kits for adults. Halloween wood letter cutouts diy projects

How to paint your DIY CRAFT KIT, BOO WOOD CUTOUTS

I just love these little wood cutouts. They are so adorable and tie in perfectly with our simple Halloween décor. I primarily decorate for fall but I do like to add touches of Halloween to our decorations because I have little kiddos and they LOVE the Halloween stuff far more than the traditional fall décor. So we compromise and get the best of both worlds.

Affiliate Disclosure. Some of the links on this website are affiliate links, which means that I may earn a small commission if you click on the link or make a purchase using the link. If you make a purchase you will not be charged anything additional.

If you love this DIY CRAFT KIT check out another popular fall craft kit, DIY FREE STANDING PUMPKINS

Don’t feel like reading the tutorial? No worries I have a short video tutorial on my YouTube channel. Scroll to the bottom to catch it or click here to view the HOW TO PAINT YOUR CRAFT KIT, DIY BOO WOOD CUTOUTS

If you need a CRAFT KIT you can order yours here —-> DIY CRAFT KIT BOO WOOD CUTOUTS FOR HALLOWEEN

If you want to make yours from scratch check out this post on how to make your own BOO WOOD CUTOUTS using a Cricut cutting machine and a Ryobi scroll saw. I show you exactly how I make my BOO cutout sets and if you have the tools you can make your own too! There’s even a video tutorial at the end ;)!

How to paint your BOO wood cutouts

If you didn’t but the DIY CRAFT KIT here’s what you’ll need


Real quick…if you have ever wanted to learn how to paint wood signs, the way the PROs do, you don’t want to miss my complete guide to sign painting. It is a whole course that you complete on your time. I am teaching you EVERYTHING I know without you having to go through the headache and expense of trial and error. If you’ve struggled with paint bleed, designs not lining up, paint peel up, sticky residue left behind you are in for a treat! Click on the image below or go here for more info.


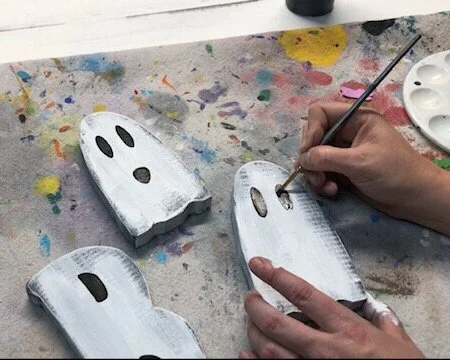
First you want to decide if you want to paint white or black letters. Heck, you could even mix it up and do both! I chose to do white ghosts but I wanted black distressing on my cutouts. There are lots of different ways to achieve this look but my favorite is to paint the distressing color first then paint my project whatever color I want it to actually be.

So on these BOO cutouts I first painted them with a SUPER thin layer of black paint {remember this is going to be the underneath/distressed color}.

How to paint your adult DIY CRAFT KIT, BOO wood cutouts for Halloween.

After the underneath color is dry you can paint your wood cutouts the actual color you want them to be.

Some important things to know:

  • use a VERY LIGHT hand when painting the top color. You do not want to press hard as this will put too much paint on your wood cutouts and it is far easier to add more paint than it is to take too much paint off.

  • do NOT get your brush wet. For almost all of my paint projects I always use a DRY brush.

  • use very little paint, dab off excess paint before applying

  • work from the middle out

  • paint lightly around the edges as this is where the “natural” wear would be

  • if you need a little more coverage wait till your paint is dry then add more paint

Paint all sides of each cutout this way.

How to paint your adult DIY CRAFT KIT, BOO wood cutouts for Halloween.

Trace around your cardstock cutouts. You will have a total of 5 - 2 cutouts for the letter B and 3 cutouts for the ghosts {you will reuse the ghost cutouts for both ghosts}. Place them where they need to go on your cutouts then trace around them with a pencil. This does not have to be perfect ;)!

How to paint your adult DIY CRAFT KIT, BOO wood cutouts for Halloween.

Using a fine paintbrush paint inside the traced lines with the same colored paint you used for your distressing color. I used black for my distressing color so I also used black for areas I traced around.

How to paint your adult DIY CRAFT KIT, BOO wood cutouts for Halloween.

And then you’re done! If you have sandpaper on hand you can lightly give it a little more distressing but that is totally up to you.

Click here to shop even more DIY CRAFT KITS

Check out the full video tutorial

If you have any questions about your DIY CRAFT KIT please leave a comment below or feel free to send me a message. If you purchased through my Etsy shop please message via their platform to stay in compliance with Etsy’s policy.

DIY free standing BOO cutouts using your Cricut & scroll saw

How to use your Cricut to make halloween wood cutouts.

DIY- use your CRICUT to make BOO wood cutouts for Halloween

I don’t have the latest fancy Cricut Maker, but that doesn’t mean I still can’t create AMAZING projects with my older model, CRICUT EXPLORE. Especially when use it with my Ryobi scroll saw…pure magic happens! Ok, obviously not real magic but the projects you can create with this combo is everything to write home about!

Affiliate Disclosure. Some of the links on this website are affiliate links, which means that I may earn a small commission if you click on the link or make a purchase using the link. If you make a purchase you will not be charged anything additional.

I wanted to add another DIY craft kit to my crafty line up for my online business and thought these BOO cutouts would fit in perfectly with the craft kits I already offer.

If you don’t have the tools to make your own BOO cutouts grab your own

—-> BOO DIY CRAFT KIT <——

After you read this tutorial check out how I finished my own BOO WOOD CUTOUTS

Here’s what you’ll need to cut out your own Halloween BOO wood letters

Don’t feel like reading the tutorial? Catch the video below or click here for the DIY BOO cutouts tutorial using your Cricut & scroll saw


Join the crafty community. Get exclusive offers, content, and more


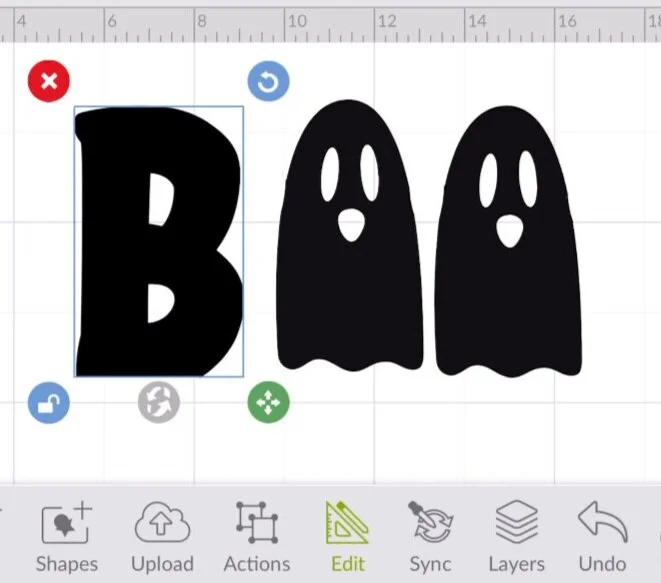
First, design your BOO in Cricut Design Space. I used the font beefcake for the letter “B”. I used a ghost image in DS {design space} that is included in my Cricut Access monthly subscription plan. It had arms but I took those away using the slice function. I resized them too fit the piece of wood I was using so mine are 6”x3.25”.

DIY free standing BOO cutouts using your Cricut & scroll saw. DIY craft kit for adutls for fall and Halloween.  How to make free stnading wood cutouts using your cricut.

Next, cut them out on cardstock. I used some scrap cardstock that I had leftover from a previous DIY project. After I started cutting them I realized that I really didn’t need to cut out two ghosts. So really you just need 1 letter B and 1 ghost. Don’t toss the middles of the ghost or B, you’ll need those for later when you paint them.

DIY free standing BOO cutouts using your Cricut & scroll saw

Now trace around your cutouts using a pencil onto your wood. I have TONS of scrap wood so I used a scrap piece that I had on hand. I used a 1” pine board that you can find at most home improvement stores. Check out the DIY SCRAP WOOD PUMPKINS I made using this same method. They turned out SO CUTE!!

You don’t need to trace around the middle cutouts because we won’t be cutting those pieces out. Remember to trace around your ghost twice ;)

DIY free standing BOO cutouts using your Cricut & scroll saw

After you have your Cricut cutouts traced it’s time to cut them out using your Ryobi scroll saw. If you don’t have a scroll saw you can use a band saw and maybe even a jigsaw but I’ve had great luck with cutting things out on my scroll saw so for now that’s what I’m sticking with.

DIY free standing BOO cutouts using your Cricut & scroll saw

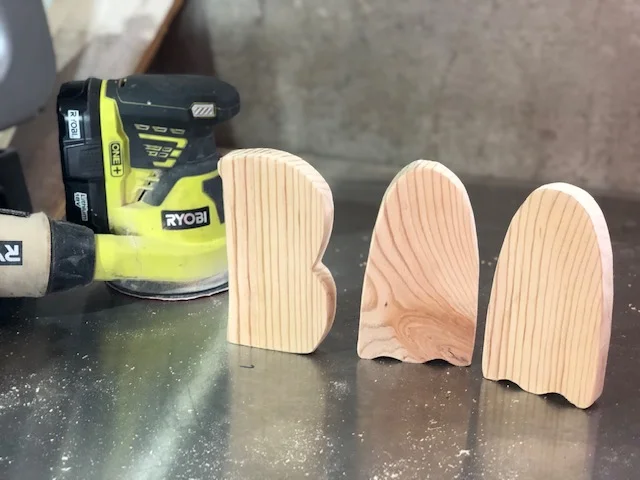
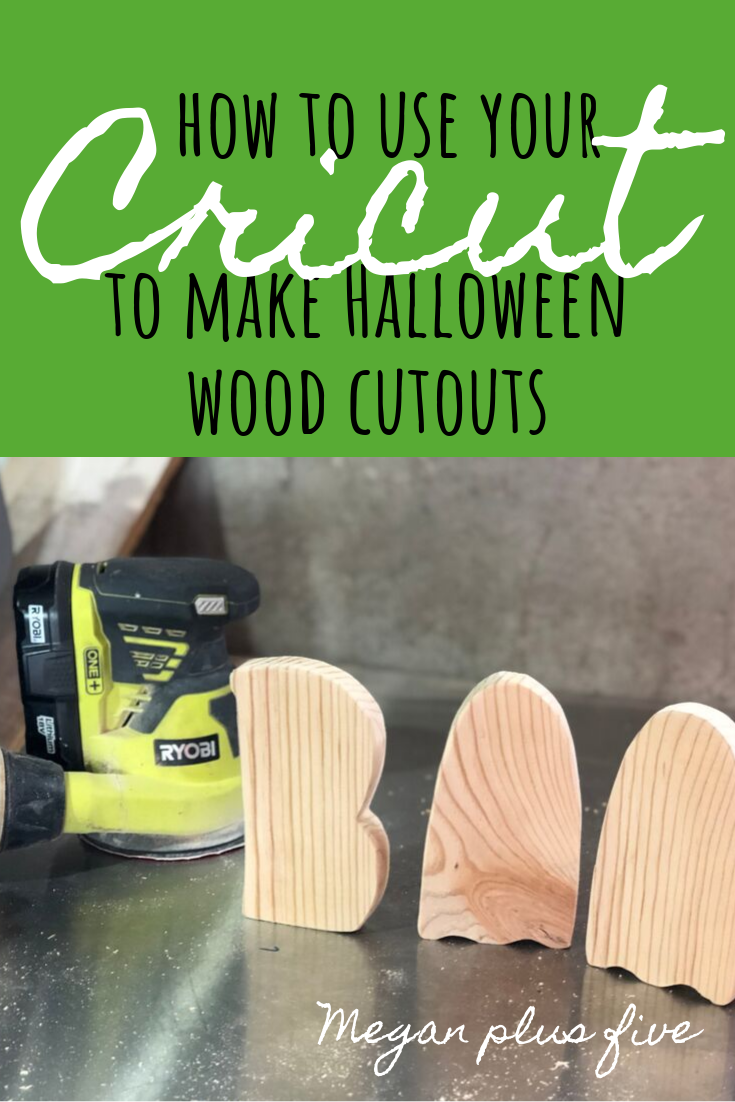
Once you have them all cut out you’ll want them to be able to stand on their own. I used my miter saw to do this. My miter has a laser on it making it SUPER easy to line things up and to show me exactly how much I’m taking off. By cutting a sliver off the bottom with your miter saw you get a nice straight base so your projects are able to stand freely on their own.

SIDE NOTE: if you’re thinking about investing in a set of your own power tools you’ll want to read this WHAT ARE THE BEST POWER TOOLS FOR CRAFTERS. It wasn’t that long ago when I had some serious anxiety about using power tools so I wrote a little about that and why I’ve chosen the tools I have for my crafty projects and business.

DIY free standing BOO cutouts using your Cricut & scroll saw

Then just give them a quick sanding and you’re ready to paint them. I always use a 120 grit sandpaper and most of the time I don’t sand my projects to a super smooth finish. A little bit of bumps and divots just add to the rustic look ;)!!

DIY free standing BOO cutouts using your Cricut & scroll saw

There are so many projects you can do when you start pairing your tools together. Like this DIY MERMAID CUPCAKE STAND I made for my daughter’s birthday party this year. And a bonus is that she has a pretty awesome new room decoration she was able to decoration then hang in her bedroom after the party was over.

Check out the DIY BOO cutouts using your Cricut & scroll saw video tutorial below

COMING SOON…a complete guide to paint wood signs without the stress and headache of trial and error. Click here for more info

DIY make a wood CUPCAKE base using your Cricut

Use your cricut to make a wood base for your pull apart cupcakes. See how this mom made a pull apart mermaid tail cake from cupcakes. She used her Cricut and Cricut design space to make her template then cut it out using her Ryobi scroll saw.

Use your Cricut & scroll saw to make a wooden cupcake base in the shape of a mermaid tail

I love throwing birthday parties for my four daughters. I love the excitement in their eyes when they see all the work and thought that’s been put into THEIR big day! I love sitting with them and planning out the details. And when the oldest three were much younger I LOVED making their cakes. As the years have passed though, I found my self getting busier and busier and it was just easier for me to run to Sams club and grab a cake from there.

Affiliate Disclosure. Some of the links on this website are affiliate links, which means that I may earn a small commission if you click on the link or make a purchase using the link. If you make a purchase you will not be charged anything additional.

But this year when the second oldest was planning her birthday she asked if I would make her cake. I felt so honored. Really? She didn’t want a store bought cake but one that momma made! Seriously bring on the happy tears!

She had been pinning on Pinterest for a couple of months and decided she wanted a MERMAID cake! As soon as she said those words I knew what I was going to do to make that happen… MERMAID PULL APART CUPCAKES! So much easier than an actual cake and less mess on the day of the party. Years and years ago I did a similar one for the oldest daughter when she turned 4. I made pull apart cupcakes in the shape of a 4 and it was ADORABLE and SOOOOOOO easy!

Thank goodness for tools like Cricut and Ryobi, if I didn’t have those then her cake might have turned out a little….less than edible looking lol!

If you want more little girl birthday party inspiration be sure to check out these ADORABLE UNICRON party centerpieces I made using my Cricut too!

Don’t feel like reading the full tutorial? Skip to the bottom to catch the video or go here ——-> MERMAID TAIL CUPCAKE BASE on my YouTube channel

How to make a wood base for pull apart mermaid cupcakes

Use your cricut to make a wood base for your pull apart cupcakes. See how this mom made a pull apart mermaid tail cake from cupcakes. She used her Cricut and Cricut design space to make her template then cut it out using her Ryobi scroll saw.

Here’s what you’ll need

First select your design in CRICUT DESIGN SPACE. If you are like me and create a ton of projects each monthly I highly recommend signing up for CRICUT ACCESS. You will have access to thousands of images, fonts, and projects for a small monthly fee…and it’s SO worth it!

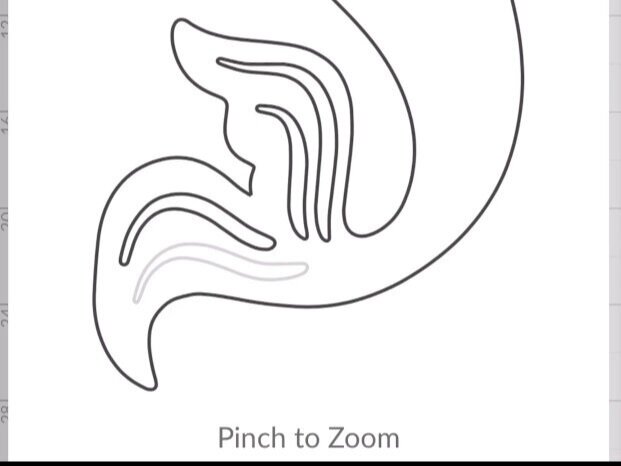
Here’s the mermaid tail I chose in Cricut Access. I just simply searched MERMAID TAIL and chose one that I liked.

Use your cricut to make a wood base for your pull apart cupcakes. See how this mom made a pull apart mermaid tail cake from cupcakes. She used her Cricut and Cricut design space to make her template then cut it out using her Ryobi scroll saw.

I chose the pink one on the bottom row. I really like that this one had some movement in it. But I didn’t really like the white spaces on the mermaid tail. So after I added it to my canvas I used the CONTOUR function to hide those white spaces. I also adjusted the size of the mermaid tail so that it was 11.45” wide. I left the size lock on so that it would adjust the height for me so that everything would be proportionate.

Use your cricut to make a wood base for your pull apart cupcakes. See how this mom made a pull apart mermaid tail cake from cupcakes. She used her Cricut and Cricut design space to make her template then cut it out using her Ryobi scroll saw.

Since I was using cardstock for my stencil and I didn’t have a piece big enough I butted two pieces together and taped the seam so that it would be like one big piece. Feed your mat through your Cricut machine and press GO when the button starts to flash.

Use your cricut to make a wood base for your pull apart cupcakes. See how this mom made a pull apart mermaid tail cake from cupcakes. She used her Cricut and Cricut design space to make her template then cut it out using her Ryobi scroll saw.

I used a piece of scrap 1x12 to make my mermaid tail cupcake base out of. I had some plywood which probably would have worked just as good {and would have been cheaper to use} but I knew I most likely wouldn’t use this again and I wanted my daughter to be able to use it to hang in her room after her party.

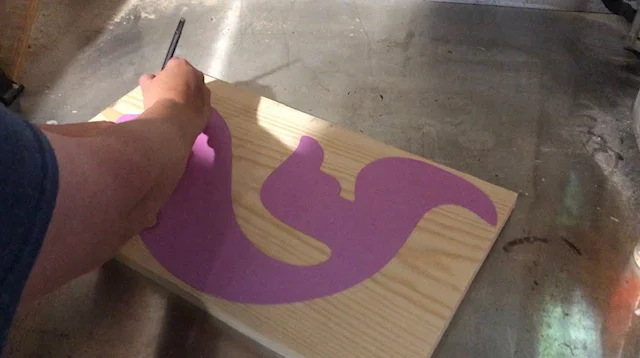
Trace your mermaid tail cardstock stencil out on your piece of wood.

Use your cricut to make a wood base for your pull apart cupcakes. See how this mom made a pull apart mermaid tail cake from cupcakes. She used her Cricut and Cricut design space to make her template then cut it out using her Ryobi scroll saw.

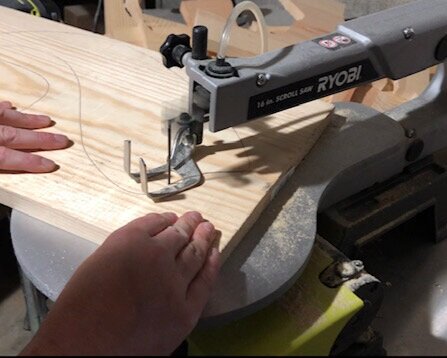
Then cut the mermaid tail out using your Ryobi scroll saw. You can use a band saw, and even a jig saw for this step if you don’t have a scroll saw.

Use your cricut to make a wood base for your pull apart cupcakes. See how this mom made a pull apart mermaid tail cake from cupcakes. She used her Cricut and Cricut design space to make her template then cut it out using her Ryobi scroll saw.

Then you want to smooth it out using your Ryobi sander. I used 120 grit sand paper on mine. I also slightly rounded some of the edges so that it wasn’t so pokey.

Use your cricut to make a wood base for your pull apart cupcakes. See how this mom made a pull apart mermaid tail cake from cupcakes. She used her Cricut and Cricut design space to make her template then cut it out using her Ryobi scroll saw.

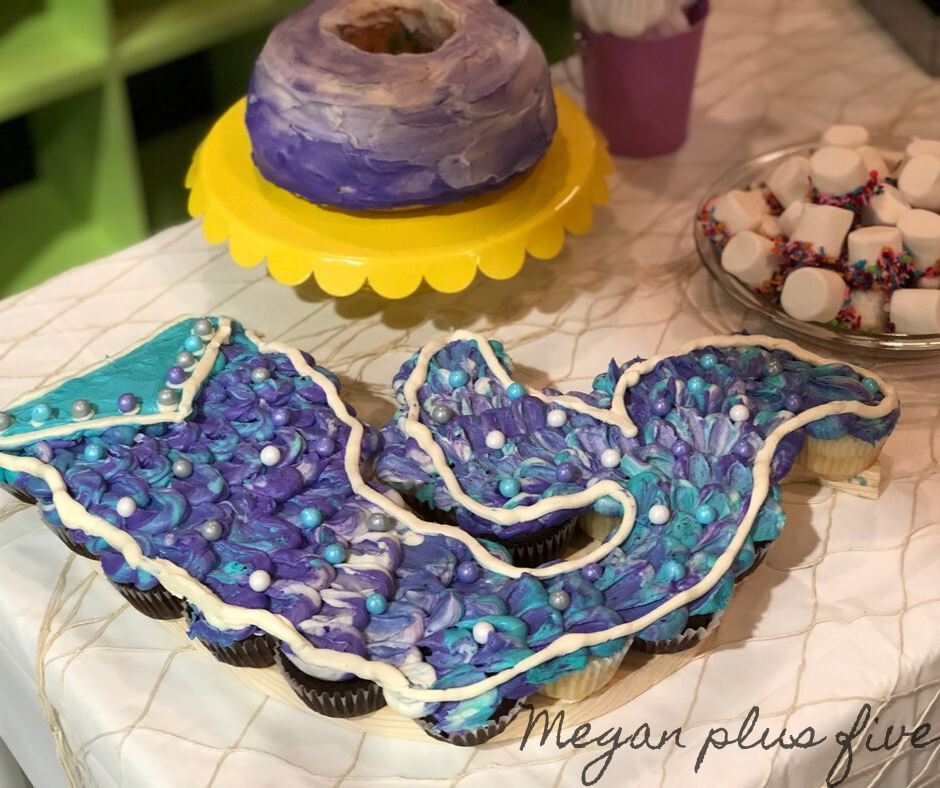
Add your cupcakes and decorate. I just slapped a little bit of frosting on the bottom of each cupcake to stick them to the board.

Use your cricut to make a wood base for your pull apart cupcakes. See how this mom made a pull apart mermaid tail cake from cupcakes. She used her Cricut and Cricut design space to make her template then cut it out using her Ryobi scroll saw.

. I used a combination of purple, teal, and white for the frosting colors and I didn’t even use any fancy piping tips {I was a little pressed for time lol}. For under $10 I was able to make the cake of her mermaid themed birthday dreams!

. I used a combination of purple, teal, and white for the frosting colors and I didn’t even use any fancy piping tips {I was a little pressed for time lol}. For under $10 I was able to make the cake of her mermaid themed birthday dreams!

Watch the video tutorial below on how to make your own MERMAID TAIL CUPCAKE BASE

DIY school spirit pallet style porch sign

DIY school spirit pallet style porch sign. How to make your own personalized repurposed wooden sign to show your small town pride.

DIY porch sign to show off your school spirit

It was an absolute PERFECT day in our small town today that I took a couple hours to make something for my own front porch. I could just feel the fall weather coming in and that reminded me that I needed to decorate for the upcoming season. Which totally meant that I NEEDED to make a new sign lol! Every year I try to incorporate a school spirit pieces on our porch, really it only makes sense because our school colors are ORANGE & BLACK but truly I do it because my husband and I absolutely adore the schools where we live.

The teachers are amazing, the staff in general is amazing, they take such great care of our girls while they are there for 8 hours a day. We can’t say enough nice things about our small town schools! So we show off our school spirit every fall blended into our fall décor.

I wanted a bigger sign than what I usually put out. The old one is a small 40”x5.5” leaning sign that honestly I’m tired of looking at lol! So today was the day for a new one! I had a pretty general idea of what I was going to do but I didn’t know it was going to turn out even more perfect than I planned!

Affiliate Disclosure. Some of the links on this website are affiliate links, which means that I may earn a small commission if you click on the link or make a purchase using the link. If you make a purchase you will not be charged anything additional. This is just a way I can help add to our family finances to raise our four daughters. Please know I would never recommend a product or service I do not totally stand behind.

Here’s what you need to make your own school spirit rustic porch sign

First

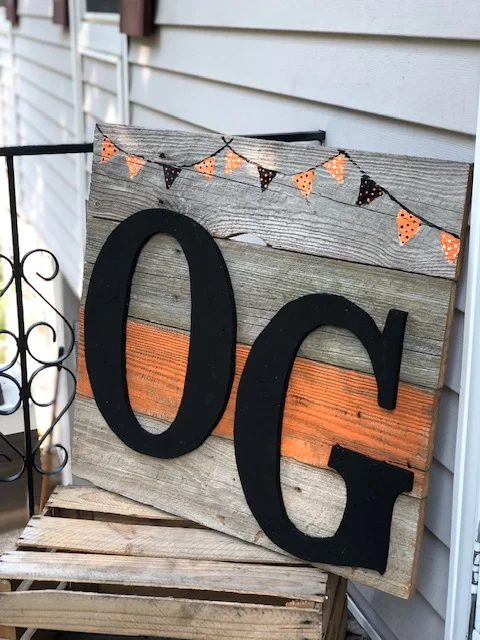
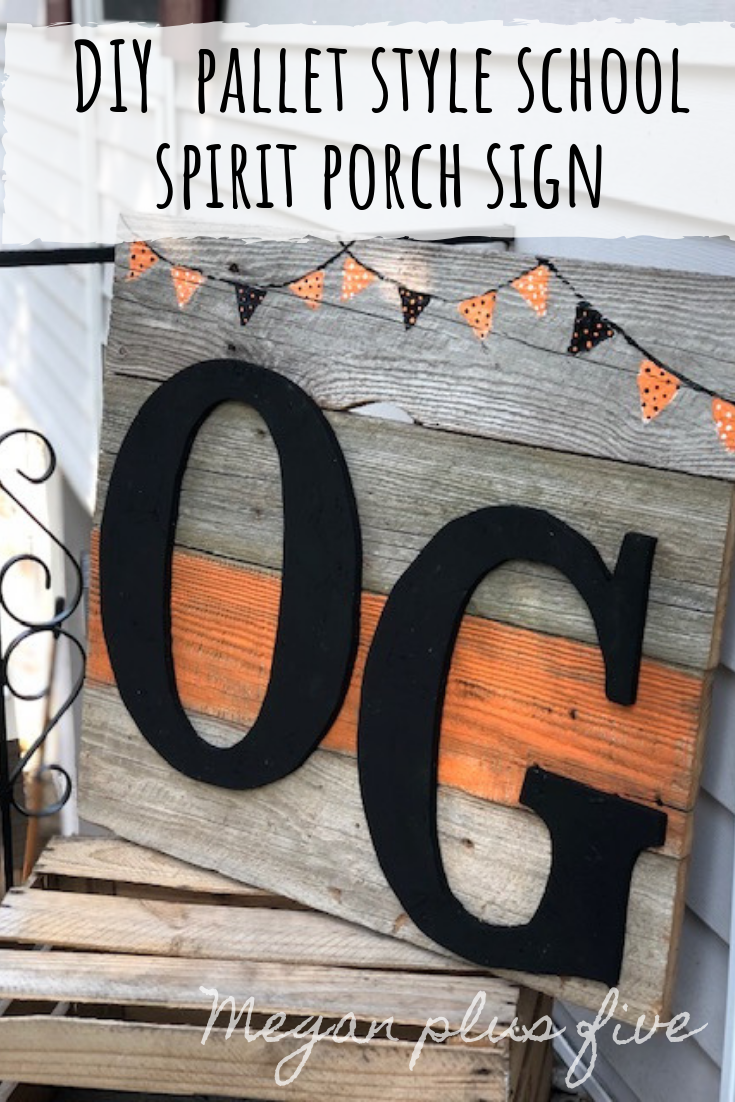
You need to decide how large you want your sign, mine is approx. 24”x 22”. Then decide how large you want your lettering to be. I wanted my letters to take up a big portion of the base so I made my lettering roughly 11.5” wide and 14” tall each.
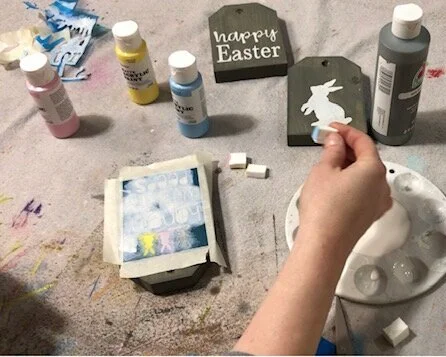
Measure out your wood base pieces and cut them to size using your miter saw. Then cut two pieces of your 1x2 a little shorter than the height of your sign. These are the pieces you’ll use to attach your pallet sign together. Place the pieces that you’ll be using for your sign face down on a flat surface. Then place your 1x2’s on it so it looks like the picture below.

DIY school spirit pallet style porch sign. How to make your own rustic style repurposed wood sign for your porch.

Second

Use wood glue {I use gorilla wood glue} to glue the 1x2’s in place, then use your brad nailer to nail them down.

DIY school spirit pallet style porch sign. How to make your own rustic style repurposed wood sign for your porch.

Third

Cut your letters out on cardstock using your Cricut.. The cardstock I had on hand wasn’t long enough so I butted two pieces together and taped the seam and it worked perfectly!

DIY school spirit pallet style porch sign. How to make your own rustic style repurposed wood sign for your porch.

Fourth

Trace the letters onto your OSB. You can use pine for this but I chose OSB because we had this leftover from building TRIPLE LOFT BEDS for our older three girls…and yes, they came out AMAZING! I still have yet to write the tutorial for their U-shaped lofts but I promise, I will have it written before the end of the month ;)!

After you have them traced, cut them out using your scroll saw. Then give them a good sanding just on the front and around the edges. You won’t see the back so don’t worry about sanding that.

DIY school spirit pallet style porch sign. How to make your own rustic style repurposed wood sign for your porch.

Fifth

Paint your letters. I chose to paint mine all black but you can get as creative with this as you’d like.

DIY school spirit pallet style porch sign. How to make your own rustic style repurposed wood sign for your porch.

I wanted to add a pop of color to my sign so I painted just one of the boards orange, just lightly brushed over it so it was medium coverage.

DIY school spirit pallet style porch sign. How to make your own rustic style repurposed wood sign for your porch.

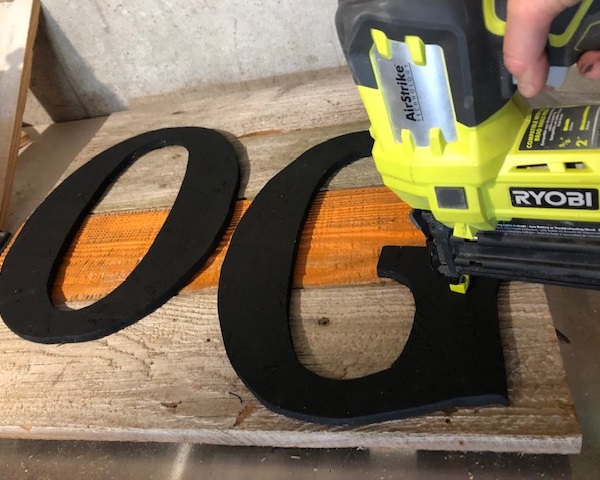
Now add your letters to your sign. I didn’t align mine because I like the offset look. I didn’t bother gluing these down I just popped a few brad nails in each letter using my brad nailer.

DIY school spirit pallet style porch sign. How to make your own rustic style repurposed wood sign for your porch.

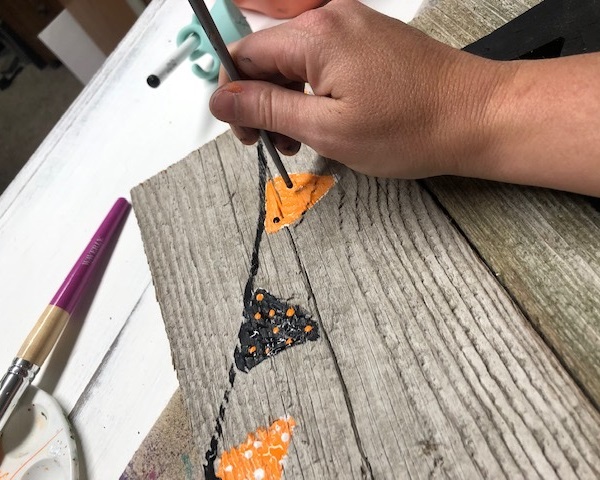
Now for the fun part! I love making these adorable free hand painted garland. I wanted the color to pop so I painted the triangles white, then once those dried I painted over them with the colors I wanted them to be. At first I wasn’t going to paint any of the triangles black but once I started painting over the white with orange I decided to break it up a little with every third triangle painted black. Then I used the end of my paint brush to add polk-a-dots to them. So CUTE!

DIY school spirit pallet style porch sign. How to make your own rustic style repurposed wood sign for your porch.

I just LOVE this rustic porch sign and it will tie in PERFECTLY with the rest of my fall décor.

I hope this inspires you to show off your own school or town spirit where you live. Let me know what you think below.

DIY school spirit pallet style porch sign. How to make your own rustic style repurposed wood sign for your porch.

Click on the pic below to PIN for later

DIY pallet porch sign. How to make a simple and rustic sign for your front porch using barnwood.

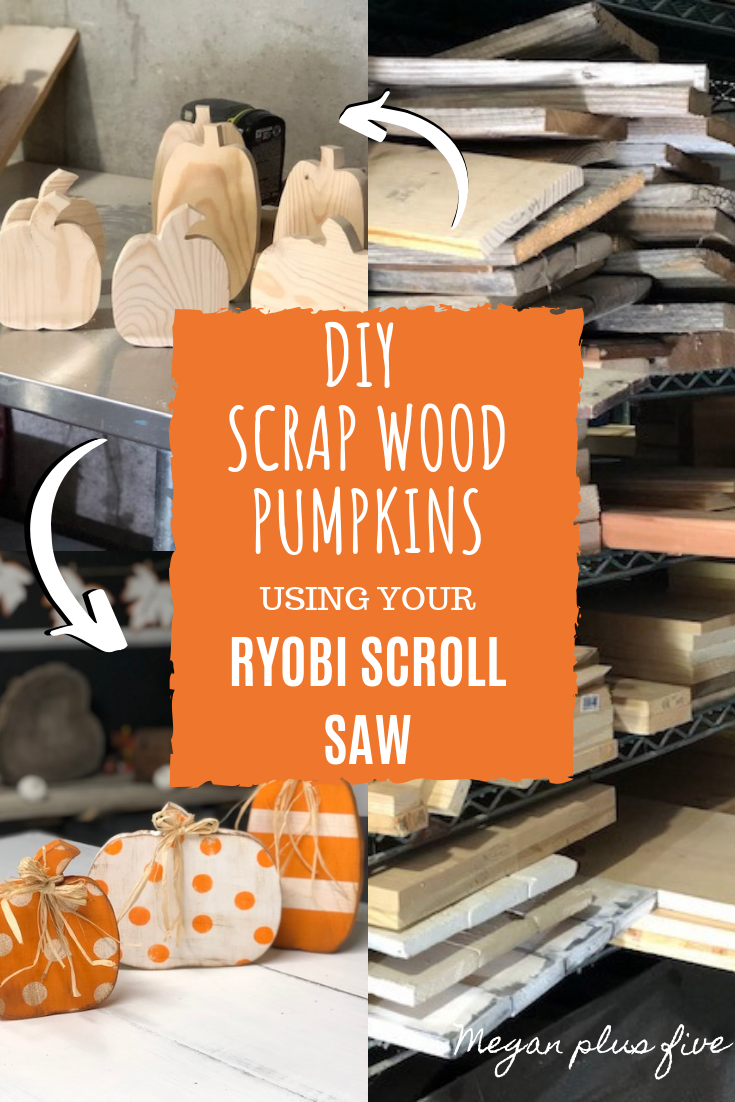
Easy scrap wood pumpkins using a RYOBI scroll saw

DIY scrap wood pumpkins using your ryobi scroll saw.png

How to cut out pumpkins from scrap pieces using your RYOBI scroll saw

Are you like me and have a TON of scrap wood on the wood pile? I seriously have a hard time tossing perfectly good scrap pieces. You just never know when a piece will come in handy. But I also know my crafty business is hitting it’s busiest season of the year and there’s no way I can hang on to all of those scrap pieces if I want a functioning wood working space. So I needed to find something to do with them.

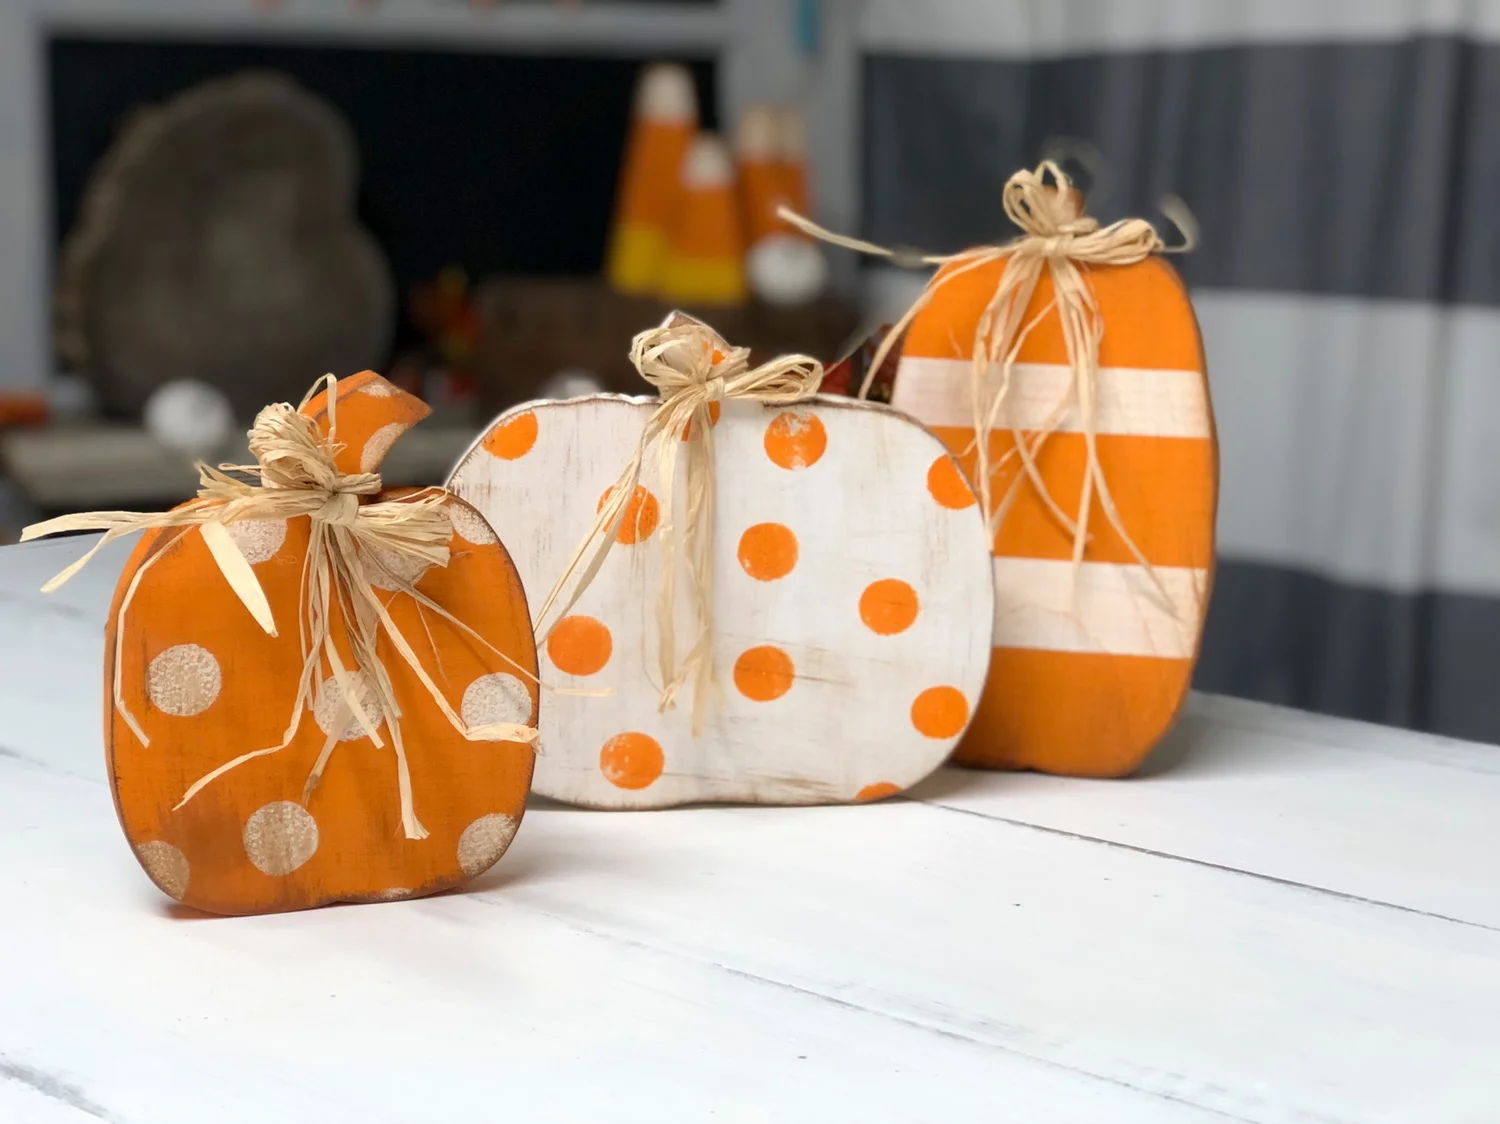
I decided to make these adorable free standing wood pumpkin cutouts. They turned out even cuter than I imagined they would! So much that I added them to my DIY CRAFT KITS and they have been selling like crazy!

Affiliate Disclosure. Some of the links on this website are affiliate links, which means that I may earn a small commission if you click on the link or make a purchase using the link. If you make a purchase you will not be charged anything additional.

How to use your Cricut and Ryobi scroll saw to make free standing wood pumpkins

Here’s what you need

If you’re not in the reading mood skip to the bottom to catch the video tutorial ;)


First you want to cut out your pumpkins on cardstock. You can free hand them on your scrap wood pieces but honestly getting the sides even isn’t really a strong suit of mine lol. I used some scrap pieces of cardstock I had on hand to cut these out on.

After you cut your templates out trace them on your scrap pieces.

Easy scrap wood pumpkins using your Ryobi scroll saw. How to cut out pumpkin cutouts for your fall decor using your scroll saw.

Next, making sure you are following the manufactures instructions, cut out the pumpkins you just traced using your scroll saw. If you’ve never used a scroll saw before this is a pretty easy project to start get some practice with. It’s a lot like using a sew machine. Just remember to go slow and the more you do it the better you will get at it.

Easy scrap wood pumpkins using your Ryobi scroll saw. How to cut out pumpkin cutouts for your fall decor using your scroll saw.

After you have your scrap pumpkins cut out you’ll want to give them a light sanding. Try not to sand the bottoms too much as you don’t want the surface to get uneven so they won’t be able to stand.

Easy scrap wood pumpkins using your Ryobi scroll saw. How to cut out pumpkin cutouts for your fall decor using your scroll saw.

After you have them sanded you can stain, paint, or decorate them however you want to match them to your décor.

These little guys are perfect for

  • your own décor

  • gift giving

  • Thanksgiving Day hostess present

  • ladies craft night

  • mom and me craft {my four daughters and I painted these on a facebook live and they turned out adorable!}

  • so much more

The possibilities are endless on how you can decorate these hand cut wood pumpkins.

Check out the VIDEO tutorial below.

Don’t forget to visit my YouTube channel and subscribe there so you never miss when I upload a new one.

Confused about what power tools to buy to make even more amazing crafts? This is a must read especially if you’re planning on starting a new business adventure with your handmade crafts click here ——-> WHAT ARE THE BEST POWER TOOLS FOR CRAFTERS?

DIY CRAFT KIT how to paint your standing wood pumpkin cutouts

DIY CRAFT KIT how to paint your standing wood pumpkin cut outs. This craft is perfect for you to DIY for your rustic fall decor.

DIY how to paint your free standing wood pumpkin cut outs

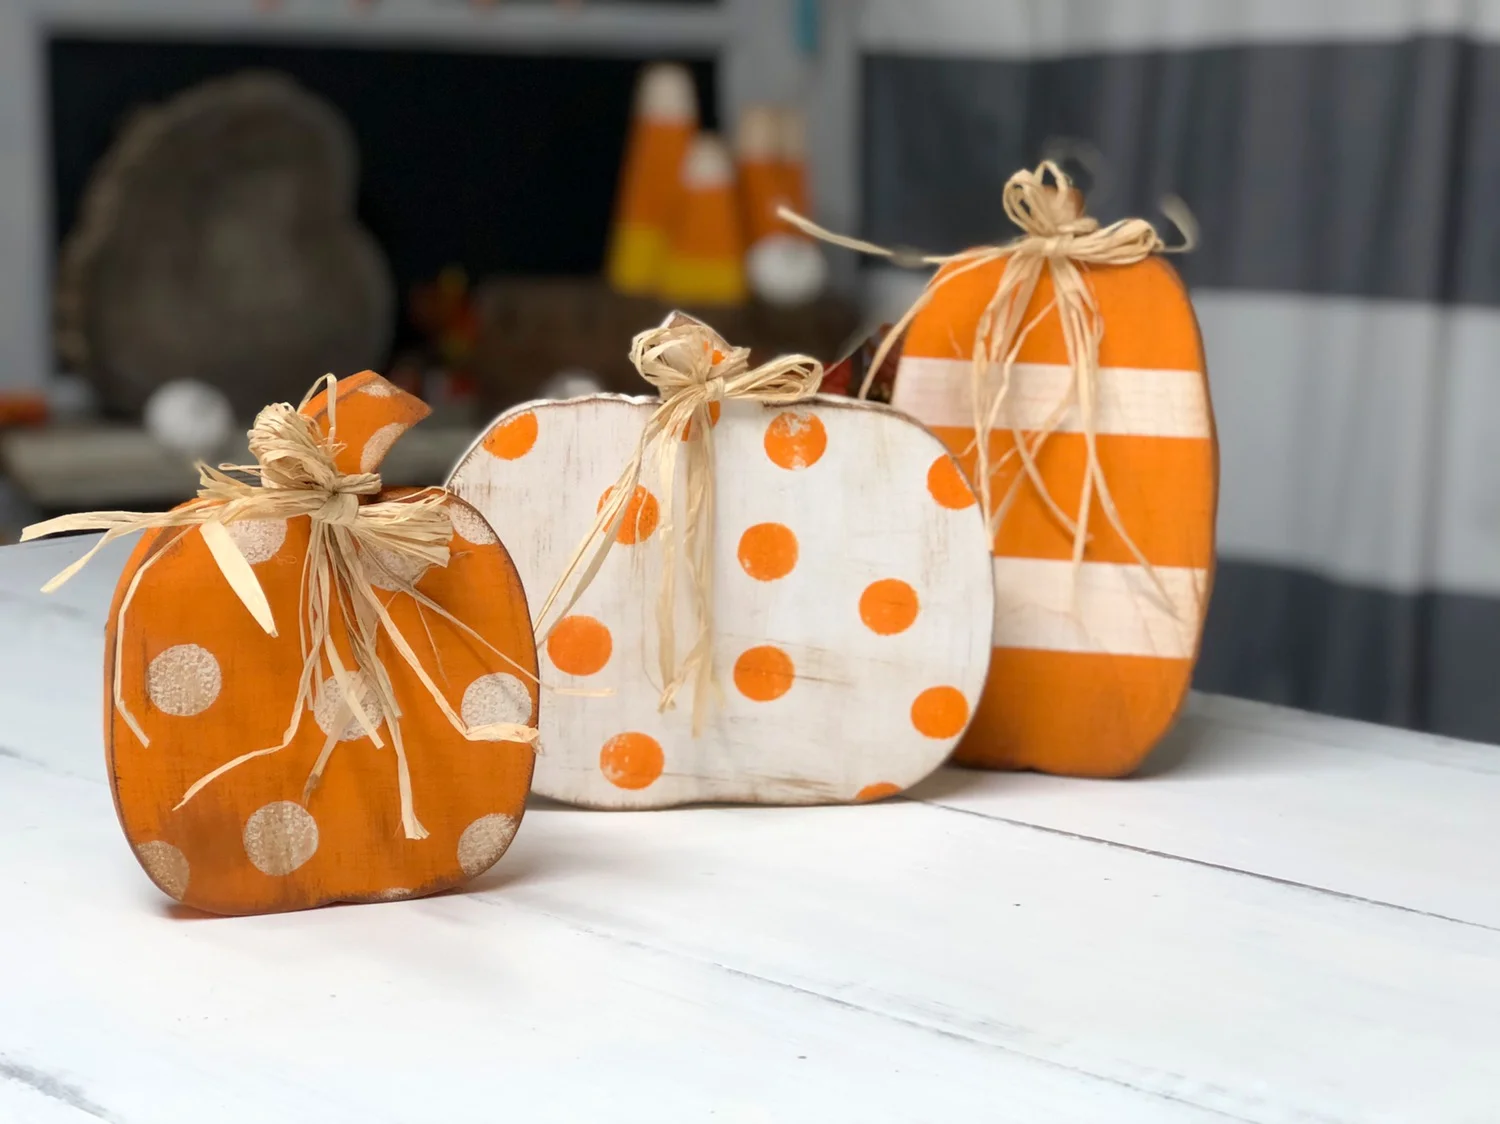
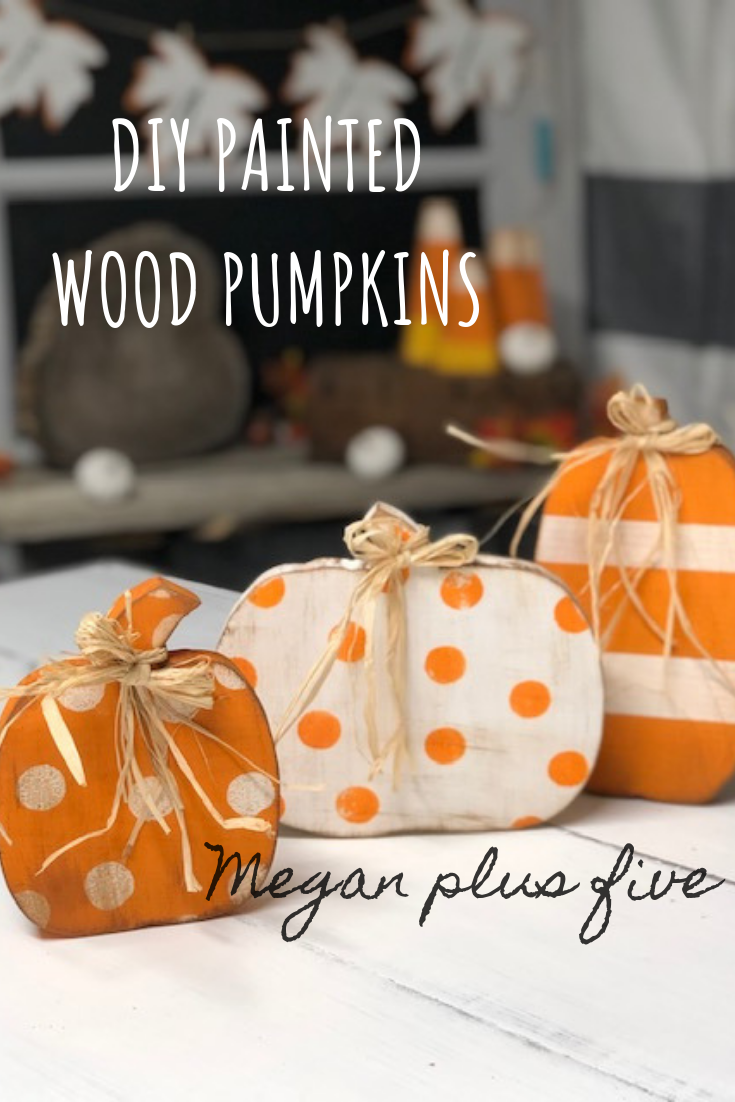
I’m LOVING these little wood pumpkin cutouts! Seriously, what’s not to love?! The polk-a-dots? The stripes? The raffia? Yup! I love everything about these handmade pumpkins. And I know yours will turn out just as adorable as these guys.

If you haven’t ordered your DIY PUMPKIN CUTOUT CRAFT KIT be sure to grab yours so you can get started on your fall décor.

Affiliate Disclosure. Some of the links on this website are affiliate links, which means that I may earn a small commission if you click on the link or make a purchase using the link. If you make a purchase you will not be charged anything additional.

CHOOSE YOUR CRAFT KIT

BASIC KIT:
3 wood cutouts

PREMIUM KIT:
3 wood cutouts
2 oz orange acrylic paint
2 oz white acrylic paint
2 foam brushes
1 round foam brush
raffia
sandpaper

Please feel free to message me if you have any questions once your kit arrives. I want your DIY projects to turn out AMAZING and will help you in any way I can to make that happen. If you order from the website shoot me an email BUT if you ordered from my handmade ETSY shop please message me on there. In order to keep in compliance with Etsy all convos must be kept on their platform.

If you want to skip the written tutorial and get right to the video tutorial shoot to the bottom of this page and you’ll find my youtube thumbnail for the DIY wood pumpkin cutout craft tutorial.

How to paint wood pumpkin cutouts. This easy DIY kit has everything you need to DIY this sweet and simple rustic  fall decor.

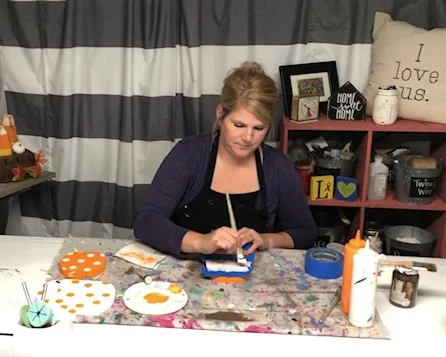
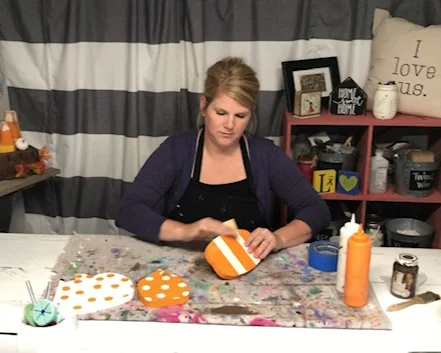
First you want to paint your wood pumpkin bases. I chose to paint the tallest and shortest pumpkins orange and the medium sized pumpkin white. Paint a THIN layer on all sides of each pumpkin. Once the fronts are dry you can paint a second THIN layer to get more coverage.

How to paint wood pumpkin cutouts. This easy DIY kit has everything you need to DIY this sweet and simple rustic  fall decor.

Next, after your base coat is completely dry, using your round sponge brush make polk a dots on your pumpkins. If using the same round brush to make the different colored dots do NOT rinse. You don’t want all that water in your foam round brush. Just dab it off onto a paper towel until all the paint is gone then you can use it in the second color.

TIP: to avoid a messy blog don’t push your round brush all the way down onto your wood pumpkin. Instead, lightly dab, even using a slight twisting motion works MUCH better to achieve a non-blobby polk a dot ;)!

How to paint wood pumpkin cutouts. This easy DIY kit has everything you need to DIY this sweet and simple rustic  fall decor. How to paint polk a dots on pumpkins

Now for the striped pumpkin. I used wide painter’s tape to achieve this look. Tape off the bottom, lining it up with the bottom of the pumpkin { you can get out a ruler if you want this to be exact but honestly just eye balling it works great too}. Then I placed a piece close to the top, but not all the way at the top. I wanted a little of the stem to be white. Then I place another piece in between those two pieces.

Paint the areas that are not taped off. Paint two THIN layers, allowing them to dry in between coats.

TIP: to avoid paint bleed brush with the tape not into the tape.

How to paint wood pumpkin cutouts. This easy DIY kit has everything you need to DIY this sweet and simple rustic  fall decor.
How to paint wood pumpkin cutouts. This easy DIY kit has everything you need to DIY this sweet and simple rustic  fall decor. How to paint stripes on pumpkins.

Let all three pumpkins dry. Now’s a perfect time for a glass of wine!

After they are dry you can start distressing them. A good rule to remember when distressing is that you want to distress where things would naturally be worn. Around edges, corners, and lightly on the fronts. Use your sand paper and distress along the edges and lightly pass it along the front {I also lightly distress the back to keep the look cohesive}. Wipe the sawdust off with a lint free cloth.

How to paint wood pumpkin cutouts. This easy DIY kit has everything you need to DIY this sweet and simple rustic  fall decor. How to distress wood pumpkins.

Applying the antiquing wax really gives these little guys life! Take your chip brush and lightly dip just the tip of it into the wax, then brush off most of it onto a paper towel. You do this so you do not end up with way too much wax on your project. It is far easier to apply more than it is to remove it from your project. You want to apply the wax the same way you sanded your pumpkins. Focus on the edges and lightly brush on the front/back.

TIP: trimming down your chip brush will give you better control over the bristles and will prevent them from making your wax so wispy when you apply it to your pumpkins.

How to paint wood pumpkin cutouts. This easy DIY kit has everything you need to DIY this sweet and simple rustic  fall decor. How to apply antiquing wax to wood pumpkins.

Tie a couple stands of raffia around the stems and you’re done! Trim the ends if needed. Since raffia tends to come in long strands you’ll want to cut the strands in half, and even in thirds in some cases. Then tie in a bow around the wood stem.

How to paint wood pumpkin cutouts. This easy DIY kit has everything you need to DIY this sweet and simple rustic  fall decor. How to add raffia to your wood pumpkins.

And you’re done! If you loved this tutorial please let me know in the comments. If you’re on social media don’t forget to follow me there FACEBOOK, INSTAGRAM, PINTEREST, YOUTUBE

Pin the image below for later ;)

How to paint wood pumpkins for your rustic decor. Distressing and applying wax to make them even more adorable. Add some stripes and polk-a-dots too to give them a modern twist.

Watch the full video tutorial below

Check out my other crafty fall tutorials

Ultimate Dollar Tree birthday gift idea

Ultimate kid's birthday gift from the Dollar Tree

The best kid’s birthday gift idea when you’re on a budget

It’s no secret that my girls and I LOVE the dollar tree. Seriously, we were just there today and when we got home my oldest couldn’t believe that we spent and entire HOUR in there and it literally felt like only 20 minutes had past lol! Yep…raising those girls right!

Our sole purpose of the trip was to find a couple gifts for the oldest daughter’s friends for their birthday parties. Raising a family of 6 isn’t a cheap task. So, things like friend’s birthday parties typically have a pretty small budget of $10 per kiddo. At Walmart $10 doesn’t get you much from the toy aisle or any aisle that a kid would be interested in anyway. But, I have to say over the years we have gotten really good at whipping up some amazing birthday gifts on the $10 budget. And I can’t wait to share the latest gift that comes in WAY under budget! Under budget meaning 70% lower than what we typically budget for friend’s birthdays.

Affiliate Disclosure. Some of the links on this website are affiliate links, which means that I may earn a small commission if you click on the link or make a purchase using the link. If you make a purchase you will not be charged anything additional.

How was I able to create two gifts for kids for under $6?

Well, first the Dollar Tree. It is FULL of really amazing things that on their own may not be all that amazing but when paired with something else, like let’s say a personalized wood letter cut out, can be one of the best gifts ever! And second, I just purchased a scroll saw last weekend with the money that comes in from my handmade business so I used that to create the customized gifts for her friends.

The ultimate Dollar Tree birthday gift idea for under $5

My only regret is not buying a scroll saw sooner. If you’re curious about the one I purchased you can see more about the Ryobi scroll saw here. And if you wanna know about the other tools I have in my shop I’ve written a break down of which tools every crafter needs.

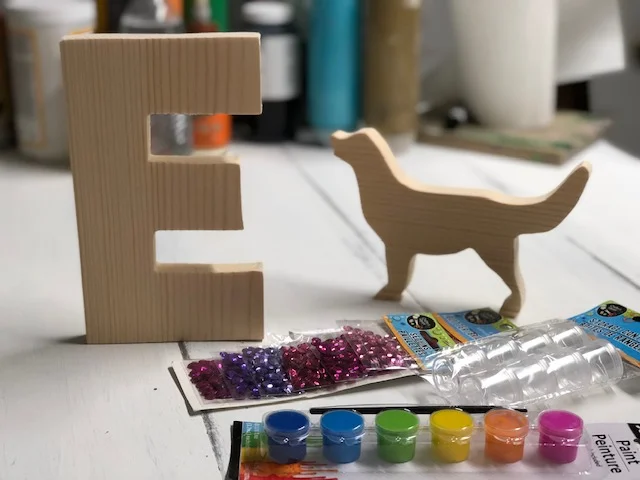
I used my Cricut Explore to cut out the letter E and the dog from cardstock. Then I outlined them with a pencil on a scrap piece of 1x8 that had been sitting on the wood shelf in the garage. Using my new handy scroll saw I cut out the shapes. Gave them a light sanding and they were ready to add to the items we picked up at the dollar tree.

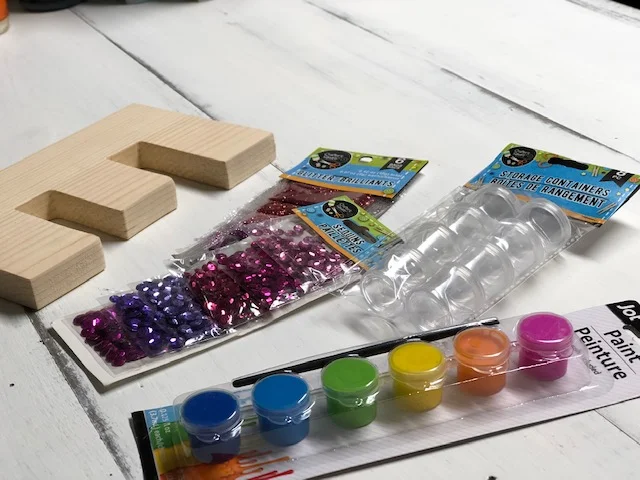
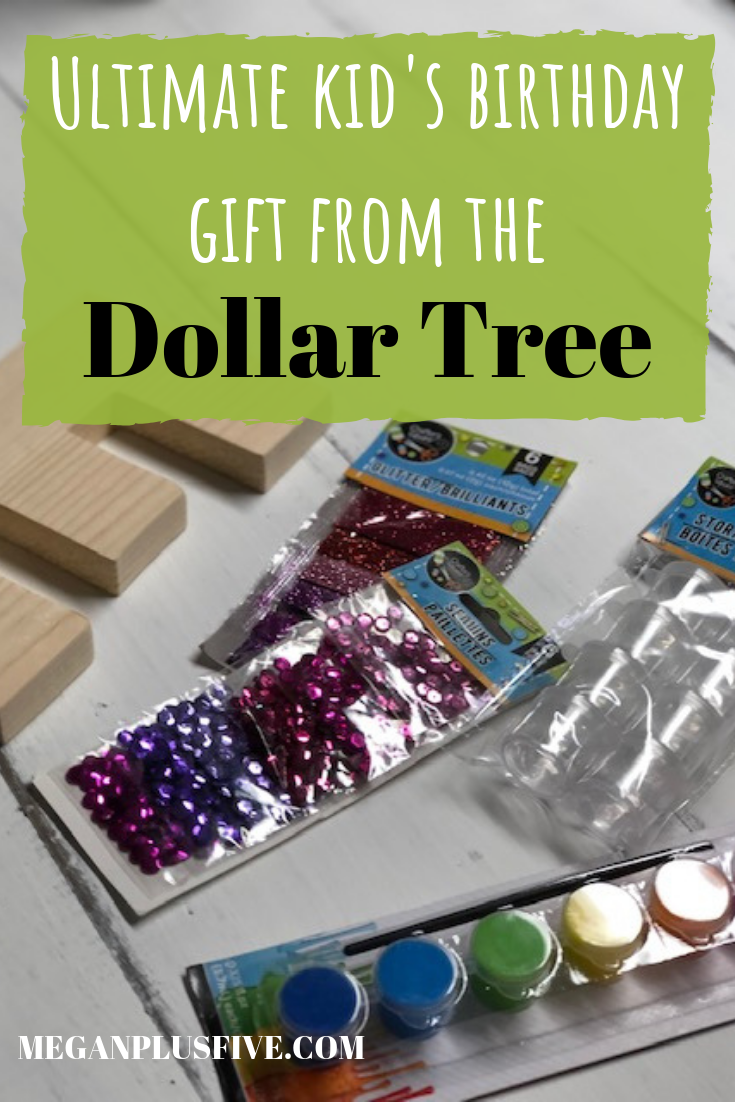
Here’s what we picked up from the dollar tree

  • 1 package of purple/pink 6 pk glitter

  • 1 package of blue/green 6 pk glitter

  • 1 package of purple/pink sequence

  • 1 package of small containers

  • 2 paint pots

We bought the small containers to fill with white paint and glue {which we have a TON of at home} . Since the paint pots don’t come with white paint and sequence doesn’t stick well to paint we thought those additions to the birthday gifts would be a good idea. I wrote on the outside of the containers which one was glue and which one was paint so there wasn’t any confusion when the birthday girl goes to use her new craft kit.

The glitters and sequence were individually wrapped so we pulled them off of the original packaging {they were just taped to the thin cardboard} and gave each birthday girl 4 glitters and 2 sequence.

The ultimate DOLLAR TREE birthday gift idea

To keep the birthday crafts looking somewhat professional I packaged the craft supplies in a clear goody bag {the party favor kind} that we already had left over at home.

I am so excited about this new DIY birthday craft idea! It’s absolutely perfect for the crafty kiddo in your life and it costs just a few dollars to create! I can honestly say that our girls loved this idea so much they each want their own.

———> Want more crafty gift giving ideas? Check out my post on these top selling kid approved DIY CRAFT KITS FOR KIDS

——> Also, you don’t want to miss this a great list of the PRE TEEN CRAFT IDEAS, because they can be so hard to buy for sometime