DIY wedding guestbook alternative

DIY wedding tree guest book. How yo make your own painted wood signs for your wedding. Making your custom wedding signs.

Oh how I wish I had something gorgeous like this when my husband and I married almost 11 years ago. Back in those days, ha I say that like it was so long ago, but truthfully back then personalized wedding décor was not an affordable option. Our young selves scrimped together $2k for our wedding, that included the dress, the rings, and all the food, so buying a fancy sign like the ones I make for other newlyweds today was not in our wedding budget.

Affiliate Disclosure. Some of the links on this website are affiliate links, which means that I may earn a small commission if you click on the link or make a purchase using the link. If you make a purchase you will not be charged anything additional. This is just a way I can help add to our family finances to raise our four daughters. Please know I would never recommend a product or service I do not totally stand behind.

But despite our small budget our wedding was beautiful. We got married on my father-in-law’s property in the fall, back before outdoor rustic weddings were a thing. I always knew I wanted to marry my husband outside surrounded by nature and God. Something about that just sings happiness. And that’s exactly what it was <3!

I know some brides are like me, and are on a little tighter budget so saving here and there really adds up. That’s why I wanted to offer this DIY PAINTED WOOD WEDDING TREE SIGN KIT. It’s an affordable option to the ones we paint for you. Instead of us making them we send you everything so you can save a little money and DIY your own.

How to paint your own wood wedding tree sign

DIY wedding tree craft kit. How to make your own wedding guestbook alternative for your rustic themed wedding. DIY wedding tree with birds, how to paint your own wood wedding signs

DIY PREMIUM KIT includes everything you need to make your own sign but you can opt for other kit styles to include just the stencil or just the stencil and board.

  • prestained board

  • personalized stencil on professional quality stencil film with transfer tape attached

  • white paint

  • stenciling sponge

Helpful tools not included

If you just need the stencil we can accommodate that too. But to make it super easy for you we recommend opting for the kit that includes the prestained board. If you don’t allow enough time for your stained board to dry prior to stenciling you can run into a lot of problems :/.


Want to learn how to paint signs like a professional? Join my SIGN PAINTING ECOURSE where I teach you everything I know about sign painting. Painting thousands of signs over the last couple of years for my online business I’ve had to teach myself A LOT and boy do I wish I had a course like this when I started out. I would have saved so much time, energy and so much money!


If you don’t need a DIY craft kit and have all the tools to make your own stencils/prep your own board here’s what you’ll need

  • 11.5”x14.5” stencil, cut and weeded {you want it slightly larger than your board so that your wedding tree will hang off of your piece of wood]

  • transfer tape

  • 11.25”x14” sanded and pre-stained. You want to wait a full 24 hours before painting on stained wood. You will have a very difficult time getting the stencil to stick if the wood is not full dry.

  • white acrylic paint

  • stenciling sponge

DIY wedding guestbook alternative, how to make your own wood sign for your wedding. Personalized painted wedding tree with birds.

Painting your own wedding guestbook alternative

Your stencil will come with three pieces

  • white paper backing

  • blue stencil film

  • clear transfer tape {this is what will enable you to easily transfer your stencil to the board in one piece without any issues, do not remove this till after the stencil is applied to your board}

DIY wedding tree craft kit. How to make your own wedding guestbook alternative for your rustic themed wedding. DIY wedding tree with birds, how to paint your own wood wedding signs

Using either a vinyl squeegee {here is the exact vinyl squeegee I use for my sign painting business} or a rewards card rub the front and back of your stencil. This will help the stencil adhere even more to the transfer tape and for the paper backing to release a little easier when you remove it.

DIY wedding tree craft kit. How to make your own wedding guestbook alternative for your rustic themed wedding. DIY wedding tree with birds, how to paint your own wood wedding signs

Flip your stencil over so that the paper backing is facing up and peel the backing away from the stencil, leaving the stencil attached to the transfer tape.

PRO TIP: rolling it away works best. You don’t want to pull it up, this will cause the stencil to tear. Instead roll it off. If you have little pieces that stick just push them back down and keep rolling the paper away {see the video above for a visual of how to easily remove the paper stencil backing}

DIY wedding tree craft kit. How to make your own wedding guestbook alternative for your rustic themed wedding. DIY wedding tree with birds, how to paint your own wood wedding signs

After you’ve removed the paper back from your wedding tree stencil you can discard the paper, you won’t need it again. Flip your stencil over so it’s sticky side is on the wood. Align the bottom and left sides of your stencil with the bottom and left sides of your wood base. Then pull the stencil to the left so it overhangs on the wood base, this will make it so that your tree branches are hanging off the sign and you won’t have a weird edge where the tree branches just suddenly stop.

Starting from the middle and working your way out press your stencil to your board using your vinyl squeegee or rewards card. You want to apply a fair amount of pressure for this step so that you work out the air bubbles. The less air bubbles the less paint bleed you’ll have.

DIY wedding tree craft kit. How to make your own wedding guestbook alternative for your rustic themed wedding. DIY wedding tree with birds, how to paint your own wood wedding signs

Then remove the transfer tape the same way you removed the paper backing. Start from one corner and work your way to the opposite corner.

PRO TIP: GO SLOW! If you do this step too quickly you will likely tear your stencil and you definitely don’t want that to happen.

DIY wedding tree craft kit. How to make your own wedding guestbook alternative for your rustic themed wedding. DIY wedding tree with birds, how to paint your own wood wedding signs

Give your board a once over to make sure there aren’t any air bubbles or areas that need to be flattened. Use your squeegee if you need to take care of those spots.

To paint your wedding tree board you will need to use the FLAT end of your stenciling sponge. To keep the paint bleed at a super minimum you are going to paint 3 SUPER LIGHT layers.

Dip the end of your stenciling sponge into your paint. If you ordered the PREMIUM WEDDING GUESTBOOK DIY CRAFT KIT you will have a lot more paint than you will actually need. You will literally use a TINY amount of paint on your sign but I always send more than enough paint for our DIY CRAFT KITS.

Dab off the excess paint, you don’t want there to be any globs on there. Then dab the paint onto the areas that need to be stenciled. Try to get an even coat.

DIY wedding tree craft kit. How to make your own wedding guestbook alternative for your rustic themed wedding. DIY wedding tree with birds, how to paint your own wood wedding signs

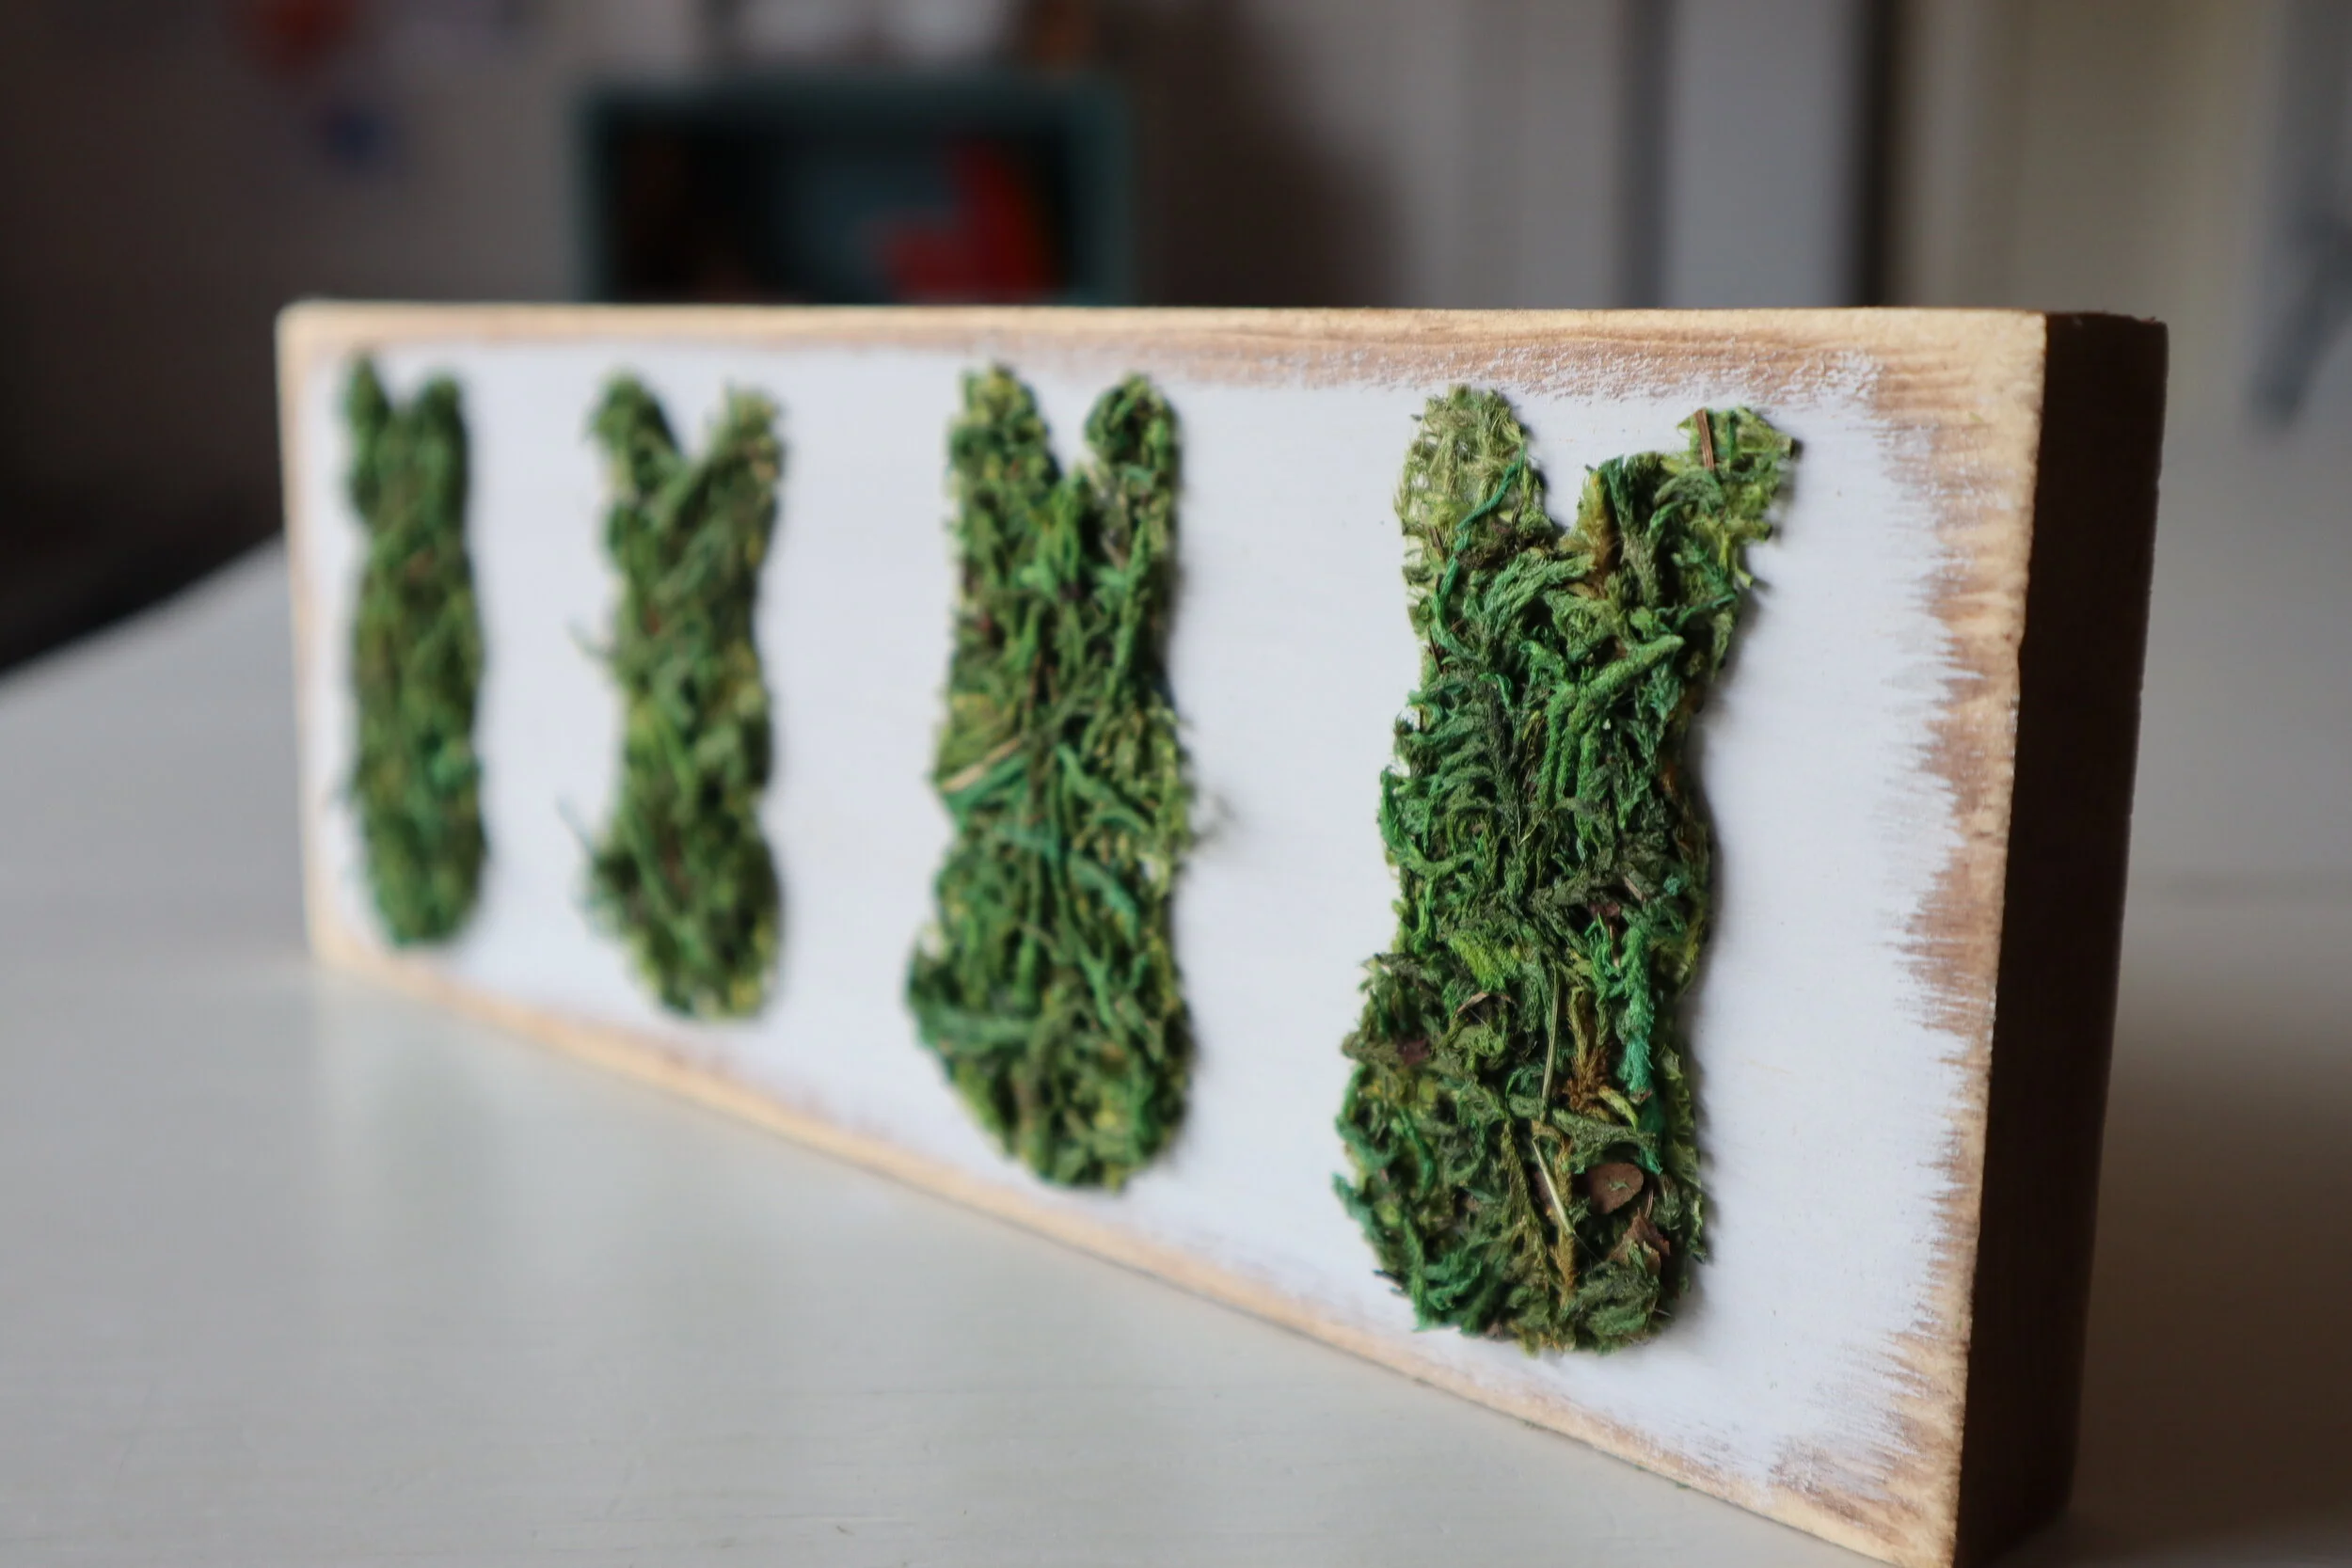
You want to be able to see the wood grain still through the first couple of layers of paint. Here’s what mine looked like on the lettering after the first coat.

DIY wedding tree craft kit. How to make your own wedding guestbook alternative for your rustic themed wedding. DIY wedding tree with birds, how to paint your own wood wedding signs

After the first layer is dry you can apply a second layer, using the same technique. It will be super tempting to apply a heavier amount of paint but you definitely do NOT want to do this. All that extra paint will seep under your stencil and it will just be a big ugly mess and you’ll cry. ugly cry at that.

This is what my wedding guestbook looked like after the second layer. It obviously needs another coat. Just keep applying coats until you are happy with the coverage. You can apply up to 4 thin coats.

PRO TIP: the coverage will actually be darker than it appears while the stencil is still on the wood base.

DIY wedding tree craft kit. How to make your own wedding guestbook alternative for your rustic themed wedding. DIY wedding tree with birds, how to paint your own wood wedding signs

After you’re satisfied with the coverage you need to peel up the stencil. PEEL IT UP WHILE THE PAINT IS STILL WET. I know other tutorials suggest to peel after the paint dries but in my professional opinion dry peeling does not give good results. I have painted THOUSANDS of signs over the last couple of years and had LOTS of trial and error in this department ——> if you want to take your sign painting journey even further check out my SIGN PAINTING ECOURSE

Remove the taped off areas then to peel the stencil start from one corner and peel at a sharp angle, do not peel in the up direction rather in the pull toward you direction.

DIY wedding tree craft kit. How to make your own wedding guestbook alternative for your rustic themed wedding. DIY wedding tree with birds, how to paint your own wood wedding signs

Use and xacto knife to get up and under the stencil film. Do not force it under as this will gouge your board.

DIY wedding tree craft kit. How to make your own wedding guestbook alternative for your rustic themed wedding. DIY wedding tree with birds, how to paint your own wood wedding signs

After you’ve removed all of the stencil film your sign needs to cure for about 24 hours before using it. You can spray your sign with either a matte or satin finish but this is not necessary. Here’s the one I use for my signs, satin finishing spray.

DIY wedding tree craft kit. How to make your own wedding guestbook alternative for your rustic themed wedding. DIY wedding tree with birds, how to paint your own wood wedding signs

Please let me know if you have any questions on how to paint your wedding guestbook alternative. If you want to take your sign painting journey even further you can’t miss my sign painting E-course. I spent endless amounts money {seriously more than I’d like to admit}, wasted a ridiculous amount of time and energy to find the exact way to easily and efficiently paint wood signs for my sign painting business. I don’t want you to have the same stress. I wish I stumbled across a course like this when I was starting out. Someone to tell me and SHOW me exactly what to do {bc let’s be honest some tutorials are just WAY off on their DIY sign painting}. And not only that but tell me EXACTLY what to buy. I could have been making a HUGE profit a lot sooner if I didn’t have to go through all the trial and error.

Save yourself the headache learn the RIGHT WAY to create professional one of a kind signs.

DIY make a wood CUPCAKE base using your Cricut

Use your cricut to make a wood base for your pull apart cupcakes. See how this mom made a pull apart mermaid tail cake from cupcakes. She used her Cricut and Cricut design space to make her template then cut it out using her Ryobi scroll saw.

Use your Cricut & scroll saw to make a wooden cupcake base in the shape of a mermaid tail

I love throwing birthday parties for my four daughters. I love the excitement in their eyes when they see all the work and thought that’s been put into THEIR big day! I love sitting with them and planning out the details. And when the oldest three were much younger I LOVED making their cakes. As the years have passed though, I found my self getting busier and busier and it was just easier for me to run to Sams club and grab a cake from there.

Affiliate Disclosure. Some of the links on this website are affiliate links, which means that I may earn a small commission if you click on the link or make a purchase using the link. If you make a purchase you will not be charged anything additional.

But this year when the second oldest was planning her birthday she asked if I would make her cake. I felt so honored. Really? She didn’t want a store bought cake but one that momma made! Seriously bring on the happy tears!

She had been pinning on Pinterest for a couple of months and decided she wanted a MERMAID cake! As soon as she said those words I knew what I was going to do to make that happen… MERMAID PULL APART CUPCAKES! So much easier than an actual cake and less mess on the day of the party. Years and years ago I did a similar one for the oldest daughter when she turned 4. I made pull apart cupcakes in the shape of a 4 and it was ADORABLE and SOOOOOOO easy!

Thank goodness for tools like Cricut and Ryobi, if I didn’t have those then her cake might have turned out a little….less than edible looking lol!

If you want more little girl birthday party inspiration be sure to check out these ADORABLE UNICRON party centerpieces I made using my Cricut too!

Don’t feel like reading the full tutorial? Skip to the bottom to catch the video or go here ——-> MERMAID TAIL CUPCAKE BASE on my YouTube channel

How to make a wood base for pull apart mermaid cupcakes

Use your cricut to make a wood base for your pull apart cupcakes. See how this mom made a pull apart mermaid tail cake from cupcakes. She used her Cricut and Cricut design space to make her template then cut it out using her Ryobi scroll saw.

Here’s what you’ll need

First select your design in CRICUT DESIGN SPACE. If you are like me and create a ton of projects each monthly I highly recommend signing up for CRICUT ACCESS. You will have access to thousands of images, fonts, and projects for a small monthly fee…and it’s SO worth it!

Here’s the mermaid tail I chose in Cricut Access. I just simply searched MERMAID TAIL and chose one that I liked.

Use your cricut to make a wood base for your pull apart cupcakes. See how this mom made a pull apart mermaid tail cake from cupcakes. She used her Cricut and Cricut design space to make her template then cut it out using her Ryobi scroll saw.

I chose the pink one on the bottom row. I really like that this one had some movement in it. But I didn’t really like the white spaces on the mermaid tail. So after I added it to my canvas I used the CONTOUR function to hide those white spaces. I also adjusted the size of the mermaid tail so that it was 11.45” wide. I left the size lock on so that it would adjust the height for me so that everything would be proportionate.

Use your cricut to make a wood base for your pull apart cupcakes. See how this mom made a pull apart mermaid tail cake from cupcakes. She used her Cricut and Cricut design space to make her template then cut it out using her Ryobi scroll saw.

Since I was using cardstock for my stencil and I didn’t have a piece big enough I butted two pieces together and taped the seam so that it would be like one big piece. Feed your mat through your Cricut machine and press GO when the button starts to flash.

Use your cricut to make a wood base for your pull apart cupcakes. See how this mom made a pull apart mermaid tail cake from cupcakes. She used her Cricut and Cricut design space to make her template then cut it out using her Ryobi scroll saw.

I used a piece of scrap 1x12 to make my mermaid tail cupcake base out of. I had some plywood which probably would have worked just as good {and would have been cheaper to use} but I knew I most likely wouldn’t use this again and I wanted my daughter to be able to use it to hang in her room after her party.

Trace your mermaid tail cardstock stencil out on your piece of wood.

Use your cricut to make a wood base for your pull apart cupcakes. See how this mom made a pull apart mermaid tail cake from cupcakes. She used her Cricut and Cricut design space to make her template then cut it out using her Ryobi scroll saw.

Then cut the mermaid tail out using your Ryobi scroll saw. You can use a band saw, and even a jig saw for this step if you don’t have a scroll saw.

Use your cricut to make a wood base for your pull apart cupcakes. See how this mom made a pull apart mermaid tail cake from cupcakes. She used her Cricut and Cricut design space to make her template then cut it out using her Ryobi scroll saw.

Then you want to smooth it out using your Ryobi sander. I used 120 grit sand paper on mine. I also slightly rounded some of the edges so that it wasn’t so pokey.

Use your cricut to make a wood base for your pull apart cupcakes. See how this mom made a pull apart mermaid tail cake from cupcakes. She used her Cricut and Cricut design space to make her template then cut it out using her Ryobi scroll saw.

Add your cupcakes and decorate. I just slapped a little bit of frosting on the bottom of each cupcake to stick them to the board.

Use your cricut to make a wood base for your pull apart cupcakes. See how this mom made a pull apart mermaid tail cake from cupcakes. She used her Cricut and Cricut design space to make her template then cut it out using her Ryobi scroll saw.

. I used a combination of purple, teal, and white for the frosting colors and I didn’t even use any fancy piping tips {I was a little pressed for time lol}. For under $10 I was able to make the cake of her mermaid themed birthday dreams!

. I used a combination of purple, teal, and white for the frosting colors and I didn’t even use any fancy piping tips {I was a little pressed for time lol}. For under $10 I was able to make the cake of her mermaid themed birthday dreams!

Watch the video tutorial below on how to make your own MERMAID TAIL CUPCAKE BASE