Kid's gingerbread house decorating party

Kid friendly gingerbread house decorating party using graham crackers. How to have a stress free Christmas tradition party with your kids. Decorating gingerbread houses as a family. How to make easy gingerbread houses for kids.

Kid friendly gingerbread decorating party using graham crackers

Christmas with kids is always fun. There’s so many traditions you can start with them. Like baking cookies, making Christmas stockings, and decorating gingerbread houses to name a few.

We made graham cracker gingerbread houses last night and it was so much fun! And my stress level was at a ZERO! Yes, a zero. If you are a momma of multiples, especially multiples that are stair steps, you know what I’m talking about. Things like this can stress us out. My secret to a no stress gingerbread making party? Let the kids have fun and don’t worry about any of it being pretty or perfect. That’s it!

Affiliate Disclosure. Some of the links on this website are affiliate links, which means that I may earn a small commission if you click on the link or make a purchase using the link. If you make a purchase you will not be charged anything additional.
Kid friendly gingerbread house decorating party using graham crackers. How to have a stress free Christmas tradition party with your kids. Decorating gingerbread houses as a family. How to make easy gingerbread houses for kids.

Don’t get me wrong the pictures on Pinterest with the perfectly decorated “kid” made gingerbread houses are absolutely adorable. A picture perfect graham cracker house with a tiny little spill of sprinkles on the table and a dab of out of place frosting is oh so cute…but let’s be honest that’s not likely to happen in most homes with little ones. As a mom of 4 I KNOW this lol! And really, where’s the fun if there’s not a GIANT MESS of sprinkles, crumbs of graham crackers, frosting smeared on their faces and broken candy canes to pick up?

Kid friendly gingerbread house decorating party using graham crackers. How to have a stress free Christmas tradition party with your kids. Decorating gingerbread houses as a family. How to make easy gingerbread houses for kids.

So let’s ditch the vision of perfectly put together Christmas gingerbread houses and embrace that beautiful chaos. Those are the moments you are connecting with kids. Those are the moments your kids are learning. Those are the moments that matter.

GRAHAM CRACKER GINGERBREAD HOUSE YOUR KIDS WILL ENJOY MAKING

Most of the supplies I picked up at my local Dollar Tree. Here’s what we used

Kid friendly gingerbread house decorating party using graham crackers. How to have a stress free Christmas tradition party with your kids. Decorating gingerbread houses as a family. How to make easy gingerbread houses for kids.
  • graham crackers

  • 2 tubs of cream cheese frosting

  • green food coloring

  • mini candy canes

  • gumdrops

  • assorted hard candies

  • large spree candies

  • twizzlers pull and peel

  • red and white round peppermints

  • green and white peppermints

  • mini & regular sized marshmallows

  • jellybeans

  • traditional pretzels

  • large & mini pretzel sticks

  • sprinkles

Other supplies that we used:

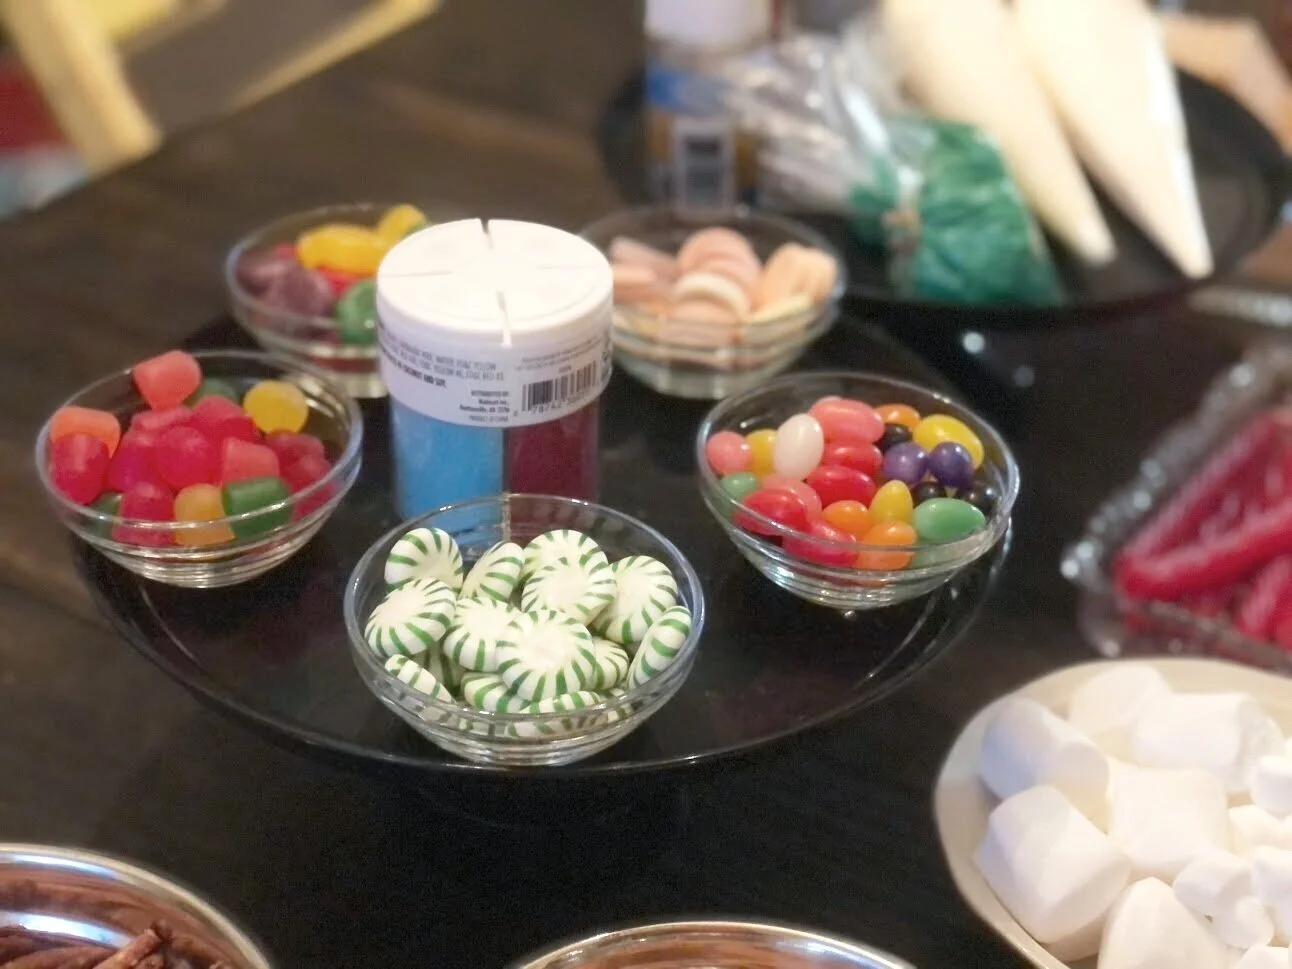
To free up space we used cake stands to hold the candies that were in these little glass condiment dishes. I love these little dishes. They are super cheap, only $.25 each! This got them up and off of the table so that the girls would have more space to create.
Kid friendly gingerbread house decorating party using graham crackers. How to have a stress free Christmas tradition party with your kids. Decorating gingerbread houses as a family. How to make easy gingerbread houses for kids.

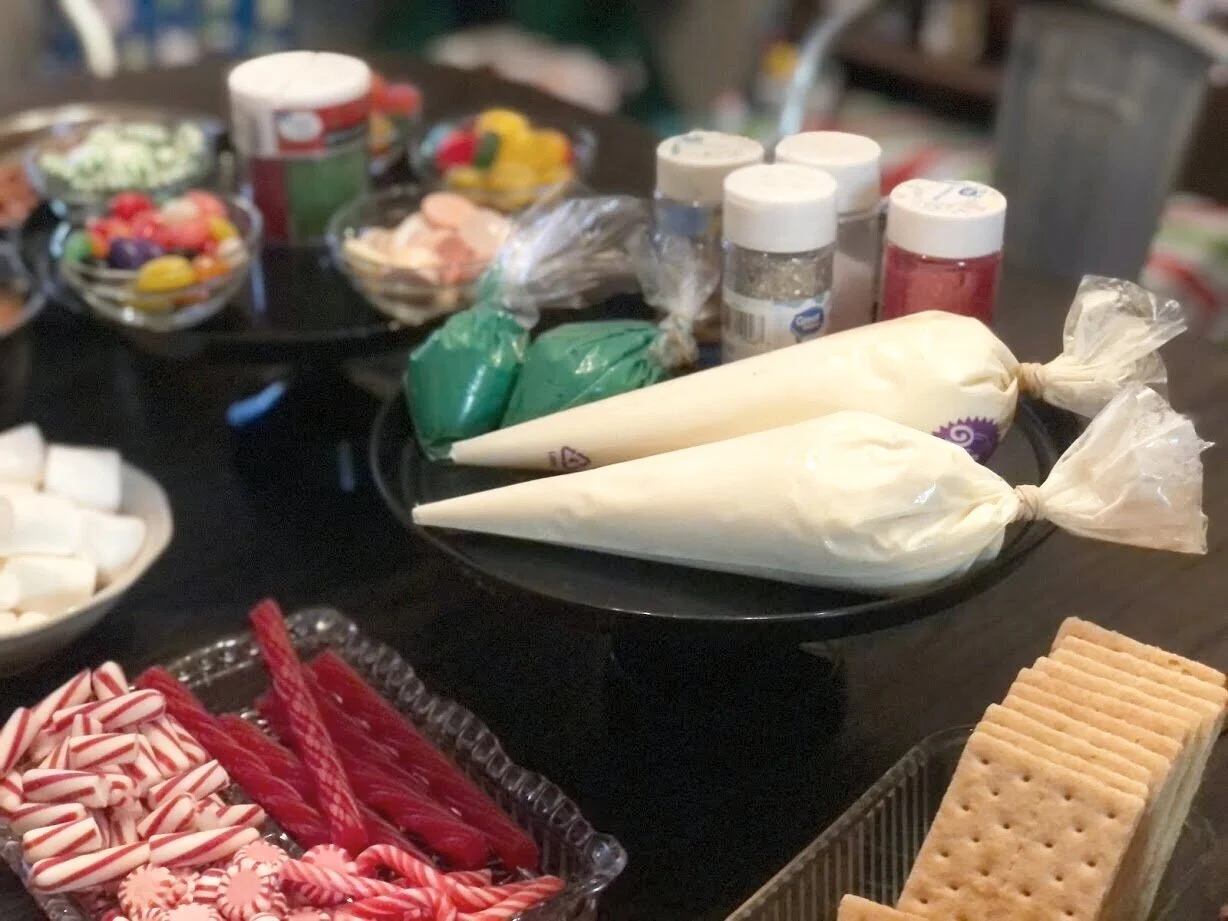
We used another cake stand to hold the sprinkles and the bags of frosting. The frosting I used, generic cream cheese frosting in a can, wasn’t really the best for this but it works. It doesn’t set up/dry super fast but it works. We also stuck the bags of frosting in the fridge about an hour before we started decorating so that the icing would be more firm to work with.
Kid friendly gingerbread house decorating party using graham crackers. How to have a stress free Christmas tradition party with your kids. Decorating gingerbread houses as a family. How to make easy gingerbread houses for kids.

Each daughter got a paper plate to make their gingerbread house on.

Kid friendly gingerbread house decorating party using graham crackers. How to have a stress free Christmas tradition party with your kids. Decorating gingerbread houses as a family. How to make easy gingerbread houses for kids.

They played around with different designs then started “gluing” their pieces together using the bags of icing.

Kid friendly gingerbread house decorating party using graham crackers. How to have a stress free Christmas tradition party with your kids. Decorating gingerbread houses as a family. How to make easy gingerbread houses for kids.

After their houses set up, the frosting had hardened a bit, they decorated their little hearts out!

Kid friendly gingerbread house decorating party using graham crackers. How to have a stress free Christmas tradition party with your kids. Decorating gingerbread houses as a family. How to make easy gingerbread houses for kids.

I always love seeing their creativity take flight. They kept adding and adding candies thinking of new ways they could use all the different colors and shapes.

Kid friendly gingerbread house decorating party using graham crackers. How to have a stress free Christmas tradition party with your kids. Decorating gingerbread houses as a family. How to make easy gingerbread houses for kids.

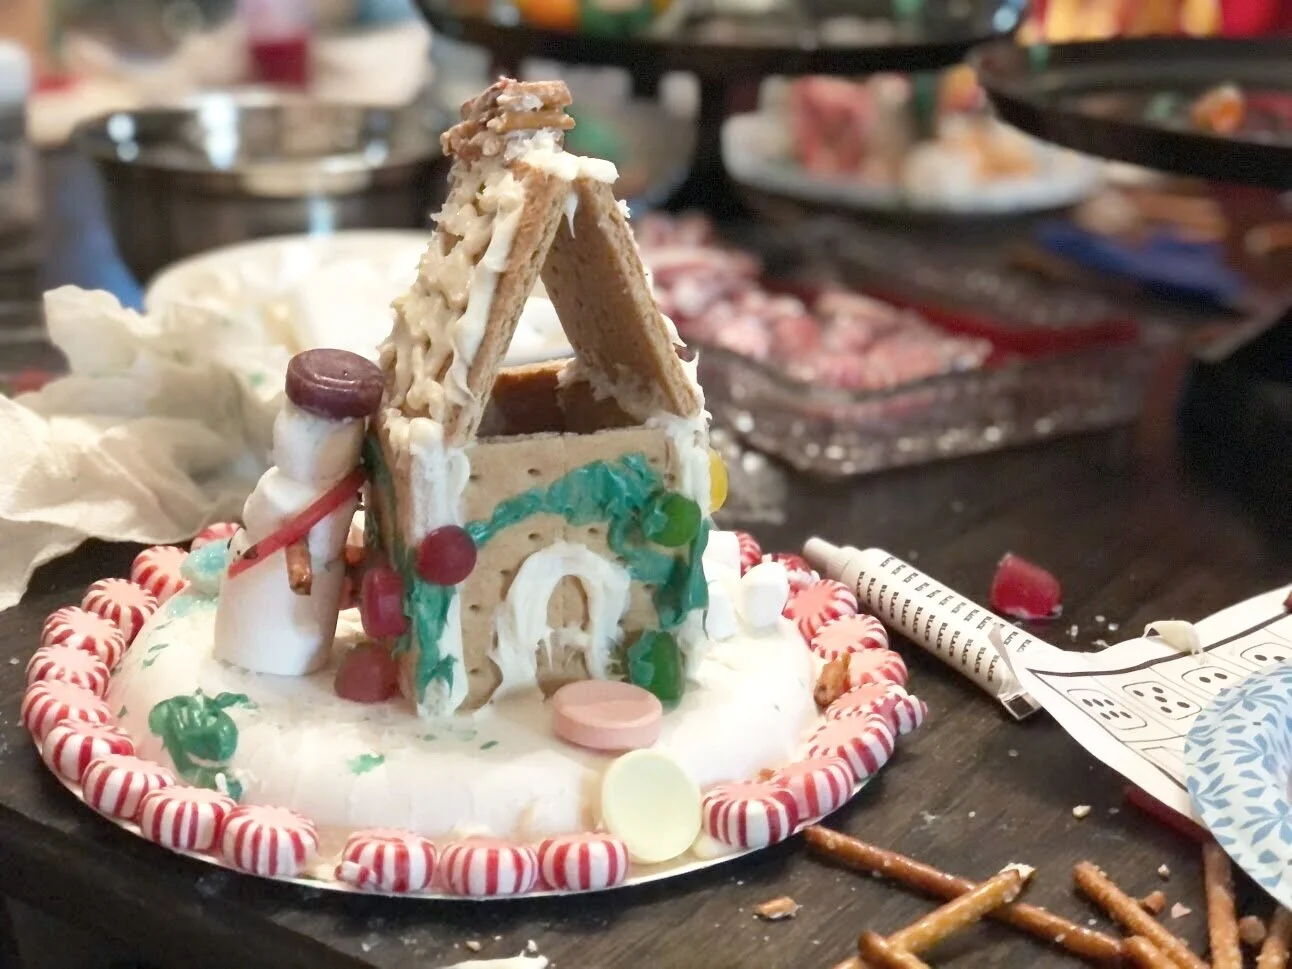
My third daughter was the only one to make a snowman out of the marshmallows. He was adorable with his little hard candy hat and twizzler scarf.

Kid friendly gingerbread house decorating party using graham crackers. How to have a stress free Christmas tradition party with your kids. Decorating gingerbread houses as a family. How to make easy gingerbread houses for kids.

I love the doorway my first born daughter made using the marshmallows.

Kid friendly gingerbread house decorating party using graham crackers. How to have a stress free Christmas tradition party with your kids. Decorating gingerbread houses as a family. How to make easy gingerbread houses for kids.

And this super creative door crafted by daughter number 2 made into the shape of a heart using mini peppermint sticks. Adorable!

Kid friendly gingerbread house decorating party using graham crackers. How to have a stress free Christmas tradition party with your kids. Decorating gingerbread houses as a family. How to make easy gingerbread houses for kids.

Last but not least is the masterpiece from daughter number 4. Oh the love that was put into this. It may look like a mess to others but she had THE MOST fun making this. After her original house fell she turned the rubble into a work of gingerbread house art!

Sure our houses weren’t perfect by Pinterest standards but it doesn’t even matter. For a couple of hours our family sat around our kitchen table and had the best time singing random songs, cracking jokes, teasing one another, and making memories. AND there wasn’t an argument one! I know, super rare for a family with 4 kiddos. It was a perfect Christmas themed evening.

Check out more kid friendly crafts below.

DIY make a wood CUPCAKE base using your Cricut

Use your cricut to make a wood base for your pull apart cupcakes. See how this mom made a pull apart mermaid tail cake from cupcakes. She used her Cricut and Cricut design space to make her template then cut it out using her Ryobi scroll saw.

Use your Cricut & scroll saw to make a wooden cupcake base in the shape of a mermaid tail

I love throwing birthday parties for my four daughters. I love the excitement in their eyes when they see all the work and thought that’s been put into THEIR big day! I love sitting with them and planning out the details. And when the oldest three were much younger I LOVED making their cakes. As the years have passed though, I found my self getting busier and busier and it was just easier for me to run to Sams club and grab a cake from there.

Affiliate Disclosure. Some of the links on this website are affiliate links, which means that I may earn a small commission if you click on the link or make a purchase using the link. If you make a purchase you will not be charged anything additional.

But this year when the second oldest was planning her birthday she asked if I would make her cake. I felt so honored. Really? She didn’t want a store bought cake but one that momma made! Seriously bring on the happy tears!

She had been pinning on Pinterest for a couple of months and decided she wanted a MERMAID cake! As soon as she said those words I knew what I was going to do to make that happen… MERMAID PULL APART CUPCAKES! So much easier than an actual cake and less mess on the day of the party. Years and years ago I did a similar one for the oldest daughter when she turned 4. I made pull apart cupcakes in the shape of a 4 and it was ADORABLE and SOOOOOOO easy!

Thank goodness for tools like Cricut and Ryobi, if I didn’t have those then her cake might have turned out a little….less than edible looking lol!

If you want more little girl birthday party inspiration be sure to check out these ADORABLE UNICRON party centerpieces I made using my Cricut too!

Don’t feel like reading the full tutorial? Skip to the bottom to catch the video or go here ——-> MERMAID TAIL CUPCAKE BASE on my YouTube channel

How to make a wood base for pull apart mermaid cupcakes

Use your cricut to make a wood base for your pull apart cupcakes. See how this mom made a pull apart mermaid tail cake from cupcakes. She used her Cricut and Cricut design space to make her template then cut it out using her Ryobi scroll saw.

Here’s what you’ll need

First select your design in CRICUT DESIGN SPACE. If you are like me and create a ton of projects each monthly I highly recommend signing up for CRICUT ACCESS. You will have access to thousands of images, fonts, and projects for a small monthly fee…and it’s SO worth it!

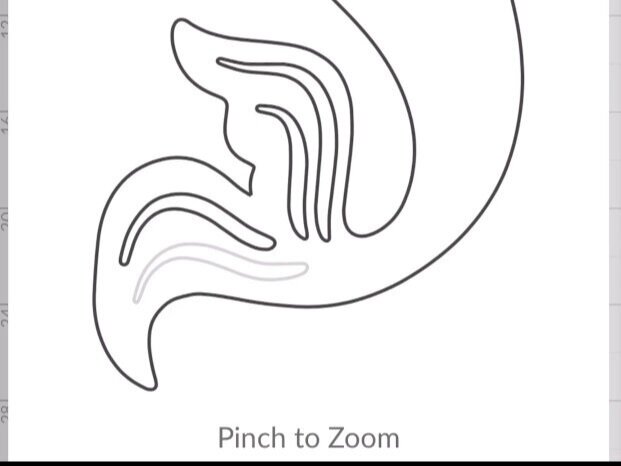
Here’s the mermaid tail I chose in Cricut Access. I just simply searched MERMAID TAIL and chose one that I liked.

Use your cricut to make a wood base for your pull apart cupcakes. See how this mom made a pull apart mermaid tail cake from cupcakes. She used her Cricut and Cricut design space to make her template then cut it out using her Ryobi scroll saw.

I chose the pink one on the bottom row. I really like that this one had some movement in it. But I didn’t really like the white spaces on the mermaid tail. So after I added it to my canvas I used the CONTOUR function to hide those white spaces. I also adjusted the size of the mermaid tail so that it was 11.45” wide. I left the size lock on so that it would adjust the height for me so that everything would be proportionate.

Use your cricut to make a wood base for your pull apart cupcakes. See how this mom made a pull apart mermaid tail cake from cupcakes. She used her Cricut and Cricut design space to make her template then cut it out using her Ryobi scroll saw.

Since I was using cardstock for my stencil and I didn’t have a piece big enough I butted two pieces together and taped the seam so that it would be like one big piece. Feed your mat through your Cricut machine and press GO when the button starts to flash.

Use your cricut to make a wood base for your pull apart cupcakes. See how this mom made a pull apart mermaid tail cake from cupcakes. She used her Cricut and Cricut design space to make her template then cut it out using her Ryobi scroll saw.

I used a piece of scrap 1x12 to make my mermaid tail cupcake base out of. I had some plywood which probably would have worked just as good {and would have been cheaper to use} but I knew I most likely wouldn’t use this again and I wanted my daughter to be able to use it to hang in her room after her party.

Trace your mermaid tail cardstock stencil out on your piece of wood.

Use your cricut to make a wood base for your pull apart cupcakes. See how this mom made a pull apart mermaid tail cake from cupcakes. She used her Cricut and Cricut design space to make her template then cut it out using her Ryobi scroll saw.

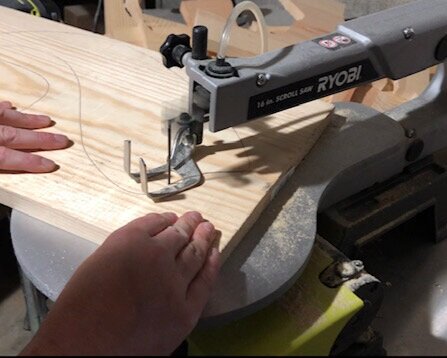
Then cut the mermaid tail out using your Ryobi scroll saw. You can use a band saw, and even a jig saw for this step if you don’t have a scroll saw.

Use your cricut to make a wood base for your pull apart cupcakes. See how this mom made a pull apart mermaid tail cake from cupcakes. She used her Cricut and Cricut design space to make her template then cut it out using her Ryobi scroll saw.

Then you want to smooth it out using your Ryobi sander. I used 120 grit sand paper on mine. I also slightly rounded some of the edges so that it wasn’t so pokey.

Use your cricut to make a wood base for your pull apart cupcakes. See how this mom made a pull apart mermaid tail cake from cupcakes. She used her Cricut and Cricut design space to make her template then cut it out using her Ryobi scroll saw.

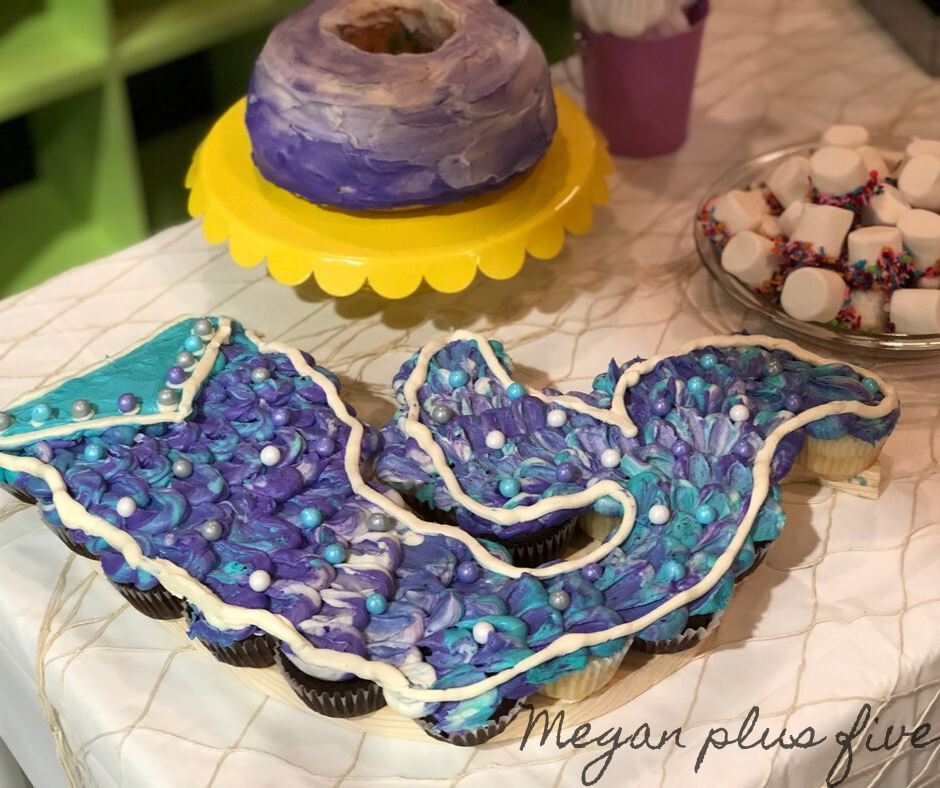
Add your cupcakes and decorate. I just slapped a little bit of frosting on the bottom of each cupcake to stick them to the board.

Use your cricut to make a wood base for your pull apart cupcakes. See how this mom made a pull apart mermaid tail cake from cupcakes. She used her Cricut and Cricut design space to make her template then cut it out using her Ryobi scroll saw.

. I used a combination of purple, teal, and white for the frosting colors and I didn’t even use any fancy piping tips {I was a little pressed for time lol}. For under $10 I was able to make the cake of her mermaid themed birthday dreams!

. I used a combination of purple, teal, and white for the frosting colors and I didn’t even use any fancy piping tips {I was a little pressed for time lol}. For under $10 I was able to make the cake of her mermaid themed birthday dreams!

Watch the video tutorial below on how to make your own MERMAID TAIL CUPCAKE BASE

Ultimate Dollar Tree birthday gift idea

Ultimate kid's birthday gift from the Dollar Tree

The best kid’s birthday gift idea when you’re on a budget

It’s no secret that my girls and I LOVE the dollar tree. Seriously, we were just there today and when we got home my oldest couldn’t believe that we spent and entire HOUR in there and it literally felt like only 20 minutes had past lol! Yep…raising those girls right!

Our sole purpose of the trip was to find a couple gifts for the oldest daughter’s friends for their birthday parties. Raising a family of 6 isn’t a cheap task. So, things like friend’s birthday parties typically have a pretty small budget of $10 per kiddo. At Walmart $10 doesn’t get you much from the toy aisle or any aisle that a kid would be interested in anyway. But, I have to say over the years we have gotten really good at whipping up some amazing birthday gifts on the $10 budget. And I can’t wait to share the latest gift that comes in WAY under budget! Under budget meaning 70% lower than what we typically budget for friend’s birthdays.

Affiliate Disclosure. Some of the links on this website are affiliate links, which means that I may earn a small commission if you click on the link or make a purchase using the link. If you make a purchase you will not be charged anything additional.

How was I able to create two gifts for kids for under $6?

Well, first the Dollar Tree. It is FULL of really amazing things that on their own may not be all that amazing but when paired with something else, like let’s say a personalized wood letter cut out, can be one of the best gifts ever! And second, I just purchased a scroll saw last weekend with the money that comes in from my handmade business so I used that to create the customized gifts for her friends.

The ultimate Dollar Tree birthday gift idea for under $5

My only regret is not buying a scroll saw sooner. If you’re curious about the one I purchased you can see more about the Ryobi scroll saw here. And if you wanna know about the other tools I have in my shop I’ve written a break down of which tools every crafter needs.

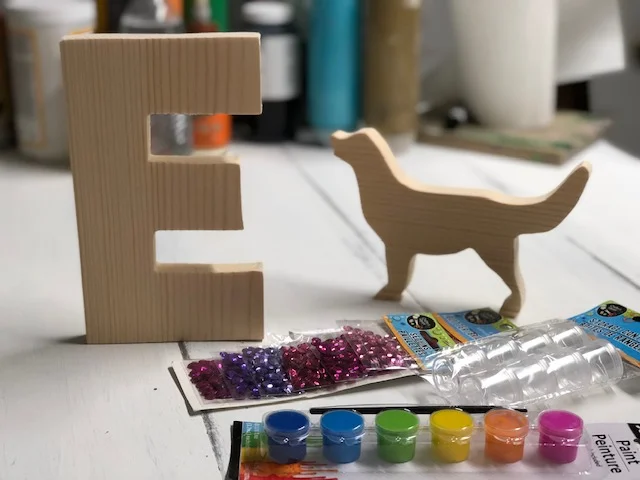
I used my Cricut Explore to cut out the letter E and the dog from cardstock. Then I outlined them with a pencil on a scrap piece of 1x8 that had been sitting on the wood shelf in the garage. Using my new handy scroll saw I cut out the shapes. Gave them a light sanding and they were ready to add to the items we picked up at the dollar tree.

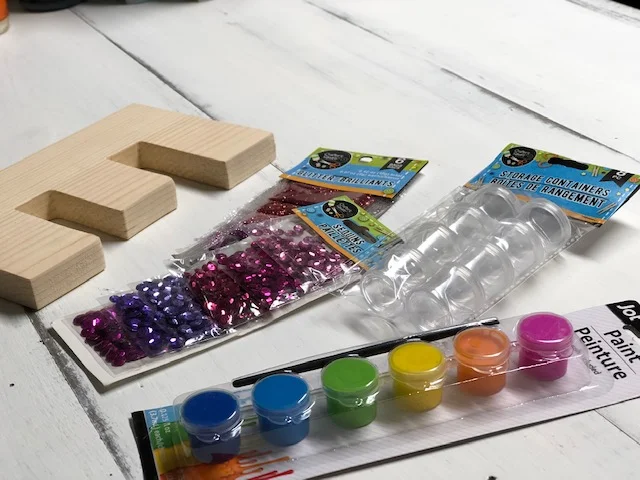
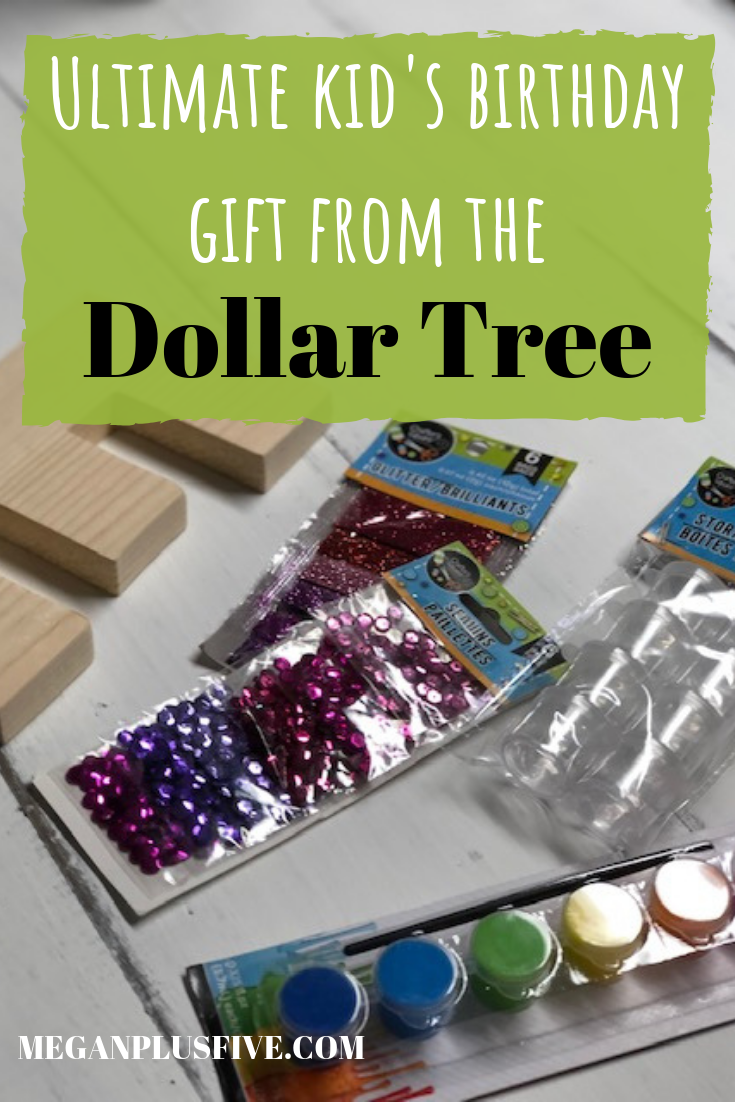
Here’s what we picked up from the dollar tree

  • 1 package of purple/pink 6 pk glitter

  • 1 package of blue/green 6 pk glitter

  • 1 package of purple/pink sequence

  • 1 package of small containers

  • 2 paint pots

We bought the small containers to fill with white paint and glue {which we have a TON of at home} . Since the paint pots don’t come with white paint and sequence doesn’t stick well to paint we thought those additions to the birthday gifts would be a good idea. I wrote on the outside of the containers which one was glue and which one was paint so there wasn’t any confusion when the birthday girl goes to use her new craft kit.

The glitters and sequence were individually wrapped so we pulled them off of the original packaging {they were just taped to the thin cardboard} and gave each birthday girl 4 glitters and 2 sequence.

The ultimate DOLLAR TREE birthday gift idea

To keep the birthday crafts looking somewhat professional I packaged the craft supplies in a clear goody bag {the party favor kind} that we already had left over at home.

I am so excited about this new DIY birthday craft idea! It’s absolutely perfect for the crafty kiddo in your life and it costs just a few dollars to create! I can honestly say that our girls loved this idea so much they each want their own.

———> Want more crafty gift giving ideas? Check out my post on these top selling kid approved DIY CRAFT KITS FOR KIDS

——> Also, you don’t want to miss this a great list of the PRE TEEN CRAFT IDEAS, because they can be so hard to buy for sometime

5 awesome craft kits your kids will love

5 awesome craft kits your kids will love. Totally kid approved

Craft kits kids will love

Kids love to create. They have creativity coming out their ears it seems like. Back when we had our brick and mortar craft studio we would sell these kits like crazy! And now we have them online so kids all across the world can enjoy them.

Don’t want to buy the kits but want to know how to make the craft? I’ve got ya covered! After the end of the descriptions I’ve included the link to the tutorial here on my blog.

Here are our top 5 craft kits that have been kid tested and APPROVED!

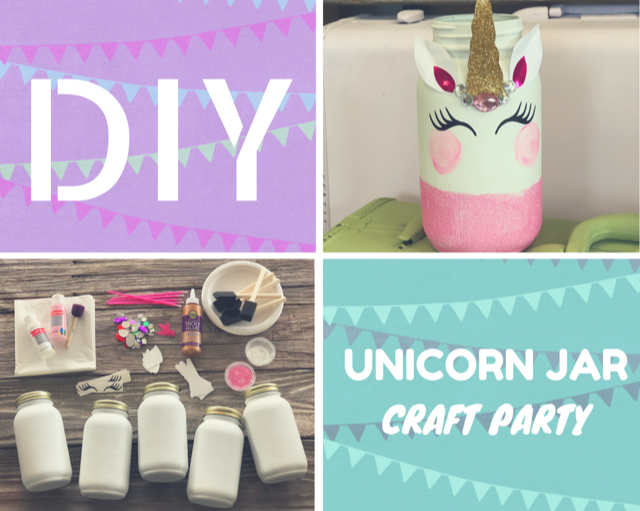
  1. DIY glittery unicorn mason jar

This unicorn mason jar craft kit is one of our top selling craft kits we ship. Each kit comes with a pre-painted mason jar so you don’t even have to worry about that step {painting mason jars can be a challenge due to curing times in between coats}. Upgrade to a unicorn mason jar craft party size

Check out the DIY glittery unicorn jar tutorial

2. CUSTOM name canvas art

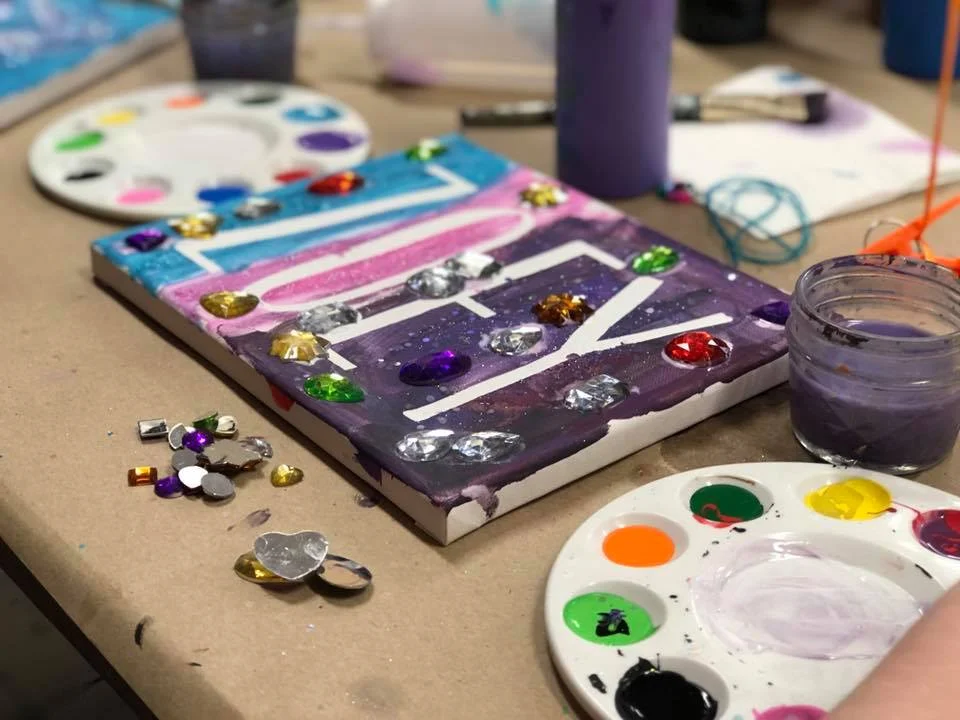
What kid doesn’t want their name on a beautiful canvas that they paint? This custom name art canvas craft kit comes with everything your kiddo needs to have a personalized canvas art. Your name of choice comes already attached to the canvas so it’s ready to go right out of the box. Once your kiddo paints their canvas you simply peel up the stencil to reveal the white lettering underneath. This custom name art craft is also available in party sized, actually this a great option for family get togethers to give the little ones something fun to do.

Check out the DIY custom canvas art tutorial

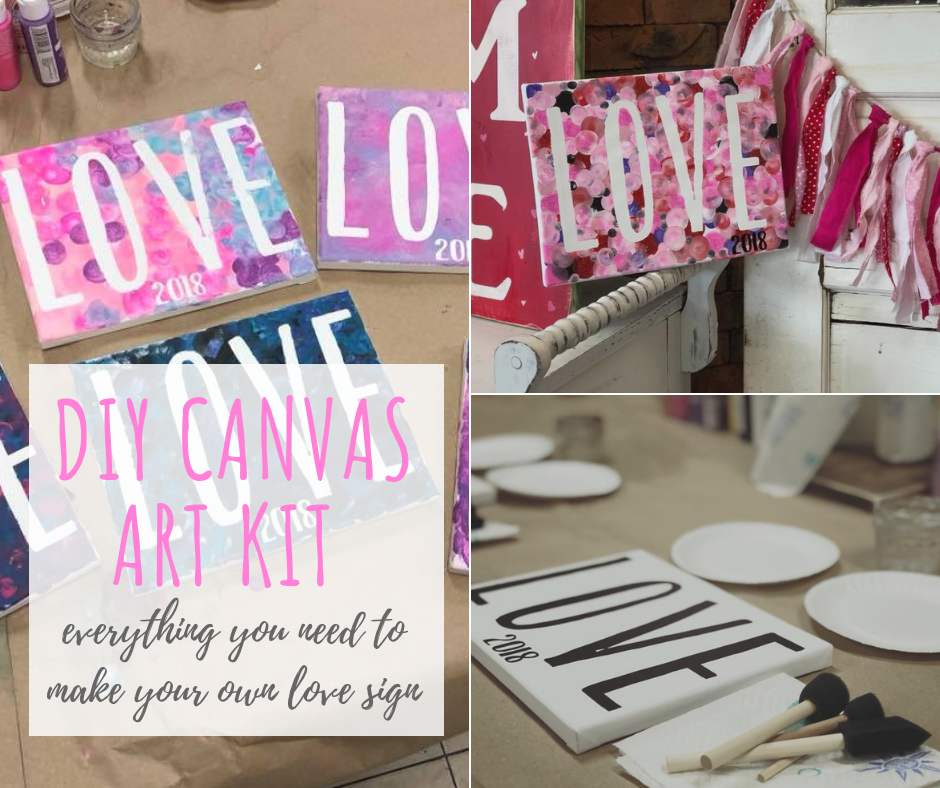
3. LOVE canvas art craft kit

Much like the craft kit above this canvas art come with the stencil already applied and ready to create right out of the box. This Valentine’s Day canvas art craft kit is always a big winner with moms and kids!

Check out the DIY canvas art tutorial

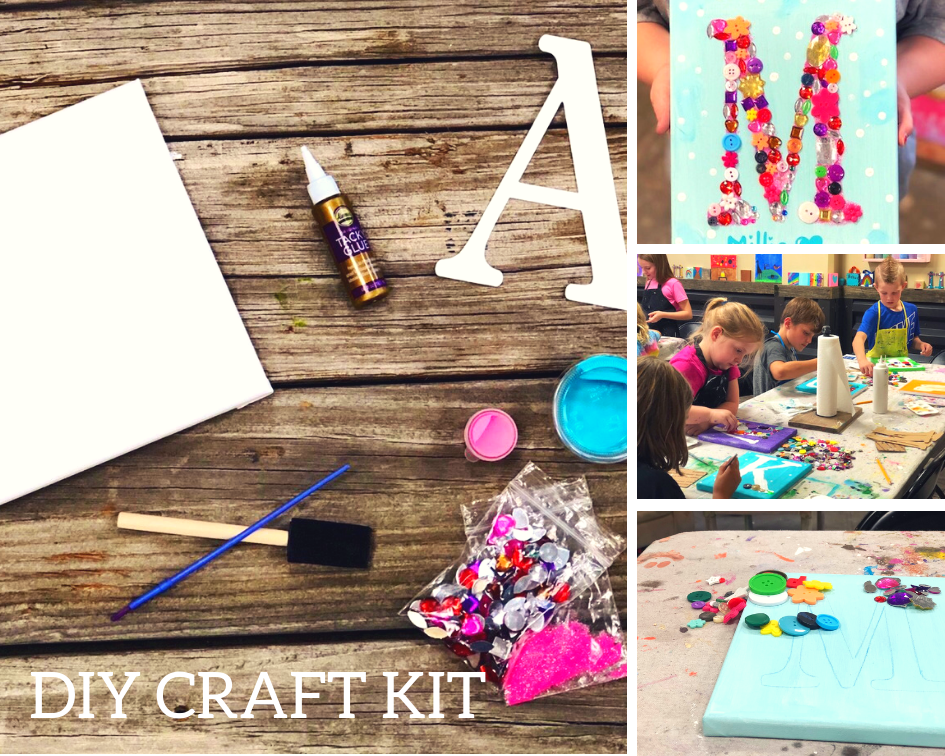
4. Mixed media canvas art craft kit

I can’t tell you enough how much kids LOVE this custom initial craft kit. The get to choose their own colors, buttons, rhinestones, and glitter and totally make it their own. This kit is so much fun and more!

Check out the DIY custom mixed media name canvas art tutorial

5. DIY light up fairy jar

Calling all whimsical fairy believers! This light up fairy jar craft kit will make a perfect gift for the fairy lover in your life. This kit includes a smooth mason jar, embellishments, cardstock fairy, glitter, twine, tissue paper, and a battery operated light. Full picture instructions are included.

Check out the DIY glittered light up fairy jar tutorial

There you have it our top 5 craft kits approved by kids! Each and every one of these kits was a top seller in our brick and mortar craft studio and they each continue to be top sellers in our online shop.

If you have any questions on the craft kits please feel free to reach out to me. Each one come will full picture instructions and materials to complete each craft. Please note tools such as a glue gun are not included inside our DIY kits.


DIY Unicorn birthday party centerpiece

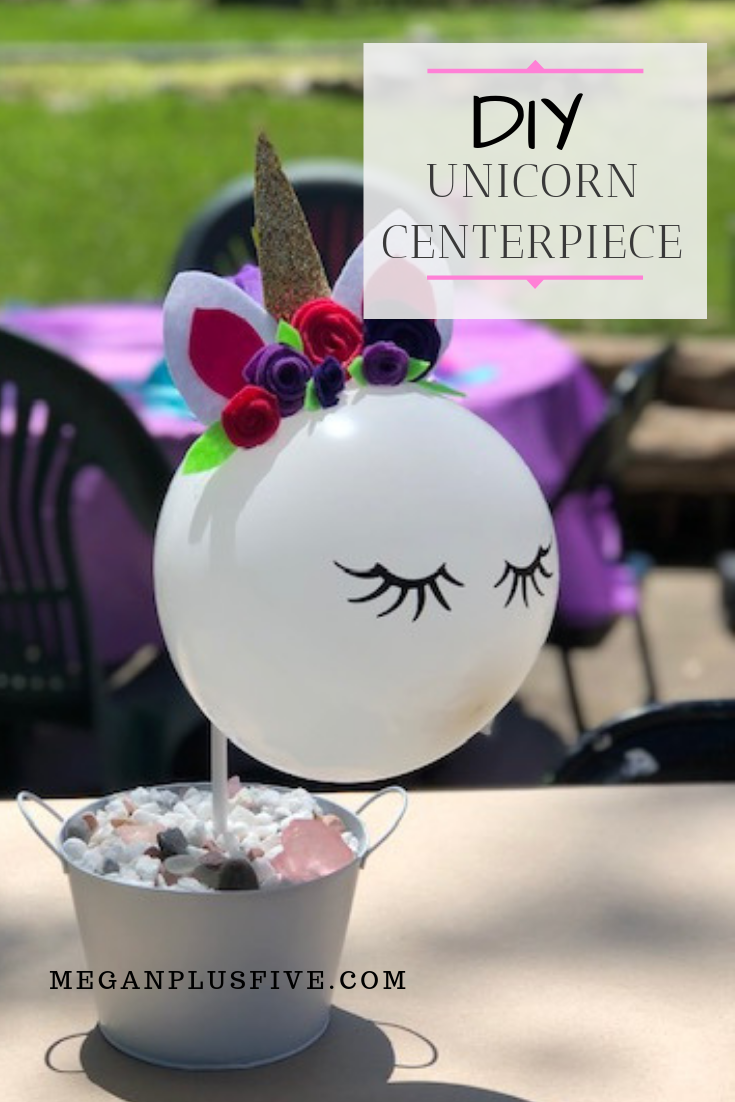
DIY Unicorn Centerpiece, how to make your own easy to follow tutorial

Our third daughter had her 8th birthday party recently and had her big heart set on a unicorn theme. I had $50 to make it happen {decorations, cake, games, and invites} and I wasn’t about to disappoint her so I set out on Pinterest to find all the things I could for a DIY unicorn party. Here’s the pin that inspired this centerpiece. Super adorable right?! But I wanted hers to look a little different, a little more whimsical and I wanted to spend the least amount possible. Which meant I needed to shop my craft stash before getting started.

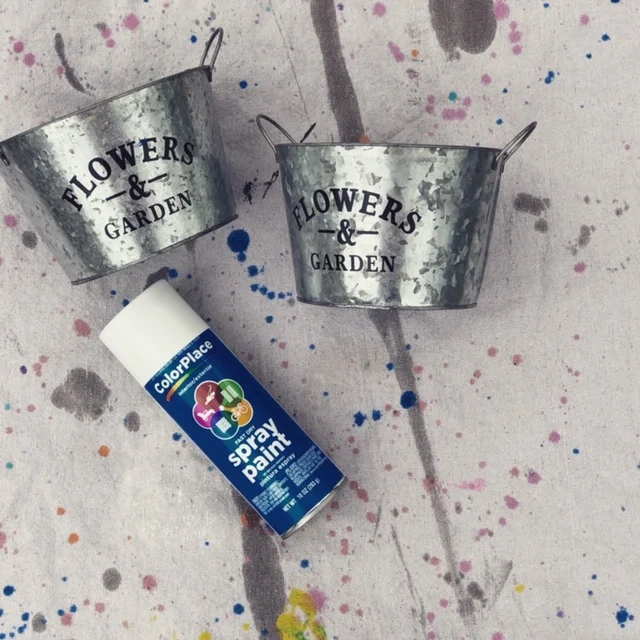
Here’s what you’ll need to create you own at unicorn centerpiece

First spay paint your buckets and dowel rods with white spray paint. Let dry completely.

DIY unicorn birthday party centerpiece

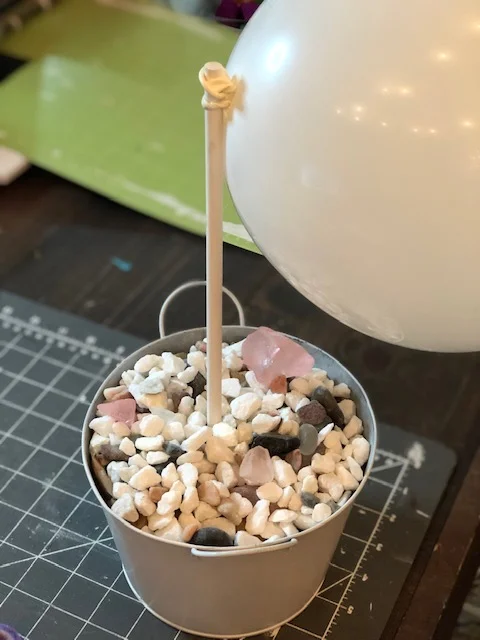
Fill the bottom third of your bucket with crumpled up paper, leaving space in the very center to place the dowel rod. Place the dowel rod inside and fill the rest in with your rocks. I just used what we had on hand that was left over from previous crafts.

Next, blow your balloon up but not all the way. You want to try to get as round of a shape for it as possible. Then tie it around your dowel rod.

DIY unicorn birthday party centerpiece

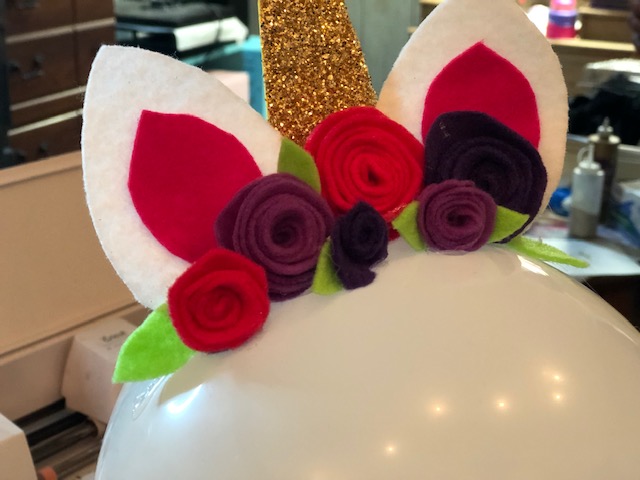
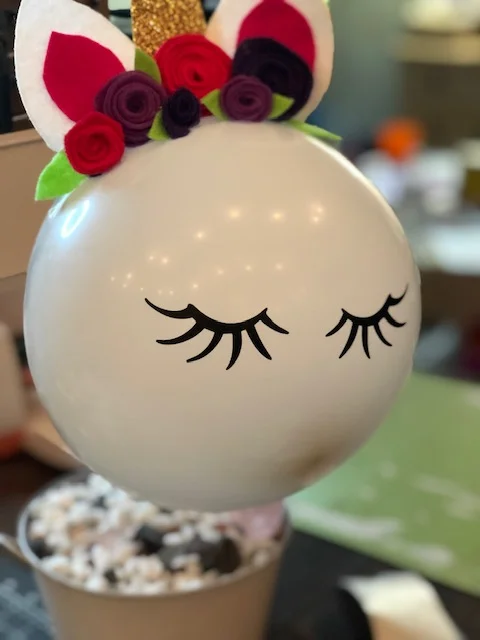
I free hand cut the ears, flowers, and horn. Not pictured, I cut the horn out of cardstock, glued glitter to the entire thing, and let it dry prior to this next step. Using your LOW TEMP glue gun glue them to your balloon. Place the glue on the felt first, wait a couple seconds, then place on your balloon. It’s important you use a low temp glue gun as a hot temp will likely pop your balloon.

DIY unicorn birthday party centerpiece

If you’d rather use paper flowers this DIY PAPER FLOWER TUTORIAL might help you. They aren’t the exact same style of flower as the ones pictured in this tutorial but they are super adorable and you just might like them better.

I cut out the vinyl eyes using my Cricut but you can free hand these with a sharpie.

DIY unicorn birthday party centerpiece

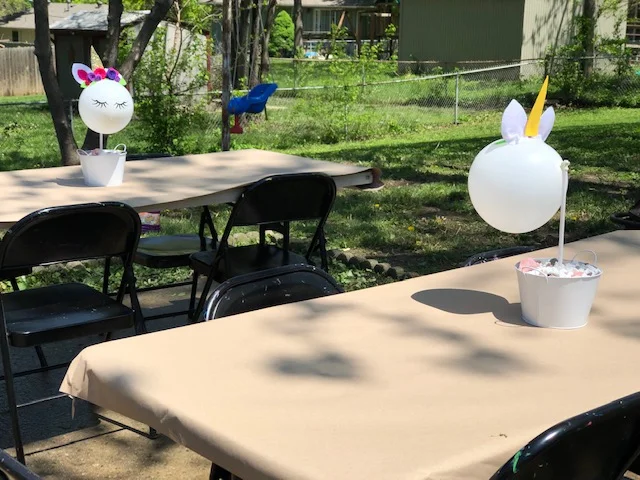
And that’s it! Our birthday girl was completely happy and loved all her unicorn decorations but these were her favorite! She so wished she could have kept them forever but sadly they deflated {and honestly I’m totally ok with that because the birthday girl would never toss anything if we didn’t make her}.

DIY Unicorn birthday party centerpiece

I hope this inspires you to make your own perfect unicorn decorations.

Check out the UNICORN TASSLE GARLAND I made to go along with her theme.


DIY Tassel Garland, make your own for just pennies each

DIY Tassel Garland, make your own for just pennies each

Affiliate Disclosure. Some of the links on this website are affiliate links, which means that I may earn a small commission if you click on the link or make a purchase using the link. If you make a purchase you will not be charged anything additional.

Raising kids is so hard sometimes. Nothing prepares you for having to console your child on days when they are feeling down about themselves. I think this is especially true for raising daughters. We have four little girls and life is a roller coaster of emotions with them some days. Recently we celebrated our third daughter’s birthday. We always celebrate before school lets out because she has a summer birthday.

We sent invites out two weeks in advance and this girl was SO excited to have all her school friends over for her unicorn themed birthday party. I’ll admit I’m a frugal person thru and thru. When I plan our girl’s parties my husband and I don’t spend an arm and a leg on the party. I try to keep it under $50 for the cake and decorations that way we still have room in our budget to gift them a decent gift that they’ve been wanting.

But this year I had to get super creative on my spending because I needed to throw her a fancy {as fancy as we get around here ;) } unicorn birthday party! It was just days before her party and she had only had one, yes ONE friend RSVP to her big day. Talk about tears falling and hearts breaking. I HAD to make up for the possibility that there be no one besides family at her party.

So I scoured all the pretty things on Pinterest and put together a few ideas of things to decorate her party with to make her feel extra special. Keeping it under $50 was a bit of a challenge but I was determined to make it work! Tassel Garland, among a few other DIY decorations, made the cut. These ended up costing than $4 to make two full strands of tassels PLUS extras to put around the unicorn centerpieces.

Thankfully two days before her party she had a couple more friends RSVP and she had a great party! They played some fun unicorn games, made tasty treats and loaded them down with EXTRA sprinkles, got to decorate their own cupcakes, and most of all the birthday girl felt so loved and special on her day!

After her party she got to hang the pretty garland in her room which made these tassel even better!

To make your own DIY tassel garland for your own special occasion…

Here’s what you’ll need

I was so surprised at how EASY these were to make! I was able to knock these out in no time. And our sweet girl LOVED them!

I’d love to hear your feedback below!

DIY Tassel Garland, make your own for just pennies each

How to make your own CUSTOM canvas name art at home

How to make your own CUSTOM canvas name art at home

I love canvas art! There are so many different things you can create on these wonderful little blank pieces. The possibilities are endless with a blank canvas! You can free hand paint, make adorable handprint keepsakes, explore the fun of melting crayons and so much more! If you haven’t checked out our letter canvas art DIY you must after you read this tutorial.

Affiliate Disclosure. Some of the links on this website are affiliate links, which means that I may earn a small commission if you click on the link or make a purchase using the link. If you make a purchase you will not be charged anything additional.

How to make your own CUSTOM canvas name art at home

I’ve put together this CRAFT KIT to make this DIY so super easy for you. Everything you need in one little box shipped right to your door. You child’s name comes already attached and sealed to the canvas, which makes it even better! Get your personalized kit here. But if you want to go solo on this one here’s what you’ll need…

How to make your own CUSTOM canvas name art at home

The first steps aren’t pictured. First, cut your name in vinyl using your Cricut or other cutting machine. I always use oracal 651 but you can use any brand/strength. The color does not matter because you will be removing it once the painting is done. Now using transfer tape, attach your vinyl name to the canvas. This can be super tricky to get it to stick to the canvas so go slow when peeling the transfer tape off. After your vinyl name is attached and you are sure all the air bubbles are out of it you’ll want to seal it with SUPER THIN layer of MATTE finish mod podge. This is really easy. Just brush over the letters focusing on where the vinyl and the canvas meet. Essentially you are filling in any areas where paint might get in under the stencil with clear mod podge.

Check out the video below to see how to apply AND seal your canvas stencil ❤️.

After the mod podge is dry you can start painting away!!

How to make your own CUSTOM canvas name art at home

Be sure your kiddo is covering the entire area around the vinyl. If there are areas that don’t get painted the letter might not look like a letter when you are finished.

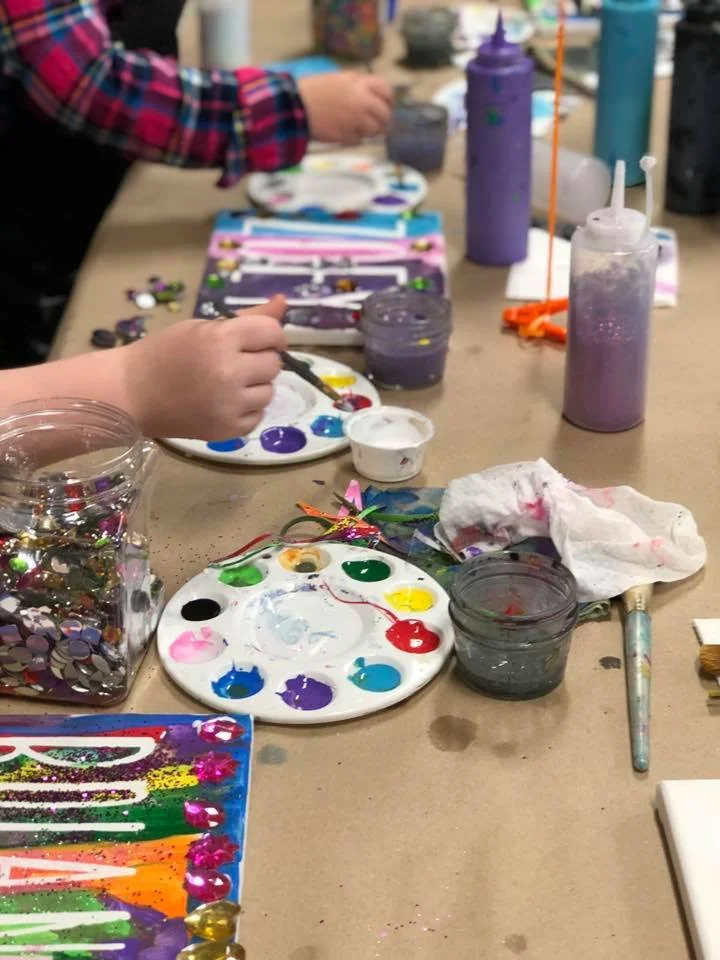
They can get super creative with it. I just LOVE how these turn out. All the kids do something different some do one solid color while others want the whole rainbow, then some make fun galaxy super gorgeous pieces and others use the shaped sponge brushes we have at the studio all over their canvas. The possibilities are endless.

How to make your own CUSTOM canvas name art at home

I recommend if your kiddo wants to add any glitter to their canvas to do so while their paint is still wet.

After they are done with their masterpiece you’ll peel the vinyl lettering up and toss it in the trash {this is why the color of the vinyl doesn’t matter ;) }. I use a sharp xacto knife to do this but a sewing pin works great too. Be careful not to drop it onto their freshly painted art work.

How to make your own CUSTOM canvas name art at home

You can add a ribbon on the back to make a fun hanger to hang it on the wall. We use our stapler for this {not a paper one but a home improvement one}. Your kiddo will admire this for years to come!

How to make your own CUSTOM canvas name art at home

I hope you enjoy this crafty tutorial and that it inspires you to create your own masterpieces and memories with your own kiddos.

Check out more craft kid posts below