Rusty old metal cabinet / locker turned mudroom shoe storage

Rusty locker / metal cabinet repurposed for a mudroom sunporch. Turn an antique chipped paint locker into a shoe holder for your mudroom. Frugal rustic farmhouse furniture for your storage needs.

$20 vintage locker repurposed for the sunporch / mudroom

Antique stores have the best finds! I scored a gorgeous old metal locker / metal cabinet at my local antique shop last week. I wasn’t sure exactly what I was going to do with but after seeing it’s $20 price tag I knew it had to come home with me.

Affiliate Disclosure. Some of the links on this website are affiliate links, which means that I may earn a small commission if you click on the link or make a purchase using the link. If you make a purchase you will not be charged anything additional.
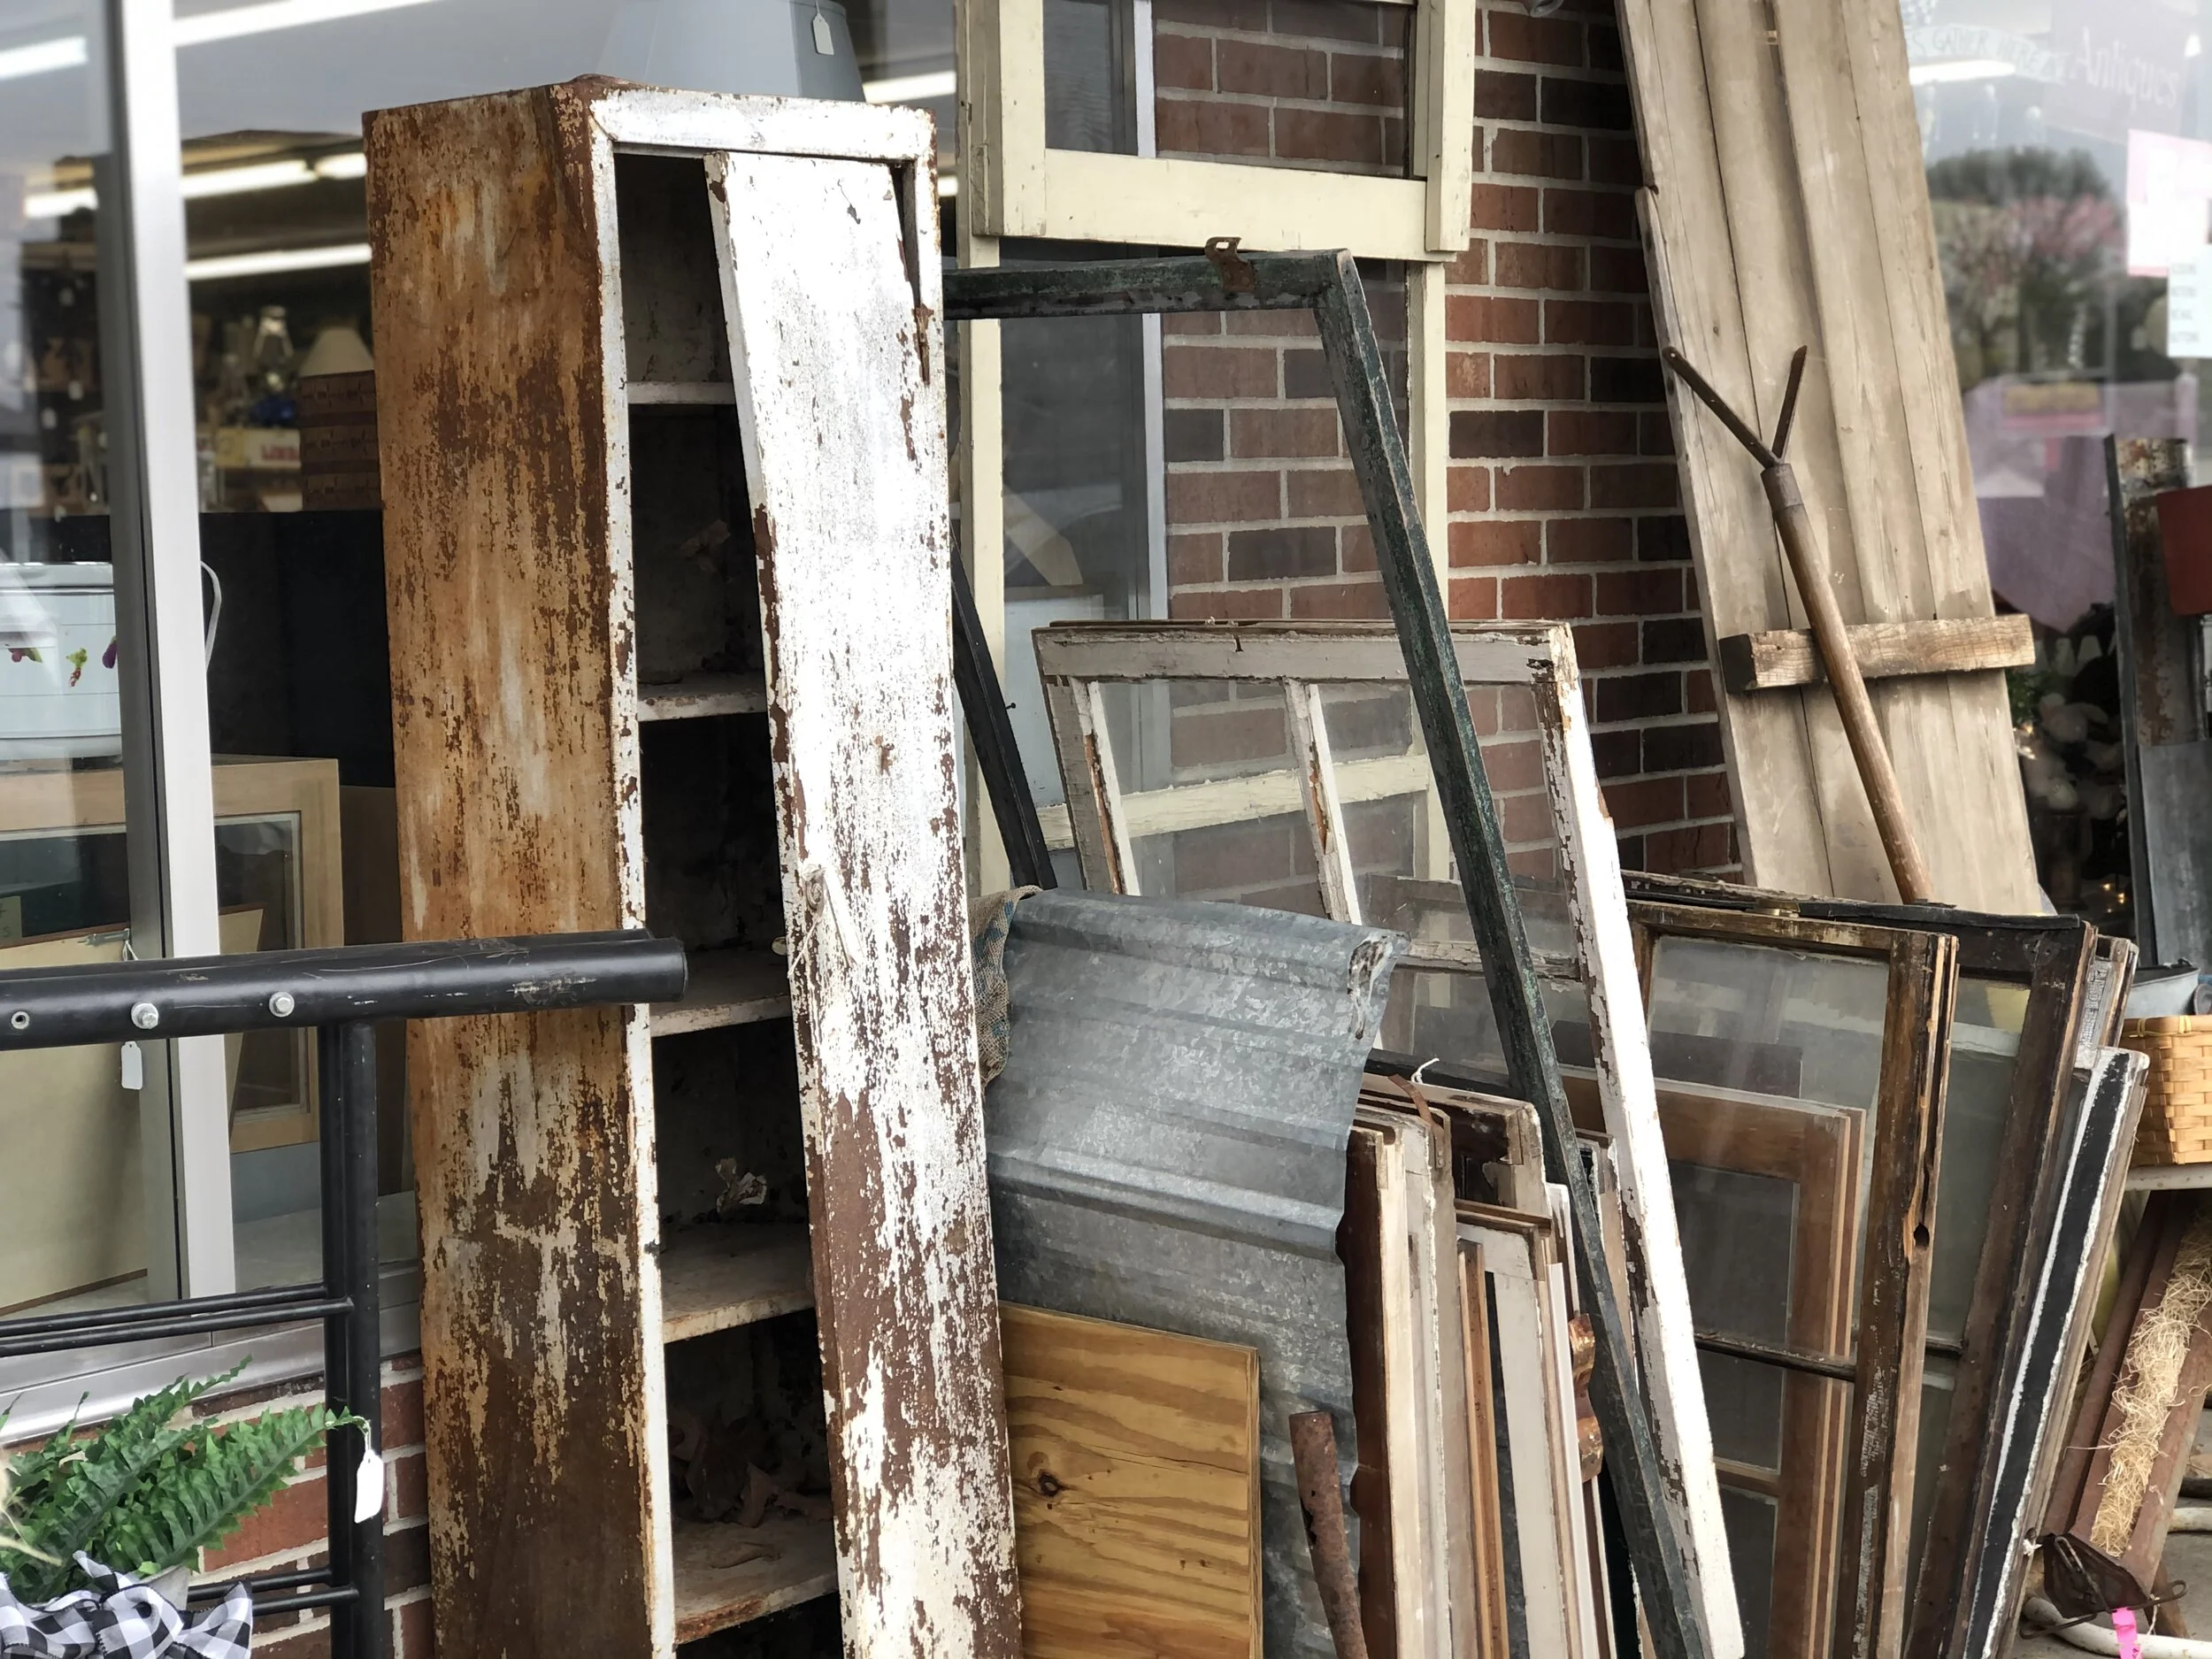
Rusty locker / metal cabinet repurposed for a mudroom sunporch. Turn an antique chipped paint locker into a shoe holder for your mudroom. Frugal rustic farmhouse furniture for your storage needs.

I took the tag inside, paid for it, then loaded it up in our brand new to us fancy minivan (literally the nicest car we’ve ever owned and I still can’t believe it’s ours!!). Thank goodness I had just put this cargo liner blanket thing in there so it kept my van from getting gross stuff all over it or scratched up. Three of the four daughters were excited about our new find but one of them…not so much lol!

Rusty locker / metal cabinet repurposed for a mudroom sunporch. Turn an antique chipped paint locker into a shoe holder for your mudroom. Frugal rustic farmhouse furniture for your storage needs.

A week after bringing it home I finally had time to do something with it. I decided I was going to turn it into a muddy boot/shoe holder for our sunporch / mudroom. Oh my goodness it turned out so freaking cute!

I have seen others paint their metal cabinets / lockers that look like this but honestly I loved everything about this piece as is. I didn’t want to scrape off any of the old paint or add anything to it. I thought it was perfect just the way it was. The only thing I did to it was remove the door and clean it up a bit.

Rusty locker / metal cabinet repurposed for a mudroom sunporch. Turn an antique chipped paint locker into a shoe holder for your mudroom. Frugal rustic farmhouse furniture for your storage needs.

It was full of crunchy old leaves, spiderwebs, and lots of dirt, rust, and chipped paint. I used my vacuum to get all of that out of there. I didn’t see a need to wipe it down with any spray cleaning agent. I mean, after all it will be holding shoes that have just stomped through a chicken coop.

Rusty locker / metal cabinet repurposed for a mudroom sunporch. Turn an antique chipped paint locker into a shoe holder for your mudroom. Frugal rustic farmhouse furniture for your storage needs.

With just a light cleaning this metal cabinet looked a million times better. I did vacuum off the big chipped paint spots. I figured those will end up falling off anyway soon from putting shoes in there.

Rusty locker / metal cabinet repurposed for a mudroom sunporch. Turn an antique chipped paint locker into a shoe holder for your mudroom. Frugal rustic farmhouse furniture for your storage needs.

The legs on this piece were in pretty good shape but because our sunporch slants down for drainage the cabinet sat lopsided. To fix that I put a small piece of scrap wood under two of the feet. That worked great!
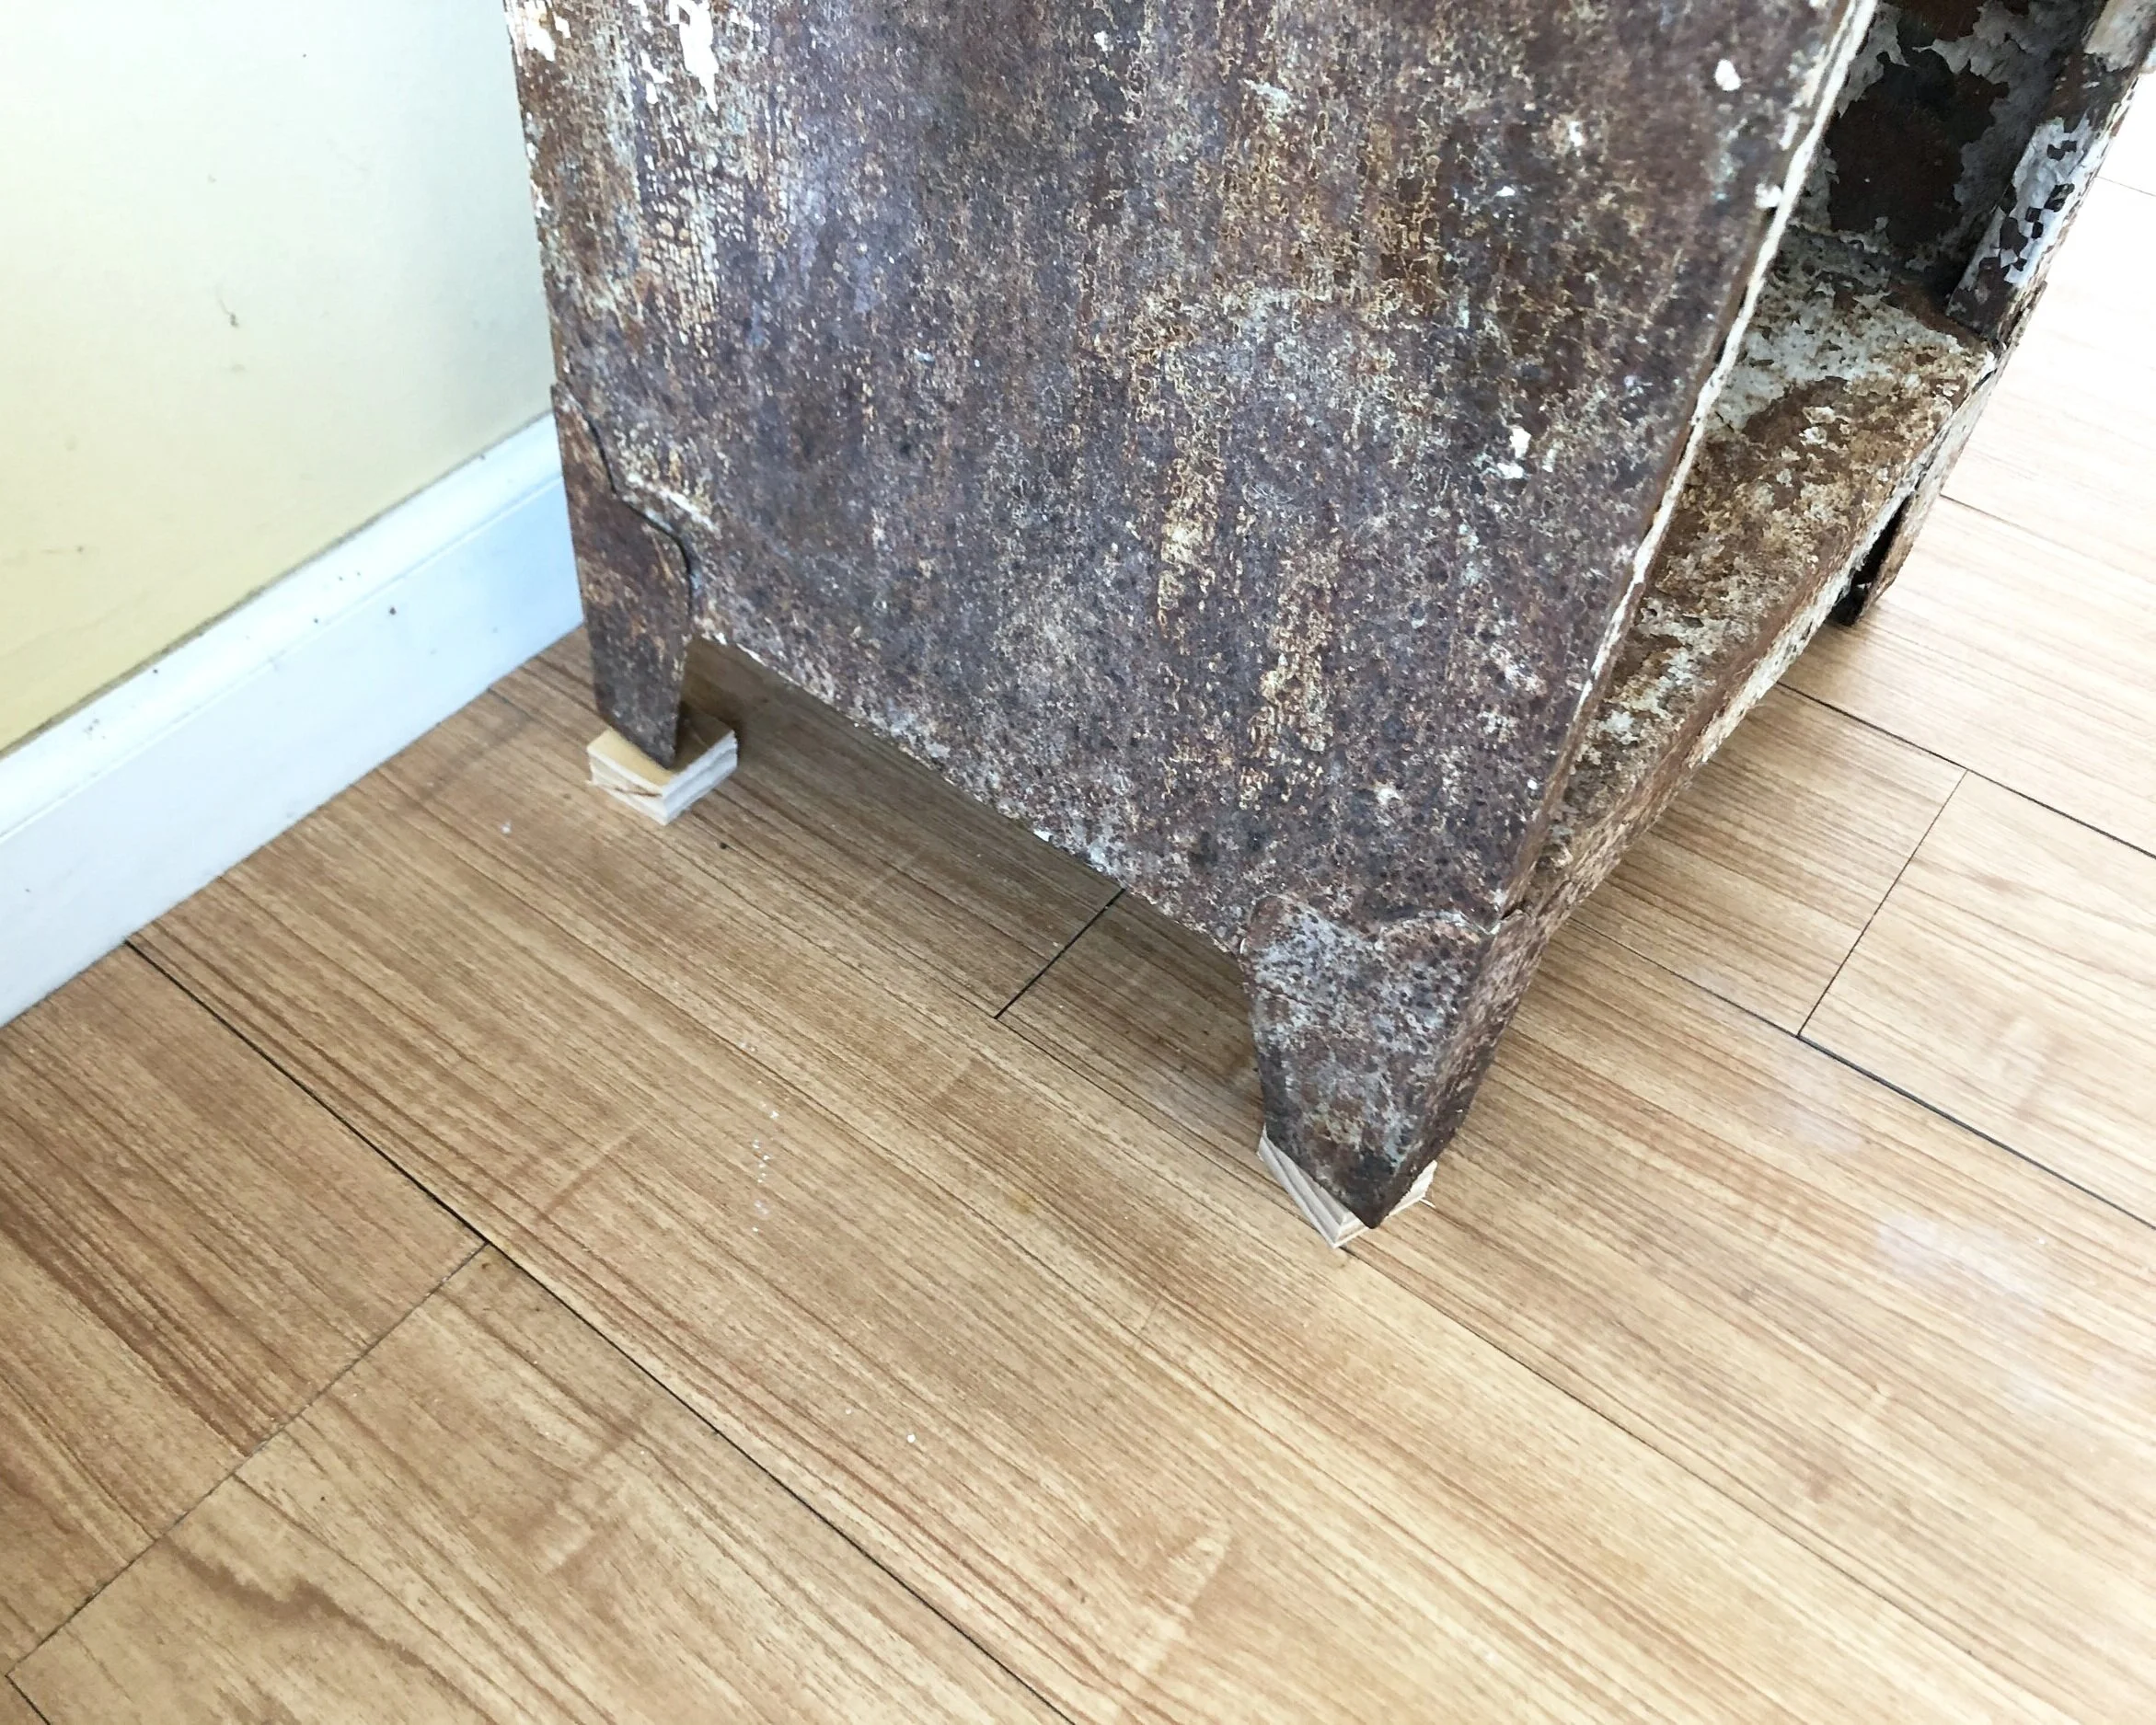
Rusty locker / metal cabinet repurposed for a mudroom sunporch. Turn an antique chipped paint locker into a shoe holder for your mudroom. Frugal rustic farmhouse furniture for your storage needs.

On one of the shelves I added a bucket to store bug spray and sunscreen. It took me forever to find a piece of chalk so I could write sunscreen & bug spray on the front of that lol! Oh the mom life, gotta love it! Next to that I put a wire basket and filled it with the bubbles and jump ropes that the girls got for Easter. If you need a cheap Easter craft for your rustic home decor check out this adorable moss bunny sign I made this year.

Rusty locker / metal cabinet repurposed for a mudroom sunporch. Turn an antique chipped paint locker into a shoe holder for your mudroom. Frugal rustic farmhouse furniture for your storage needs.

I don’t think I could have found a more perfect shoe holder for this space. It’s unique and beautifully imperfect just like our family.
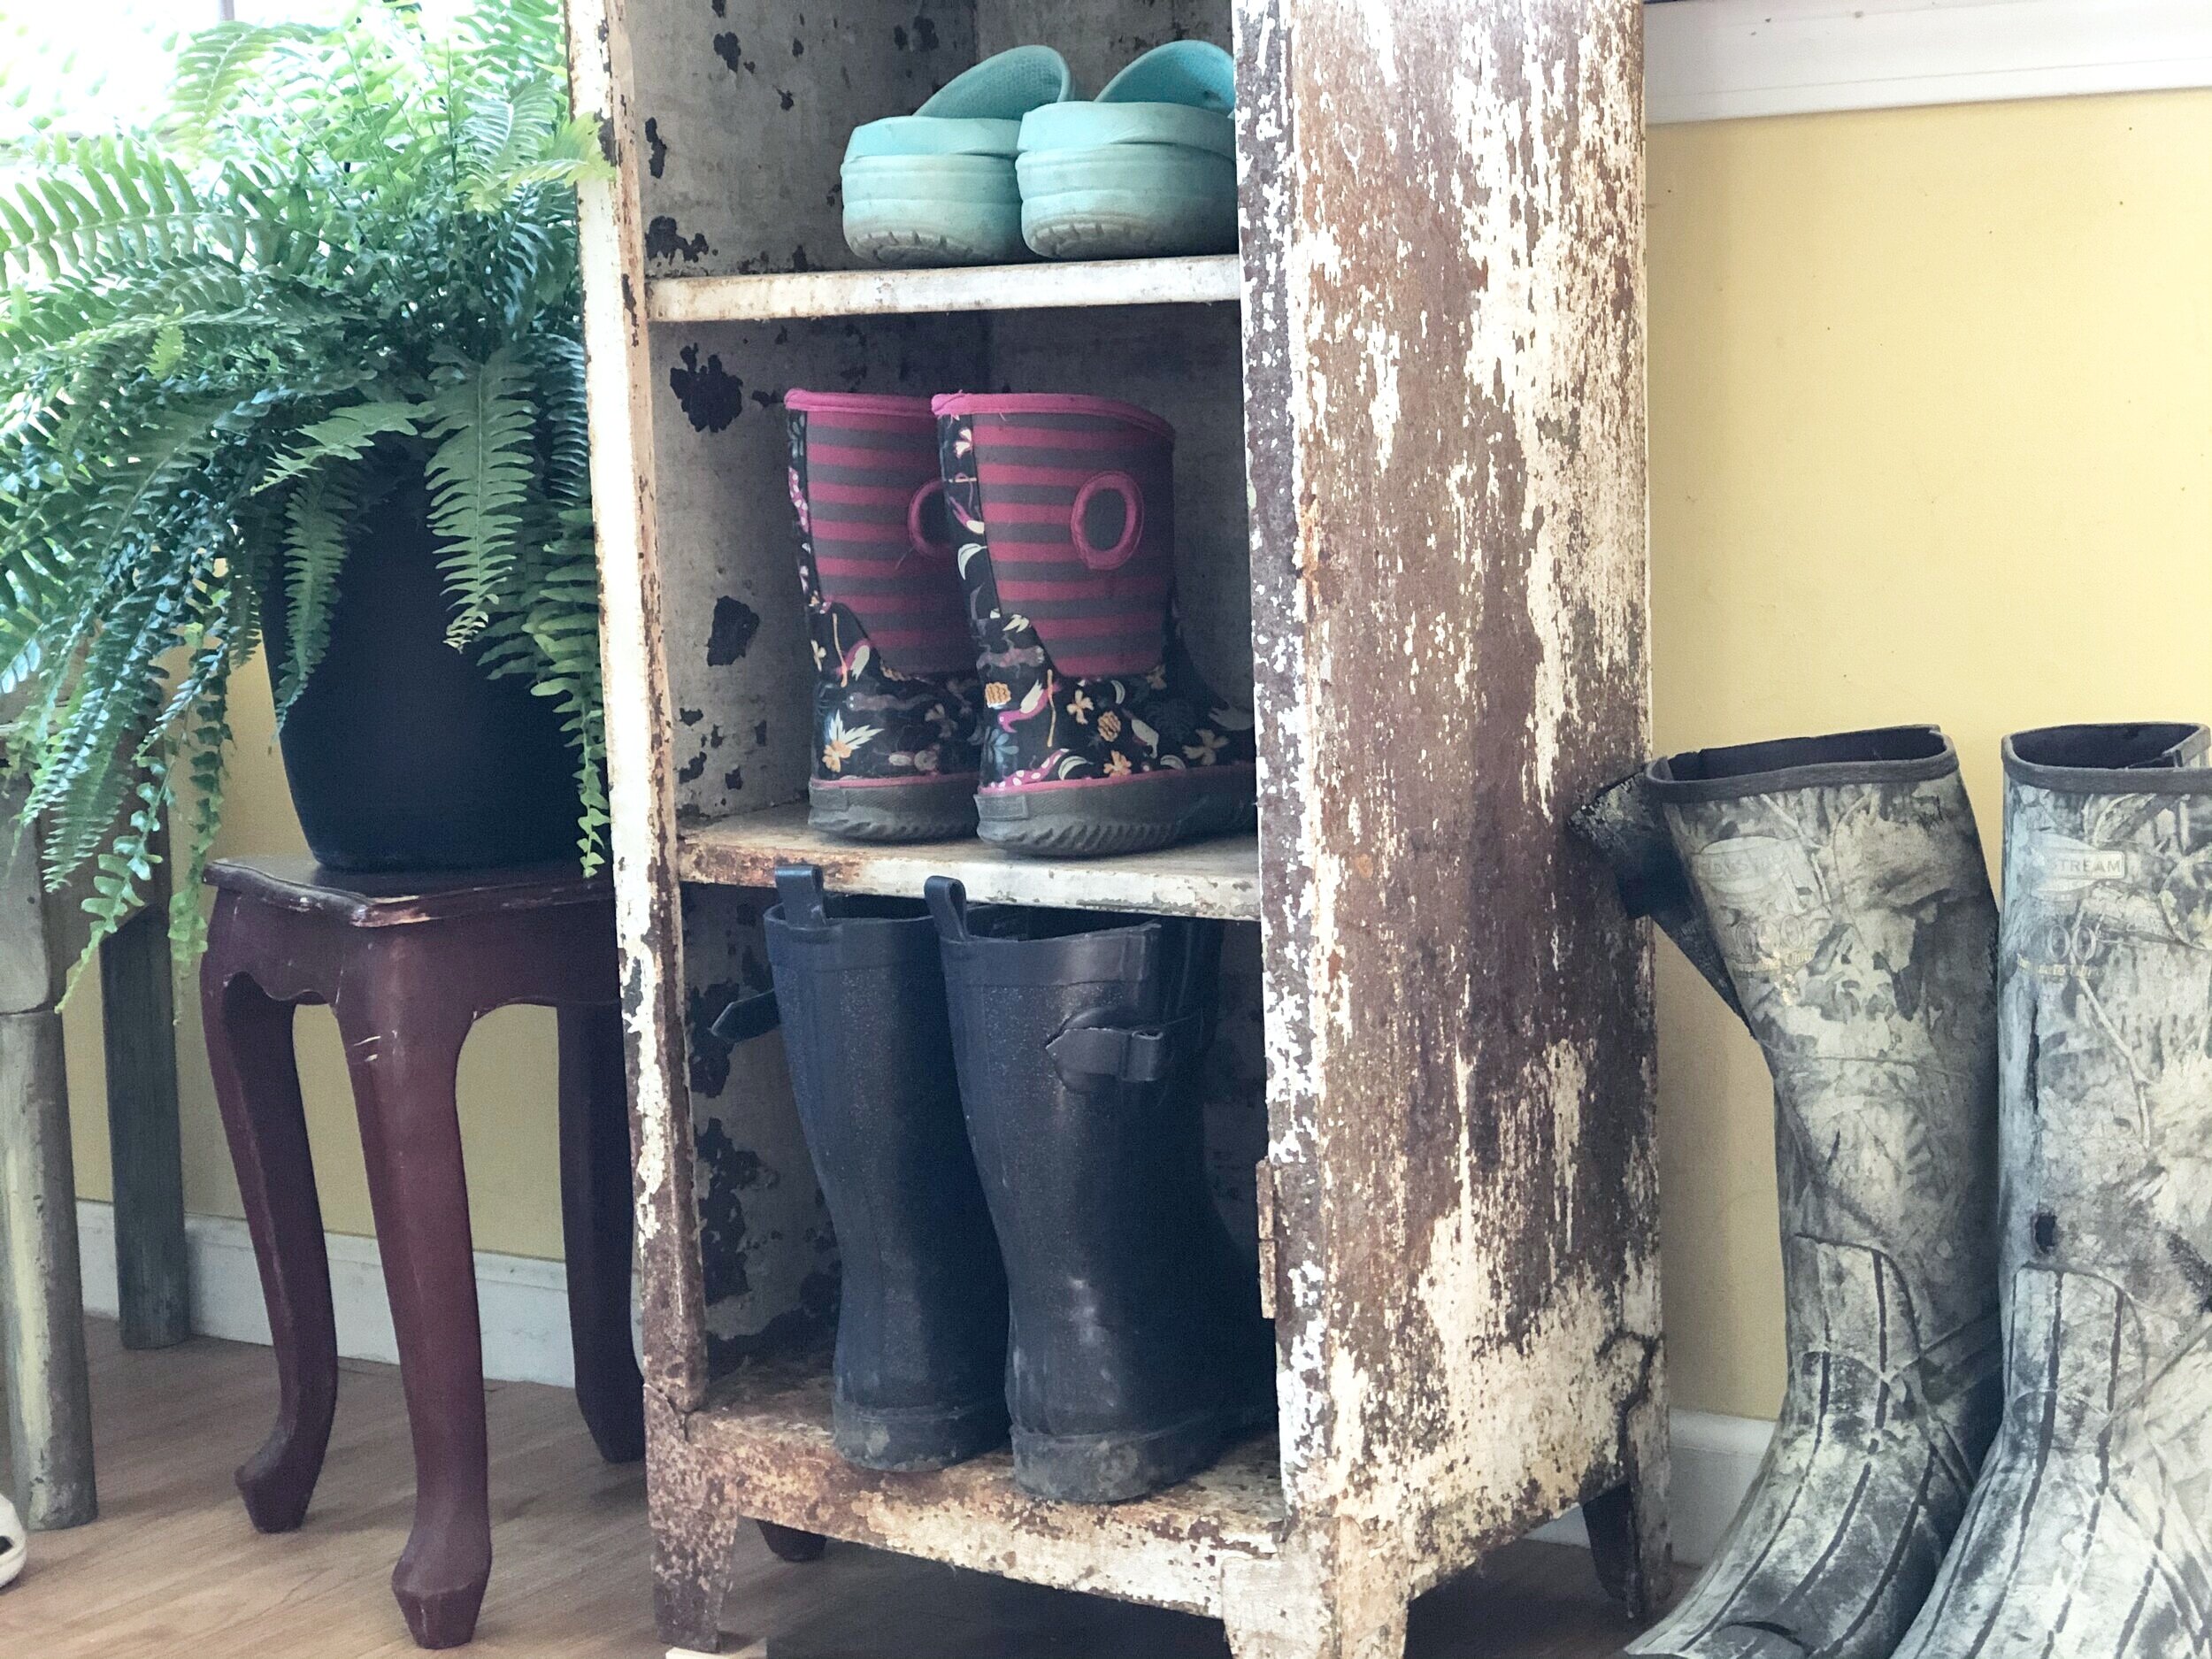
Rusty locker / metal cabinet repurposed for a mudroom sunporch. Turn an antique chipped paint locker into a shoe holder for your mudroom. Frugal rustic farmhouse furniture for your storage needs.

Let me know if you have any questions in the comments below.

family water tracker + FREE PRINTABLE

FREE PRIBTABLE family water tracker. Download this free water tracking print to use as a family. Help and encourage your kids to keep hydrated with the modern print to put in your home. Place in a picture frame and use a dry erase marker to check th…

FAMILY WATER TRACKER + FREE EDIT FRIENDLY PRINTABLE

Do you struggle with getting your kiddos to drink water throughout the day? Yes, same momma! I am right there with ya. I feel like a broken record always reminding my girls to drink more water on a daily basis.

So much so that I created a printable {that I’m giving to you for FREE;) } so that my girls can start tracking their own water intake. I’m hopeful that this works and that it makes us all more aware of how important it is to keep our bodies properly hydrated.

Affiliate Disclosure. Some of the links on this website are affiliate links, which means that I may earn a small commission if you click on the link or make a purchase using the link. If you make a purchase you will not be charged anything additional.

FREE PRIBTABLE family water tracker. Download this free water tracking print to use as a family. Help and encourage your kids to keep hydrated with the modern print to put in your home. Place in a picture frame and use a dry erase marker to check th…

I made my custom water tracker in Canva. If you’ve never used that site before you are missing out. The version I use is totally free but if you want to upgrade to their paid for version you can do that too.

This water tracking printable is completely EDITABLE! Click here to get access to the link in my FREE RESOURCE LIBRARY.

After you open the link it will take you to editable version in Canva. There you can completely customize this print to fit the needs for you own household. I just used letters for my girls but you can add your kiddo’s names, and change up the size of the font too.

FREE PRIBTABLE family water tracker. Download this free water tracking print to use as a family. Help and encourage your kids to keep hydrated with the modern print to put in your home. Place in a picture frame and use a dry erase marker to check th…

When you are all done click the download button to save it to your computer, open the document then send it to your printer. If you need to adjust the size of yours you can do that there. I printed mine at 83% on my print settings. I used a simple HP printer and regular copy paper to print out my family water tracker.

I trimmed my printout down using this paper trimmer. I LOVE this handy tool. I didn’t realize how often I actually would use it till I bought it.

FREE PRIBTABLE family water tracker. Download this free water tracking print to use as a family. Help and encourage your kids to keep hydrated with the modern print to put in your home. Place in a picture frame and use a dry erase marker to check th…

I placed it in a picture frame I picked up on clearance at Walmart. I have a dry erase marker by it, one with a felted cap eraser, sitting by it so the girls can mark off the glasses they drink daily.

FREE PRIBTABLE family water tracker. Download this free water tracking print to use as a family. Help and encourage your kids to keep hydrated with the modern print to put in your home. Place in a picture frame and use a dry erase marker to check th…

I’m so hopeful this helps all of us make better choices to keep our bodies hydrated and I hope that I can keep some of my sanity by not reminding my girls to drink water instead of chocolate milk or tea on a daily basis.

I hope you enjoy this free printable. Let me know if you have any questions in the comments below.

Kid's gingerbread house decorating party

Kid friendly gingerbread house decorating party using graham crackers. How to have a stress free Christmas tradition party with your kids. Decorating gingerbread houses as a family. How to make easy gingerbread houses for kids.

Kid friendly gingerbread decorating party using graham crackers

Christmas with kids is always fun. There’s so many traditions you can start with them. Like baking cookies, making Christmas stockings, and decorating gingerbread houses to name a few.

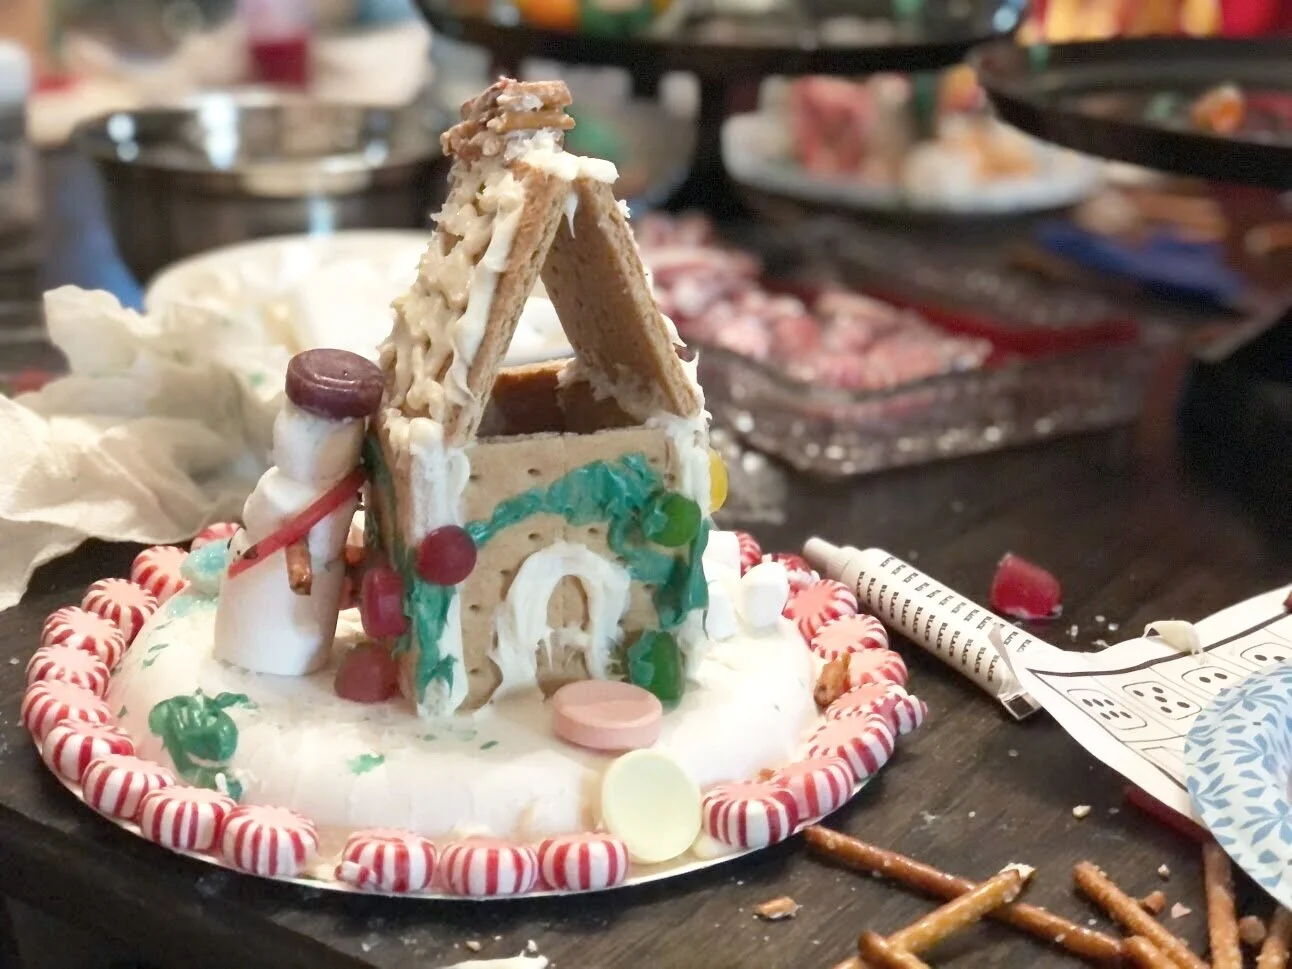
We made graham cracker gingerbread houses last night and it was so much fun! And my stress level was at a ZERO! Yes, a zero. If you are a momma of multiples, especially multiples that are stair steps, you know what I’m talking about. Things like this can stress us out. My secret to a no stress gingerbread making party? Let the kids have fun and don’t worry about any of it being pretty or perfect. That’s it!

Affiliate Disclosure. Some of the links on this website are affiliate links, which means that I may earn a small commission if you click on the link or make a purchase using the link. If you make a purchase you will not be charged anything additional.

Kid friendly gingerbread house decorating party using graham crackers. How to have a stress free Christmas tradition party with your kids. Decorating gingerbread houses as a family. How to make easy gingerbread houses for kids.

Don’t get me wrong the pictures on Pinterest with the perfectly decorated “kid” made gingerbread houses are absolutely adorable. A picture perfect graham cracker house with a tiny little spill of sprinkles on the table and a dab of out of place frosting is oh so cute…but let’s be honest that’s not likely to happen in most homes with little ones. As a mom of 4 I KNOW this lol! And really, where’s the fun if there’s not a GIANT MESS of sprinkles, crumbs of graham crackers, frosting smeared on their faces and broken candy canes to pick up?

Kid friendly gingerbread house decorating party using graham crackers. How to have a stress free Christmas tradition party with your kids. Decorating gingerbread houses as a family. How to make easy gingerbread houses for kids.

So let’s ditch the vision of perfectly put together Christmas gingerbread houses and embrace that beautiful chaos. Those are the moments you are connecting with kids. Those are the moments your kids are learning. Those are the moments that matter.

GRAHAM CRACKER GINGERBREAD HOUSE YOUR KIDS WILL ENJOY MAKING

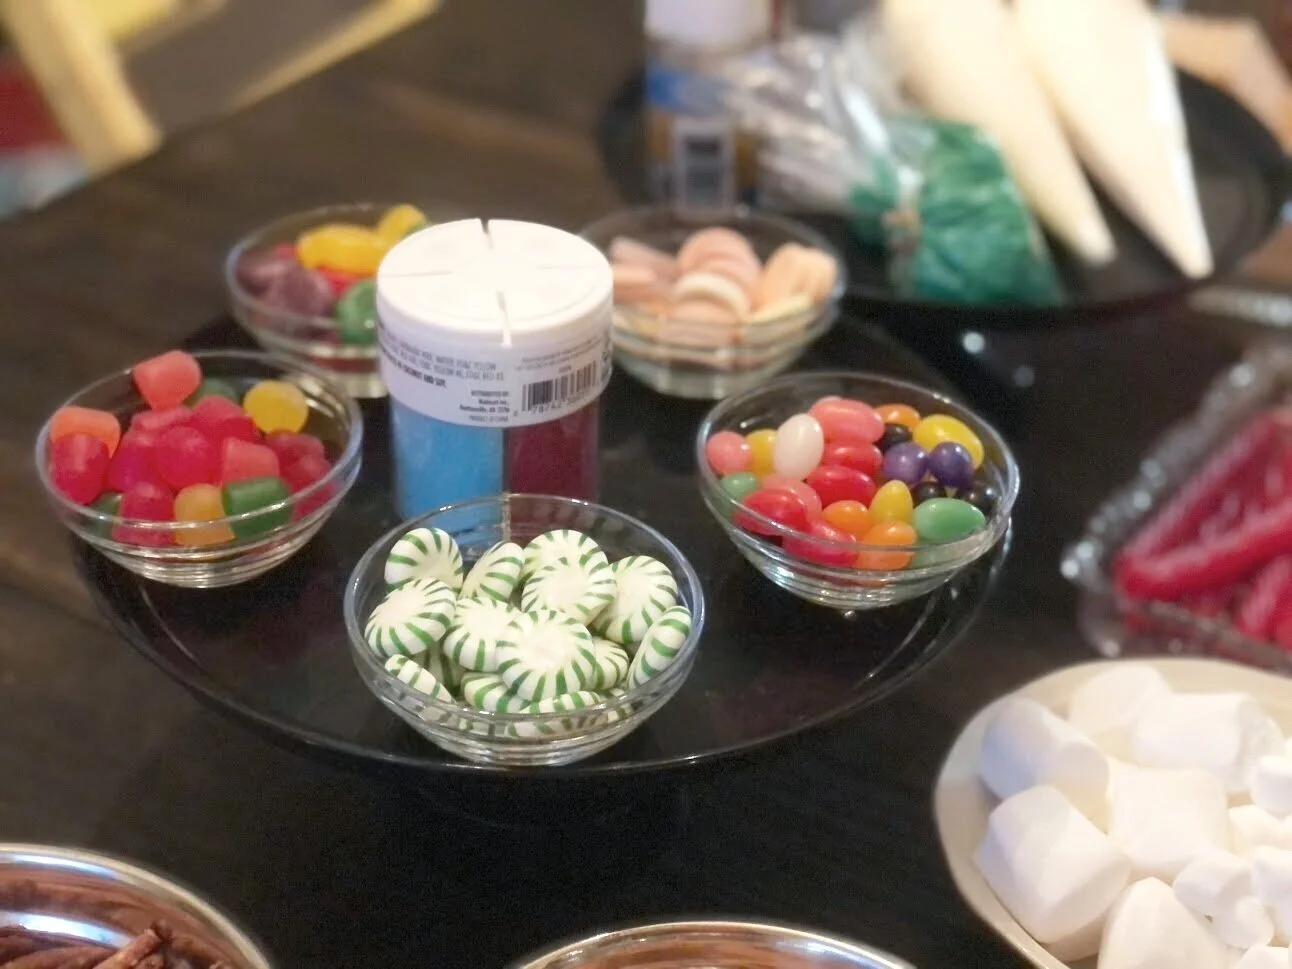
Most of the supplies I picked up at my local Dollar Tree. Here’s what we used

Kid friendly gingerbread house decorating party using graham crackers. How to have a stress free Christmas tradition party with your kids. Decorating gingerbread houses as a family. How to make easy gingerbread houses for kids.
  • graham crackers

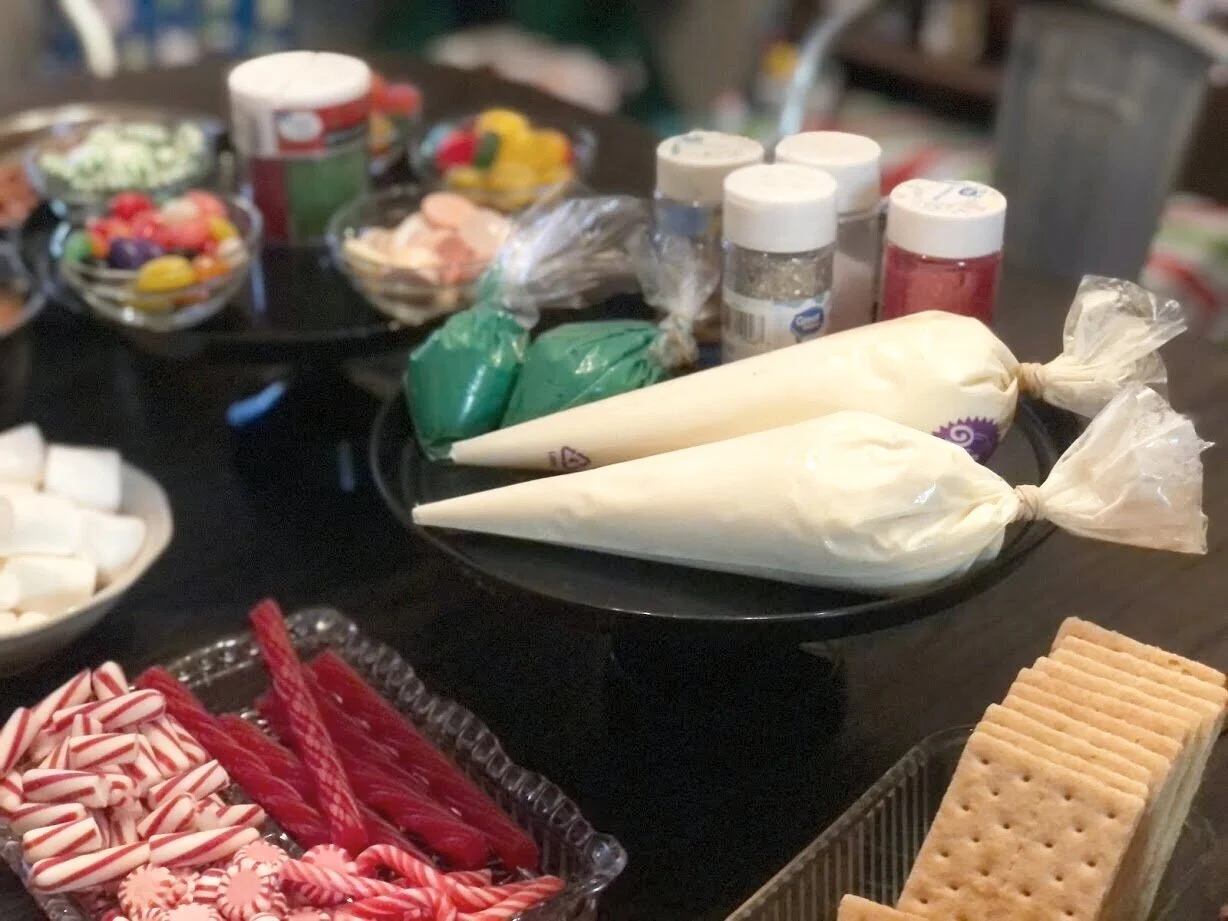
  • 2 tubs of cream cheese frosting

  • green food coloring

  • mini candy canes

  • gumdrops

  • assorted hard candies

  • large spree candies

  • twizzlers pull and peel

  • red and white round peppermints

  • green and white peppermints

  • mini & regular sized marshmallows

  • jellybeans

  • traditional pretzels

  • large & mini pretzel sticks

  • sprinkles

Other supplies that we used:

To free up space we used cake stands to hold the candies that were in these little glass condiment dishes. I love these little dishes. They are super cheap, only $.25 each! This got them up and off of the table so that the girls would have more space to create.

Kid friendly gingerbread house decorating party using graham crackers. How to have a stress free Christmas tradition party with your kids. Decorating gingerbread houses as a family. How to make easy gingerbread houses for kids.

We used another cake stand to hold the sprinkles and the bags of frosting. The frosting I used, generic cream cheese frosting in a can, wasn’t really the best for this but it works. It doesn’t set up/dry super fast but it works. We also stuck the bags of frosting in the fridge about an hour before we started decorating so that the icing would be more firm to work with.

Kid friendly gingerbread house decorating party using graham crackers. How to have a stress free Christmas tradition party with your kids. Decorating gingerbread houses as a family. How to make easy gingerbread houses for kids.

Each daughter got a paper plate to make their gingerbread house on.

Kid friendly gingerbread house decorating party using graham crackers. How to have a stress free Christmas tradition party with your kids. Decorating gingerbread houses as a family. How to make easy gingerbread houses for kids.

They played around with different designs then started “gluing” their pieces together using the bags of icing.

Kid friendly gingerbread house decorating party using graham crackers. How to have a stress free Christmas tradition party with your kids. Decorating gingerbread houses as a family. How to make easy gingerbread houses for kids.

After their houses set up, the frosting had hardened a bit, they decorated their little hearts out!

Kid friendly gingerbread house decorating party using graham crackers. How to have a stress free Christmas tradition party with your kids. Decorating gingerbread houses as a family. How to make easy gingerbread houses for kids.

I always love seeing their creativity take flight. They kept adding and adding candies thinking of new ways they could use all the different colors and shapes.

Kid friendly gingerbread house decorating party using graham crackers. How to have a stress free Christmas tradition party with your kids. Decorating gingerbread houses as a family. How to make easy gingerbread houses for kids.

My third daughter was the only one to make a snowman out of the marshmallows. He was adorable with his little hard candy hat and twizzler scarf.

Kid friendly gingerbread house decorating party using graham crackers. How to have a stress free Christmas tradition party with your kids. Decorating gingerbread houses as a family. How to make easy gingerbread houses for kids.

I love the doorway my first born daughter made using the marshmallows.

Kid friendly gingerbread house decorating party using graham crackers. How to have a stress free Christmas tradition party with your kids. Decorating gingerbread houses as a family. How to make easy gingerbread houses for kids.

And this super creative door crafted by daughter number 2 made into the shape of a heart using mini peppermint sticks. Adorable!

Kid friendly gingerbread house decorating party using graham crackers. How to have a stress free Christmas tradition party with your kids. Decorating gingerbread houses as a family. How to make easy gingerbread houses for kids.

Last but not least is the masterpiece from daughter number 4. Oh the love that was put into this. It may look like a mess to others but she had THE MOST fun making this. After her original house fell she turned the rubble into a work of gingerbread house art!

Sure our houses weren’t perfect by Pinterest standards but it doesn’t even matter. For a couple of hours our family sat around our kitchen table and had the best time singing random songs, cracking jokes, teasing one another, and making memories. AND there wasn’t an argument one! I know, super rare for a family with 4 kiddos. It was a perfect Christmas themed evening.

Check out more kid friendly crafts below.

Christmas stocking party with the kids

How to have a stress free stocking party with your kids. Make cute Christmas stockings out of drop cloths. DIY Christmas stockings plus a free sock stocking SVG to use with your Cricut.

KID MADE CHRISTMAS STOCKINGS

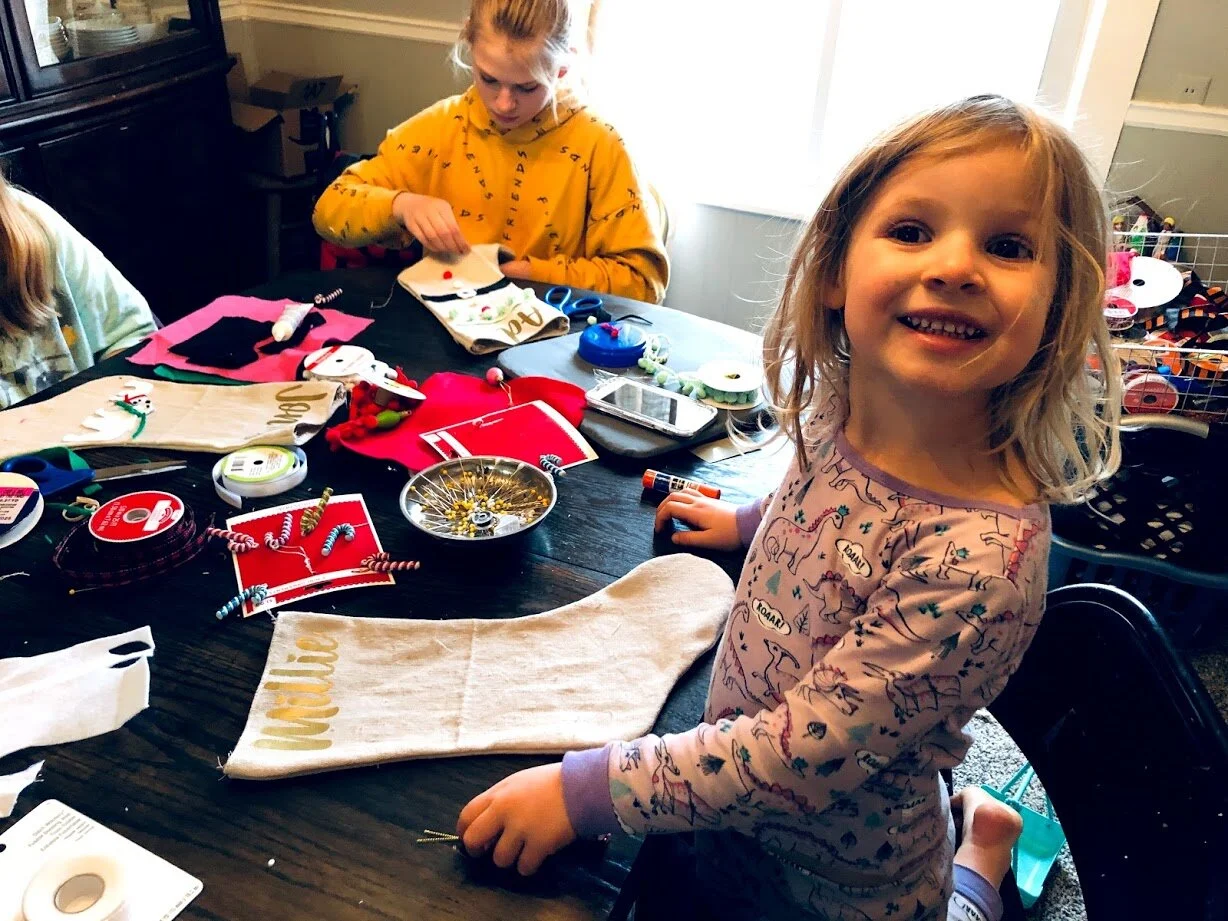
Making Christmas stockings with my girls is one of my most favorite Christmas traditions we do. Every year my four daughters and I sit around the table that is basically a big mess of Christmas craft supplies and make stockings. We break out the glitter, felt, ribbons, fabric markers, bells, buttons… all the things. And I let them create whatever their little hearts want.

Granted they don’t look perfect or match lol but we have so much fun and the memories are priceless. Sometimes I’ll give my momma input as to what might look good but mostly I’m there to help, encourage, and tell them their stockings look amazing.

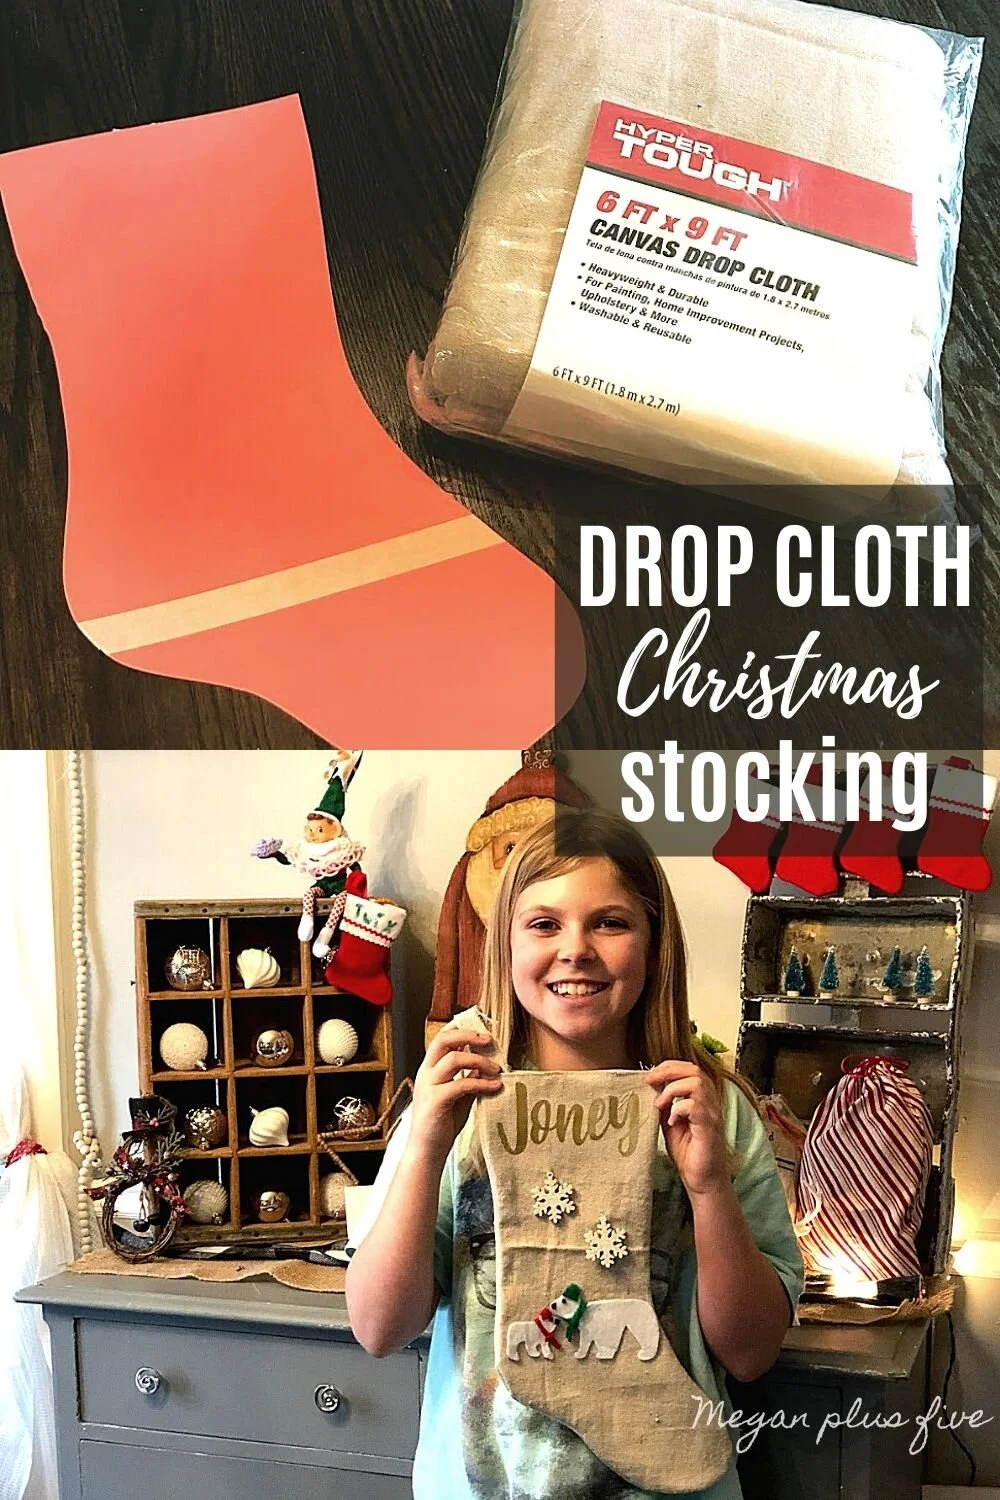
This year I was browsing Instagram and came across Heide’s post from Everyday Cookies- Heide. She shared a gorgeous pic of her handmade Christmas stockings that she had made from a DROP CLOTH! You guys, my mind was blown!

Affiliate Disclosure. Some of the links on this website are affiliate links, which means that I may earn a small commission if you click on the link or make a purchase using the link. If you make a purchase you will not be charged anything additional.

How to have a stress free stocking party with your kids. Make cute Christmas stockings out of drop cloths. DIY Christmas stockings plus a free sock stocking SVG to use with your Cricut.

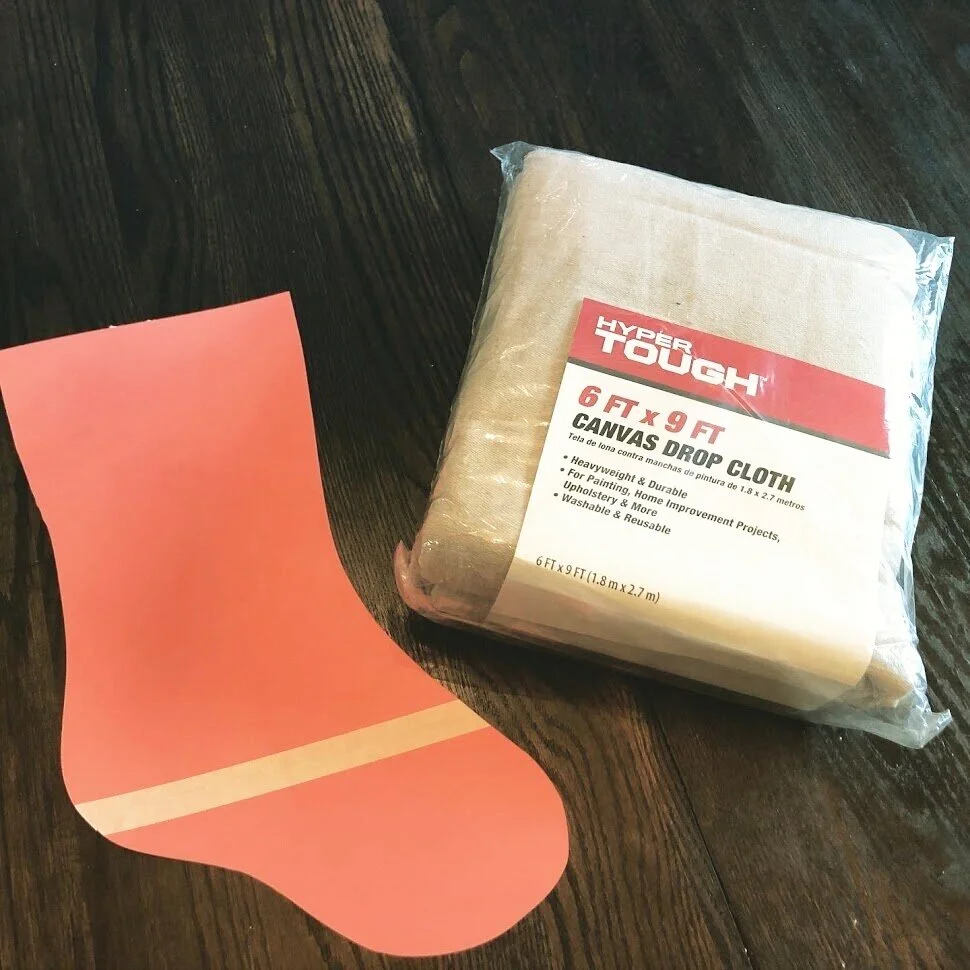
I honestly never thought to use a drop cloth for a Christmas stocking! But it was SO PERFECT. The natural color of the drop cloth was just what I had in mind for making our stockings this year.

The best part is that the drop cloth was cheaper than buying traditional fabric and I have so much left over for LOTS more projects.

Use the same Christmas stocking SVG I used for free —-> CLICK HERE

HOW TO HAVE A CHRISTMAS STOCKING PARTY

Here are some basic supplies you need

1. SEW STOCKINGS

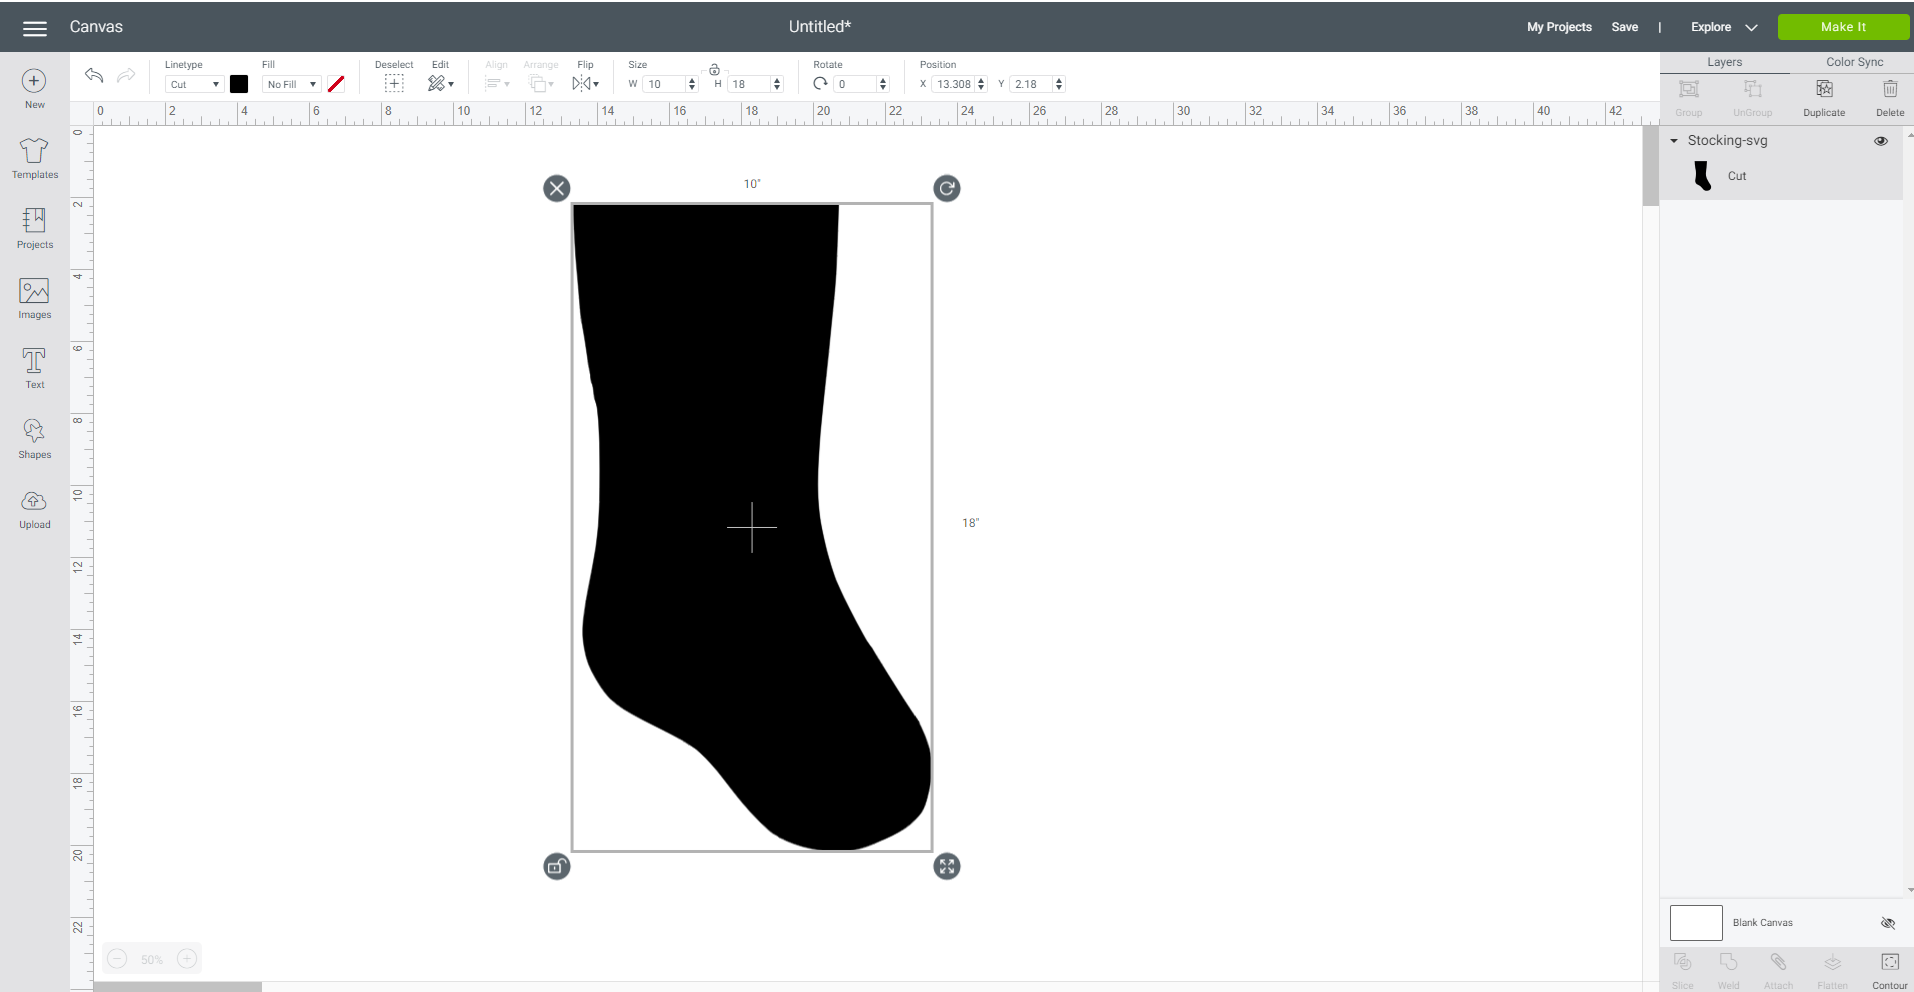
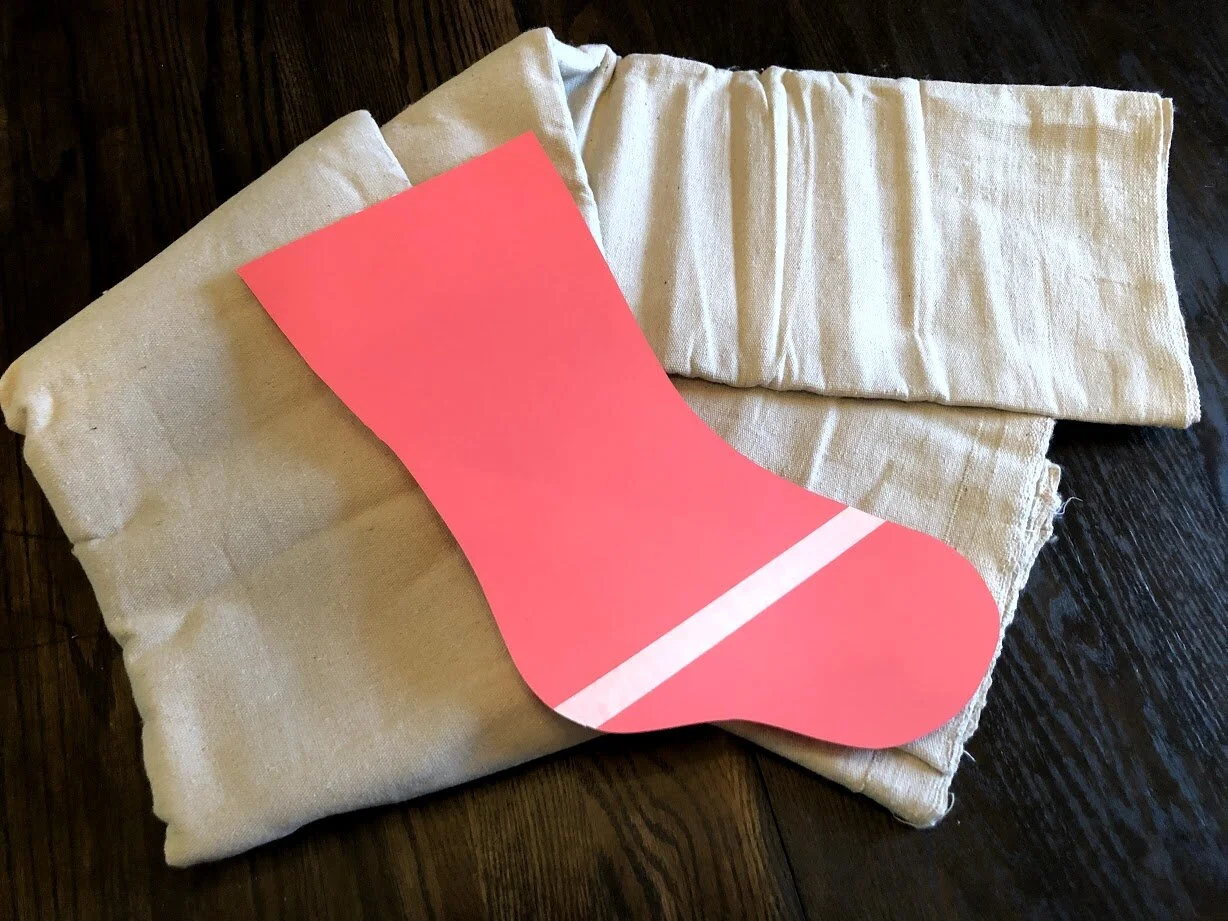
I made a template on my computer then I cut it out on cardstock using my Cricut cutting machine. I didn’t have long enough cardstock so I butted two pieces of 12”x12” cardstock and taped them together. I used this same style when I made this wooden mermaid tale cupcake stand.

I re-sized my stocking template to 10”wide by 18” long in Cricut Design space.

How to have a stress free stocking party with your kids. Make cute Christmas stockings out of drop cloths. DIY Christmas stockings plus a free sock stocking SVG to use with your Cricut.

I don’t have a video, or pictures of this but it was pretty simple. You will need to cut out two stockings, one for the front and one for the back. The pin them together and sew around the stocking leaving the top open. Then turn the stocking inside out so that the sewed seam is now on the inside of the stocking. I will get a video of this process up asap.

How to have a stress free stocking party with your kids. Make cute Christmas stockings out of drop cloths. DIY Christmas stockings plus a free sock stocking SVG to use with your Cricut.

2. ADD NAMES

I used my Cricut to cut names out of HTV (heat transfer vinyl) prior to the girls decorating their Christmas stockings.

To keep it easy, because I was cutting out 5 names (my four girls plus a friend), I had them agree on a color that all 5 names would be cut from. They chose a gold color.

We used my mini Cricut EasyPress to press the names on the stockings. I let the older girls do this and helped when they needed it. If you don’t have a mini EasyPress I highly recommend getting one if you do a lot of little crafty projects that require HTV. I have used this little handy press more than I actually thought I would. And it’s perfect for my teen & preteen to use because it’s easy to hold and manage.


3. DECORATE

I picked up several packages of mini Christmas embellishments at my local Walmart of snowflakes, candy canes, vintage looking lights, and a few more.

How to have a stress free stocking party with your kids. Make cute Christmas stockings out of drop cloths. DIY Christmas stockings plus a free sock stocking SVG to use with your Cricut.

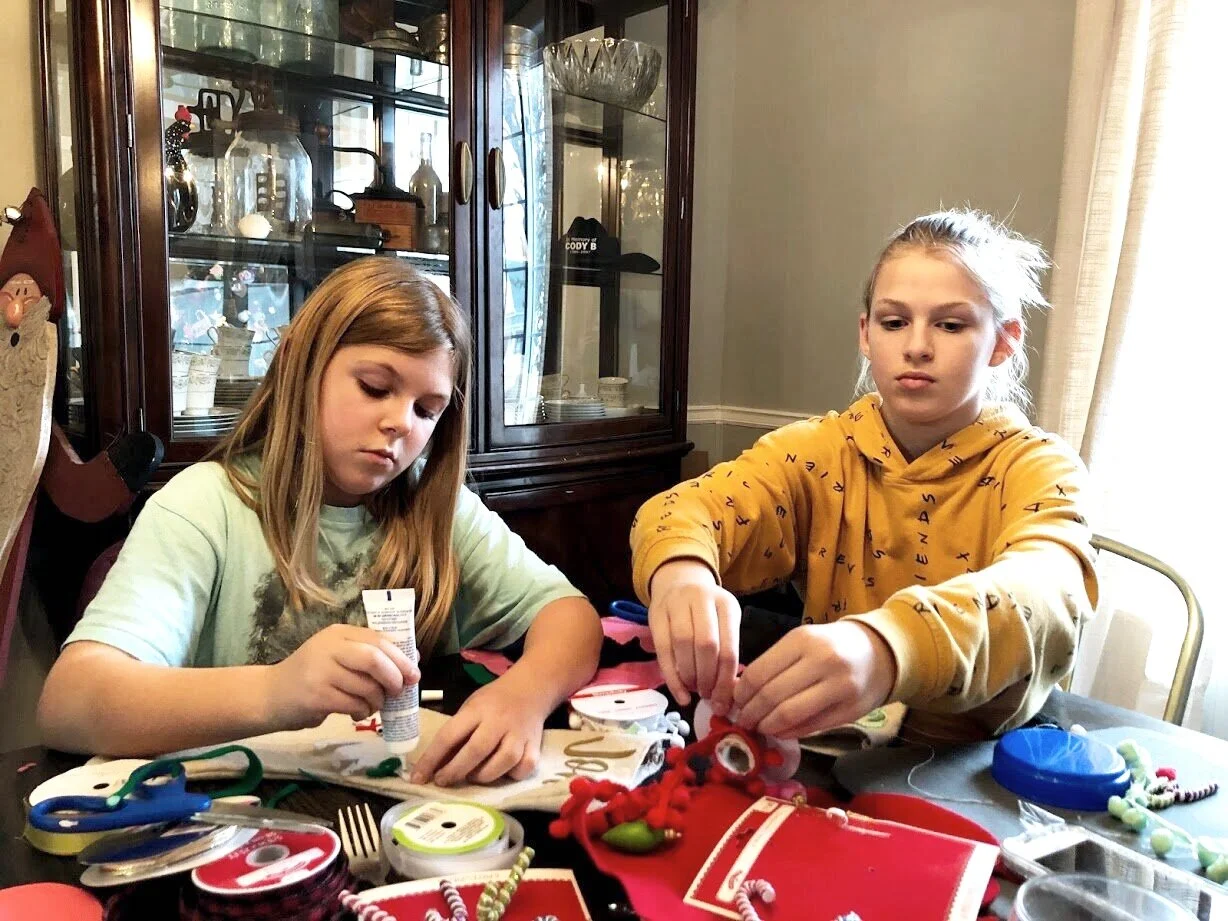
We also pulled out my ribbons, felts, yarns, and buttons. Everything was put on the table in one big beautiful Christmas craft explosion. Sometimes it’s just better to embrace the mess than it is to try and keep all the things organized and tidy. They even brought out a fork to make pom poms (just in case you noticed there was a fork in the picture below lol).

How to have a stress free stocking party with your kids. Make cute Christmas stockings out of drop cloths. DIY Christmas stockings plus a free sock stocking SVG to use with your Cricut.

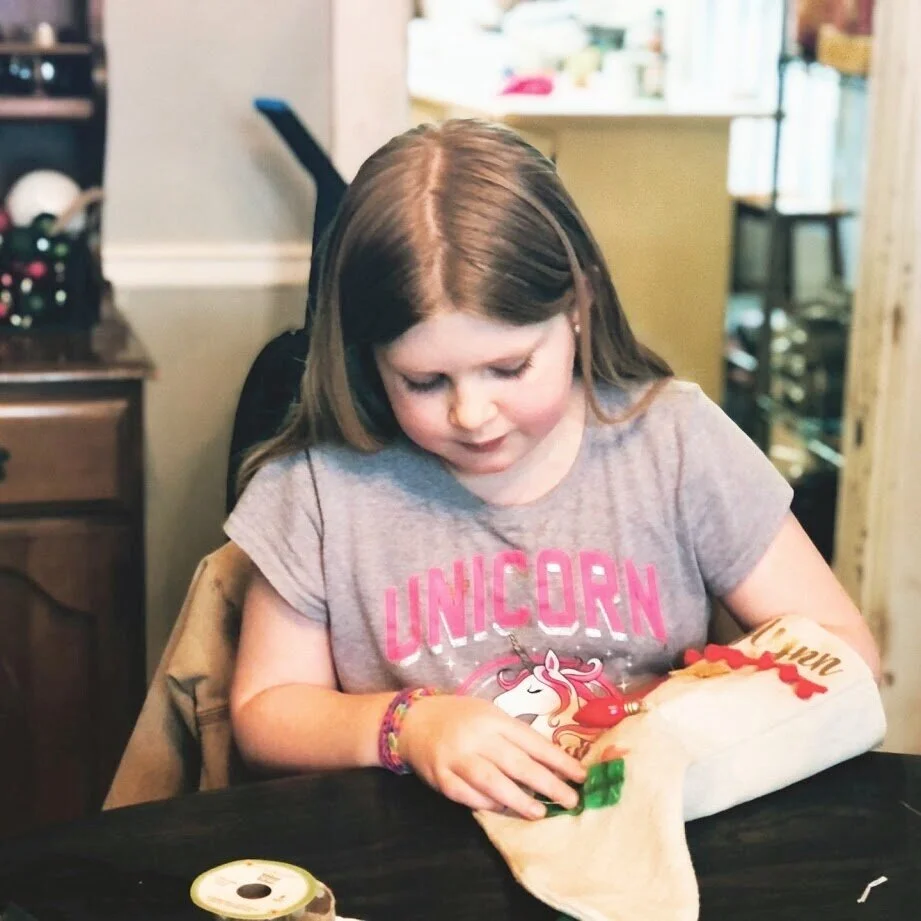
I encourage my girls to try using the tools, like my daughter in the pic below hand sewing on an embellishment, before I step in and help. It’s so important for us parents to let our kiddos do things on their own so they can learn.

How to have a stress free stocking party with your kids. Make cute Christmas stockings out of drop cloths. DIY Christmas stockings plus a free sock stocking SVG to use with your Cricut.

4. ADD HANGER

Don’t forget to add a hanger. We did this step last and all of the girls came up with something different. One used yarn, two of the girls used a piece of the drop cloth, and the other two used different kinds of ribbon. We tacked these on using a needle and thread then I reinforced them with the hot glue gun.

How to have a stress free stocking party with your kids. Make cute Christmas stockings out of drop cloths. DIY Christmas stockings plus a free sock stocking SVG to use with your Cricut.

Didn’t their Christmas stockings turn out SO cute?!

My girls and I enjoy this so much every single year. Mostly because I let them just go to town and create whatever their little hearts want on their Christmas stockings. Let me know if you have any questions in the comments below.

Happy Crafting!

Making leaf art with your kids

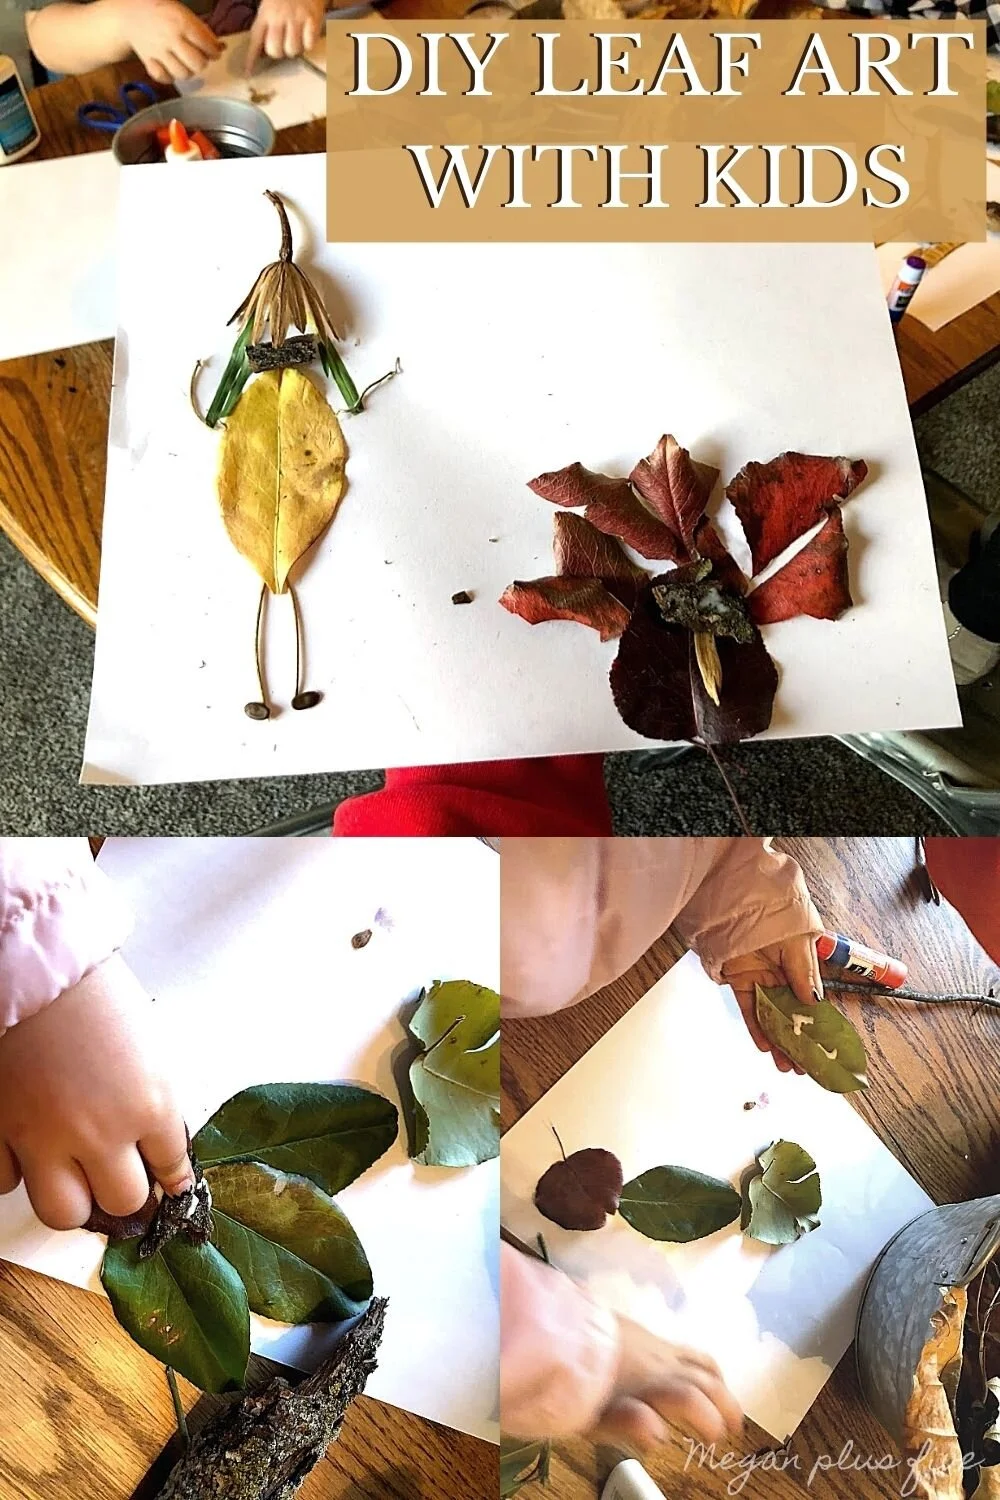
Leaf art with kids. Fun and easy leaf people and leaf turkeys for kids to make with their parents. Fun outdoor fall craft project to do with kids of all ages.

MAKING LEAF ART WITH YOUR KIDDOS

Whoa what a school year this has turned out to be for all of our kiddos. I know that virtual learning can be a lot of screen time but it also means that we get to have a lot of creative fun time with our kids too.

While we are learning at home I’m trying to plan fun things to do for the older kids and also things that will keep daughter #4 busy too since we are doing pre-k at home instead of the traditional pre-k we’ve always done. Today we made art. And not just any art, we made people and animals with leaves and other nature items.

Affiliate Disclosure. Some of the links on this website are affiliate links, which means that I may earn a small commission if you click on the link or make a purchase using the link. If you make a purchase you will not be charged anything additional.

Leaf art with kids. Fun and easy leaf people and leaf turkeys for kids to make with their parents. Fun outdoor fall craft project to do with kids of all ages.

CLICK HERE for more KIDS PROJECTS

And it was SO FUN!

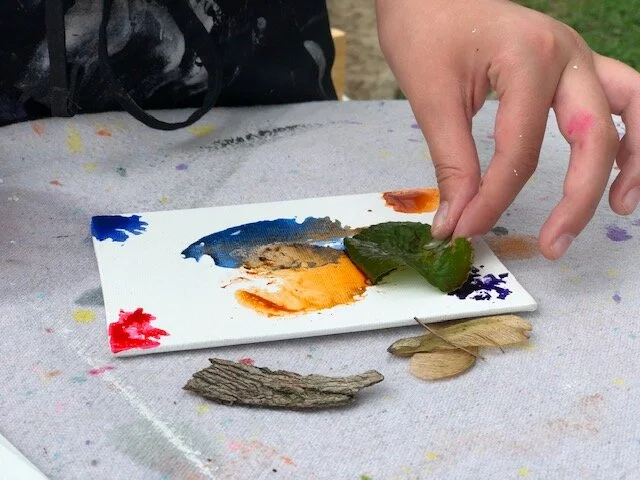
We’ve done something similar before, painting with nature click here to see how fun that turned out. But today we didn’t break out any paints. We just used the colors (and the option for markers for faces) that we found in the things that God gave to our backyard.

The older girls actually enjoyed it way more than my pre-k girl did which completely surprised me. I figured they would think it was “baby-ish” but they fully enjoyed this crafty project.

Making leaf art with your kids

STEP 1

Gather pieces of nature. We took a small basket outside and filled it with all kind of things (I purposefully didn’t take a big basket out there because I knew they would fill it FULL lol! The small one was more than enough materials for them to create with)

  • colorful leaves

  • twigs

  • some pine cone looking things

  • blades of grass

  • berries

  • vines

  • and whatever else the kiddos want to grab

STEP 2

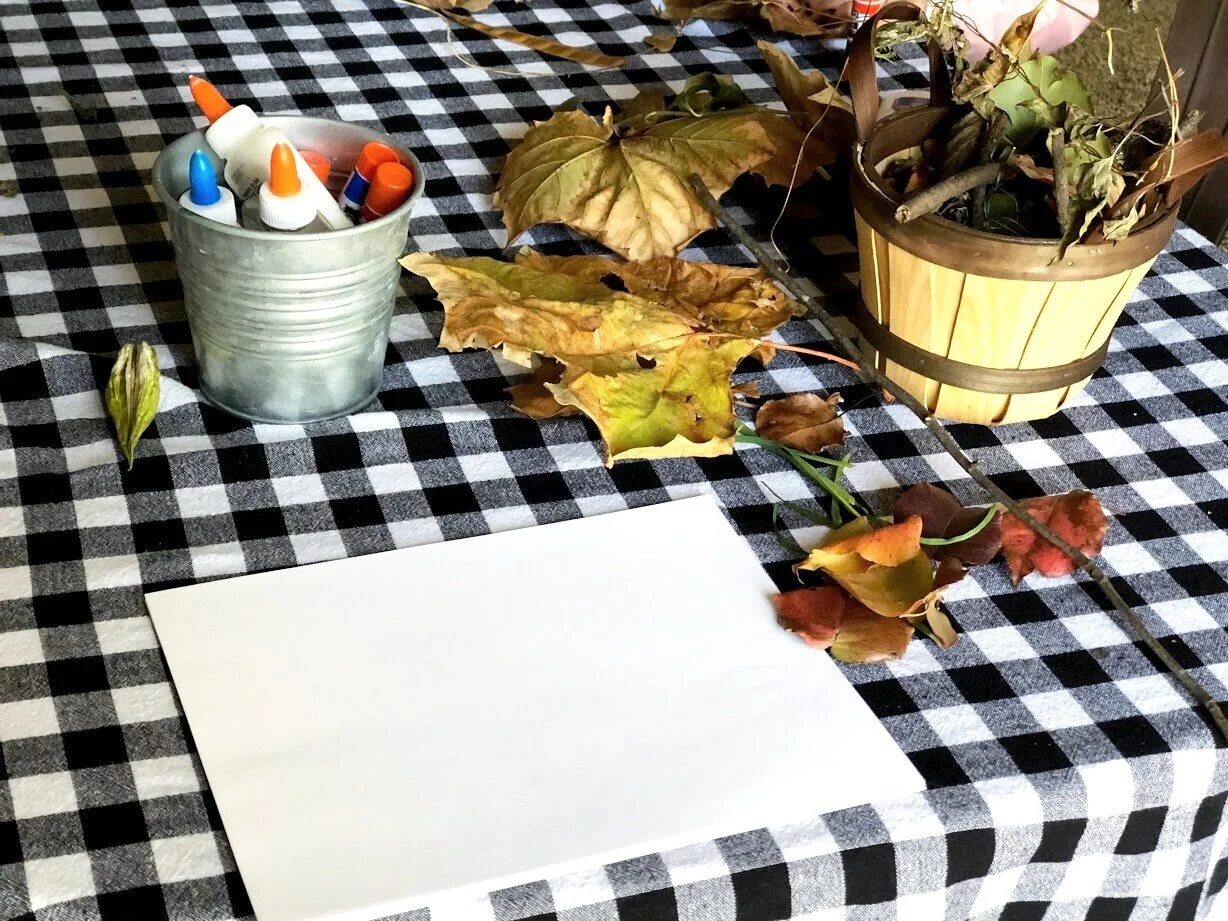
Bring it inside and set up a place where the kids can get messy. We used our dining room table and since we weren’t painting I didn’t mess with putting a drop cloth down.

I brought out our metal bin of glues, squeeze glue bottles and glue sticks, washable markers for if they wanted to add faces or anything their imaginations could think of, kid friendly scissors, and copy paper.

Leaf art with kids. Fun and easy leaf people and leaf turkeys for kids to make with their parents. Fun outdoor fall craft project to do with kids of all ages.

STEP 3

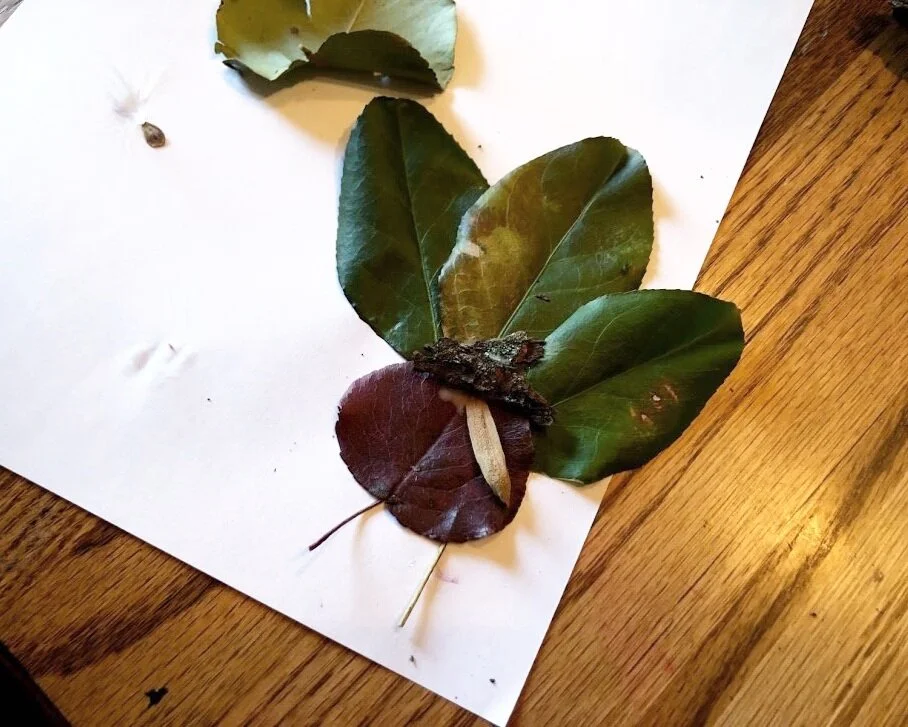
I helped my preschooler at first, showing her how we could create a Thanksgiving Day turkey out of the leaves and although she thought that was really cool she just wanted to glue whatever, and most importantly wherever to her piece of paper.

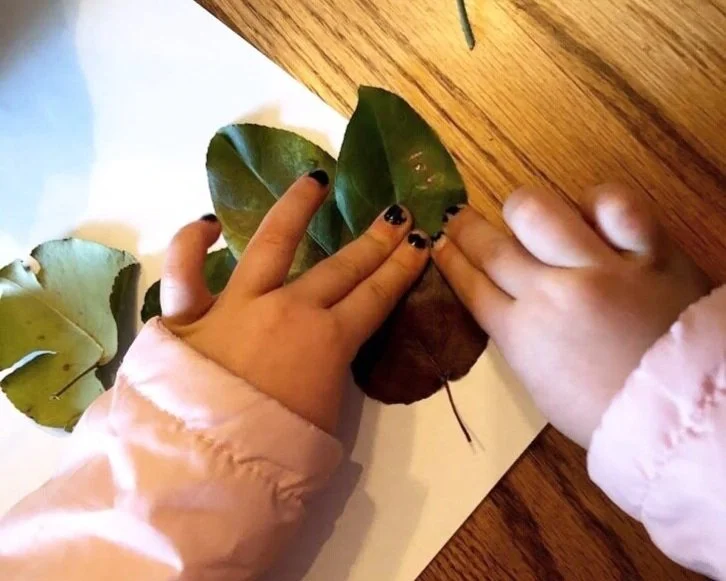
We took a round leaf and glued it down first

Then we took longer more oblong looking leaves and glued them behind the round leaf for the Turkey feathers.

Leaf art with kids. Fun and easy leaf people and leaf turkeys for kids to make with their parents. Fun outdoor fall craft project to do with kids of all ages.

My pre-k girl wanted to use a piece of bark for the head so that’s what we used.

Leaf art with kids. Fun and easy leaf people and leaf turkeys for kids to make with their parents. Fun outdoor fall craft project to do with kids of all ages.

For the gobble we glued a small skinny leaf like thing down and pushed it up so it was under the bark head.

Leaf art with kids. Fun and easy leaf people and leaf turkeys for kids to make with their parents. Fun outdoor fall craft project to do with kids of all ages.

For the legs we just added a second stem from another leaf and glue it in place using a glue stick.

The most important step of all though is to just enjoy this crafty art time with your kids. Let them make a mess. Let them create. Let them make mistakes and not feel like they have to be perfect.

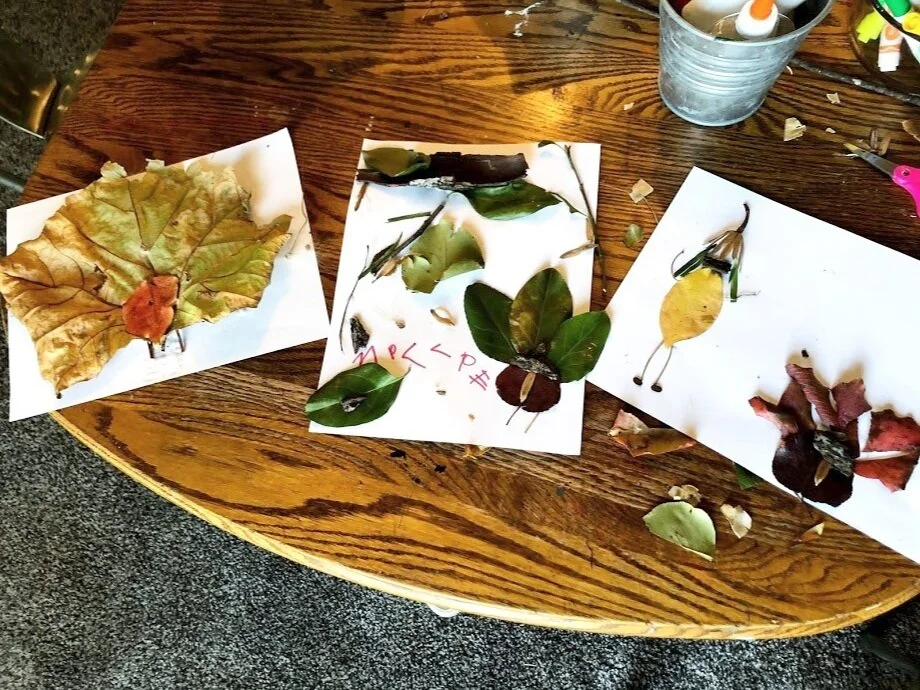
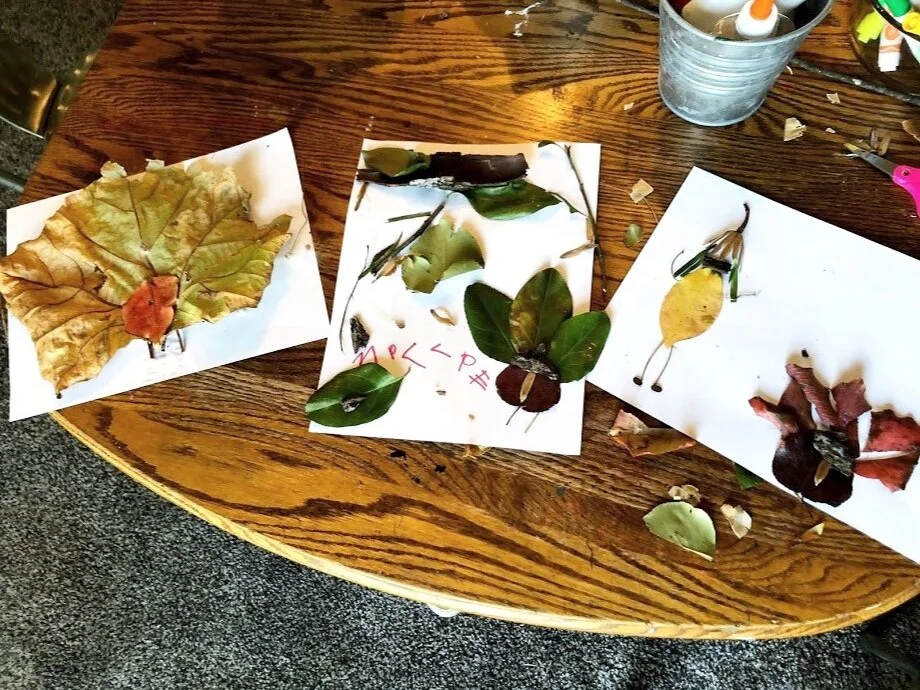
Here are a few finished leaf art pictures my girls made. I LOVE them! They were so creative and really took time to enjoy the whole process of this leaf art project. I can’t wait to do the next just for fun creative activity with them.

Leaf art with kids. Fun and easy leaf people and leaf turkeys for kids to make with their parents. Fun outdoor fall craft project to do with kids of all ages.

If you enjoy this craft with your kiddos be sure to check out this post on painting with nature.

Leaf art with kids. Fun and easy leaf people and leaf turkeys for kids to make with their parents. Fun outdoor fall craft project to do with kids of all ages.

A Christmas gift teens & tweens will LOVE!

DIY spa kits for teens. Great gift to give teens and tweens for Christmas is a DIY spa experiment recipe kit. Let them make their own lotions, bathbombs, essential oil sprays, soaps, face masks, and more.

DIY SPA KITS FOR TEENS

What does you preteen (tween), or teen want for Christmas? I don’t know about your kiddos but my girls are getting harder and harder to buy for the older they get.

I’m a momma of 4 girls, three of which are all with in 3 years of one another. They are stair steps and I love having them so close in age. One of the benefits is they are all kind of into the same things at the same time. But, this year the older 3 girls had just a few items on their Christmas wish lists, which isn’t a bad thing but it does make for more challenging shopping.

Affiliate Disclosure. Some of the links on this website are affiliate links, which means that I may earn a small commission if you click on the link or make a purchase using the link. If you make a purchase you will not be charged anything additional.

Anyway, I thought long and hard about what to get the girls for Christmas. I just know with 2020 being what it is, that we are going to have a TON of time at home.

So I decided we would gift them things they that would keep them busy over winter. On the list of items bought so far are lots of books, board games, art supplies and….. a SPA KIT! But not just any spa kit, this is like the ULTIMATE SPA KIT for teens!

I looked online and didn’t really find exactly what I was looking for so I thought I’d put together my own. So fitting for a frugal DIY momma.

So, how do you make a DIY SPA KIT you ask?

It might be easier than you think. If you are great at shopping online you can easily put one together too!

I started with this book, Girls' Home Spa Lab: All-Natural Recipes, Healthy Habits, and Feel-Good Activities to Make You Glow

It’s amazing! It has tons of recipes and other good for you activities. And since it’s written and illustrated for teen and tween girls they will extra love it. There’s no old fashioned old lady vibe with this DIY book. It has a fresh and modern look to it that’s super attractive and it makes me want to read all of it and make my own spa products.

Since this was just the book, no ingredients or anything, I read through it and picked out ingredients that were repetitive throughout the book. I didn’t want to buy every single ingredient in the book because that would be expensive and we keep several of the ingredients like olive oil and witch hazel on hand at home. I bought the main ones I kept seeing that we don’t usually have at home.

Here’s what I bought

1. ESSENTIAL OILS


Non ingredient items I ordered:

1. MORTAR & PESTLE

I have a fancy Kitchen Aid stand mixer but I really didn’t want it taken over. I opted for this handheld mixer AND I was sure to get the one that has attached storage for the beaters. That way there’s less chance they will loose them.

3. DOUBLE BOILER

Just like with the mixer I really didn’t want the girls to use my double boiler for bath and body ingredients. I looked on good ole Amazon for double boilers and found this gem! It was exactly what I wanted!

This pot is great because it will fit in any pot we have at home. We have a few different small sauce pans and this double boiler option will work perfectly with all three of them.


Of course the spa kit wouldn’t be complete without containers to put all their new spa products in. If you search on Amazon there’s a ton of different things to choose from. Here’s what I ordered for my girls. No judgements on the glass containers please ;) if you don’t feel comfortable with yours teens having glass there are other options out there. We typically will always choose glass over plastic, it’s just a personal preference.

4. SMALL PLASTIC CONTAINERS WITH SCREW ON LIDS


As I’m writing this it’s early November so I have not packaged any of the gifts yet to put under the Christmas tree.

The girls know that one of their gifts is one big gift to share. So I think I’m going to wrap all the spa ingredients individually then put everything in a big box that will be wrapped too. You know, make it more fun for them to open it.

This gift is going to be amazing for the girls this winter and I can’t wait for them to start experimenting in the kitchen making their own bath and body products.

I’d love to know, is this something your teens/tweens would love? Let me know in the comments.

Last minute end of the season cheerleader gift bags

Cheerleader gift bags that are quick, easy, and inexpensive. Put together cute pampered gift bags for cheer appreciation gifts for the end of the season. Use your Cricut to make personalized vinyl decals.

If you are needing to put together a last minute gift for a squad of cheerleaders, or SUPER last minute in my case, you have come to the right place! I needed to do the same thing last week for my daughter’s cheer team and I only had a few hours to make it happen.

Cheerleader gift bags that are quick, easy, and inexpensive. Put together cute pampered gift bags for cheer appreciation gifts for the end of the season. Use your Cricut to make personalized vinyl decals.

I knew I didn’t want to spend a ton of money, because I’m frugal like that, but I also didn’t want whatever I put together to seem cheap.

Affiliate Disclosure. Some of the links on this website are affiliate links, which means that I may earn a small commission if you click on the link or make a purchase using the link. If you make a purchase you will not be charged anything additional.

So off to Walmart I went. My youngest daughter and I trolled up and down the aisles of our TINY Walmart, which carries about 1/4 of the variety that a super center does, but we found some goodies that were perfect for cheerleader gift bags.

We went for a pamper yourself theme that the girls loved! And I only spend $60, not counting what I already had at home.

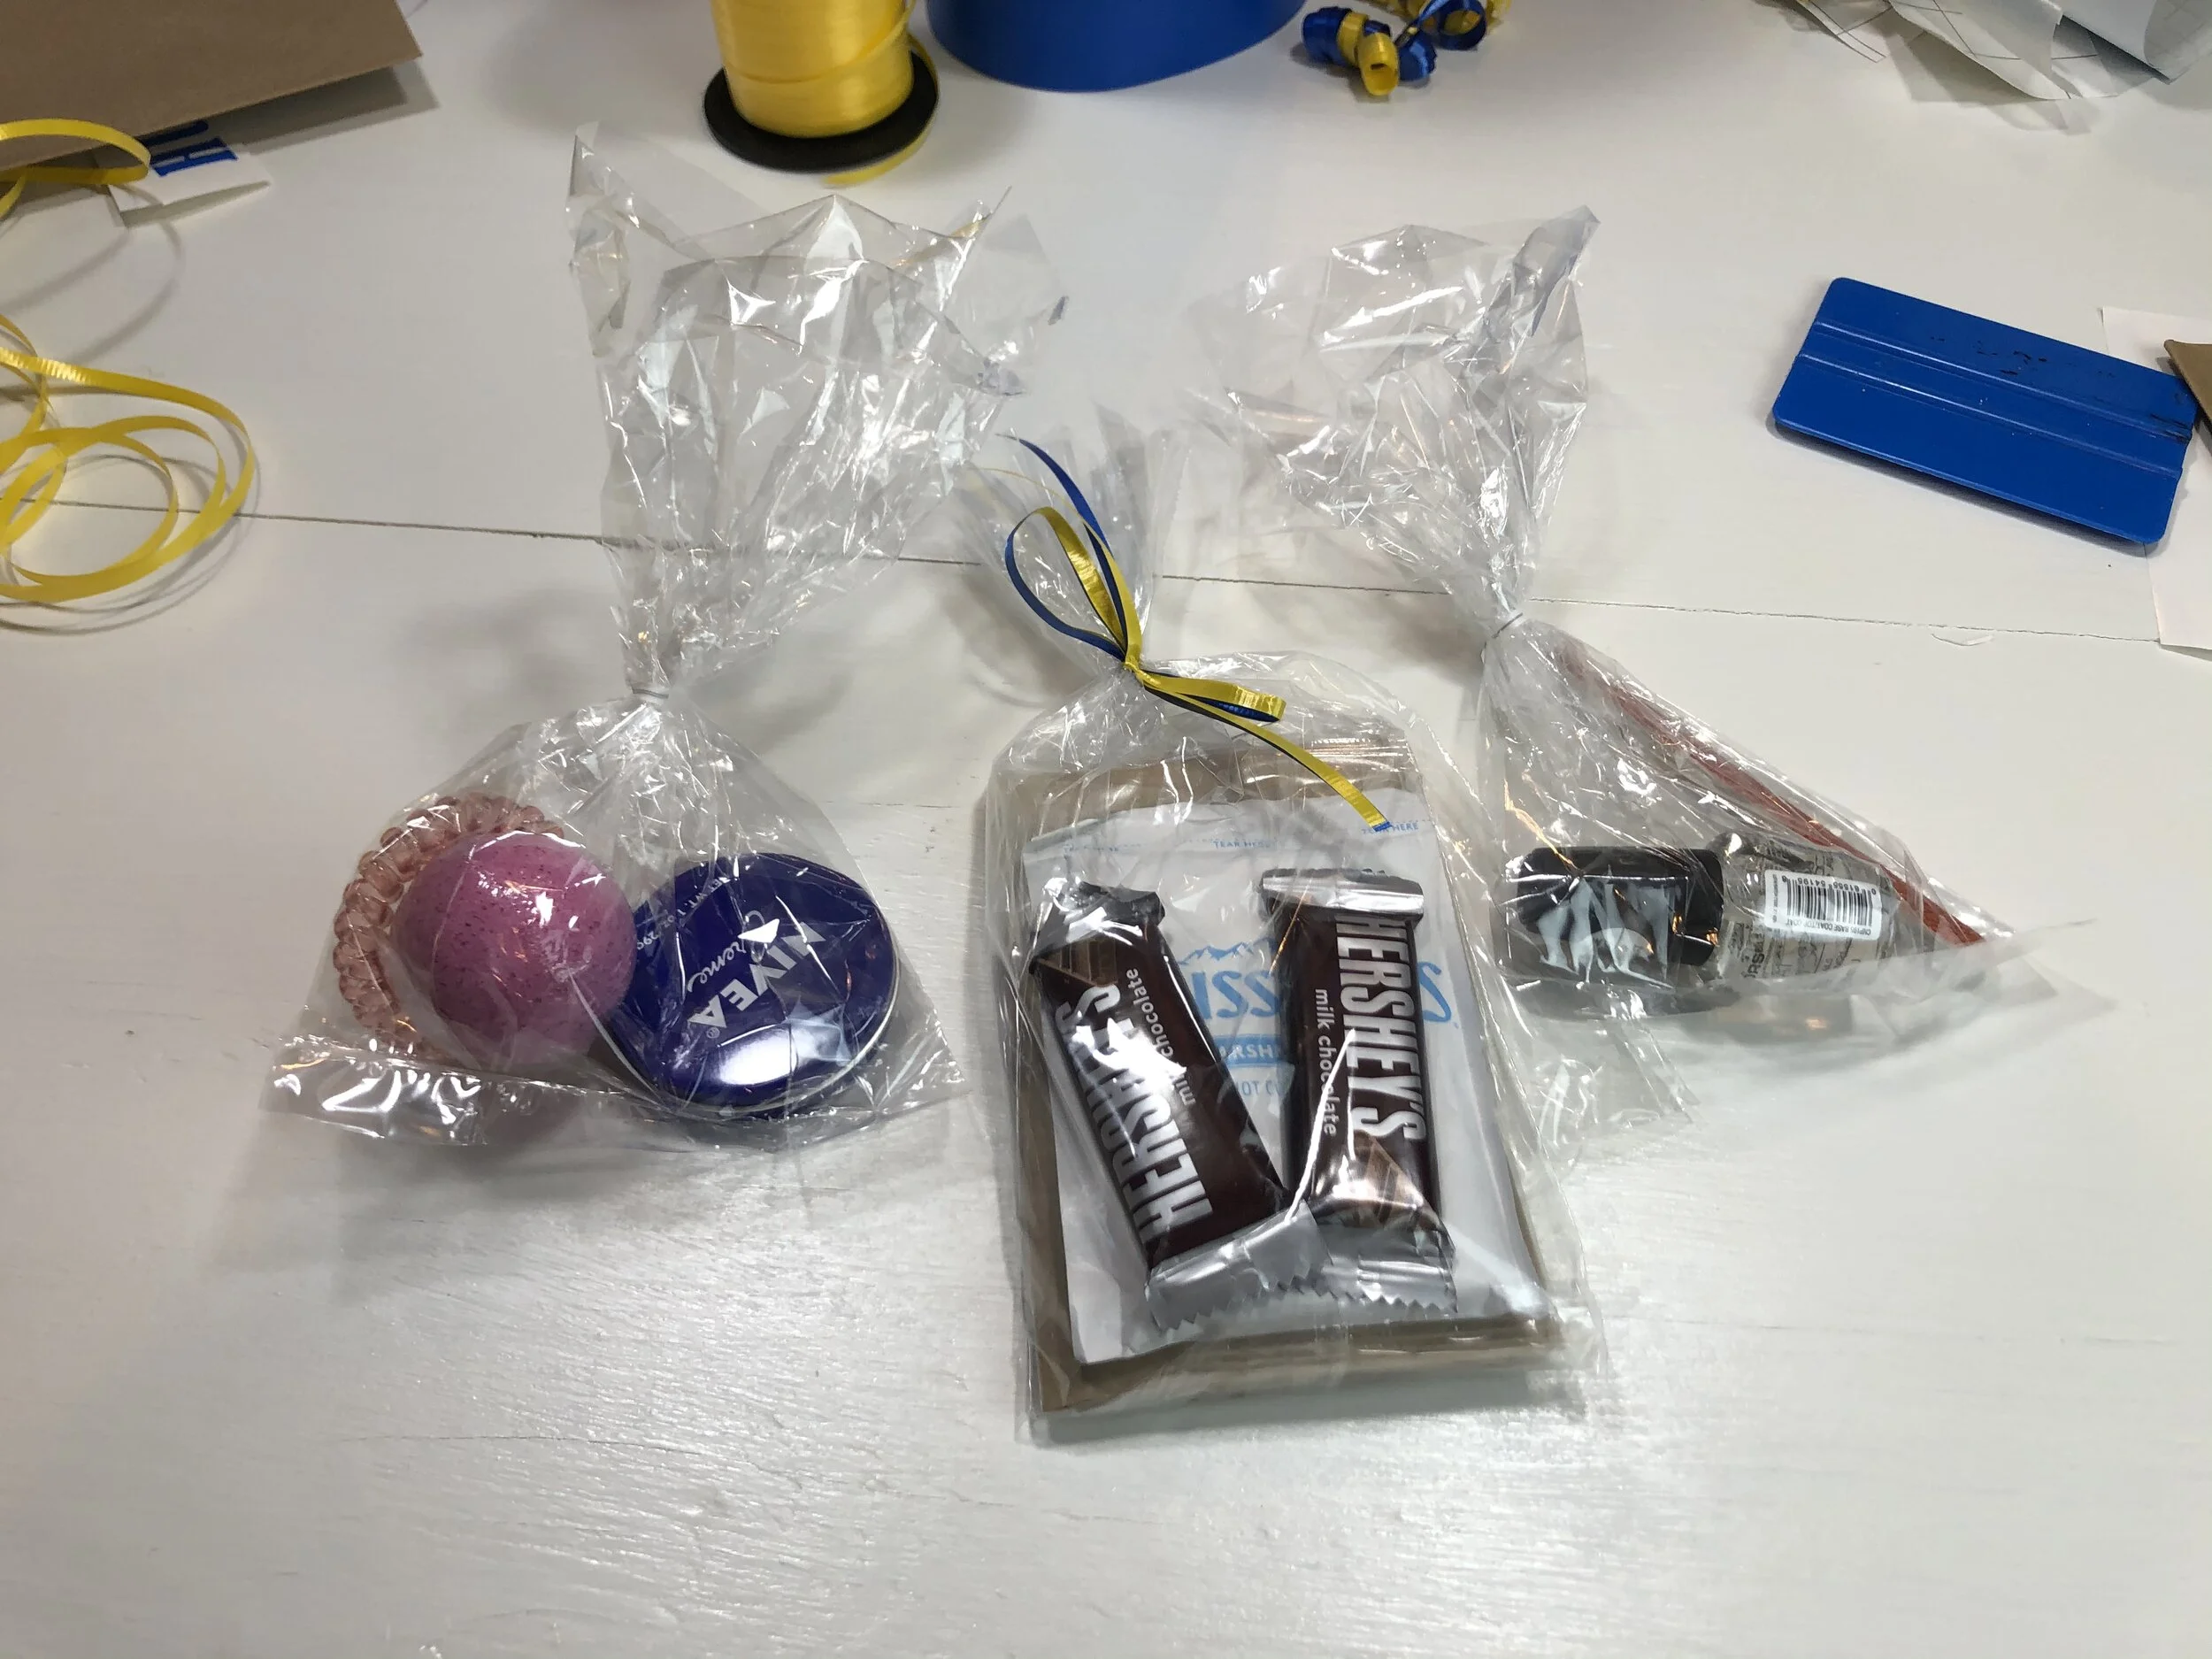
Here’s what I filled the bags with. Each girl got one of the following

  • small tin of Nivea lotion (find it on Amazon here)

  • clear nail polish

  • nail file (purchased in a pk of 12)

  • bath bomb

  • coiled hair tie

  • popcorn bag

  • hot cocoa

  • 2 mini chocolate bars

Other items I bought to make the gift bags

  • roll of yellow ribbon

  • roll of blue ribbon

  • yellow tissue paper

  • blue tissue paper

I already had these materials on hand

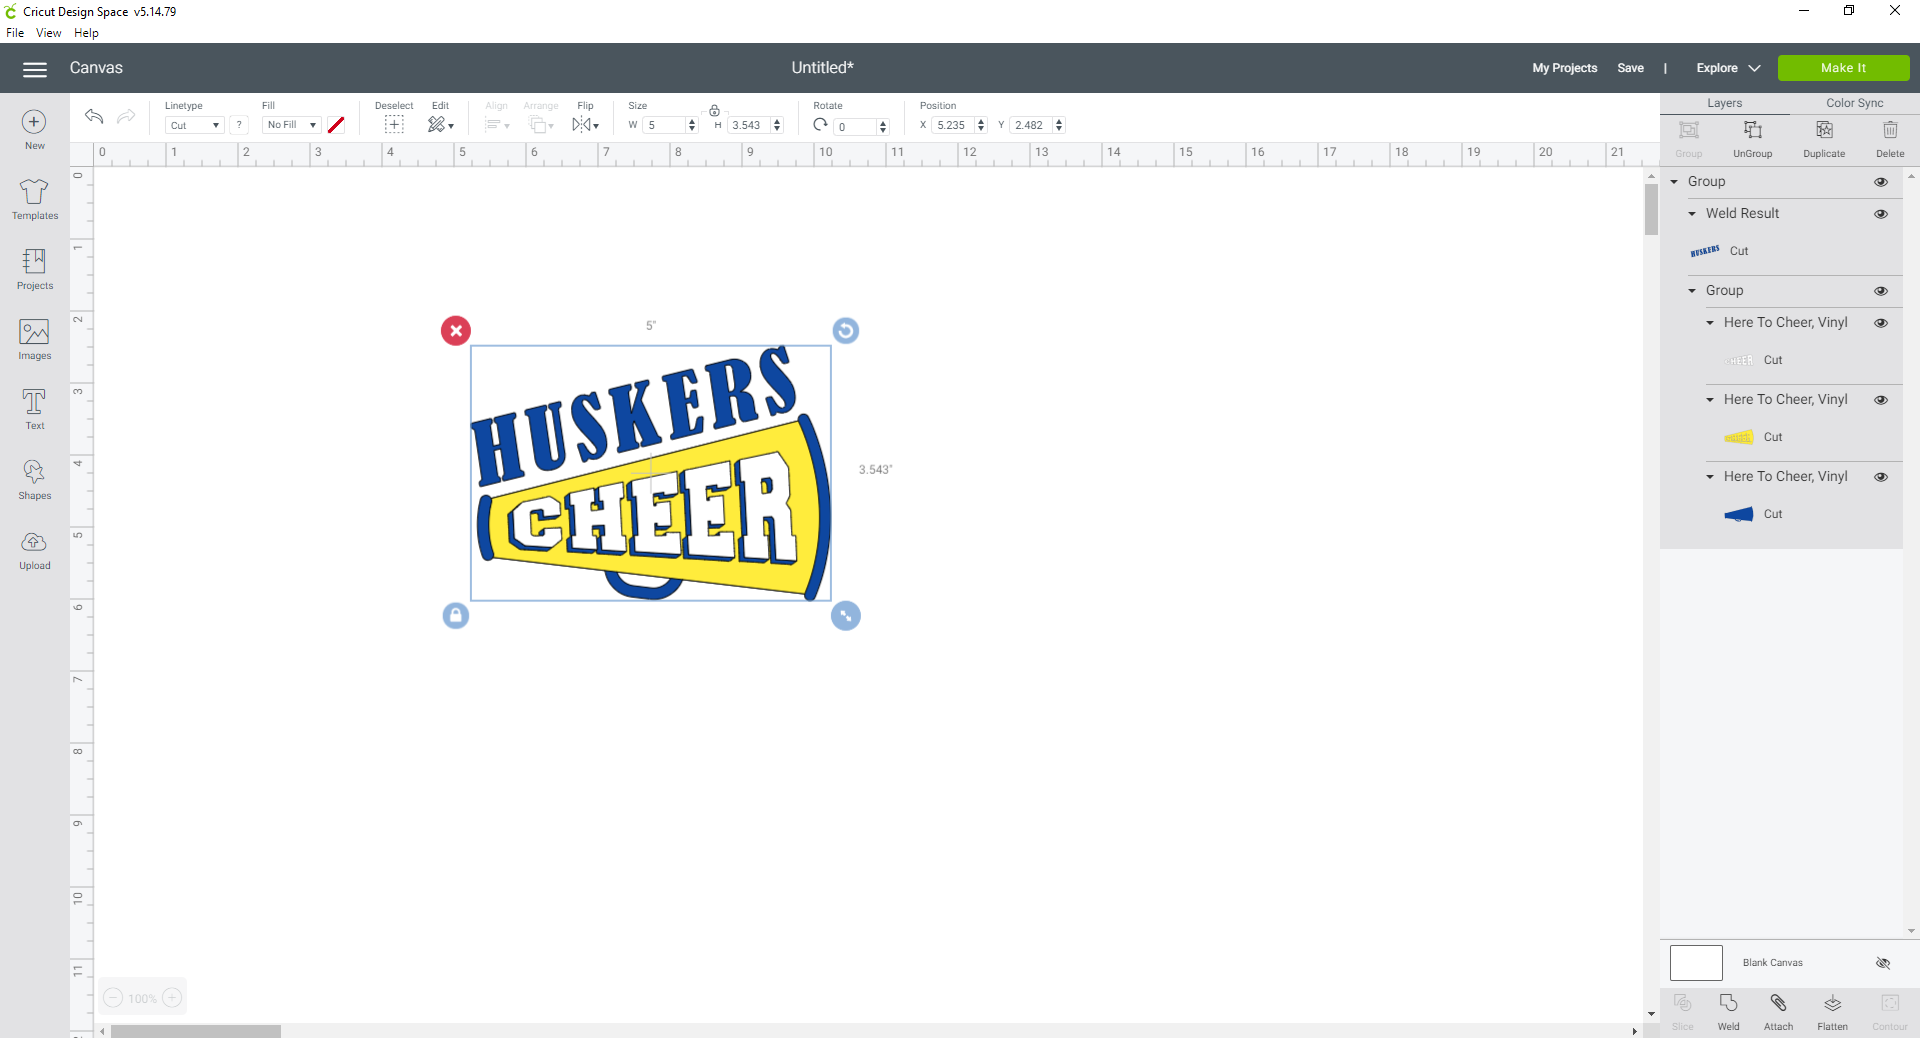
To keep the bags simple, and because I didn’t know everyone’s name on the cheer squad, I cut out vinyl decals that said ‘ HUSKERS CHEER’ with a megaphone. I used Cricut Design Space and used my Cricut Access for this. Click here to find the link to my project in design space.

I made my decals 5” wide so they would fit perfectly on the gift bags.

How to make cheerleader gift bags. Use your Cricut machine to make personalized decals on gift bags. DIY gift bags using your Cricut machine.

I had two different brands of vinyl that I used (Oracal & Starcraft) but any colored vinyl, that’s not HTV, will work. What I had on had were matte and gloss but I would have preferred it all to have been matte.

Cheerleader gift bags that are quick, easy, and inexpensive. Put together cute pampered gift bags for cheer appreciation gifts for the end of the season. Use your Cricut to make personalized vinyl decals.

I used my Cricut Explore and green cutting mat to cut my decals out. You can see how well loved both my machine and mat is lol! If you’re looking for a cart for your cutting machine I HIGHLY recommend the one in this pic. I absolutely LOVE it!

Cheerleader gift bags that are quick, easy, and inexpensive. Put together cute pampered gift bags for cheer appreciation gifts for the end of the season. Use your Cricut to make personalized vinyl decals.

This decal was a little more work than I really wanted to do BUT it was sooooo cute! Each bag had 4 different vinyl pieces to put on the bags. But since they were all the same I was able to get them on the bags pretty quickly.

Cheerleader gift bags that are quick, easy, and inexpensive. Put together cute pampered gift bags for cheer appreciation gifts for the end of the season. Use your Cricut to make personalized vinyl decals.

I used clear transfer tape and a vinyl squeegee to help get them on the bags easier.

Cheerleader gift bags that are quick, easy, and inexpensive. Put together cute pampered gift bags for cheer appreciation gifts for the end of the season. Use your Cricut to make personalized vinyl decals.

I didn’t want to just throw everything inside the brown bags. I thought separating the items out like this made the pampered bags look a lot nicer and fancier. I put the nail polish and file in one bag. The edible treats in another bag. And the lotion, hair tie, and bath bomb in another bag. My cheerleader loved this.

Cheerleader gift bags that are quick, easy, and inexpensive. Put together cute pampered gift bags for cheer appreciation gifts for the end of the season. Use your Cricut to make personalized vinyl decals.

Once I started getting the decals on my older girls and I made an assembly line to fill the bags. We were really pressed for time by this point lol. It worked pretty great. And they learned how to curl package ribbon.

Cheerleader gift bags that are quick, easy, and inexpensive. Put together cute pampered gift bags for cheer appreciation gifts for the end of the season. Use your Cricut to make personalized vinyl decals.

These were so quick to make and had a lot of school spirit to show on the outside with the tissue paper and curled ribbons. The girls loved them!

Cheerleader gift bags that are quick, easy, and inexpensive. Put together cute pampered gift bags for cheer appreciation gifts for the end of the season. Use your Cricut to make personalized vinyl decals.

I hope you enjoyed this quick and easy project.

Happy crafting!

Check out more projects made with my Cricut

How to make beeswax wraps, reusable cotton saran wrap

How to make resuable saran wrap. DIY beeswax cotton food wraps made with pine resin. Save money in the kitchen by making your own fabric food wraps.

Make your own reusable cotton food wraps

I gotta say I am impressed with these simple yet useful beeswax reusable cotton wraps. If you’ve never heard of these before you’re not alone, my husband had no idea what they were and I’m pretty sure he thought I was crazy when I told him what I wanted to make. You use these cloth wraps in your kitchen to replace saran wrap…genius I know! I had never used beeswax or pine resin before this DIY, I actually had no idea pine resin was a thing to buy until recently. But after seeing how easy this project was I am eager to try others that use these ingredients.

I read several different articles telling how to make them. They all basically used the same three ingredients: BEESWAX, PINE RESIN, JOJOBA OIL. Some however didn’t use the pine resin, or any resin at all, and what I read, and now agree with since I have made them myself, is that you won’t get that sticky saran wrap feel unless you use the pine resin. Technically you can just use beeswax but I wouldn’t recommend it.

If you enjoy this money saving tip be sure to check out these reusable oil bottles for the kitchen.

How to make resuable saran wrap. DIY beeswax cotton food wraps made with pine resin. Save money in the kitchen by making your own fabric food wraps.

DIY EASY BEESWAX & RESIN SARAN WRAP

Here’s what you'll need

This is the recipe I used

  • 1/2 c BEESWAX PELLETS

  • 2 t PINE RESIN

  • 1/2 t JOJOBA OIL

The first couple of wraps I made I only used 1 teaspoon of the pine resin and I did not like the way those wraps turned out. So I doubled the resin for the next batch and they turned out SO much better!

1.MELT THE INGREDIENTS

Preheat your oven to 215 degrees. Then mix 1/2 cup of beeswax pellets, 2 teaspoons of pine resin, and 1/2 teaspoon of jojoba oil. The BEST way to do this is to melt it all in a double boiler. I used an old sauce pan and a short mason jar for this. I put a small amount of water in the sauce pan because I didn’t want the jar to float and I knew since I was making a small batch it wouldn’t take much to heat of the jar to melt the beeswax. I used a thin chip brush to do all of the stirring.

How to make resuable saran wrap. DIY beeswax cotton food wraps made with pine resin. Save money in the kitchen by making your own fabric food wraps.

2. CUT YOUR FABRIC

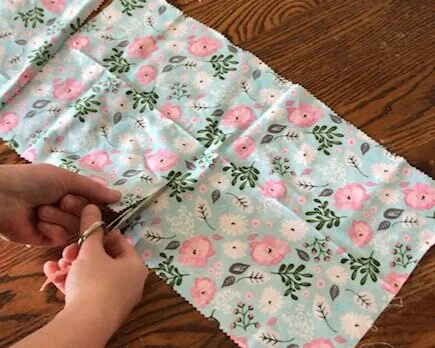
while my ingredients were melting I cut my fabric into pieces I thought would be good sizes for what I wanted to use them for. I cut a few small ones that would fit around the top of a jar. Several medium sized ones that would be good to wrap around food. And a couple of large ones that would fit around my larger sized mixing bowls. I used my grandma’s old pair of pinking shears on the edges of the fabric so that the edges wouldn’t fray once I start using the food wraps. Also, you want to be sure you are using 100% cotton.

How to make resuable saran wrap. DIY beeswax cotton food wraps made with pine resin. Save money in the kitchen by making your own fabric food wraps.

3. BRUSH ON & BAKE

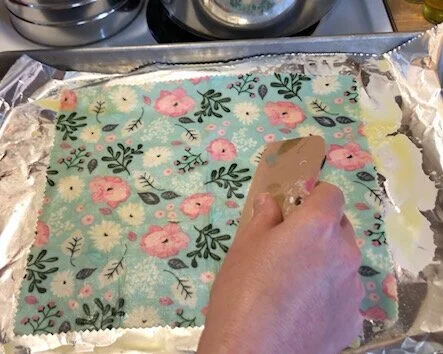
Line your cookie sheet with foil, shiny side down. Place a piece of your fabric on the cookie sheet. Use the chip brush to brush on the melted mixture. Then pop it in the oven for 5 minutes or so. Do not skip placing it in the over. If you just brush the wax mixture on your food wraps they will be stiff, the mixture won’t be on the fabric evenly and it will result in them not working quite right. Placing them in the oven allows the wax to melt completely into the fabric and giving you a nice even coat over the entire piece of fabric.

How to make resuable saran wrap. DIY beeswax cotton food wraps made with pine resin. Save money in the kitchen by making your own fabric food wraps.

4. REMOVE EXCESS WAX

Remove your cookie sheet from the oven. Use a squeegee, here's the kind I used, and squeegee the excess beeswax mixture off of the fabric. I didn’t do this for the first couple of wraps I made and I didn’t like how they turned out, for two reasons - there wasn’t enough resin AND they were WAY TOO stiff and waxy. None of the tutorials I read said to do this step though. So maybe they know something I don’t. But I do know when I went to use the first two to try them out before I made more they were kind of blah and I wasn’t impressed at all with them. After I squeegeed the excess off it made all the difference in the world! I didn’t let the excess go to waste either. I scooped it up and placed it back into the mason jar so it could melt back down.

How to make resuable saran wrap. DIY beeswax cotton food wraps made with pine resin. Save money in the kitchen by making your own fabric food wraps.

5. REMOVE & LET DRY

Immediately take them off of the baking sheet and place them somewhere to dry. I lined a cookie drying rack with a piece of foil and then placed the finished wax wraps on there to dry. It didn’t take very long at all for them to completely dry on the drying rack.

How to make resuable saran wrap. DIY beeswax cotton food wraps made with pine resin. Save money in the kitchen by making your own fabric food wraps.

6. USE

Once your food wraps are dry you can start using them immediately. I was so surprised at how well these turned out! I’m even thinking about making some to give as gifts to family and friends.

How to make resuable saran wrap. DIY beeswax cotton food wraps made with pine resin. Save money in the kitchen by making your own fabric food wraps.

Like with all of my DIY posts if you have any questions please feel free to ask. If you make these at home I’d love to hear how yours turn out!

Happy crafting!

How to make your own corsage with faux flowers

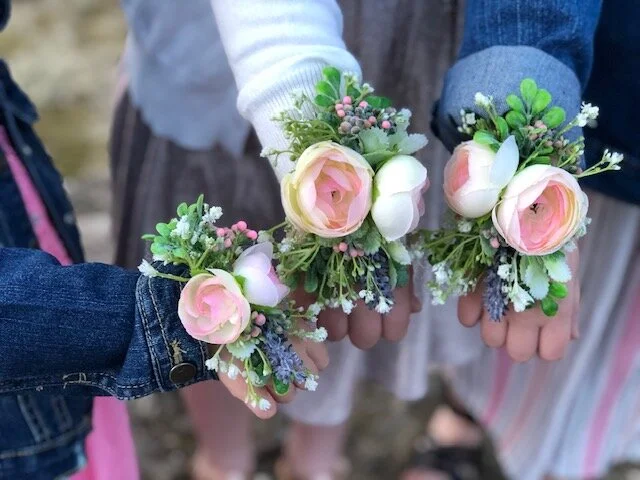
DIY corsage made with faux flowers. How to make a corsage for little girls with fake flowers from Walmart. Silk flower easy corsage for spring, prom, weddings, father daughter dance.

DIY YOUR OWN CORSAGE WITH FAKE FLOWERS

Real corsages are gorgeous! But they can be a little pricey, especially for being a small part of the fancy attire. Our small town held a father daughter dance and I really wanted my girls to feel extra special and wear a corsage. Since my husband was taking three of our four daughters I figured it would be more cost effective if I ordered them from a big chain grocery florist. I looked online and they were $20+ per corsage plus $20 for my husbands boutonniere. A total of $80 for accent flowers…that was not in the budget. What I did instead was take a trip to our local Walmart and picked out some inexpensive flowers, hair ties, and floral tape. I spent a total of $13 and everyone got a beautiful corsage/boutonniere to wear to the fancy daddy daughter dance.

Affiliate Disclosure. Some of the links on this website are affiliate links, which means that I may earn a small commission if you click on the link or make a purchase using the link. If you make a purchase you will not be charged anything additional. This is just a way I can help add to our family finances to raise our four daughters. Please know I would never recommend a product or service I do not totally stand behind.

I’ll be honest, I tried to make one for the oldest of the four daughters when she was in the first grade and it turned out awful! I used a real flower that was WAY too big and it seriously looked like a Pinterest fail! This time around I extra crossed my fingers they would turn out as a win and thank goodness they did! The girls got SO MANY C0MPLIMENTS on them at the dance.

How to make your own corsage using faux flowers. DIY fake flower wrist corsage tutorial using spring florals. Father daughter dance flowers.

DIY FLOWER CORSAGE

Here’s what I used

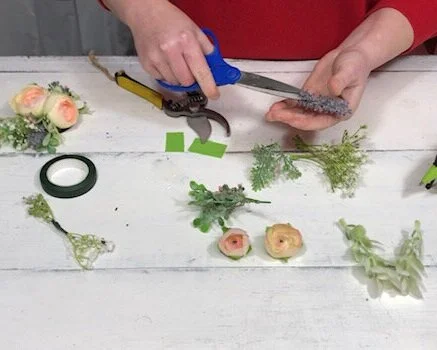
  • faux round roses

  • faux babies breath

  • faux spring flower bunch

  • green floral tape

  • felt

  • scissors

  • wire cutters

  • black hair tie (pony tail holder)

  • hot glue gun

  • gorilla glue hot glue sticks

Make this DIY even more inexpensive by visiting your local DOLLAR TREE. They have a great floral selection depending on the season.

How to make your own faux flower corsage. Pony tail holder wrist corsage DIY using fake flowers, super inexpensive to make. Spring flower corsage to make for weddings, father daughter dance, or prom.

I found everything I needed at Walmart. I already had the glue, glue gun, and felt on hand so I didn’t need to pick those up. I also had a ton of supplies left over. I used some in their hair for little accents and then still had some left over. I couldn’t believe it cost around $3 per corsage to make. That beats $20/ wrist corsage any day!

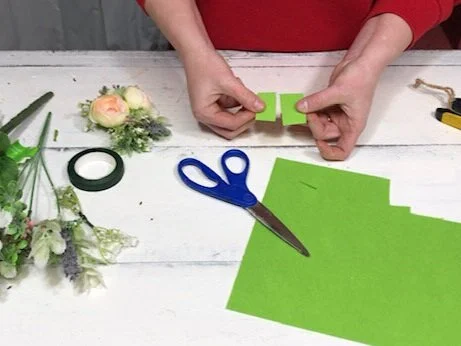
1. I cut a rectangle that was smaller than the width of one of my daughter’s wrist. This is what I glued my flowers to. Then, I cut a second rectangle that was a little smaller than the first rectangle.

DIY corsage made with faux flowers. How to make a corsage for little girls with fake flowers from Walmart. Silk flower easy corsage for spring, prom, weddings, father daughter dance.

2. I picked out 2 main flowers for the corsages. I used these gorgeous round roses I found at my local Walmart that were about $3 per stem. I used 2 per corsage and 1 for my husband’s boutonniere. I made these round roses the focal point and added the other flowers as accents. I pulled the round rose flower heads off of their stems then I cut them flush at the bottom of the flower so that the bottom side of the flower was flat.

DIY corsage made with faux flowers. How to make a corsage for little girls with fake flowers from Walmart. Silk flower easy corsage for spring, prom, weddings, father daughter dance.

3. I started layering the flowers that surrounded the main flowers. This took me a little while to get the flowers where I wanted them to go. I used a combination of baby’s breath, lavender, and a spring flower bunch. I had to trim them up here and there, so don’t be afraid to do that too. This will keep your corsage from being gigantic. See the picture below, I had to trim down the lavender stems so that they wouldn’t be so long. I did this carefully making sure I wasn’t removing too much.

DIY corsage made with faux flowers. How to make a corsage for little girls with fake flowers from Walmart. Silk flower easy corsage for spring, prom, weddings, father daughter dance.

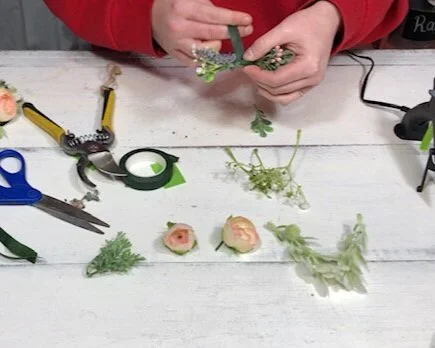
4. I attached the accent flower stems together. Basically I made double ended floral stems. I tried to make them somewhat similar in size in both length and width so that the corsage wasn’t lopsided. I didn’t make them identical, I used different accent flowers on each end but was sure to incorporate baby’s breath on each end. Then I wrapped the middle of the double ended floral stem in green floral tape to keep them together.

DIY corsage made with faux flowers. How to make a corsage for little girls with fake flowers from Walmart. Silk flower easy corsage for spring, prom, weddings, father daughter dance.

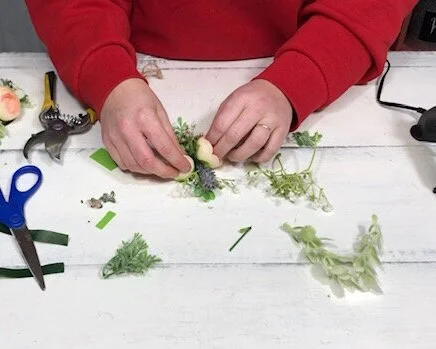
5. I placed them on the bigger rectangle to see where exactly I wanted to place them before I started gluing anything down. This is the time to trim your felt down if you need to.

DIY corsage made with faux flowers. How to make a corsage for little girls with fake flowers from Walmart. Silk flower easy corsage for spring, prom, weddings, father daughter dance.

6. Then I used my glue gun to glue everything down to the felt. I first glued down the double ended floral stem I made. Let that dry so that it gets secure. Then I glued down the main focal point flowers, the round roses.

DIY corsage made with faux flowers. How to make a corsage for little girls with fake flowers from Walmart. Silk flower easy corsage for spring, prom, weddings, father daughter dance.

7. Fill in the gaps. After I got the roses glued down and the glue dried I added in more accent flowers where I thought the corsage was bare. I even cut off single leaves, this spring bunch I picked up had the most beautiful soft lambs ear like leaves. I added in several of those leaves where I thought they would look good. I attached some to the sides of the roses. I also did this with the baby’s breath. Before I glued them down I was sure to double check I liked that placement. A tiny dab of glue is all you need for these little pieces.

DIY corsage made with faux flowers. How to make a corsage for little girls with fake flowers from Walmart. Silk flower easy corsage for spring, prom, weddings, father daughter dance.

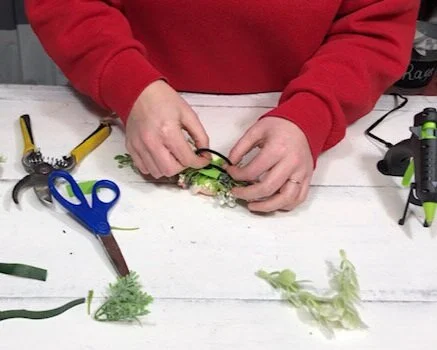
8. Once I was happy with how it look and the glue was dry I flipped it over and added a thick hair tie. While recording this tutorial I actually attached my hair tie the wrong way. For the most comfort I suggest gluing on the hair tie so that the corsage lays vertically against the wrist. So you would want to attach your hair tie so that it would sit on the rectangle horizontally. Once that glue dries glue the second rectangle on top of the hair tie so that the hair tie is sandwiched in-between the two pieces of felt. This will make it really secure and will be difficult for the elastic to come off.

DIY corsage made with faux flowers. How to make a corsage for little girls with fake flowers from Walmart. Silk flower easy corsage for spring, prom, weddings, father daughter dance.

I hope you enjoyed this inexpensive tutorial. Like with all of my posts, if you have any questions at all please don’t hesitate to ask.

DIY corsage made with faux flowers. How to make a corsage for little girls with fake flowers from Walmart. Silk flower easy corsage for spring, prom, weddings, father daughter dance.

Happy crafting!

How I made super girly dinosaurs for my daughter's bedroom

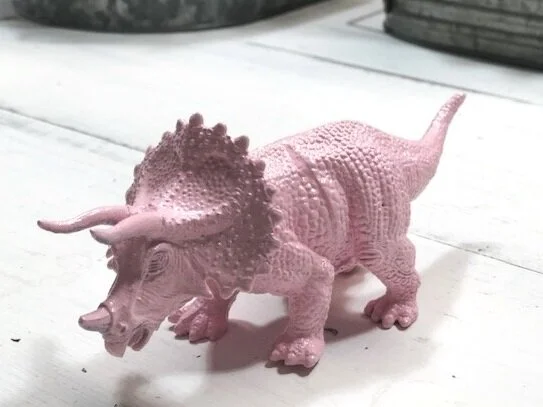
Make your little girl's dinosaur room dreams come true. How to spray paint cheap plastic dinosaurs to make them girly. DIY girl themed dinosaur bedroom for your daughter.

DIY GIRLY DINOSAURS

My youngest daughter is obsessed with dinosaurs. But she’s also really into things that are sparkly, pink, and super girly! While we were taking a wonderful stroll around Hobby Lobby we came across this adorable dino display. It was full of these really cool signs, garland, figurines, and more. The only thing was that everything was dark blue, orange, dark green, red. Which are great colors but her favorites are pink, mint, purple, light green…and glitter lol! Hobby Lobby didn’t have any dinosaur décor in those colors. One of the things she really really really loved were these ceramic dinos. Again, they were in the typical “boy” colors. So I thought ‘Megan, just buy some plastic ones and paint them’. So I did just that!

Affiliate Disclosure. Some of the links on this website are affiliate links, which means that I may earn a small commission if you click on the link or make a purchase using the link. If you make a purchase you will not be charged anything additional. This is just a way I can help add to our family finances to raise our four daughters. Please know I would never recommend a product or service I do not totally stand behind.

Make your little girl's dinosaur room dreams come true. How to spray paint cheap plastic dinosaurs to make them girly. DIY girl themed dinosaur bedroom for your daughter.

See, super adorable dinosaur décor but it doesn’t really go with glittery unicorns and magical butterflies.

The next day we took a trip to our local Walmart to find some inexpensive dinosaurs and spray paint. My sweet girl was so excited! She got to pick which dinosaurs she wanted AND she got to pick the colors. It was so cute watching her little face light up choosing things for her room.

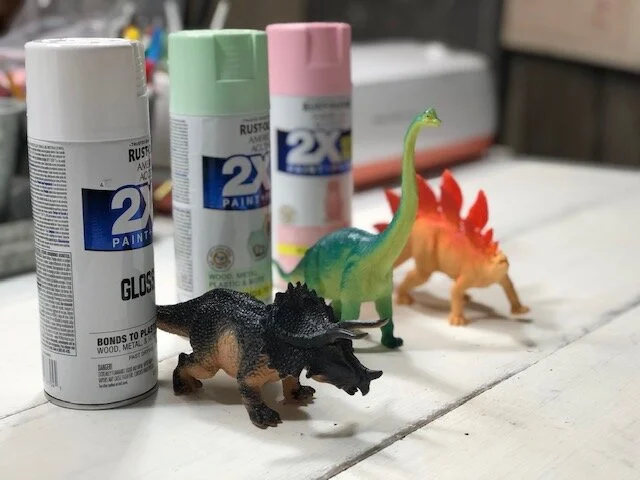
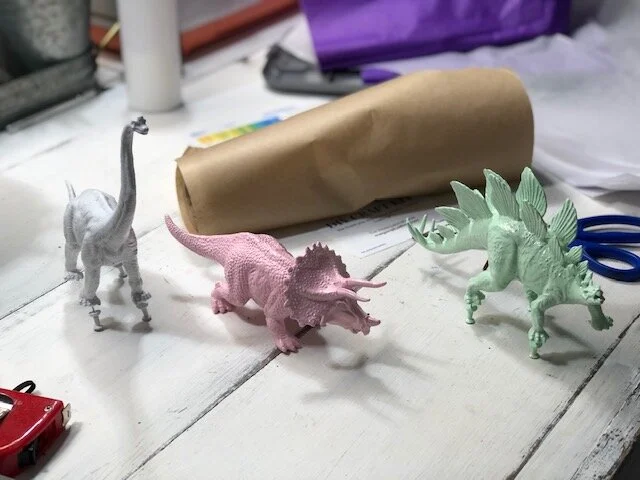
She picked out three different dinosaurs and chose the colors light pink, mint green, and white.

Make super girly dinosaurs for your daughter’s bedroom

Here’s what you’ll need

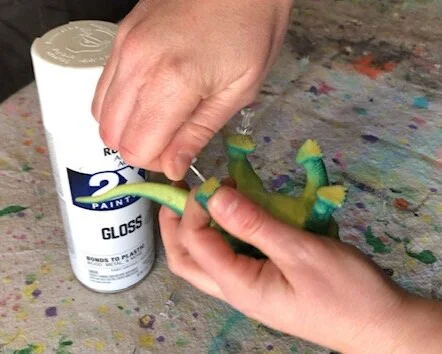
ONE- The first thing I did was place a push pin in each dinosaur foot. Since the dinosaurs are hard plastic it was a little difficult to get them in.

Make your little girl's dinosaur room dreams come true. How to spray paint cheap plastic dinosaurs to make them girly. DIY girl themed dinosaur bedroom for your daughter.

TWO- Shake the can really well then spray a layer of paint on each dinosaur. I bought the “fancy” spray paint, as I like to call it, because it has primer already in it. It’s cheaper and easier in the long run to just buy the more expensive spray paint so you have less layers to paint and it takes less time to finish your project.

Make your little girl's dinosaur room dreams come true. How to spray paint cheap plastic dinosaurs to make them girly. DIY girl themed dinosaur bedroom for your daughter.

THREE- Let that layer completely dry. I let mine dry overnight just to be sure it was fully dry.

FOUR- Spray a second layer on each dinosaur.

FIVE- Let your dinosaurs dry. Since I used gloss spray paint it seemed to take the dinosaurs a long time for the second layer to dry. I let them sit for a full 48 hours before taking the pushpins out of their feet. Because my daughter will be playing with them I am letting them cure for 30 days.

Make your little girl's dinosaur room dreams come true. How to spray paint cheap plastic dinosaurs to make them girly. DIY girl themed dinosaur bedroom for your daughter.

Seriously, these are the CUTEST dinosaurs!!

Make your little girl's dinosaur room dreams come true. How to spray paint cheap plastic dinosaurs to make them girly. DIY girl themed dinosaur bedroom for your daughter.

I have plans to make her MANY more girly dinosaur decorations for her room soon. One that will include some glitter too!

I hope this inspires you to create some adorable dino décor for your own little girl. If you do GIRL UP your dinos I’d love to see what you come up with! As with all of my DIY posts if you have any questions please ask away. I’m always happy to help.

DIY Dollar Tree work for hire chore chart

Dollar Tree pizza pan DIY work for hire chore chart. How to make a work for hire board for your kids. Easy Dollar Tree craft.

Easy work for hire board

I don’t know about you but in my house we don’t do allowance. Well, not the traditional allowance anyway. Instead, we have a work for hire board. And I so wish I would have made this sooner. For years my girls have been asking “what needs to be done” for them to earn money for the not so everyday chores around the house. Of course they would ask at the times when my brain was on anything but that and I would have to stop and think hard about what needs to be done and how much to pay for that chore.

Affiliate Disclosure. Some of the links on this website are affiliate links, which means that I may earn a small commission if you click on the link or make a purchase using the link. If you make a purchase you will not be charged anything additional.

Now my brain doesn’t have that extra stress (yes, it’s a stress when your sweet daughter is asking to do work around the house so she can make some cash and your brain just draws a blank :(! ) Having this work for hire board is WONDERFUL! I clip the money to the chore that needs to be done. Then they do the chore and take their earnings. This gives them so much independence and instills a good work ethic that they will carry with them through adulthood. Everyone is happy! They get paid and I didn’t have to wash the windows lol!

Now, I don’t pay the girls to do everyday things like washing dishes, picking up the living room, washing their clothes. Those are everyday kind of chores. The chores on the work for hire board are more like washing the windows, wiping down the baseboards, deep cleaning the bathroom, organizing the stockpile, etc.

And to make it even better was that I picked up the metal tin I used for the work for hire boar from the Dollar Tree! All together this DIY cost less than $5 for everything. See more of my DIY Dollar Tree crafts.

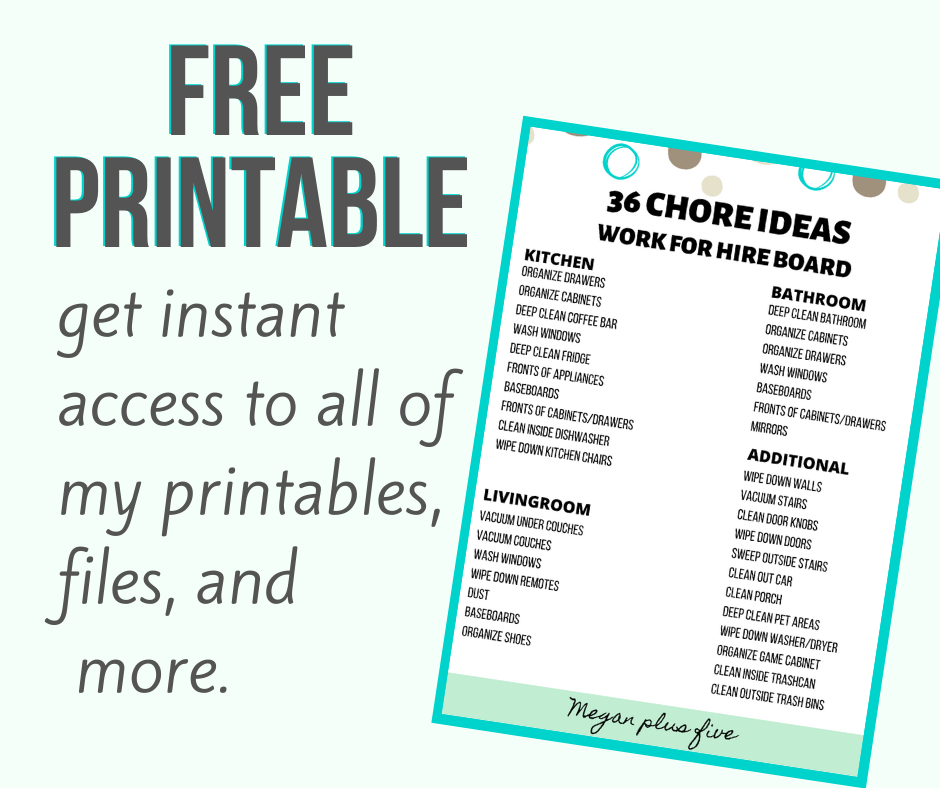
FREE PRINTABLE- 36 work for hire chore ideas for you to print off. Click the photo below to get the password for instant access to my free resource library.

How to make a kid’s work for hire board

Here’s what you’ll need

Helpful tools

ONE-

Use chalk paint and paint the entire front of your pizza pan. I painted two coats on mine, letting the first one dry completely before painting the second coat on. To add a little rustic feel I added some cream colored accent markings to mine. I did this while the second coat of paint was still wet and just liberally added in strokes of the cream colored chalk paint. Let your painted pizza pan dry. I let mine day for several days because I had other things to do before I could finish it up. After mine dried I gave it a quick spray with a clear sealant to give it a protective top coat.

Dollar Tree pizza pan DIY work for hire chore chart. How to make a work for hire board for your kids. Easy Dollar Tree craft.

TWO-

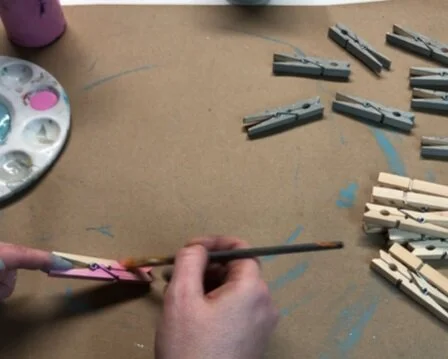
Paint your clothes pins. I just used two colors, pink and gray. I painted my clothespins with two coats of acrylic paint to get a good coverage on them. Let them dry.

Dollar Tree pizza pan DIY work for hire chore chart. How to make a work for hire board for your kids. Easy Dollar Tree craft.

THREE-

Add a vinyl decal to the top that says ‘ work for hire’. You can make your own or grab one similar to the one I used, get it in my FREE RESOURCE LIBRARY. I used gray oracal 651 vinyl for mine. Even though I allowed my painted pizza pan to dry for several days I wasn’t sure if the transfer tape would remove the paint so I applied my decal very gently. I tried not to push the transfer tape down too much and focused on just the decal. Thankfully none of the paint came off of my pizza pan when applying the work for hire decal.

Dollar Tree pizza pan DIY work for hire chore chart. How to make a work for hire board for your kids. Easy Dollar Tree craft.

FOUR-

Write the chores on your clothes pins. Ours don’t change too much, they are pretty much the same things that need to be done every month so I used a fine point sharpie to write on mine. When I made mine I wrote on the painted clothespins after I glued the magnets to them…big mistake. It would have been far easier to write on them first, glued magnets second. But now I know for next time AND I know the right way to tell you how to do it so you don’t make the mistake I did.

Dollar Tree pizza pan DIY work for hire chore chart. How to make a work for hire board for your kids. Easy Dollar Tree craft.

FIVE-

Use E6000 and glue a magnet to the backside of each of your clothespins. If you’ve never heard of E6000 it’s basically a really strong glue. It does take about 24 hours to fully dry though. Oh, and it does have a bit of a weird smell to it but it is good for crafts lol! Set your clothespins somewhere they won’t be disturbed so they can dry properly.

work for hire3.Dollar Tree pizza pan DIY work for hire chore chart. How to make a work for hire board for your kids. Easy Dollar Tree craft.

SIX-

Add a ribbon hanger to the back. Make sure it lines up with the front, you don’t want a lopsided chart hanging up after all this hard work. Use tape to hold the ribbon in place on the backside. Glue to the back side of the pizza pan using E6000. I used the discarded piece of backing from my vinyl to press the ribbon into the glue. I didn’t want all of that on my fingers. That worked great for me! Just like with the clothespins, set the pizza pan in a place it can fully dry without being disturbed.

Dollar Tree pizza pan DIY work for hire chore chart. How to make a work for hire board for your kids. Easy Dollar Tree craft.
work+for+hire9.jpgDollar Tree pizza pan DIY work for hire chore chart. How to make a work for hire board for your kids. Easy Dollar Tree craft.

SEVEN-

After everything is dry hang up and add your clothespins with the money attached to them.

Dollar Tree pizza pan DIY work for hire chore chart. How to make a work for hire board for your kids. Easy Dollar Tree craft.

I hope you enjoyed this crafty tutorial and that it helps and inspires you to create your own. As with all of my posts, if you have any questions please feel free to ask.

Happy crafting!

Want instant access to all of my freebies? Fill out the info below and you instantly get the password to get into my FREE RESOURCE LIBRARY. This is where I share all of my printable, files, more to share with anyone that wants them to use for non commercial use.

Ultimate Dollar Tree birthday gift idea

Ultimate kid's birthday gift from the Dollar Tree

The best kid’s birthday gift idea when you’re on a budget

It’s no secret that my girls and I LOVE the dollar tree. Seriously, we were just there today and when we got home my oldest couldn’t believe that we spent and entire HOUR in there and it literally felt like only 20 minutes had past lol! Yep…raising those girls right!

Our sole purpose of the trip was to find a couple gifts for the oldest daughter’s friends for their birthday parties. Raising a family of 6 isn’t a cheap task. So, things like friend’s birthday parties typically have a pretty small budget of $10 per kiddo. At Walmart $10 doesn’t get you much from the toy aisle or any aisle that a kid would be interested in anyway. But, I have to say over the years we have gotten really good at whipping up some amazing birthday gifts on the $10 budget. And I can’t wait to share the latest gift that comes in WAY under budget! Under budget meaning 70% lower than what we typically budget for friend’s birthdays.

Affiliate Disclosure. Some of the links on this website are affiliate links, which means that I may earn a small commission if you click on the link or make a purchase using the link. If you make a purchase you will not be charged anything additional.

How was I able to create two gifts for kids for under $6?

Well, first the Dollar Tree. It is FULL of really amazing things that on their own may not be all that amazing but when paired with something else, like let’s say a personalized wood letter cut out, can be one of the best gifts ever! And second, I just purchased a scroll saw last weekend with the money that comes in from my handmade business so I used that to create the customized gifts for her friends.

The ultimate Dollar Tree birthday gift idea for under $5

My only regret is not buying a scroll saw sooner. If you’re curious about the one I purchased you can see more about the Ryobi scroll saw here. And if you wanna know about the other tools I have in my shop I’ve written a break down of which tools every crafter needs.

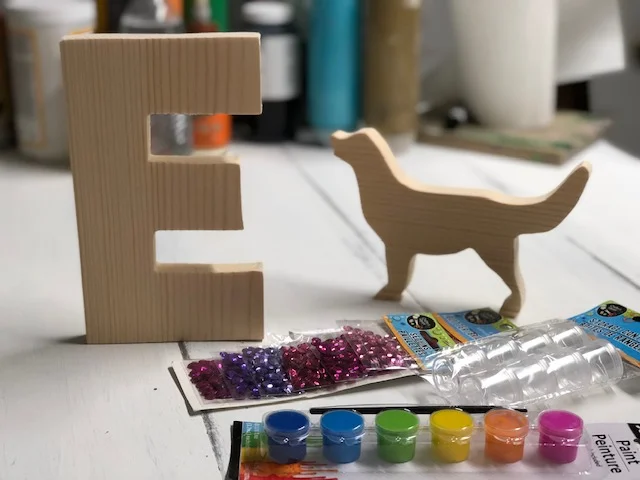
I used my Cricut Explore to cut out the letter E and the dog from cardstock. Then I outlined them with a pencil on a scrap piece of 1x8 that had been sitting on the wood shelf in the garage. Using my new handy scroll saw I cut out the shapes. Gave them a light sanding and they were ready to add to the items we picked up at the dollar tree.

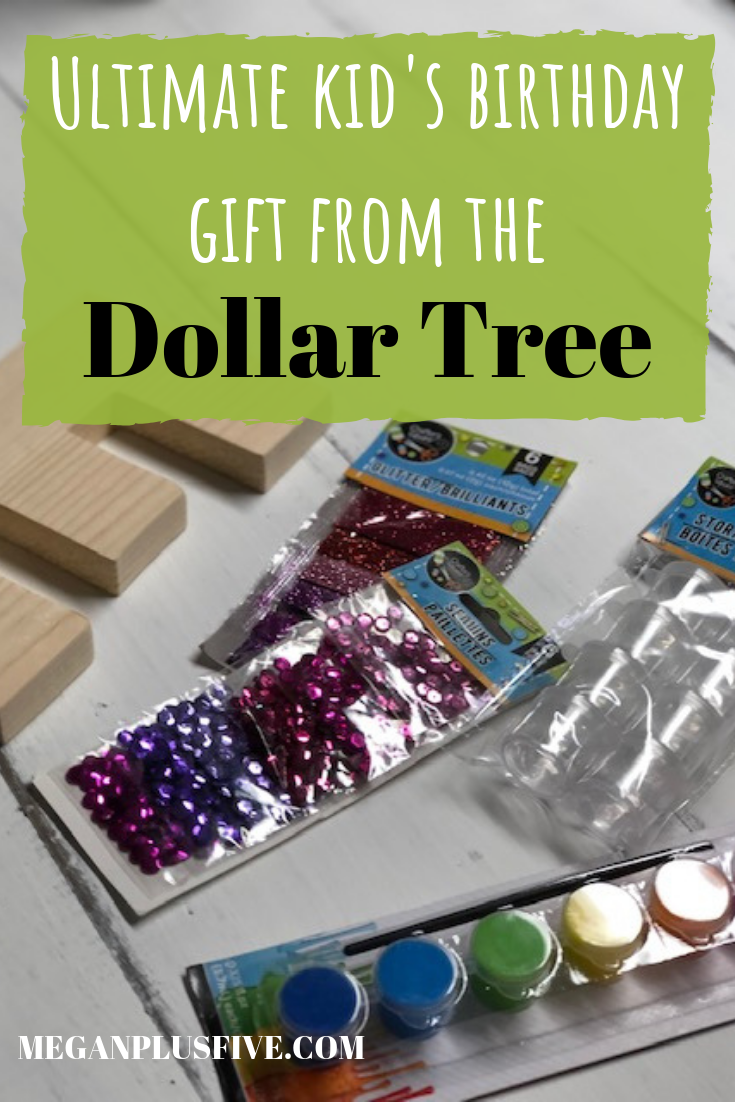
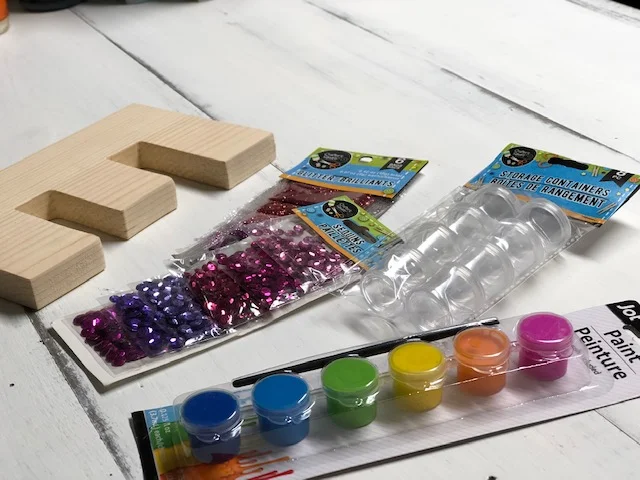
Here’s what we picked up from the dollar tree

  • 1 package of purple/pink 6 pk glitter

  • 1 package of blue/green 6 pk glitter

  • 1 package of purple/pink sequence

  • 1 package of small containers

  • 2 paint pots

We bought the small containers to fill with white paint and glue {which we have a TON of at home} . Since the paint pots don’t come with white paint and sequence doesn’t stick well to paint we thought those additions to the birthday gifts would be a good idea. I wrote on the outside of the containers which one was glue and which one was paint so there wasn’t any confusion when the birthday girl goes to use her new craft kit.

The glitters and sequence were individually wrapped so we pulled them off of the original packaging {they were just taped to the thin cardboard} and gave each birthday girl 4 glitters and 2 sequence.

The ultimate DOLLAR TREE birthday gift idea

To keep the birthday crafts looking somewhat professional I packaged the craft supplies in a clear goody bag {the party favor kind} that we already had left over at home.

I am so excited about this new DIY birthday craft idea! It’s absolutely perfect for the crafty kiddo in your life and it costs just a few dollars to create! I can honestly say that our girls loved this idea so much they each want their own.

———> Want more crafty gift giving ideas? Check out my post on these top selling kid approved DIY CRAFT KITS FOR KIDS

——> Also, you don’t want to miss this a great list of the PRE TEEN CRAFT IDEAS, because they can be so hard to buy for sometime

DIY sensory activites your toddler will love

DIY sensory activities your toddler will love. How to make sensory bins for you tot.

What is sensory play for toddlers?

Sensory play is crucial for your child’s development. I’m not going to spout out all the scientific reasonings sensory play is huge for your toddler…because I am not a doctor or licensed in this field in any way. I am, however, a momma of 4 and have seen what it’s done for our own daughters. And since I’m super frugal and crafty I am going to share with you how you can make your own DIY sensory activities on a dime! If you’d like to read a little more science behind sensory importance read this article from Heather at Growing Hands-On Kids.

Sensory play touches on these five senses

  • sight

  • smell

  • touch

  • taste

  • hearing

When we let our kiddos explore the things around them they start to understand their bodies. They start to understand just how all these different things work. So when all you see is a mess what they “see” is so much more. They are learning through play. Just as you would learn through doing something, say a new craft technique, or a task at work. We learn when we do and our babies and toddlers are no different. So, don’t focus on the mess. Focus on the wonderful things that are happening inside your little one’s brain.

And a plus is that it’s SO easy to make your own sensory activities at home. More than likely you already have everything you need to create these too.

Affiliate Disclosure. Some of the links on this website are affiliate links, which means that I may earn a small commission if you click on the link or make a purchase using the link. If you make a purchase you will not be charged anything additional. This is just a way I can help add to our family finances to raise our four daughters. Please know I would never recommend a product or service I do not totally stand behind.

If you love this article you’ll also love my post on toddler apple stamping canvas art. This is sensory oriented and makes an adorable keepsake for you!

Here are my top sensory activities to do at home for toddlers

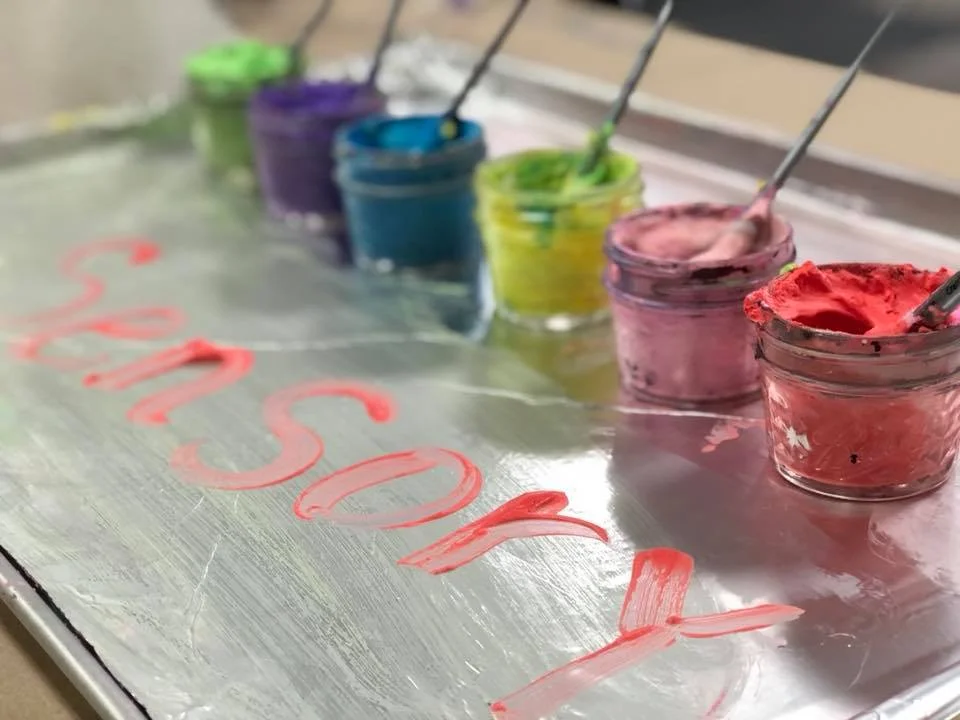
1. Colorful fluffy paint on foil

Here’s what you need

  • containers

  • paint brushes {or they can use their fingers}

  • pan

  • foil

  • food coloring

  • cool whip

Cover a metal pan in foil. Fill containers half way with cool whip. Add a few drops of food coloring. Let them paint. You can wipe off the foil if there gets to be too much cool whip “paint” on it and let them do it all over again.

DIY sensory activites for your toddler that you can do at home

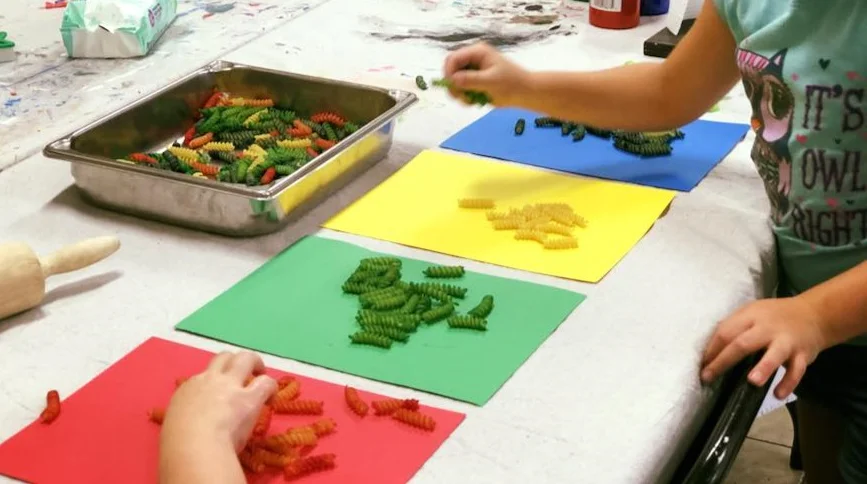
2. Color sorting with noodles

Here’s what you’ll need

  • colored noodles. I made these by placing them in ziplock bags, adding food coloring and shaking. Allow them to dry overnight prior to using.

  • bin or bowl

  • colored paper to coordinate with the colors of noodles you have

This is a really fun game for kids. This would literally keep our youngest daughter busy for a solid hour! You can even add some drops of essential oil to the noodles when you color them to make it an even better experience for your tot.

DIY+sensory+activities+your+toddler+will+love%2C+how+to+make+sensory+games+for+toddlers

3. Racing cars in paint

Here’s what you’ll need

Cut the bottom off your trash bag and a slit in the side, so that the bag opens flat. Tape it to the floor, a solid ground not the carpet. Add some paint and let your kiddos explore what it looks and feels like to run wheeled things through it. Even better because they see what it looks like when they start mixing the different colors together. This is super fun!

DIY sensory activitiy for your toddler, how to make your own sensory fun at home

4. Scented Playdough

Here’s the recipe I used for DIY playdough. I did add food safe scented oils to mine. You can see this one is still a big hit with our older daughters. We bring out the cookie cutters, rolling pins when we play with our DIY playdough. Don’t worry if they mix all the colors together, it’s apart of the fun for them.

DIY sensory activities for your toddler, how to make sensory days at home for your kids

5. Water Play

Here’s what you’ll need

  • bins

  • water

  • measuring cups

  • floating balls

  • large kitchen ladles and anything else that looks like fun to use in the water

This one was HUGE with kids! They love playing in the water. Show them how they can pour a scoop of water from one thing to the other. There are so many senses that are used during water play.

DIY sensory activities for your toddler, how to make sensory bins at home

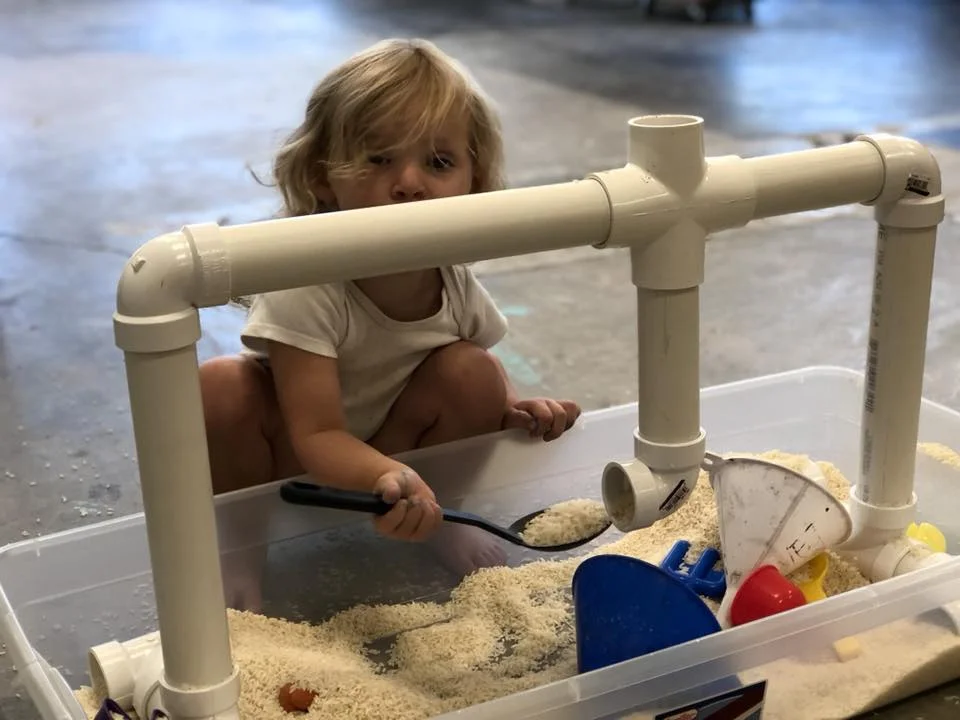
6. Rice Bin

Here’s what you’ll need

  • rice, LOTS of rice

  • pvc, solid pieces, elbows, and T’s

  • funnels

  • scoop spoons

  • large bin

I saved this one for last because is has been the ALL TIME FAVORITE with the girls! I don’t have exact plans for this DIY sensory rice bin but it didn’t take too much thinking to put together. I just cut pieces for sides, two pieces for the top bar, added some elbow’s, t’s and it was ready to go. I did not glue this together as I wanted to be able to take this apart to store away. You could even do something like this for water play!

DIY sensory activities your toddler will love and how you can make them at home

There you have it, my top 6 sensory play activities for toddlers from a mom’s point of view. Most of the materials for these activities you probably have around the house, talk about frugal toddler fun! Yes, they are messy but let them get messy. Let them learn. Let them explore. Let them be toddlers and enjoy this time you have with them.
Check out more kid friendly posts below

How to juggle it all during the summer when you're a WAHM

5 must have tips for WAHMs to survive the summer months

Is it possible to be a mompreneur during the summer months?

Yes, absolutely! Working from home during summertime with kiddos is, let’s just say a little crazy sometimes, but it’s still possible. I haven’t always been a WAHM so I’ve definitely had to adjust how we “summer” these days. And after a few years I think I finally found our happy middle. As long as I keep these 5 tips for how to juggle it all I can keep my sanity too.

Here are 5 tips to help you “summer” better as a work at home mom.

  1. Set a MOM IS WORKING schedule.

This does not have to be the same every single day. In fact, ours changes daily. I create handmade décor & craft kits so my days are really pretty flexible and this type of scheduling works well for our family. If your schedule can’t be as flexible decide what days you need to work and be sure the ENTIRE family is on board. And then implement the schedule all summer long. I personally have chosen to work 3 days a week and scheduled off 2 fun days per week.

2. Let them help

If your kiddos are old enough and your type of business allows for it let them help you. Take the time to show them what it is you do. They will have a much bigger appreciation for your work AND they will love that they got to be involved. Some things our girls help me with in our crafty business is organize invoices, write thank you notes to our customers, and help with packaging.

3. Plan a bucket list

Planning a summer bucket list will give them something to look forward to all summer long. Even better, plan it together. Here is the summer bucket list that our family planned. They are all FREE things to do so I don’t even have the stress about finding room in the budget for a ton of summer activities.

4. Take an hour a day to tidy up the house

Keeping a tidy house will help you keep your mind clear. It’s when the laundry starts to pile up, the toys are scattered everywhere, and the bathroom counter looks like an explosion…don’t judge lol we’ve all been there…that your mind starts focusing on those items instead of what’s on the calendar for the day, whether it’s a fun or a work day. I take 20 minutes each morning to do some light chores and 40 minutes before my husband gets home from work we do the rest of the chores that need to be done that day. This has really helped me from getting distracted and staying on task for the day. We are a chore family so all of our girls, even our 3 year old, get involved in the housework.

5.. Take the time to unwind

For the most part I stop working my crafty job when my husband gets home from work. Although I could craft and create all day everyday it’s so important for my sanity, my marriage, and my job as a mom to take time to just let my brain unwind and breath. Enjoy a drink with your husband on the patio talking about your day. Jump on the trampoline with your kids. Take a walk as a family around the block. No matter what it is, take the time to be present with them every day.

I hope this list of managing your summer as a work at home mom helps. Remember to enjoy those precious babies, work will always be there but they won’t be little forever.

Summer 2019 Bucket List FREE things to do in KC

Summer Bucket List 2019 FREE things to do in Kansas City

27 FREE THINGS TO DO IN AND AROUND KANSAS CITY THIS SUMMER WITH THE KIDS, especially if you’re a SAHM {stay at home mom}

Ahhhh summer! As a mom of 4 I know it can be super difficult to plan a summer on a really tight budget. And when I say a tight budget I mean spending ZERO dollars. I know it sounds like it’s impossible but with a little bit of planning it can be done. But after reading this you won’t be asking yourself or googling “what is there to do in Kansas City with kids”.

Before school let out I was on the hunt for all kinds of amazing adventures to take our girls on during our days while my husband was at work. But not just fun, I was specifically looking for FREE things. It was actually a little more difficult than I thought. I thought I could just google FREE THINGS TO DO IN KANSAS CITY and a magical list would pop up, I’d hit print and away we’d go. Nope, it didn’t happen like that. While there are great lists out there none were exactly what I was looking for for our family. The more I dug into these lists the more I found that a lot of the things listed weren’t open during the weekdays, they weren’t actually free {free with a membership doesn’t count if you have to buy the membership}, the places were way too far for us to drive, or they weren’t in operation anymore.

So my husband and I brain stormed and thanks to google we came up with a pretty decent list of things I could take the girls to during the weekdays. I promised them 2 days of fun each week and so far it is going great! And we thought how fun would it be to just explore the historic downtown areas of some local towns?! So we put that on our list too!

GRAB YOUR FREE PRINTABLE FOR KANSAS CITY SUMMER FUN

Be sure to check out other ways to get in some family time without breaking the bank .

So, here’s our list. 27 totally FREE things to do with kids in and around Kansas City.

DEANNA ROSE FARMSTEAD

Deanna Rose Farmstead is one I hear people talking about a lot. It is FREE when you attend M-TH after 2pm. Otherwise it is $3

KALEIDOSCOPE

Is always FREE. It is a magical place that lets kids create to their heart’s content. I advise you go early in the day, the earlier the better, and just a warning it can get a little crazy with field trips. But their staff does a great job at handling it all.

CHILDREN’S PEACE PAVILION

General public tours are held on Wednesdays & Fridays 9-4. While it is technically FREE they do accept donations.

BURR OAKS NATURE CENTER

It is open T-S 8-5 and has so much to offer families. Kids and grown up of all ages are sure to enjoy this if they are a nature lover. They have numerous trails, and outdoor kid’s discovery area, indoor kid’s discovery area, bird watching, snake feedings and so much more.

THE SPLASH PAD AT BURRUS OLD MILL PARK

This splash pad is new to Blue Springs and is something our girls can’t wait to enjoy. It is totally free unless you would like to rent a shelter house.

FREE PASS AT THE KANSAS CITY ZOO

If you live in JACKSON or CLAY counties the KC zoo MAILS out FREE passes for the residents in those counties to use during certain months. During the summer months they send out a FREE pass for JULY and AUGUST. Be sure to make your trip the best it can be with my tips for a stress free trip to the zoo

KANSAS CITY STREET CAR

The Kansas City street car is a wonderful addition to KC! It’s a FREE 2 mile ride through the heart of downtown. Definitely a must do in KC!

CROWN CENTER

While we don’t visit Crown Center for it’s shopping, it does offer some great things for families to do for free. Be sure you get your FREE 3 hour parking pass by getting a merchant to validate it, no purchase necessary.

NATIVE HOOVED ANIMAL ENCLOSURE {FEEDING THE BUFFALO}

This one is tucked away so be sure you use GPS to help get you there. Also, bring fresh veggies like carrots as there isn’t a place to buy feed once you’re there.

EXPLORE DOWNTOWN INDEPENDENCE

The historic Independence Square has SO much history to explore. This is truly one of our favorite historic places. Aside from Harry S Truman’s home there are so many things to see in such a small area. AND there are lots of unique photo ops too! Take your time and really explore this area.

FEDERAL NATIONAL BANK

This museum is FREE 9:30-4 M-F. Be sure to bring your photo ID. It is located right by Crown Center so make a day of it and visit all the things that area has to offer.

KANSAS CITY FOUNTAINS

Spend the day driving around looking at all the wonderful fountains that Kansas City has to offer. With over 200 fountains this is sure to keep you busy all day. Be sure to get this Kansas City Fountain Guide to assist you on your adventure.

EXPLORE DOWNTOWN LIBERTY

Downtown Liberty is truly a beautiful place. With so much history you’re sure to learn something new.
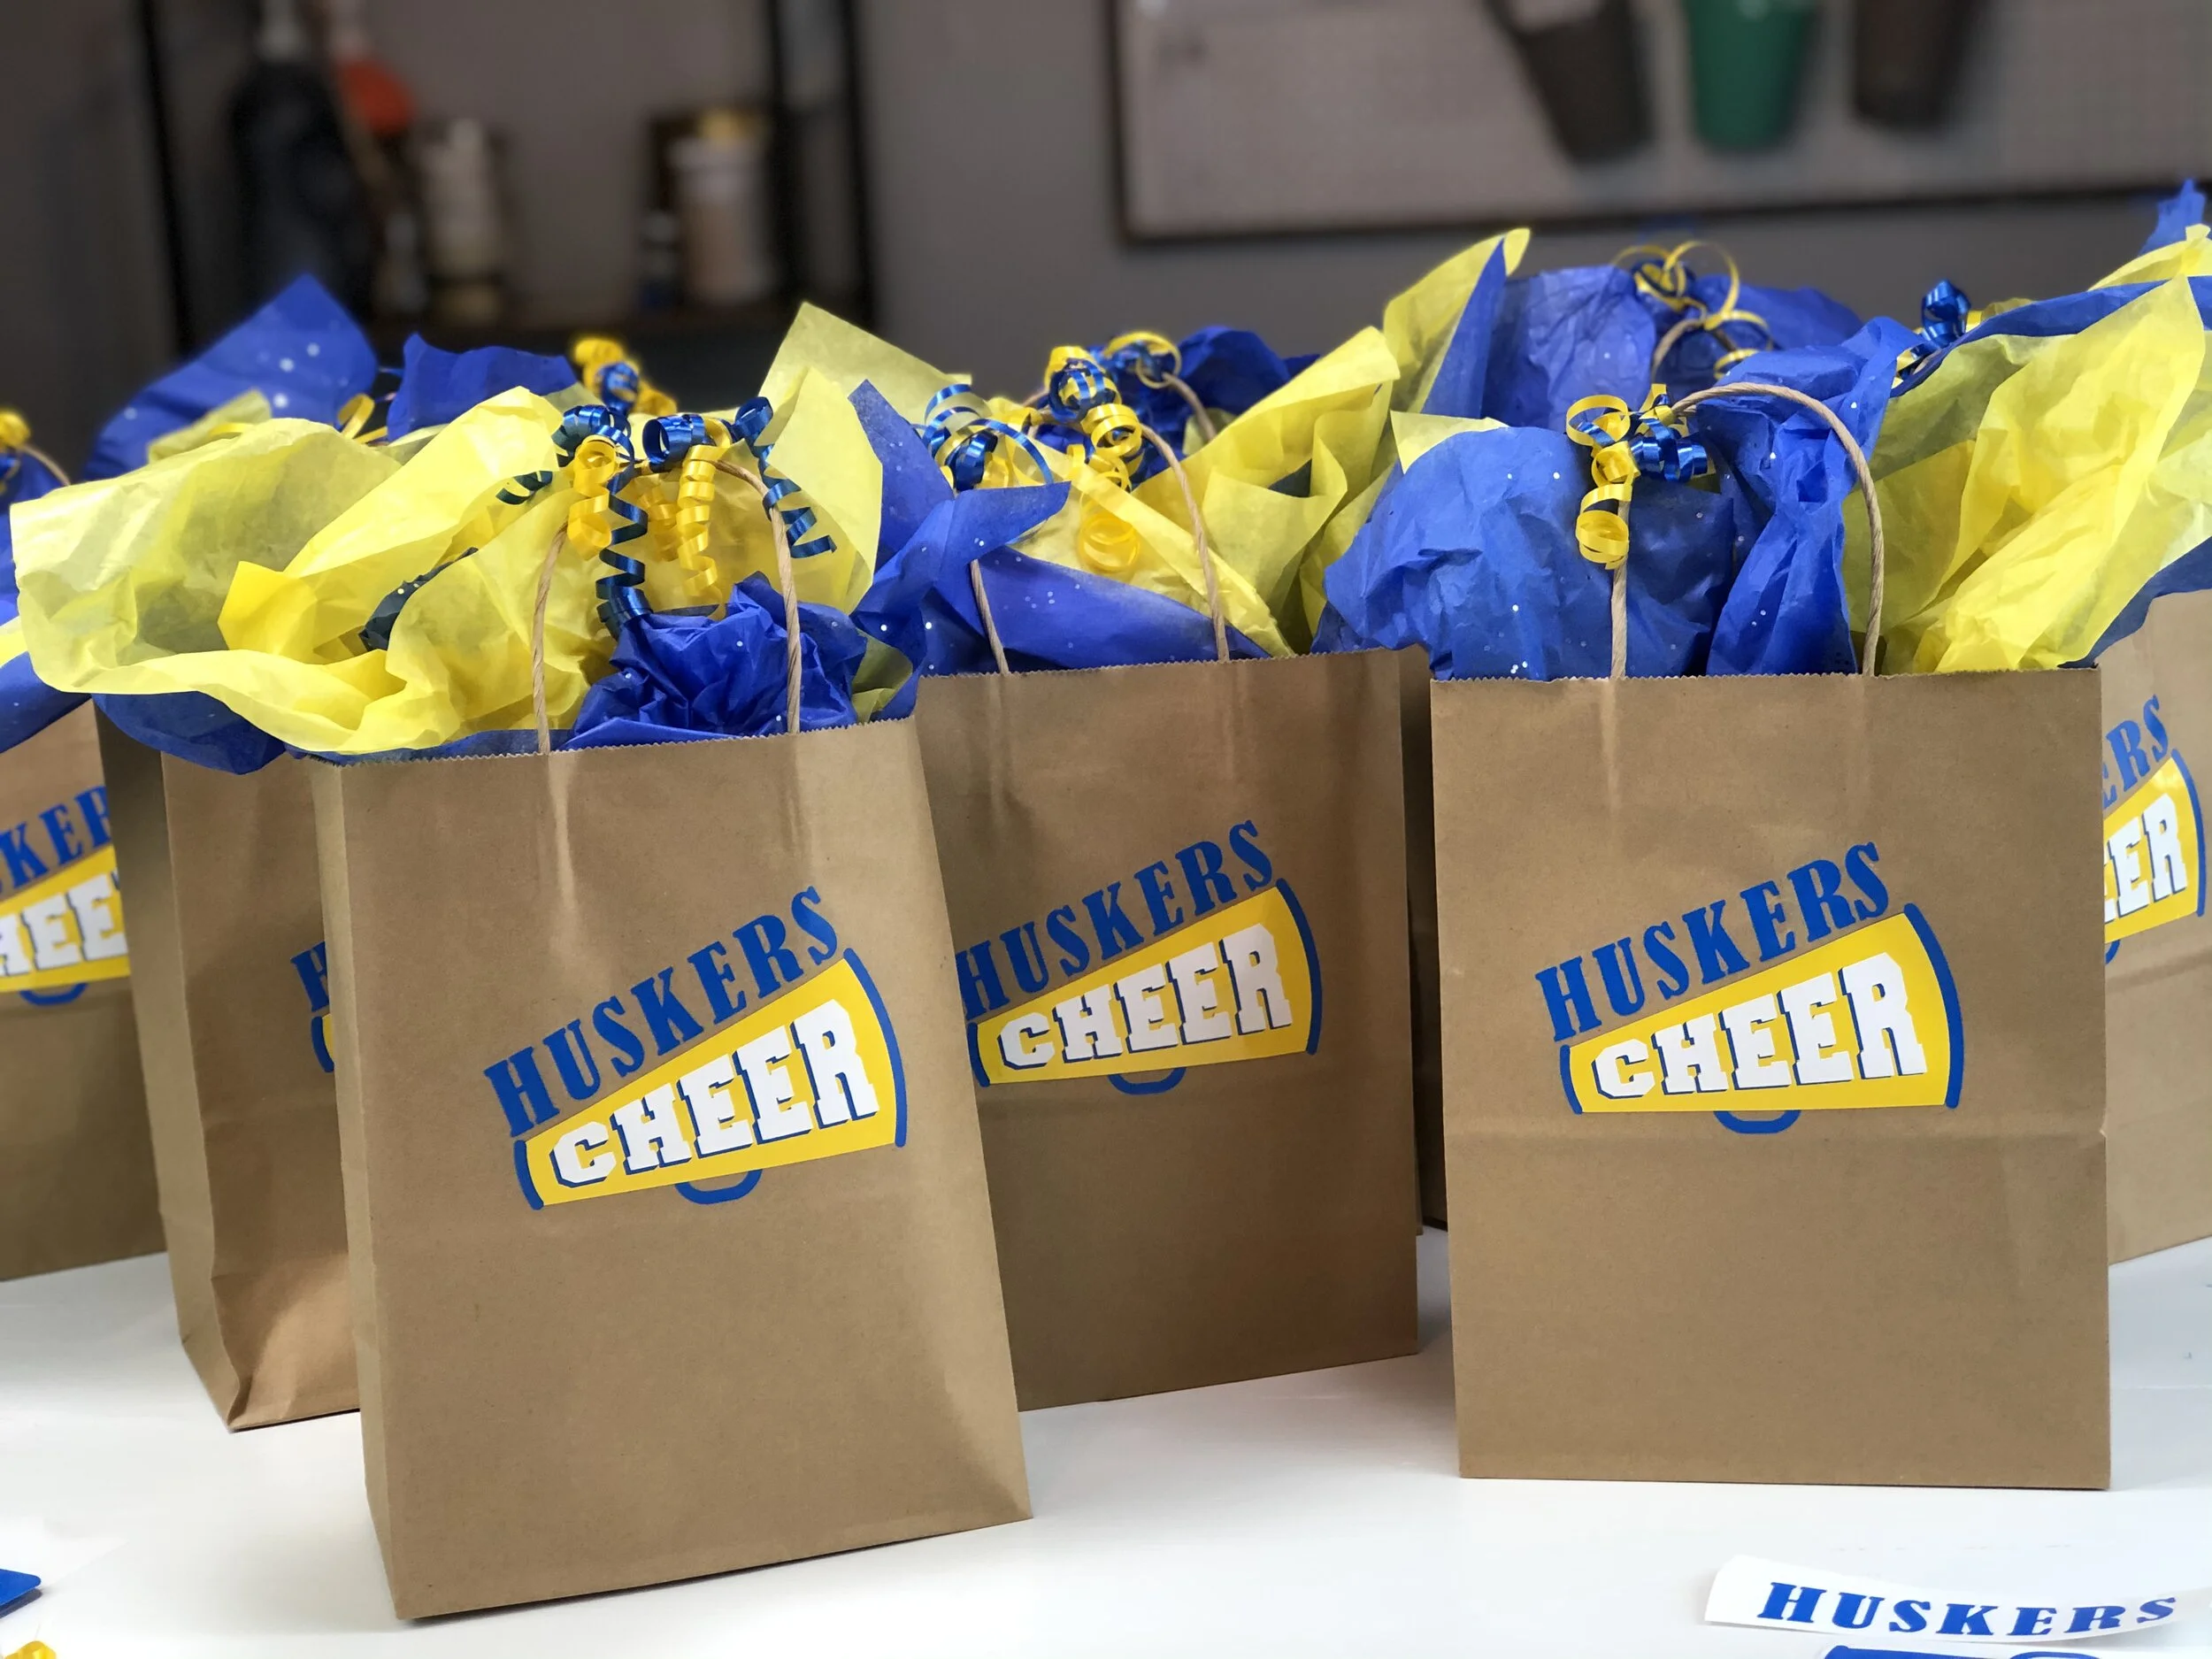
LIBERTY JAIL

The Liberty Jail is ran by the LDS Church. I’m going to be honest I had a hard time finding info on this one but we think it will be interesting to see.

LAKESIDE NATURE CENTER

Open to the public TUES-SAT 9-4. It is one of Missouri’s largest wildlife rehabilitation facilities and provides educational and recreational opportunities that focus on the environment.

EXPLORING LEXINGTON MISSOURI

Take a day and explore this beautiful town. There is a ton of history and beautiful houses galore.

PENGUIN PARK

Penguin Park is located in Kansas City and is one unlike any others around.

LEE'S SUMMIT HISTORY MUSEUM

It is open Thursdays & Fridays from 10-2 and Saturdays 10-4 and admission is totally FREE. Learn about the early days of Lee’s Summit.

EXPLORING DOWNTOWN LEE'S SUMMIT

While you’re at the Lee’s Summit History Museum explore the rest of what downtown Lee’s Summit has to offer.

WATERFALL PARK

Waterfall Park is located in Independence right off of Bass Pro. It features a pond, playground, small rock climbing wall, picnic area, and a walking trail. This park is very shaded which makes it nice on super hot and sunny days.

LIBERTY MEMORIAL

The Liberty Memorial is a MUST to take your kiddos to. While there is a museum you can pay to see, just visiting the FREE outdoor attraction is pretty amazing.

EXPLORE DOWNTOWN KANSAS CITY

See the fun sites of big city life in downtown Kansas City. Park the car and take a walk around.

UNION STATION

Such a wonderful place to take your kids! While Science City and other attractions aren’t free walking around and seeing all the amazing beauty and it’s history is enough reason to take a trip there.

HALLMARK VISITORS CENTER

The Hallmark Visitors Center is located right next to Kaleidoscope. It is open 9:30-4 M-Sat and is completely FREE.

MARBLE MOON COMPANY

Visit the Marble Moon Company M-Sat 10-5. Catch a marble making demo on Tuesdays, Fridays & Saturdays from 10:30-3.

WATKINS MILL

Take a trip back to the 1800’s and visit Watkins Mill. While the guided tours do cost money just driving through and looking around is FREE.

LEGACY PARK

Legacy Park is located in Lee’s Summit on 692 acres. The kiddos will love their destination playground.


I hope you enjoy this list our family put together. Everything I shared here is completely FREE unless you opt for the extras, those do cost money and I’ve listed them where they are applicable. Fill up the gas tank, pack a lunch and get ready explore the Greater Kansas City area. Let me know what else we should add to our list:)!

27 totally FREE things to do with your kids in Kansas City

12 tips to make your trip to the zoo even better and stress free

12 tips for a stress free trip to the zoo

I love watching my girl’s faces light up when they see all the animals at the zoo. But to tell you the truth, I haven’t always loved actually going. I know all moms everywhere can relate. It can be so much work and STRESS to take your kids places like this by yourself. But it can be fun for you too you just have to change a few things up. For more fun stress free adventures with the kids check out my backyard camping tips.

Here are my top 12 tips to make your zoo trip even better.

  1. Go to the zoo when it’s not crazy hot. When I’m hot I get grumpy, which really just means that I’m not enjoyable to be around lol! So we always go on days when this crazy Midwest weather isn’t scorching.

  2. If you’re taking multiples have them wear the same color. I have four girls so I bought larger pink shirts from Walmart, so they could grow in to them each year, and those were our zoo shirts. This way it’s super easy to pick them out in the crowd.

  3. Take a backpack. this is a must! Anytime we are going to be out walking around for extended periods I ALWAYS wear my backpack. I’m not a fashion forward kind of girl so this does not intrude on my style one bit. Comfort over fashion, that’s how I roll lol!

  4. Don’t over pack. I know you’ll want to take everything but the kitchen sink but the truth is you don’t need everything. I used to be that mom and I learned that I don’t need to be prepared for EVERYTHING. The zoo is equipped with Band-Aids if one of my precious girls falls and skins her knee. So keep the load light and if you absolutely need something you didn’t pack it’s not the end of the world, the zoo will likely have what you need.

  5. Pack the essentials. I’m talking wet wipes, ibuprofen for both you and the kids, Benadryl for the kids {this is a must with us because we’ve been in situations where we needed it asap for a yellow jacket sting and now I don’t go on trips like this without it}. These items are small and will fit easily and weightlessly in your backpack. Trust me, these are items you don’t want to buy once you get there. Talk about a convenience fee.

  6. Pack a lunch. I don’t think we’ve ever bought lunch at the zoo. The prices there are crazy high so we pack one. If you choose to pack a lunch keep it simple. We usually take a sandwich, cut up veggies, chips, and something sweet for everyone. I’ve found if I keep my kids busy they don’t want to snack all day. So keep pointing out those animals and talking about them, they’ll likely not ask for a snack.

  7. Take refillable water bottles. We usually take two and I keep them in the side pockets of my backpack. Our zoo has water refill stations everywhere there is a bathroom so we usually refill every time we stop to use the facilities. And with four kids we stop often.

  8. Everyone NEEDS to wear comfortable walking shoes. We don’t ever wear sandals or flipflops, always tennis shoes because again, comfort over fashion ;)! Not having your kiddos complain that their feet are hurting from wearing uncomfortable shoes is a glorious thing! You might have to stand your ground before you leave the house but you’ll be SO thankful at the end of the day bc the jelly shoes little Susie wanted to wear won’t be giving her blisters today 🙌!

  9. Pack sunscreen. Our family is full of fair skinned faces so we apply this a lot throughout the day. If your sunscreen bottle is a little too big to carry around all day get a small travel sized shampoo bottle from the Dollar Tree and fill that with your sunscreen.

  10. Bug spray. If you live in an area with little flying evil blood suckers, in other words mosquitos, you will probably need this. Even on days when it’s not typical prime mosquito weather we’ve still encountered them at the zoo. I always take this just to be on the safe side. For some reason they REALLY love us.

  11. Take quarters, enough for all your kiddos, to feed the animals. Our zoo has several areas that kids can feed the animals and sure enough the times when I forget quarters the change machine is down. So take enough for each of your children to get their own to feed for the animals.

  12. Don’t feel like you have to see everything. The times when my girls and I have had the most fun at the zoo is when we go in without a plan. These are the days when I’m not stressing over making it in time for them to watch the birds get fed, or rushing through the animals so fast so we can see them all and we end up not really SEEING them because we rushed. Take your time and enjoy it. And if your kids want to stop and play let them play. Granted you’re there to see the animals but you’re also there to enjoy the day with your kids and if stopping for 20 minutes will make them happy, let them play.

As a mom of four this list has helped me tremendously enjoy our trips to the zoo. The important thing to remember is tip #12. It’s all about enjoying the day with those precious little souls.


Stress free backyard camping

Fun and stress free backyard camping

Affiliate Disclosure. Some of the links on this website are affiliate links, which means that I may earn a small commission if you click on the link or make a purchase using the link. If you make a purchase you will not be charged anything additional.

Camping is such a fun experience that every family should have at least once. Our family tries to go every year but this spring it has been a little difficult to plan a trip. With flooding, tornadoes, and the temperature not making up it’s mind if it wants to stay cold or move on to warmer weather…oh the good ole Midwest lol!

Since our girls have been asking for months to go on our camping trip we decided to bring the camping trip to us. And I have to say I can’t believe we haven’t done this sooner! The girls loved it because it was something new and we loved it because we didn’t have to pack half our house up for an over night trip. And a bonus because our toddler has been super cranky lately she spent a lot of the time watching Disney Junior, thank you home wifi {no judgements please, we all parent in different ways and if Disney Junior will keep her happy then so be it}.

We wanted to keep our camping stress free so we didn’t plan any fun games or fancy Pinterest worthy foods. We put up our massive 10 person tent {we are a big family and this tent is sized perfectly for us}, added some tiki torches, moved the fire pit, and started the fun!

Stress free backyard camping

I guess you could say we got a tad bit fancy. My husband grilled up something different than the typical burgers and hotdogs that we would have had if we were camping on a campground. He is the grilling king and made us all the most delicious grilled chicken sandwiches.

My tips for stress free backyard camping

  • Keep it simple, don’t over plan.

  • Make sure you have all the pieces to your tent before you tell the kids. The last thing you want are sad little faces looking at you when you realize you don’t have everything there to put their tent up.

  • Let your kids dig and really explore the backyard. Our girls pretended they were lost in the wilderness and the tent was their new home.

  • Air mattresses, they may not be a must but I completely enjoy a good nights sleep even when I’m sleeping in a tent. These are the exact ones we use and trust me, if they can withstand our rowdy chaotic bunch they must be good!

  • Fresh batteries for all the things

  • Bug spray

  • Fire wood

  • Comfy clothes you can get messy for everyone

  • Let loose and have fun with your family.

Stree free backyard camping


And the best part…if you forget something it’s ok! Your home is just a few steps away. Our whole family, aside from our toddler, had a great time! Being a family of 6 with 3 of the 4 daughters within 4 years of one another, we tend to have bickering. I think because we were in our own element we didn’t have any of that, which also made it stress free!

I hope these tips help you to create your own stress free backyard camping with your own family.


Drinking enough water when you're a busy momma, the #1 tip that really works

Drinking enough water when you're a busy momma, the #1 tip that really works

Affiliate Disclosure. Some of the links on this website are affiliate links, which means that I may earn a small commission if you click on the link or make a purchase using the link. If you make a purchase you will not be charged anything additional.

I am going to be seriously honest, I don’t drink enough water every single day. Well, I used to not anyway. I’m willing to bet that there are a lot of mommas that feel the same way I used to. Something about knowing I HAD to drink 8 full glasses, 90 OUNCES of water every single day was intimidating {but give me 8 glasses of Dr. Pepper or iced coffee and that’s a whole different story}. I for real struggled to drink enough water most days and I was really feeling the side effects of it.

Some of my side effects were

  • skin was looking extra dry and wrinkly

  • hungry ALL the time

  • urine was dark in color

  • feeling super fatigued a lot

  • getting a lot of headaches

It wasn’t till I picked up a package of stainless steel straws and used them that I realized it was a mind of matter kind of thing to get myself to guzzle down at least 8 glasses every day. I had every intention of trying these fancy straws out the last two years and just never got around to it {busy mom brain}. One day I finally added them to my cart and I am KICKING myself for not doing it sooner!

Using the straw works because we tend to drink more when we use a straw. And using a stainless steel straw works even better because it is reusable. Just wash and dry when you’re done using it and it’s ready for water drinking the next day!

But I still wasn’t drinking enough water. I was drinking more, but not as much as I needed to be to get adequate hydration. I still felt an overall blah. So I pulled out my stainless steel tumbler to see if maybe that would help.

Drinking enough water when you're a busy momma, the #1 tip that really works

Holy cow it did! After about a week of drinking from my Ozark 30 oz tumbler I noticed a HUGE difference in the way I felt. For the first time in a very long time I felt truly hydrated! My skin felt amazing. It wasn’t itchy and scaly {even using coconut oil daily wasn’t combating this}. My hair didn’t feel as yuck as it had been. My mind was even clearer! I had a better focus and I actually had energy to get things done AND wake up early!! This is huge for me since I’m not a morning person at all.

This has worked so well for me that I picked up an Ozark 20 oz tumbler for each of my girls. They are loving them and I’m loving that they don’t get all the glasses in the cabinet dirty anymore.

I picked my tumblers up at my local Walmart but here are the links to purchase similar ones on Amazon Prime

Being a busy momma it is hard to be sure to do all the things but we really do need to put our health and our family’s health at the top of the to do list. Start with drinking enough water. I promise you will be a much more productive momma and you will love your hydrated self!

DIY Tassel Garland, make your own for just pennies each

DIY Tassel Garland, make your own for just pennies each

Affiliate Disclosure. Some of the links on this website are affiliate links, which means that I may earn a small commission if you click on the link or make a purchase using the link. If you make a purchase you will not be charged anything additional.

Raising kids is so hard sometimes. Nothing prepares you for having to console your child on days when they are feeling down about themselves. I think this is especially true for raising daughters. We have four little girls and life is a roller coaster of emotions with them some days. Recently we celebrated our third daughter’s birthday. We always celebrate before school lets out because she has a summer birthday.

We sent invites out two weeks in advance and this girl was SO excited to have all her school friends over for her unicorn themed birthday party. I’ll admit I’m a frugal person thru and thru. When I plan our girl’s parties my husband and I don’t spend an arm and a leg on the party. I try to keep it under $50 for the cake and decorations that way we still have room in our budget to gift them a decent gift that they’ve been wanting.

But this year I had to get super creative on my spending because I needed to throw her a fancy {as fancy as we get around here ;) } unicorn birthday party! It was just days before her party and she had only had one, yes ONE friend RSVP to her big day. Talk about tears falling and hearts breaking. I HAD to make up for the possibility that there be no one besides family at her party.

So I scoured all the pretty things on Pinterest and put together a few ideas of things to decorate her party with to make her feel extra special. Keeping it under $50 was a bit of a challenge but I was determined to make it work! Tassel Garland, among a few other DIY decorations, made the cut. These ended up costing than $4 to make two full strands of tassels PLUS extras to put around the unicorn centerpieces.

Thankfully two days before her party she had a couple more friends RSVP and she had a great party! They played some fun unicorn games, made tasty treats and loaded them down with EXTRA sprinkles, got to decorate their own cupcakes, and most of all the birthday girl felt so loved and special on her day!

After her party she got to hang the pretty garland in her room which made these tassel even better!

To make your own DIY tassel garland for your own special occasion…

Here’s what you’ll need

I was so surprised at how EASY these were to make! I was able to knock these out in no time. And our sweet girl LOVED them!

I’d love to hear your feedback below!

DIY Tassel Garland, make your own for just pennies each

Grocery budgeting to feed your big family, how to master this so your fridge is never empty

grocery shopping on a budget, how to stretch your grocery list to last longer

Affiliate Disclosure. Some of the links on this website are affiliate links, which means that I may earn a small commission if you click on the link or make a purchase using the link. If you make a purchase you will not be charged anything additional.

It’s a no brainer that the more kids you have the more you’re going to have to spend at the grocery store. But that doesn’t mean you can only afford rice and beans. You just have to get a little creative with your shopping list and meals.

We have a relatively larger sized family, there are 6 of us. Granted our girls are young, elementary aged and younger so they don’t eat like teenage boys, but don’t underestimate these girls. They can put back some food. Especially our toddler. I honestly don’t know where she puts all that food.

As our family has grown over the years we’ve learned to get a little creative with our meals to really stretch the groceries every week. Some weeks are harder than others, especially in the winter months when everyone is working on packing on that thick winter coat and it seems like everyone is constantly hungry. But that’s a whole other post all together.

How do I feed our family of 6 for $400 a month? I don’t use coupons and I certainly don’t hop from store to store to chase down what’s on sale that week. BUDGETING and meal planning. I’ll admit before my creative business took off I absolutely was one of those coupon queens. I was really good at it, even teaching others how to do the same. But those days are long past me while I’m working on building my own crafty empire for our girls to carry on if they wish.

So back to business, if you’re disciplined you too can feed your family every month without going over budget.

Almost every single meal our family eats we get it from home. We don’t eat fast food a whole lot, we don’t dine at fancy restaurants {that’s not really our thing anyway}, and our girls don’t eat school lunches. We can pack a lunch for less than $1/day per person.

Our family spends $400 a month on groceries but it’s not the same amount every single week. Some weeks we might spend $140 while others we might only spend $50. Things like meat and cheese we buy in bulk so we don’t run out of those more expensive items as quickly.

Here are the same tips and strategies I use every month when I grocery shop.

  • The first thing I do each week is meal plan. You can create your own or use the same meal planner I use, it’s totally FREE. The way I plan my meals is I ask each family member something they would like to have for dinner. Most of the time it gets added to the menu but occasionally mom and dad X a suggested meal if it’s way out of budget, like steak, or if it’s something most everyone else is tired of having.

  • Buy selectively in bulk. We have a membership to our local SAMs Club but we are very selective about what we do and do not buy from there. Things we buy are some meats, lunch meat, sliced and shredded cheese and that’s pretty much it for food. Everything else is a little more expensive to buy at the bulk store.

  • Find a great discount store to shop at. The one we shop at weekly is Aldi. It has come a LONG way since the days when I was a kid. Most of them in our area have been given a big makeover so they are set up like a regular grocery store vs the old style layout they used to have.

  • Use cash when you go to the store. We are fans of the Dave Ramsey method of using cash and it truly works. We personally do not have any credit cards but even using a debit card we ALWAYS spend more than budgeted, so use cash and you will be forced to only spend what you have in your wallet.

  • Buy ingredients that you can use for more than one meal. Things like rice and potatoes can be used for lots and lots of different meals and they cost next to nothing. You can make anything from taco rice to rice pudding with a $2 bag of white rice. And with potatoes you can use them in several different dishes, shepherds pie, perogies, garlic potato wedges…mmmmmm!!! Just get creative with it.

  • Pack lunches. This is HUGE! Eating out adds up very quickly. That $5-$10 at lunch every single day can add up to $25-$50 a work week for just one person.

  • Try making your sweet treats. Most of the time buying them premade costs way more than if you made them yourself. Take muffins for example. Our family loves them so I will make several batches of different kinds at a time and it costs approx. $3 for several dozen muffins. If I were to buy 1 dozen muffins even at the discount store we shop at, their cost would be $4. CRAZY! Granted it’s more work but saving at least $8 to make them myself and they are probably one of the easiest baking things to make, sign me up! The same goes for brownies, cakes, cookies, and granola bars. These are all things you can make at home and costs significantly less to make vs to buy.

  • One thing that we bought a long time ago that truly helps us stay on budget is using a Food Saver . We use this every single month. From left over foods that would have gone had in the fridge to freezing the meats in bulk. This is an investment worth your hard earned money.

  • Last but not least buy in season. Produce prices change from season to season so those foods are typically next to nothing during the summer months. That’s when our family eats an abundance of the fresh stuff. Not that we don’t eat any in winter, but our dollar doesn’t go as far in the winter so we are extra selective about the produce we buy during the cold season.

I hope these tips help when you’re grocery shopping for your large family. I know without these tips our family would be WAY over budget every single month.