Rusty old metal cabinet / locker turned mudroom shoe storage

Rusty locker / metal cabinet repurposed for a mudroom sunporch. Turn an antique chipped paint locker into a shoe holder for your mudroom. Frugal rustic farmhouse furniture for your storage needs.

$20 vintage locker repurposed for the sunporch / mudroom

Antique stores have the best finds! I scored a gorgeous old metal locker / metal cabinet at my local antique shop last week. I wasn’t sure exactly what I was going to do with but after seeing it’s $20 price tag I knew it had to come home with me.

Affiliate Disclosure. Some of the links on this website are affiliate links, which means that I may earn a small commission if you click on the link or make a purchase using the link. If you make a purchase you will not be charged anything additional.
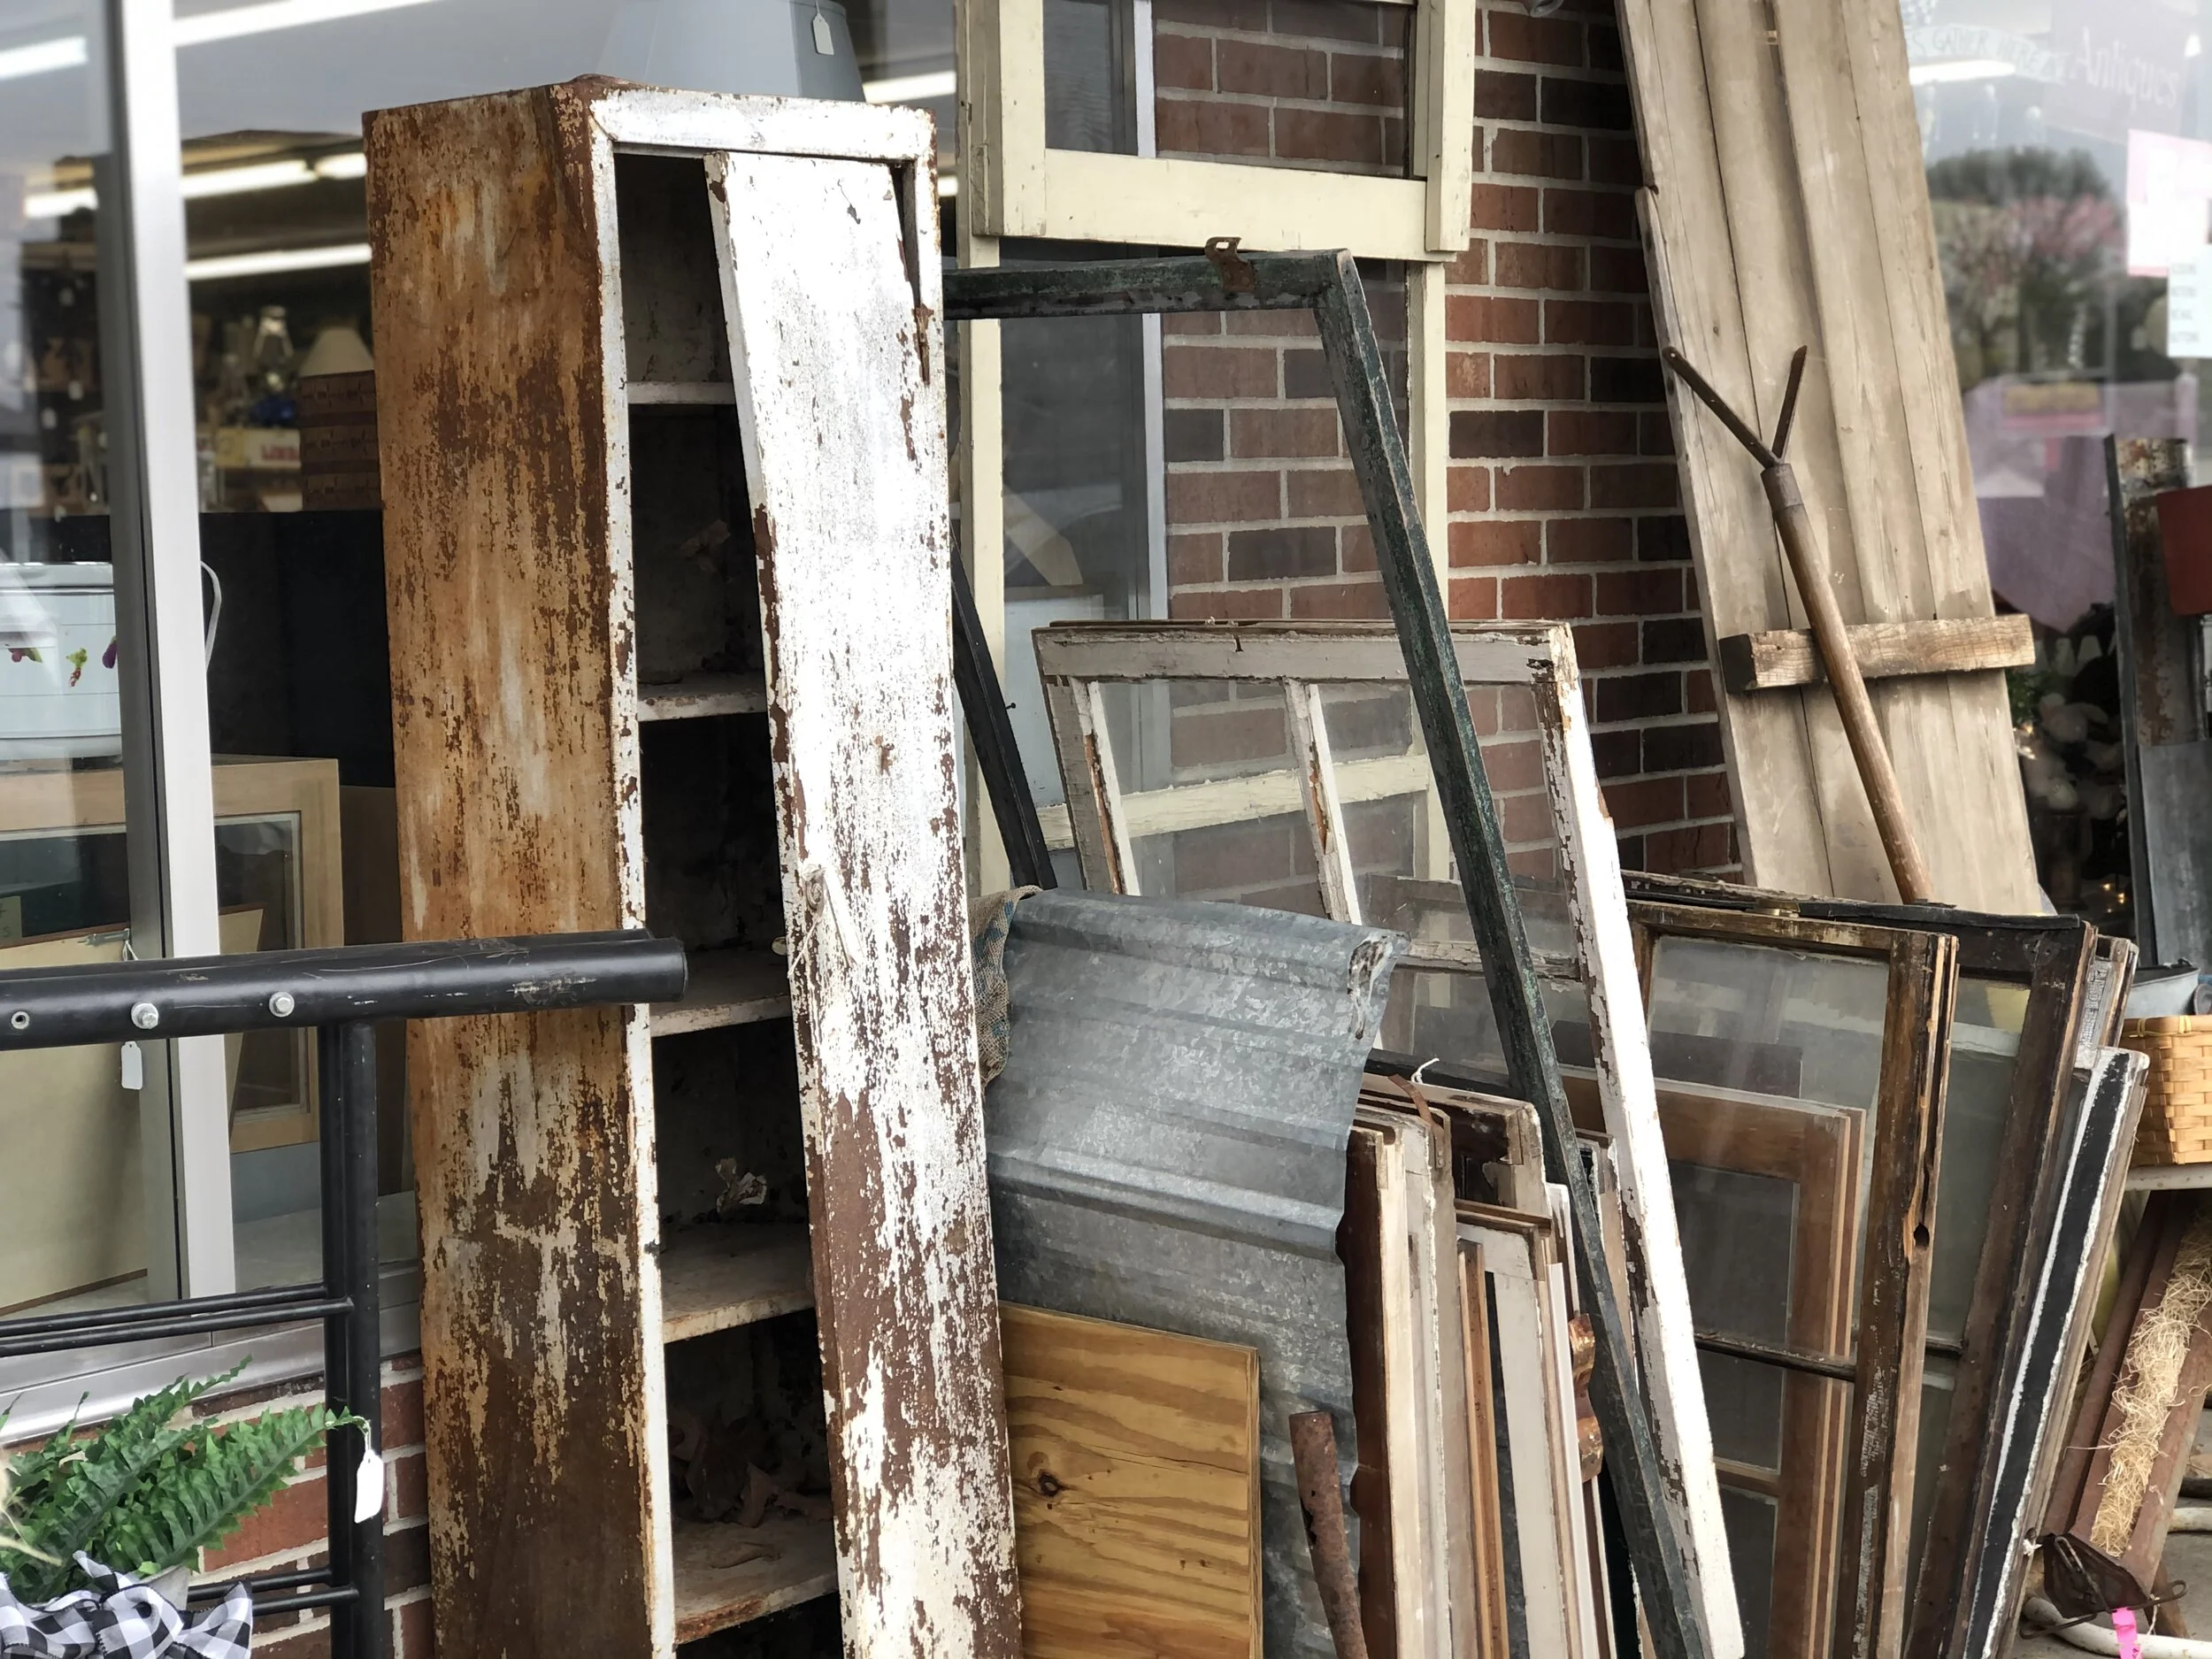
Rusty locker / metal cabinet repurposed for a mudroom sunporch. Turn an antique chipped paint locker into a shoe holder for your mudroom. Frugal rustic farmhouse furniture for your storage needs.

I took the tag inside, paid for it, then loaded it up in our brand new to us fancy minivan (literally the nicest car we’ve ever owned and I still can’t believe it’s ours!!). Thank goodness I had just put this cargo liner blanket thing in there so it kept my van from getting gross stuff all over it or scratched up. Three of the four daughters were excited about our new find but one of them…not so much lol!

Rusty locker / metal cabinet repurposed for a mudroom sunporch. Turn an antique chipped paint locker into a shoe holder for your mudroom. Frugal rustic farmhouse furniture for your storage needs.

A week after bringing it home I finally had time to do something with it. I decided I was going to turn it into a muddy boot/shoe holder for our sunporch / mudroom. Oh my goodness it turned out so freaking cute!

I have seen others paint their metal cabinets / lockers that look like this but honestly I loved everything about this piece as is. I didn’t want to scrape off any of the old paint or add anything to it. I thought it was perfect just the way it was. The only thing I did to it was remove the door and clean it up a bit.

Rusty locker / metal cabinet repurposed for a mudroom sunporch. Turn an antique chipped paint locker into a shoe holder for your mudroom. Frugal rustic farmhouse furniture for your storage needs.

It was full of crunchy old leaves, spiderwebs, and lots of dirt, rust, and chipped paint. I used my vacuum to get all of that out of there. I didn’t see a need to wipe it down with any spray cleaning agent. I mean, after all it will be holding shoes that have just stomped through a chicken coop.

Rusty locker / metal cabinet repurposed for a mudroom sunporch. Turn an antique chipped paint locker into a shoe holder for your mudroom. Frugal rustic farmhouse furniture for your storage needs.

With just a light cleaning this metal cabinet looked a million times better. I did vacuum off the big chipped paint spots. I figured those will end up falling off anyway soon from putting shoes in there.

Rusty locker / metal cabinet repurposed for a mudroom sunporch. Turn an antique chipped paint locker into a shoe holder for your mudroom. Frugal rustic farmhouse furniture for your storage needs.

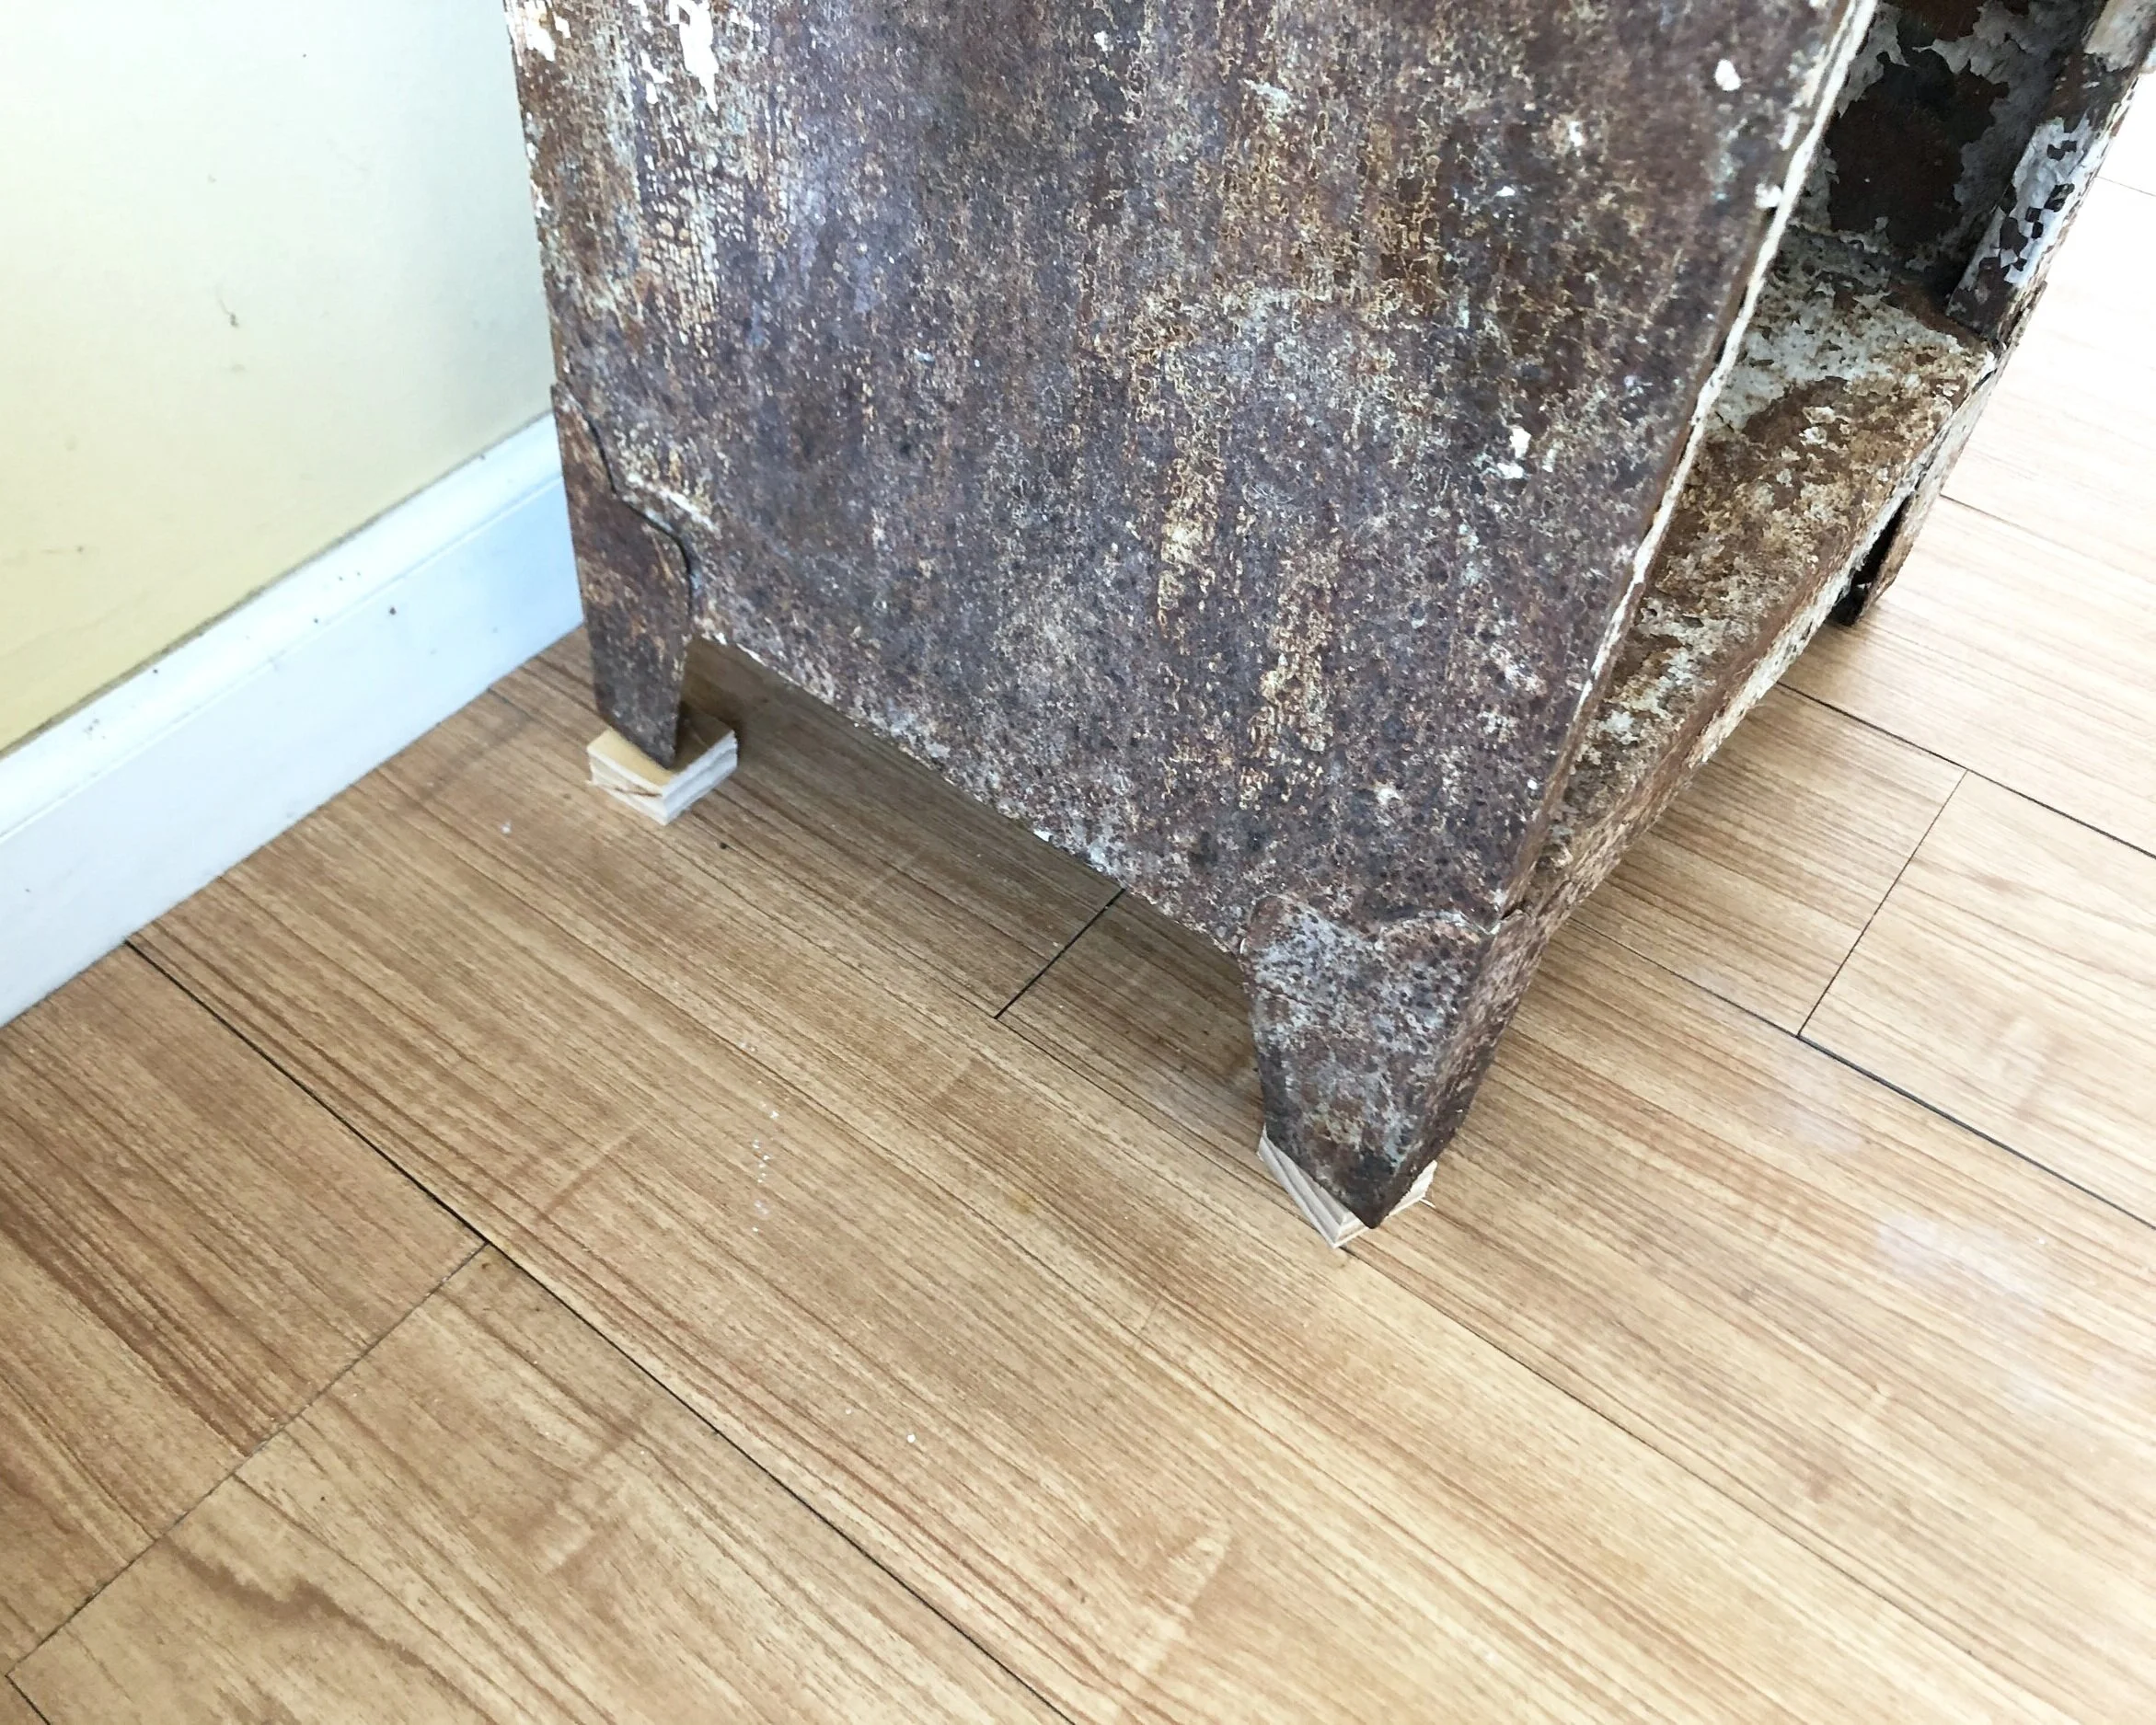
The legs on this piece were in pretty good shape but because our sunporch slants down for drainage the cabinet sat lopsided. To fix that I put a small piece of scrap wood under two of the feet. That worked great!
Rusty locker / metal cabinet repurposed for a mudroom sunporch. Turn an antique chipped paint locker into a shoe holder for your mudroom. Frugal rustic farmhouse furniture for your storage needs.

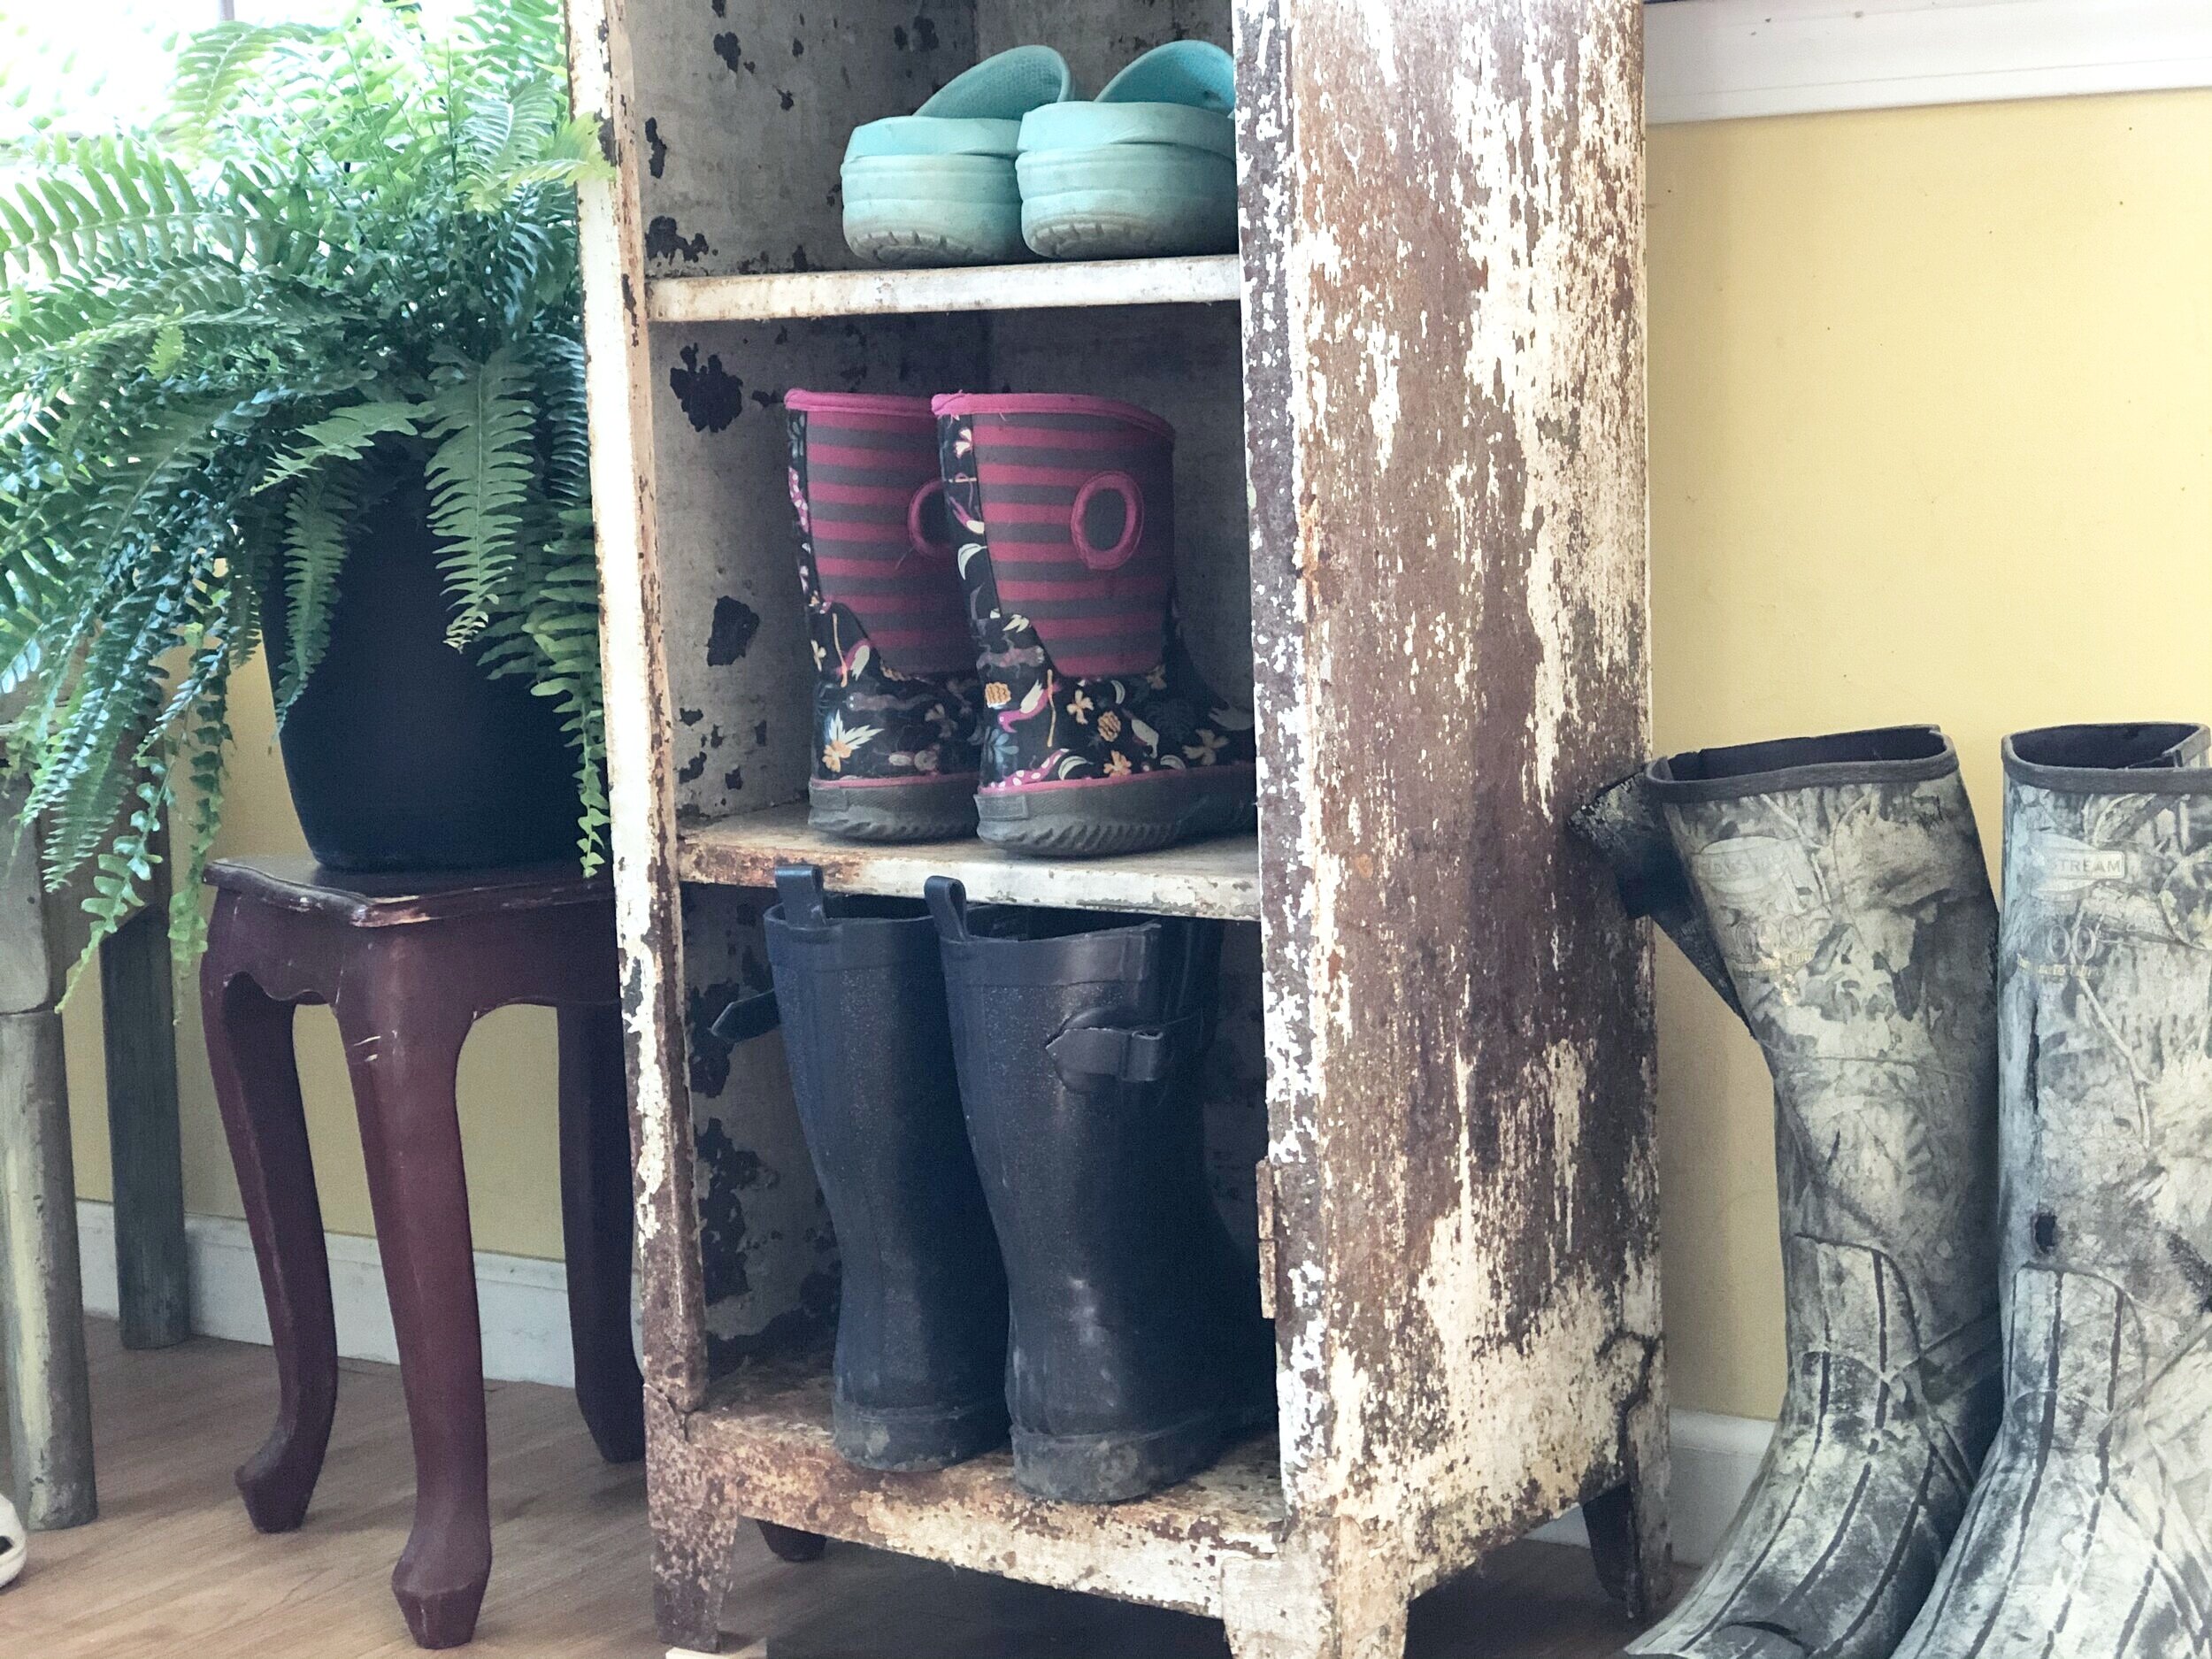
On one of the shelves I added a bucket to store bug spray and sunscreen. It took me forever to find a piece of chalk so I could write sunscreen & bug spray on the front of that lol! Oh the mom life, gotta love it! Next to that I put a wire basket and filled it with the bubbles and jump ropes that the girls got for Easter. If you need a cheap Easter craft for your rustic home decor check out this adorable moss bunny sign I made this year.

Rusty locker / metal cabinet repurposed for a mudroom sunporch. Turn an antique chipped paint locker into a shoe holder for your mudroom. Frugal rustic farmhouse furniture for your storage needs.

I don’t think I could have found a more perfect shoe holder for this space. It’s unique and beautifully imperfect just like our family.
Rusty locker / metal cabinet repurposed for a mudroom sunporch. Turn an antique chipped paint locker into a shoe holder for your mudroom. Frugal rustic farmhouse furniture for your storage needs.

Let me know if you have any questions in the comments below.

Hobby Lobby picture frame makeover

DIY Hobby Lobby clearance picture frame makeover. How to use Dollar Tree office clips to makeover an old picture frame.

EASY CLEARANCE PICTURE FRAME MAKEOVER

I love browsing the clearance aisles. Idk what it is about a good buy but it sure does give this momma a feeling of accomplishment lol! Even if what I find isn’t exactly what I’m looking for it’s usually affordable enough to buy it up and give it a little makeover.

Affiliate Disclosure. Some of the links on this website are affiliate links, which means that I may earn a small commission if you click on the link or make a purchase using the link. If you make a purchase you will not be charged anything additional.

Like these cute floating cubby shelves I picked up at Big Lots. They were nothing close to the color I wanted but the bones were good. With a little paint, my Cricut and some vinyl those boy themed shelves took little effort to transform into boho floating shelves for my girl’s bedroom.

DIY Hobby Lobby clearance picture frame makeover. How to use Dollar Tree office clips to makeover an old picture frame.

When I found this almost outdated looking frame at Hobby Lobby for $5.49 I wasn’t loving the look it had BUT again, it had good bones so I bought it.

CLEARANCE FIND HOBBY LOBBY PICTURE FRAME MAKEOVER

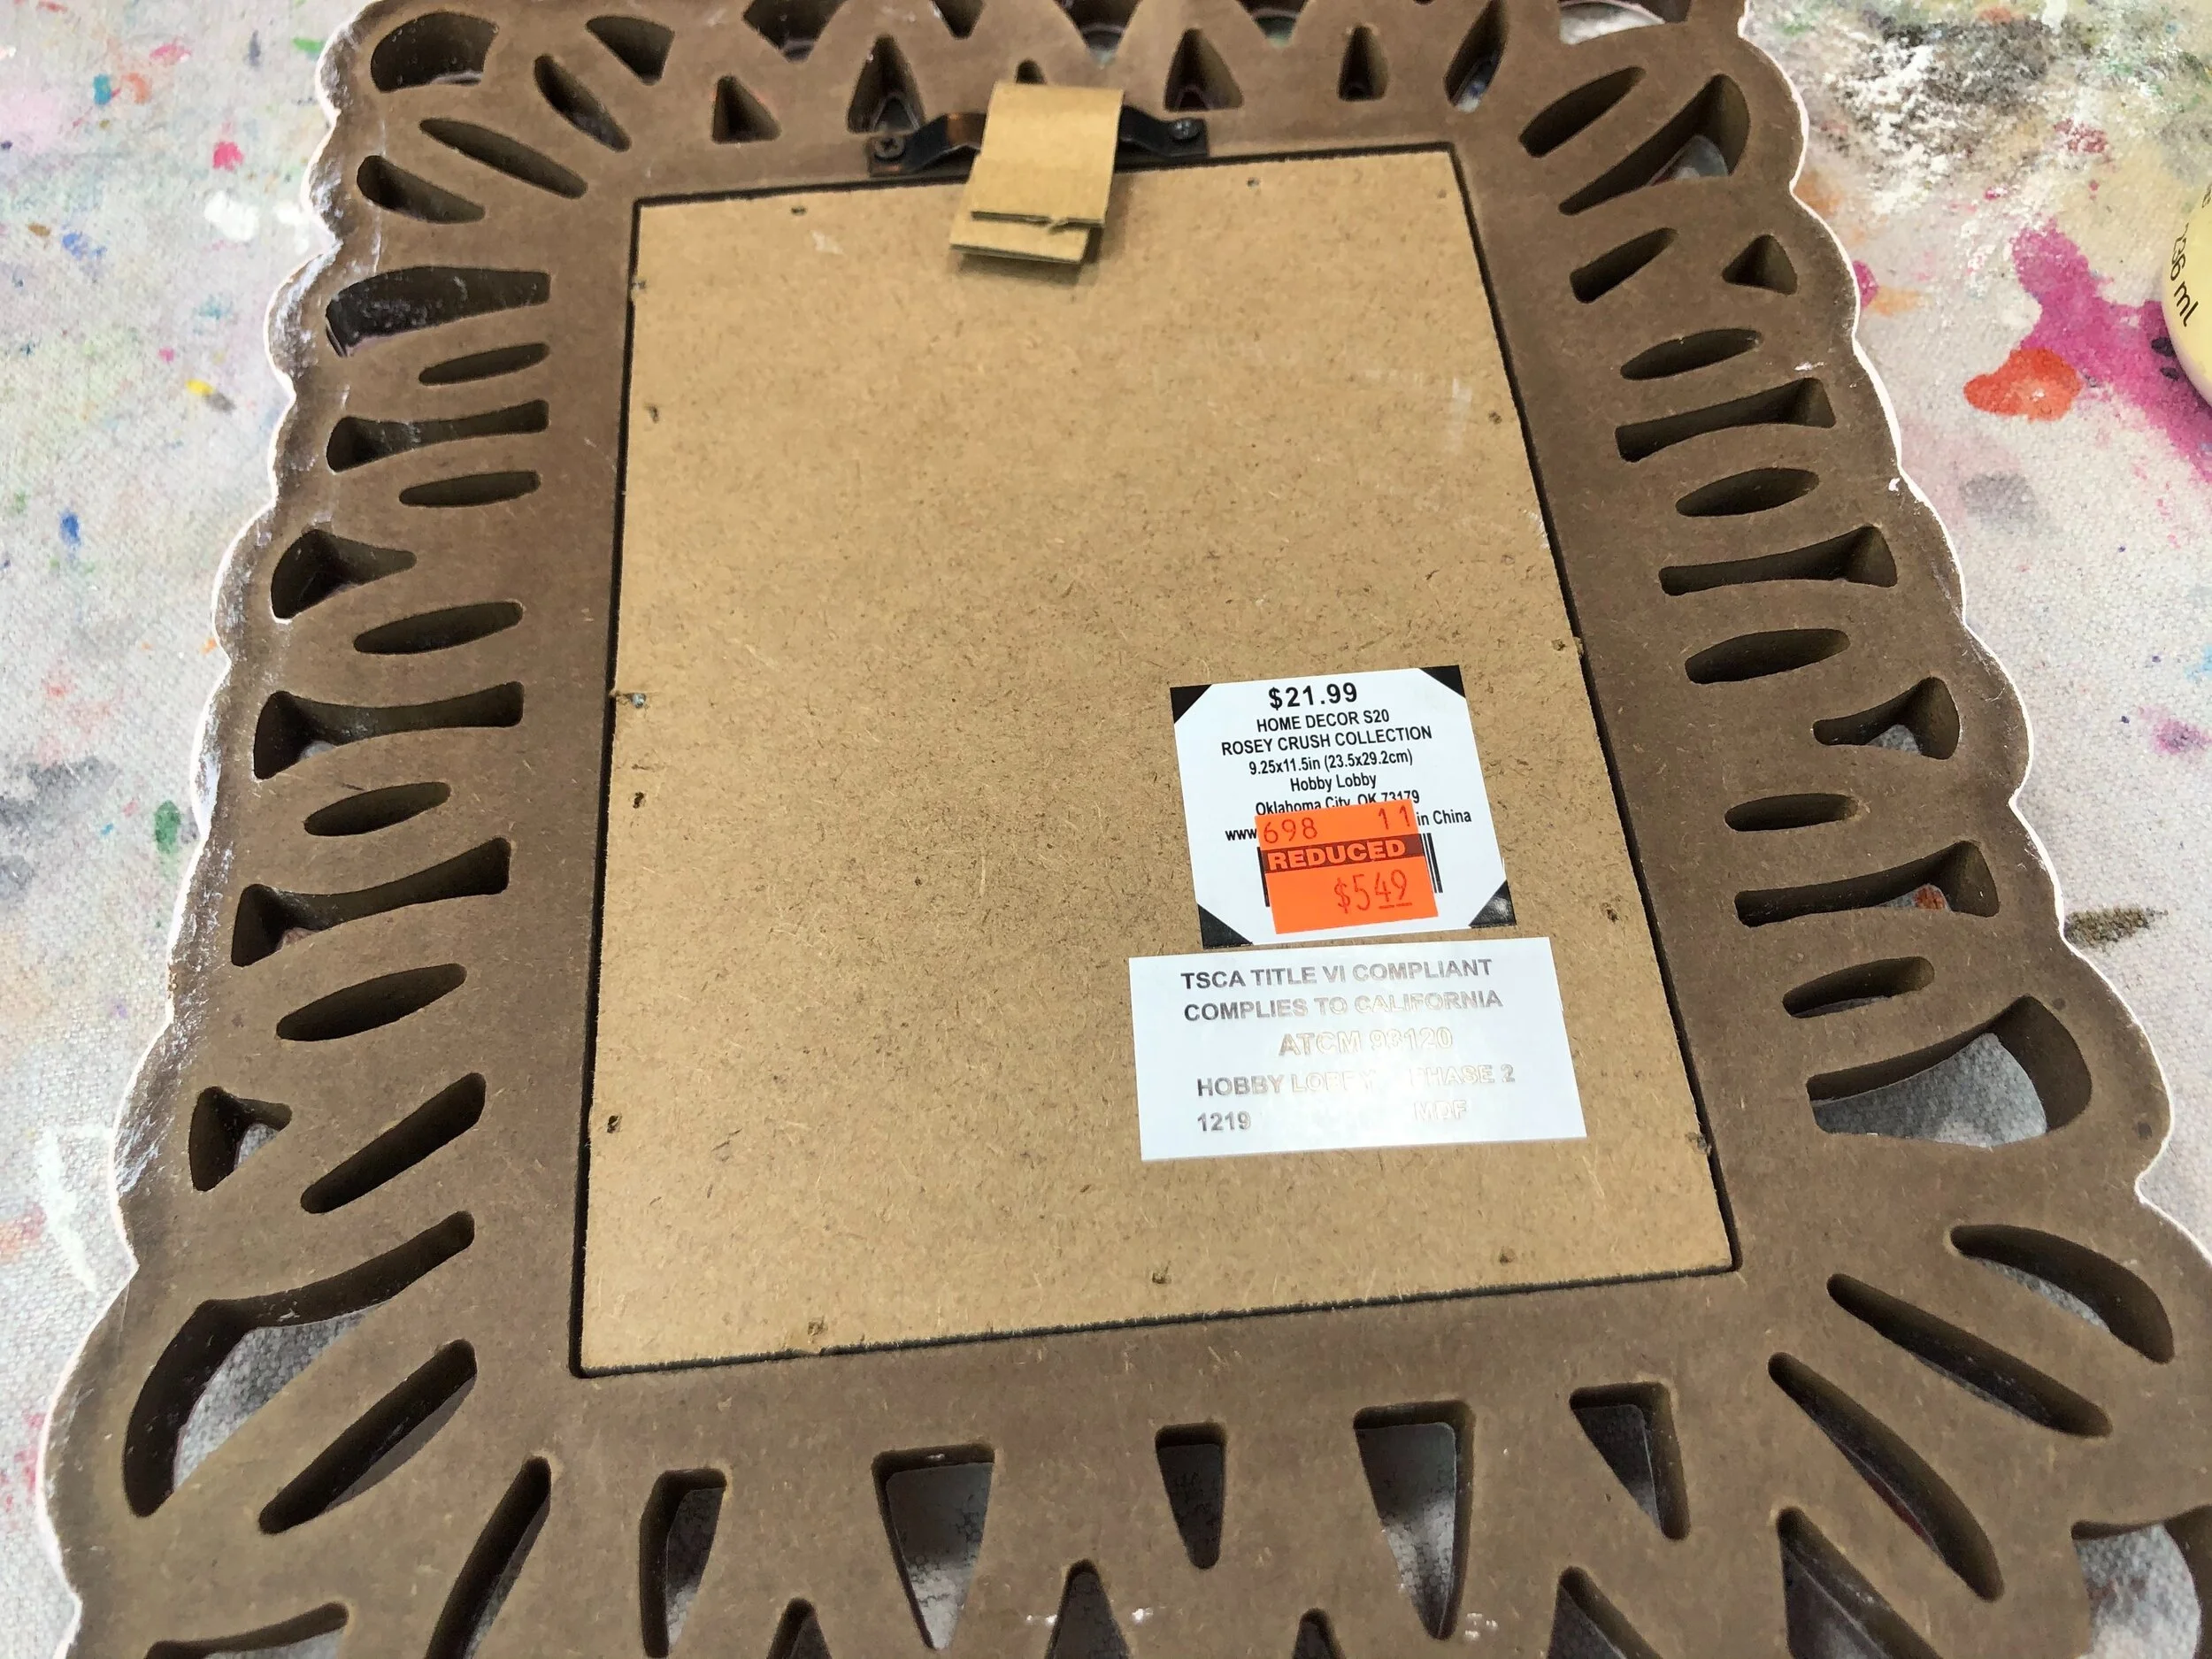
Here’s what the frame looked like when I bought it. I mean, it’s cute because I actually really do love that old lady old fashioned style. But I bought this to put in my girl’s hallway/lounge area and this would totally clash as is.

DIY Hobby Lobby clearance picture frame makeover. How to use Dollar Tree office clips to makeover an old picture frame.

I couldn’t believe this frame was $22! And this is why I love strolling the aisles of the craft stores.

DIY Hobby Lobby clearance picture frame makeover. How to use Dollar Tree office clips to makeover an old picture frame.

This was such an easy craft!

Here’s what I used

1.PAINT THE FRAME

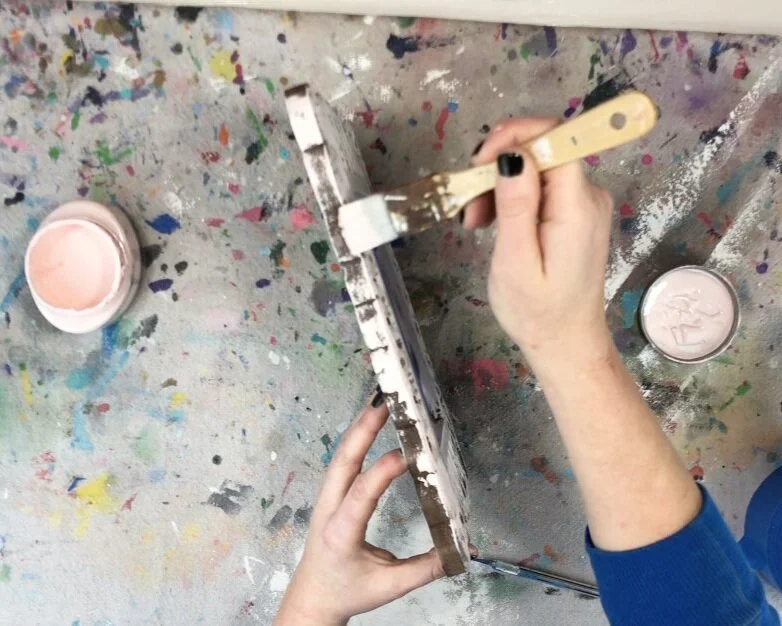
The first thing I did was paint the frame. I wasn’t totally sold on painting over the florals at this point so I wanted to paint the frame first to see how it looked.

I used a paint sample of Valspar pink paint that I found at my local home improvement store. It’s more of a peachy pink color, super soft but not too girly.

DIY Hobby Lobby clearance picture frame makeover. How to use Dollar Tree office clips to makeover an old picture frame.

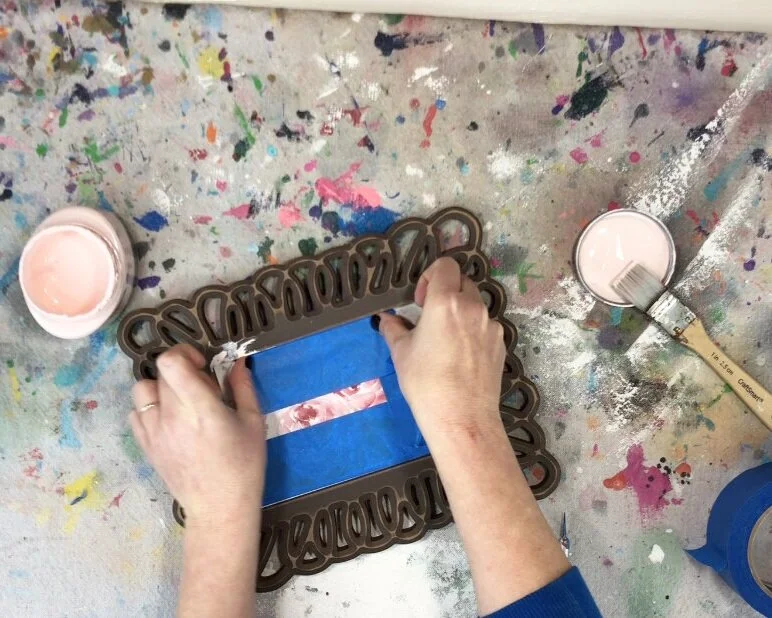
I started painting and realized I forgot to tape off my edges which is why you can see the pink paint along the edges of the frame while I’m taping it off with my wide painters tape.

DIY Hobby Lobby clearance picture frame makeover. How to use Dollar Tree office clips to makeover an old picture frame.

I used a dry 1” paint brush (is my FAVORITE CRAFTY PAINTBRUSH to use) and painted a thin layer of pink paint all over the front and sides of the frame.

DIY Hobby Lobby clearance picture frame makeover. How to use Dollar Tree office clips to makeover an old picture frame.

I didn’t worry about painting inside the cutouts and I painted lightly so that the dark on the frame would show through in some spots.

DIY Hobby Lobby clearance picture frame makeover. How to use Dollar Tree office clips to makeover an old picture frame.

Once the first coat of paint was dry I painted a second coat on my frame.

DIY Hobby Lobby clearance picture frame makeover. How to use Dollar Tree office clips to makeover an old picture frame.

2. PAINT THE INSIDE

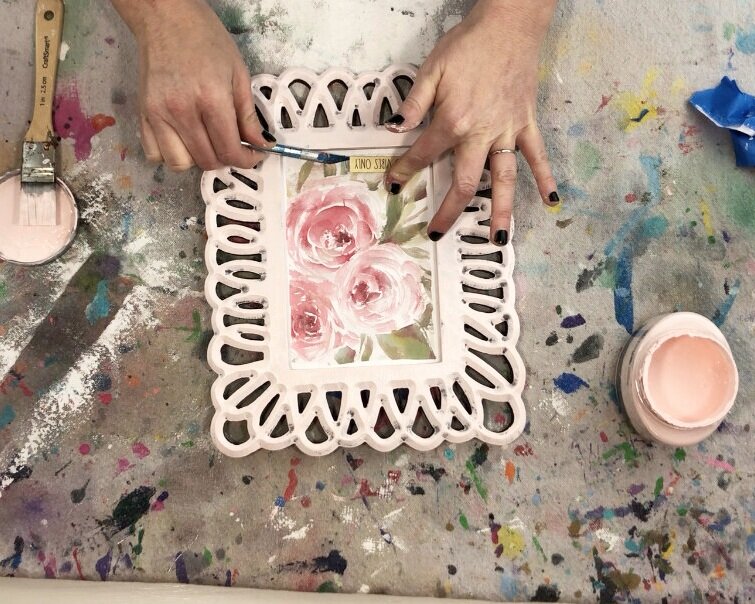
After the frame was all dry and the painters tape taken off I removed the little good vibes only decal using my xacto knife. It actually came off pretty easily. I wasn’t sure if I was going to keep it so I set it aside instead of tossing it in the trash.

DIY Hobby Lobby clearance picture frame makeover. How to use Dollar Tree office clips to makeover an old picture frame.

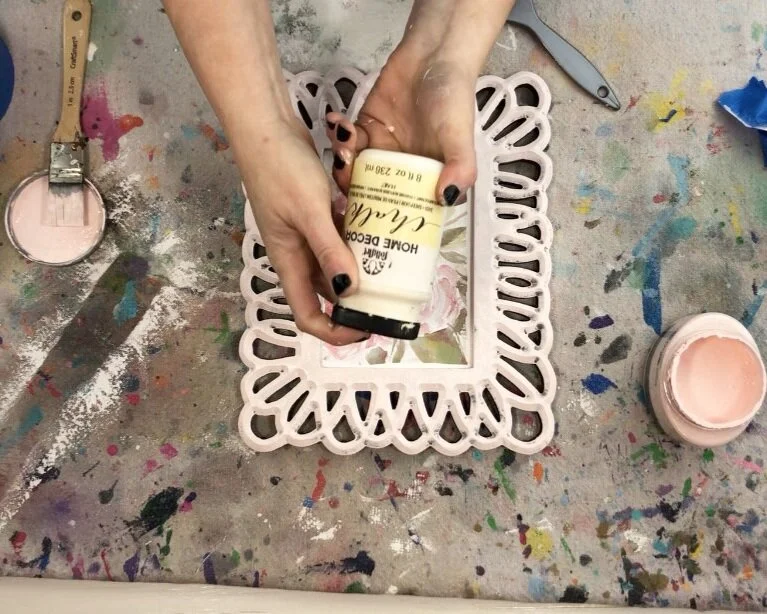
I used chalk paint, the color sheepskin, to paint the frame. I would have preferred white but I didn’t have that on hand so I made do with what I had in my craft room. Sheep skin chalk paint it was!

DIY Hobby Lobby clearance picture frame makeover. How to use Dollar Tree office clips to makeover an old picture frame.

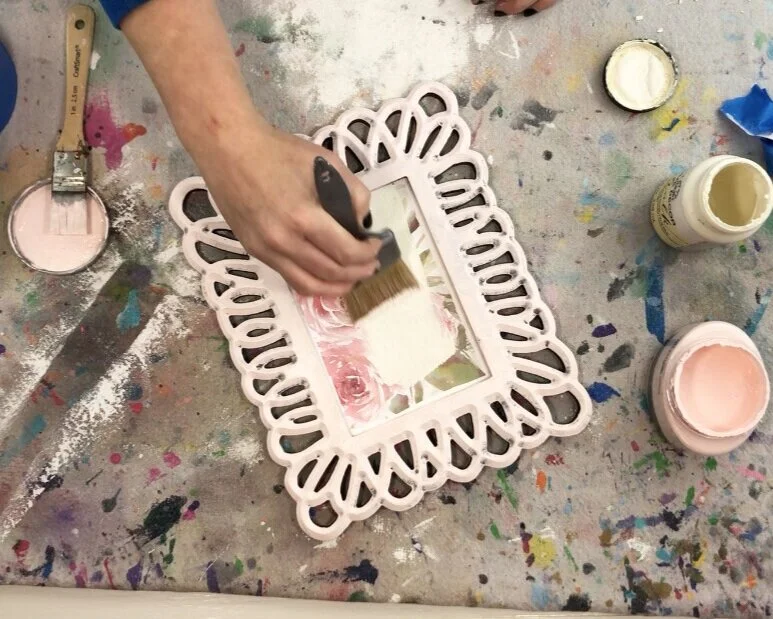
I painted on a super thin layer, just enough to still be able to see the floral print through the paint.

DIY Hobby Lobby clearance picture frame makeover. How to use Dollar Tree office clips to makeover an old picture frame.

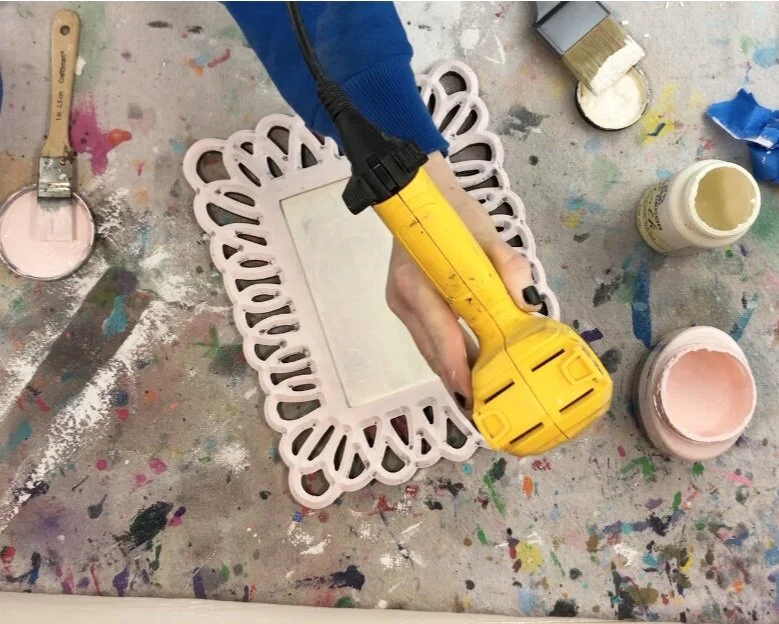
After that was dry I paint a second layer of the chalk paint. I used my handy heat gun to help the paint dry a little faster.

DIY Hobby Lobby clearance picture frame makeover. How to use Dollar Tree office clips to makeover an old picture frame.

3. ADD THE ACCENT & PICTURE CLIP

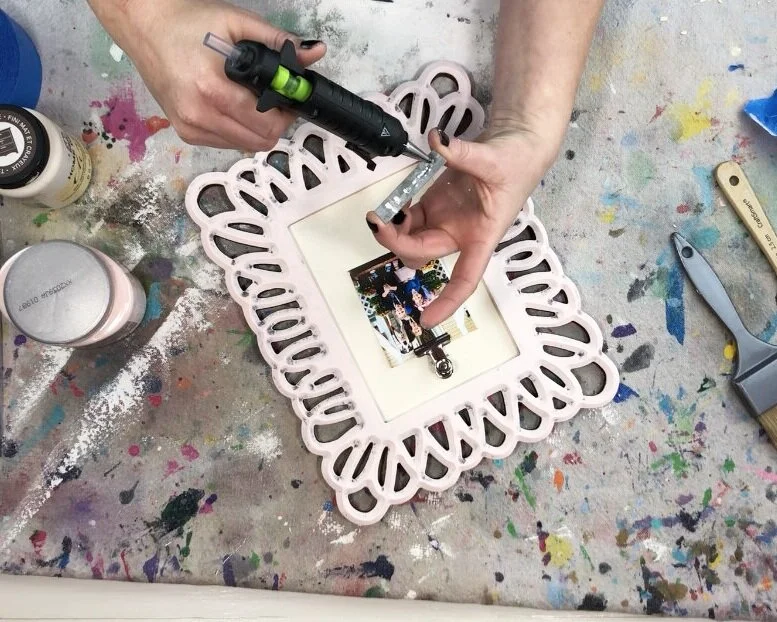
Once my paint was totally dry I used hot glue gun to attach the picture hanging clip and the good vibes only metal decal.

I arranged them on the frame before I glued them down to be sure I was happy with it.

DIY Hobby Lobby clearance picture frame makeover. How to use Dollar Tree office clips to makeover an old picture frame.

I just love how this frame turned out!

DIY Hobby Lobby clearance picture frame makeover. How to use Dollar Tree office clips to makeover an old picture frame.

I hope you enjoyed this frugal crafty makeover. Let me know if you have any questions in the comments below.

Happy Crafting!

Dollar store Christmas star makeover

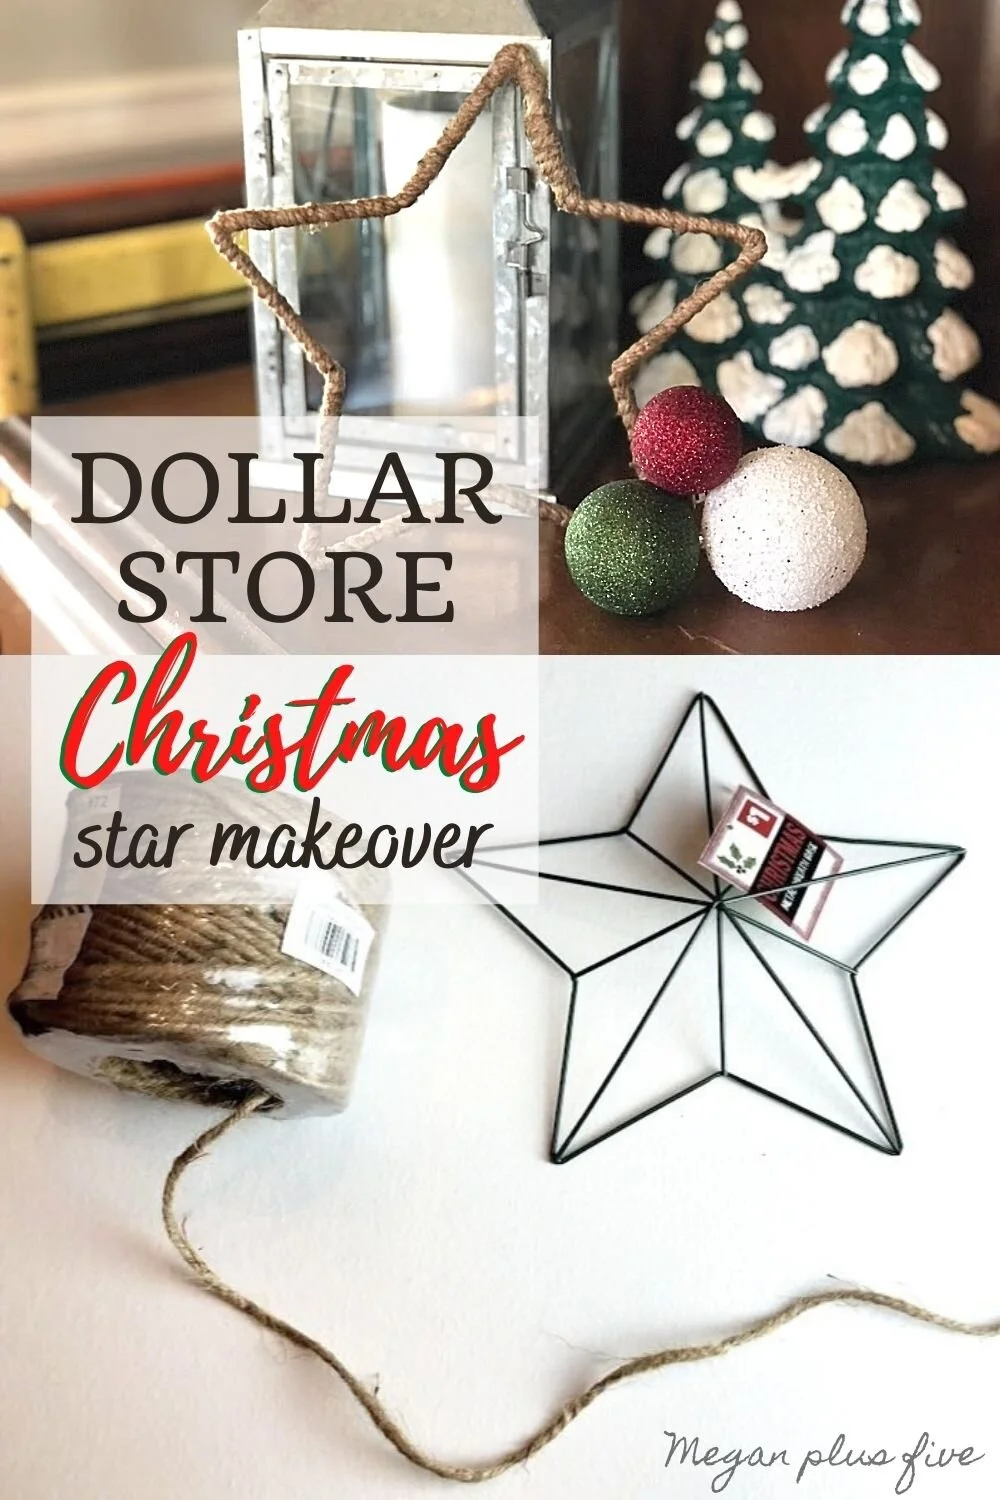
DIY dollar store Christmas decor. Christmas decorations on a budget. How to make a rustic farmhouse style star using twine or just and a wire star form.

The dollar stores are really outdoing themselves lately with their Christmas selections. I have found so many great finds there to either add to my Christmas décor OR give a bit of a makeover then add it to my Christmas decorations.

I found this little wire star at the Dollar General last night and since it was just $1 I snagged it up to take it home and give it a little makeover. Frugal living just runs through my veins. If you like this budget friendly Christmas DIY you will probably love these DIY TWIG STARS that basically costs $0 to make.

Affiliate Disclosure. Some of the links on this website are affiliate links, which means that I may earn a small commission if you click on the link or make a purchase using the link. If you make a purchase you will not be charged anything additional.

DIY dollar store Christmas decor. Christmas decorations on a budget. How to make a rustic farmhouse style star using twine or just and a wire star form.

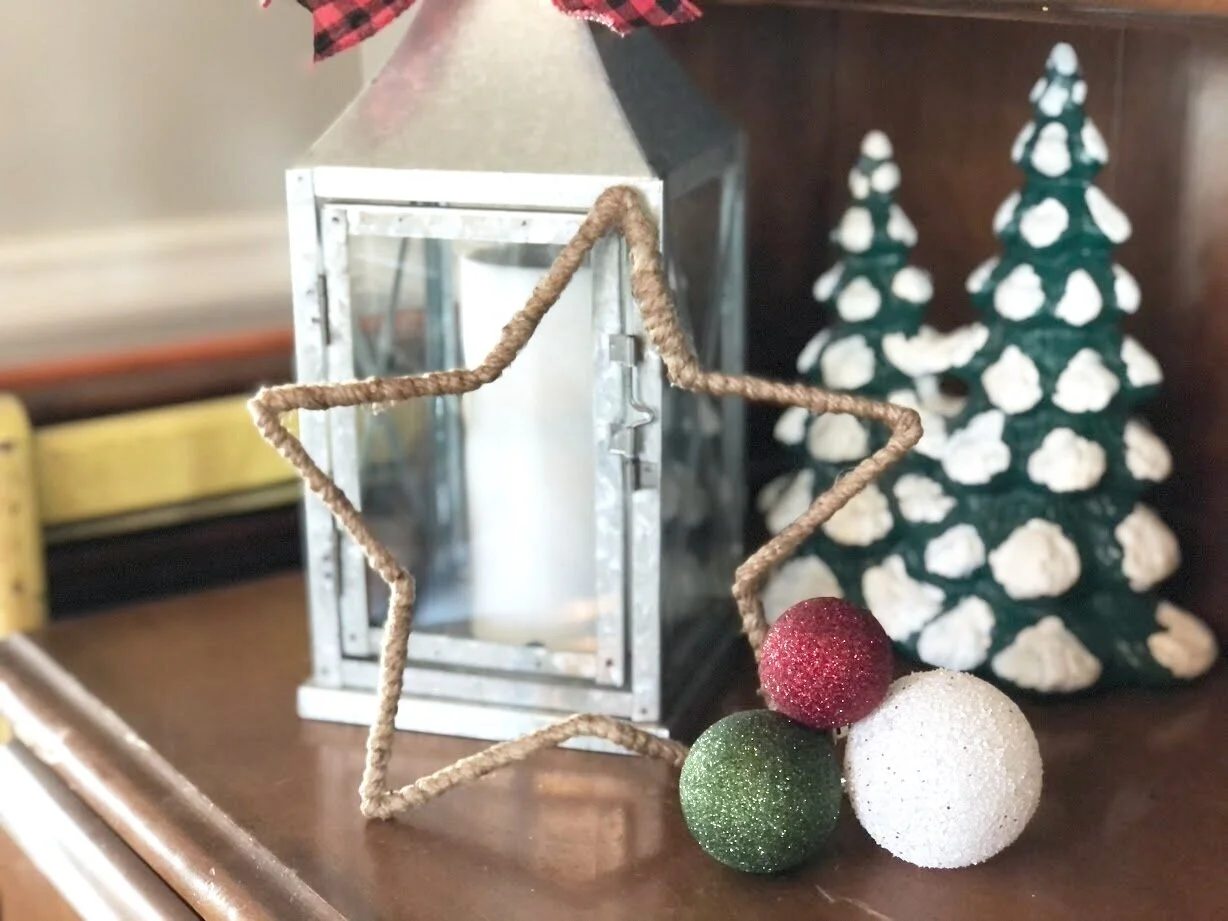
I was originally going to wrap the wire star form in twine but that turned out hideous lol! It was bulky and just plain ugly. So I thought instead to remove the middle pieces and then wrap it and it turned out so simple but perfect for my Christmas decorations.

DOLLAR STORE STAR MAKEOVER

Here’s what you’ll need

DISCLOSURE: not responsible for any damages caused. Please craft at your own risk :)

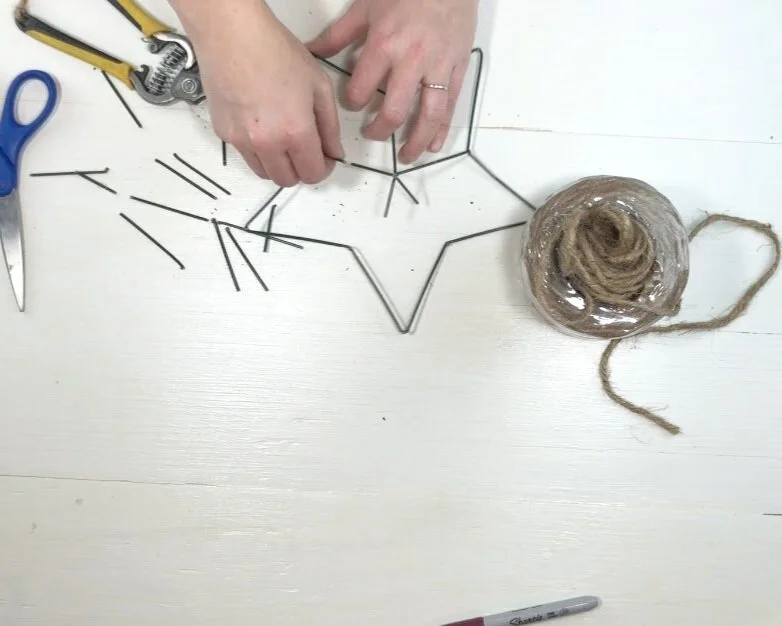
1. REMOVE THE MIDDLE WIRE

This was actually harder than I thought it would be. I had to try and cut it with all my might then bend it away in pieces.

DIY dollar store Christmas decor. Christmas decorations on a budget. How to make a rustic farmhouse style star using twine or just and a wire star form.

2. WRAP THE STAR

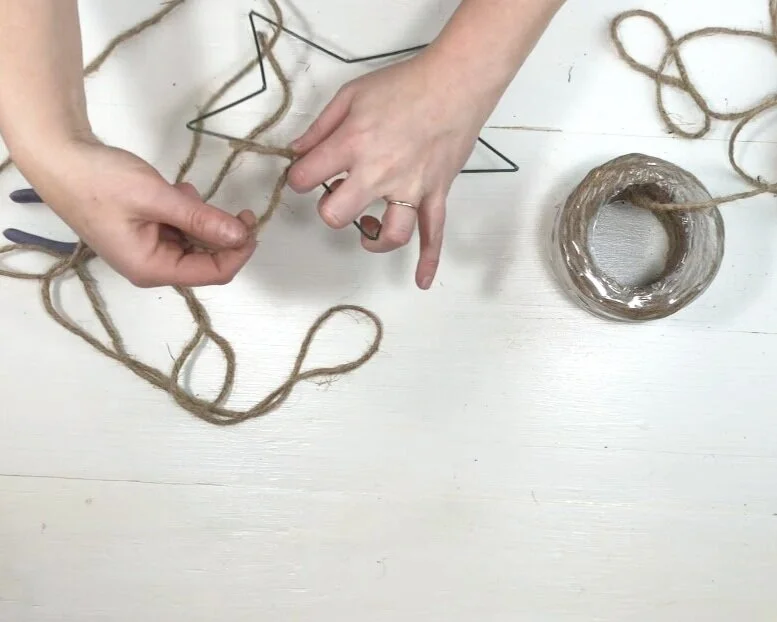
Then I cut a long piece of twine and just wrapped and wrapped and wrapped till I got back to the starting point. Around the corners of the wire star I added hot glue to reinforce the frame then wrapped it in twine.

DIY dollar store Christmas decor. Christmas decorations on a budget. How to make a rustic farmhouse style star using twine or just and a wire star form.

When I got to the very end I secured it in place with hot glue.

3. REMOVE THE FRZZIES

My star had a ton of frizz to it from wrapping and wrapping. So I used my lighter to remove those. I just lightly waved my lighter over the areas that I wanted the frizz gone and was sure to blow as soon as it touched the star so it wouldn’t catch fire.

DIY dollar store Christmas decor. Christmas decorations on a budget. How to make a rustic farmhouse style star using twine or just and a wire star form.

That’s it! Quick and easy dollar store Christmas makeover craft.

DIY dollar store Christmas decor. Christmas decorations on a budget. How to make a rustic farmhouse style star using twine or just and a wire star form.

I hope you enjoyed this crafty tutorial. If you have any questions please leave them in the comments below.

Interchangeable Christmas pallet sign

DIY twig stars for Christmas pallet sign. Interchangeable Christmas home decor on a budget. How to make easy and simple reversible home décor for the holidays. Make a sign from twigs.

INTERCHANGEABLE WINTER PALLET SIGN

I love decorating for the holidays. Especially Christmas. Now that I have a bigger home to decorate I’m finding it a little challenging to do AND keep it in budget. I have always had the heart of a frugal women so spending an arm and a leg to put up Christmas décor just wasn’t happening.

That’s why in the fall I made this lightweight faux pallet sign. It’s a blank pallet style sign that I can change out with the seasons. It’s a big statement type piece that I prop up on my dining room hutch. I love this so much. Best of all the planks I used to make this sign were left over from this plank wall project.

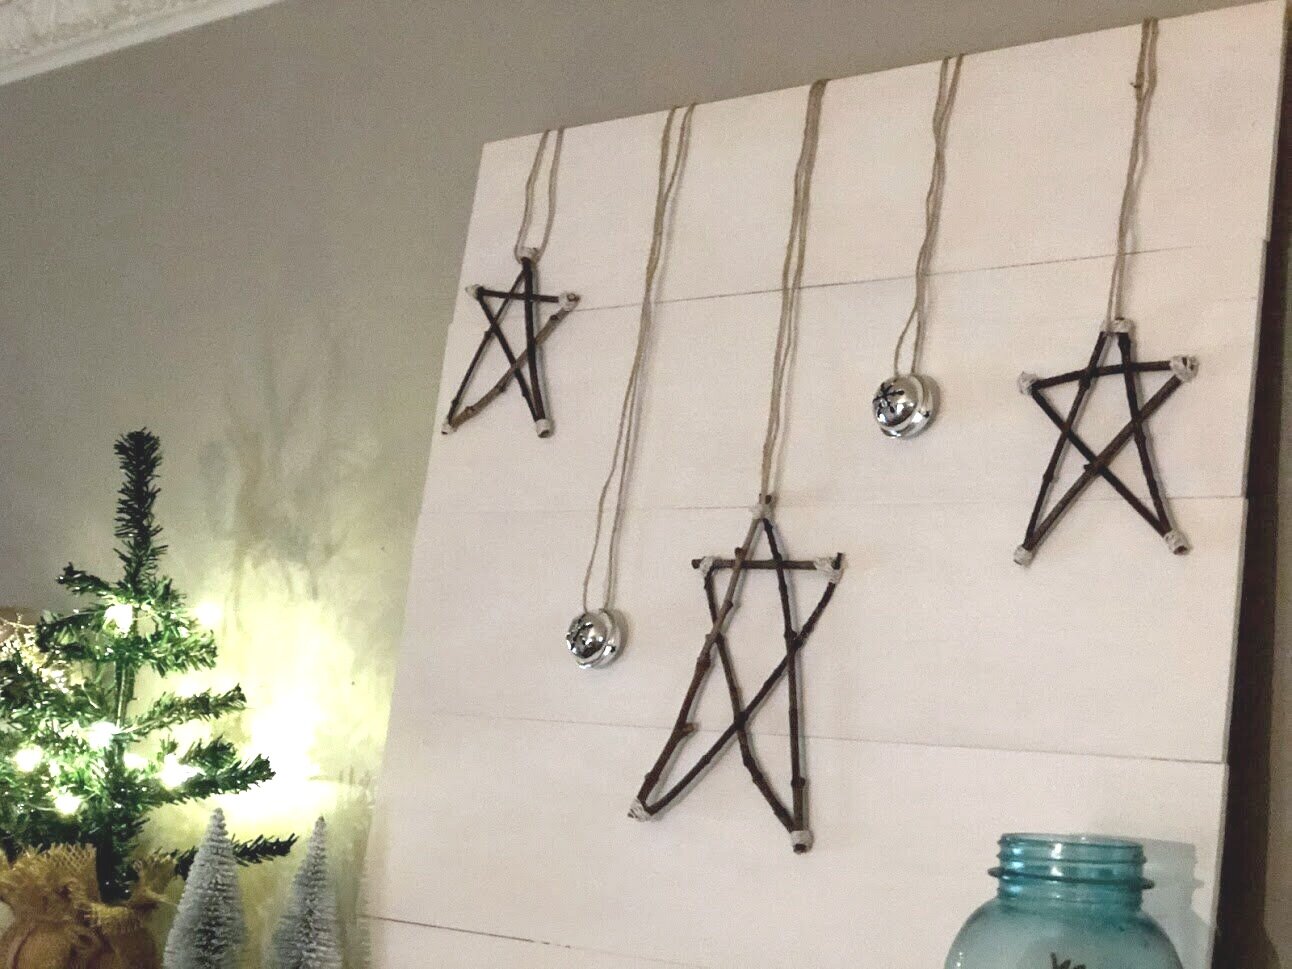
I really tried hard to spend minimal funds for Christmas decorating. So, for Christmas I had this great idea to make stars from twigs I had in the backyard. And they turned out so cute! I want to make more!!

Affiliate Disclosure. Some of the links on this website are affiliate links, which means that I may earn a small commission if you click on the link or make a purchase using the link. If you make a purchase you will not be charged anything additional.

DIY twig stars for Christmas pallet sign. Interchangeable Christmas home decor on a budget. How to make easy and simple reversible home décor for the holidays. Make a sign from twigs.

I made 2 smaller twig stars and 1 medium sized star. You can see how I made my twig stars click here.

I was so glad I snagged up a package of silver bells from the Dollar Tree prior to making this craft because without them I don’t think it would have turned out so cute or looked as festive for Christmas.

DIY twig stars for Christmas pallet sign. Interchangeable Christmas home decor on a budget. How to make easy and simple reversible home décor for the holidays. Make a sign from twigs.

Here’s what I used

1. PLACE THE DECORATIONS

The first thing I did was place my twig stars and bells on my pallet sign to see where I wanted them.

DIY twig stars for Christmas pallet sign. Interchangeable Christmas home decor on a budget. How to make easy and simple reversible home décor for the holidays. Make a sign from twigs.

2. MEASURE

Next I measured out how much jute I would need to hang my decorations from the backside of my sign. I doubled the amount of jute since I was looping it and hanging it from the backside.

DIY twig stars for Christmas pallet sign. Interchangeable Christmas home decor on a budget. How to make easy and simple reversible home décor for the holidays. Make a sign from twigs.

3. ADD THE JUTE

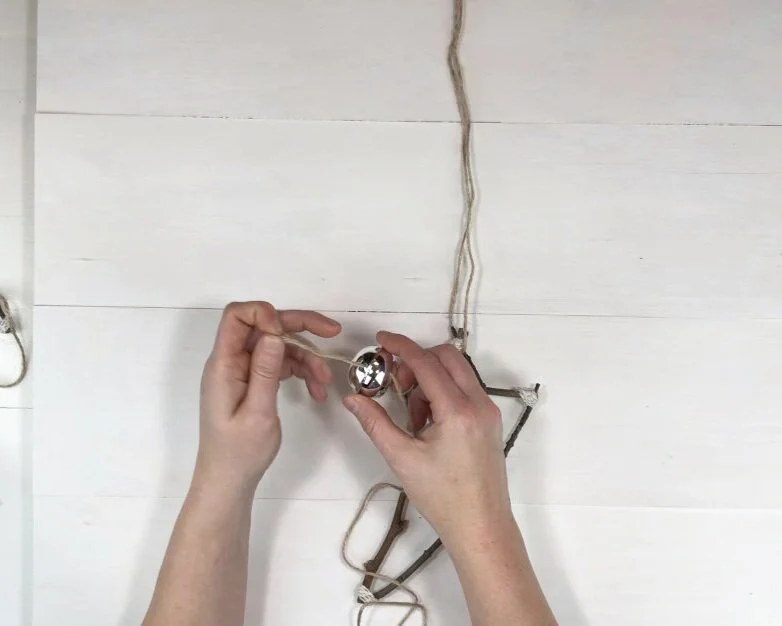
The stars were easy to add the jute to. I just fed the jute through the top of each twig star. The bells were a little more difficult. I wanted to see the snowflakes that were on the bottom side of the bells so I had to hang them sideways.

DIY twig stars for Christmas pallet sign. Interchangeable Christmas home decor on a budget. How to make easy and simple reversible home décor for the holidays. Make a sign from twigs.

I fed the jute through one side of the bell and then out the other side and tied the two ends of the jute together.

DIY twig stars for Christmas pallet sign. Interchangeable Christmas home decor on a budget. How to make easy and simple reversible home décor for the holidays. Make a sign from twigs.

4. HANG

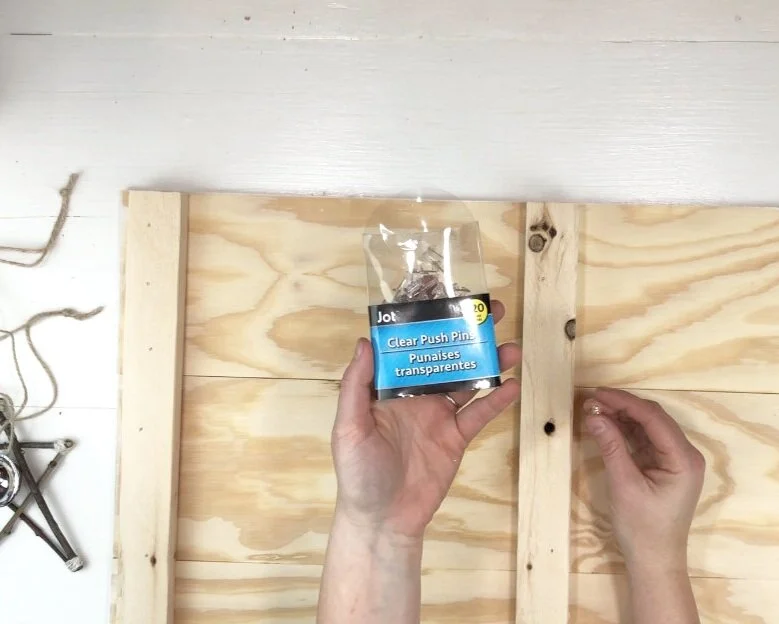
I hung my twig stars and silver bells from the backside of my pallet sign. I just kina eyeballed where I wanted them to be. Placed a pushpin there and pushed it in as far as I could get it.

DIY twig stars for Christmas pallet sign. Interchangeable Christmas home decor on a budget. How to make easy and simple reversible home décor for the holidays. Make a sign from twigs.

Then I looped where I had tied the jute ends together around the pushpin and draped it over to the front side of the pallet sign.

DIY twig stars for Christmas pallet sign. Interchangeable Christmas home decor on a budget. How to make easy and simple reversible home décor for the holidays. Make a sign from twigs.

I prop my pallet sign up on my dining room hutch, which one day I need to make time to give a makeover and I will most definitely post the before and after for you to see on here:)!!

DIY twig stars for Christmas pallet sign. Interchangeable Christmas home decor on a budget. How to make easy and simple reversible home décor for the holidays. Make a sign from twigs.

Happy crafting!

Check out more below

Easy Christmas stars from twigs

How to make stars from twigs for Christmas. Make cheap and frugal Christmas decor using sticks from your yard. Twine/jute twig stars easy craft tutorial for simple rustic looking farmhouse home decor.

CHRISTMAS STARS MADE FROM TWIGS- EASY TUTORIAL

Have you made stars from twigs? This Christmas decoration was super quick, easy, and best of all basically FREE!

If you’ve read any of my content you know how I love a good frugal DIY craft. Especially during the holidays when finances can be a little tighter. Like this easy and incredibly inexpensive Christmas tree I spruced up. I fits in perfectly with my rustic décor.

If you have access to twigs, a glue gun, and some jute/bakers twine you can make this twig star Christmas craft.

Affiliate Disclosure. Some of the links on this website are affiliate links, which means that I may earn a small commission if you click on the link or make a purchase using the link. If you make a purchase you will not be charged anything additional.

HOW TO MAKE CHRISTMAS STARS FROM TWIGS

Here’s what you need

How to make stars from twigs for Christmas. Make cheap and frugal Christmas decor using sticks from your yard. Twine/jute twig stars easy craft tutorial for simple rustic looking farmhouse home decor.

1. GATHER TWIGS

If you don’t have a yard to gather twigs from, or if you don’t have trees in your yard, take a stroll through the local park and you will most definitely find enough twigs to use.

For these mini stars you’ll want to find twigs that are thin, not thick.

2. CUT

I used wire cutters for this step but garden snips will work too.

How to make stars from twigs for Christmas. Make cheap and frugal Christmas decor using sticks from your yard. Twine/jute twig stars easy craft tutorial for simple rustic looking farmhouse home decor.

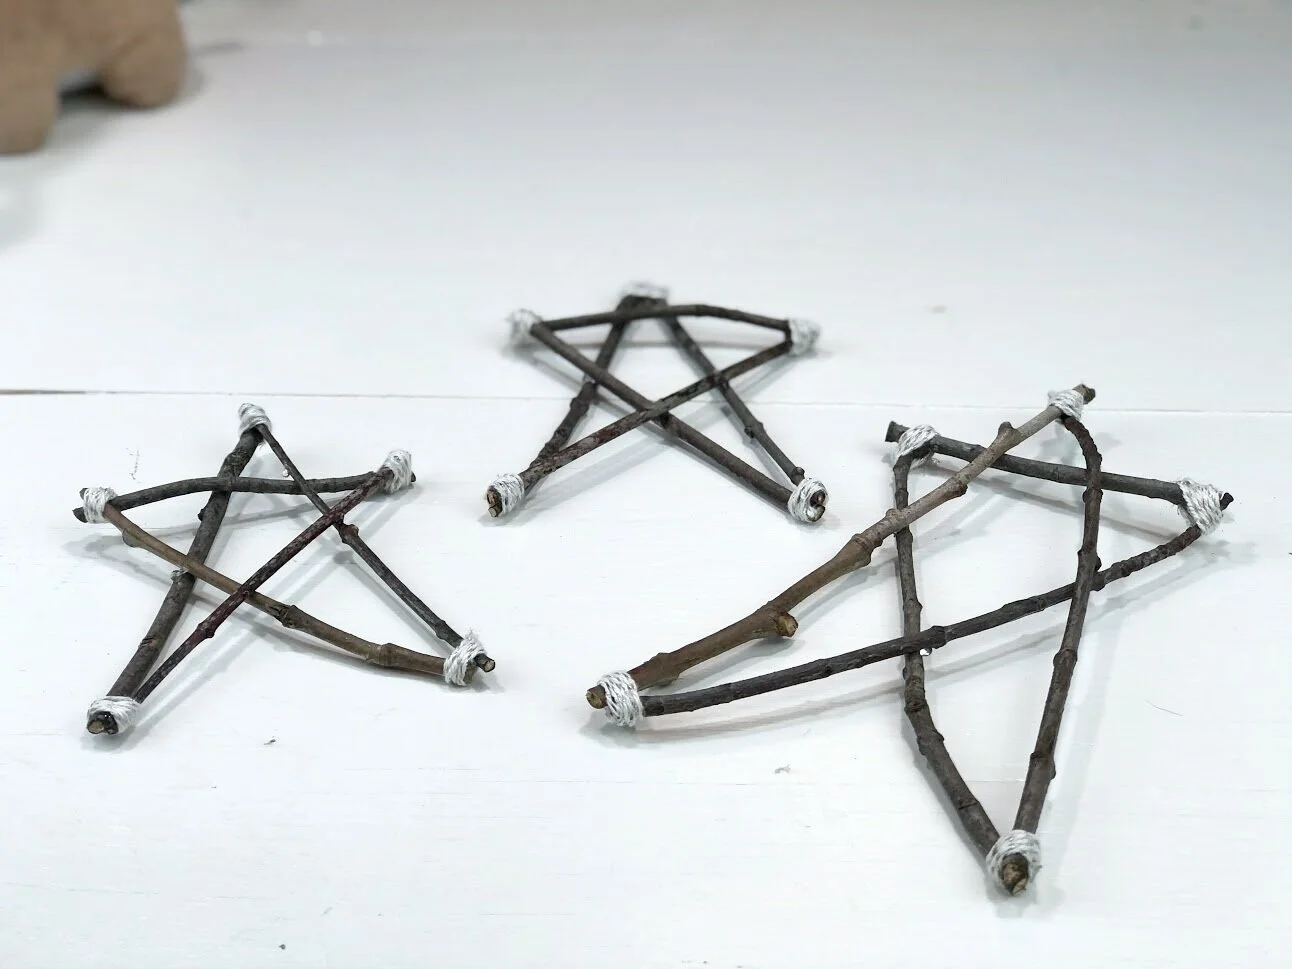
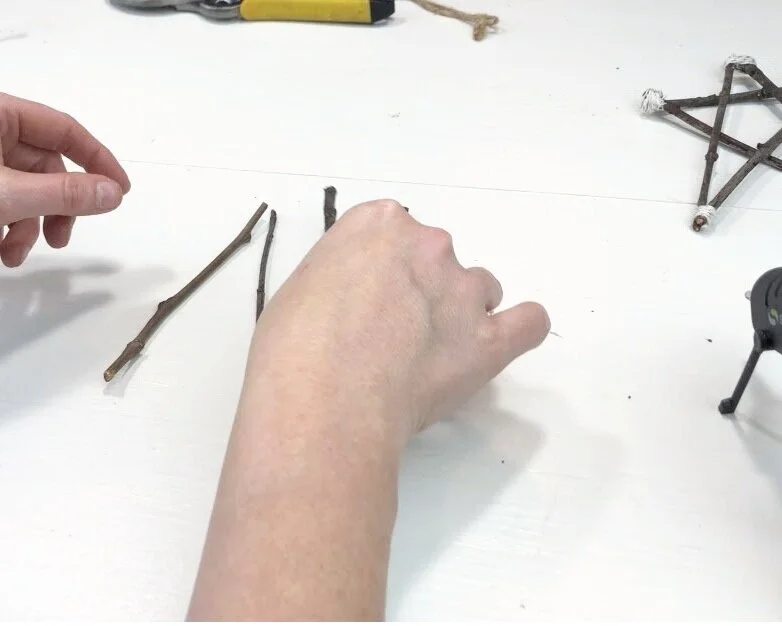
I cut 4 pieces of twigs that were the same size and 1 piece that was about 2/3 or so the size of longer twigs. I just eyeballed this, it doesn’t have to be exact.

How to make stars from twigs for Christmas. Make cheap and frugal Christmas decor using sticks from your yard. Twine/jute twig stars easy craft tutorial for simple rustic looking farmhouse home decor.

3. MAKE A STAR

Just like when you were a kid making stars that’s exactly how you are going to make these stars.

Make an upside-down V.

How to make stars from twigs for Christmas. Make cheap and frugal Christmas decor using sticks from your yard. Twine/jute twig stars easy craft tutorial for simple rustic looking farmhouse home decor.

Then make an X with the other two long pieces.

How to make stars from twigs for Christmas. Make cheap and frugal Christmas decor using sticks from your yard. Twine/jute twig stars easy craft tutorial for simple rustic looking farmhouse home decor.

Then put the smallest twig going across the top.

How to make stars from twigs for Christmas. Make cheap and frugal Christmas decor using sticks from your yard. Twine/jute twig stars easy craft tutorial for simple rustic looking farmhouse home decor.

I had to carefully move them around till I was happy with the placement of my twig star.

4. GLUE

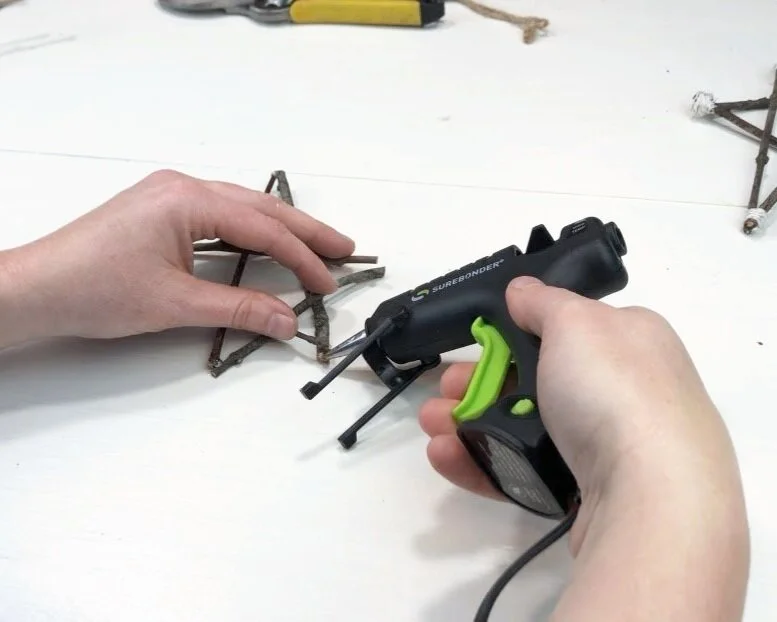
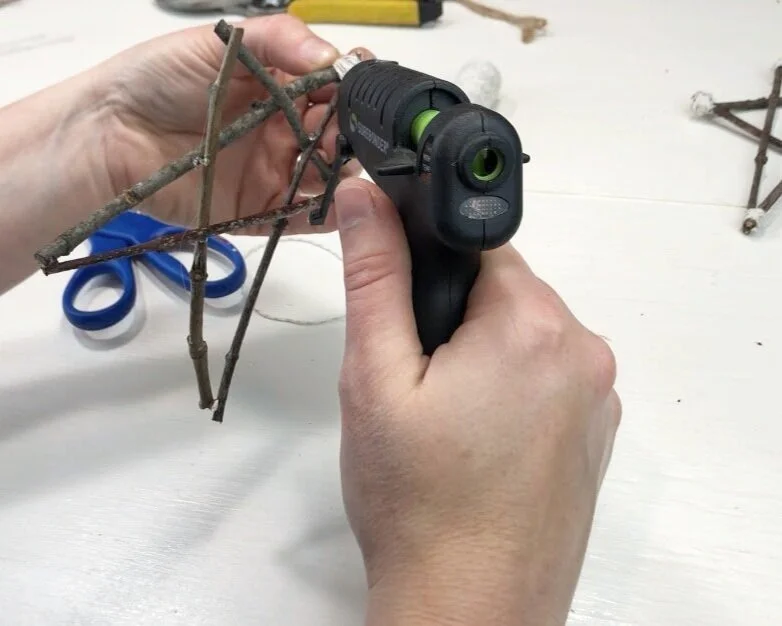
I had already preheated my glue gun prior to this step so it would be ready when I was. I added a SMALL DAB of hot glue wherever the twigs touched. You don’t want a ton of glue, just enough to keep it in place for now.

How to make stars from twigs for Christmas. Make cheap and frugal Christmas decor using sticks from your yard. Twine/jute twig stars easy craft tutorial for simple rustic looking farmhouse home decor.

5. WRAP

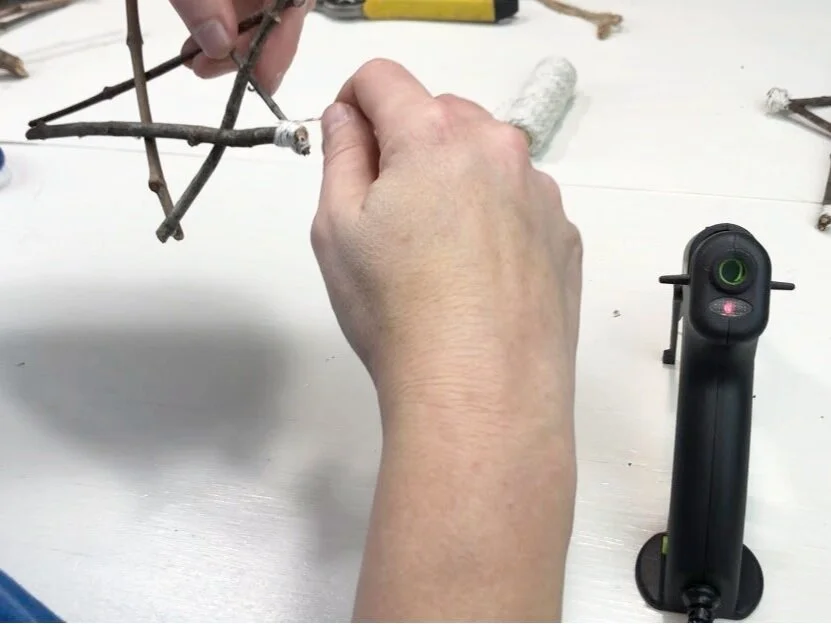
After my glue was dry I wrapped each star point in a silver and white bakers twine. I added a tiny drop of glue then put the end of my bakers twine on it till it was dry.

How to make stars from twigs for Christmas. Make cheap and frugal Christmas decor using sticks from your yard. Twine/jute twig stars easy craft tutorial for simple rustic looking farmhouse home decor.

Then I wrapped the end till I was happy with how it looked.

How to make stars from twigs for Christmas. Make cheap and frugal Christmas decor using sticks from your yard. Twine/jute twig stars easy craft tutorial for simple rustic looking farmhouse home decor.

Then I cut the bakers twine and added another tiny drop of glue to hold it in place.

How to make stars from twigs for Christmas. Make cheap and frugal Christmas decor using sticks from your yard. Twine/jute twig stars easy craft tutorial for simple rustic looking farmhouse home decor.

That’s it. Nothing crazy complicated. I will warn ya, it can get a little frustrating if your kiddos are yelling at one another in the other room and your twigs keep moving out of place from the slightest touch lol! That totally happened a few times to me when I was making these stars for my frugal Christmas décor.

How to make stars from twigs for Christmas. Make cheap and frugal Christmas decor using sticks from your yard. Twine/jute twig stars easy craft tutorial for simple rustic looking farmhouse home decor.

I hope you enjoyed this crafty tutorial. If you have any questions please leave them in the comments below.
Happy Crafting!

Check out more DIY crafts below

Dollar Tree Christmas Tree rustic decoration

DIY Dollar Tree farmhouse Christmas tree. What to do with the mini Christmas trees from the dollar tree. Easy way to use the cheap Christmas trees from the dollar store. Rustic farmhouse Christmas decor on a budget.

Have you been to the Dollar Tree lately? I don’t get there as often as I’d like but I did get a chance to stop in last night and WOW their Christmas supply gets better and better every year!

They have these cute Charlie Brown looking Christmas trees this year and I just couldn’t leave the store without buying a couple of them.

Affiliate Disclosure. Some of the links on this website are affiliate links, which means that I may earn a small commission if you click on the link or make a purchase using the link. If you make a purchase you will not be charged anything additional.

DIY Dollar Tree farmhouse Christmas tree. What to do with the mini Christmas trees from the dollar tree. Easy way to use the cheap Christmas trees from the dollar store. Rustic farmhouse Christmas decor on a budget.

This DIY was SUPER easy! It was almost mess free and it was ready to put on the shelf in just a matter of minutes from taking it out of the plastic Dollar Tree bag.

EASY DOLLAR TREE CHRISTMAS TREE DIY

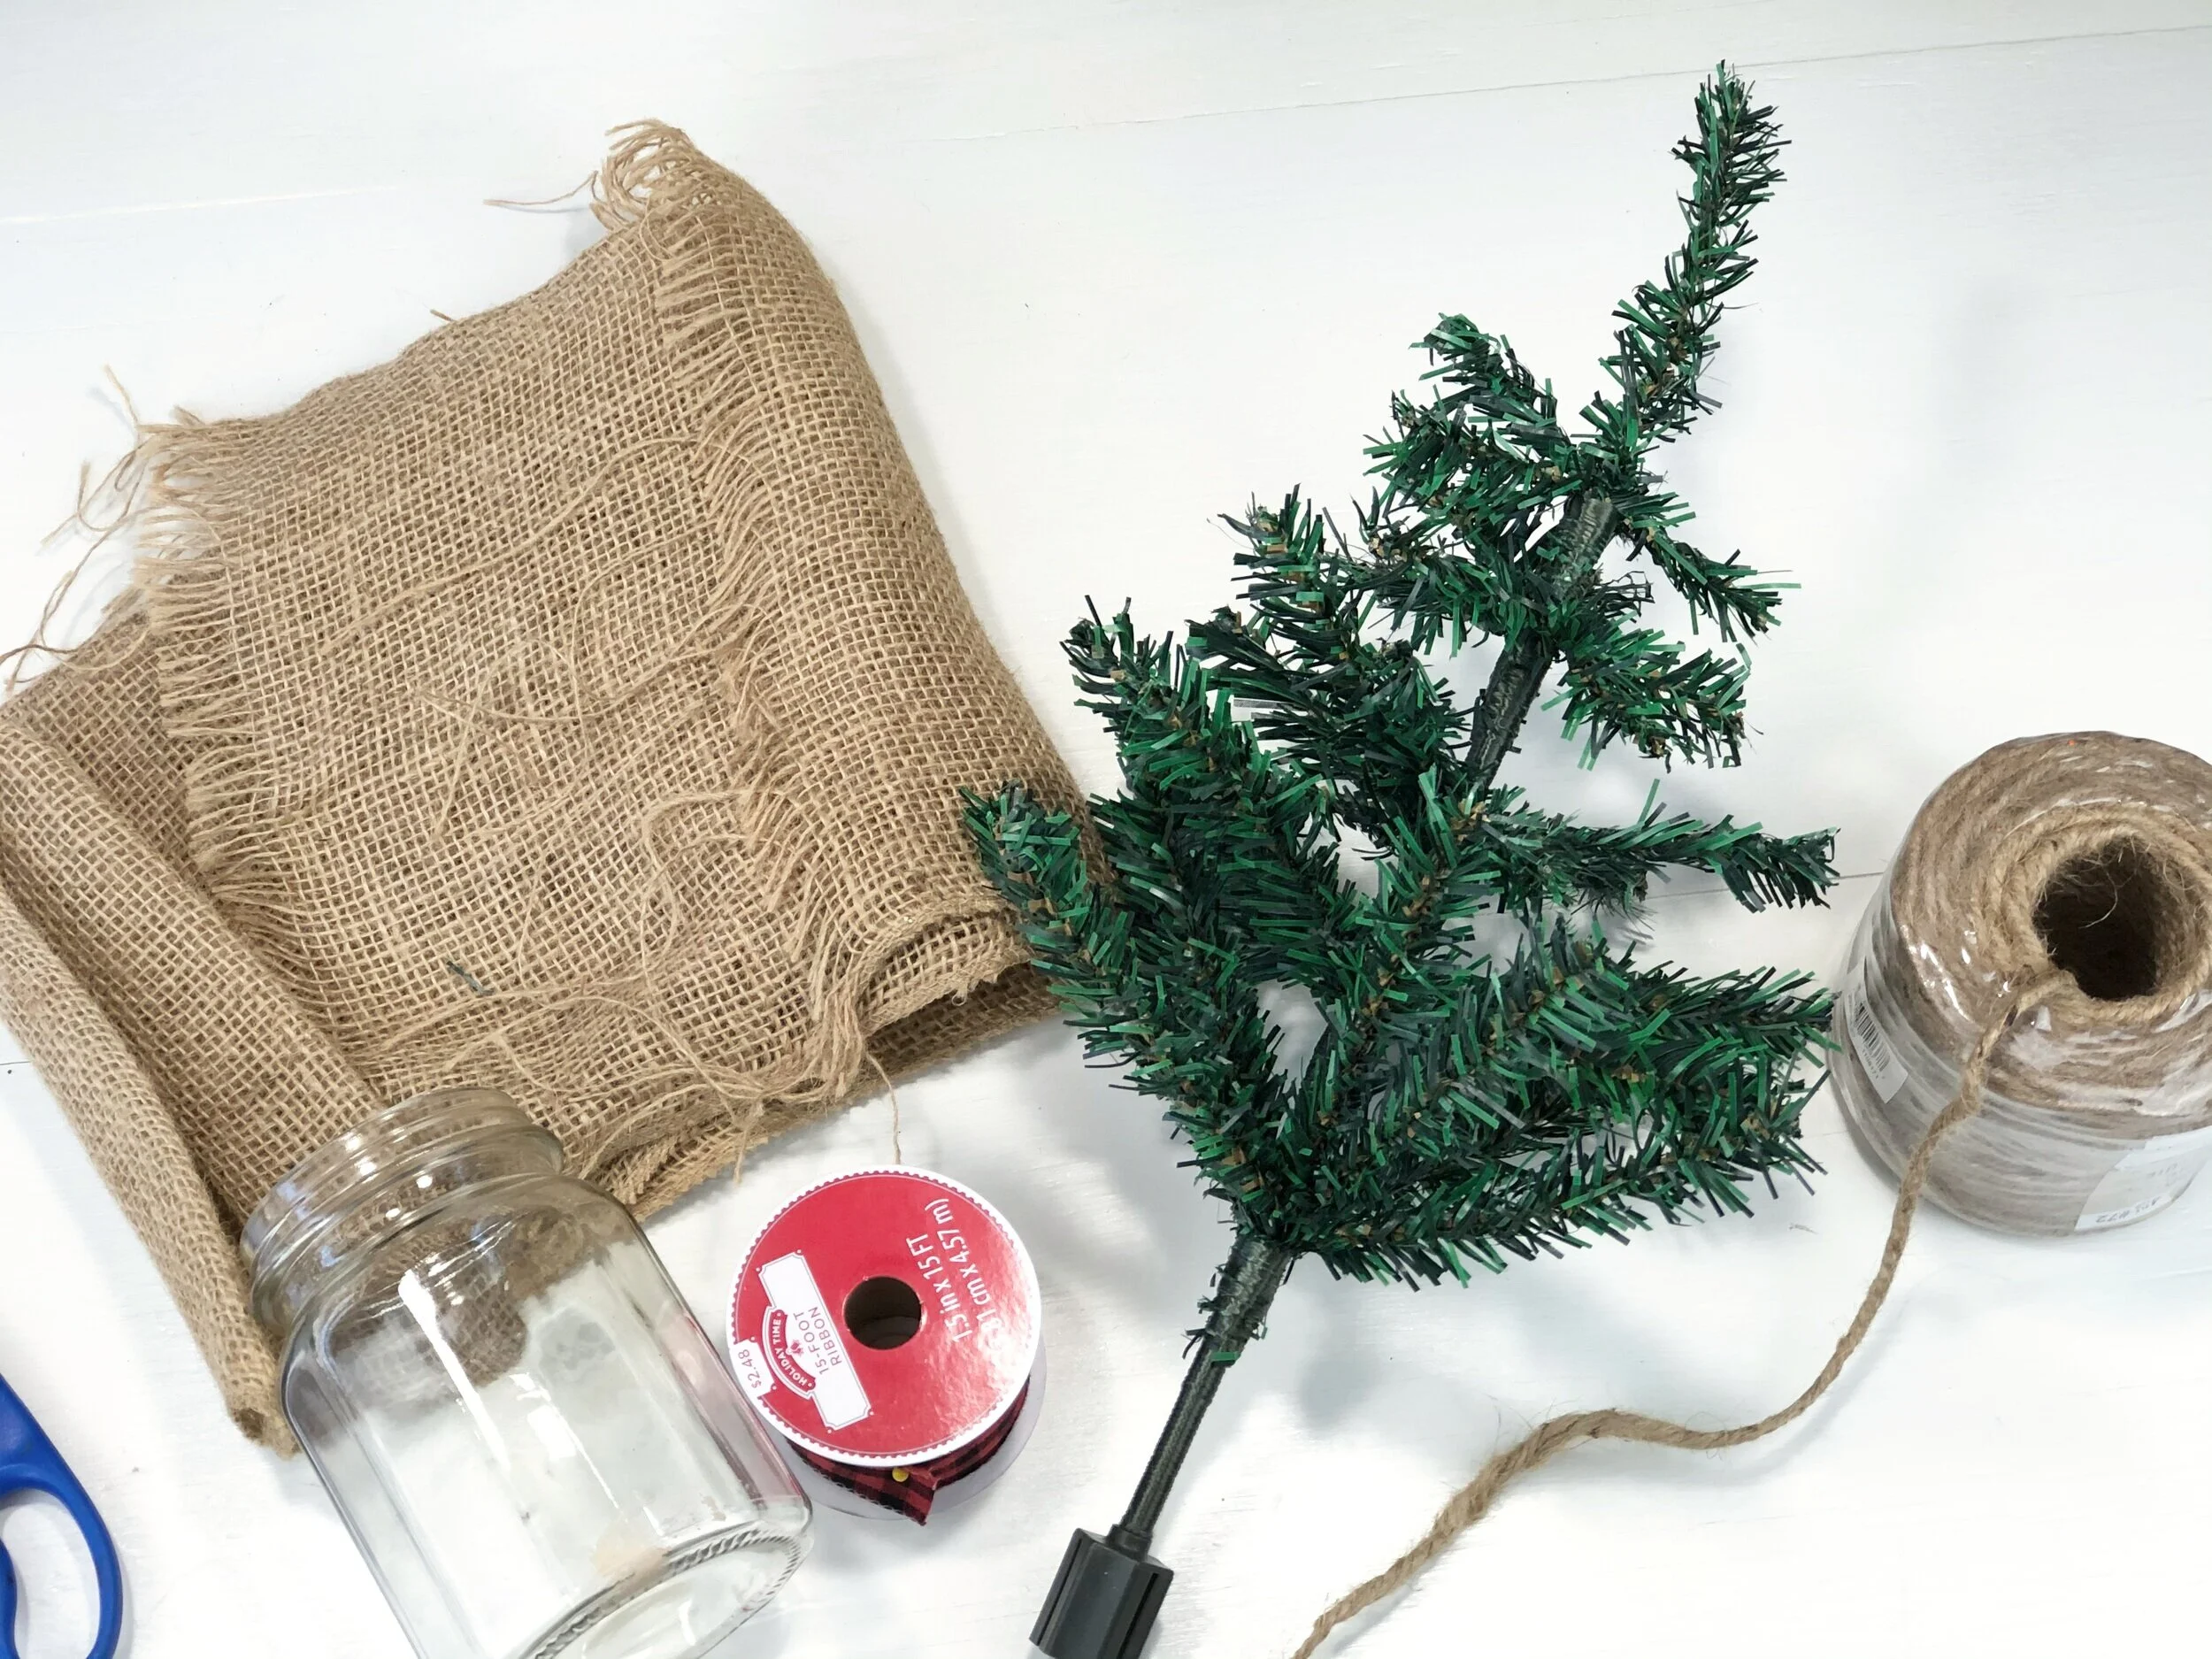
Here’s what I used

DIY Dollar Tree farmhouse Christmas tree. What to do with the mini Christmas trees from the dollar tree. Easy way to use the cheap Christmas trees from the dollar store. Rustic farmhouse Christmas decor on a budget.

I had everything except for the Christmas tree on hand which was awesome because when I bought the tree I had no idea what exactly I was going to do with it. Which is usually how I shop for my projects lol!

1. CUT THE BURLAP TO SIZE

I used a piece of scrap burlap I had from years ago (I don’t throw anything away lol). I placed my old jar on the burlap, pulled the burlap up over the glass so I’d know how big of a piece I’d need.

DIY Dollar Tree farmhouse Christmas tree. What to do with the mini Christmas trees from the dollar tree. Easy way to use the cheap Christmas trees from the dollar store. Rustic farmhouse Christmas decor on a budget.

Then I cut that into a circle. I just eyeballed this. Also, this glass used to hold craft supplies and since I was covering it I didn’t think I needed to give it a bath first.

2. ADD TWINE

DIY Dollar Tree farmhouse Christmas tree. What to do with the mini Christmas trees from the dollar tree. Easy way to use the cheap Christmas trees from the dollar store. Rustic farmhouse Christmas decor on a budget.

I didn’t get super fancy with this at all. I cut off a piece of twine I thought would be long enough to tie around the bottom lip of the glass then then pulled it tight and tied it in a bow.

DIY Dollar Tree farmhouse Christmas tree. What to do with the mini Christmas trees from the dollar tree. Easy way to use the cheap Christmas trees from the dollar store. Rustic farmhouse Christmas decor on a budget.

3. ADD THE TREE

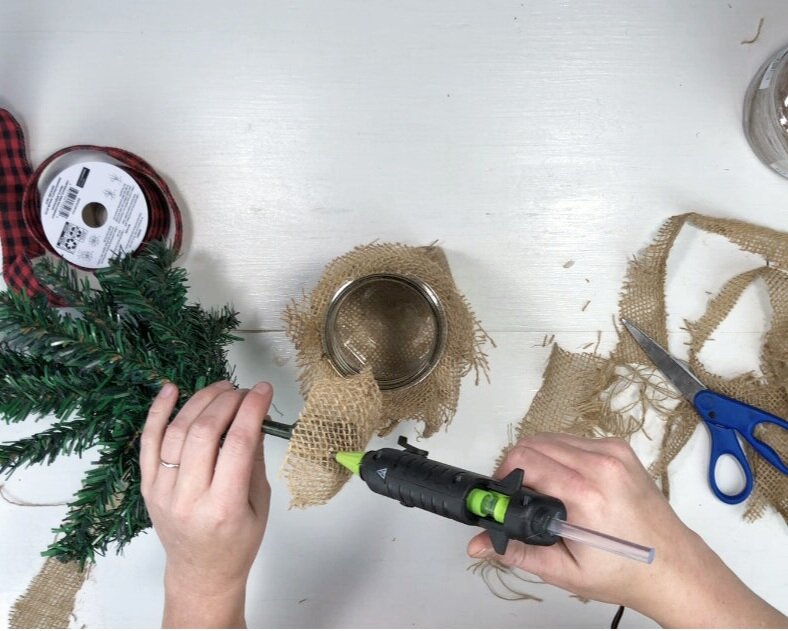
I didn’t want to mess with stuffing anything into the jar to hold the tree up so instead I hot glued it in. This took a bit of trial and error before I finally got it to stick right.

What worked for me was taking a piece of the discarded burlap and hot gluing it to the bottom of the tree.

DIY Dollar Tree farmhouse Christmas tree. What to do with the mini Christmas trees from the dollar tree. Easy way to use the cheap Christmas trees from the dollar store. Rustic farmhouse Christmas decor on a budget.

Then I added more hot glue to the bottom of the burlap and stuck the tree in the glass jar. I held it there till the glue was dry. It didn’t budge after that!

DIY Dollar Tree farmhouse Christmas tree. What to do with the mini Christmas trees from the dollar tree. Easy way to use the cheap Christmas trees from the dollar store. Rustic farmhouse Christmas decor on a budget.

4. LIGHTS

My tree was looking kind of sad so I found some lights I had bought from the Dollar Tree over the summer and strung them on the tree. They are battery operated so I just stuck the battery pack into the glass jar to hide it.

DIY Dollar Tree farmhouse Christmas tree. What to do with the mini Christmas trees from the dollar tree. Easy way to use the cheap Christmas trees from the dollar store. Rustic farmhouse Christmas decor on a budget.

That’s it! It turned out SOOOOO CUTE! And so crazy easy! It’s nice to do a craft sometimes where the results are kinda instant and you don’t have to wash out any paint brushes or clean up hardly anything.

DIY Dollar Tree farmhouse Christmas tree. What to do with the mini Christmas trees from the dollar tree. Easy way to use the cheap Christmas trees from the dollar store. Rustic farmhouse Christmas decor on a budget.

I can’t wait to get more of my Christmas decorations made for my new house! Let me know if you have any questions about this DIY in the comments below.

Happy Crafting!

Check out more Christmas DIY tutorials below


Last minute end of the season cheerleader gift bags

Cheerleader gift bags that are quick, easy, and inexpensive. Put together cute pampered gift bags for cheer appreciation gifts for the end of the season. Use your Cricut to make personalized vinyl decals.

If you are needing to put together a last minute gift for a squad of cheerleaders, or SUPER last minute in my case, you have come to the right place! I needed to do the same thing last week for my daughter’s cheer team and I only had a few hours to make it happen.

Cheerleader gift bags that are quick, easy, and inexpensive. Put together cute pampered gift bags for cheer appreciation gifts for the end of the season. Use your Cricut to make personalized vinyl decals.

I knew I didn’t want to spend a ton of money, because I’m frugal like that, but I also didn’t want whatever I put together to seem cheap.

Affiliate Disclosure. Some of the links on this website are affiliate links, which means that I may earn a small commission if you click on the link or make a purchase using the link. If you make a purchase you will not be charged anything additional.

So off to Walmart I went. My youngest daughter and I trolled up and down the aisles of our TINY Walmart, which carries about 1/4 of the variety that a super center does, but we found some goodies that were perfect for cheerleader gift bags.

We went for a pamper yourself theme that the girls loved! And I only spend $60, not counting what I already had at home.

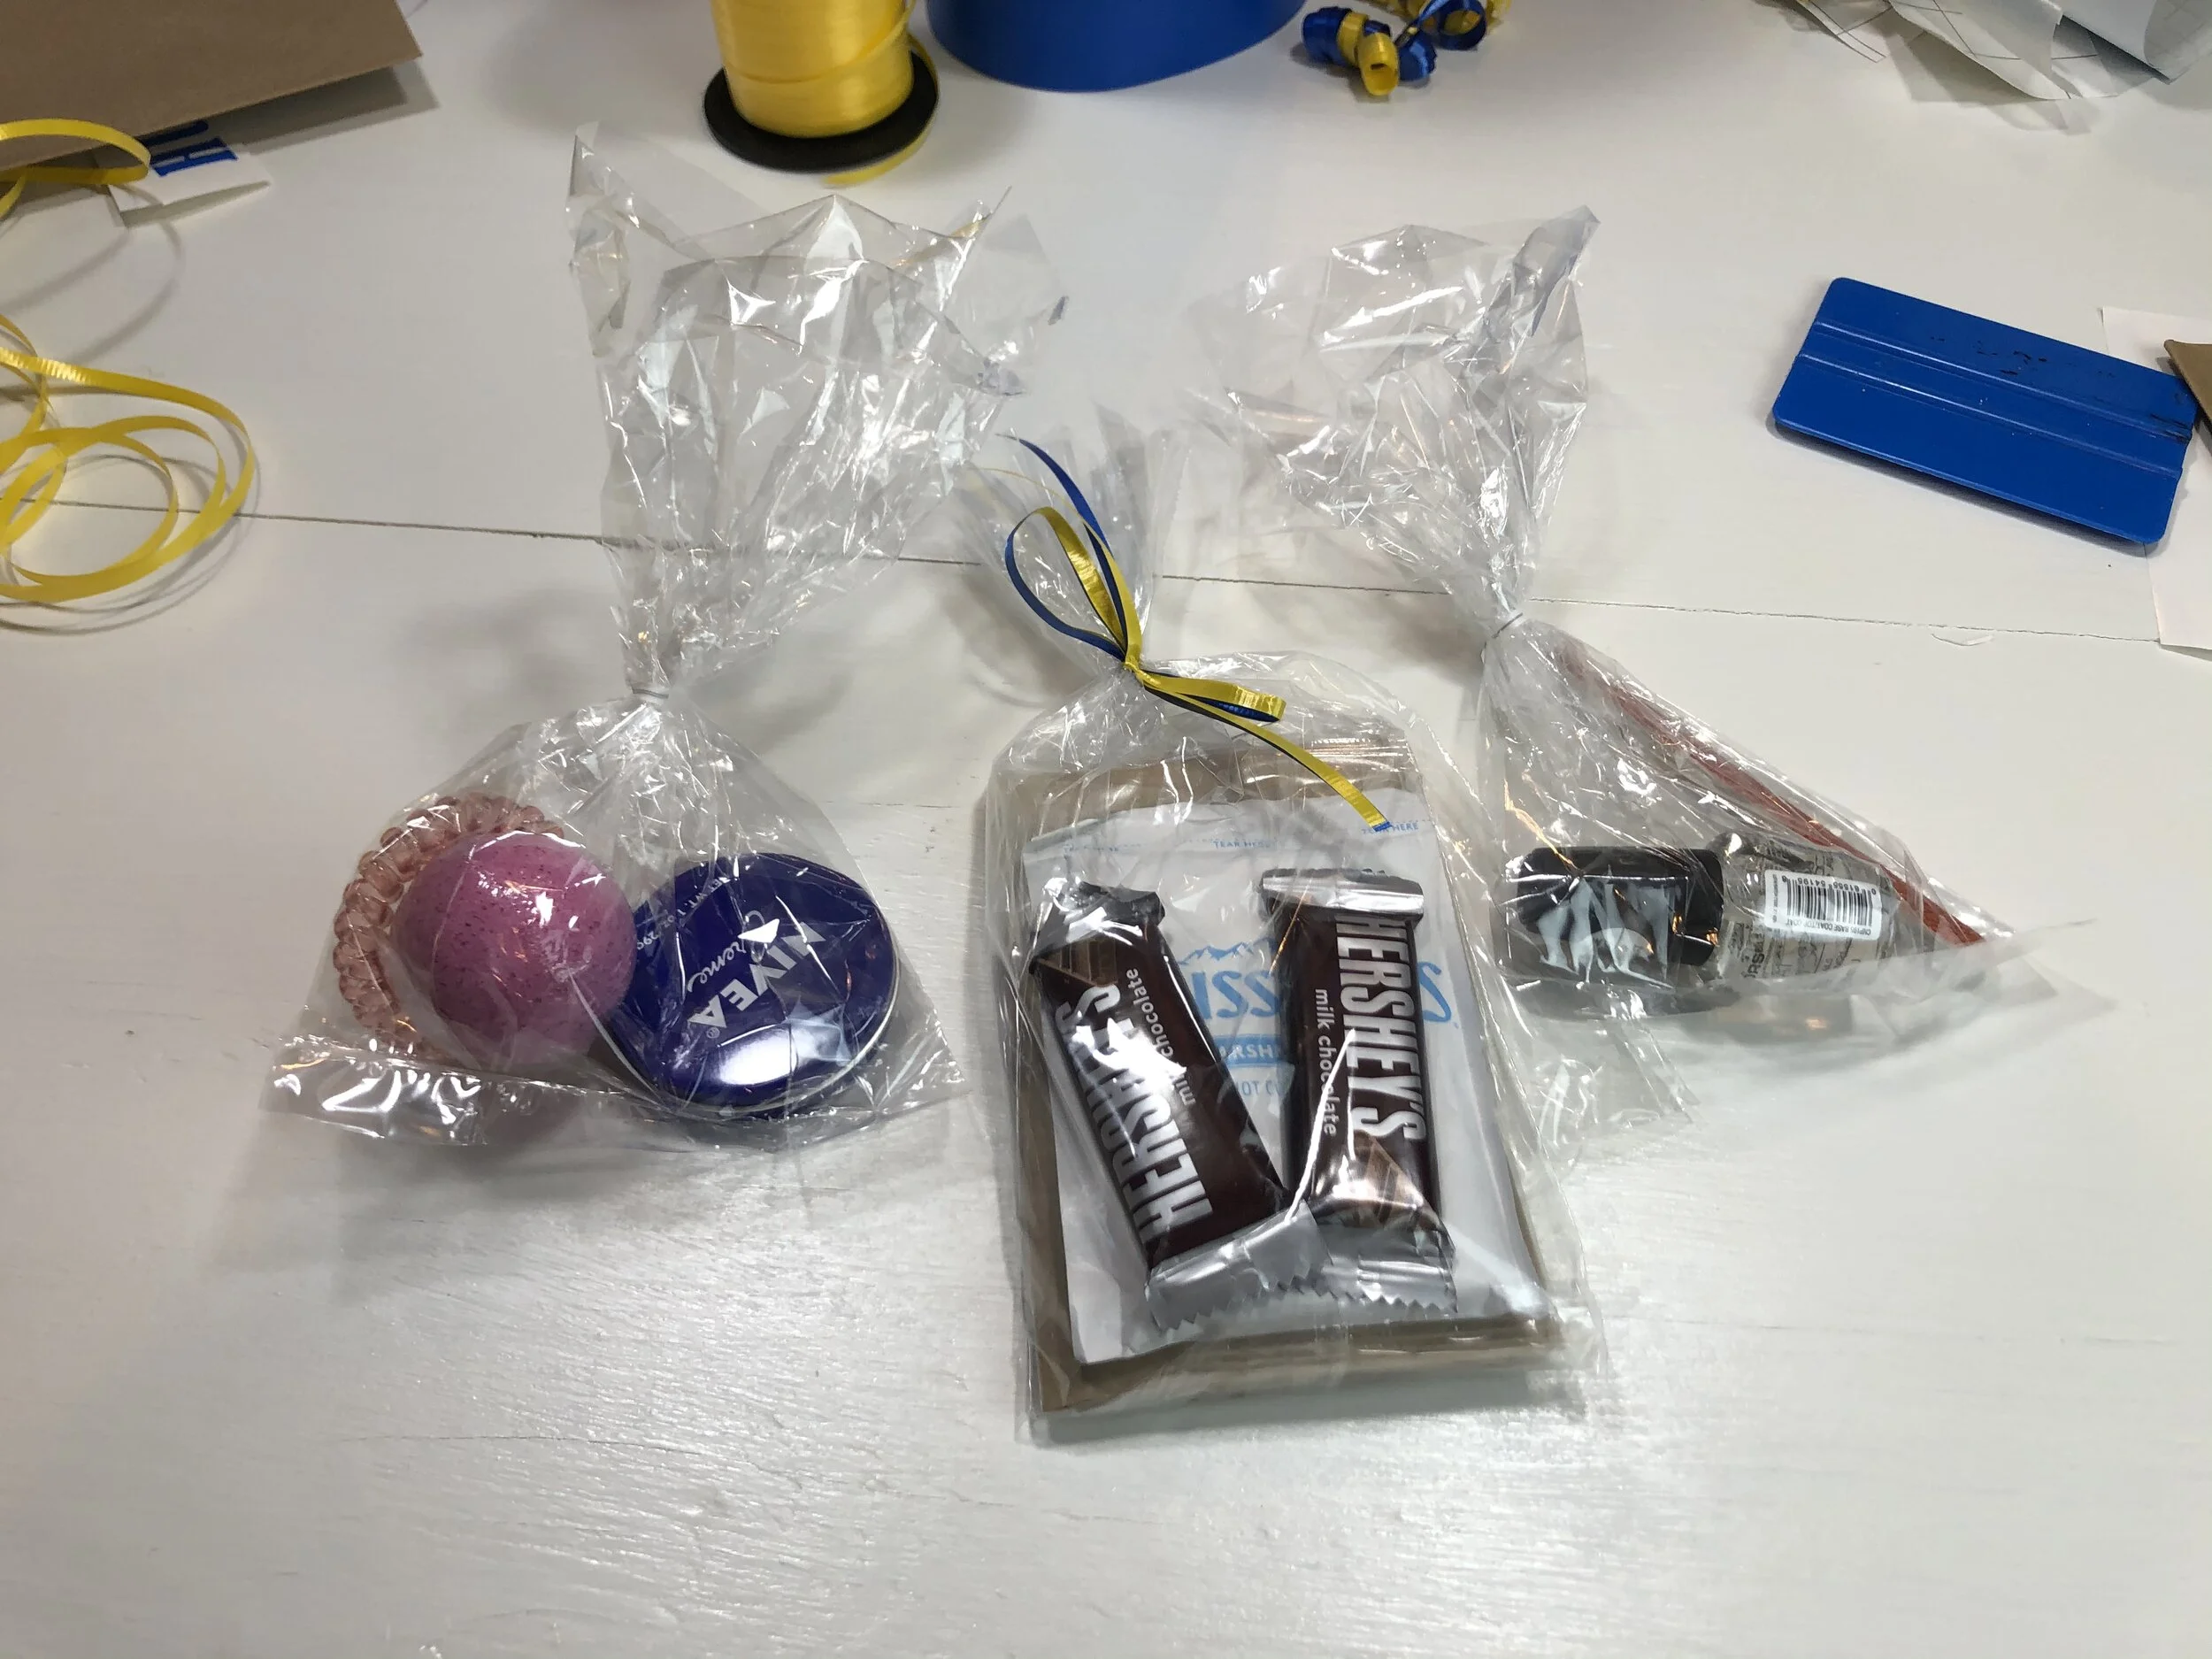
Here’s what I filled the bags with. Each girl got one of the following

  • small tin of Nivea lotion (find it on Amazon here)

  • clear nail polish

  • nail file (purchased in a pk of 12)

  • bath bomb

  • coiled hair tie

  • popcorn bag

  • hot cocoa

  • 2 mini chocolate bars

Other items I bought to make the gift bags

  • roll of yellow ribbon

  • roll of blue ribbon

  • yellow tissue paper

  • blue tissue paper

I already had these materials on hand

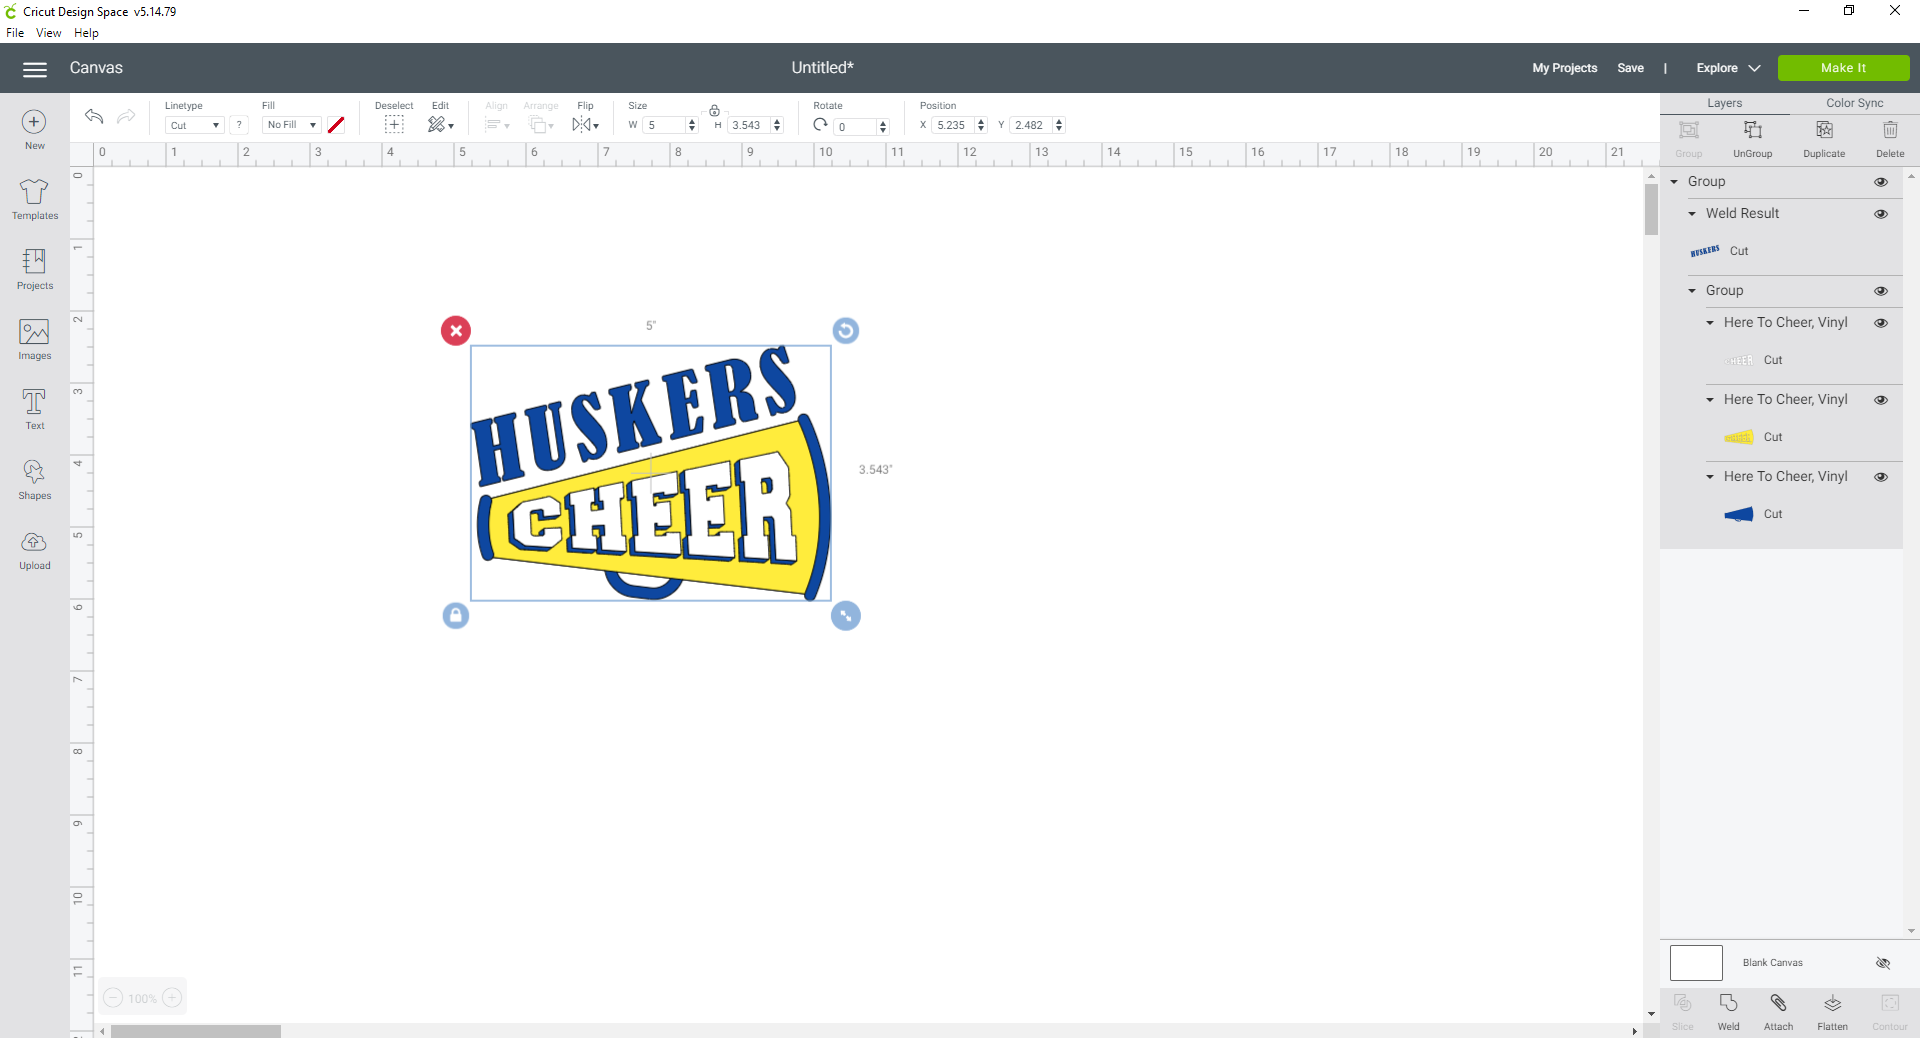
To keep the bags simple, and because I didn’t know everyone’s name on the cheer squad, I cut out vinyl decals that said ‘ HUSKERS CHEER’ with a megaphone. I used Cricut Design Space and used my Cricut Access for this. Click here to find the link to my project in design space.

I made my decals 5” wide so they would fit perfectly on the gift bags.

How to make cheerleader gift bags. Use your Cricut machine to make personalized decals on gift bags. DIY gift bags using your Cricut machine.

I had two different brands of vinyl that I used (Oracal & Starcraft) but any colored vinyl, that’s not HTV, will work. What I had on had were matte and gloss but I would have preferred it all to have been matte.

Cheerleader gift bags that are quick, easy, and inexpensive. Put together cute pampered gift bags for cheer appreciation gifts for the end of the season. Use your Cricut to make personalized vinyl decals.

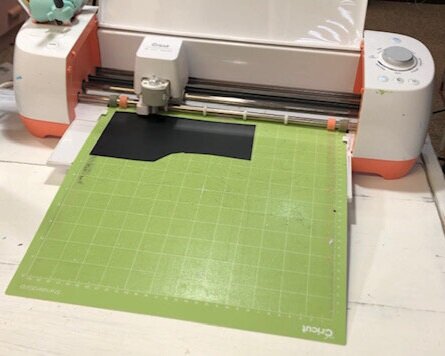
I used my Cricut Explore and green cutting mat to cut my decals out. You can see how well loved both my machine and mat is lol! If you’re looking for a cart for your cutting machine I HIGHLY recommend the one in this pic. I absolutely LOVE it!

Cheerleader gift bags that are quick, easy, and inexpensive. Put together cute pampered gift bags for cheer appreciation gifts for the end of the season. Use your Cricut to make personalized vinyl decals.

This decal was a little more work than I really wanted to do BUT it was sooooo cute! Each bag had 4 different vinyl pieces to put on the bags. But since they were all the same I was able to get them on the bags pretty quickly.

Cheerleader gift bags that are quick, easy, and inexpensive. Put together cute pampered gift bags for cheer appreciation gifts for the end of the season. Use your Cricut to make personalized vinyl decals.

I used clear transfer tape and a vinyl squeegee to help get them on the bags easier.

Cheerleader gift bags that are quick, easy, and inexpensive. Put together cute pampered gift bags for cheer appreciation gifts for the end of the season. Use your Cricut to make personalized vinyl decals.

I didn’t want to just throw everything inside the brown bags. I thought separating the items out like this made the pampered bags look a lot nicer and fancier. I put the nail polish and file in one bag. The edible treats in another bag. And the lotion, hair tie, and bath bomb in another bag. My cheerleader loved this.

Cheerleader gift bags that are quick, easy, and inexpensive. Put together cute pampered gift bags for cheer appreciation gifts for the end of the season. Use your Cricut to make personalized vinyl decals.

Once I started getting the decals on my older girls and I made an assembly line to fill the bags. We were really pressed for time by this point lol. It worked pretty great. And they learned how to curl package ribbon.

Cheerleader gift bags that are quick, easy, and inexpensive. Put together cute pampered gift bags for cheer appreciation gifts for the end of the season. Use your Cricut to make personalized vinyl decals.

These were so quick to make and had a lot of school spirit to show on the outside with the tissue paper and curled ribbons. The girls loved them!

Cheerleader gift bags that are quick, easy, and inexpensive. Put together cute pampered gift bags for cheer appreciation gifts for the end of the season. Use your Cricut to make personalized vinyl decals.

I hope you enjoyed this quick and easy project.

Happy crafting!

Check out more projects made with my Cricut

Building a tall craft desk on a budget

How to make a rolling craft desk on a budget. DIY Amazon 9 cube organizer standing tall craft desk. Non ikea craft desk craft.

AMAZON CRAFT DESK HACK ON A BUDGET

If you’re in the market to DIY your own tall craft desk you’ve likely seen all the GORGEOUS Ikea tall craft tables that are on Pinterest. Oh boy are they so pretty and clean looking! I have found myself almost drooling over them the last few months.

The thing is my current craft space is just temporary. We moved into a beautiful old home a few months back so until we get my she shed up outside I have taken over a way too beautiful to craft in sitting room. Everything I put up in there is just a for now thing, not permanent.

I just needed a space to create all of my craft tutorials to share with you all here on my blog.

Affiliate Disclosure. Some of the links on this website are affiliate links, which means that I may earn a small commission if you click on the link or make a purchase using the link. If you make a purchase you will not be charged anything additional.

Of course this frugal momma didn’t want to spend too much money on a craft table that may or may not fit into the she shed once it’s done.

How to make a rolling craft desk on a budget. DIY Amazon 9 cube organizer standing tall craft desk. Non ikea craft desk craft.

That’s a pic of daughter #2 making the first project after the rolling craft desk was complete. She approved! This is a real view of what my craft space will look like and what you don’t see in my crafty DIY tutorials. The lights, microphone, and all the cords.

Here’s how I made a SUPER BUDGET friendly tall craft table

What I used to make my roll away craft table

Tools I used

1.ASSMEBLE THE 9 CUBE ORGANIZERS

My tips for this step. When I purchased mine they were around $40 per organizer. I don’t have pictures of this step. I was so excited to get them built I completely spaced taking pics.

  • read the instructions completely prior to assembling, but if you’re anything like me you probably won’t lol!

  • use an impact (it looks like a drill but it’s a little different, it has screwdriver bits that fit into it instead of drill bits) to get the screw in properly, a screwdriver really sucks for this

  • enjoy a glass of wine while you build these, again trust me you will need one lol!!

This next step is only necessary if you want to have a moveable craft desk. This is something that was a must for me as I’m always needing space to work on bigger projects.

2. ATTACH THE CASTOR WHEELS

Again, I didn’t take pictures because I was SO darn excited to get them done. You want to attach 4 castor wheels onto each 9 cube organizer, two on each end of the organizers. When I purchased mine they were about $14 per set of 4 castor wheels. And they are GREAT QUALITY. I was very impressed.

I HIGHLY suggest attaching a piece of wood to the inside of the cubby on the bottom shelf of each end so that your castor screws will have something to grab. I didn’t do this for the first cubby and I really wish I would have. The screws poked through the bottom cubbies and it’s kind of ugly now. I didn’t make the same mistake on the second one though.

I recommend shooting a brad nail through the wood just to keep it from moving when you start screwing the castor wheels on. This worked great for me when I attached the second set of castors.

3.CUT YOUR PLYWOOD

Measure out how big of a work space you want. Keep in mind that if it’s too wide you’ll need something to brace it on the underneath side of your craft table.

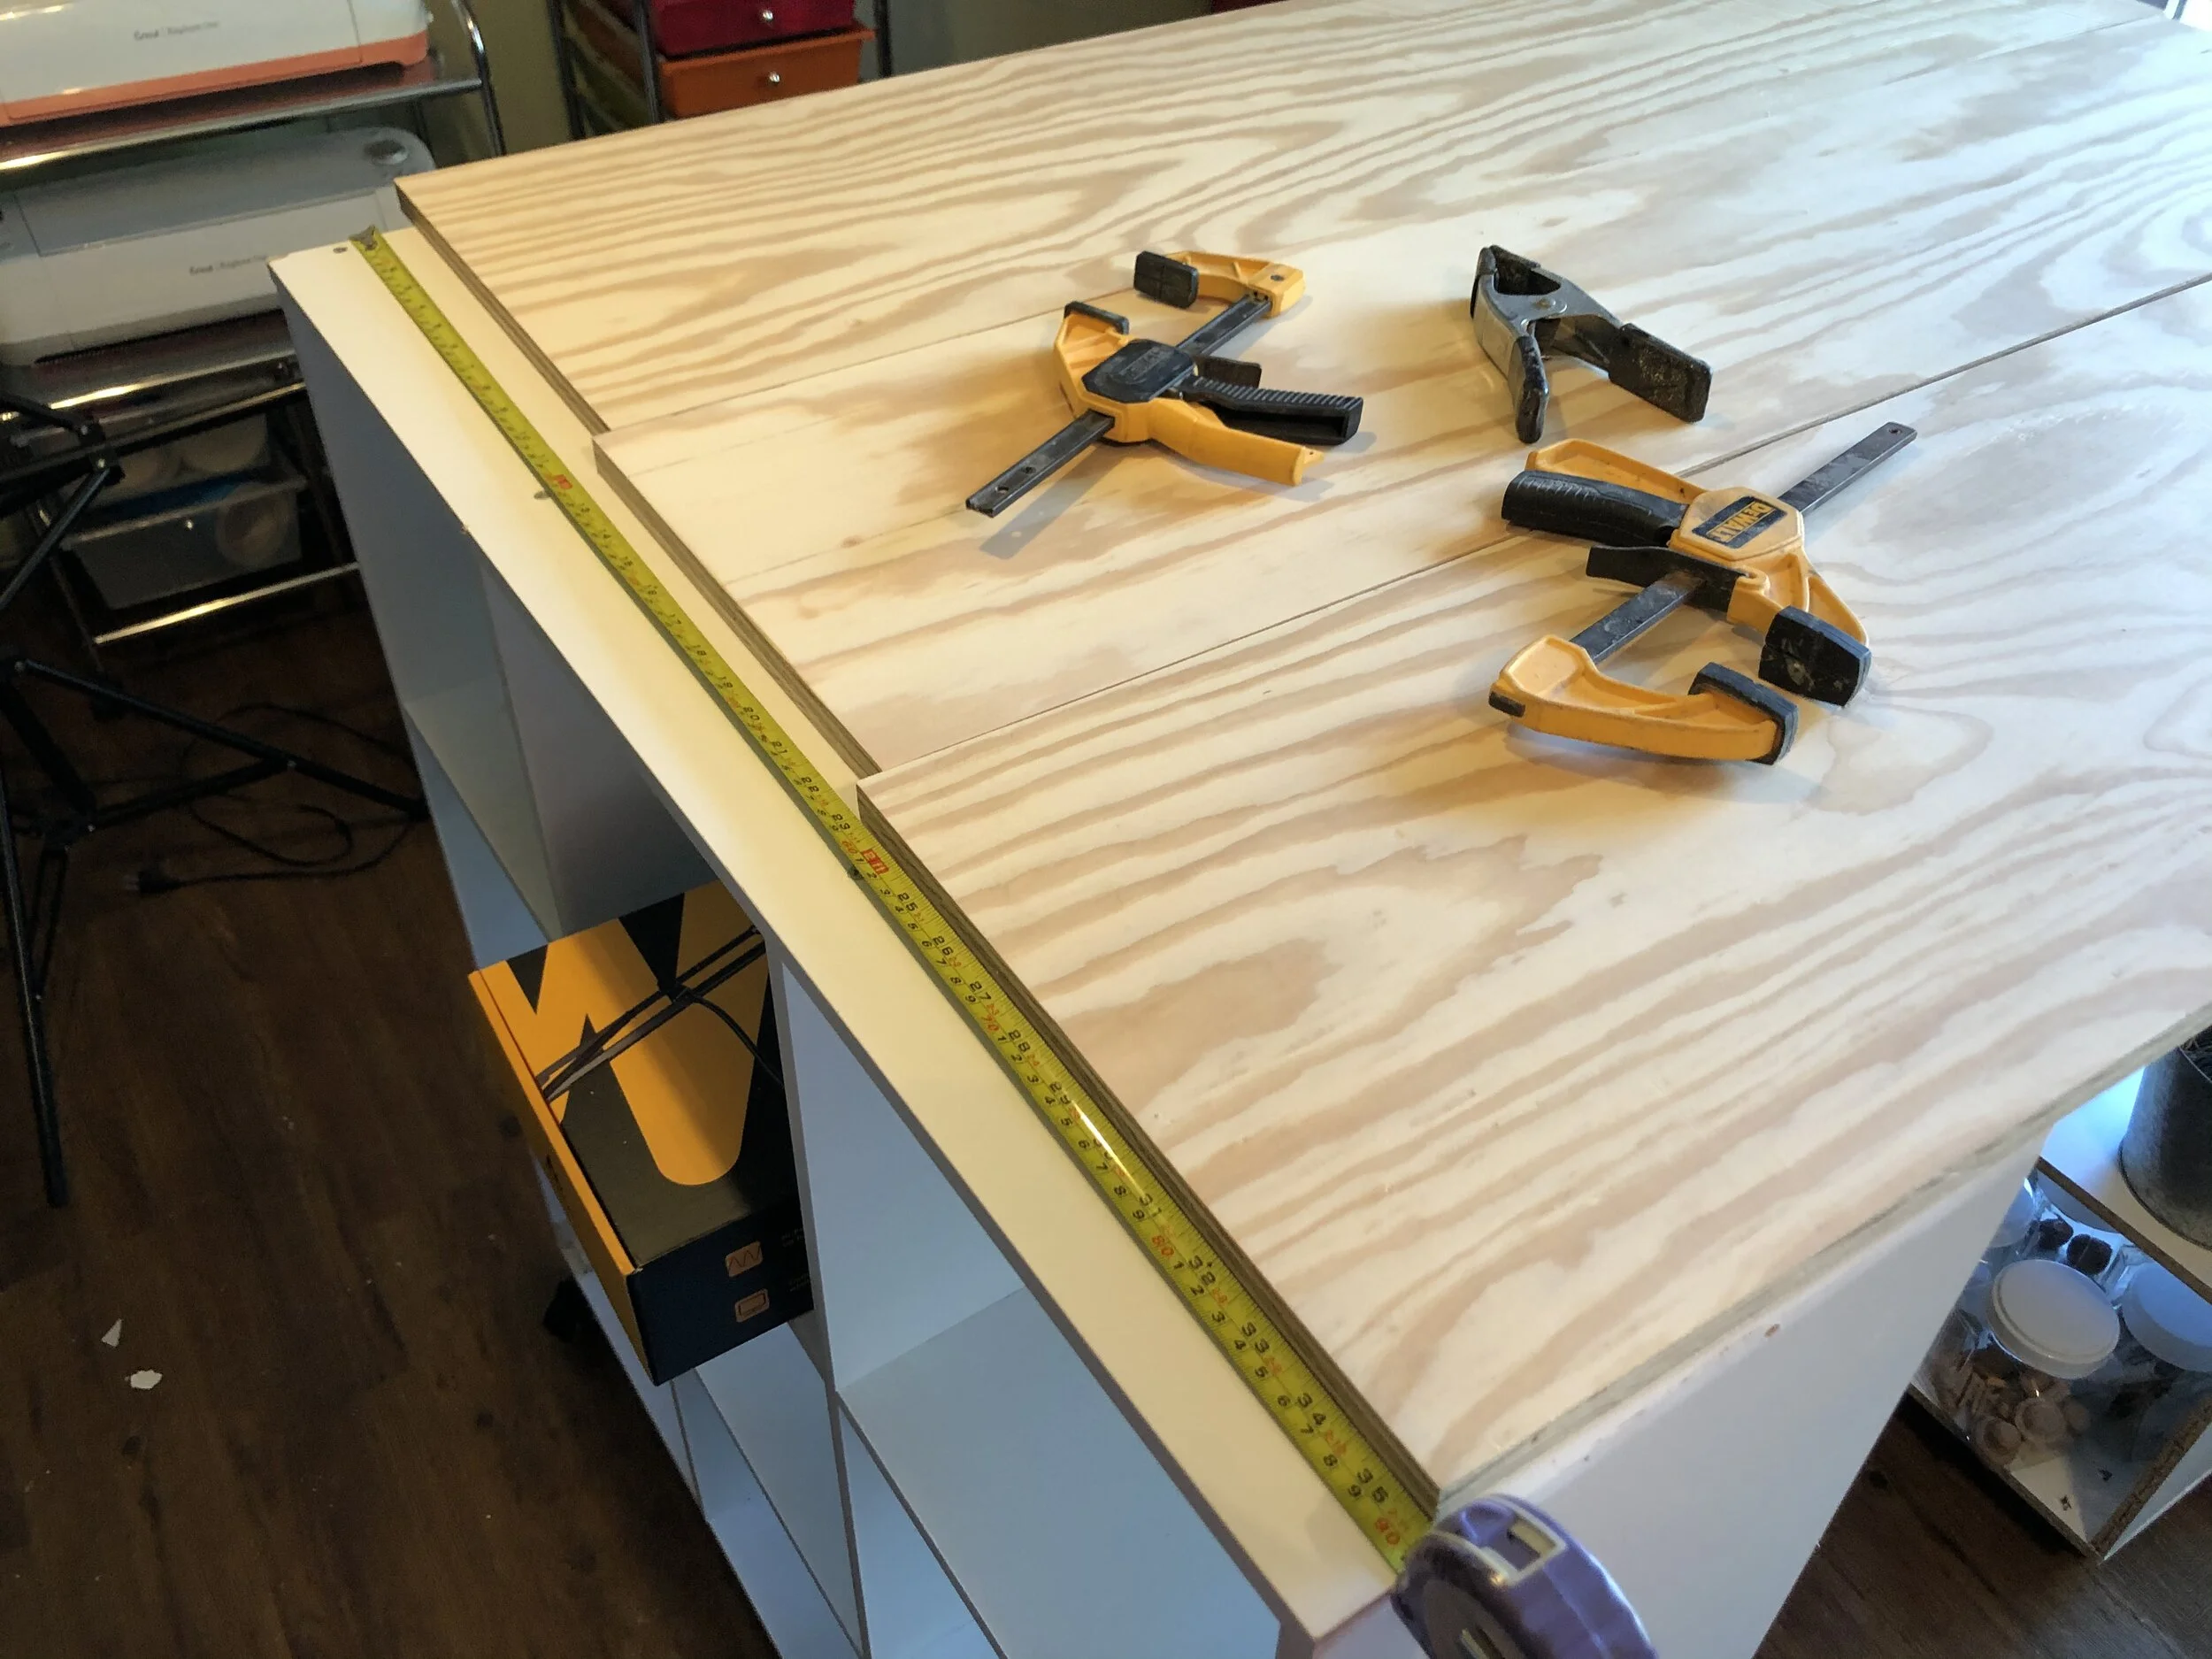
I used some leftover 3/4” plywood my husband brought home off of a jobsite. I cut 3 pieces to 47.5” in length and it seemed to work out perfectly. Almost like it was meant to go on my rolling craft table. I used my miter saw to cut these to length.

If you want to know what power tools I recommend for crafters check out this post.

4.SAND

I used my Ryobi orbit sander and just lightly went over the plywood. Just enough to give it a smooth surface.

5. ATTACH THE PLYWOOD

I know there are a lot of different ways to do this step but this is what I did and it worked great for me.

I was sure to lock the castor wheel before starting this step. Then I measured to find the middle of one of my 9 cube organizers.

How to make a rolling craft desk on a budget. DIY Amazon 9 cube organizer standing tall craft desk. Non ikea craft desk craft.

Using my brad nailer I attached the ends of my skinniest board to the edge. This is basically just to tack down the plywood so it doesn’t go anywhere till you can get the screws in.

How to make a rolling craft desk on a budget. DIY Amazon 9 cube organizer standing tall craft desk. Non ikea craft desk craft.

Then I lined up the other 9 cube organizer and did the same thing. Once those were down I attached the wider pieces, one on each side of the skinniest piece.

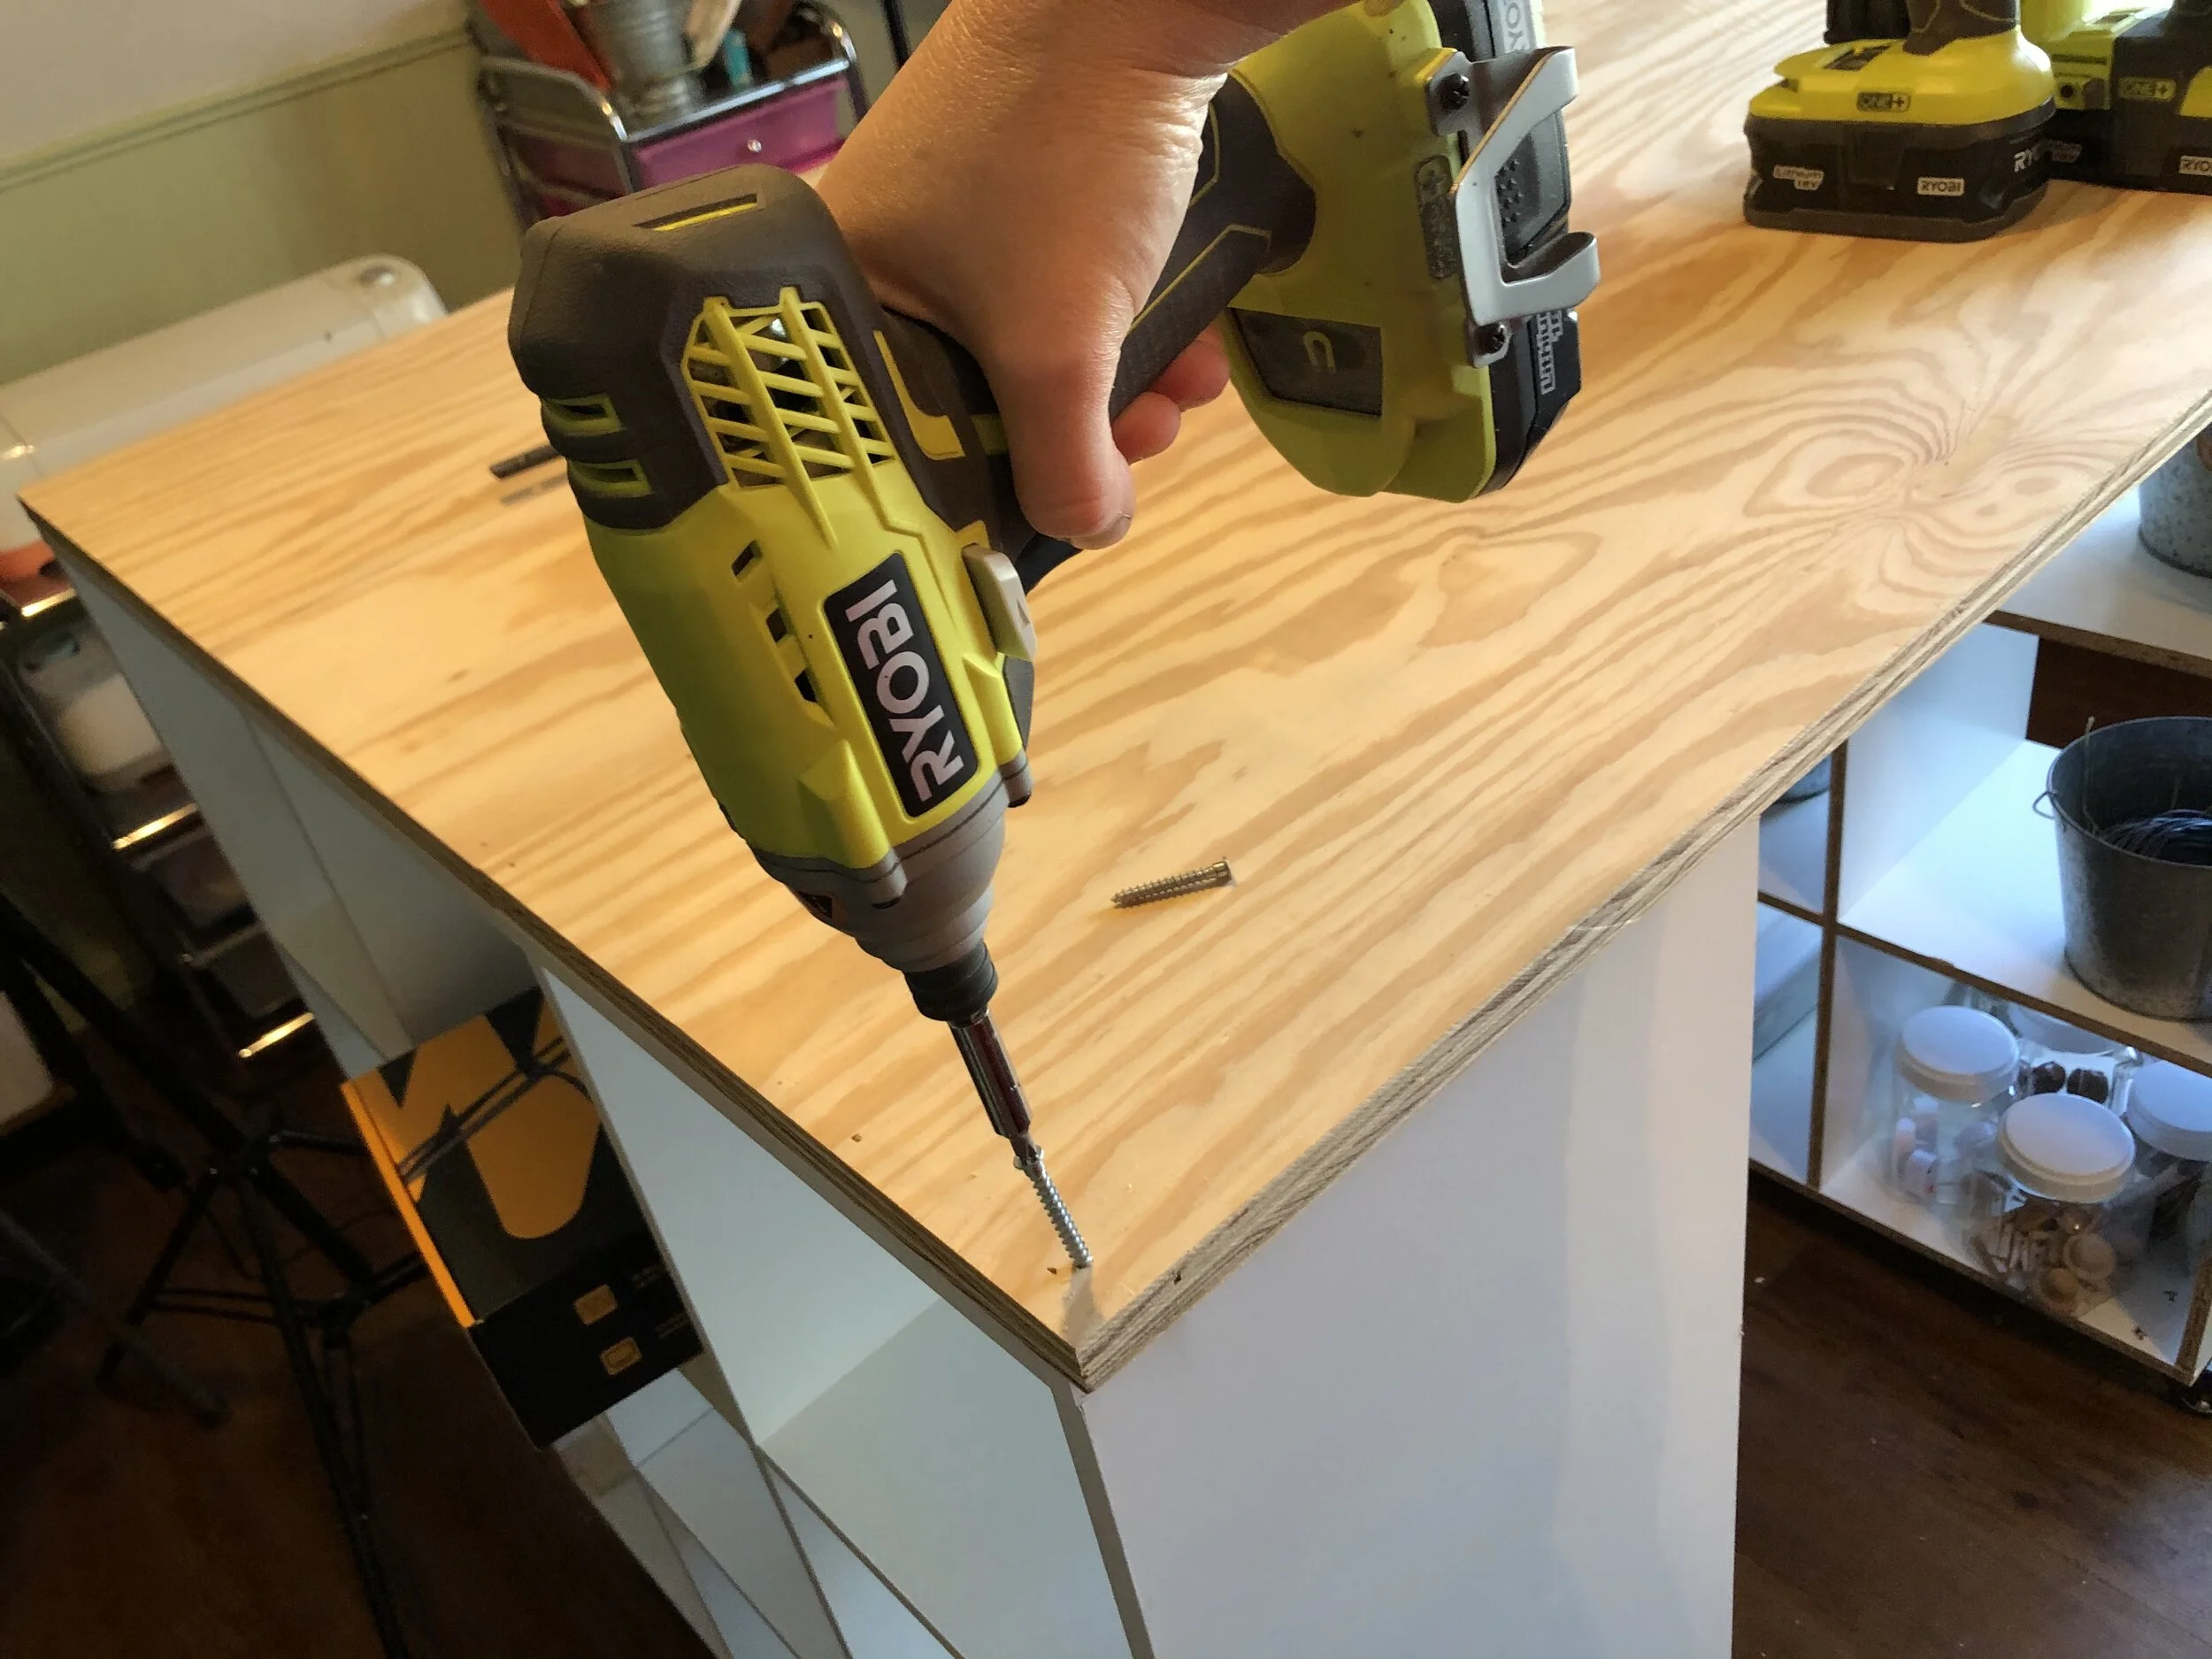
I used a drill to make small pilot holes, those are holes that help you get your screw into the wood easier. I just used whatever screws I had on had that were long enough to go through the plywood and into the 9 cube organizer. Ignore how not straight the screw and drill are. It was incredibly difficult to take this pic myself so I said ‘good enough pic for me’ lol!

How to make a rolling craft desk on a budget. DIY Amazon 9 cube organizer standing tall craft desk. Non ikea craft desk craft.

5.PAINT

I used a leftover white paint we used in the house to paint the top of my rolling craft desk. I applied two coats, letting them dry in between coats.

How to make a rolling craft desk on a budget. DIY Amazon 9 cube organizer standing tall craft desk. Non ikea craft desk craft.

6.SEAL

It’s a good idea to apply a sealant to the top of your workspace. I just used whatever I had on hand mainly because this isn’t a long term desk for my craft space. If I were to buy a sealant I don’t think I would use this specific one because it did yellow the white a little bit but it does work for sealing the paint and keeping the surface of the craft table wipeable and cleanup-able.

How to make a rolling craft desk on a budget. DIY Amazon 9 cube organizer standing tall craft desk. Non ikea craft desk craft.

All and all I spent around $110 to make this. I’m not factoring in the materials I already had on hand. I know technically money was spent on those somewhere down the line but it’s hard telling when, where, and how much was spent so I just left out.

How to make a rolling craft desk on a budget. DIY Amazon 9 cube organizer standing tall craft desk. Non ikea craft desk craft.

It’s far from perfect but it certainly works for my crafty space.

I hope you enjoyed this tutorial and if you have any questions please leave them in the comments below

Happy Crafting!

DIY How to make a RUSTIC UNICORN sign + FREE SVG

How to make rustic unicorn sign. DIY easy tutorial for stenciling a wooden unicorn sign for your little gilr's bedroom decor. Painted unicorn wall art with flowers. Always believe in magical things wall art.

Unicorns…my third daughter is OBSESSED with these magical creators and has been for years. She was the inspiration behind these rustic looking glittery unicorn themed mason jars that we found on Pinterest and HAD to make our own. Everything is unicorn theme from her bedroom décor to her birthday party themes to her clothing. So, this year for her birthday of course she asked for…you guessed it UNICORN themed presents!

With all the craziness going on the world in the year of 2020 she couldn’t have a traditional birthday party. BOO! Instead she had a small but SUPER FUN day at home filled with a unicorn shaped cake made by her older sisters and LOTS of fun outdoor activities.

While she did get a few store bought gifts I thought it would be so fun to make her a rustic looking unicorn sign to hang in her unicorn themed side of the bedroom. She already has this gorgeous unicorn themed bedspread and SO many other purple glittery unicorn knick knacks I thought this sign would tie in perfectly with all of it.

Affiliate Disclosure. Some of the links on this website are affiliate links, which means that I may earn a small commission if you click on the link or make a purchase using the link. If you make a purchase you will not be charged anything additional.

How to make rustic unicorn sign. DIY easy tutorial for stenciling a wooden unicorn sign for your little gilr's bedroom decor. Painted unicorn wall art with flowers. Always believe in magical things wall art.

And she LOVED it! I was so happy because sometimes you make or buy something for your kid and you don’t always get the reaction you were hoping for. You know the one where they give you a huge smile and a thank you but you can tell deep down that it really wasn’t what they were expecting. Thank goodness my sweet girl BEAMED with unicorn excitement when she got her handmade rustic always believe in magical things sign from her momma! YAY a mom WIN!!

If you want to make this exact unicorn SVG you can get it for FREE here in my FREE RESOURCE LIBRARY. If you’re new to the blog my resource library is where I share all of my freebies. It’s all in one place so you can access it super easy. Just click here to get my password. If you already have the password click here and it will take you to my secure page.

How to make rustic unicorn sign. DIY easy tutorial for stenciling a wooden unicorn sign for your little gilr's bedroom decor. Painted unicorn wall art with flowers. Always believe in magical things wall art.

HOW TO MAKE A RUSTIC PALLET STYLE UNICORN SIGN

For this tutorial I’m starting with a pre built, stained, and painted pallet style sign. If you’ve never built a pallet style sign before not worries they are actually really easy to make. You can read my post on how to built your own pallet style sign here. I also used a weathered gray stain on this wood unicorn sign along with white paint for the background colors.

1. CUT OUT YOUR UNICORN STENCIL

The first thing I did was cut out my stencil on ORAMASK STENCIL FILM. If you plan to cut out a ton of stencils and want to buy stencil film even cheaper you must read my oramask stencil film post on how I dramatically my out of pocket on this material for my small business. I used my Cricut to cut out my stencil and weeded my unicorn themed stencil with a super sharp exacto knife.

If you’re new to the Cricut world here are 10 must have to get you started on you Cricut journey.

How to make rustic unicorn sign. DIY easy tutorial for stenciling a wooden unicorn sign for your little gilr's bedroom decor. Painted unicorn wall art with flowers. Always believe in magical things wall art.

2. APPLY YOUR UNICORN STENCIL

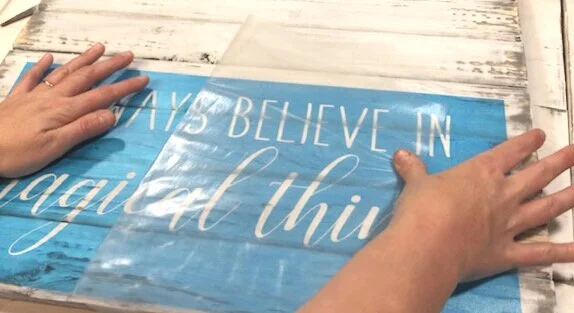
Using transfer tape apply your unicorn stencil to your wood base. When removing the transfer tape it’s easiest to roll the transfer tape off your of stencil film. Use your vinyl squeegee to get your stencil good and adhered to the base of your unicorn sign.

How to make rustic unicorn sign. DIY easy tutorial for stenciling a wooden unicorn sign for your little gilr's bedroom decor. Painted unicorn wall art with flowers. Always believe in magical things wall art.

3. PAINT YOUR STENCIL

To prevent tons of paint bleed you can seal your unicorn stencil first with the same color paint that you used for your background color. In my case I used white paint because my background is white. The wood I used to make my daughter’s rustic unicorn sign was EXTRA RUSTIC. Meaning it had lots of imperfections. The wood was very uneven, rounded on the edges, and had small and large gouges all over. I knew even with sealing my stencil I would still have paint bleed unless I took extra time to paint the sign very slowing. I’m a momma of 4, I don’t have time to be that perfect lol so my sign had more than usual paint bleed. When painting your stencil you can use a cosmetic sponge or a paint brush. If using a cosmetic sponge you want to make an up and down dabbing motion to paint the stencil. Do very THIN even coats and layer up to 3 THIN layers but no more than that. I promise the coverage will be darker once the stencil is removed.

How to make rustic unicorn sign. DIY easy tutorial for stenciling a wooden unicorn sign for your little gilr's bedroom decor. Painted unicorn wall art with flowers. Always believe in magical things wall art.

4. REMOVE YOUR STENCIL

An xacto knife works great for removing stencils. Just be sure is super sharp. If you don’t have an xacto knife you can also use a sewing pin. You want to gently lift the stencil film up and off your wood base without causing damage.

How to make rustic unicorn sign. DIY easy tutorial for stenciling a wooden unicorn sign for your little gilr's bedroom decor. Painted unicorn wall art with flowers. Always believe in magical things wall art.

5. DISTRESS YOUR UNICORN SIGN

I used a sanding sponge to lightly sand over my lettering on my unicorn pallet sign once my paint was dry. Just to give it a little more rustic look. I didn’t want my sign to be all gorgeously distressed and the lettering be crisp.

How to make rustic unicorn sign. DIY easy tutorial for stenciling a wooden unicorn sign for your little gilr's bedroom decor. Painted unicorn wall art with flowers. Always believe in magical things wall art.

6. PAINT ON UNICORN EARS

I almost forgot to do this part…insert facepalm!… I freehanded the ears with a pencil then painted them in with light pink paint. I added a little detail with a little bit of gray paint while the pink paint was still wet just so they didn’t look so flat. Then I distressed them with the sponge sander.

How to make rustic unicorn sign. DIY easy tutorial for stenciling a wooden unicorn sign for your little gilr's bedroom decor. Painted unicorn wall art with flowers. Always believe in magical things wall art.

7. MAKE THE HORN

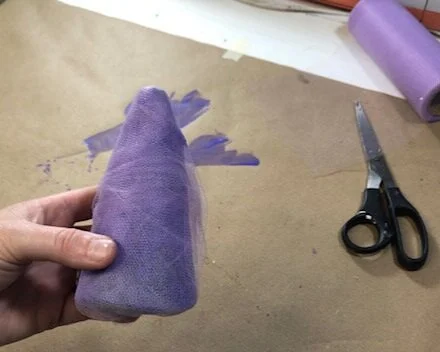
I used a foam cone for this and cut it down to the size I needed. I used craft paint for this instead of spray painting it (check out my tips for spray painting Styrofoam here). Let dry. Once dry wrap it in tulle, I did this several times to get a good coverage.

How to make rustic unicorn sign. DIY easy tutorial for stenciling a wooden unicorn sign for your little gilr's bedroom decor. Painted unicorn wall art with flowers. Always believe in magical things wall art.

8. ADD ACCENTS TO THE HORN

I only needed a small piece of wire for this project so I used what I had on hand. I only had silver or green floral wire so I painted a piece of the silver wire with glittery nail polish and let it dry. Then I wrapped it around the horn and secured the ends inside of the foam. This really made a big difference in how the unicorn horn looked overall. Without this piece of glittery wire I don’t think it would have turned out as cute.

How to make rustic unicorn sign. DIY easy tutorial for stenciling a wooden unicorn sign for your little gilr's bedroom decor. Painted unicorn wall art with flowers. Always believe in magical things wall art.

9. GLUE ON FLORAL UNICORN CROWN

I picked up my floral accents from Walmart. It’s spring/summer so they had a great selection of florals that had a magical unicorn vibe. I used gorilla hot glue in my glue gun to attach them to my wood base. I highly suggest doing a dry run with the floral crown before you actually glue them down. You want to make sure you are going to like the placement before you commit to the glue. Don’t be afraid to cut down your florals. Sometimes you just need a small piece of baby’s breath instead of a whole piece of it.

Some of the florals I used on this unicorn crown were leftover from these DIY corsages I made from my youngest three daughters for the daddy daughter dance. I love that I could also incorporate them into this piece. They were such beautiful florals and my store was completely out of them so I couldn’t get any more for this sign.

How to make rustic unicorn sign. DIY easy tutorial for stenciling a wooden unicorn sign for your little gilr's bedroom decor. Painted unicorn wall art with flowers. Always believe in magical things wall art.

Now you’re ready to give this gorgeously rustic unicorn sign to your sweetest unicorn obsessed little girl to hang in her room. I hope you enjoyed this crafty tutorial. If you have any questions please leave them in the comments below.
Happy Crafting!

Where to buy STENCIL MATERIAL for SIGN MAKING super cheap

How to save money on stencil film when painting wooden signs. The best and cheapest place to buy oramask 813 stencil film for sign making. DIY painted wood signs tips and tricks.

SAVE MONEY ON ORAMASK STENCIL FILM WHEN MAKING PAINTED WOOD SIGNS

Making painted wooden signs can get expensive. The wood, paint, SVG files, transfer tape, stencil film, power tools, it all adds up. But, did you know you CAN save money on STENCIL FILM for sign making? I know a lot of people prefer to use anything but Oramask 813 because it can be pricey but you don’t have to compromise. You CAN use the proper material, ORAMASK 813, for the same price OR even cheaper than other materials that tend to be less expensive. The key is to find the right vendor. With prices varying so much from vendor to vendor it’s hard to know where you should order from. One may carry a 12”x12” sheet for $0.90 while another will have the same thing priced for $1.25. While the difference in price isn’t a lot it does add up when you figure some signs take several feet of stencil film just to create.

 Affiliate Disclosure. Some of the links on this website are affiliate links, which means that I may earn a small commission if you click on the link or make a purchase using the link. If you make a purchase you will not be charged anything additional.

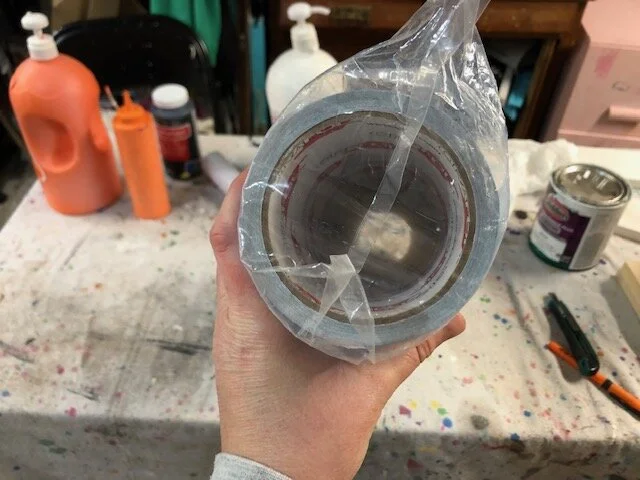
I have ordered through countless companies and I will tell you I have sent some stencil film back. Why? Stencil film is a sensitive type of material. If wound TOO tight it will not cut properly and will leave bubbles all throughout the freshly cut design making it impossible to use. If you ever receive Oramask 813 stencil film from a company and the stencil film is not wound around a large 3”-4” cardboard tube you will likely waste your time trying to use it.

How to save money on stencil film when painting wooden signs. The best and cheapest place to buy oramask 813 stencil film for sign making. DIY painted wood signs tips and tricks.

A little comparison, the stencil film on the left cost me $0.66 per fo ot, the one on the right cost me $0.90 per foot AND I have to order a LOT or pay for shipping for the $.90/ft price one.

I haven’t always used stencil material to paint my handmade signs though. When I first started out I used shelf liner…please just save yourself the headache if you are planning on painting signs for a business and DON’T use shelf liner. For me anyway, shelf liner caused more problems than it was worth. I have made THOUSANDS of signs and that is a decision in my business that I do not regret one bit. It caused so many problems, too many to get into for this post but I will make one later about the pros to using professional grade stencil film vs shelf liner later on.

WHERE TO BUY ORAMASK 813 STENCIL FILM IN BULK TO SAVE MONEY?

I swore I would never order rolls of oramask 813 from Amazon again but…here I am telling you that's exactly where I order from now and where you should too if you want to cut costs on stencil making. After a lot of buying from different companies, Amazon and small business websites, I have found the LOWEST PRICE I’VE EVER SEEN FOR STENCIL FILM and they properly wind the stencil film around a wide enough cardboard tube. It saves me SO MUCH MONEY in my sign making business. That’s more money that our family can put into savings. More money for my husband and I to feed our four daughters. More money we can put back into the business. I couldn’t keep this little secret to myself because I want you to order from a good company AND save money too!

So here’s what I do, I order a giant roll of ORAMASK 813 STENCIL FILM that measures 24'“ wide by 10 yards (30 feet) long. You’re probably thinking ‘seriously, Megan, I have a CRICUT and it only cuts up to 11.5” wide thanks but no thanks’. If you follow me on here or any of my social media accounts you know that’s what I use too, for almost a decade now.
CLICK HERE TO ORDER YOUR ORAMASK STENCIL MATERIAL

How to save money on stencil film when painting wooden signs. The best and cheapest place to buy oramask 813 stencil film for sign making. DIY painted wood signs tips and tricks.

Hear me out… IF you have a miter saw, have a family member that has a miter saw, know someone who has a miter saw OR happen to make a brand new best friend that has a miter saw, you can cut that 24” wide roll of stencil film in HALF so now you have 2 rolls instead of 1 that you can easily use to make stencils with any 12” deck vinyl cutting machine.

Let that sink in. I was kicking myself when I found this out! SO MUCH MONEY WASTED ON 12” ROLLS OF VINYL. But you live and learn and since I’ve learned I’m sharing it with you.

Your vinyl will likely come shipped in plastic to protect it. Leave it in the plastic until you are done cutting it. Measure in 12” from where your stencil film starts, NOT where the cardboard starts. Then make a mark.

How to save money on stencil film when painting wooden signs. The best and cheapest place to buy oramask 813 stencil film for sign making. DIY painted wood signs tips and tricks.

Be sure your stencil film is still in the plastic, this will help keep the edges nice and clean. If it didn’t come shipping in plastic you can tape around the very middle where it measures 12” with wide painters tape, this will have the same effect. Then line your saw up with your 12” mark and cut. Wipe away any saw dust, you don’t want any of that when going to cut your stencils out with your Cricut or Silhouette machine.

How to save money on stencil film when painting wooden signs. The best and cheapest place to buy oramask 813 stencil film for sign making. DIY painted wood signs tips and tricks.

I’m not a big math person but I can do simple math lol. When I buy these giant rolls of stencil film they cost about $40. $40 divided by 30 (number of feet in the roll) = $1.33 but wait it’s still 24” wide so you divide $1.33 by 2 (because you will have 2 12” rolls of stencil film after you cut it in half) = $0.66!

How to save money on stencil film when painting wooden signs. The best and cheapest place to buy oramask 813 stencil film for sign making. DIY painted wood signs tips and tricks.

Yes, SIXTY SIX CENTS $0.66 per foot for oramask stencil film. Granted, prices go up and down so it may not be exactly this price when you go to buy but that is the price when I purchase it. And since I am a AMAZON PRIME member I’ve already paid for my shipping with my membership. Which is totally worth the super small fee in my opinion.

DIY paint stick wall hanging, with FREE printable

How to make interchangable printed wall art at home using paint sticks. DIY stir stick wall art. Print from home computer to make beautiful and rustic wall hangings for cheap. DIY farmhouse stir stick decor.

MAKE RUSTIC INTERCHANGEABLE WALL ART USING PAINT STIR STICKS AND A PRINTER AT HOME

Paint sticks don’t sound like the kind of thing you would purposely hang on your wall as part of your décor. Well think again! They are actually PERFECT to use to make interchangeable hanging frames. AND they are SO cheap to make which makes this crafty DIY even better! With a little bit of paint, magnetic tape,printable and some twine you can transform your own stir sticks into a farmhouse style picture frame.

Affiliate Disclosure. Some of the links on this website are affiliate links, which means that I may earn a small commission if you click on the link or make a purchase using the link. If you make a purchase you will not be charged anything additional.

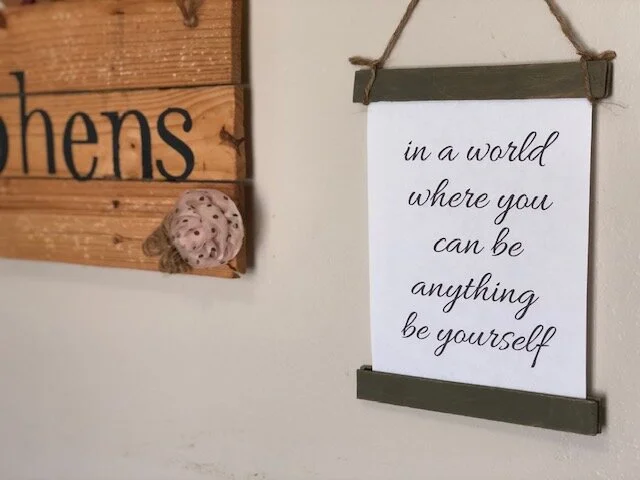
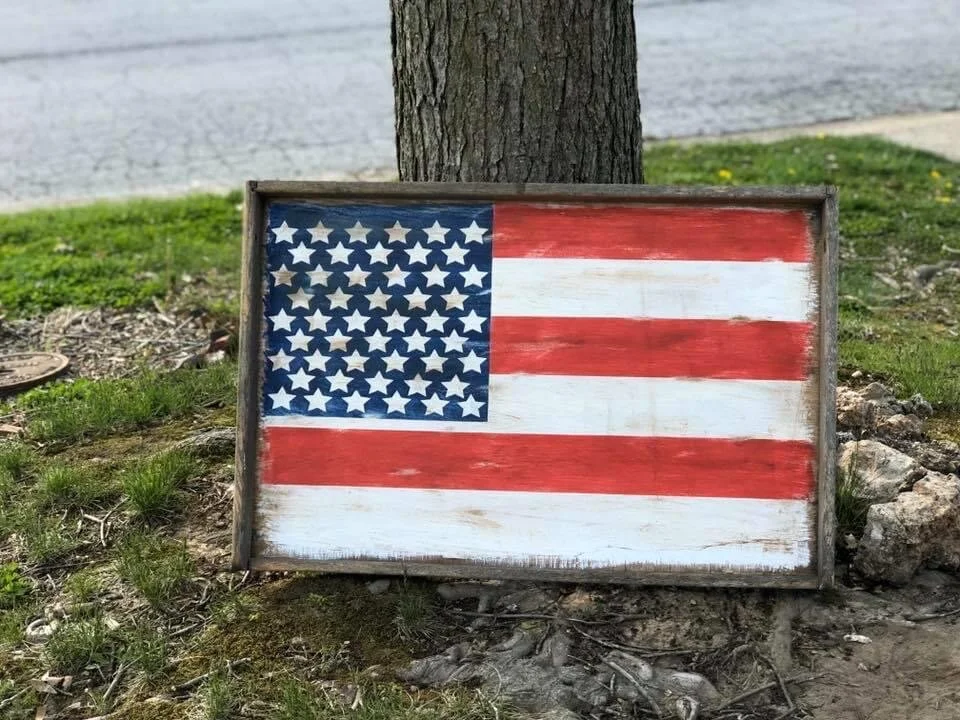
BONUS grab my FREE printable to use for your own wall hanging. I love being a girl mom x4 but it for sure has it’s moments of hard conversations. One of those hard convos I had recently is the sole purpose to creating this printed wall hanging. I had plans to make these stir stick decorations but I wasn’t really planning to hang this exact piece. I was going to do something a little patriotic to tie in with this repurposed drawer into an American flag instead I chose to showcase a saying that would sink in a little deeper for my girls. When they read it I hope it sets in even deeper that they are perfect just the way they are.

If you like easy to make signs check out this super simple free standing wood sign. All you need is a printer and some mod podge and of course a piece of wood ;).

How to make interchangable printed wall art at home using paint sticks. DIY stir stick wall art. Print from home computer to make beautiful and rustic wall hangings for cheap. DIY farmhouse stir stick decor.

Here’s how you can make your own affordable rustic wall hanging

Here’s what you’ll need

Helpful tools

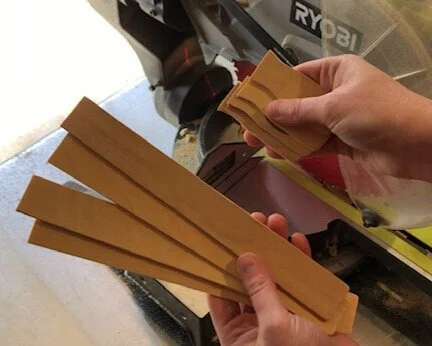
ONE- The first thing I did was cut the ends off of all of my paint sticks. You can keep these on if you want but I like the look of them cut off better. I used my miter saw to do this.

How to make interchangable printed wall art at home using paint sticks. DIY stir stick wall art. Print from home computer to make beautiful and rustic wall hangings for cheap. DIY farmhouse stir stick decor.

TWO- I painted the blank side of my paint sticks gray. I really wanted to stain them in gray but honestly I didn’t want the mess so instead I painted a thin layer then took a paper towel and wiped it off. This gives a faux stained look.

How to make interchangable printed wall art at home using paint sticks. DIY stir stick wall art. Print from home computer to make beautiful and rustic wall hangings for cheap. DIY farmhouse stir stick decor.

THREE- I attached a strip of magnetic tape to the insides, the side I didn’t paint, of each paint stick. To save on tape I cut a strip in half length wise for one top and one bottom stick. I’d never used this stuff before this project and so far I’m impressed with how well it works.

How to make interchangable printed wall art at home using paint sticks. DIY stir stick wall art. Print from home computer to make beautiful and rustic wall hangings for cheap. DIY farmhouse stir stick decor.

FOUR- I printed off my printable from my home computer and trimmed about 1/4” off of each long edge with my paper trimmer (if you don’t have one you NEED to get one lol they are so inexpensive and save so much time and stress from not having straight cut lines when you need them). Then I sandwiched the printable between the paint sticks at the top and bottom.

How to make interchangable printed wall art at home using paint sticks. DIY stir stick wall art. Print from home computer to make beautiful and rustic wall hangings for cheap. DIY farmhouse stir stick decor.

FIVE- To keep this stir stick wall art interchangeable I loosely tied my twine hanger to the ends of the top sides. This way if I want to change it out or if somehow a spaghetti noodle gets flung on to it, which can totally happen with four kids let’s be real, I can easily slip off the twine remove the old print add a new one and slip the twine loop back on. Super simple and easy!@

How to make your own paint stick wall hanging. DIY stir stick wall art for rustic home decor. Print your own wall art for farmhouse home decor.
Rustic home decor for cheap. Make your own printable wall art using paint sticks.

Like with all of my crafty tutorials if you have any questions please feel free to ask away:)!

Happy Crafting!

How to make beeswax wraps, reusable cotton saran wrap

How to make resuable saran wrap. DIY beeswax cotton food wraps made with pine resin. Save money in the kitchen by making your own fabric food wraps.

Make your own reusable cotton food wraps

I gotta say I am impressed with these simple yet useful beeswax reusable cotton wraps. If you’ve never heard of these before you’re not alone, my husband had no idea what they were and I’m pretty sure he thought I was crazy when I told him what I wanted to make. You use these cloth wraps in your kitchen to replace saran wrap…genius I know! I had never used beeswax or pine resin before this DIY, I actually had no idea pine resin was a thing to buy until recently. But after seeing how easy this project was I am eager to try others that use these ingredients.

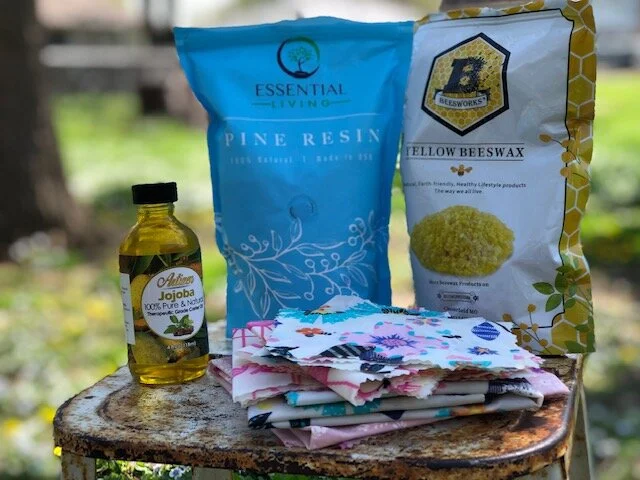
I read several different articles telling how to make them. They all basically used the same three ingredients: BEESWAX, PINE RESIN, JOJOBA OIL. Some however didn’t use the pine resin, or any resin at all, and what I read, and now agree with since I have made them myself, is that you won’t get that sticky saran wrap feel unless you use the pine resin. Technically you can just use beeswax but I wouldn’t recommend it.

If you enjoy this money saving tip be sure to check out these reusable oil bottles for the kitchen.

How to make resuable saran wrap. DIY beeswax cotton food wraps made with pine resin. Save money in the kitchen by making your own fabric food wraps.

DIY EASY BEESWAX & RESIN SARAN WRAP

Here’s what you'll need

This is the recipe I used

  • 1/2 c BEESWAX PELLETS

  • 2 t PINE RESIN

  • 1/2 t JOJOBA OIL

The first couple of wraps I made I only used 1 teaspoon of the pine resin and I did not like the way those wraps turned out. So I doubled the resin for the next batch and they turned out SO much better!

1.MELT THE INGREDIENTS

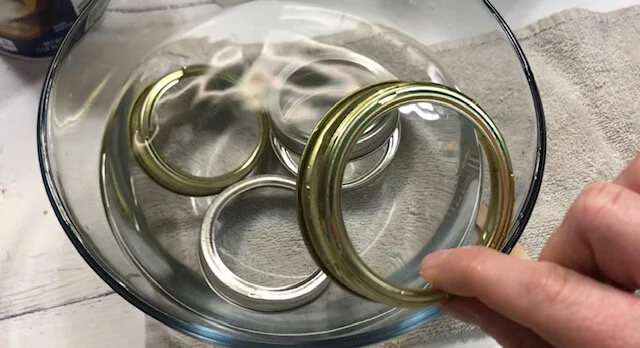
Preheat your oven to 215 degrees. Then mix 1/2 cup of beeswax pellets, 2 teaspoons of pine resin, and 1/2 teaspoon of jojoba oil. The BEST way to do this is to melt it all in a double boiler. I used an old sauce pan and a short mason jar for this. I put a small amount of water in the sauce pan because I didn’t want the jar to float and I knew since I was making a small batch it wouldn’t take much to heat of the jar to melt the beeswax. I used a thin chip brush to do all of the stirring.

How to make resuable saran wrap. DIY beeswax cotton food wraps made with pine resin. Save money in the kitchen by making your own fabric food wraps.

2. CUT YOUR FABRIC

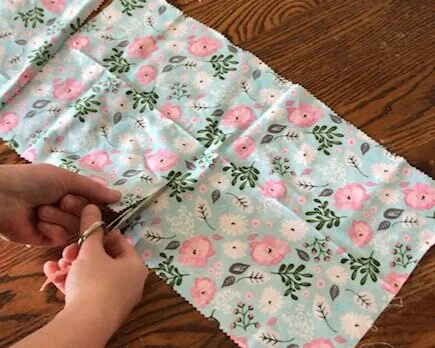
while my ingredients were melting I cut my fabric into pieces I thought would be good sizes for what I wanted to use them for. I cut a few small ones that would fit around the top of a jar. Several medium sized ones that would be good to wrap around food. And a couple of large ones that would fit around my larger sized mixing bowls. I used my grandma’s old pair of pinking shears on the edges of the fabric so that the edges wouldn’t fray once I start using the food wraps. Also, you want to be sure you are using 100% cotton.

How to make resuable saran wrap. DIY beeswax cotton food wraps made with pine resin. Save money in the kitchen by making your own fabric food wraps.

3. BRUSH ON & BAKE

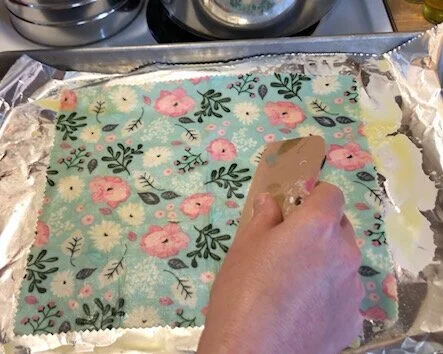
Line your cookie sheet with foil, shiny side down. Place a piece of your fabric on the cookie sheet. Use the chip brush to brush on the melted mixture. Then pop it in the oven for 5 minutes or so. Do not skip placing it in the over. If you just brush the wax mixture on your food wraps they will be stiff, the mixture won’t be on the fabric evenly and it will result in them not working quite right. Placing them in the oven allows the wax to melt completely into the fabric and giving you a nice even coat over the entire piece of fabric.

How to make resuable saran wrap. DIY beeswax cotton food wraps made with pine resin. Save money in the kitchen by making your own fabric food wraps.

4. REMOVE EXCESS WAX

Remove your cookie sheet from the oven. Use a squeegee, here's the kind I used, and squeegee the excess beeswax mixture off of the fabric. I didn’t do this for the first couple of wraps I made and I didn’t like how they turned out, for two reasons - there wasn’t enough resin AND they were WAY TOO stiff and waxy. None of the tutorials I read said to do this step though. So maybe they know something I don’t. But I do know when I went to use the first two to try them out before I made more they were kind of blah and I wasn’t impressed at all with them. After I squeegeed the excess off it made all the difference in the world! I didn’t let the excess go to waste either. I scooped it up and placed it back into the mason jar so it could melt back down.

How to make resuable saran wrap. DIY beeswax cotton food wraps made with pine resin. Save money in the kitchen by making your own fabric food wraps.

5. REMOVE & LET DRY

Immediately take them off of the baking sheet and place them somewhere to dry. I lined a cookie drying rack with a piece of foil and then placed the finished wax wraps on there to dry. It didn’t take very long at all for them to completely dry on the drying rack.

How to make resuable saran wrap. DIY beeswax cotton food wraps made with pine resin. Save money in the kitchen by making your own fabric food wraps.

6. USE

Once your food wraps are dry you can start using them immediately. I was so surprised at how well these turned out! I’m even thinking about making some to give as gifts to family and friends.

How to make resuable saran wrap. DIY beeswax cotton food wraps made with pine resin. Save money in the kitchen by making your own fabric food wraps.

Like with all of my DIY posts if you have any questions please feel free to ask. If you make these at home I’d love to hear how yours turn out!

Happy crafting!

Reusable oil spray bottles + FREE SVG file

DIY labeled reusable oil spray bottles. How to make your own pam spray bottles for vegetable and olive oil for the kitchen. Plus a FREE svg file to download. Great small project to use for Cricut. Labeling kitchen with vinyl.

The days of buying cooking oil spray bottles are over. I don’t know about you but I really dislike buying Pam at the grocery store, actually it’s never name brand because I’m super frugal and have a big family to feed lol! Buying that spray always feels like such a fat waste of money and in our house cooking oil spray doesn’t last very long anyway so we are always running out at the worst time. Yes, using a paper towel with oil on it will get the job done but sometimes it would just be one less thing to stress about when you go to pull it out of the cabinet only to find one of the oldest of the four daughters put it back in there with barely a squirt left in it.

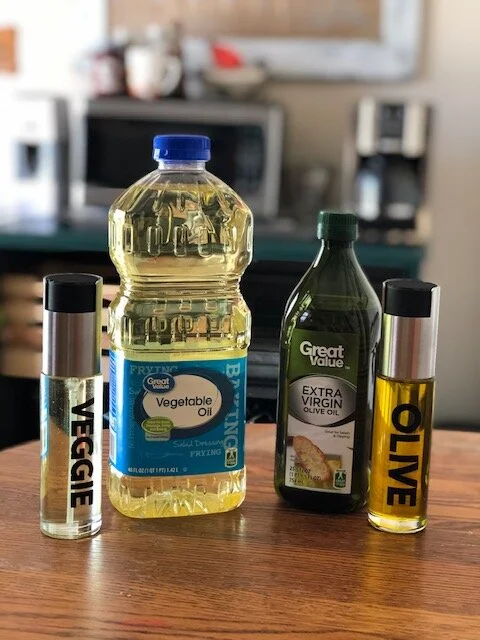
So I got on Amazon and found some heavy duty looking spray bottles that looked perfect to hold our veggie and olive oils.

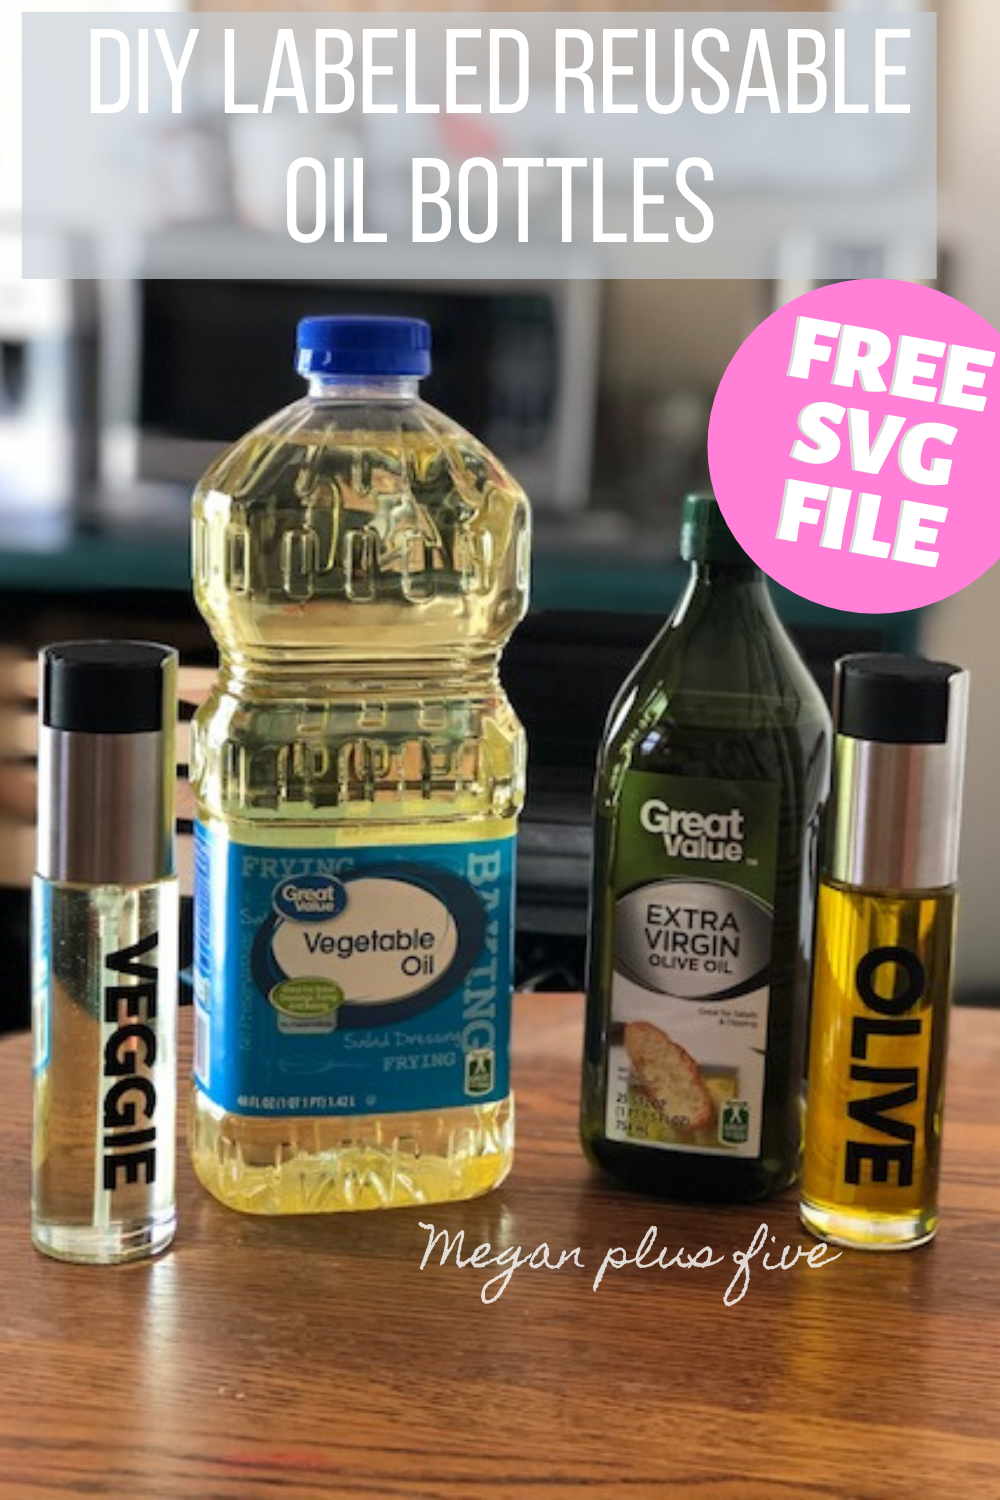
Even though you can totally tell which one is which I thought it would still be a good idea to label them. I figured it would at least save me from having the same conversation a couple times a week as to what one is olive oil and what one is vegetable oil.

I really like the skinny type fonts but since the labels are going on oil bottles I thought a thicker font would work much better. If a little oil gets under the vinyl decals of a thin font they will come off super easy. If you want to use the same SVG I used you can get it here in my FREE RESOURCE LIBRARY.

Reusable oil spray bottle for the kitchen. Vegetable and olive oil mister bottles to refill. Never buy pam spray again instead buy glass bottles and make your own reusable spray bottles for kitchen oils. Plus svg vinyl decals.

Watch my video on my YouTube channel or keep scrolling for the written/photo tutorial

DIY labeled reusable oil spray bottles. How to make your own pam spray bottles for vegetable and olive oil for the kitchen. Plus a FREE svg file to download. Great small project to use for Cricut. Labeling kitchen with vinyl.

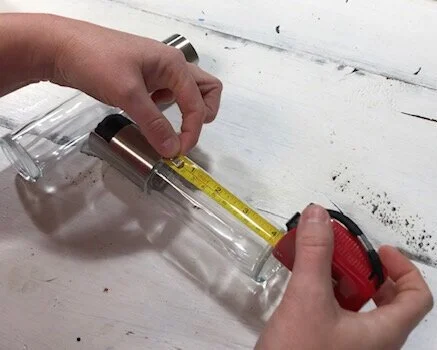
1. Cut out your vinyl decal. I used my Cricut Explore set on the vinyl cut setting and the green cutting mat. I used Oracal 651, permanent outdoor grade vinyl, in black matte finish. I measured out the length of the spray bottles I was applying it to and made it a little shorter in length. I keep most all of my scraps of vinyl in a plastic tote just for projects like this. You never know when you’ll need a small piece of vinyl lol!

DIY labeled reusable oil spray bottles. How to make your own pam spray bottles for vegetable and olive oil for the kitchen. Plus a FREE svg file to download. Great small project to use for Cricut. Labeling kitchen with vinyl.

2. I like using an xacto knife to weed my vinyl projects. You can use a fancy vinyl picker like this one but I think these are a little more difficult to hold than a simple xacto knife. Be sure when you weed your design you are weeding out the background, not the letter themselves.

DIY labeled reusable oil spray bottles. How to make your own pam spray bottles for vegetable and olive oil for the kitchen. Plus a FREE svg file to download. Great small project to use for Cricut. Labeling kitchen with vinyl.

3. I completely forgot to wash the bottles before applying the decals but I was sure to wash them before I added the oil to them ;). You want to wipe down the area of the bottle you are applying the decal to with isopropyl alcohol. This will remove any dirt or oil and allow for the best adhesion of the vinyl.

DIY labeled reusable oil spray bottles. How to make your own pam spray bottles for vegetable and olive oil for the kitchen. Plus a FREE svg file to download. Great small project to use for Cricut. Labeling kitchen with vinyl.

4. Apply transfer tape to the front of your decal. Use your vinyl squeegee to remove any air bubbles then peel the paper backing off of your vinyl decal.

DIY labeled reusable oil spray bottles. How to make your own pam spray bottles for vegetable and olive oil for the kitchen. Plus a FREE svg file to download. Great small project to use for Cricut. Labeling kitchen with vinyl.

5. Place your vinyl decal where you would like it to go on your glass spray bottle. I like to hover it over where I’m thinking about placing it first. Once you place vinyl down, especially small decals like these, it’s really difficult to get them to come up without ruining them.

DIY labeled reusable oil spray bottles. How to make your own pam spray bottles for vegetable and olive oil for the kitchen. Plus a FREE svg file to download. Great small project to use for Cricut. Labeling kitchen with vinyl.

6. When you have your decal where you want it to go place it down gently starting from the middle and work your way out. This will help to keep the air bubbles to a minimum. Use your vinyl squeegee to remove any air bubbles you see then peel the transfer tape off of your vinyl decal.

DIY labeled reusable oil spray bottles. How to make your own pam spray bottles for vegetable and olive oil for the kitchen. Plus a FREE svg file to download. Great small project to use for Cricut. Labeling kitchen with vinyl.

7. Fill your bottles with oil and enjoy!

DIY labeled reusable oil spray bottles. How to make your own pam spray bottles for vegetable and olive oil for the kitchen. Plus a FREE svg file to download. Great small project to use for Cricut. Labeling kitchen with vinyl.

I know we are going to get A LOT of use out of these reusable oil spray bottles!

If you have any questions please ask away:)!

Decorating your porch for FALL on a BUDGET

How to decorate your porch for fall on a budget. Your don't have to spend an arm and a leg to decorate for the seasons. See how this mom spent less than $20 to decorate her porch for fall.

I’ve never been one to spend a lot of money on decorations. And this year is even more a reason to keep the fall decorations budget to a minimum. My husband and I are on track to be totally debt free by the end of 2019! This is something we’ve been working on for awhile {with a few setbacks though} and we are seeing the light at the end of the tunnel! So this year for the fall decorating budget we put aside $20…yes TWENTY dollars to create a beautiful fall scenery on our uncovered front porch.

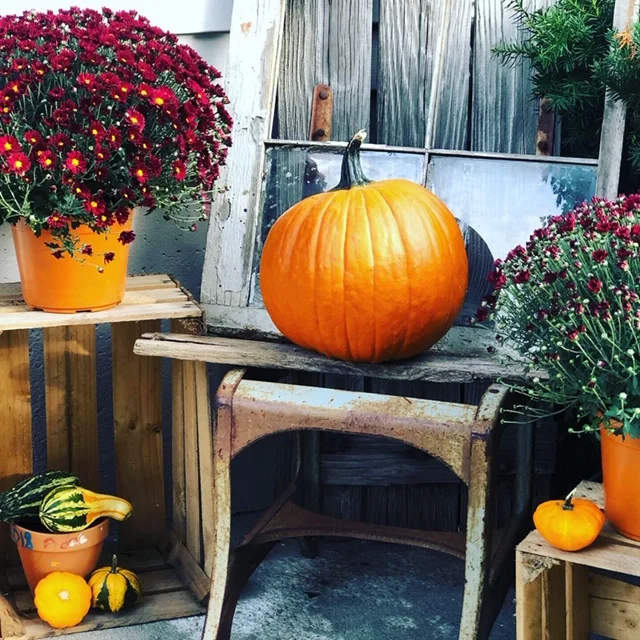
And truthfully I wasn’t worried at all because I knew I could make that happen! A few things I knew I wanted were fresh mums and pumpkins. A bale of straw and some dried corn stalks would have been icing on the cake but sadly there was no room to splurge for these…maybe next year.

How to decorate your uncovered front porch on a BUDGET for fall

Decorating your porch for fall on a budget. See  how this mom spent $20 to spruce up her uncorvered front porch to decorate for the fall season. Mums and pumpkins included.

If you’re like me and don’t have a lot of money {or maybe nothing at all} to put toward your fall porch decorations here are some tips to help you to create a beautiful porch on a budget.

FIRST use what you have. This is a rule I use for decorating year round. If you incorporate things you already have you are literally spending nothing.

SECOND this one is a favorite of mine…if you have relatives that are tossing things out ask if you can have them. My father in law had this AMAZING pile of, well junk, on his property and every time we would go over there I would search through his junk pile lol! He gave me full permission to take whatever my little heart wanted and boy did I always find good stuff to take home. My husband didn’t always agree ha! A couple things I picked from his pile that I used in my fall porch décor

  • the rusty old chair

  • old broken window

Both of these things I keep on the porch year round and thank goodness I rescued them because they are absolutely perfect!

THIRD check your Facebook swap n shop pages/groups. People love getting rid of things, even for free. This is so my personality type too! When I’m tired of looking at the clutter I go in full on purge mode lol! Just this last weekend the overwhelm from daughter # 4’s bedroom was really getting to me. So, naturally like a lot of moms do, I took in the roll of trash bags and just started tossing anything and everything that I hadn’t seen her play with since the start of summer. It’s a little embarrassing but I filled 7 kitchen sized trash bags full of gently used toys and some clothes that he had outgrown.

FOURTH shop around for the best prices. Even though supporting small business is always on my mind because I own a small business, I do shop at Walmart. And I don’t feel guilty about it. One day when we are rich we will be able to shop small all day everyday but for now, while raising four daughters, I have to pick and choose when we can afford to support small business.

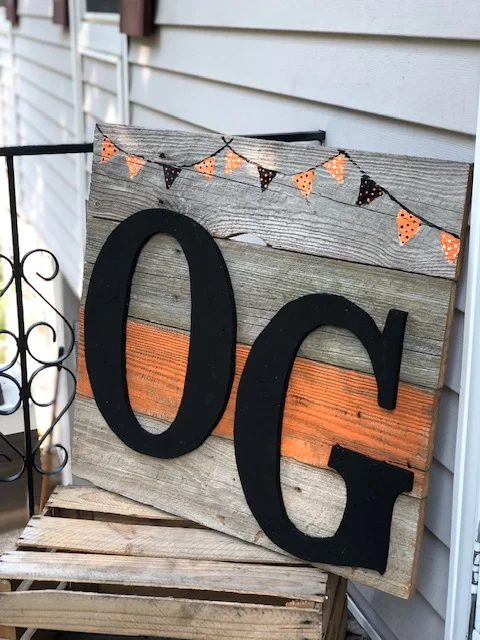
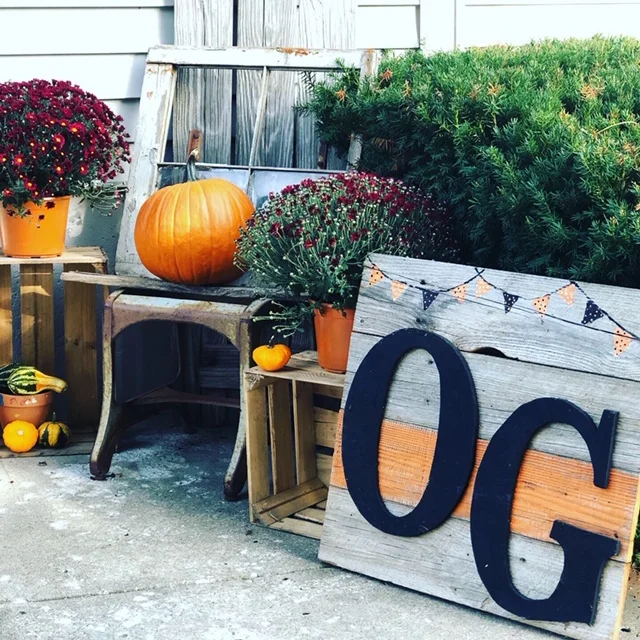
FIFTH make your own décor. If you’re crafty jump on some DIY PINTEREST boards to get some ideas of what to make. I suggest skimming your crafty stash to see what you have too. The OG barn wood looking sign is one I made, DIY PALLET SIGN for our front porch for fall. It’s actually a school spirit sign. We live in a pretty small town and school spirit is alive and well here. Since our school colors are orange and black I try to incorporate school spirit into our décor. It makes it a little more fun for our girls too because we are visually saying ‘go school’ and I know that’s encouraging for them. Just be sure whatever pieces you put out there that they are protected from the elements if needed. To make this sign I just used leftover pieces from other projects, check out these SCRAP WOOD PUMPKINS

Now that you have some tips on how to make the most of your budget here’s how I spent my $20 for my DIY fall porch decorating

  • $3.98 large pumpkin at Walmart

  • $2.98 bag of mini gourds

  • $4.84 mum x2

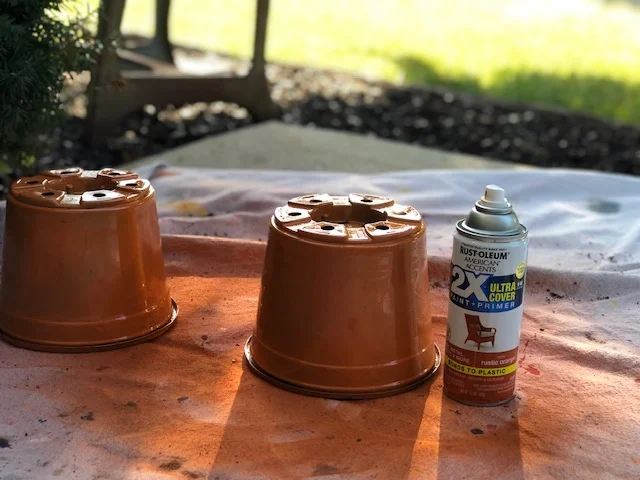
  • 3.96 orange spray paint, I only used 1/3 of it

Technically I went over the $20 by .60 BUT I do have 2/3 of a can of spray paint left over for another project, so in my mind I only spent 1/3 of the price for this project lol!!

I really wanted fresh mums but I couldn’t afford the GORGEOUS ones from the local farms. Just one mum would have taken up my entire budget. I opted for the cheapest large mums I could find at Walmart but they had UGLY bases. The green/brown color that just screams cheap flowers. I loved the more decorative bases but those too were not in the budget. Instead I grabbed a can of spray paint, and not the $1 can because I knew the coverage on that would be awful, and sprayed the bases orange in matte finish. This was the PERFECT solution!

See my video below on how to easily spray paint your ugly fall flower bases.

I’d love to hear how you are planning to decorate your front porch for fall. Leave a comment below ;)!

Dollar Tree pumpkins, how to give them a RUSTIC makeover

Frugal fall decorating, how to give a Dollar Tree pumpkin a rustic makeover

Frugal fall decorating, how to give a Dollar Tree pumpkin a rustic makeover

We’ve all seen them the bright orange pumpkins on the shelves at the Dollar Tree. You think to yourself ‘I could paint that up and make it look soooo much better’. Then fall comes and the darn ugly pumpkin is still sitting there untouched by your creativity. Yep…that’s me. I am totally that kind of Dollar Tree shopper and I’m not ashamed to admit it.

After having several of these little pumpkins sit on my craft room shelf for almost a year I decided what better time to give them a makeover than now?! Fall is almost here and I have been working like a busy crafty bee trying to gear up for this season. Check out my latest DIY, 2x4 candy corn they turned out SO stinking cute! AND you don’t want to miss this frugal find, Walmart clearance shoes, that I gave a total makeover to for my 3 year old to wear this fall. She absolutely LOVES them!

How to turn your DOLLAR TREE pumpkins into rustic perfectly distressed pumpkins

Affiliate Disclosure. Some of the links on this website are affiliate links, which means that I may earn a small commission if you click on the link or make a purchase using the link. If you make a purchase you will not be charged anything additional.

I had everything I needed on hand, including the pumpkins, but here’s what I used to turn my pumpkin from bright orange into rustic farmhouse.

First you want to paint your pumpkin white. I used what I found in our garage but you can use any kind of white FLAT spray paint. Stick the skewer in the bottom of the pumpkin so you can hold the pumpkin and spray all around it. Let it dry before you put it down. I used a blow dryer to speed up this process.

Dollar Tree pumpkins, how to give them a rustic makeover

Next you want to paint your pumpkin with your gold chalk paint. I broke 3 small pieces off of the skewer and stuck them in the bottom of the pumpkin so that it would stand up and not touch the table while I was painting it. Let that dry completely before moving on to the next step.

Dollar Tree pumpkins, how to give them a rustic makeover

Once your gold chalk paint is dry you want to very lightly dip the tip of your brush into your teal/blue colored paint. I used a color called lagoon and on it’s own is VERY bright but when used as an accent color it is absolutely gorgeous! You don’t want to completely cover the gold paint but lightly brush over it leaving light streaks of the lagoon colored paint. This will dry pretty quick.

Dollar Tree pumpkins, how to give them a rustic makeover

Next you are going to repeat the previous step but instead you are going to use antiquing wax and your chip brush. I added a little more wax than I did the lagoon colored paint to give it a more rustic look. TIP: trim your chip brush down to about an 1” and it will work MUCH better.

Dollar Tree pumpkins, how to give them a rustic makeover

Once you’re satisfied with your coverage you are all done! I’m not totally loving the stem on this on so I might replace it with a stick from the yard but for now it will tie in perfectly with my fall décor! I paired it next to the glittery gold 2x4 pumpkins I made a while back.

Dollar Tree pumpkins, how to give them a rustic makeover

If you loved this tutorial you will love even more of my DIY fall craft tutorials

Check out the full video tutorial below


Top 15 craft supplies you should be buying from the Dollar Tree

15 MUST HAVE craft supplies from the Dollar Tree

The DOLLAR TREE!! I love this place and I actually buy lots of supplies here, especially ones for the kiddos to use. But don’t be fooled by that $1 price tag, not all supplies are a smart buy there.

Here are my top craft supplies that I personally most of the time buy from the Dollar Tree.

CRAFT ROCKS Usually they have a wide variety of rocks. You can find them in the ribbon section. I made some adorable UNICORN PARTY CENTERPIECES using these inside the buckets.

FAUX FLOWERS They alternate these out with the seasons and every year they get prettier! Our girls especially love the ones that have butterflies in them. Check out this DIY LIGHT UP FAIRY JAR and we used flowers picked up from the Dollar Tree on the outside. Super cute!

TISSUE PAPER You can use this for SOOOOOO many different crafts. This is what we use on the outside of those fairy jars.

WOOD SHAPE CUT OUTS this is a must buy here. I have yet to find any place that compares in price to the amount you get per package. Granted, these are thin but for kids crafts these are perfect. These little guys will keep our girls busy for a long time without the ouch effect on the wallet. They can add these to all kinds of arts and crafts projects.

GLUE Our house goes through a ton of glue. We let our girls experiment and explore their creative side often and they use SO much glue during their process lol!

MUFFIN TINS ok, I know this isn't a typical craft supply but read this post on the craft hack you need for your kids and you’ll understand.

SEASONAL BLANKS Every season the Dollar Tree comes out with super trendy, and actually cute, craft blanks. These are inexpensive and you don’t have to pay for shipping. Woohoo!

POM POMS they are all the rage right now and our girls go through them like crazy. Their colors are limited but they are super cheap.

SEASHELLS you can find these right next to the rocks and ribbon. You’ll be surprised what you can use these for. And you don’t feel the pain when your kiddo paints it up unlike the ones from your last beach vacation.

CONDIMENT BOTTLES I use these to hold my acrylic paint. They are half the price of buying them from Walmart and I’m sure WAY cheaper than buying them online. They have held up pretty well too. We originally bought these when we had our brick and mortar craft store, just to see if I’d even like using them for paint, and other than the caps being picked off by little hands they are in perfect working order.

Top 15 craft supplies you should be buying from the Dollar Tree

WIRE WREATH FORM I have yet to find these cheaper any where else. These little guys can be used to make all kinds of different wreaths. Here is a 4th of July rag tie wreath I made using one of these wire forms.

WASHI TAPE the Dollar Tree has all kinds of different prints of washi tape. Our girls love love love to use this to decorate different things. One of their favorite things to use this for is decorating the front covers of notebooks.

STICKERS if you have a toddler who is sticker obsessed the Dollar Tree is the only place to buy these lol. And a side note if your kiddo gets these stuck to your floor a steam mop takes them up effortlessly {just a tip from one mom to another ;)!}

CRAFT STICK aka popsicle sticks. They have a fun colorful assortment too! You can use these for anything from applying AMOUR ETCH to etch glass to letting your kids just go crazy and make whatever their little hearts desire out of them. We always keep these guys on hand.

POSTER BOARD There are so many different uses for this outside of the school project. You can even use this to make a DIY light box for taking pictures in your own crafty business.

Now get to your nearest Dollar Tree and explore all it has to offer. Remember to go beyond the craft aisles as there are so many different things you can use that aren’t considered “craft supplies”.

Let me know below what your favorite Dollar Tree crafty supplies are ;)!

Stress free backyard camping

Fun and stress free backyard camping

Affiliate Disclosure. Some of the links on this website are affiliate links, which means that I may earn a small commission if you click on the link or make a purchase using the link. If you make a purchase you will not be charged anything additional.

Camping is such a fun experience that every family should have at least once. Our family tries to go every year but this spring it has been a little difficult to plan a trip. With flooding, tornadoes, and the temperature not making up it’s mind if it wants to stay cold or move on to warmer weather…oh the good ole Midwest lol!

Since our girls have been asking for months to go on our camping trip we decided to bring the camping trip to us. And I have to say I can’t believe we haven’t done this sooner! The girls loved it because it was something new and we loved it because we didn’t have to pack half our house up for an over night trip. And a bonus because our toddler has been super cranky lately she spent a lot of the time watching Disney Junior, thank you home wifi {no judgements please, we all parent in different ways and if Disney Junior will keep her happy then so be it}.

We wanted to keep our camping stress free so we didn’t plan any fun games or fancy Pinterest worthy foods. We put up our massive 10 person tent {we are a big family and this tent is sized perfectly for us}, added some tiki torches, moved the fire pit, and started the fun!

Stress free backyard camping

I guess you could say we got a tad bit fancy. My husband grilled up something different than the typical burgers and hotdogs that we would have had if we were camping on a campground. He is the grilling king and made us all the most delicious grilled chicken sandwiches.

My tips for stress free backyard camping

  • Keep it simple, don’t over plan.

  • Make sure you have all the pieces to your tent before you tell the kids. The last thing you want are sad little faces looking at you when you realize you don’t have everything there to put their tent up.

  • Let your kids dig and really explore the backyard. Our girls pretended they were lost in the wilderness and the tent was their new home.

  • Air mattresses, they may not be a must but I completely enjoy a good nights sleep even when I’m sleeping in a tent. These are the exact ones we use and trust me, if they can withstand our rowdy chaotic bunch they must be good!

  • Fresh batteries for all the things

  • Bug spray

  • Fire wood

  • Comfy clothes you can get messy for everyone

  • Let loose and have fun with your family.

Stree free backyard camping


And the best part…if you forget something it’s ok! Your home is just a few steps away. Our whole family, aside from our toddler, had a great time! Being a family of 6 with 3 of the 4 daughters within 4 years of one another, we tend to have bickering. I think because we were in our own element we didn’t have any of that, which also made it stress free!

I hope these tips help you to create your own stress free backyard camping with your own family.


DIY Tassel Garland, make your own for just pennies each

DIY Tassel Garland, make your own for just pennies each

Affiliate Disclosure. Some of the links on this website are affiliate links, which means that I may earn a small commission if you click on the link or make a purchase using the link. If you make a purchase you will not be charged anything additional.

Raising kids is so hard sometimes. Nothing prepares you for having to console your child on days when they are feeling down about themselves. I think this is especially true for raising daughters. We have four little girls and life is a roller coaster of emotions with them some days. Recently we celebrated our third daughter’s birthday. We always celebrate before school lets out because she has a summer birthday.

We sent invites out two weeks in advance and this girl was SO excited to have all her school friends over for her unicorn themed birthday party. I’ll admit I’m a frugal person thru and thru. When I plan our girl’s parties my husband and I don’t spend an arm and a leg on the party. I try to keep it under $50 for the cake and decorations that way we still have room in our budget to gift them a decent gift that they’ve been wanting.

But this year I had to get super creative on my spending because I needed to throw her a fancy {as fancy as we get around here ;) } unicorn birthday party! It was just days before her party and she had only had one, yes ONE friend RSVP to her big day. Talk about tears falling and hearts breaking. I HAD to make up for the possibility that there be no one besides family at her party.

So I scoured all the pretty things on Pinterest and put together a few ideas of things to decorate her party with to make her feel extra special. Keeping it under $50 was a bit of a challenge but I was determined to make it work! Tassel Garland, among a few other DIY decorations, made the cut. These ended up costing than $4 to make two full strands of tassels PLUS extras to put around the unicorn centerpieces.

Thankfully two days before her party she had a couple more friends RSVP and she had a great party! They played some fun unicorn games, made tasty treats and loaded them down with EXTRA sprinkles, got to decorate their own cupcakes, and most of all the birthday girl felt so loved and special on her day!

After her party she got to hang the pretty garland in her room which made these tassel even better!

To make your own DIY tassel garland for your own special occasion…

Here’s what you’ll need

I was so surprised at how EASY these were to make! I was able to knock these out in no time. And our sweet girl LOVED them!

I’d love to hear your feedback below!

DIY Tassel Garland, make your own for just pennies each

Easy and adorable mini mum planters for less than $2, get the look with this tutorial

Easy and adorable mini mum planters for less than $2, get the look with this tutorial

DIY cheap fall porch décor

I love finding new ways to decorate on the cheap! Having 4 kids…especially girls…is expensive. From clothes to medical expenses these girls can drain a wallet! So I get a little creative when it comes to buying decorations, especially if they are seasonal ones.

A few years ago I wanted to spruce up our front porch with some fall colored mums. I LOVE them, they scream FALL IS HERE! I was shopping around Walmart had the mums loaded in my basket and they come with the standard ugly stamped containers so I thought I’d pick up some inexpensive pots to put them in. Our porch decorating budget wasn’t a whole lot and I was already spending a big portion of it on the flowers. I found the pots and was floored at how expensive they were. They were twice as much as the flowers! Being raised to be super frugal by my mom and insanely CRAFTY grandma my wheels got to turning. I walked around the store looking for ideas of what I could stick these flowers in. Got to the Halloween aisle and BAM! There they were. Perfect round containers that looked like they were made to put those flowers in!!

This year I wanted to recreate those because they unfortunately didn’t last more than that season. I went to Walmart and the regular sized pumpkin buckets were no where to be found but they had mini ones which were the PERFECT size for the mini mum flowers…and a fraction of the cost! And did I mention they were MINI which automatically makes them even more adorable!

So I grabbed the mums, a mini pumpkin and a mini cauldron treat buckets and set back to our brick and mortar shop to make some cute planters!

Affiliate Disclosure. Some of the links on this website are affiliate links, which means that I may earn a small commission if you click on the link or make a purchase using the link. If you make a purchase you will not be charged anything additional. This is just a way I can help add to our family finances to raise our four daughters. Please know I would never recommend a product or service I do not totally stand behind.


Here’s what you’ll need

I picked everything up from my local Walmart.

2 mini MUM planted flowers, $.97 each {I picked mine up at our local Walmart, but they are not listed online

2 mini Halloween treat buckets $.74 each {I bought a pumpkin & cauldron}

scissors

It cost $1.71 {plus taxes} to make one flower pot. SUPER CHEAP for cute décor, and the kids will love them. I did mine by myself because my kiddos were at school, but you could totally make this a fun family thing and have everyone pot their own.

These are so super simple, literally 2 steps!

First you need to cut the top lip off of the pot the flowers are currently in. This can be hard to get the initial cut so I advise this step for adults.

Easy and adorable mini mum planters for less than $2, get the look with this tutorial

Now shove those babies in the treat bucket and you’re done! If yours are going to stay outside all the time you can drill 2 holes in the bottom to let them drain but I will be bringing mine in and out of our shop and I don’t want the water to drip everywhere so I will manually drain ours.

Easy and adorable mini mum planters for less than $2, get the look with this tutorial

I can’t wait for these to bloom and be even CUTER!

Check out more fall & Halloween themed posts below

How to save money on cheese WITHOUT clipping coupons

How to save money on cheese WITHOUT clipping coupons

Whether you have a big family or prefer to buy in bulk this is a cheesy good deal you won't want to pass up! {I know that was a terrible intro but I couldn't resist!}

I used to be one of those crazy couponing ladies...the real deal! I had the binder. I had the coupons. I had my trips planned out. I even taught people how to coupon. And I loved it! But once our online business took off I didn't have the time to do it anymore. I didn't have time to bounce from store to store, scour the sale ads for the best deals, and mindlessly clip coupons. So I had to explore other money saving options. That's when I found SAMs club!

Back in my couponing days I would stock up on shredded cheese when it was $1/8oz bag, $.12/oz. I would buy enough to last us till it was it's season to go on sale again {yes, this is a real thing but I'll save that for another post}.  Now that I'm not couponing I still try to find the best deal but not nearly as good as the deals I used to score. I am excited to say have gotten pretty darn close to that stock up cheese price at SAMs and I don't have to spend HOURS searching for the deal! Everything is bulk buy there, which is great for big families like ours. We go through cheese like a bunch of crazy cheese obsessed people! But it's just SO darn delicious!

How to save money on cheese WITHOUT clipping coupons

SAMs sells a giant 5 POUND bag of colby/jack shredded cheese for about $12/bag, $.15/oz...seriously affordable! The bag doesn't come with a fancy zipper but it does have a sticky tab you can use to close it. I've found that if you have kids this doesn't work so great. Someone will move things around in the fridge, the cheese will fall over and the next thing you know you're sweeping $10 worth of cheese into the trashcan. 

How to save money on cheese WITHOUT clipping coupons

Here's what I do. I buy gallon sized zipper bags from Walmart and divided the cheese into 3 different bags. We typically will go through a bag before its expiration date so I don't usually bother with freezing it. But, if your family won't go through all 5lbs of cheese in that time, pop a couple bags in the freezer and pull them out when you need them. Shredded cheese is perfectly ok to freeze. However, you don't want to freeze sliced or block cheese, it will crumble once it's thawed.

How to save money on cheese WITHOUT clipping coupons

Then once you're done rebagging and storing you're done! Super easy and it's that price every single week! 

If you don't have a SAMs membership ask your family and friends if they do. I am sure you will find someone that would be willing to let you take a shopping trip with them. Then you'll see for yourself that getting one of your own is a GREAT investment for your family too.