Leaning rustic front porch 'oh hello' sign + FREE SVG

How to make a rustic farmhouse style front porch sign. DIY oh hello leaning porch sign using your Cricut or Silhouette cutting machine plus free svg.

Leaning rustic front porch 'oh hello' sign + FREE SVG

Make your own unique rustic farmhouse leaning porch sign… bonus I’m giving you the same SVG I used for this tutorial for you to use for free!

65227969-C2CD-46D3-9B4D-87FB064CBF8D.jpeg

DIY rustic leaning porch sign

The other day I shared with you how I turned a rusty old metal locker / cabinet into a storage for our muddy shoes on our sunporch. I had picked up that rusted gem at a local antique store for just $20! I had no idea when I bought that chipped old farmhouse looking piece that it would actually serve our home double duty!

Affiliate Disclosure. Some of the links on this website are affiliate links, which means that I may earn a small commission if you click on the link or make a purchase using the link. If you make a purchase you will not be charged anything additional.

Here’s what the metal cabinet looked like when I picked it up from the antique store.

How to make a rustic farmhouse style front porch sign. DIY oh hello leaning porch sign using your Cricut or Silhouette cutting machine plus free svg.

And here’s what I repurposed it into. So perfect for our family’s muddy shoes on the sunporch!

How to make a rustic farmhouse style front porch sign. DIY oh hello leaning porch sign using your Cricut or Silhouette cutting machine plus free svg.

Since one of the pins on the door was gone I removed the door from the cabinet all together. I wasn’t sure what I was going to do with the door but I knew if I put it on a shelf in the garage it would sit there for a long time because honestly I’d forget it was there. So I did some head scratching and thought I could turn it into a super cute painted sign. And so I did!

How to paint your own farmhouse style welcome sign for your front porch

Here’s what I used

How to make a rustic farmhouse style front porch sign. DIY oh hello leaning porch sign using your Cricut or Silhouette cutting machine plus free svg.

1. CUT OUT LETTERS

You can grab the same oh hello SVG that I used in my free resource library. That’s where I keep all of my printables, cut files, and more for my readers to use free of charge <3!

I opted to use a cardstock stencil on this metal porch sign. I was afraid if I used a sticky back stencil (like used on this other leaning porch sign) would remove a lot of the paint and rust that was already on the metal door.

I uploaded the SVG into Cricut Design Space then sized it so that it would fit on the 12”x59” door. I sized mine so that it was about 10”x50” or so then I had to break up the oh hello SVG so that I could cut it out. This is easy, just take a square and slice the letters out so now you have individual sections instead of one single image, I hope that makes sense. Here’s what my SVG looked like after I sliced it and deleted the duplicate slices (I changed the colors so you could see them better).

How to make a rustic farmhouse style front porch sign. DIY oh hello leaning porch sign using your Cricut or Silhouette cutting machine plus free svg.

To cut them out I used 12”x12” cardstock. If my cut image was larger than 12” I just butted two pieces together and taped the seam. Click Click here to see how I do this on another projectto see how I do this on another project.

2. ARRANGE LETTERS & TRACE

After my letters were cut out I decided which end I wanted to be the top…then I did opposite of that lol I placed my door on one side of my table then went to the other side to arrange my letters, total facepalm moment. But that’s ok it turned out SO CUTE even with that mess up. I left more blank space toward the bottom of the sign so that I would have room to place a plant at the base if I wanted without hiding the first letter. Here’s a great still shot from my video lol!!

How to make a rustic farmhouse style front porch sign. DIY oh hello leaning porch sign using your Cricut or Silhouette cutting machine plus free svg.

I started tracing with a pen but that just wasn’t cutting it so then I found the nearest sharpie and used that. It was brown but the black paint covered it perfectly!
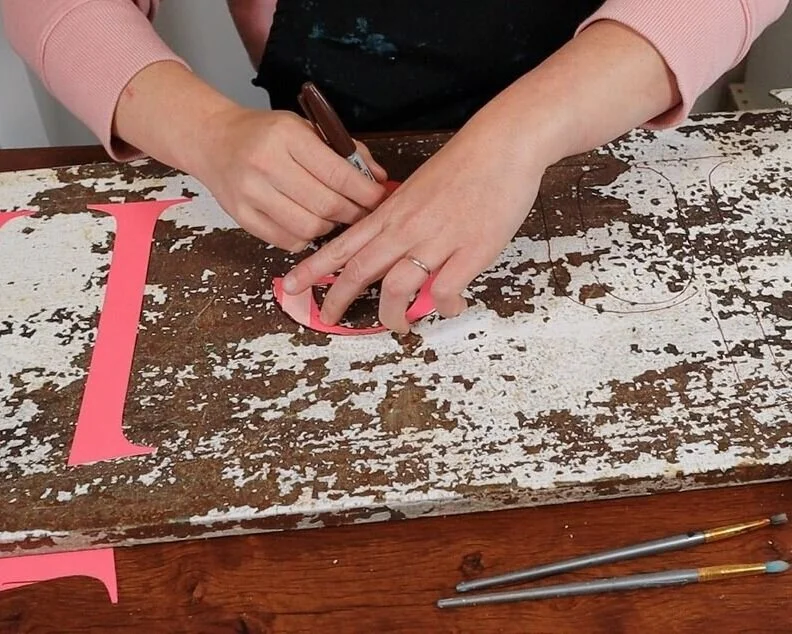
How to make a rustic farmhouse style front porch sign. DIY oh hello leaning porch sign using your Cricut or Silhouette cutting machine plus free svg.

3. PAINT

I had a bottle of old outdoor paint, like 3 years old, and used that to paint my sign. I used a small round tipped brush to outline the letters but also fill them in as I went along.
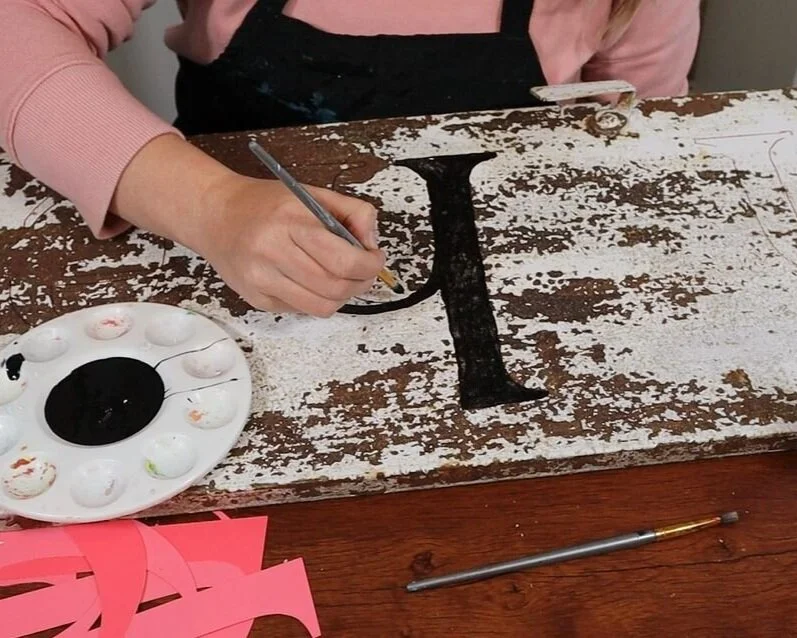

How to make a rustic farmhouse style front porch sign. DIY oh hello leaning porch sign using your Cricut or Silhouette cutting machine plus free svg.

4. DRY

Like with most of the DIYs I do for around my house I needed this one to be quick and easy. I’m a busy momma to four girls and we had a movie to catch at the theatre so I used my heat gun to speed up the dry time.
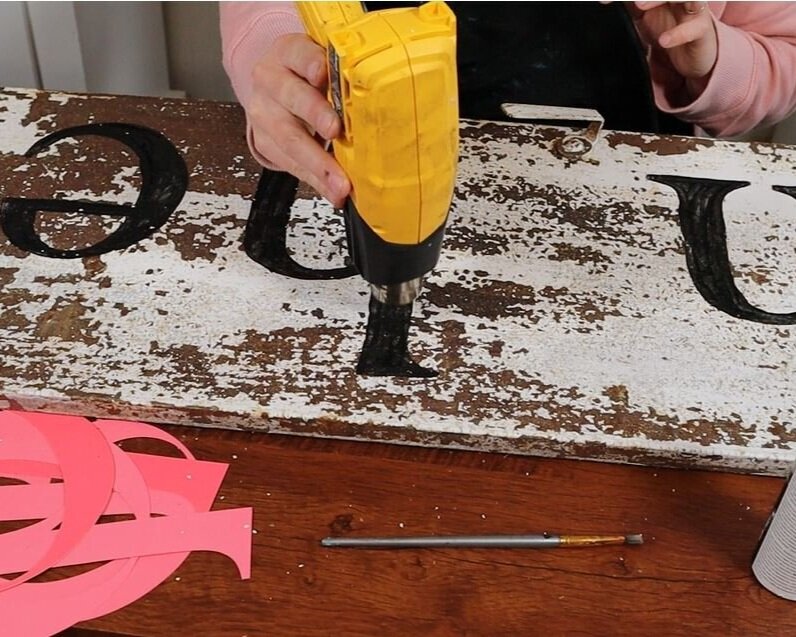
How to make a rustic farmhouse style front porch sign. DIY oh hello leaning porch sign using your Cricut or Silhouette cutting machine plus free svg.

5. 2ND COAT OF PAINT

I thought maybe one coat of paint would do it but it wasn’t quiet enough coverage so I painted a second coat. This went much faster than the first coat. Then I used my heat gun to dry it again.
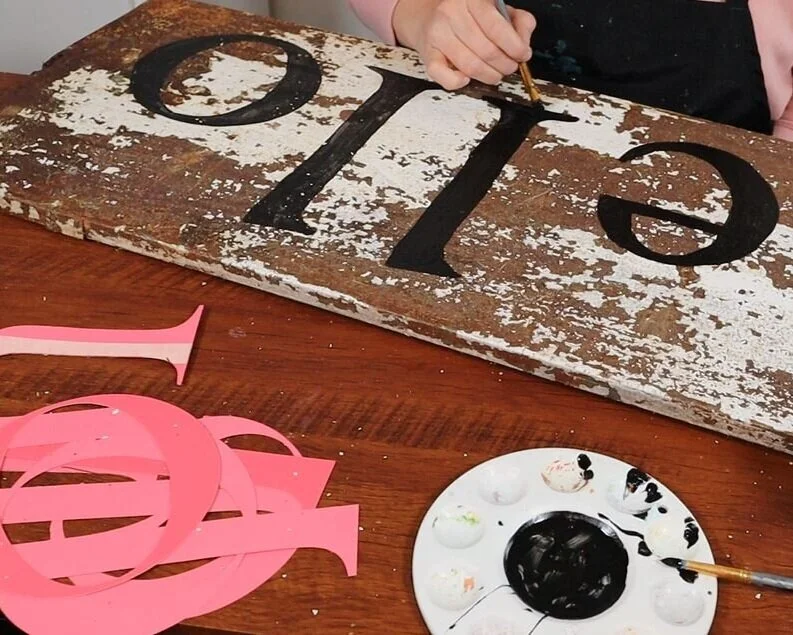
How to make a rustic farmhouse style front porch sign. DIY oh hello leaning porch sign using your Cricut or Silhouette cutting machine plus free svg.

I’m super impatient so I put my sign out as soon as that second coat was dry.
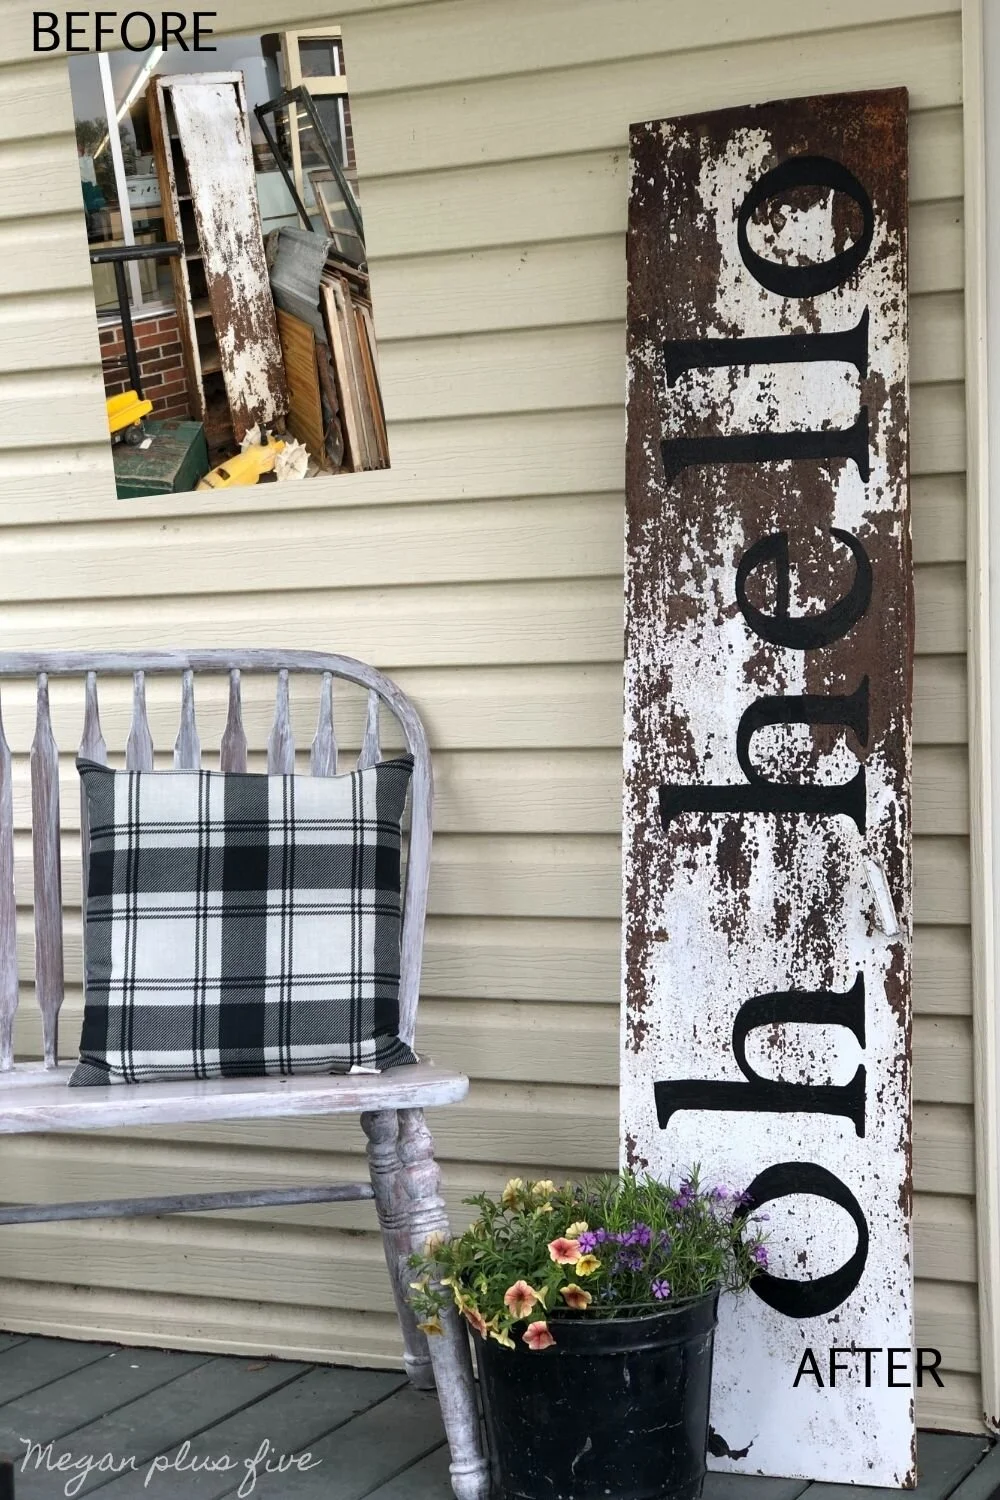
How to make a rustic farmhouse style front porch sign. DIY oh hello leaning porch sign using your Cricut or Silhouette cutting machine plus free svg.

I just LOVE how this old porch sign turned out! I still can’t believe it turned out so stinking good! I had no plans for that door when I bought that cabinet but I’m so glad I made use of it instead of it just sitting on a shelf collecting even more dust in the garage.

I hope you enjoyed this crafty tutorial. If you have any questions please leave them in the comments below.

Happy Crafting!

More posts you’ll love

Interchangeable Christmas pallet sign

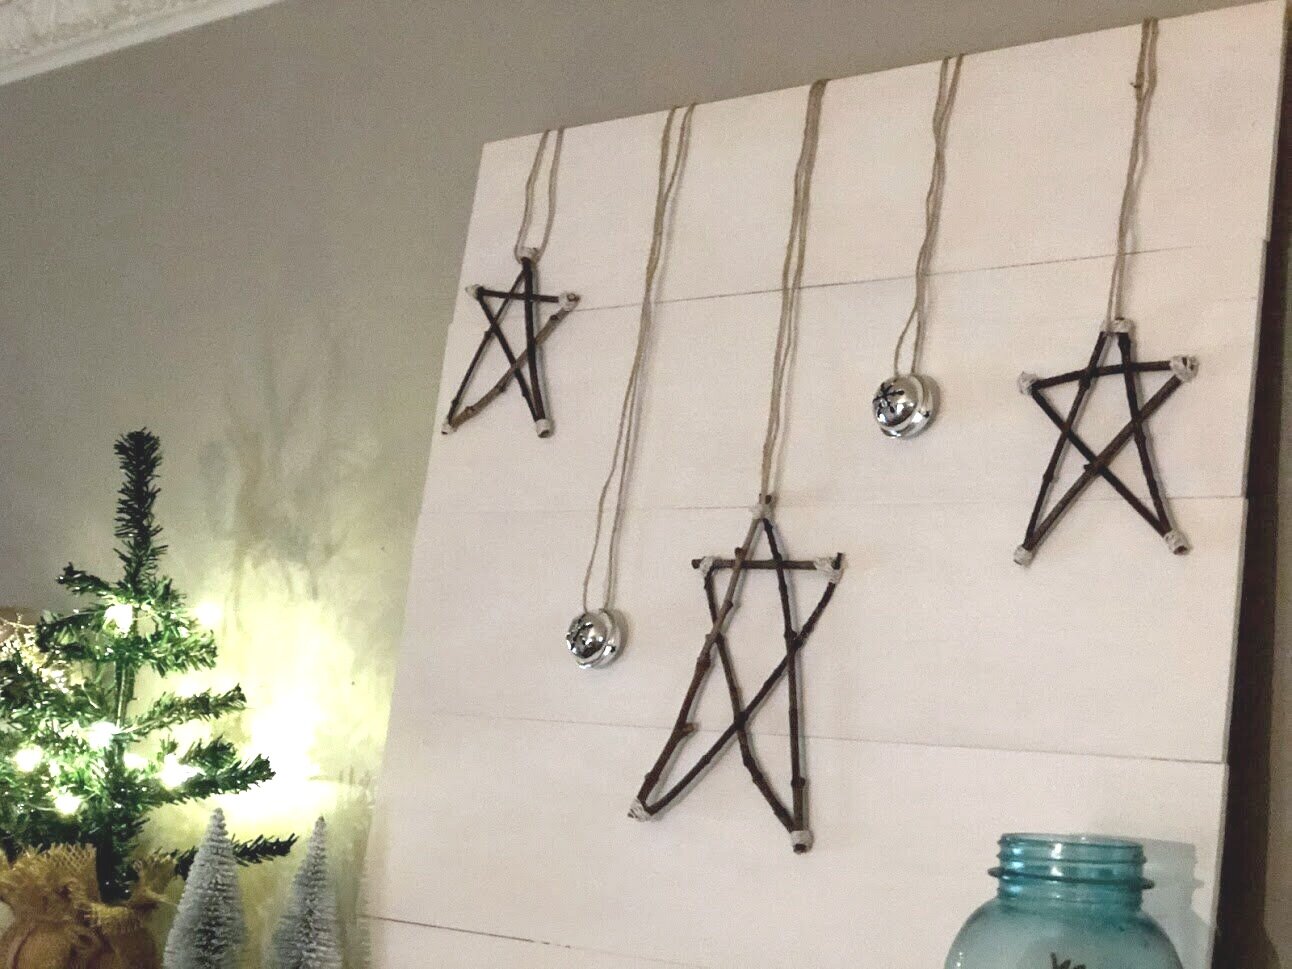
DIY twig stars for Christmas pallet sign. Interchangeable Christmas home decor on a budget. How to make easy and simple reversible home décor for the holidays. Make a sign from twigs.

INTERCHANGEABLE WINTER PALLET SIGN

I love decorating for the holidays. Especially Christmas. Now that I have a bigger home to decorate I’m finding it a little challenging to do AND keep it in budget. I have always had the heart of a frugal women so spending an arm and a leg to put up Christmas décor just wasn’t happening.
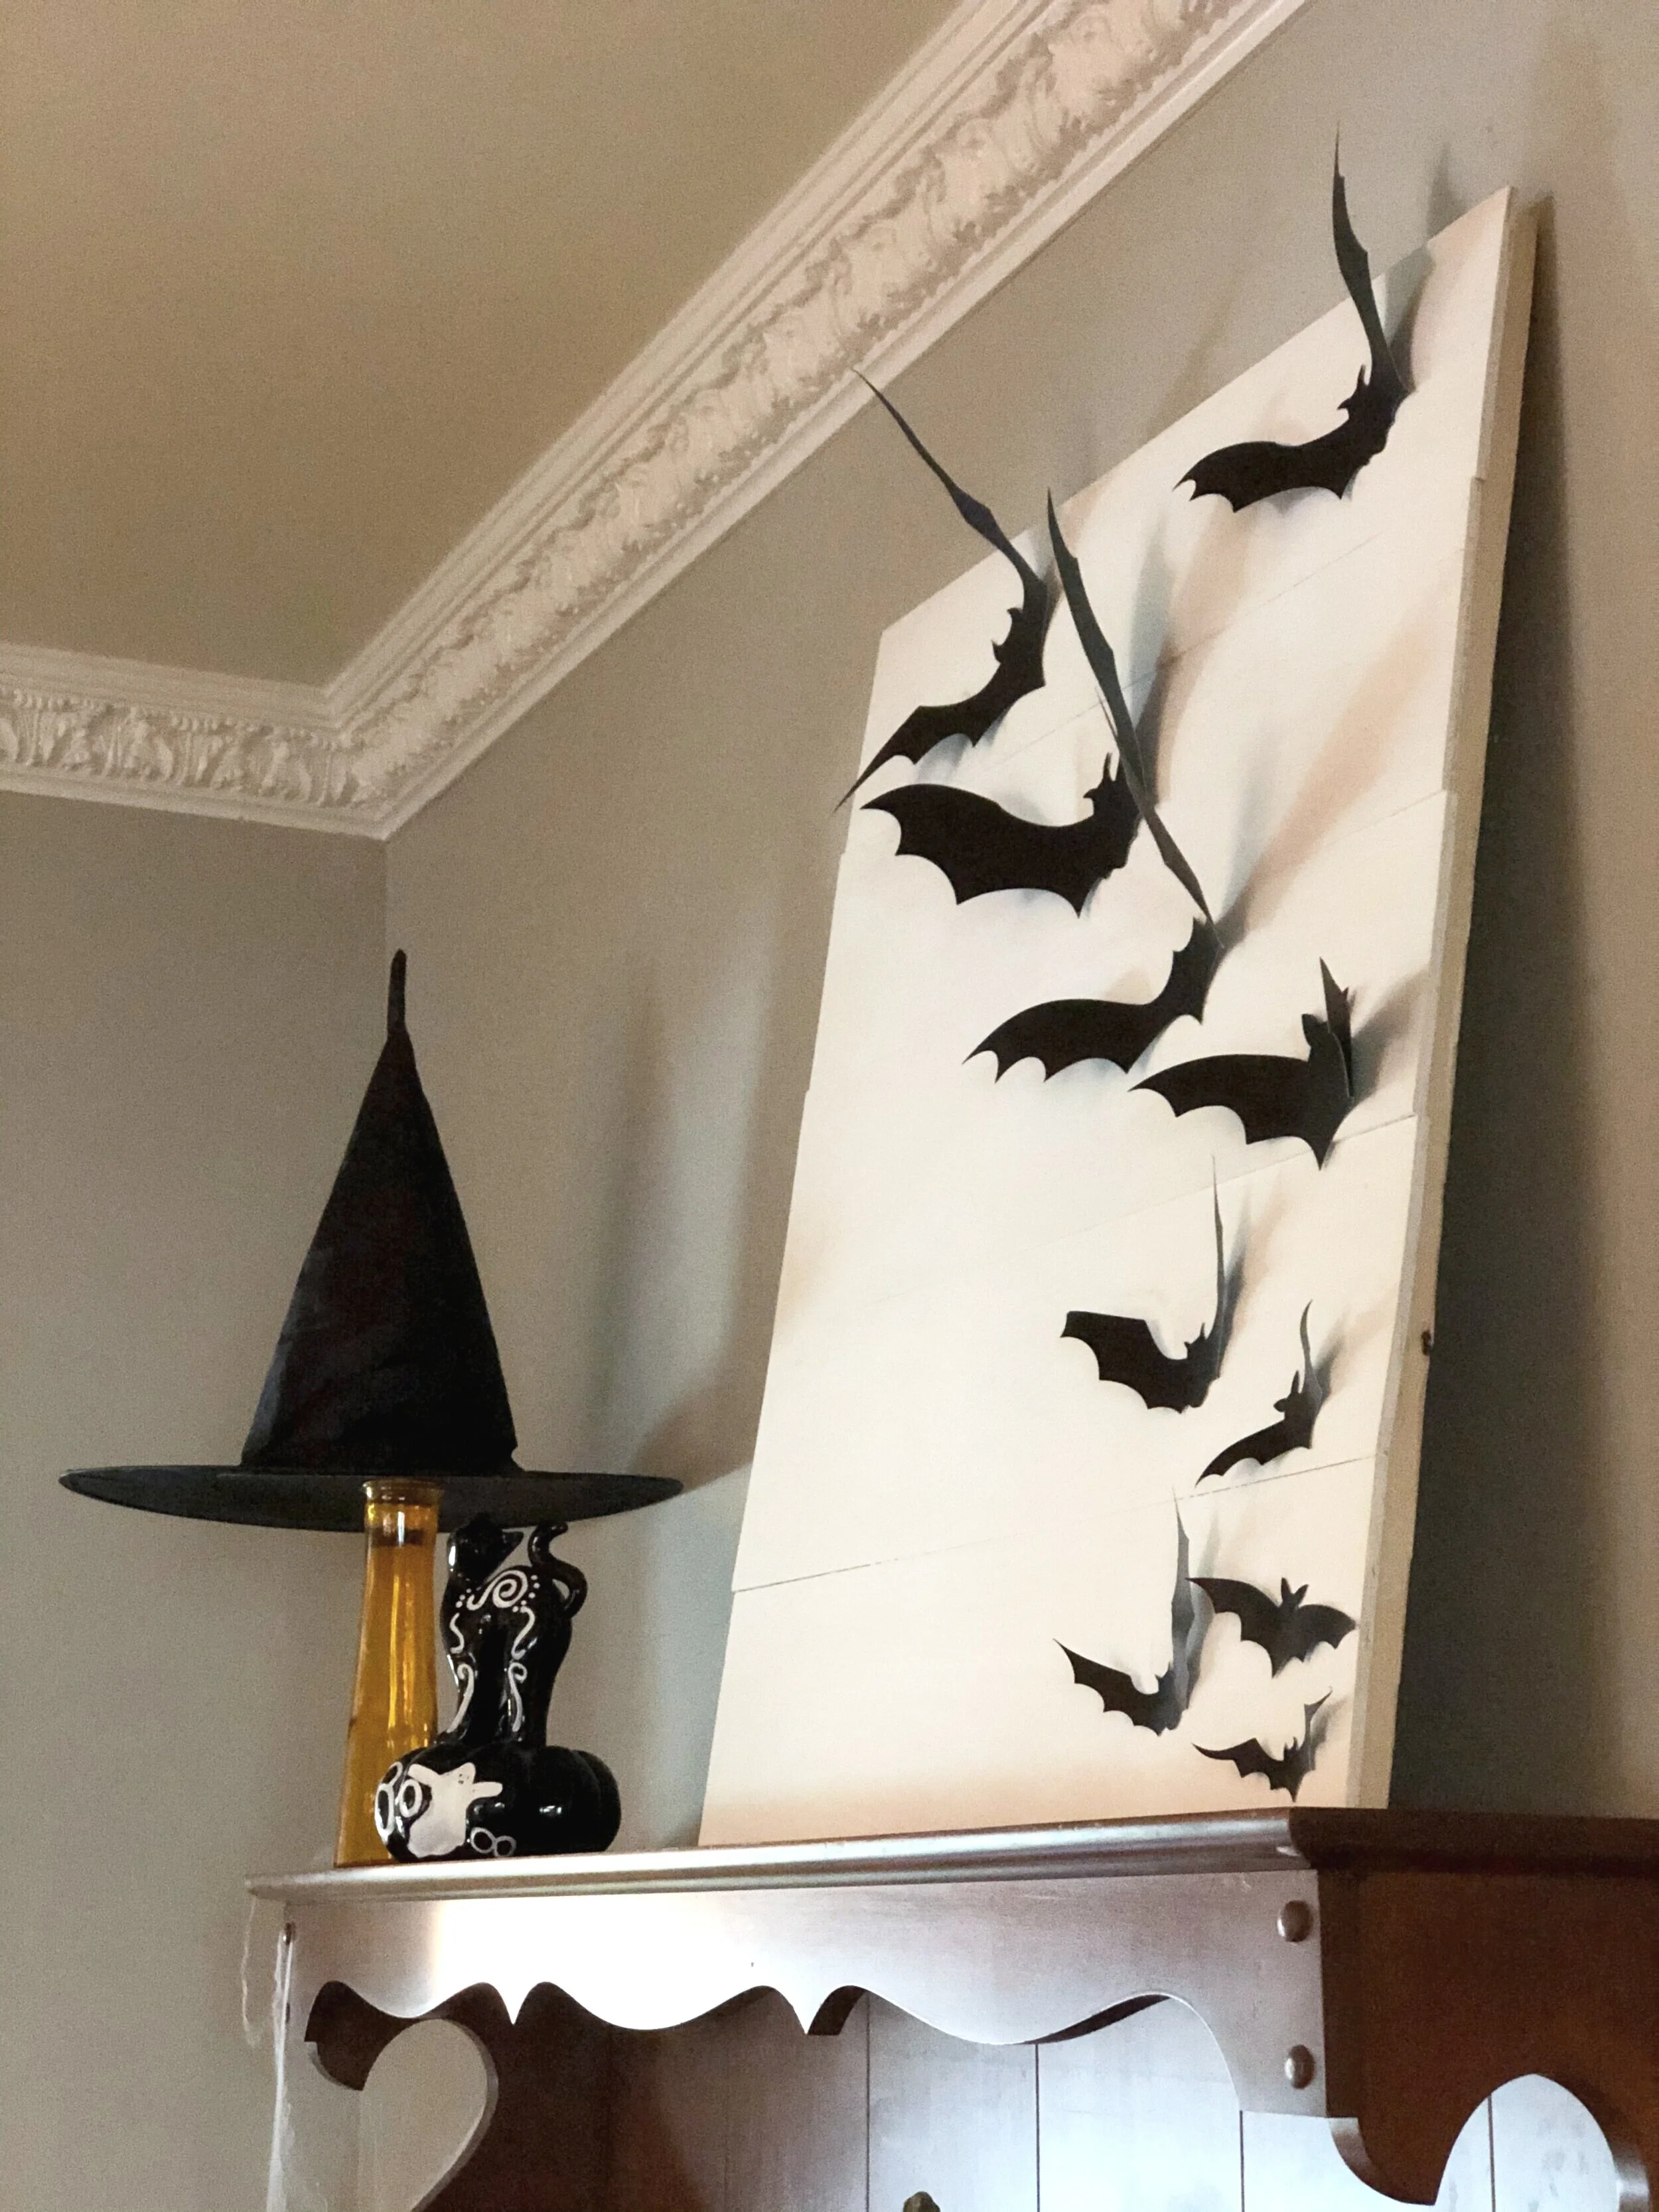
That’s why in the fall I made this lightweight faux pallet sign. It’s a blank pallet style sign that I can change out with the seasons. It’s a big statement type piece that I prop up on my dining room hutch. I love this so much. Best of all the planks I used to make this sign were left over from this plank wall project.
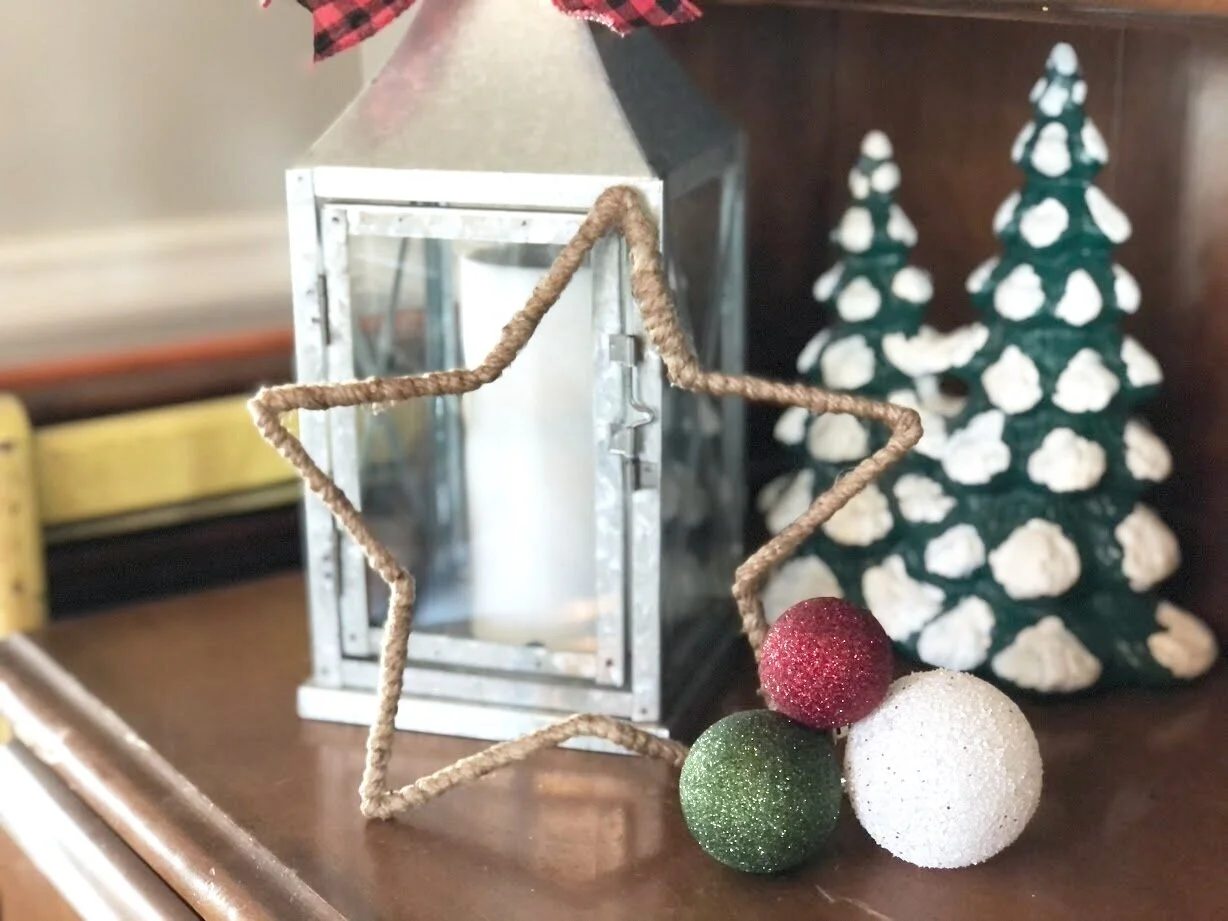
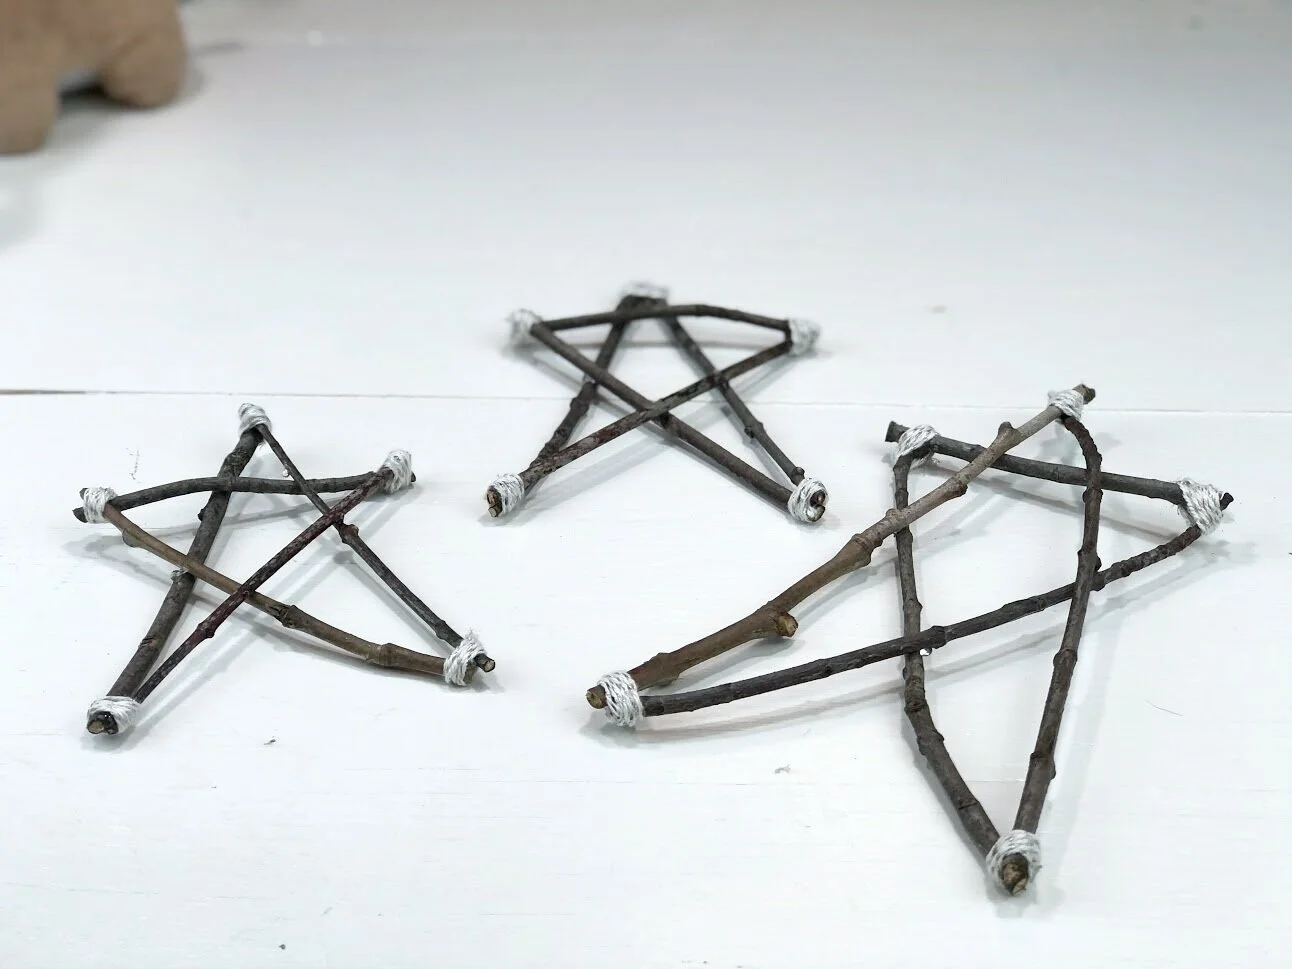
I really tried hard to spend minimal funds for Christmas decorating. So, for Christmas I had this great idea to make stars from twigs I had in the backyard. And they turned out so cute! I want to make more!!

Affiliate Disclosure. Some of the links on this website are affiliate links, which means that I may earn a small commission if you click on the link or make a purchase using the link. If you make a purchase you will not be charged anything additional.

DIY twig stars for Christmas pallet sign. Interchangeable Christmas home decor on a budget. How to make easy and simple reversible home décor for the holidays. Make a sign from twigs.

I made 2 smaller twig stars and 1 medium sized star. You can see how I made my twig stars click here.

I was so glad I snagged up a package of silver bells from the Dollar Tree prior to making this craft because without them I don’t think it would have turned out so cute or looked as festive for Christmas.

DIY twig stars for Christmas pallet sign. Interchangeable Christmas home decor on a budget. How to make easy and simple reversible home décor for the holidays. Make a sign from twigs.

Here’s what I used

1. PLACE THE DECORATIONS

The first thing I did was place my twig stars and bells on my pallet sign to see where I wanted them.

DIY twig stars for Christmas pallet sign. Interchangeable Christmas home decor on a budget. How to make easy and simple reversible home décor for the holidays. Make a sign from twigs.

2. MEASURE

Next I measured out how much jute I would need to hang my decorations from the backside of my sign. I doubled the amount of jute since I was looping it and hanging it from the backside.

DIY twig stars for Christmas pallet sign. Interchangeable Christmas home decor on a budget. How to make easy and simple reversible home décor for the holidays. Make a sign from twigs.

3. ADD THE JUTE

The stars were easy to add the jute to. I just fed the jute through the top of each twig star. The bells were a little more difficult. I wanted to see the snowflakes that were on the bottom side of the bells so I had to hang them sideways.

DIY twig stars for Christmas pallet sign. Interchangeable Christmas home decor on a budget. How to make easy and simple reversible home décor for the holidays. Make a sign from twigs.

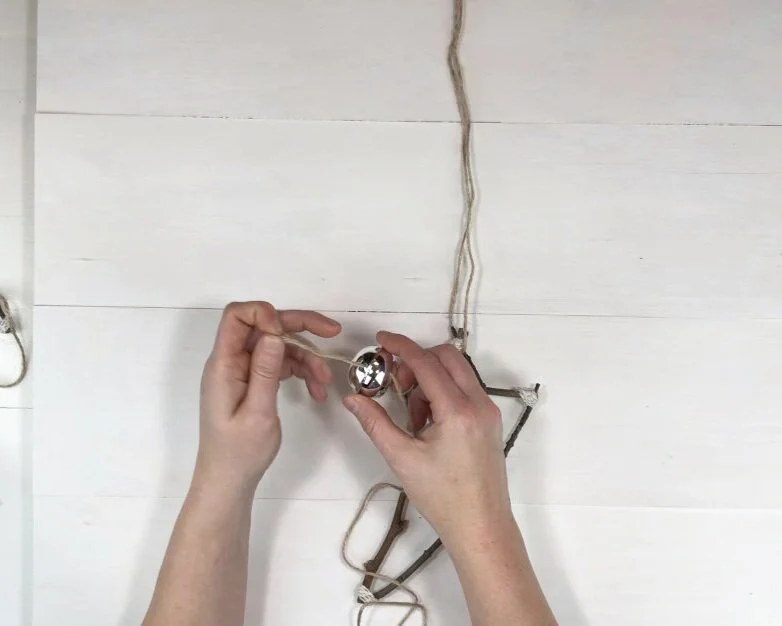
I fed the jute through one side of the bell and then out the other side and tied the two ends of the jute together.

DIY twig stars for Christmas pallet sign. Interchangeable Christmas home decor on a budget. How to make easy and simple reversible home décor for the holidays. Make a sign from twigs.

4. HANG

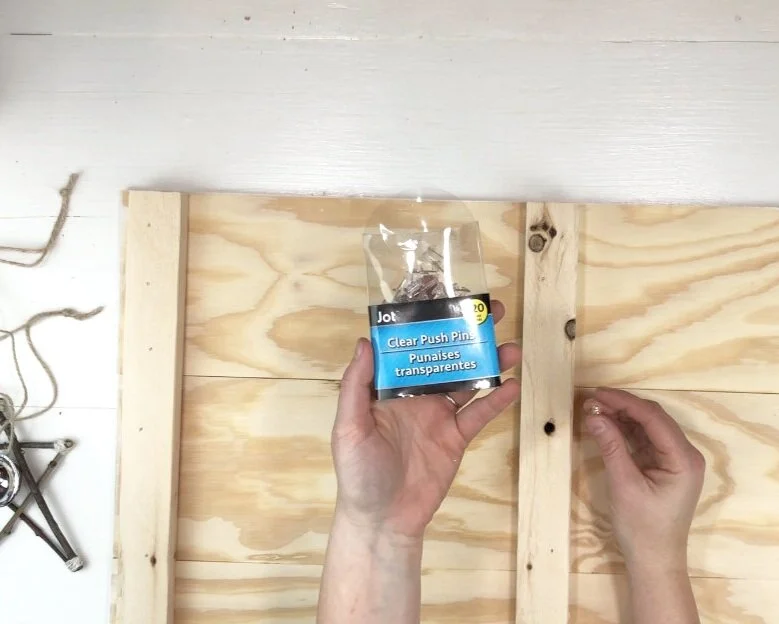
I hung my twig stars and silver bells from the backside of my pallet sign. I just kina eyeballed where I wanted them to be. Placed a pushpin there and pushed it in as far as I could get it.

DIY twig stars for Christmas pallet sign. Interchangeable Christmas home decor on a budget. How to make easy and simple reversible home décor for the holidays. Make a sign from twigs.

Then I looped where I had tied the jute ends together around the pushpin and draped it over to the front side of the pallet sign.

DIY twig stars for Christmas pallet sign. Interchangeable Christmas home decor on a budget. How to make easy and simple reversible home décor for the holidays. Make a sign from twigs.

I prop my pallet sign up on my dining room hutch, which one day I need to make time to give a makeover and I will most definitely post the before and after for you to see on here:)!!

DIY twig stars for Christmas pallet sign. Interchangeable Christmas home decor on a budget. How to make easy and simple reversible home décor for the holidays. Make a sign from twigs.

Happy crafting!

Check out more below

Simple Halloween décor using a witch hat

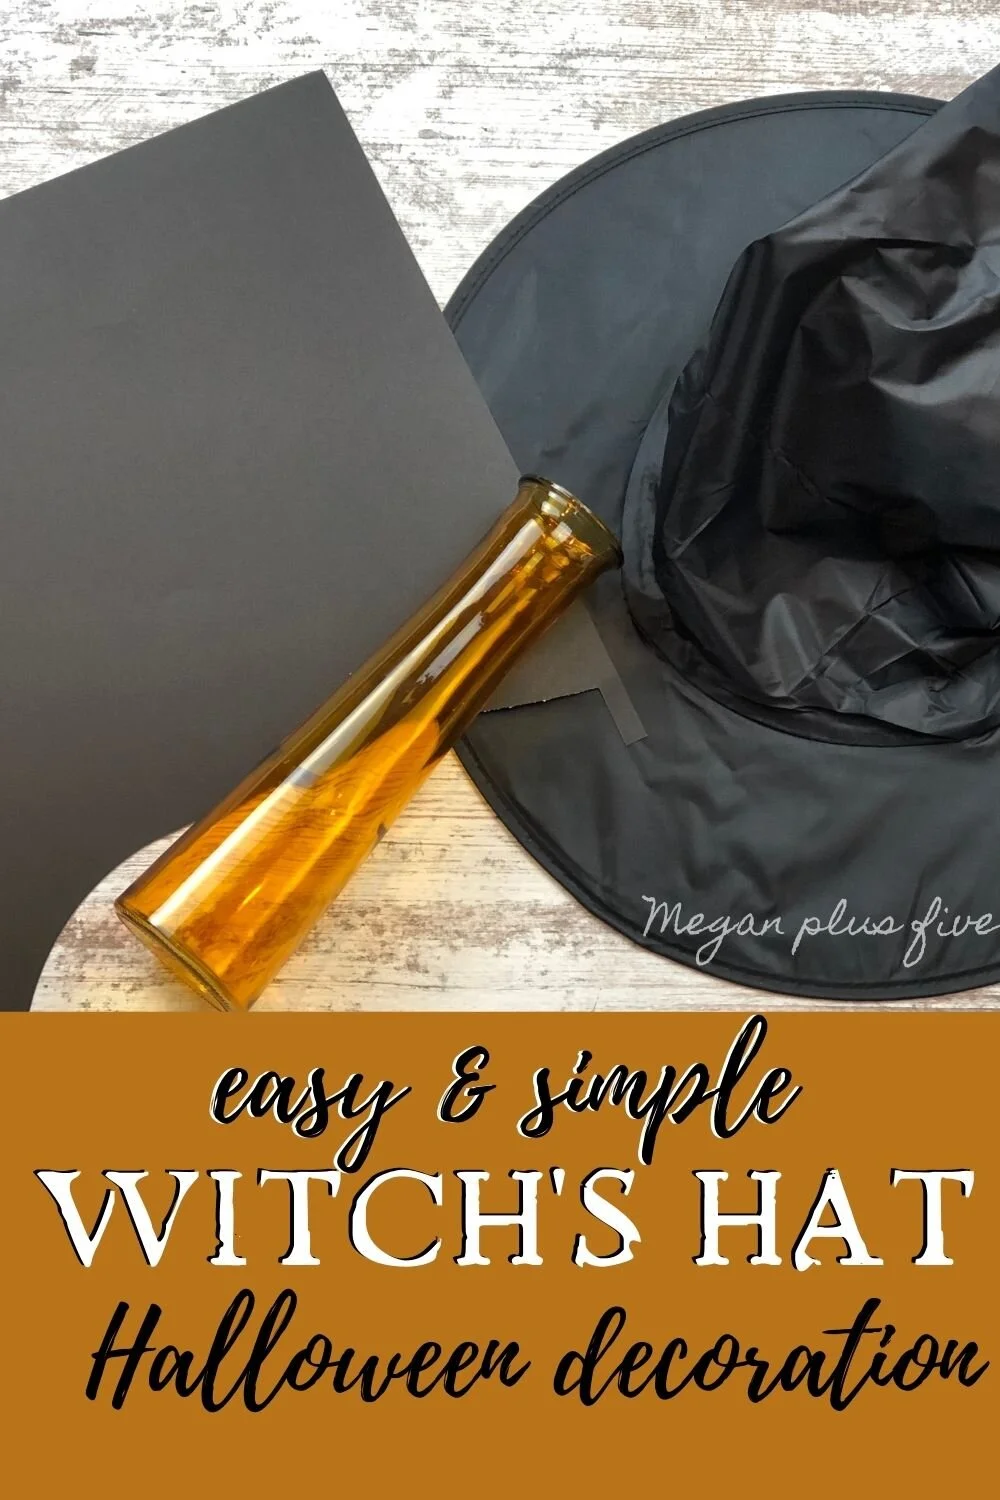
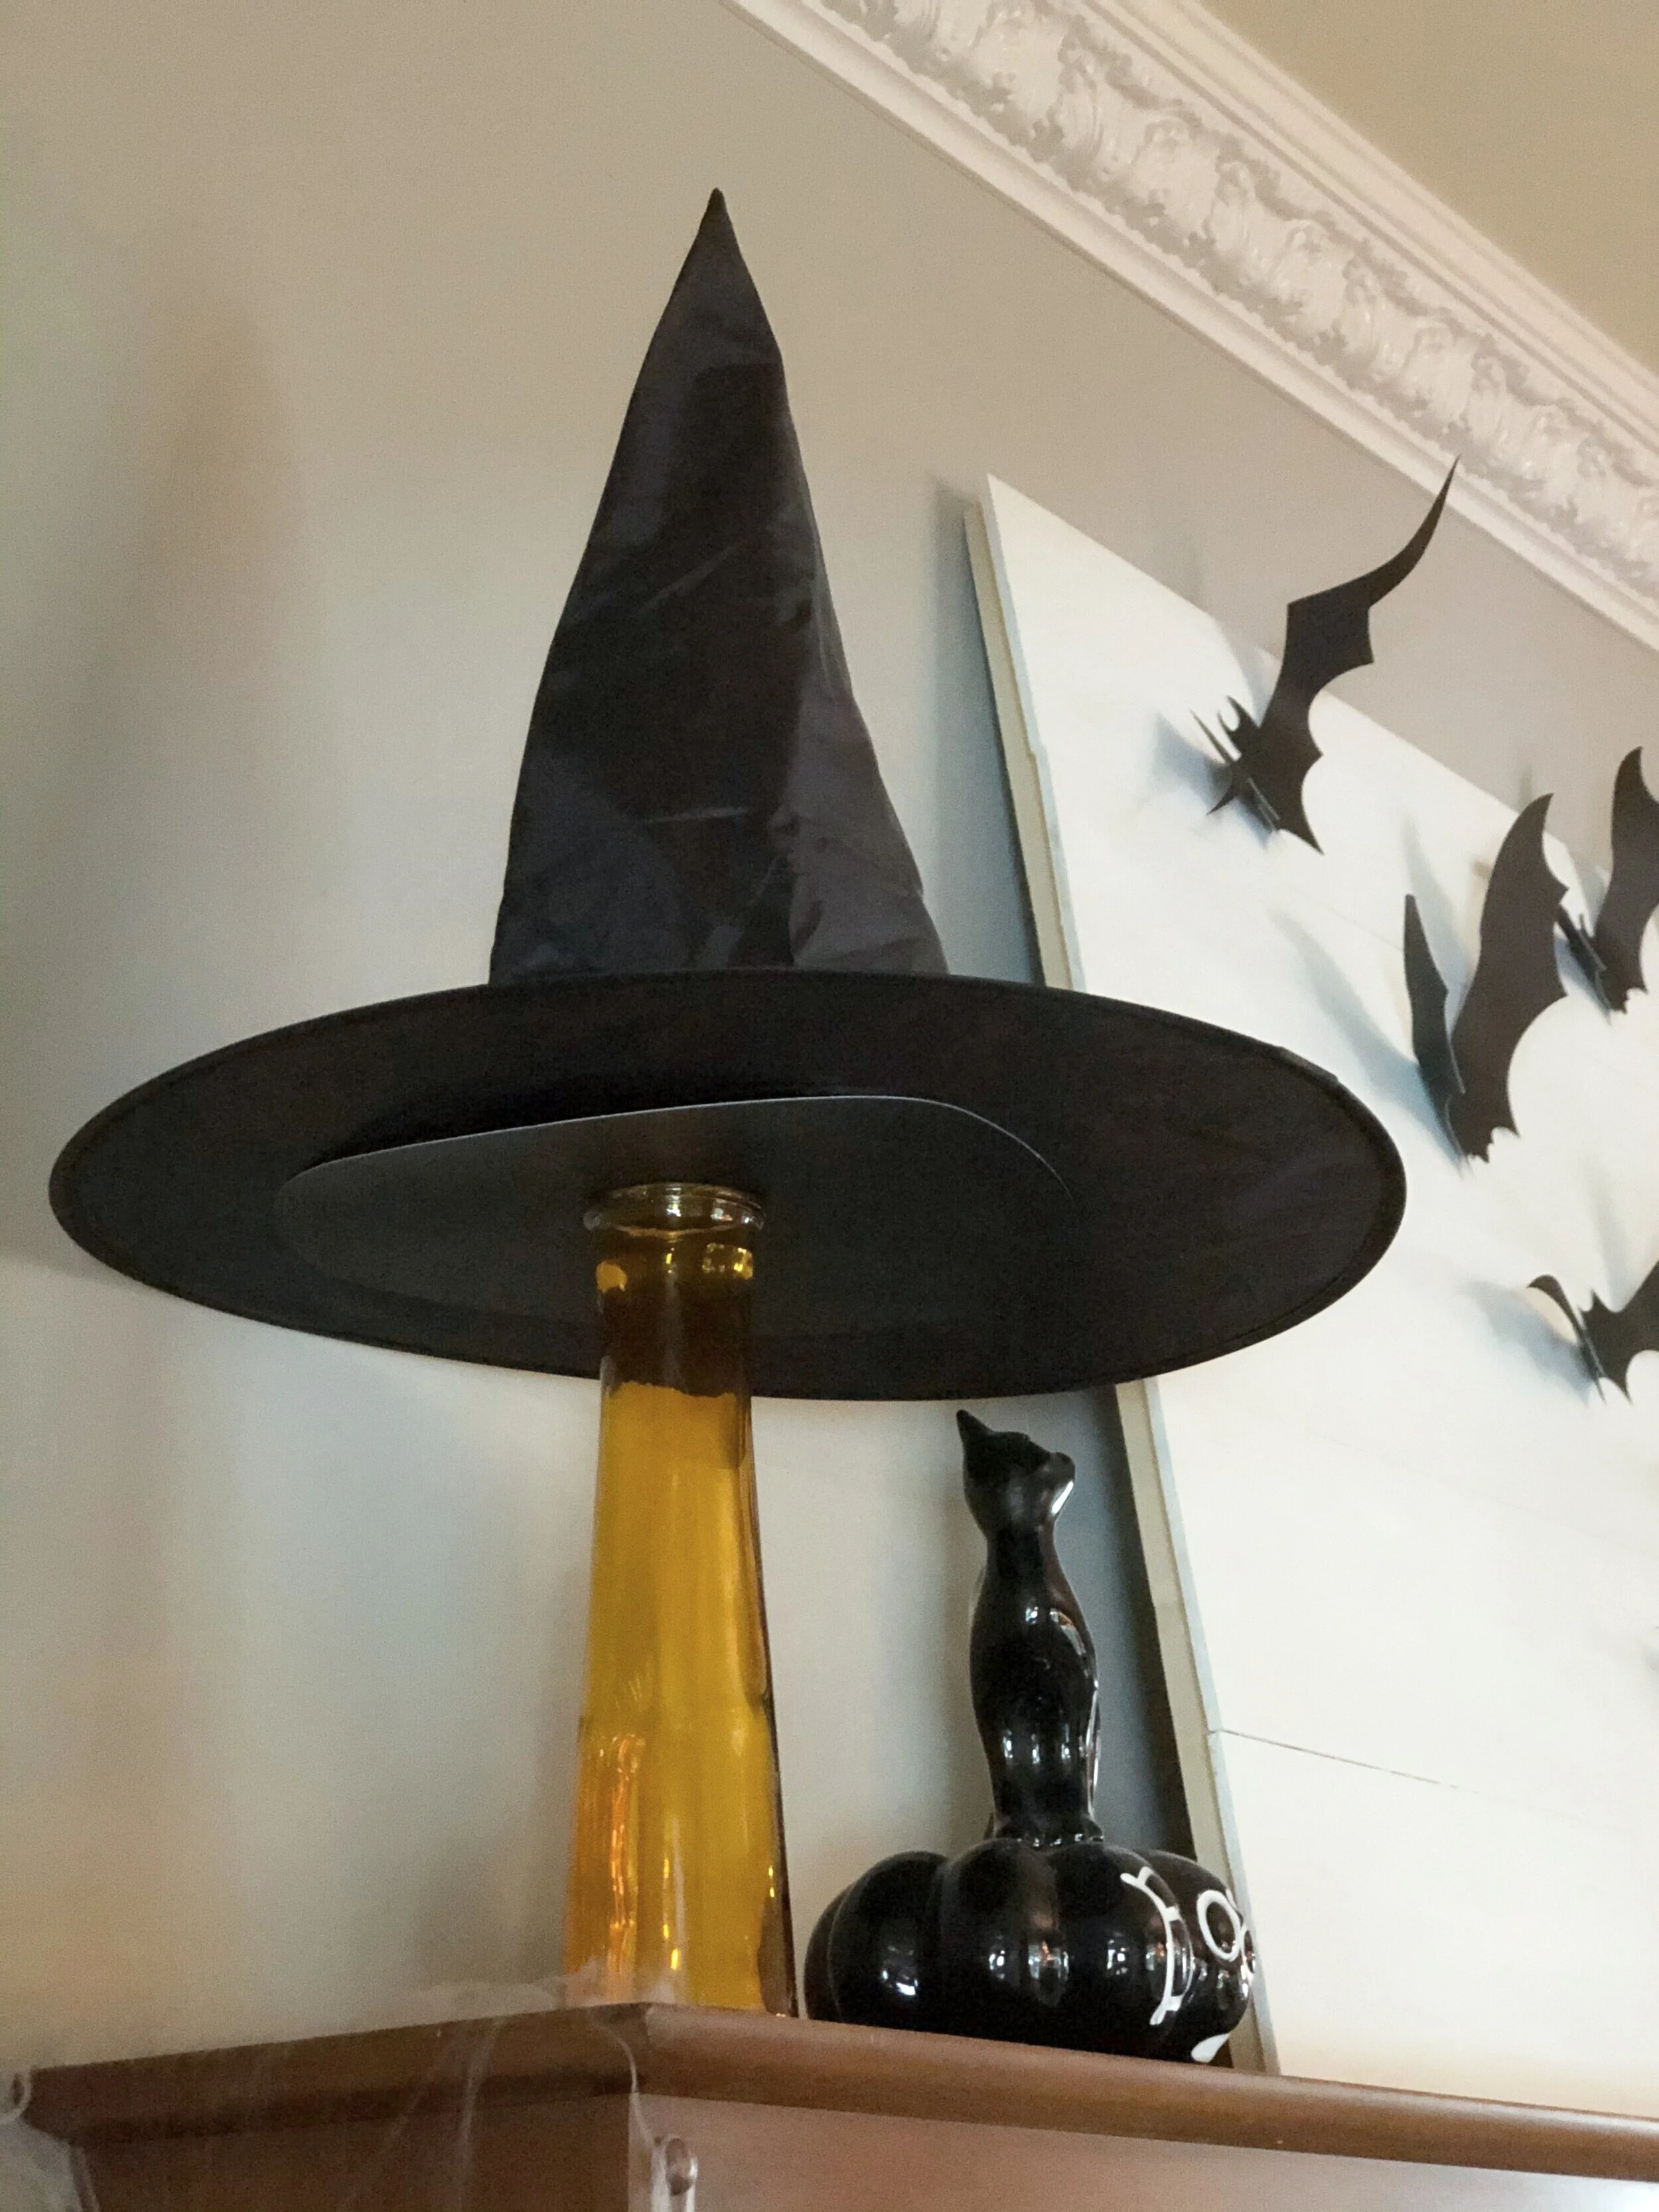
How to make an easy and cute Halloween decoration using a Dollar Tree vase and a witch hat. DIY  Halloween decor using your Cricut cutting machine. Make your own adorable witch hat Halloween decoration.

Easy Witch Hat Halloween Decoration

There are some really super cute Halloween decorations out there. I love simple AND frugal! I’m not one to spend a lot on décor so I really loved this easy and cheap project!

If you want even more fun HALLOWEEN DECOR IDEAS be sure to scroll all the way to the bottom for more DIY’s for the fall season.

Affiliate Disclosure. Some of the links on this website are affiliate links, which means that I may earn a small commission if you click on the link or make a purchase using the link. If you make a purchase you will not be charged anything additional.

Here’s what you’ll need

How to make an easy and cute Halloween decoration using a Dollar Tree vase and a witch hat. DIY  Halloween decor using your Cricut cutting machine. Make your own adorable witch hat Halloween decoration.

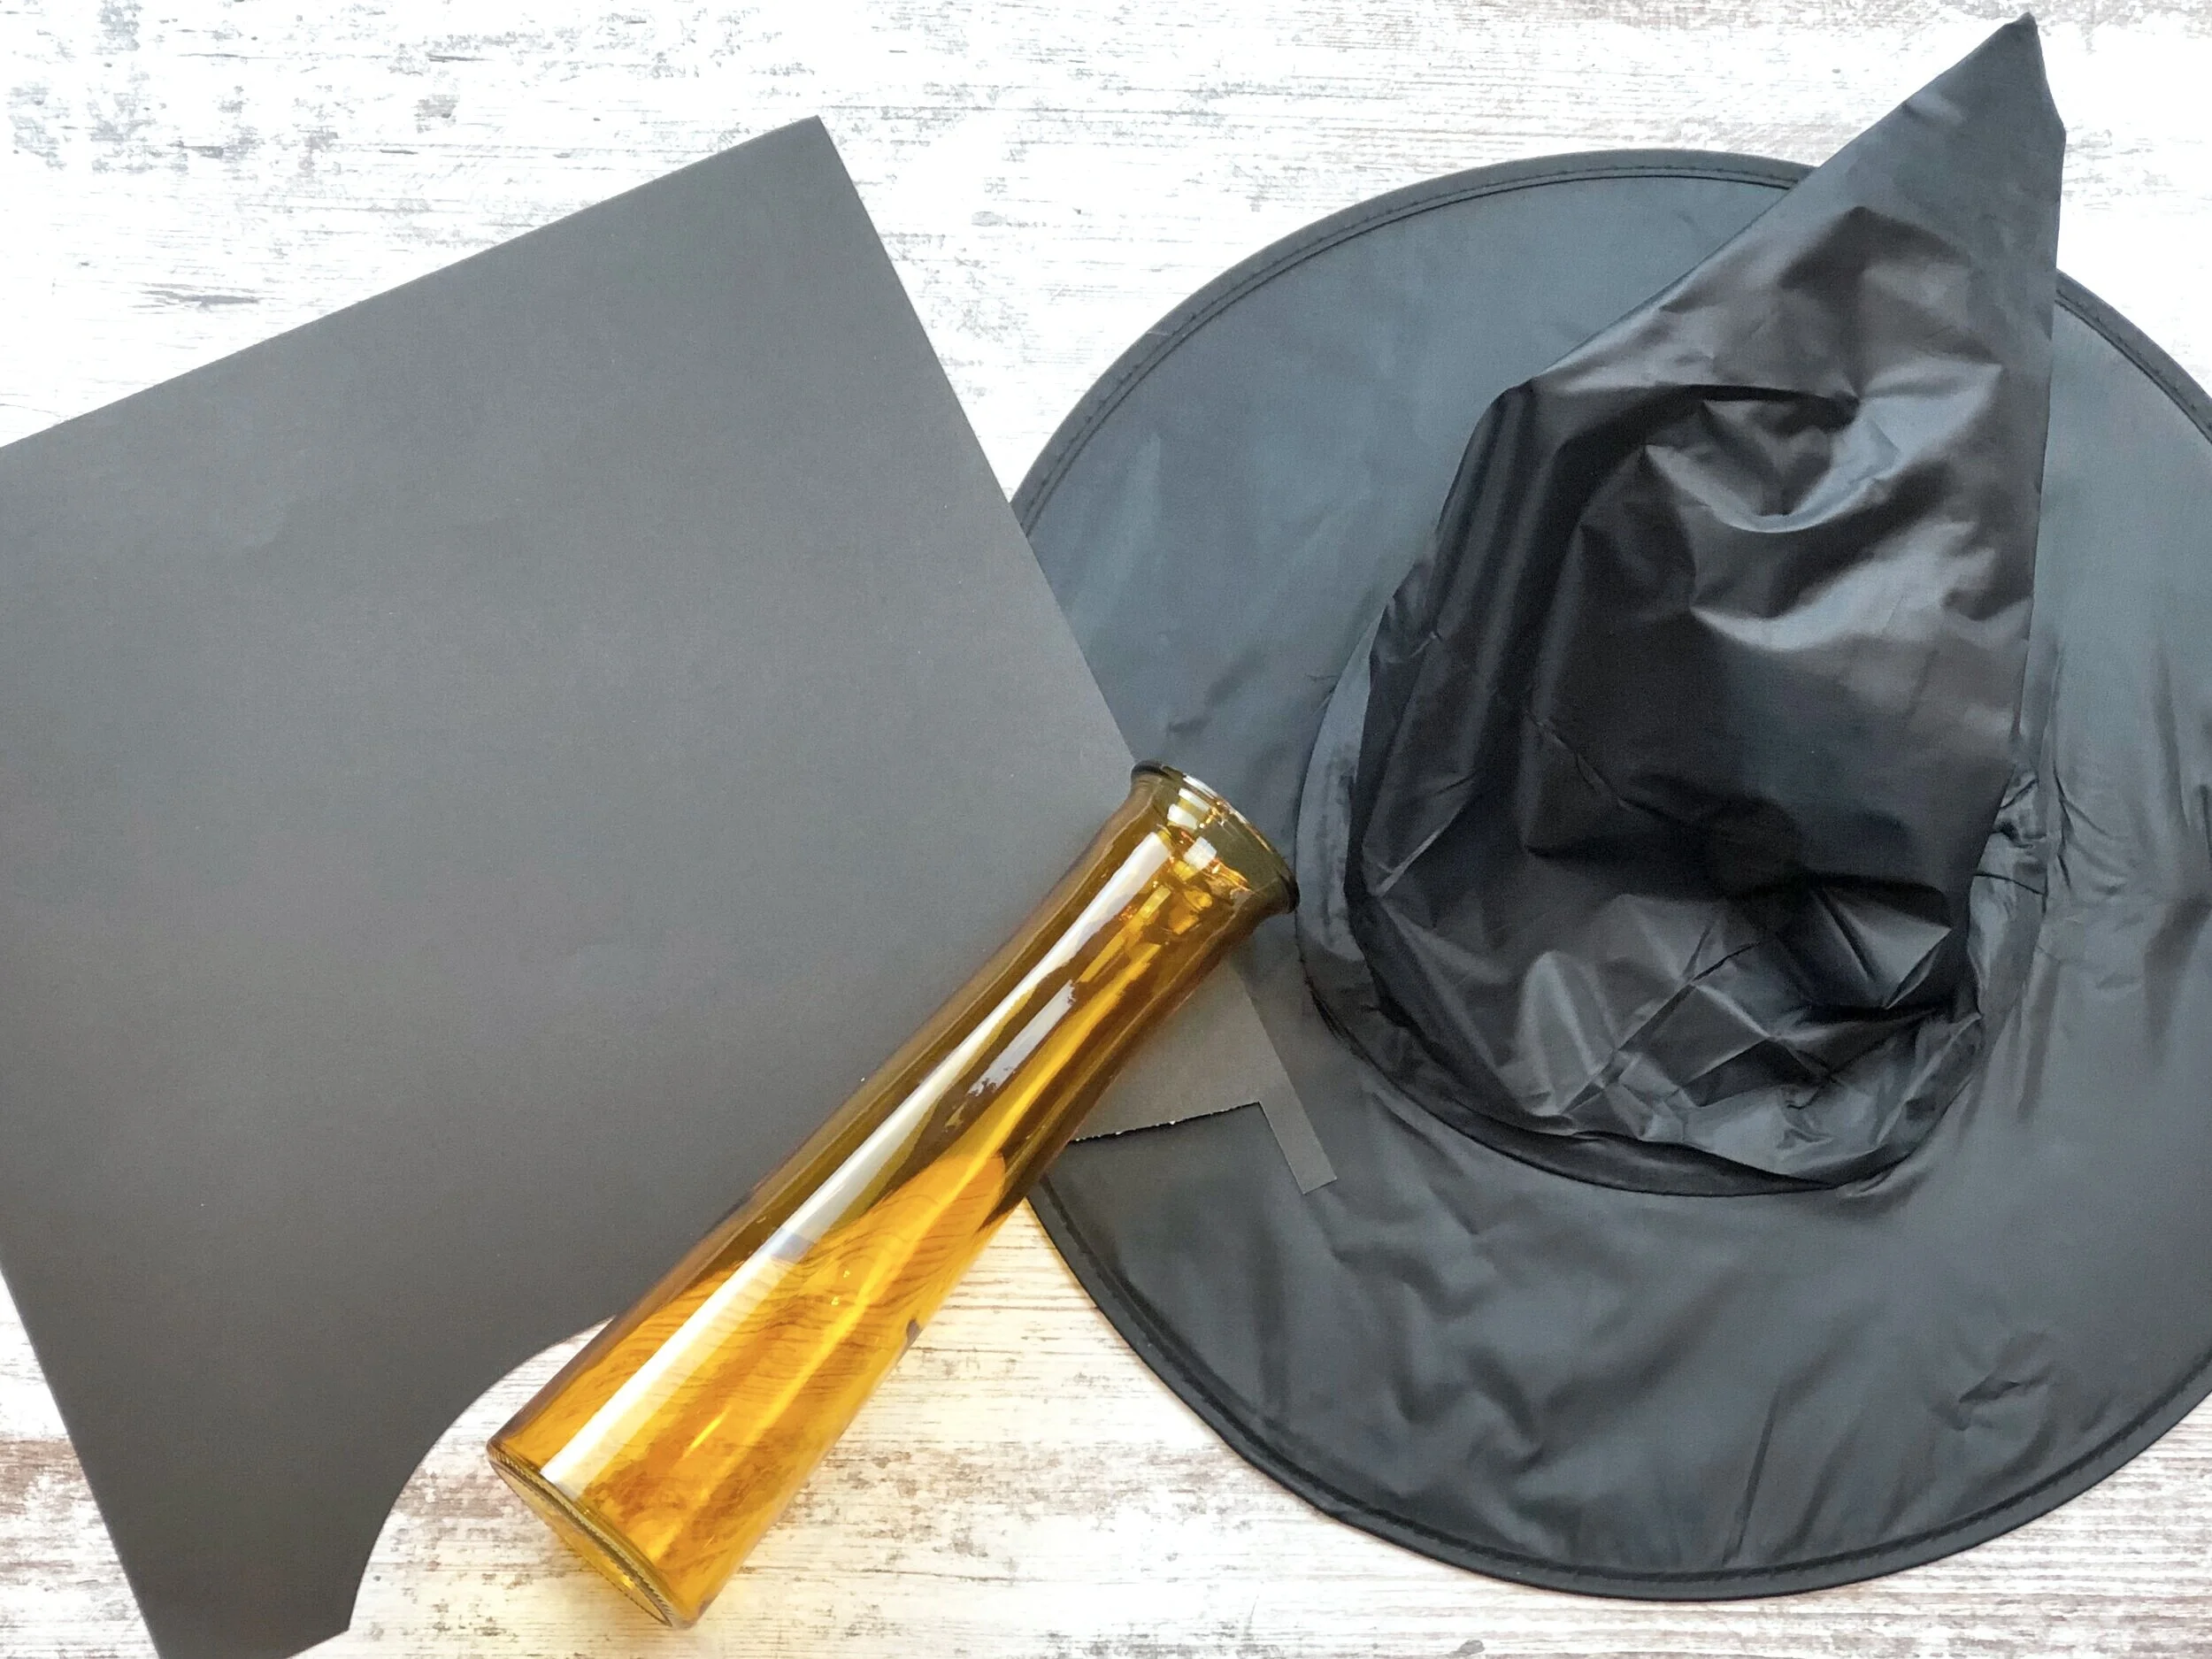
The first thing I did was measure the opening of the witch hat.

How to make an easy and cute Halloween decoration using a Dollar Tree vase and a witch hat. DIY  Halloween decor using your Cricut cutting machine. Make your own adorable witch hat Halloween decoration.

Using Cricut Design Space I made a 9” circle and cut it out on black cardstock using my Cricut Explore.

How to make an easy and cute Halloween decoration using a Dollar Tree vase and a witch hat. DIY  Halloween decor using your Cricut cutting machine. Make your own adorable witch hat Halloween decoration.

Next I used my glue gun and added hot glue to the top of the vase.

How to make an easy and cute Halloween decoration using a Dollar Tree vase and a witch hat. DIY  Halloween decor using your Cricut cutting machine. Make your own adorable witch hat Halloween decoration.

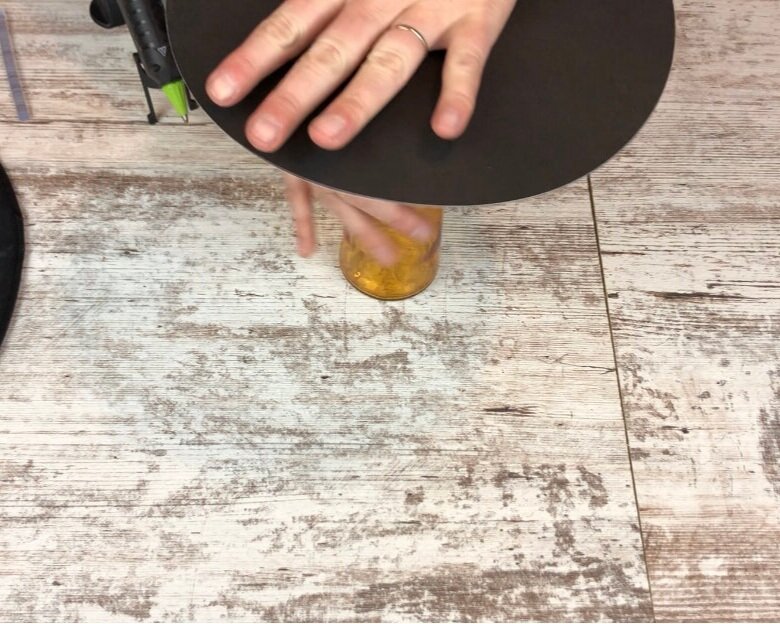
Then I quickly placed my cardstock circle cut out on top. Be sure to do this step quickly because hot glue can dry fairly fast.

How to make an easy and cute Halloween decoration using a Dollar Tree vase and a witch hat. DIY  Halloween decor using your Cricut cutting machine. Make your own adorable witch hat Halloween decoration.

Then I placed it on my hutch and added my witch hat.

How to make an easy and cute Halloween decoration using a Dollar Tree vase and a witch hat. DIY  Halloween decor using your Cricut cutting machine. Make your own adorable witch hat Halloween decoration.

I love it! It was so super easy and adds so much height to my Halloween display.

How to make an easy and cute Halloween decoration using a Dollar Tree vase and a witch hat. DIY  Halloween decor using your Cricut cutting machine. Make your own adorable witch hat Halloween decoration.

I hope you enjoyed this super simple Halloween craft. Let me know if you have any questions in the comments below.

Happy Crafting!

Check out more of my fun Halloween & fall crafts below

How to make beeswax wraps, reusable cotton saran wrap

How to make resuable saran wrap. DIY beeswax cotton food wraps made with pine resin. Save money in the kitchen by making your own fabric food wraps.

Make your own reusable cotton food wraps

I gotta say I am impressed with these simple yet useful beeswax reusable cotton wraps. If you’ve never heard of these before you’re not alone, my husband had no idea what they were and I’m pretty sure he thought I was crazy when I told him what I wanted to make. You use these cloth wraps in your kitchen to replace saran wrap…genius I know! I had never used beeswax or pine resin before this DIY, I actually had no idea pine resin was a thing to buy until recently. But after seeing how easy this project was I am eager to try others that use these ingredients.

I read several different articles telling how to make them. They all basically used the same three ingredients: BEESWAX, PINE RESIN, JOJOBA OIL. Some however didn’t use the pine resin, or any resin at all, and what I read, and now agree with since I have made them myself, is that you won’t get that sticky saran wrap feel unless you use the pine resin. Technically you can just use beeswax but I wouldn’t recommend it.

If you enjoy this money saving tip be sure to check out these reusable oil bottles for the kitchen.

How to make resuable saran wrap. DIY beeswax cotton food wraps made with pine resin. Save money in the kitchen by making your own fabric food wraps.

DIY EASY BEESWAX & RESIN SARAN WRAP

Here’s what you'll need

This is the recipe I used

  • 1/2 c BEESWAX PELLETS

  • 2 t PINE RESIN

  • 1/2 t JOJOBA OIL

The first couple of wraps I made I only used 1 teaspoon of the pine resin and I did not like the way those wraps turned out. So I doubled the resin for the next batch and they turned out SO much better!

1.MELT THE INGREDIENTS

Preheat your oven to 215 degrees. Then mix 1/2 cup of beeswax pellets, 2 teaspoons of pine resin, and 1/2 teaspoon of jojoba oil. The BEST way to do this is to melt it all in a double boiler. I used an old sauce pan and a short mason jar for this. I put a small amount of water in the sauce pan because I didn’t want the jar to float and I knew since I was making a small batch it wouldn’t take much to heat of the jar to melt the beeswax. I used a thin chip brush to do all of the stirring.

How to make resuable saran wrap. DIY beeswax cotton food wraps made with pine resin. Save money in the kitchen by making your own fabric food wraps.

2. CUT YOUR FABRIC

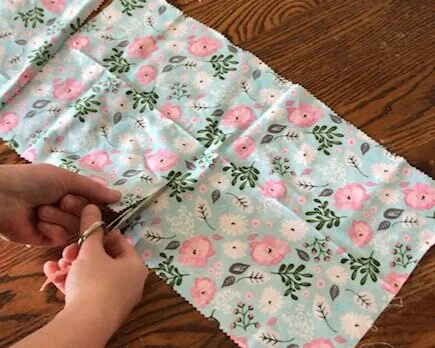
while my ingredients were melting I cut my fabric into pieces I thought would be good sizes for what I wanted to use them for. I cut a few small ones that would fit around the top of a jar. Several medium sized ones that would be good to wrap around food. And a couple of large ones that would fit around my larger sized mixing bowls. I used my grandma’s old pair of pinking shears on the edges of the fabric so that the edges wouldn’t fray once I start using the food wraps. Also, you want to be sure you are using 100% cotton.

How to make resuable saran wrap. DIY beeswax cotton food wraps made with pine resin. Save money in the kitchen by making your own fabric food wraps.

3. BRUSH ON & BAKE

Line your cookie sheet with foil, shiny side down. Place a piece of your fabric on the cookie sheet. Use the chip brush to brush on the melted mixture. Then pop it in the oven for 5 minutes or so. Do not skip placing it in the over. If you just brush the wax mixture on your food wraps they will be stiff, the mixture won’t be on the fabric evenly and it will result in them not working quite right. Placing them in the oven allows the wax to melt completely into the fabric and giving you a nice even coat over the entire piece of fabric.

How to make resuable saran wrap. DIY beeswax cotton food wraps made with pine resin. Save money in the kitchen by making your own fabric food wraps.

4. REMOVE EXCESS WAX

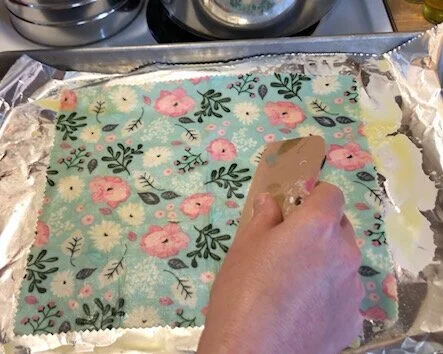
Remove your cookie sheet from the oven. Use a squeegee, here's the kind I used, and squeegee the excess beeswax mixture off of the fabric. I didn’t do this for the first couple of wraps I made and I didn’t like how they turned out, for two reasons - there wasn’t enough resin AND they were WAY TOO stiff and waxy. None of the tutorials I read said to do this step though. So maybe they know something I don’t. But I do know when I went to use the first two to try them out before I made more they were kind of blah and I wasn’t impressed at all with them. After I squeegeed the excess off it made all the difference in the world! I didn’t let the excess go to waste either. I scooped it up and placed it back into the mason jar so it could melt back down.

How to make resuable saran wrap. DIY beeswax cotton food wraps made with pine resin. Save money in the kitchen by making your own fabric food wraps.

5. REMOVE & LET DRY

Immediately take them off of the baking sheet and place them somewhere to dry. I lined a cookie drying rack with a piece of foil and then placed the finished wax wraps on there to dry. It didn’t take very long at all for them to completely dry on the drying rack.

How to make resuable saran wrap. DIY beeswax cotton food wraps made with pine resin. Save money in the kitchen by making your own fabric food wraps.

6. USE

Once your food wraps are dry you can start using them immediately. I was so surprised at how well these turned out! I’m even thinking about making some to give as gifts to family and friends.

How to make resuable saran wrap. DIY beeswax cotton food wraps made with pine resin. Save money in the kitchen by making your own fabric food wraps.

Like with all of my DIY posts if you have any questions please feel free to ask. If you make these at home I’d love to hear how yours turn out!
Happy crafting!

DIY western themed party table sign

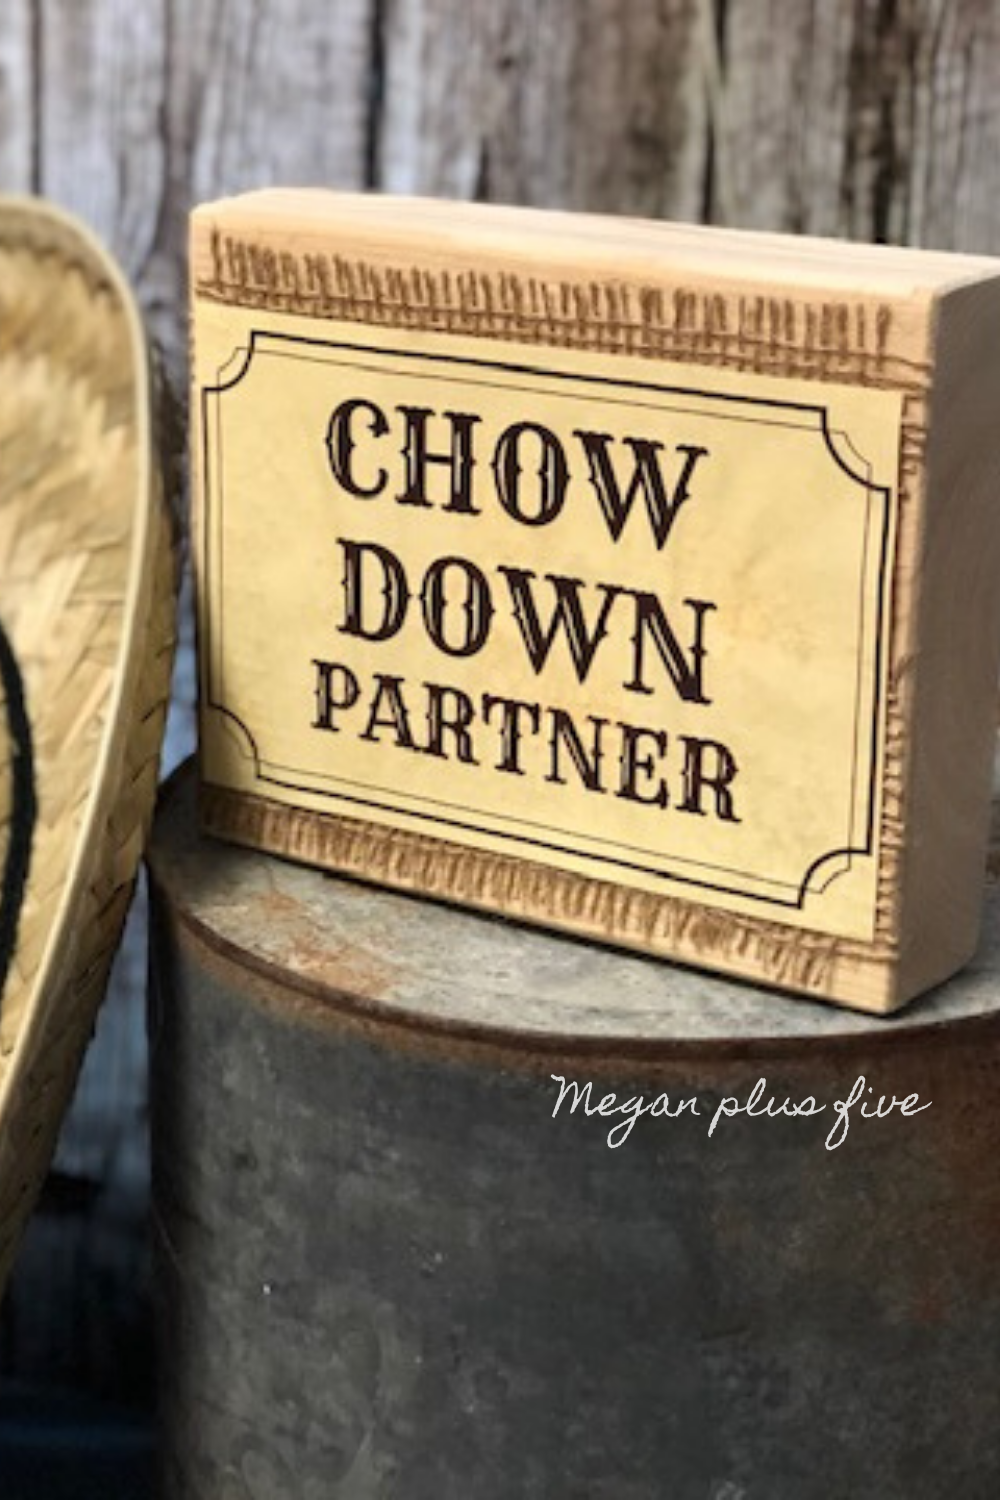
DIY western themed party table sign. Western signs for your wild west party. Chow down partner party decor easy wood sign

How to make a sign for your western themed party table

Teacher appreciation week is coming up for our elementary school and I was asked to help throw it all together. One of the things I was asked to help out with were signs for the food table to go with the wild west theme. Being a busy momma of 4 and a handmade small business owner I didn’t have a ton of time to devote to the signs. I thought about just printing something up and sticking them in inexpensive frames but I didn’t want to have to spend money on frames I wouldn’t use again. And I wanted them to look a little more rustic/handmade than what a picture frame would look like.

Affiliate Disclosure. Some of the links on this website are affiliate links, which means that I may earn a small commission if you click on the link or make a purchase using the link. If you make a purchase you will not be charged anything additional.

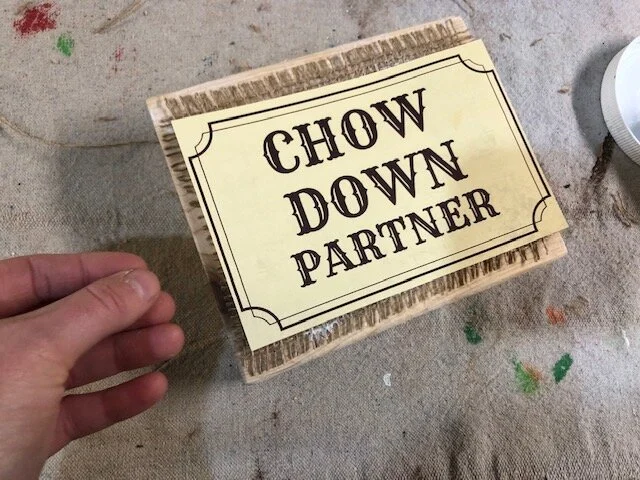
So I looked around my craft room and thought ‘why couldn’t I just glue the paper to a chunk of wood?’. And that’s exactly what I did! Gotta love Mod Podge! And of course burlap too!

You can use the printable I used for my project, it’s in my FREE RESOURCE LIBRARY click here to get the free printable

Wild  west themed party table sign DIY. How to put together a chow down partner sign for your western themed party.

DIY wild west sign for your party table

These table signs are SO easy to make!

Here’s what you’ll need

Helpful tools

ONE-

I printed off my printables, CHOW DOWN PARTNER, SNACK STAMPEDE, HAPPY TRAILS, and WATERING HOLE. Then I trimmed them down using my paper cutter. Even though these are not expensive at all it took me years to finally bite the bullet and buy one and I’m SO glad I did! I know it sounds silly but not having to stress about the lines being straight on things, especially on my orders, is priceless!

TWO-

Cut down your 2x6 to fit your printable. I already had several sections of 2x6’s leftover from a loft bed project we made for the three oldest daughters. So I used my miter saw cut two of those pieces in half. That gave me 4 2x6 pieces.

Watering hole wild west table sign. DIY western party table decor. Free printable

THREE-

I wanted the background to have a little more to it than just the wood I added a piece of burlap to two of the signs and a piece of red duck cloth fabric to the other two western signs. I had all of these materials on hand, I didn’t need to go to the store and buy anything. That’s the great part of holding on to scrap pieces.

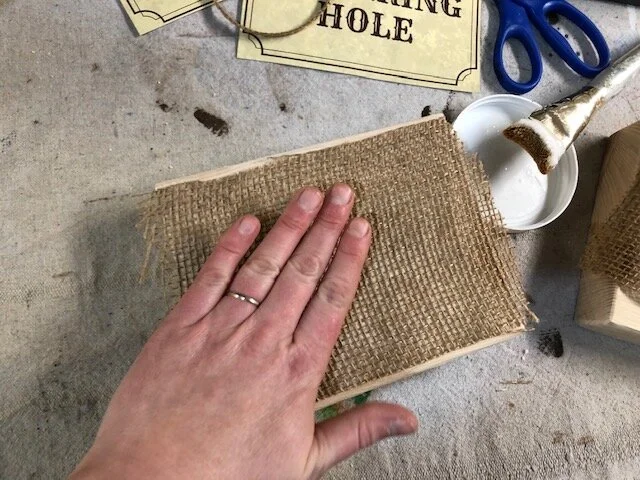
I used MATTE FINISH MOD PODGE to glue the burlap and fabric on to the wood chunks. Paint on a thick layer of the mod podge (if you’ve never used mod podge it’s basically just fancy glue that comes in lots of different finishes and purposes). Cut your fabric or burlap down to size and press it down on the mod podge covered front of your sign. Smooth out any air bubbles with your hand.

How to apply fabric and burlap to wood. Watering hole wild west table sign. DIY western party table decor. Free printable

FOUR-

I wanted the edges to be frayed a little so I trimmed down the fabric/burlap what hung over the edge then pulled out some of the treads on each end to fray them.

How to apply fabric and burlap to wood. Watering hole wild west table sign. How to fray fabric. DIY western party table decor. Free printable

FIVE-

Then I applied mod podge to top of the burlap/fabric and placed a printable down on it. On the first ones. the burlap ones, I applied mod podge all over where the printable would go, not even thinking that it was going to bubble the paper because that’s what glue does to paper. So the next two I just applied the mod podge to the ends of the paper and I like that look a lot better.

How to apply fabric and burlap to wood. Watering hole wild west table sign. DIY western party table decor. Free printable

SIX-

Let them dry and you’re ready to put them on display on your western themed party table.

How to apply fabric and burlap to wood. Watering hole wild west table sign. DIY western party table decor. Free printable

I hope you enjoyed this tutorial and it helps you DIY your own easy and quick signs. As with all of my posts if you have any questions please feel free to ask away.

Snack stampede, how to apply paper to wood. DIY western party table decor. mod podge on wooden sign for easy inexpensive sign making.

Want instant access to all of my free printables (like the one used in this post) files, and checklists? Fill in your info and I will send you will immediately get the password to all of my freebies.

DIY Dollar Tree St. Patrick's Day rag wreath

DIY Dollar Tree rag wreath for St. Patrick's Day. How to make an easy rag wreath using a Dollar Tree wire wreath form and scraps of fabric or fat quarters.

How to make a rag wreath using a Dollar Tree wire wreath form

I LOVE shopping at the Dollar Tree. When they put one in our small town my girls and I were EX-CI-TED! It’s not that we lived too far away from the next Dollar Tree but it is so nice to have one that is just a couple minutes away vs having to get on the highway and drive 25+ minutes, we are loving this convenience! I don’t buy everything from the Dollar Tree though, but there are several things I do prefer to pick up from here like wire wreath forms. Here’s my list of the top 15 craft supplies I buy from the Dollar Tree.

Affiliate Disclosure. Some of the links on this website are affiliate links, which means that I may earn a small commission if you click on the link or make a purchase using the link. If you make a purchase you will not be charged anything additional.

There are so many different types of wreaths you can make with the wire wreath forms but my absolute favorite are the rag wreaths. They are so beautifully imperfect and they tie in nicely with my rustic/inexpensive style lol! This is my third rag wreath I’ve posted here on my blog. My first one was this super country cottage chic spring wreath. I really wanted to put it up for Valentine’s day this year but decided against it since it has bunnies for one of the prints. My second rag wreath was this rustic but patriotic red, white, and blue one.

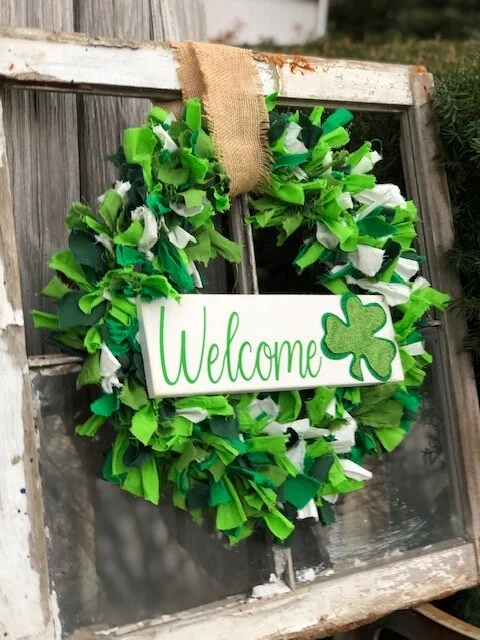
For my St. Patrick’s Day rag wreath, or tied fabric wreath as some call it, I wanted to add a little sign that said welcome. I admit I took the easy way out and didn’t stencil the sign, I made a vinyl decal instead. It is far easier to make these they just don’t last as long as the fully painted signs I create and ship world wide in my handmade business. Check out my handmade signs here. If you’ve been dreaming of making your own hand painted wooden signs but you keep running into problems my sign painters e-course is for you!

Check out the rag wreath video tutorial or keep scrolling for written/picture instructions.

Here’s what you’ll need to make your own St. Patrick’s Day rag wreath

Helpful tools

DIY Dollar Tree rag wreath for St. Patrick's Day. How to make an easy rag wreath using a Dollar Tree wire wreath form and scraps of fabric or fat quarters.

DIY rag wreath for ST. Patrick’s Day

One-

Unfold your fabric. Then about ever 1” or so cut a small slit on one side of the fabric. Now rip those 1” sections so that you have a bunch of strips of fabric. Repeat this step for all of your pieces of fabric. I’ve found fat quarters that you get from Walmart work really well for these wreaths.

DIY Dollar Tree rag wreath for St. Patrick's Day. How to make an easy rag wreath using a Dollar Tree wire wreath form and scraps of fabric or fat quarters.

Two-

Cut your ripped fabric strips into 3-4 inch pieces. These don’t have to be perfect, mine are never the exact same size.

DIY Dollar Tree rag wreath for St. Patrick's Day. How to make an easy rag wreath using a Dollar Tree wire wreath form and scraps of fabric or fat quarters.

Three-

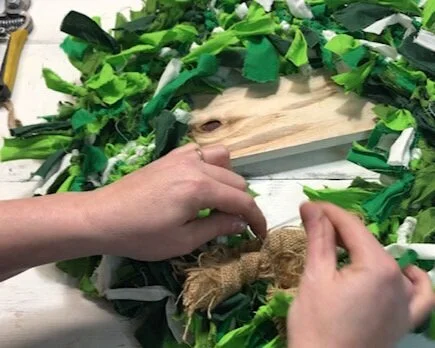
Tie your pieces in a single knot onto your wire wreath form. This took me about 45 minutes to complete.

DIY Dollar Tree rag wreath for St. Patrick's Day. How to make an easy rag wreath using a Dollar Tree wire wreath form and scraps of fabric or fat quarters.

Four-

Once you have all of your fabric pieces tied onto your wire wreath form you flip your wreath over. Then push any long fabric pieces back on to the front.

DIY Dollar Tree rag wreath for St. Patrick's Day. How to make an easy rag wreath using a Dollar Tree wire wreath form and scraps of fabric or fat quarters.

Five-

Set your wreath to the side so you can start on your welcome sign that is going to attach to the front. I used a piece of scrap wood I had in the garage from a previous project. Paint the base white, I used two coats of paint to get a good coverage. Be sure you let both coats dry completely before moving on to step 6.

DIY Dollar Tree rag wreath for St. Patrick's Day. How to make an easy rag wreath using a Dollar Tree wire wreath form and scraps of fabric or fat quarters.

Six-

Instead of stenciling this sign I applied a vinyl decal. I used my Cricut to cut out my vinyl decal. You can get my WELCOME Cricut cut file here.

DIY Dollar Tree rag wreath for St. Patrick's Day. How to make an easy rag wreath using a Dollar Tree wire wreath form and scraps of fabric or fat quarters.

Seven-

I bought a package of foam green clovers at my local Dollar Tree last year and thought these would be super cute to add to one side of my welcome sign. They were the same size so I trimmed down the shamrock I wanted to place on the top so that you could see a little bit the bottom shamrock showing through the edge. I did this same technique on this Rae Dunn inspired fall burlap leaf garland. Then I glued the two together and glued them down to the end of the sign.

DIY Dollar Tree rag wreath for St. Patrick's Day. How to make an easy rag wreath using a Dollar Tree wire wreath form and scraps of fabric or fat quarters.

Eight-

Attach your sign to your wreath. To do this I used a soft wire but I have no idea where I got it from. I would also recommend a floral wire for this step. I drilled holes in the top corners of my sign and used a small piece of wire to attach it to the wreath. Make a U shape to your wire, place one end of the wire in the hole of the sign and feed it to the back then twist the two ends together on the back side so you can’t see them once your wreath is hanging. Do this for both sides of your welcome sign to attach it to your wreath.

DIY Dollar Tree rag wreath for St. Patrick's Day. How to make an easy rag wreath using a Dollar Tree wire wreath form and scraps of fabric or fat quarters.

Nine-

I finished my wreath off with a 4” wide piece of burlap so I could hang it up. I didn’t really like the knot I made in the burlap so I wanted to hide it lol. I just took another piece of wire and secured the knot to the back of the wreath.

DIY Dollar Tree rag wreath for St. Patrick's Day. How to make an easy rag wreath using a Dollar Tree wire wreath form and scraps of fabric or fat quarters.

Now you're ready to hang your wreath for St. Patrick’s Day. I hope you enjoyed this crafty DIY. If you did and make your own St. Patty’s Day wreath I’d love to see pictures of it. As always with all of my tutorials, if you have any questions please don’t hesitate to ask:)!

DIY Dollar Tree rag wreath for St. Patrick's Day. How to make an easy rag wreath using a Dollar Tree wire wreath form and scraps of fabric or fat quarters.

Happy crafting!

Want instant access to my FREE RESOURCE LIBRARY? This is where I share my freebies of cut files, printables, checklists and more. Leave your info below and I will send you the password and link to get instant access into my library.

Easy popsicle stick picture frame for Valentine's Day

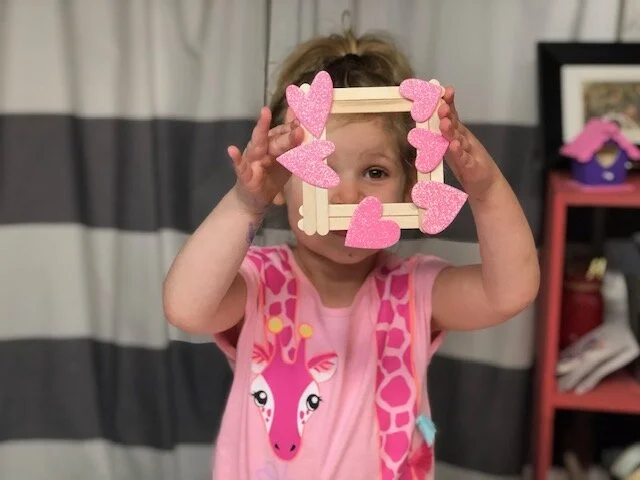
Easy popsicle stick picture frame valentine's day. How to make a mess free Valentine's Day craft with your kids and family. Cute and easy popsicle stick frame craft for kids.

We belong to a wonderful little program called Parents as Teachers. If you’ve never heard of this you can check out Parents as Teachers here. Every week our local PAT’s host a play group and during the holiday season they host themed groups with a fun party. This year they asked me again if I would help host the Valentine’s Day craft for the party. Of course I said yes!

Affiliate Disclosure. Some of the links on this website are affiliate links, which means that I may earn a small commission if you click on the link or make a purchase using the link. If you make a purchase you will not be charged anything additional.

I knew I wanted the craft to be a keepsake. Every momma LOVES keepsakes! They are my most favorite thing the girls bring home from school in the early years. So I searched Pinterest looking for an easy to make Valentine’s Day keepsake for little ones. I came across a fun popsicle stick frame and knew this would be something super easy for the kids and moms to make together.

My husband and I premade all the frames so everything was ready to go for the Valentine’s Day party, 30 frames total, and of couse since we live in the center of the USA winter did a little showing off, school got cancelled and so did the party *insert sad momma tears*. But we still had fun making these frames at home and the older three daughters actually had even more fun than I thought they would. They loved decorating their own frames with the Valentine’s Day stickers and cutouts.

How to make a mess free Valentine’s Day keepsake craft

Watch the video below or keep reading for the step by step instructions

Want access to my FREE RESOURCE LIBRARY? This is where I keep all of my files, printables, lists, and more. Get your password to get all the freebies —-> Send me to the FREE RESOURCE LIBRARY

Here’s what you’ll need to make your Valentine’s Day popsicle stick frame

You can find all of these items at the Dollar Tree (except the gorilla glue and glue gun) but I’ve included the links if you prefer your supplies delivered right to your door:)!

DIY popsicle stick picture frame. How to make a Valentine's Day craft with kids mess free. Keepsake art to Valentine's Day

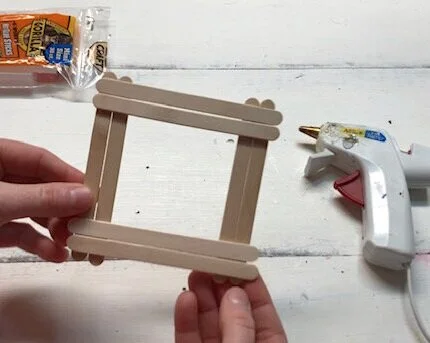
To make 1 popsicle stick picture frame you need 8 popsicle sticks.

  1. The first thing you need to do is put your frame together. This should be done by an adult. I’ve found using gorilla glue sticks vs regular hot glue sticks hold projects together so much better. You want to line your sticks out first before you glue them down. You will need 2 popsicle sticks on each side of the frame.

DIY popsicle stick picture frame. How to make a Valentine's Day craft with kids mess free. Keepsake art to Valentine's Day

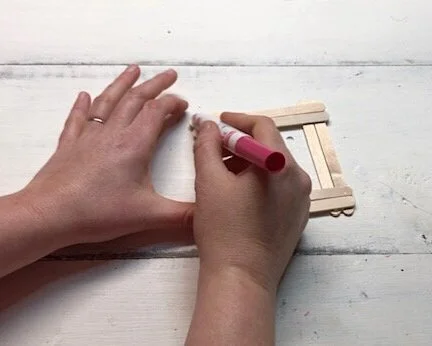
2. Once the glue has set and dried you can start decorating. No need to get out messy paint, although I LOVE paint sometimes it’s nice to not have that mess to clean up. Washable markers work great to give the frame a color and your work area will clean up with a washcloth after with no fuss. This is great for little ones who are working on their fine motor skills too!

DIY popsicle stick picture frame. How to make a Valentine's Day craft with kids mess free. Keepsake art to Valentine's Day

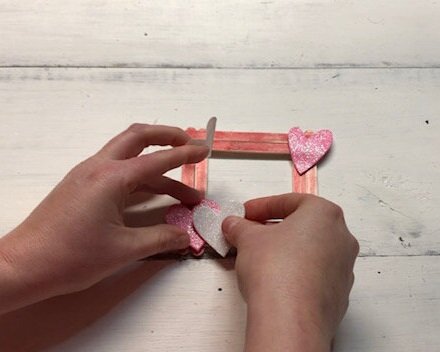
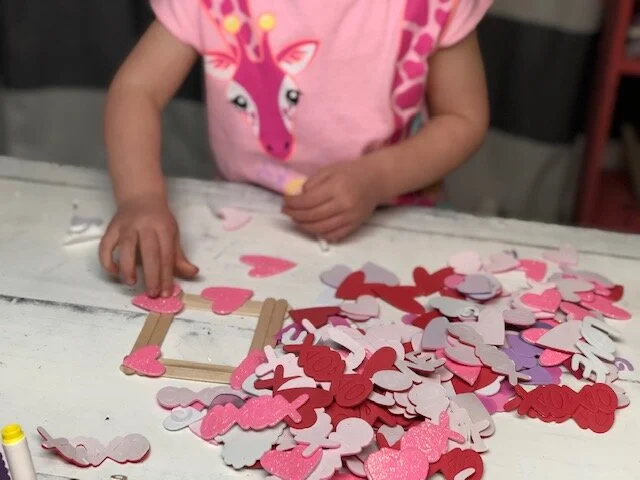
3. Add some more decorations. Stickers are PERFECT for these adorable Valentine’s Day frames! Your kiddos can just peel off the backing and stick them wherever they would like. Let them have fun with this step. If you want you can bring out some rhinestones, sequence, and even glitter (but these will require glue).

DIY popsicle stick picture frame. How to make a Valentine's Day craft with kids mess free. Keepsake art to Valentine's Day

4. Glue a photo or their art work to the back. I just used my hot glue gun to glue a photo of our sweet family to add to the frame I made for this tutorial. If you want you can also add a small magnet so you can hang it on the fridge.

DIY popsicle stick picture frame. How to make a Valentine's Day craft with kids mess free. Keepsake art to Valentine's Day
DIY popsicle stick picture frame craft for kids. Mess free Valentine's Day craft to make with your kiddo

5. Enjoy their art! place it on a shelf and keep it out year round. Now that my girls are getting older I am even more appreciative of all their handmade creations they’ve made me over the years.

DIY popsicle stick picture frame. How to make a Valentine's Day craft with kids mess free. Keepsake art to Valentine's Day

If you have any questions about this DIY craft or any other leave a comment below. Happy Valentine’s Day!

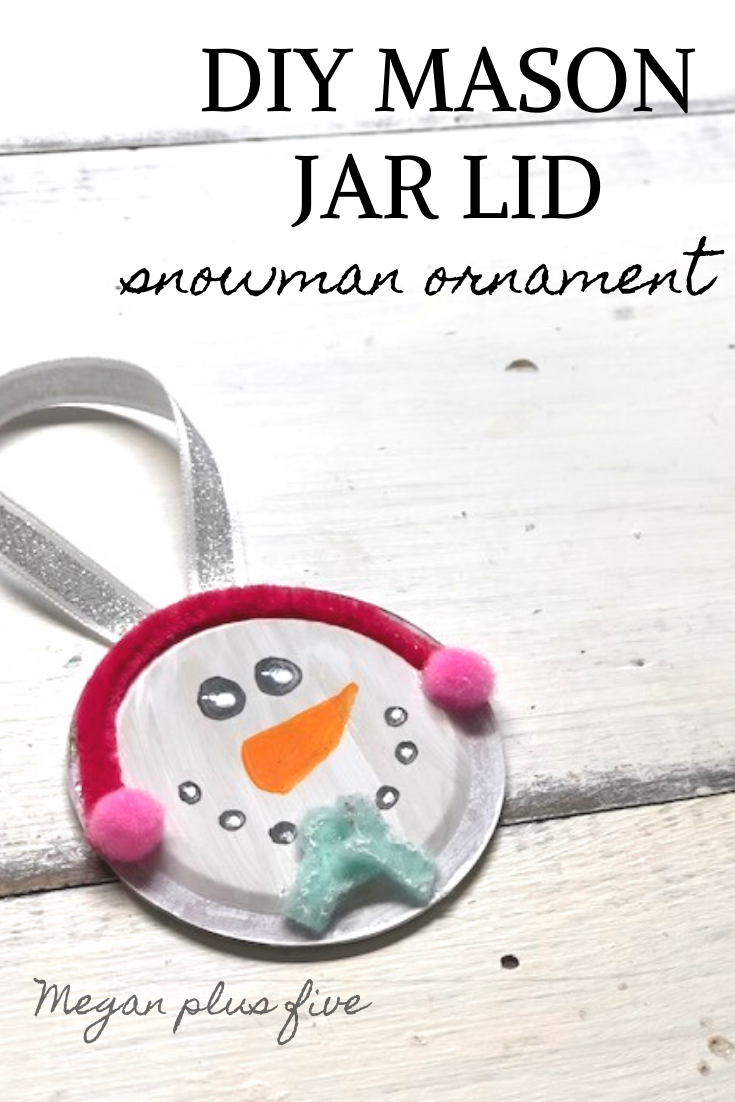
DIY mason jar lid snowman Christmas ornament, DAY 4

DIY snowman made from a mason jar lid. How to make cute snowmen Christmas ornaments from a lid from a mason jar. Easy craft tutorial to make fun ornaments for kids.

How to make a super cute snowman Christmas ornament from a mason jar lid

Day 4 of DIY Christmas Ornaments

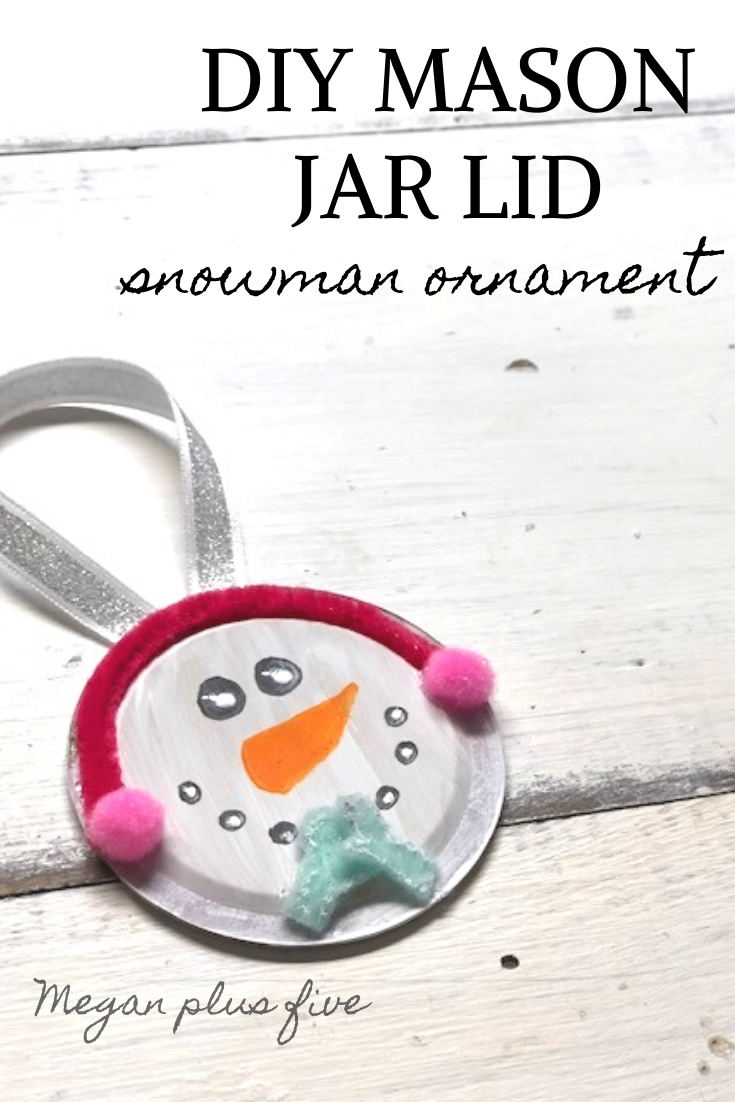
Day of 4 of DIY Christmas ornaments is this super easy and adorable mason jar lid snowman. He is complete with a mini set of mittens and a cute little pair of earmuffs! This little guy was really simple to make and is a great use for all those extra lids from your mason jar crafts. And if you follow me on here at all I’m not shy about my love for mason jars! I’ve always loved them, even before they were all mainstream lol!

Affiliate Disclosure. Some of the links on this website are affiliate links, which means that I may earn a small commission if you click on the link or make a purchase using the link. If you make a purchase you will not be charged anything additional. This is just a way I can help add to our family finances to raise our four daughters. Please know I would never recommend a product or service I do not totally stand behind.

If you missed the first few days of my 30 DAYS OF DIY CHRISTMAS ORNAMENTS be sure to click here to see the full list of make your own ornaments

If you love mason jars as much as I do be sure to check out my DIY MASON JAR CRAFTS for more inspiration.

Check out the snowman mason jar lid video tutorial below or keep scrolling to read the step by step instructions.

Here’s what you’ll need to make your own mason jar lid snowman for your Christmas tree.

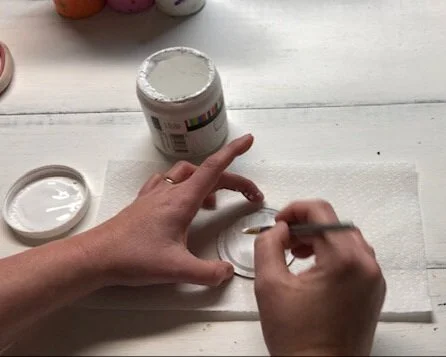
First you want to paint the bottom side of your mason jar lid {the non silver side}. I used chalk paint to paint mine but any kind of white paint should work fine, even spray paint.

First you want to paint the bottom side of your mason jar lid {the non silver side}. I used chalk paint to paint mine but any kind of white paint should work fine, even spray paint.

DIY snowman made from a mason jar lid. How to make cute snowmen Christmas ornaments from a lid from a mason jar. Easy craft tutorial to make fun ornaments for kids.

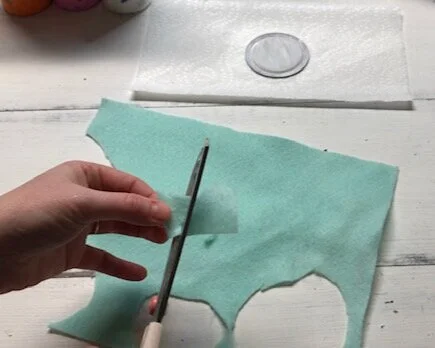
While your mason jar lid is drying cut out the tiny mittens from felt. I free handed this step and they were actually pretty easy to make. So that they would match I used the first one I cut out as my template to cut out the second one.

DIY snowman made from a mason jar lid. How to make cute snowmen Christmas ornaments from a lid from a mason jar. Easy craft tutorial to make fun ornaments for kids.

Now measure about half way around your mason jar lid for the ear muffs using your pipe cleaner. Then cut it to size with your craft scissors.

DIY snowman made from a mason jar lid. How to make cute snowmen Christmas ornaments from a lid from a mason jar. Easy craft tutorial to make fun ornaments for kids.

I know it’s hard to tell in the picture but I used a black paint marker, or paint pen, to draw on the eyes and the mouth. I LOVE these paint pens and I actually use them more than I thought I would for crafts like on this DIY PERSONALIZED MASON JAR LID. They come in hand for all kinds of projects. If you want to add little accent dots on the eyes with white paint be sure to do so when the black paint is all the way dry. I made the mistake and rushed that step and you can totally see the ugly error.

DIY snowman made from a mason jar lid. How to make cute snowmen Christmas ornaments from a lid from a mason jar. Easy craft tutorial to make fun ornaments for kids.

I painted on my snowman’s nose but if I had an orange paint pen I would have use that instead to create the nose. If you use paint it takes VERY LITTLE .You can vaguely see the little orange dot on the paper towel, that’s what I used to dip my paint brush in to paint the nose. And I didn’t even use very much of it.

DIY snowman made from a mason jar lid. How to make cute snowmen Christmas ornaments from a lid from a mason jar. Easy craft tutorial to make fun ornaments for kids.

Then glue down the earmuffs. You want to glue the pipe cleaner to the mason jar lid first then glue the mini pompoms down on each end of the pipe cleaner. {btw my 10 year old daughter totally had to tell me I’ve been spelling pompoms wrong lol! I was spelling them as 2 words which is clearly wrong. Hey, I’m a really great crafter lol spelling isn’t really my strong suit}.

DIY snowman made from a mason jar lid. How to make cute snowmen Christmas ornaments from a lid from a mason jar. Easy craft tutorial to make fun ornaments for kids.

Next, glue on your snowman’s gloves. I faced the gloves so that the thumbs were facing in which if you do that to yourself is wrong but trust me they actually look better facing the wrong direction

DIY snowman made from a mason jar lid. How to make cute snowmen Christmas ornaments from a lid from a mason jar. Easy craft tutorial to make fun ornaments for kids.

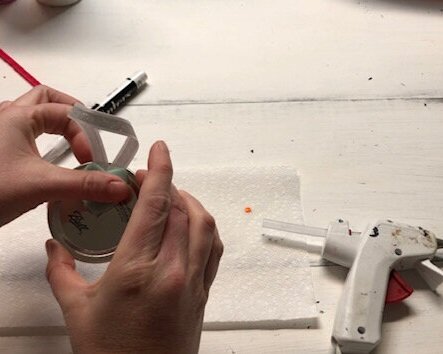
Last, loop a piece of ribbon and glue it to the back of your snowman mason jar lid. For extra support I recommend gluing a piece of felt over it. I cut mine in the shape of a heart so it looked pretty instead of just a circle or a misshaped cut piece of felt. You can also write on the back of the ornament who made it and what year with your paint pen.

DIY snowman made from a mason jar lid. How to make cute snowmen Christmas ornaments from a lid from a mason jar. Easy craft tutorial to make fun ornaments for kids.

Now your adorable snowman is ready to hang on your Christmas tree! I hope you enjoyed this tutorial and you make wonderful memories with your kiddos making these for your own tree. If you have any questions about this crafty tutorial or any others I’d love to hear from you. Leave a comment below or send me an email.

DIY snowman made from a mason jar lid. How to make cute snowmen Christmas ornaments from a lid from a mason jar. Easy craft tutorial to make fun ornaments for kids.

Check out more Christmas posts below.

DIY easy dinosaur claw gloves, simple sewing project

DIY Dinosaur Gloves, easy sewing project for Halloween costumes, how to sew claws onto gloves. Monster glove tutorial.

Halloween can be a tricky thing to plan for here in the Midwest. Some years we are blessed with AMAZING weather and we don’t have to fret with lots of layers. I have to say that is not what is typical here, although that would be pretty great! Most years we are bundled up with boots, wool socks, and coats. That’s why these DIY DINOSAUR GLOVES were the perfect addition to daughter #4’s handmade costume.

—>Click here to see even more Halloween & Fall DIY projects <—

Affiliate Disclosure. Some of the links on this website are affiliate links, which means that I may earn a small commission if you click on the link or make a purchase using the link. If you make a purchase you will not be charged anything additional. This is just a way I can help add to our family finances to raise our four daughters. Please know I would never recommend a product or service I do not totally stand behind.

These gloves were such a HUGE hit too! She got so many comments at how adorable her little dinosaur claws were reaching into the bowls of candy after she said “trick or treat”. And she is going to LOVE wearing them all winter long.

How to sew claws onto winter gloves

These gloves are SOOOOO super easy to make and you just need a few supplies. You can pick these up at a local store or click the links to see what I recommend to purchase online.

Here’s what you’ll need

Check out the video tutorial from my YouTube channel. Be sure to like and subscribe, this helps me so much to continue to share crafty tutorials and reach even more fellow moms and help them with their own craft projects.


1. CUT OUT CLAWS

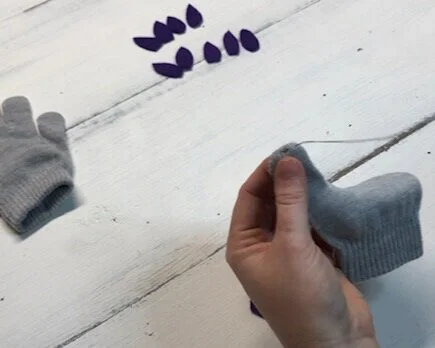
First, cut out one tear drop shape from your felt.

DIY dinosaur gloves, how to add claws to winter gloves. Easy sewing projects for beginers. DIY Dino costume for kids. Easy felt projects

Then use that claw as your template to cut out 9 more felt dinosaur claws

DIY dinosaur gloves, how to add claws to winter gloves. Easy sewing projects for beginers. DIY Dino costume for kids. Easy felt projects

2. SEW THEM ON

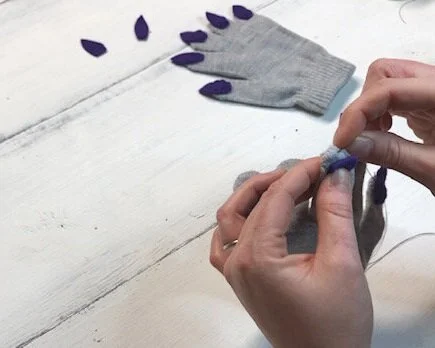
After you have all 10 dinosaur claws {or monster claws they can be for LOTS of different costumes} you are ready to start sewing them on. Thread your needle using your coordinating thread. Instead of placing the knot inside the glove I suggest hiding it under the dino nail.

This way the knot won’t irritate your kiddo. I know lots of kids have sensory issues, while my daughters don’t have this too bad I was one of those kids. I HATED jeans because the inseam “hurt” and I HAD to wear my socks inside out because I couldn’t handle the way that seam felt on my toes. Back then they didn’t call it sensory issues they called it being picky. So If your kiddo has any kind of sensory issue be sure to place the know on the outside, not the inside of the glove.

DIY dinosaur gloves, how to add claws to winter gloves. Easy sewing projects for beginers. DIY Dino costume for kids. Easy felt projects

Now place one felt dinosaur nail on the glove so that half of it is on the glove and half is hanging off. Then stitch it on using a simple stitch. You don’t have to get fancy with the stitch, just a simple straight will be perfect for this. BE SURE YOU ARE NOT STITCHING THROUGH BOTH SIDES OF THE GLOVE. You just want to go thru the very first layer of the glove. Repeat this for all 5 dinosaur nails on the first glove.


When you get to the second glove don’t just start sewing dino claws on it. Trust me I totally made the mistake of starting on the second glove and I didn’t realize till my daughter tried them on that I had sewn claws on them and made 2 RIGHT HANDED GLOVES. So before you start the second glove lay them both out in front of you so that you have one right glove and one left glove. It totally sucked to take the claws off of the second glove right after I just thought I had finished lol!

DIY dinosaur gloves, how to add claws to winter gloves. Easy sewing projects for beginers. DIY Dino costume for kids. Easy felt projects

When you have the second glove facing the correct way you can start sewing the dinosaur claws onto that glove the same way you sewed them onto the first glove.

DIY dinosaur gloves, how to add claws to winter gloves. Easy sewing projects for beginers. DIY Dino costume for kids. Easy felt projects

After you finish sewing the second glove you are done! If you have any questions about this Halloween themed sewing project please reach out to me. Leave your questions below or feel free to message me.

DIY CRAFT KIT how to paint your free standing BOO wood cutouts

how to paint your diy craft kit, BOO wood letters. DIY craft kits for adults. Halloween wood letter cutouts diy projects

How to paint your DIY CRAFT KIT, BOO WOOD CUTOUTS

I just love these little wood cutouts. They are so adorable and tie in perfectly with our simple Halloween décor. I primarily decorate for fall but I do like to add touches of Halloween to our decorations because I have little kiddos and they LOVE the Halloween stuff far more than the traditional fall décor. So we compromise and get the best of both worlds.

Affiliate Disclosure. Some of the links on this website are affiliate links, which means that I may earn a small commission if you click on the link or make a purchase using the link. If you make a purchase you will not be charged anything additional.

If you love this DIY CRAFT KIT check out another popular fall craft kit, DIY FREE STANDING PUMPKINS

Don’t feel like reading the tutorial? No worries I have a short video tutorial on my YouTube channel. Scroll to the bottom to catch it or click here to view the HOW TO PAINT YOUR CRAFT KIT, DIY BOO WOOD CUTOUTS

If you need a CRAFT KIT you can order yours here —-> DIY CRAFT KIT BOO WOOD CUTOUTS FOR HALLOWEEN

If you want to make yours from scratch check out this post on how to make your own BOO WOOD CUTOUTS using a Cricut cutting machine and a Ryobi scroll saw. I show you exactly how I make my BOO cutout sets and if you have the tools you can make your own too! There’s even a video tutorial at the end ;)!

How to paint your BOO wood cutouts

If you didn’t but the DIY CRAFT KIT here’s what you’ll need


Real quick…if you have ever wanted to learn how to paint wood signs, the way the PROs do, you don’t want to miss my complete guide to sign painting. It is a whole course that you complete on your time. I am teaching you EVERYTHING I know without you having to go through the headache and expense of trial and error. If you’ve struggled with paint bleed, designs not lining up, paint peel up, sticky residue left behind you are in for a treat! Click on the image below or go here for more info.


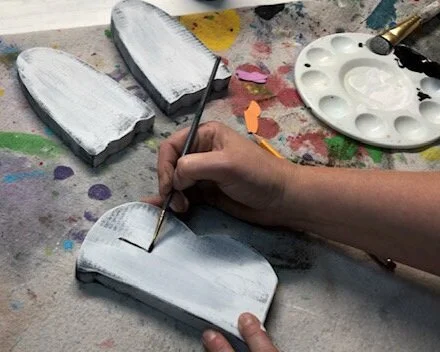
First you want to decide if you want to paint white or black letters. Heck, you could even mix it up and do both! I chose to do white ghosts but I wanted black distressing on my cutouts. There are lots of different ways to achieve this look but my favorite is to paint the distressing color first then paint my project whatever color I want it to actually be.

So on these BOO cutouts I first painted them with a SUPER thin layer of black paint {remember this is going to be the underneath/distressed color}.

How to paint your adult DIY CRAFT KIT, BOO wood cutouts for Halloween.

After the underneath color is dry you can paint your wood cutouts the actual color you want them to be.

Some important things to know:

  • use a VERY LIGHT hand when painting the top color. You do not want to press hard as this will put too much paint on your wood cutouts and it is far easier to add more paint than it is to take too much paint off.

  • do NOT get your brush wet. For almost all of my paint projects I always use a DRY brush.

  • use very little paint, dab off excess paint before applying

  • work from the middle out

  • paint lightly around the edges as this is where the “natural” wear would be

  • if you need a little more coverage wait till your paint is dry then add more paint

Paint all sides of each cutout this way.

How to paint your adult DIY CRAFT KIT, BOO wood cutouts for Halloween.

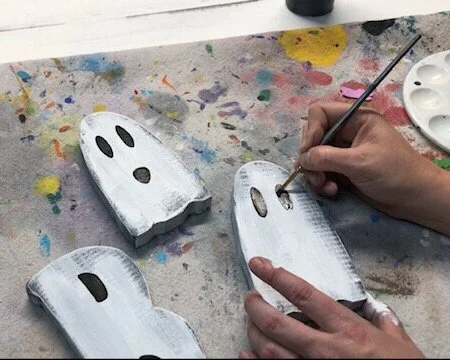
Trace around your cardstock cutouts. You will have a total of 5 - 2 cutouts for the letter B and 3 cutouts for the ghosts {you will reuse the ghost cutouts for both ghosts}. Place them where they need to go on your cutouts then trace around them with a pencil. This does not have to be perfect ;)!

How to paint your adult DIY CRAFT KIT, BOO wood cutouts for Halloween.

Using a fine paintbrush paint inside the traced lines with the same colored paint you used for your distressing color. I used black for my distressing color so I also used black for areas I traced around.

How to paint your adult DIY CRAFT KIT, BOO wood cutouts for Halloween.

And then you’re done! If you have sandpaper on hand you can lightly give it a little more distressing but that is totally up to you.

Click here to shop even more DIY CRAFT KITS

Check out the full video tutorial

If you have any questions about your DIY CRAFT KIT please leave a comment below or feel free to send me a message. If you purchased through my Etsy shop please message via their platform to stay in compliance with Etsy’s policy.

EASY witch's brew coffee mug decal using your CRICUT

DIY witch's brew decal using your cricut. Adding vinyl decals to your everyday decor is an easy way to decorate for the holidays without a spending alot on new decorations.

DIY - how to apply a Halloween vinyl decal to a white coffee mug using your CRICUT

I just love how a simple decal and totally change the look of something. Truthfully I NEVER use this coffee mug. Why? Because it’s all white and not at all fun to drink out of. Sounds ridiculous, I know, but it’s honest. So when I go for my morning cup of room temp coffee {because I am not a big fan of warm/hot coffee} I always pass by this guy and reach for a cheery option.

I wanted to do a tutorial on how to apply vinyl to coffee mugs and knew this coffee mug would be the perfect sacrifice for the job! And I am totally going to start drinking out of this one now that it got a little Halloween decal makeover!

Affiliate Disclosure. Some of the links on this website are affiliate links, which means that I may earn a small commission if you click on the link or make a purchase using the link. If you make a purchase you will not be charged anything additional.

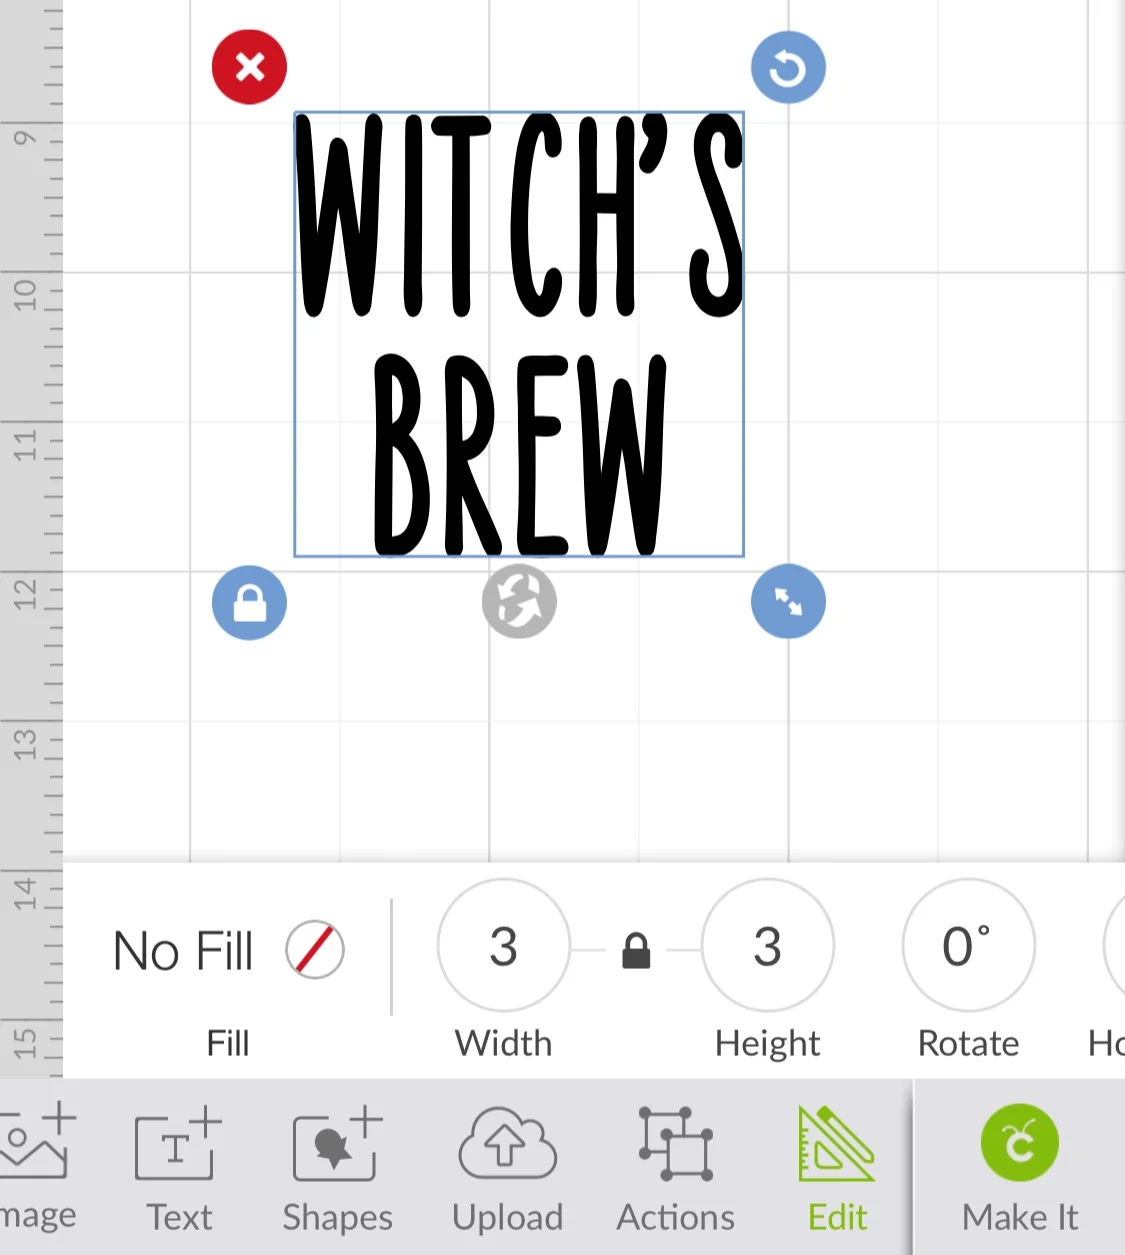
I chose a super simple font and saying, because I wanted to keep it easy for my first tutorial on applying a vinyl decal to a coffee mug. If you have Cricut Design Space you can use the font for free on there, but if not you can find a million different fonts on a number of font downloading websites. The font on Design Space is FOUR SEASONS HOME DECOR

PSSST if you need to make your own striped wood pumpkin that’s peeking on the side of this pic go here ——> DIY WOOD PUMPKIN

How to apply a Halloween vinyl decal to a coffee mug

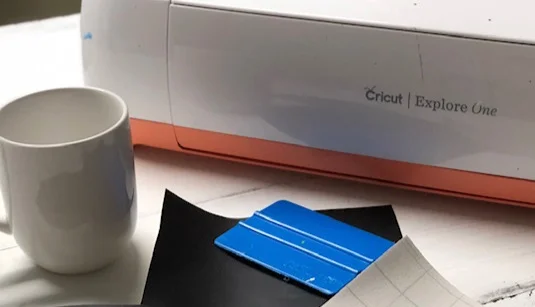
Here’s what you’ll need

Easy Halloween themed coffee mug vinyl decal using Cricut Design Space. How to make and apply your own custom decals using your Cricut and Oracal vinyl.

First make your design. I used FOUR SEASONS HOME DECOR font in CRICUT DESIGN SPACE. I made my decal 3”x3” so it would take up a good portion of the area I was applying it to. Before you send it to the mat be sure your design is SAVED and either WELDED or ATTACHED. This way your design cuts out like you see it on the screen instead of the letters jumbled around.

TIP: I usually always save my font name into the title so I can remember what I used

Easy Halloween themed coffee mug vinyl decal using Cricut Design Space. How to make and apply your own custom decals using your Cricut and Oracal vinyl.

I used a Oracal 631 vinyl in BLACK and in a MATTE FINISH. This grade of vinyl is for temporary or indoor use. I can not go in the dishwasher and I would not recommend using this grade of vinyl if you’re wanting it to last longer than one season. I plan to remove this after Halloween and apply a Christmas or wintery decal. If you do want a more resistant vinyl use ORACAL 651, that is outdoor grade and is what is recommended for a long lasting decal.

Easy Halloween themed coffee mug vinyl decal using Cricut Design Space. How to make and apply your own custom decals using your Cricut and Oracal vinyl.

Weed your design. I use an Xacto knife for this but you can use whatever weeding tool you are most comfortable with, even a sewing pin will get the job done.

Easy Halloween themed coffee mug vinyl decal using Cricut Design Space. How to make and apply your own custom decals using your Cricut and Oracal vinyl.

Before you can apply your decal you need to be sure that your mug is free and clean of any oil or residue. Use a lint free cloth and rubbing alcohol to clean the area you are applying the vinyl decal to. Do not use a cotton ball for this as it will totally leave behind fibers that will get stuck under your design and they will stick out and you will be able to see them ;)!

Easy Halloween themed coffee mug vinyl decal using Cricut Design Space. How to make and apply your own custom decals using your Cricut and Oracal vinyl.

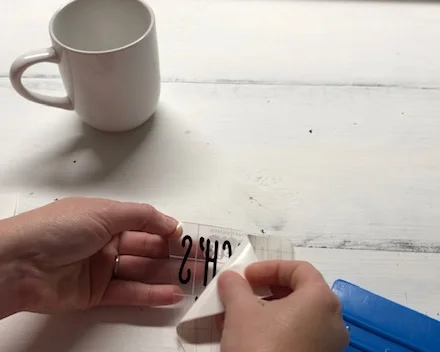
Apply your transfer tape to the front of your decal. Rub the front and back with your vinyl squeegee {if you don’t have one you can use a rewards card from the store} then slowly peel the paper backing away from your decal, leaving your decal attached to your transfer tape. The purpose of transfer tape is to easily transfer your design from the paper back it comes on to the base you are applying it to.

Easy Halloween themed coffee mug vinyl decal using Cricut Design Space. How to make and apply your own custom decals using your Cricut and Oracal vinyl.

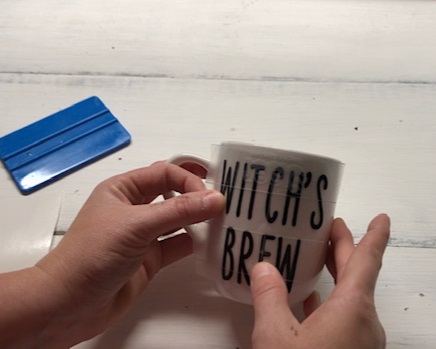
Hover your decal over your mug to decide where exactly you want it. If you need to apply tape to use as a guide that is ok. Do not press your decal down until you are positive that is where you want it. Then press down the middle and work your way out. Applying decals to curved surfaces isn’t always easy so go slow and give yourself grace if it is a crooked disaster the first time. It’s ok if you transfer tape doesn’t lay flat on your mug, you’ll see mine do this in the video, but the important thing is that the design does.

witch%27s+brew10.jpgEasy Halloween themed coffee mug vinyl decal using Cricut Design Space. How to make and apply your own custom decals using your Cricut and Oracal vinyl.

Starting in one corner slowly peel/roll the transfer tape away from the mug leaving the vinyl decal attached to the mug. If your letters want to come up with the transfer tape just push them back down with your finger and keep rolling the tape away. After you completely remove the transfer tape take your finger and rub along each letter to make sure that they are adhered and there aren’t any air bubbles.

Easy Halloween themed coffee mug vinyl decal using Cricut Design Space. How to make and apply your own custom decals using your Cricut and Oracal vinyl.

I know I will be loving this mug now. And the saying is pretty fitting for my grouchy days lol!

I hope you enjoyed this tutorial and it helps you create your own DIY vinyl decal. If you have any questions please ask away:)! I am honored to help you on your crafty journey.

Easy Halloween themed coffee mug vinyl decal using Cricut Design Space. How to make and apply your own custom decals using your Cricut and Oracal vinyl.

Check out the full video tutorial below. I would LOVE if you subscribed to my YouTube channel. It’s how I am able to reach even more people who want to learn more about the crafty world.

For more fall themed projects click the button below

DIY how to make 2x4 wood candy corn

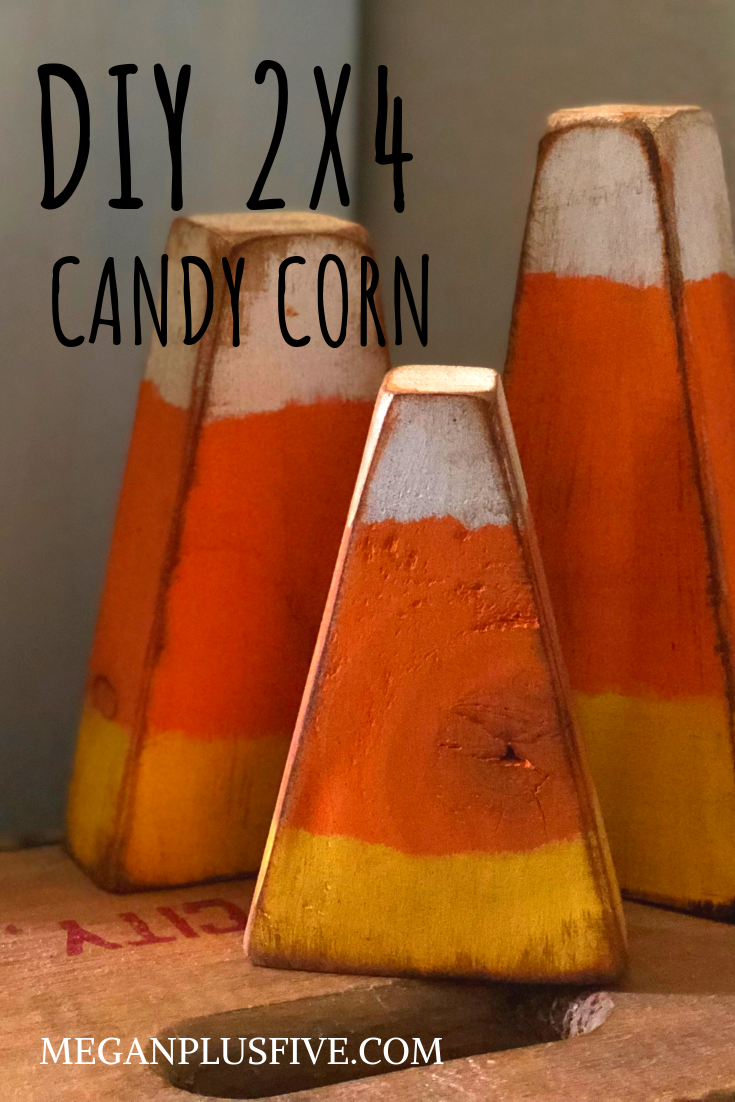
DIY 2x4 candy corn, how to make easy primitive fall decor

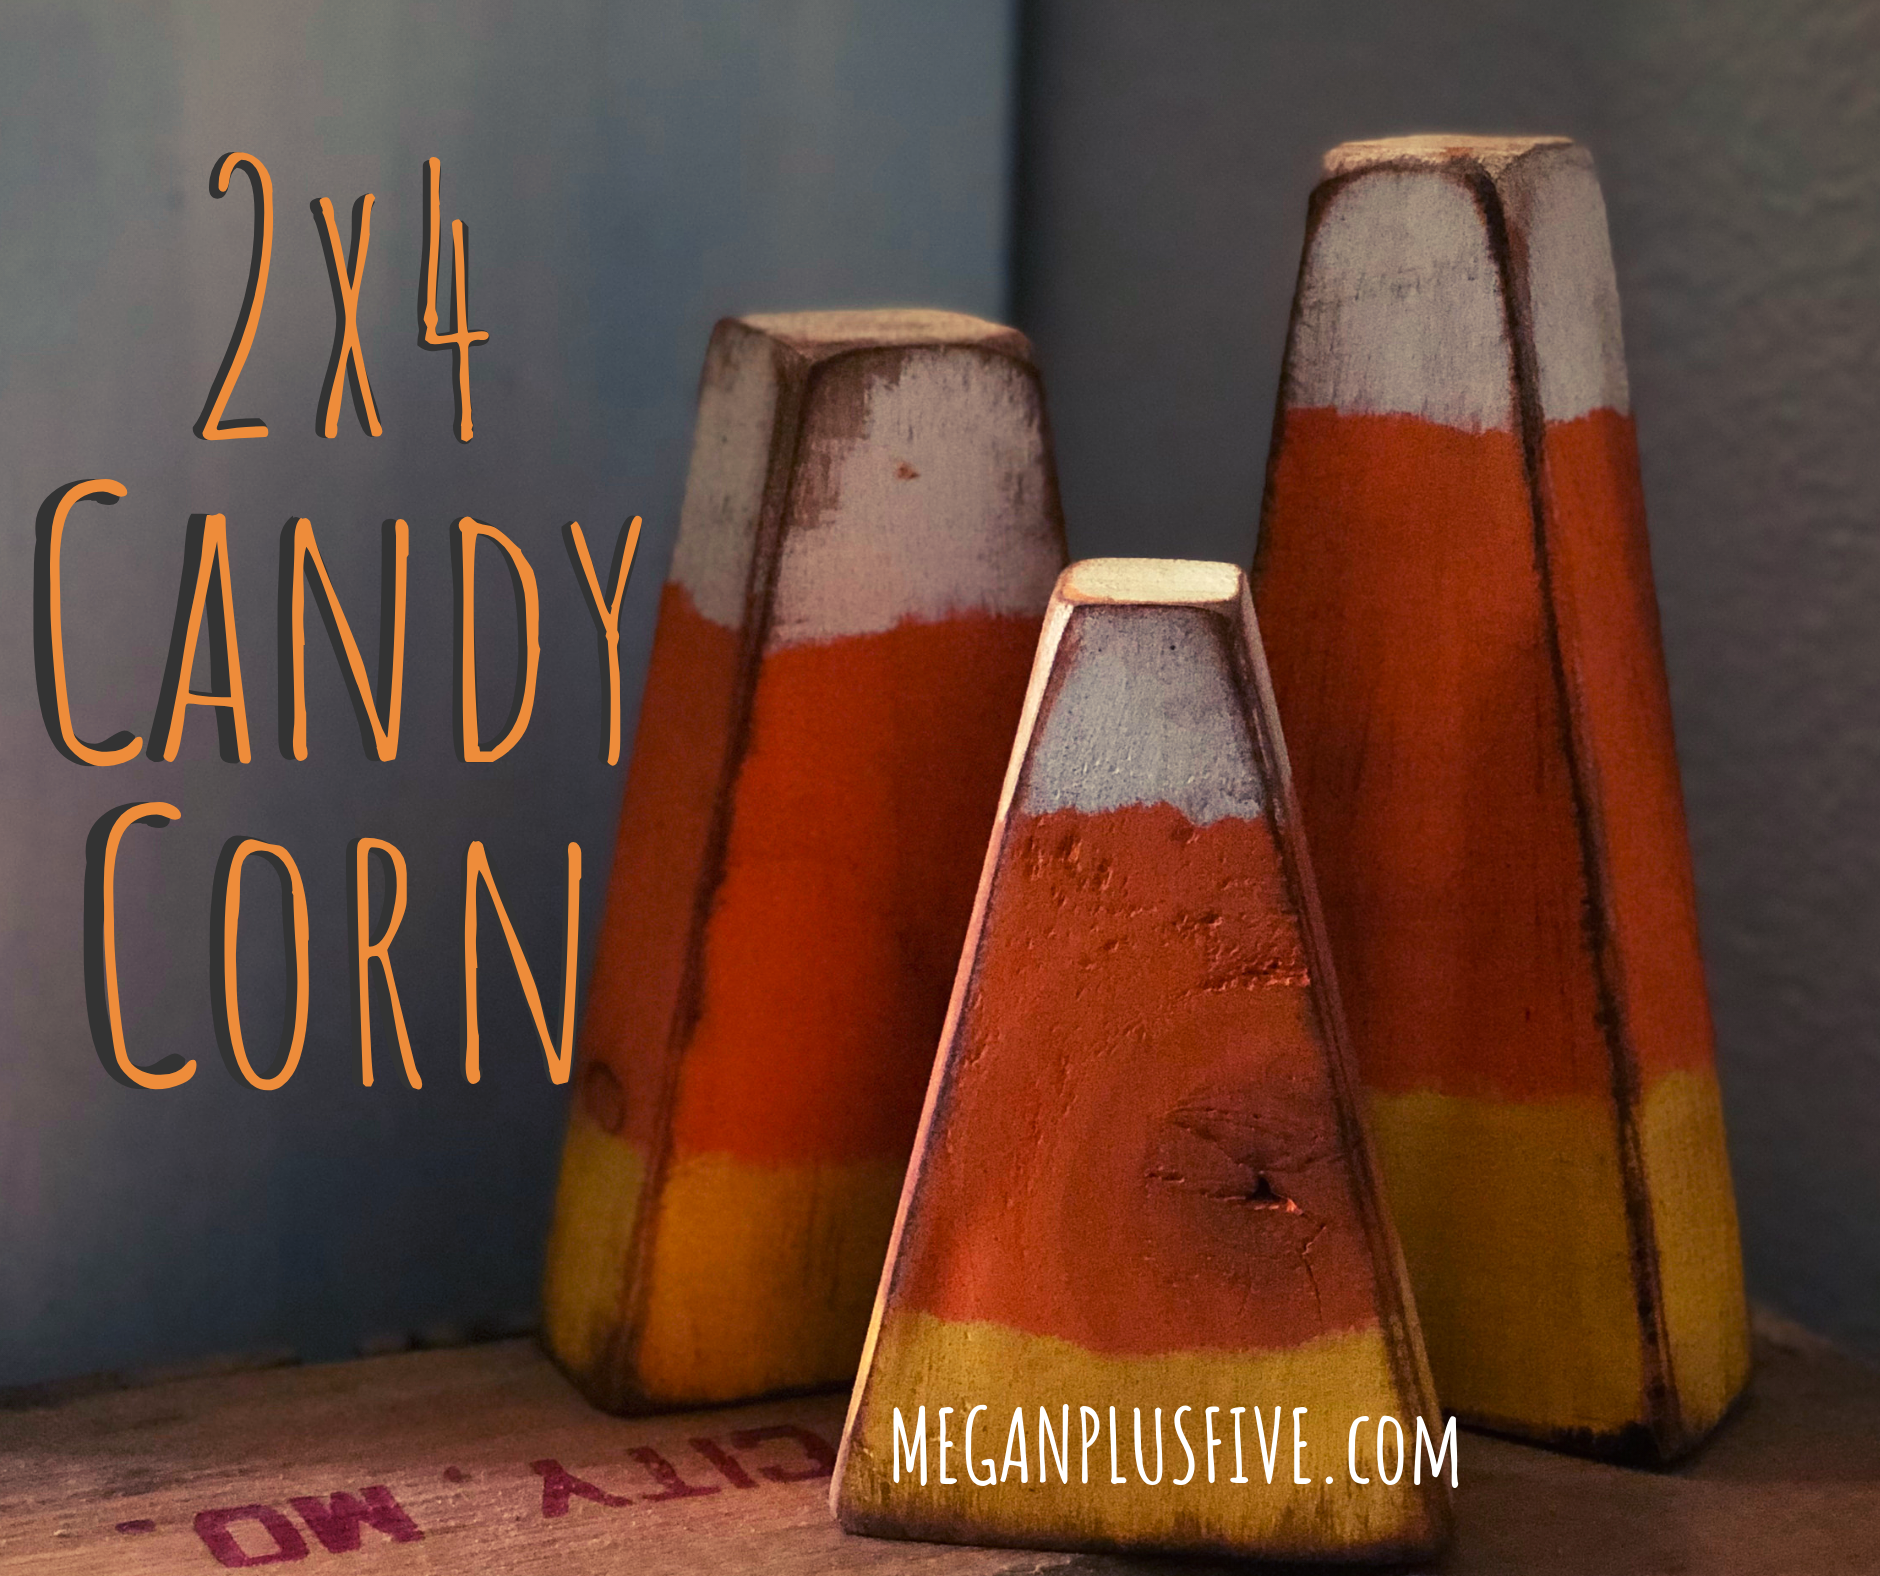
DIY EASY 2x4 primitive wood candy corn

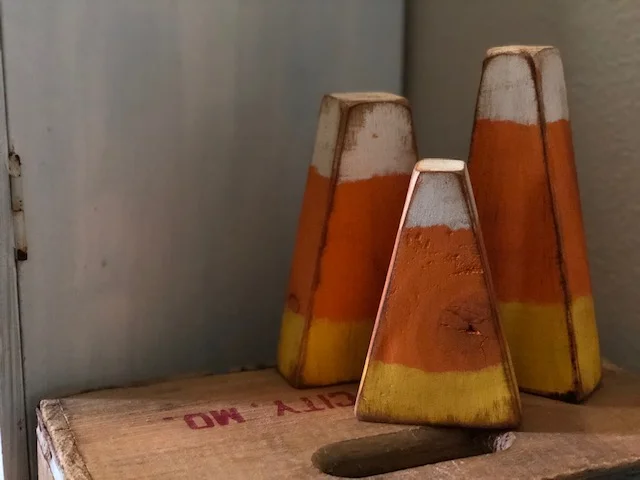
DIY primitive candy corn, aren’t they soooo cute?! The last couple of years have been a little busier than normal at our house and I haven’t been decorating for the holidays like I normally do. So this summer I decided I’m going to make time to get back into the festive decorating. And with that I need to make lots of new pieces to decorate the seasons with. Including these adorable wood candy corn. Check out this fun TRICK OR TREAT shelf sitter set I made a few weeks ago.

I’ve had these on my craft to do list for a looooong time and just hadn’t made time to make myself a set. And now I do! I LOVE them! They turned out even better than I thought they were going to! And I can keep them up for the entire fall season.

DIY easy primitive wood 2x4 candy corn for your fall decorations

How to make your own set of primitive candy corn from a 2x4

And it was super easy to DIY. I was a bit nervous cutting the angles but I think they turned out so great!

If you don’t have the space or tools to DIY this from start to finish you can get one of my easy CANDY CORN CRAFT KIT. Everything you need to make these at home is included in your own candy corn craft kit.

Don’t have all the tools needed to complete this craft? Snag one of my easy DIY craft kit from my Etsy shop. Click CANDY CORN CRAFT KIT to get yours. Want to send it as a gift? During checkout mark that you would like to send it as a gift, leave their address and a sweet note to them and we’ll take care of the rest.

Affiliate Disclosure. Some of the links on this website are affiliate links, which means that I may earn a small commission if you click on the link or make a purchase using the link. If you make a purchase you will not be charged anything additional.

If you want to make them from scratch here’s what you’ll need

First cut your pieces into 4”, 5.5”, & 7” lengths. The angles I cut: 4”= 15°, 5.5”= 10°, 7”=10°. After you cut them give them a quick sanding. You don’t want to sand them super smooth as this will take away so much of the wood’s natural character. Be sure to wipe away the sawdust with a lint free cloth after you sand your candy corn.

DIY candy corn decorations. How this mom made her own from a scrap 2x4

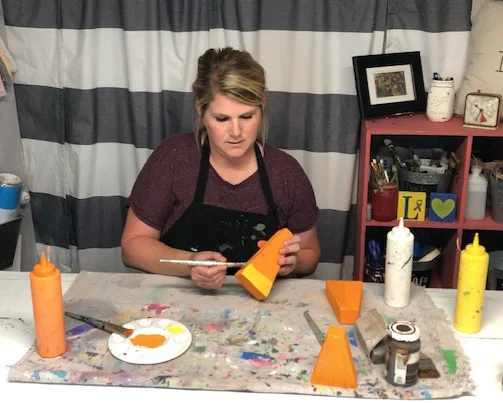
Now paint all three with a thin coat of orange paint.

DIY candy corn decorations. How this mom made her own from a scrap 2x4

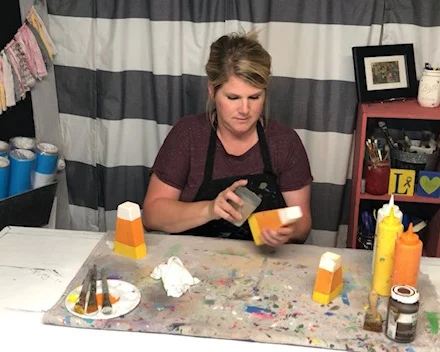
After the orange paint dries paint the bottoms yellow. You will likely need 2 coats for this. Let the first coat dry completely before applying the second coat.

DIY candy corn decorations. How this mom made her own from a scrap 2x4

Now, paint the tops white. Again, you'll need to paint two coats making sure your let the first coat dry completely before applying the second coat of white paint.

DIY candy corn decorations. How this mom made her own from a scrap 2x4

Once all of your candy corn are completely dry you can start distressing them with your 120 grit sand paper. Focus on the edges, corners, and lightly sand the fronts and sides. Then wipe the dust away with your lint free cloth.

DIY candy corn decorations. How this mom made her own from a scrap 2x4

Now you can apply your antiquing wax. A little bit of wax goes a VERY long way. Just like when sanding, you want to focus more on the edges and corners and give a light swipe with your chip brush on the fronts and sides. TIP: if you trim your chip brush down a little you will get a more stiff brush that you can better control your wax with.

DIY candy corn decorations. How this mom made her own from a scrap 2x4

If you don’t like the look of the antiquing wax you can opt for a clear wax. I LOVE antiquing wax and use it on TONS of my projects it highlights so much of the wood’s character. You can see the difference it makes. Check out my DIY American Flag tutorial where I use this same dark wax.

DIY candy corn decorations. How this mom made her own from a scrap 2x4

Now you’re ready to display them! I am soooo happy with the way these little 2x4 candy corns turned out {I think that’s the plural from lol}! I have a few more DIY fall projects yet to tackle before the season arrives so be sure to check back for more tutorials to make your own decorations for the upcoming season.

DIY candy corn decorations. How this mom made her own from a scrap 2x4

Catch the video tutorial below. If you LOVE it I would very much love if you would subscribe to my YouTube channel where I share all of my crafty video tutorials.


How to make paper flowers without a cutting machine

How to make paper flowers without a cutting machine

I absolutely LOVE my Cricut cutting machine and use it almost daily but there are certain projects when it’s much easier to hand cut things myself. Being a buys momma of 4 I don’t always have time to wait on technology lol. Because we all know when we are rushed for getting a project done something is going to go wrong, like the app needing updated or the computer taking forever to start…that kind of stuff always happens, never fails.

I appreciate the simplicity of making hand cut flowers. There’s no need for technology. Each flower turns out totally and 100% unique. And it’s just plain fun! These small flowers are super simple and make a great starting point of learning how to make flowers by hand. If you can cut a circle and hold a paint brush then you don’t have any worries!

Affiliate Disclosure. Some of the links on this website are affiliate links, which means that I may earn a small commission if you click on the link or make a purchase using the link. If you make a purchase you will not be charged anything additional.

I had everything I needed on hand to make this but I’ve included the links where you can get some of these supplies. Yes, those are affiliate links but not to worry, you will not be charged anything extra if you make a purchase through them. They are just a way for this stay at home momma to help with the daily bills of raising our four little girls :)!

How to make hand cut paper flowers, no cutting machine required

How to make paper flowers without a cutting machine

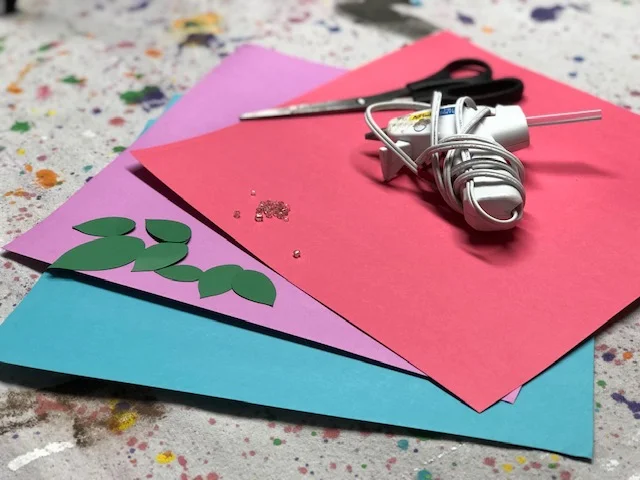
Here’s what you’ll need

  • scissors

  • cardstock

  • a small paint brush, pencil, or pen {you won’t be painting or writing with this}

  • small beads

  • LOW TEMP GLUE GUN

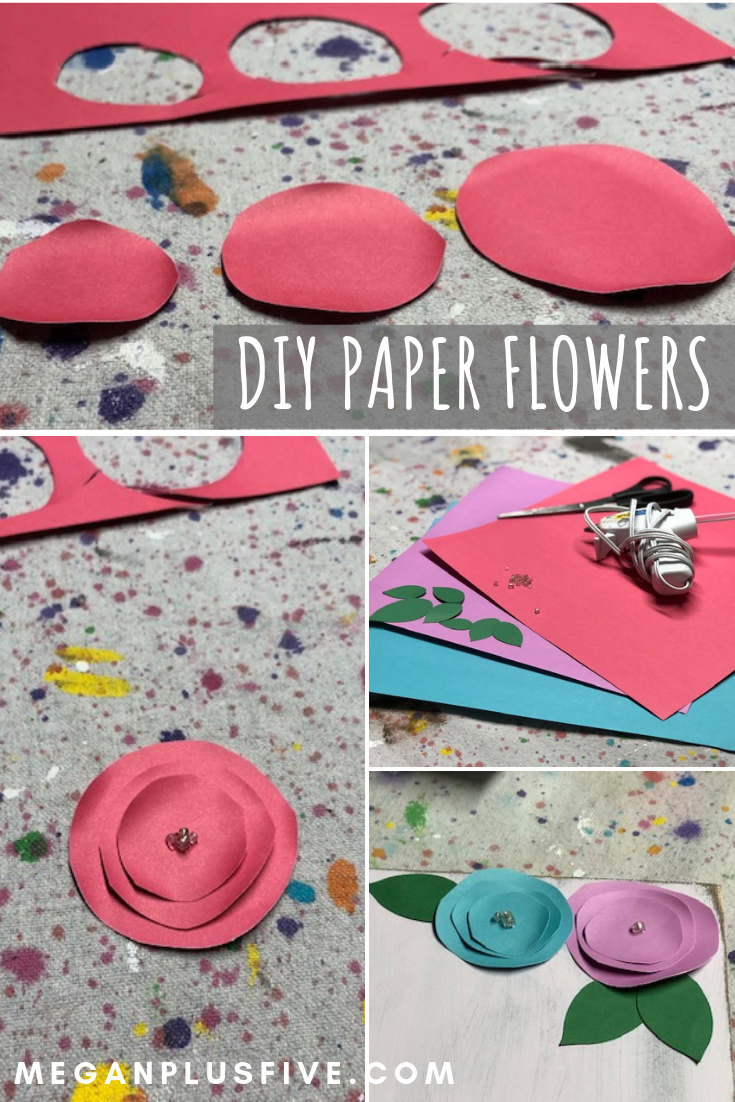
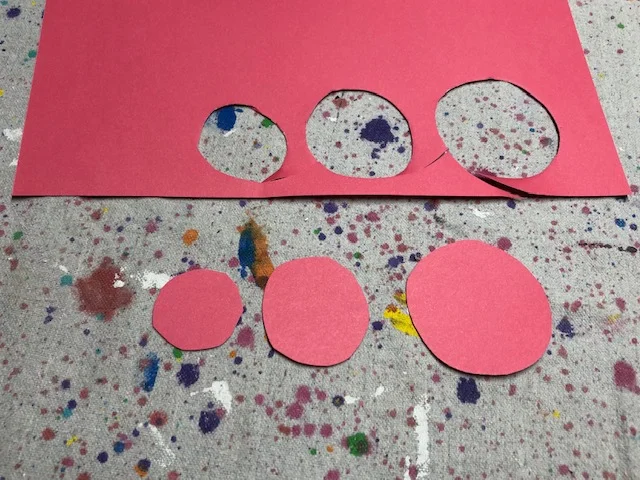
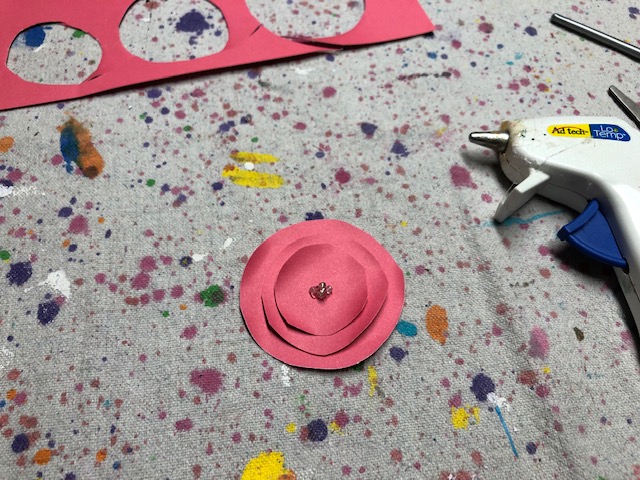
Start by cutting out three circles that are just a tiny bit smaller as the last one. I always cut the biggest one first then work my way to the smallest. I eyeball how big of a diameter I need for the space I’m filling. They will almost look like you are cutting out circles to build a paper snowman.

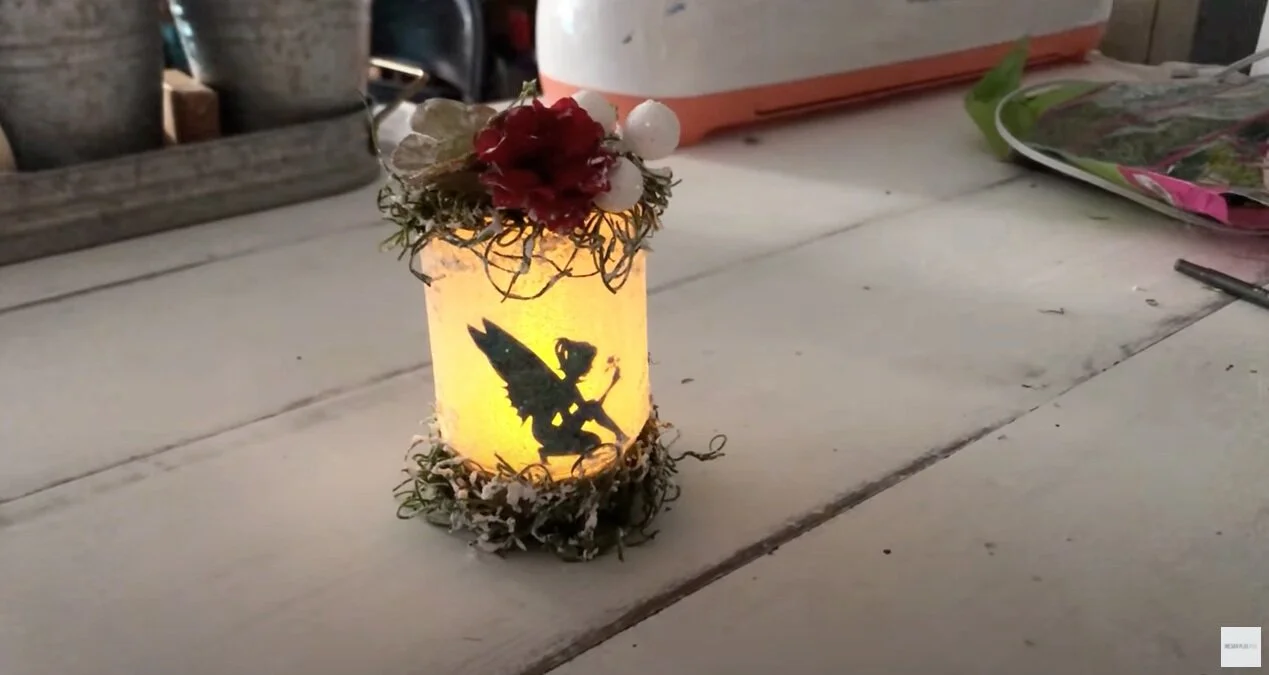
I chose cardstock to make my flowers out of but you can truly use any kind of paper you’d like. If you choose cardstock there are a few things you should know. One, it’s fancy a fancy name for thick paper {or at least that’s what I think of it}. Two, it comes in a wide variety of colors, thickness, prints, and textures. Three, it can be a little pricey but if you catch it on sale at Michael’s or any other craft store you can stock up at a really low price. This is what I do. Anytime I find cardstock on sale I grab what I can afford because I make so many different projects using cardstock. Like this DIY LIGHT UP FAIRY JAR , or this DIY VALENTINE’S DAY PALLET SIGN, or this adorable KIDS CATERPILLAR CRAFT. I used cardstock I had on hand to create all of those fun projects. And since I’m an impulse maker lol, I hardly ever plan my projects out ahead of time so having things on hand is just apart of my create process;)!

How to make paper flowers without a cutting machine

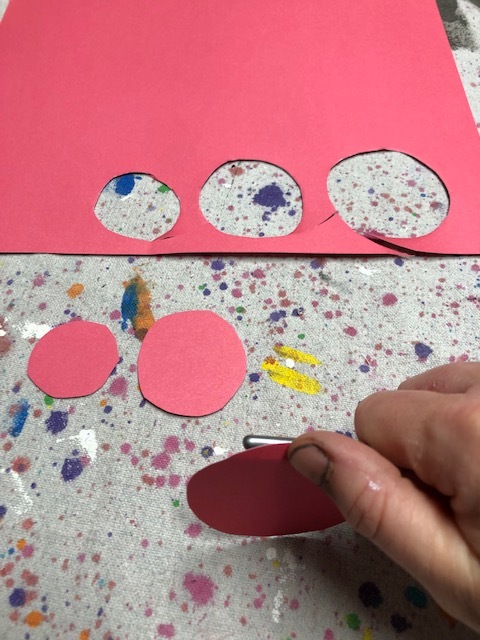
Taking your paintbrush, pen, or pencil and roll just the edges of each circle. I used a paint brush but a pen or pencil will work just fine too. don’t roll them too much as they’ll end up too curled under. If you don’t have any of these on hand you can always just use your finger to curl up the edges of your paper pedals.

How to make paper flowers without a cutting machine

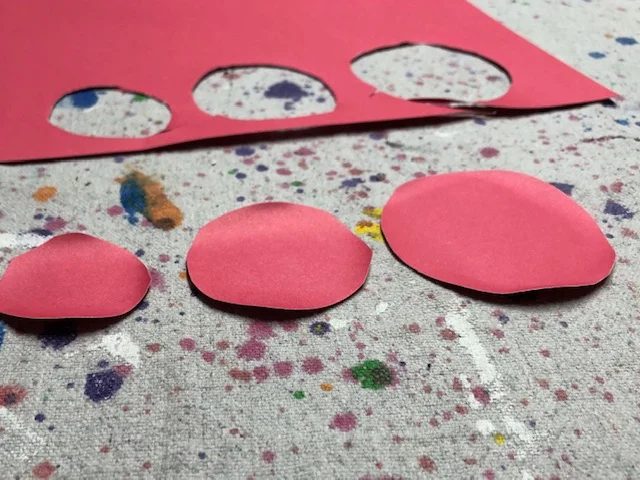
This is what your circles should look like once you’ve rolled the edges. You can see they are starting to look like paper flowers already! I love you uneven the circles are, it makes them so unique!

How to make paper flowers without a cutting machine

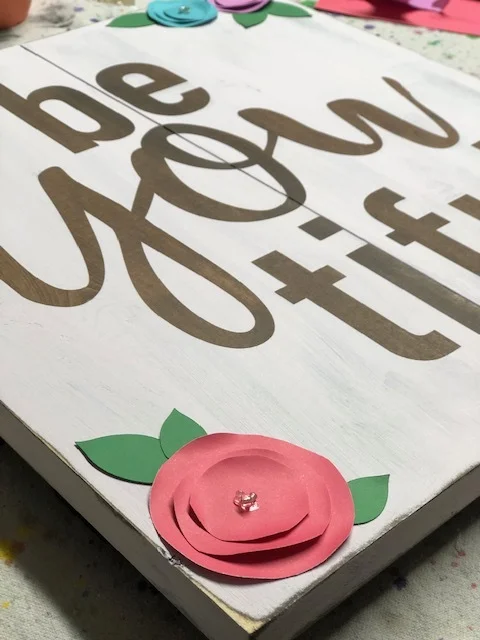
Then glue the circles on top of one another, starting with the biggest circle as the base, the medium circle in the middle and the smallest circle on top. Just a small dab of hot glue from a low temp glue gun will work great. Add another dab of glue to top of the smallest circle and add some beads.

How to make paper flowers without a cutting machine

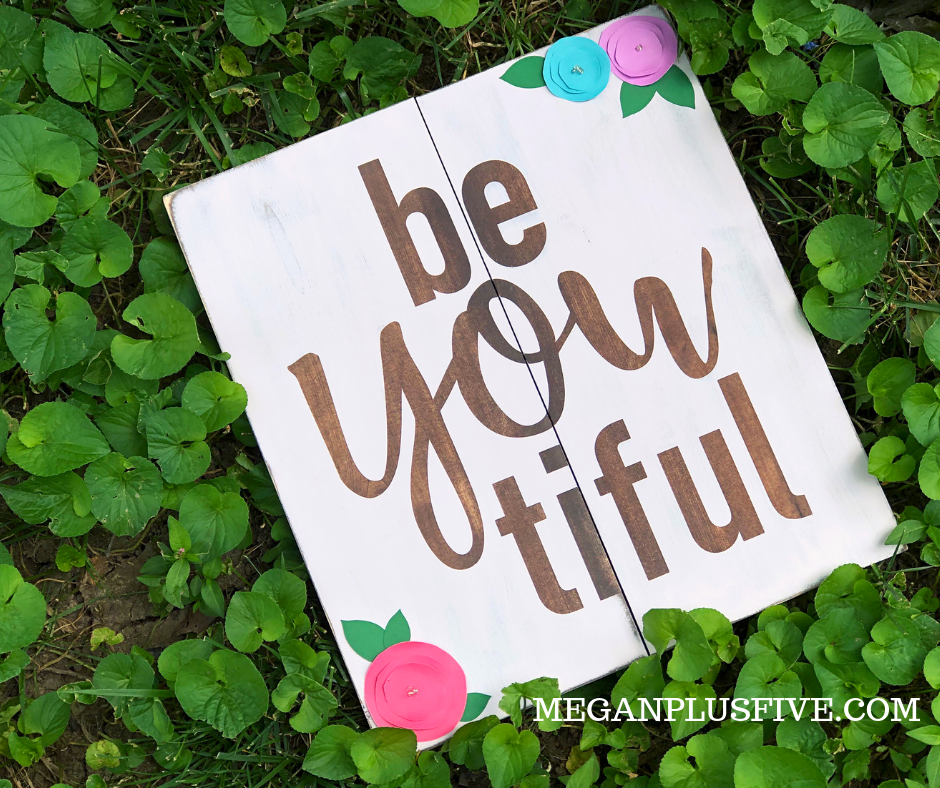
And your hand cut paper flowers are done. So cute right?!!! I added a few green leaves that I had already cut form a prior project using my Cricut cutting machine.

How to make paper flowers without a cutting machine.

You can add these hand cut flowers to almost anything. I used them for this beYOUtiful sign that you can purchase in my Etsy shop.

How to make paper flowers without a cutting machine

Be sure to leave your pictures below of the gorgeous hand cut paper flowers you make using this tutorial.


Glass etching the easy way

Learn how to etch glass the easy way

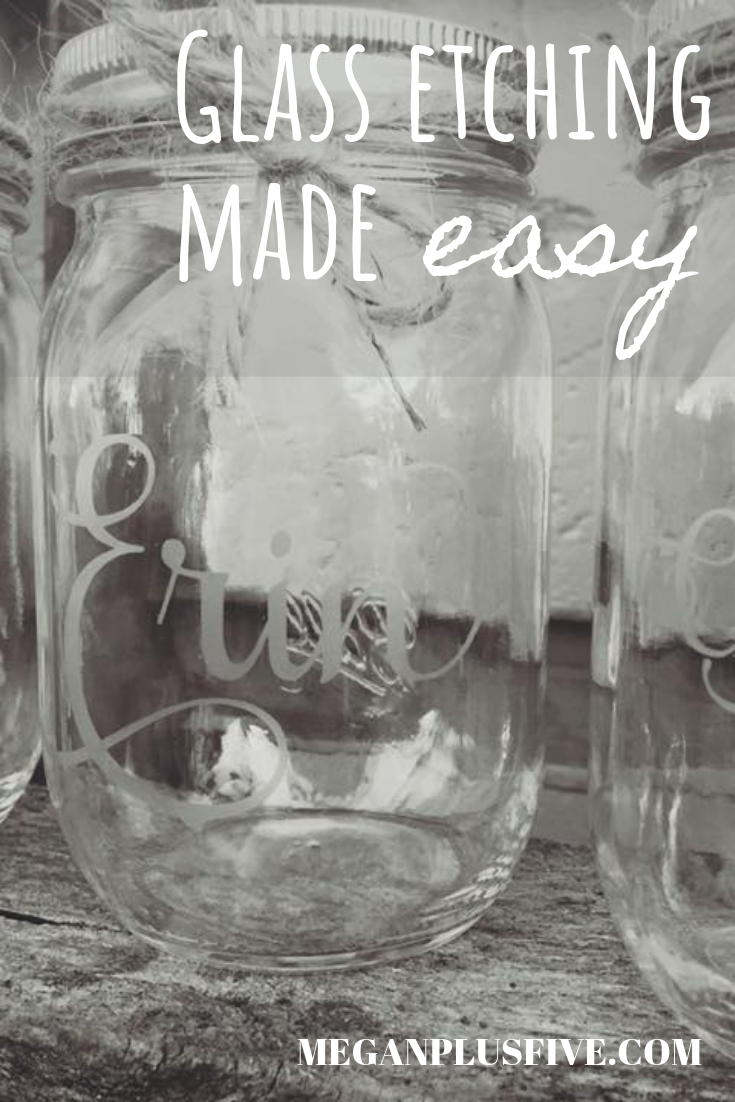
One of my most favorite gifts my husband and I received when we got married were a set of personalized glasses. Someone, whom I had never met because she was an old friend of my father in law’s, took the time to make such a meaningful gift for us. I thought she must have some fancy equipment to make such a fancy gift but I couldn’t have been more wrong.

A couple years we were married I got my very first Cricut. The ones that exclusively used the cartridges to cut {if they did hook up to a computer I had no idea because that was WELL before our computer owning days lol}. Those were the days…not really I’m super thankful for the ease of use the current Cricut system offers. Anyway over the years I have experimented like a mad women with all the things I can make using my wonderful cutting machine. And I was happy to learn of an amazing product I could buy that would chemically etch glass and do any design that I cut a stencil for! Heck yes!

I tried it out and I was amazed by it’s powers lol! It’s called AMOR ETCH. It’s a little pricey BUT it will last you forever. I have etched so many things since and I have to say they are one of my most favorite personalized gifts to make. A few things I’ve made with the etching cream are, wine glasses, mason jars, whisky glasses, glass picture frames, vases and I’m sure way more but I just can’t recall them all.


Be sure to follow the manufacturer’s instructions and always remember this is a chemical so always put safety first.

Here’s what you’ll need

Check out the Facebook live I did showing you step by step how to create your own glass etchings at home.


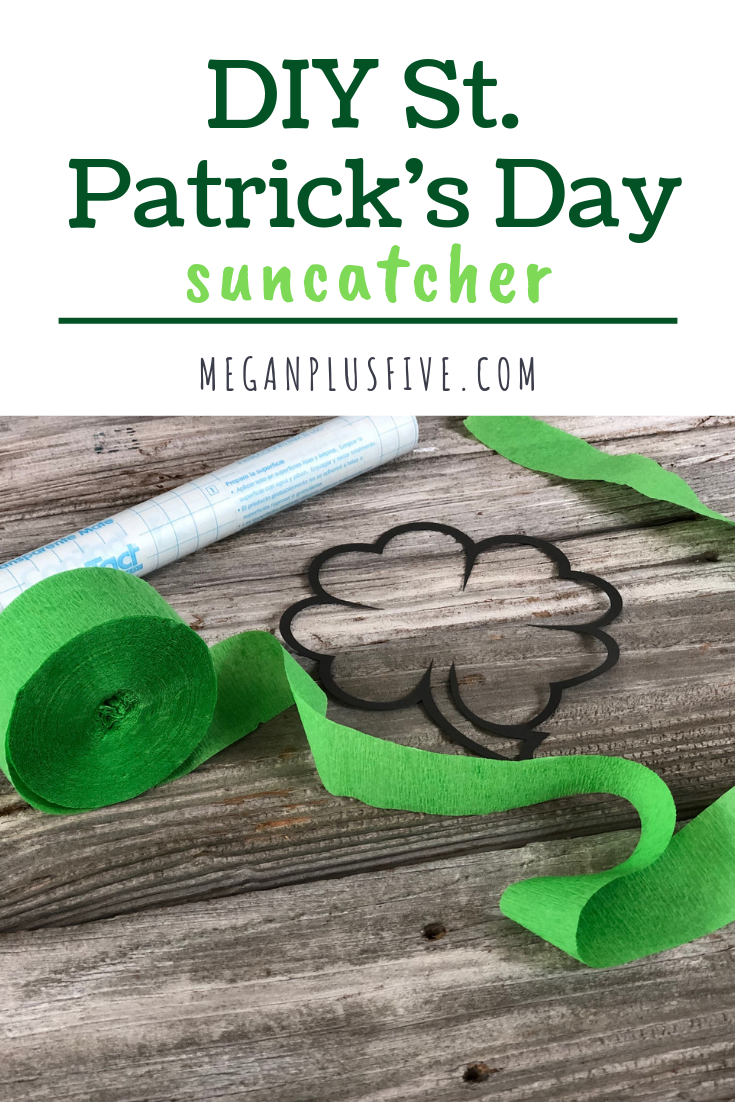
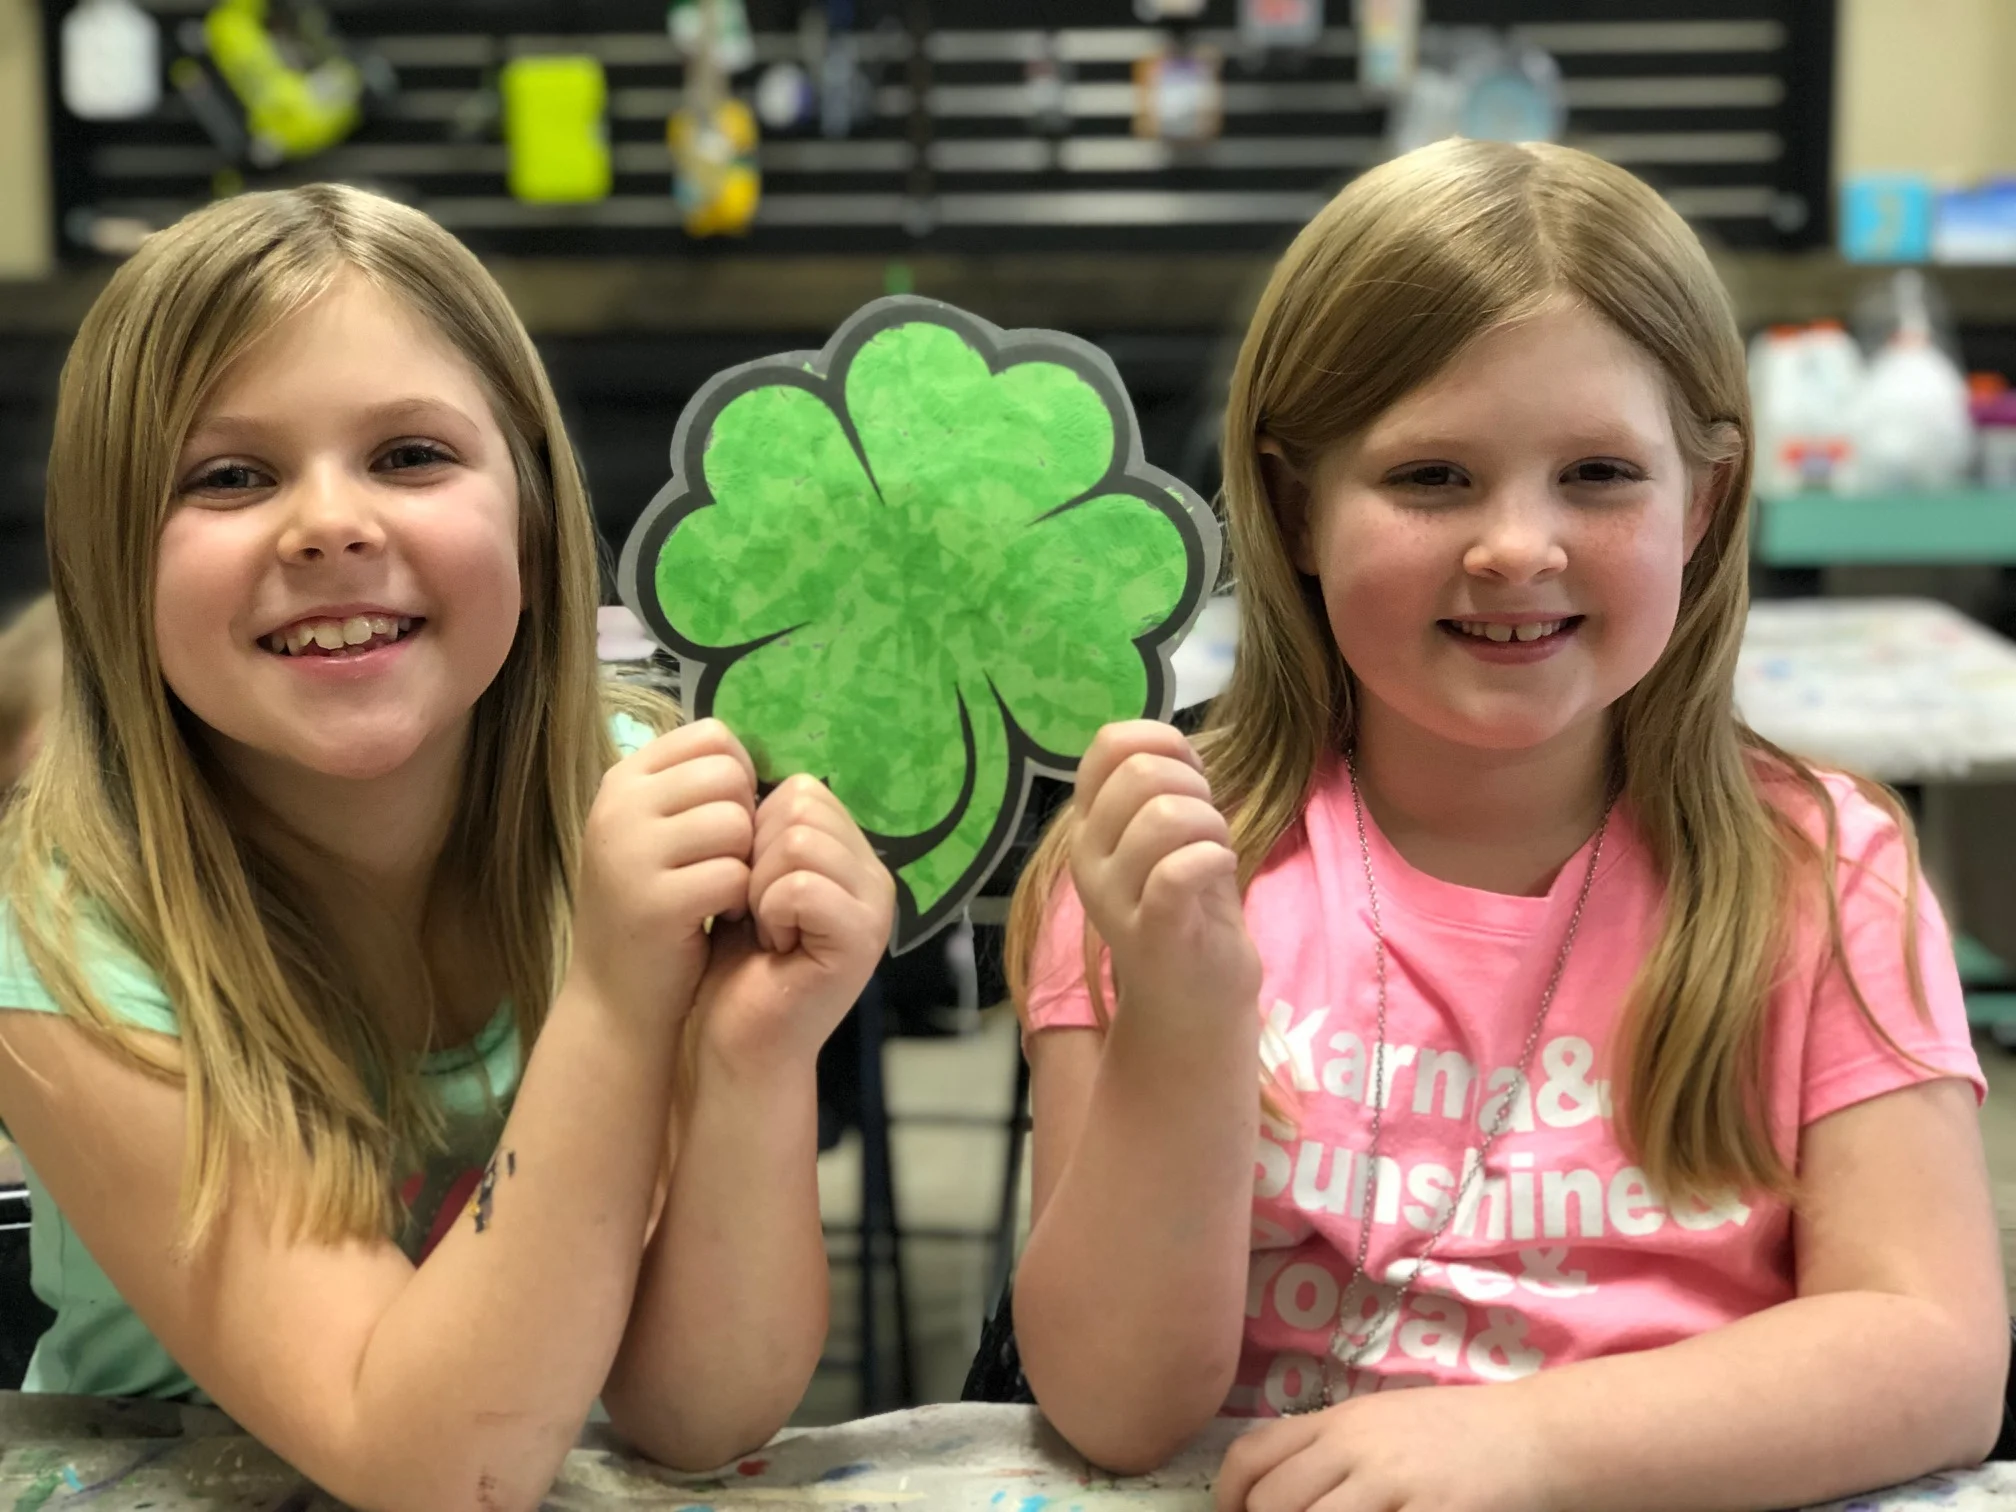
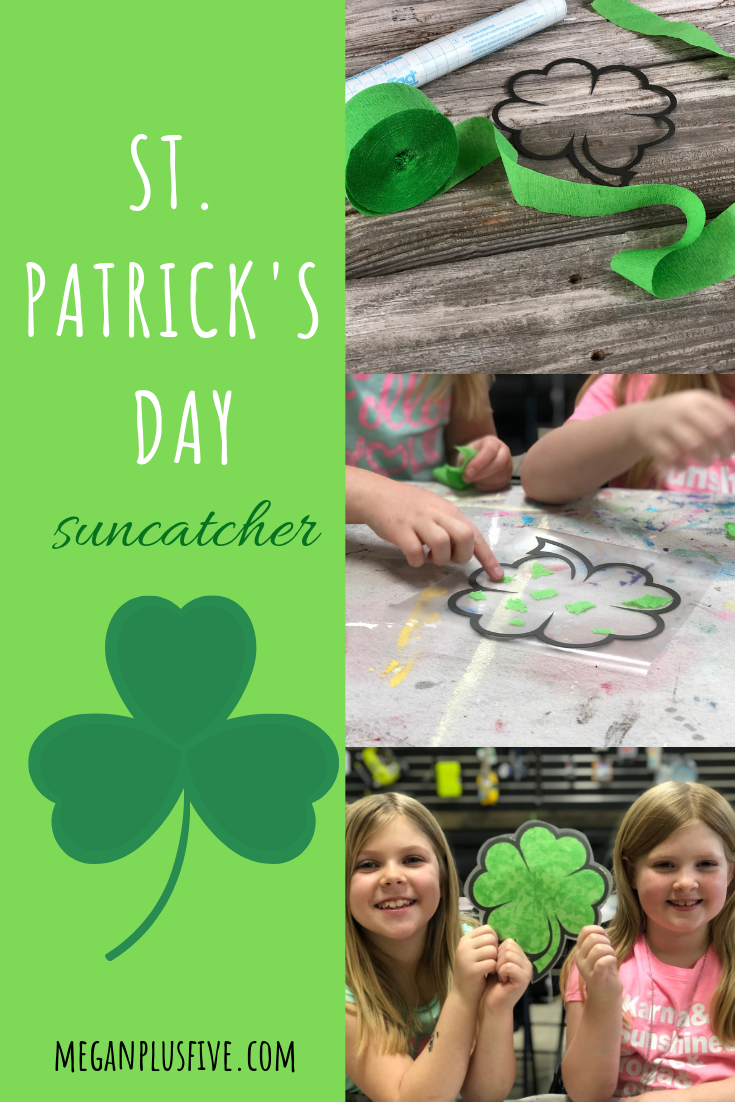
DIY St. Patrick's Day suncatcher, easy tutorial to make your own with your kiddos

DIY St. Patrick's Day suncatcher, easy tutorial to make your own with your kiddos

St. Patrick’s Day isn’t a super big deal around our house but we do enjoy the holiday. We always wear green and we try to make tasty green foods {that doesn’t always happen}. But this year we did get around to making some fun green crafts for the occasion!

Each week we host a toddler day in our CRAFT STUDIO called TOTS IN THE SHOP and I needed to plan for the events for the upcoming months. I try to coincide our weeks with the holidays when they come up and St. Patrick’s Day is coming up so I scoured Pinterest to see what I could find. I came across this adorable suncatcher by Julie from Director Jewels and I knew we had to make one too! I did change up ours a bit to make it easier/simpler for the tots to make.

Before we host our workshops our four daughters and I create mockups for them. I have to say our girls LOVED making this one. I was actually pretty surprised though. I thought for sure the older girls would be too “grown up” for this one but they loved making it more than our three year old. Woohoo!

This craft was so super easy to make too. I didn’t really do much except show them how to do it and they took it from there.

DIY St. Patrick's Day suncatcher, easy tutorial to make your own with your kiddos

Here’s what you’ll need

  • contact paper

  • green crepe paper

  • a shamrock with a hollow middle {I cut mine out using my cricut}

  • scissors

I used my trusty Cricut to cut out my shamrock. I found the image in design space and adjusted it to be approx. 7” wide. You can always print your own and use scissors to cut out the middle. Julie has a printable linked on her website if you click her link above.

Then you need to measure out your contact paper. You want it to be larger than your shamrock.

DIY St. Patrick's Day suncatcher, easy tutorial to make your own with your kiddos

You’ll need to cut TWO pieces of contact paper that are larger than your shamrock.

DIY St. Patrick's Day suncatcher, easy tutorial to make your own with your kiddos

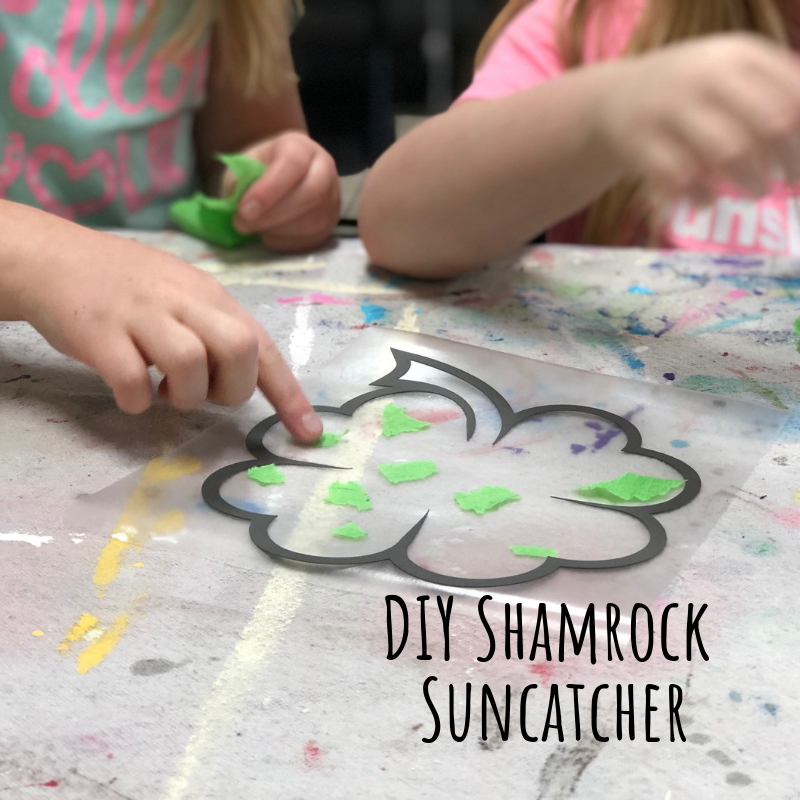
Remove the paper backing from your contact paper and place your shamrock in the middle. Then start tearing pieces of the crepe paper off and sticking them inside of the shamrock.

DIY St. Patrick's Day suncatcher, easy tutorial to make your own with your kiddos

Once your shamrock is covered remove the paper from the second piece of contact paper and lay it sticky side down onto the shamrock, essentially you are making a shamrock sandwich with the contact paper. Then trim off the extra leaving a 1/4 of and inch of contact paper all the way around the paper shamrock.

DIY St. Patrick's Day suncatcher, easy tutorial to make your own with your kiddos

And you’re done! SO EASY!!

St. Patrick's Day suncatcher, easy how to make this fun DIY

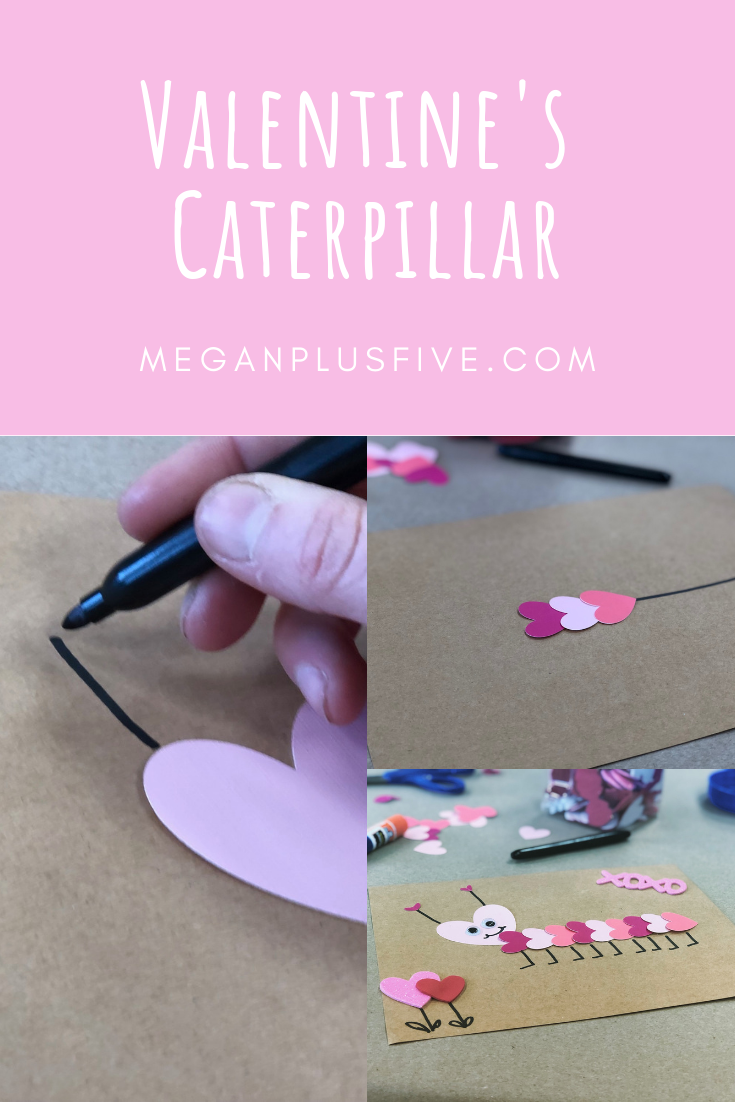
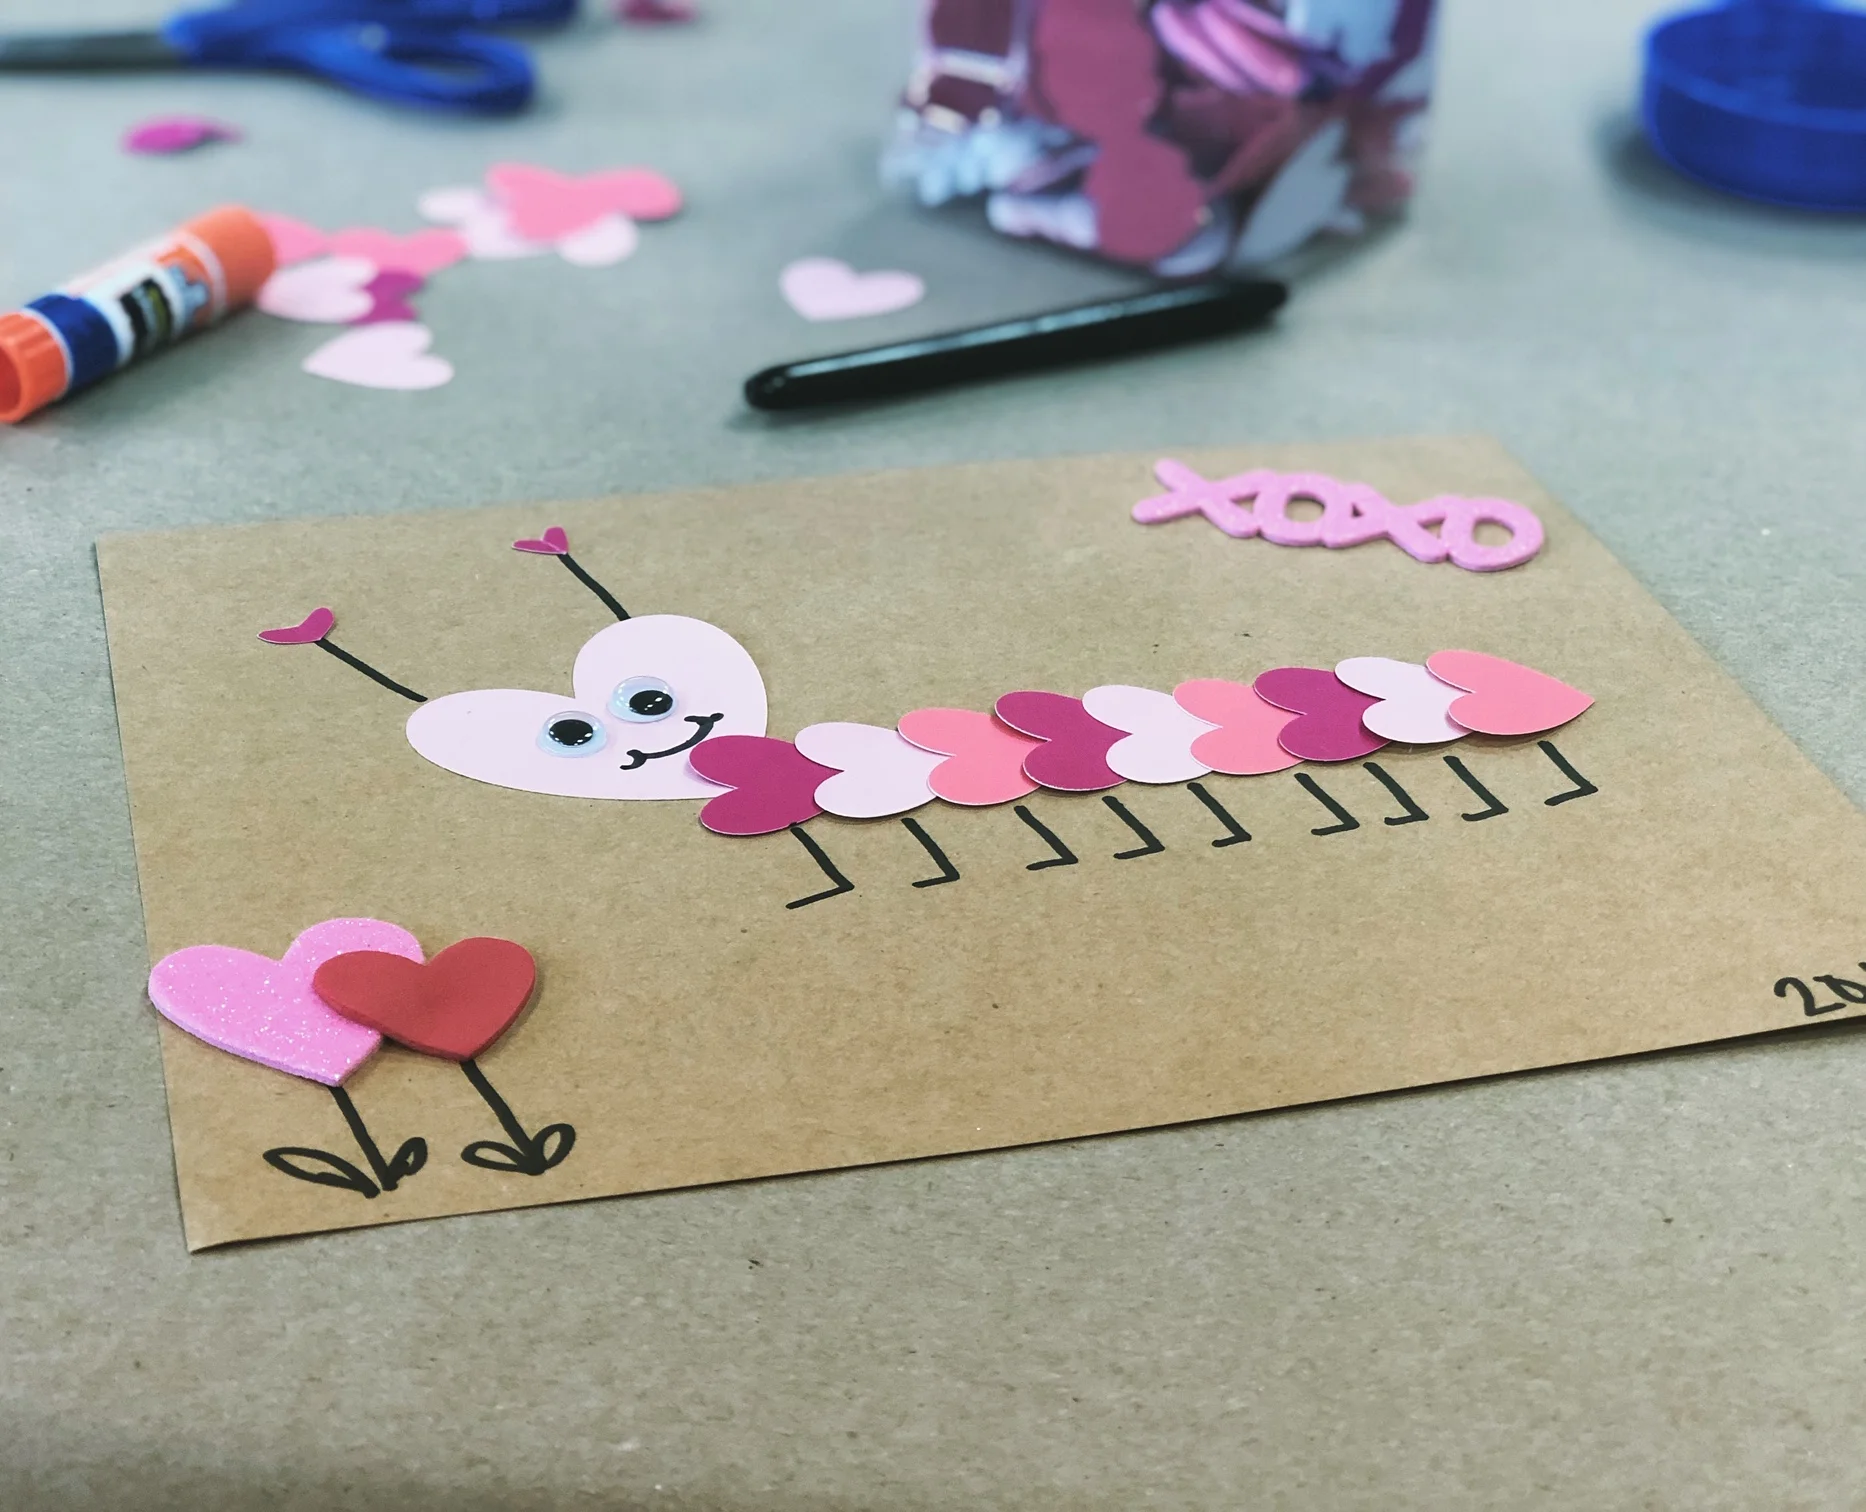
DIY Valentine's Caterpillar, easy simple step by step tutorial

DIY Valentine's Caterpillar, easy simple step by step tutorial

Quick and simple crafts…I love them! Especially when they are quick crafts for the kiddos. Let’s face it their attention span isn’t always the longest and usually half way through the craft they’ve already found something shiny to play with on the other side of the room.

This project won’t take up a ton of their time and will most definitely be a sweet keepsake for you for years to come.

Some links may contain affiliate content meaning if you click the link and make a purchase I will get a small commission from this, at no extra cost to you. Please know that I would never endorse anything I don’t believe in or use in my own life.

DIY Valentine's Caterpillar, easy simple step by step tutorial

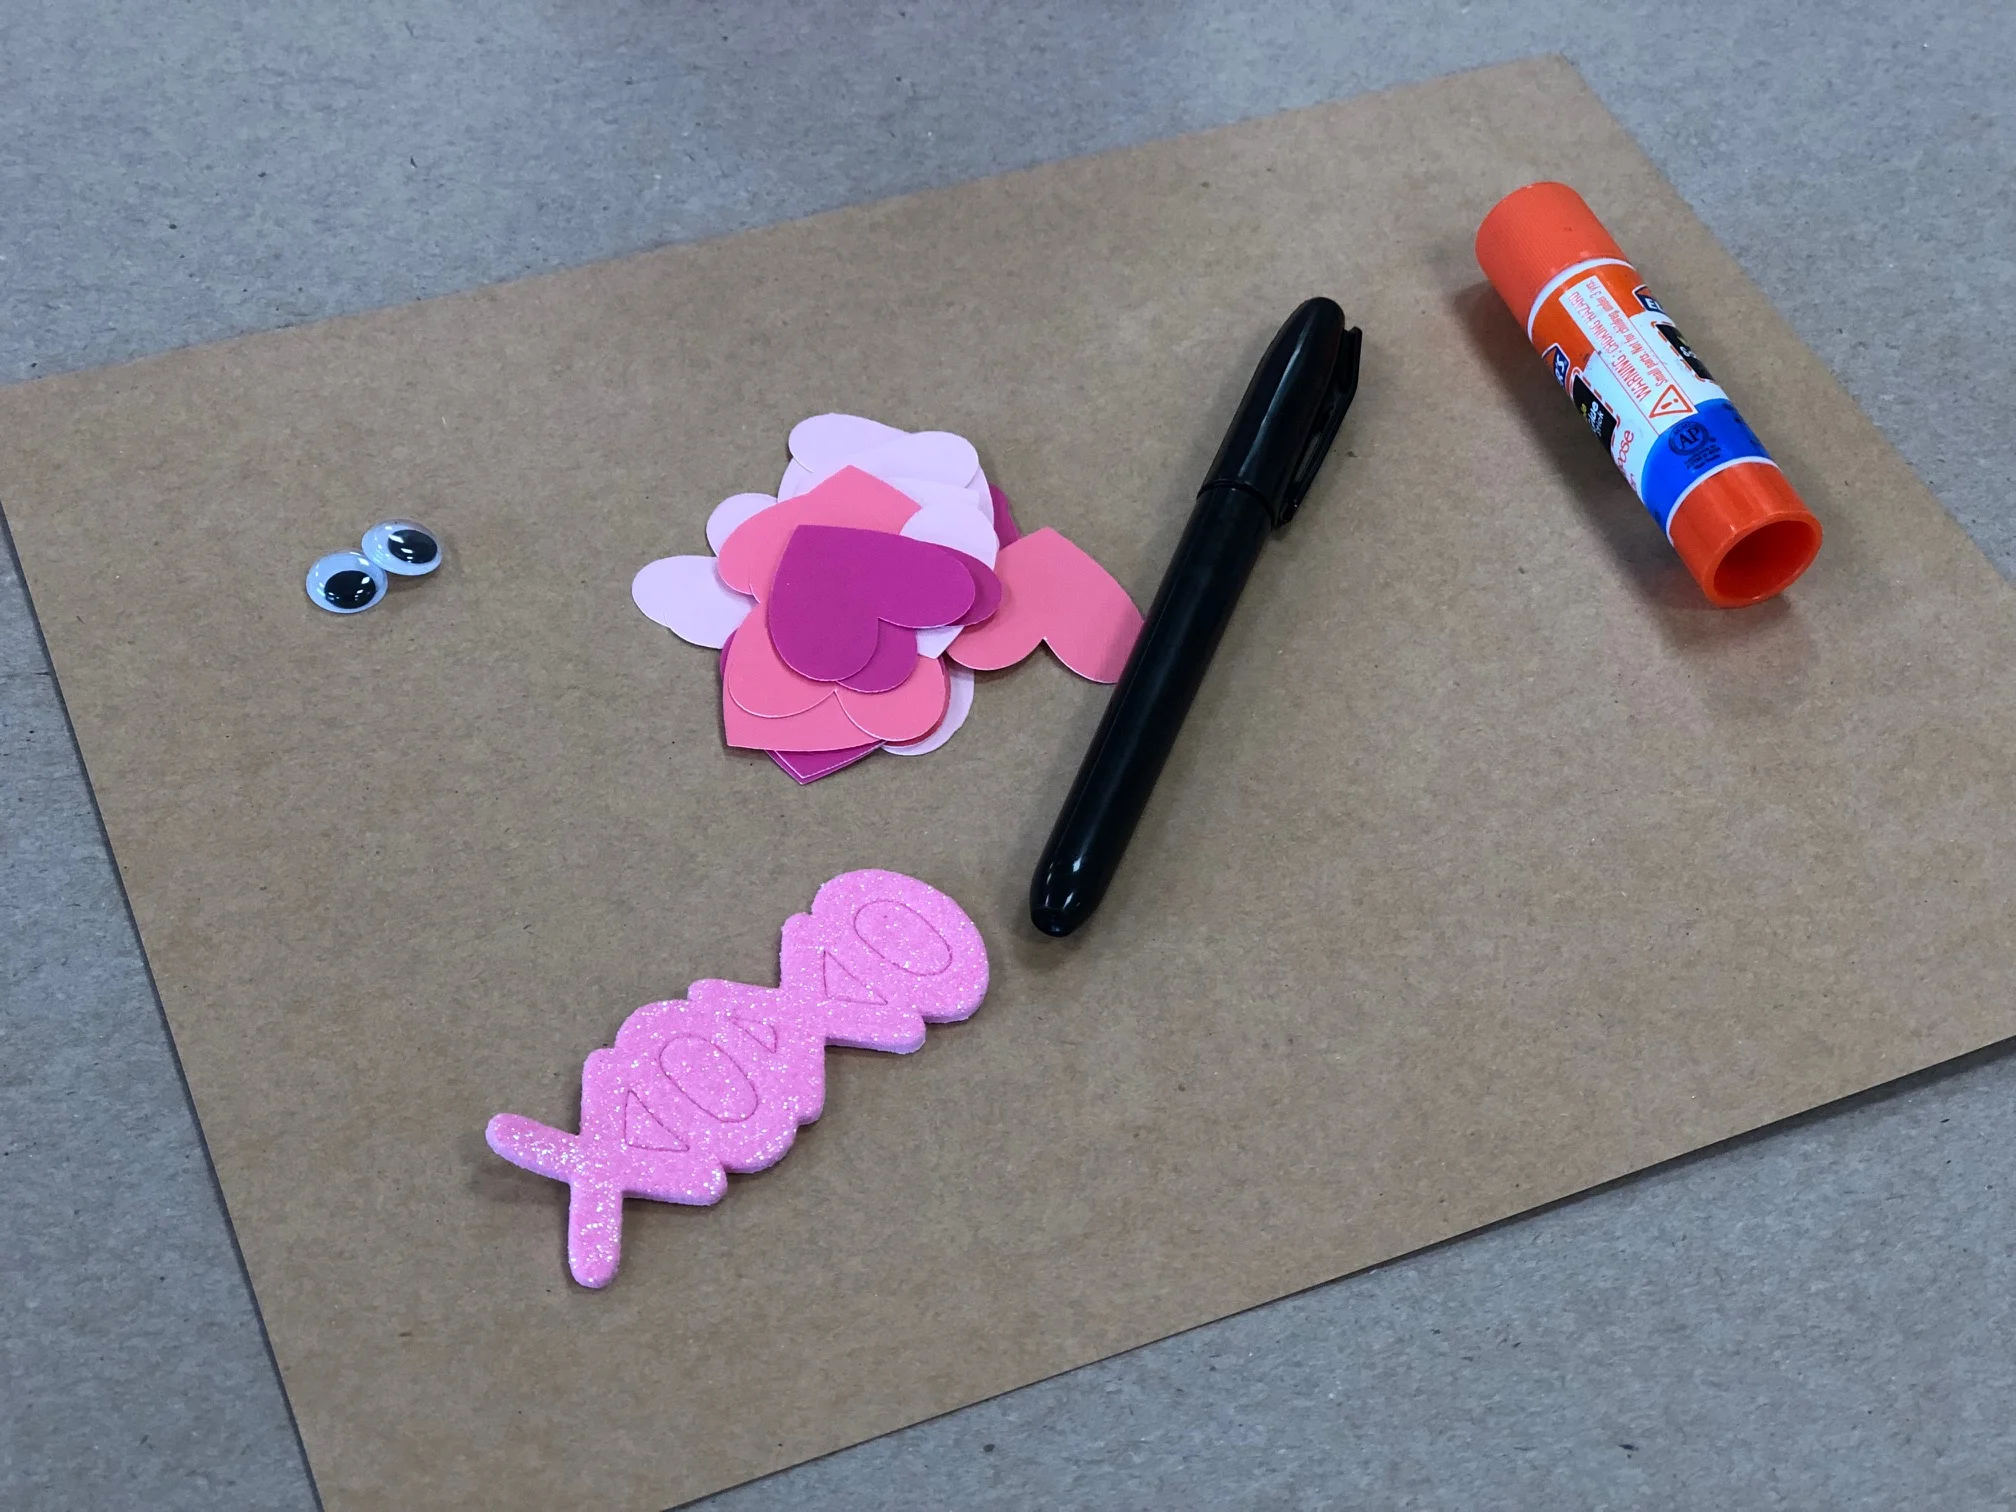
Here’s what you’ll need

  • piece of paper, we used cardstock

  • black marker

  • googly eyes

  • glue stick

  • valentine themed stickers

  • heart cut outs,. I used my Cricut to make ours but you can make your own by hand

DIY Valentine's Caterpillar, easy simple step by step tutorial

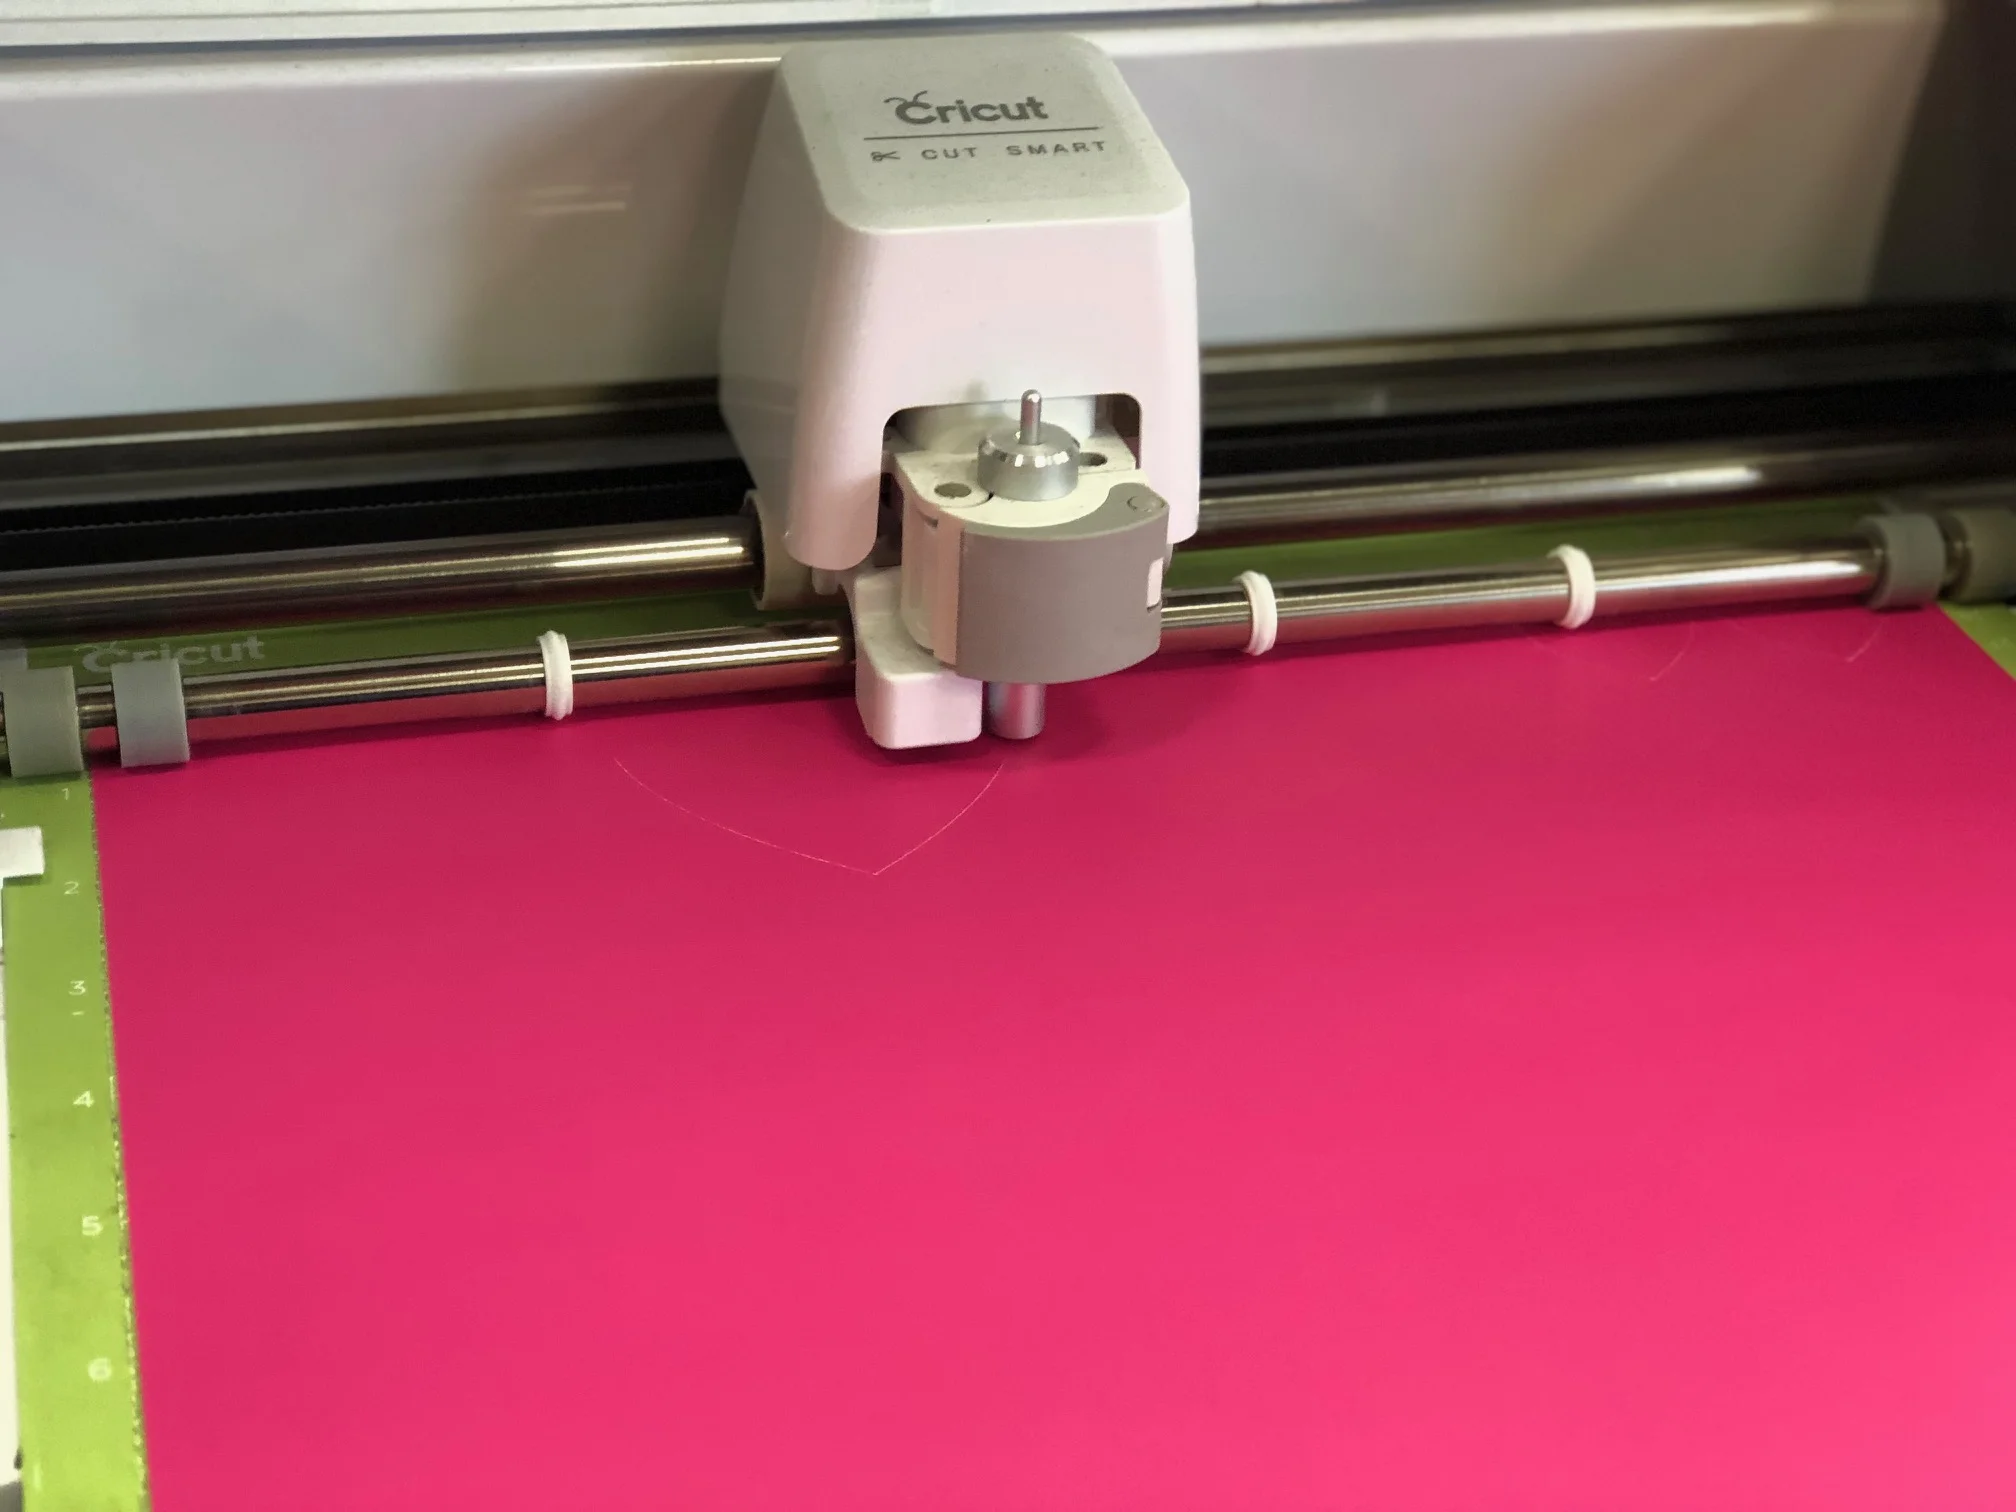
Start by cutting out your hearts. I used my Cricut Explore to do this task. I absolutely LOVE my Cricut machines, and have been using one for MANY years.

DIY Valentine's Caterpillar, easy simple step by step tutorial

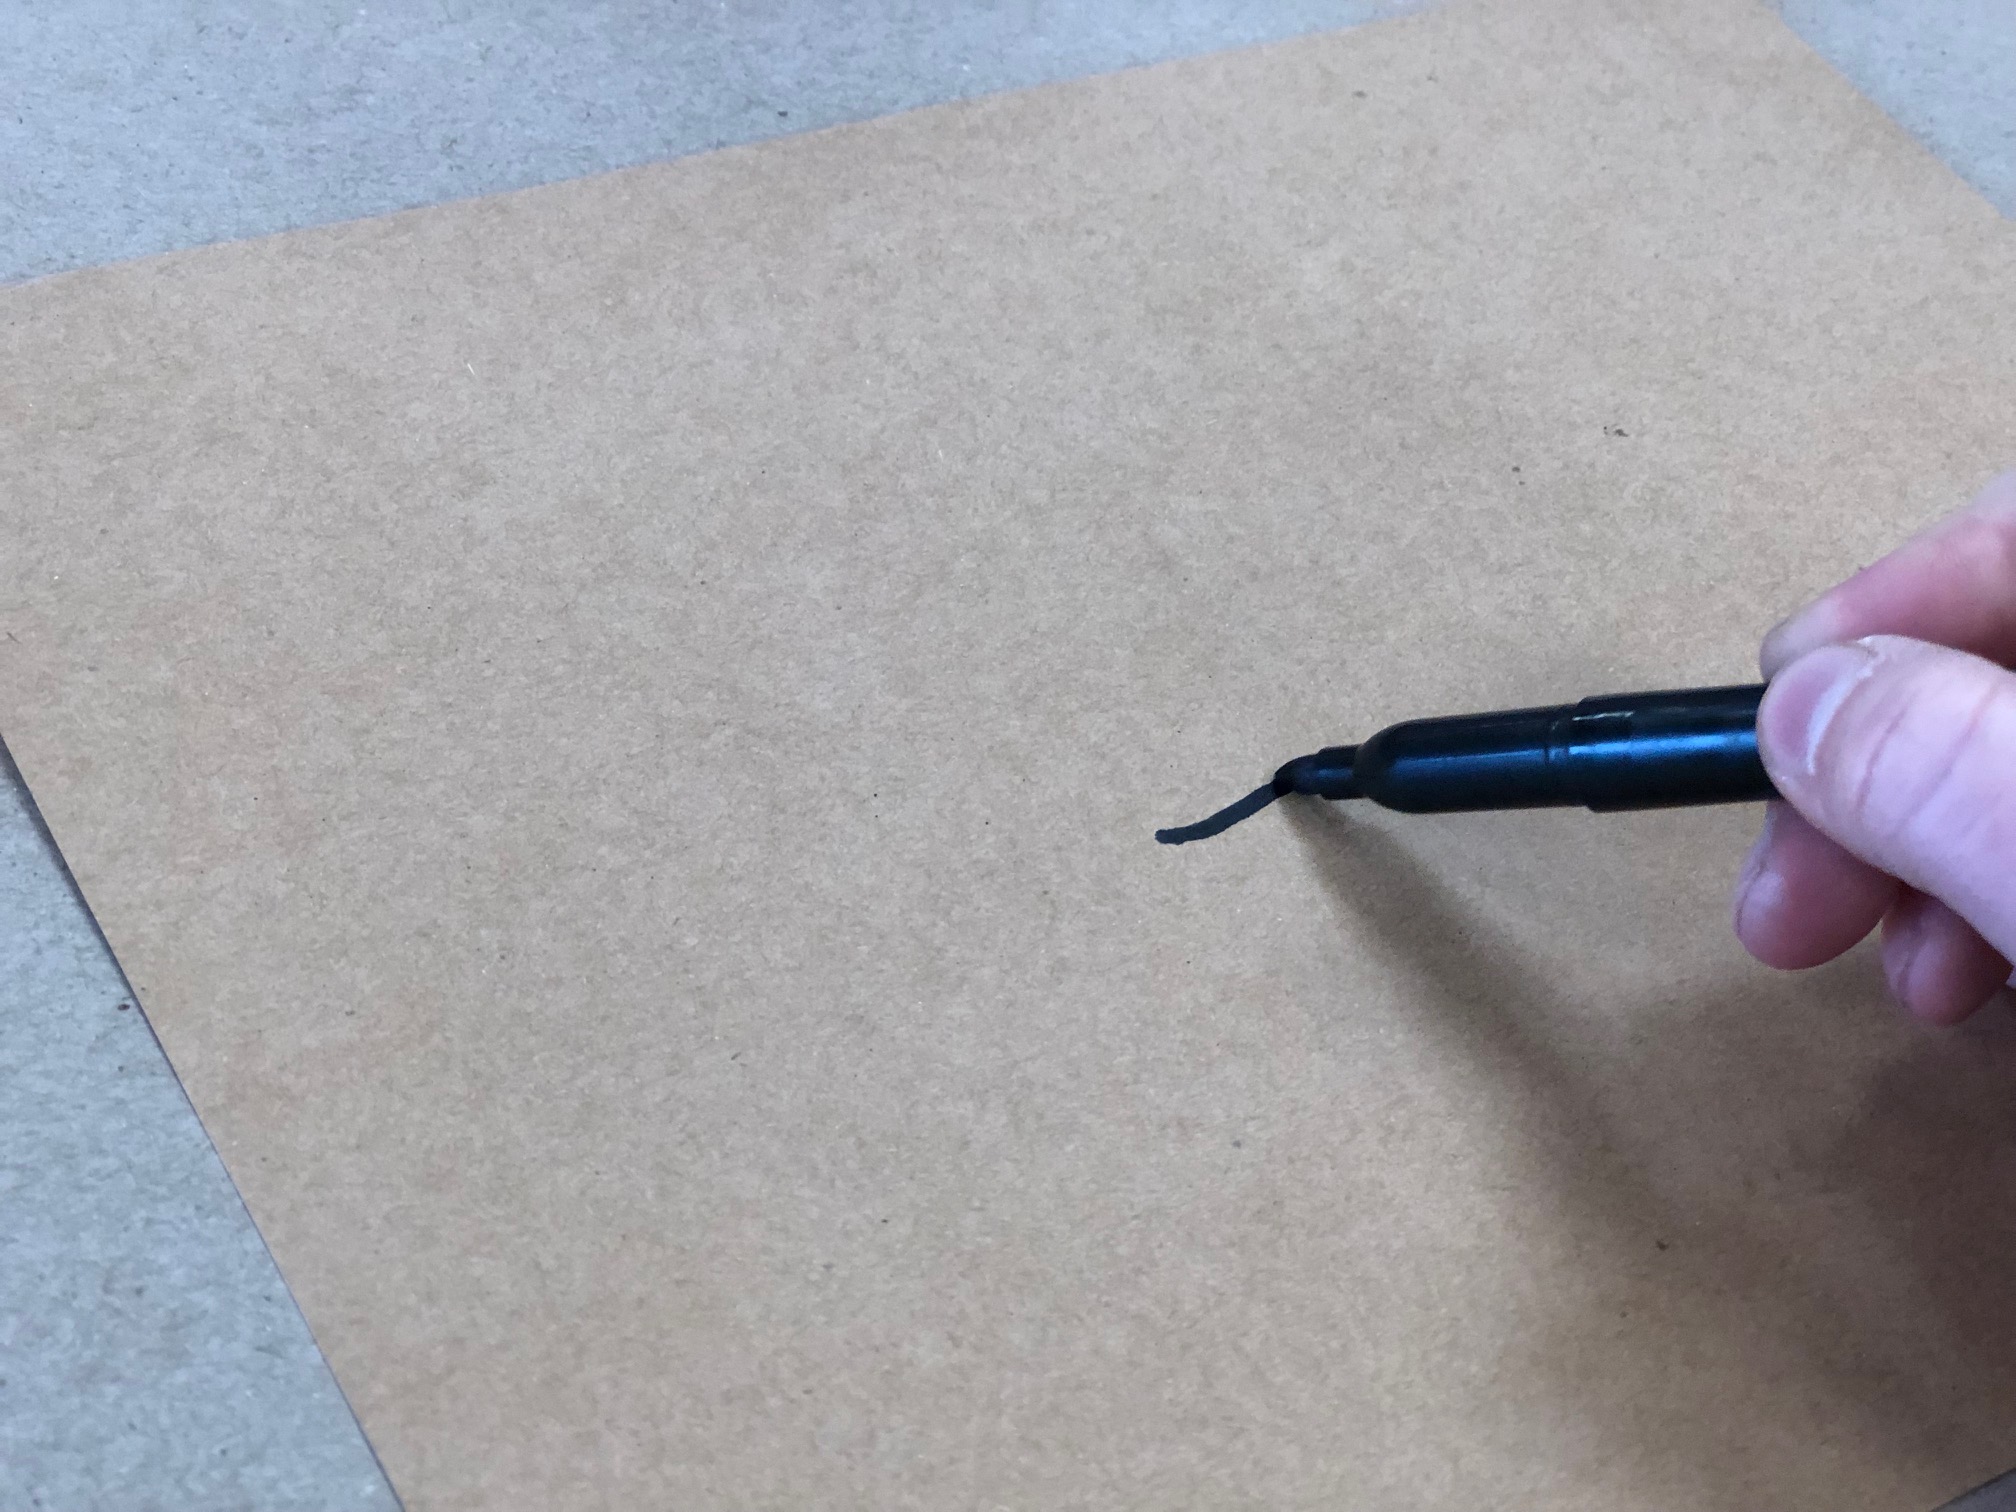
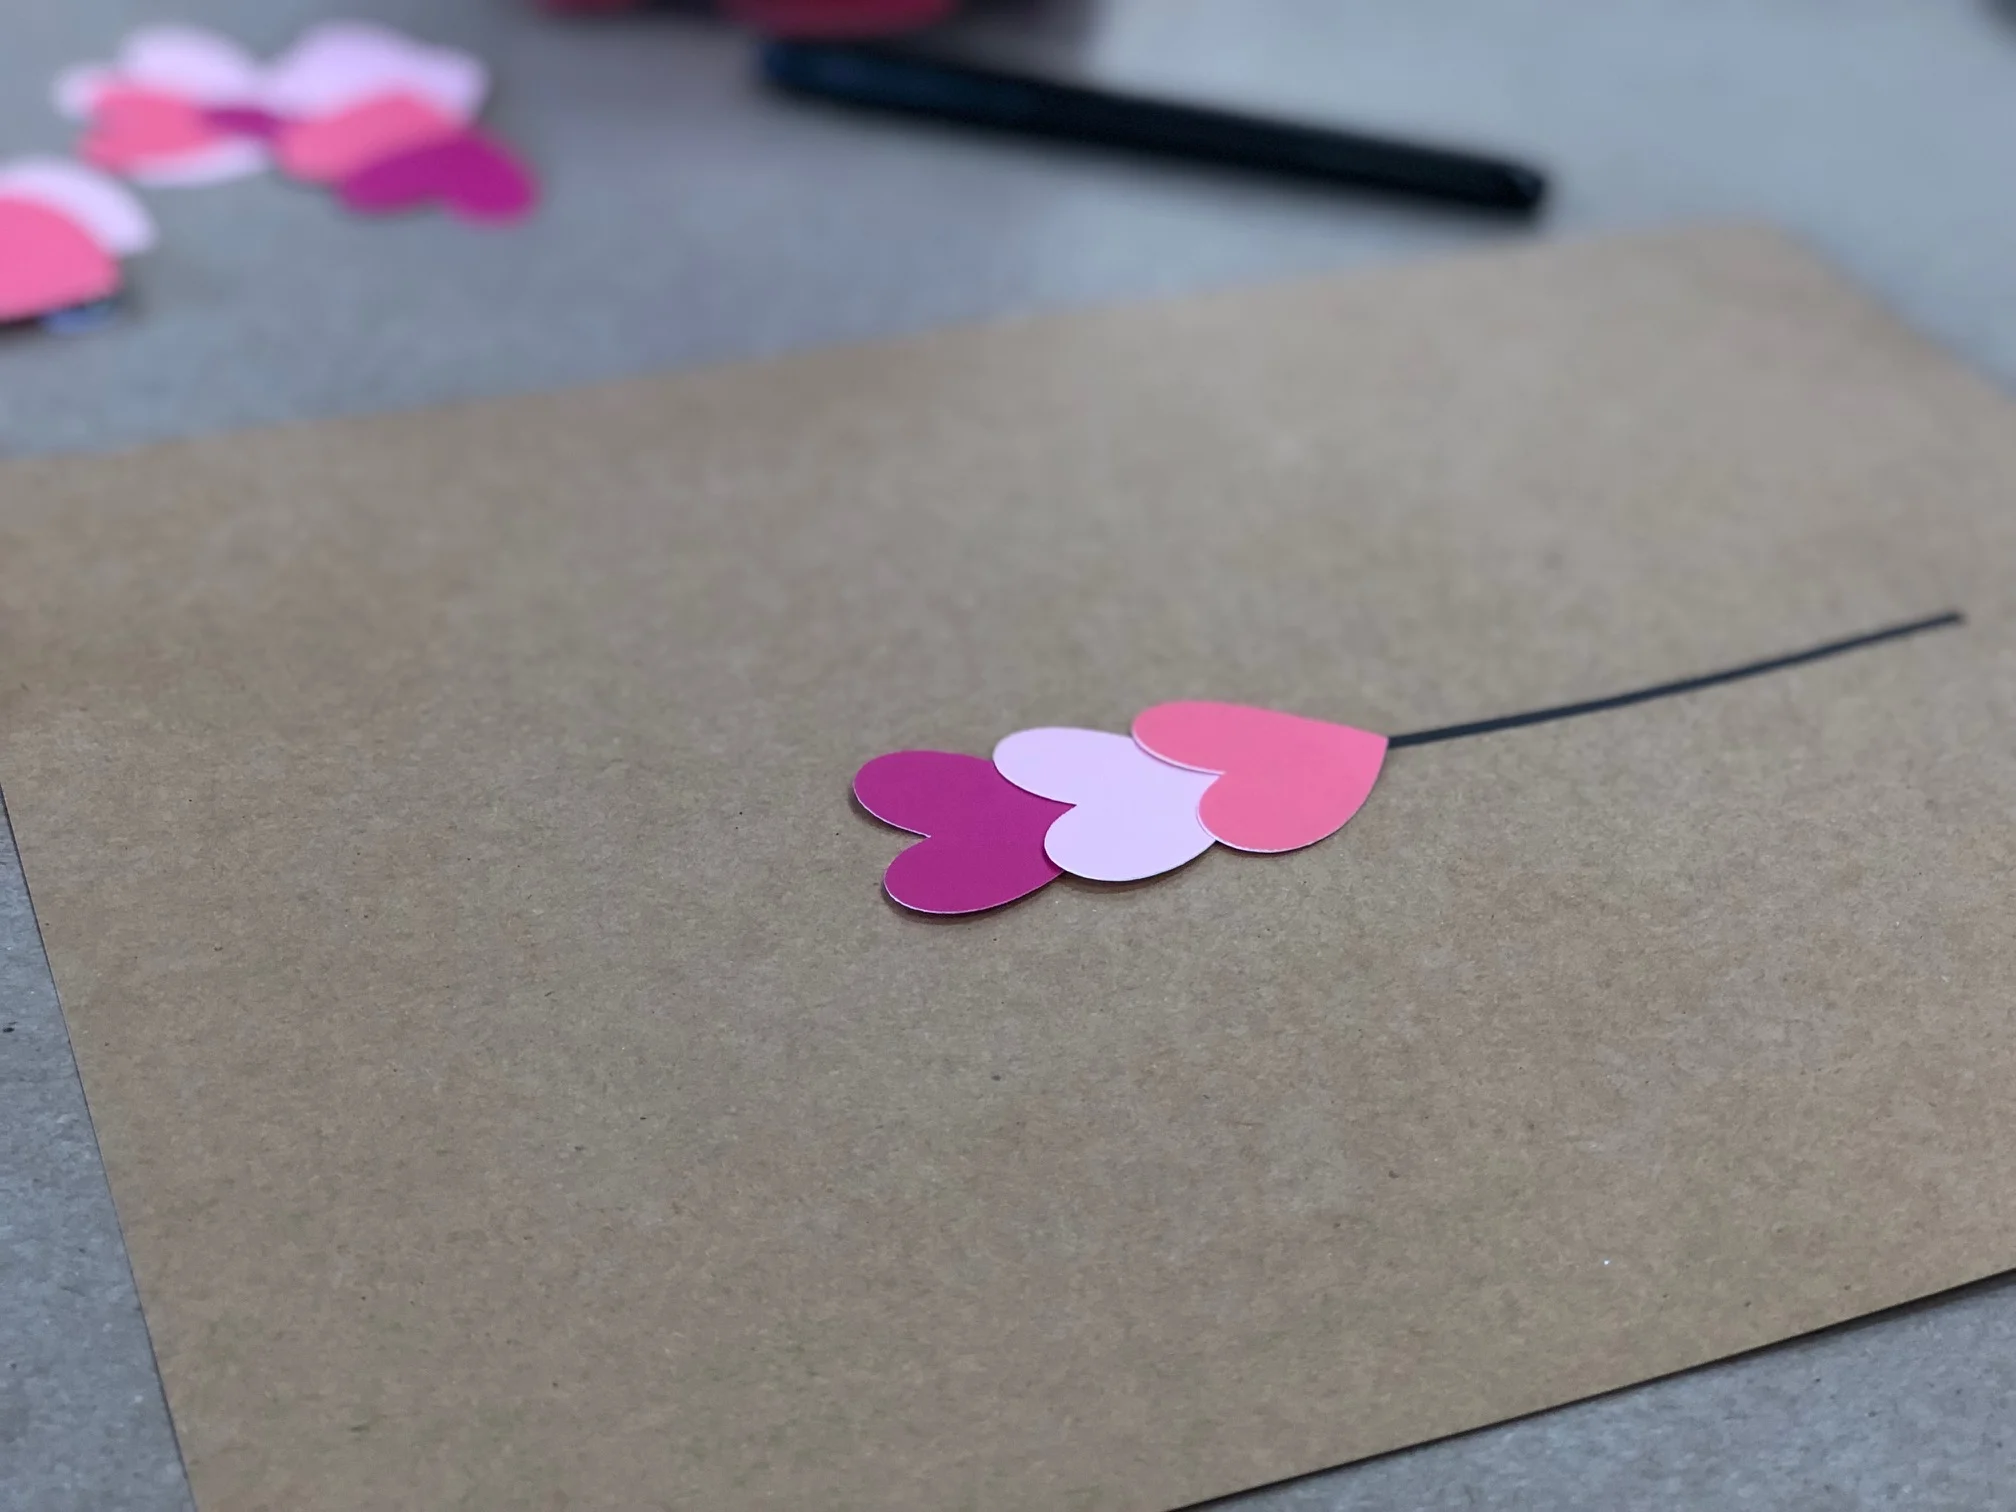
Next, using your marker, draw a line horizontally on your paper. I did this to keep the hearts straight on the paper.

DIY Valentine's Caterpillar, easy simple step by step tutorial

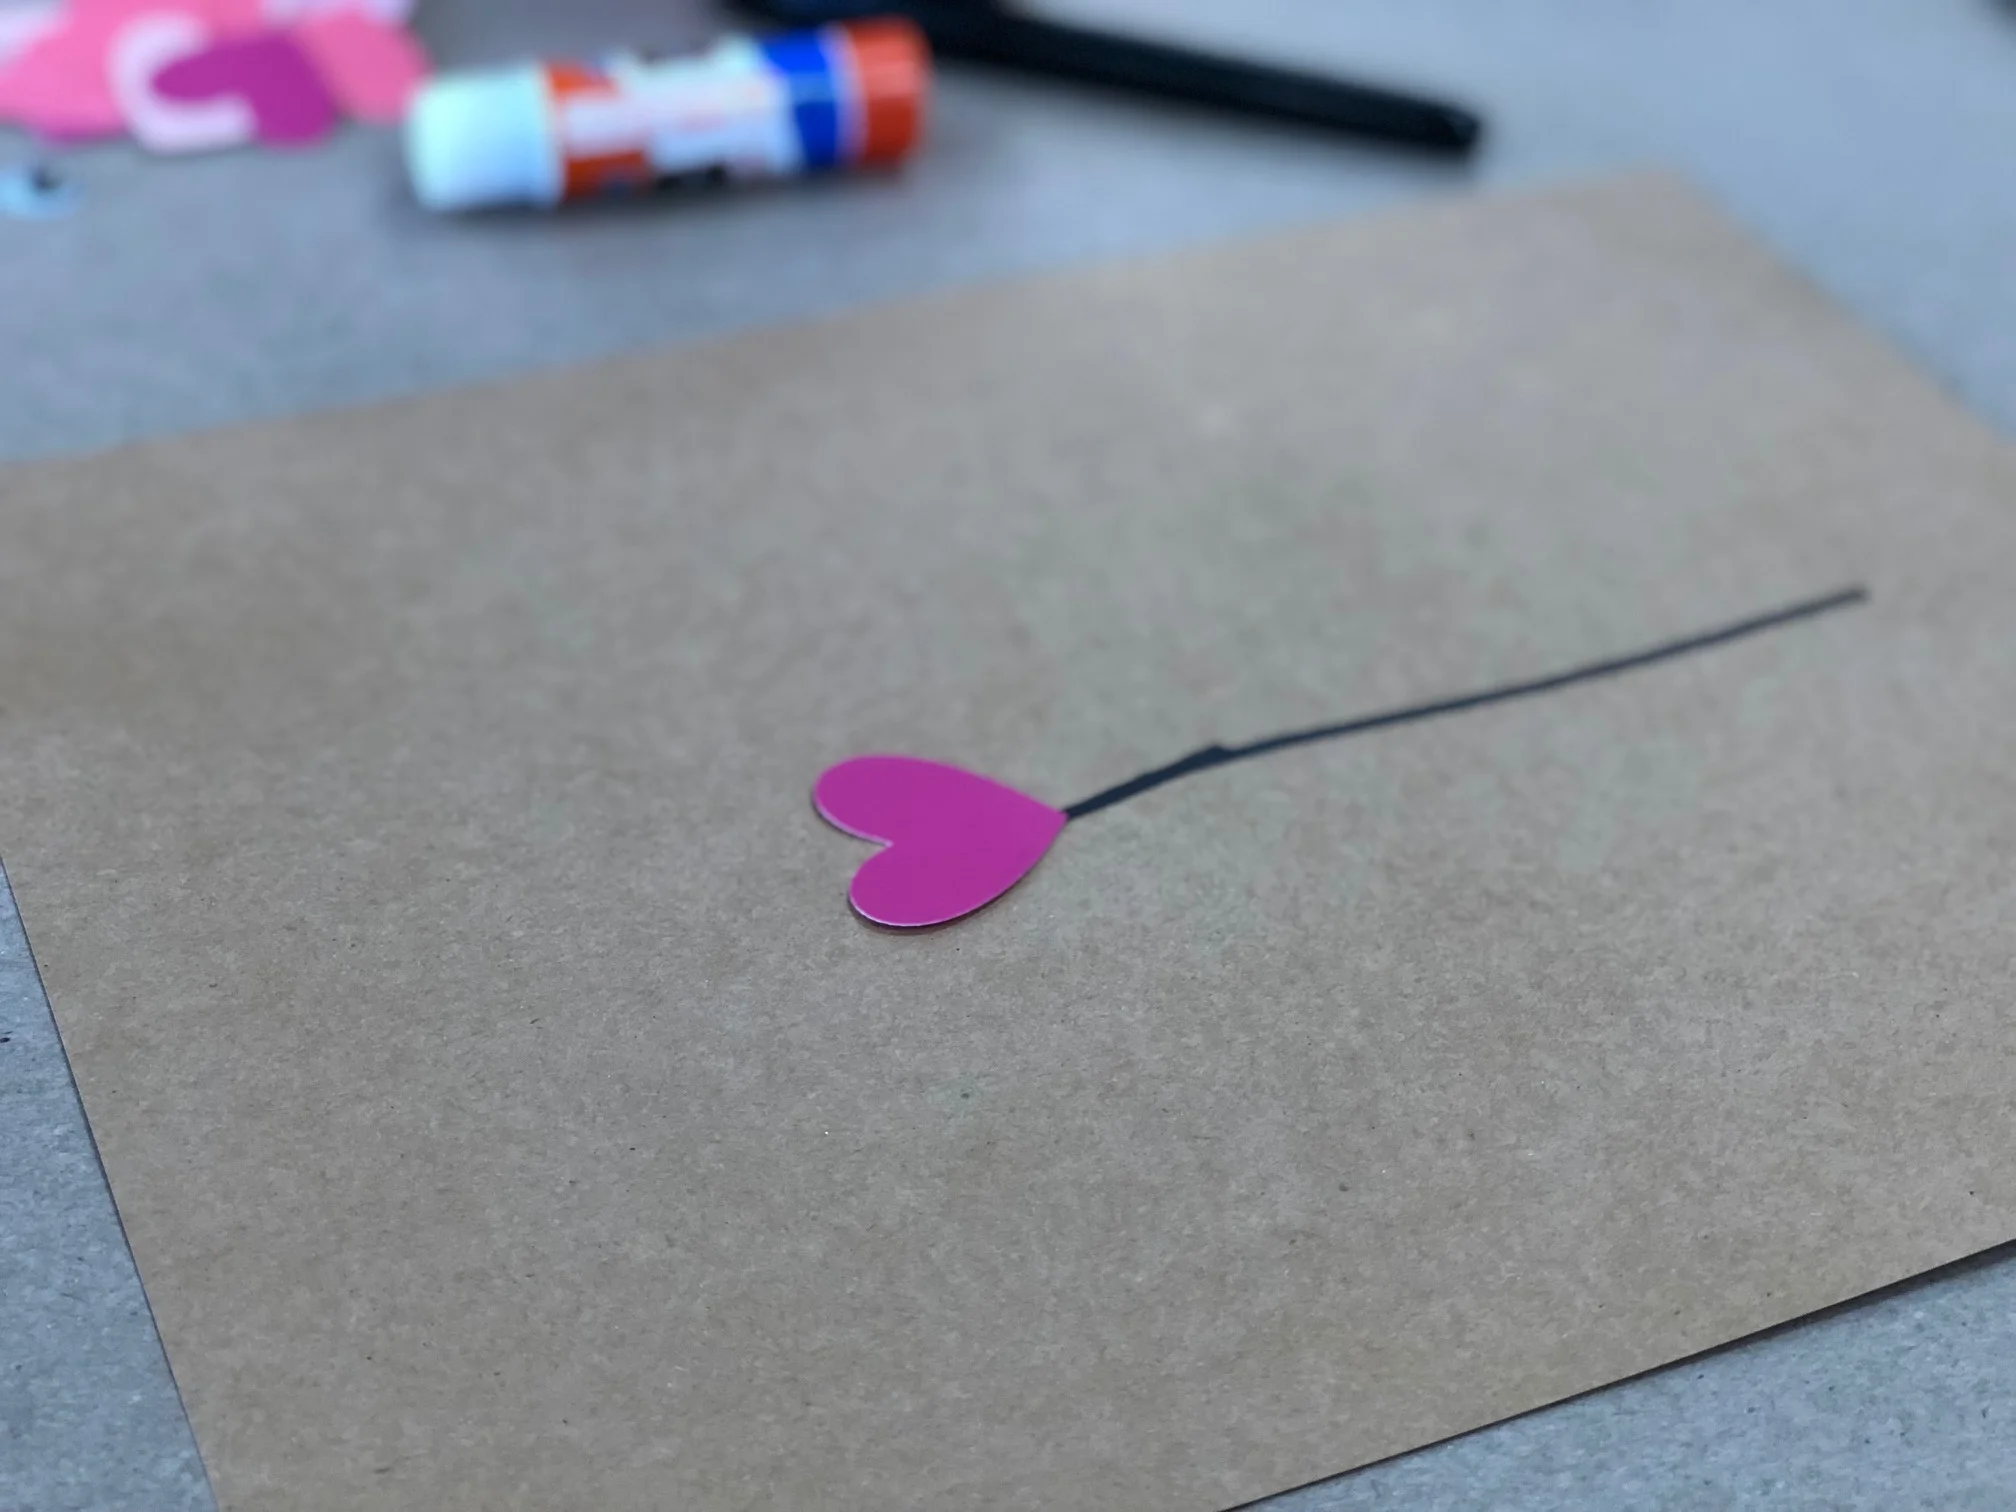
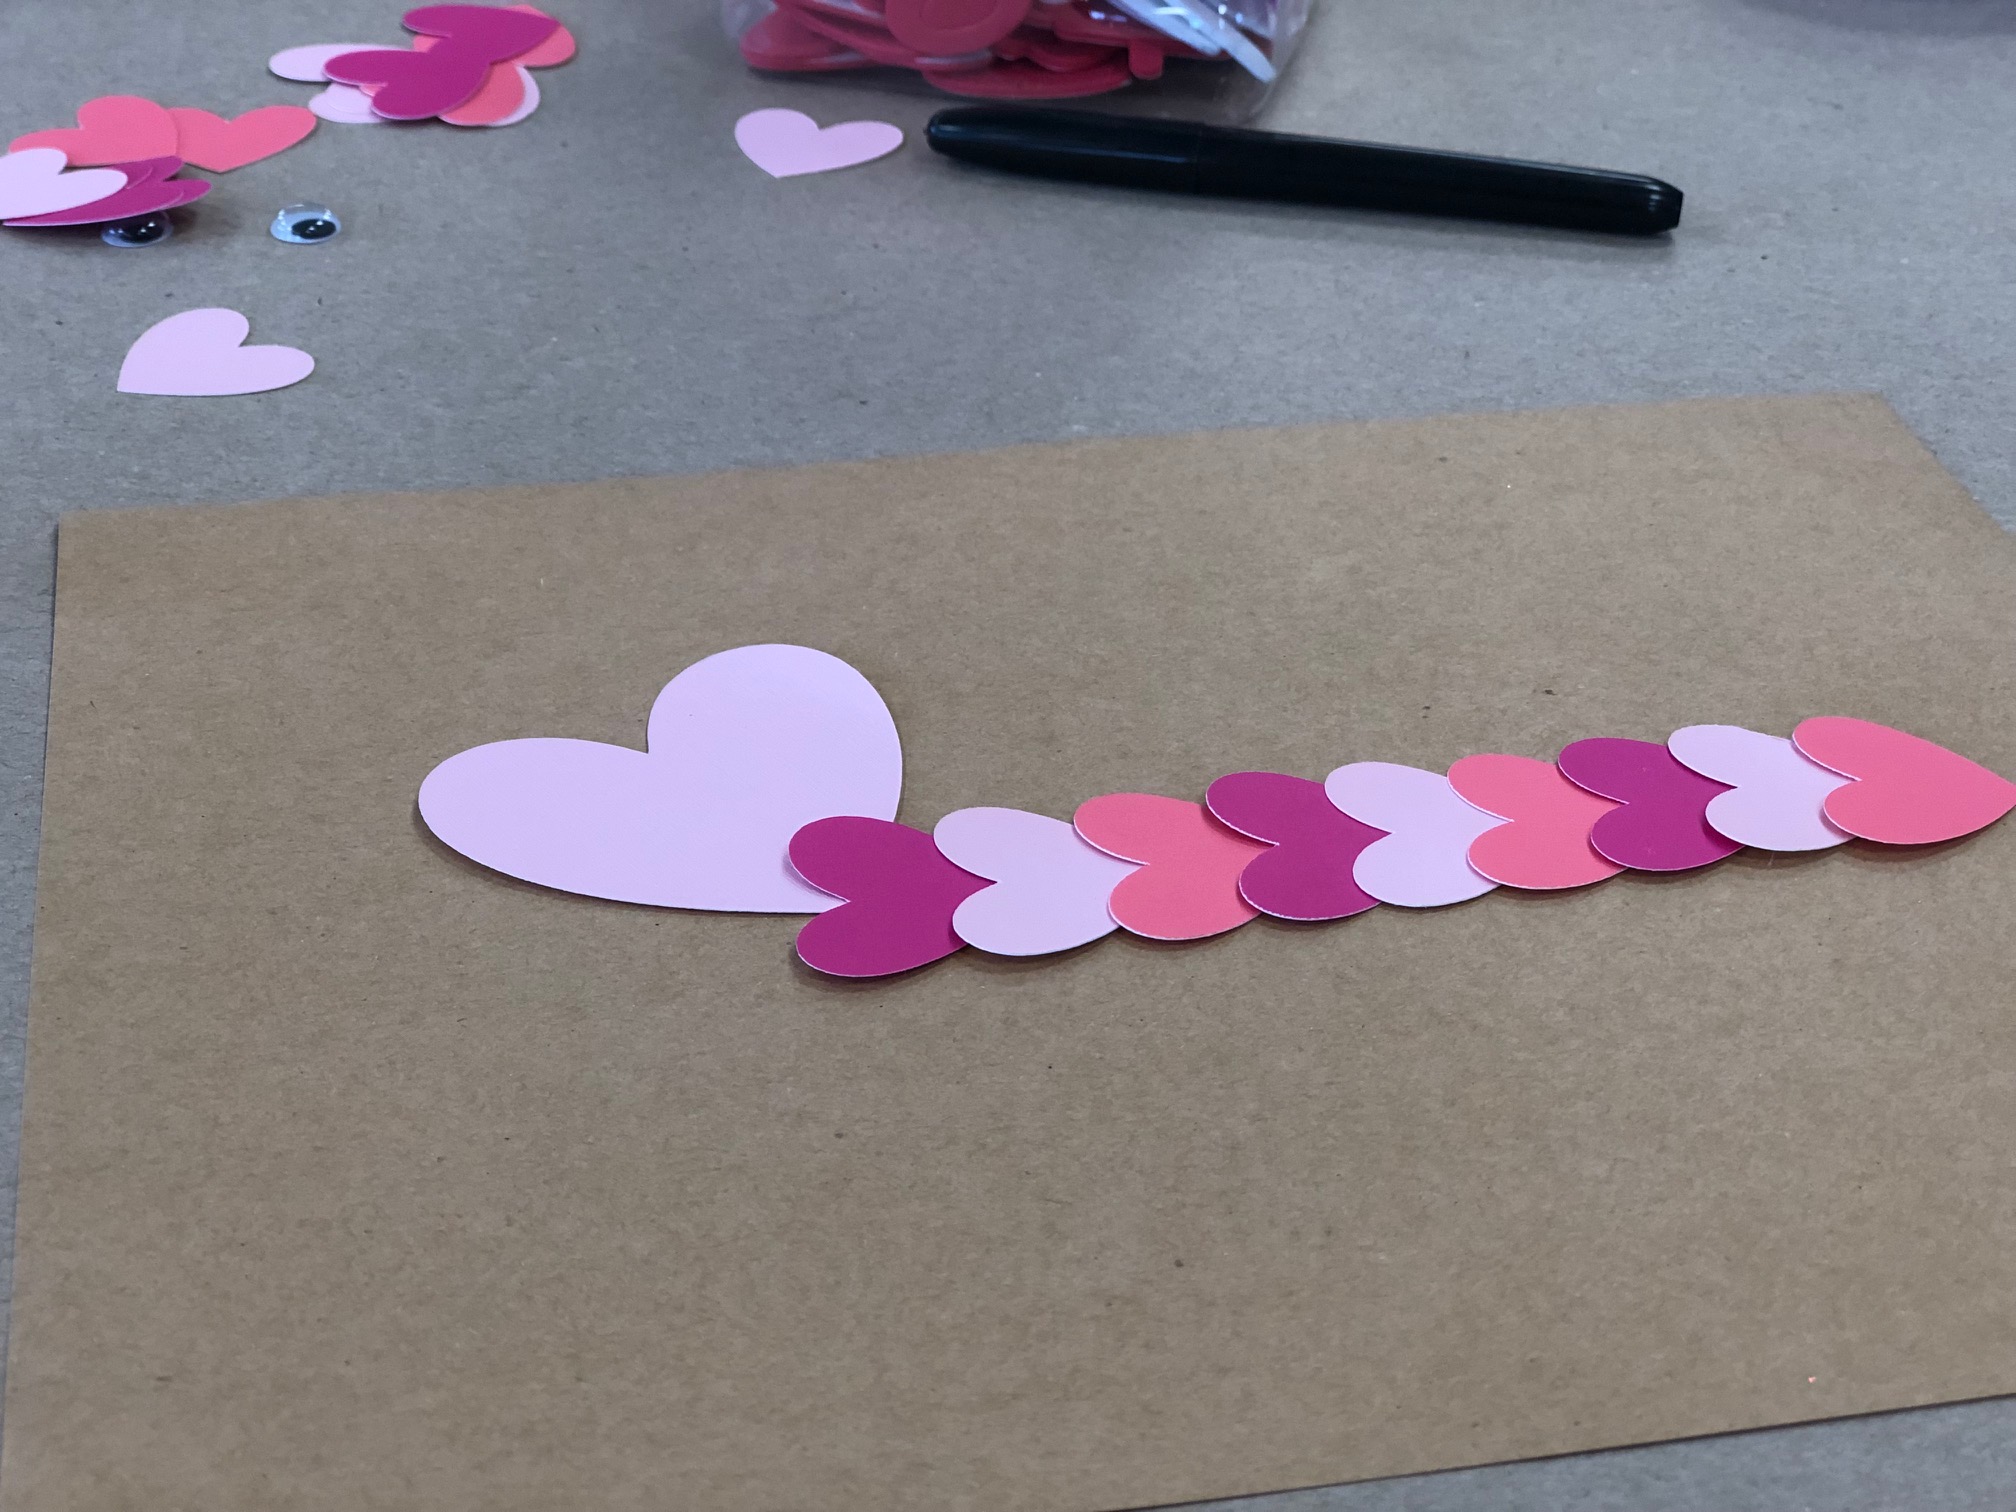
Starting on the left glue several hearts one after the other on to the paper till you’ve reached the end of your line.

DIY Valentine's Caterpillar, easy simple step by step tutorial

Using a slightly larger heart for the head of the caterpillar, glue that under the first heart on the left and slightly tilted like above.

DIY Valentine's Caterpillar, easy simple step by step tutorial

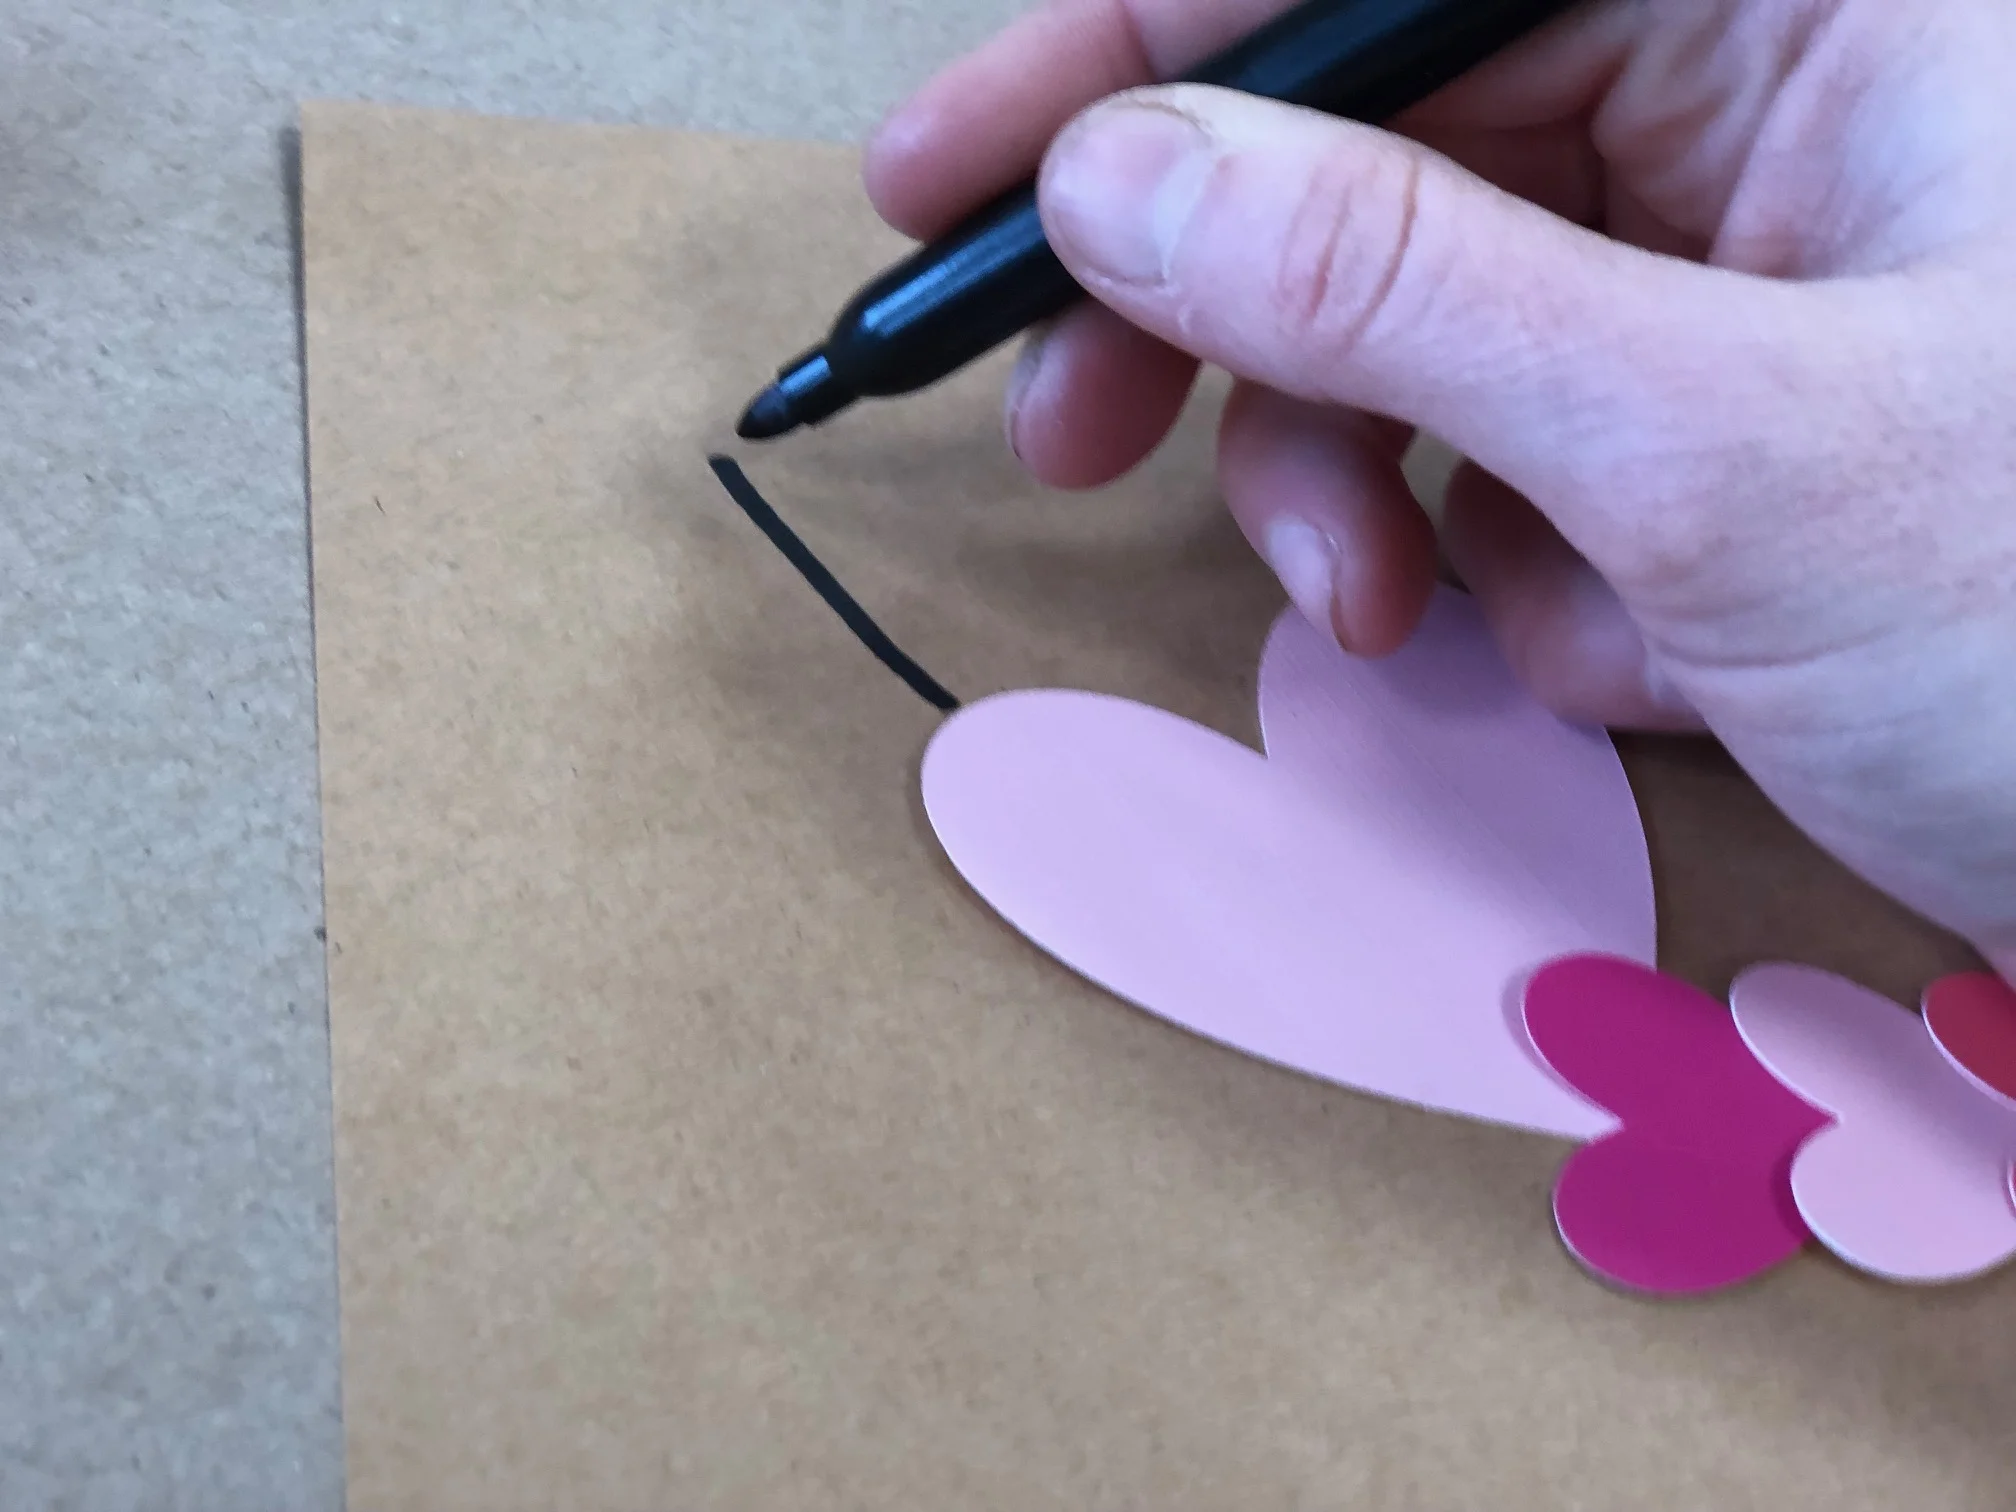
Draw two lines going out of the top for the antennas.

DIY Valentine's Caterpillar, easy simple step by step tutorial

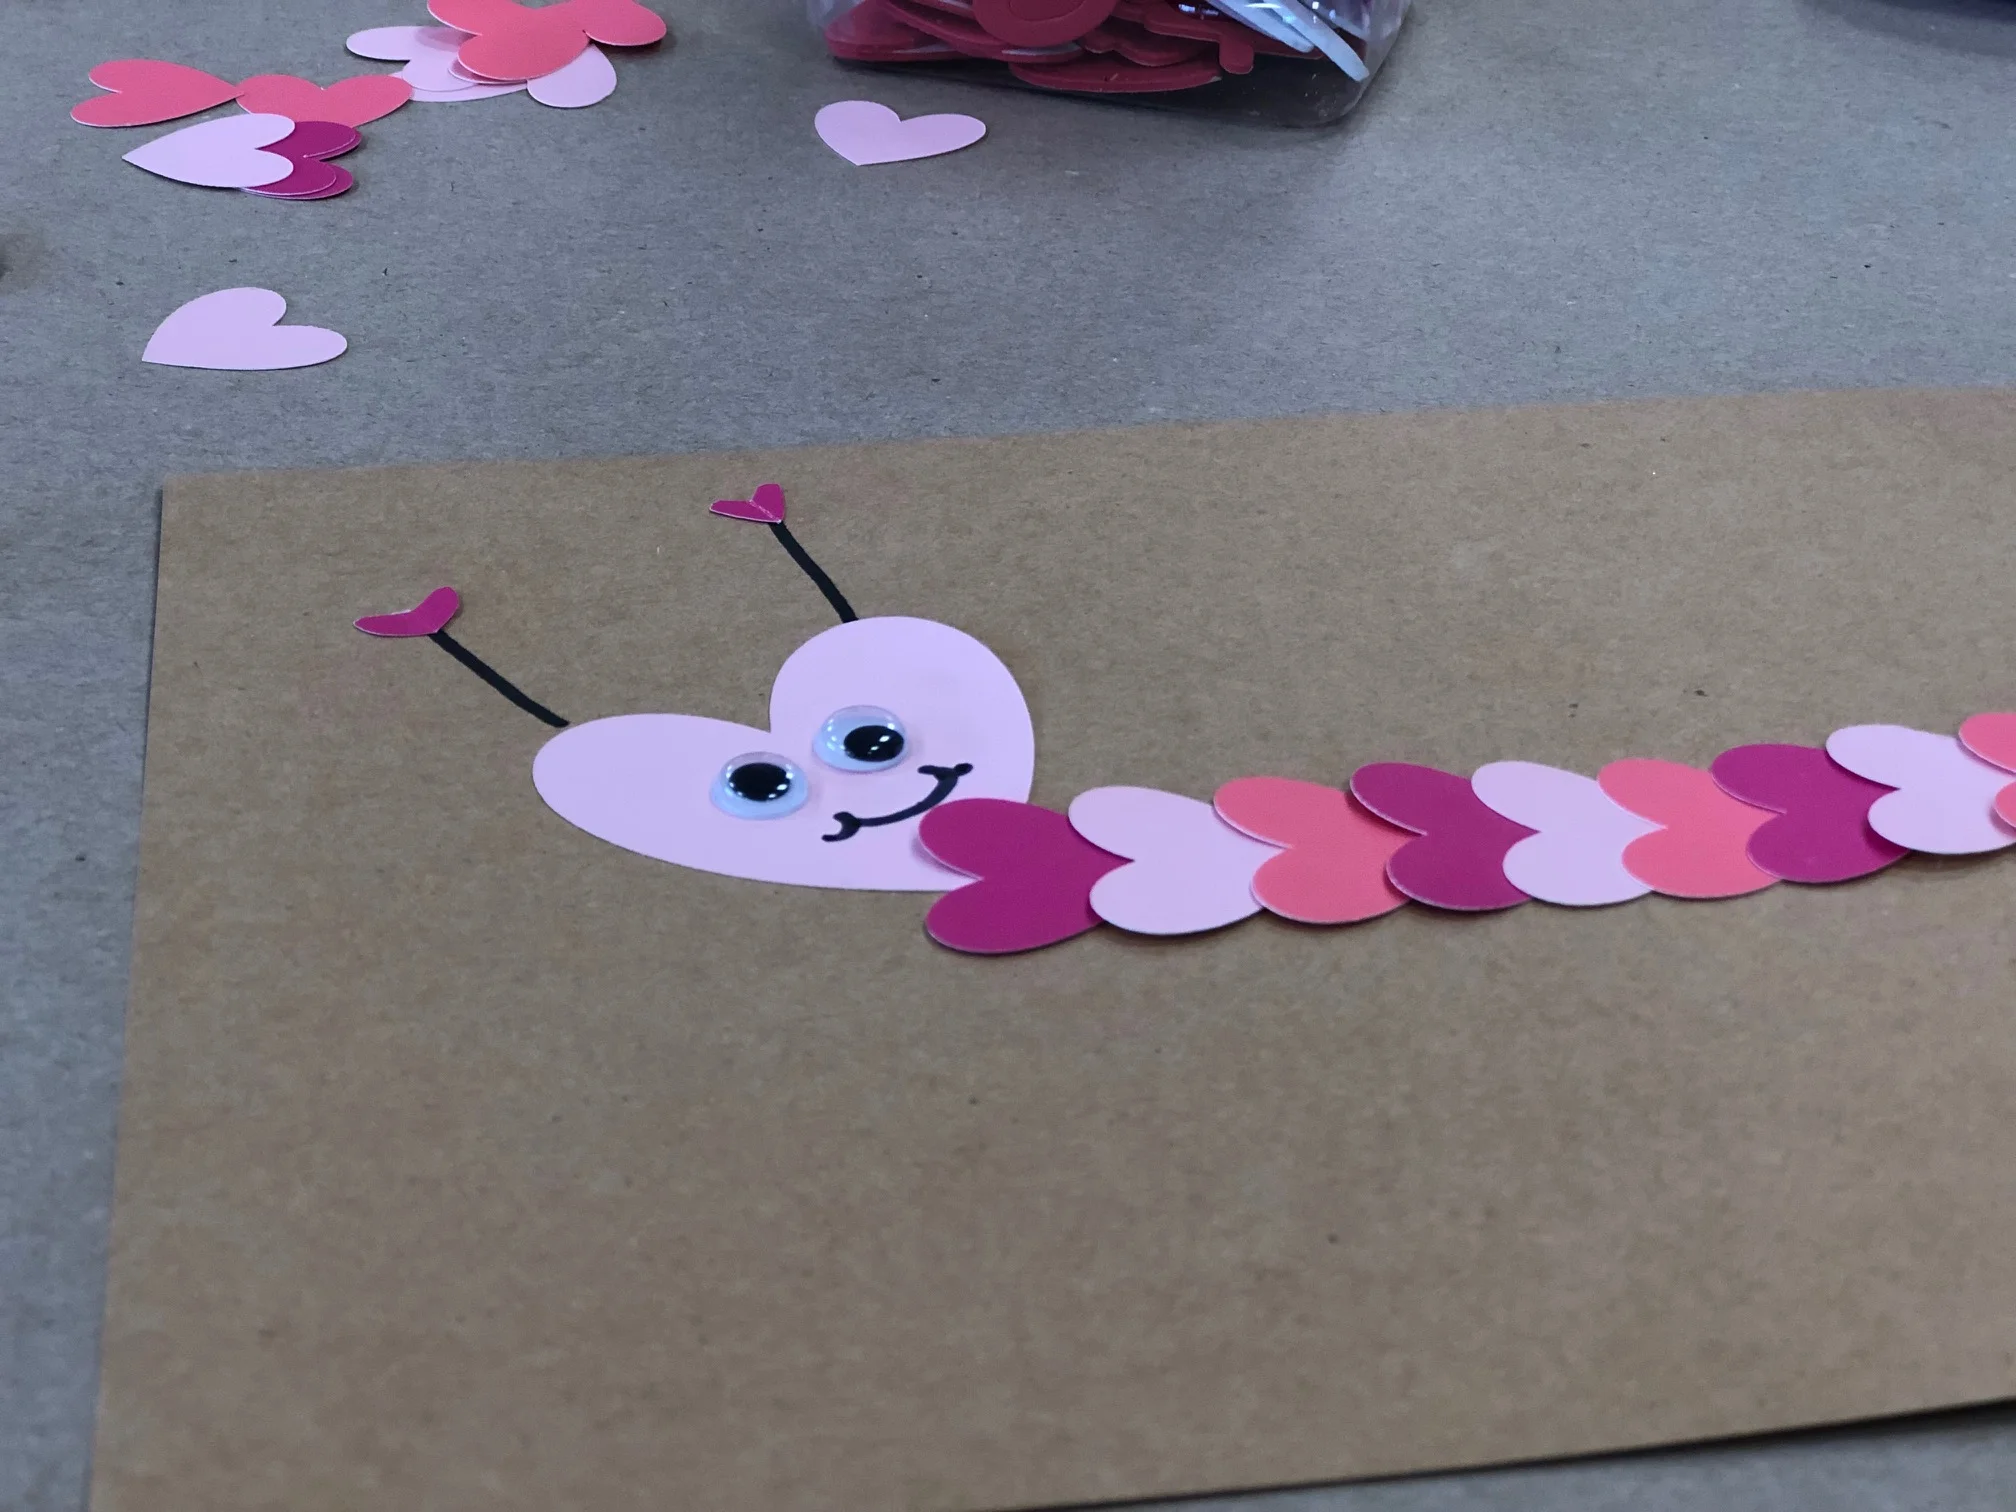
Glue on the eyes then draw on the smile with the marker.

DIY Valentine's Caterpillar, easy simple step by step tutorial

Add a couple tiny hearts {I cut these from larger ones} to the antennas, draw on some feet, and add any other little accents to your page and your done.

See I told you that would be sooooo super easy!! Your kiddos can even do this one all by themselves.

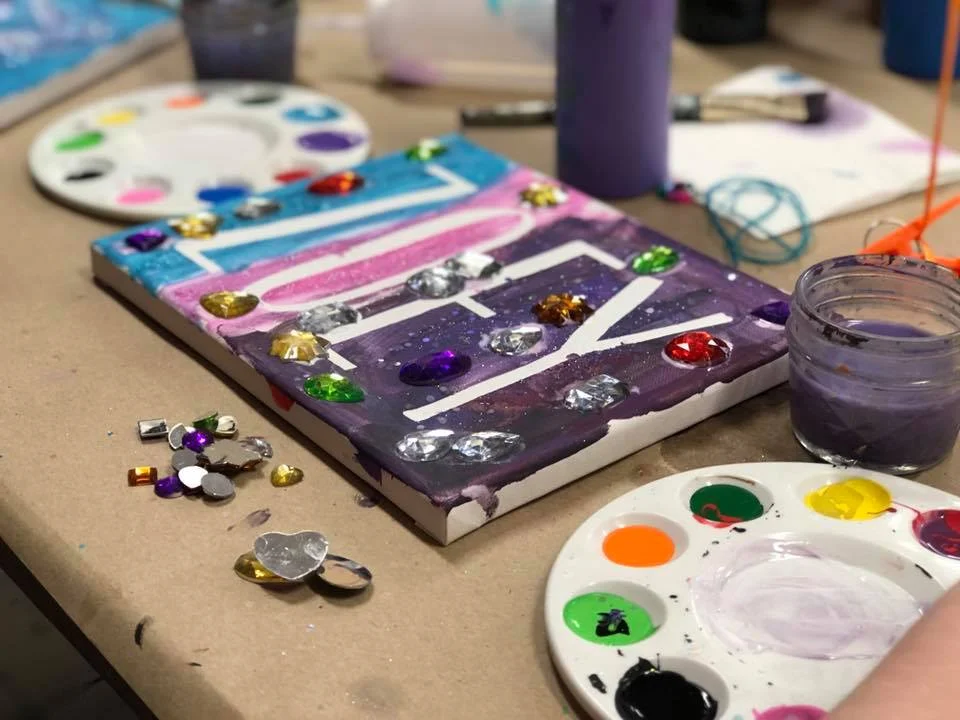
How to make your own CUSTOM canvas name art at home

How to make your own CUSTOM canvas name art at home

I love canvas art! There are so many different things you can create on these wonderful little blank pieces. The possibilities are endless with a blank canvas! You can free hand paint, make adorable handprint keepsakes, explore the fun of melting crayons and so much more! If you haven’t checked out our letter canvas art DIY you must after you read this tutorial.

Affiliate Disclosure. Some of the links on this website are affiliate links, which means that I may earn a small commission if you click on the link or make a purchase using the link. If you make a purchase you will not be charged anything additional.

How to make your own CUSTOM canvas name art at home

I’ve put together this CRAFT KIT to make this DIY so super easy for you. Everything you need in one little box shipped right to your door. You child’s name comes already attached and sealed to the canvas, which makes it even better! Get your personalized kit here. But if you want to go solo on this one here’s what you’ll need…

How to make your own CUSTOM canvas name art at home

The first steps aren’t pictured. First, cut your name in vinyl using your Cricut or other cutting machine. I always use oracal 651 but you can use any brand/strength. The color does not matter because you will be removing it once the painting is done. Now using transfer tape, attach your vinyl name to the canvas. This can be super tricky to get it to stick to the canvas so go slow when peeling the transfer tape off. After your vinyl name is attached and you are sure all the air bubbles are out of it you’ll want to seal it with SUPER THIN layer of MATTE finish mod podge. This is really easy. Just brush over the letters focusing on where the vinyl and the canvas meet. Essentially you are filling in any areas where paint might get in under the stencil with clear mod podge.

Check out the video below to see how to apply AND seal your canvas stencil ❤️.

After the mod podge is dry you can start painting away!!

How to make your own CUSTOM canvas name art at home

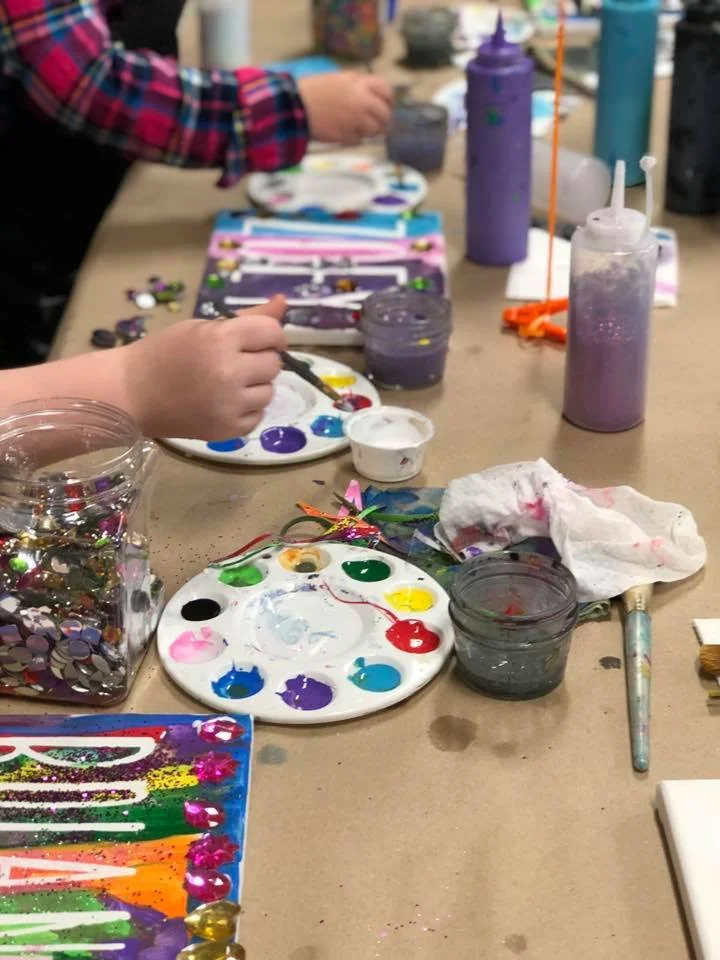
Be sure your kiddo is covering the entire area around the vinyl. If there are areas that don’t get painted the letter might not look like a letter when you are finished.

They can get super creative with it. I just LOVE how these turn out. All the kids do something different some do one solid color while others want the whole rainbow, then some make fun galaxy super gorgeous pieces and others use the shaped sponge brushes we have at the studio all over their canvas. The possibilities are endless.

How to make your own CUSTOM canvas name art at home

I recommend if your kiddo wants to add any glitter to their canvas to do so while their paint is still wet.

After they are done with their masterpiece you’ll peel the vinyl lettering up and toss it in the trash {this is why the color of the vinyl doesn’t matter ;) }. I use a sharp xacto knife to do this but a sewing pin works great too. Be careful not to drop it onto their freshly painted art work.

How to make your own CUSTOM canvas name art at home

You can add a ribbon on the back to make a fun hanger to hang it on the wall. We use our stapler for this {not a paper one but a home improvement one}. Your kiddo will admire this for years to come!

How to make your own CUSTOM canvas name art at home

I hope you enjoy this crafty tutorial and that it inspires you to create your own masterpieces and memories with your own kiddos.

Check out more craft kid posts below

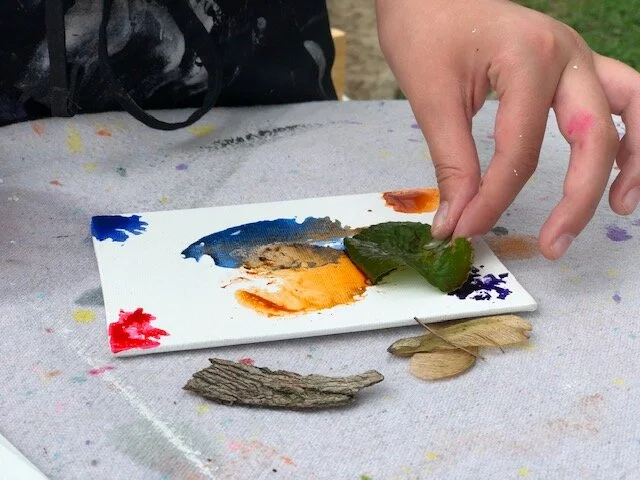
PINE CONE ART, easy and mess free. Make your own with these simple steps.

PINE CONE ART, easy and mess free. Make your own with these simple steps.

If your kids are anything like mine they are ALWAYS wanting to make something. They don’t care what it is they just NEED to create. Either in our craft studio or the kitchen they just have that itch to make all the things.

So, naturally, I am always trying to find ways to be resourceful. Reusing old items, things that we would normally recycle or toss out, or things we find in nature…like pine cones!

We gathered some pine cones and had a mission to use them to create a really cool piece of art.

PINE CONE ART, easy and mess free. Make your own with these simple steps.

Here’s what you’ll need

  • pine cones

  • box {we used an old usps box}

  • tape

  • cardstock {we used white but you can use whatever color you’d like}

  • acrylic paint


Start by taping a boarder around your paper. We only had 3/4” tape so that’s what we used.

This next step isn’t picture, now tape the piece of paper down to your box. We taped ours all the way around so that the pine cone didn’t get snagged on the paper if it wasn’t secured down all the way.

PINE CONE ART, easy and mess free. Make your own with these simple steps.

Now decide what colors you want your art to be. We used lighter colors but you can use any that you’d like. You want to put your paint on something you can easily dip a pine cone into. We used the middles of our paint trays.

PINE CONE ART, easy and mess free. Make your own with these simple steps.

Dip your pine cone into your paint. You can do one color or several at a time. At first we did just one at a time then she got brave and started dipping all the colors in different spots.

PINE CONE ART, easy and mess free. Make your own with these simple steps.

Now drop it in your box and SHAKE it up! Take care not to shake it too fast or rough because your pine cone will go flying…we may or may not know this first hand. Keep repeating this step till you’re satisfied with the coverage.

PINE CONE ART, easy and mess free. Make your own with these simple steps.

This is what ours looked like before we removed the paper from the box. All the mess contained inside the box…woohoo!!

PINE CONE ART, easy and mess free. Make your own with these simple steps.

We let our dry for a few minutes before we peeled the paper out of the box and peeled the tape away from the outside edges. She was VERY impressed at how clean the lines came out. I have to say I am too!

PINE CONE ART, easy and mess free. Make your own with these simple steps.

This is such an inexpensive {literally cost pennies to make} and one that doesn’t require a ton of prep or clean up. I hope you enjoy this craft with your kiddos as much as I did with our girls!

Apple Stamping, how to make a precious Autumn keepsake art project with your toddler

apple stamping, how to make a precious Autumn keepsake art project with your toddler

DIY keepsake apple stamping canvas art for your toddler

I LOVE fall! I love the colors, the smell, the oversized clothing to keep you warm on the cool Midwest days….I love it all.

This fall I took our four girls to a small off the beaten path apple orchard. Seriously these are the best kind of farms! The people are always so nice and the atmosphere is just so welcoming.

We had all these apples {literally 30lbs of apples, I know it sounds crazy but at $1/lb I thought if nothing else it was cheap educational entertainment for our girls} and I thought, why not do a fun little craft with them at our CRAFT STUDIO for our TOTS IN THE SHOP day. So we did! Boy did all the toddlers have the best time making a mess and painting with apples.

If your tot is anything like ours you’ll end up with a gorgeous blend of fall colors…but she had so much fun and that makes my heart happy!

Seriously, look how proud that girl is! Smiling from ear to ear with her artwork!

Affiliate Disclosure. Some of the links on this website are affiliate links, which means that I may earn a small commission if you click on the link or make a purchase using the link. If you make a purchase you will not be charged anything additional.

Here’s what you need to make your own at home


Start by tracing your toddler’s hand and the upper part of the forearm on the canvas with a pencil. Do this lightly so you can easily hide the pencil mark with your paint.

Apple Stamping, how to make a precious Autumn keepsake art project with your toddler

Next you want to paint the inside of where you traced with brown. This will be the trunk of your tree. Some moms in our class painted this for their tots but our sweet girl wanted to paint hers all by herself. I think she did a pretty great job {go Millie!}

Apple Stamping, how to make a precious Autumn keepsake art project with your toddler

Once the brown is dry you can start stamping away. We stuck forks in our apples so the kiddos could hold onto the apple a little better but you can just pick the apple up with your hand if you’d like.

We used discarded pieces of cardboard to squirt our paint on. Put some paint on there, dip the half apple in, smear it around a bit so it gets a good coat, then stamp it right on the canvas. This is going to be messy, embrace it! This is how your little one learns and explores.

Apple Stamping, how to make a precious Autumn keepsake art project with your toddler

Keep stamping till your tot is satisfied with their little work of art.

Apple Stamping, how to make a precious Autumn keepsake art project with your toddler

Be sure to check out more crafty kids projects below.