DIY Dollar Tree St. Patrick's Day rag wreath

DIY Dollar Tree rag wreath for St. Patrick's Day. How to make an easy rag wreath using a Dollar Tree wire wreath form and scraps of fabric or fat quarters.

How to make a rag wreath using a Dollar Tree wire wreath form

I LOVE shopping at the Dollar Tree. When they put one in our small town my girls and I were EX-CI-TED! It’s not that we lived too far away from the next Dollar Tree but it is so nice to have one that is just a couple minutes away vs having to get on the highway and drive 25+ minutes, we are loving this convenience! I don’t buy everything from the Dollar Tree though, but there are several things I do prefer to pick up from here like wire wreath forms. Here’s my list of the top 15 craft supplies I buy from the Dollar Tree.

Affiliate Disclosure. Some of the links on this website are affiliate links, which means that I may earn a small commission if you click on the link or make a purchase using the link. If you make a purchase you will not be charged anything additional.

There are so many different types of wreaths you can make with the wire wreath forms but my absolute favorite are the rag wreaths. They are so beautifully imperfect and they tie in nicely with my rustic/inexpensive style lol! This is my third rag wreath I’ve posted here on my blog. My first one was this super country cottage chic spring wreath. I really wanted to put it up for Valentine’s day this year but decided against it since it has bunnies for one of the prints. My second rag wreath was this rustic but patriotic red, white, and blue one.

For my St. Patrick’s Day rag wreath, or tied fabric wreath as some call it, I wanted to add a little sign that said welcome. I admit I took the easy way out and didn’t stencil the sign, I made a vinyl decal instead. It is far easier to make these they just don’t last as long as the fully painted signs I create and ship world wide in my handmade business. Check out my handmade signs here. If you’ve been dreaming of making your own hand painted wooden signs but you keep running into problems my sign painters e-course is for you!

Check out the rag wreath video tutorial or keep scrolling for written/picture instructions.

Here’s what you’ll need to make your own St. Patrick’s Day rag wreath

Helpful tools

DIY Dollar Tree rag wreath for St. Patrick's Day. How to make an easy rag wreath using a Dollar Tree wire wreath form and scraps of fabric or fat quarters.

DIY rag wreath for ST. Patrick’s Day

One-

Unfold your fabric. Then about ever 1” or so cut a small slit on one side of the fabric. Now rip those 1” sections so that you have a bunch of strips of fabric. Repeat this step for all of your pieces of fabric. I’ve found fat quarters that you get from Walmart work really well for these wreaths.

DIY Dollar Tree rag wreath for St. Patrick's Day. How to make an easy rag wreath using a Dollar Tree wire wreath form and scraps of fabric or fat quarters.

Two-

Cut your ripped fabric strips into 3-4 inch pieces. These don’t have to be perfect, mine are never the exact same size.

DIY Dollar Tree rag wreath for St. Patrick's Day. How to make an easy rag wreath using a Dollar Tree wire wreath form and scraps of fabric or fat quarters.

Three-

Tie your pieces in a single knot onto your wire wreath form. This took me about 45 minutes to complete.

DIY Dollar Tree rag wreath for St. Patrick's Day. How to make an easy rag wreath using a Dollar Tree wire wreath form and scraps of fabric or fat quarters.

Four-

Once you have all of your fabric pieces tied onto your wire wreath form you flip your wreath over. Then push any long fabric pieces back on to the front.

DIY Dollar Tree rag wreath for St. Patrick's Day. How to make an easy rag wreath using a Dollar Tree wire wreath form and scraps of fabric or fat quarters.

Five-

Set your wreath to the side so you can start on your welcome sign that is going to attach to the front. I used a piece of scrap wood I had in the garage from a previous project. Paint the base white, I used two coats of paint to get a good coverage. Be sure you let both coats dry completely before moving on to step 6.

DIY Dollar Tree rag wreath for St. Patrick's Day. How to make an easy rag wreath using a Dollar Tree wire wreath form and scraps of fabric or fat quarters.

Six-

Instead of stenciling this sign I applied a vinyl decal. I used my Cricut to cut out my vinyl decal. You can get my WELCOME Cricut cut file here.

DIY Dollar Tree rag wreath for St. Patrick's Day. How to make an easy rag wreath using a Dollar Tree wire wreath form and scraps of fabric or fat quarters.

Seven-

I bought a package of foam green clovers at my local Dollar Tree last year and thought these would be super cute to add to one side of my welcome sign. They were the same size so I trimmed down the shamrock I wanted to place on the top so that you could see a little bit the bottom shamrock showing through the edge. I did this same technique on this Rae Dunn inspired fall burlap leaf garland. Then I glued the two together and glued them down to the end of the sign.

DIY Dollar Tree rag wreath for St. Patrick's Day. How to make an easy rag wreath using a Dollar Tree wire wreath form and scraps of fabric or fat quarters.

Eight-

Attach your sign to your wreath. To do this I used a soft wire but I have no idea where I got it from. I would also recommend a floral wire for this step. I drilled holes in the top corners of my sign and used a small piece of wire to attach it to the wreath. Make a U shape to your wire, place one end of the wire in the hole of the sign and feed it to the back then twist the two ends together on the back side so you can’t see them once your wreath is hanging. Do this for both sides of your welcome sign to attach it to your wreath.

DIY Dollar Tree rag wreath for St. Patrick's Day. How to make an easy rag wreath using a Dollar Tree wire wreath form and scraps of fabric or fat quarters.

Nine-

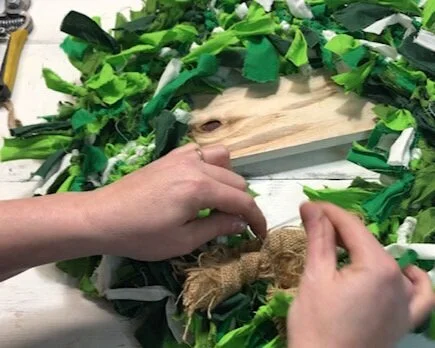
I finished my wreath off with a 4” wide piece of burlap so I could hang it up. I didn’t really like the knot I made in the burlap so I wanted to hide it lol. I just took another piece of wire and secured the knot to the back of the wreath.
DIY Dollar Tree rag wreath for St. Patrick's Day. How to make an easy rag wreath using a Dollar Tree wire wreath form and scraps of fabric or fat quarters.

Now you're ready to hang your wreath for St. Patrick’s Day. I hope you enjoyed this crafty DIY. If you did and make your own St. Patty’s Day wreath I’d love to see pictures of it. As always with all of my tutorials, if you have any questions please don’t hesitate to ask:)!

DIY Dollar Tree rag wreath for St. Patrick's Day. How to make an easy rag wreath using a Dollar Tree wire wreath form and scraps of fabric or fat quarters.

Happy crafting!

Want instant access to my FREE RESOURCE LIBRARY? This is where I share my freebies of cut files, printables, checklists and more. Leave your info below and I will send you the password and link to get instant access into my library.

DIY mini St. Patrick's Day wood tags

DIY St. Patrick's Day wood tags, how to paint mini wood signs. Using Ryobi tools and a Cricut  to create handmade wood signs

DIY MINI WOOD TAGS FOR ST. PATRICK’S DAY

If you’ve been reading my blog you might know that my four daughters have been asking me to decorate more for the holidays…including St. Patrick’s Day decorations. Yes, that is a holiday they think I should decorate for too lol! So they win. I’ve truly been making an effort to have a more festive home even though daughter #4 totally rearranges everything.

Affiliate Disclosure. Some of the links on this website are affiliate links, which means that I may earn a small commission if you click on the link or make a purchase using the link. If you make a purchase you will not be charged anything additional.

I have been eyeing these adorable mini wood tags on Pinterest for forever now. They are CUTE! They tie in with pretty much anything. You can add these wood tags to a wreath, to a welcome sign, on the mantle (I really wish we had one but I’ll just have to make a faux mantle one of these days) or my favorite- to a tiered tray. Those trays are seriously rustic home décor overload! I love them!! I need to add one to my coffee bar soon.

If you’re looking for fun green holiday themed to make with the kiddos try this easy St. Patrick’s Day suncatcher.

To make this completely from scratch at home you’ll need a few power tools. But, if you don’t have power tools to DIY this craft from start to finish you can grab a DIY CRAFT KIT here. I haven’t always been super comfortable using power tools, actually I was deathly afraid of them not too long ago. Now that I’m over my power tool phobia here’s what I recommend for DIY crafters.

DIY St. Patrick’s Day Wood Tags

Here’s what you’ll need

If you’d like the same file I used to create this set of 3 mini wood St. Patrick’s Day tags you can get my Cricut file here. It’s in my FREE resource library. It’s where I keep all of my FREEBIES like files, printables, patterns, and more. You’ll need the password because I like to keep it a little bit secret but no worries it’s super easy to get. Jut fill out the prompt and you'll get instant access.

DIY craft kit for adults. How to make mini wood tags for St. Patrick's Day using your Cricut. How to stenicil wood signs for spring.

Watch the video or keep scrolling for step by step written/photo instructions for these wood St. Patrick’s Day tags.

Cutting your wood pieces

  1. First you want to cut out your wood tags. I used my Ryobi miter saw to do this. Cut a 1x4 in to 3 5” long pieces. On the top of each 5” piece measure in 1” and make a mark. Set your miter saw to 45 degrees, line it up with your 1” mark and cut. Flip your tag over and do the same to the other side.

  2. Now drill a hole in the middle of the top of each piece. This is for your twine holder to go through.

  3. After you have that done give each piece a quick sanding. You don’t have to get crazy with this, it’s not a fine piece of furniture. I use 120 grit sandpaper for this and that’s it. Just enough to take off that shine it has when you get it from the lumberyard.

    WATCH THE VIDEO OF HOW I MADE THESE USING MY MITER SAW

Stencils

You can use any cutting machine to create your stencils. I use my Cricut Explore to make all of mine. If you use a Cricut you can get my cutting file here. I use Oramask stenciling film to make my stencils. While it is a little more expensive than other materials I have found it works the absolute best for stenciling.

Painting (the fun part!)

  1. First a thin layer of white paint on each wood tag. Be sure it is a thin layer, you will still be able to see the wood grain through the paint. After the first thin layer is dry you can paint a second thin layer. You don’t want more than two layer of base paint on your wooden tags, or any painted wood sign. Too much paint will cause issues when stenciling with base paint peel up, which can be impossible to fix sometimes and honestly it just plain sucks to have to go back and fix.

DIY craft kit for adults. How to make mini wood tags for St. Patrick's Day using your Cricut. How to stenicil wood signs for spring.

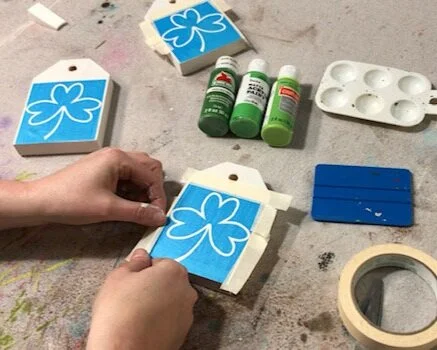
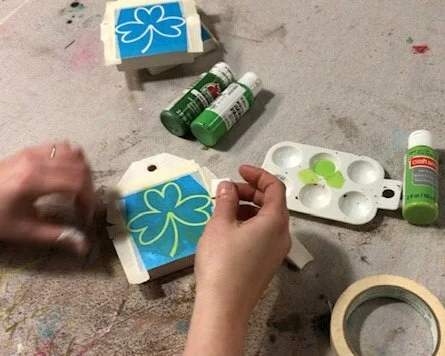
2. After your base paint is completely dry you can apply your stencils to all three wood blanks. Apply your transfer tape to your stencils (if you bought my DIY CRAFT KIT this step has already been done for you). Peel the paper backing from your stencil/transfer tape. Go slow. Place your stencils sticky side down on the front of your painted wood tag. The front is just whichever side you prefer best ;). Using your vinyl squeegee, if you don’t have one you can use a plastic store rewards card, and rub the stencil to that it adheres to the wood. Slowly peel the transfer tape away from the wood leaving your stencil attached to the wood. I find that it works best when I roll the transfer tape away, check out this DIY PAINTED WOOD SIGN TUTORIAL for a closer look at how to do this.

DIY craft kit for adults. How to make mini wood tags for St. Patrick's Day using your Cricut. How to stenicil wood signs for spring.

3. Use masking tape to tape off the edges of your stencil so you don’t get paint on areas of the wood tags that you don’t want paint on.

DIY craft kit for adults. How to make mini wood tags for St. Patrick's Day using your Cricut. How to stenicil wood signs for spring.


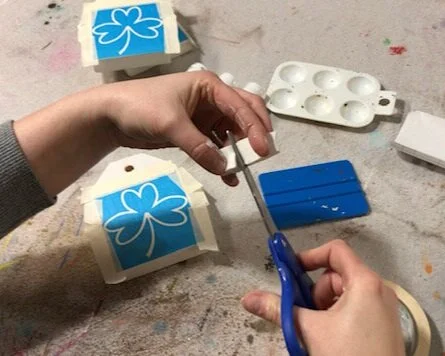
4. Cut your stenciling sponge in half so you can use it in all three paint colors without mixing the colors.

DIY craft kit for adults. How to make mini wood tags for St. Patrick's Day using your Cricut. How to stenicil wood signs for spring.

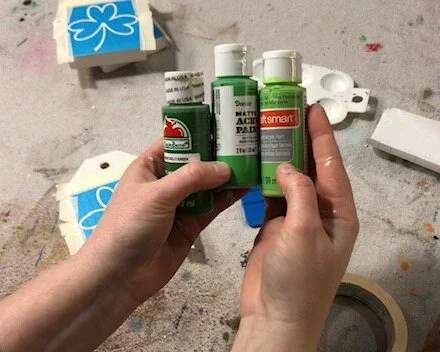
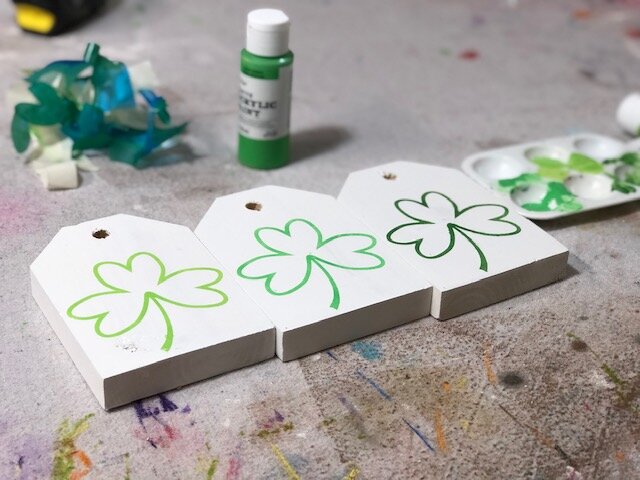
5. Using one end of one of the sponges dip it in the lightest color of green. You need very little paint, the more paint you use the more paint bleed you will likely have. Dab your sponge onto one of your wood blocks where the clover is exposed on the wood. The coverage should be VERY faint. Let that dry and repeat up to three times. You don’t want to apply more than three coats as this could cause issues with paint peel up where you just stenciled.

DIY craft kit for adults. How to make mini wood tags for St. Patrick's Day using your Cricut. How to stenicil wood signs for spring.

6. Peel up your stencil and tape. Using an xacto knife helps to remove the middle piece of the clover.

DIY craft kit for adults. How to make mini wood tags for St. Patrick's Day using your Cricut. How to stenicil wood signs for spring.

7. Repeat steps 5 & 6 for your other two wood tag bases.

8. Let them dry.

How to make mini wood tags for St. Patrick's Day. Easy tutorial to make mini wooden tags for spring using your Cricut.

Distressing

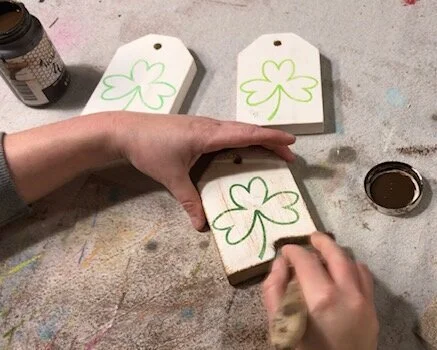
After your paint completely dries from stenciling you can start distressing your wood St. Patrick’s Day tags. I LOVE using antiquing wax for this process. Antiquing wax comes in a several different colors but my favorite its definitely the regular antiquing wax. Learn more about how to transform your DIY farmhouse style crafts with antiquing wax.

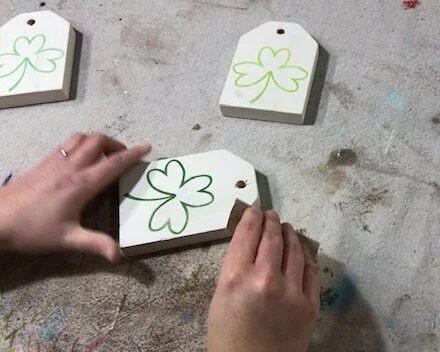
  1. Using sand paper or your sander give a quick sanding to the edges, corners, and lightly on the front of each wooden tag. Wipe off and dust.

DIY craft kit for adults. How to make mini wood tags for St. Patrick's Day using your Cricut. How to stenicil wood signs for spring. How to distress handpainted wood signs using sandpaper.

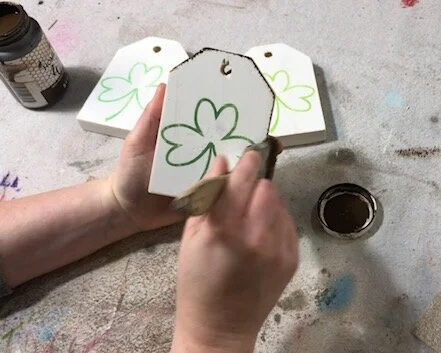
2. Take your chip brush and lightly dip it into your antiquing wax. Dab off the excess, a little wax goes a very long way. Much like you did with the sandpaper, focus on brushing the wax on the edges, corners, and lightly on the front of your wooden tags.

DIY craft kit for adults. How to make mini wood tags for St. Patrick's Day using your Cricut. How to stenicil wood signs for spring. How to apply antiquing wax to wood.

Adding twine

Probably the easiest step is adding the twine. Decide how long you would like your twine hangers to be. I think I measured mine at 12” or so. You’ll need 3 pieces, one for each wood tag. Feed one piece of twine through the hole in one of the wood tags then tie it in a knot.

DIY craft kit for adults. How to make mini wood tags for St. Patrick's Day using your Cricut. How to stenicil wood signs for spring.

You’re ready to display your St. Patrick’s Day wood tags in your home. I know it may seem like a lot of steps written out but really these are super easy and quick to DIY once you get going on them.

Like with all of my DIY tutorials if you have any questions please reach out. Leave a comment below or send me a message on one of my social media pages. You can find my links at the top.

Happy Crafting!

Do you love freebies? Don’t forget to check out my FREE RESOURCE LIBRARY. It’s where I keep all of my FREE printables, files, and more. Go here to get instant access to my library

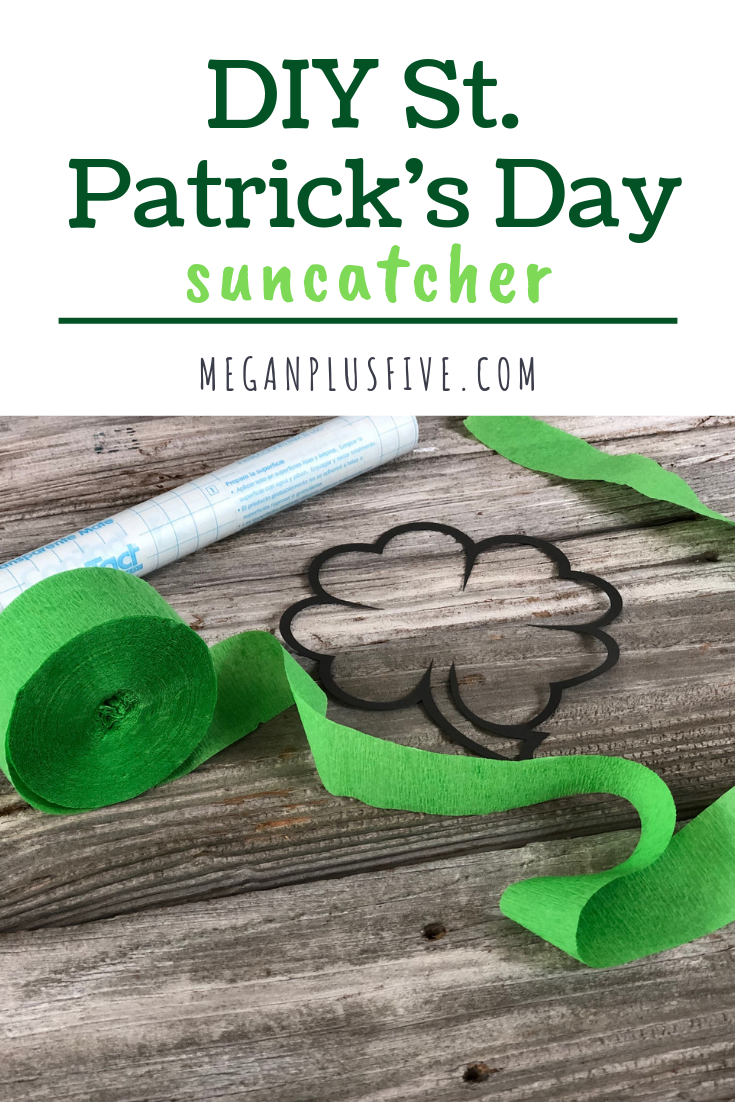
DIY St. Patrick's Day suncatcher, easy tutorial to make your own with your kiddos

DIY St. Patrick's Day suncatcher, easy tutorial to make your own with your kiddos

St. Patrick’s Day isn’t a super big deal around our house but we do enjoy the holiday. We always wear green and we try to make tasty green foods {that doesn’t always happen}. But this year we did get around to making some fun green crafts for the occasion!
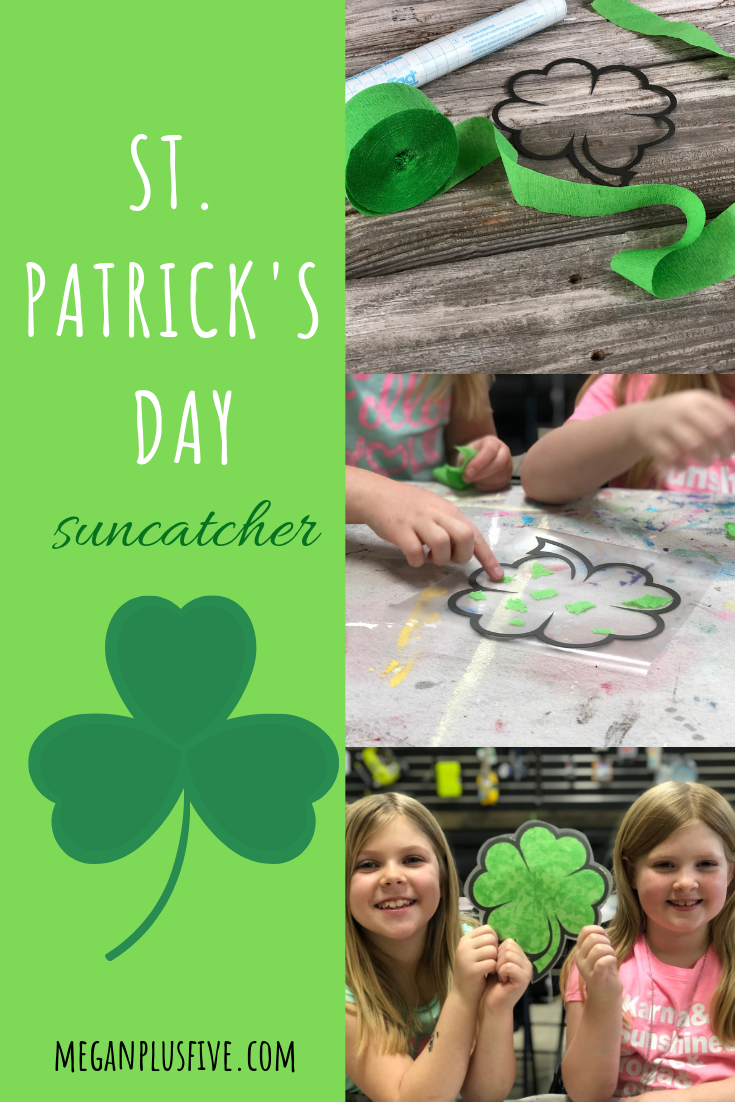
Each week we host a toddler day in our CRAFT STUDIO called TOTS IN THE SHOP and I needed to plan for the events for the upcoming months. I try to coincide our weeks with the holidays when they come up and St. Patrick’s Day is coming up so I scoured Pinterest to see what I could find. I came across this adorable suncatcher by Julie from Director Jewels and I knew we had to make one too! I did change up ours a bit to make it easier/simpler for the tots to make.

Before we host our workshops our four daughters and I create mockups for them. I have to say our girls LOVED making this one. I was actually pretty surprised though. I thought for sure the older girls would be too “grown up” for this one but they loved making it more than our three year old. Woohoo!

This craft was so super easy to make too. I didn’t really do much except show them how to do it and they took it from there.

DIY St. Patrick's Day suncatcher, easy tutorial to make your own with your kiddos

Here’s what you’ll need

  • contact paper

  • green crepe paper

  • a shamrock with a hollow middle {I cut mine out using my cricut}

  • scissors

I used my trusty Cricut to cut out my shamrock. I found the image in design space and adjusted it to be approx. 7” wide. You can always print your own and use scissors to cut out the middle. Julie has a printable linked on her website if you click her link above.

Then you need to measure out your contact paper. You want it to be larger than your shamrock.

DIY St. Patrick's Day suncatcher, easy tutorial to make your own with your kiddos

You’ll need to cut TWO pieces of contact paper that are larger than your shamrock.

DIY St. Patrick's Day suncatcher, easy tutorial to make your own with your kiddos

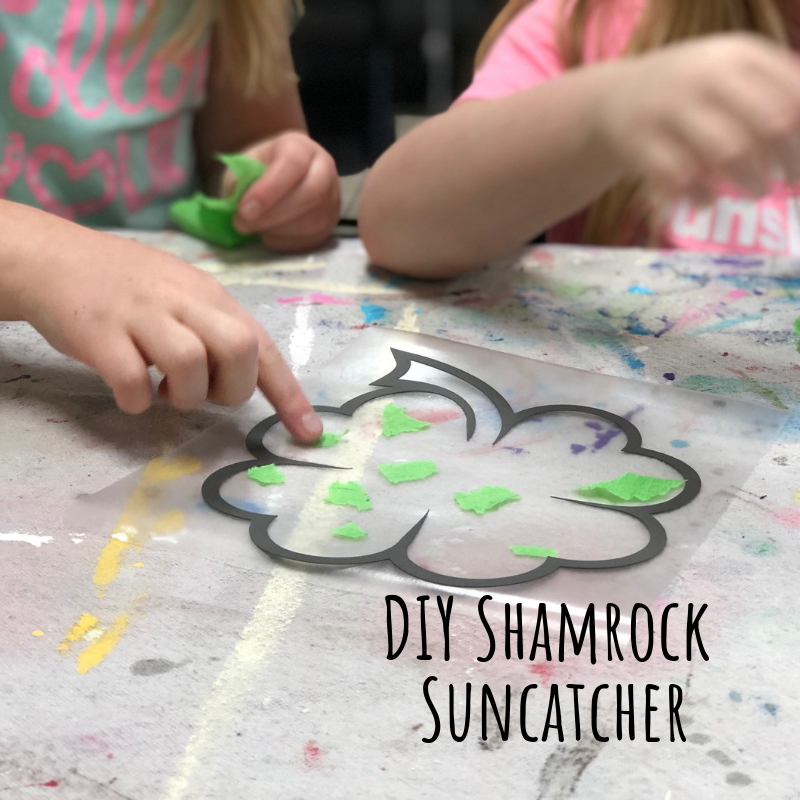
Remove the paper backing from your contact paper and place your shamrock in the middle. Then start tearing pieces of the crepe paper off and sticking them inside of the shamrock.

DIY St. Patrick's Day suncatcher, easy tutorial to make your own with your kiddos

Once your shamrock is covered remove the paper from the second piece of contact paper and lay it sticky side down onto the shamrock, essentially you are making a shamrock sandwich with the contact paper. Then trim off the extra leaving a 1/4 of and inch of contact paper all the way around the paper shamrock.

DIY St. Patrick's Day suncatcher, easy tutorial to make your own with your kiddos

And you’re done! SO EASY!!

St. Patrick's Day suncatcher, easy how to make this fun DIY