Dollar Tree moss bunny peeps on wood + FREE SVG

EASY SPRING CRAFT

DIY spring Easter Dollar Tree craft, easy and simple peep bunny craft made out of sheet moss. Frugal Easter craft for spring using your Cricut or vinyl cutting machine. Scrap wood craft project

DIY DOLLAR TREE SHEET MOSS BUNNIES + FREE SVG

Need an easy & inexpensive spring or Easter craft? This little moss bunny sign will fit in perfectly with your farmhouse or rustic decorations! And it won’t break the bank!

I love the Dollar Tree and I also love my Cricut machine. So when I can make projects combining the two it’s like fireworks in my craft room! Today I made little moss peep bunny cutouts using both my Dollar Tree find and the help of my never fail me Cricut machine. Be sure to check out this DOLLAR TREE BOOK STACK if you love this spring dollar store craft.

DIY spring Easter Dollar Tree craft, easy and simple peep bunny craft made out of sheet moss. Frugal Easter craft for spring using your Cricut or vinyl cutting machine. Scrap wood craft project

This spring Easter craft was super easy, crazy quick and it represents my gaggle of girls. I am a momma to four daughters so I wanted there to be four little moss bunny peeps to represent them <3 !! It just so happened to work out perfectly that I had a 10” piece of scrap wood I originally made for a different craft over a year ago {yes I’m one of those craft hoarder ladies} to use for this simple DIY. So there was no need to cut, paint, or stain anything today at least.

Affiliate Disclosure. Some of the links on this website are affiliate links, which means that I may earn a small commission if you click on the link or make a purchase using the link. If you make a purchase you will not be charged anything additional.


DIY spring Easter Dollar Tree craft, easy and simple peep bunny craft made out of sheet moss. Frugal Easter craft for spring using your Cricut or vinyl cutting machine. Scrap wood craft project

1. WOOD BASE

I used a piece of scrap wood from another project. It was already cut, stained, and painted so I didn’t need to do that for this project. If you want to know how to get that distressed wood look check out this DIY sign painting post.

2. CARDSTOCK BUNNY

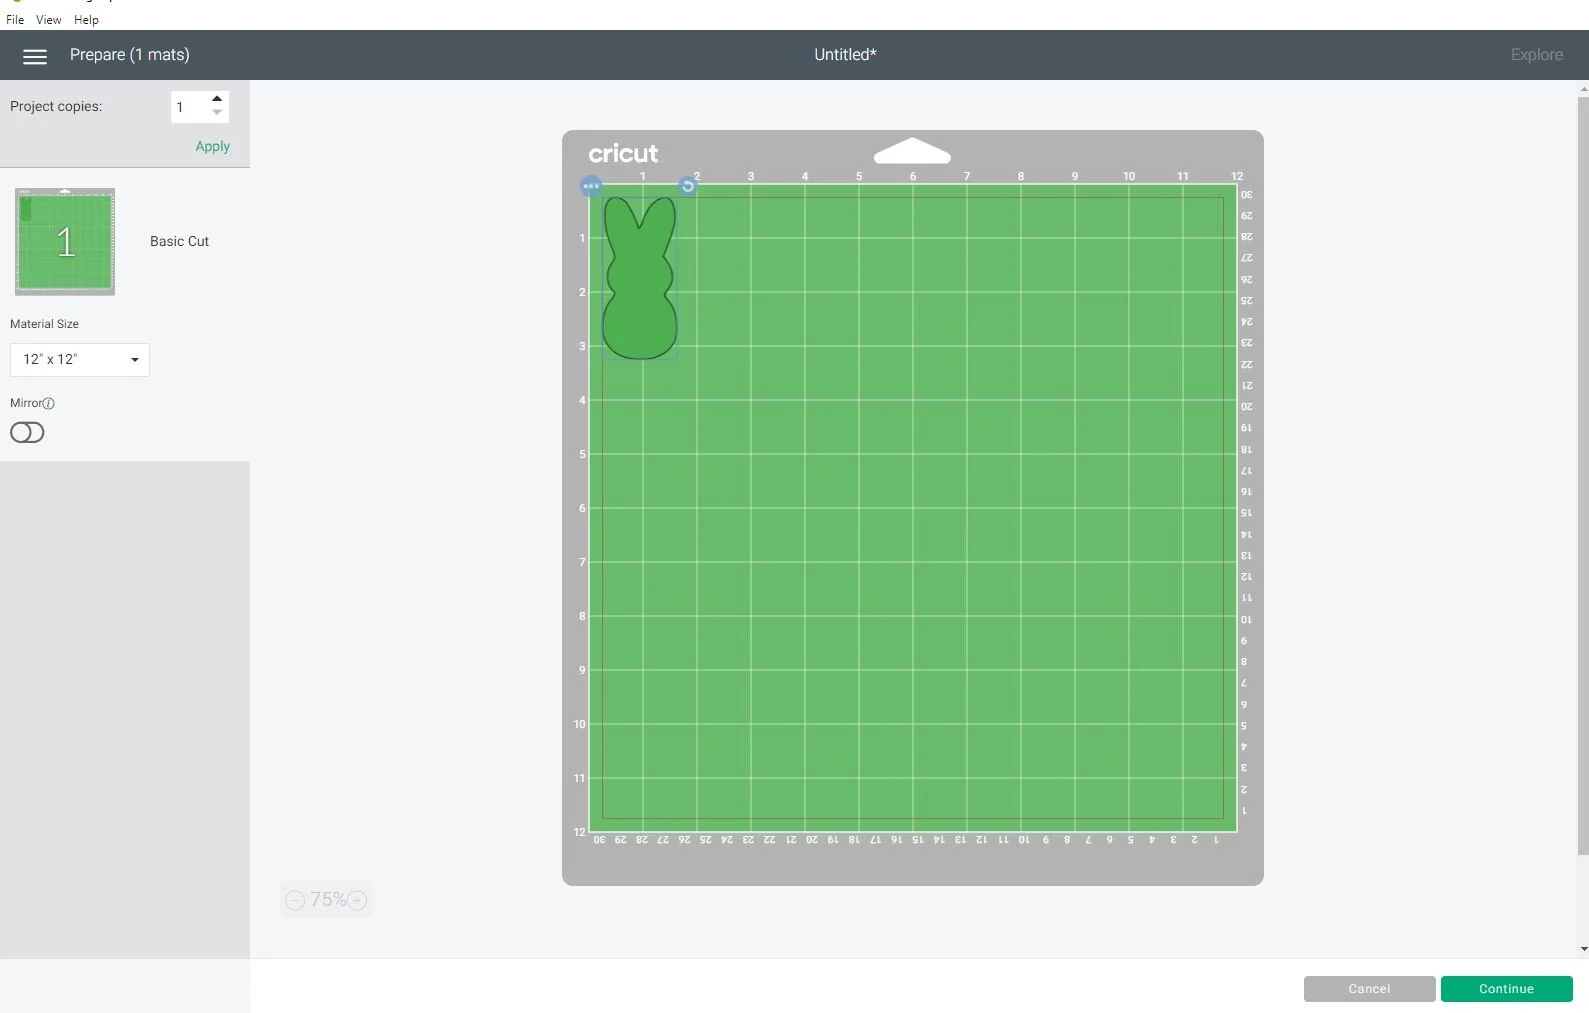
I used my Cricut to cut out a cardstock template. You can grab the same SVG I used from my FREE RESOURCE LIBRARY. That is my personal library where I share all of my free printables, SVG cut files, and patterns. This is a much easier way for my readers to get access to my freebies rather than filtering through emails or worse deleting an email that contains a file you needed.
DIY spring Easter Dollar Tree craft, easy and simple peep bunny craft made out of sheet moss. Frugal Easter craft for spring using your Cricut or vinyl cutting machine. Scrap wood craft project

You will only need ONE cardstock bunny no matter how many bunnies you plan on cutting out of the sheet moss.

If you are new to the Cricut world be sure to check out my post on the top 10 supplies & accessories you need to get started using your Cricut cutting machine.

2. TRACE

I flipped my sheet of moss upside down on my craft surface. Then I traced around it using a dark colored permanent thick marker. I tried doing this with a pen but it didn’t work out so great so I grabbed the closest thing to me I could find that would work, a permanent marker. This was a little tricky only because the moss backing is so uneven but since I’m not a perfectionist it worked just fine.

DIY spring Easter Dollar Tree craft, easy and simple peep bunny craft made out of sheet moss. Frugal Easter craft for spring using your Cricut or vinyl cutting machine. Scrap wood craft project

I tried to fit all four bunnies on one side of the sheet so I could make the most of my $1 find lol!

3. CUT THE MOSS BUNNIES OUT

Using a pair of regular scissors I cut the peep bunnies out of the moss sheet. Some of the moss fell off in some pieces leaving it looking a little bare in spots but don’t worry if that happens to you. You can fix that at the very end.

DIY spring Easter Dollar Tree craft, easy and simple peep bunny craft made out of sheet moss. Frugal Easter craft for spring using your Cricut or vinyl cutting machine. Scrap wood craft project

4. GLUE

Before I glued my moss bunnies down I placed them on my piece of wood so I could make adjustments before they were glued down.

DIY spring Easter Dollar Tree craft, easy and simple peep bunny craft made out of sheet moss. Frugal Easter craft for spring using your Cricut or vinyl cutting machine. Scrap wood craft project

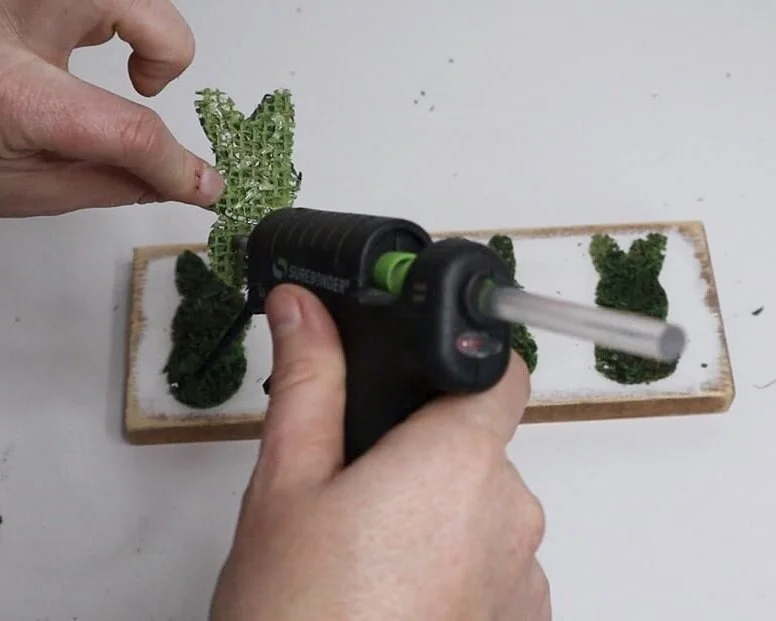
Then I used my fine tipped hot glue gun to glue them in place.
DIY spring Easter Dollar Tree craft, easy and simple peep bunny craft made out of sheet moss. Frugal Easter craft for spring using your Cricut or vinyl cutting machine. Scrap wood craft project

For the little areas that were bare I glue some leftover moss in those spots. You couldn’t even tell once I was finished that I had to add moss.
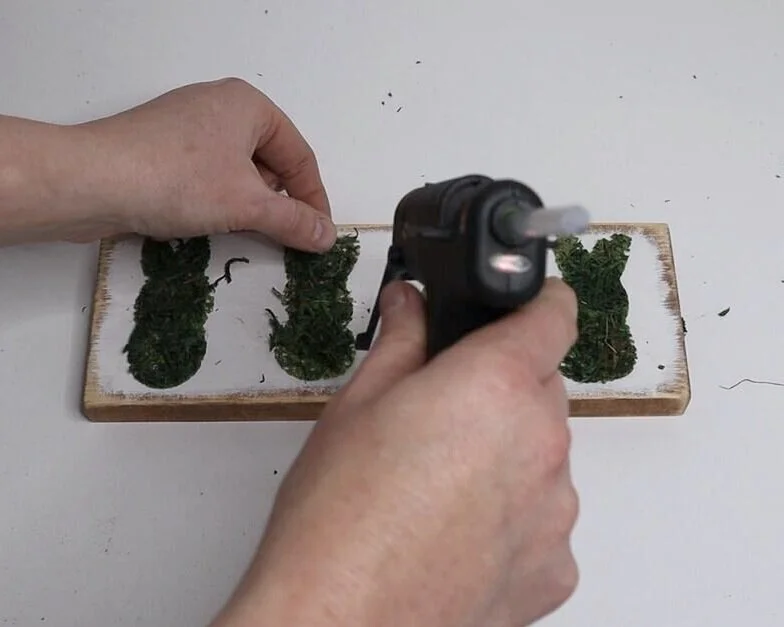
DIY spring Easter Dollar Tree craft, easy and simple peep bunny craft made out of sheet moss. Frugal Easter craft for spring using your Cricut or vinyl cutting machine. Scrap wood craft project

That’s it! So quick and easy. Click here for more DIY DOLLAR TREE CRAFTS.

DIY spring Easter Dollar Tree craft, easy and simple peep bunny craft made out of sheet moss. Frugal Easter craft for spring using your Cricut or vinyl cutting machine. Scrap wood craft project

Let me know if you have any questions in the comments below.

DIY farmhouse Dollar Tree bookstack + FREE SVG

DIY farmhouse book stack using real book and vinyl decals from your Cricut cutting machine. Make your own simple rustic book stack easy & simple from Dollar Tree books.

DIY FARMHOUSE BOOK STACK

Farmhouse book stacks are such an easy craft to DIY especially if you are just starting out in the crafting world. This is one of those craft projects you can do in less than 30 minutes start to finish. You don’t even have to wait for paint to dry. Don’t get me wrong I LOVE painting but it is so nice to do projects once in a while that have almost that instant satisfaction like this one does.

There are many different variations of ways to making these book stacks too. I chose to make the most simple stack out there but you can also paint them, you can make them out of wood instead of using real books, you can stamp them, or like in this craft tutorial you can use vinyl decals. No matter what rustic farmhouse book stack you choose to make it is sure to turn out gorgeous!

If you love this farmhouse craft be sure to check out these tiered tray mini farmhouse signs.

Affiliate Disclosure. Some of the links on this website are affiliate links, which means that I may earn a small commission if you click on the link or make a purchase using the link. If you make a purchase you will not be charged anything additional.

IMG_0190.jpgDIY farmhouse book stack using real book and vinyl decals from your Cricut cutting machine. Make your own simple rustic book stack easy & simple from Dollar Tree books.

how to make your own book stack using Dollar Tree books & your Cricut cutting machine

DIY farmhouse book stack using real book and vinyl decals from your Cricut cutting machine. Make your own simple rustic book stack easy & simple from Dollar Tree books.

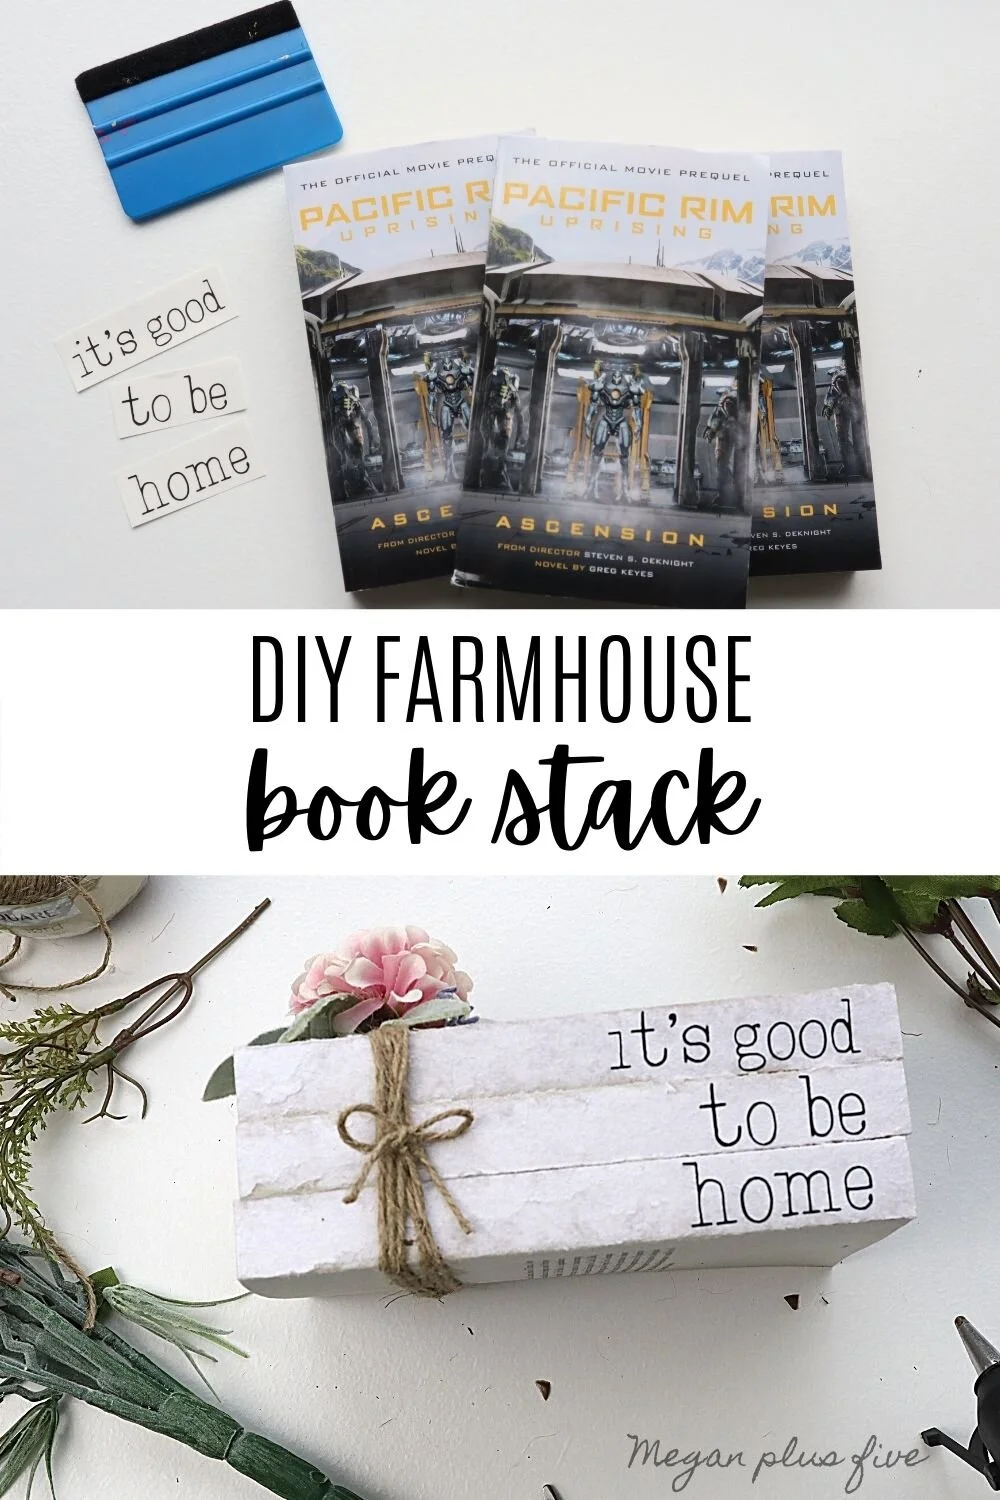
Here’s what you need

1. CUT OUT DECALS

You can get the SVG I used to make my book stack in my free resource library. In Cricut Design Space I adjusted the height of the words so that they would fit on the spine of the books. Also want to note that I left my words on lock mode so that the width adjusted with the height if that makes sense. My book spines measured around .75” with the covers on so I made my decals .69”. That size seemed to be perfect for my book stack.

DIY farmhouse book stack using real book and vinyl decals from your Cricut cutting machine. Make your own simple rustic book stack easy & simple from Dollar Tree books.

I cut my words out on black matte finish vinyl using my Cricut cutting machine and green cutting mat. Then I weeded my design using an exacto knife.

2. REMOVE THE OUTER COVER & PAGES

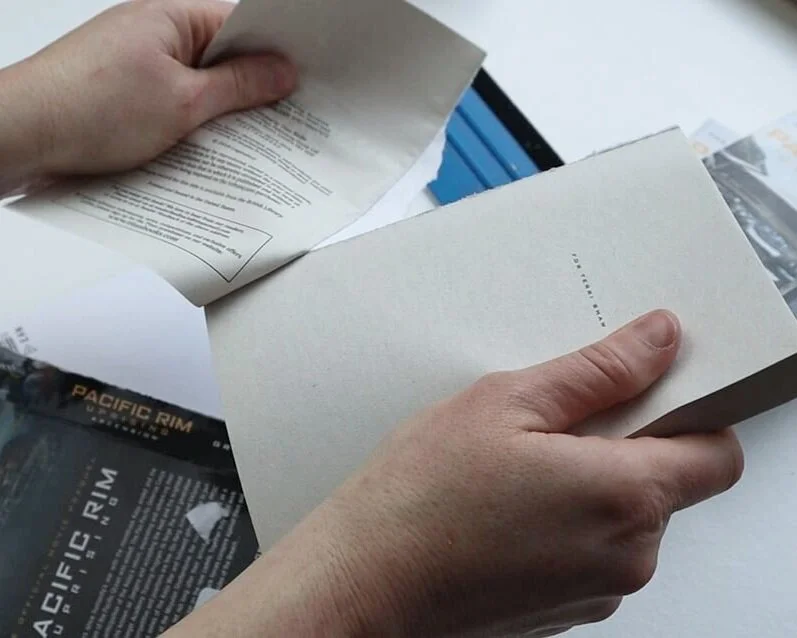
This is super easy! to get that rustic look of your books you just need to remove the cover, the shiny spine of the book, and the first few pages. They will rip right off. Something I also did was rip out a few extra pages so that I can use them to make some Easter bunny garland out of them. You want to do this with all three books.

DIY farmhouse book stack using real book and vinyl decals from your Cricut cutting machine. Make your own simple rustic book stack easy & simple from Dollar Tree books.

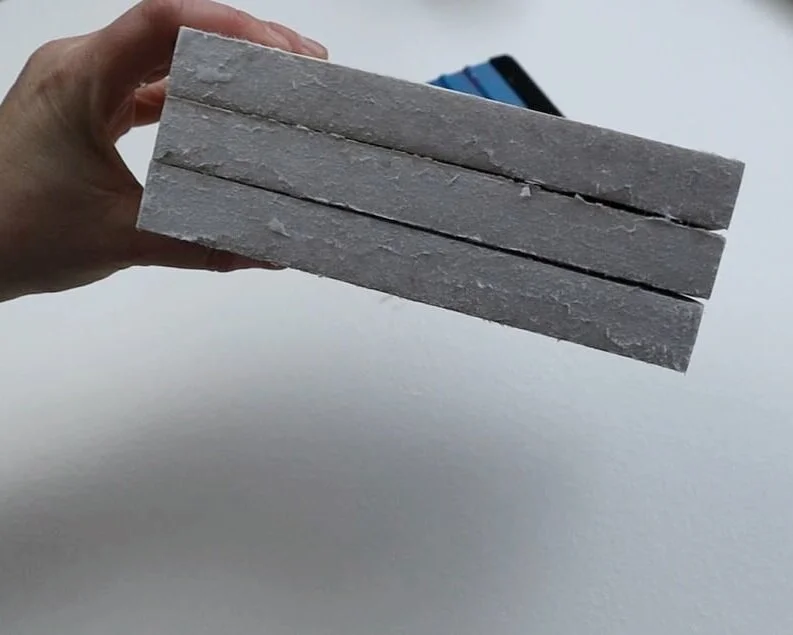
This is what my stack looked like after I removed the covers. There is still paper and it’s not completely smooth but that was the look I was going for. I could have kept peeling or taken a sanding sponge to it but I like this look.

DIY farmhouse book stack using real book and vinyl decals from your Cricut cutting machine. Make your own simple rustic book stack easy & simple from Dollar Tree books.

3. APPLY THE DECALS

When you get to this step be sure you take your time. This word decal has super skinny lines so it’s easy to mess up especially if you’re moving too quickly. I actually messed mine up a little and lost the dot to my “i”. I ended up having to recut just the dot but if I was more focused I wouldn’t have lost that tiny guy. A little behind the scenes while I was making this book stack…I had 5 kids, 15 baby chicks, 4 baby ducks, 2 dogs, and a cat all in my craft room while making these lol! We most definitely have that beautiful chaos going on 24/7 in our home. We had just picked up our new feathered babies the day before so their temporary home while they grow is in bins with heat lamps over them on my craft table.

DIY farmhouse book stack using real book and vinyl decals from your Cricut cutting machine. Make your own simple rustic book stack easy & simple from Dollar Tree books.

I used my favorite clear transfer tape to transfer the decals on the spines of my books. I didn’t measure or get super exact with this. I just eyeballed it and that worked great. I used my trusty blue vinyl squeegee to help press my decals down so that they were good and adhered to the sides of the books.

DIY farmhouse book stack using real book and vinyl decals from your Cricut cutting machine. Make your own simple rustic book stack easy & simple from Dollar Tree books.

Then I slowly removed the transfer tape. Be sure to go super slow on this step.

DIY farmhouse book stack using real book and vinyl decals from your Cricut cutting machine. Make your own simple rustic book stack easy & simple from Dollar Tree books.

4. TWINE

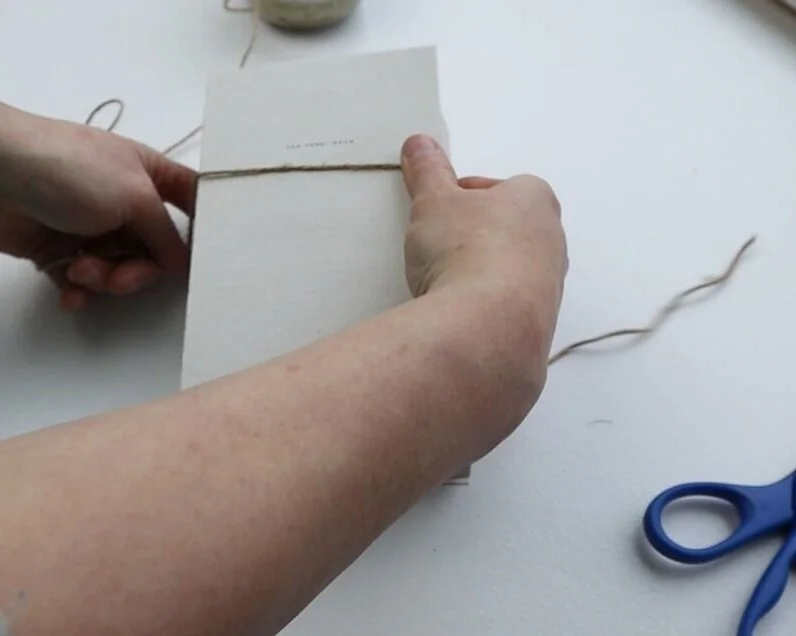
Stack your farmhouse books in order then take some twine and wrap it around your books. I chose to tie a bow on the spine side but you can also do this on the top. I did glue some lambs ear and flowers to the top of mine but I didn’t like it at all. So I removed those. They came off pretty easy because I glued them to the twine and not the page itself.

DIY farmhouse book stack using real book and vinyl decals from your Cricut cutting machine. Make your own simple rustic book stack easy & simple from Dollar Tree books.

Look at that before and after. So pretty!!!

DIY farmhouse book stack using real book and vinyl decals from your Cricut cutting machine. Make your own simple rustic book stack easy & simple from Dollar Tree books.

That’s it! Such and EASY rustic home décor DIY project! I hope you enjoyed this crafty tutorial. If you have any questions about this craft or any other projects on my blog comment below or message me in the about section.

Check out more DIY crafts below

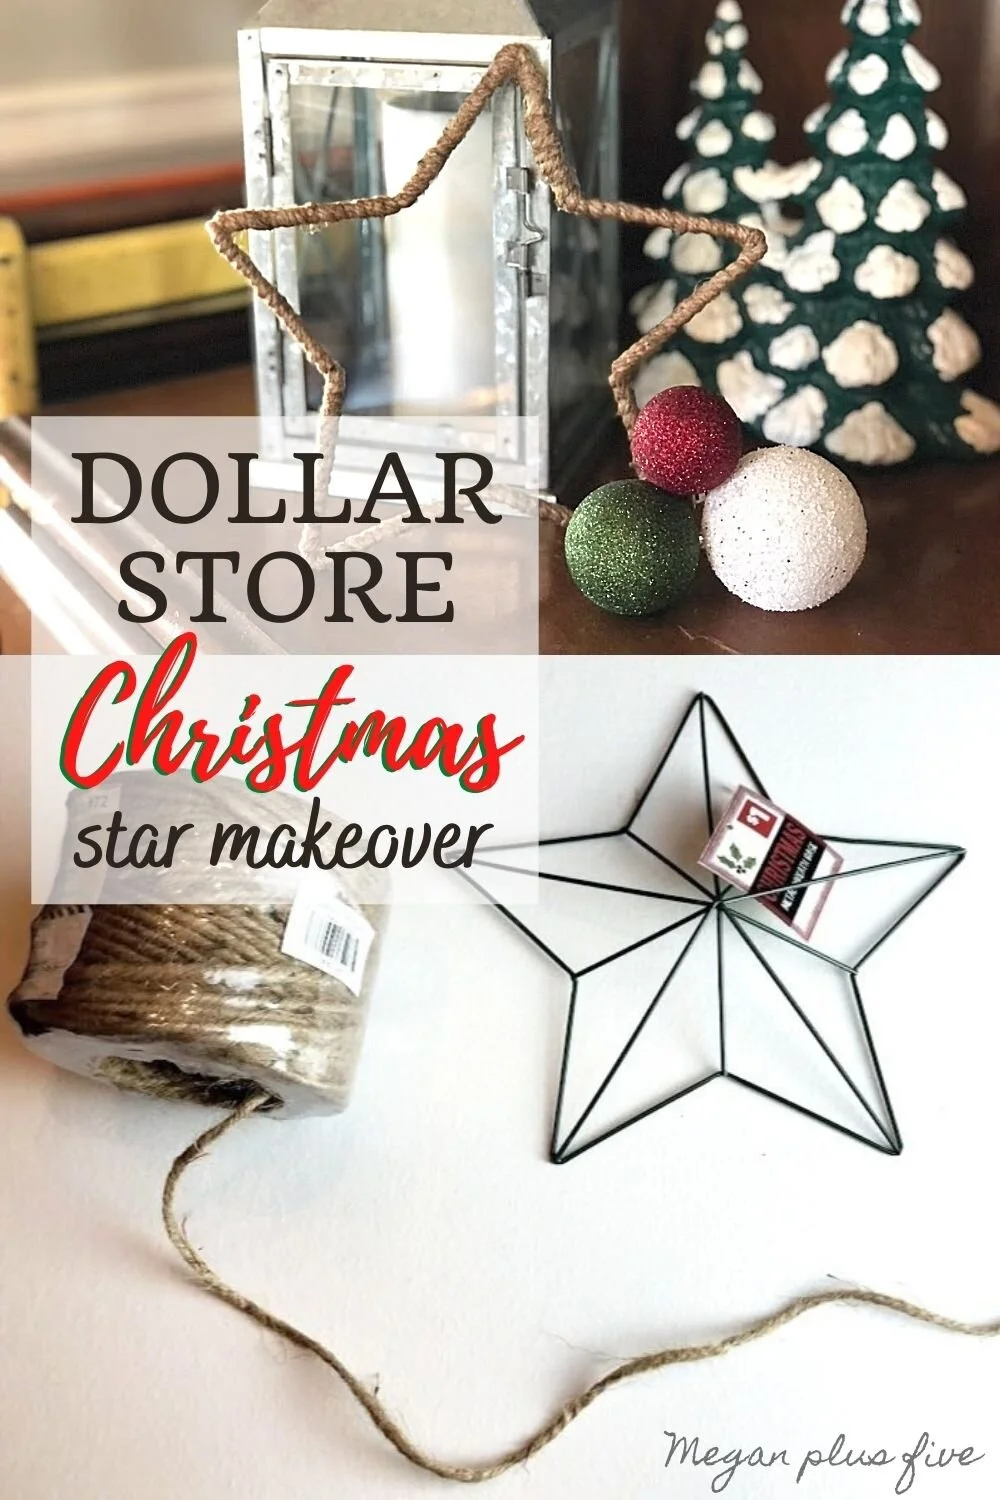
Dollar store Christmas star makeover

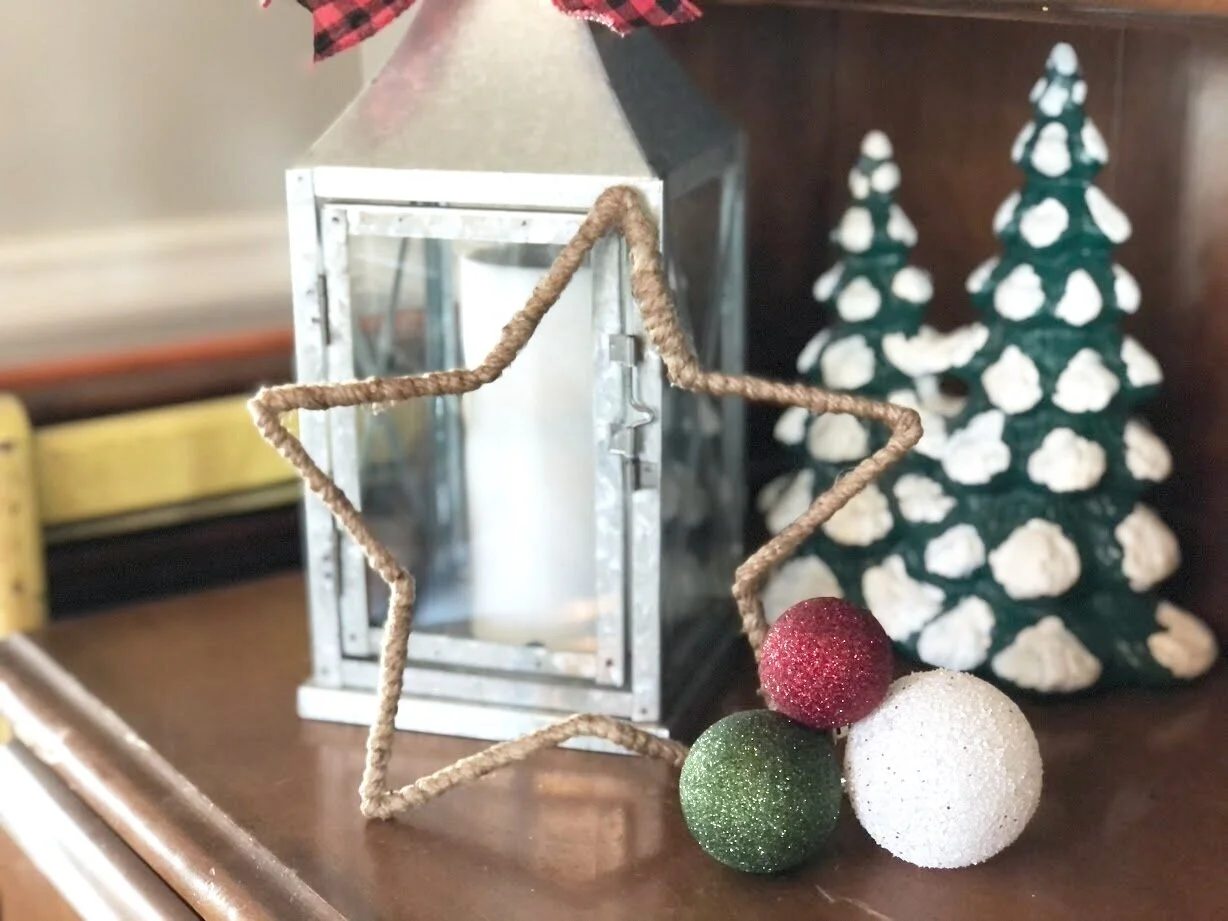
DIY dollar store Christmas decor. Christmas decorations on a budget. How to make a rustic farmhouse style star using twine or just and a wire star form.

The dollar stores are really outdoing themselves lately with their Christmas selections. I have found so many great finds there to either add to my Christmas décor OR give a bit of a makeover then add it to my Christmas decorations.

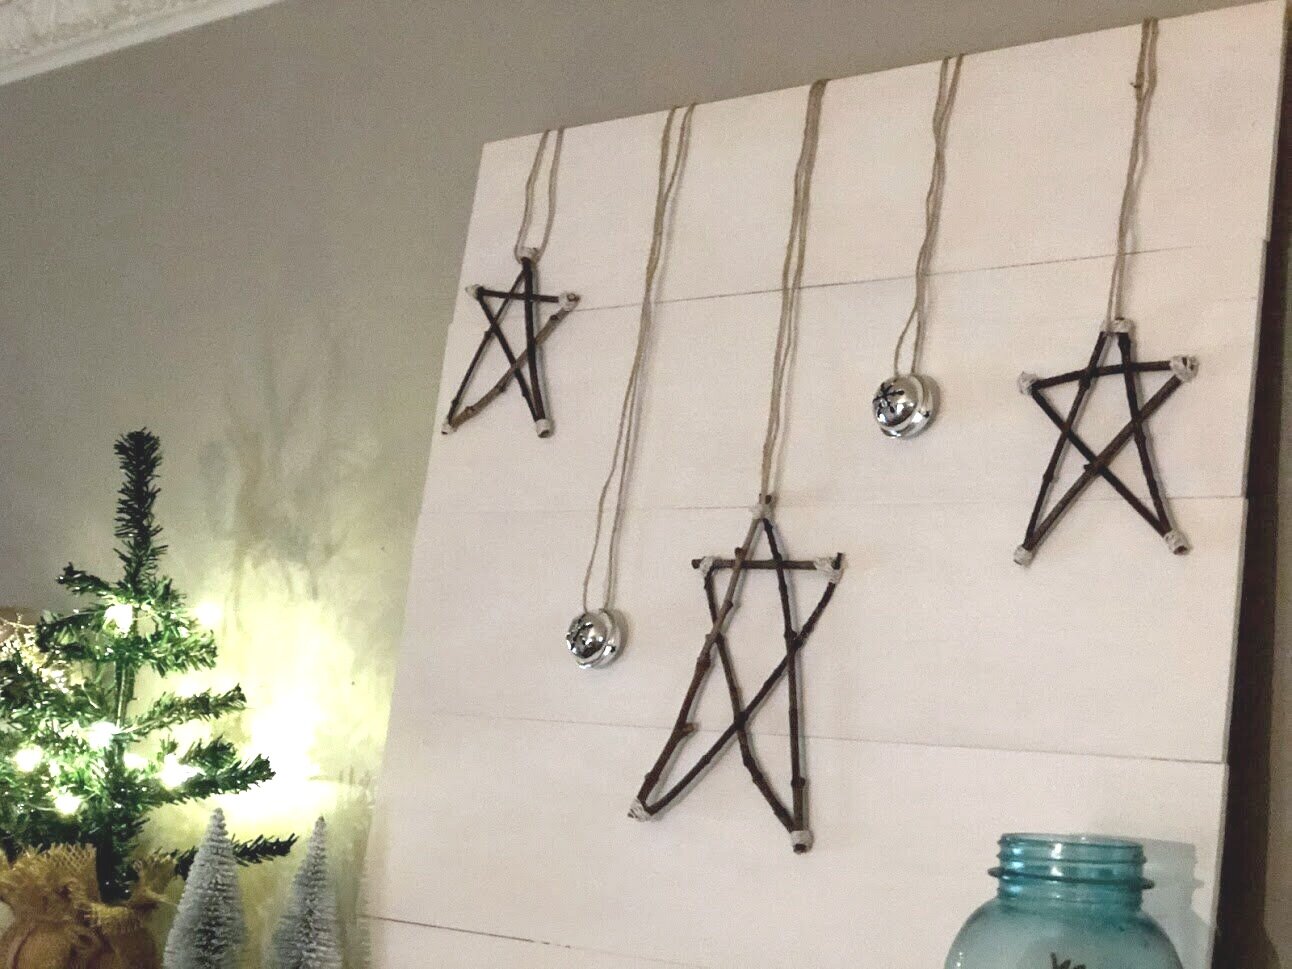
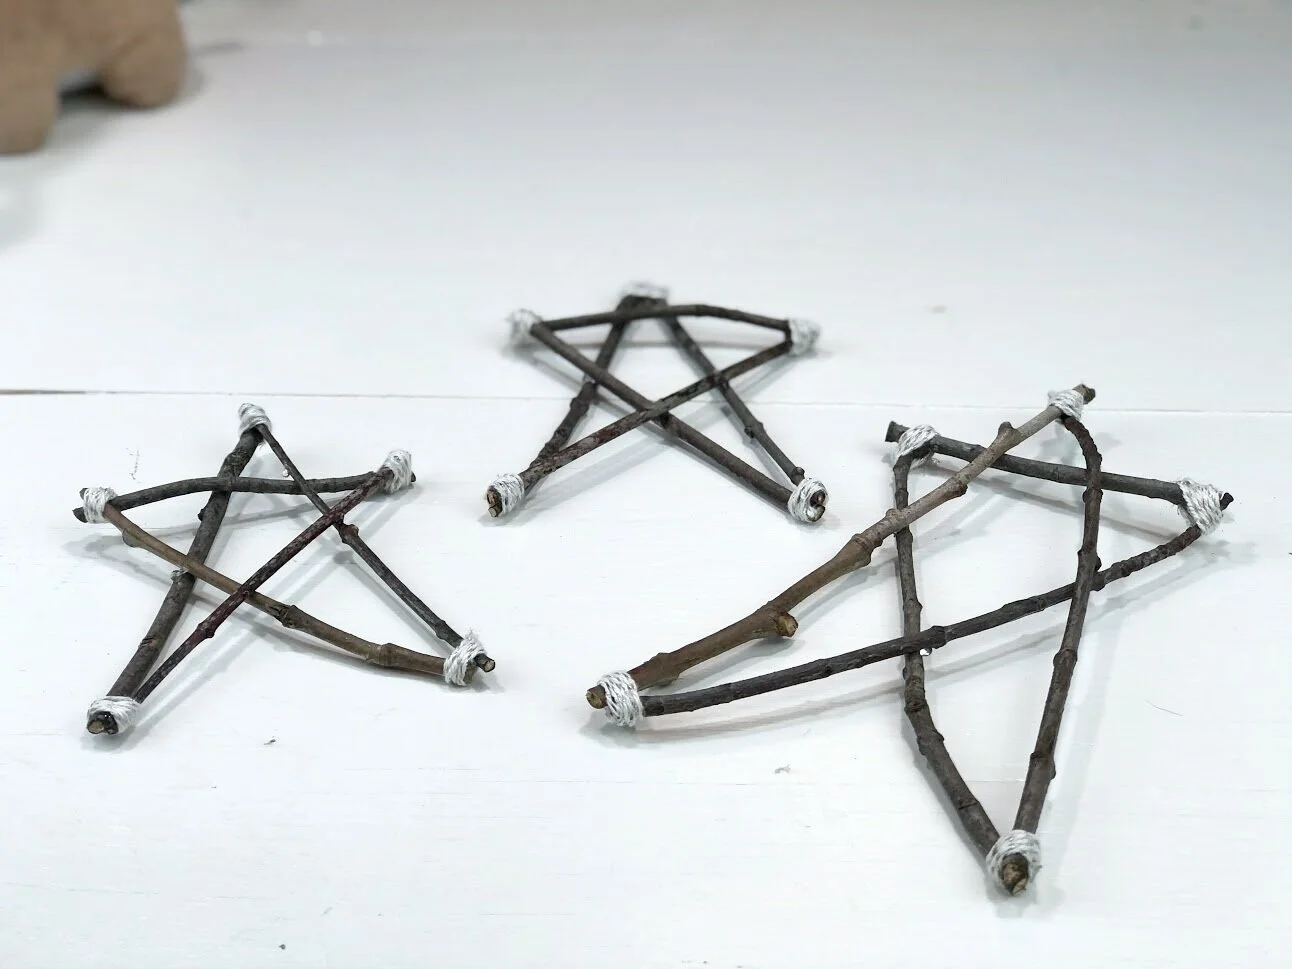
I found this little wire star at the Dollar General last night and since it was just $1 I snagged it up to take it home and give it a little makeover. Frugal living just runs through my veins. If you like this budget friendly Christmas DIY you will probably love these DIY TWIG STARS that basically costs $0 to make.

Affiliate Disclosure. Some of the links on this website are affiliate links, which means that I may earn a small commission if you click on the link or make a purchase using the link. If you make a purchase you will not be charged anything additional.

DIY dollar store Christmas decor. Christmas decorations on a budget. How to make a rustic farmhouse style star using twine or just and a wire star form.

I was originally going to wrap the wire star form in twine but that turned out hideous lol! It was bulky and just plain ugly. So I thought instead to remove the middle pieces and then wrap it and it turned out so simple but perfect for my Christmas decorations.

DOLLAR STORE STAR MAKEOVER

Here’s what you’ll need

DISCLOSURE: not responsible for any damages caused. Please craft at your own risk :)

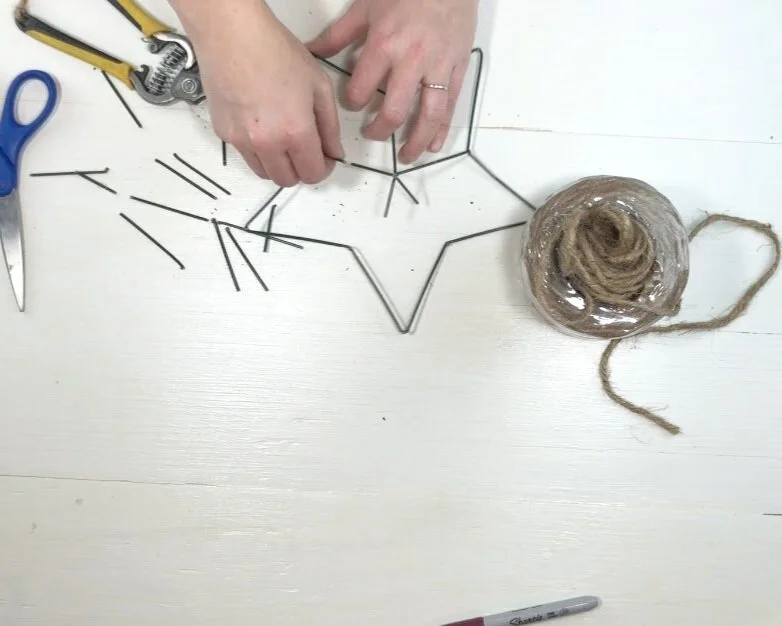
1. REMOVE THE MIDDLE WIRE

This was actually harder than I thought it would be. I had to try and cut it with all my might then bend it away in pieces.

DIY dollar store Christmas decor. Christmas decorations on a budget. How to make a rustic farmhouse style star using twine or just and a wire star form.

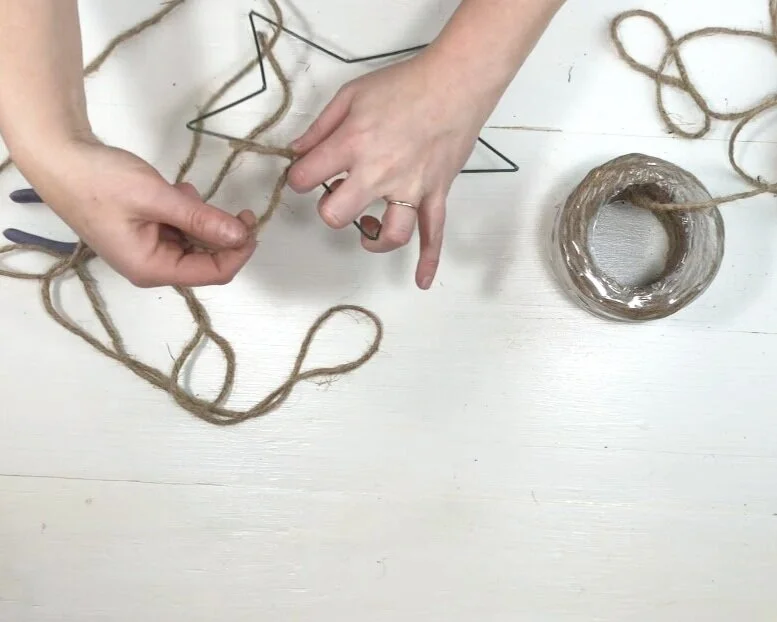
2. WRAP THE STAR

Then I cut a long piece of twine and just wrapped and wrapped and wrapped till I got back to the starting point. Around the corners of the wire star I added hot glue to reinforce the frame then wrapped it in twine.

DIY dollar store Christmas decor. Christmas decorations on a budget. How to make a rustic farmhouse style star using twine or just and a wire star form.

When I got to the very end I secured it in place with hot glue.

3. REMOVE THE FRZZIES

My star had a ton of frizz to it from wrapping and wrapping. So I used my lighter to remove those. I just lightly waved my lighter over the areas that I wanted the frizz gone and was sure to blow as soon as it touched the star so it wouldn’t catch fire.

DIY dollar store Christmas decor. Christmas decorations on a budget. How to make a rustic farmhouse style star using twine or just and a wire star form.

That’s it! Quick and easy dollar store Christmas makeover craft.

DIY dollar store Christmas decor. Christmas decorations on a budget. How to make a rustic farmhouse style star using twine or just and a wire star form.

I hope you enjoyed this crafty tutorial. If you have any questions please leave them in the comments below.

DIY dowel rod snowman ornament DAY 8

DIY Christmas ornaments to make with kids. Easy snowman (snowmen) Christmas tree hanging ornament to make from a dowel rod. How to paint a snowman on a Christmas ornament easy craft tutorial.

This DIY Christmas ornament is SUPER EASY! Similar to the square snowmen ornaments I made last year. Only this time they are round and they have cute rosy cheeks like these mason jar snowmen I showed how to make on my blog. There are differences of course but all three of these snowmen are so adorable.

If you are a craft-aholic like myself, then you probably hang on to EVERYTHING. The dowels I’m using for this snowman ornament were actually leftover stems from a larger version of these 2x4 wood pumpkins. Really, I probably should have tossed these scraps BUT then I wouldn’t have been inspired to create this Christmas ornament tutorial to share here on my blog.

DIY Christmas ornaments to make with kids. Easy snowman (snowmen) Christmas tree hanging ornament to make from a dowel rod. How to paint a snowman on a Christmas ornament easy craft tutorial.

See more of my 30 DAYS OF DIY CHRISTMAS ORNAMENTS here

Here’s what you need to make a dowel rod snowman ornament

DIY Christmas ornaments to make with kids. Easy snowman (snowmen) Christmas tree hanging ornament to make from a dowel rod. How to paint a snowman on a Christmas ornament easy craft tutorial.

This ornament is so fun, easy and a wonderful Christmas craft to make with the kids. Don’t sweat it if they don’t come out perfect. Lord knows when we craft with our kids it’s never about the perfection, rather it’s about the memories and bond you’re building with your children.

1.PAINT

The first thing I did was paint the dowel rod piece all white, including the top and bottom. I let the first coat dry then I applied a second coat for a little more coverage then I let that coat dry before moving on to step 2.

DIY Christmas ornaments to make with kids. Easy snowman (snowmen) Christmas tree hanging ornament to make from a dowel rod. How to paint a snowman on a Christmas ornament easy craft tutorial.

2. CHEEKS

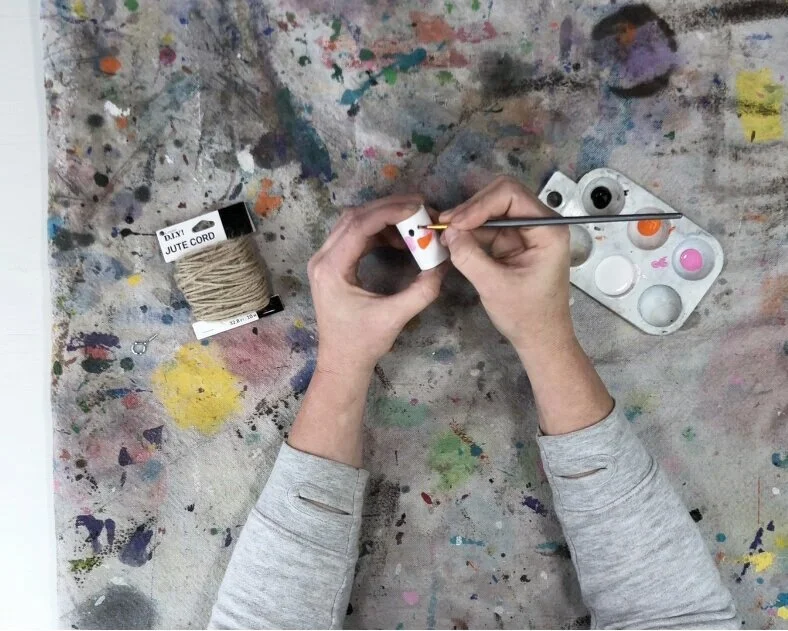
Because I want the nose to go over the cheek I painted the snowman’s cheeks first. This takes a TINY amount of paint, like a teeny tiny amount. I lightly tapped the tip of my paint brush into the pink paint then into the white paint, but less white paint than pink paint on my brush.

DIY Christmas ornaments to make with kids. Easy snowman (snowmen) Christmas tree hanging ornament to make from a dowel rod. How to paint a snowman on a Christmas ornament easy craft tutorial.

Then I made swirly circles with my brush. I probably should have used a round tipped brush for this but I grabbed a pointy tipped one and just didn’t want to hunt for a new brush so I went with it. It worked but not as good as it could have with a round tipped brush.

I kept added white and pink paint to the cheeks till I was happy with the way they looked.

3. NOSE

After the cheeks were dry I painted on an orange nose. I used the same pointy brush for this. I made a sideways triangle then filled it in with orange paint. I added a tiny bit of black paint to give it a little depth.

DIY Christmas ornaments to make with kids. Easy snowman (snowmen) Christmas tree hanging ornament to make from a dowel rod. How to paint a snowman on a Christmas ornament easy craft tutorial.

4.EYES & MOUTH

Using the same brush I painted on irregular looking circles for the eyes and for the mouth in black. I really tried to make them look like coal.

DIY Christmas ornaments to make with kids. Easy snowman (snowmen) Christmas tree hanging ornament to make from a dowel rod. How to paint a snowman on a Christmas ornament easy craft tutorial.

After the black paint was dry I used the end of my paint brush to make accent dots on the eyes and mouth.

DIY Christmas ornaments to make with kids. Easy snowman (snowmen) Christmas tree hanging ornament to make from a dowel rod. How to paint a snowman on a Christmas ornament easy craft tutorial.

5. SCREW EYE AND JUTE

I screwed the hanger (screw eye) into the top of my snowman ornament to hang it. Then I added a piece of jute to hang it from the Christmas tree.

DIY Christmas ornaments to make with kids. Easy snowman (snowmen) Christmas tree hanging ornament to make from a dowel rod. How to paint a snowman on a Christmas ornament easy craft tutorial.

I hope you enjoyed this crafty Christmas ornament tutorial. Let me know if you have any questions in the comments below.

Don’t forget to pin the image below to save for later :)!

DIY Christmas ornaments to make with kids. Easy snowman (snowmen) Christmas tree hanging ornament to make from a dowel rod. How to paint a snowman on a Christmas ornament easy craft tutorial.

Happy Crafting!

Check out more Christmas posts below

Dollar Tree Christmas Tree rustic decoration

DIY Dollar Tree farmhouse Christmas tree. What to do with the mini Christmas trees from the dollar tree. Easy way to use the cheap Christmas trees from the dollar store. Rustic farmhouse Christmas decor on a budget.

Have you been to the Dollar Tree lately? I don’t get there as often as I’d like but I did get a chance to stop in last night and WOW their Christmas supply gets better and better every year!

They have these cute Charlie Brown looking Christmas trees this year and I just couldn’t leave the store without buying a couple of them.

Affiliate Disclosure. Some of the links on this website are affiliate links, which means that I may earn a small commission if you click on the link or make a purchase using the link. If you make a purchase you will not be charged anything additional.

DIY Dollar Tree farmhouse Christmas tree. What to do with the mini Christmas trees from the dollar tree. Easy way to use the cheap Christmas trees from the dollar store. Rustic farmhouse Christmas decor on a budget.

This DIY was SUPER easy! It was almost mess free and it was ready to put on the shelf in just a matter of minutes from taking it out of the plastic Dollar Tree bag.

EASY DOLLAR TREE CHRISTMAS TREE DIY

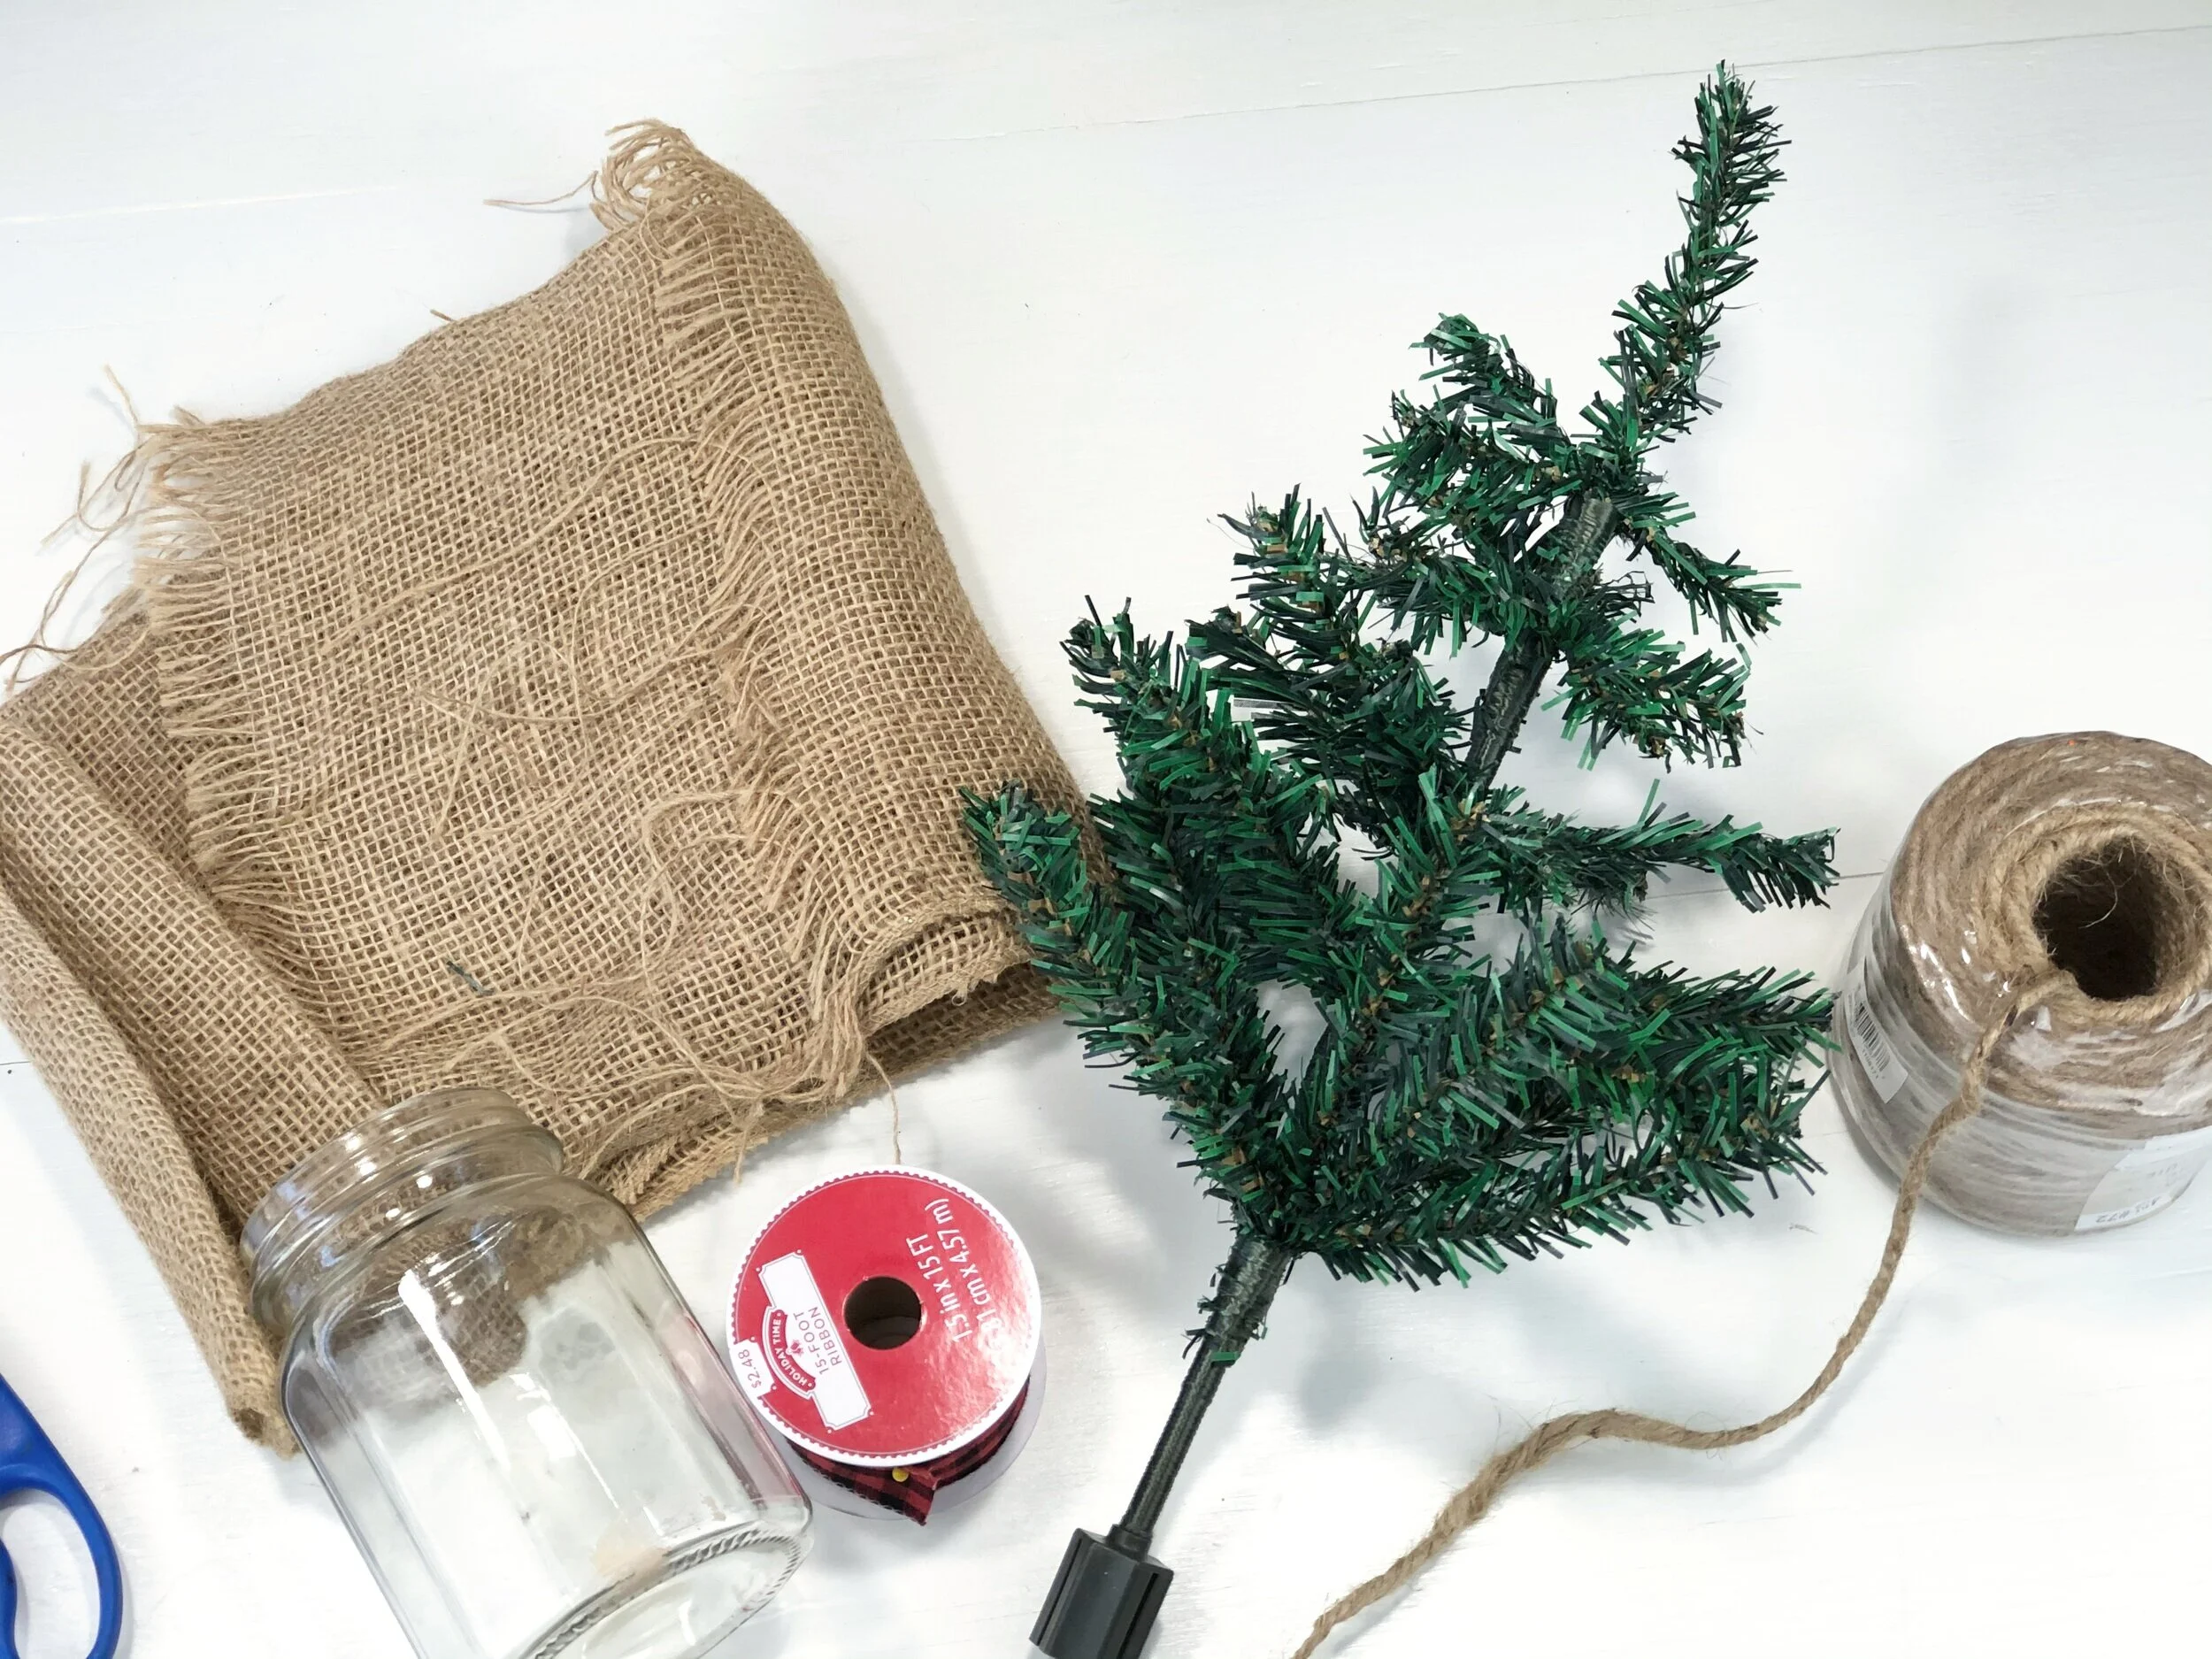
Here’s what I used

DIY Dollar Tree farmhouse Christmas tree. What to do with the mini Christmas trees from the dollar tree. Easy way to use the cheap Christmas trees from the dollar store. Rustic farmhouse Christmas decor on a budget.

I had everything except for the Christmas tree on hand which was awesome because when I bought the tree I had no idea what exactly I was going to do with it. Which is usually how I shop for my projects lol!

1. CUT THE BURLAP TO SIZE

I used a piece of scrap burlap I had from years ago (I don’t throw anything away lol). I placed my old jar on the burlap, pulled the burlap up over the glass so I’d know how big of a piece I’d need.

DIY Dollar Tree farmhouse Christmas tree. What to do with the mini Christmas trees from the dollar tree. Easy way to use the cheap Christmas trees from the dollar store. Rustic farmhouse Christmas decor on a budget.

Then I cut that into a circle. I just eyeballed this. Also, this glass used to hold craft supplies and since I was covering it I didn’t think I needed to give it a bath first.

2. ADD TWINE

DIY Dollar Tree farmhouse Christmas tree. What to do with the mini Christmas trees from the dollar tree. Easy way to use the cheap Christmas trees from the dollar store. Rustic farmhouse Christmas decor on a budget.

I didn’t get super fancy with this at all. I cut off a piece of twine I thought would be long enough to tie around the bottom lip of the glass then then pulled it tight and tied it in a bow.

DIY Dollar Tree farmhouse Christmas tree. What to do with the mini Christmas trees from the dollar tree. Easy way to use the cheap Christmas trees from the dollar store. Rustic farmhouse Christmas decor on a budget.

3. ADD THE TREE

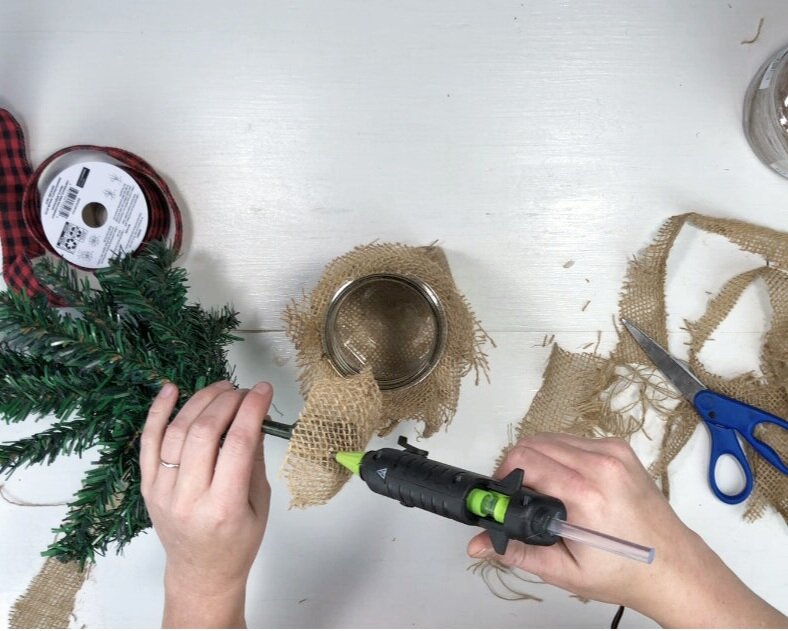
I didn’t want to mess with stuffing anything into the jar to hold the tree up so instead I hot glued it in. This took a bit of trial and error before I finally got it to stick right.

What worked for me was taking a piece of the discarded burlap and hot gluing it to the bottom of the tree.

DIY Dollar Tree farmhouse Christmas tree. What to do with the mini Christmas trees from the dollar tree. Easy way to use the cheap Christmas trees from the dollar store. Rustic farmhouse Christmas decor on a budget.

Then I added more hot glue to the bottom of the burlap and stuck the tree in the glass jar. I held it there till the glue was dry. It didn’t budge after that!

DIY Dollar Tree farmhouse Christmas tree. What to do with the mini Christmas trees from the dollar tree. Easy way to use the cheap Christmas trees from the dollar store. Rustic farmhouse Christmas decor on a budget.

4. LIGHTS

My tree was looking kind of sad so I found some lights I had bought from the Dollar Tree over the summer and strung them on the tree. They are battery operated so I just stuck the battery pack into the glass jar to hide it.

DIY Dollar Tree farmhouse Christmas tree. What to do with the mini Christmas trees from the dollar tree. Easy way to use the cheap Christmas trees from the dollar store. Rustic farmhouse Christmas decor on a budget.

That’s it! It turned out SOOOOO CUTE! And so crazy easy! It’s nice to do a craft sometimes where the results are kinda instant and you don’t have to wash out any paint brushes or clean up hardly anything.

DIY Dollar Tree farmhouse Christmas tree. What to do with the mini Christmas trees from the dollar tree. Easy way to use the cheap Christmas trees from the dollar store. Rustic farmhouse Christmas decor on a budget.

I can’t wait to get more of my Christmas decorations made for my new house! Let me know if you have any questions about this DIY in the comments below.

Happy Crafting!

Check out more Christmas DIY tutorials below


DIY easy wood tag ornament with cute wooden beads DAY 7

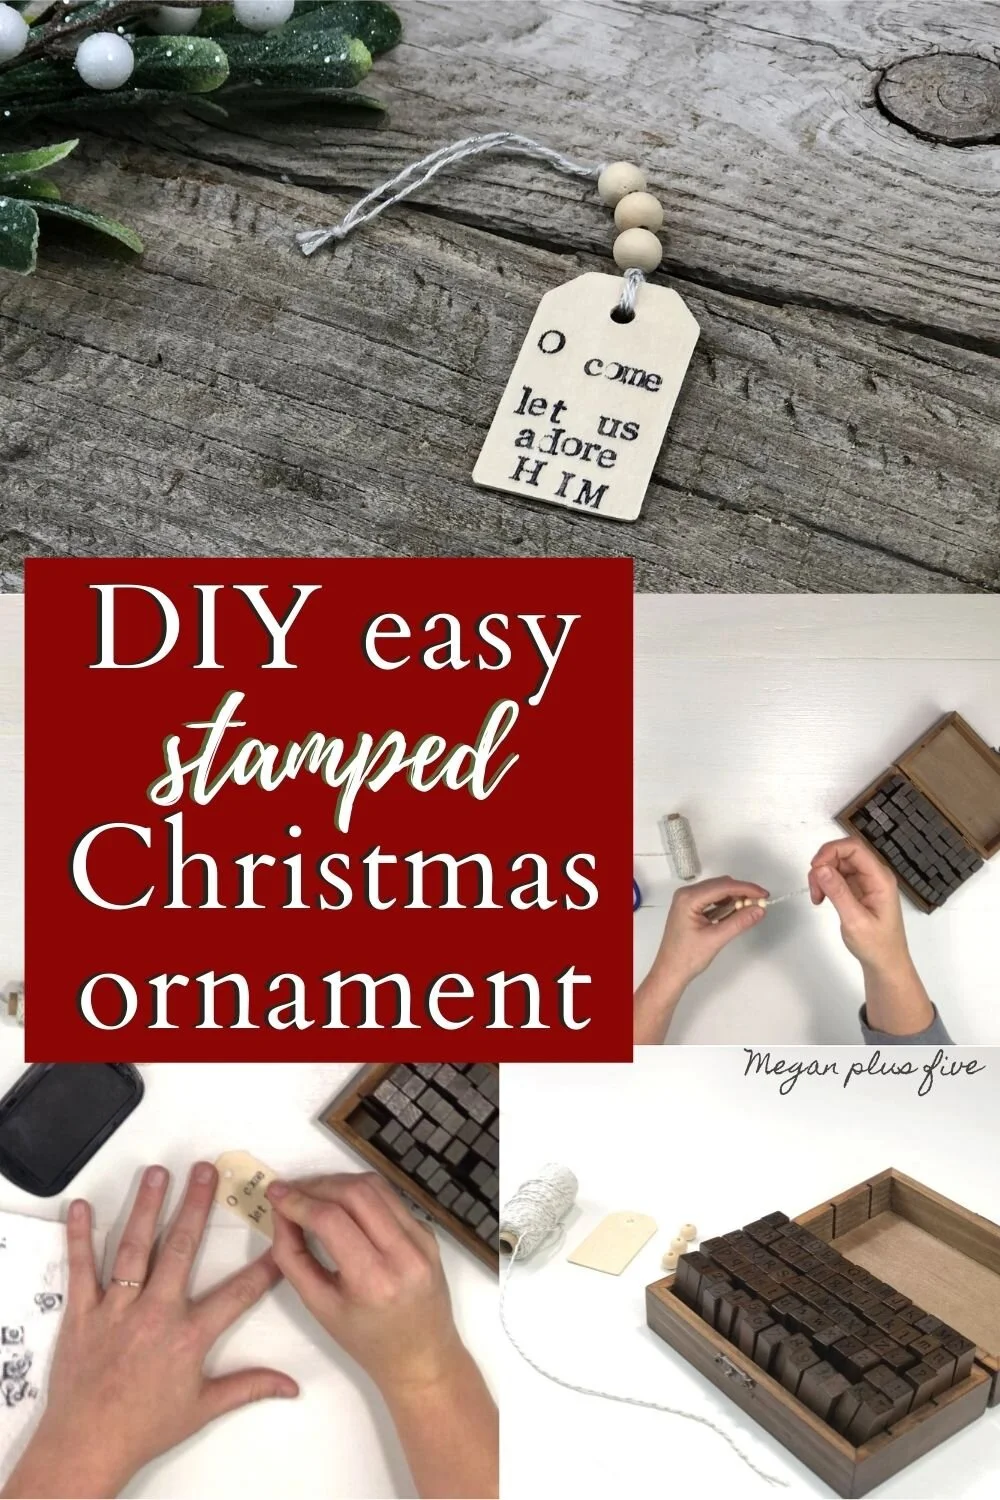
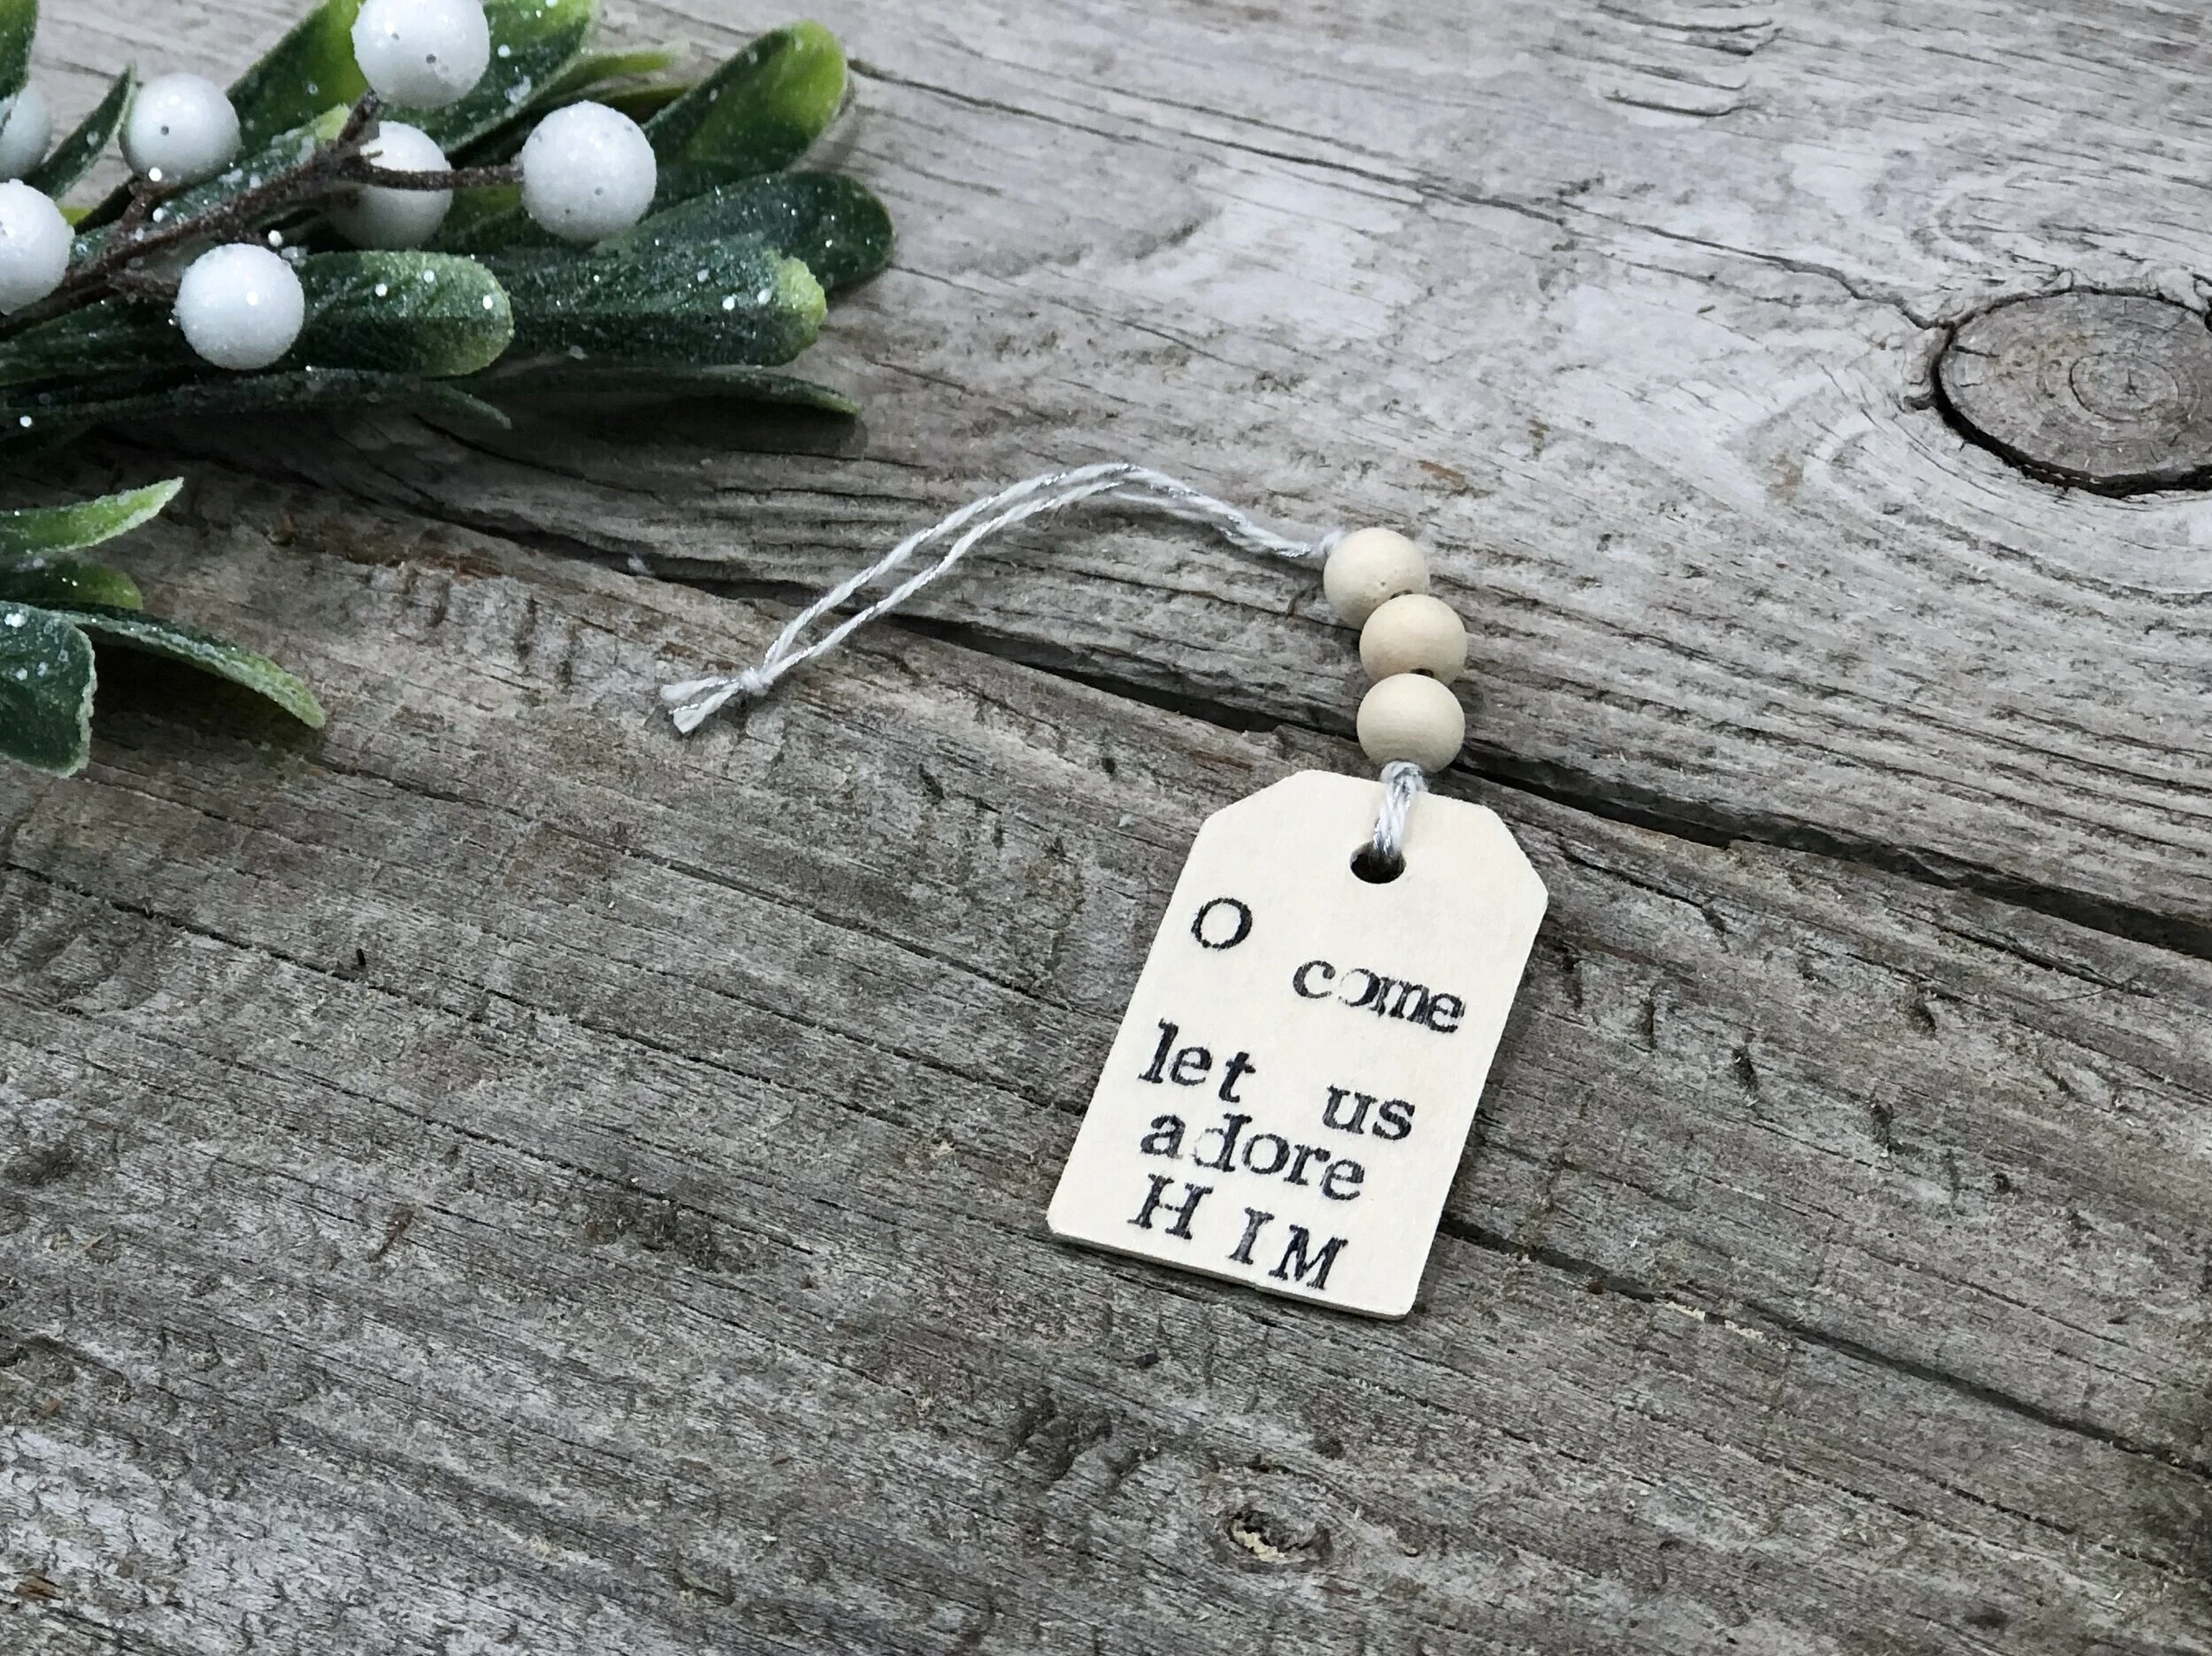
How to make a wood tag Christmas ornament. DIY Christmas ornament with wood beads. How to stamp on wood. O come let us adore Him Christmas DIY.

Super easy wood tag Christmas ornament DIY

Christmas will be here before we know it! Last year I started a 30 days of DIY Christmas ornaments challenge for myself and I got so crazy busy with orders from my shop that I couldn’t squeeze very many in. I completely underestimated how busy I would be last year.

This year I have toned my shop down a lot. I am in a place where I am no longer making finished home décor items {thank goodness because while I LOVE creating it does take more time to make finished pieces than it does to create files and craft kits} and I am solely focusing on SVG’s, DIY craft kits, and writing craft tutorials for you to enjoy.

Affiliate Disclosure. Some of the links on this website are affiliate links, which means that I may earn a small commission if you click on the link or make a purchase using the link. If you make a purchase you will not be charged anything additional. This is just a way I can help add to our family finances to raise our four daughters. Please know I would never recommend a product or service I do not totally stand behind

How to make a wood tag Christmas ornament. DIY Christmas ornament with wood beads. How to stamp on wood. O come let us adore Him Christmas DIY.

I’m just going to pick up where I left off last year with my 30 days of DIY Christmas ornaments.


DAY 7 of my 30 days of DIY Christmas ornaments I made a simple stamped wood tag with wood bead accents to hang it from.

These little wooden beads are SUPER POPULAR right now. And for good reason because they are so versatile. I have used them for photo accents, bead garland, Christmas ornaments, keychains, the list goes on.

Today I used them on this ornament and it was super easy to make. It took just minutes to make AND there was virtually NO MESS to clean up after.

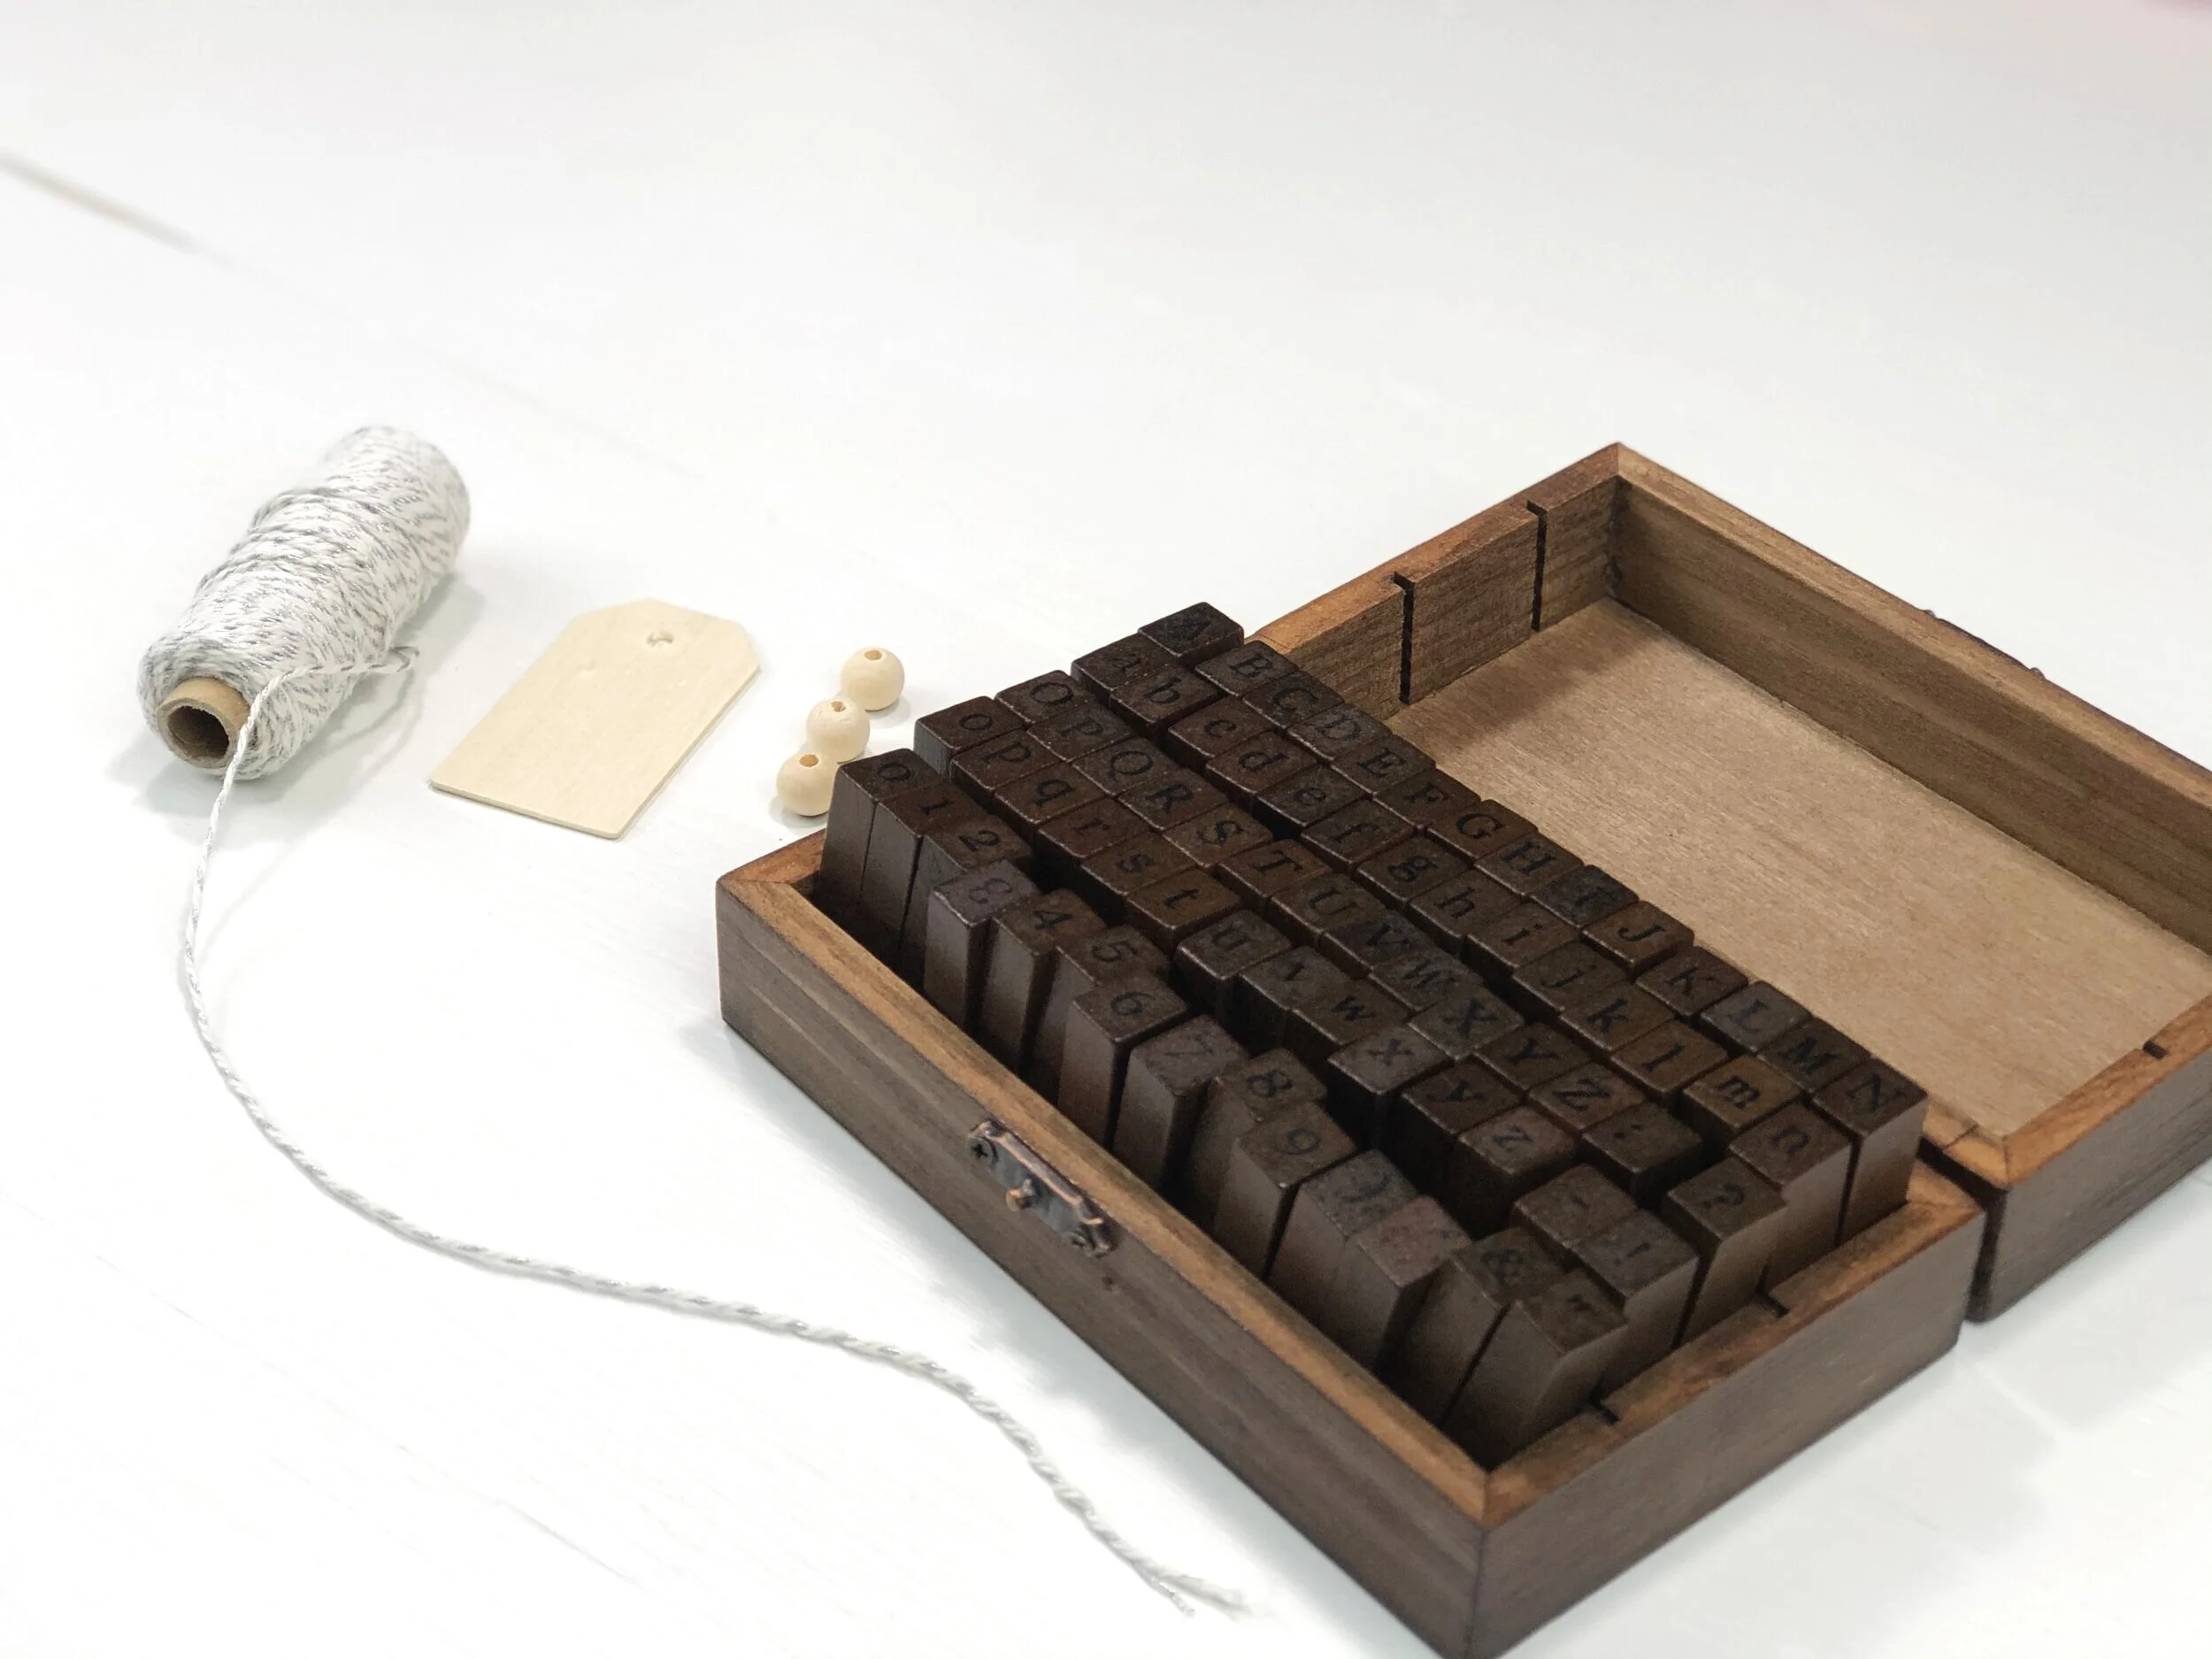
Here’s what you’ll need to make a stamped wood tag Christmas ornament

How to make a wood tag Christmas ornament. DIY Christmas ornament with wood beads. How to stamp on wood. O come let us adore Him Christmas DIY.

1.STAMP

The first thing I did was think of a saying. I wanted this one to say “O come let us adore Him”. It’s short and sweet and the reason for the season. Mine is FAR from perfect but that’s what makes handmade so special anyway.

How to make a wood tag Christmas ornament. DIY Christmas ornament with wood beads. How to stamp on wood. O come let us adore Him Christmas DIY.

I had a paper towel on hand so I could stamp off the excess. I lightly tapped the stamp onto the black stamp pad. You do not want a heavy hand for this. Then again lightly pressed it onto my wooden tag. Very lightly. If you press too hard you’ll get markings from the edges of the stamp. You may want to practice this a few times on your paper towel before trying it on the wooden tag.

Then I let that dry.

2. ADD BAKERS TWINE

Next I added my bakers twine. I used one that was white and had a bit of silver in it. I just eyeballed a length I wanted. Folded it in half and fed the looped end through the hole in my wood tag. Then I pulled the loose ends through the loop to secure it onto the tag.

How to make a wood tag Christmas ornament. DIY Christmas ornament with wood beads. How to stamp on wood. O come let us adore Him Christmas DIY.

3. ADD BEADS

The beads I used were fairly small and it was difficult to feed the twine through the small holes. I added a piece of masking tape to the open ends of the twine to make it easier.

How to make a wood tag Christmas ornament. DIY Christmas ornament with wood beads. How to stamp on wood. O come let us adore Him Christmas DIY.

I fed three small beads onto the twine then tied a knot at the top of the beads so they stayed in place.

How to make a wood tag Christmas ornament. DIY Christmas ornament with wood beads. How to stamp on wood. O come let us adore Him Christmas DIY.

4. KNOT THE TWINE

I removed the tape and tied the two ends of the bakers twine together so I could hang it on the Christmas Tree.

How to make a wood tag Christmas ornament. DIY Christmas ornament with wood beads. How to stamp on wood. O come let us adore Him Christmas DIY.

That’s it. No painting, no glue gun, no fuss really. Super simple Christmas ornament you can even make with the kiddos.

How to make a wood tag Christmas ornament. DIY Christmas ornament with wood beads. How to stamp on wood. O come let us adore Him Christmas DIY.

I hope you enjoyed this Christmas ornament tutorial. Check out more of my Christmas and winter themed DIY crafts


Flying bat sign, easy DIY sign for Halloween

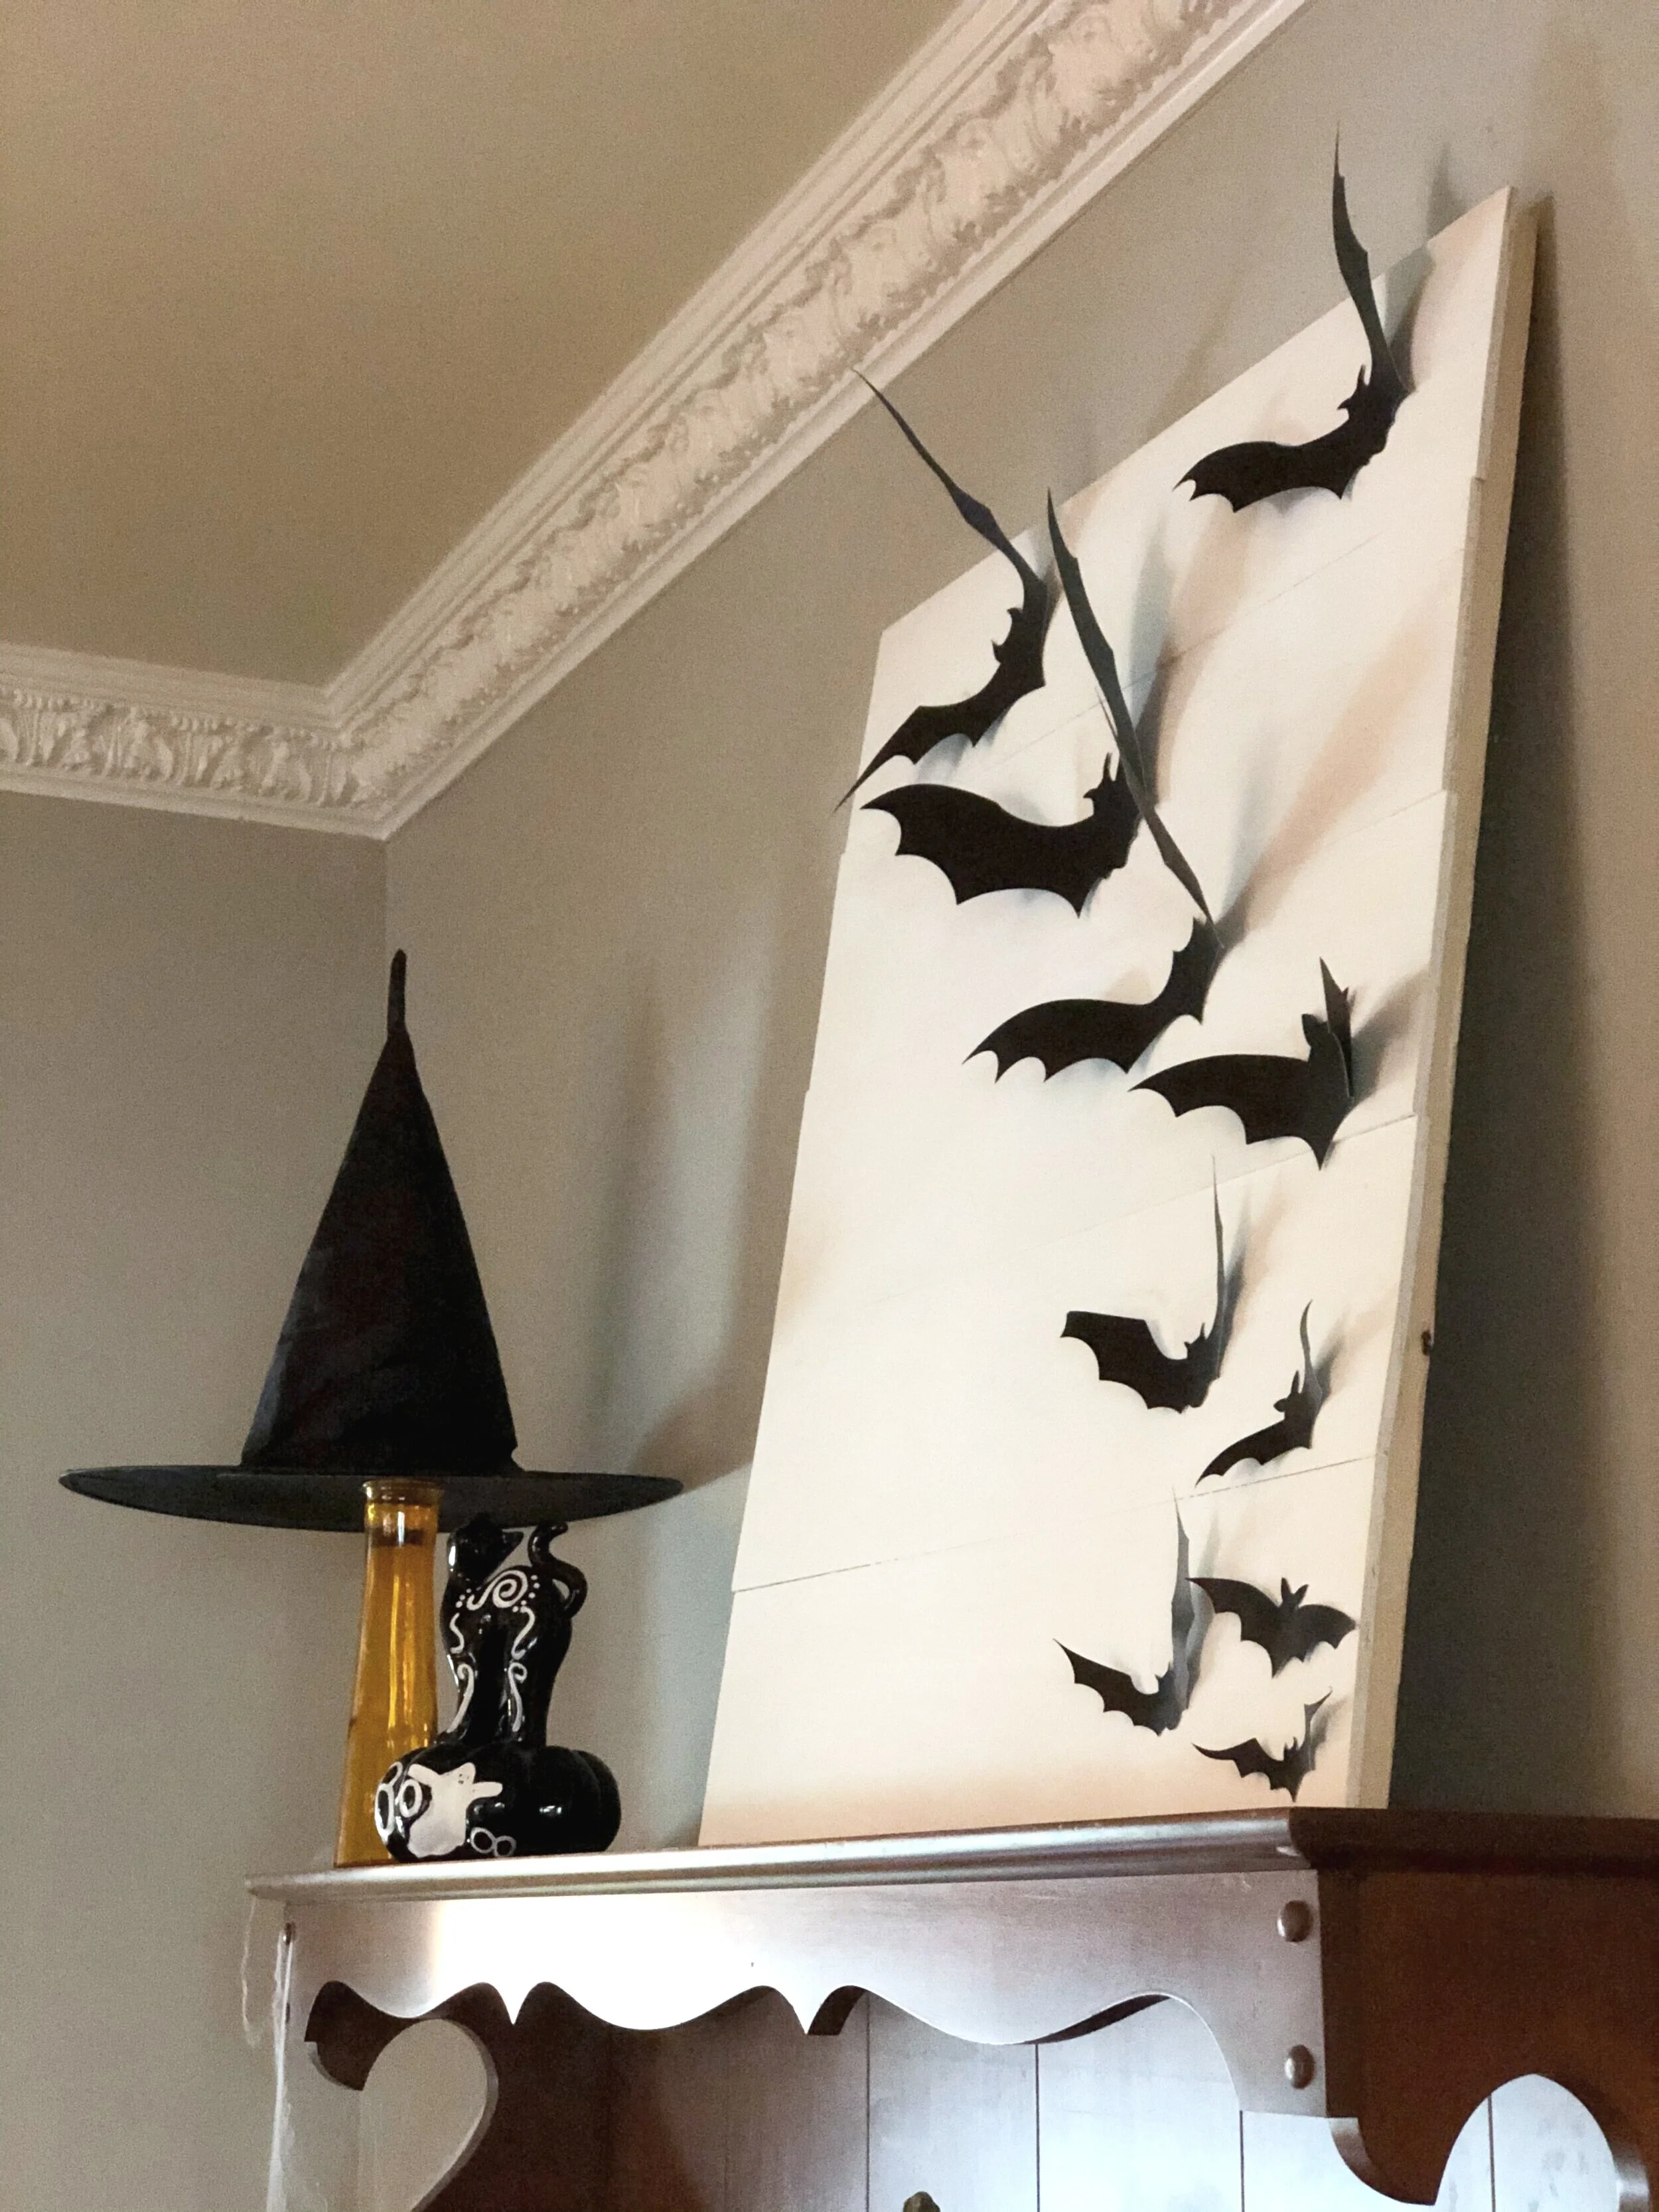
DIY flying bat sign using your Cricut cutting machine. How to make cardstock flying bats for Halloween. Easy and simple rustic Halloween Decor for your farmhouse style

DIY - Super simple Halloween sign

This year I decorated for Halloween instead of my typical fall only décor. My girls are loving it! One piece they have especially loved, and I must say I do too, is my flying bat sign I made. It was so crazy simple to make too!

The best part of this wooden Halloween sign is that once Halloween is over I can simply take the bats off and replace them with something else.

If you love this DIY be sure to check out this framed Halloween sign I made for my front porch…p.s. it has a FREE SVG to use ;)!

Affiliate Disclosure. Some of the links on this website are affiliate links, which means that I may earn a small commission if you click on the link or make a purchase using the link. If you make a purchase you will not be charged anything additional.

The Best Machine for DIY Projects

MAKE YOUR OWN FLYING BAT SIGN

Here’s what you’ll need

If you’re new to the Cricut crafting world be sure to check out my post on 10 must have supplies and accessories when starting out using a Cricut cutting machine.

1. CUT OUT CARDSTOCK BATS

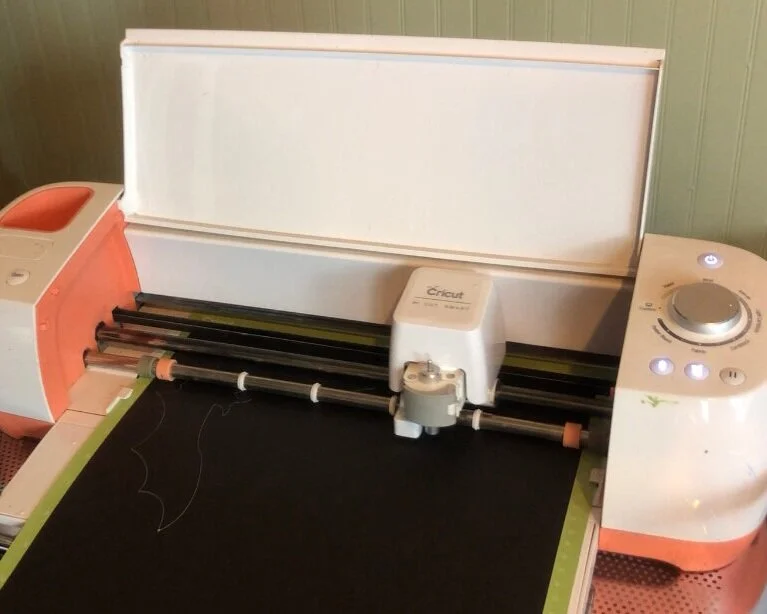
I used my older model Cricut Explore to cut out my cardstock bats. If you have Cricut Access you can use the Cricut image, click here for the link.

DIY flying bat sign using your Cricut cutting machine. How to make cardstock flying bats for Halloween. Easy and simple rustic Halloween Decor for your farmhouse style

2. REMOVE THE BAT CUT OUTS FROM YOUR GREEN CUTTING MAT

It’s easier to flip the cardstock facedown on your table then slowly roll the mat away from the material you’ve just cut.

DIY flying bat sign using your Cricut cutting machine. How to make cardstock flying bats for Halloween. Easy and simple rustic Halloween Decor for your farmhouse style

3. ARRANGE THE BATS

Before you put tape on the back of them decide where you want them to go. This took me entirely too long lol!

DIY flying bat sign using your Cricut cutting machine. How to make cardstock flying bats for Halloween. Easy and simple rustic Halloween Decor for your farmhouse style

4. MAKE THE BATS FLY

Give the bats some movement by gently curving their wings upward. I used a pencil to curl the wings up so they didn’t have creases.

DIY flying bat sign using your Cricut cutting machine. How to make cardstock flying bats for Halloween. Easy and simple rustic Halloween Decor for your farmhouse style

5. TAPE THE BATS DOWN

I used double sided tape to temporarily tape them to my wooden pallet style sign.

DIY flying bat sign using your Cricut cutting machine. How to make cardstock flying bats for Halloween. Easy and simple rustic Halloween Decor for your farmhouse style

This is seriously my favorite piece in the house for Halloween! It’s crazy simple but it gives the spooky décor a little something extra ya know?! I love it!

DIY flying bat sign using your Cricut cutting machine. How to make cardstock flying bats for Halloween. Easy and simple rustic Halloween Decor for your farmhouse style

I hope you loved this simple decoration to add to your own home for the Halloween season. Let me know if you have any questions in the comments below.

Happy Crafting!

Check out more of my Halloween & fall craft tutorials

Classic farmhouse tiered tray signs

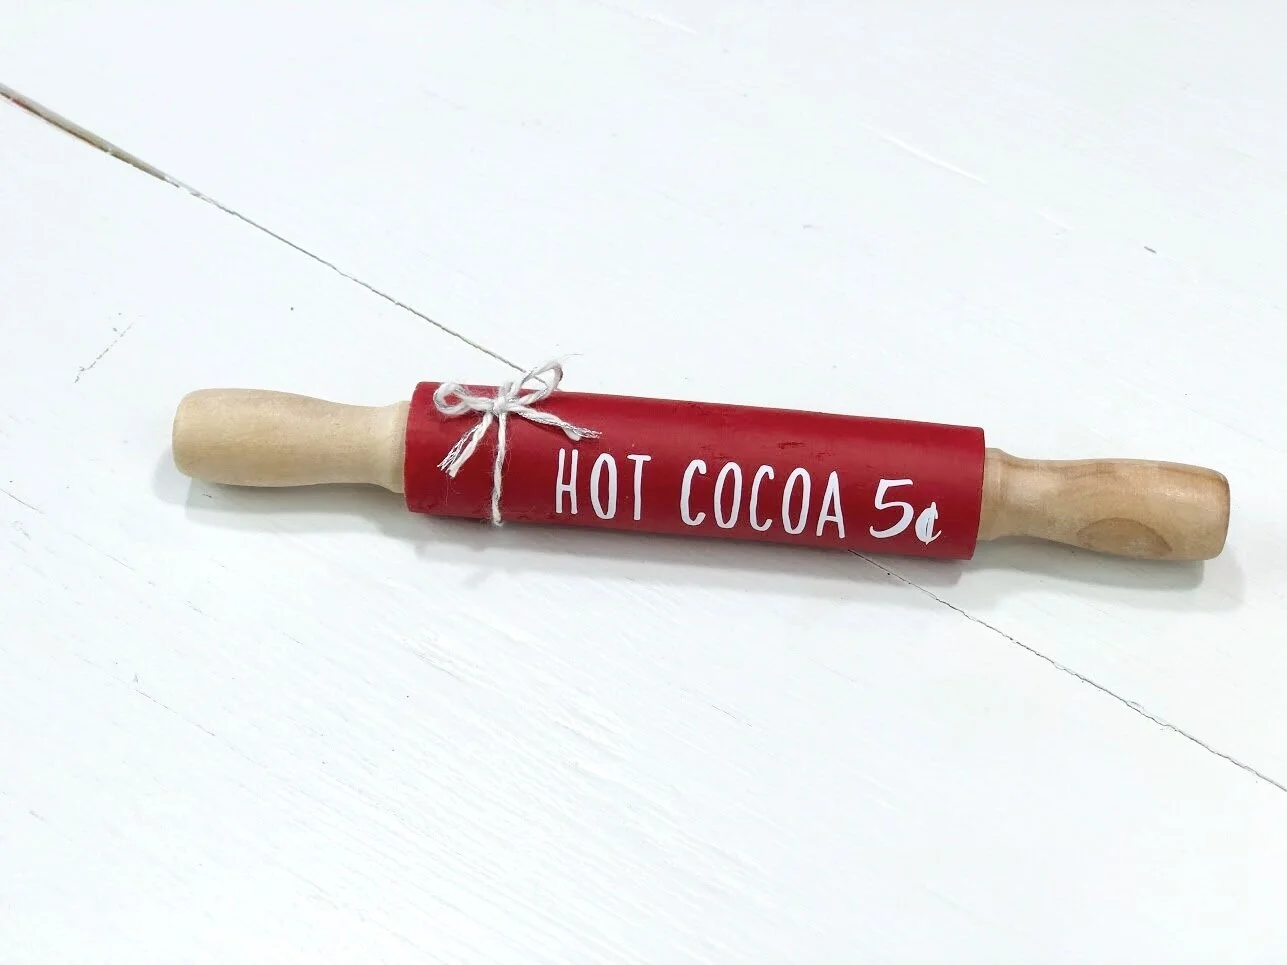
Tiered tray signs for rustic home decor. Classic style mini wood signs in white and black. Sign bundle comes with home sweet home, farm animal trio of chicken pig and cow on a rustic wood tag, mini rolling pin our nest, and farm fresh.

Tiered tray sign bundle for your CLASSIC looking farmhouse decor

I am loving this tiered tray decor that’s all the rage right now. There are so many different seasons, holidays, and themes you can do. Or you can keep it super classy and simple with the classic black and white farmhouse colors. There is so much you can do with these simple color scheme. You can keep it black and white or add a couple rustic pieces that will give it a pop of color here and there. I love how versatile it is!

Affiliate Disclosure. Some of the links on this website are affiliate links, which means that I may earn a small commission if you click on the link or make a purchase using the link. If you make a purchase you will not be charged anything additional.

If you LOVE this crafty post be sure to check out how I made a mini house family number sign. Instead of using vinyl like I did on these rustic farmhouse mini signs I painted it instead.

Tiered tray signs for rustic home decor. Classic style mini wood signs in white and black. Sign bundle comes with home sweet home, farm animal trio of chicken pig and cow on a rustic wood tag, mini rolling pin our nest, and farm fresh.

If you’re in to the rustic farmhouse style how can you not love a mini wooden tag that has farm animals on it?! This one is probably my favorite of all the bundled pieces. I absolutely LOVE chickens! Well of course cows and pigs too but chickens are really my favorite farm animal! Every time I see one, whether that be a real life chicken or a picture of one, I smile! They are just too cute!

TIERED TRAY RUSTIC SIGNS

For this tiered tray bundle I incorporated different sizes and shapes to these farmhouse pieces mix it up a bit. I typically create identical bases for my handmade sign pieces, like these hilarious rustic looking cactus signs. Another example are these Easter mini wood tags. They come in a set of 3 but they are all the same sized wood base. While they are super cute I am really loving the mix and match look of the different sized and styled bases of these classic farmhouse tiered tray signs.

Here are the sign bases I used:

Since they are all different sizes and shapes they truly work perfectly for the tiered tray signs.

Tiered tray signs for rustic home decor. Classic style mini wood signs in white and black. Sign bundle comes with home sweet home, farm animal trio of chicken pig and cow on a rustic wood tag, mini rolling pin our nest, and farm fresh.

Unlike most of my signs I actually chose to use vinyl on them instead of painting the entire design. I have been one BUSY momma this year so I’ve been adding more simple designs and styles to my shop line up. I guess I always thought using vinyl was “cheating” in the sign making game but I have no regrets using the vinyl on these designs. They are quick to make, priced at a more affordable price point, and I can get them out to my customers even faster because it takes SO much LESS time to create.

While stenciling designs will always be my preferred method for making signs I do love how these vinyled signs turned out. So much that I have plans to add even more in my shop!

You can grab the FARM FRESH design in my FREE RESOURCE LIBRARY.

Want your own set but don’t want to make them? You can purchase your handmade signs from my shop, click here —-> CLASSIC FARMHOUSE STYLE TIERED TRAY SIGNS

Tiered tray signs for rustic home decor. Classic style mini wood signs in white and black. Sign bundle comes with home sweet home, farm animal trio of chicken pig and cow on a rustic wood tag, mini rolling pin our nest, and farm fresh.

If you are a DIY-er and want to make your own rustic farmhouse style tiered tray signs here’s what I recommend you use.

New to Cricut? Check out these 10 must haves to get you started on your crafty journey

I don’t have a full on tutorial on how I made these signs they were really pretty simple to make since there wasn’t any stenciling involved. Stenciling is a WAY more involved process. But this process is super easy.

Here’s how I made my rustic tiered tray signs

  1. Paint each wood base white. Let dry. Paint a second coat. Let dry.

  2. Once dry distress the edges. Wipe with a dry lint free cloth.

  3. Cut out your designs using your Cricut, or other cutting machine.

  4. Weed your designs using your xacto knife.

  5. Apply your transfer tape and remove paper backing from your designs.

  6. Place your designs on your wood bases. Rub with your vinyl squeegee and remove your transfer tape.

  7. Add any twine accents.

  8. Place on your tiered tray and enjoy!

It’s really that simple! No messing with paint bleed. No fuss with drying time between stenciling paint coats. No stress about paint peel up. I really enjoyed how quick and easy these DIY mini wood signs were!

I hope you enjoyed this crafty tutorial. If you have any questions please feel free to ask in the comments section below.

Happy Crafting!

See how I make my mini wood tags. Don’t have the power tools to create the tags from scratch? Grab the unfinished wood tags here.

Easy popsicle stick picture frame for Valentine's Day

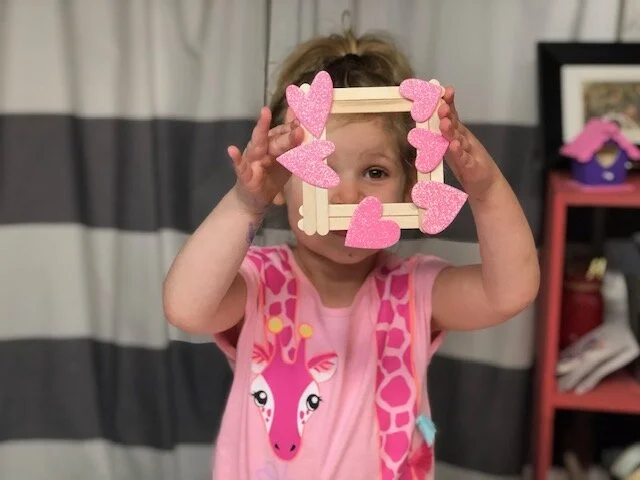
Easy popsicle stick picture frame valentine's day. How to make a mess free Valentine's Day craft with your kids and family. Cute and easy popsicle stick frame craft for kids.

We belong to a wonderful little program called Parents as Teachers. If you’ve never heard of this you can check out Parents as Teachers here. Every week our local PAT’s host a play group and during the holiday season they host themed groups with a fun party. This year they asked me again if I would help host the Valentine’s Day craft for the party. Of course I said yes!

Affiliate Disclosure. Some of the links on this website are affiliate links, which means that I may earn a small commission if you click on the link or make a purchase using the link. If you make a purchase you will not be charged anything additional.

I knew I wanted the craft to be a keepsake. Every momma LOVES keepsakes! They are my most favorite thing the girls bring home from school in the early years. So I searched Pinterest looking for an easy to make Valentine’s Day keepsake for little ones. I came across a fun popsicle stick frame and knew this would be something super easy for the kids and moms to make together.

My husband and I premade all the frames so everything was ready to go for the Valentine’s Day party, 30 frames total, and of couse since we live in the center of the USA winter did a little showing off, school got cancelled and so did the party *insert sad momma tears*. But we still had fun making these frames at home and the older three daughters actually had even more fun than I thought they would. They loved decorating their own frames with the Valentine’s Day stickers and cutouts.

How to make a mess free Valentine’s Day keepsake craft

Watch the video below or keep reading for the step by step instructions

Want access to my FREE RESOURCE LIBRARY? This is where I keep all of my files, printables, lists, and more. Get your password to get all the freebies —-> Send me to the FREE RESOURCE LIBRARY

Here’s what you’ll need to make your Valentine’s Day popsicle stick frame

You can find all of these items at the Dollar Tree (except the gorilla glue and glue gun) but I’ve included the links if you prefer your supplies delivered right to your door:)!

DIY popsicle stick picture frame. How to make a Valentine's Day craft with kids mess free. Keepsake art to Valentine's Day

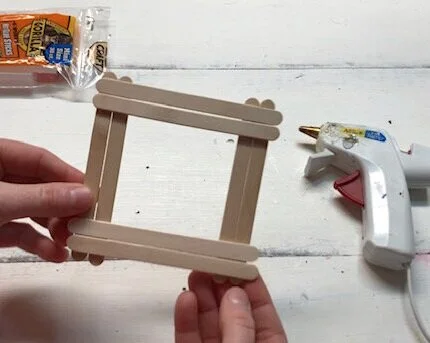
To make 1 popsicle stick picture frame you need 8 popsicle sticks.

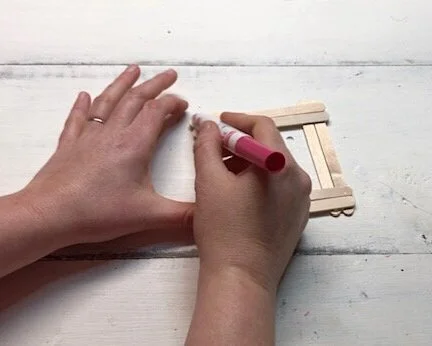
  1. The first thing you need to do is put your frame together. This should be done by an adult. I’ve found using gorilla glue sticks vs regular hot glue sticks hold projects together so much better. You want to line your sticks out first before you glue them down. You will need 2 popsicle sticks on each side of the frame.

DIY popsicle stick picture frame. How to make a Valentine's Day craft with kids mess free. Keepsake art to Valentine's Day

2. Once the glue has set and dried you can start decorating. No need to get out messy paint, although I LOVE paint sometimes it’s nice to not have that mess to clean up. Washable markers work great to give the frame a color and your work area will clean up with a washcloth after with no fuss. This is great for little ones who are working on their fine motor skills too!

DIY popsicle stick picture frame. How to make a Valentine's Day craft with kids mess free. Keepsake art to Valentine's Day

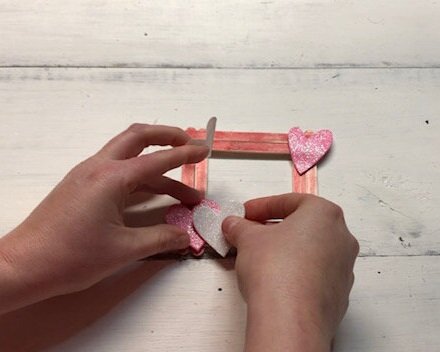
3. Add some more decorations. Stickers are PERFECT for these adorable Valentine’s Day frames! Your kiddos can just peel off the backing and stick them wherever they would like. Let them have fun with this step. If you want you can bring out some rhinestones, sequence, and even glitter (but these will require glue).

DIY popsicle stick picture frame. How to make a Valentine's Day craft with kids mess free. Keepsake art to Valentine's Day

4. Glue a photo or their art work to the back. I just used my hot glue gun to glue a photo of our sweet family to add to the frame I made for this tutorial. If you want you can also add a small magnet so you can hang it on the fridge.

DIY popsicle stick picture frame. How to make a Valentine's Day craft with kids mess free. Keepsake art to Valentine's Day
DIY popsicle stick picture frame craft for kids. Mess free Valentine's Day craft to make with your kiddo

5. Enjoy their art! place it on a shelf and keep it out year round. Now that my girls are getting older I am even more appreciative of all their handmade creations they’ve made me over the years.

DIY popsicle stick picture frame. How to make a Valentine's Day craft with kids mess free. Keepsake art to Valentine's Day

If you have any questions about this DIY craft or any other leave a comment below. Happy Valentine’s Day!

DIY wood spool ornament, DAY 5

Easy Christmas ornament. How to make an upcycled wood spool Christmas ornament. Simple ornanments to DIY at home with the kids.

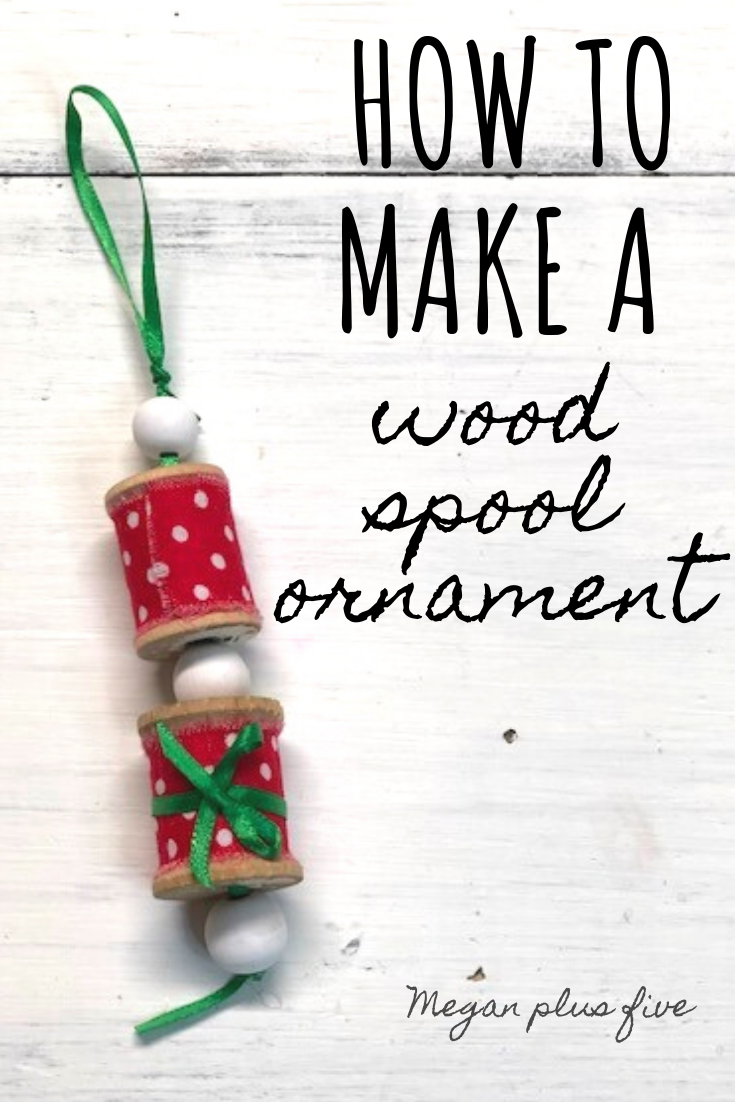
DIY WOOD SPOOL CHRISTMAS ORNAMENT

Day 5 of 30 days of DIY Christmas ornaments

Hey guys! Day 5 of 30 days of DIY Christmas ornaments is a really special one for me. I have several of these old wood spools that were given to me by my grandma, the mother of all things crafty! This women could paint a masterpiece with mud and sew like no ones business! She was the most talented and creative soul I have ever met in my lifetime and I’m thankful to have been given a small fraction of her wonderful God given talents.

Affiliate Disclosure. Some of the links on this website are affiliate links, which means that I may earn a small commission if you click on the link or make a purchase using the link. If you make a purchase you will not be charged anything additional. This is just a way I can help add to our family finances to raise our four daughters. Please know I would never recommend a product or service I do not totally stand behind.

In her old sewing basket she had held on to some super old wooden thread spools. Did I mention my grandma also kept everything??? I think this is a crafter gene lol! Must not throw anything away because you just never know when you’ll need it! So these little wooden beauties were among the wonderful treasures she kept in her old wicker sewing basket. I, of course, could not ever get rid of such gems! So they’ve been sitting in that basket till now. I didn’t want to alter them too much so painting them was out of the question. But glue a piece of fabric would cause too much damage so I thought ‘why not make a fun little Christmas ornament out of a couple of them?’ And so I did!

Day 5 of DIY Christmas ornaments is probably the easiest ornament I’ve made so far on my 30 days of ornament making. If you can use a glue gun and thread a bead you are a shoe in!

You can watch the WOOD SPOOL DIY CHRISTMAS ORNMENT video

Here’s what you’ll need to make your own wood spool DIY Christmas ornament

DIY wood spool Christmas ornament. How to make an easy Christmas tree ornament with old wooden spools. Scrap piece ornament making.

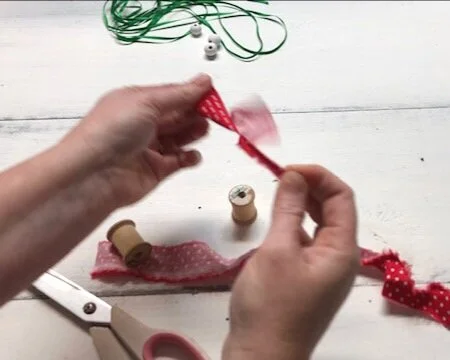
First you need to cover your wood spools in fabric. I used a scrap piece of fabric I had left over from when I made this DIY 4TH OF JULY TIE RAG WREATH. I don’t think I included this particular fabric in my tie wreath but I bought it the the intent to use it for that lol. It never hurts to have extra pretty fabrics on hand!

Cut your fabric piece so it’s the size of the middle party of your wooden spool. I really like the frayed edges so I cut a tiny slit in the fabric then I ripped it the rest of the way to give it that frayed look.

DIY Christmas ornament craft, how to make your own Christmas ornaments easy tutorial. Wood spool craft to do at home. DIY rustic and farmhouse Christmas decor

If you are more of a visual learner {this is totally me!} be sure to check out my YouTube channel. This is THE hub I use to hold all of my DIY CRAFTY VIDEO TUTORIALS


Then glue your fabric pieces to your wood thread spools. I used as little glue as possible for this so I didn’t ruin the wooden spool.

*crafty tip- if you are making this with little ones be sure you are using a LOW temp glue gun. I have found that using the mini glue guns they don’t get as hot as the larger full sized glue guns.

DIY Christmas ornament craft, how to make your own Christmas ornaments easy tutorial. Wood spool craft to do at home. DIY rustic and farmhouse Christmas decor

I added a small ribbon bow around the larger of the two wood spools. I didn’t want them to look identical and thought this little bow broke it up just enough.

DIY Christmas ornament craft, how to make your own Christmas ornaments easy tutorial. Wood spool craft to do at home. DIY rustic and farmhouse Christmas decor

Now your DIY wood spool Christmas ornament is ready to put together. The wooden beads I used I had already painted from a previous project I did, unfortunately I don’t have a tutorial for this :/ but it’s super easy to paint them. I used white acrylic paint and painted two thin coats on each bead. To make it even easier I set the beads on the tip of an xacto knife to hold on to it while I painted. I just placed the sharp pointy end of the xacto knife in the hole of the bead and it was perfect!

You’ll need to cut a piece of ribbon that is 3x the length of what your ornament will be. Thread on one of your painted beads on the bottom, leaving an inch or so. Then tie the bottom piece of the ribbon in a couple of knots. Next place the knot so that it is just under the opening of the hole on the bead, apply a decent sized drop of hot glue and let it dry completely. This will keep your ornament from falling apart.

I tried to just tie a ton of knots that I thought were bigger than the hole of the wood bead but the giant knot kept slipping through, so I gave up and the hot glue worked SO much better!

DIY Christmas ornament craft, how to make your own Christmas ornaments easy tutorial. Wood spool craft to do at home. DIY rustic and farmhouse Christmas decor

After the hot glue is dry you can string on the rest of the pieces of your ornament. Here’s the order mine were in from top to bottom

  • bead

  • wood spool

  • bead

  • wood spool

  • bead

Then tie what’s left of the ribbon on the top part of the ornament into a loop. Be sure you don’t pull the ribbon clean through the wood spools and beads. I held the ribbon at the base of then pulled it tight.

DIY Christmas ornament craft, how to make your own Christmas ornaments easy tutorial. Wood spool craft to do at home. DIY rustic and farmhouse Christmas decor

And that’s it. Your DIY wood spool Christmas ornament is finished:)!! I hope you enjoyed this easy craft tutorial and I would LOVE to hear how yours turns out if you make your own.

If you have any questions please feel free to reach out to me. Leave a comment below or send me an email.

Check out more posts below

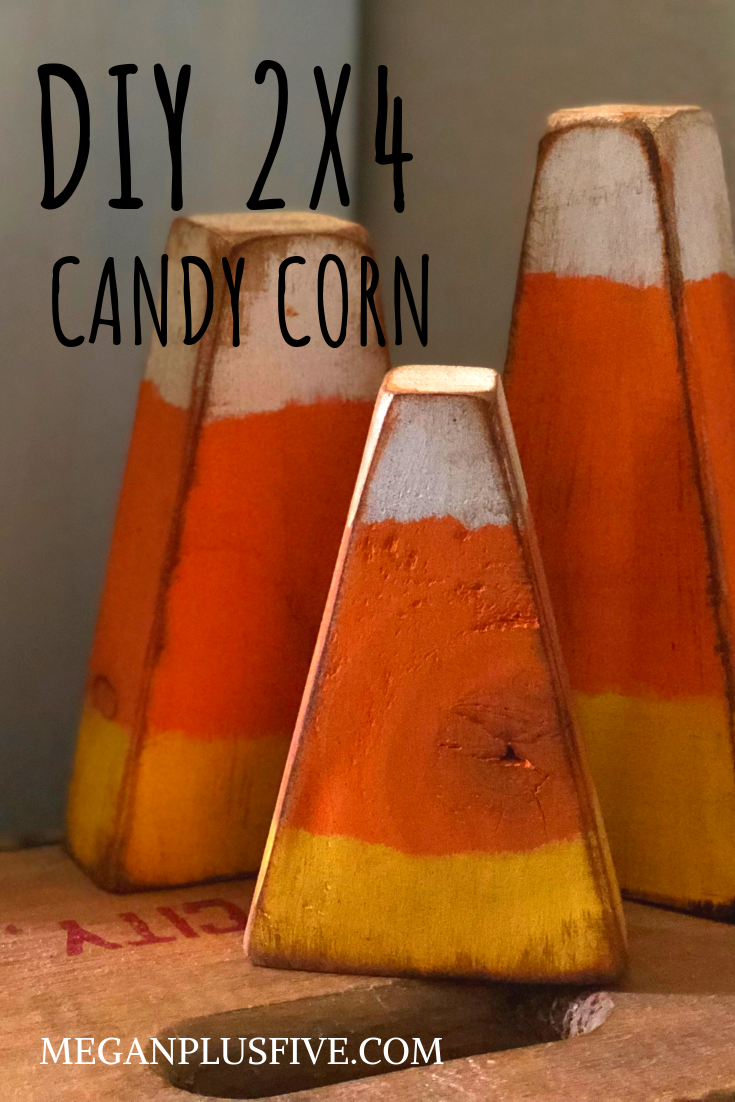
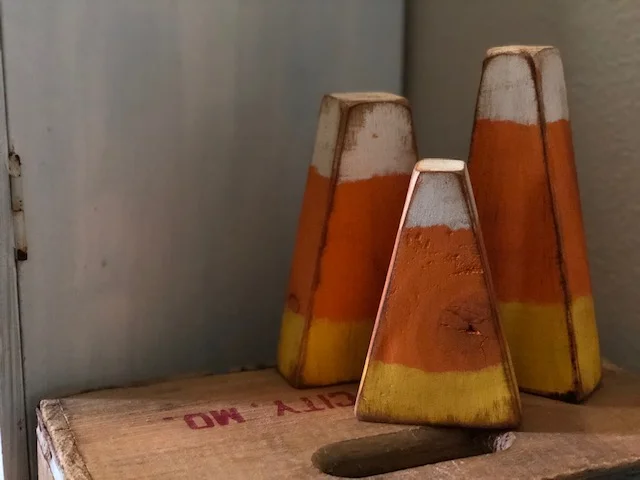
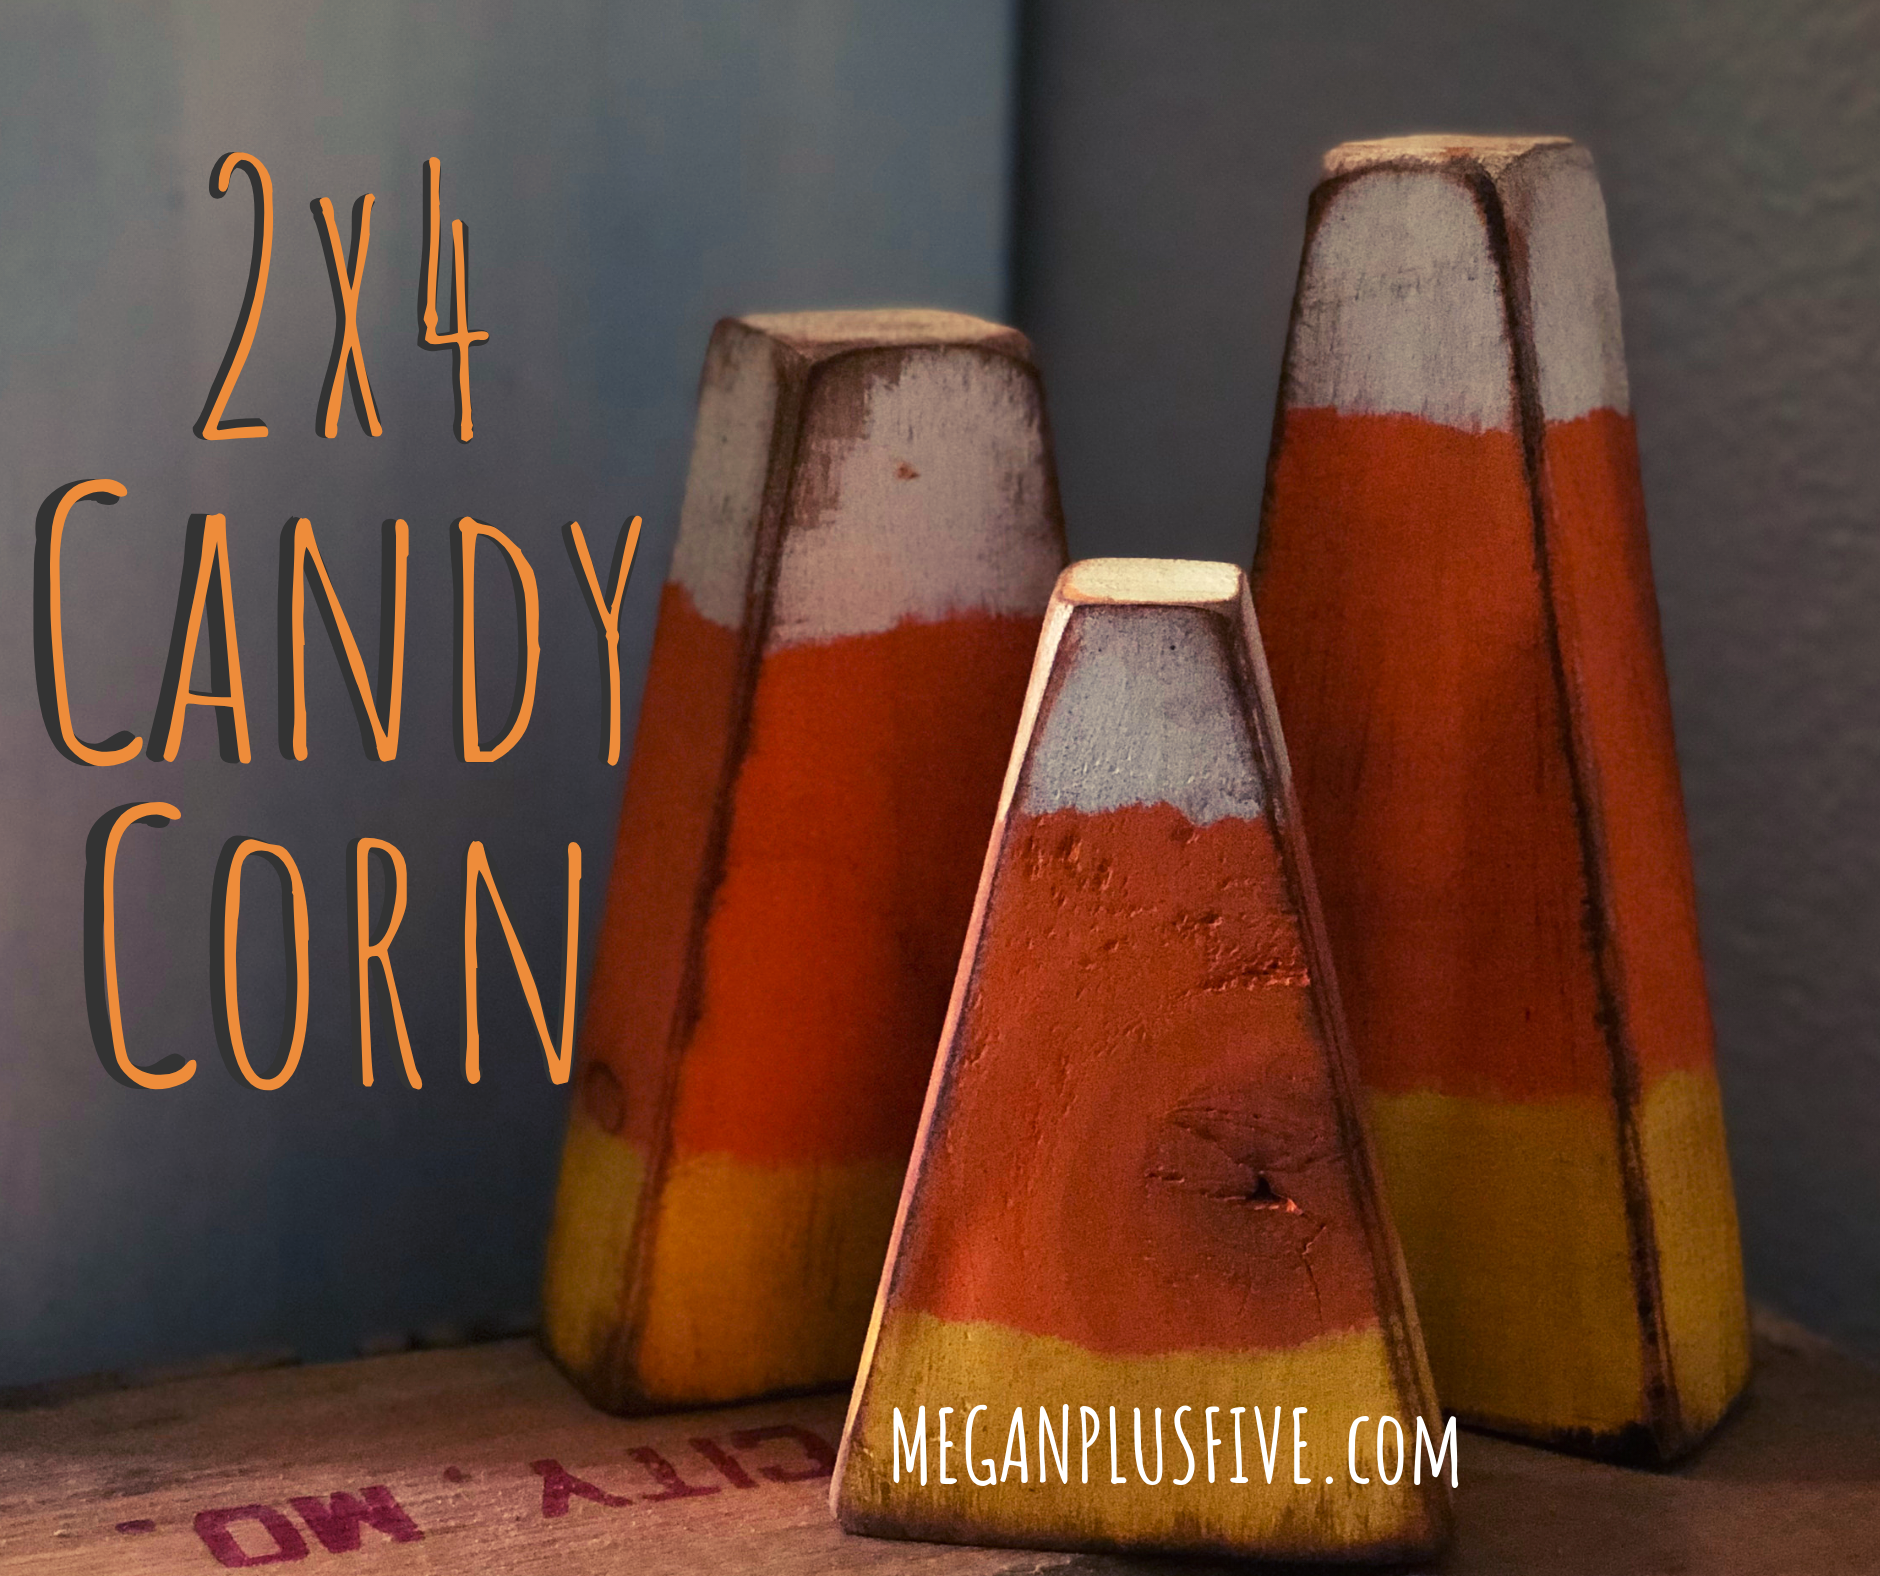
DIY how to make 2x4 wood candy corn

DIY 2x4 candy corn, how to make easy primitive fall decor

DIY EASY 2x4 primitive wood candy corn

DIY primitive candy corn, aren’t they soooo cute?! The last couple of years have been a little busier than normal at our house and I haven’t been decorating for the holidays like I normally do. So this summer I decided I’m going to make time to get back into the festive decorating. And with that I need to make lots of new pieces to decorate the seasons with. Including these adorable wood candy corn. Check out this fun TRICK OR TREAT shelf sitter set I made a few weeks ago.

I’ve had these on my craft to do list for a looooong time and just hadn’t made time to make myself a set. And now I do! I LOVE them! They turned out even better than I thought they were going to! And I can keep them up for the entire fall season.

DIY easy primitive wood 2x4 candy corn for your fall decorations

How to make your own set of primitive candy corn from a 2x4

And it was super easy to DIY. I was a bit nervous cutting the angles but I think they turned out so great!

If you don’t have the space or tools to DIY this from start to finish you can get one of my easy CANDY CORN CRAFT KIT. Everything you need to make these at home is included in your own candy corn craft kit.

Don’t have all the tools needed to complete this craft? Snag one of my easy DIY craft kit from my Etsy shop. Click CANDY CORN CRAFT KIT to get yours. Want to send it as a gift? During checkout mark that you would like to send it as a gift, leave their address and a sweet note to them and we’ll take care of the rest.

Affiliate Disclosure. Some of the links on this website are affiliate links, which means that I may earn a small commission if you click on the link or make a purchase using the link. If you make a purchase you will not be charged anything additional.

If you want to make them from scratch here’s what you’ll need

First cut your pieces into 4”, 5.5”, & 7” lengths. The angles I cut: 4”= 15°, 5.5”= 10°, 7”=10°. After you cut them give them a quick sanding. You don’t want to sand them super smooth as this will take away so much of the wood’s natural character. Be sure to wipe away the sawdust with a lint free cloth after you sand your candy corn.

DIY candy corn decorations. How this mom made her own from a scrap 2x4

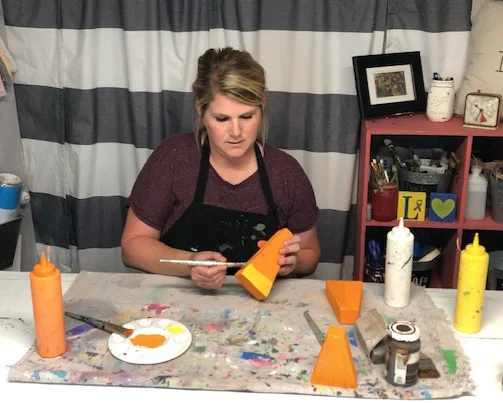
Now paint all three with a thin coat of orange paint.

DIY candy corn decorations. How this mom made her own from a scrap 2x4

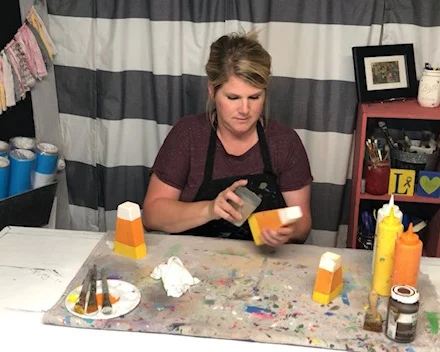
After the orange paint dries paint the bottoms yellow. You will likely need 2 coats for this. Let the first coat dry completely before applying the second coat.

DIY candy corn decorations. How this mom made her own from a scrap 2x4

Now, paint the tops white. Again, you'll need to paint two coats making sure your let the first coat dry completely before applying the second coat of white paint.

DIY candy corn decorations. How this mom made her own from a scrap 2x4

Once all of your candy corn are completely dry you can start distressing them with your 120 grit sand paper. Focus on the edges, corners, and lightly sand the fronts and sides. Then wipe the dust away with your lint free cloth.

DIY candy corn decorations. How this mom made her own from a scrap 2x4

Now you can apply your antiquing wax. A little bit of wax goes a VERY long way. Just like when sanding, you want to focus more on the edges and corners and give a light swipe with your chip brush on the fronts and sides. TIP: if you trim your chip brush down a little you will get a more stiff brush that you can better control your wax with.

DIY candy corn decorations. How this mom made her own from a scrap 2x4

If you don’t like the look of the antiquing wax you can opt for a clear wax. I LOVE antiquing wax and use it on TONS of my projects it highlights so much of the wood’s character. You can see the difference it makes. Check out my DIY American Flag tutorial where I use this same dark wax.

DIY candy corn decorations. How this mom made her own from a scrap 2x4

Now you’re ready to display them! I am soooo happy with the way these little 2x4 candy corns turned out {I think that’s the plural from lol}! I have a few more DIY fall projects yet to tackle before the season arrives so be sure to check back for more tutorials to make your own decorations for the upcoming season.

DIY candy corn decorations. How this mom made her own from a scrap 2x4

Catch the video tutorial below. If you LOVE it I would very much love if you would subscribe to my YouTube channel where I share all of my crafty video tutorials.


5 awesome craft kits your kids will love

5 awesome craft kits your kids will love. Totally kid approved

Craft kits kids will love

Kids love to create. They have creativity coming out their ears it seems like. Back when we had our brick and mortar craft studio we would sell these kits like crazy! And now we have them online so kids all across the world can enjoy them.

Don’t want to buy the kits but want to know how to make the craft? I’ve got ya covered! After the end of the descriptions I’ve included the link to the tutorial here on my blog.

Here are our top 5 craft kits that have been kid tested and APPROVED!

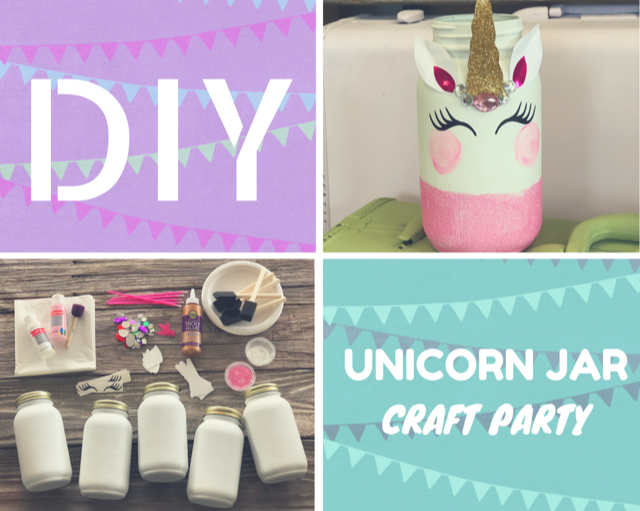
  1. DIY glittery unicorn mason jar

This unicorn mason jar craft kit is one of our top selling craft kits we ship. Each kit comes with a pre-painted mason jar so you don’t even have to worry about that step {painting mason jars can be a challenge due to curing times in between coats}. Upgrade to a unicorn mason jar craft party size

Check out the DIY glittery unicorn jar tutorial

2. CUSTOM name canvas art

What kid doesn’t want their name on a beautiful canvas that they paint? This custom name art canvas craft kit comes with everything your kiddo needs to have a personalized canvas art. Your name of choice comes already attached to the canvas so it’s ready to go right out of the box. Once your kiddo paints their canvas you simply peel up the stencil to reveal the white lettering underneath. This custom name art craft is also available in party sized, actually this a great option for family get togethers to give the little ones something fun to do.

Check out the DIY custom canvas art tutorial

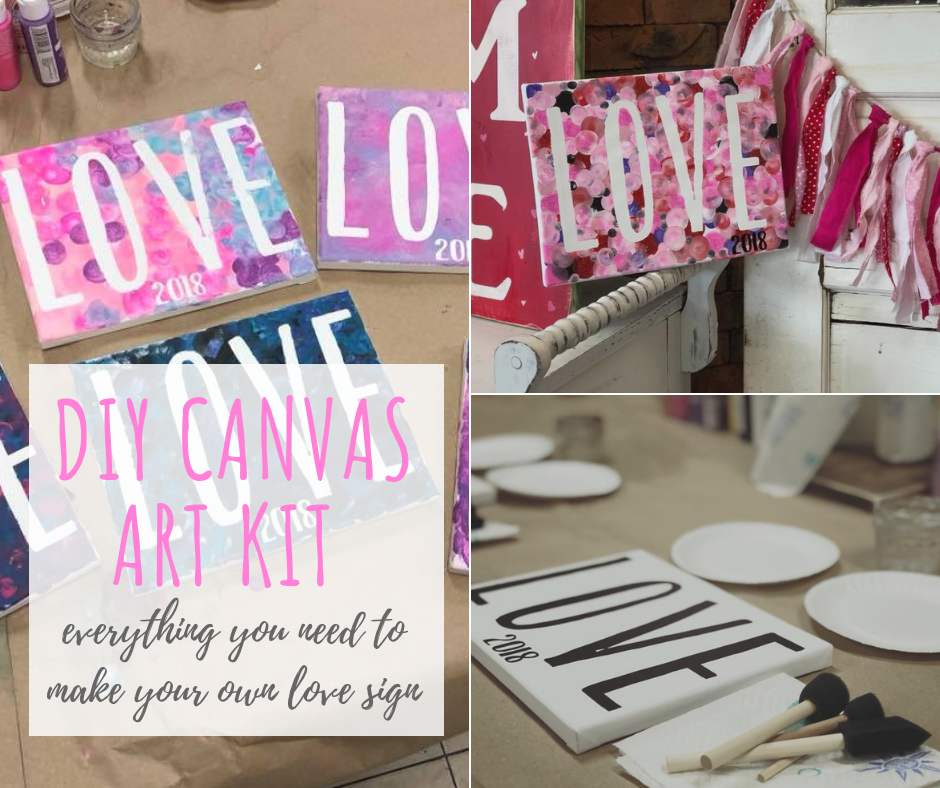
3. LOVE canvas art craft kit

Much like the craft kit above this canvas art come with the stencil already applied and ready to create right out of the box. This Valentine’s Day canvas art craft kit is always a big winner with moms and kids!

Check out the DIY canvas art tutorial

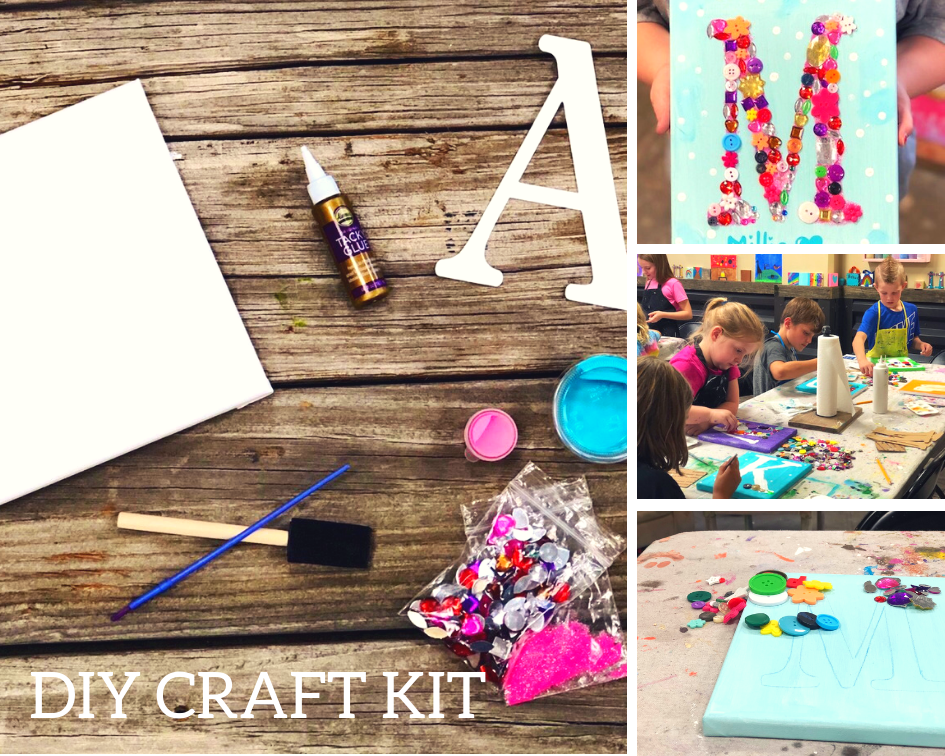
4. Mixed media canvas art craft kit

I can’t tell you enough how much kids LOVE this custom initial craft kit. The get to choose their own colors, buttons, rhinestones, and glitter and totally make it their own. This kit is so much fun and more!

Check out the DIY custom mixed media name canvas art tutorial

5. DIY light up fairy jar

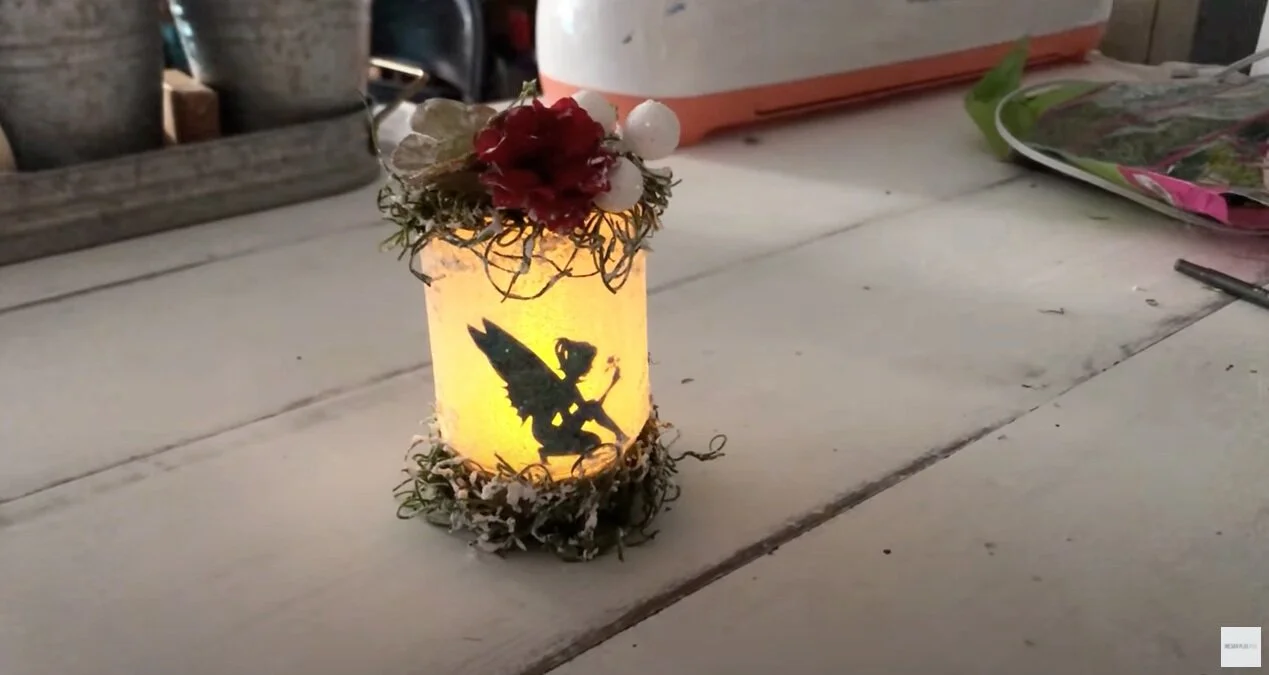
Calling all whimsical fairy believers! This light up fairy jar craft kit will make a perfect gift for the fairy lover in your life. This kit includes a smooth mason jar, embellishments, cardstock fairy, glitter, twine, tissue paper, and a battery operated light. Full picture instructions are included.

Check out the DIY glittered light up fairy jar tutorial

There you have it our top 5 craft kits approved by kids! Each and every one of these kits was a top seller in our brick and mortar craft studio and they each continue to be top sellers in our online shop.

If you have any questions on the craft kits please feel free to reach out to me. Each one come will full picture instructions and materials to complete each craft. Please note tools such as a glue gun are not included inside our DIY kits.


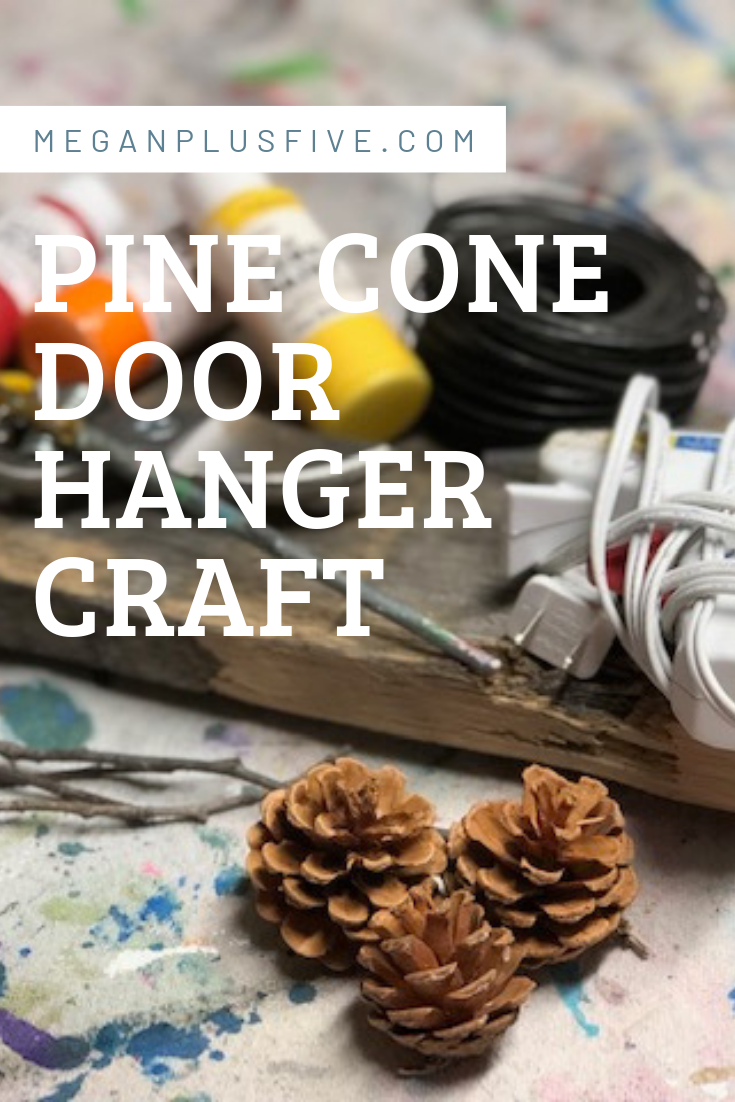
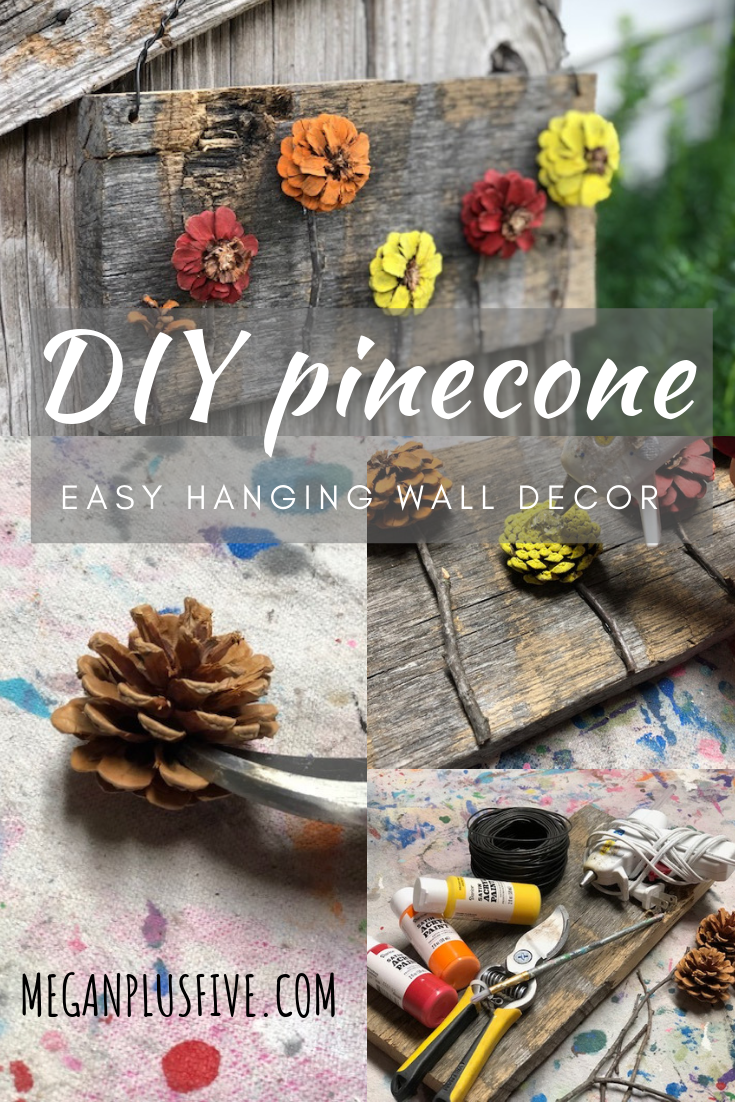
Easy pine cone door hanger DIY

PINE CONE DOOR HANGER CRAFT

How to make an easy pine cone door hanger

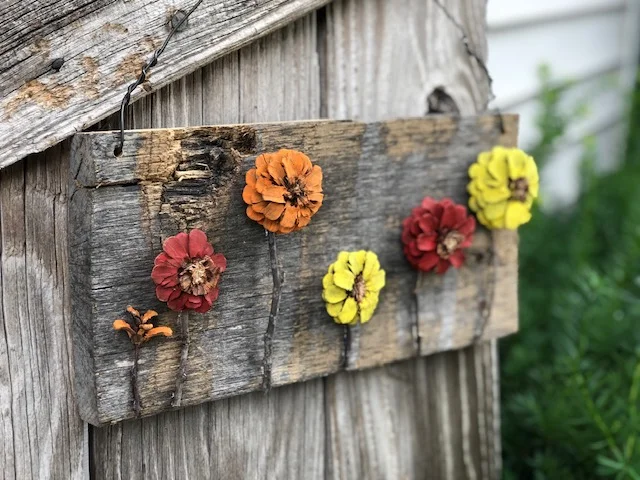
There are so many pine cone crafts I want to try but I thought I would try these adorable pine cone flowers first. I was really surprised at how easy they were to make myself and I plan to make SO many more!

If you’re looking for a more kid friendly project be sure to check out mess free pine cone art using a box. This was a favorite with our girls, and me too because it was literally mess free!

Here in the Midwest we have an abundant supply of pine cones so I didn’t have to search too far to find these little guys. I had great luck at my local park but here are some other places you can find pine cones *remember to always ask permission prior to collecting any pine cones

  • family

  • friends

  • local nature park {although ours doesn’t allow this yours might}

  • neighbors

  • shopping malls that have pine trees in the landscaping

After you’ve collected your pine cones you’ll want to make sure they aren’t covered in gross stuff, honestly I just wouldn’t pick up the ones that need super cleaned anyway lol! Leave those for the critters. I personally didn’t clean any of the pine cones we collected because they were in pretty good shape but if your pine cones have visible dirt or anything it’s a good idea to clean them prior to use.

Affiliate Disclosure. Some of the links on this website are affiliate links, which means that I may earn a small commission if you click on the link or make a purchase using the link. If you make a purchase you will not be charged anything additional.

Easy pine cone door hanger DIY

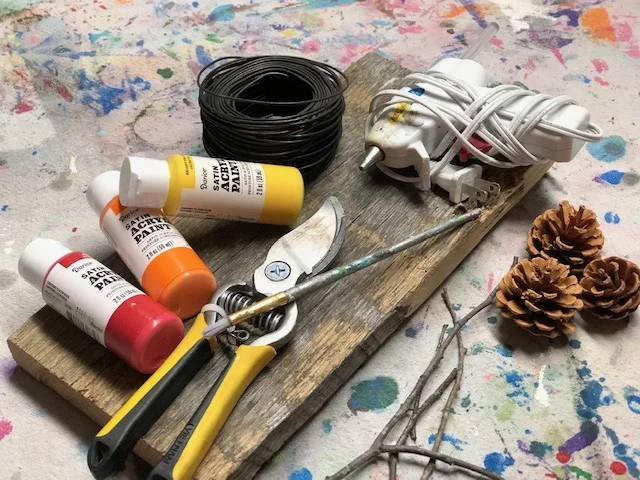
Here’s what you’ll need

Helpful tools

How to make flowers from pine cones

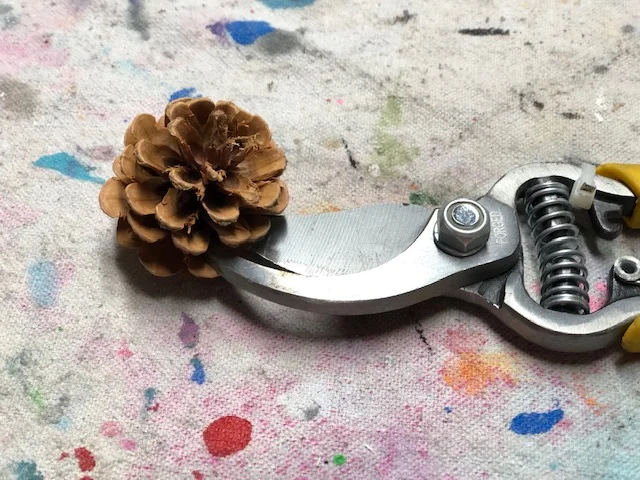
First you need to break apart your pine cones. This is a little harder than it looks and takes a lot of patients. Using your wire cutting slowing wedge them into the pinecone where you want it to break apart then use those muscles to cut. You might have to do this a few times before it comes completely apart.

easy pine cone door hanger

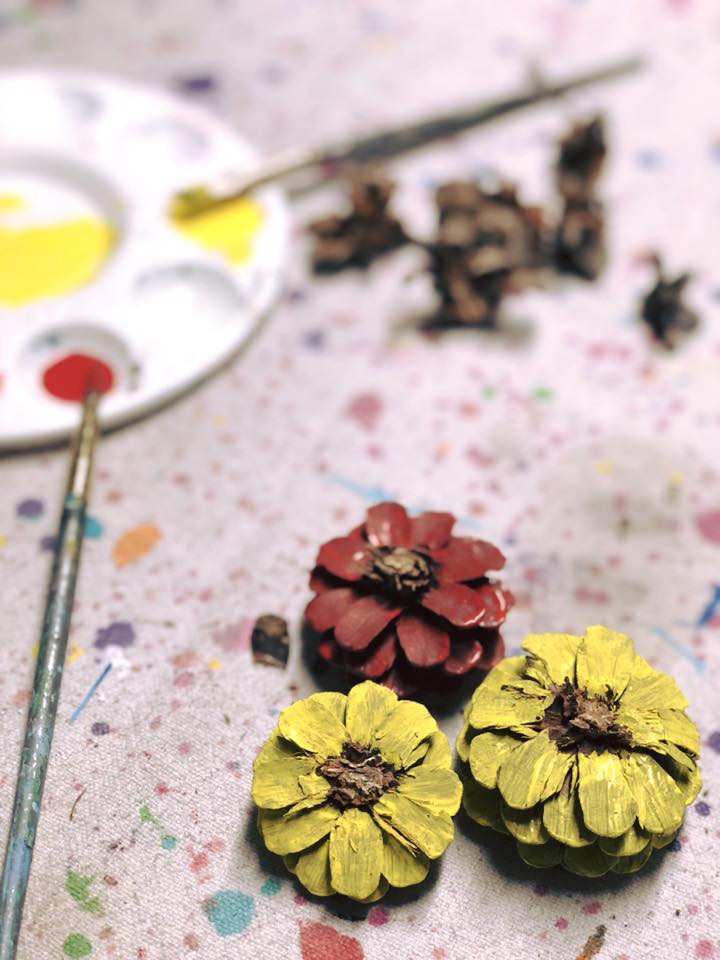
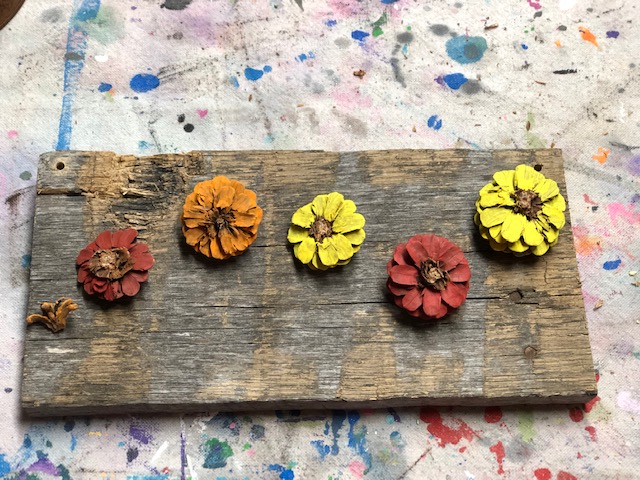
Now paint them. I just used a small paint brush and carefully painted all around the pine cone EXCEPT the middle. Leaving the middles unpainted they will look like adorable little flowers! I chose to paint mine in fall colors, red, yellow, and orange, but you can use whatever colors you’d like. I even painted the bottom as you’ll be able to see that once it’s glued down because it’s curved. I just did one coat on mine but if you don’t like the coverage of one coat on your pine cones you can give yours two coats.

Easy pine cone door hanger DIY

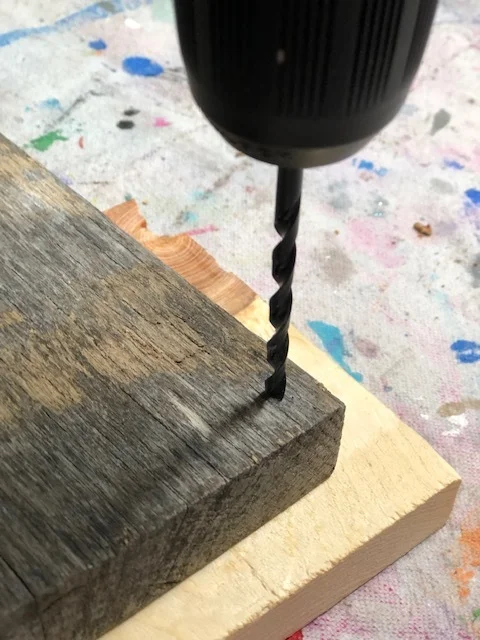
I used an old piece of wood for my base but you can use any wood base you’d like. Because I wanted to hang mine I went ahead and drilled the holes using my Ryobi drill, for the wire to go through before I started gluing the pine cones and sticks down.

easy pine cone door hanger DIY

While my glue gun was warming up I laid out the painted pine cone flowers where I wanted them to go. See how gorgeous this old piece of wood is! It even still has the nails in it, see them on the right. Granted it’s a little warped but it’s perfect for a scrappy craft like this.

Easy pine cone door hanger DIY

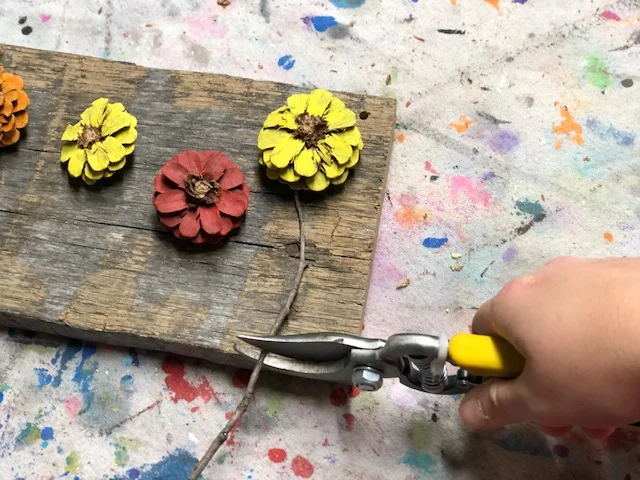
Then I used my wire cutters to cut the sticks down to size for the stems. I just eyeballed this, it doesn’t have to be exact. The sticks I used were pretty thin. You could also use some of the discarded pine cone pieces and make green leaves to glue by the stems. That would have made this project even better!

easy pine cone door handger DIY

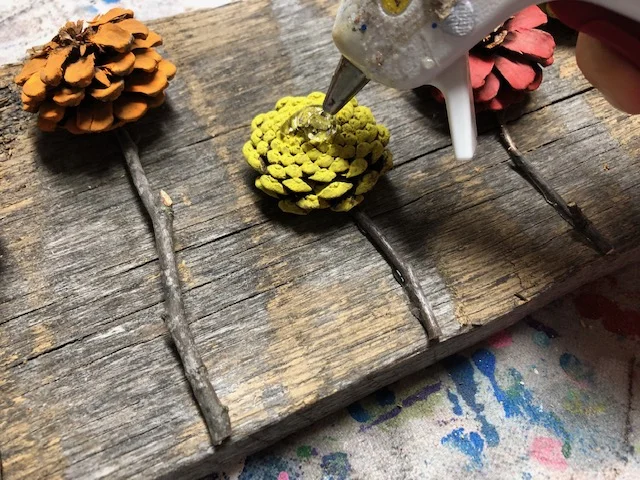
Then start hot gluing down all the pieces. I put a fairly good amount on the pine cones because they were heavier than the sticks and I didn’t want them falling off as soon as I hung the door hanger up. You’ll want this to totally dry before hanging just incase the glue underneath isn’t all the way dry you don’t want it to start slipping and your pine cone fall off.

easy pine cone door hanger

Add your wire and you’re done. One of the easiest craft projects and you probably didn’t have to spend a penny!

Easy pine cone door hanger DIY

Pin this for later

easy pine cone door hanger, flower pine cones

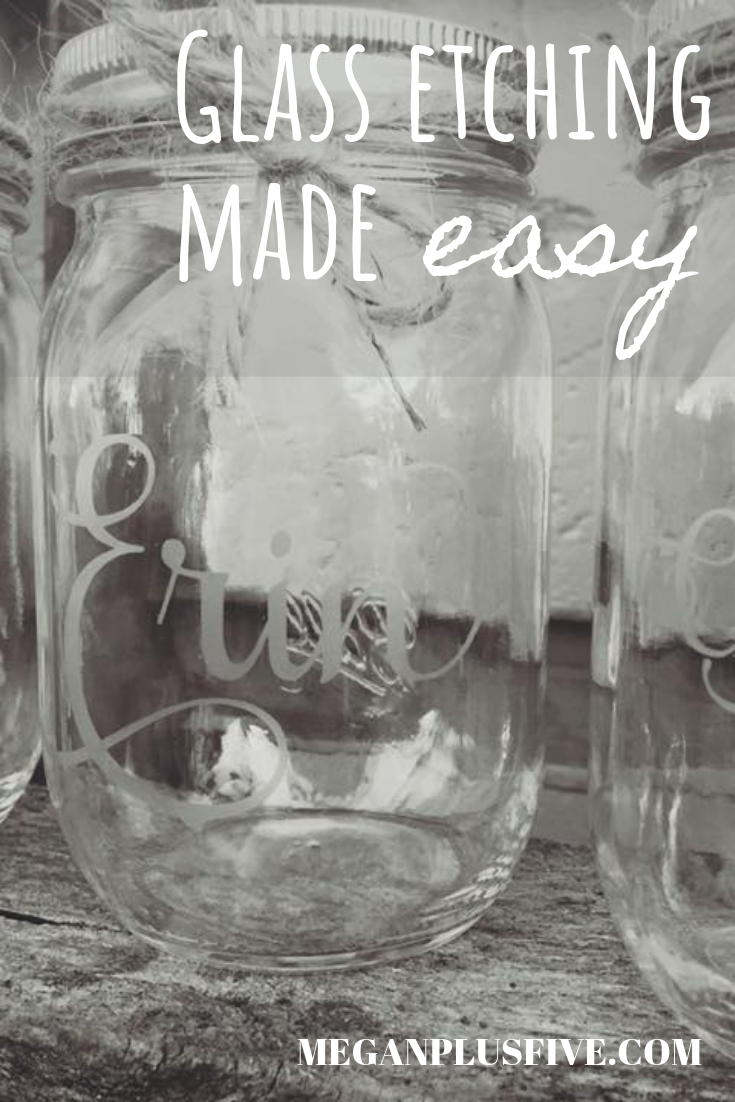
Glass etching the easy way

Learn how to etch glass the easy way

One of my most favorite gifts my husband and I received when we got married were a set of personalized glasses. Someone, whom I had never met because she was an old friend of my father in law’s, took the time to make such a meaningful gift for us. I thought she must have some fancy equipment to make such a fancy gift but I couldn’t have been more wrong.

A couple years we were married I got my very first Cricut. The ones that exclusively used the cartridges to cut {if they did hook up to a computer I had no idea because that was WELL before our computer owning days lol}. Those were the days…not really I’m super thankful for the ease of use the current Cricut system offers. Anyway over the years I have experimented like a mad women with all the things I can make using my wonderful cutting machine. And I was happy to learn of an amazing product I could buy that would chemically etch glass and do any design that I cut a stencil for! Heck yes!

I tried it out and I was amazed by it’s powers lol! It’s called AMOR ETCH. It’s a little pricey BUT it will last you forever. I have etched so many things since and I have to say they are one of my most favorite personalized gifts to make. A few things I’ve made with the etching cream are, wine glasses, mason jars, whisky glasses, glass picture frames, vases and I’m sure way more but I just can’t recall them all.


Be sure to follow the manufacturer’s instructions and always remember this is a chemical so always put safety first.

Here’s what you’ll need

Check out the Facebook live I did showing you step by step how to create your own glass etchings at home.


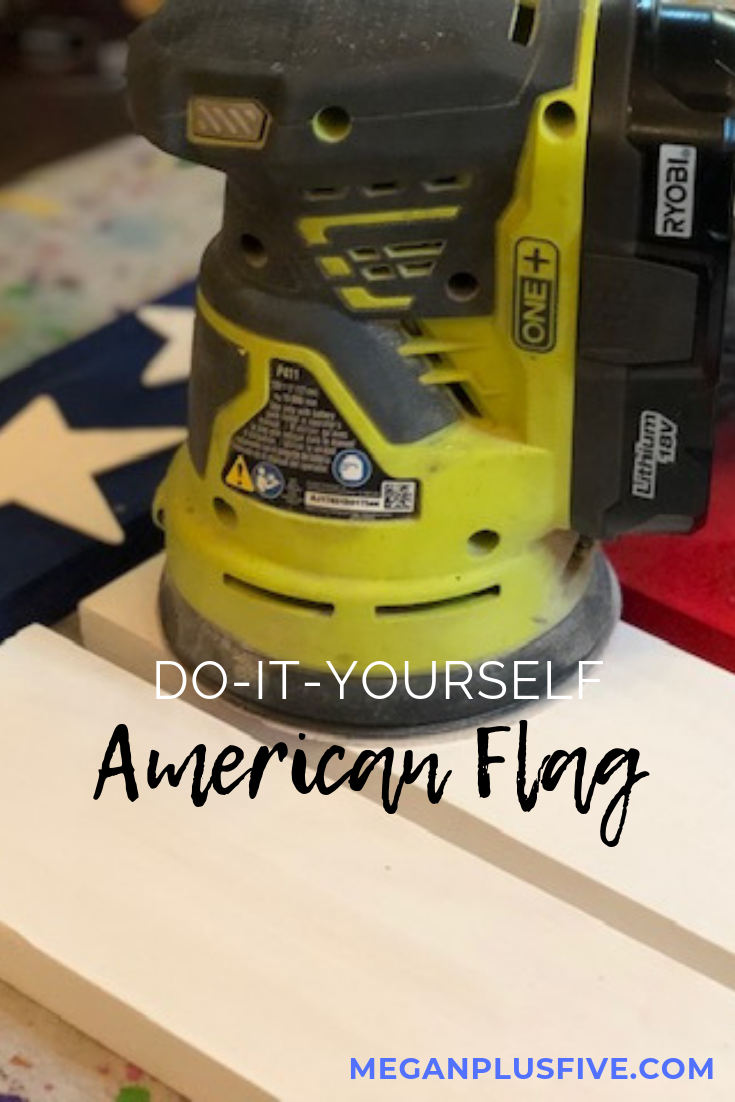
DIY hanging wood flag

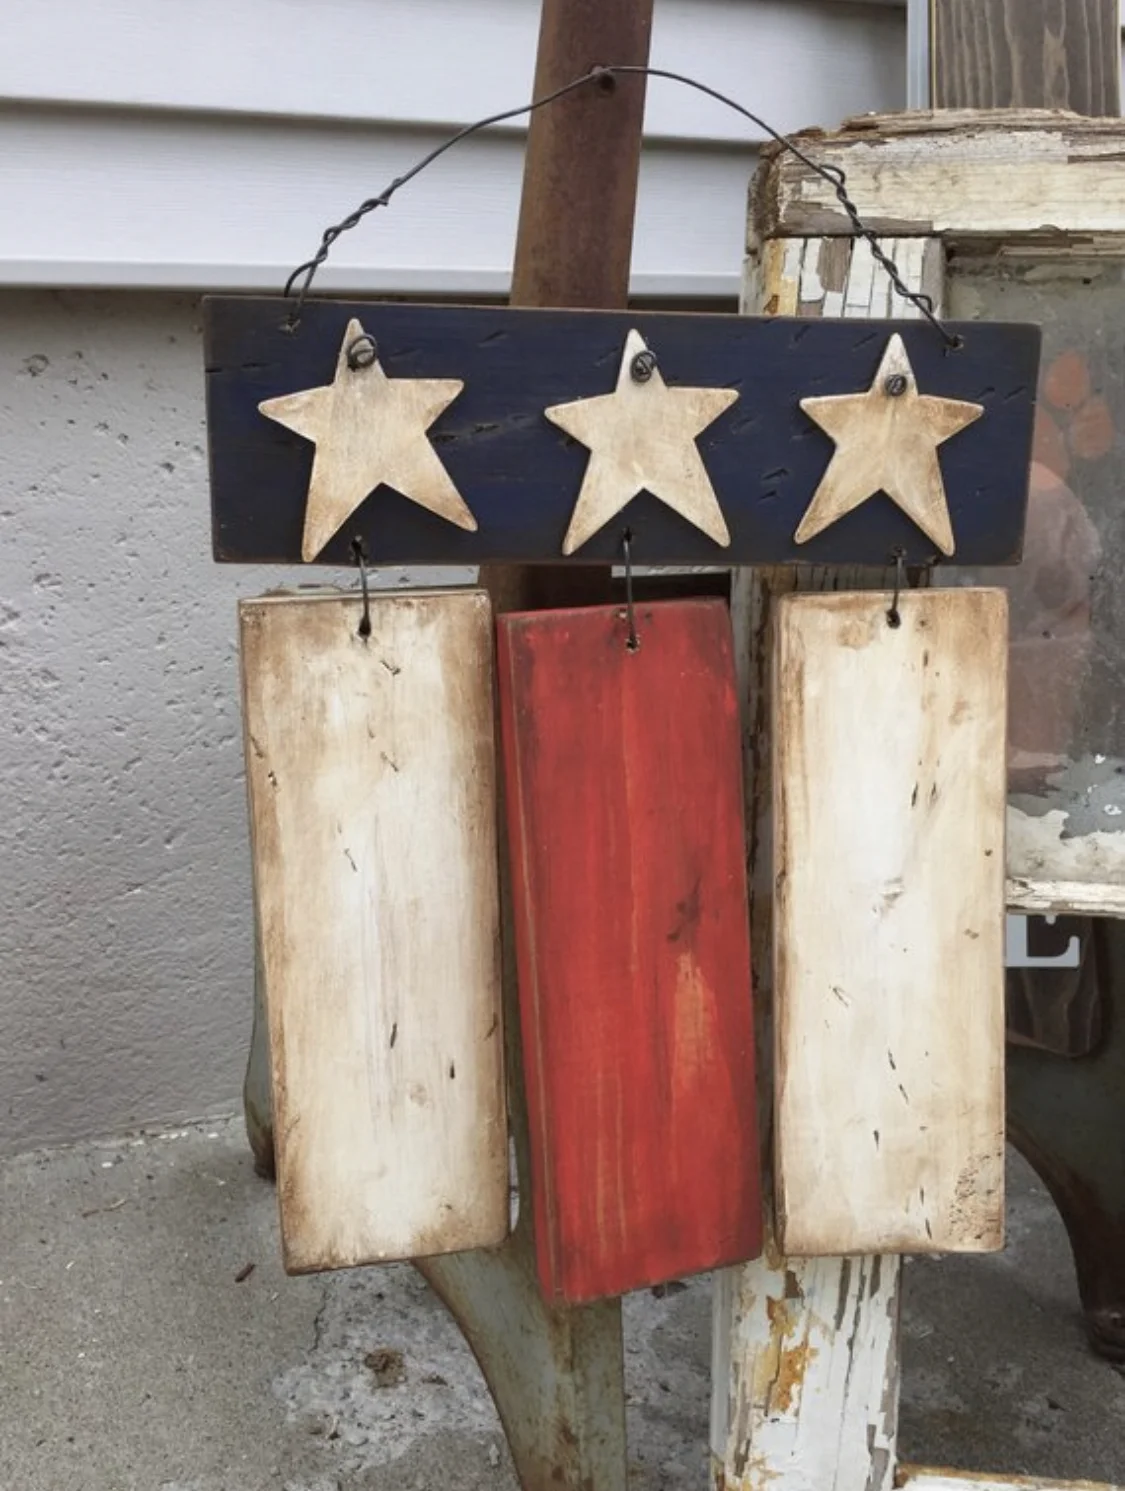
Do it yourself rustic American Flag, how to make a hanging American flag

I love patriotic décor. Not only because I truly love being an American but because it never goes out of season! You can leave it up year round and it looks perfectly beautiful and not at all out of place, unlike the wooden Santa I had hanging out in the living room five months after Christmas. Yes, that’s a true story! My grandma painted this amazing 5 ft tall Santa ages ago and I somehow overlooked him for months in our living room.

So unlike Mr. Claus, patriotic décor would not stick out like a sore thumb long after Independence Day has passed.

If you don’t have time to make your own be sure to stop by my Etsy shop and purchase your own handmade wood American Flag made by yours truly ;)

Affiliate Disclosure. Some of the links on this website are affiliate links, which means that I may earn a small commission if you click on the link or make a purchase using the link. If you make a purchase you will not be charged anything additional.

Ok, on to the tutorial.

Here’s what you’ll need

SUPPLIES

DIY hanging wood flag, how to make your own primitive American flag

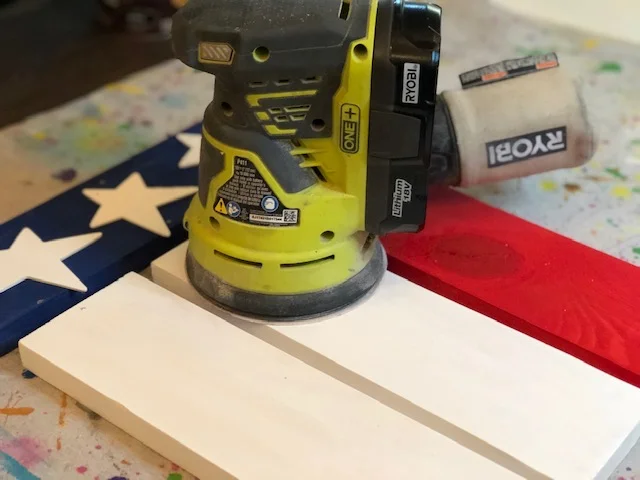
After you cut down your 1x4 into the correct sizes you need to give them a quick sanding. I use my Ryobi handheld cordless sander for this but you can use just sandpaper or a sanding block, although it will take a lot more work and more time. I purchased my sander fairy cheap at my local hardware store, one of the best $50 I’ve ever spent! After you have all the 1x4 pieces sanded give them a quick wipe down to get all the saw dust off.

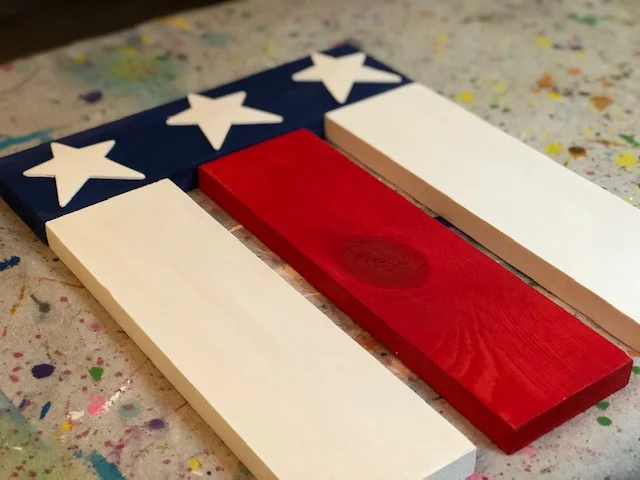
Next you need to paint all the wood pieces and the stars. I only did two coats on each piece. To get the look that I did on mine you will need to paint all three stars WHITE, 2 of the 1x4x12’s WHITE , 1 of the 1x4x12 RED, and the 1x4x13 BLUE. Let them dry COMPLETELY between coats.

DIY hanging wood flag, make your own American flag at easy with this tutorial

After everything is totally dry you need to mark your pieces where you will drill your holes. I am not a perfectionist so I just eyeball it. It’s rustic so it doesn’t have to be perfect anyway ;) I do this with a pen but if you’re worried about messing up you can use a pencil.

DIY hanging wood flag, how to make an American flag at home for your porch

Not counting the stars, your pieces should have a total of 11 markings, 3 on the top of the blue piece where you will attach the stars, 3 on the bottom of the blue piece where you will attach the hanging white and red pieces, 1 on the top right of the blue piece and 1 on the top left of the blue piece where you will attach the baler wire to hang for displaying, 1 in the top middle of each white piece, 1 in the top middle of the red piece. I don’t typically mark the stars because it’s not necessary, the hole goes in the top of the star.

DIY hanging wood flag, how to make your own American wood flag to hang on your front door

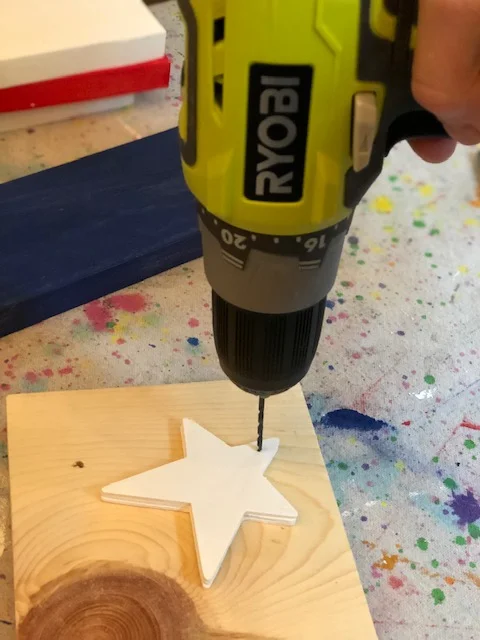
Now it’s time to drill. Your drill bit will vary depending on how thick your baler wire is. I always use a drill bit that is just a size above the wire size, that way the wire has room to move so that it’s not super tight. Be sure when you are drilling the holes in the stars you don’t get too close to the top. If you get too close you will crack the tip of the star and you won’t be able to use it. PRO TIP: place a flat discarded piece of wood under what you’re drilling into so you don’t drill into the table underneath.

DIY hangin wood flag, how to make your own at home

Now it’s time to distress. Using your Ryobi sander sand around the edges. Here’s a good example on how I do this in my Dr. Seuss keepsake craft. There are some good close ups on sanding just the edges and rounding the corners of the wood to give it a perfect rustic look.

DIY hanging wood flag, how to make your own American flag to display on your front porch

I only sand the 1x4 pieces. The stars are so small and fragile that yo don’t need to sand those, using the wax on them in the next step will work just fine.

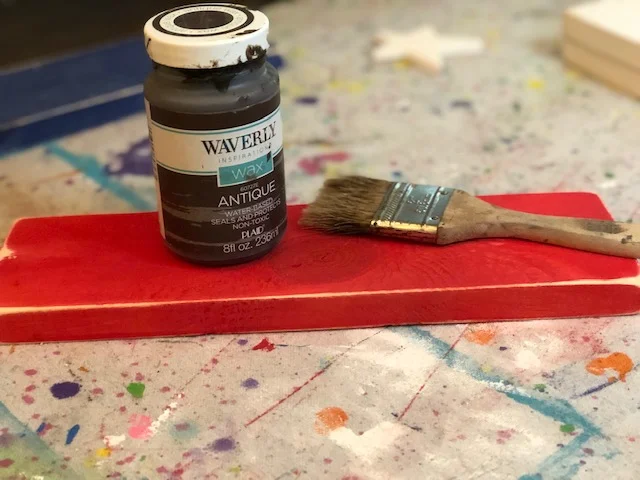
Apply wax around all the edges, corners, and give them a light coat down the center of each piece. Check out my DIY rustic wooden pumpkins post on a more detailed way to do this using your chip brush. I love pretty much any brand of antiquing wax, they all work great! PRO TIP: cut the bristles down on your chip brush. You get a better outcome when the bristles are shorter and stiffer.

DIY hanging wood flag, how to make your own American flag porch decor

You’re almost done! The next steps are just assembling your pieces together. You’ll need your baler wire and wire cutters for this.

DIY hanging wood flag, how to make your own patriotic porch decor

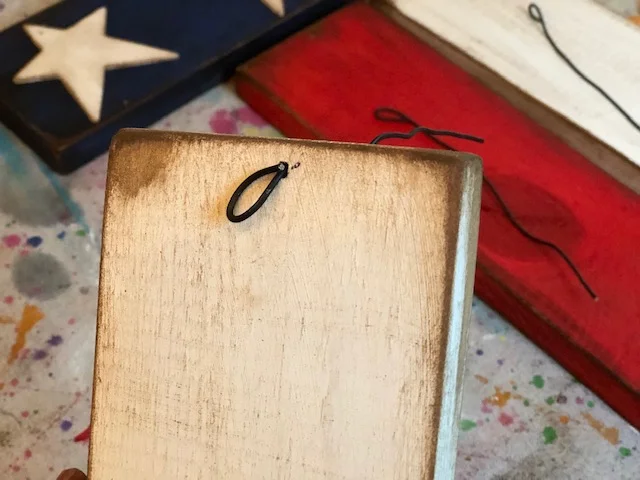
You’ll need 3 wire pieces cut to approx. 6”-7”. Cut your pieces short if you want less space from the blue piece to the hanging pieces, and longer if you want more space from the blue piece to the hanging pieces. Now make a loop with your plies on ONE end of each piece like pictured below.
DIY hanging wood flag, how to make your own American flag porch decor

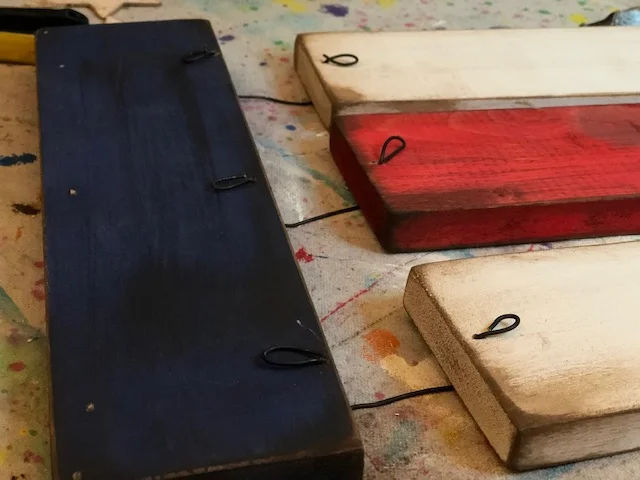
These loops will go on the BACK of each piece.
DIY hanging wood flag for the front door

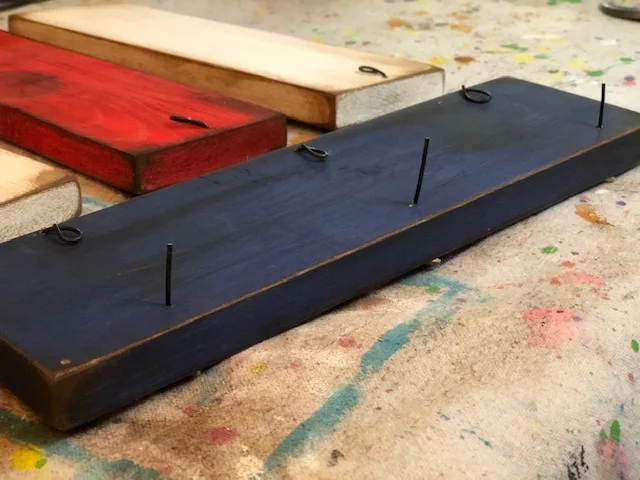
Then connect it to the blue piece and loop the end just like you did before. This is what the BACK of your flag should look like before you attach your stars.
DIY front door hanging wood American flag

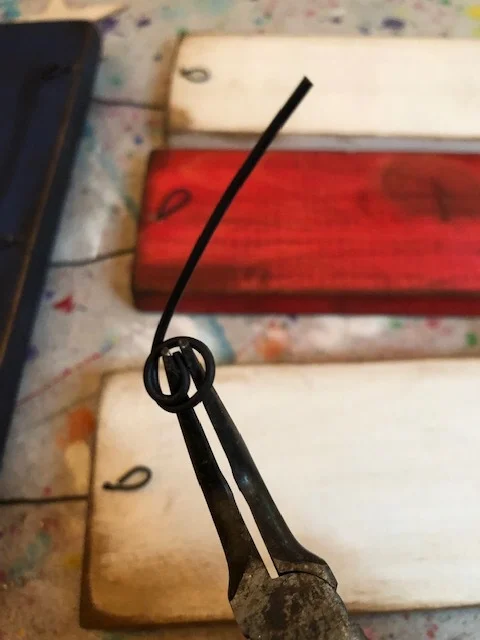
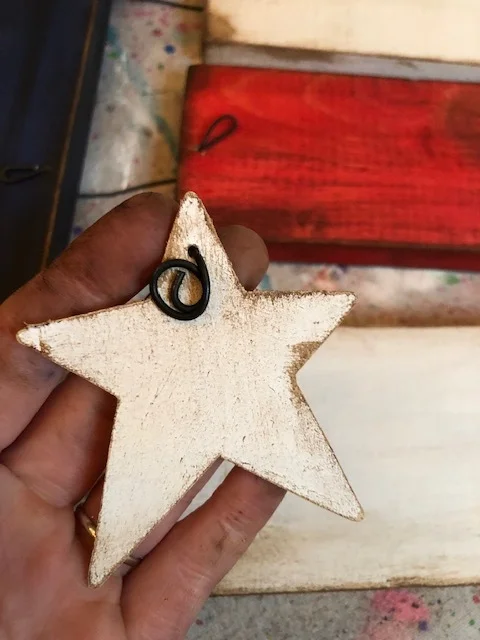
The star wire is slightly different. You’ll need a 3” piece for each star. One end you need to wrap a few times around your needle nose pliers. This doesn’t have to be perfect, mine never are. Leave the other end open.

DIY front door hanging American flag

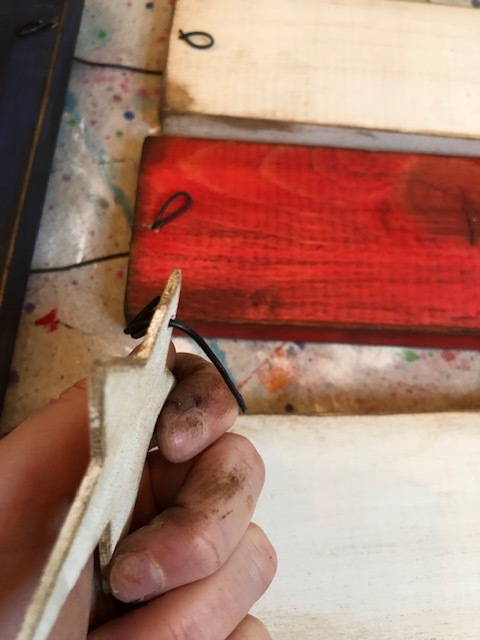
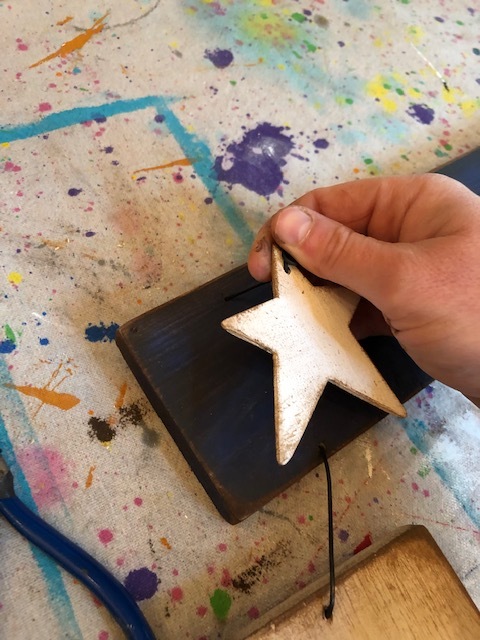
Then feed the straight end of the wire through the front of your star then through the front of the boar where you drilled a star hole.

DIY hanging wood flag for your front porch
DIY hanging wood flag

After you put your star wires through their holes on the blue wood you want to do the same thing and loop them on the back like you did with the other wires. Pictured below is BEFORE they are looped.

DIY hanging wood flag for your front porch

Add a piece of wire to hang at the top corner holes and you’re done! I know it seems like a lot of steps but it’s SUPER easy! I’d love to see pictures of your handmade patriotic decor, especially if you make this piece:)!!

IMG_4189.jpeg

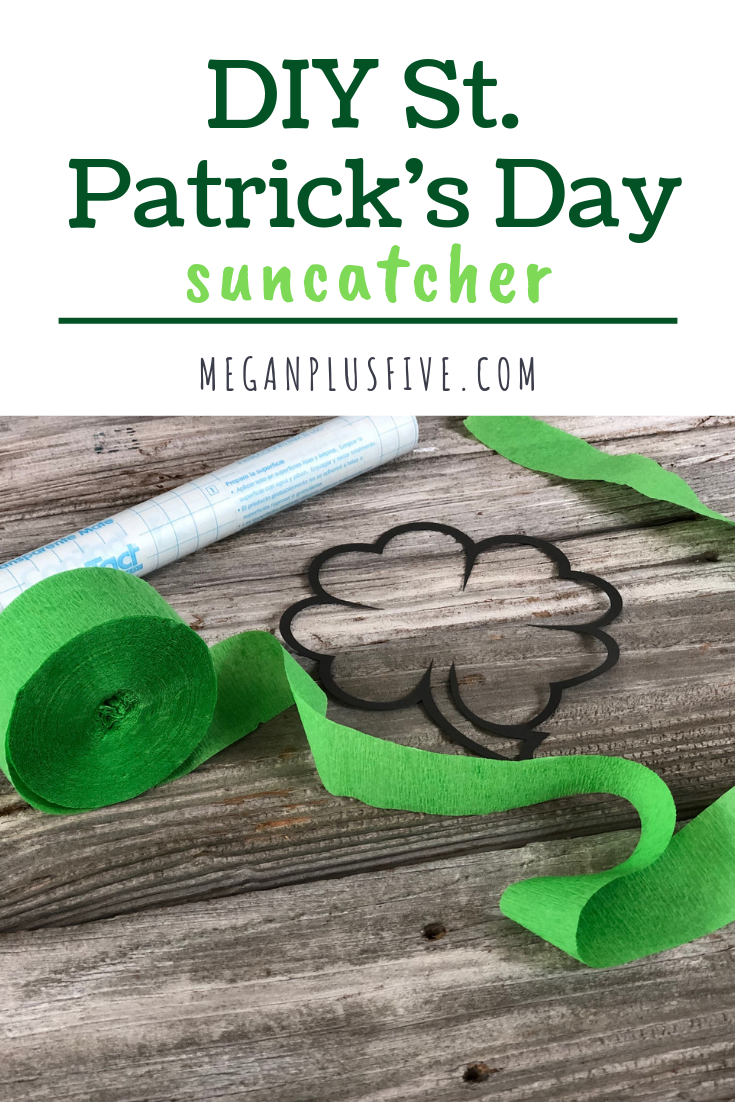
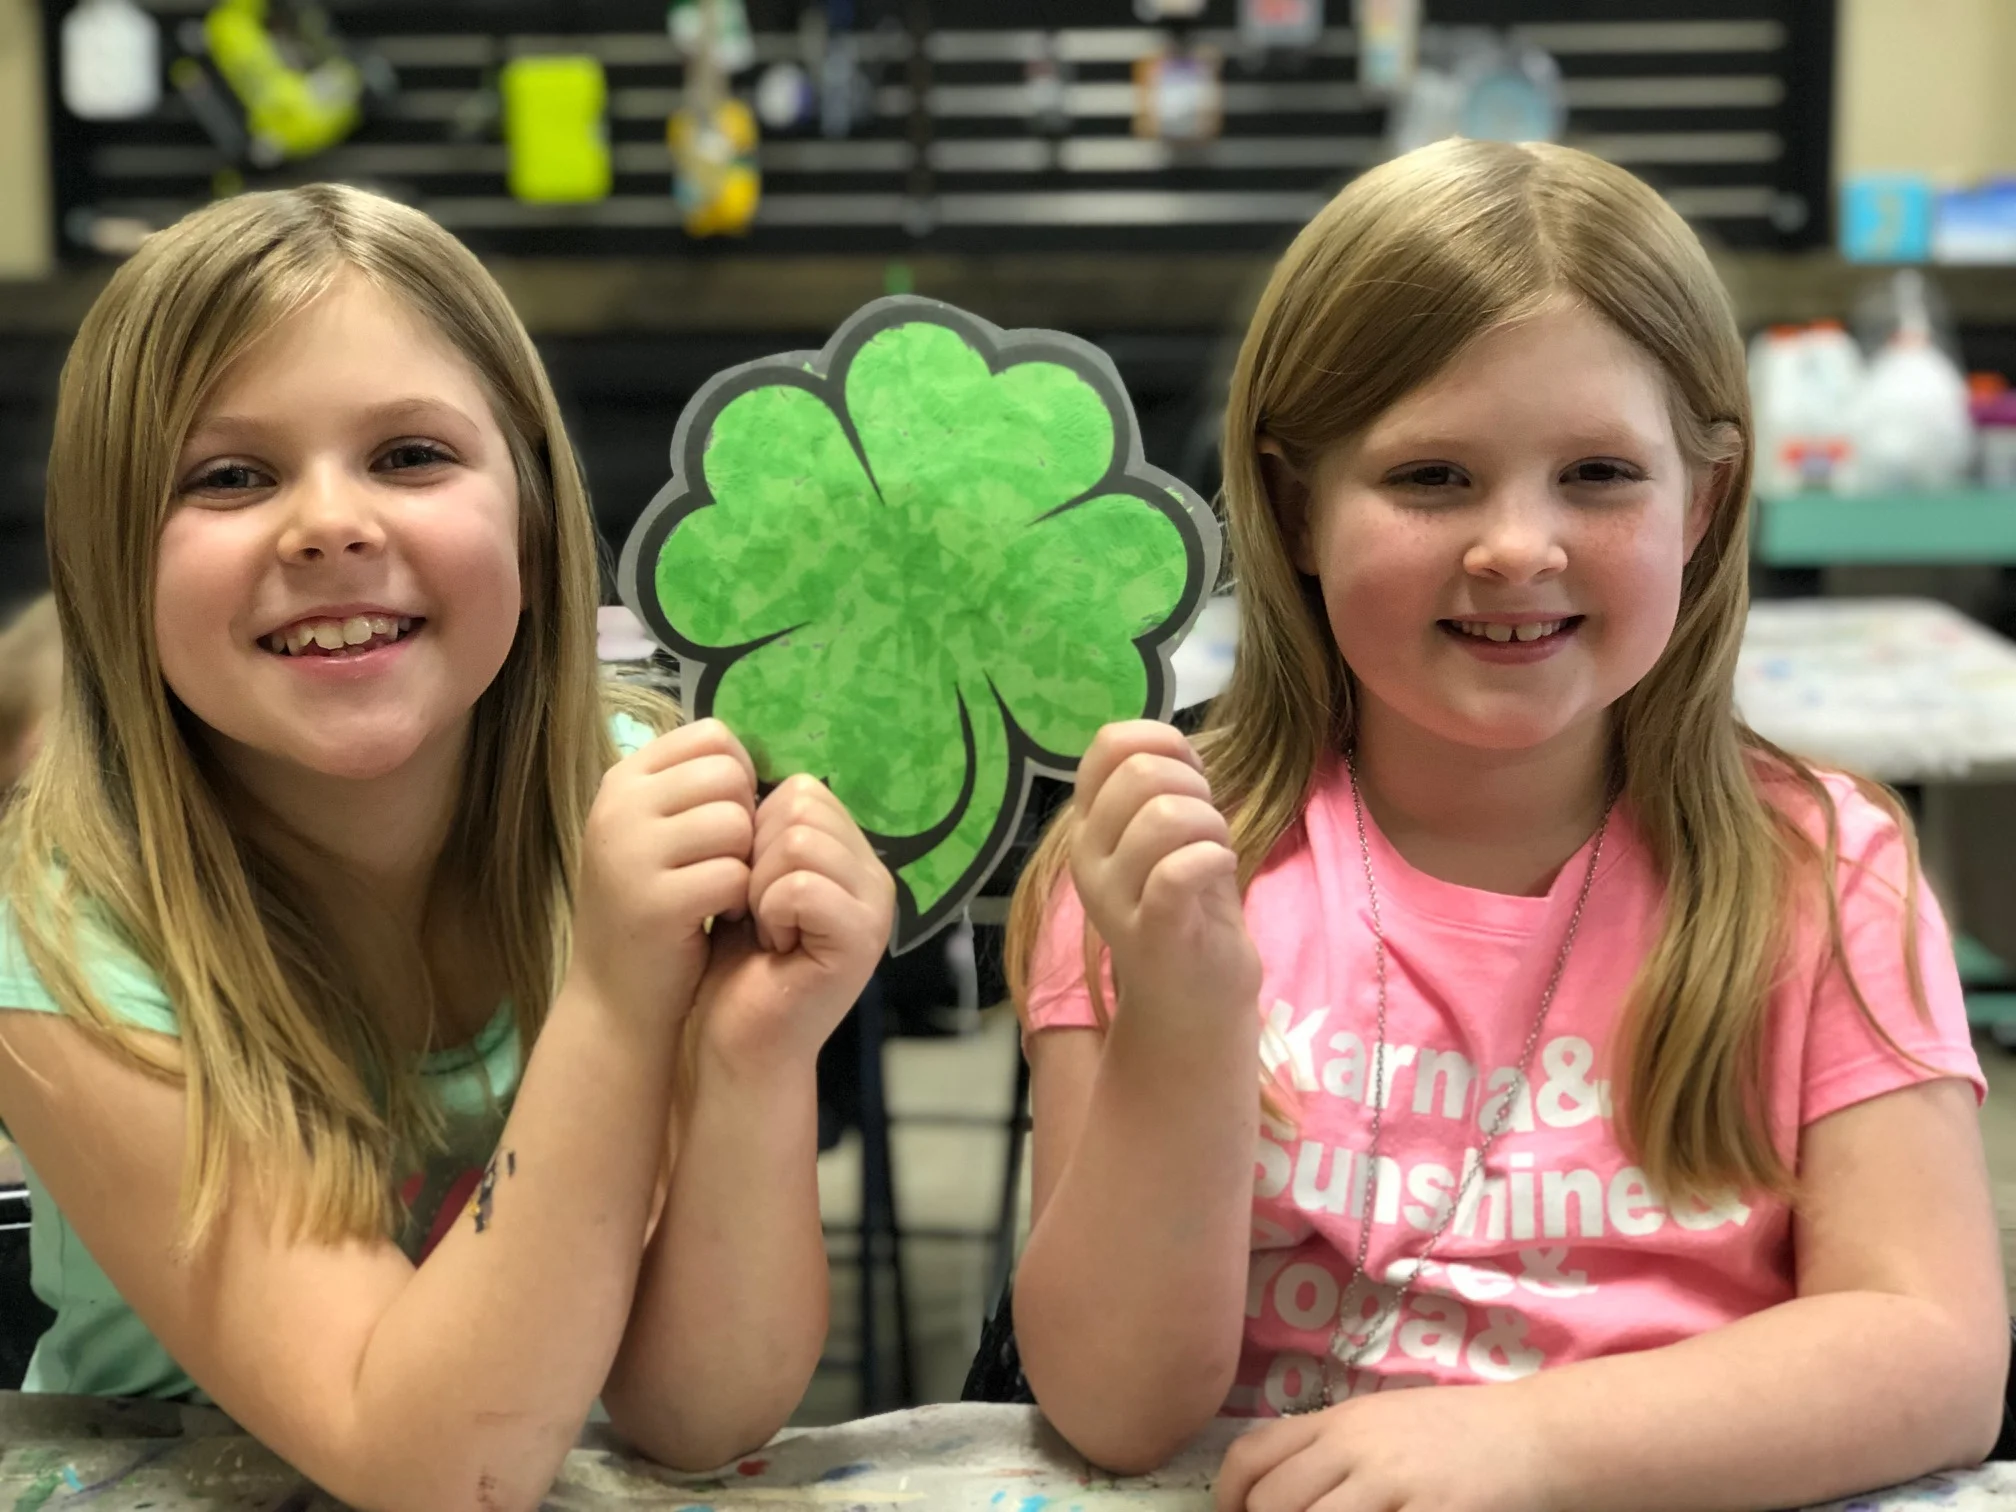
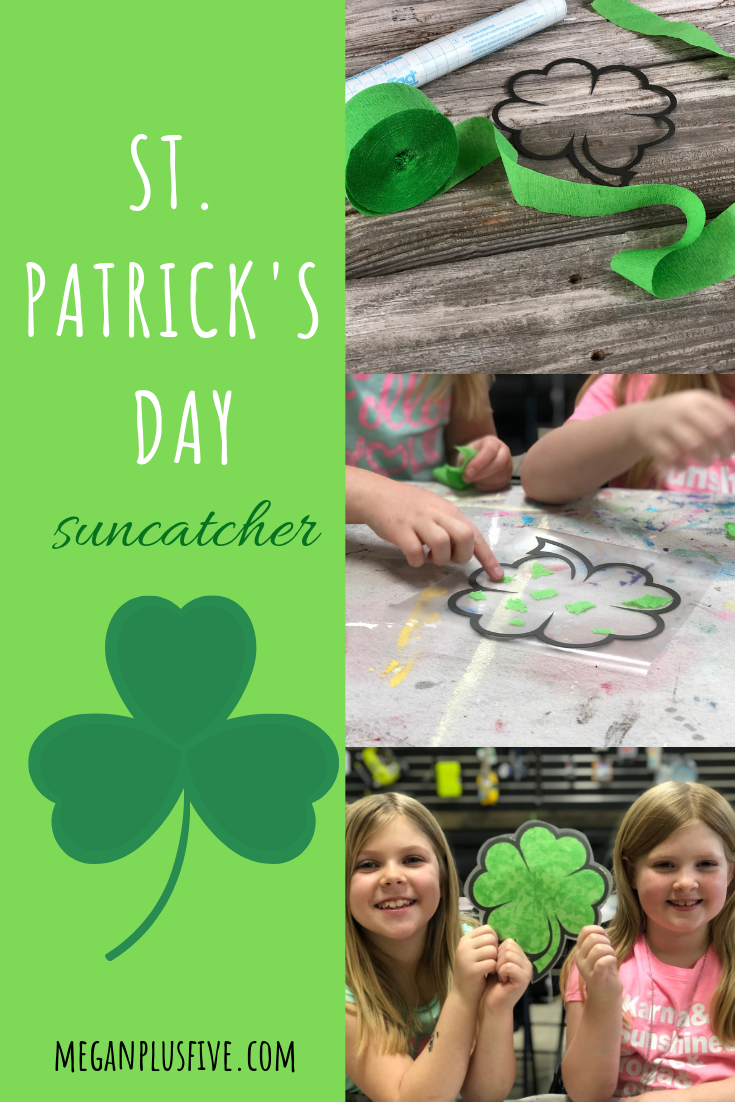
DIY St. Patrick's Day suncatcher, easy tutorial to make your own with your kiddos

DIY St. Patrick's Day suncatcher, easy tutorial to make your own with your kiddos

St. Patrick’s Day isn’t a super big deal around our house but we do enjoy the holiday. We always wear green and we try to make tasty green foods {that doesn’t always happen}. But this year we did get around to making some fun green crafts for the occasion!

Each week we host a toddler day in our CRAFT STUDIO called TOTS IN THE SHOP and I needed to plan for the events for the upcoming months. I try to coincide our weeks with the holidays when they come up and St. Patrick’s Day is coming up so I scoured Pinterest to see what I could find. I came across this adorable suncatcher by Julie from Director Jewels and I knew we had to make one too! I did change up ours a bit to make it easier/simpler for the tots to make.

Before we host our workshops our four daughters and I create mockups for them. I have to say our girls LOVED making this one. I was actually pretty surprised though. I thought for sure the older girls would be too “grown up” for this one but they loved making it more than our three year old. Woohoo!

This craft was so super easy to make too. I didn’t really do much except show them how to do it and they took it from there.

DIY St. Patrick's Day suncatcher, easy tutorial to make your own with your kiddos

Here’s what you’ll need

  • contact paper

  • green crepe paper

  • a shamrock with a hollow middle {I cut mine out using my cricut}

  • scissors

I used my trusty Cricut to cut out my shamrock. I found the image in design space and adjusted it to be approx. 7” wide. You can always print your own and use scissors to cut out the middle. Julie has a printable linked on her website if you click her link above.

Then you need to measure out your contact paper. You want it to be larger than your shamrock.

DIY St. Patrick's Day suncatcher, easy tutorial to make your own with your kiddos

You’ll need to cut TWO pieces of contact paper that are larger than your shamrock.

DIY St. Patrick's Day suncatcher, easy tutorial to make your own with your kiddos

Remove the paper backing from your contact paper and place your shamrock in the middle. Then start tearing pieces of the crepe paper off and sticking them inside of the shamrock.

DIY St. Patrick's Day suncatcher, easy tutorial to make your own with your kiddos

Once your shamrock is covered remove the paper from the second piece of contact paper and lay it sticky side down onto the shamrock, essentially you are making a shamrock sandwich with the contact paper. Then trim off the extra leaving a 1/4 of and inch of contact paper all the way around the paper shamrock.

DIY St. Patrick's Day suncatcher, easy tutorial to make your own with your kiddos

And you’re done! SO EASY!!

St. Patrick's Day suncatcher, easy how to make this fun DIY

How to plan the PERFECT no stress art party for your crafty kiddo for less than $40

How to plan the PERFECT no stress art party for your crafty kiddo for less than $40

Has your kiddo been dreaming of that PERFECT art birthday party? Maybe they are like my older girls and have all of their out of budget party dreams pinned to Pinterest {yes, they really do this!}. After having 4 girls and LOTS of birthday parties I’ve learned a thing or two on how to pull off that perfect art party on a budget!

Disclosure: some of the links below are affiliate links, meaning, at no additional cost to you, I will earn a small commission if you click through and make a purchase.

Here’s the a little truth, kids just want to let loose and be kids. They don’t care about fancy decorations, perfectly spaced plates and napkins, banners hung at just the right height. Let’s be honest, that’s for the adults. The kids are there to hang with their friends, eat cake, and have loads of fun, but that’s a whole different blog post.

So how to you plan a kids painting birthday party under $40? Yes, you read that right…. just $40!

First you need to decided how many kids will be coming to your party. Usually I will have a few extra supplies in case a kiddo RSVP’s at the last minute or if one shows up and doesn’t RSVP at all. A typical party we host at our craft studio has about 6-8 kids. Our kids, they usually have about 20…gulp! I know that seems a little ridiculous but they have lots of cousins and I always invite the party goers siblings to stay because I’m a sucker for feelings and don’t want any kids to feel left out. Honestly this is easier for the parents that want to stay for the party anyway.

 
Art party on a budget. FREE printable how to plan a crafty art birthday party without breaking the bank

Snag your FREE checklist below


How to plan the PERFECT no stress art party for your crafty kiddo for less than $40

If you don’t have anything at home here’s everything you will need

Most of these supplies are disposable to make this EXTRA easy and stress free for you!

-8”x10” canvas these come in a pk of 12

- acrylic paint set of 12 2oz paints
- paint brushes these you can toss when the kiddos are done

-paper cups used for holding water to rinse paint brushes

-paper plates used to hold the paint, one for each kiddo

-plastic table covering this you can toss when you’re done


All of these items can be shipped right to your door with amazon prime*, I told you this would be stress free. No going to 5 different stores to track down all the supplies you need only to get home and realize you totally forgot something {I do this all the time!}. Then the day of the party you kick yourself because I never made it back to the store to get that forgotten item. All of this will cost you less than $40, not including taxes or any applicable shipping*

*based off of when this post was published

So how do you host an art party? First, I always tell the parents to put their kiddos in clothes they can get messy. There’s nothing scarier than a pissed off momma because her child got their new clothes ruined by non washable paint. So try to avoid that at all costs. Next, you want to have everything set up before the kids get there. This is so much easier than trying to pass out all the materials with 10 little helpers gathered around. That means, plastic table cloth down, water cups filled half way, canvases, paper plates, and a couple of brushes at each table setting. Let’s talk about paint…paint goes a LONG way, you’d be surprised at how much paint gets wasted at parties like these. Before the party I always squeeze a small amount of each color of paint that’s available onto each child’s paint plate. Trust me, you’ll thank me for this stress saving tip!

I try not to let the kids sit at the table where they will be painting until we are ready to paint. Unless you have some kiddos that are great at following directions I would have the kids avoid the paint table till you’re absolutely ready.

Now for the fun! Once all the party guests are ready let em loose on their canvases. In my experience kids have WAY more fun when they can paint their own thing using the colors they pick out. Usually that’s what we do. You can see the joy it brings them and their creativity coming to life the second that paint brush hits their canvas. And they all make something totally different and it makes my heart so happy! That individuality is so beautiful!

I promise your kiddo will be so happy creating beside all their friends they won’t even notice the fancy decorations aren’t there.

How to plan the PERFECT no stress art party for your crafty kiddo for less than $40

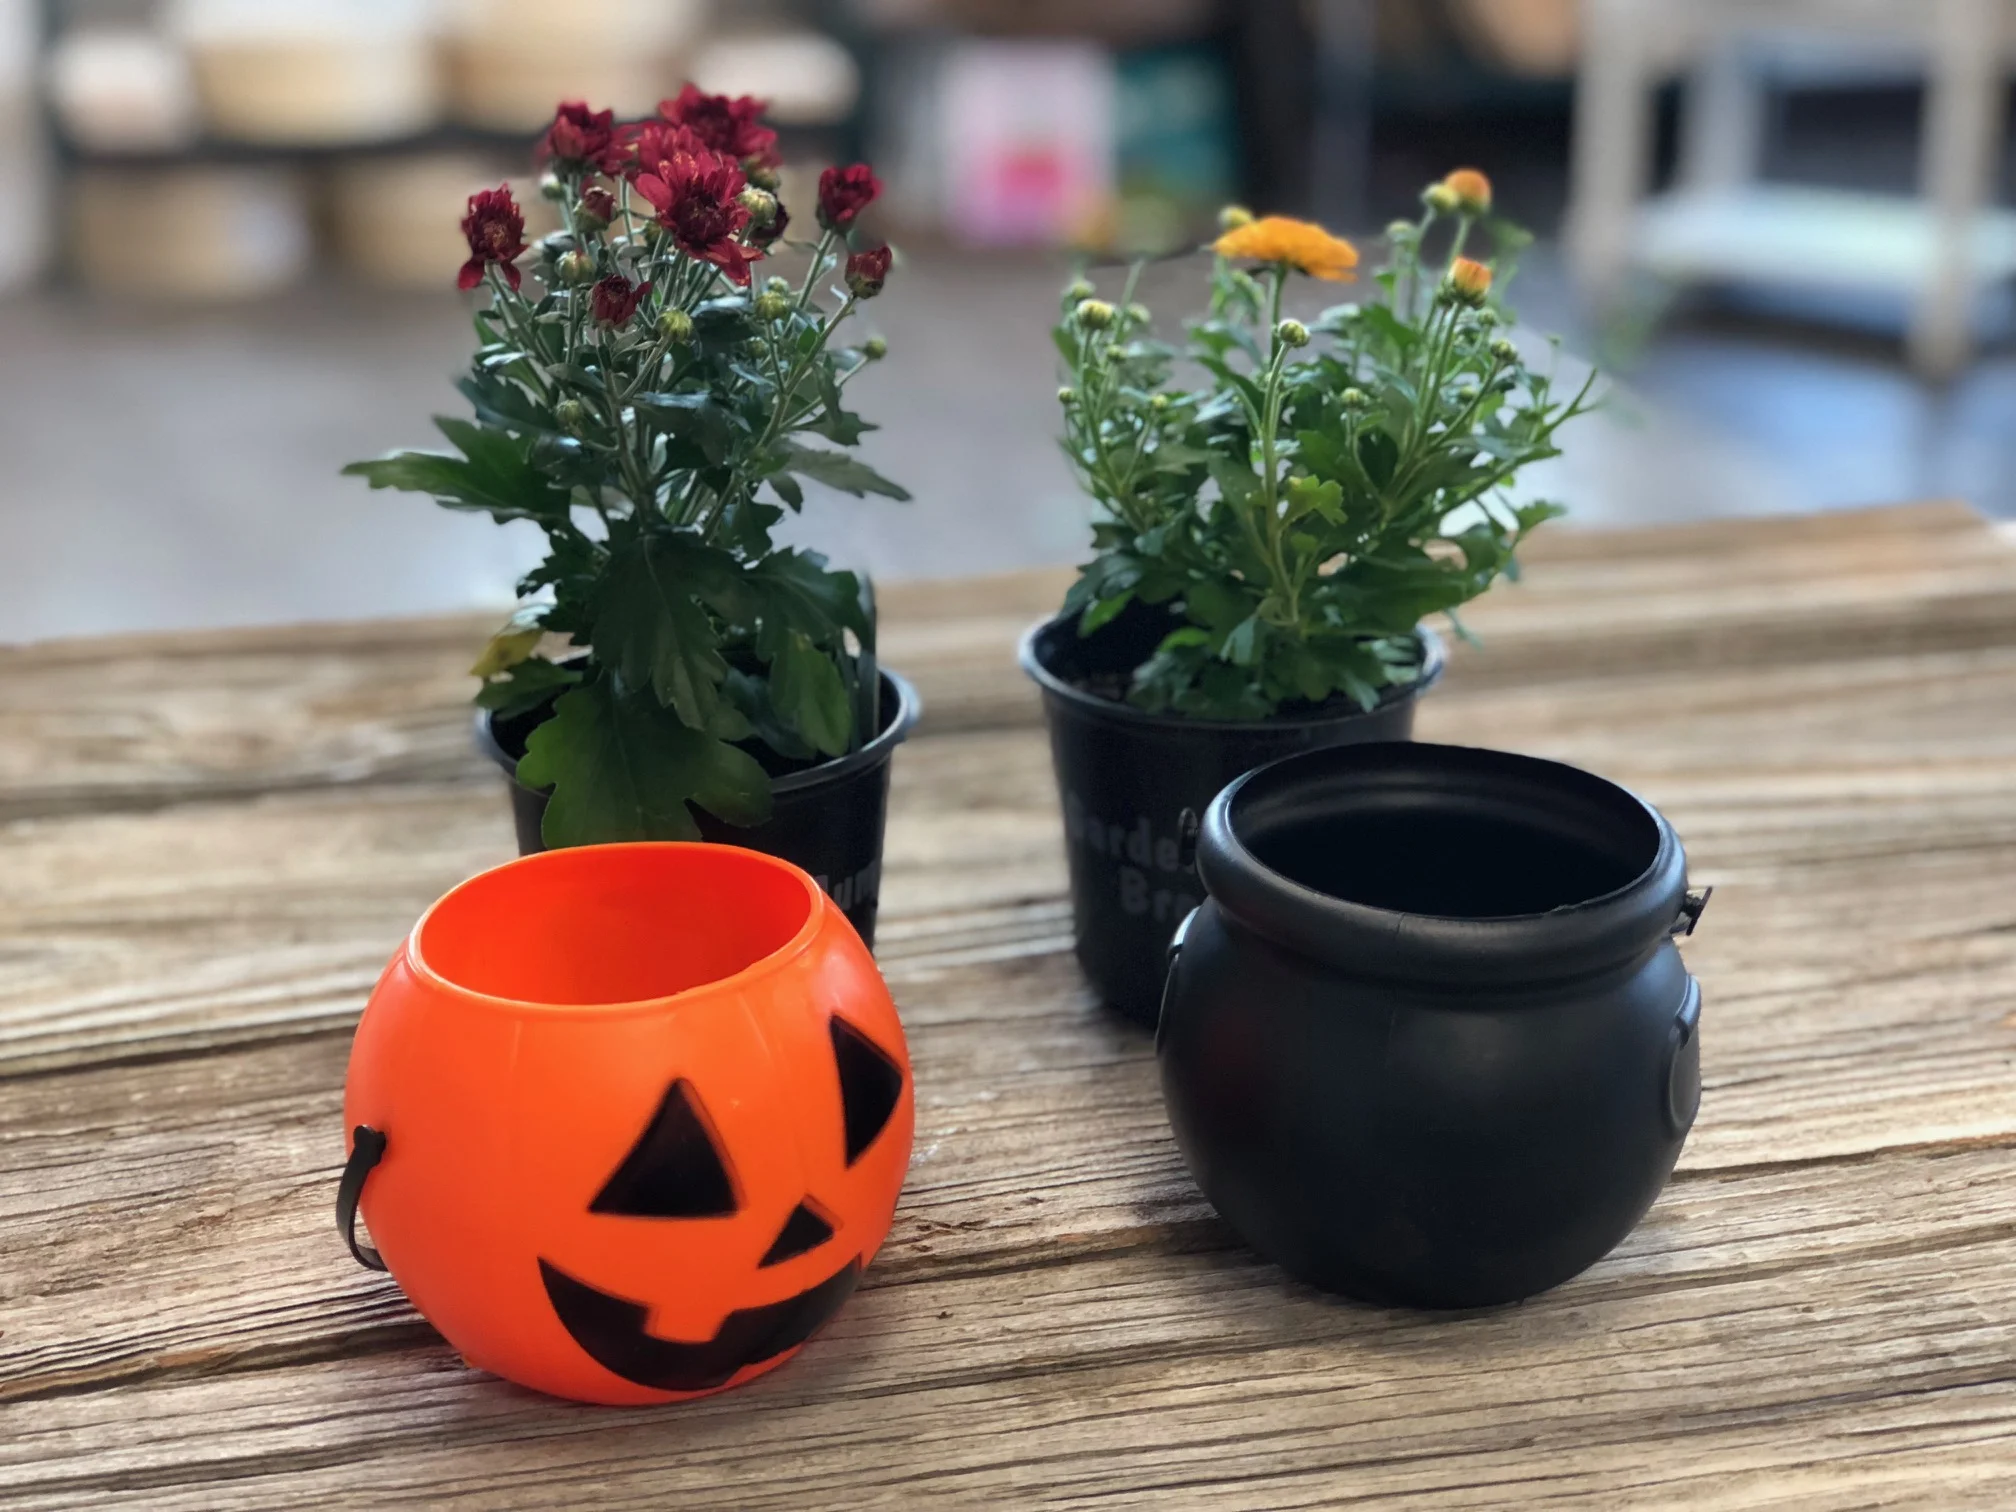
Easy and adorable mini mum planters for less than $2, get the look with this tutorial

Easy and adorable mini mum planters for less than $2, get the look with this tutorial

DIY cheap fall porch décor

I love finding new ways to decorate on the cheap! Having 4 kids…especially girls…is expensive. From clothes to medical expenses these girls can drain a wallet! So I get a little creative when it comes to buying decorations, especially if they are seasonal ones.

A few years ago I wanted to spruce up our front porch with some fall colored mums. I LOVE them, they scream FALL IS HERE! I was shopping around Walmart had the mums loaded in my basket and they come with the standard ugly stamped containers so I thought I’d pick up some inexpensive pots to put them in. Our porch decorating budget wasn’t a whole lot and I was already spending a big portion of it on the flowers. I found the pots and was floored at how expensive they were. They were twice as much as the flowers! Being raised to be super frugal by my mom and insanely CRAFTY grandma my wheels got to turning. I walked around the store looking for ideas of what I could stick these flowers in. Got to the Halloween aisle and BAM! There they were. Perfect round containers that looked like they were made to put those flowers in!!

This year I wanted to recreate those because they unfortunately didn’t last more than that season. I went to Walmart and the regular sized pumpkin buckets were no where to be found but they had mini ones which were the PERFECT size for the mini mum flowers…and a fraction of the cost! And did I mention they were MINI which automatically makes them even more adorable!

So I grabbed the mums, a mini pumpkin and a mini cauldron treat buckets and set back to our brick and mortar shop to make some cute planters!

Affiliate Disclosure. Some of the links on this website are affiliate links, which means that I may earn a small commission if you click on the link or make a purchase using the link. If you make a purchase you will not be charged anything additional. This is just a way I can help add to our family finances to raise our four daughters. Please know I would never recommend a product or service I do not totally stand behind.


Here’s what you’ll need

I picked everything up from my local Walmart.

2 mini MUM planted flowers, $.97 each {I picked mine up at our local Walmart, but they are not listed online

2 mini Halloween treat buckets $.74 each {I bought a pumpkin & cauldron}

scissors

It cost $1.71 {plus taxes} to make one flower pot. SUPER CHEAP for cute décor, and the kids will love them. I did mine by myself because my kiddos were at school, but you could totally make this a fun family thing and have everyone pot their own.

These are so super simple, literally 2 steps!

First you need to cut the top lip off of the pot the flowers are currently in. This can be hard to get the initial cut so I advise this step for adults.

Easy and adorable mini mum planters for less than $2, get the look with this tutorial

Now shove those babies in the treat bucket and you’re done! If yours are going to stay outside all the time you can drill 2 holes in the bottom to let them drain but I will be bringing mine in and out of our shop and I don’t want the water to drip everywhere so I will manually drain ours.

Easy and adorable mini mum planters for less than $2, get the look with this tutorial

I can’t wait for these to bloom and be even CUTER!

Check out more fall & Halloween themed posts below