Christmas stocking party with the kids

How to have a stress free stocking party with your kids. Make cute Christmas stockings out of drop cloths. DIY Christmas stockings plus a free sock stocking SVG to use with your Cricut.

KID MADE CHRISTMAS STOCKINGS

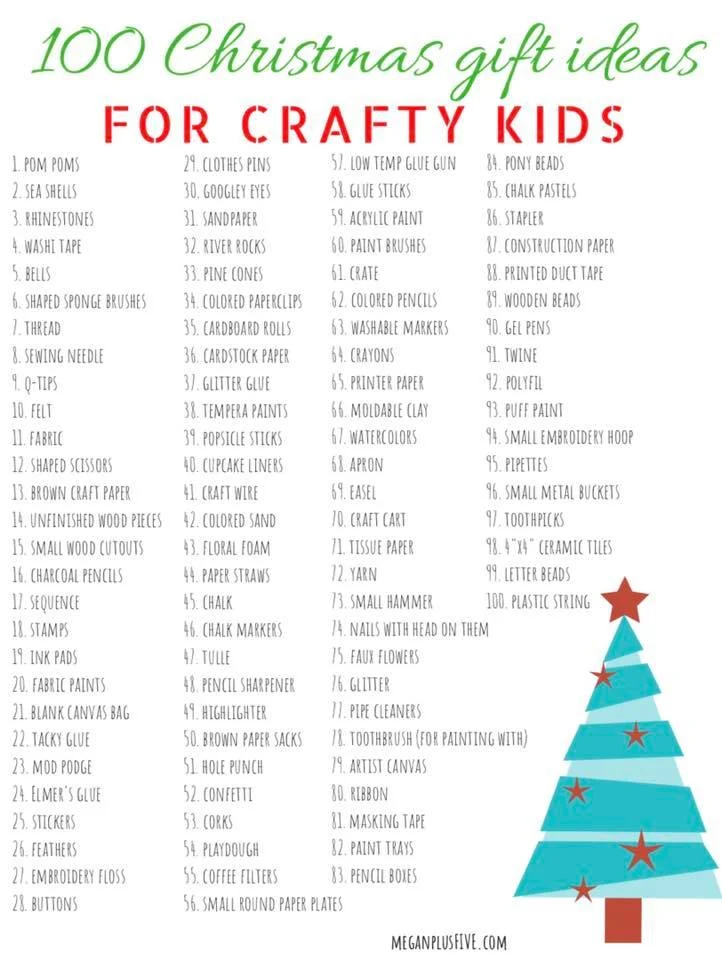
Making Christmas stockings with my girls is one of my most favorite Christmas traditions we do. Every year my four daughters and I sit around the table that is basically a big mess of Christmas craft supplies and make stockings. We break out the glitter, felt, ribbons, fabric markers, bells, buttons… all the things. And I let them create whatever their little hearts want.

Granted they don’t look perfect or match lol but we have so much fun and the memories are priceless. Sometimes I’ll give my momma input as to what might look good but mostly I’m there to help, encourage, and tell them their stockings look amazing.

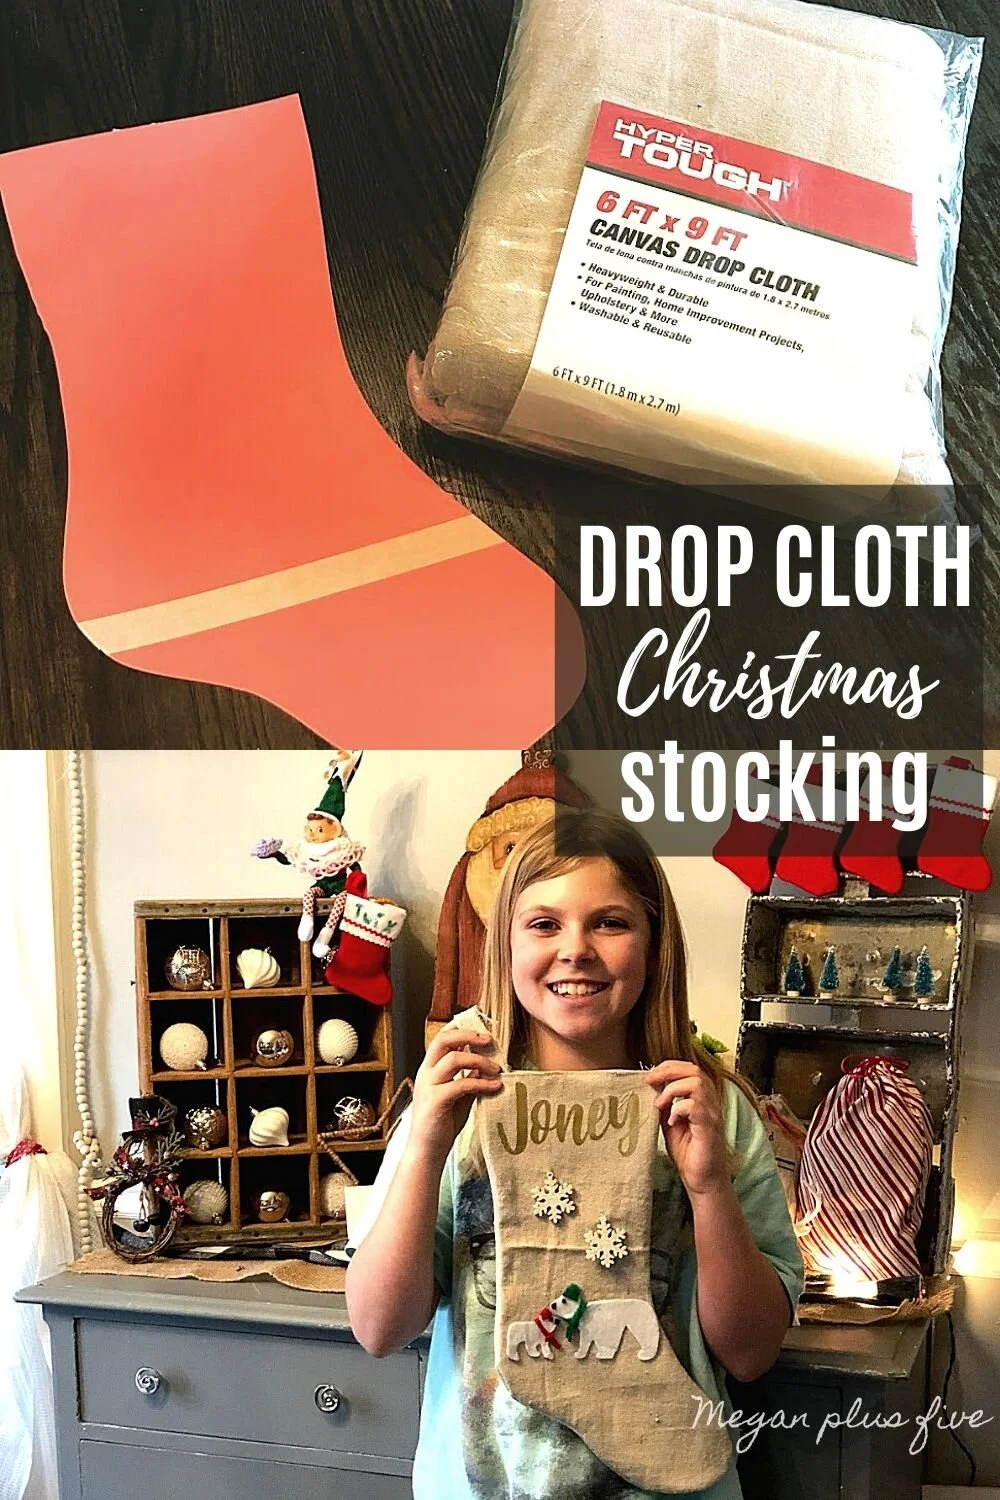
This year I was browsing Instagram and came across Heide’s post from Everyday Cookies- Heide. She shared a gorgeous pic of her handmade Christmas stockings that she had made from a DROP CLOTH! You guys, my mind was blown!

Affiliate Disclosure. Some of the links on this website are affiliate links, which means that I may earn a small commission if you click on the link or make a purchase using the link. If you make a purchase you will not be charged anything additional.
How to have a stress free stocking party with your kids. Make cute Christmas stockings out of drop cloths. DIY Christmas stockings plus a free sock stocking SVG to use with your Cricut.

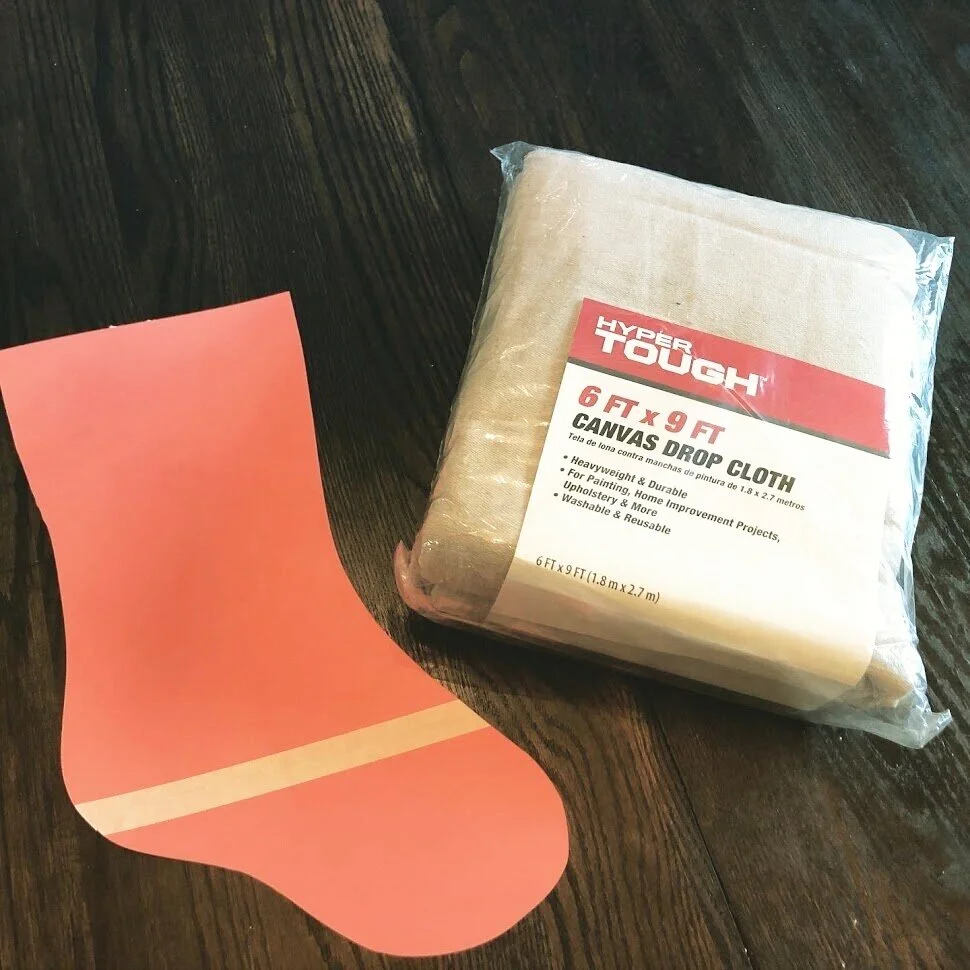
I honestly never thought to use a drop cloth for a Christmas stocking! But it was SO PERFECT. The natural color of the drop cloth was just what I had in mind for making our stockings this year.

The best part is that the drop cloth was cheaper than buying traditional fabric and I have so much left over for LOTS more projects.

Use the same Christmas stocking SVG I used for free —-> CLICK HERE

HOW TO HAVE A CHRISTMAS STOCKING PARTY

Here are some basic supplies you need

1. SEW STOCKINGS

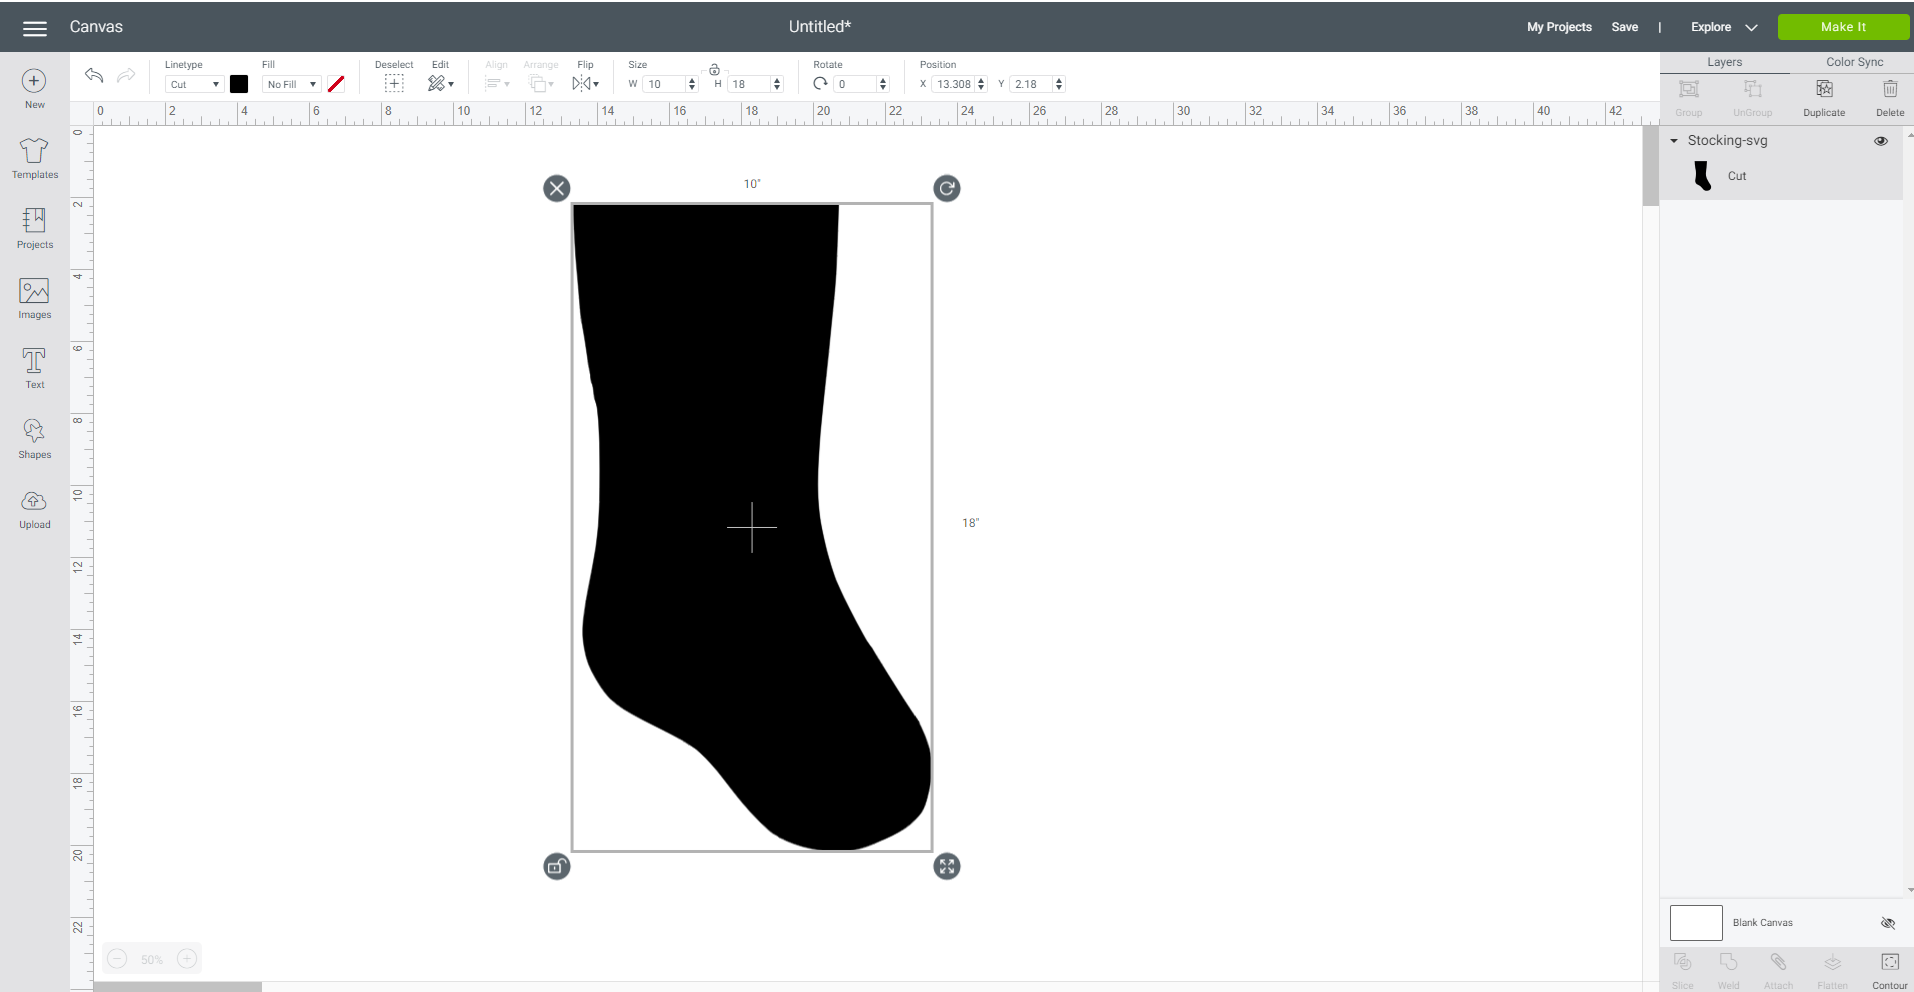
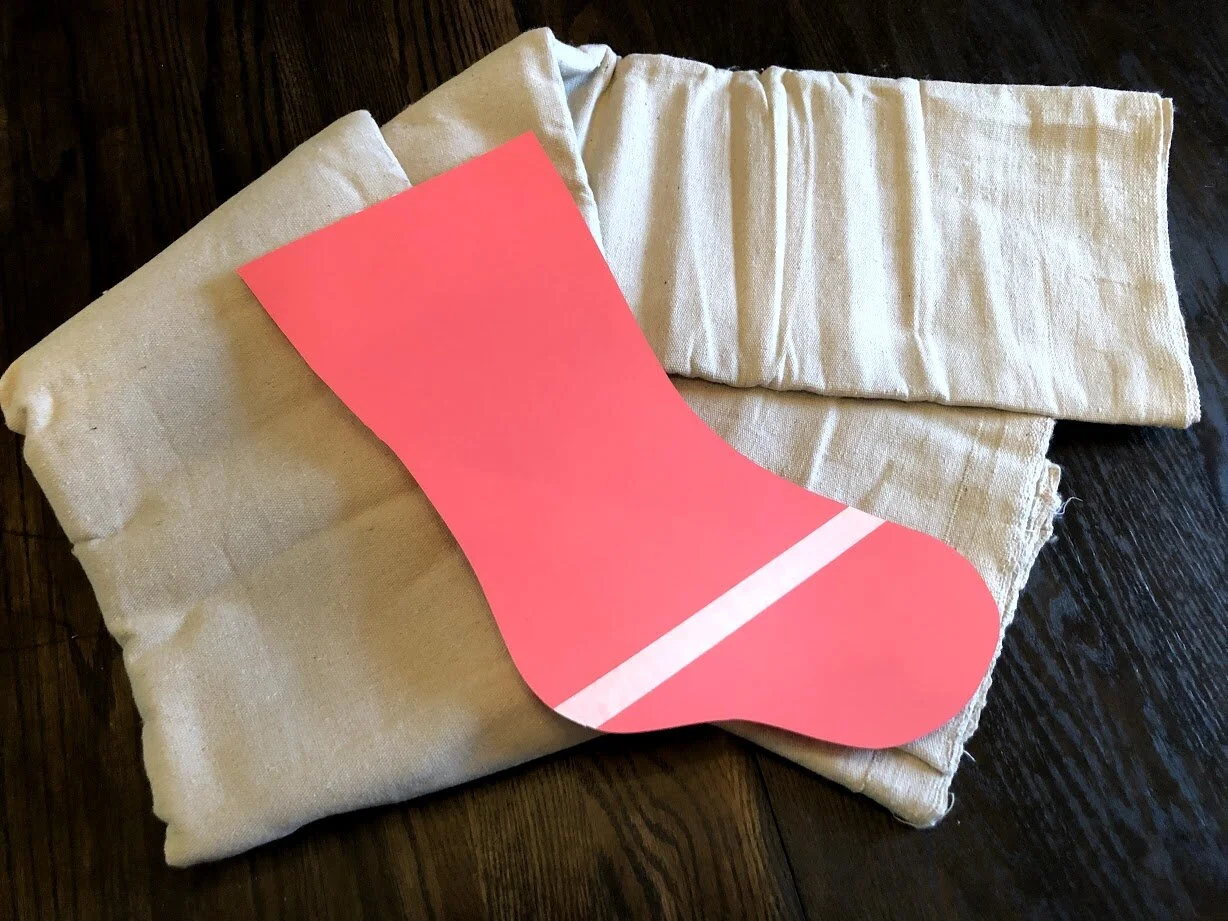
I made a template on my computer then I cut it out on cardstock using my Cricut cutting machine. I didn’t have long enough cardstock so I butted two pieces of 12”x12” cardstock and taped them together. I used this same style when I made this wooden mermaid tale cupcake stand.

I re-sized my stocking template to 10”wide by 18” long in Cricut Design space.
How to have a stress free stocking party with your kids. Make cute Christmas stockings out of drop cloths. DIY Christmas stockings plus a free sock stocking SVG to use with your Cricut.

I don’t have a video, or pictures of this but it was pretty simple. You will need to cut out two stockings, one for the front and one for the back. The pin them together and sew around the stocking leaving the top open. Then turn the stocking inside out so that the sewed seam is now on the inside of the stocking. I will get a video of this process up asap.
How to have a stress free stocking party with your kids. Make cute Christmas stockings out of drop cloths. DIY Christmas stockings plus a free sock stocking SVG to use with your Cricut.

2. ADD NAMES

I used my Cricut to cut names out of HTV (heat transfer vinyl) prior to the girls decorating their Christmas stockings.

To keep it easy, because I was cutting out 5 names (my four girls plus a friend), I had them agree on a color that all 5 names would be cut from. They chose a gold color.

We used my mini Cricut EasyPress to press the names on the stockings. I let the older girls do this and helped when they needed it. If you don’t have a mini EasyPress I highly recommend getting one if you do a lot of little crafty projects that require HTV. I have used this little handy press more than I actually thought I would. And it’s perfect for my teen & preteen to use because it’s easy to hold and manage.


3. DECORATE

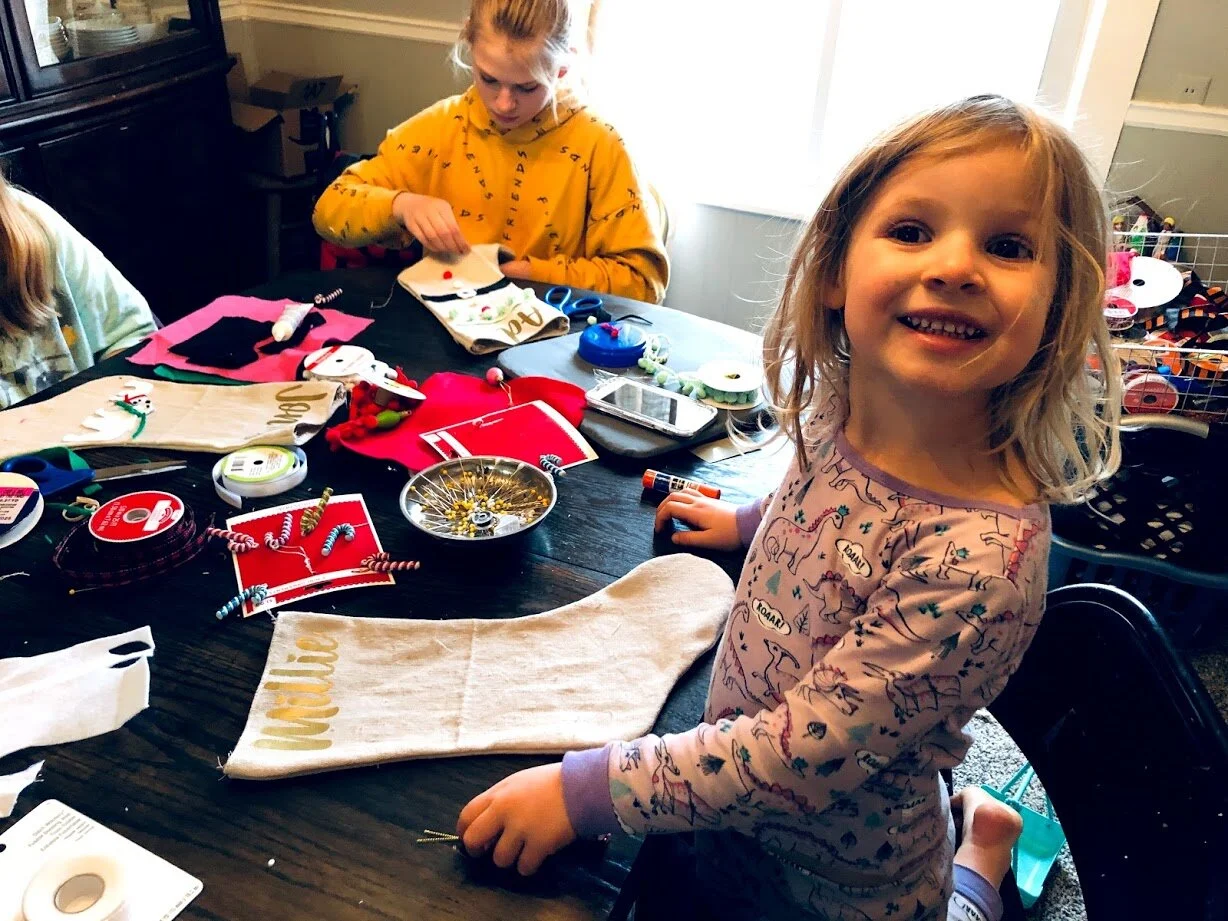
I picked up several packages of mini Christmas embellishments at my local Walmart of snowflakes, candy canes, vintage looking lights, and a few more.
How to have a stress free stocking party with your kids. Make cute Christmas stockings out of drop cloths. DIY Christmas stockings plus a free sock stocking SVG to use with your Cricut.

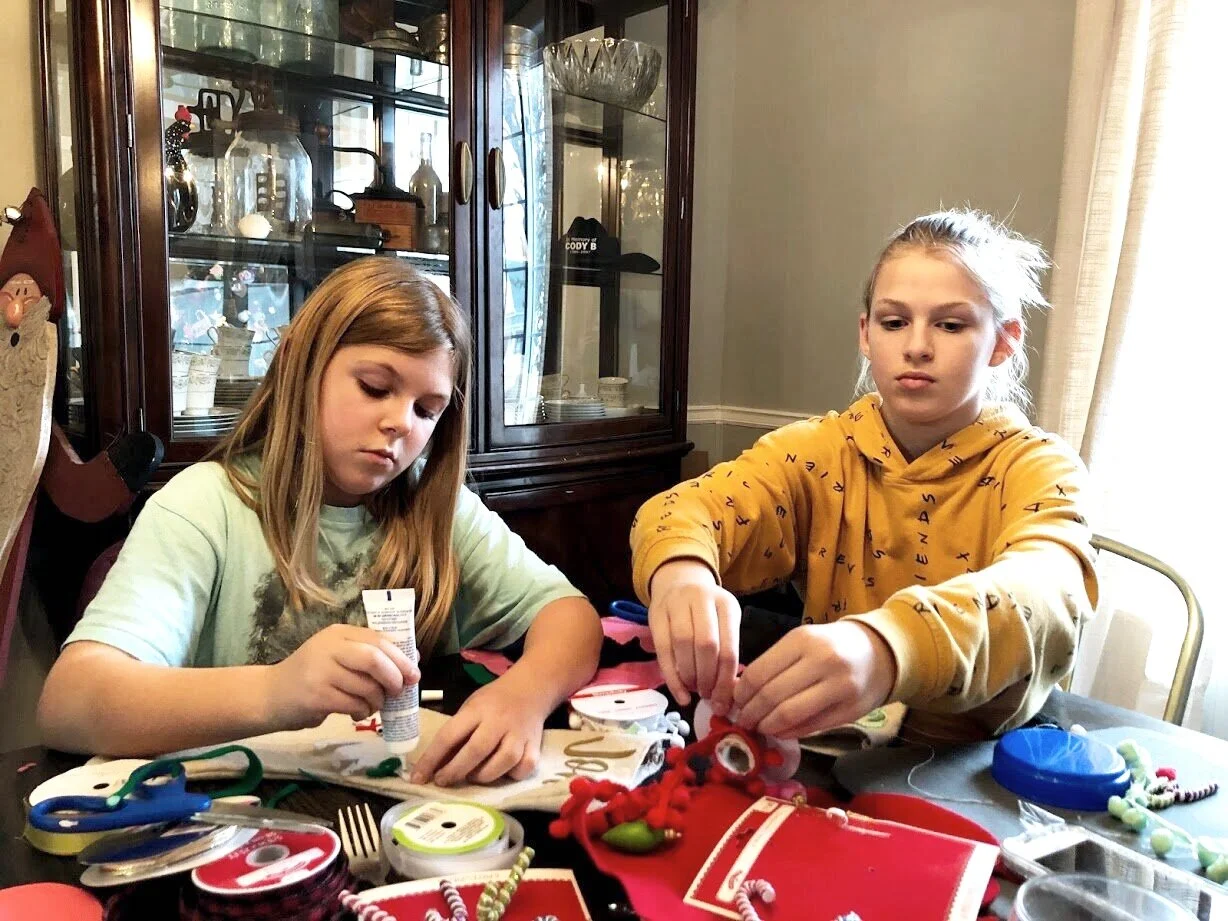
We also pulled out my ribbons, felts, yarns, and buttons. Everything was put on the table in one big beautiful Christmas craft explosion. Sometimes it’s just better to embrace the mess than it is to try and keep all the things organized and tidy. They even brought out a fork to make pom poms (just in case you noticed there was a fork in the picture below lol).
How to have a stress free stocking party with your kids. Make cute Christmas stockings out of drop cloths. DIY Christmas stockings plus a free sock stocking SVG to use with your Cricut.

I encourage my girls to try using the tools, like my daughter in the pic below hand sewing on an embellishment, before I step in and help. It’s so important for us parents to let our kiddos do things on their own so they can learn.

How to have a stress free stocking party with your kids. Make cute Christmas stockings out of drop cloths. DIY Christmas stockings plus a free sock stocking SVG to use with your Cricut.

4. ADD HANGER

Don’t forget to add a hanger. We did this step last and all of the girls came up with something different. One used yarn, two of the girls used a piece of the drop cloth, and the other two used different kinds of ribbon. We tacked these on using a needle and thread then I reinforced them with the hot glue gun.

How to have a stress free stocking party with your kids. Make cute Christmas stockings out of drop cloths. DIY Christmas stockings plus a free sock stocking SVG to use with your Cricut.

Didn’t their Christmas stockings turn out SO cute?!

My girls and I enjoy this so much every single year. Mostly because I let them just go to town and create whatever their little hearts want on their Christmas stockings. Let me know if you have any questions in the comments below.

Happy Crafting!

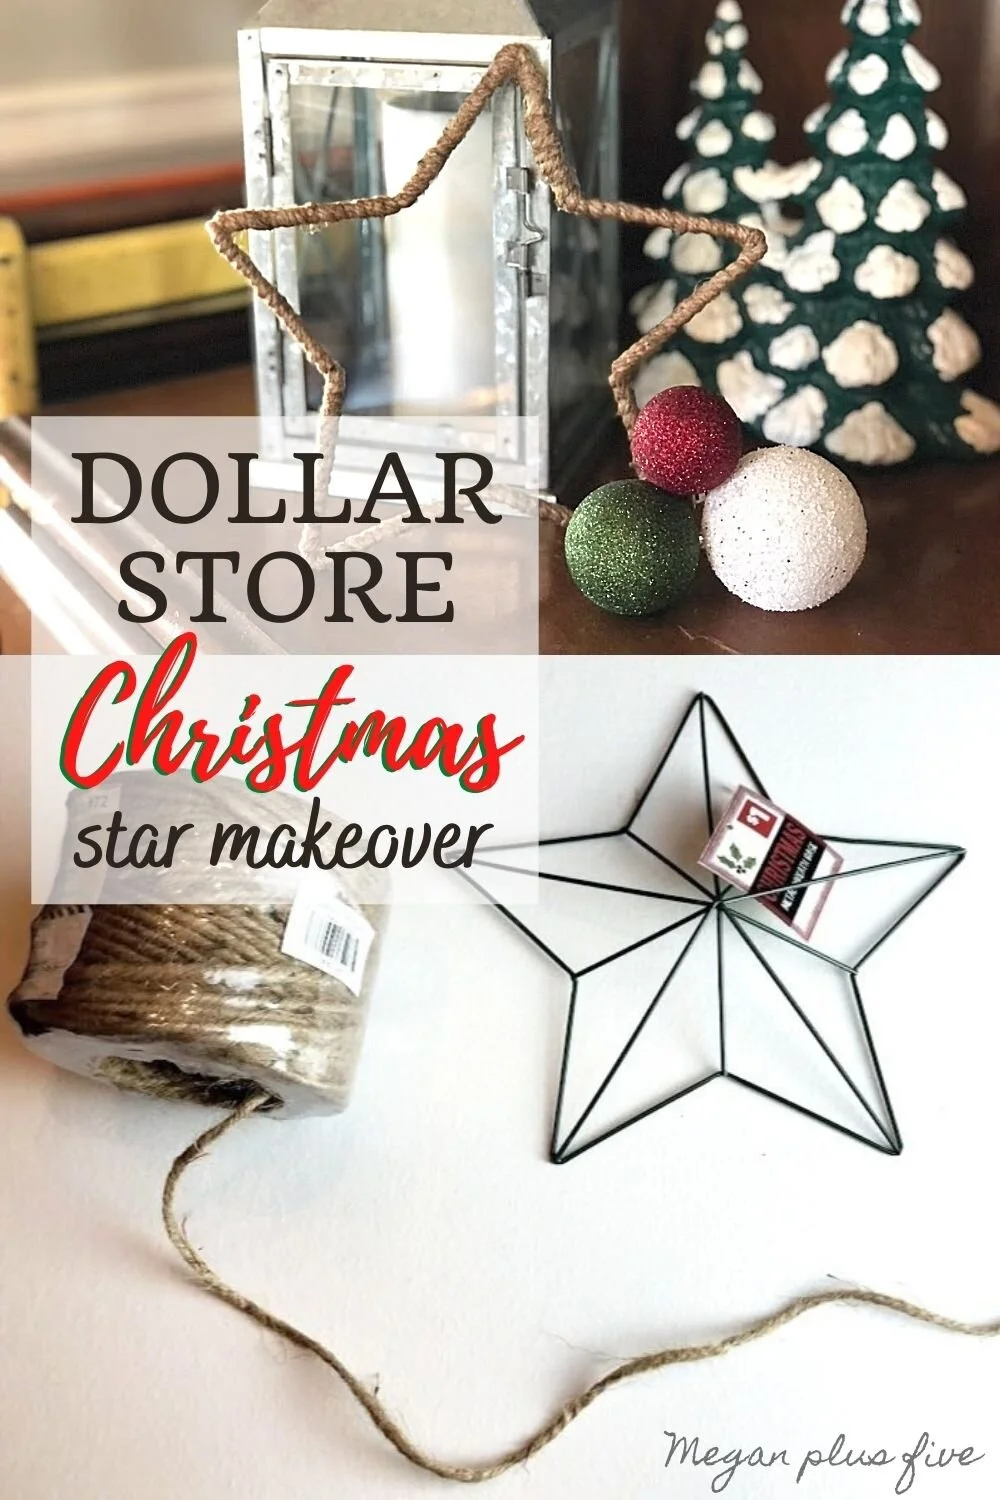
Dollar store Christmas star makeover

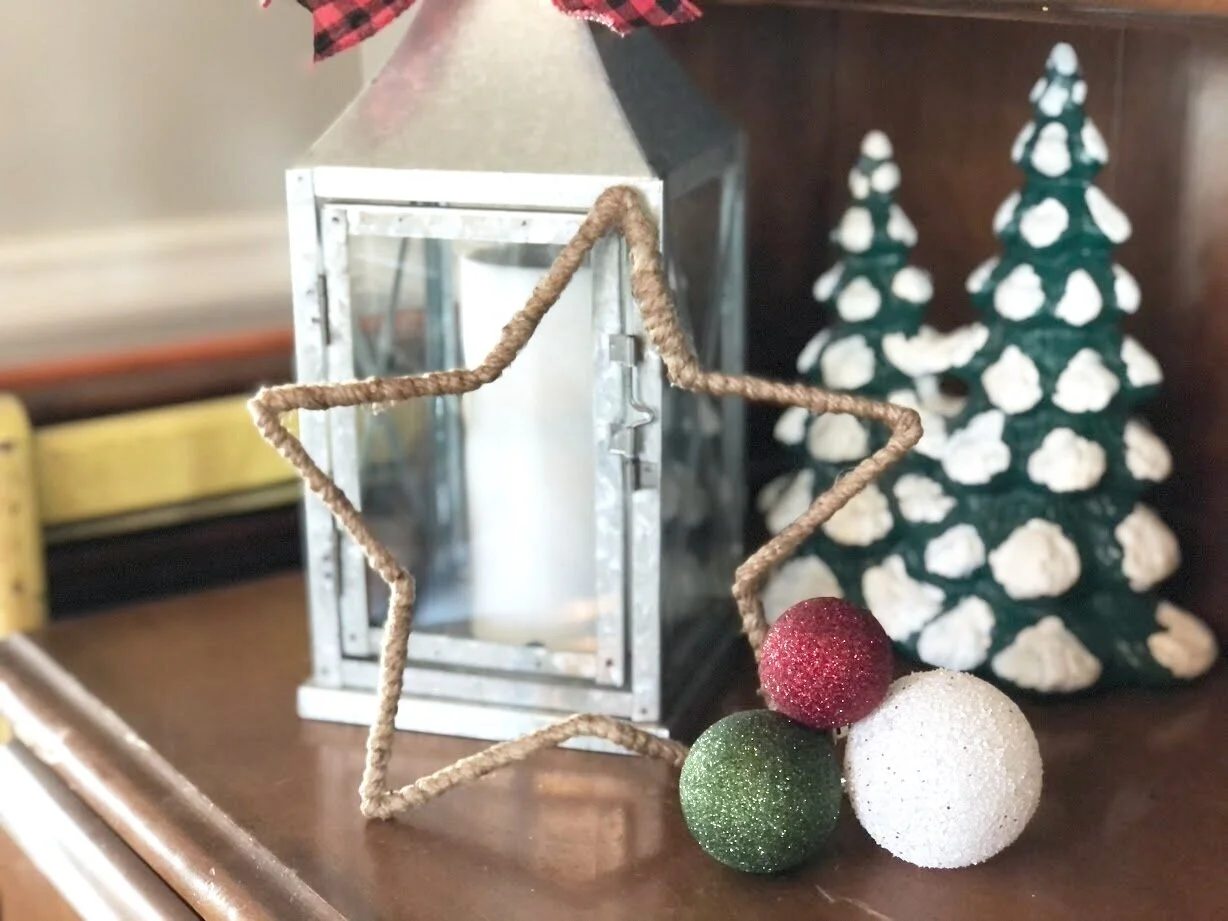
DIY dollar store Christmas decor. Christmas decorations on a budget. How to make a rustic farmhouse style star using twine or just and a wire star form.

The dollar stores are really outdoing themselves lately with their Christmas selections. I have found so many great finds there to either add to my Christmas décor OR give a bit of a makeover then add it to my Christmas decorations.

I found this little wire star at the Dollar General last night and since it was just $1 I snagged it up to take it home and give it a little makeover. Frugal living just runs through my veins. If you like this budget friendly Christmas DIY you will probably love these DIY TWIG STARS that basically costs $0 to make.

Affiliate Disclosure. Some of the links on this website are affiliate links, which means that I may earn a small commission if you click on the link or make a purchase using the link. If you make a purchase you will not be charged anything additional.

DIY dollar store Christmas decor. Christmas decorations on a budget. How to make a rustic farmhouse style star using twine or just and a wire star form.

I was originally going to wrap the wire star form in twine but that turned out hideous lol! It was bulky and just plain ugly. So I thought instead to remove the middle pieces and then wrap it and it turned out so simple but perfect for my Christmas decorations.

DOLLAR STORE STAR MAKEOVER

Here’s what you’ll need

DISCLOSURE: not responsible for any damages caused. Please craft at your own risk :)

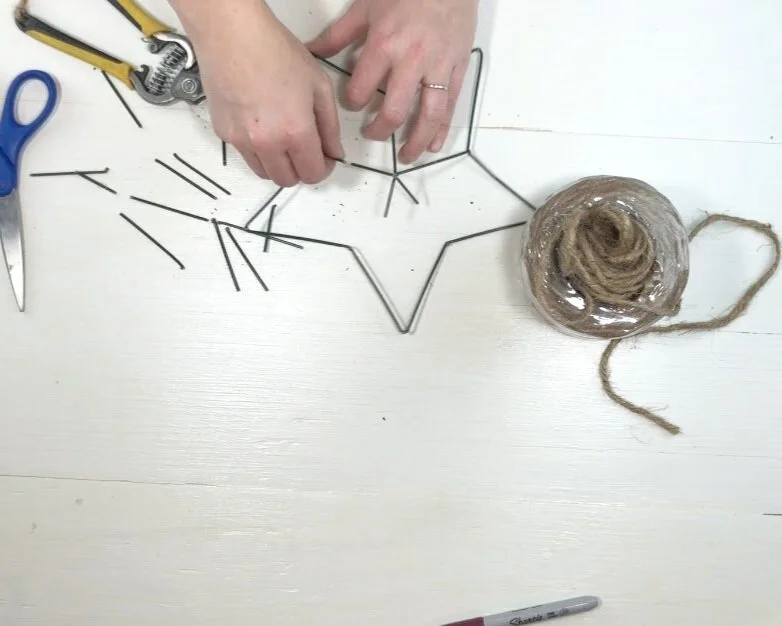
1. REMOVE THE MIDDLE WIRE

This was actually harder than I thought it would be. I had to try and cut it with all my might then bend it away in pieces.

DIY dollar store Christmas decor. Christmas decorations on a budget. How to make a rustic farmhouse style star using twine or just and a wire star form.

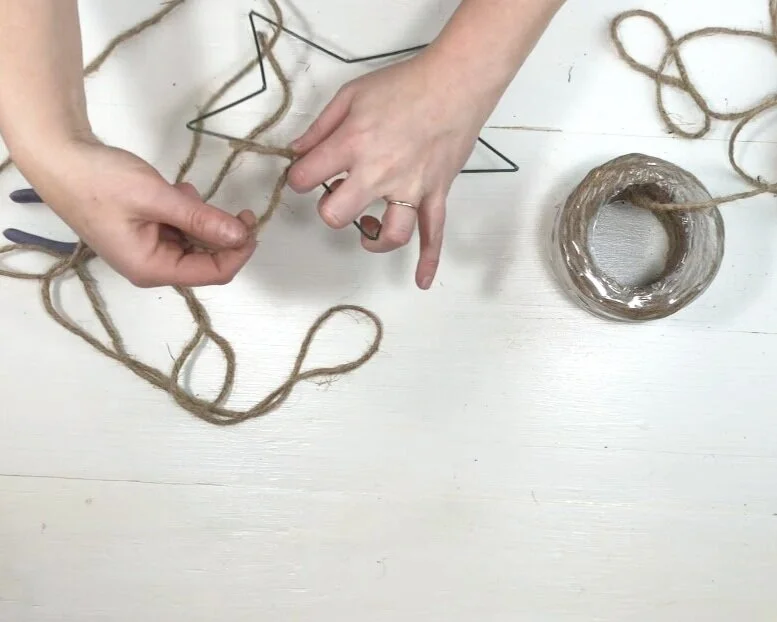
2. WRAP THE STAR

Then I cut a long piece of twine and just wrapped and wrapped and wrapped till I got back to the starting point. Around the corners of the wire star I added hot glue to reinforce the frame then wrapped it in twine.

DIY dollar store Christmas decor. Christmas decorations on a budget. How to make a rustic farmhouse style star using twine or just and a wire star form.

When I got to the very end I secured it in place with hot glue.

3. REMOVE THE FRZZIES

My star had a ton of frizz to it from wrapping and wrapping. So I used my lighter to remove those. I just lightly waved my lighter over the areas that I wanted the frizz gone and was sure to blow as soon as it touched the star so it wouldn’t catch fire.

DIY dollar store Christmas decor. Christmas decorations on a budget. How to make a rustic farmhouse style star using twine or just and a wire star form.

That’s it! Quick and easy dollar store Christmas makeover craft.

DIY dollar store Christmas decor. Christmas decorations on a budget. How to make a rustic farmhouse style star using twine or just and a wire star form.

I hope you enjoyed this crafty tutorial. If you have any questions please leave them in the comments below.

Interchangeable Christmas pallet sign

DIY twig stars for Christmas pallet sign. Interchangeable Christmas home decor on a budget. How to make easy and simple reversible home décor for the holidays. Make a sign from twigs.

INTERCHANGEABLE WINTER PALLET SIGN

I love decorating for the holidays. Especially Christmas. Now that I have a bigger home to decorate I’m finding it a little challenging to do AND keep it in budget. I have always had the heart of a frugal women so spending an arm and a leg to put up Christmas décor just wasn’t happening.

That’s why in the fall I made this lightweight faux pallet sign. It’s a blank pallet style sign that I can change out with the seasons. It’s a big statement type piece that I prop up on my dining room hutch. I love this so much. Best of all the planks I used to make this sign were left over from this plank wall project.

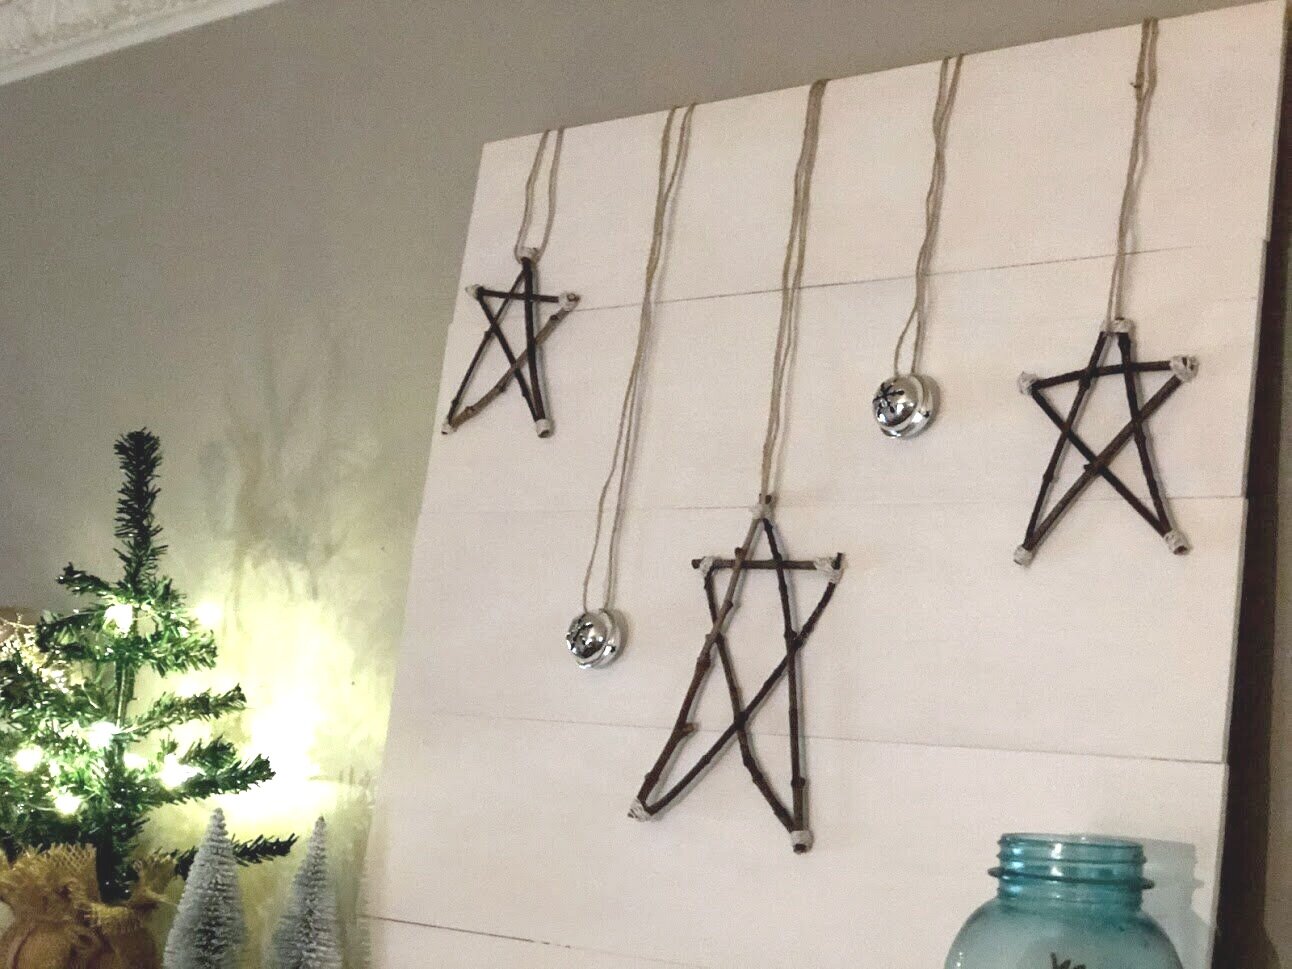
I really tried hard to spend minimal funds for Christmas decorating. So, for Christmas I had this great idea to make stars from twigs I had in the backyard. And they turned out so cute! I want to make more!!

Affiliate Disclosure. Some of the links on this website are affiliate links, which means that I may earn a small commission if you click on the link or make a purchase using the link. If you make a purchase you will not be charged anything additional.

DIY twig stars for Christmas pallet sign. Interchangeable Christmas home decor on a budget. How to make easy and simple reversible home décor for the holidays. Make a sign from twigs.

I made 2 smaller twig stars and 1 medium sized star. You can see how I made my twig stars click here.

I was so glad I snagged up a package of silver bells from the Dollar Tree prior to making this craft because without them I don’t think it would have turned out so cute or looked as festive for Christmas.

DIY twig stars for Christmas pallet sign. Interchangeable Christmas home decor on a budget. How to make easy and simple reversible home décor for the holidays. Make a sign from twigs.

Here’s what I used

1. PLACE THE DECORATIONS

The first thing I did was place my twig stars and bells on my pallet sign to see where I wanted them.

DIY twig stars for Christmas pallet sign. Interchangeable Christmas home decor on a budget. How to make easy and simple reversible home décor for the holidays. Make a sign from twigs.

2. MEASURE

Next I measured out how much jute I would need to hang my decorations from the backside of my sign. I doubled the amount of jute since I was looping it and hanging it from the backside.

DIY twig stars for Christmas pallet sign. Interchangeable Christmas home decor on a budget. How to make easy and simple reversible home décor for the holidays. Make a sign from twigs.

3. ADD THE JUTE

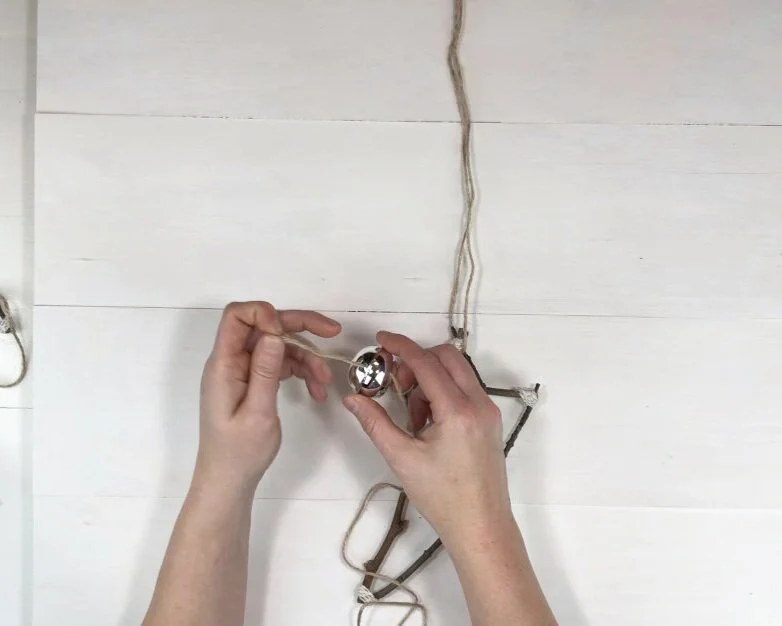
The stars were easy to add the jute to. I just fed the jute through the top of each twig star. The bells were a little more difficult. I wanted to see the snowflakes that were on the bottom side of the bells so I had to hang them sideways.

DIY twig stars for Christmas pallet sign. Interchangeable Christmas home decor on a budget. How to make easy and simple reversible home décor for the holidays. Make a sign from twigs.

I fed the jute through one side of the bell and then out the other side and tied the two ends of the jute together.

DIY twig stars for Christmas pallet sign. Interchangeable Christmas home decor on a budget. How to make easy and simple reversible home décor for the holidays. Make a sign from twigs.

4. HANG

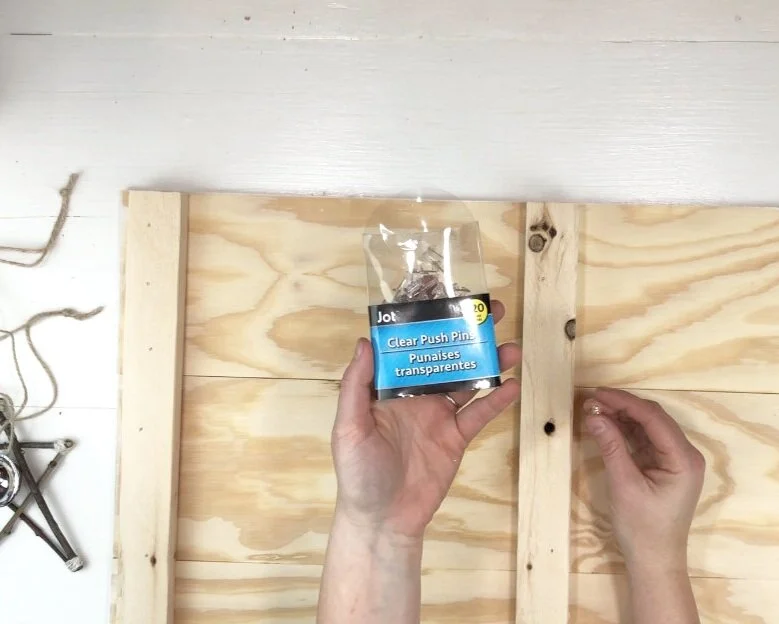
I hung my twig stars and silver bells from the backside of my pallet sign. I just kina eyeballed where I wanted them to be. Placed a pushpin there and pushed it in as far as I could get it.

DIY twig stars for Christmas pallet sign. Interchangeable Christmas home decor on a budget. How to make easy and simple reversible home décor for the holidays. Make a sign from twigs.

Then I looped where I had tied the jute ends together around the pushpin and draped it over to the front side of the pallet sign.

DIY twig stars for Christmas pallet sign. Interchangeable Christmas home decor on a budget. How to make easy and simple reversible home décor for the holidays. Make a sign from twigs.

I prop my pallet sign up on my dining room hutch, which one day I need to make time to give a makeover and I will most definitely post the before and after for you to see on here:)!!

DIY twig stars for Christmas pallet sign. Interchangeable Christmas home decor on a budget. How to make easy and simple reversible home décor for the holidays. Make a sign from twigs.

Happy crafting!

Check out more below

MINI glittery fairy jar Christmas ornament

fairy jar ornament21.jpg

DIY FAIRY JAR CHRISTMAS ORNAMENT

Day 9 of DIY Christmas ornaments

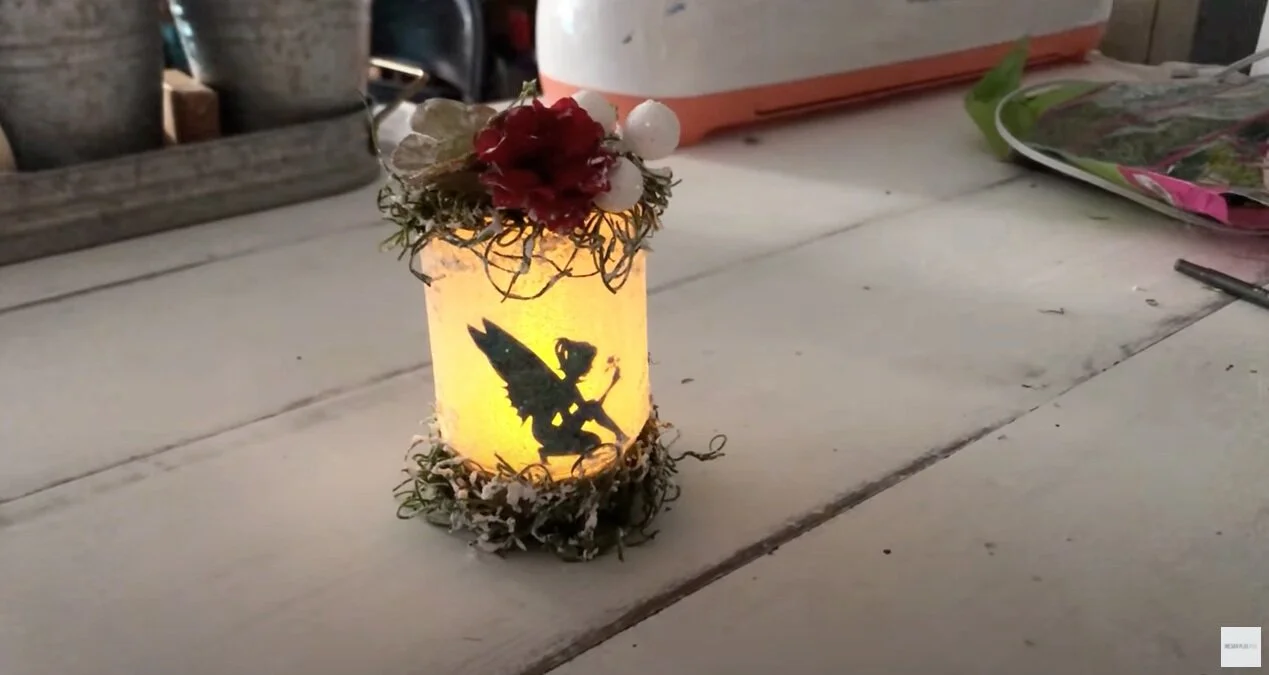
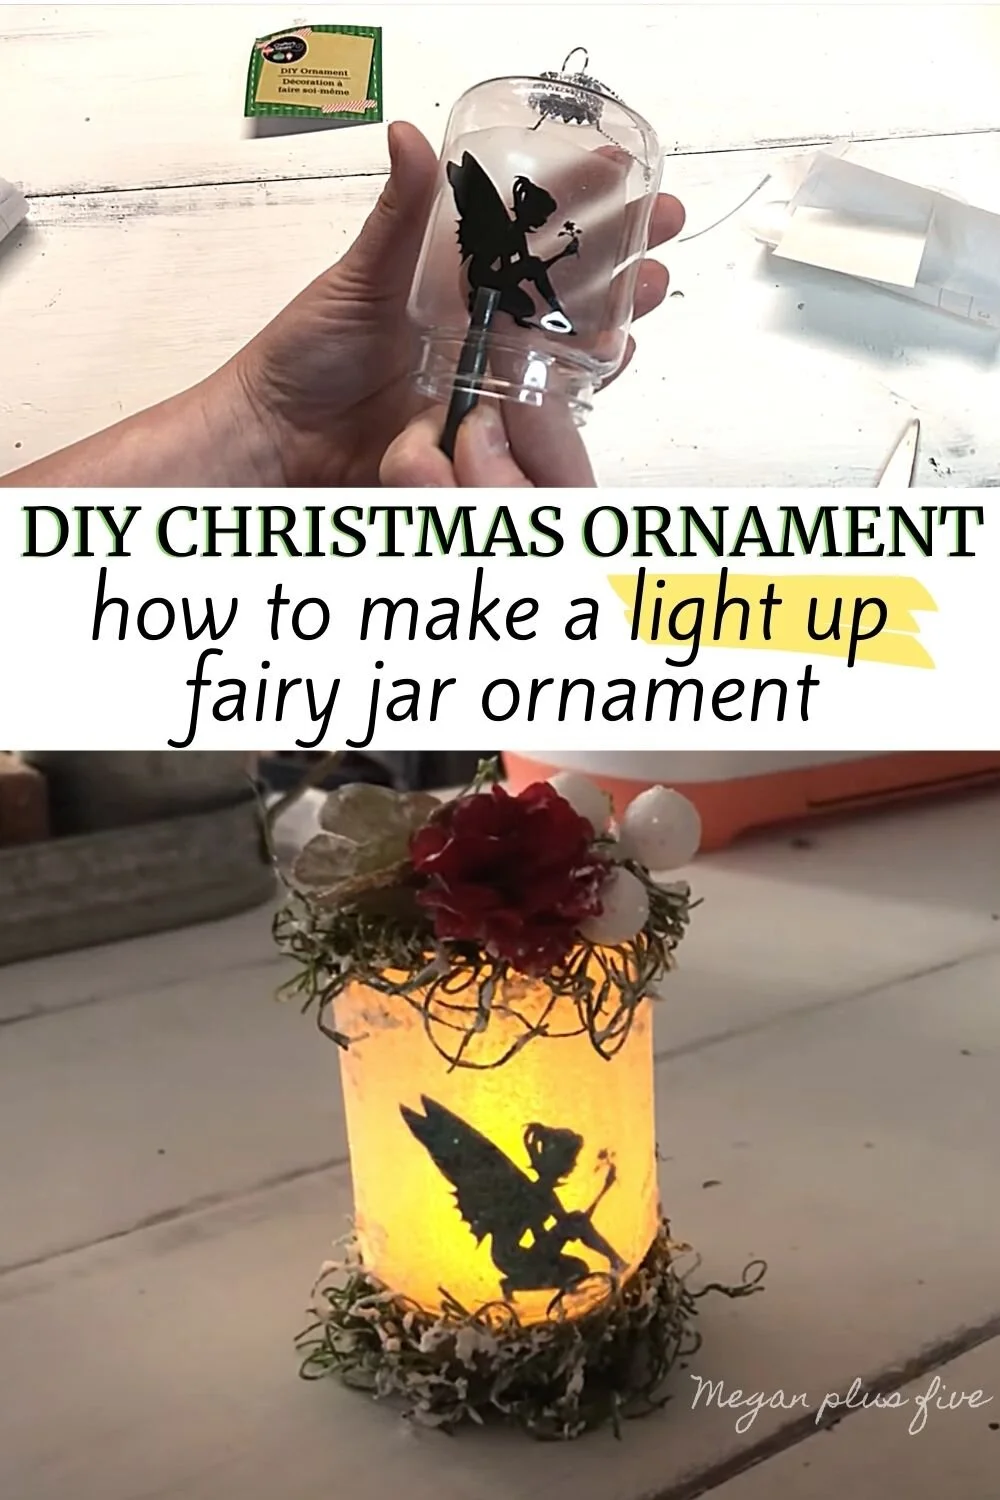
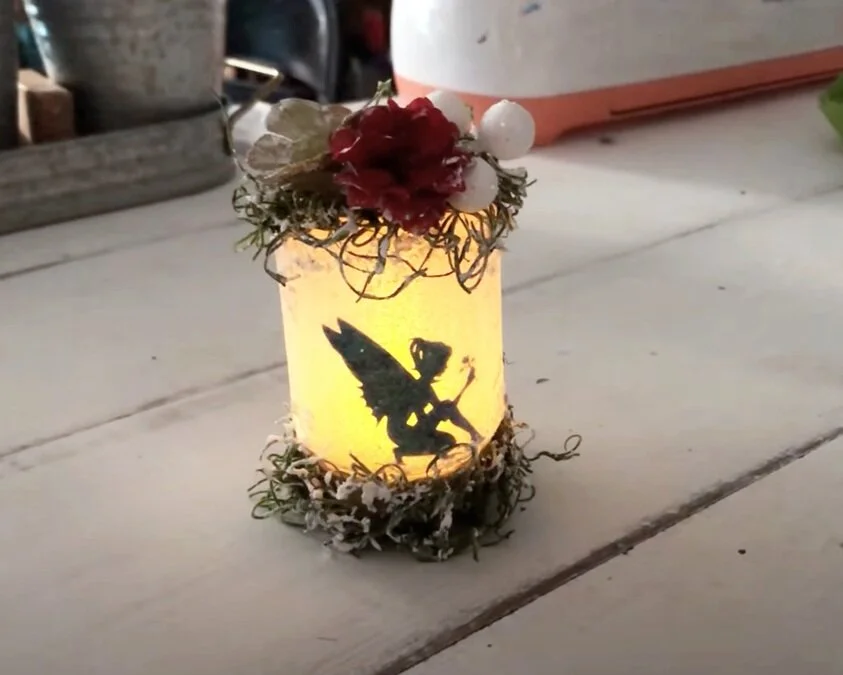
If you enjoyed one of my very first ever craft tutorials that I wrote, HOW TO MAKE GLITTERY LIGHT UP FAIRY JARS, then you will love this Christmas version. It’s such a cute mini version of the large light up fairy jar and I love the winter twist that it has. With the faux glitter snow it makes me think of the winter fairy from Tinker Bell. So adorable!

Affiliate Disclosure. Some of the links on this website are affiliate links, which means that I may earn a small commission if you click on the link or make a purchase using the link. If you make a purchase you will not be charged anything additional.

DIY glittered light up fairy jar Christmas ornament. Super cute Dollar Tree Christmas ornament DIY craft tutorial for the holiday season. How to make inexpensive Christmas ornaments the kids will love. Pretty make your own Christmas tree ornament cr…

I was browsing the aisles of the Dollar Tree last year when I came across a mini plastic looking mason jar in Christmas ornament form. And I instantly knew my girls and I had to make a fairy jar for our Christmas tree.

Click here for 30 days of DIY Christmas ornaments

MINI FAIRY JAR CHRISTMAS ORNAMENT

Here’s what you’ll need

1. CUT OUT DECAL

The first thing I did was cut my fairy decal out using my Cricut cutting machine. I used my GREEN cutting mat for this and THIS SVG CUT FILE (you can use my shareable Cricut link).

I measured how big my jar was then sized my fairy to fit. I used black Oracal 631 to cut my fairy out of. This is one difference from the larger mason jar version. In that version I used a cardstock cut out fairy but for this one I wanted to use sticky vinyl, make it a little easier.

2. APPLY THE FAIRY DECAL

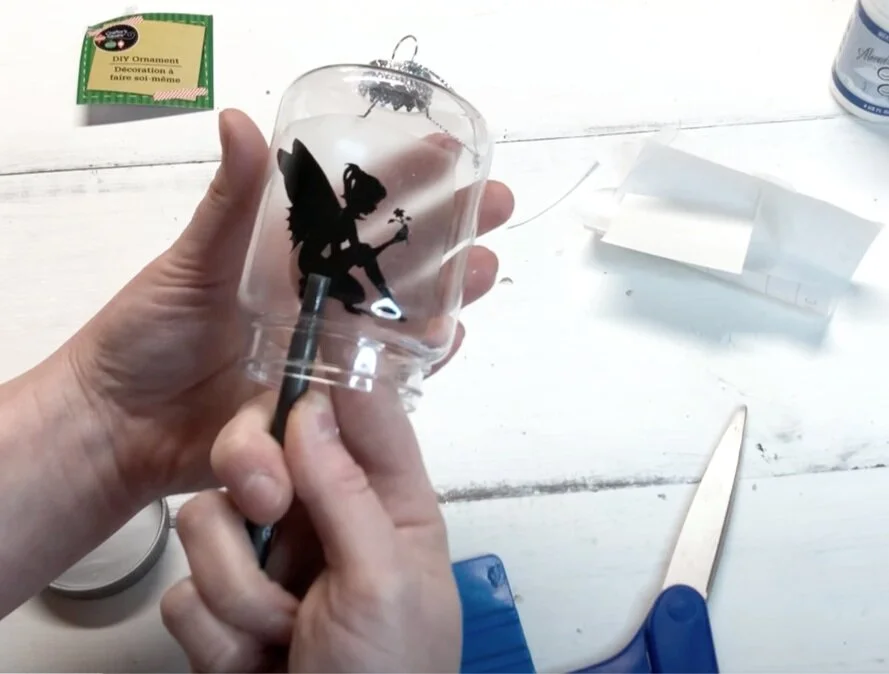
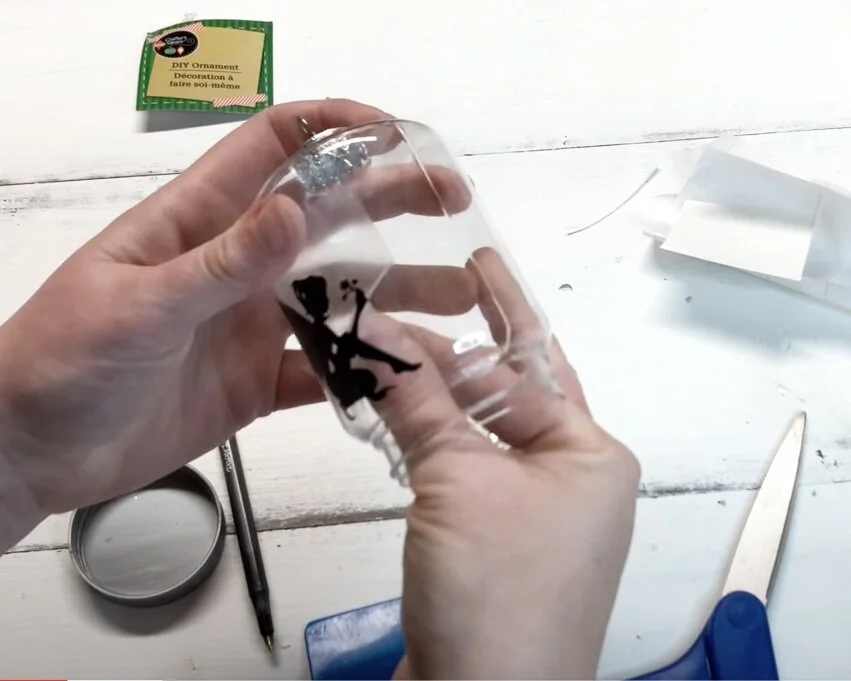
I applied the fairy decal to the INSIDE of the Christmas ornament. I used contact paper as my transfer tape. The end of a pen worked well to help me position the decal before pressing it down. Once I was happy with the placement I used my fingers to work out any airy bubbles.

DIY glittered light up fairy jar Christmas ornament. Super cute Dollar Tree Christmas ornament DIY craft tutorial for the holiday season. How to make inexpensive Christmas ornaments the kids will love. Pretty make your own Christmas tree ornament cr…

Then I slowly rolled the transfer tape, contact paper, off and away from the fairy decal. Since this has some delicate lines it can rip easily so be sure when you do this step to go very slow.

DIY glittered light up fairy jar Christmas ornament. Super cute Dollar Tree Christmas ornament DIY craft tutorial for the holiday season. How to make inexpensive Christmas ornaments the kids will love. Pretty make your own Christmas tree ornament cr…

3. APPLY TISSUE PAPER

To get the frosted look I cut a piece of plain white tissue paper so that it was a little bigger than my mason jar Christmas ornament. I wanted it bigger in case I messed up I would have a little extra to work with. You want you tissue paper to be able to fully wrap around your ornament plus cover the top.

DIY glittered light up fairy jar Christmas ornament. Super cute Dollar Tree Christmas ornament DIY craft tutorial for the holiday season. How to make inexpensive Christmas ornaments the kids will love. Pretty make your own Christmas tree ornament cr…

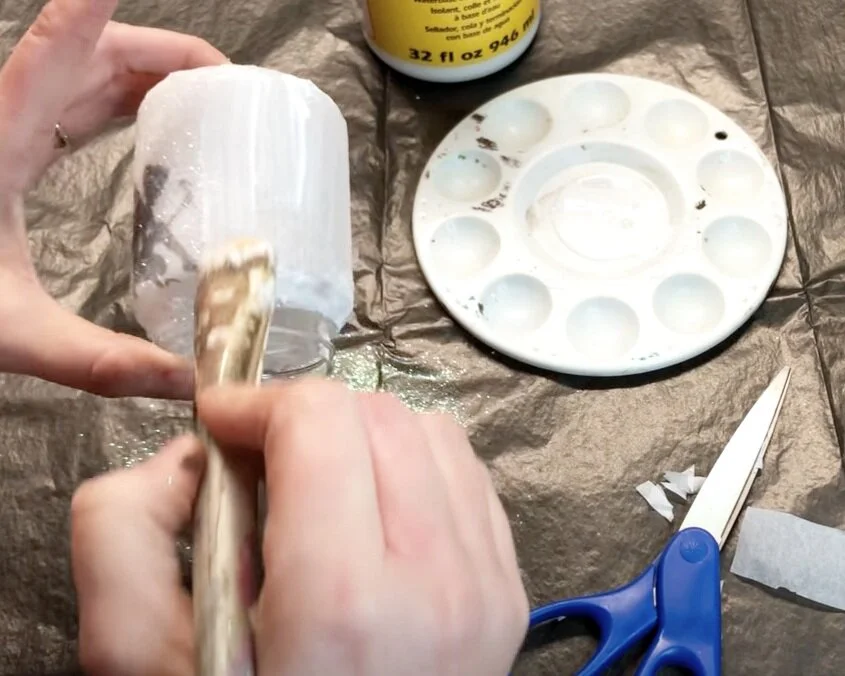
Then I used matte finish mod podge to apply the tissue paper to the Christmas ornament. A regular artist paint brush works great for this. I covered the front of my ornament in sections with the mod podge.

DIY glittered light up fairy jar Christmas ornament. Super cute Dollar Tree Christmas ornament DIY craft tutorial for the holiday season. How to make inexpensive Christmas ornaments the kids will love. Pretty make your own Christmas tree ornament cr…

The I placed the tissue paper on top of it and carefully smoothed it out with my fingers. I did this all the way around the jar.

DIY glittered light up fairy jar Christmas ornament. Super cute Dollar Tree Christmas ornament DIY craft tutorial for the holiday season. How to make inexpensive Christmas ornaments the kids will love. Pretty make your own Christmas tree ornament cr…

Once I got to the top of the jar I cut off so there was just enough to cover it. Then I cut slits in the tissue paper so it would lay down smooth.

DIY glittered light up fairy jar Christmas ornament. Super cute Dollar Tree Christmas ornament DIY craft tutorial for the holiday season. How to make inexpensive Christmas ornaments the kids will love. Pretty make your own Christmas tree ornament cr…

I used my paint brush again to apply mod podge to glue the top pieces down. I trimmed off the excess with my scissors.

DIY glittered light up fairy jar Christmas ornament. Super cute Dollar Tree Christmas ornament DIY craft tutorial for the holiday season. How to make inexpensive Christmas ornaments the kids will love. Pretty make your own Christmas tree ornament cr…

4. ADD GLITTER

After my tissue paper was pretty much dry I applied a thin layer of the matte finish mod podge to the front of the Christmas ornament and then sprinkled it with extra fine translucent glitter. Then I let that dry.

DIY glittered light up fairy jar Christmas ornament. Super cute Dollar Tree Christmas ornament DIY craft tutorial for the holiday season. How to make inexpensive Christmas ornaments the kids will love. Pretty make your own Christmas tree ornament cr…

5. ADD WINTER EMBELLISHMENTS

To make my fairy jar more winter themed I added faux glitter snow to the flowers and moss. I glued the moss down first then glued the florals to the moss.

DIY glittered light up fairy jar Christmas ornament. Super cute Dollar Tree Christmas ornament DIY craft tutorial for the holiday season. How to make inexpensive Christmas ornaments the kids will love. Pretty make your own Christmas tree ornament cr…

I even glued the moss to the bottom piece that screws onto the Christmas mason jar. I added the faux snow here and there.

6. ADD A TEA LIGHT

I let my ornament dry then I added a tea light.

DIY glittered light up fairy jar Christmas ornament. Super cute Dollar Tree Christmas ornament DIY craft tutorial for the holiday season. How to make inexpensive Christmas ornaments the kids will love. Pretty make your own Christmas tree ornament cr…

I think it turned out SO CUTE!

If you have any questions please ask below in the comments.

Happy Crafting!

Check out more DIY Dollar Tree crafts below

Easy Christmas stars from twigs

How to make stars from twigs for Christmas. Make cheap and frugal Christmas decor using sticks from your yard. Twine/jute twig stars easy craft tutorial for simple rustic looking farmhouse home decor.

CHRISTMAS STARS MADE FROM TWIGS- EASY TUTORIAL

Have you made stars from twigs? This Christmas decoration was super quick, easy, and best of all basically FREE!

If you’ve read any of my content you know how I love a good frugal DIY craft. Especially during the holidays when finances can be a little tighter. Like this easy and incredibly inexpensive Christmas tree I spruced up. I fits in perfectly with my rustic décor.

If you have access to twigs, a glue gun, and some jute/bakers twine you can make this twig star Christmas craft.

Affiliate Disclosure. Some of the links on this website are affiliate links, which means that I may earn a small commission if you click on the link or make a purchase using the link. If you make a purchase you will not be charged anything additional.

HOW TO MAKE CHRISTMAS STARS FROM TWIGS

Here’s what you need

How to make stars from twigs for Christmas. Make cheap and frugal Christmas decor using sticks from your yard. Twine/jute twig stars easy craft tutorial for simple rustic looking farmhouse home decor.

1. GATHER TWIGS

If you don’t have a yard to gather twigs from, or if you don’t have trees in your yard, take a stroll through the local park and you will most definitely find enough twigs to use.

For these mini stars you’ll want to find twigs that are thin, not thick.

2. CUT

I used wire cutters for this step but garden snips will work too.

How to make stars from twigs for Christmas. Make cheap and frugal Christmas decor using sticks from your yard. Twine/jute twig stars easy craft tutorial for simple rustic looking farmhouse home decor.

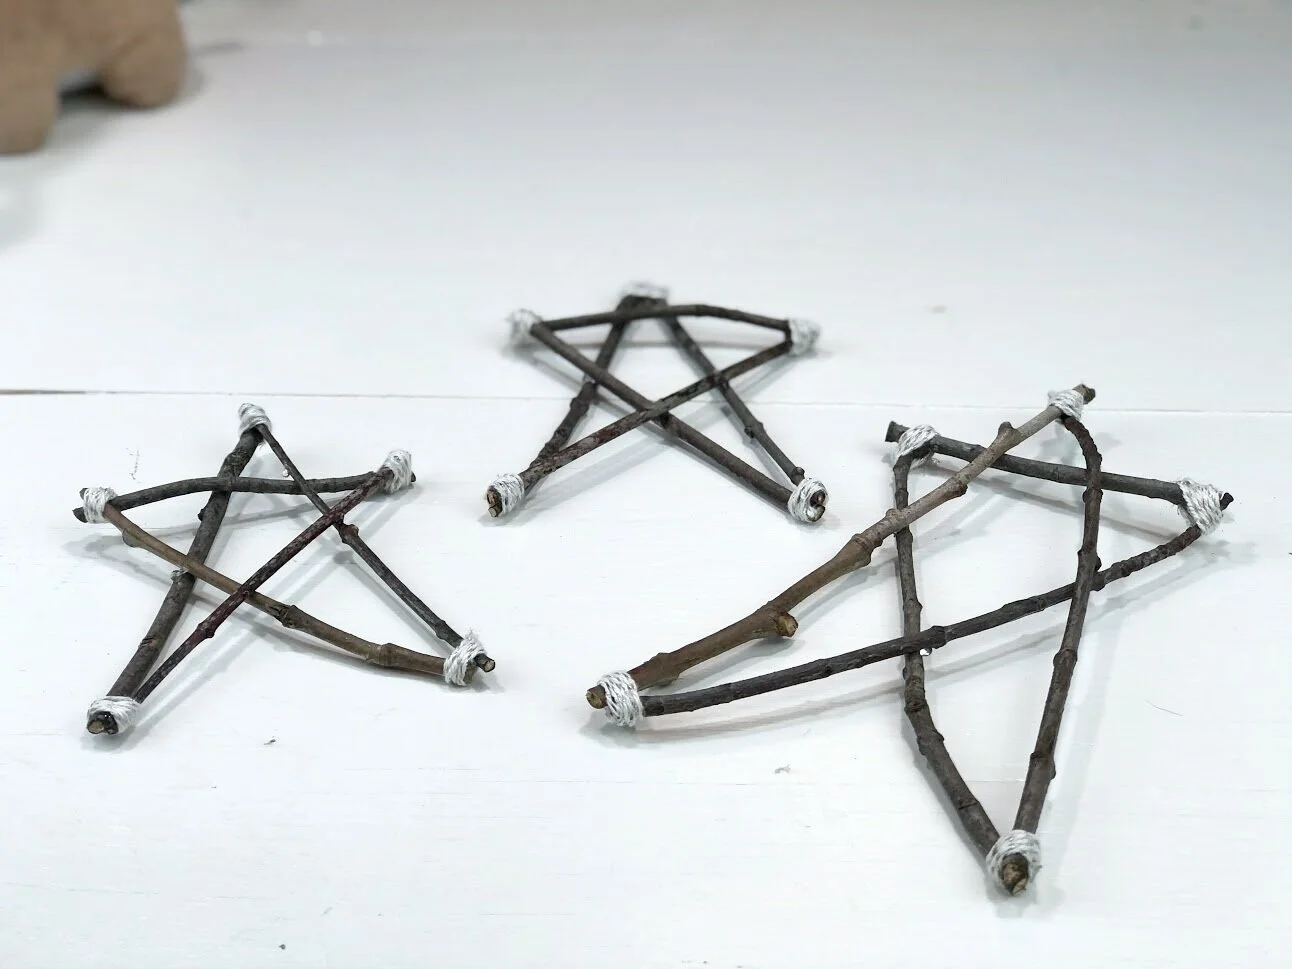
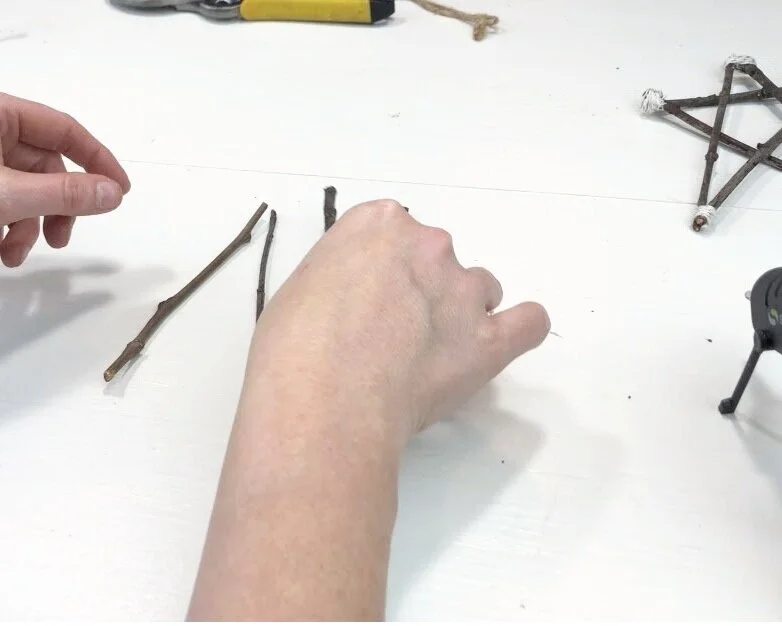
I cut 4 pieces of twigs that were the same size and 1 piece that was about 2/3 or so the size of longer twigs. I just eyeballed this, it doesn’t have to be exact.

How to make stars from twigs for Christmas. Make cheap and frugal Christmas decor using sticks from your yard. Twine/jute twig stars easy craft tutorial for simple rustic looking farmhouse home decor.

3. MAKE A STAR

Just like when you were a kid making stars that’s exactly how you are going to make these stars.

Make an upside-down V.

How to make stars from twigs for Christmas. Make cheap and frugal Christmas decor using sticks from your yard. Twine/jute twig stars easy craft tutorial for simple rustic looking farmhouse home decor.

Then make an X with the other two long pieces.

How to make stars from twigs for Christmas. Make cheap and frugal Christmas decor using sticks from your yard. Twine/jute twig stars easy craft tutorial for simple rustic looking farmhouse home decor.

Then put the smallest twig going across the top.

How to make stars from twigs for Christmas. Make cheap and frugal Christmas decor using sticks from your yard. Twine/jute twig stars easy craft tutorial for simple rustic looking farmhouse home decor.

I had to carefully move them around till I was happy with the placement of my twig star.

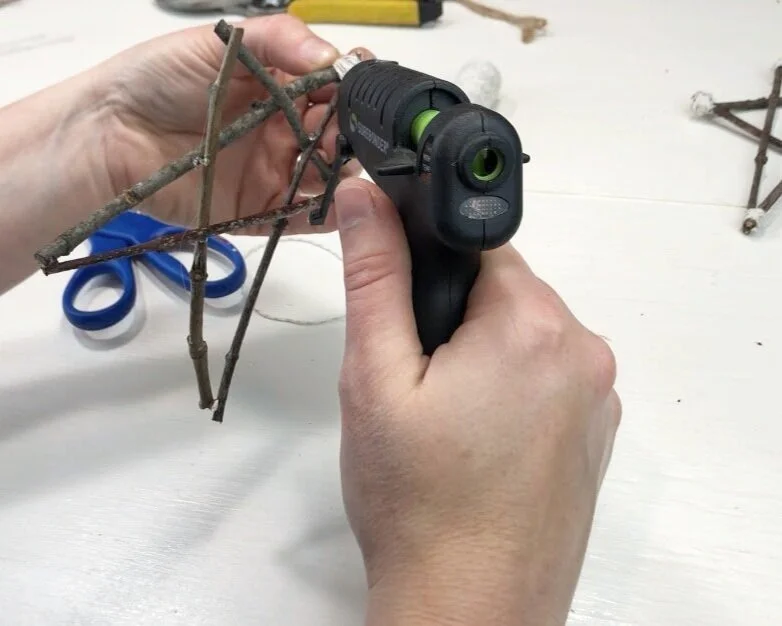
4. GLUE

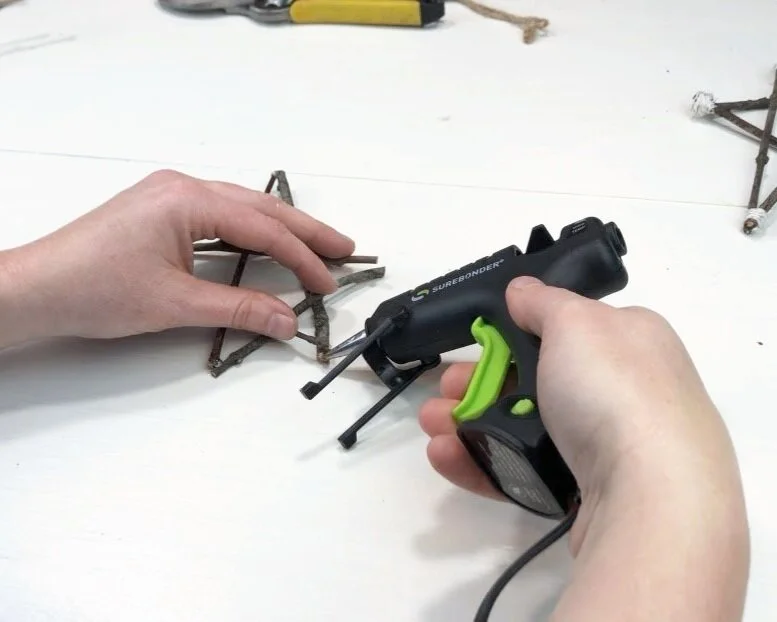
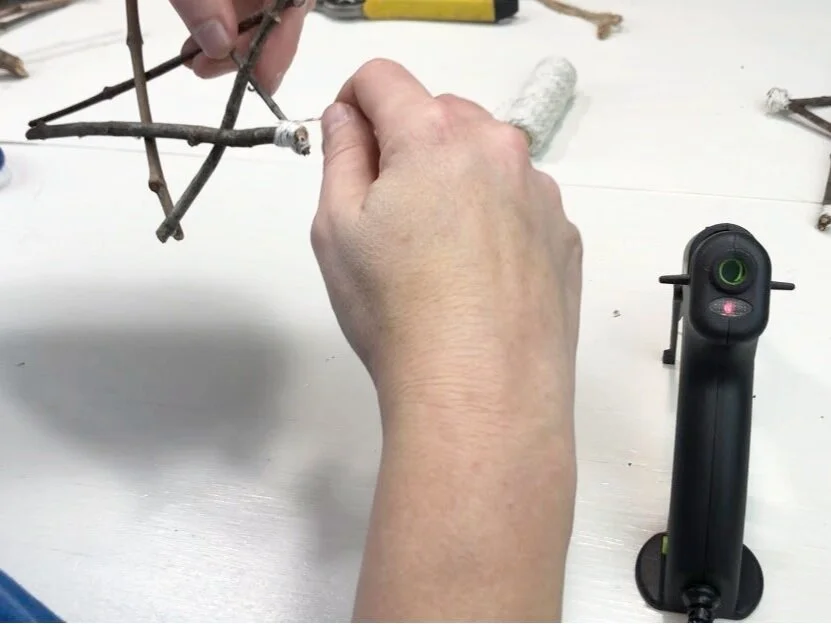
I had already preheated my glue gun prior to this step so it would be ready when I was. I added a SMALL DAB of hot glue wherever the twigs touched. You don’t want a ton of glue, just enough to keep it in place for now.

How to make stars from twigs for Christmas. Make cheap and frugal Christmas decor using sticks from your yard. Twine/jute twig stars easy craft tutorial for simple rustic looking farmhouse home decor.

5. WRAP

After my glue was dry I wrapped each star point in a silver and white bakers twine. I added a tiny drop of glue then put the end of my bakers twine on it till it was dry.

How to make stars from twigs for Christmas. Make cheap and frugal Christmas decor using sticks from your yard. Twine/jute twig stars easy craft tutorial for simple rustic looking farmhouse home decor.

Then I wrapped the end till I was happy with how it looked.

How to make stars from twigs for Christmas. Make cheap and frugal Christmas decor using sticks from your yard. Twine/jute twig stars easy craft tutorial for simple rustic looking farmhouse home decor.

Then I cut the bakers twine and added another tiny drop of glue to hold it in place.

How to make stars from twigs for Christmas. Make cheap and frugal Christmas decor using sticks from your yard. Twine/jute twig stars easy craft tutorial for simple rustic looking farmhouse home decor.

That’s it. Nothing crazy complicated. I will warn ya, it can get a little frustrating if your kiddos are yelling at one another in the other room and your twigs keep moving out of place from the slightest touch lol! That totally happened a few times to me when I was making these stars for my frugal Christmas décor.

How to make stars from twigs for Christmas. Make cheap and frugal Christmas decor using sticks from your yard. Twine/jute twig stars easy craft tutorial for simple rustic looking farmhouse home decor.

I hope you enjoyed this crafty tutorial. If you have any questions please leave them in the comments below.

Happy Crafting!

Check out more DIY crafts below

A Christmas gift teens & tweens will LOVE!

DIY spa kits for teens. Great gift to give teens and tweens for Christmas is a DIY spa experiment recipe kit. Let them make their own lotions, bathbombs, essential oil sprays, soaps, face masks, and more.

DIY SPA KITS FOR TEENS

What does you preteen (tween), or teen want for Christmas? I don’t know about your kiddos but my girls are getting harder and harder to buy for the older they get.

I’m a momma of 4 girls, three of which are all with in 3 years of one another. They are stair steps and I love having them so close in age. One of the benefits is they are all kind of into the same things at the same time. But, this year the older 3 girls had just a few items on their Christmas wish lists, which isn’t a bad thing but it does make for more challenging shopping.

Affiliate Disclosure. Some of the links on this website are affiliate links, which means that I may earn a small commission if you click on the link or make a purchase using the link. If you make a purchase you will not be charged anything additional.

Anyway, I thought long and hard about what to get the girls for Christmas. I just know with 2020 being what it is, that we are going to have a TON of time at home.

So I decided we would gift them things they that would keep them busy over winter. On the list of items bought so far are lots of books, board games, art supplies and….. a SPA KIT! But not just any spa kit, this is like the ULTIMATE SPA KIT for teens!

I looked online and didn’t really find exactly what I was looking for so I thought I’d put together my own. So fitting for a frugal DIY momma.

So, how do you make a DIY SPA KIT you ask?

It might be easier than you think. If you are great at shopping online you can easily put one together too!

I started with this book, Girls' Home Spa Lab: All-Natural Recipes, Healthy Habits, and Feel-Good Activities to Make You Glow

It’s amazing! It has tons of recipes and other good for you activities. And since it’s written and illustrated for teen and tween girls they will extra love it. There’s no old fashioned old lady vibe with this DIY book. It has a fresh and modern look to it that’s super attractive and it makes me want to read all of it and make my own spa products.

Since this was just the book, no ingredients or anything, I read through it and picked out ingredients that were repetitive throughout the book. I didn’t want to buy every single ingredient in the book because that would be expensive and we keep several of the ingredients like olive oil and witch hazel on hand at home. I bought the main ones I kept seeing that we don’t usually have at home.

Here’s what I bought

1. ESSENTIAL OILS


Non ingredient items I ordered:

1. MORTAR & PESTLE

I have a fancy Kitchen Aid stand mixer but I really didn’t want it taken over. I opted for this handheld mixer AND I was sure to get the one that has attached storage for the beaters. That way there’s less chance they will loose them.

3. DOUBLE BOILER

Just like with the mixer I really didn’t want the girls to use my double boiler for bath and body ingredients. I looked on good ole Amazon for double boilers and found this gem! It was exactly what I wanted!

This pot is great because it will fit in any pot we have at home. We have a few different small sauce pans and this double boiler option will work perfectly with all three of them.


Of course the spa kit wouldn’t be complete without containers to put all their new spa products in. If you search on Amazon there’s a ton of different things to choose from. Here’s what I ordered for my girls. No judgements on the glass containers please ;) if you don’t feel comfortable with yours teens having glass there are other options out there. We typically will always choose glass over plastic, it’s just a personal preference.

4. SMALL PLASTIC CONTAINERS WITH SCREW ON LIDS


As I’m writing this it’s early November so I have not packaged any of the gifts yet to put under the Christmas tree.

The girls know that one of their gifts is one big gift to share. So I think I’m going to wrap all the spa ingredients individually then put everything in a big box that will be wrapped too. You know, make it more fun for them to open it.

This gift is going to be amazing for the girls this winter and I can’t wait for them to start experimenting in the kitchen making their own bath and body products.

I’d love to know, is this something your teens/tweens would love? Let me know in the comments.

DIY dowel rod snowman ornament DAY 8

DIY Christmas ornaments to make with kids. Easy snowman (snowmen) Christmas tree hanging ornament to make from a dowel rod. How to paint a snowman on a Christmas ornament easy craft tutorial.

This DIY Christmas ornament is SUPER EASY! Similar to the square snowmen ornaments I made last year. Only this time they are round and they have cute rosy cheeks like these mason jar snowmen I showed how to make on my blog. There are differences of course but all three of these snowmen are so adorable.

If you are a craft-aholic like myself, then you probably hang on to EVERYTHING. The dowels I’m using for this snowman ornament were actually leftover stems from a larger version of these 2x4 wood pumpkins. Really, I probably should have tossed these scraps BUT then I wouldn’t have been inspired to create this Christmas ornament tutorial to share here on my blog.

DIY Christmas ornaments to make with kids. Easy snowman (snowmen) Christmas tree hanging ornament to make from a dowel rod. How to paint a snowman on a Christmas ornament easy craft tutorial.

See more of my 30 DAYS OF DIY CHRISTMAS ORNAMENTS here

Here’s what you need to make a dowel rod snowman ornament

DIY Christmas ornaments to make with kids. Easy snowman (snowmen) Christmas tree hanging ornament to make from a dowel rod. How to paint a snowman on a Christmas ornament easy craft tutorial.

This ornament is so fun, easy and a wonderful Christmas craft to make with the kids. Don’t sweat it if they don’t come out perfect. Lord knows when we craft with our kids it’s never about the perfection, rather it’s about the memories and bond you’re building with your children.

1.PAINT

The first thing I did was paint the dowel rod piece all white, including the top and bottom. I let the first coat dry then I applied a second coat for a little more coverage then I let that coat dry before moving on to step 2.

DIY Christmas ornaments to make with kids. Easy snowman (snowmen) Christmas tree hanging ornament to make from a dowel rod. How to paint a snowman on a Christmas ornament easy craft tutorial.

2. CHEEKS

Because I want the nose to go over the cheek I painted the snowman’s cheeks first. This takes a TINY amount of paint, like a teeny tiny amount. I lightly tapped the tip of my paint brush into the pink paint then into the white paint, but less white paint than pink paint on my brush.

DIY Christmas ornaments to make with kids. Easy snowman (snowmen) Christmas tree hanging ornament to make from a dowel rod. How to paint a snowman on a Christmas ornament easy craft tutorial.

Then I made swirly circles with my brush. I probably should have used a round tipped brush for this but I grabbed a pointy tipped one and just didn’t want to hunt for a new brush so I went with it. It worked but not as good as it could have with a round tipped brush.

I kept added white and pink paint to the cheeks till I was happy with the way they looked.

3. NOSE

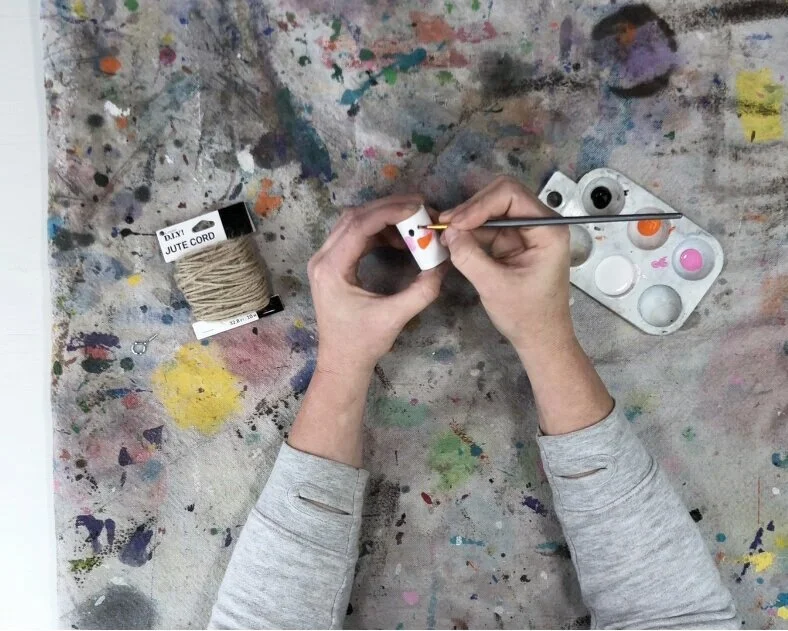
After the cheeks were dry I painted on an orange nose. I used the same pointy brush for this. I made a sideways triangle then filled it in with orange paint. I added a tiny bit of black paint to give it a little depth.

DIY Christmas ornaments to make with kids. Easy snowman (snowmen) Christmas tree hanging ornament to make from a dowel rod. How to paint a snowman on a Christmas ornament easy craft tutorial.

4.EYES & MOUTH

Using the same brush I painted on irregular looking circles for the eyes and for the mouth in black. I really tried to make them look like coal.

DIY Christmas ornaments to make with kids. Easy snowman (snowmen) Christmas tree hanging ornament to make from a dowel rod. How to paint a snowman on a Christmas ornament easy craft tutorial.

After the black paint was dry I used the end of my paint brush to make accent dots on the eyes and mouth.

DIY Christmas ornaments to make with kids. Easy snowman (snowmen) Christmas tree hanging ornament to make from a dowel rod. How to paint a snowman on a Christmas ornament easy craft tutorial.

5. SCREW EYE AND JUTE

I screwed the hanger (screw eye) into the top of my snowman ornament to hang it. Then I added a piece of jute to hang it from the Christmas tree.

DIY Christmas ornaments to make with kids. Easy snowman (snowmen) Christmas tree hanging ornament to make from a dowel rod. How to paint a snowman on a Christmas ornament easy craft tutorial.

I hope you enjoyed this crafty Christmas ornament tutorial. Let me know if you have any questions in the comments below.

Don’t forget to pin the image below to save for later :)!

DIY Christmas ornaments to make with kids. Easy snowman (snowmen) Christmas tree hanging ornament to make from a dowel rod. How to paint a snowman on a Christmas ornament easy craft tutorial.

Happy Crafting!

Check out more Christmas posts below

Hot cocoa mini wood rolling pin DIY

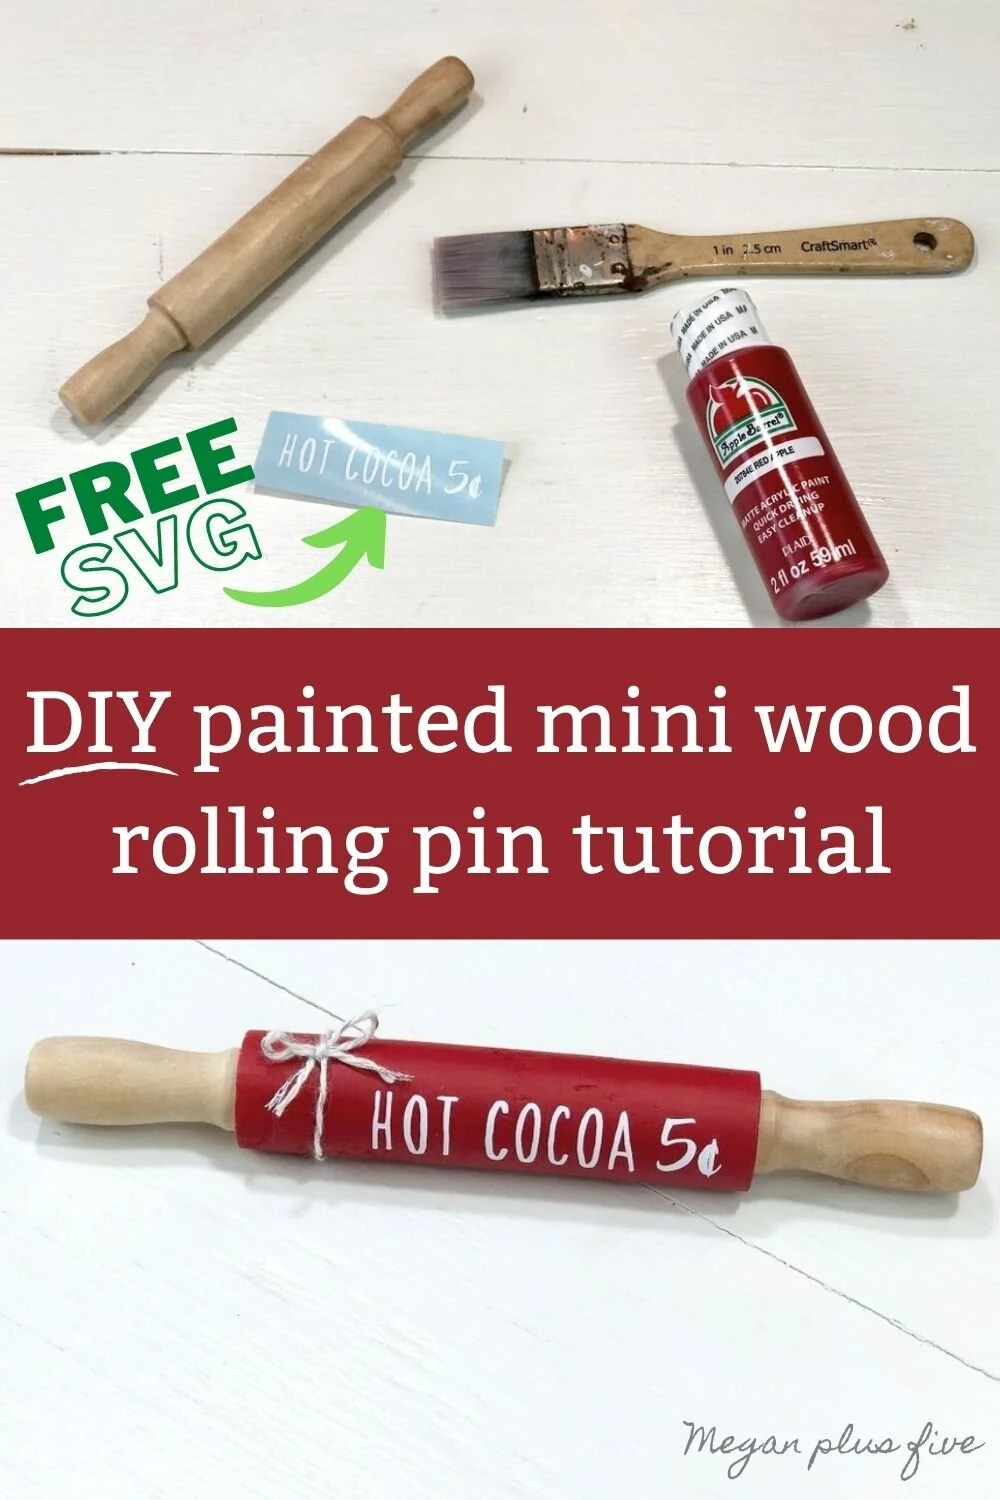
DIY mini wood rolling pin for tiered tray decorations for winter. How to make a hot cocoa themed coffee bar mini rolling pin accent plus free SVG. Make a painted wooden rolling pin for your rustic farmhouse home decor.

Do you have a coffee bar? I hope you said yes because coffee bars are SO fun to decorate! I picked up an old vanity from a garage sale a few years back that I have turned into our coffee bar and oh my goodness it is so cute and fits perfectly in the space we have.

This Christmas season I chose to do a HOT COCOA & COFFEE theme for the old coffee bar. I was inspired by this SVG I created, Baby it’s cold outside warm up here…hot cocoa & coffee. And from there I pinned all the cute hot cocoa themed projects I could find on Pinterest.

Affiliate Disclosure. Some of the links on this website are affiliate links, which means that I may earn a small commission if you click on the link or make a purchase using the link. If you make a purchase you will not be charged anything additional.

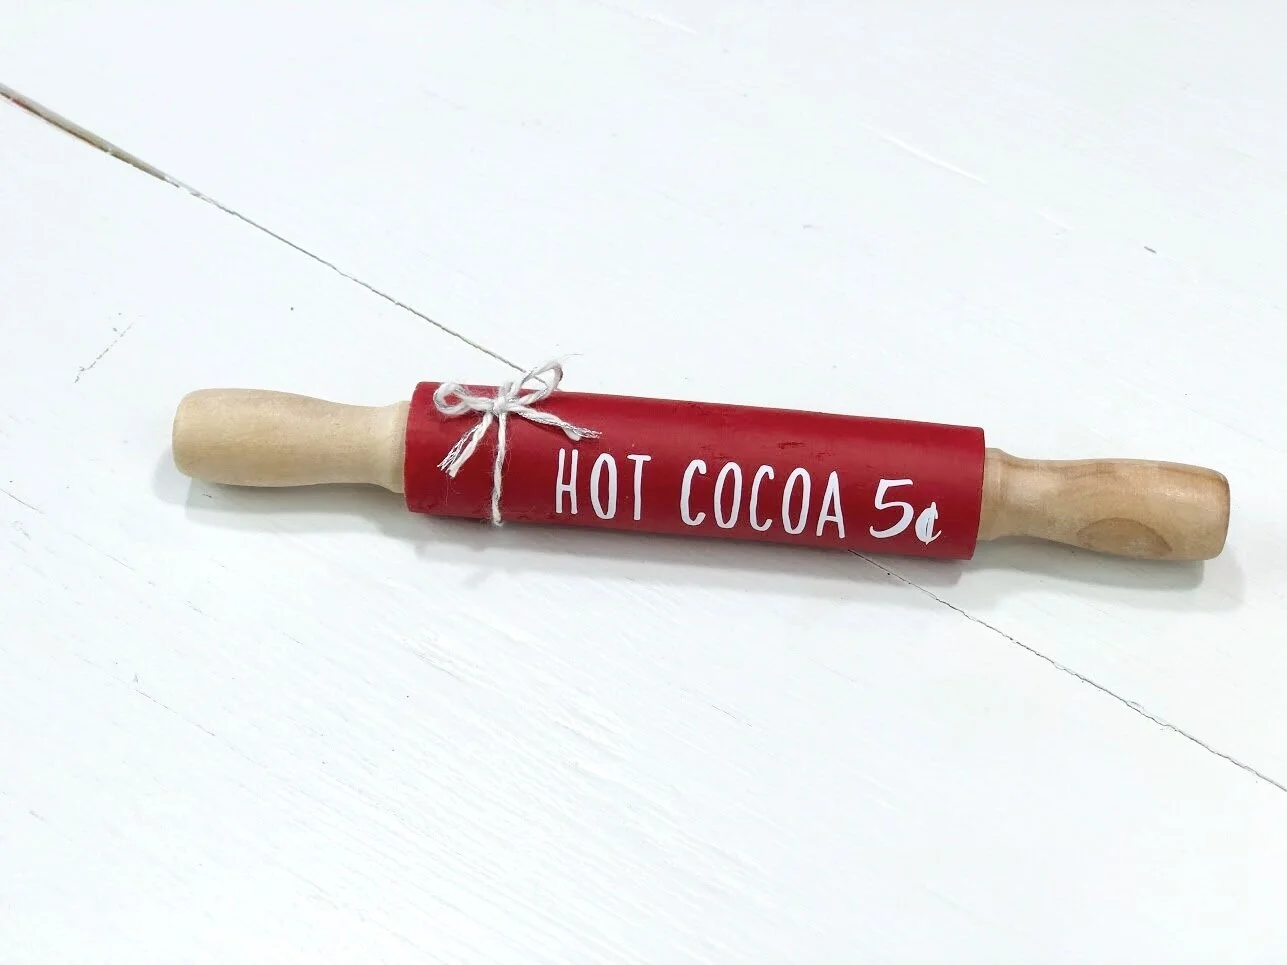
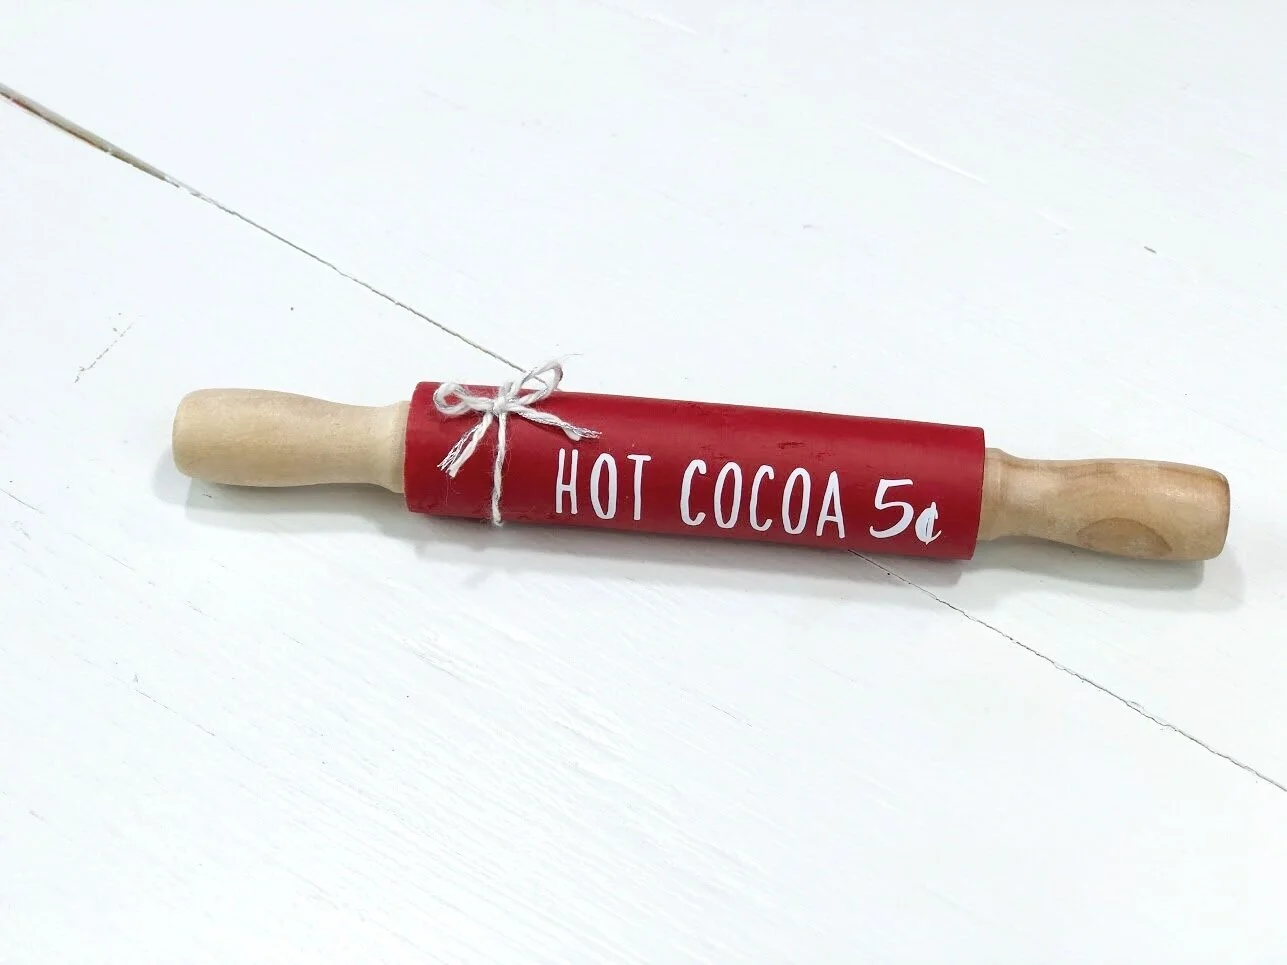
DIY mini rolling pin for coffee bar. How to make a hot cocoa mini wood rolling pin for tiered trays. Easy tutorial for wood rolling pin for your Christmas and hot cocoa coffee bar.

This little rolling pin is one of the DIY’s I made for the coffee bar. Seriously, how cute are these wooden rolling pins that seem to be everywhere for every occasion?! I love them!

DIY mini wood rolling pin for tiered tray decorations for winter. How to make a hot cocoa themed coffee bar mini rolling pin accent plus free SVG. Make a painted wooden rolling pin for your rustic farmhouse home decor.

1. CUT OUT THE HOT COCOA DECAL

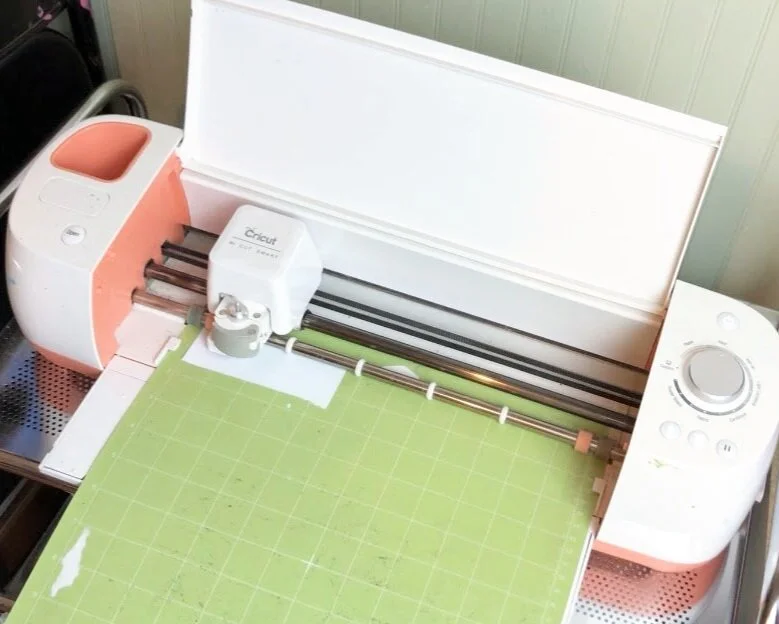
I used my older model Cricut Explore for this and let me tell ya that machine has been pumping out projects for me for YEARS! I upgraded to this little guy when my youngest daughter was a baby. Before I had used the super old model that was around when dinosaurs roamed the earth. I’m joking but really, the older model machines were SOOOOO hard to work with compared to the newer machines.

DIY mini wood rolling pin for tiered tray decorations for winter. How to make a hot cocoa themed coffee bar mini rolling pin accent plus free SVG. Make a painted wooden rolling pin for your rustic farmhouse home decor.

If you are needing a cart to hold your Cricut machine I highly recommend the one in this pic. I know it’s hard to see but it’s a wonderful cart on wheels that will hold 2 machines and has 4 drawers for storage, CLICK HERE.

Grab the SVG file for FREE in my free resource library CLICK HERE. While you’re there take a look at all the other fun things you can make with my free to use files.

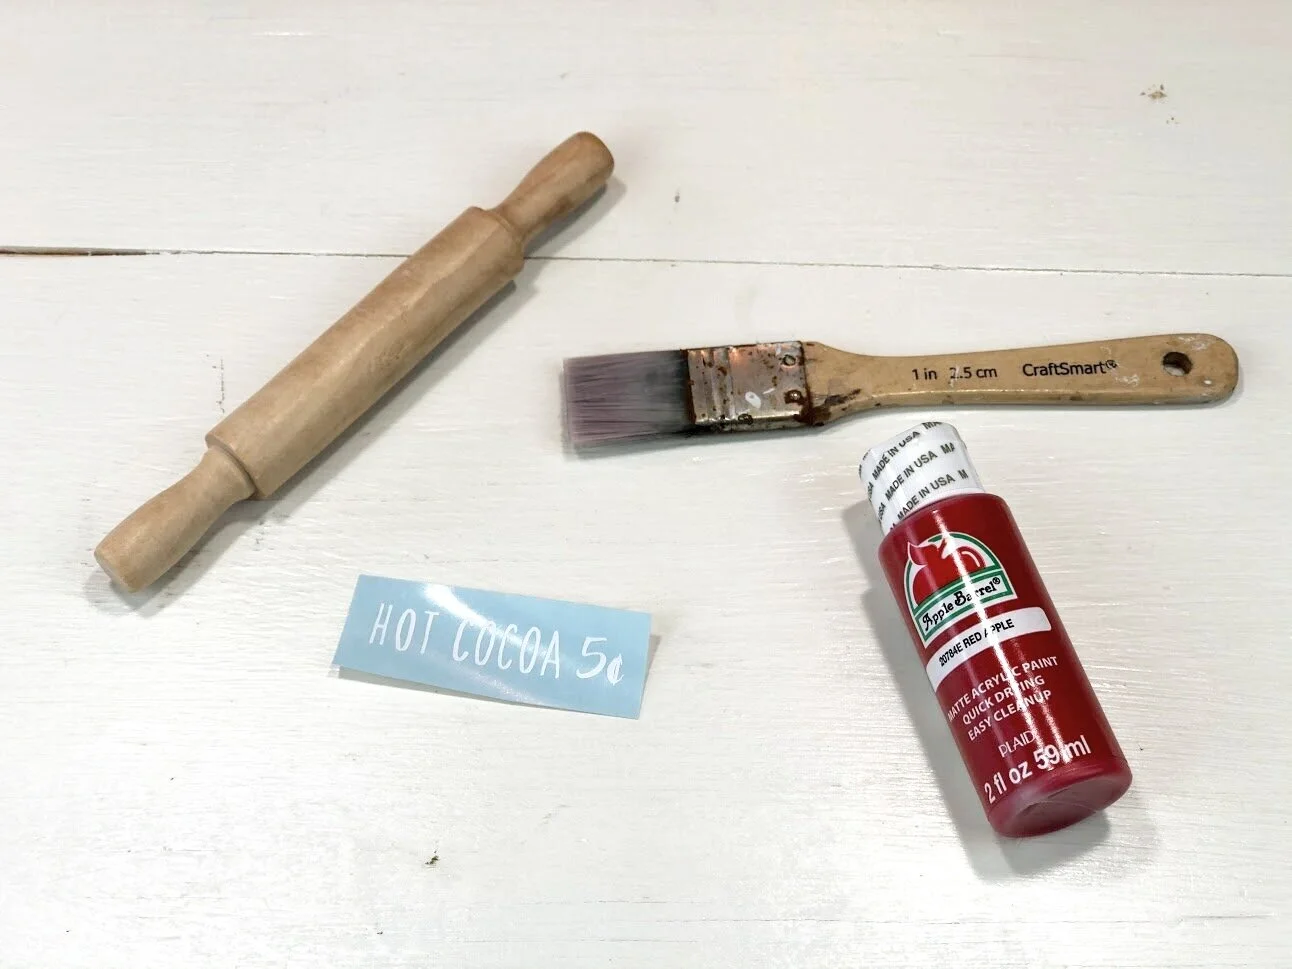
I used a scrap piece of Oracal 651 matte finish white vinyl because that’s what I had on hand.

Once it was done cutting I weeded out the background and all the little middles using a sewing pin.

DIY mini wood rolling pin for tiered tray decorations for winter. How to make a hot cocoa themed coffee bar mini rolling pin accent plus free SVG. Make a painted wooden rolling pin for your rustic farmhouse home decor.

2. PAINT THE ROLLING PIN

I used a red paint I picked up at Walmart but if you prefer to order from Amazon I put a link above for a paint I like to use from there.

DIY mini wood rolling pin for tiered tray decorations for winter. How to make a hot cocoa themed coffee bar mini rolling pin accent plus free SVG. Make a painted wooden rolling pin for your rustic farmhouse home decor.

I only painted the rolling part of the rolling pin. I left the edges and the handles natural. I applied one thin coat of red paint.

DIY mini wood rolling pin for tiered tray decorations for winter. How to make a hot cocoa themed coffee bar mini rolling pin accent plus free SVG. Make a painted wooden rolling pin for your rustic farmhouse home decor.

Then I let it dry. I got a little creative when propping this up. I used the paint bottle and a tin of lotion to prop this little guy up and it worked great.

DIY mini wood rolling pin for tiered tray decorations for winter. How to make a hot cocoa themed coffee bar mini rolling pin accent plus free SVG. Make a painted wooden rolling pin for your rustic farmhouse home decor.

Once the first coat was dry I applied a second coat.

DIY mini wood rolling pin for tiered tray decorations for winter. How to make a hot cocoa themed coffee bar mini rolling pin accent plus free SVG. Make a painted wooden rolling pin for your rustic farmhouse home decor.

BTW this paint brush may look like a hot mess but I LOVE this style of a thin flat paint brush! I left a link to a similar one you can also get on Amazon that will work just like it.

Let the wood rolling pin dry completely before moving on to the next step. Always remember that vinyl will not stick to wet paint, like at all.

3. APPLY THE VINYL DECAL

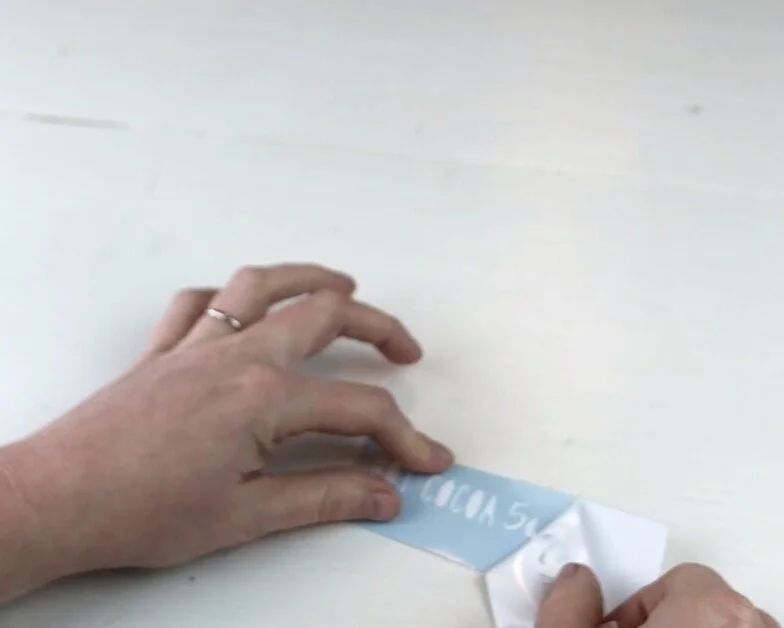
I used this clear transfer tape to help apply my decal to my rolling pin. Be careful when applying these decals because they are so small, it’s very easy to move too fast and mess the decal up.

DIY mini wood rolling pin for tiered tray decorations for winter. How to make a hot cocoa themed coffee bar mini rolling pin accent plus free SVG. Make a painted wooden rolling pin for your rustic farmhouse home decor.

I carefully positioned my decal on the right side of my rolling pin and pressed it down with my hand.

DIY mini wood rolling pin for tiered tray decorations for winter. How to make a hot cocoa themed coffee bar mini rolling pin accent plus free SVG. Make a painted wooden rolling pin for your rustic farmhouse home decor.

Once my decal was in place I used a vinyl squeegee to help press it down a little more then slowly peeled the transfer tape off of the rolling pin leaving the decal on the rolling pin. I’ve found it’s much easier if you roll the transfer tape off and away from the decal.

DIY mini wood rolling pin for tiered tray decorations for winter. How to make a hot cocoa themed coffee bar mini rolling pin accent plus free SVG. Make a painted wooden rolling pin for your rustic farmhouse home decor.

4. ADD BAKERS TWINE

I added a cute little accent bow using bakers twine. I just tied it to the side of the rolling pin that was blank, the left side, and tied it in a bow.

DIY mini wood rolling pin for tiered tray decorations for winter. How to make a hot cocoa themed coffee bar mini rolling pin accent plus free SVG. Make a painted wooden rolling pin for your rustic farmhouse home decor.

This particular bakers twine was giving me a fit so I used my sewing pin to help me get it straightened out and that seemed to work great.

DIY mini wood rolling pin for tiered tray decorations for winter. How to make a hot cocoa themed coffee bar mini rolling pin accent plus free SVG. Make a painted wooden rolling pin for your rustic farmhouse home decor.

That’s it! Super easy craft to make for your tiered tray decor for winter. This craft took me just under an hour, mainly waiting on paint to dry. I think I might even make a couple more to pair with this one. So cute!

DIY mini wood rolling pin for tiered tray decorations for winter. How to make a hot cocoa themed coffee bar mini rolling pin accent plus free SVG. Make a painted wooden rolling pin for your rustic farmhouse home decor.

I can’t wait to finish the rest of my hot cocoa & coffee winter themed coffee bar.

I hope you enjoyed this crafty tutorial. If you have any questions please ask away in the comments below.

Happy crafting!

Check out more DIY crafts using my CRICUT cutting machine

Dollar Tree Christmas Tree rustic decoration

DIY Dollar Tree farmhouse Christmas tree. What to do with the mini Christmas trees from the dollar tree. Easy way to use the cheap Christmas trees from the dollar store. Rustic farmhouse Christmas decor on a budget.

Have you been to the Dollar Tree lately? I don’t get there as often as I’d like but I did get a chance to stop in last night and WOW their Christmas supply gets better and better every year!

They have these cute Charlie Brown looking Christmas trees this year and I just couldn’t leave the store without buying a couple of them.

Affiliate Disclosure. Some of the links on this website are affiliate links, which means that I may earn a small commission if you click on the link or make a purchase using the link. If you make a purchase you will not be charged anything additional.

DIY Dollar Tree farmhouse Christmas tree. What to do with the mini Christmas trees from the dollar tree. Easy way to use the cheap Christmas trees from the dollar store. Rustic farmhouse Christmas decor on a budget.

This DIY was SUPER easy! It was almost mess free and it was ready to put on the shelf in just a matter of minutes from taking it out of the plastic Dollar Tree bag.

EASY DOLLAR TREE CHRISTMAS TREE DIY

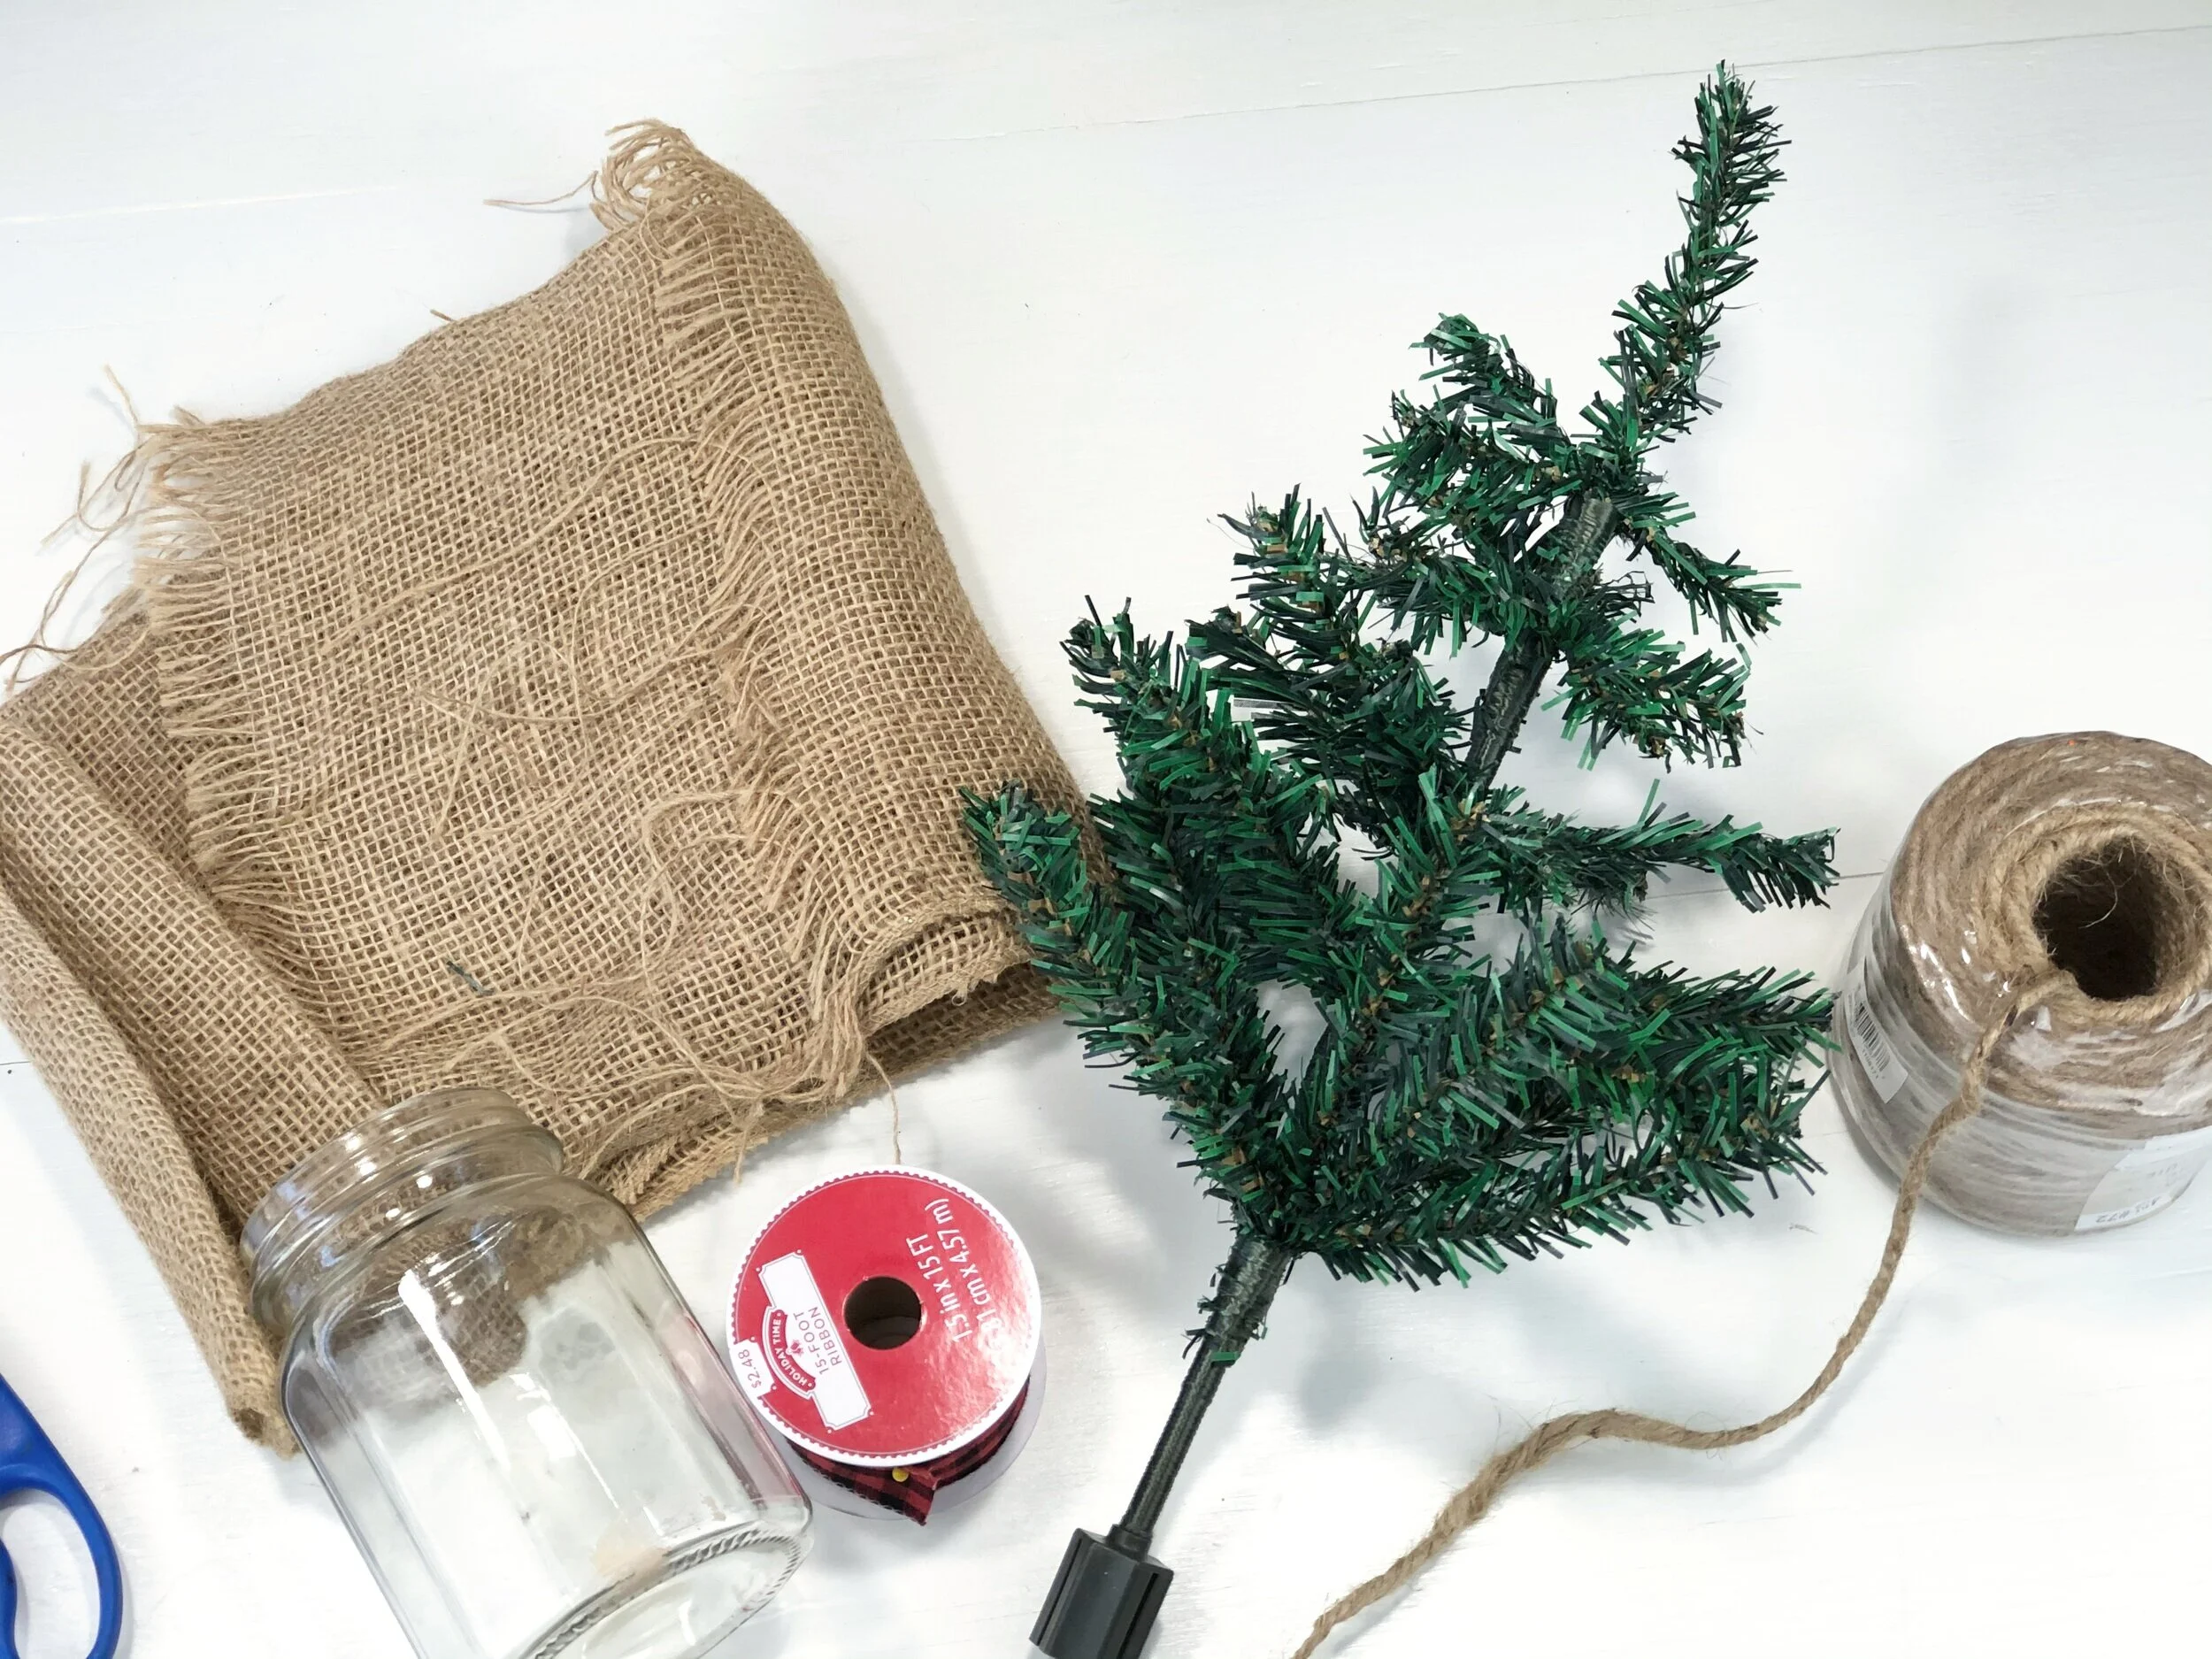
Here’s what I used

DIY Dollar Tree farmhouse Christmas tree. What to do with the mini Christmas trees from the dollar tree. Easy way to use the cheap Christmas trees from the dollar store. Rustic farmhouse Christmas decor on a budget.

I had everything except for the Christmas tree on hand which was awesome because when I bought the tree I had no idea what exactly I was going to do with it. Which is usually how I shop for my projects lol!

1. CUT THE BURLAP TO SIZE

I used a piece of scrap burlap I had from years ago (I don’t throw anything away lol). I placed my old jar on the burlap, pulled the burlap up over the glass so I’d know how big of a piece I’d need.

DIY Dollar Tree farmhouse Christmas tree. What to do with the mini Christmas trees from the dollar tree. Easy way to use the cheap Christmas trees from the dollar store. Rustic farmhouse Christmas decor on a budget.

Then I cut that into a circle. I just eyeballed this. Also, this glass used to hold craft supplies and since I was covering it I didn’t think I needed to give it a bath first.

2. ADD TWINE

DIY Dollar Tree farmhouse Christmas tree. What to do with the mini Christmas trees from the dollar tree. Easy way to use the cheap Christmas trees from the dollar store. Rustic farmhouse Christmas decor on a budget.

I didn’t get super fancy with this at all. I cut off a piece of twine I thought would be long enough to tie around the bottom lip of the glass then then pulled it tight and tied it in a bow.

DIY Dollar Tree farmhouse Christmas tree. What to do with the mini Christmas trees from the dollar tree. Easy way to use the cheap Christmas trees from the dollar store. Rustic farmhouse Christmas decor on a budget.

3. ADD THE TREE

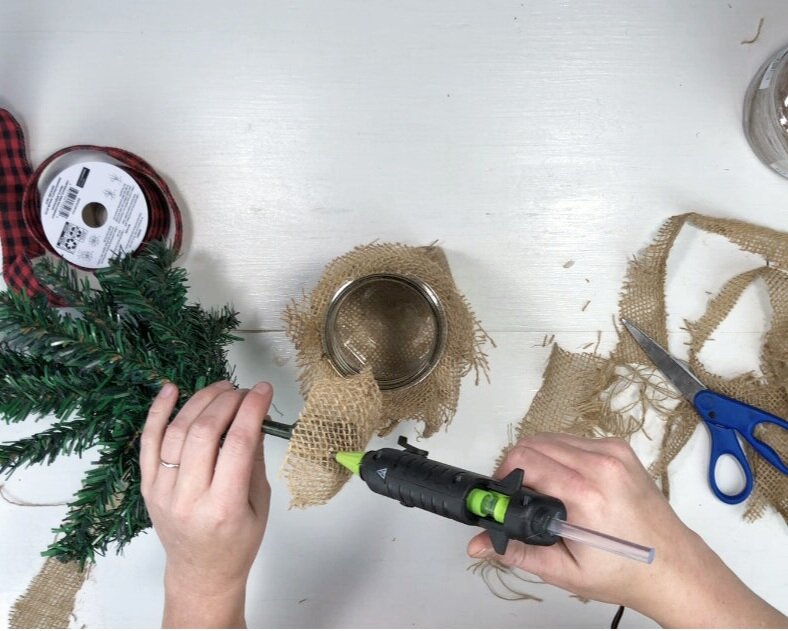
I didn’t want to mess with stuffing anything into the jar to hold the tree up so instead I hot glued it in. This took a bit of trial and error before I finally got it to stick right.

What worked for me was taking a piece of the discarded burlap and hot gluing it to the bottom of the tree.

DIY Dollar Tree farmhouse Christmas tree. What to do with the mini Christmas trees from the dollar tree. Easy way to use the cheap Christmas trees from the dollar store. Rustic farmhouse Christmas decor on a budget.

Then I added more hot glue to the bottom of the burlap and stuck the tree in the glass jar. I held it there till the glue was dry. It didn’t budge after that!

DIY Dollar Tree farmhouse Christmas tree. What to do with the mini Christmas trees from the dollar tree. Easy way to use the cheap Christmas trees from the dollar store. Rustic farmhouse Christmas decor on a budget.

4. LIGHTS

My tree was looking kind of sad so I found some lights I had bought from the Dollar Tree over the summer and strung them on the tree. They are battery operated so I just stuck the battery pack into the glass jar to hide it.

DIY Dollar Tree farmhouse Christmas tree. What to do with the mini Christmas trees from the dollar tree. Easy way to use the cheap Christmas trees from the dollar store. Rustic farmhouse Christmas decor on a budget.

That’s it! It turned out SOOOOO CUTE! And so crazy easy! It’s nice to do a craft sometimes where the results are kinda instant and you don’t have to wash out any paint brushes or clean up hardly anything.

DIY Dollar Tree farmhouse Christmas tree. What to do with the mini Christmas trees from the dollar tree. Easy way to use the cheap Christmas trees from the dollar store. Rustic farmhouse Christmas decor on a budget.

I can’t wait to get more of my Christmas decorations made for my new house! Let me know if you have any questions about this DIY in the comments below.

Happy Crafting!

Check out more Christmas DIY tutorials below


DIY easy wood tag ornament with cute wooden beads DAY 7

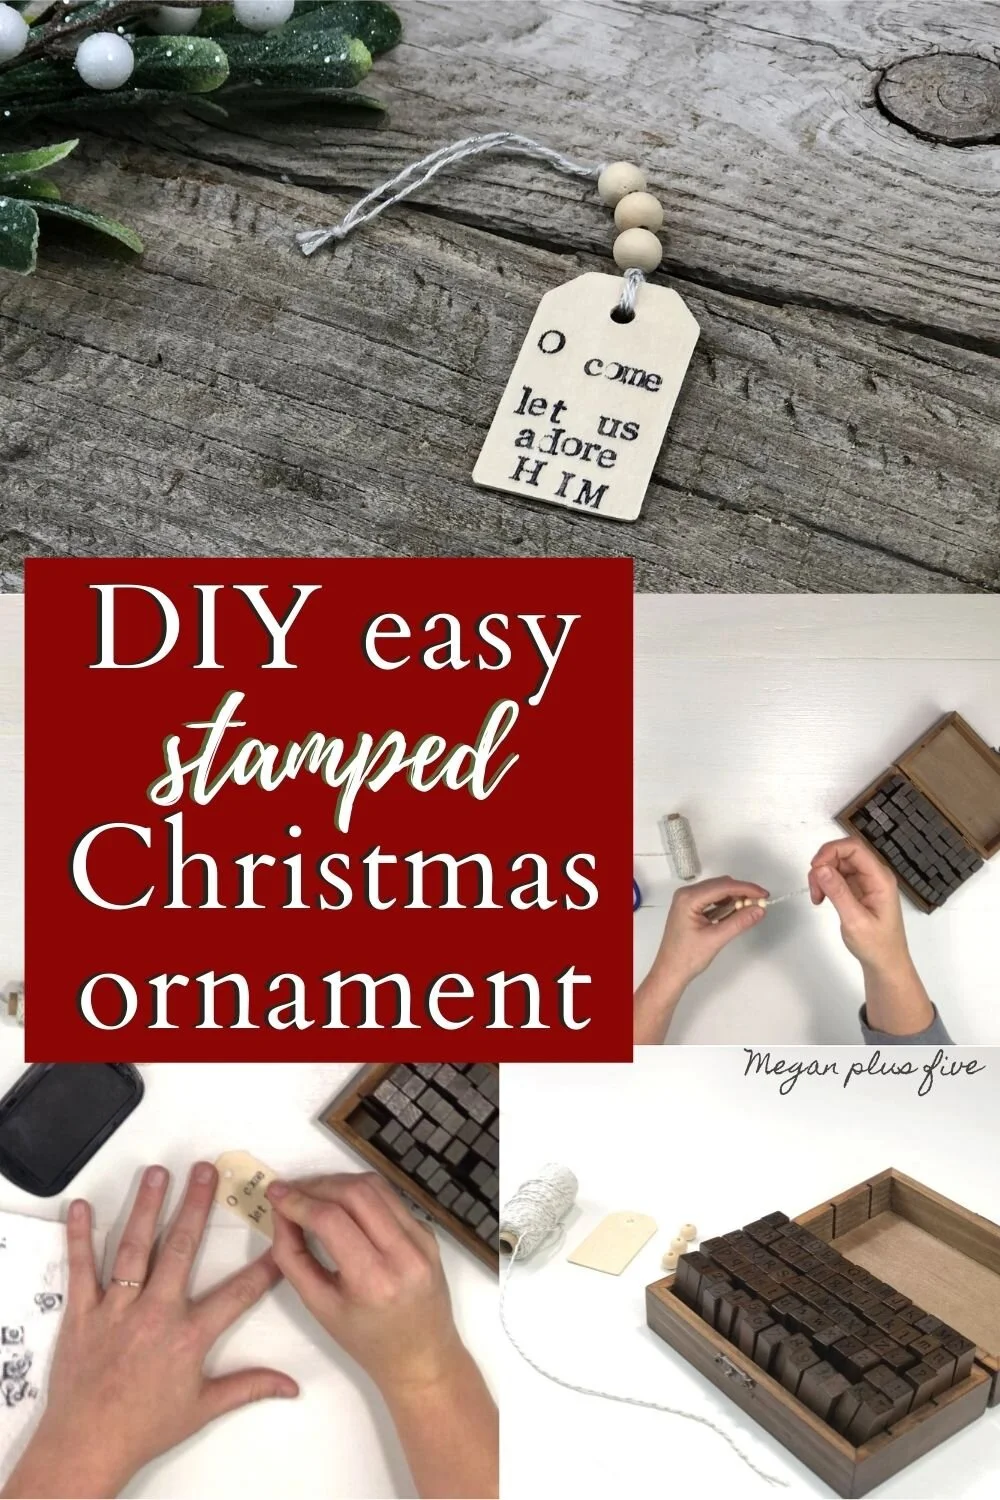
How to make a wood tag Christmas ornament. DIY Christmas ornament with wood beads. How to stamp on wood. O come let us adore Him Christmas DIY.

Super easy wood tag Christmas ornament DIY

Christmas will be here before we know it! Last year I started a 30 days of DIY Christmas ornaments challenge for myself and I got so crazy busy with orders from my shop that I couldn’t squeeze very many in. I completely underestimated how busy I would be last year.

This year I have toned my shop down a lot. I am in a place where I am no longer making finished home décor items {thank goodness because while I LOVE creating it does take more time to make finished pieces than it does to create files and craft kits} and I am solely focusing on SVG’s, DIY craft kits, and writing craft tutorials for you to enjoy.

Affiliate Disclosure. Some of the links on this website are affiliate links, which means that I may earn a small commission if you click on the link or make a purchase using the link. If you make a purchase you will not be charged anything additional. This is just a way I can help add to our family finances to raise our four daughters. Please know I would never recommend a product or service I do not totally stand behind

How to make a wood tag Christmas ornament. DIY Christmas ornament with wood beads. How to stamp on wood. O come let us adore Him Christmas DIY.

I’m just going to pick up where I left off last year with my 30 days of DIY Christmas ornaments.


DAY 7 of my 30 days of DIY Christmas ornaments I made a simple stamped wood tag with wood bead accents to hang it from.

These little wooden beads are SUPER POPULAR right now. And for good reason because they are so versatile. I have used them for photo accents, bead garland, Christmas ornaments, keychains, the list goes on.

Today I used them on this ornament and it was super easy to make. It took just minutes to make AND there was virtually NO MESS to clean up after.

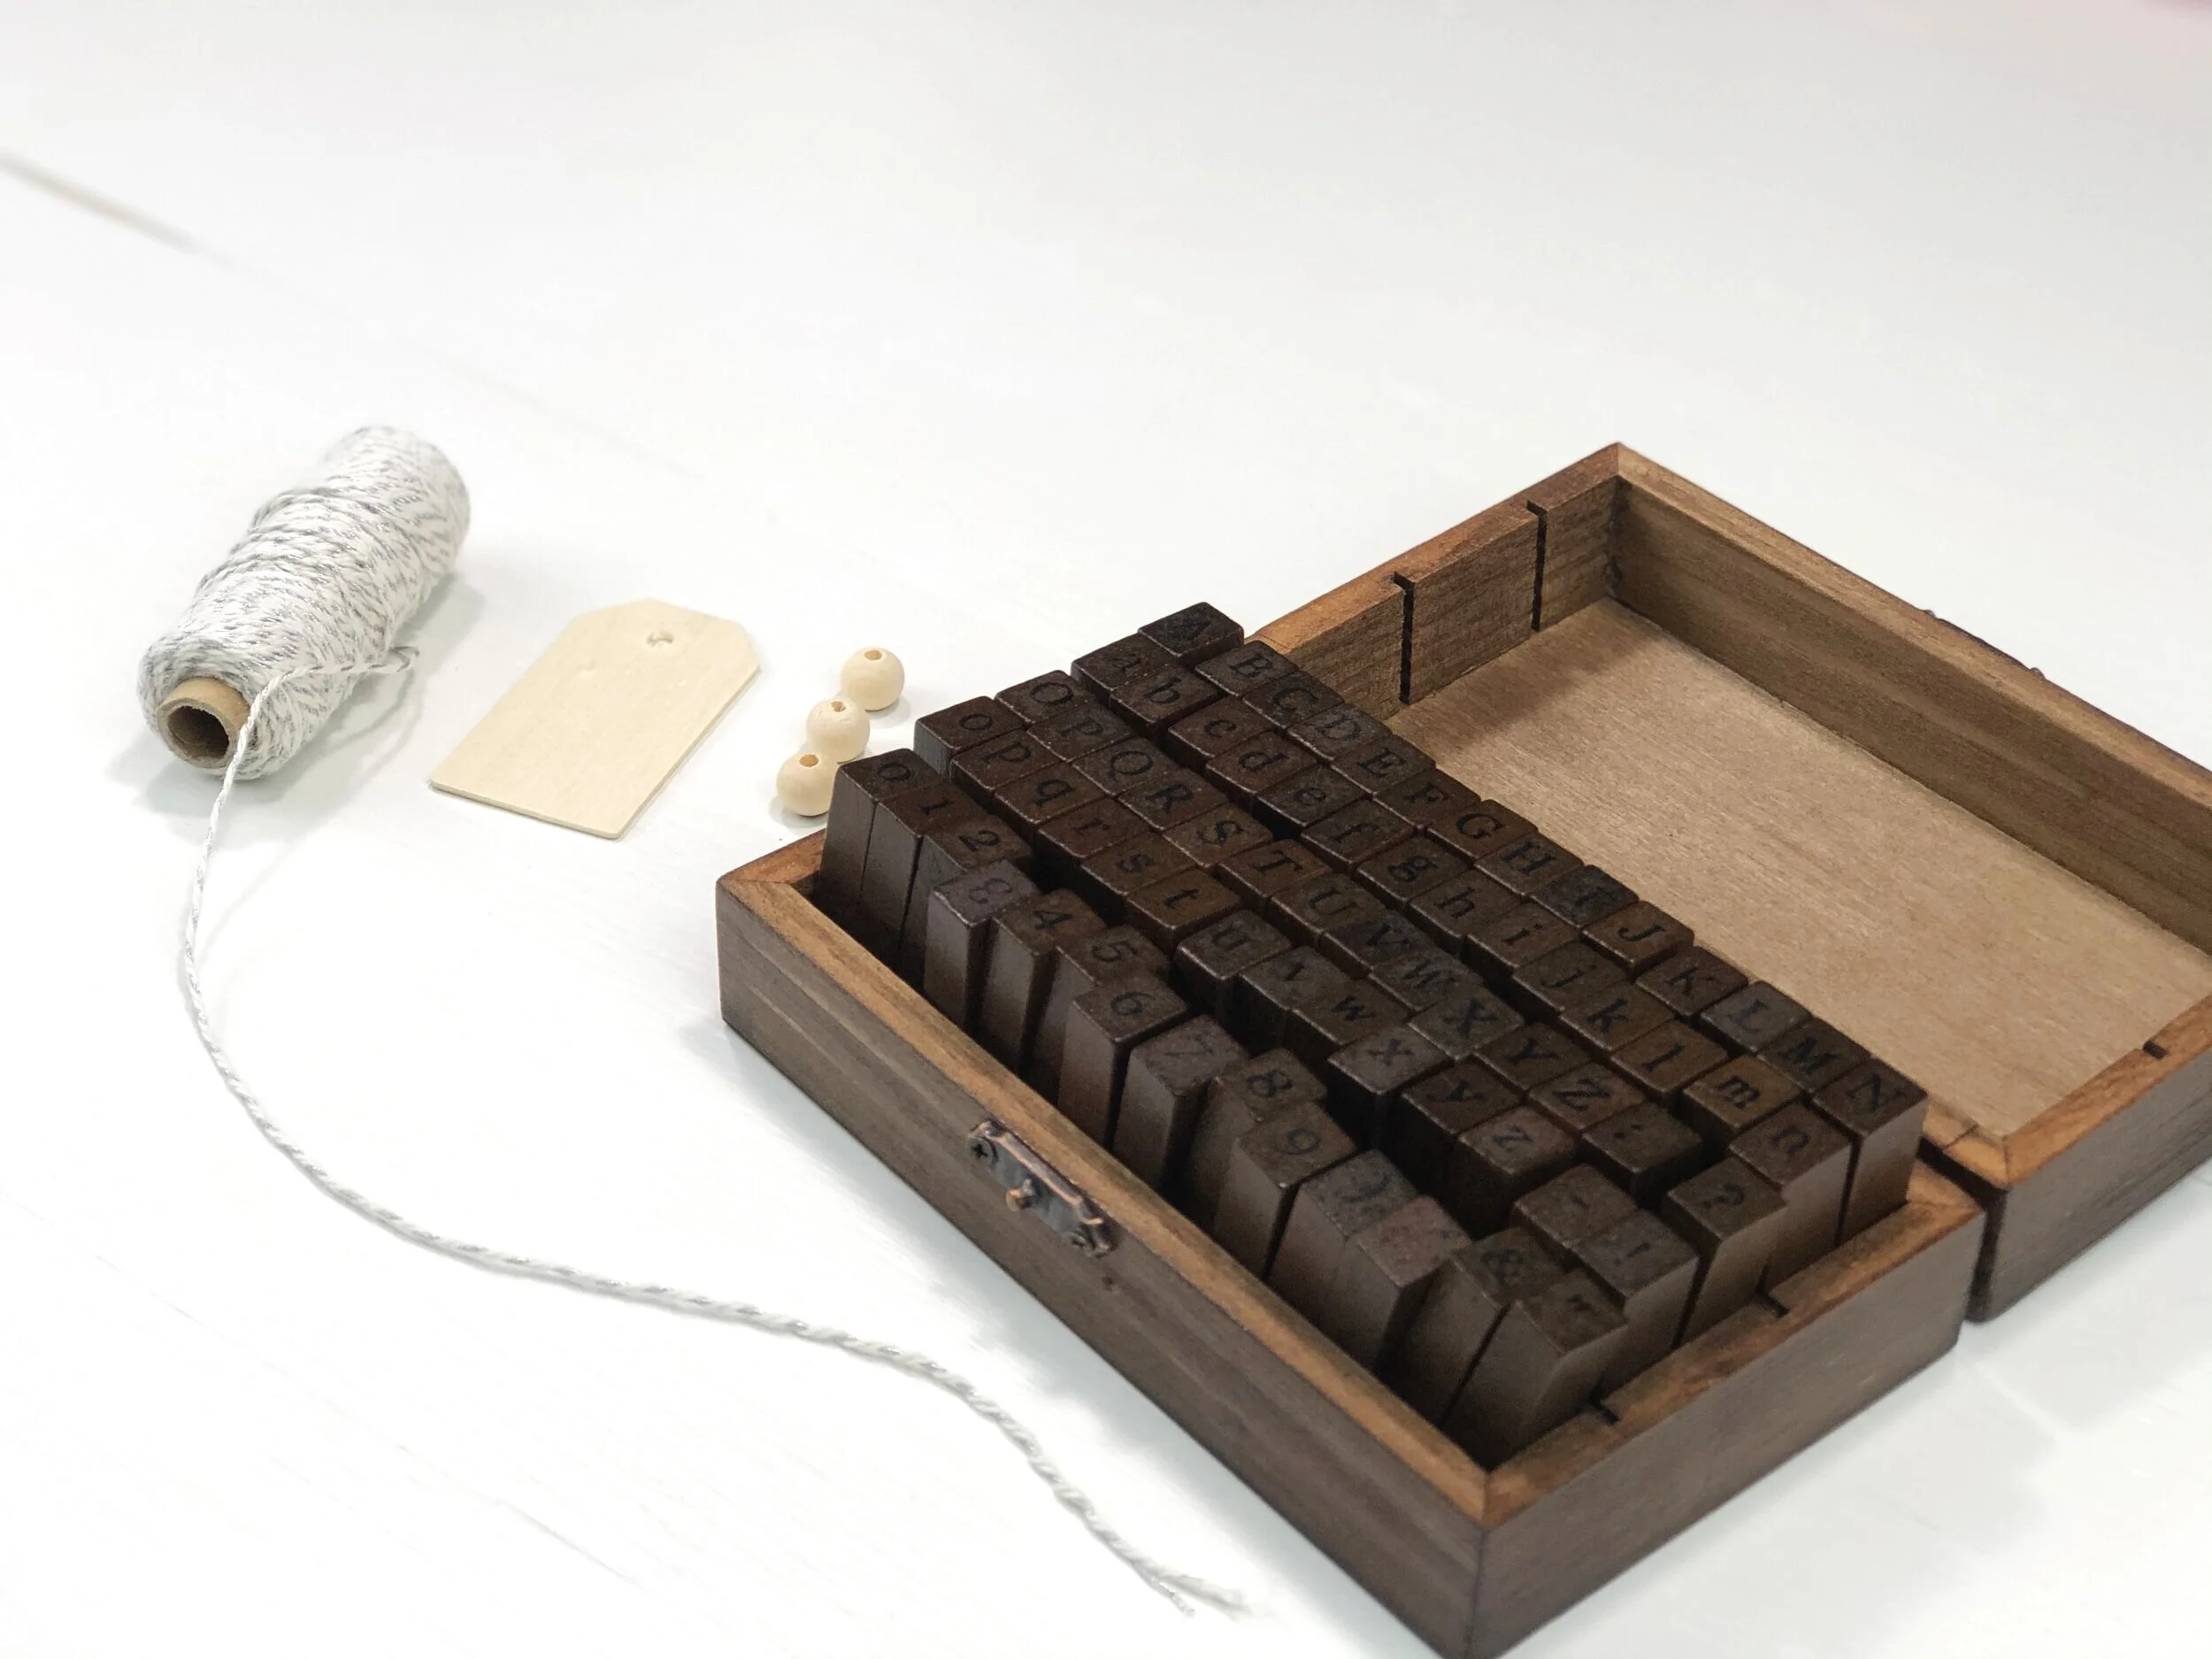
Here’s what you’ll need to make a stamped wood tag Christmas ornament

How to make a wood tag Christmas ornament. DIY Christmas ornament with wood beads. How to stamp on wood. O come let us adore Him Christmas DIY.

1.STAMP

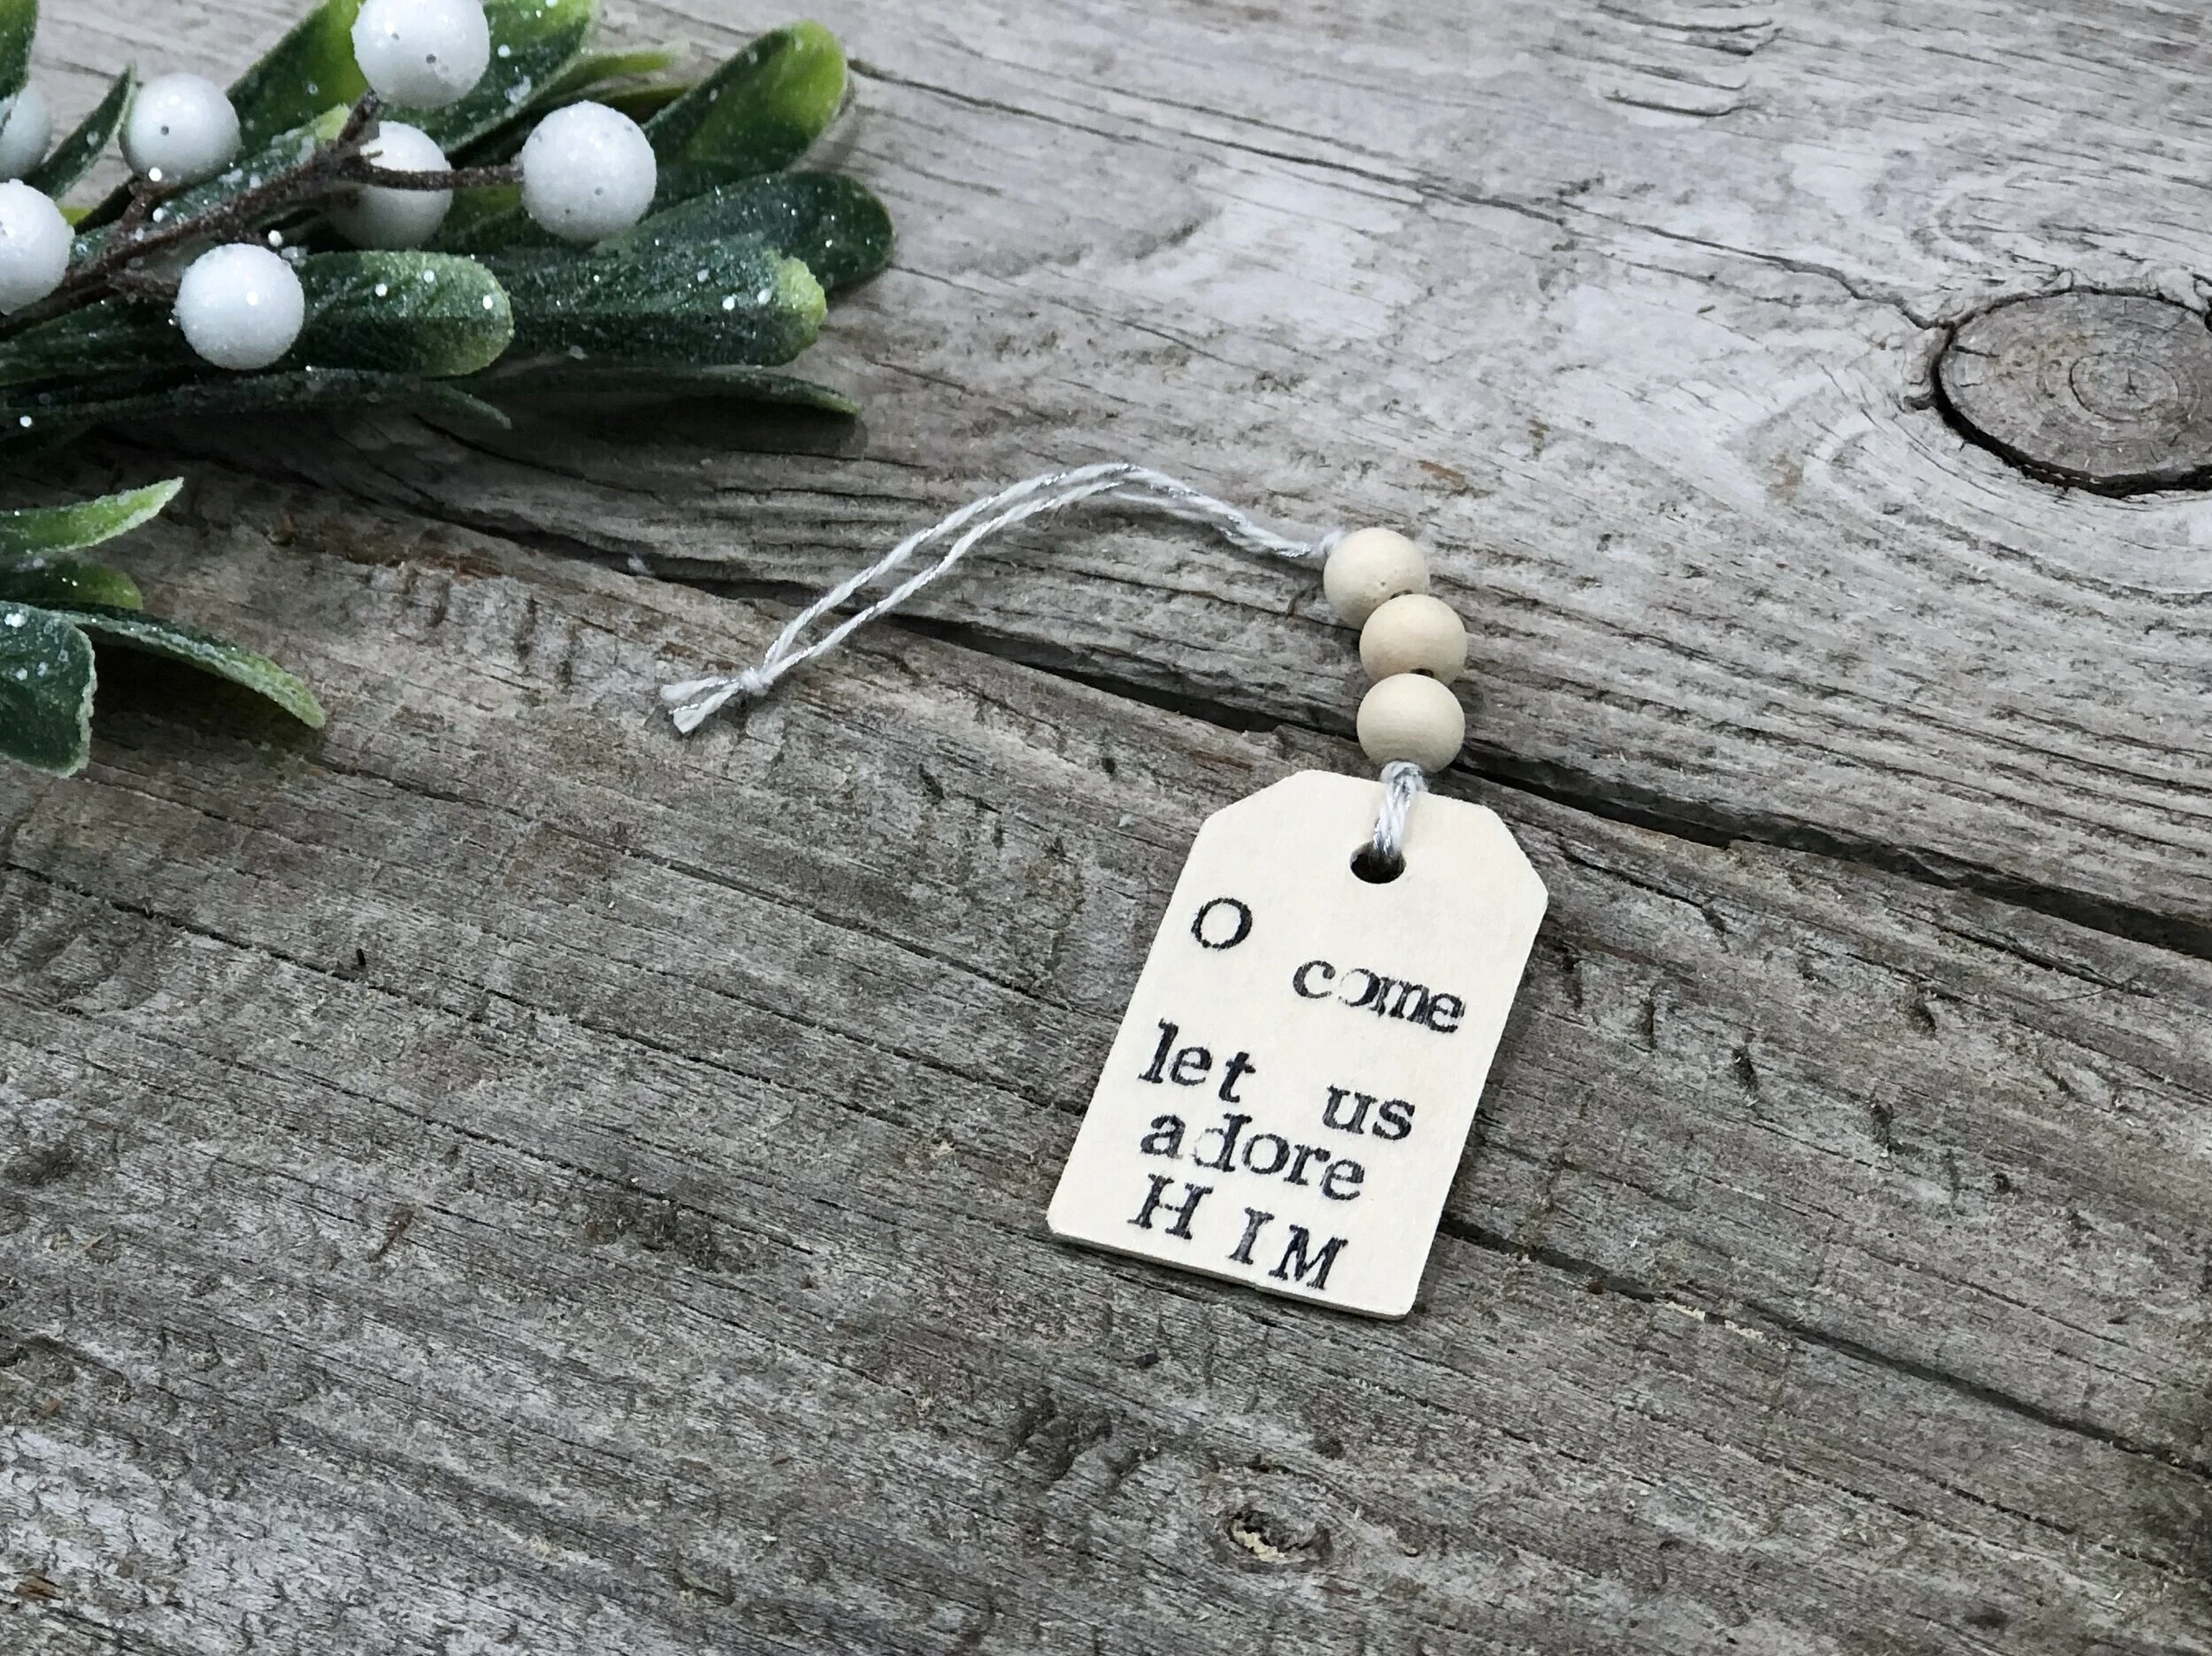
The first thing I did was think of a saying. I wanted this one to say “O come let us adore Him”. It’s short and sweet and the reason for the season. Mine is FAR from perfect but that’s what makes handmade so special anyway.

How to make a wood tag Christmas ornament. DIY Christmas ornament with wood beads. How to stamp on wood. O come let us adore Him Christmas DIY.

I had a paper towel on hand so I could stamp off the excess. I lightly tapped the stamp onto the black stamp pad. You do not want a heavy hand for this. Then again lightly pressed it onto my wooden tag. Very lightly. If you press too hard you’ll get markings from the edges of the stamp. You may want to practice this a few times on your paper towel before trying it on the wooden tag.

Then I let that dry.

2. ADD BAKERS TWINE

Next I added my bakers twine. I used one that was white and had a bit of silver in it. I just eyeballed a length I wanted. Folded it in half and fed the looped end through the hole in my wood tag. Then I pulled the loose ends through the loop to secure it onto the tag.

How to make a wood tag Christmas ornament. DIY Christmas ornament with wood beads. How to stamp on wood. O come let us adore Him Christmas DIY.

3. ADD BEADS

The beads I used were fairly small and it was difficult to feed the twine through the small holes. I added a piece of masking tape to the open ends of the twine to make it easier.

How to make a wood tag Christmas ornament. DIY Christmas ornament with wood beads. How to stamp on wood. O come let us adore Him Christmas DIY.

I fed three small beads onto the twine then tied a knot at the top of the beads so they stayed in place.

How to make a wood tag Christmas ornament. DIY Christmas ornament with wood beads. How to stamp on wood. O come let us adore Him Christmas DIY.

4. KNOT THE TWINE

I removed the tape and tied the two ends of the bakers twine together so I could hang it on the Christmas Tree.

How to make a wood tag Christmas ornament. DIY Christmas ornament with wood beads. How to stamp on wood. O come let us adore Him Christmas DIY.

That’s it. No painting, no glue gun, no fuss really. Super simple Christmas ornament you can even make with the kiddos.

How to make a wood tag Christmas ornament. DIY Christmas ornament with wood beads. How to stamp on wood. O come let us adore Him Christmas DIY.

I hope you enjoyed this Christmas ornament tutorial. Check out more of my Christmas and winter themed DIY crafts


DIY wood block snowmen ornaments, DAY 6

DIY snowmen block ornaments, how to make hanging snowman ornaments for your Christmas tree. Easy painted snowmen ornament for Christmas using scrap wood.

DIY wooden snowmen Christmas ornaments

Day 6 of 30 days of DIY Christmas ornaments

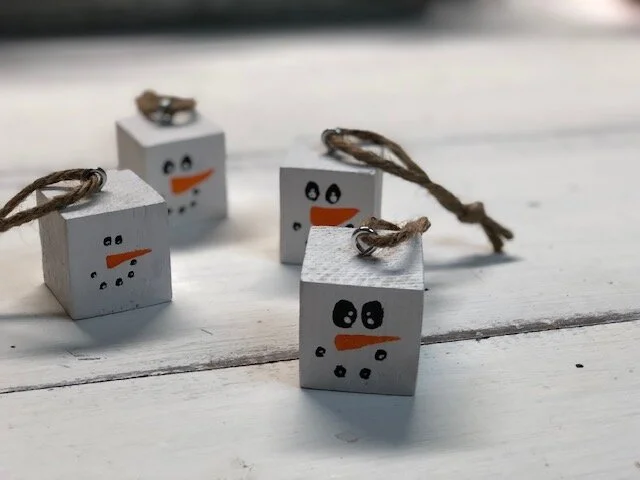
Day 6 of my 30 days of DIY Christmas ornaments I made these cute wood block snowmen! They were SO SIMPLE and they were SO QUICK to make too! I haven’t made these with my four daughters yet but they are definitely on the list of Christmas ornaments to make with them.

Affiliate Disclosure. Some of the links on this website are affiliate links, which means that I may earn a small commission if you click on the link or make a purchase using the link. If you make a purchase you will not be charged anything additional. This is just a way I can help add to our family finances to raise our four daughters. Please know I would never recommend a product or service I do not totally stand behind

To make this DIY craft even easier for you I put together a DIY CHRISTMAS SNOWMEN ORNAMENT CRAFT KIT. I know not everyone can use or has access to power tools like the ones I use in my crafty tutorials. So with some of my more popular projects you can purchase a DIY craft kit so you can make your own at home. Leave all the cutting and presanding to me, you take care of all the creativity to really make it come to life.

Watch the video tutorial or keep scrolling to read how to make your own wooden snowman ornament

Here’s what you’ll need to make your own wood snowmen Christmas ornaments

OR if not snagging your own craft kit here’s a list of all the supplies you'll need

The first thing you need to do is to cut your piece of wood in to cubes. The wood I used is called a 2”x2”, it actually measures approx. 1.5”x1.5” lumber measures weird like that lol! So, I cut 4 pieces into 1.5” cubes. The miter saw I use has a ruler on the side of it to make measuring super easy. If you are looking into getting power tools I wrote this post for crafters about what kinds of power tools you need. I used to use my husband’s power tools and I am SO glad I finally purchased my very own set. I am a huge fan of RYOBI power tools and recommend them to any fellow crafter.

DIY snowmen block ornaments, how to make hanging snowman ornaments for your Christmas tree. Easy painted snowmen ornament for Christmas using scrap wood.DIY snowmen block ornaments, how to make hanging snowman ornaments for your Christmas tree. Easy…

Next, you want to give your wooden blocks a quick sanding. I use 120 grit sandpaper for this. You can use a regular piece of sandpaper for this step but using a power tool sander is much faster.

DIY snowmen block ornaments, how to make hanging snowman ornaments for your Christmas tree. Easy painted snowmen ornament for Christmas using scrap wood.

After you give your blocks a quick sanding be sure to wipe the sawdust off of them. Then paint them with a thin layer of white acrylic paint. Once that layer is completely dry you can paint a second thin layer of white acrylic paint to give it a little better coverage. Think of this like when you paint your nails, you apply a thin base coat first then once that dries you apply a second coat to get a good even coverage.

DIY snowmen block ornaments, how to make hanging snowman ornaments for your Christmas tree. Easy painted snowmen ornament for Christmas using scrap wood.

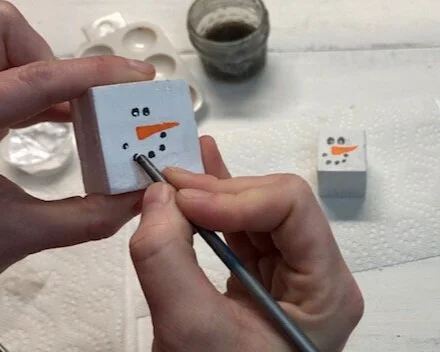
Let the white paint dry. After it dries you can paint on the face. I used orange and black acrylic paint for this step BUT you could totally use paint markers or even an orange and black sharpies for this step and they would turn out just as cute!

DIY snowmen block ornaments, how to make hanging snowman ornaments for your Christmas tree. Easy painted snowmen ornament for Christmas using scrap wood.

If you want to add little accent dots to the snowman’s eyes just use the end of your paint brush. Lightly dip it into your white acrylic paint and dab on where you would like the accent dot to go.

DIY snowmen block ornaments, how to make hanging snowman ornaments for your Christmas tree. Easy painted snowmen ornament for Christmas using scrap wood.

Add a 3/4” screw eye to the top middle of your wood snowman ornament. I just eyeballed mine but if you want to get an exact measurement then you could find the middle by making an X going from cross corner to cross corner. Where the lines meet that’s where the middle is.

DIY snowmen block ornaments, how to make hanging snowman ornaments for your Christmas tree. Easy painted snowmen ornament for Christmas using scrap wood.

Loop a piece of twine through the screw eye then tie it in a knot. You’re ready to hang this adorable little wooden snowman set on your Christmas tree. This is such an easy ornament to make with the kids too! Not a whole lot of skill is required making it perfect for little ones.

DIY snowmen block ornaments, how to make hanging snowman ornaments for your Christmas tree. Easy painted snowmen ornament for Christmas using scrap wood.

As always, if you have any questions please reach out and ask:)! You can leave a comment below or send me a message on any of my social media platforms {links are above}

DIY wood spool ornament, DAY 5

Easy Christmas ornament. How to make an upcycled wood spool Christmas ornament. Simple ornanments to DIY at home with the kids.

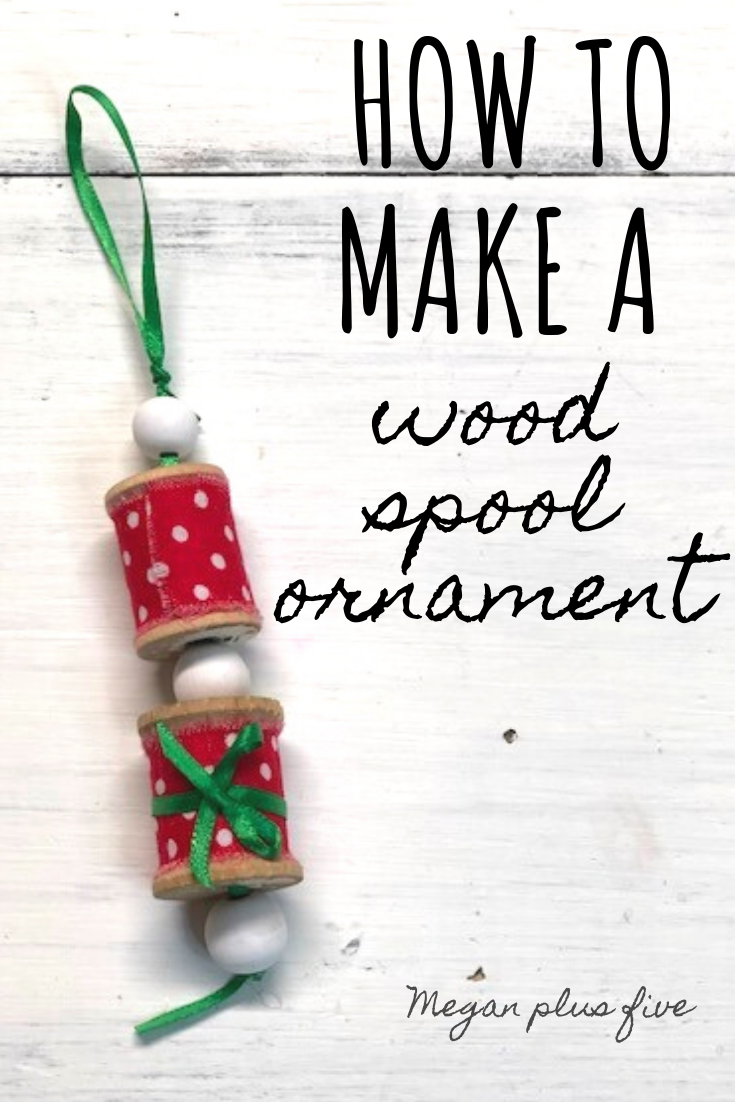
DIY WOOD SPOOL CHRISTMAS ORNAMENT

Day 5 of 30 days of DIY Christmas ornaments

Hey guys! Day 5 of 30 days of DIY Christmas ornaments is a really special one for me. I have several of these old wood spools that were given to me by my grandma, the mother of all things crafty! This women could paint a masterpiece with mud and sew like no ones business! She was the most talented and creative soul I have ever met in my lifetime and I’m thankful to have been given a small fraction of her wonderful God given talents.

Affiliate Disclosure. Some of the links on this website are affiliate links, which means that I may earn a small commission if you click on the link or make a purchase using the link. If you make a purchase you will not be charged anything additional. This is just a way I can help add to our family finances to raise our four daughters. Please know I would never recommend a product or service I do not totally stand behind.

In her old sewing basket she had held on to some super old wooden thread spools. Did I mention my grandma also kept everything??? I think this is a crafter gene lol! Must not throw anything away because you just never know when you’ll need it! So these little wooden beauties were among the wonderful treasures she kept in her old wicker sewing basket. I, of course, could not ever get rid of such gems! So they’ve been sitting in that basket till now. I didn’t want to alter them too much so painting them was out of the question. But glue a piece of fabric would cause too much damage so I thought ‘why not make a fun little Christmas ornament out of a couple of them?’ And so I did!

Day 5 of DIY Christmas ornaments is probably the easiest ornament I’ve made so far on my 30 days of ornament making. If you can use a glue gun and thread a bead you are a shoe in!

You can watch the WOOD SPOOL DIY CHRISTMAS ORNMENT video

Here’s what you’ll need to make your own wood spool DIY Christmas ornament

DIY wood spool Christmas ornament. How to make an easy Christmas tree ornament with old wooden spools. Scrap piece ornament making.

First you need to cover your wood spools in fabric. I used a scrap piece of fabric I had left over from when I made this DIY 4TH OF JULY TIE RAG WREATH. I don’t think I included this particular fabric in my tie wreath but I bought it the the intent to use it for that lol. It never hurts to have extra pretty fabrics on hand!

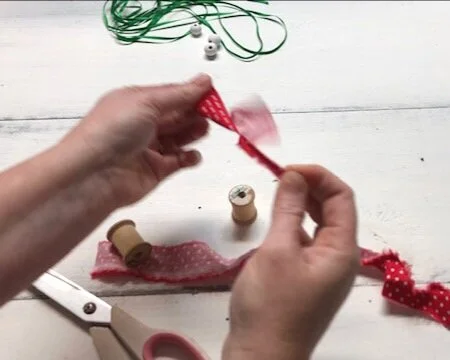
Cut your fabric piece so it’s the size of the middle party of your wooden spool. I really like the frayed edges so I cut a tiny slit in the fabric then I ripped it the rest of the way to give it that frayed look.

DIY Christmas ornament craft, how to make your own Christmas ornaments easy tutorial. Wood spool craft to do at home. DIY rustic and farmhouse Christmas decor

If you are more of a visual learner {this is totally me!} be sure to check out my YouTube channel. This is THE hub I use to hold all of my DIY CRAFTY VIDEO TUTORIALS


Then glue your fabric pieces to your wood thread spools. I used as little glue as possible for this so I didn’t ruin the wooden spool.

*crafty tip- if you are making this with little ones be sure you are using a LOW temp glue gun. I have found that using the mini glue guns they don’t get as hot as the larger full sized glue guns.

DIY Christmas ornament craft, how to make your own Christmas ornaments easy tutorial. Wood spool craft to do at home. DIY rustic and farmhouse Christmas decor

I added a small ribbon bow around the larger of the two wood spools. I didn’t want them to look identical and thought this little bow broke it up just enough.

DIY Christmas ornament craft, how to make your own Christmas ornaments easy tutorial. Wood spool craft to do at home. DIY rustic and farmhouse Christmas decor

Now your DIY wood spool Christmas ornament is ready to put together. The wooden beads I used I had already painted from a previous project I did, unfortunately I don’t have a tutorial for this :/ but it’s super easy to paint them. I used white acrylic paint and painted two thin coats on each bead. To make it even easier I set the beads on the tip of an xacto knife to hold on to it while I painted. I just placed the sharp pointy end of the xacto knife in the hole of the bead and it was perfect!

You’ll need to cut a piece of ribbon that is 3x the length of what your ornament will be. Thread on one of your painted beads on the bottom, leaving an inch or so. Then tie the bottom piece of the ribbon in a couple of knots. Next place the knot so that it is just under the opening of the hole on the bead, apply a decent sized drop of hot glue and let it dry completely. This will keep your ornament from falling apart.

I tried to just tie a ton of knots that I thought were bigger than the hole of the wood bead but the giant knot kept slipping through, so I gave up and the hot glue worked SO much better!

DIY Christmas ornament craft, how to make your own Christmas ornaments easy tutorial. Wood spool craft to do at home. DIY rustic and farmhouse Christmas decor

After the hot glue is dry you can string on the rest of the pieces of your ornament. Here’s the order mine were in from top to bottom

  • bead

  • wood spool

  • bead

  • wood spool

  • bead

Then tie what’s left of the ribbon on the top part of the ornament into a loop. Be sure you don’t pull the ribbon clean through the wood spools and beads. I held the ribbon at the base of then pulled it tight.

DIY Christmas ornament craft, how to make your own Christmas ornaments easy tutorial. Wood spool craft to do at home. DIY rustic and farmhouse Christmas decor

And that’s it. Your DIY wood spool Christmas ornament is finished:)!! I hope you enjoyed this easy craft tutorial and I would LOVE to hear how yours turns out if you make your own.

If you have any questions please feel free to reach out to me. Leave a comment below or send me an email.

Check out more posts below

DIY mason jar lid snowman Christmas ornament, DAY 4

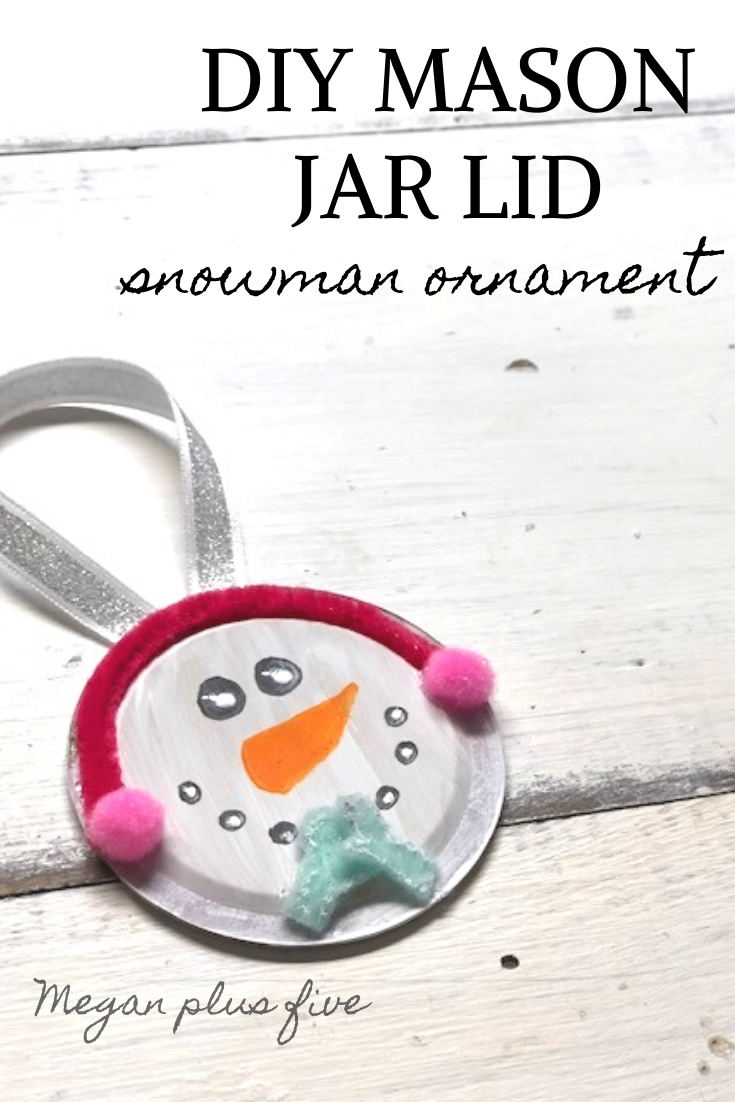
DIY snowman made from a mason jar lid. How to make cute snowmen Christmas ornaments from a lid from a mason jar. Easy craft tutorial to make fun ornaments for kids.

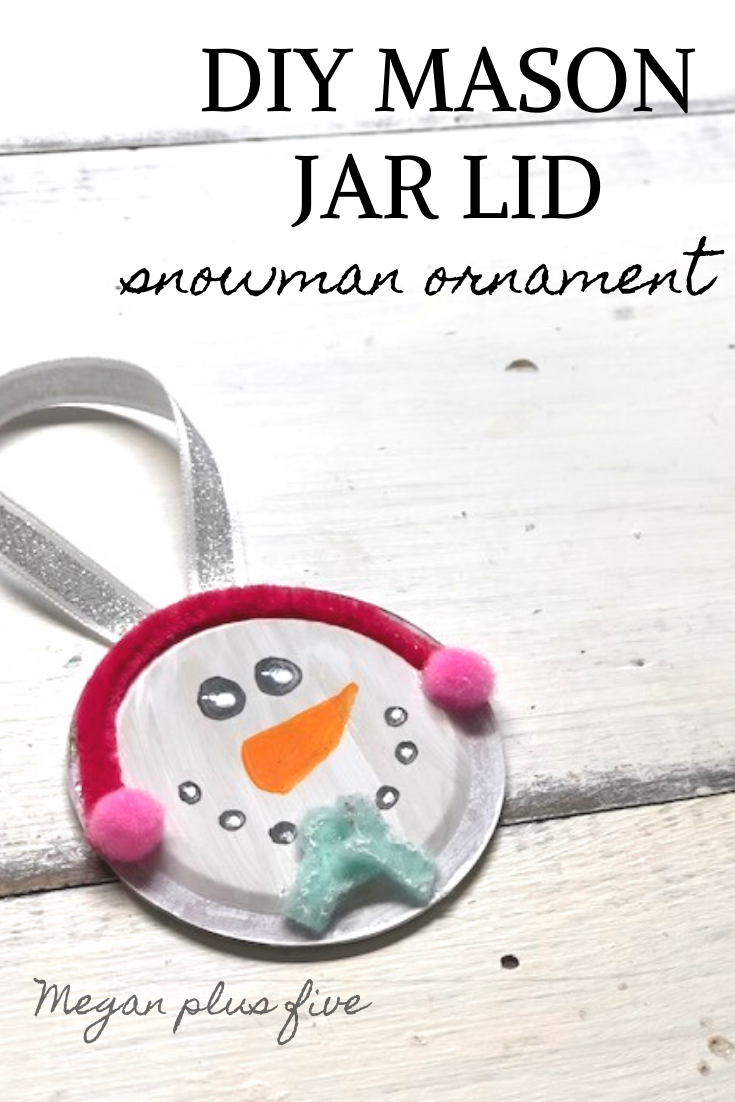
How to make a super cute snowman Christmas ornament from a mason jar lid

Day 4 of DIY Christmas Ornaments

Day of 4 of DIY Christmas ornaments is this super easy and adorable mason jar lid snowman. He is complete with a mini set of mittens and a cute little pair of earmuffs! This little guy was really simple to make and is a great use for all those extra lids from your mason jar crafts. And if you follow me on here at all I’m not shy about my love for mason jars! I’ve always loved them, even before they were all mainstream lol!

Affiliate Disclosure. Some of the links on this website are affiliate links, which means that I may earn a small commission if you click on the link or make a purchase using the link. If you make a purchase you will not be charged anything additional. This is just a way I can help add to our family finances to raise our four daughters. Please know I would never recommend a product or service I do not totally stand behind.

If you missed the first few days of my 30 DAYS OF DIY CHRISTMAS ORNAMENTS be sure to click here to see the full list of make your own ornaments

If you love mason jars as much as I do be sure to check out my DIY MASON JAR CRAFTS for more inspiration.

Check out the snowman mason jar lid video tutorial below or keep scrolling to read the step by step instructions.

Here’s what you’ll need to make your own mason jar lid snowman for your Christmas tree.

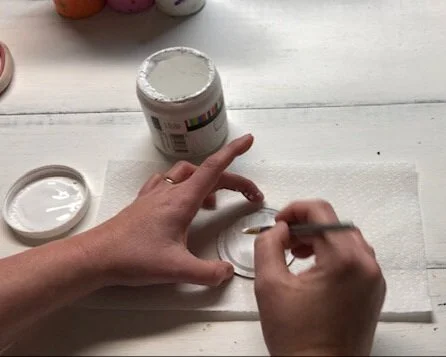
First you want to paint the bottom side of your mason jar lid {the non silver side}. I used chalk paint to paint mine but any kind of white paint should work fine, even spray paint.

First you want to paint the bottom side of your mason jar lid {the non silver side}. I used chalk paint to paint mine but any kind of white paint should work fine, even spray paint.

DIY snowman made from a mason jar lid. How to make cute snowmen Christmas ornaments from a lid from a mason jar. Easy craft tutorial to make fun ornaments for kids.

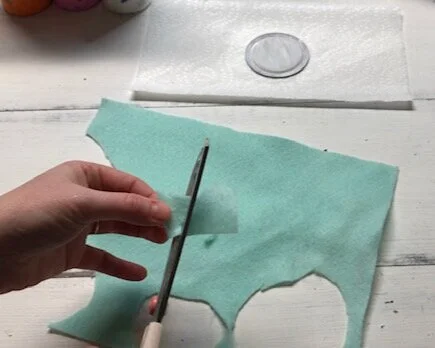
While your mason jar lid is drying cut out the tiny mittens from felt. I free handed this step and they were actually pretty easy to make. So that they would match I used the first one I cut out as my template to cut out the second one.

DIY snowman made from a mason jar lid. How to make cute snowmen Christmas ornaments from a lid from a mason jar. Easy craft tutorial to make fun ornaments for kids.

Now measure about half way around your mason jar lid for the ear muffs using your pipe cleaner. Then cut it to size with your craft scissors.

DIY snowman made from a mason jar lid. How to make cute snowmen Christmas ornaments from a lid from a mason jar. Easy craft tutorial to make fun ornaments for kids.

I know it’s hard to tell in the picture but I used a black paint marker, or paint pen, to draw on the eyes and the mouth. I LOVE these paint pens and I actually use them more than I thought I would for crafts like on this DIY PERSONALIZED MASON JAR LID. They come in hand for all kinds of projects. If you want to add little accent dots on the eyes with white paint be sure to do so when the black paint is all the way dry. I made the mistake and rushed that step and you can totally see the ugly error.

DIY snowman made from a mason jar lid. How to make cute snowmen Christmas ornaments from a lid from a mason jar. Easy craft tutorial to make fun ornaments for kids.

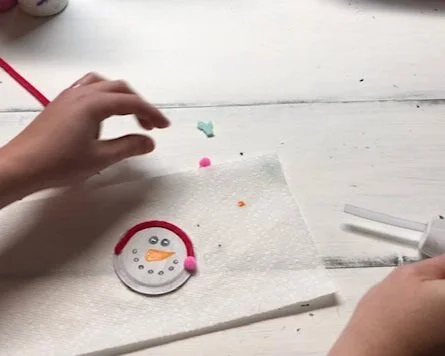
I painted on my snowman’s nose but if I had an orange paint pen I would have use that instead to create the nose. If you use paint it takes VERY LITTLE .You can vaguely see the little orange dot on the paper towel, that’s what I used to dip my paint brush in to paint the nose. And I didn’t even use very much of it.

DIY snowman made from a mason jar lid. How to make cute snowmen Christmas ornaments from a lid from a mason jar. Easy craft tutorial to make fun ornaments for kids.

Then glue down the earmuffs. You want to glue the pipe cleaner to the mason jar lid first then glue the mini pompoms down on each end of the pipe cleaner. {btw my 10 year old daughter totally had to tell me I’ve been spelling pompoms wrong lol! I was spelling them as 2 words which is clearly wrong. Hey, I’m a really great crafter lol spelling isn’t really my strong suit}.

DIY snowman made from a mason jar lid. How to make cute snowmen Christmas ornaments from a lid from a mason jar. Easy craft tutorial to make fun ornaments for kids.

Next, glue on your snowman’s gloves. I faced the gloves so that the thumbs were facing in which if you do that to yourself is wrong but trust me they actually look better facing the wrong direction

DIY snowman made from a mason jar lid. How to make cute snowmen Christmas ornaments from a lid from a mason jar. Easy craft tutorial to make fun ornaments for kids.

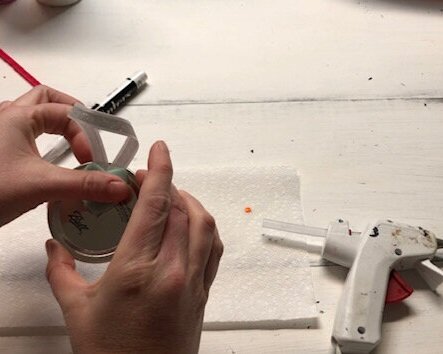
Last, loop a piece of ribbon and glue it to the back of your snowman mason jar lid. For extra support I recommend gluing a piece of felt over it. I cut mine in the shape of a heart so it looked pretty instead of just a circle or a misshaped cut piece of felt. You can also write on the back of the ornament who made it and what year with your paint pen.

DIY snowman made from a mason jar lid. How to make cute snowmen Christmas ornaments from a lid from a mason jar. Easy craft tutorial to make fun ornaments for kids.

Now your adorable snowman is ready to hang on your Christmas tree! I hope you enjoyed this tutorial and you make wonderful memories with your kiddos making these for your own tree. If you have any questions about this crafty tutorial or any others I’d love to hear from you. Leave a comment below or send me an email.

DIY snowman made from a mason jar lid. How to make cute snowmen Christmas ornaments from a lid from a mason jar. Easy craft tutorial to make fun ornaments for kids.

Check out more Christmas posts below.

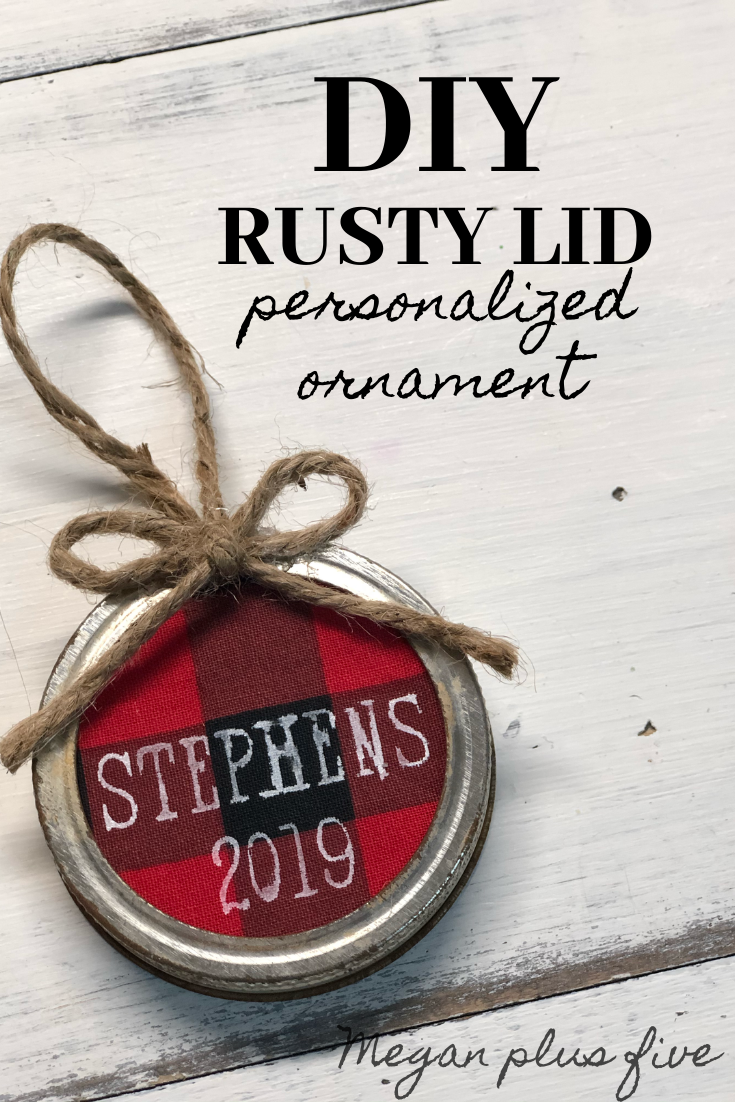
DIY personalized mason jar lid ornament using buffalo plaid - DAY 3

DIY Rusty Lid Personalized Ornament. How to make a Christmas ornament from an old canning jar lid. Using buffalo plaid to make a rustic Christmas tree ornament

DIY rusty canning jar lid ornament, personalized on buffalo plaid

Day 3 of DIY Christmas Ornaments

Day 3 of my 30 days of DIY Christmas ornaments…PERSONALIZED RUSTY MASON JAR LID ORNAMENT. I don’t know about you but I have a HUGE abundance of old mason jar lids. I save them from the hand painted mason jars I create and ship out in my Etsy shop. Here’s a tutorial I made for this adorable snowman painted mason jar set that is super popular in my shop.

Affiliate Disclosure. Some of the links on this website are affiliate links, which means that I may earn a small commission if you click on the link or make a purchase using the link. If you make a purchase you will not be charged anything additional. This is just a way I can help add to our family finances to raise our four daughters. Please know I would never recommend a product or service I do not totally stand behind.

—-> Check out other DIY mason jar crafts <—-

Here is day 1 of the 30 days of DIY Christmas ornaments - DIY SCRAP FABRIC CHRISTMAS TREE

I really enjoyed making this personalized ornament for my family Christmas tree. So much so that I am going to make these as gifts for loved ones and teachers/school staff gifts! There were so easy and actually super quick to make.

If you’re a seasoned crafter you probably have everything you need to make this DIY mason jar lid ornament. But if not I will leave links to everything you’ll need to create your own canning lid Christmas ornament.

mason jar lid ornament2.DIY Rusty Lid Personalized Ornament. How to make a Christmas ornament from an old canning jar lid. Using buffalo plaid to make a rustic Christmas tree ornamentjpg

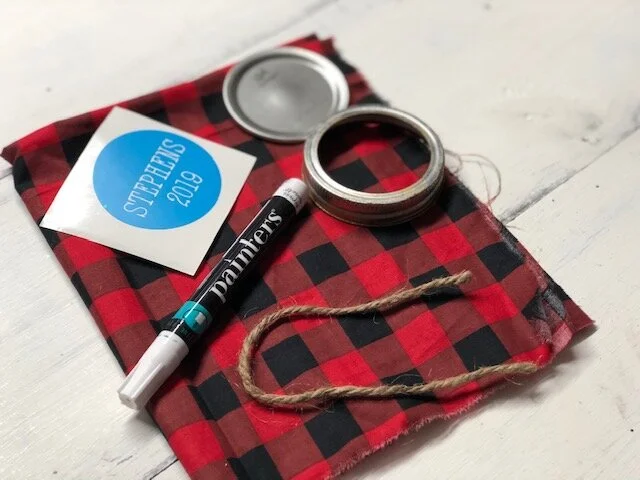
Here’s what you’ll need

Check out the video tutorial from my YouTube channel or keep scrolling to read the written tutorial

First you want to create your stencil on your Cricut Design Space. I used the font HAND TYPEWRITER because I really like how this one looks. I use it often for different DIY craft projects I make. I made a circle that is the same size as the mason jar lid I used, 2.5”. Then I typed out my text, on two separate lines and I made my BOLD TYPE. Welded them together. I made it 2” wide. Then positioned it on the circle I offset it slightly so that there was more room on the top potion, then aligned the circle and text so they would align HORIZONTALLY. Then used the SLICE button to slice the font out of the circle. And sent it to my mat to cut.

I cut it out on STENCIL FILM. I know I totally could have used HTV but I wanted to try something a little different. Something a little easier, something that hasn’t been done a ton. That’s why I chose to use a paint pen/marker vs regular paint or HTV.

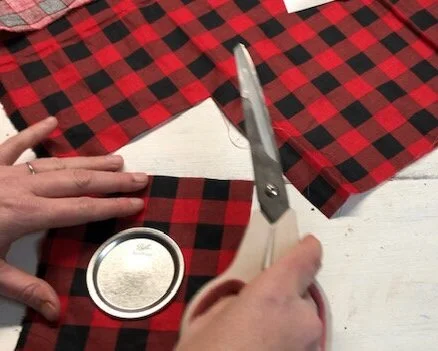
Then cut a square out of your fabric. I am using red buffalo plaid that I picked up from Walmart. It was in their fat quarters seasonal section. You want to cut your square larger than your lid. I cut mine a couple inches larger.

DIY personalized  mason jar lid ornament using buffalo plaid. How to make Christmas ornaments out of rusty canning jar lids and your Cricut

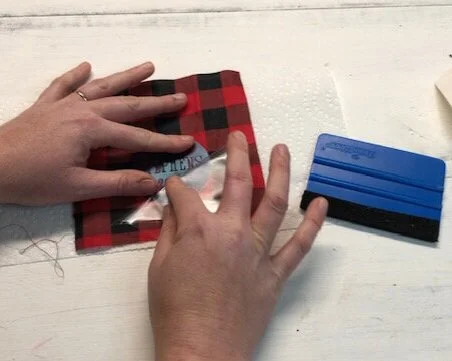
Then transfer your stencil onto your fabric. I used contact paper to transfer mine but you can use whatever material works best for you. After you place your stencil where you are happiest with it remove the transfer tape then pat the stencil down with your hand to make sure there are not any air bubbles.

DIY personalized  mason jar lid ornament using buffalo plaid. How to make Christmas ornaments out of rusty canning jar lids and your Cricut


Now use your paint marker to “trace” the areas that are exposed inside the stencil. Be sure not to press too firmly as the more pressure you apply the more likely you’ll have paint bleed. If you make a mistake no worries, you can fix it later :)!!

TIP: place a paper towel under your fabric to catch any paint that might bleed through

DIY personalized  mason jar lid ornament using buffalo plaid. How to make Christmas ornaments out of rusty canning jar lids and your Cricut

After you have your stencil all painted in you can remove it. It should release easily from the fabric. I used an xacto knife to take out the middle pieces. It does a great job at lifting them up with the sharp point.

DIY personalized  mason jar lid ornament using buffalo plaid. How to make Christmas ornaments out of rusty canning jar lids and your Cricut

Take your marker and fill in any areas that didn’t get good coverage. This does not have to look perfect. I actually LOVE that mine came out super imperfect. It gives it so much character and a more handmade Christmas ornament look and feel to it.

DIY personalized  mason jar lid ornament using buffalo plaid. How to make Christmas ornaments out of rusty canning jar lids and your Cricut

Place your fabric over the metal mason jar lid then place both inside the mason jar ring. You can gently pull the fabric to center it where you want it on the mason jar ornament.

DIY personalized  mason jar lid ornament using buffalo plaid. How to make Christmas ornaments out of rusty canning jar lids and your Cricut

Once you have the fabric where you want it glue it in place on the backside using your hot glue gun. You’ll want to glue fairly close to where the lid, fabric, and ring meet. This will give it a more secure hold. Glue all the way around the ring.

DIY personalized  mason jar lid ornament using buffalo plaid. How to make Christmas ornaments out of rusty canning jar lids and your Cricut

After the glue is dry trim away any fabric that hangs over the ring. Be sure not to trim it too closely to the lid part of your mason jar lid ornament. If you trim it too closely then the fabric won’t have enough of a “seam allowance” and your fabric will likely slip thru to the front of the ornament.

DIY personalized  mason jar lid ornament using buffalo plaid. How to make Christmas ornaments out of rusty canning jar lids and your Cricut

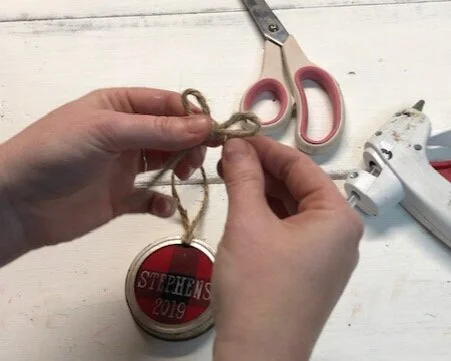
Add a twine hanger. I glued a piece of twine to the middle spot on the front of the ring then looped it to the back and hot glued it there as well. If I wanted a super strong hold I would have used my drill and drilled a small hole on the top and fed my twine thru there. But for not the hot glued hanger will work.

DIY personalized  mason jar lid ornament using buffalo plaid. How to make Christmas ornaments out of rusty canning jar lids and your Cricut

Then add a cute little twine bow. I glued mine on top of the twine I glued to the front to hide that and it worked great. Adding a simple twine bow really adds a little more rustic touch to the ornament too!

DIY personalized  mason jar lid ornament using buffalo plaid. How to make Christmas ornaments out of rusty canning jar lids and your Cricut

Once your hot glue is dry you’re ready to hang your mason jar ornament on your tree! I hope you enjoyed this tutorial and that it inspires you to create your own DIY ornaments and so much more <3 !

DIY personalized  mason jar lid ornament using buffalo plaid. How to make Christmas ornaments out of rusty canning jar lids and your Cricut

Check out more Christmas posts below

DIY gnome ornament from a paint brush, DAY 2

DIY Gnome Ornament, how to make an easy gnome Christmas tree ornament from a paint brush. Cheap and easy gnome craft for adults and kids.

EASY DIY GNOME CHRISTMAS ORNAMENT

Day 2 of 30 days of DIY Christmas ornaments

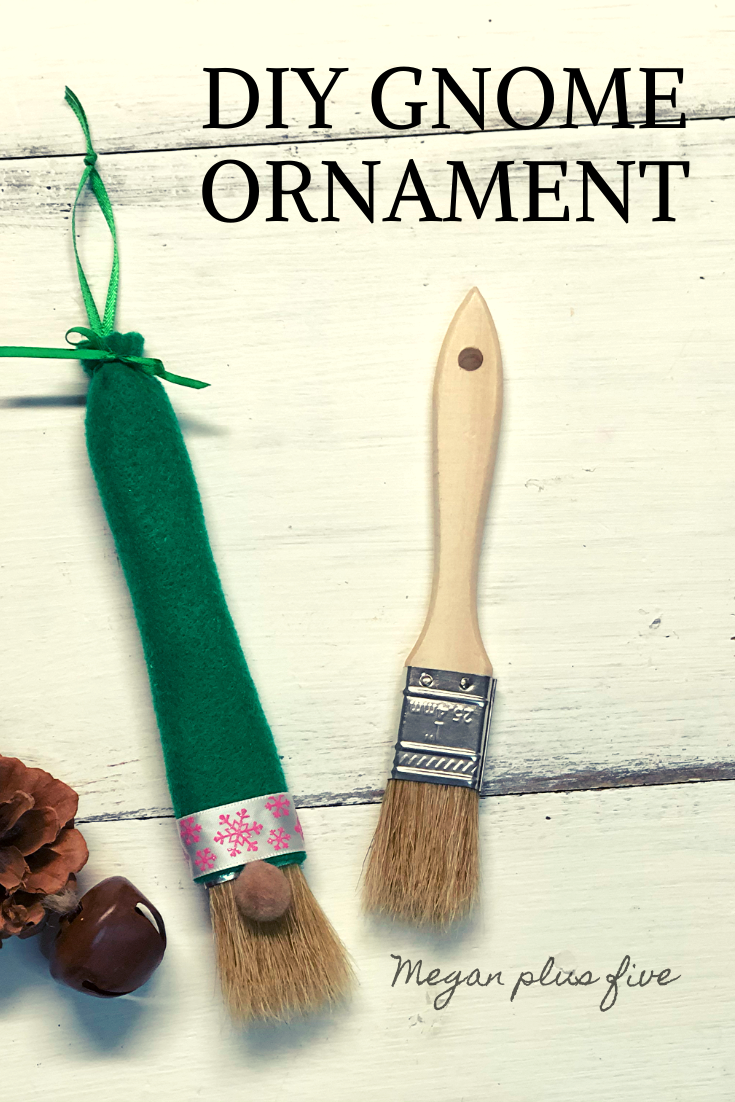
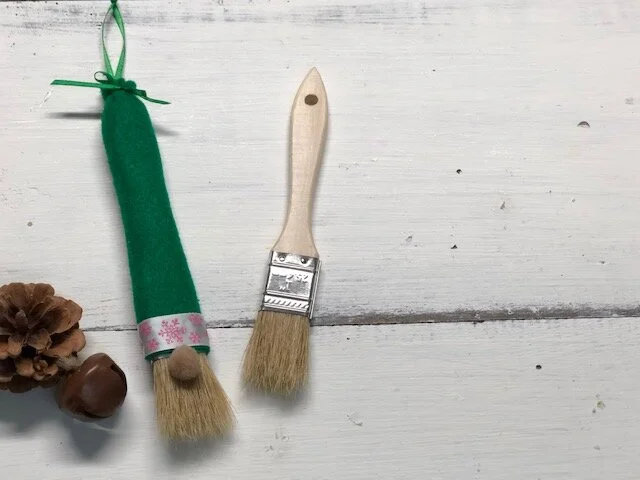
On the second day of DIY Christmas ornaments I turned this boring chip brush into a fun little GNOME! I really wasn’t sure how the finished product was going to look but I couldn’t get over how much the bristles on the paint brush look like a beard! More specifically an old man gnome beard lol! I had to at least try to turn it into a gnome and it actually turned out sooooo super adorable!

These brushes is what I always recommend for applying antique wax to distressed rustic looking projects. They are the same brushes I send out in my DIY CRAFT KITS so I always have a big box of them on hand.

Did you miss day 1? Not to worry! Here is DAY 1 OF DIY CHRISTMAS ORNAMENTS

Affiliate Disclosure. Some of the links on this website are affiliate links, which means that I may earn a small commission if you click on the link or make a purchase using the link. If you make a purchase you will not be charged anything additional. This is just a way I can help add to our family finances to raise our four daughters. Please know I would never recommend a product or service I do not totally stand behind.

Seriously these ornaments are fun to make for adults and kiddos! I could have sat there all day and created one after another <3!!

DIY Gnome Ornament, how to make an easy gnome Christmas tree ornament from a paint brush. Cheap and easy gnome craft for adults and kids.

Here’s what you need to make your own little gnome Christmas ornament

First start by tying a ribbon hanger in the hole of the paint brush so you can hang it on your tree. Then cut a piece of felt just a little wider than your chip brush. Felt can be a tricky thing to cut so I highly recommend using a good pair of fabric scissors like these —-> click here to see fabric scissors. You can use any color or pattern felt you’d like, I chose green because it’s what I had on hand that looked the most festive.

DIY Gnome Ornament, how to make an easy gnome Christmas tree ornament from a paint brush. Cheap and easy gnome craft for adults and kids.

Then glue the piece of felt to your chip brush. You don’t want to pull it tight around the shape of the brush because it will look like the shape of the brush and not a gnome hat. Leave it loose around the bottom part of the brush so that it’s full there. Glue it around the metal part and the back side of the handle of the chip paint brush. You may need to trim away the excess so that it lays flat and not bunched up. {see the video above for a more detailed visual on how to do this}.

DIY Gnome Ornament, how to make an easy gnome Christmas tree ornament from a paint brush. Cheap and easy gnome craft for adults and kids. How to make an adorable gnome simple tutorial

Next, trim away the extra that hangs over the tip of the chip brush, you want to leave about an inch or so overhang.

DIY Gnome Ornament, how to make an easy gnome Christmas tree ornament from a paint brush. Cheap and easy gnome craft for adults and kids. Easy how to make a gnome tutorial.

Using your thin ribbon tie a bow just above the tip of the chip paint brush to finish off the top of the hat.

DIY Gnome Ornament, how to make an easy gnome Christmas tree ornament from a paint brush. Cheap and easy gnome craft for adults and kids. Easy how to make a gnome tutorial.

Add a little 1/2” decorative ribbon around the base of the hat. This will break up the felt and give it a little more Christmas-ey look.

DIY Gnome Ornament, how to make an easy gnome Christmas tree ornament from a paint brush. Cheap and easy gnome craft for adults and kids. Easy how to make a gnome tutorial.

Then hot glue on a little nose just below the metal on the chip paint brush. Let it dry and your DIY gnome ornament is ready to hang on your Christmas tree.

DIY Gnome Ornament, how to make an easy gnome Christmas tree ornament from a paint brush. Cheap and easy gnome craft for adults and kids. Easy how to make a gnome tutorial.

These gnomes are SOOOOO easy to make and SOOOOOOOOOOO cheap too!

DIY Gnome Ornament, how to make an easy gnome Christmas tree ornament from a paint brush. Cheap and easy gnome craft for adults and kids. Easy how to make a gnome tutorial.

Let me know what you think and I’d especially LOVE if you shared pictures of your finished gnome ornament here on the blog.

DIY scrap fabric & ribbon Christmas ornament, DAY 1

DIY fabric & ribbon ornament craft. How to make easy ornaments with the kids for Christmas. Frugal Crhistmas ornaments to DIY with the family.

DIY EASY CHRISTMAS ORNAMENT

I am SO excited about my 30 days of DIY Christmas ornaments. And first up on the list is this super cute scrap fabric Christmas Tree! There are SO many really great DIY ornament tutorials out there and I can’t wait to share with you some of my favorites my family and I have made over the years…and some new ones too!

Affiliate Disclosure. Some of the links on this website are affiliate links, which means that I may earn a small commission if you click on the link or make a purchase using the link. If you make a purchase you will not be charged anything additional. This is just a way I can help add to our family finances to raise our four daughters. Please know I would never recommend a product or service I do not totally stand behind.

For this fun tree ornament I used a piece of scrap fabric, and not just any fabric I used left over fabric from a DIY Halloween costume I made for daughter # 3. I almost threw it away but I had that little crafty hoarder on my shoulder that said ‘no Megan! Keep that because you might need it later’ lol! And clearly I was glad I listened because I got to turn those scraps into a super cute Christmas ornament.

If you love DIY CHIRSTIMAS/WINTER CRAFTS here are even more DIY projects to check out click here

Here’s what you’ll need


—> Want to learn how to make all those amazing hand painted signs you see everywhere? Click my SIGN PAINTERS COURSE for more details <—


DIY fabric and ribbon Christmas tree ornament. How to make super frugal ornaments for Christmas with your kids. Easy stick tree ornament

Check out the video tutorial or keep scrolling to see picture instructions. Don’t forget to stop by my YouTube channel and subscribe to keep up with all my up to date DIY crafty videos

First trim down your stick. I made mine so that it was a little wider than the width of my hand. I used wire cutters to trim mine, which truthfully wasn’t the best thing to use but it was what I had on hand and it worked.

DIY fabric and ribbon Christmas tree ornament. How to make super frugal ornaments for Christmas with your kids. Easy stick tree ornament

Now cut your scrap fabric into strips. Like I said earlier, I used pieces from a costume to make mine. I cut my strips approx. 1” wide.

DIY fabric and ribbon Christmas tree ornament. How to make super frugal ornaments for Christmas with your kids. Easy stick tree ornament

Cut the strips for your ribbon. I gaged about how wide I wanted my base then added about an inch. I used that piece to measure out the rest of the strips and cut them to the same size. I ended up cutting 3 strips of each ribbon but only used 2 of each.

DIY fabric and ribbon Christmas tree ornament. How to make super frugal ornaments for Christmas with your kids. Easy stick tree ornament

Before I started tying the strips of fabric and ribbon onto the stick I went ahead and hot glued the buttons together. This way they were completely dry and ready when I needed them. I used 1 small white star, 1 small red button, and 1 even smaller green button. I hot glued the red button on top of the star, let that dry, then hot glued the green button on top of the red button.

DIY fabric and ribbon Christmas tree ornament. How to make super frugal ornaments for Christmas with your kids. Easy stick tree ornament

Next start tying on your strips of fabric and ribbon. Be sure to leave room at the bottom for the base of the tree. Don’t pull the fabric pieces too tight. Depending on the type of fabric you are using pulling too tight can cause it to become stretched out. I’m using t-shirts scraps {from a costume I made for daughter # 3) and if pulled too tight then it would be way too stretched out and loose it’s shape.

DIY fabric and ribbon Christmas tree ornament. How to make super frugal ornaments for Christmas with your kids. Easy stick tree ornament

After you have all your pieces tied to the stick you want to straight out each piece before you cut it. That way you have a nice straight tree line to cut.

DIY fabric and ribbon Christmas tree ornament. How to make super frugal ornaments for Christmas with your kids. Easy stick tree ornament

Now cut your tree into the shape of a triangle. I highly recommend using fabric scissors for this step. I tried using my regular craft scissors and it totally failed {you can see it in the video at the top of the post} So I had to pull out my beloved fabric scissors and they worked SO MUCH BETTER! After you have both sides cut into the triangle shape you can trim them to make them even.

DIY fabric and ribbon Christmas tree ornament. How to make super frugal ornaments for Christmas with your kids. Easy stick tree ornament

Then hot glue your buttons to the top. I glued mine to the side that didn’t show the knots. Let the glue dry. Then add your twine to hang. I glued my twine hanger around the buttons because it seemed to secure it more.

DIY fabric and ribbon Christmas tree ornament. How to make super frugal ornaments for Christmas with your kids. Easy stick tree ornament

And now it’s ready to hang on your tree! I can’t wait to make more of these with my girls. When I record my DIY tutorials I don’t usually have my kiddos help, well because anxiety goes up lol. And if I let one help they ALL want to help and having 4 young kids in a small space trying to record a craft video that makes sense enough to post for the world to see is REALLY hard hahaha! In all seriousness I hope you enjoyed this crafty tutorial and be sure to check back for more 30 DAYS OF ORNAMENTS.

DIY fabric and ribbon Christmas tree ornament. How to make super frugal ornaments for Christmas with your kids. Easy stick tree ornament

DIY painted snowman mason jar

DIY how to paint a snowman face on a mason jar. Easy winter craft using mason jars. How to paint snowmen on glass.

How to paint an adorable snowman face on a mason jar


I’ll be honest I’m not the best free hand painter. Most of my projects I use stencils for but I do have a handful of free hand pieces that I create {and creating more every year when I gain more and more confidence}. One of which are painted snowmen mason jars. They come in a set of three and are ADORABLE!

Affiliate Disclosure. Some of the links on this website are affiliate links, which means that I may earn a small commission if you click on the link or make a purchase using the link. If you make a purchase you will not be charged anything additional. This is just a way I can help add to our family finances to raise our four daughters. Please know I would never recommend a product or service I do not totally stand behind.

I paint lots of these every year and sell the completed snowman mason jar sets in my handmade Etsy shop

I love them even more because each set is slightly different. When you handmake nothing is going to be identical, no matter how hard you try, but that’s what makes it even more special and beautiful.

These snowmen mason jars are perfect for gift giving, centerpieces, candy cane holders, tea lights, sooooo many options with these winter crafts!

Here’s what you’ll need

Watch my YouTube video below or keep scrolling for detailed written instructions on how to paint a snowman face on a mason jar

First you need to start with a pre-painted mason jar. You can do this on non painted glass but I’ll be giving the steps to create this exact style pictured.

I don’ t have a post on how to paint solid color mason jars but I do have a few tips to share on how I paint my mason jars

Ok once you have your mason jar painted you are ready to paint an adorable snowman face on it!

Paint the cheeks first. You do this first because they are behind the nose. This way you won’t have to go back and paint the cheeks and take chances on ruining the perfectly imperfect snowman nose. And the cheeks give you a guide to where the rest of the features will go. You can practice this on a piece of cardboard or scrap paper first. Use very little paint, you don’t want too much paint because once it’s on the jar it’s hard to take away without removing the base coat. Dip you brush in the pink paint, then add a little white, then swirl on the jar. Repeat this step till you’re happy with how they look.

How to paint snowmen faces on mason jars. DIY snowman on a ball mason jar. Rustic winter mason jar decorations and gifts

Using a small round tipped brush paint the eyes using black acrylic paint. I make mine fairly small and I basically make two “C’s” butted up together, so that they make a bean shape. Fill them in so they are solid black.

How to paint snowmen faces on mason jars. DIY snowman on a ball mason jar. Rustic winter mason jar decorations and gifts

Next use a pencil and sketch out the nose. You’re basically going to make a sideways curved triangle. To me this gives it a lot of character and makes it super cute! Then fill in the triangle with orange paint.

How to paint snowmen faces on mason jars. DIY snowman on a ball mason jar. Rustic winter mason jar decorations and gifts

Now paint on the mouth with black paint using the same brush you used to make the eyes. I use the curved line on the mason jar as the guide for my snowman’s mouth. Just make little dots in the shape of a snowman mouth. My dots are never perfect, you want the to be lopsided like lumps of coal.

How to paint snowmen faces on mason jars. DIY snowman on a ball mason jar. Rustic winter mason jar decorations and gifts

Make all the little accent lines, like the eyebrows and dash marks, using a pointy flat brush and gray paint. The gray paint gives the snowman face more dimension and breaks up the color a bit. On each eye I make a curved up line above the eye and a curved down line below the eye. Then, for the nose, I make a curved line around the base of the nose. I add a little dash mark below each dot on the mouth.

How to paint snowmen faces on mason jars. DIY snowman on a ball mason jar. Rustic winter mason jar decorations and gifts

Using the wood end of the brush you used to paint the eyes, dip it in white paint and on each eye and mouth dot make a big and small dot. And on each eye make a dash line toward the bottom of the eye using the brush end of the paint brush.

How to paint snowmen faces on mason jars. DIY snowman on a ball mason jar. Rustic winter mason jar decorations and gifts

The snowman’s nose should be dry now, paint a second coat of orange on it. While the second coat is still wet add a little bit of black paint at the base of the nose to give the nose more dimension and a tiny bit of white toward the top. This will keep you snowman’s nose from looking too flat. Then outline the nose with a flat pointy tip brush with black paint.

How to paint snowmen faces on mason jars. DIY snowman on a ball mason jar. Rustic winter mason jar decorations and gifts

After the nose is dry add a little bit of “snow” to the top part of the nose. I used my stenciling brush for this step because the bristles are very stiff and give a good fluffy snow look. Use very little paint when doing this, if you use too much it will look like a fat blog and will be hard to fix without making a bigger mess.

How to paint snowmen faces on mason jars. DIY snowman on a ball mason jar. Rustic winter mason jar decorations and gifts

I hope I was able to break this craft down into easier to follow steps. Let me know what you think in the comments below.

DIY embroidery hoop winter wall hanging

DIY EMBROIDERY HOOP WINTER WALL HANGING. Fun embroidery hoop craft that is so easy to make at home for the holidays

How to make an EMBROIDERY HOOP wall hanging for winter

Embroidery hoops are such a versatile craft tool. You can use them for the obvious of embroidery OR you can use them for so many other projects. Like a nursery mobile, a hoop to hold your screen for faux screen printing, or this fun winter wall hanging that you’re reading.

If you love the little pinecone accents check out this EASY PINECONE DOOR HANGER. And if you have little ones you HAVE to try this EASY & MESS FREE PINECONE ART! My older girls had SO much fun making their own pinecone paintings.

Affiliate Disclosure. Some of the links on this website are affiliate links, which means that I may earn a small commission if you click on the link or make a purchase using the link. If you make a purchase you will not be charged anything additional.

Don’t have access to the right tools or just don’t have time to gather the supplies? No problem:)! I’ve put together this super easy craft kit just for times like this! Click I NEED A CRAFT KIT below to order yours from my Etsy shop.

Don’t need a craft kit? Here’s what you’ll need

Skip to the bottom to catch the full video tutorial


First you need to stain your wood base and your hoop. I recommend using a quick dry stain. Let dry

DIY embroidery hoop winter wall hanging. How to make your own winter decor with pinecones.

Next, after your wood base is dry you want to distress it. I used my Ryobi sander for this step but you can use a piece of 120 grit sandpaper. Focus on the edges and corners and lightly sand the sides and front

DIY embroiery hoop wall hanging for winter. How to use your Ryobi sander to distress your winter decor.

Now paint your sticks completely white and the outer edges of your pine cones white. Use a dabbing motion when painting the pinecones.

DIY embroidery hoop winter wall hanging. How to paint pinecones to add to your winter decorations.

Measure out how long you would like your bells to hang down then add a couple of inches. I made my bells to hang at staggering lengths.

Feed one end of the twin into the hanging part of the bell and tie it off. Repeat this step for all three.

DIY embroidery hoop winter wall hanging. How to add rustic craft bells to your farmhouse and country chic winter decorations.

After your stick are dry gather them together and wrap the green floral wire around the center. This will help to keep them together while you are placing the accents on. Then place your accent pieces on top of the sticks and wrap the middle section of the sticks and accents with twine.

DIY embroidery hoop winter wall hanging. How to add sticks adn twine to your rustic farmhouse winter decorations.

Now glue down your embroidery hoop to your wood base. Apply glue to back side of the hoop {whichever side you prefer} then place it on your wood base and press down firmly.

DIY embroidery hoop winter wall hanging. How to use an embroidery hoop to make your own rustic winter decor for your farmhouse or country chic style.

Tie your bells around the metal part on the top section of the embroidery hoop. Pull this very tight. Add a dab of hot glue to the knot and pull it tight again.

DIY embroidery hoop winter wall hanging. How to add rustic bells to your farmhouse or country chic winter decorations. Easy craft tutorial.

Use your glue gun to glue down your accents. To get a secure hold, hold the accents in place till the hot glue is completely dry.

DIY embroidery hoop winter wall hanging. How to make your own farmhouse and country chic winter and Christmas decorations.

Trim down the pieces of twine from where you tied them onto the embroidery hoop and the you are done!

DIY embroidery hoop wall hanging. How to make your own farmhouse and country chic winter and Christmas decorations.

Check out the full video tutorial below

DIY simple rustic wooden Christmas presents, how to make your own

DIY simple rustic wooden Christmas presents, how to make your own

DIY FAUX WOOD CHRISTMAS PRESENTS

I’m a busy wife, momma, and business owner so naturally I LOVE a good craft that I can whip out really fast and that makes the heads turn. These little guys are just the perfect DIY for the job!

In our studio I try to reuse the same base sizes over and over again. This makes for a smooth operation. I try to create pieces from the basic bases we have on hand at the shop. When I stumbled across something similar on Pinterest I had to make my own version of these adorable faux presents.

I know not everyone has the resources or expensive tools to make all their crafty dreams happen so I’ve put together CRAFT KITS for our most popular DIY’s. You can pick up our FAUX PRESENT KIT HERE

DIY simple rustic wooden Christmas presents, how to make your own

If you wanna start from scratch here’s what you’ll need:

DIY simple rustic wooden Christmas presents, how to make your own

These are SO super simple, once you do one set you’ll be making them for everyone for Christmas! So let’s get started.

First, you want to be sure all your pieces are sanded to knock any splintery ends. If you purchased our CRAFT KIT you do not need to do this step as it’s already been done for you:)!

Next, you want to paint each block a different color. I did two coats on mine. Be sure you wait till the first coat is TOTALLY DRY before applying the second coat. If you don’t, applying wet paint on top of wet paint tends to pull up the layer underneath.

DIY simple rustic wooden Christmas presents, how to make your own

Can we just take a minute and adore this girl! Isn’t my little helper so stinking CUTE! She’s always up for being my little crafting model Ok, back to the tutorial…

Once your paint is dry and you are happy with the coverage you’ll need to sand on the edges and the corners of your blocks. Take your 120 grit sand paper and go over the areas that would be naturally worn. You don’t have to use 120, that’s just my go to grit. Any grit of sandpaper will work, just go slow at first to see how much pressure you need to apply. I used my RYOBI cordless sander for this step.

Next you want to apply the dark wax to your blocks. If you’ve never worked with dark wax before you might want to test it out on a piece of paper first. A little wax goes a long way.

Take your chip brush and barely dip your bristles in, dab off onto a piece of paper or paper towel. Just like you did when sanding, focus on applying the wax to the areas that would be naturally worn. You’ll want to apply to the corners, edges, then do a light quick swipe on all the sides. This will give it a real natural rustic finish. The wax gets into all those uneven areas, much like how dirt would, and make it look old.

faux wooden presents4.jpgDIY simple rustic wooden Christmas presents, how to make your own

After you have your wax applied to all of your block the last step is to add your burlap “bow”. I picked up a roll of looser knit burlap at my local Walmart but any burlap will work. Fun fact, the looser the knit the easier it will unravel when cut. I cut my burlap into 2” wide strips and measured their length so they stuck up 3”-4” above the blocks like shown below. Now tie those two pieces in a knot. You’ll do the same on the last two blocks. And you’re done! Literally can’t get any easier.

DIY simple rustic wooden Christmas presents, how to make your own

Place them beside your tree, on your kitchen counter, or your mantle and admire them all Christmas season!

DIY simple rustic wooden Christmas presents, how to make your own

These little guys make such great gifts, a fun craft night with the family, or crack open a couple bottles of your fave wine with your fave girlfriends and make it a moms night in Pinterest party!

I hope you love this DIY! If you did I’d love to hear your feedback…even better, I’d LOVE to see pics of your finished faux presents.

Christmas wish list, 100 gift ideas to get the CRAFT obsessed kid in your life

Christmas wish list, 100 gift ideas to get the CRAFT obsessed kid in your life

What do you give the craft obsessed kid? We have 3 crafty girls {the fourth one isn’t too far behind though} and own a family friendly CRAFT STUDIO so we have a pretty good idea of what kids LOVE to create with. Most kids love cutting, gluing, and adding as much paint to things as they can. They are just figuring out how to use different tools and exploring different colors, textures, and possibilities.

Did you know there are ALL kinds of different everyday items you can use to create with? Take a toothbrush for instance. This is one of those things we have in our studio that makes everyone say “ummmm do you brush your teeth here?” and the answer is always “no, we use it to paint”. A fun technique my grandma taught me when I was very young, to use a toothbrush to add little specs and small splatters of paint. It is the best tool for this so we keep several toothbrushes in shop just for this. I am so proud to pass down that little technique to so many.

Our older girls and I worked on this list just for you! They really enjoyed listing off all of their favorite supplies to create with. We hope you can use this to put together a really awesome CRAFT GIFT for your crafty kiddo! Let them explore. Let them make a mess. Let them be creative.

Christmas wish list, 100 gift ideas to get the CRAFT obsessed kid in your life