family water tracker + FREE PRINTABLE

FREE PRIBTABLE family water tracker. Download this free water tracking print to use as a family. Help and encourage your kids to keep hydrated with the modern print to put in your home. Place in a picture frame and use a dry erase marker to check th…

FAMILY WATER TRACKER + FREE EDIT FRIENDLY PRINTABLE

Do you struggle with getting your kiddos to drink water throughout the day? Yes, same momma! I am right there with ya. I feel like a broken record always reminding my girls to drink more water on a daily basis.

So much so that I created a printable {that I’m giving to you for FREE;) } so that my girls can start tracking their own water intake. I’m hopeful that this works and that it makes us all more aware of how important it is to keep our bodies properly hydrated.

Affiliate Disclosure. Some of the links on this website are affiliate links, which means that I may earn a small commission if you click on the link or make a purchase using the link. If you make a purchase you will not be charged anything additional.

FREE PRIBTABLE family water tracker. Download this free water tracking print to use as a family. Help and encourage your kids to keep hydrated with the modern print to put in your home. Place in a picture frame and use a dry erase marker to check th…

I made my custom water tracker in Canva. If you’ve never used that site before you are missing out. The version I use is totally free but if you want to upgrade to their paid for version you can do that too.

This water tracking printable is completely EDITABLE! Click here to get access to the link in my FREE RESOURCE LIBRARY.

After you open the link it will take you to editable version in Canva. There you can completely customize this print to fit the needs for you own household. I just used letters for my girls but you can add your kiddo’s names, and change up the size of the font too.

FREE PRIBTABLE family water tracker. Download this free water tracking print to use as a family. Help and encourage your kids to keep hydrated with the modern print to put in your home. Place in a picture frame and use a dry erase marker to check th…

When you are all done click the download button to save it to your computer, open the document then send it to your printer. If you need to adjust the size of yours you can do that there. I printed mine at 83% on my print settings. I used a simple HP printer and regular copy paper to print out my family water tracker.

I trimmed my printout down using this paper trimmer. I LOVE this handy tool. I didn’t realize how often I actually would use it till I bought it.

FREE PRIBTABLE family water tracker. Download this free water tracking print to use as a family. Help and encourage your kids to keep hydrated with the modern print to put in your home. Place in a picture frame and use a dry erase marker to check th…

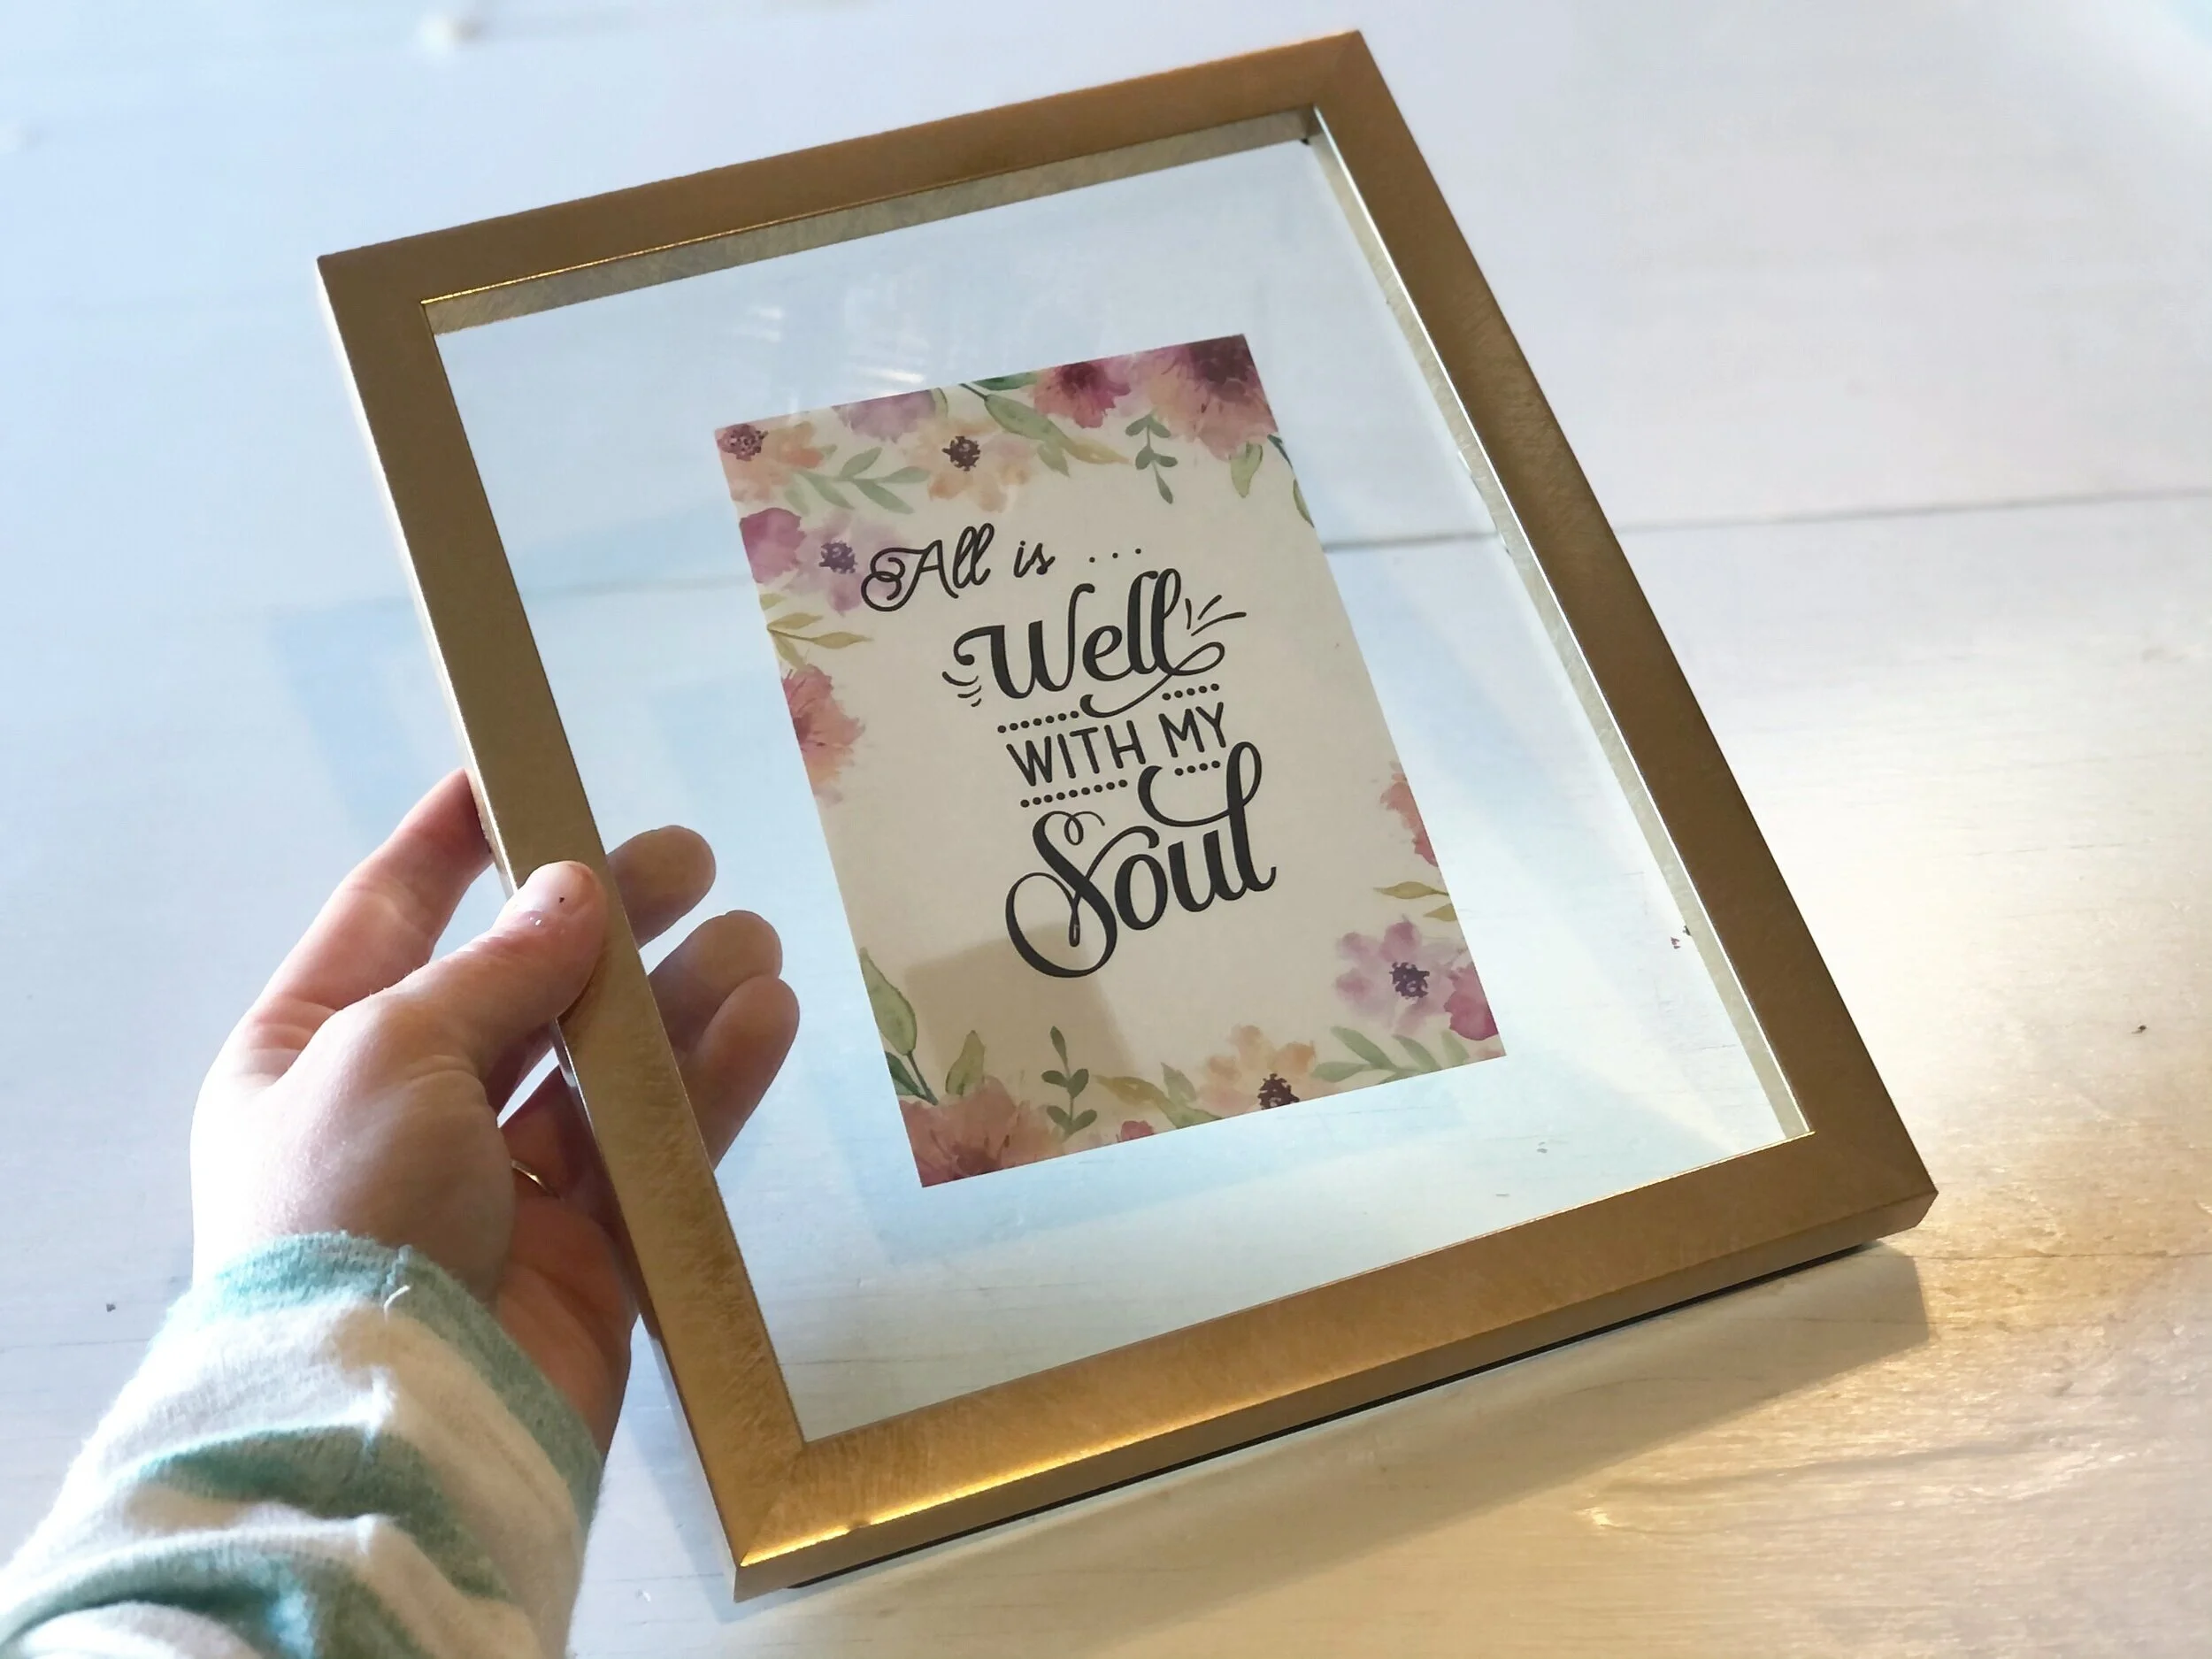
I placed it in a picture frame I picked up on clearance at Walmart. I have a dry erase marker by it, one with a felted cap eraser, sitting by it so the girls can mark off the glasses they drink daily.

FREE PRIBTABLE family water tracker. Download this free water tracking print to use as a family. Help and encourage your kids to keep hydrated with the modern print to put in your home. Place in a picture frame and use a dry erase marker to check th…

I’m so hopeful this helps all of us make better choices to keep our bodies hydrated and I hope that I can keep some of my sanity by not reminding my girls to drink water instead of chocolate milk or tea on a daily basis.

I hope you enjoy this free printable. Let me know if you have any questions in the comments below.


DIY bible tabs + FREE printable

DIY bible tab printable. How to make your own bible tabs cheap and easy. Frugal mom printable. Pretty bible tab printable that are free to use.

Printable bible tabs

Make your own easy diy bible tabs at home. Print them from any home printer see how to make them yourself.

Need a free bible tab printable? I was looking all over Pinterest for DIY bible tabs and didn’t really find exactly what I was looking for with my budget. Then it hit me ‘Megan, why don’t you just make your own?!’ And so I did.

DIY bible tab printable. How to make your own bible tabs cheap and easy. Frugal mom printable. Pretty bible tab printable that are free to use.

These are permanent bible tabs, so if you want something you can change out you can still use my bible tab printable you’ll just want to attach it using a different technique.

Affiliate Disclosure. Some of the links on this website are affiliate links, which means that I may earn a small commission if you click on the link or make a purchase using the link. If you make a purchase you will not be charged anything additional.

Of course my main goal for these bible tabs is functional but I also wanted them to be pretty. I went for a more minimal theme with them. I used muted colors on the tabs with varied cursive fonts, simple florals and accent lines. Some of the tabs I’ve seen are gorgeous but they are a little hard to read with the busy prints that are on them.

Most of the DIY bible tabs I’ve come across were going to cost me more money than I wanted to spend. I wanted to use materials I already had at home. I have already spent more money than I realized on new bibles, covers, and bible friendly markers for me and my girls so buying bible tab labels just seemed a little overload when it was something I could do myself.

MAKE YOUR OWN BIBLE TAB LABLES

Here’s what you need

This free download comes in two parts: pages 1&2 and page 3. Because the file is print quality it is larger than normal files that I upload and the fact that it’s three pages and not one. So be sure you click to download all three pages.

DIY bible tab printable. How to make your own bible tabs cheap and easy. Frugal mom printable. Pretty bible tab printable that are free to use.

I used Canva.com to create my labels in. Then I printed them off on my simple hp home printer. I also used these same tools create and print this FREE PROVERBS 31 PRINTABLE to put in my girl’s lounge area.

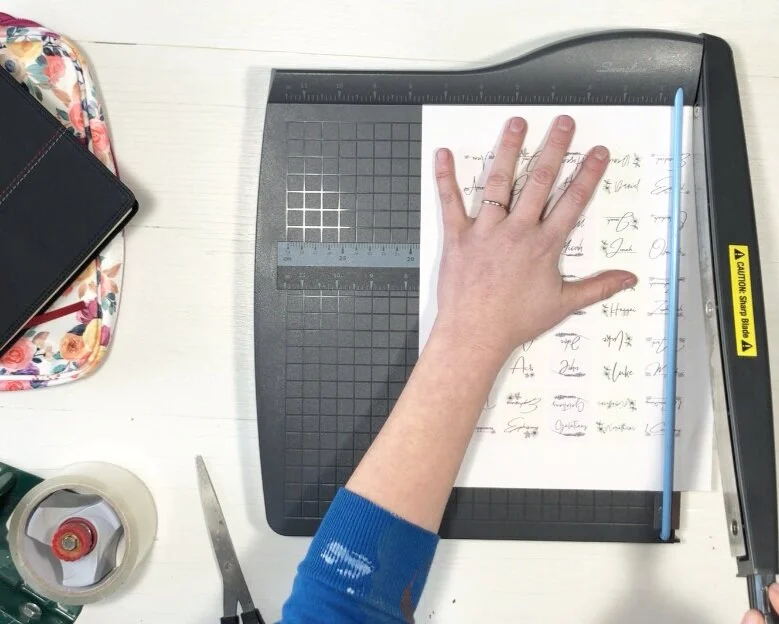
After I had all three pages of tabs printed off I used my Swingline paper cutter to cut and separate all the little tabs. Having this inexpensive tool has made my life so much easier! I never realized how often I needed to cut straight lines till I had this office tool.

{side note…don’t mind my paint stained sweatshirt. I had been painting earlier that day and I always try to wear old paint clothes because as you can see I tend to be slightly messy sometimes when I paint}

DIY bible tab printable. How to make your own bible tabs cheap and easy. Frugal mom printable. Pretty bible tab printable that are free to use.

I made muted colored squares to go around each of the labels so that they are much easier to cut.

DIY bible tab printable. How to make your own bible tabs cheap and easy. Frugal mom printable. Pretty bible tab printable that are free to use.

To make it easier to find my printed bible tabs I put them in alphabetical order…well kinda, I grouped them in order. Then I started in Genesis and worked my way to the end of the bible adding tabs. You can certainly do yours differently but I wanted to easily find things and know the order in which to find them so I thought this was the best way to do that for me.

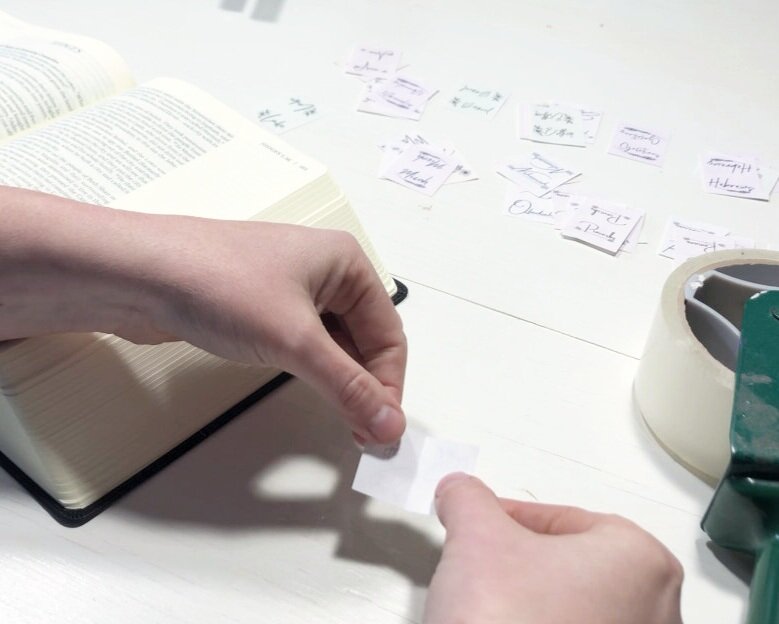
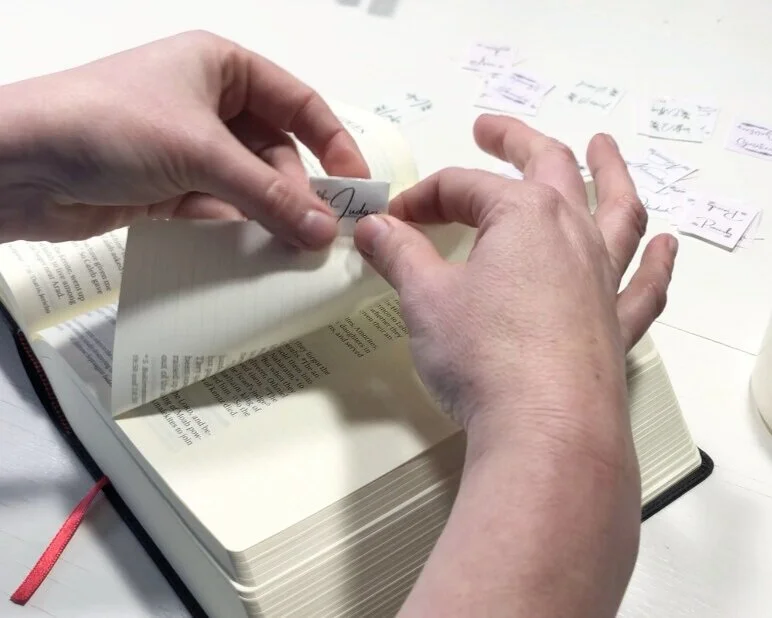
These tabs are double sided. To apply them the easiest way fold the tab in half first then open it back up. This way you will have a crease already on the tab making it easier to fold over once it’s on your bible.

DIY bible tab printable. How to make your own bible tabs cheap and easy. Frugal mom printable. Pretty bible tab printable that are free to use.

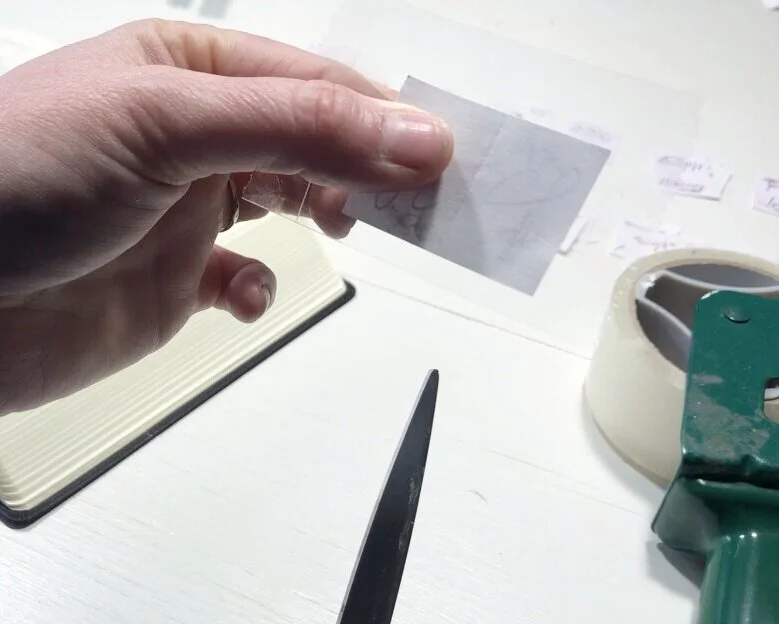
I used packaging tape but you can use whatever tape you prefer. I know this tape isn’t ideal but it’s what I had on hand and it acts as a laminator so the tabs won’t rip off easily. I took a piece of tape then placed my unfolded tab face down on the sticky side.

DIY bible tab printable. How to make your own bible tabs cheap and easy. Frugal mom printable. Pretty bible tab printable that are free to use.

Then I trimmed off the extra excess tape around my bible tab. I left just enough so I could attach it to my bible page.

DIY bible tab printable. How to make your own bible tabs cheap and easy. Frugal mom printable. Pretty bible tab printable that are free to use.

This part was a little tricky and honestly I probably should have taken more time to get these on there so they were precise. But then again I’m not really a precise, perfect kind of girl so this process fit me perfectly! I eyeballed my tabs and stuck them on their coordinating book of the bible. I placed them on the backside of the page first.

DIY bible tab printable. How to make your own bible tabs cheap and easy. Frugal mom printable. Pretty bible tab printable that are free to use.

Then I pressed the bible tab over so that the page was sandwiched in between.

DIY bible tab printable. How to make your own bible tabs cheap and easy. Frugal mom printable. Pretty bible tab printable that are free to use.

I placed all of my tabs on the right side of the books of the bible. So if a book started on the left side I still placed the bible tab on the right hand side. You don’t have to do this but I did so that I wasn’t having to flip to find which side of the tab the book started on. Just a little way to keep myself slightly organized.

DIY bible tab printable. How to make your own bible tabs cheap and easy. Frugal mom printable. Pretty bible tab printable that are free to use.

I am so glad I took the time to add these DIY tabs to my bible. This will make it so much easier when I’m in the word at church and at home. I’ve been doing a weekly bible study using this prayer journal for women. Not only is it gorgeous but there was a lot of thought put into the content.

DIY bible tab printable. How to make your own bible tabs cheap and easy. Frugal mom printable. Pretty bible tab printable that are free to use.

I hope this affordable bible tab option works for your needs. If you have any questions let me know in the comments below.

Happy Crafting!

FREE Printable- PROVERBS 31:10 + Ross CLEARANCE picture frame revamp

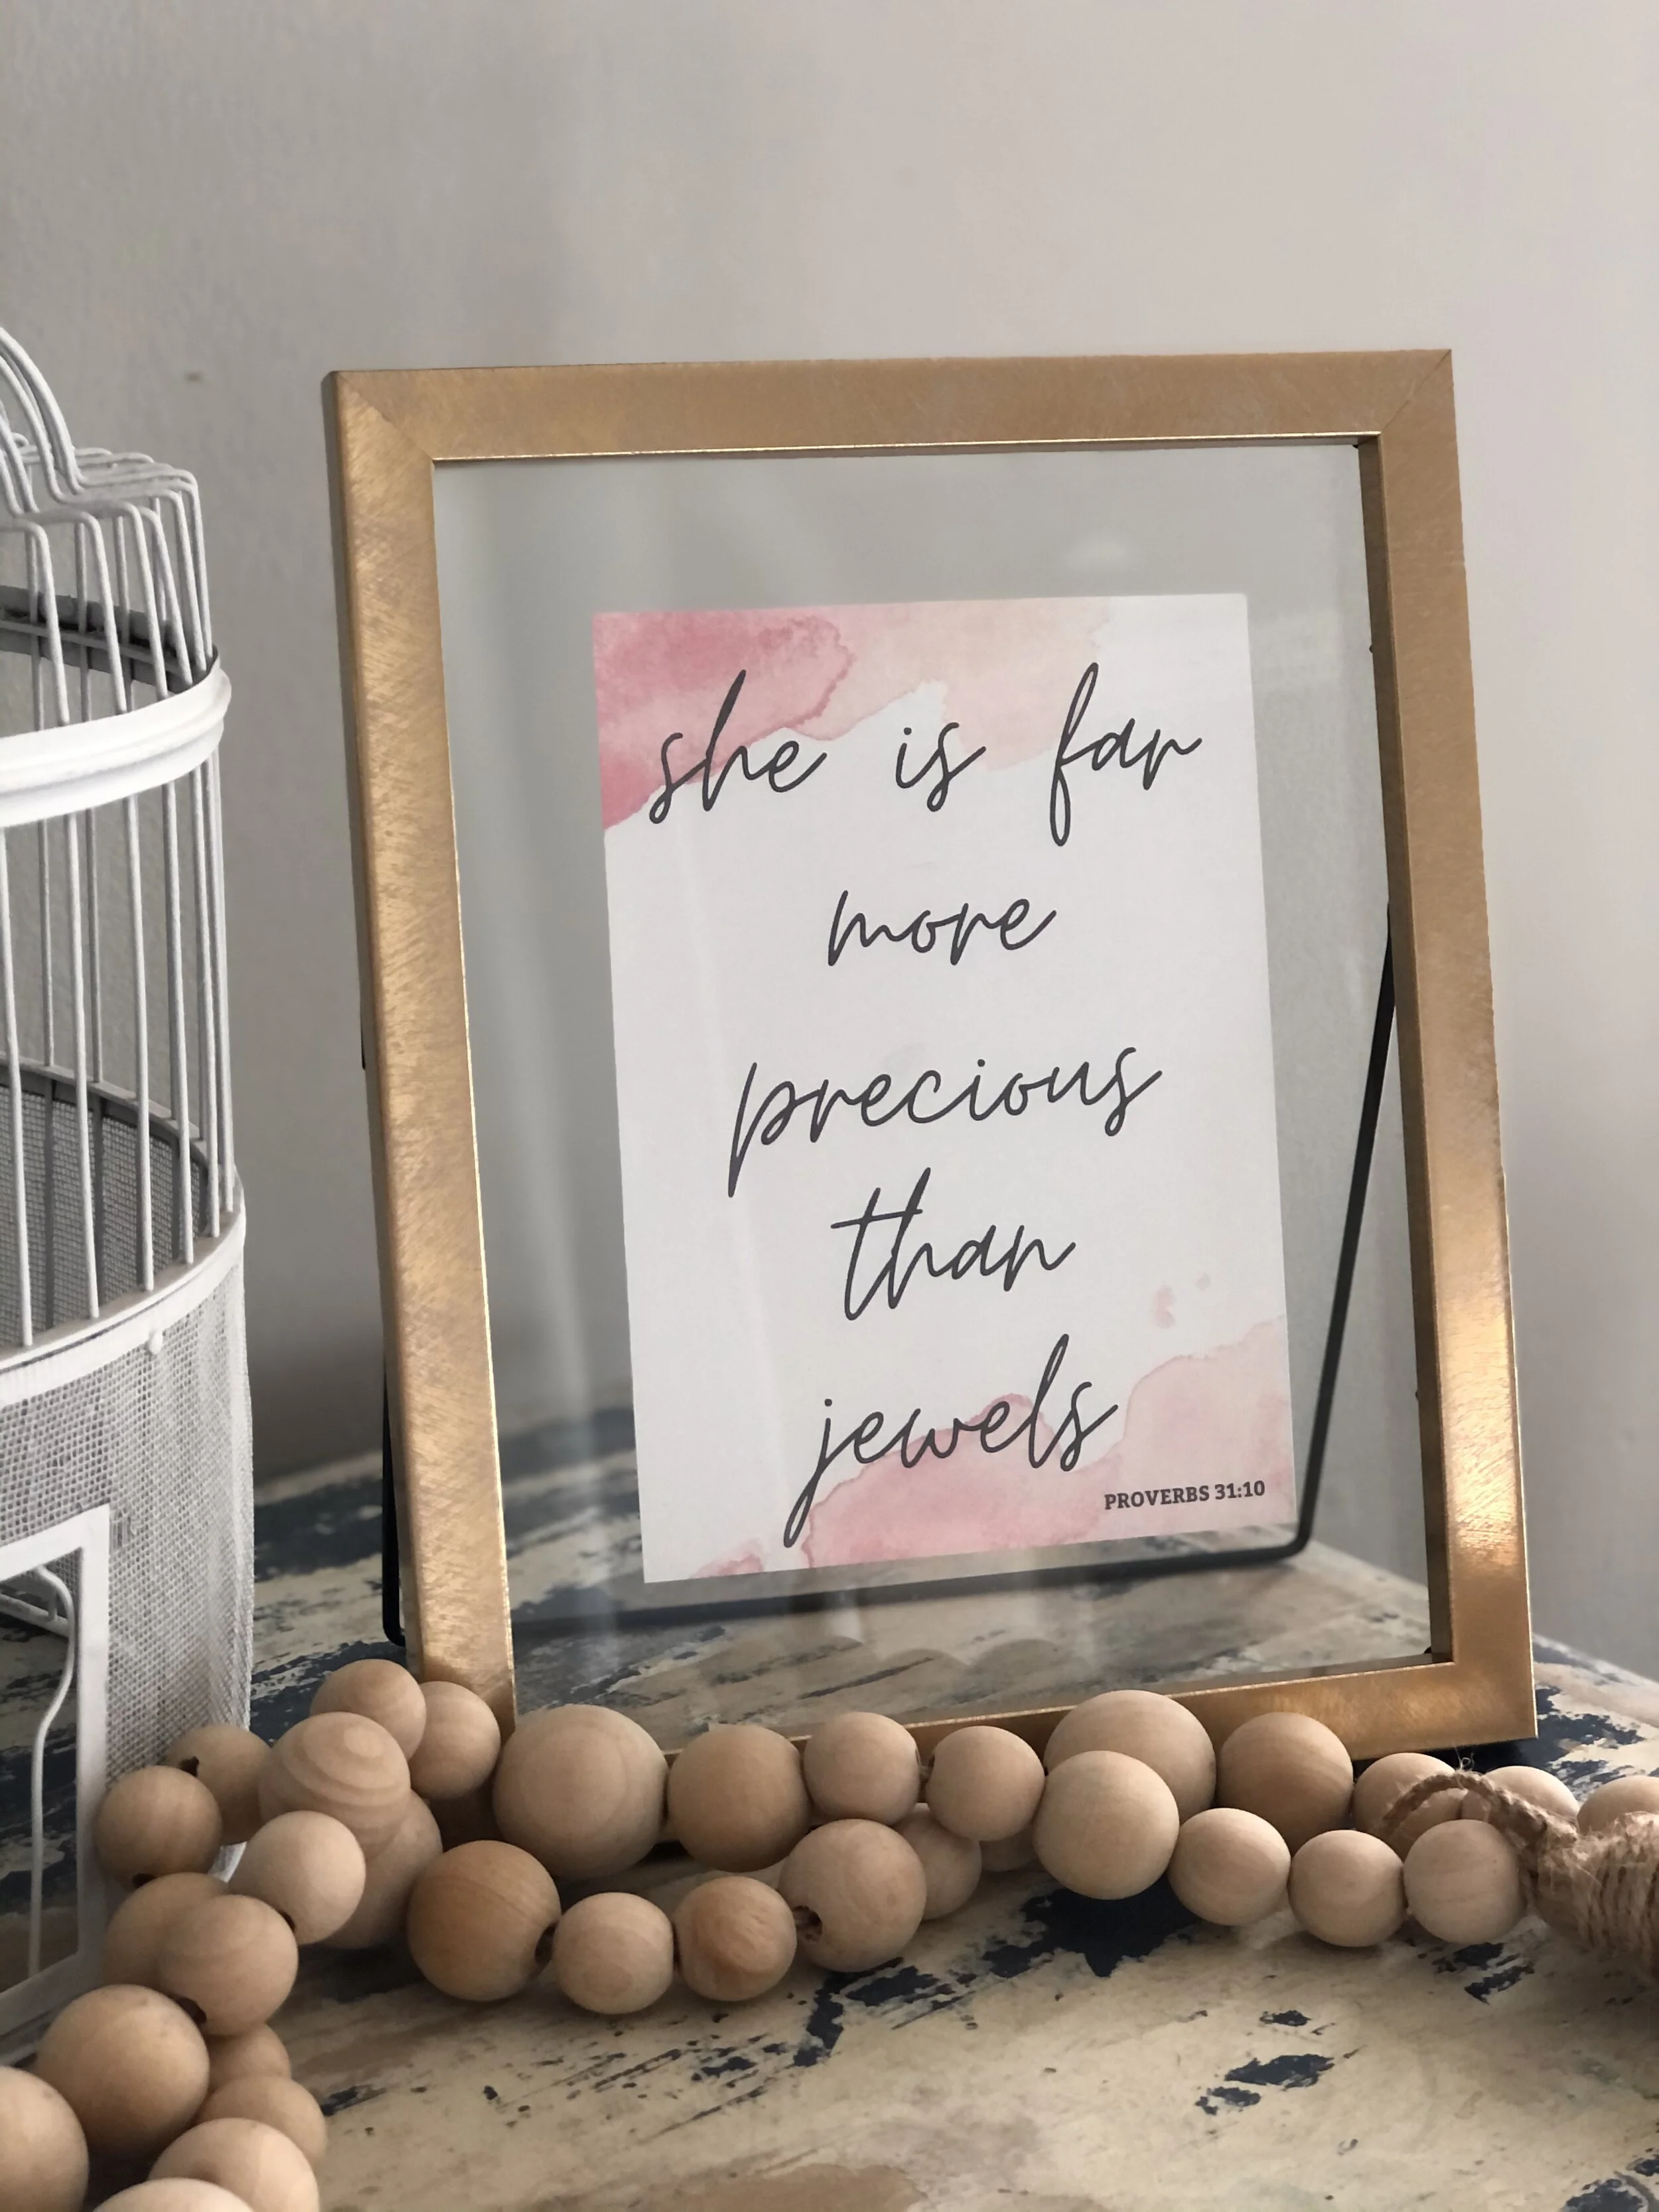
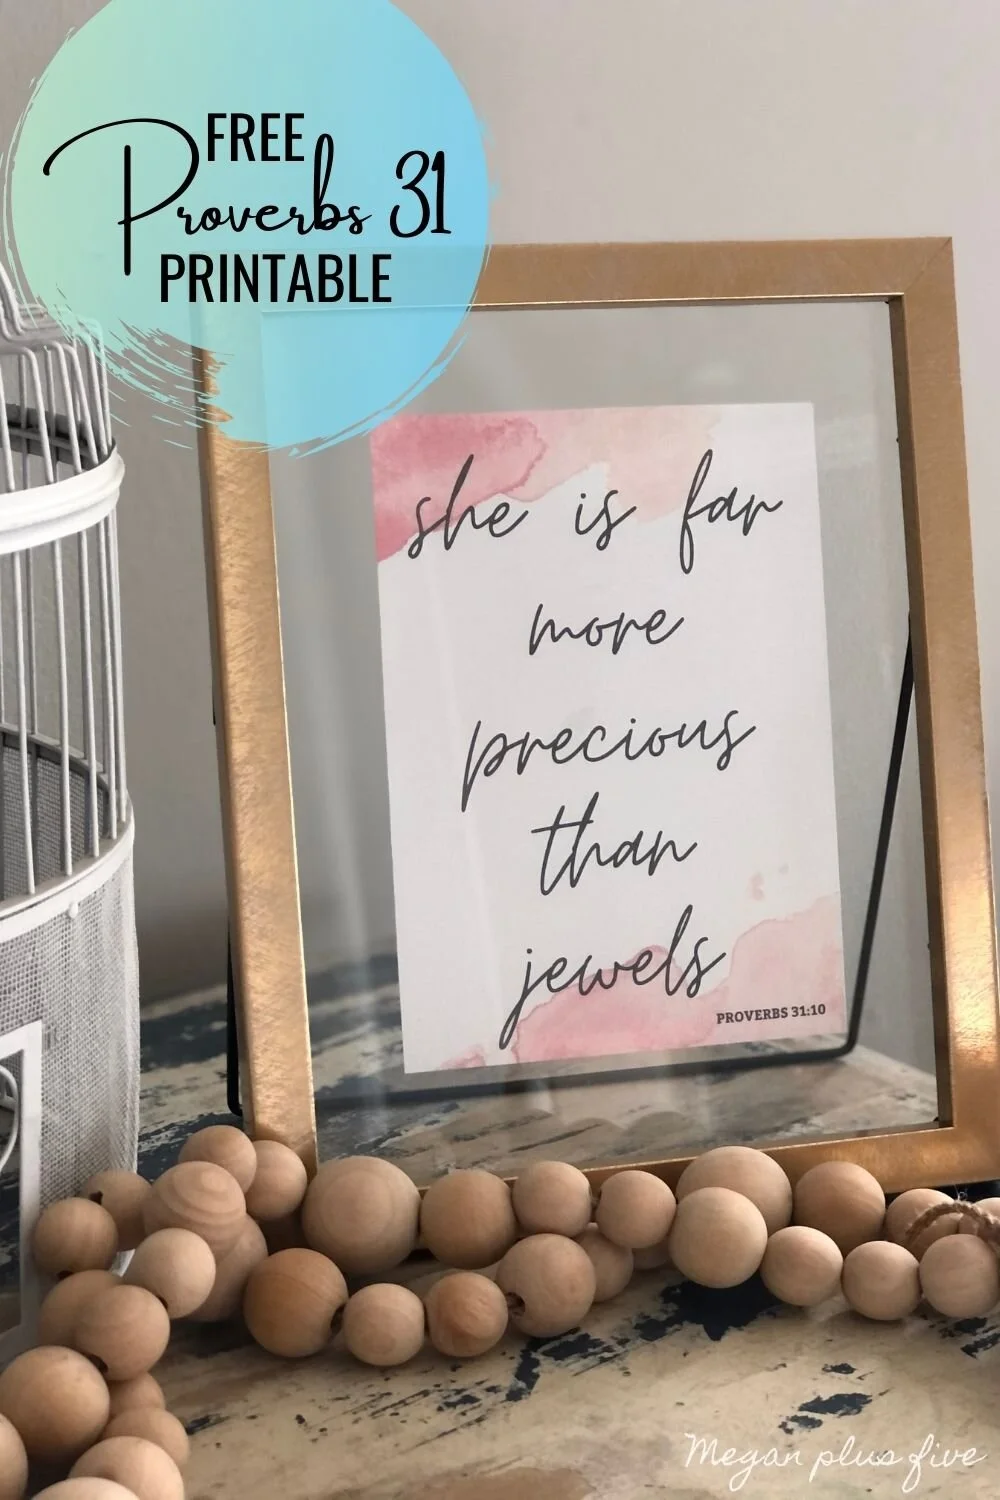
She is far more precious than jewels free printable sign. Watercolor geometrical theme proverbs 31:10 free print. Print your own girl, teen, tween biblical printout.

PROVERBS 31:10 PRINTABLE - freebie

Need a Proverbs 31 printable? Use this one, it’s FREE!

My girls have this weird hallway/lounge area space in between their bedrooms upstairs. For the last 6 months, that’s when we bought our home, that space was just a play area. Now that the holidays are over I am making time to revamp this space for them.

Affiliate Disclosure. Some of the links on this website are affiliate links, which means that I may earn a small commission if you click on the link or make a purchase using the link. If you make a purchase you will not be charged anything additional.

The one thing I was absolutely certain was that this space NEEDED to be filled with affirmations, sisterly love, and God. When they are in this space I want them to see God’s truths about them. Pictures of all 4 girls together. And words of love.

I love the Bible verse:

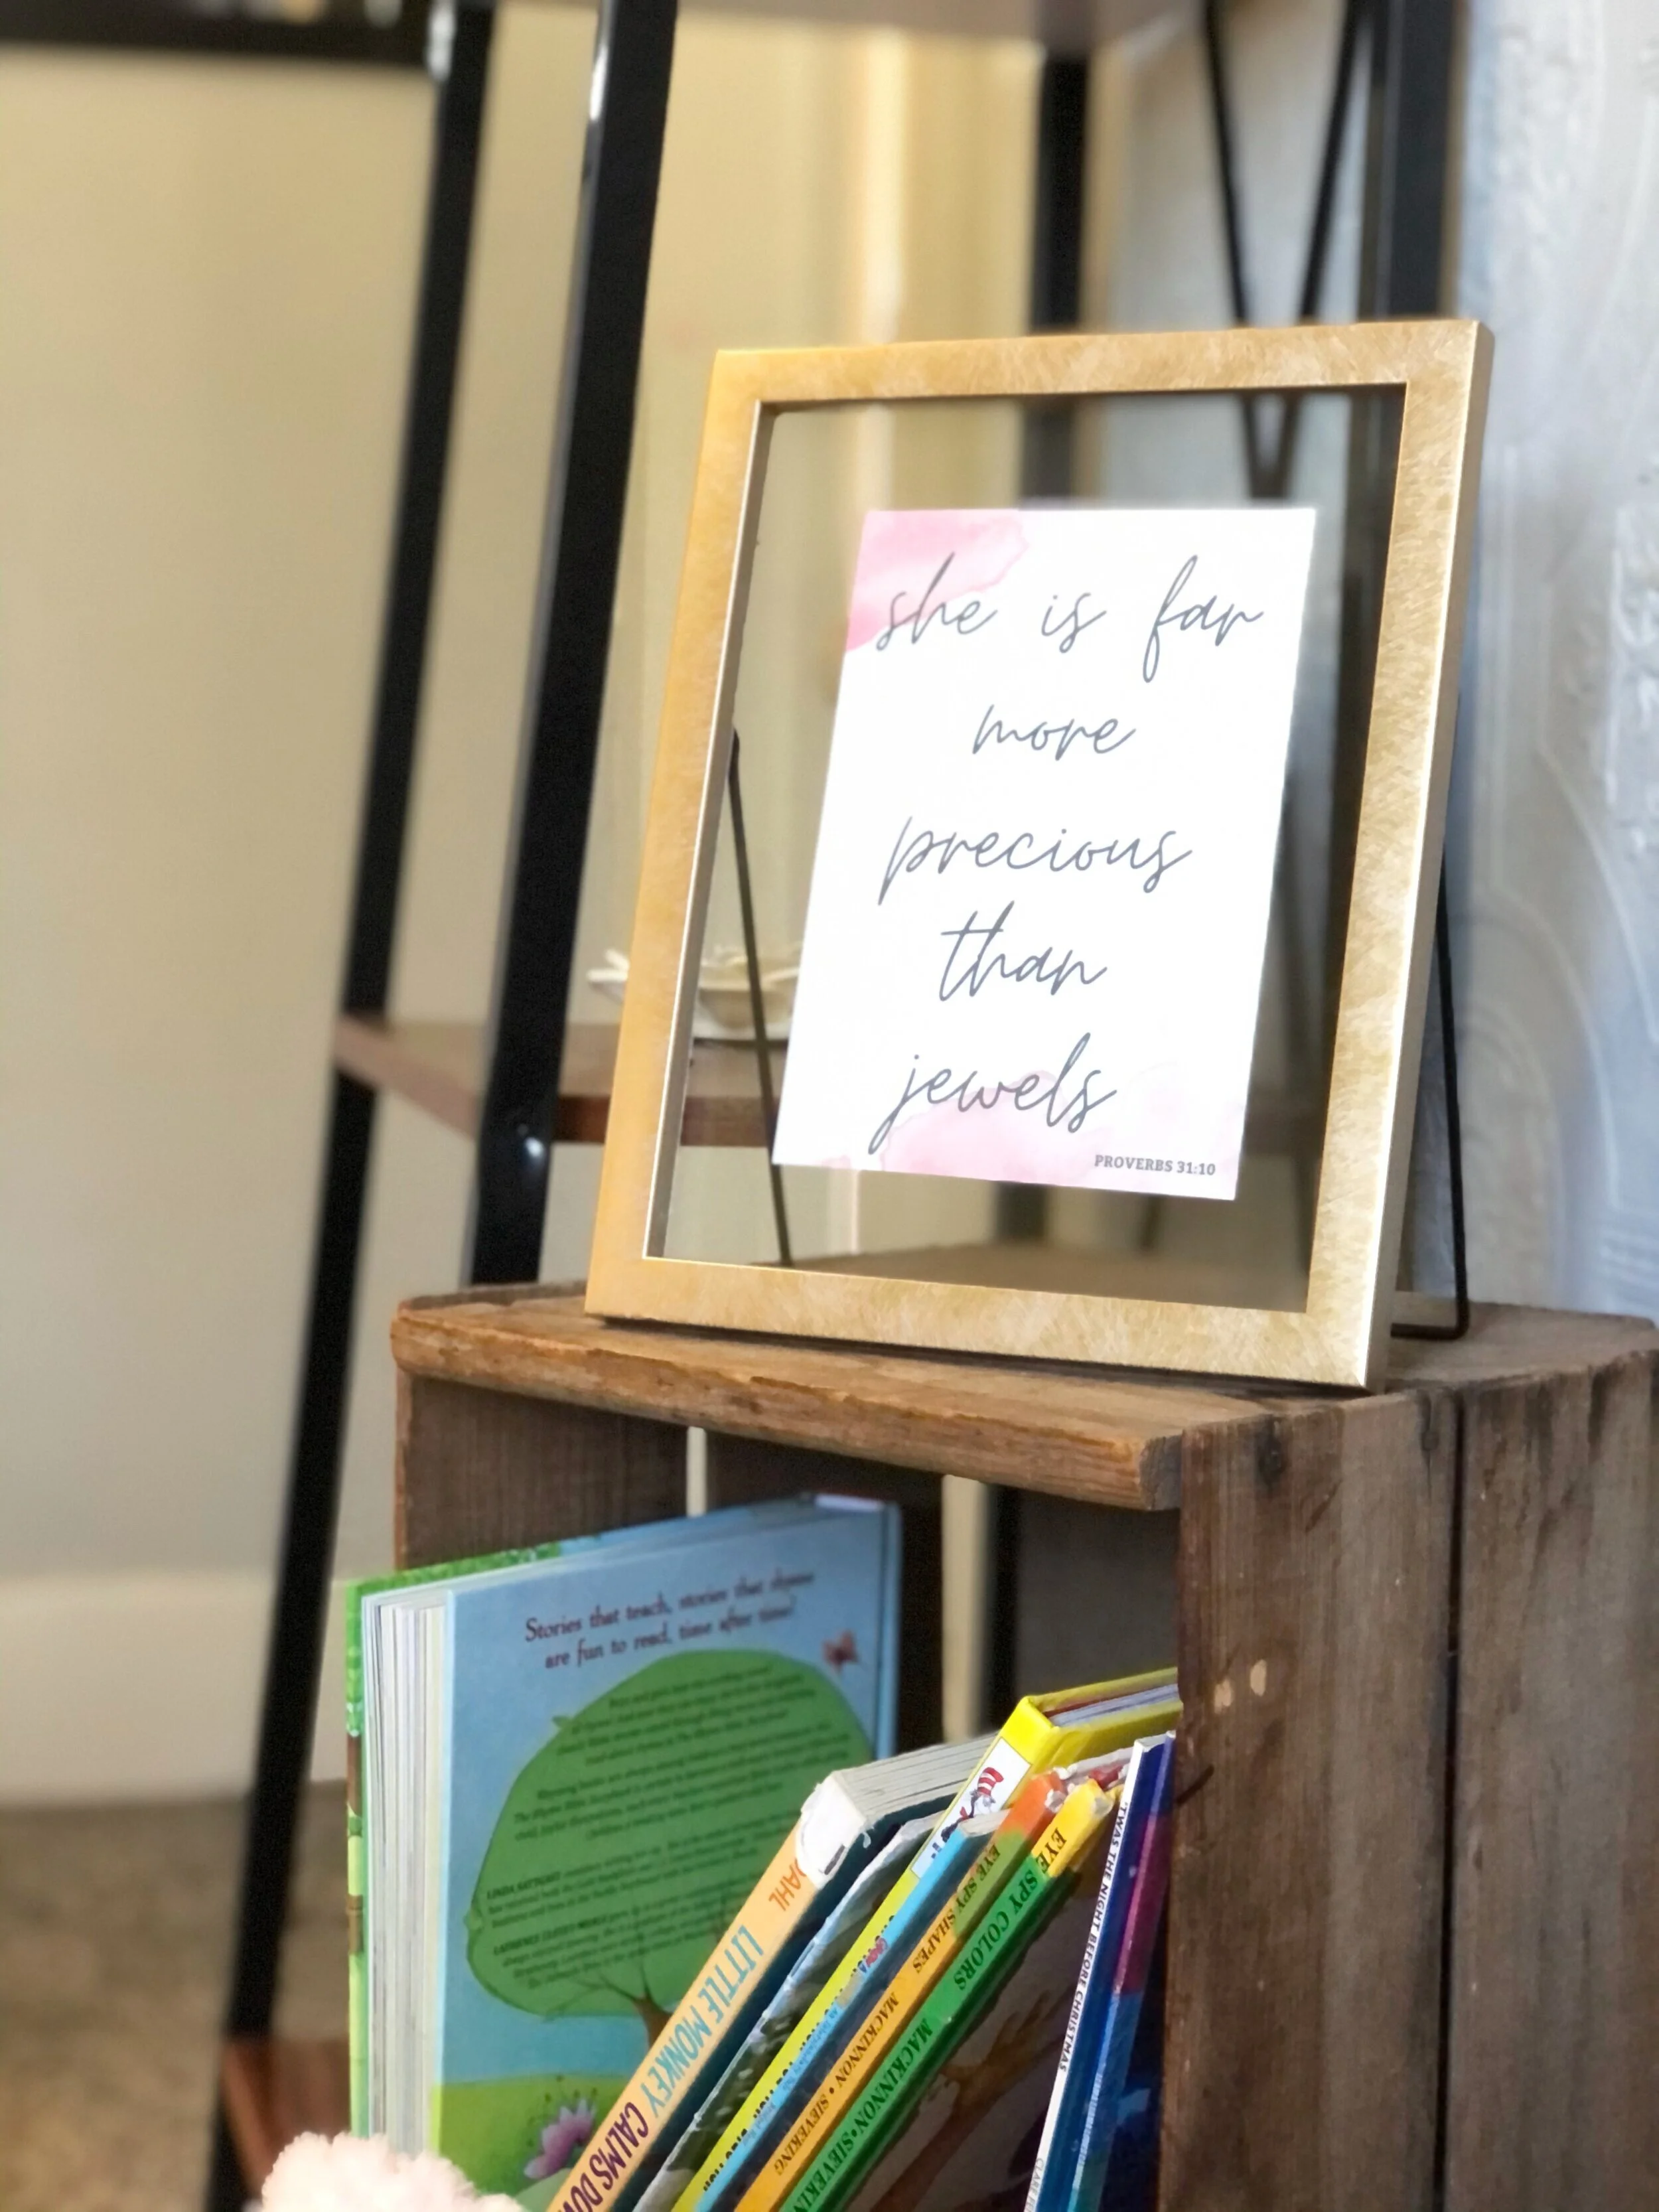
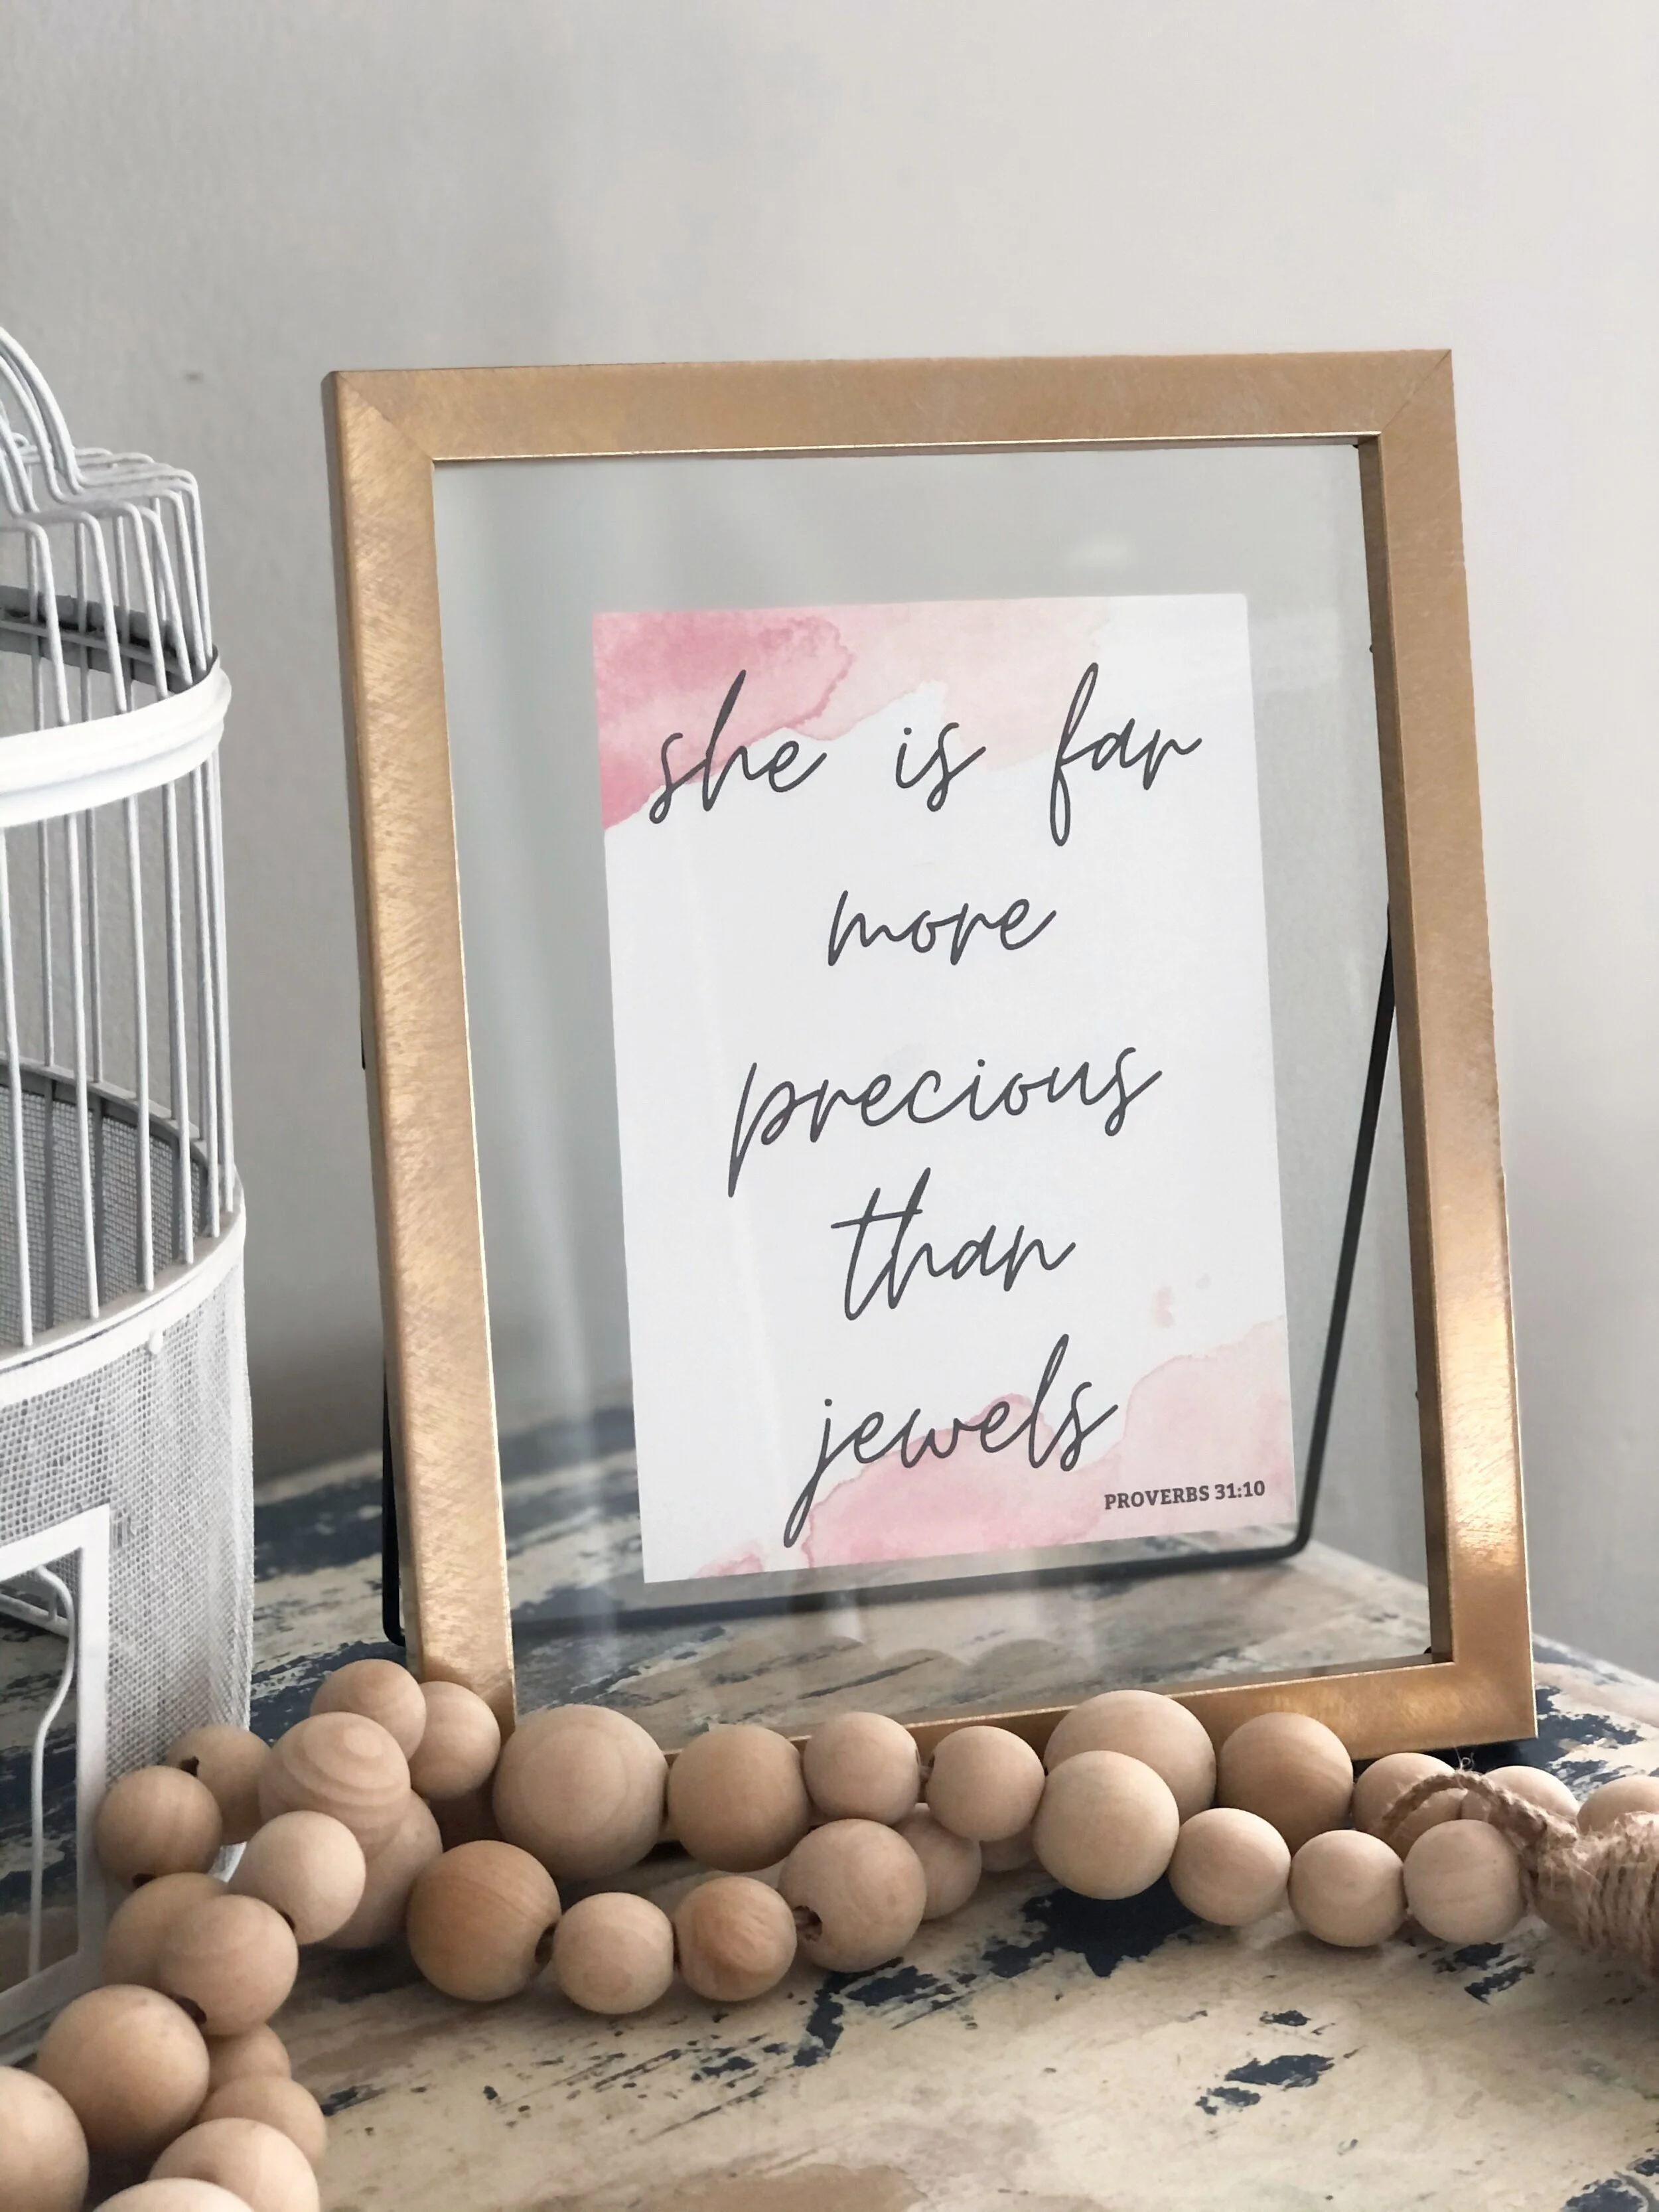
she is far more precious than jewels

proverbs 31:10

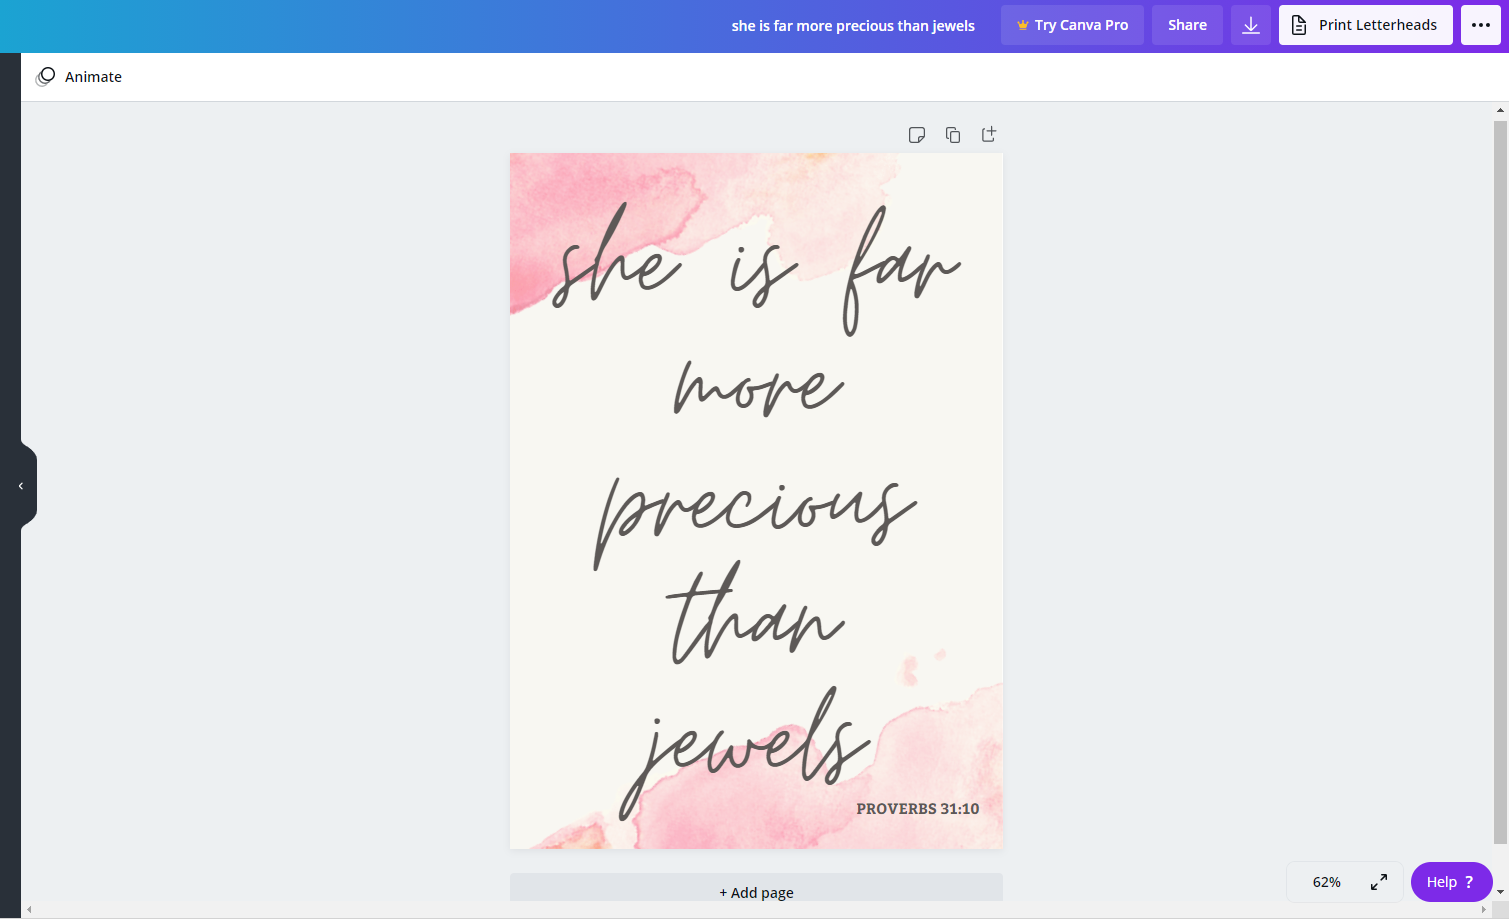
So I made a printable in Canva.com to print off and put in the frame.

Canva has SO MANY great free templates, images, and fonts to use. I use it a lot in my business to do photo mock ups, printables like this Proverbs print, and images for my blog. This website has been a wonderful tool to use.

She is far more precious than jewels free printable sign. Watercolor geometrical theme proverbs 31:10 free print. Print your own girl, teen, tween biblical printout.

If you’d like the FREE PROVERBS PRINTABLE you can get it from my free resource library. CLICK HERE.

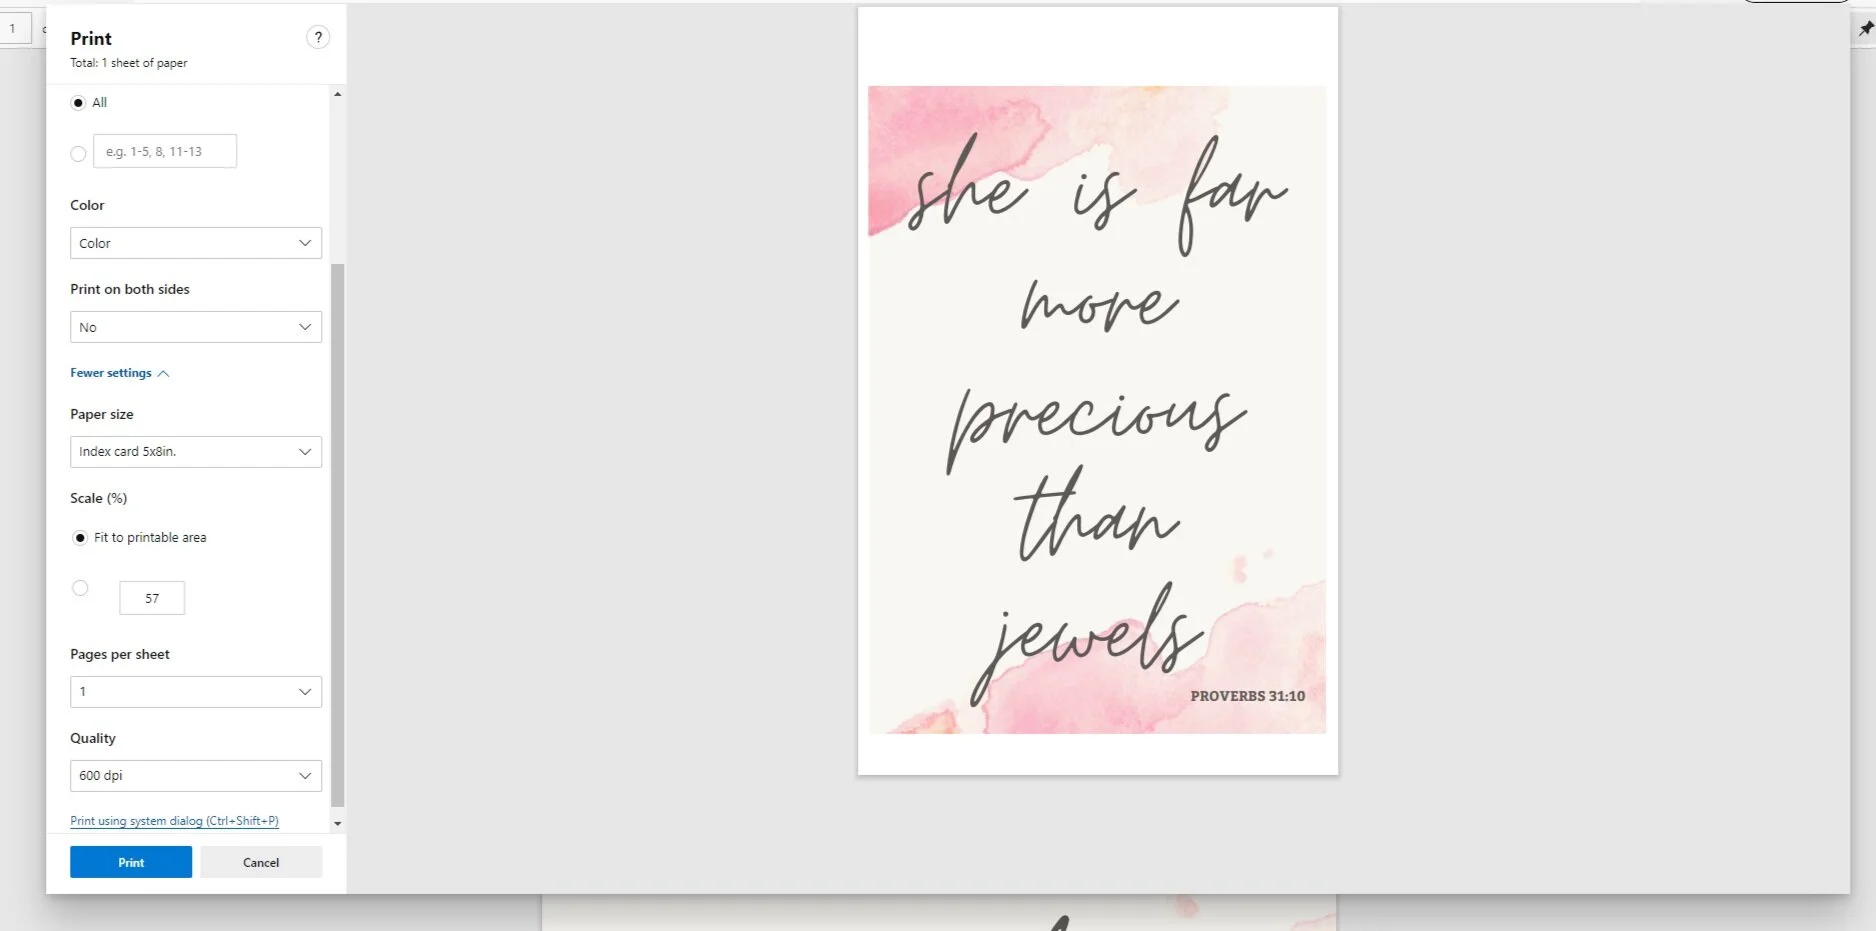
I saved this document as an A4 but after you’ve downloaded the pdf you can adjust the size to fit your needs. Before you hit the print button, if you want to adjust the size of your printable, select more on your printer settings and it will give you lots of sizes to choose from. I adjusted mine to a 5x8 to fit inside of my picture frame. Be sure if you change the size of your Proverbs printable that you also check the tab circle thing for the FIT TO SIZE so that it prints the whole printable and not just a portion.

She is far more precious than jewels free printable sign. Watercolor geometrical theme proverbs 31:10 free print. Print your own girl, teen, tween biblical printout.

Since I’m a frugal momma I actually found a frame that I loved at Ross on the clearance shelf. Even though I didn’t love the print that was inside the frame I snagged it up because it was just a few dollars and I knew I could easily change the print out.

Here’s what the frame looked like when I bought it. It’s one of those double glass picture frames, your print gets sandwiched between the two pieces.

She is far more precious than jewels free printable sign. Watercolor geometrical theme proverbs 31:10 free print. Print your own girl, teen, tween biblical printout.

I used my simple hp all-in-one printer, nothing fancy at all, to print my printable on regular office printer paper.

She is far more precious than jewels free printable sign. Watercolor geometrical theme proverbs 31:10 free print. Print your own girl, teen, tween biblical printout.

This little portable Swingline paper cutter has been a dream to have! It doesn’t take up much space and it cuts paper so much straighter than my shakey when I’m concentrating hand and a pair of scissors lol!

She is far more precious than jewels free printable sign. Watercolor geometrical theme proverbs 31:10 free print. Print your own girl, teen, tween biblical printout.

When you’re done reading this Ross frugal clearance find be sure to check out my Hobby Lobby wooden frame makeover —->click here<—-

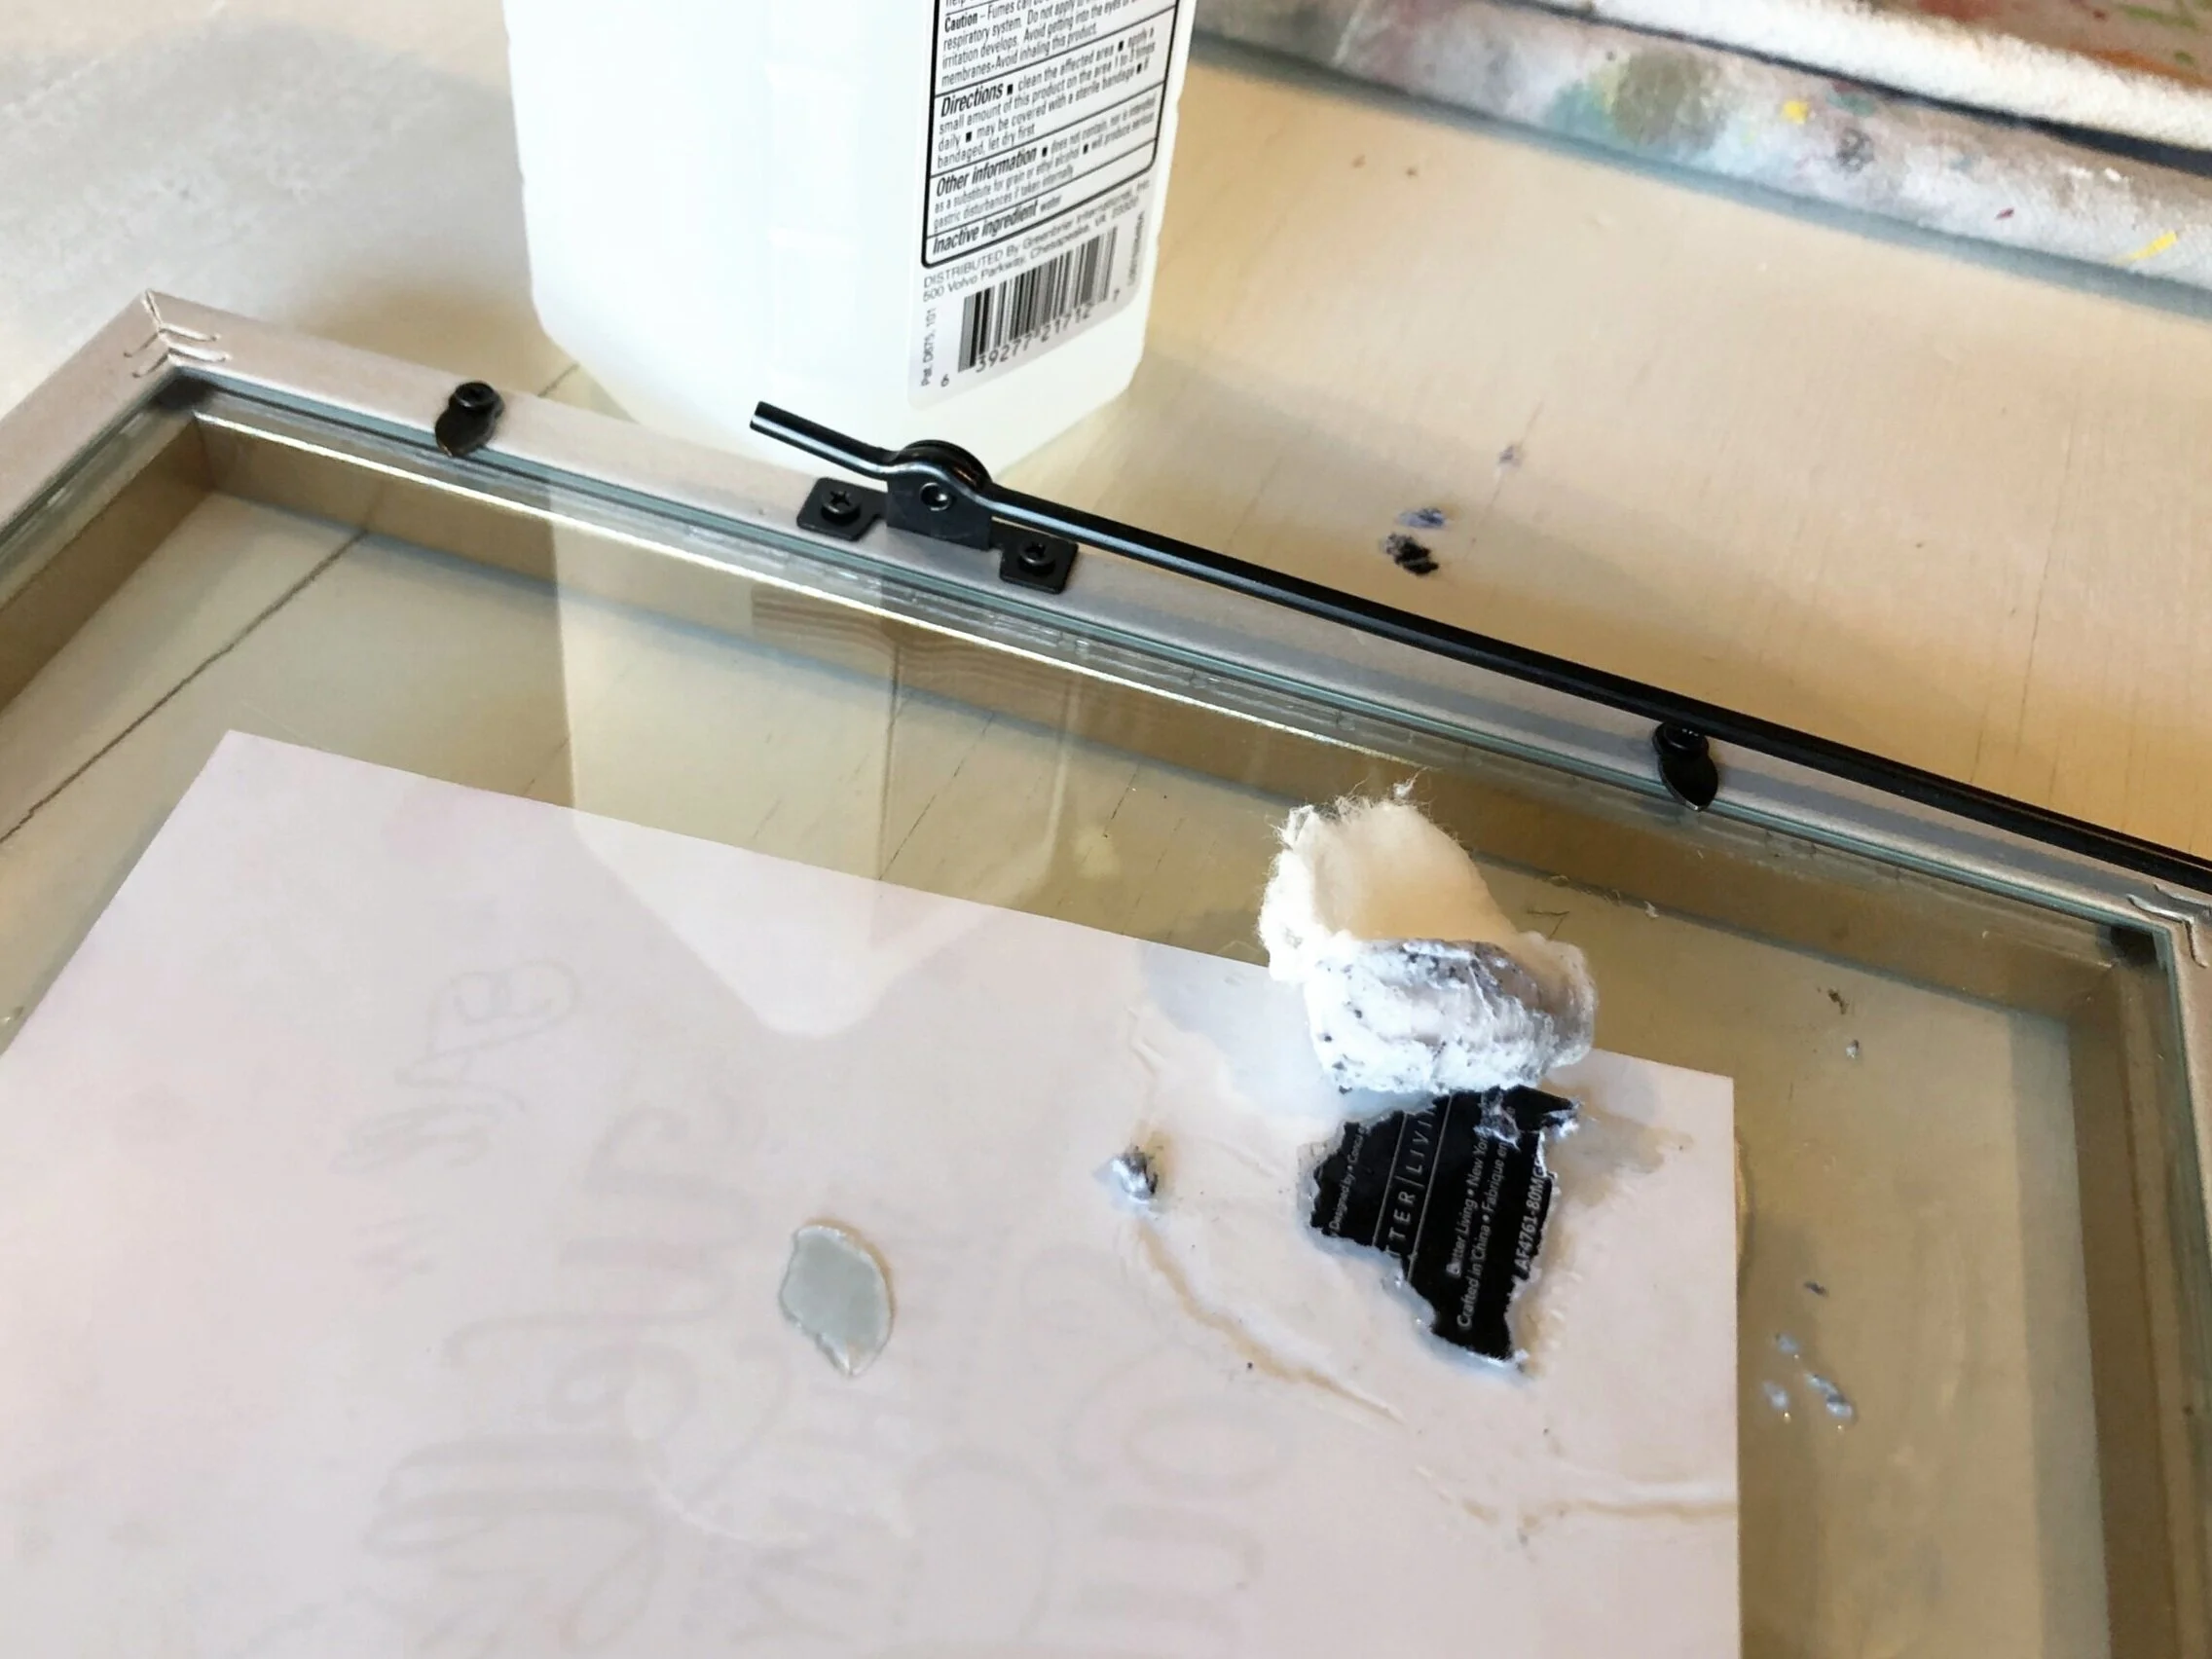
I cleaned my frame with rubbing alcohol to get all the finger prints and stickers off of it. This is super inexpensive but works great!

She is far more precious than jewels free printable sign. Watercolor geometrical theme proverbs 31:10 free print. Print your own girl, teen, tween biblical printout.

Ahhhh it’s so pretty! I love this proverbs printable so much that I almost wanted to keep it downstairs in my living room. With the lighting in there it looked absolutely gorgeous!

She is far more precious than jewels free printable sign. Watercolor geometrical theme proverbs 31:10 free print. Print your own girl, teen, tween biblical printout.

But it looks better in their girly lounge space <3!

She is far more precious than jewels free printable sign. Watercolor geometrical theme proverbs 31:10 free print. Print your own girl, teen, tween biblical printout.

Let me know if you have any questions in the comments below. Check out more from my crafty frugal momma blog.

DIY paint stick wall hanging, with FREE printable

How to make interchangable printed wall art at home using paint sticks. DIY stir stick wall art. Print from home computer to make beautiful and rustic wall hangings for cheap. DIY farmhouse stir stick decor.

MAKE RUSTIC INTERCHANGEABLE WALL ART USING PAINT STIR STICKS AND A PRINTER AT HOME

Paint sticks don’t sound like the kind of thing you would purposely hang on your wall as part of your décor. Well think again! They are actually PERFECT to use to make interchangeable hanging frames. AND they are SO cheap to make which makes this crafty DIY even better! With a little bit of paint, magnetic tape,printable and some twine you can transform your own stir sticks into a farmhouse style picture frame.

Affiliate Disclosure. Some of the links on this website are affiliate links, which means that I may earn a small commission if you click on the link or make a purchase using the link. If you make a purchase you will not be charged anything additional.

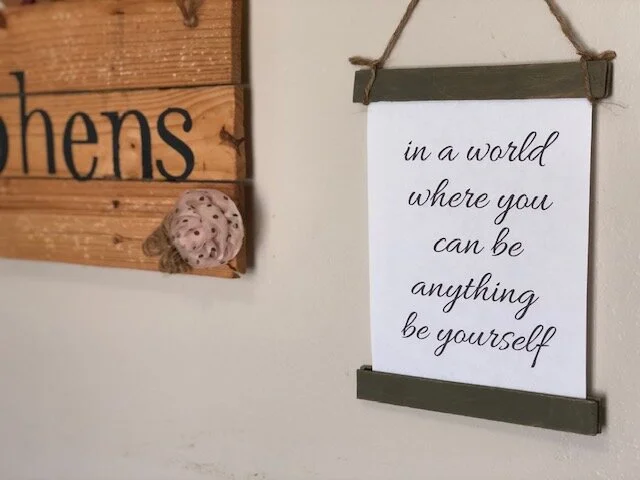
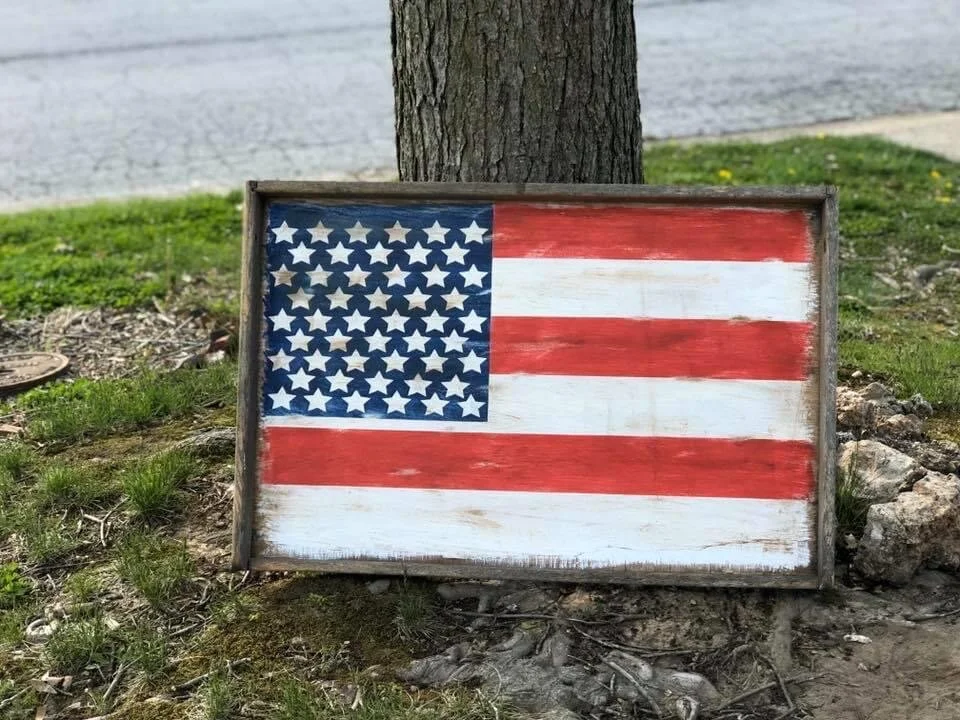
BONUS grab my FREE printable to use for your own wall hanging. I love being a girl mom x4 but it for sure has it’s moments of hard conversations. One of those hard convos I had recently is the sole purpose to creating this printed wall hanging. I had plans to make these stir stick decorations but I wasn’t really planning to hang this exact piece. I was going to do something a little patriotic to tie in with this repurposed drawer into an American flag instead I chose to showcase a saying that would sink in a little deeper for my girls. When they read it I hope it sets in even deeper that they are perfect just the way they are.

If you like easy to make signs check out this super simple free standing wood sign. All you need is a printer and some mod podge and of course a piece of wood ;).

How to make interchangable printed wall art at home using paint sticks. DIY stir stick wall art. Print from home computer to make beautiful and rustic wall hangings for cheap. DIY farmhouse stir stick decor.

Here’s how you can make your own affordable rustic wall hanging

Here’s what you’ll need

Helpful tools

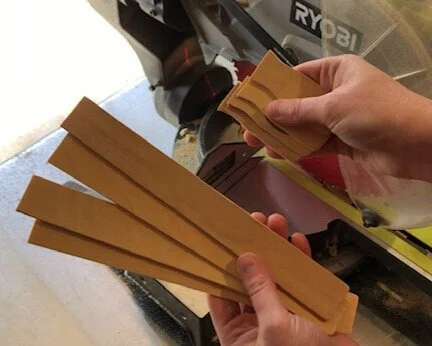
ONE- The first thing I did was cut the ends off of all of my paint sticks. You can keep these on if you want but I like the look of them cut off better. I used my miter saw to do this.

How to make interchangable printed wall art at home using paint sticks. DIY stir stick wall art. Print from home computer to make beautiful and rustic wall hangings for cheap. DIY farmhouse stir stick decor.

TWO- I painted the blank side of my paint sticks gray. I really wanted to stain them in gray but honestly I didn’t want the mess so instead I painted a thin layer then took a paper towel and wiped it off. This gives a faux stained look.

How to make interchangable printed wall art at home using paint sticks. DIY stir stick wall art. Print from home computer to make beautiful and rustic wall hangings for cheap. DIY farmhouse stir stick decor.

THREE- I attached a strip of magnetic tape to the insides, the side I didn’t paint, of each paint stick. To save on tape I cut a strip in half length wise for one top and one bottom stick. I’d never used this stuff before this project and so far I’m impressed with how well it works.

How to make interchangable printed wall art at home using paint sticks. DIY stir stick wall art. Print from home computer to make beautiful and rustic wall hangings for cheap. DIY farmhouse stir stick decor.

FOUR- I printed off my printable from my home computer and trimmed about 1/4” off of each long edge with my paper trimmer (if you don’t have one you NEED to get one lol they are so inexpensive and save so much time and stress from not having straight cut lines when you need them). Then I sandwiched the printable between the paint sticks at the top and bottom.

How to make interchangable printed wall art at home using paint sticks. DIY stir stick wall art. Print from home computer to make beautiful and rustic wall hangings for cheap. DIY farmhouse stir stick decor.

FIVE- To keep this stir stick wall art interchangeable I loosely tied my twine hanger to the ends of the top sides. This way if I want to change it out or if somehow a spaghetti noodle gets flung on to it, which can totally happen with four kids let’s be real, I can easily slip off the twine remove the old print add a new one and slip the twine loop back on. Super simple and easy!@

How to make your own paint stick wall hanging. DIY stir stick wall art for rustic home decor. Print your own wall art for farmhouse home decor.
Rustic home decor for cheap. Make your own printable wall art using paint sticks.

Like with all of my crafty tutorials if you have any questions please feel free to ask away:)!

Happy Crafting!

DIY western themed party table sign

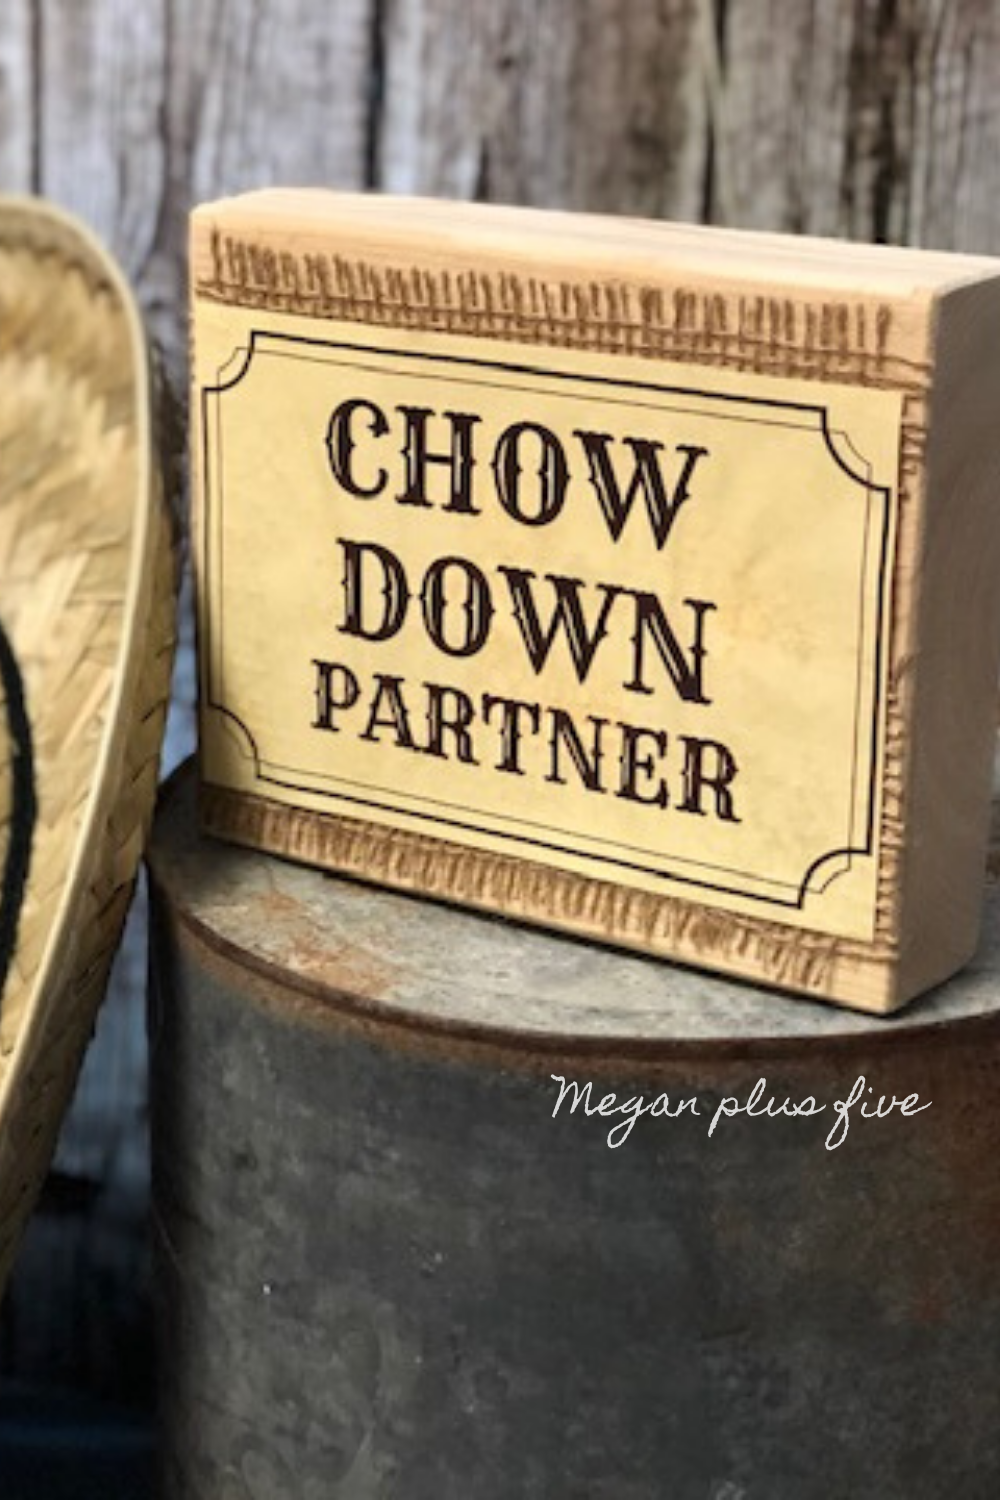
DIY western themed party table sign. Western signs for your wild west party. Chow down partner party decor easy wood sign

How to make a sign for your western themed party table

Teacher appreciation week is coming up for our elementary school and I was asked to help throw it all together. One of the things I was asked to help out with were signs for the food table to go with the wild west theme. Being a busy momma of 4 and a handmade small business owner I didn’t have a ton of time to devote to the signs. I thought about just printing something up and sticking them in inexpensive frames but I didn’t want to have to spend money on frames I wouldn’t use again. And I wanted them to look a little more rustic/handmade than what a picture frame would look like.

Affiliate Disclosure. Some of the links on this website are affiliate links, which means that I may earn a small commission if you click on the link or make a purchase using the link. If you make a purchase you will not be charged anything additional.

So I looked around my craft room and thought ‘why couldn’t I just glue the paper to a chunk of wood?’. And that’s exactly what I did! Gotta love Mod Podge! And of course burlap too!

You can use the printable I used for my project, it’s in my FREE RESOURCE LIBRARY click here to get the free printable

Wild  west themed party table sign DIY. How to put together a chow down partner sign for your western themed party.

DIY wild west sign for your party table

These table signs are SO easy to make!

Here’s what you’ll need

Helpful tools

ONE-

I printed off my printables, CHOW DOWN PARTNER, SNACK STAMPEDE, HAPPY TRAILS, and WATERING HOLE. Then I trimmed them down using my paper cutter. Even though these are not expensive at all it took me years to finally bite the bullet and buy one and I’m SO glad I did! I know it sounds silly but not having to stress about the lines being straight on things, especially on my orders, is priceless!

TWO-

Cut down your 2x6 to fit your printable. I already had several sections of 2x6’s leftover from a loft bed project we made for the three oldest daughters. So I used my miter saw cut two of those pieces in half. That gave me 4 2x6 pieces.

Watering hole wild west table sign. DIY western party table decor. Free printable

THREE-

I wanted the background to have a little more to it than just the wood I added a piece of burlap to two of the signs and a piece of red duck cloth fabric to the other two western signs. I had all of these materials on hand, I didn’t need to go to the store and buy anything. That’s the great part of holding on to scrap pieces.

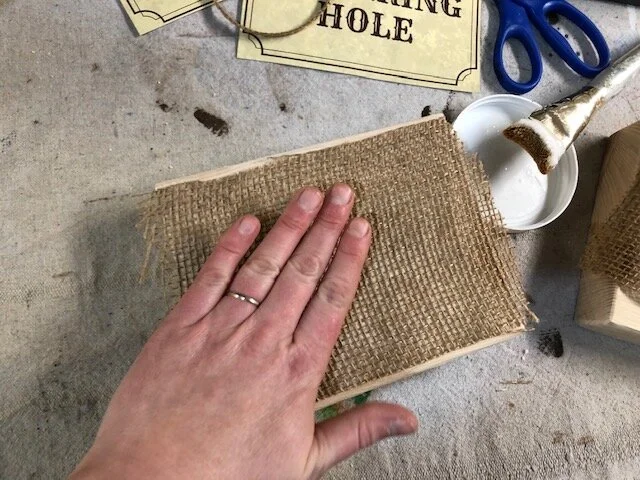
I used MATTE FINISH MOD PODGE to glue the burlap and fabric on to the wood chunks. Paint on a thick layer of the mod podge (if you’ve never used mod podge it’s basically just fancy glue that comes in lots of different finishes and purposes). Cut your fabric or burlap down to size and press it down on the mod podge covered front of your sign. Smooth out any air bubbles with your hand.

How to apply fabric and burlap to wood. Watering hole wild west table sign. DIY western party table decor. Free printable

FOUR-

I wanted the edges to be frayed a little so I trimmed down the fabric/burlap what hung over the edge then pulled out some of the treads on each end to fray them.

How to apply fabric and burlap to wood. Watering hole wild west table sign. How to fray fabric. DIY western party table decor. Free printable

FIVE-

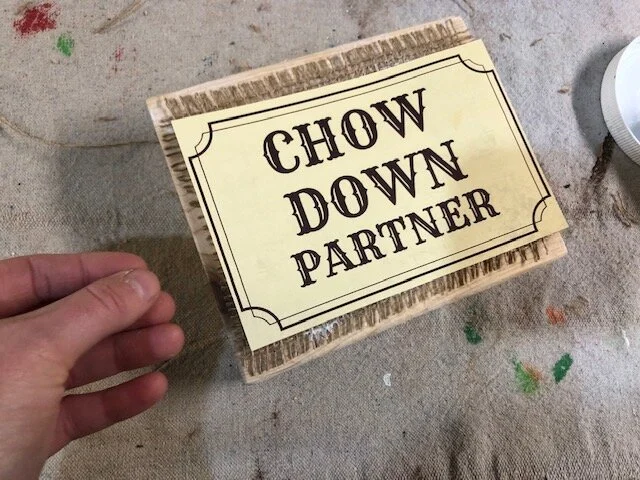
Then I applied mod podge to top of the burlap/fabric and placed a printable down on it. On the first ones. the burlap ones, I applied mod podge all over where the printable would go, not even thinking that it was going to bubble the paper because that’s what glue does to paper. So the next two I just applied the mod podge to the ends of the paper and I like that look a lot better.

How to apply fabric and burlap to wood. Watering hole wild west table sign. DIY western party table decor. Free printable

SIX-

Let them dry and you’re ready to put them on display on your western themed party table.

How to apply fabric and burlap to wood. Watering hole wild west table sign. DIY western party table decor. Free printable

I hope you enjoyed this tutorial and it helps you DIY your own easy and quick signs. As with all of my posts if you have any questions please feel free to ask away.

Snack stampede, how to apply paper to wood. DIY western party table decor. mod podge on wooden sign for easy inexpensive sign making.

Want instant access to all of my free printables (like the one used in this post) files, and checklists? Fill in your info and I will send you will immediately get the password to all of my freebies.

DIY faux leather hair bows using your Cricut

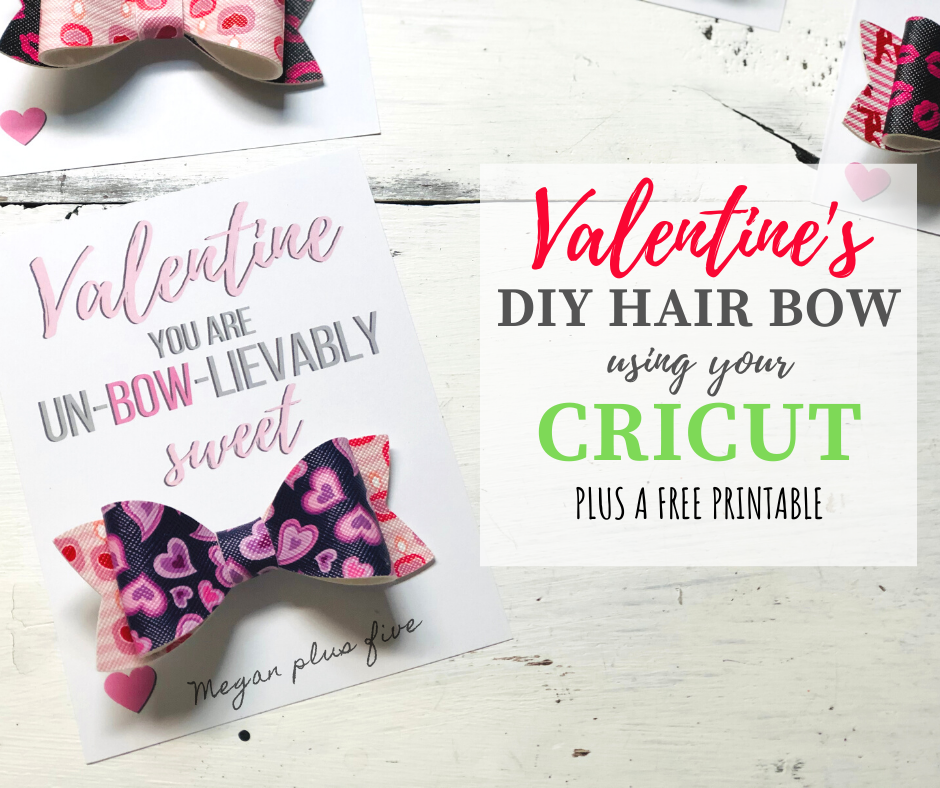
DIY faux leather hairbow using your Cricut. Free valentine printable for hairhows. Use your Cricut cutting machine to make adorable hair bows for your girls.

How to make FAUX LEATHER BOWS for Valentine’s Day

For Valentine’s Day this year I thought it would be so cute if daughter #4 and her BFF had matching hairbows. And I thought it would be even more adorable if there was a little bow themed Valentine’s Day card to go with them! I looked a little on Pinterest for a cute little printable to download and didn’t have much luck. So, I went ahead and made my own and I’m sharing the download with you! Click here to get the instant access to my Valentine’s Day Printable.

Affiliate Disclosure. Some of the links on this website are affiliate links, which means that I may earn a small commission if you click on the link or make a purchase using the link. If you make a purchase you will not be charged anything additional.

You can get the FREE VALENTINE’S DAY PRINTABLE HERE. It is in my FREE RESOURCE LIBRARY along with all of my other freebies. Just enter your info and you’ll get the password immediately for instant access!

I’ve left the bottom blank so your sweet kiddo can write their own name in the space to the right of the little pink heart.

After you make these cute little faux leather hairbows check out this fun VALENTINE’S DAY CRAFT to make with your little one. DIY VALENTINE CATERPILLAR

How to use Cricut explore to create faux leather hair bows. Making hairbows with Cricut cutting machine in design space.

USE YOUR CRICUT TO MAKE FAUX LEATHER VALENTINE’S HAIR BOWS

Here’s what you’ll need

You will also need

  • CRICUT DESIGN SPACE

  • CRICUT ACCESS ( this isn’t a must but if you have a Cricut Access membership the template I’m using is included. Otherwise you can purchase a file to use or create your own)

CRICUT USER TIP- if you have Cricut Access you get 10% off in their SHOP NOW section AND you also get FREE US SHIPPING! I’ve found that it is actually much cheaper to purchase directly from Cricut than to buy off of Amazon or in the craft stores (which is usually the most expensive option).

Before giving these as Valentine’s Day gifts you will need to let the glue cure on them for 24 hours. E6000 takes a VERY long time to dry and it need to dry undisturbed. I’ve made the mistake of being impatient and not letting the bow fully dry and my hairbow completely fell apart :(!! Don’t be like me lol!

  1. CUT OUT YOUR TEMPLATE

Grab the link to the template here

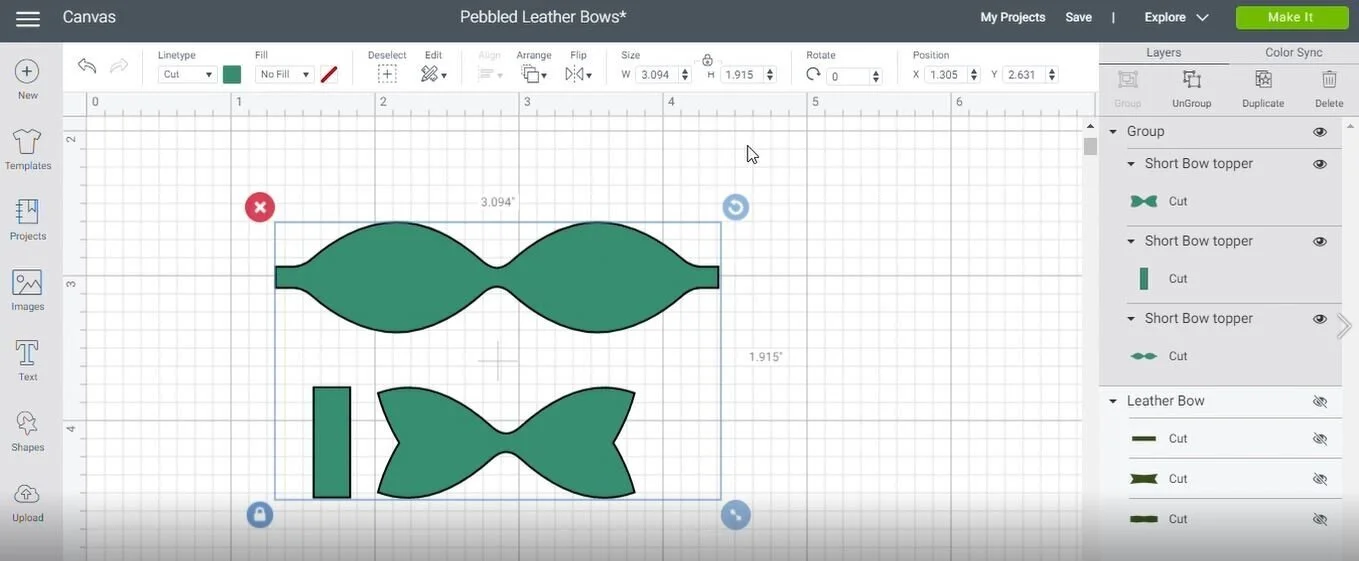
Open Cricut design space and go to Cricut’s ready to make projects.In the search bar type in PEBBLED and a project called PEBBLED LEATHER BOW should pull up. Click that project then click CUSTOMIZE. You will want to resize this so that it will be larger.

 
How to use Cricut explore to create faux leather hair bows. Making hairbows with Cricut cutting machine in design space.
 

Once your project is open you want to GROUP the 3 pieces together. This will take the guess work out of resizing each piece. The piece that looks like an actual bow you want to resize that to 3.5”. You will have to do this manually so be sure your gridlines are on to make this easier.

 
How to use Cricut explore to create faux leather hair bows. Making hairbows with Cricut cutting machine in design space.
 

If you want to cut the pieces out on to different colors of faux leather be sure to make them different colors in design space so they will automatically be positioned onto different mats.

Now click make it. Check that the MIRROR is turned ON. Then click CONTINUE. If you are using an older machine like the EXPLORE be sure you are using a DEEP CUT BLADE and the DEEP CUT BLADE HOUSING. You will want your machine to be set to CUSTOMIZED and I’ve had good luck with the FAUX LEATHER setting.

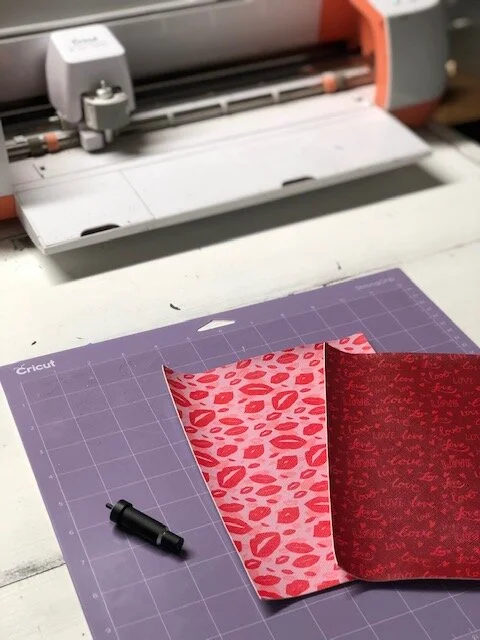
Because this is heavier material you will want to use Cricut’s PURPLE MAT. This is their strong hold mat. Place your faux leather PRINT SIDE DOWN. Load your mat into your machine and hit GO. If you need to you can adjust the cutting pressure of your machine if you need a little more/little less pressure.

How to use Cricut explore to create faux leather hair bows. Making hairbows with Cricut cutting machine in design space.

2. ASSEMBLE YOUR BOW PIECES

Now you can assemble your cute little hair bow! First, plug in your glue gun. This glue WON’T hold your bow together but we are using this to temporarily hold the pieces together because E6000 is kind of messy and a pain in the butt to work with sometimes and it can be super slippery so your bow pieces will want to slide everywhere. So by using the hot glue gun we can tack the pieces in place then go back and add the E600 to permanently hold the bow together.

How to use Cricut explore to create faux leather hair bows. Making hairbows with Cricut cutting machine in design space.

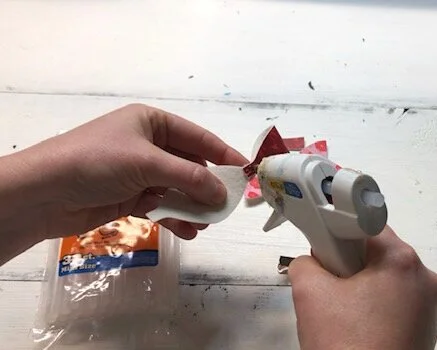
Once your hot glue gun has heated up you want to glue the piece together that looks like a pair of glasses. Just a dab of hot glue will be fine, just enough to hold it in place.

How to use Cricut explore to create faux leather hair bows. Making hairbows with Cricut cutting machine in design space.

Then place the bow on top of bottom piece using hot glue between the pieces to hold it in place.

How to use Cricut explore to create faux leather hair bows. Making hairbows with Cricut cutting machine in design space.

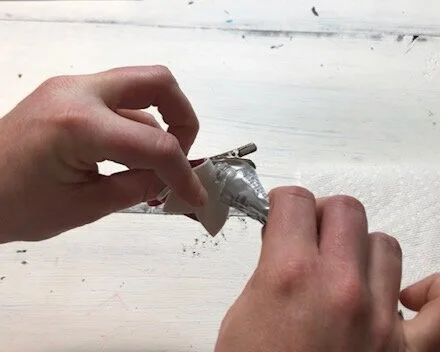
Next glue the clip onto the back side of the bottom piece. Now you will take the last piece to the bow and wrap it around the bow and clip. First, open the clip and be sure to keep it open while doing this step. Add a small amount of hot glue to the center of the clip, place one end of the rectangle piece where the glue is and wrap it around the bow and glue it in place with E6000 when you come to the end. It is much easier to show you how to do this step than to explain it lol!

How to use Cricut explore to create faux leather hair bows. Making hairbows with Cricut cutting machine in design space.

The hot glue is a temporary hold. It will not last, no matter what type of hot glue you use (trust me I’ve tried lol!!). To get a permanent hold go back and add E6000 to the areas you used hot glue. Obviously you won’ be able to get to every little area but you’ll be able to get close enough for a permanent hold. I will warn you E6000 is SUPER MESSY and has a weird smell. If it helps to keep the mess down use a toothpick to get the glue where you need it to go.

valentine+bow8.jpg

3. LET IT DRY

I know it’s really hard to walk away from a project and let it dry but these will take a long time to dry because of the E6000. They need about 24 hours of drying time.

4. ADD THE BOWS TO YOUR PRINTABLE VALENTINES

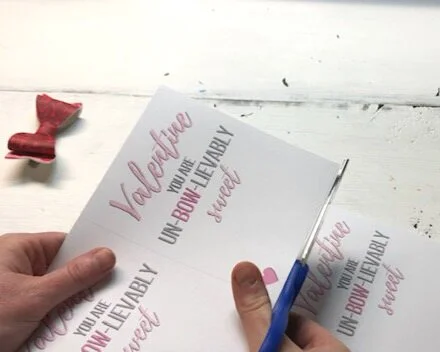
Download the FREE VALENTINE PRINTABLE. Print it out on cardstock. I chose white cardstock but you can print it on any color of cardstock paper you’d like. Cut the printable on the gray lines that are going down the middle of both sides of the printable.

How to use Cricut explore to create faux leather hair bows. Making hairbows with Cricut cutting machine in design space.

I’ve left the bottom area of each valentine blank so your little one can add their own name. Now would be a great time to let them sign the cards. My sweet girl had the best time writing her name. We’ve been working on that lately so this was a perfect opportunity for her to show off her newly learned skills! Look how adorable she is!!

How to use Cricut explore to create faux leather hair bows. Making hairbows with Cricut cutting machine in design space.

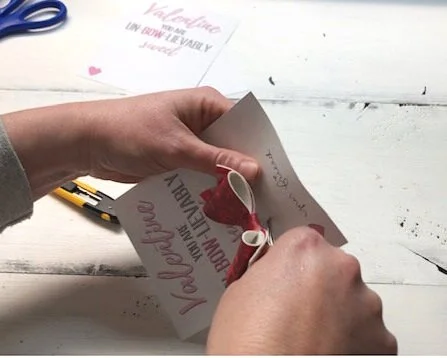
After your faux leather hairbows have dried you can attach them to your valentines. I recommend cutting a small slit just below the letter S in sweet. I cut mine halfway between the word sweet and the heart (you can use a small box cutter like I did or an xacto knife would work great too). Then slip the bottom part of the clip through to the back of the valentine, leaving the bow part on top.

How to use Cricut explore to create faux leather hair bows. Making hairbows with Cricut cutting machine in design space.

Your valentines are ready to hand out. I hope you enjoyed this tutorial and as always if you have any questions please feel free to reach out and ask

How to use your Cricut to make faux leather hairbows. Valentine's bow tutorial with a free printable.


What are the best power tools for crafters?

What are the best power tools for crafters? Which Ryobi power tools should I buy?

Power tools for the crafty girl

I haven’t always been super comfortable with power tools. In fact I didn’t use a miter saw with confidence till I was in my 30’s {which is crazy because I grew up with a grandma who most definitely knew her way around lots of heavy duty power tools that she had for her own crafty business}! My husband would do all the cutting because I was so afraid I was going to have a freak accident and cut my entire body in half…I know it sounds completely ridiculous but it was a very real fear that I had.

The problem was, other than my way over thought fear, was that my husband used to work out of town a lot and obviously couldn’t cut anything while he was gone. Our handmade online business was picking up major steam so, eventually I did get over my fear and I’m so glad I did because I was missing out on so much. Being able to cut anything to any size at any time has been a game changer for me and our family’s business.

Instead of going with the same brand of tools my husband has I chose a more budget friendly, less intimidating brand, RYOBI. I couldn’t be happier with this decision.

Affiliate Disclosure. Some of the links on this website are affiliate links, which means that I may earn a small commission if you click on the link or make a purchase using the link. If you make a purchase you will not be charged anything additional. This is just a way I can help add to our family finances to raise our four daughters. Please know I would never recommend a product or service I do not totally stand behind.

So what power tools does a crafter need?

Here are the basic power tools I started out with

Miter Saw

I really LOVE this saw! If you plan on cutting anything wider than 7” then you absolutely need a 12” SLIDING miter saw. This saw also has a laser on it making it really easy to line up your cuts. My husband’s miter does not have a sliding arm and I can not tell you enough what a pain in the butt it was to have to flip all the boards that were over 7” because the blade wasn’t wide enough to cut through the entire width of the board.

CORDLESS SANDER

Another must have is a sander. I have used both the corder and the cordless and I prefer the cordless by far. Granted to have to keep batteries charged but you also aren’t confined to sanding near a power outlet. There are lots of times when I just need to sand a quick spot where I’ve made a mistake or I just need a quick distressing and it’s just so much easier to not have to mess with a cord.

CORDLESS DRILL

This is your basic drill but it is mighty. I use this almost daily and it has yet to disappoint me.

  • BRAD NAILER

If you plan on using a nail and hammer to attach anything then you might as well save yourself some time and energy and pick up one of these. I use this tool a lot in my business. Actually, more than I thought I would. You can adjust the depth of which the nails shoot in and change up the size of brads you use.

  • REPLACEMENT BATTERIES

    Replacement batteries are a must. I have 3 that I rotate and I really need more. Although they are a little pricey you’ll be glad you have at least 2. My husband had to convince me to get additional batteries because he knew how annoyed I’d be the first time I had to wait for the only battery I had to recharge. He was right lol! So thankful I have more than one battery.

So those are the basics. As you get more comfortable using these power tools you’ll probably want to add even more to your list like a scroll saw or this trim router.

I hope this list helps you to decide which power tools is the best fit for you.

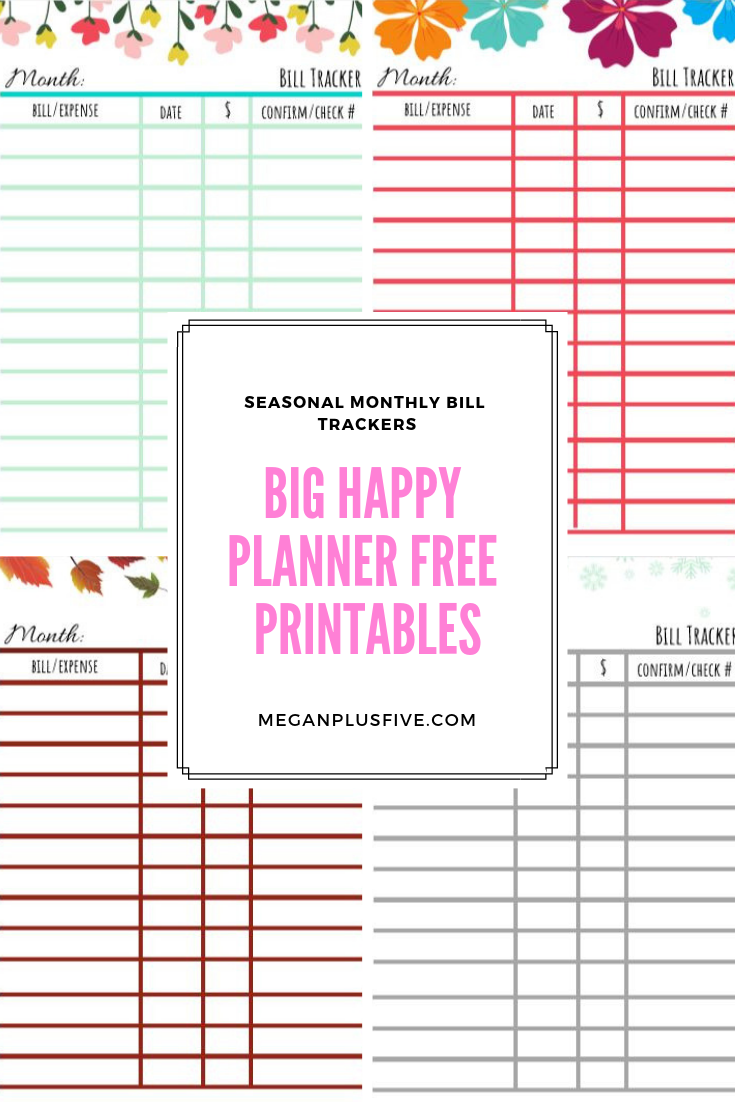
FREE Printables to keep your monthly bills in order

FREE Printables to keep your monthly bills in order

I know I am super old school when I say that I keep a planner that I can actually hold. But you know what…I have no shame. I LOVE having a tangible planner that I can pull out of my bag and put a pen to. The truth is I tried to use those fancy techy ones and they just aren’t for me. I love to write {although my handwriting is terrible} and I love to flip through the pages and feel the impression of the ink on the paper. It's sort of humbling in its own way.

I love creating printables for my BIG Happy Planner. Before I stumbled across these wonderful life savers I used to make my own planners, but that’s a whole other blog post on its own.

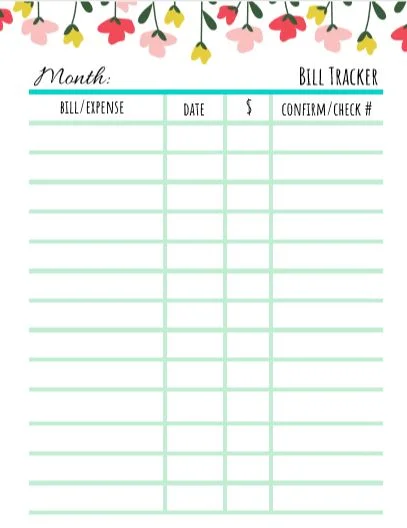
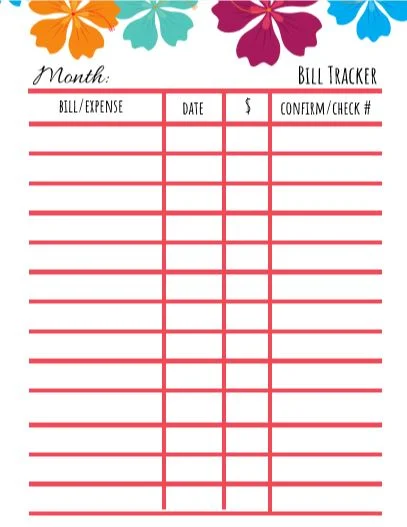
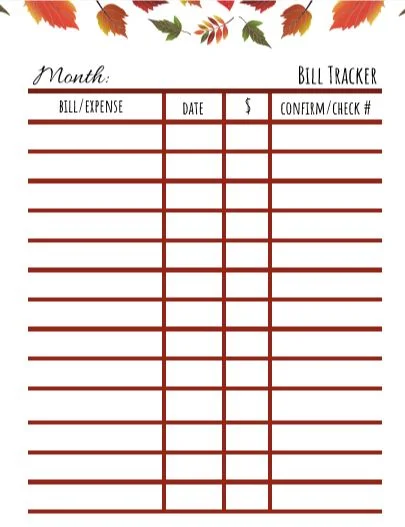
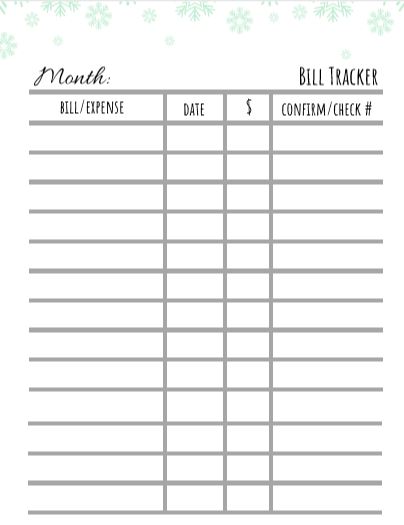
Life with kids can seriously leave you wondering what day it is most of the time. I don’t have enough brain space to remember which day I paid what bill {we don’t use auto draft for our own personal reasons} so I needed a page that I could keep track of all the bills we paid that month, the amount, and the confirmation/check number. I’ve been using a bill tracker similar to one like these for years and the months I don’t write everything down on them are the months my life just feels a little chaotic.

Making them colorful is also a must. There’s nothing more depressing than jotting down all the money you’ve paid on bills for the month on a black and white piece of paper. I HAVE to give my printables to life. I made one for each season, winter, spring, summer, fall. Print the number of printable you’ll need for each season. These are made to fit the BIG HAPPY PLANNER but you can adjust these sizes when you go to print for the size that’ll fit your needs.

I do hope you enjoy these monthly bill trackers as much as I do!

Let me know what you think by commenting below.
FREE Monthly Bill Tracker

Leave your info below so I know where to send your free printables

FREE Printables to keep your monthly bills in order

Christmas wish list, 100 gift ideas to get the CRAFT obsessed kid in your life

Christmas wish list, 100 gift ideas to get the CRAFT obsessed kid in your life

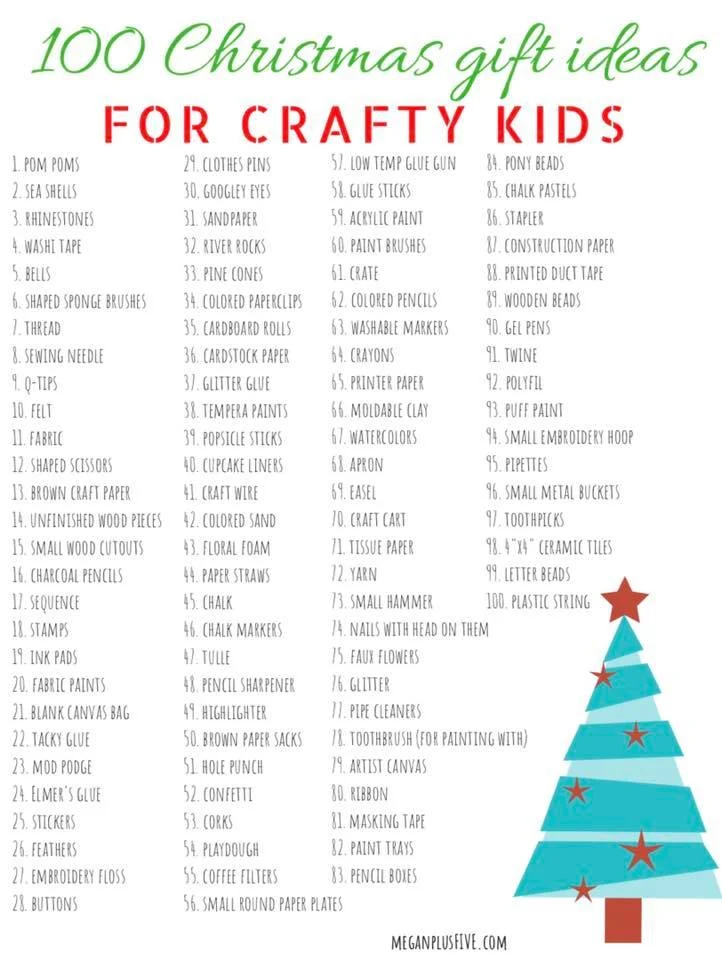
What do you give the craft obsessed kid? We have 3 crafty girls {the fourth one isn’t too far behind though} and own a family friendly CRAFT STUDIO so we have a pretty good idea of what kids LOVE to create with. Most kids love cutting, gluing, and adding as much paint to things as they can. They are just figuring out how to use different tools and exploring different colors, textures, and possibilities.

Did you know there are ALL kinds of different everyday items you can use to create with? Take a toothbrush for instance. This is one of those things we have in our studio that makes everyone say “ummmm do you brush your teeth here?” and the answer is always “no, we use it to paint”. A fun technique my grandma taught me when I was very young, to use a toothbrush to add little specs and small splatters of paint. It is the best tool for this so we keep several toothbrushes in shop just for this. I am so proud to pass down that little technique to so many.

Our older girls and I worked on this list just for you! They really enjoyed listing off all of their favorite supplies to create with. We hope you can use this to put together a really awesome CRAFT GIFT for your crafty kiddo! Let them explore. Let them make a mess. Let them be creative.

Christmas wish list, 100 gift ideas to get the CRAFT obsessed kid in your life