Easy popsicle stick picture frame for Valentine's Day

Easy popsicle stick picture frame valentine's day. How to make a mess free Valentine's Day craft with your kids and family. Cute and easy popsicle stick frame craft for kids.

We belong to a wonderful little program called Parents as Teachers. If you’ve never heard of this you can check out Parents as Teachers here. Every week our local PAT’s host a play group and during the holiday season they host themed groups with a fun party. This year they asked me again if I would help host the Valentine’s Day craft for the party. Of course I said yes!

Affiliate Disclosure. Some of the links on this website are affiliate links, which means that I may earn a small commission if you click on the link or make a purchase using the link. If you make a purchase you will not be charged anything additional.

I knew I wanted the craft to be a keepsake. Every momma LOVES keepsakes! They are my most favorite thing the girls bring home from school in the early years. So I searched Pinterest looking for an easy to make Valentine’s Day keepsake for little ones. I came across a fun popsicle stick frame and knew this would be something super easy for the kids and moms to make together.

My husband and I premade all the frames so everything was ready to go for the Valentine’s Day party, 30 frames total, and of couse since we live in the center of the USA winter did a little showing off, school got cancelled and so did the party *insert sad momma tears*. But we still had fun making these frames at home and the older three daughters actually had even more fun than I thought they would. They loved decorating their own frames with the Valentine’s Day stickers and cutouts.

How to make a mess free Valentine’s Day keepsake craft

Watch the video below or keep reading for the step by step instructions

Want access to my FREE RESOURCE LIBRARY? This is where I keep all of my files, printables, lists, and more. Get your password to get all the freebies —-> Send me to the FREE RESOURCE LIBRARY

Here’s what you’ll need to make your Valentine’s Day popsicle stick frame

You can find all of these items at the Dollar Tree (except the gorilla glue and glue gun) but I’ve included the links if you prefer your supplies delivered right to your door:)!

DIY popsicle stick picture frame. How to make a Valentine's Day craft with kids mess free. Keepsake art to Valentine's Day

To make 1 popsicle stick picture frame you need 8 popsicle sticks.

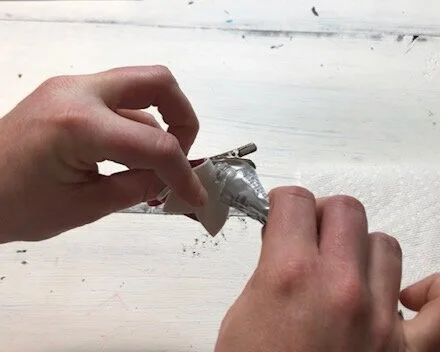
  1. The first thing you need to do is put your frame together. This should be done by an adult. I’ve found using gorilla glue sticks vs regular hot glue sticks hold projects together so much better. You want to line your sticks out first before you glue them down. You will need 2 popsicle sticks on each side of the frame.

DIY popsicle stick picture frame. How to make a Valentine's Day craft with kids mess free. Keepsake art to Valentine's Day

2. Once the glue has set and dried you can start decorating. No need to get out messy paint, although I LOVE paint sometimes it’s nice to not have that mess to clean up. Washable markers work great to give the frame a color and your work area will clean up with a washcloth after with no fuss. This is great for little ones who are working on their fine motor skills too!

DIY popsicle stick picture frame. How to make a Valentine's Day craft with kids mess free. Keepsake art to Valentine's Day

3. Add some more decorations. Stickers are PERFECT for these adorable Valentine’s Day frames! Your kiddos can just peel off the backing and stick them wherever they would like. Let them have fun with this step. If you want you can bring out some rhinestones, sequence, and even glitter (but these will require glue).

DIY popsicle stick picture frame. How to make a Valentine's Day craft with kids mess free. Keepsake art to Valentine's Day

4. Glue a photo or their art work to the back. I just used my hot glue gun to glue a photo of our sweet family to add to the frame I made for this tutorial. If you want you can also add a small magnet so you can hang it on the fridge.

DIY popsicle stick picture frame. How to make a Valentine's Day craft with kids mess free. Keepsake art to Valentine's Day
DIY popsicle stick picture frame craft for kids. Mess free Valentine's Day craft to make with your kiddo

5. Enjoy their art! place it on a shelf and keep it out year round. Now that my girls are getting older I am even more appreciative of all their handmade creations they’ve made me over the years.

DIY popsicle stick picture frame. How to make a Valentine's Day craft with kids mess free. Keepsake art to Valentine's Day

If you have any questions about this DIY craft or any other leave a comment below. Happy Valentine’s Day!

DIY faux leather hair bows using your Cricut

DIY faux leather hairbow using your Cricut. Free valentine printable for hairhows. Use your Cricut cutting machine to make adorable hair bows for your girls.

How to make FAUX LEATHER BOWS for Valentine’s Day

For Valentine’s Day this year I thought it would be so cute if daughter #4 and her BFF had matching hairbows. And I thought it would be even more adorable if there was a little bow themed Valentine’s Day card to go with them! I looked a little on Pinterest for a cute little printable to download and didn’t have much luck. So, I went ahead and made my own and I’m sharing the download with you! Click here to get the instant access to my Valentine’s Day Printable.

Affiliate Disclosure. Some of the links on this website are affiliate links, which means that I may earn a small commission if you click on the link or make a purchase using the link. If you make a purchase you will not be charged anything additional.

You can get the FREE VALENTINE’S DAY PRINTABLE HERE. It is in my FREE RESOURCE LIBRARY along with all of my other freebies. Just enter your info and you’ll get the password immediately for instant access!

I’ve left the bottom blank so your sweet kiddo can write their own name in the space to the right of the little pink heart.

After you make these cute little faux leather hairbows check out this fun VALENTINE’S DAY CRAFT to make with your little one. DIY VALENTINE CATERPILLAR

How to use Cricut explore to create faux leather hair bows. Making hairbows with Cricut cutting machine in design space.

USE YOUR CRICUT TO MAKE FAUX LEATHER VALENTINE’S HAIR BOWS

Here’s what you’ll need

You will also need

  • CRICUT DESIGN SPACE

  • CRICUT ACCESS ( this isn’t a must but if you have a Cricut Access membership the template I’m using is included. Otherwise you can purchase a file to use or create your own)

CRICUT USER TIP- if you have Cricut Access you get 10% off in their SHOP NOW section AND you also get FREE US SHIPPING! I’ve found that it is actually much cheaper to purchase directly from Cricut than to buy off of Amazon or in the craft stores (which is usually the most expensive option).

Before giving these as Valentine’s Day gifts you will need to let the glue cure on them for 24 hours. E6000 takes a VERY long time to dry and it need to dry undisturbed. I’ve made the mistake of being impatient and not letting the bow fully dry and my hairbow completely fell apart :(!! Don’t be like me lol!

  1. CUT OUT YOUR TEMPLATE

Grab the link to the template here

Open Cricut design space and go to Cricut’s ready to make projects.In the search bar type in PEBBLED and a project called PEBBLED LEATHER BOW should pull up. Click that project then click CUSTOMIZE. You will want to resize this so that it will be larger.

 
How to use Cricut explore to create faux leather hair bows. Making hairbows with Cricut cutting machine in design space.
 

Once your project is open you want to GROUP the 3 pieces together. This will take the guess work out of resizing each piece. The piece that looks like an actual bow you want to resize that to 3.5”. You will have to do this manually so be sure your gridlines are on to make this easier.

 
How to use Cricut explore to create faux leather hair bows. Making hairbows with Cricut cutting machine in design space.
 

If you want to cut the pieces out on to different colors of faux leather be sure to make them different colors in design space so they will automatically be positioned onto different mats.

Now click make it. Check that the MIRROR is turned ON. Then click CONTINUE. If you are using an older machine like the EXPLORE be sure you are using a DEEP CUT BLADE and the DEEP CUT BLADE HOUSING. You will want your machine to be set to CUSTOMIZED and I’ve had good luck with the FAUX LEATHER setting.

Because this is heavier material you will want to use Cricut’s PURPLE MAT. This is their strong hold mat. Place your faux leather PRINT SIDE DOWN. Load your mat into your machine and hit GO. If you need to you can adjust the cutting pressure of your machine if you need a little more/little less pressure.

How to use Cricut explore to create faux leather hair bows. Making hairbows with Cricut cutting machine in design space.

2. ASSEMBLE YOUR BOW PIECES

Now you can assemble your cute little hair bow! First, plug in your glue gun. This glue WON’T hold your bow together but we are using this to temporarily hold the pieces together because E6000 is kind of messy and a pain in the butt to work with sometimes and it can be super slippery so your bow pieces will want to slide everywhere. So by using the hot glue gun we can tack the pieces in place then go back and add the E600 to permanently hold the bow together.

How to use Cricut explore to create faux leather hair bows. Making hairbows with Cricut cutting machine in design space.

Once your hot glue gun has heated up you want to glue the piece together that looks like a pair of glasses. Just a dab of hot glue will be fine, just enough to hold it in place.

How to use Cricut explore to create faux leather hair bows. Making hairbows with Cricut cutting machine in design space.

Then place the bow on top of bottom piece using hot glue between the pieces to hold it in place.

How to use Cricut explore to create faux leather hair bows. Making hairbows with Cricut cutting machine in design space.

Next glue the clip onto the back side of the bottom piece. Now you will take the last piece to the bow and wrap it around the bow and clip. First, open the clip and be sure to keep it open while doing this step. Add a small amount of hot glue to the center of the clip, place one end of the rectangle piece where the glue is and wrap it around the bow and glue it in place with E6000 when you come to the end. It is much easier to show you how to do this step than to explain it lol!

How to use Cricut explore to create faux leather hair bows. Making hairbows with Cricut cutting machine in design space.

The hot glue is a temporary hold. It will not last, no matter what type of hot glue you use (trust me I’ve tried lol!!). To get a permanent hold go back and add E6000 to the areas you used hot glue. Obviously you won’ be able to get to every little area but you’ll be able to get close enough for a permanent hold. I will warn you E6000 is SUPER MESSY and has a weird smell. If it helps to keep the mess down use a toothpick to get the glue where you need it to go.

valentine+bow8.jpg

3. LET IT DRY

I know it’s really hard to walk away from a project and let it dry but these will take a long time to dry because of the E6000. They need about 24 hours of drying time.

4. ADD THE BOWS TO YOUR PRINTABLE VALENTINES

Download the FREE VALENTINE PRINTABLE. Print it out on cardstock. I chose white cardstock but you can print it on any color of cardstock paper you’d like. Cut the printable on the gray lines that are going down the middle of both sides of the printable.

How to use Cricut explore to create faux leather hair bows. Making hairbows with Cricut cutting machine in design space.

I’ve left the bottom area of each valentine blank so your little one can add their own name. Now would be a great time to let them sign the cards. My sweet girl had the best time writing her name. We’ve been working on that lately so this was a perfect opportunity for her to show off her newly learned skills! Look how adorable she is!!

How to use Cricut explore to create faux leather hair bows. Making hairbows with Cricut cutting machine in design space.

After your faux leather hairbows have dried you can attach them to your valentines. I recommend cutting a small slit just below the letter S in sweet. I cut mine halfway between the word sweet and the heart (you can use a small box cutter like I did or an xacto knife would work great too). Then slip the bottom part of the clip through to the back of the valentine, leaving the bow part on top.

How to use Cricut explore to create faux leather hair bows. Making hairbows with Cricut cutting machine in design space.

Your valentines are ready to hand out. I hope you enjoyed this tutorial and as always if you have any questions please feel free to reach out and ask

How to use your Cricut to make faux leather hairbows. Valentine's bow tutorial with a free printable.