Dollar Tree moss bunny peeps on wood + FREE SVG

EASY SPRING CRAFT

DIY spring Easter Dollar Tree craft, easy and simple peep bunny craft made out of sheet moss. Frugal Easter craft for spring using your Cricut or vinyl cutting machine. Scrap wood craft project

DIY DOLLAR TREE SHEET MOSS BUNNIES + FREE SVG

Need an easy & inexpensive spring or Easter craft? This little moss bunny sign will fit in perfectly with your farmhouse or rustic decorations! And it won’t break the bank!

I love the Dollar Tree and I also love my Cricut machine. So when I can make projects combining the two it’s like fireworks in my craft room! Today I made little moss peep bunny cutouts using both my Dollar Tree find and the help of my never fail me Cricut machine. Be sure to check out this DOLLAR TREE BOOK STACK if you love this spring dollar store craft.

DIY spring Easter Dollar Tree craft, easy and simple peep bunny craft made out of sheet moss. Frugal Easter craft for spring using your Cricut or vinyl cutting machine. Scrap wood craft project

This spring Easter craft was super easy, crazy quick and it represents my gaggle of girls. I am a momma to four daughters so I wanted there to be four little moss bunny peeps to represent them <3 !! It just so happened to work out perfectly that I had a 10” piece of scrap wood I originally made for a different craft over a year ago {yes I’m one of those craft hoarder ladies} to use for this simple DIY. So there was no need to cut, paint, or stain anything today at least.

Affiliate Disclosure. Some of the links on this website are affiliate links, which means that I may earn a small commission if you click on the link or make a purchase using the link. If you make a purchase you will not be charged anything additional.


DIY spring Easter Dollar Tree craft, easy and simple peep bunny craft made out of sheet moss. Frugal Easter craft for spring using your Cricut or vinyl cutting machine. Scrap wood craft project

1. WOOD BASE

I used a piece of scrap wood from another project. It was already cut, stained, and painted so I didn’t need to do that for this project. If you want to know how to get that distressed wood look check out this DIY sign painting post.

2. CARDSTOCK BUNNY

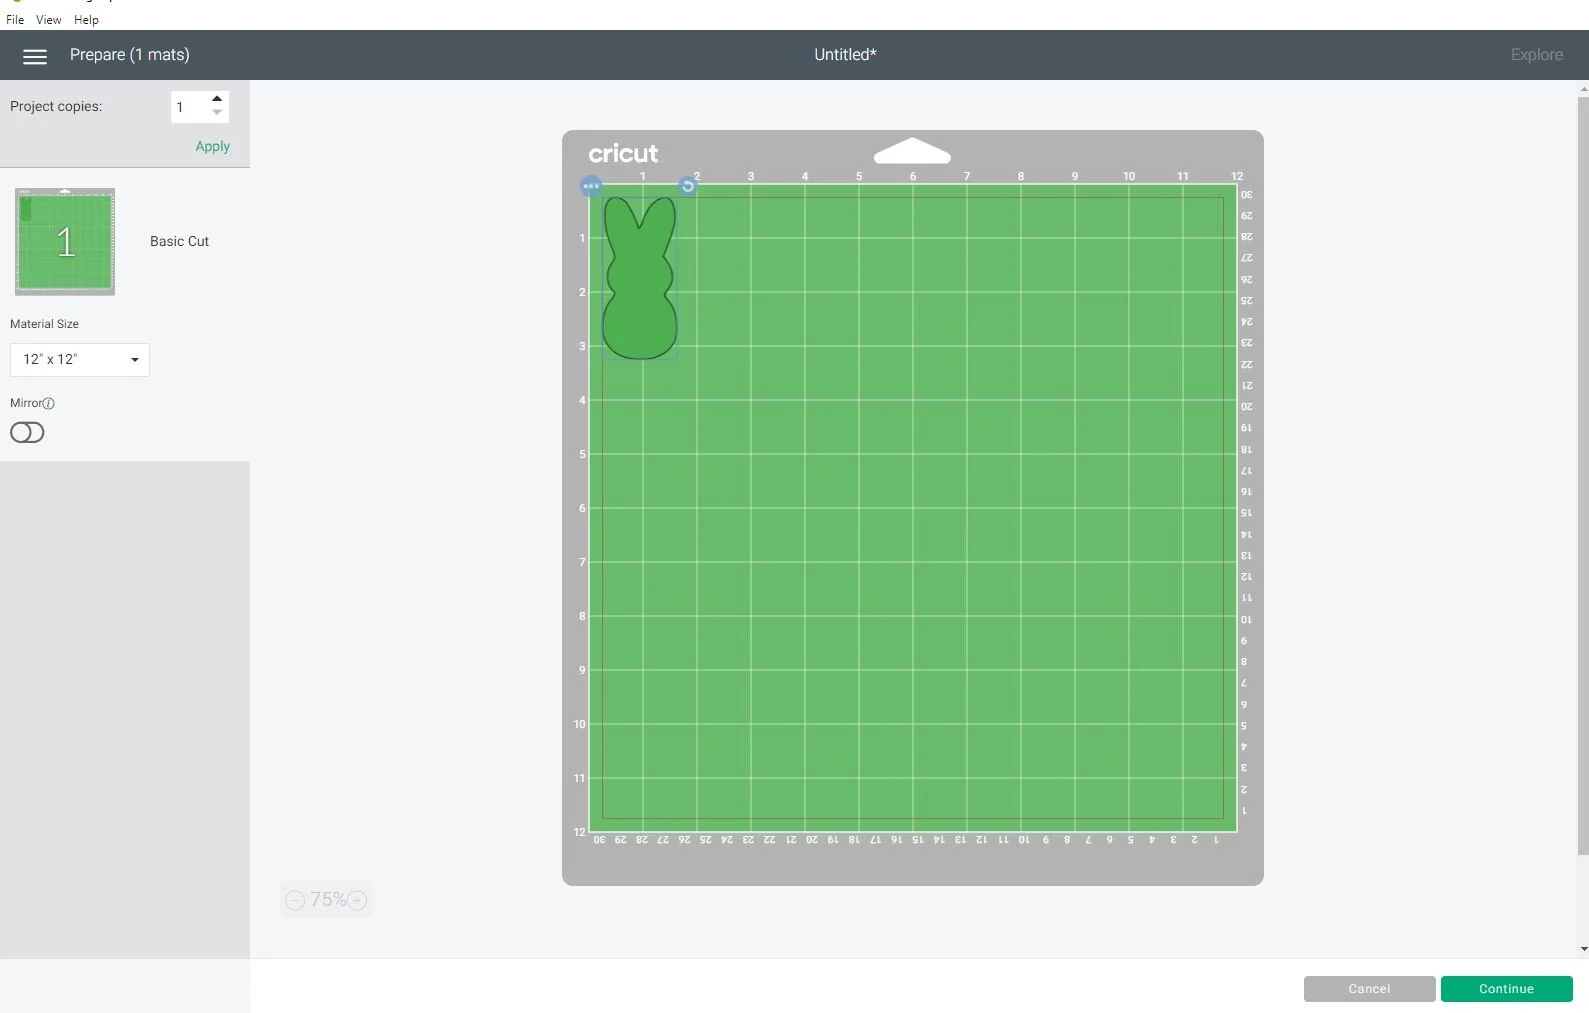
I used my Cricut to cut out a cardstock template. You can grab the same SVG I used from my FREE RESOURCE LIBRARY. That is my personal library where I share all of my free printables, SVG cut files, and patterns. This is a much easier way for my readers to get access to my freebies rather than filtering through emails or worse deleting an email that contains a file you needed.
DIY spring Easter Dollar Tree craft, easy and simple peep bunny craft made out of sheet moss. Frugal Easter craft for spring using your Cricut or vinyl cutting machine. Scrap wood craft project

You will only need ONE cardstock bunny no matter how many bunnies you plan on cutting out of the sheet moss.

If you are new to the Cricut world be sure to check out my post on the top 10 supplies & accessories you need to get started using your Cricut cutting machine.

2. TRACE

I flipped my sheet of moss upside down on my craft surface. Then I traced around it using a dark colored permanent thick marker. I tried doing this with a pen but it didn’t work out so great so I grabbed the closest thing to me I could find that would work, a permanent marker. This was a little tricky only because the moss backing is so uneven but since I’m not a perfectionist it worked just fine.

DIY spring Easter Dollar Tree craft, easy and simple peep bunny craft made out of sheet moss. Frugal Easter craft for spring using your Cricut or vinyl cutting machine. Scrap wood craft project

I tried to fit all four bunnies on one side of the sheet so I could make the most of my $1 find lol!

3. CUT THE MOSS BUNNIES OUT

Using a pair of regular scissors I cut the peep bunnies out of the moss sheet. Some of the moss fell off in some pieces leaving it looking a little bare in spots but don’t worry if that happens to you. You can fix that at the very end.

DIY spring Easter Dollar Tree craft, easy and simple peep bunny craft made out of sheet moss. Frugal Easter craft for spring using your Cricut or vinyl cutting machine. Scrap wood craft project

4. GLUE

Before I glued my moss bunnies down I placed them on my piece of wood so I could make adjustments before they were glued down.

DIY spring Easter Dollar Tree craft, easy and simple peep bunny craft made out of sheet moss. Frugal Easter craft for spring using your Cricut or vinyl cutting machine. Scrap wood craft project

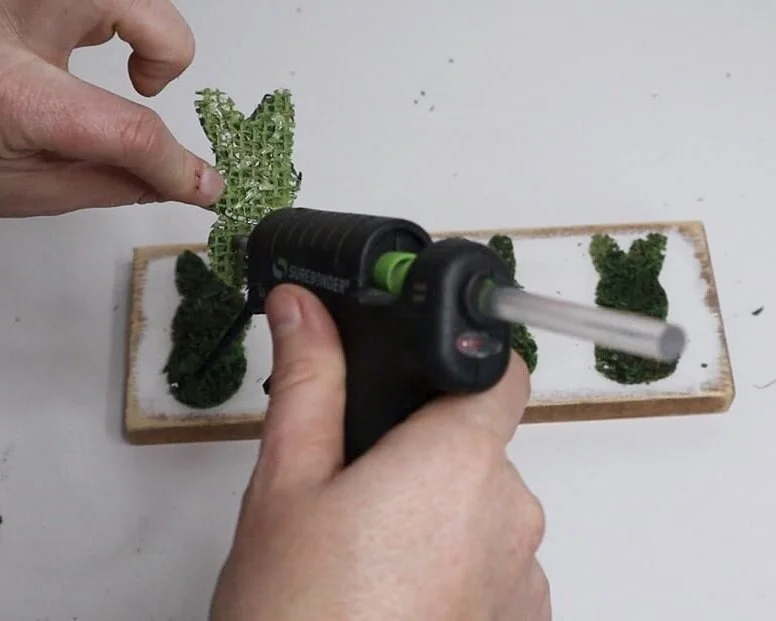
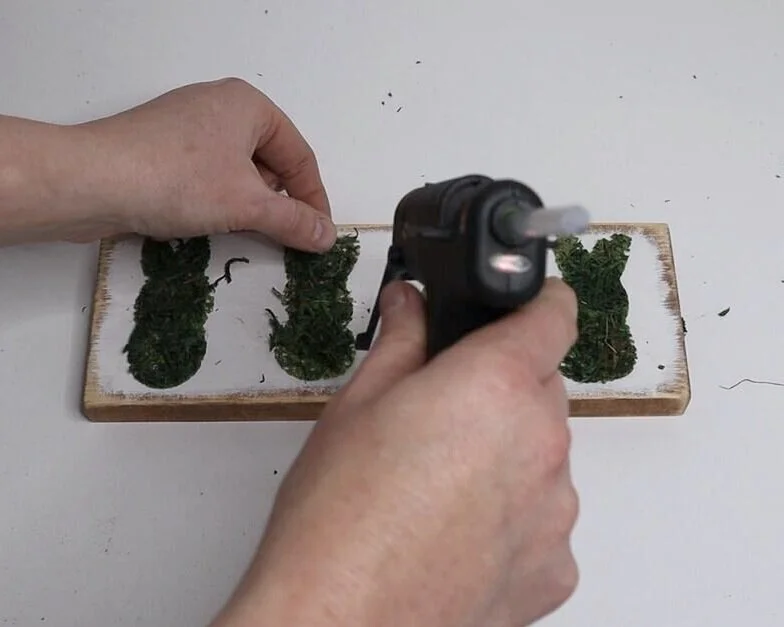
Then I used my fine tipped hot glue gun to glue them in place.
DIY spring Easter Dollar Tree craft, easy and simple peep bunny craft made out of sheet moss. Frugal Easter craft for spring using your Cricut or vinyl cutting machine. Scrap wood craft project

For the little areas that were bare I glue some leftover moss in those spots. You couldn’t even tell once I was finished that I had to add moss.
DIY spring Easter Dollar Tree craft, easy and simple peep bunny craft made out of sheet moss. Frugal Easter craft for spring using your Cricut or vinyl cutting machine. Scrap wood craft project

That’s it! So quick and easy. Click here for more DIY DOLLAR TREE CRAFTS.

DIY spring Easter Dollar Tree craft, easy and simple peep bunny craft made out of sheet moss. Frugal Easter craft for spring using your Cricut or vinyl cutting machine. Scrap wood craft project

Let me know if you have any questions in the comments below.

DIY farmhouse Dollar Tree bookstack + FREE SVG

DIY farmhouse book stack using real book and vinyl decals from your Cricut cutting machine. Make your own simple rustic book stack easy & simple from Dollar Tree books.

DIY FARMHOUSE BOOK STACK

Farmhouse book stacks are such an easy craft to DIY especially if you are just starting out in the crafting world. This is one of those craft projects you can do in less than 30 minutes start to finish. You don’t even have to wait for paint to dry. Don’t get me wrong I LOVE painting but it is so nice to do projects once in a while that have almost that instant satisfaction like this one does.

There are many different variations of ways to making these book stacks too. I chose to make the most simple stack out there but you can also paint them, you can make them out of wood instead of using real books, you can stamp them, or like in this craft tutorial you can use vinyl decals. No matter what rustic farmhouse book stack you choose to make it is sure to turn out gorgeous!

If you love this farmhouse craft be sure to check out these tiered tray mini farmhouse signs.

Affiliate Disclosure. Some of the links on this website are affiliate links, which means that I may earn a small commission if you click on the link or make a purchase using the link. If you make a purchase you will not be charged anything additional.

IMG_0190.jpgDIY farmhouse book stack using real book and vinyl decals from your Cricut cutting machine. Make your own simple rustic book stack easy & simple from Dollar Tree books.

how to make your own book stack using Dollar Tree books & your Cricut cutting machine

DIY farmhouse book stack using real book and vinyl decals from your Cricut cutting machine. Make your own simple rustic book stack easy & simple from Dollar Tree books.

Here’s what you need

1. CUT OUT DECALS

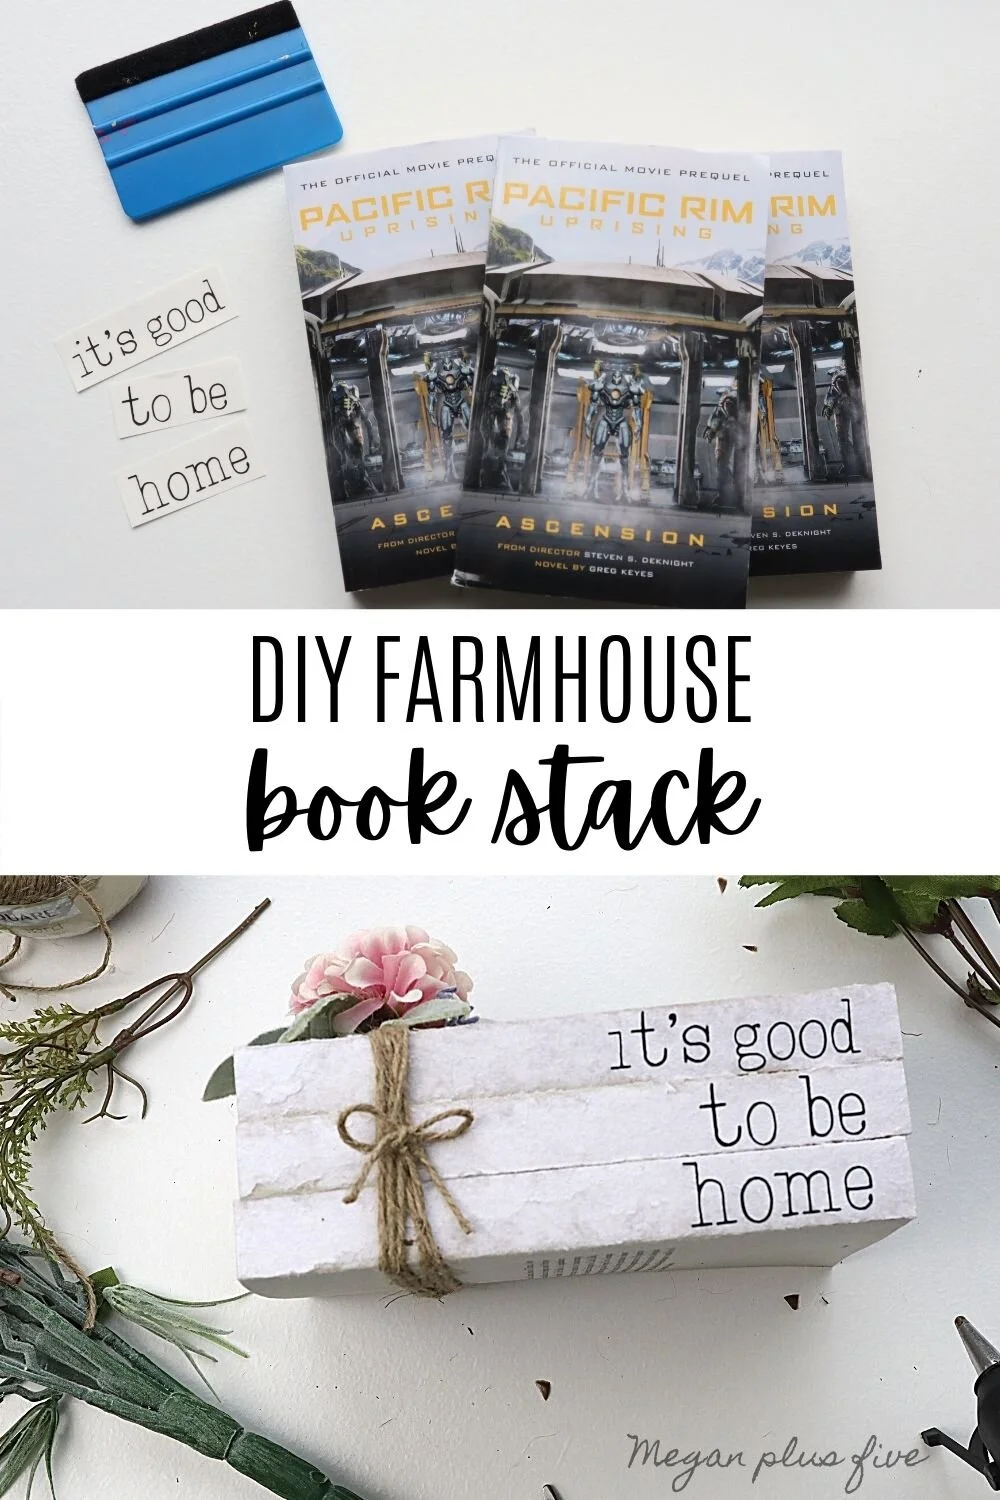
You can get the SVG I used to make my book stack in my free resource library. In Cricut Design Space I adjusted the height of the words so that they would fit on the spine of the books. Also want to note that I left my words on lock mode so that the width adjusted with the height if that makes sense. My book spines measured around .75” with the covers on so I made my decals .69”. That size seemed to be perfect for my book stack.

DIY farmhouse book stack using real book and vinyl decals from your Cricut cutting machine. Make your own simple rustic book stack easy & simple from Dollar Tree books.

I cut my words out on black matte finish vinyl using my Cricut cutting machine and green cutting mat. Then I weeded my design using an exacto knife.

2. REMOVE THE OUTER COVER & PAGES

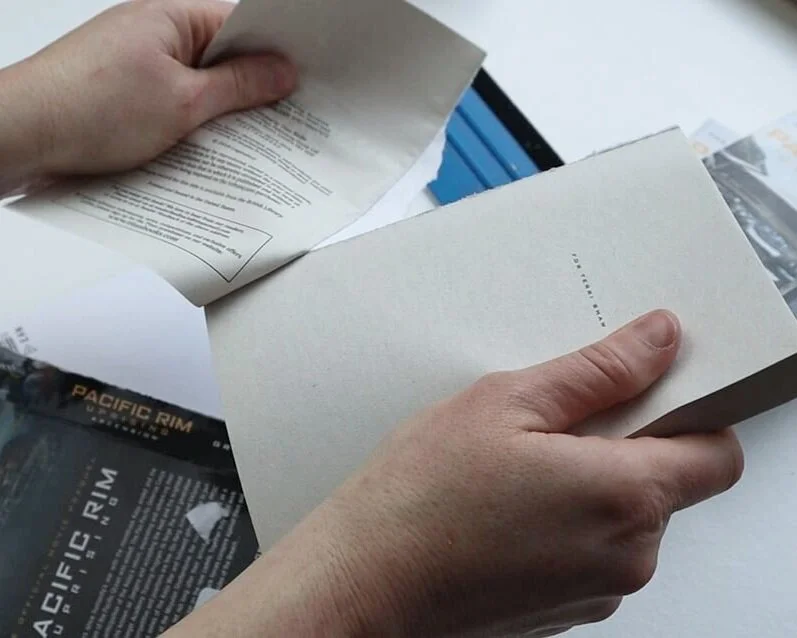
This is super easy! to get that rustic look of your books you just need to remove the cover, the shiny spine of the book, and the first few pages. They will rip right off. Something I also did was rip out a few extra pages so that I can use them to make some Easter bunny garland out of them. You want to do this with all three books.

DIY farmhouse book stack using real book and vinyl decals from your Cricut cutting machine. Make your own simple rustic book stack easy & simple from Dollar Tree books.

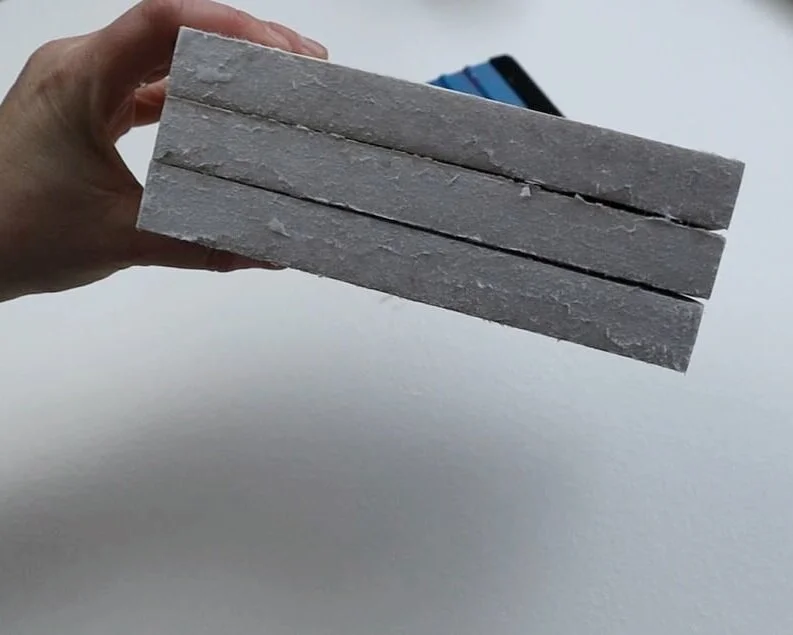
This is what my stack looked like after I removed the covers. There is still paper and it’s not completely smooth but that was the look I was going for. I could have kept peeling or taken a sanding sponge to it but I like this look.

DIY farmhouse book stack using real book and vinyl decals from your Cricut cutting machine. Make your own simple rustic book stack easy & simple from Dollar Tree books.

3. APPLY THE DECALS

When you get to this step be sure you take your time. This word decal has super skinny lines so it’s easy to mess up especially if you’re moving too quickly. I actually messed mine up a little and lost the dot to my “i”. I ended up having to recut just the dot but if I was more focused I wouldn’t have lost that tiny guy. A little behind the scenes while I was making this book stack…I had 5 kids, 15 baby chicks, 4 baby ducks, 2 dogs, and a cat all in my craft room while making these lol! We most definitely have that beautiful chaos going on 24/7 in our home. We had just picked up our new feathered babies the day before so their temporary home while they grow is in bins with heat lamps over them on my craft table.

DIY farmhouse book stack using real book and vinyl decals from your Cricut cutting machine. Make your own simple rustic book stack easy & simple from Dollar Tree books.

I used my favorite clear transfer tape to transfer the decals on the spines of my books. I didn’t measure or get super exact with this. I just eyeballed it and that worked great. I used my trusty blue vinyl squeegee to help press my decals down so that they were good and adhered to the sides of the books.

DIY farmhouse book stack using real book and vinyl decals from your Cricut cutting machine. Make your own simple rustic book stack easy & simple from Dollar Tree books.

Then I slowly removed the transfer tape. Be sure to go super slow on this step.

DIY farmhouse book stack using real book and vinyl decals from your Cricut cutting machine. Make your own simple rustic book stack easy & simple from Dollar Tree books.

4. TWINE

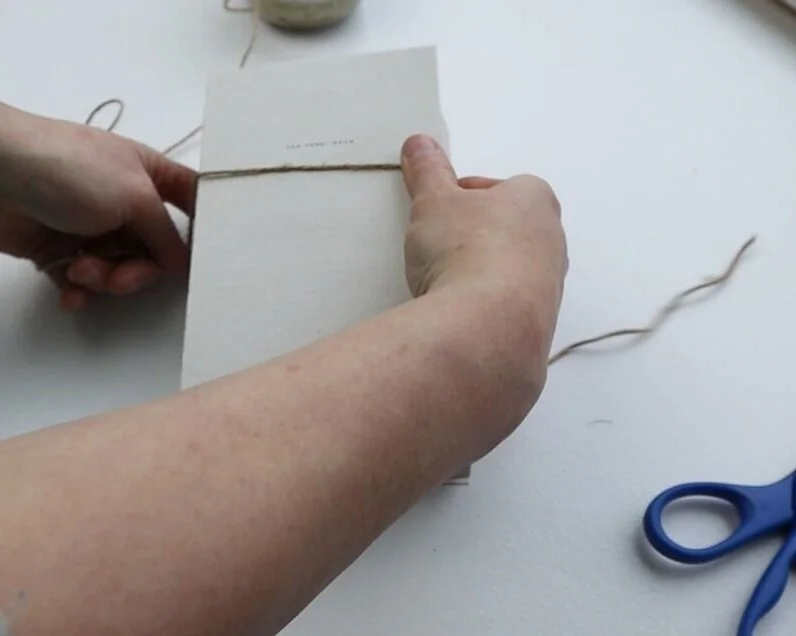
Stack your farmhouse books in order then take some twine and wrap it around your books. I chose to tie a bow on the spine side but you can also do this on the top. I did glue some lambs ear and flowers to the top of mine but I didn’t like it at all. So I removed those. They came off pretty easy because I glued them to the twine and not the page itself.

DIY farmhouse book stack using real book and vinyl decals from your Cricut cutting machine. Make your own simple rustic book stack easy & simple from Dollar Tree books.

Look at that before and after. So pretty!!!

DIY farmhouse book stack using real book and vinyl decals from your Cricut cutting machine. Make your own simple rustic book stack easy & simple from Dollar Tree books.

That’s it! Such and EASY rustic home décor DIY project! I hope you enjoyed this crafty tutorial. If you have any questions about this craft or any other projects on my blog comment below or message me in the about section.

Check out more DIY crafts below

Dollar Tree mini St. Patrick's Day sign makeover + FREE SVG

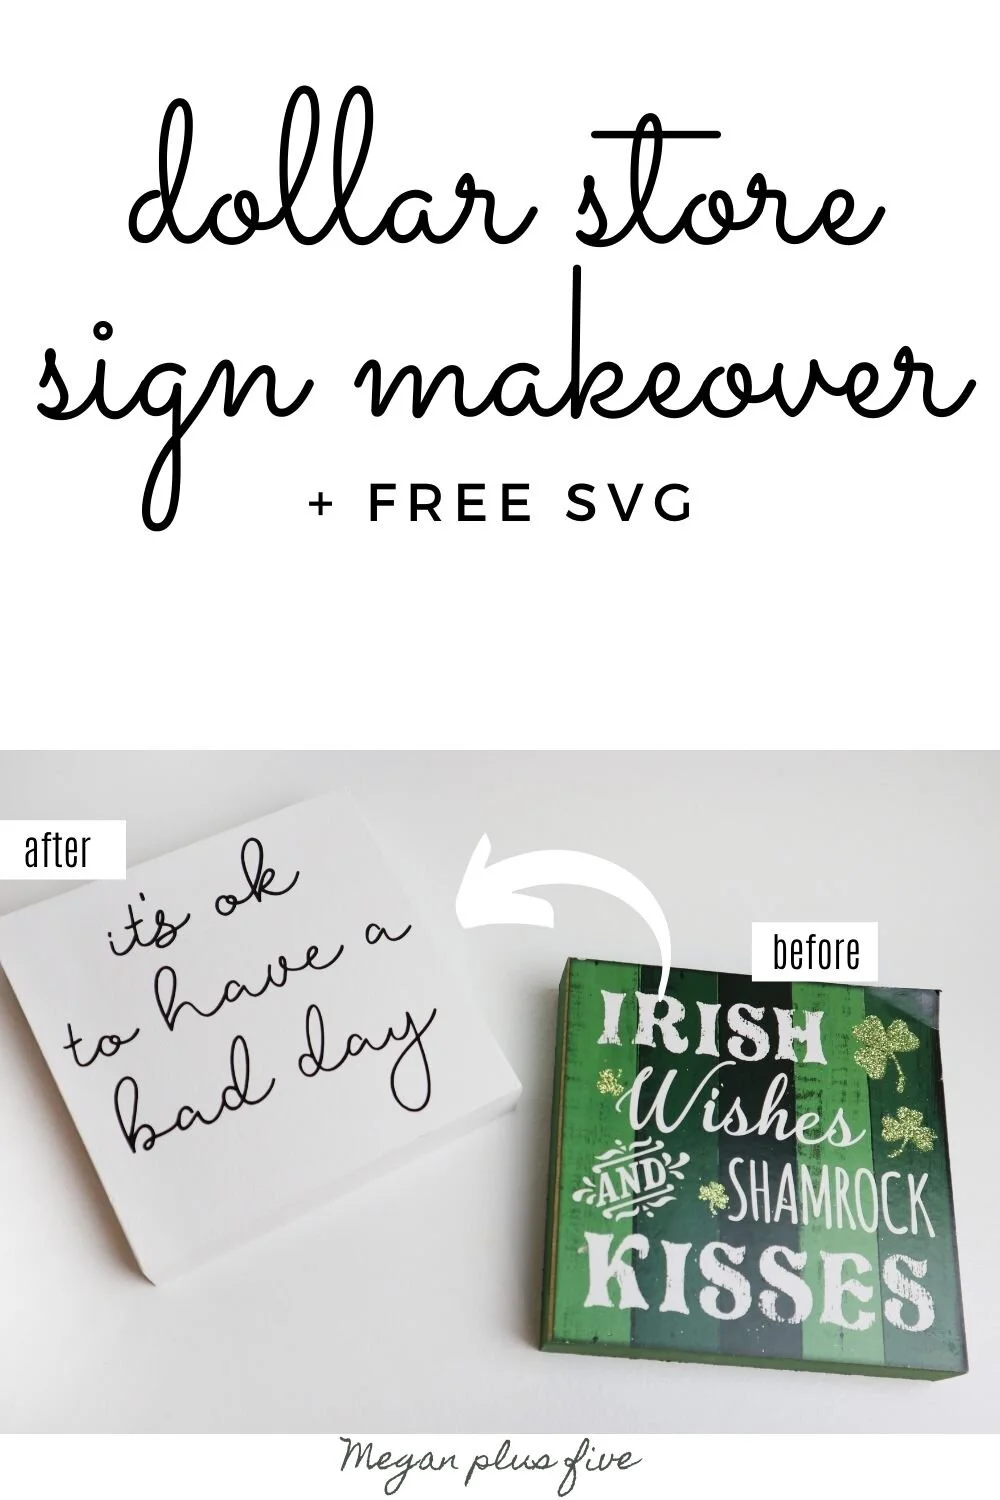
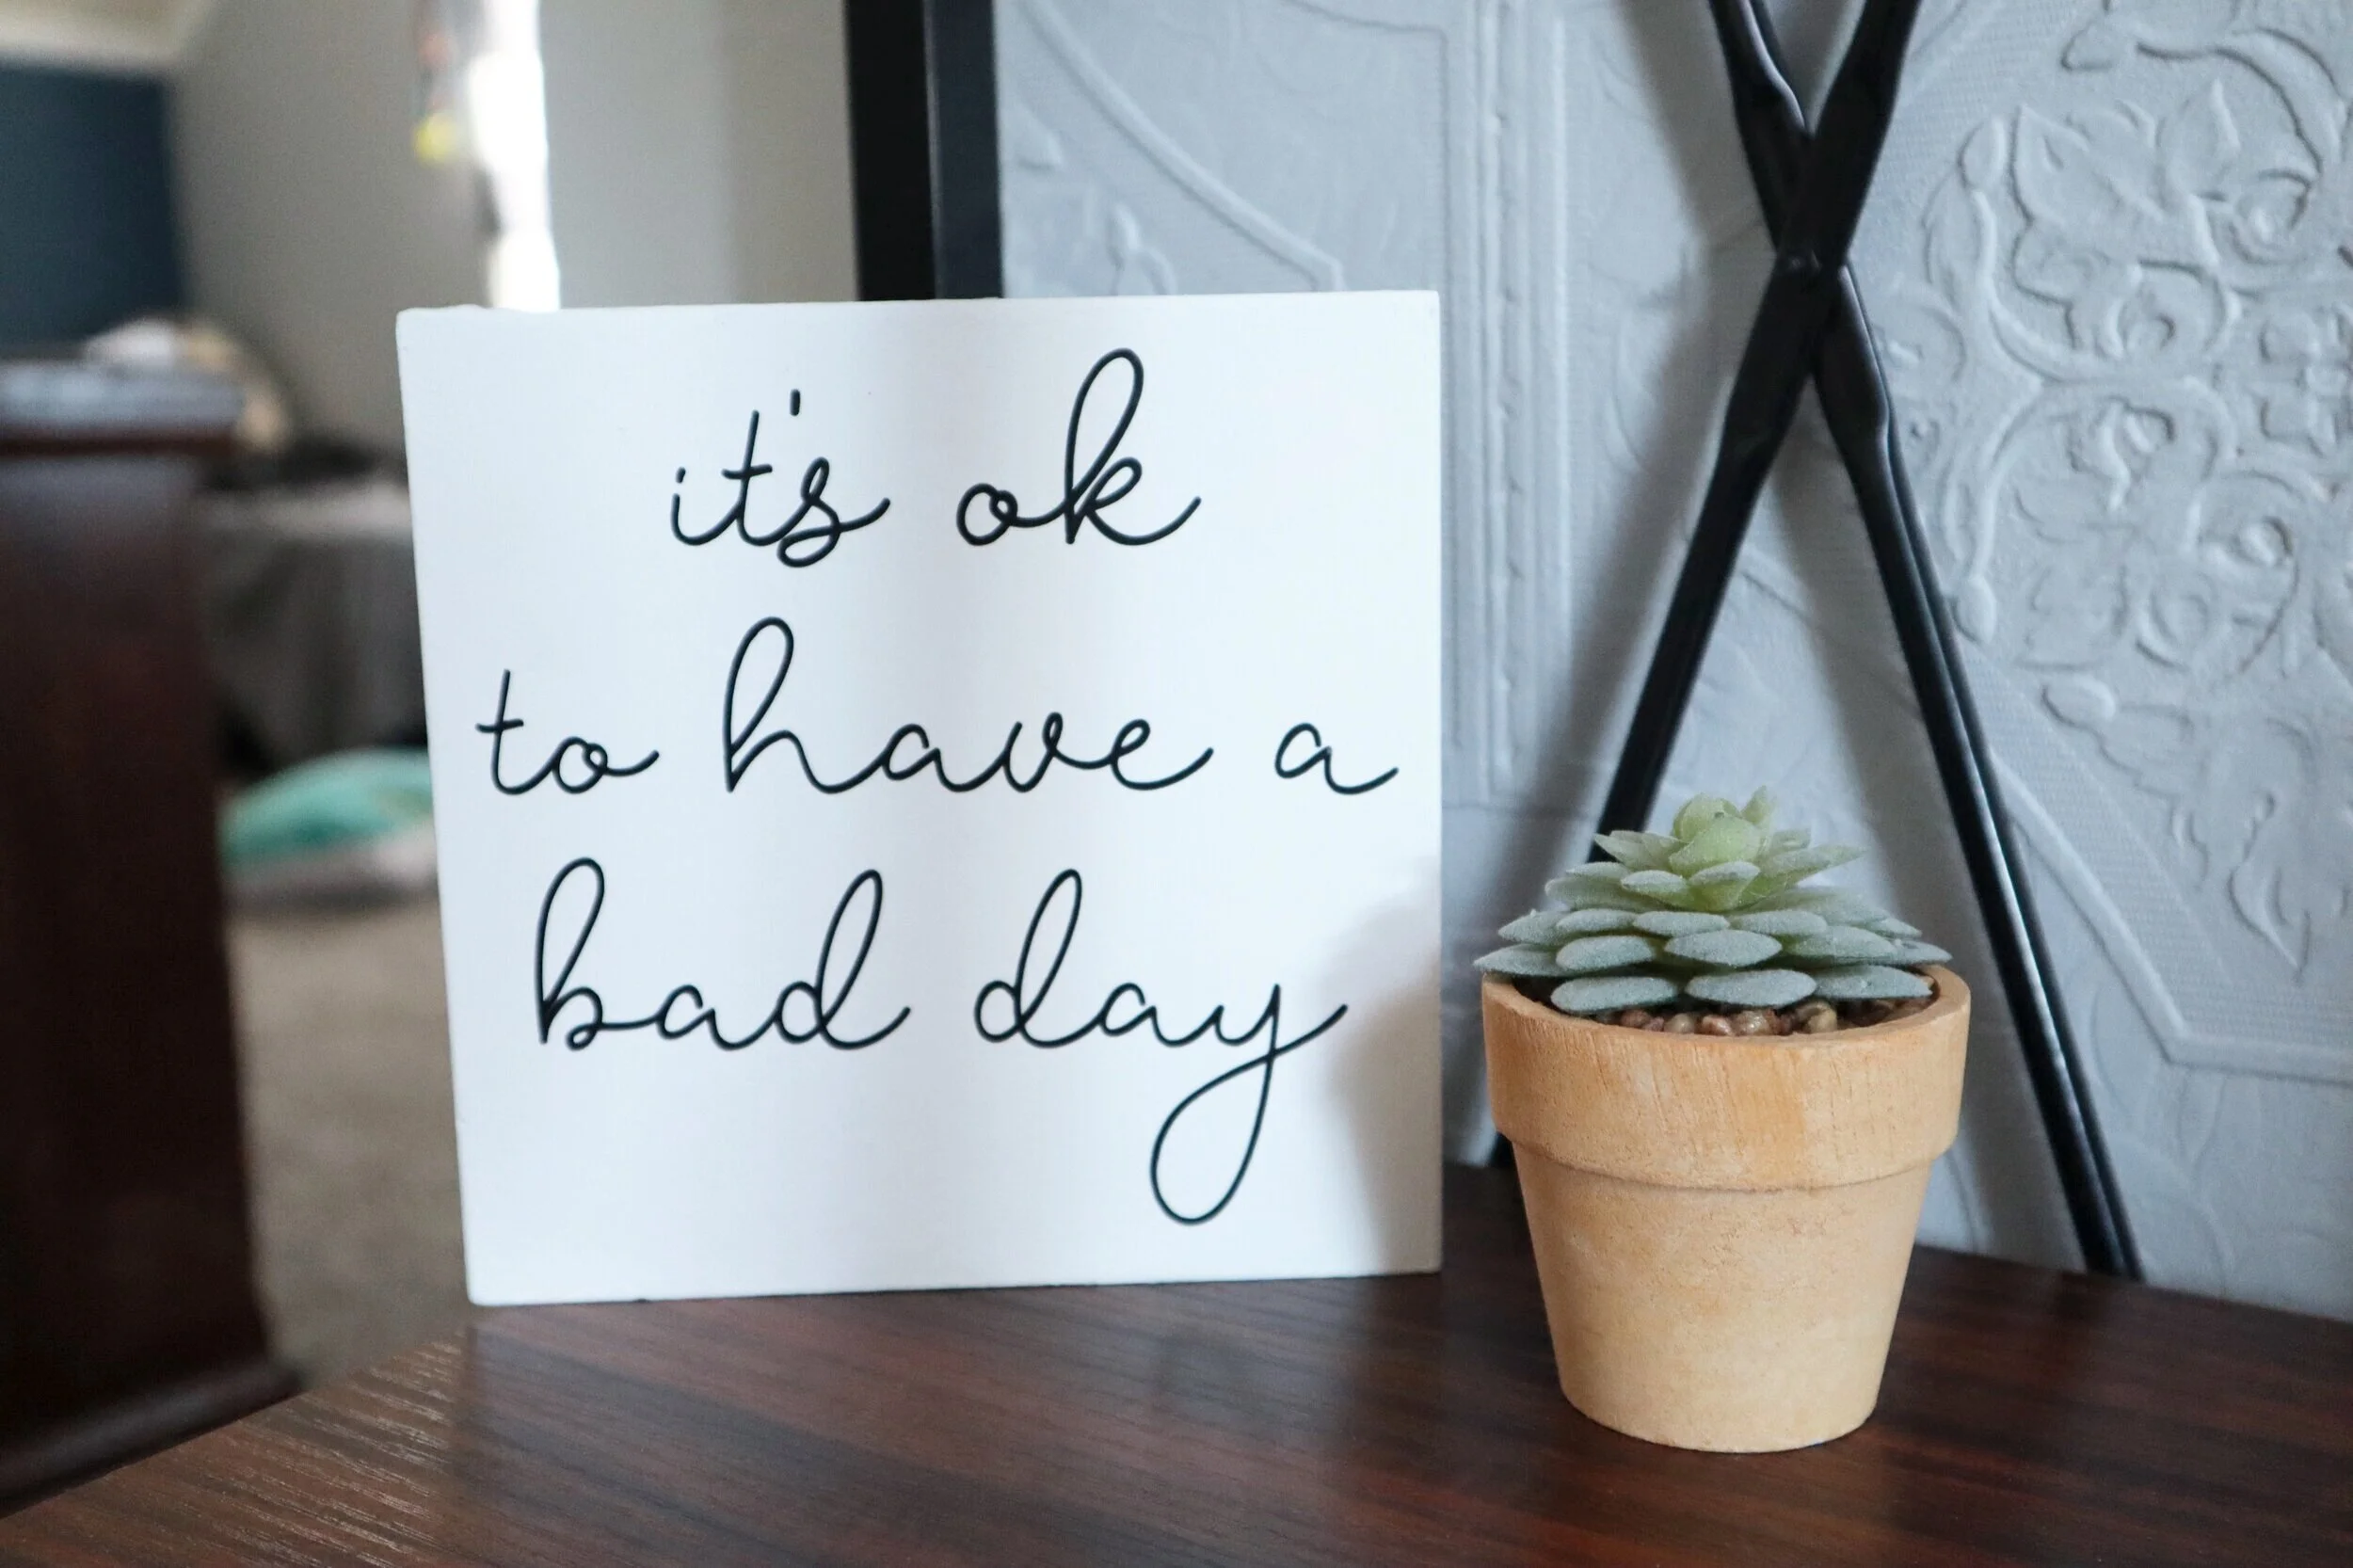
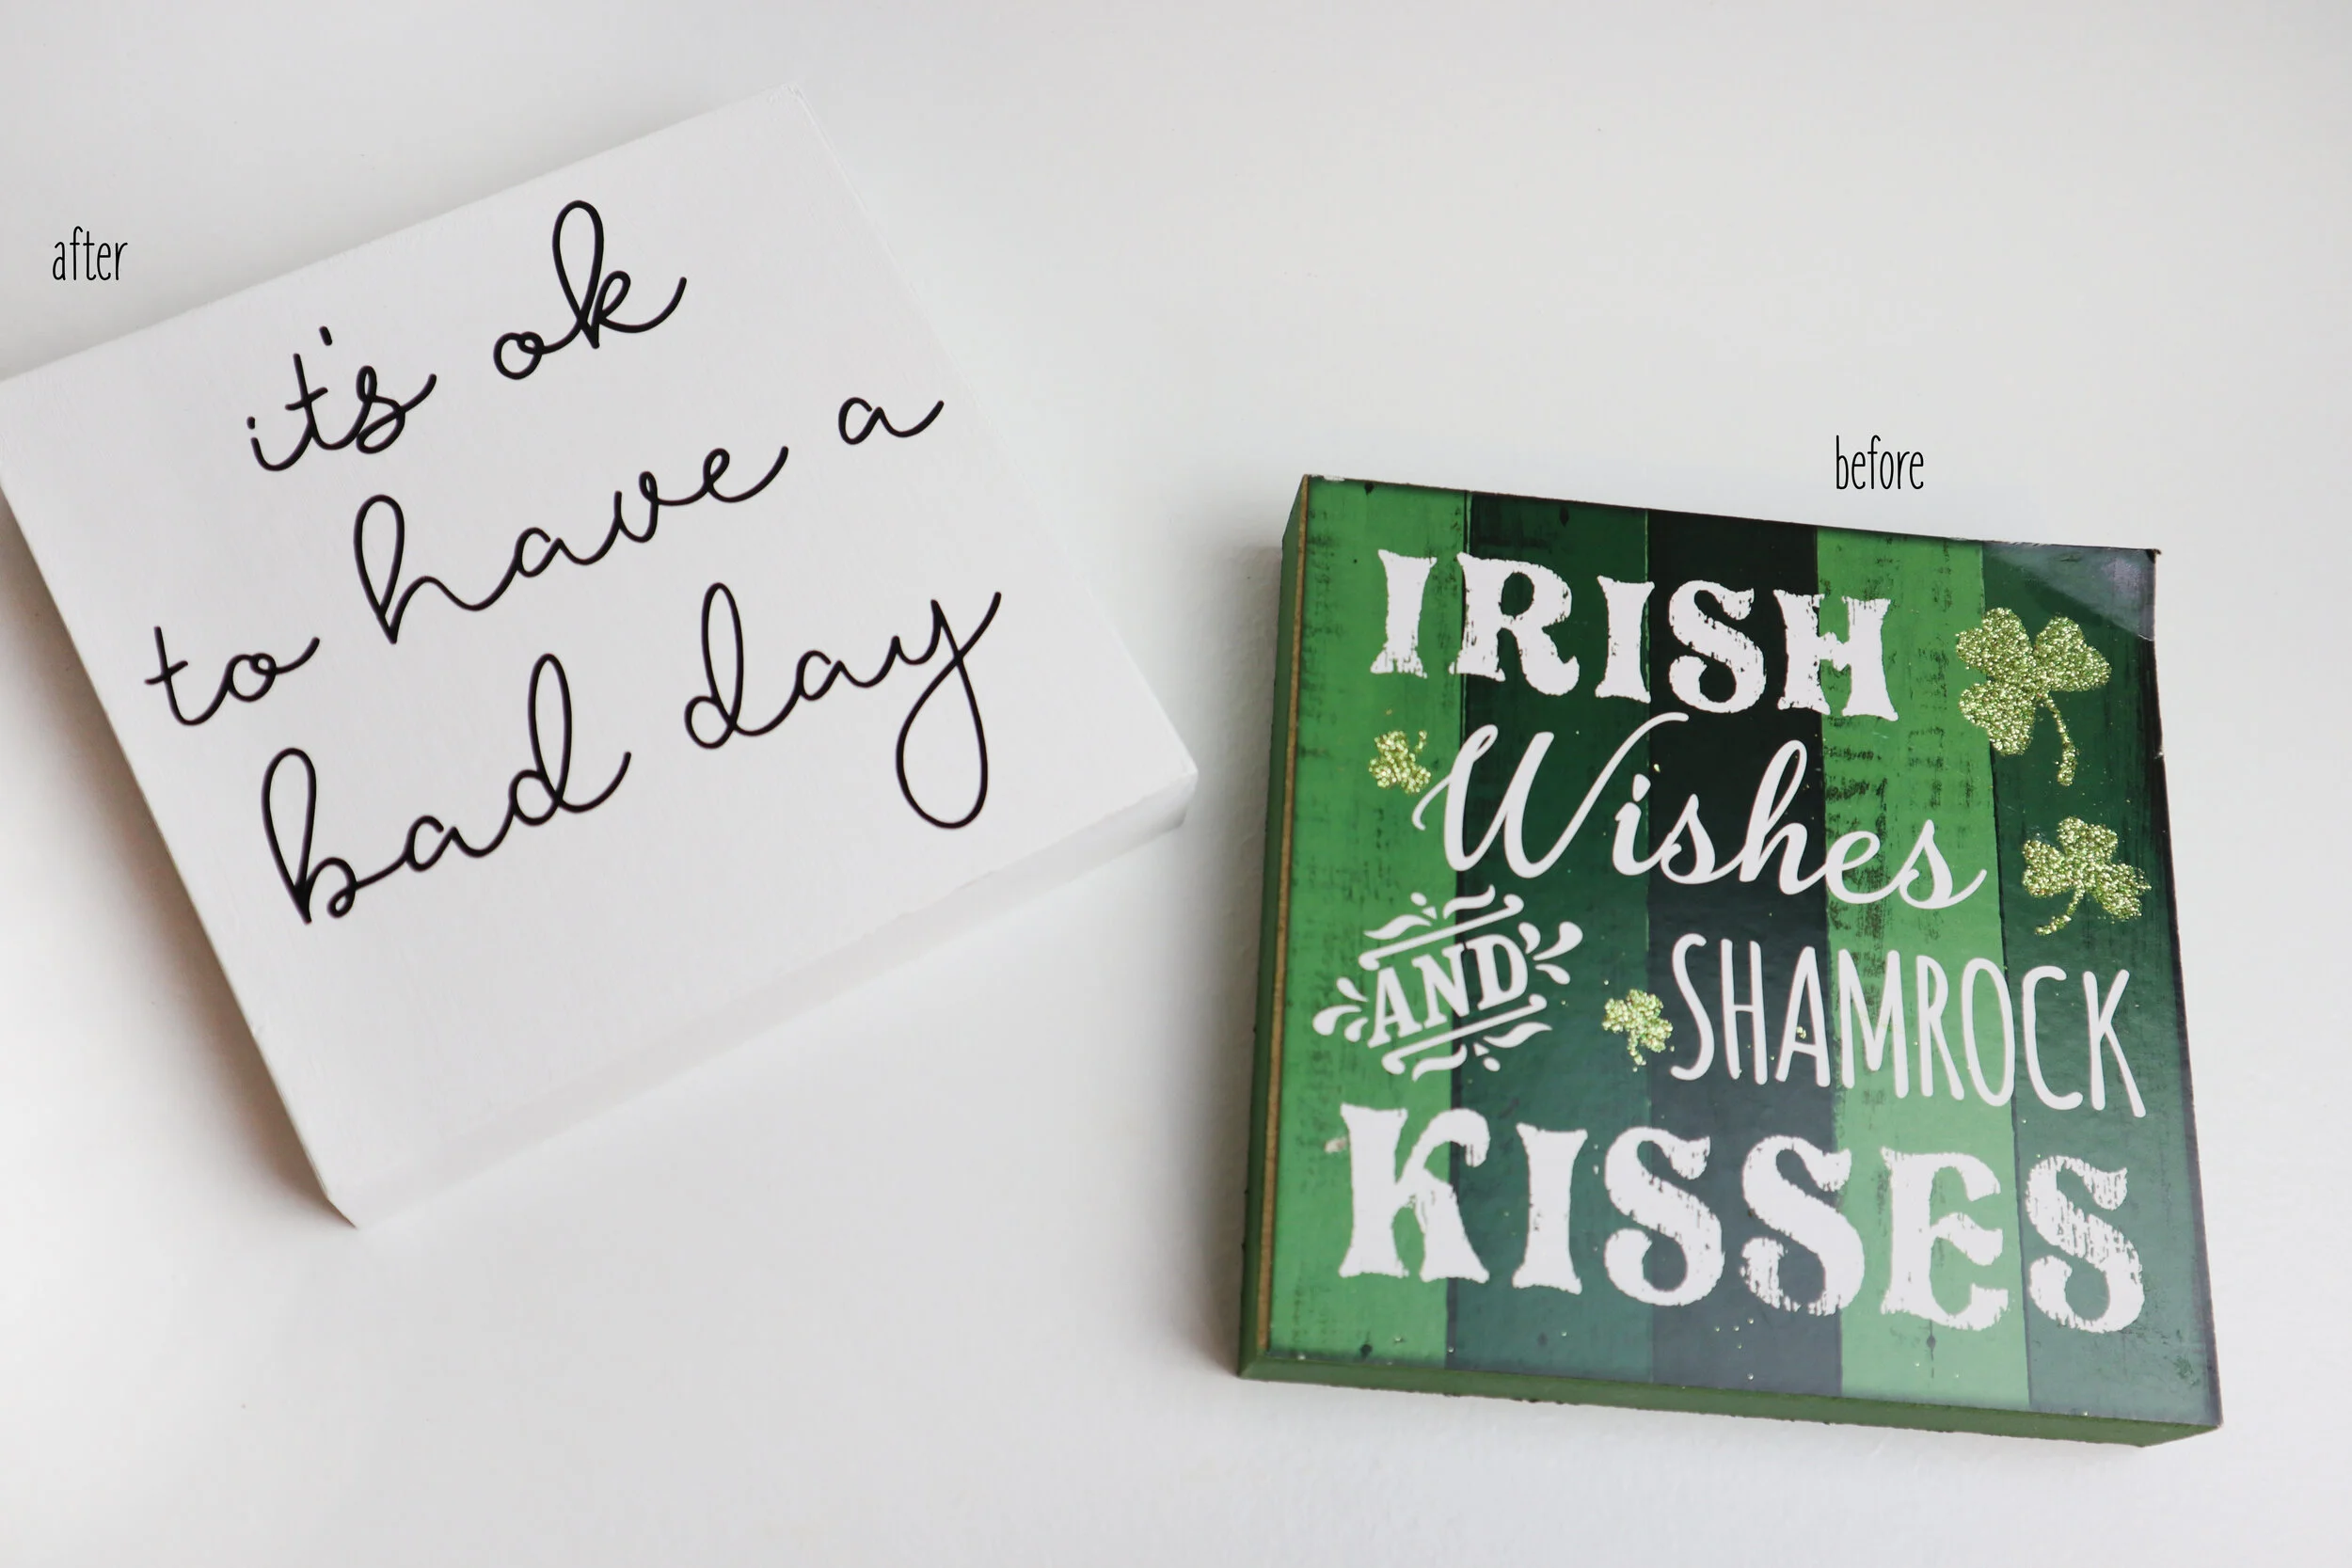
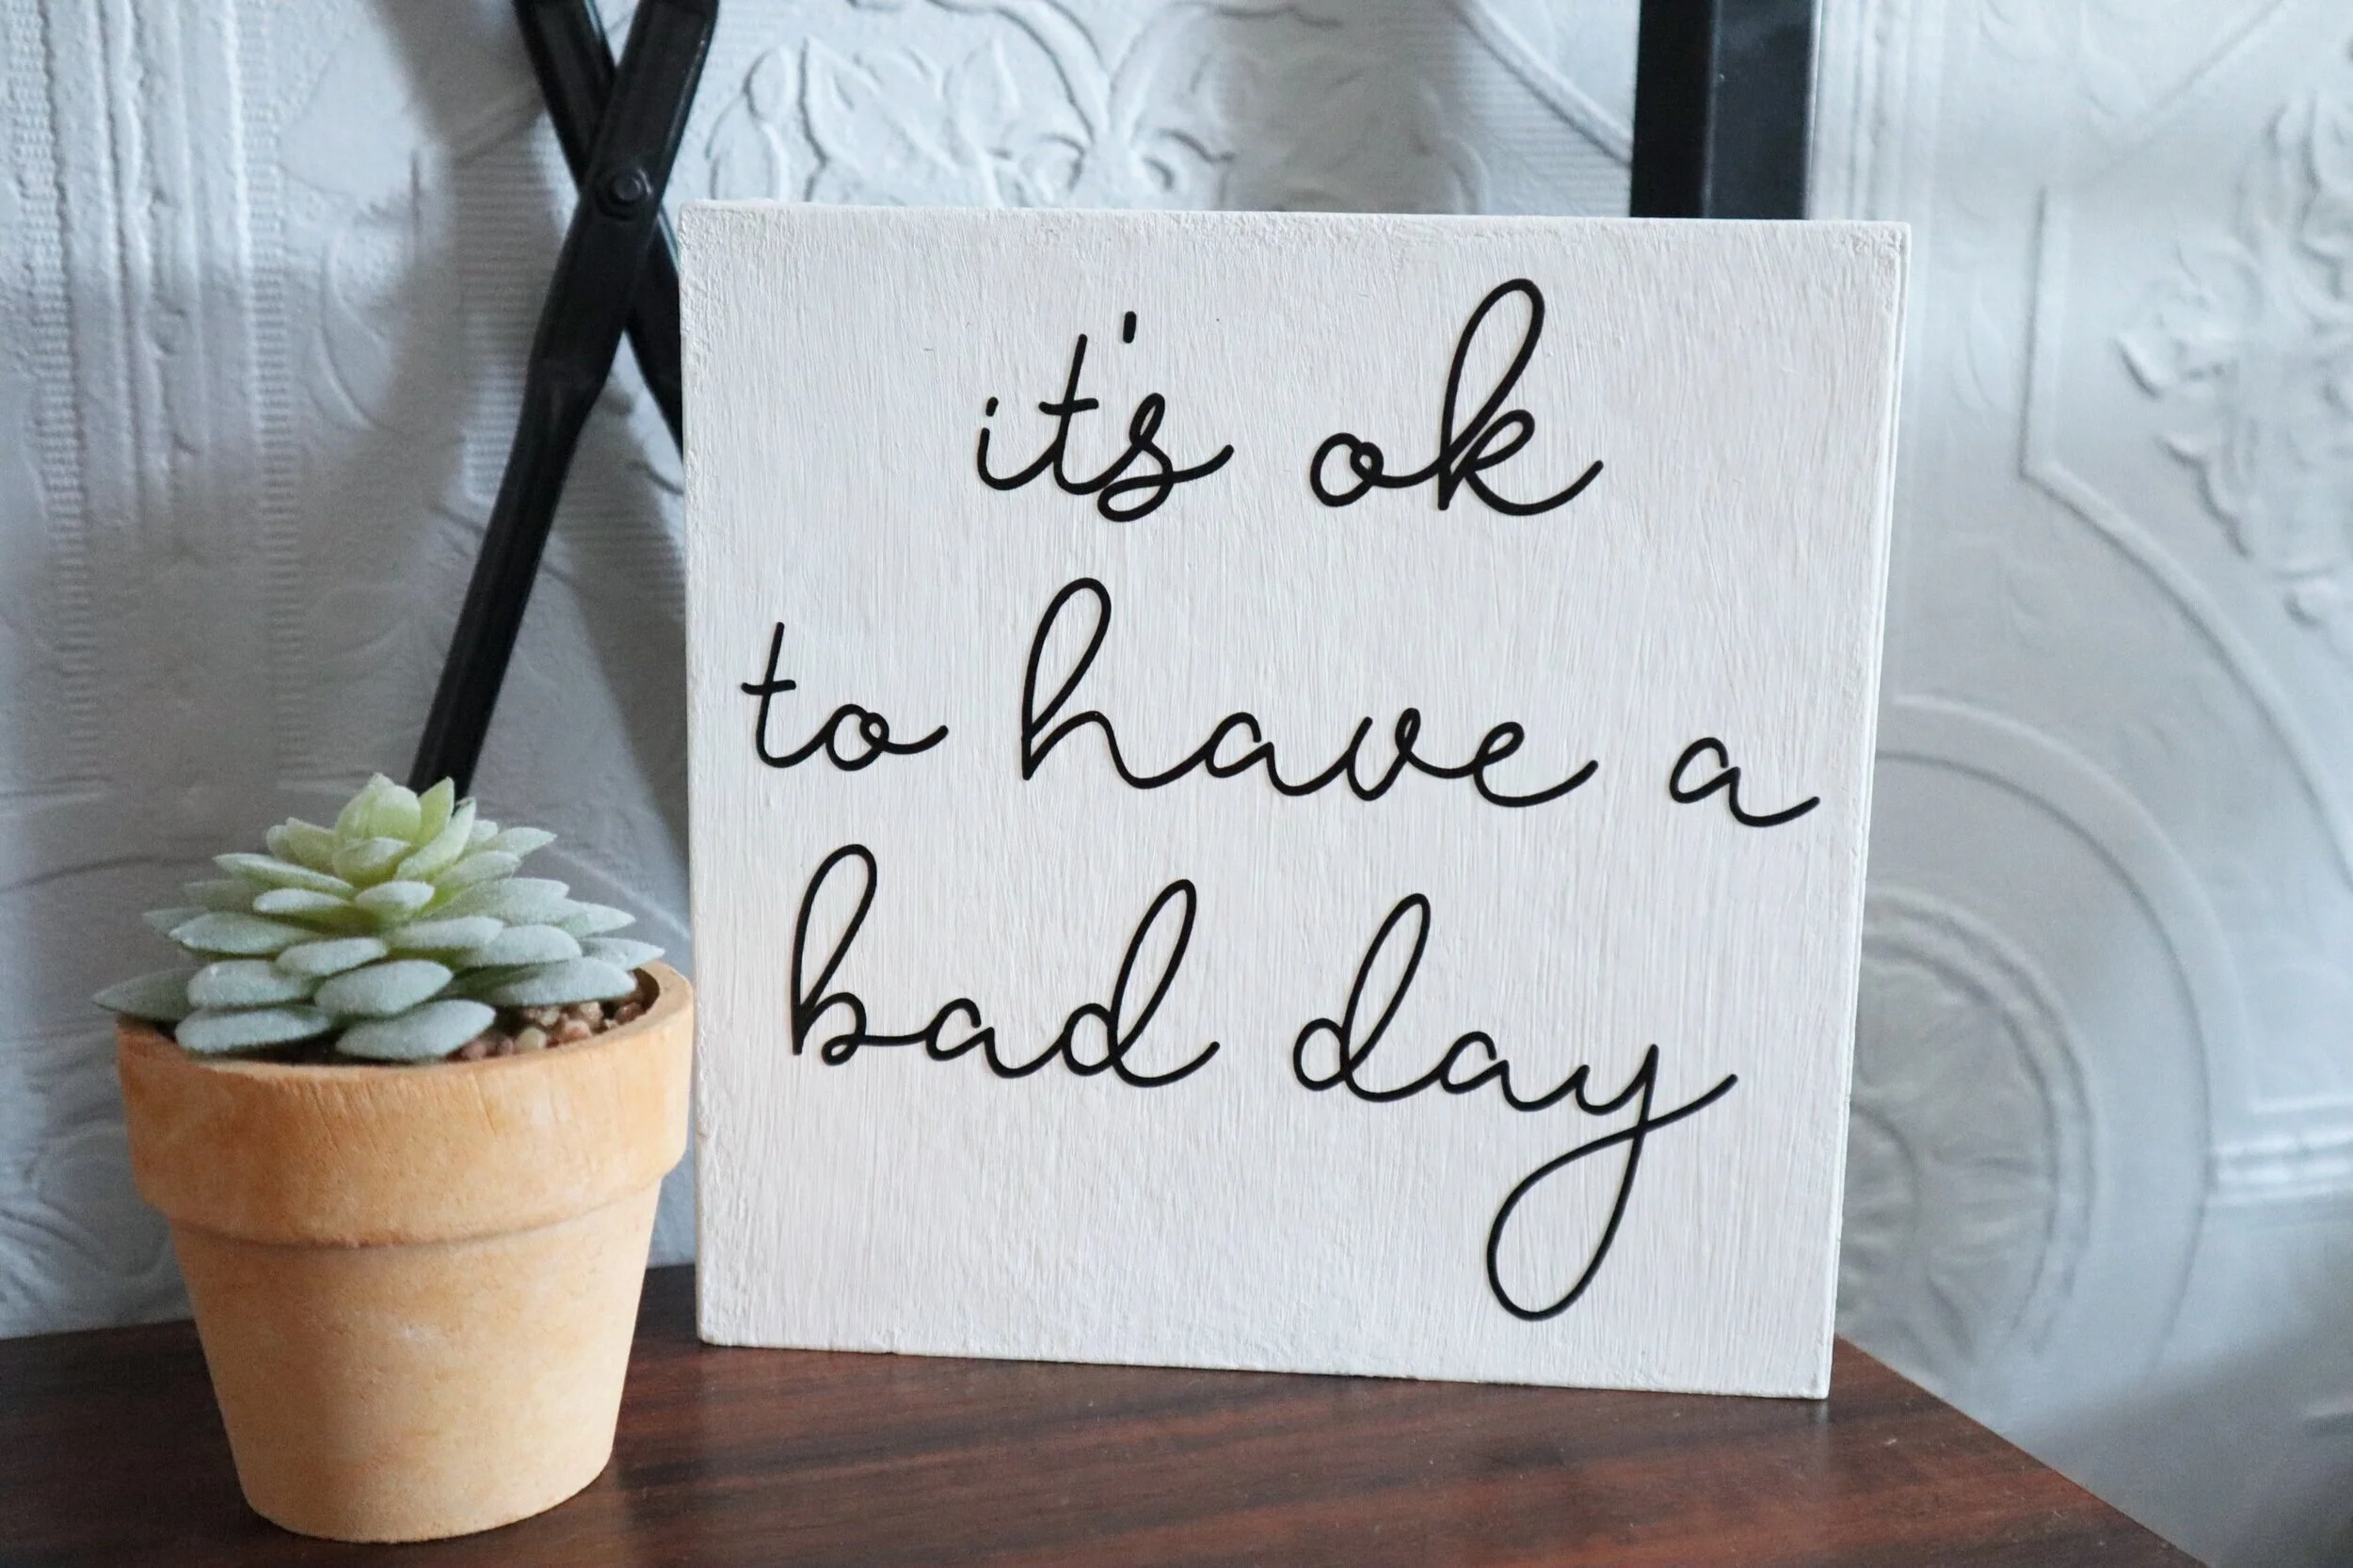
DIY dollar store sign makeover. How to give a dollar tree seasonal free standing faux wood sign a more modern look using your Cricut. DIY vinyl decal using your Cricut 'it's ok to have a bad day' diy sign.

I’ve been working on this little cozy space my girls have claimed in our new home, well it’s actually 100+ year old home but it’s new to us. It’s their play/reading area/hangout zone but I really wanted this space to look like it had more purpose than that. I wanted to create a space that screamed (in a super sweet polite kind of way ;)) “you are loved, you are beautiful, and your heart is amazing, daughter” kind of vibe.

While I’m creating this darling daughter you are loved space I want to share with you not just how I DIY-ed it all but I also want to share with you the same exact cut files and printables I used so you can use them too if you want. You can find all of my freebies in my FREE RESOURCE LIBRARY.

Affiliate Disclosure. Some of the links on this website are affiliate links, which means that I may earn a small commission if you click on the link or make a purchase using the link. If you make a purchase you will not be charged anything additional.

DIY dollar store sign makeover. How to give a dollar tree seasonal free standing faux wood sign a more modern look using your Cricut. DIY vinyl decal using your Cricut 'it's ok to have a bad day' diy sign.

Total transparency here… AFTER I wrote this post (meaning I had already finished the sign, took all the pictures, uploaded everything, pushed publish on the post and posted it to social media) I realized a big UH OH moment! I had added the word to too many times to the “it’s ok to have a bad day” quote. HUGE facepalm to myself. But I have since fixed my error, and honestly though how fitting of a mistake for this project. It really is ok to have a bad day ;)!

DIY dollar store sign makeover. How to give a dollar tree seasonal free standing faux wood sign a more modern look using your Cricut. DIY vinyl decal using your Cricut 'it's ok to have a bad day' diy sign.

Since I’m a frugal kind of momma I extra love how affordable this sign was to make. While I love using my power tools I didn’t use any to make this sign. I actually bought an already made sign from the Dollar Tree and gave that a little makeover. I spent less than $2 to make this small free standing sign using my Cricut and I want to show you how you can make your own without power tools too.

DIY FREE STANDING SIGN + FREE SVG

See the picture below…I wasn’t going to completely retake every single photo so you see my mistake, it’s ok to to have a bad day lol!!

DIY dollar store sign makeover. How to give a dollar tree seasonal free standing faux wood sign a more modern look using your Cricut. DIY vinyl decal using your Cricut 'it's ok to have a bad day' diy sign.

Here’s what I used

1. CUT & WEED THE DECAL

I used my Cricut to cut out my vinyl decal. I used StarCraft vinyl in matte black but honestly it’s not my favorite. I highly recommend ORACAL 651 (or 631 if you have it since this project is for indoor use). I bought the StarCraft thinking I would love it as much as 651 but sadly I don’t.

Grab the SVG for FREE here.

2. SAND

A drop cloth is a must for this if you don’t want glitter everywhere. I usually always lay down a drop cloth when I crafting. It doesn’t make for a super gorgeous backdrop for my tutorials BUT it keeps my surface clean AND I can throw it in the washer when I’m done.

DIY dollar store sign makeover. How to give a dollar tree seasonal free standing faux wood sign a more modern look using your Cricut. DIY vinyl decal using your Cricut 'it's ok to have a bad day' diy sign.

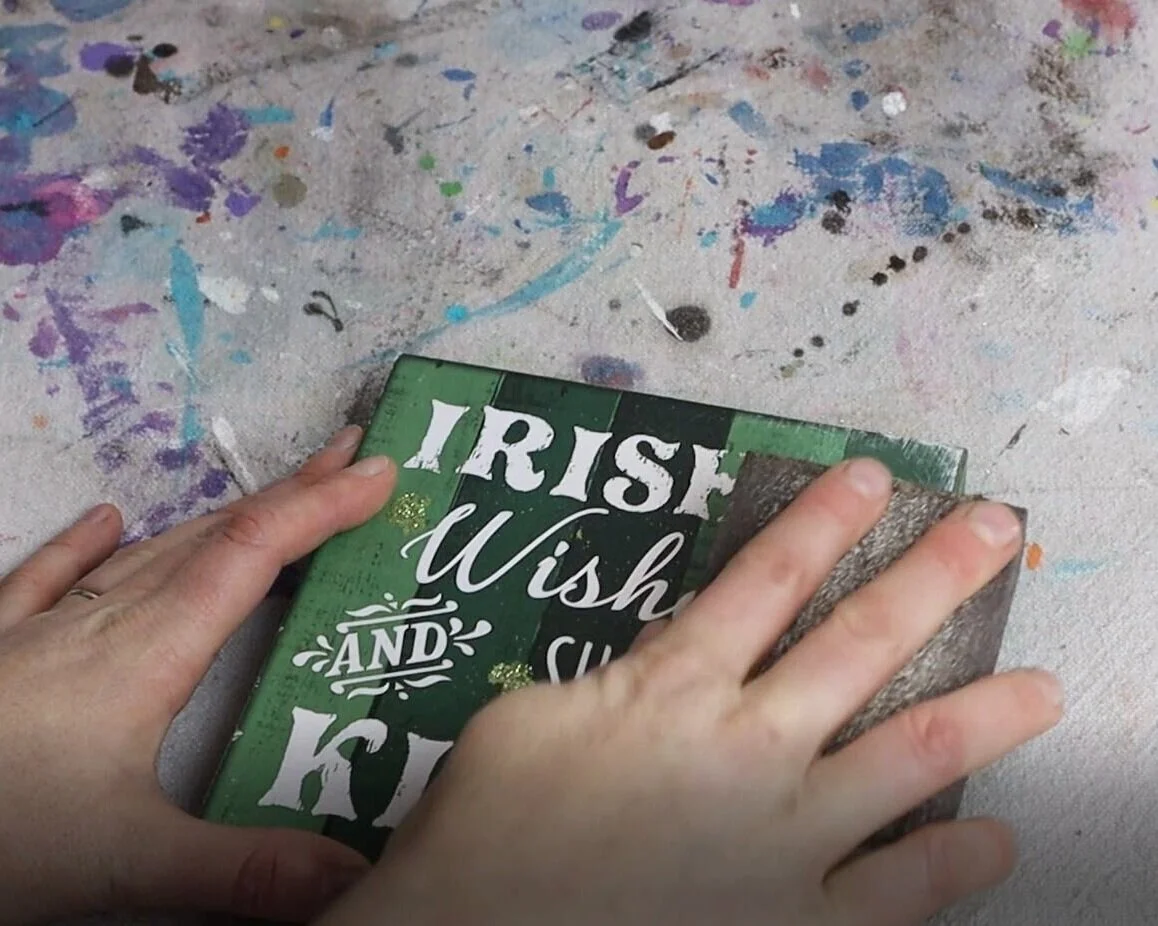
I used a sanding sponge to remove all of the glitter from the Dollar Tree sign first. This surprisingly comes off easily. Then I wiped it down with a paper towel to get all to the sanded stuff off of my sign.

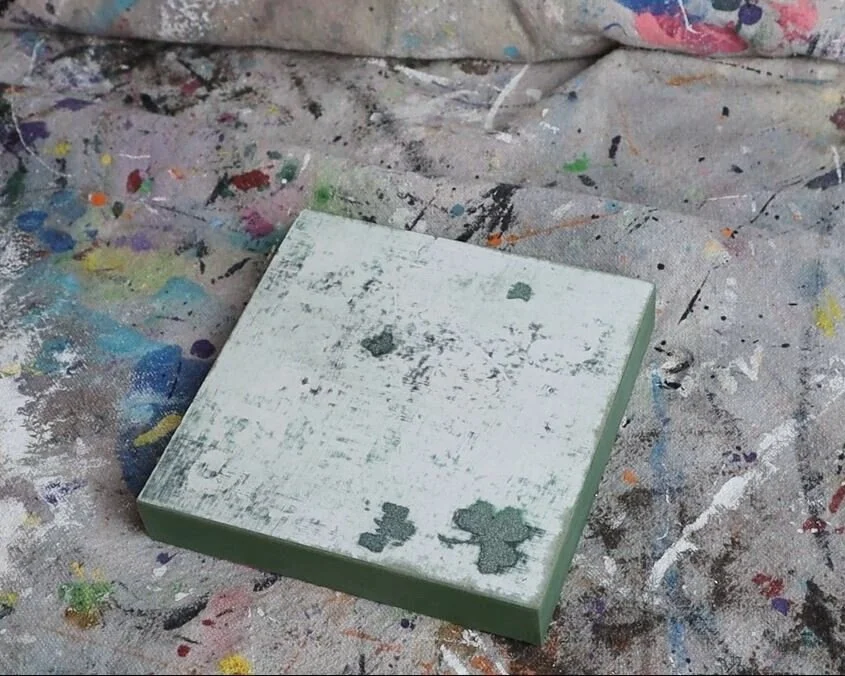
DIY dollar store sign makeover. How to give a dollar tree seasonal free standing faux wood sign a more modern look using your Cricut. DIY vinyl decal using your Cricut 'it's ok to have a bad day' diy sign.

This is what my sign looked like once I sanded it down. I could have sanded more but this much was good enough:)! You mainly want to get all of the glitter off because paint won’t cover over glitter smoothly.

3. PAINT

Then I painted my little sign. This took quite a few coats, 3 actually. I did thin layers so that they would dry smooth and fast. Acrylic paint is what I used but if you want better coverage with less coats chalk paint is a great option too. Be sure to let your paint dry fully between coats.

DIY dollar store sign makeover. How to give a dollar tree seasonal free standing faux wood sign a more modern look using your Cricut. DIY vinyl decal using your Cricut 'it's ok to have a bad day' diy sign.

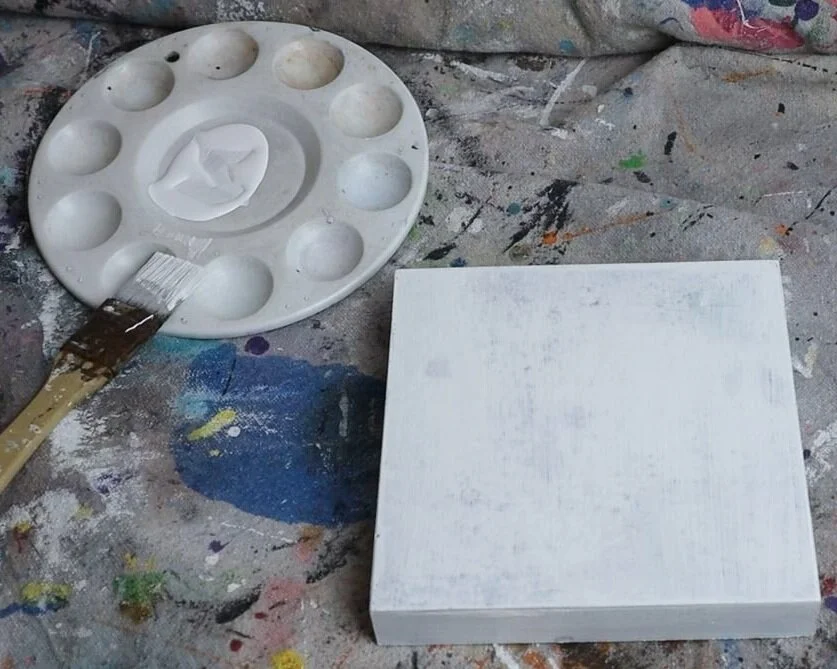
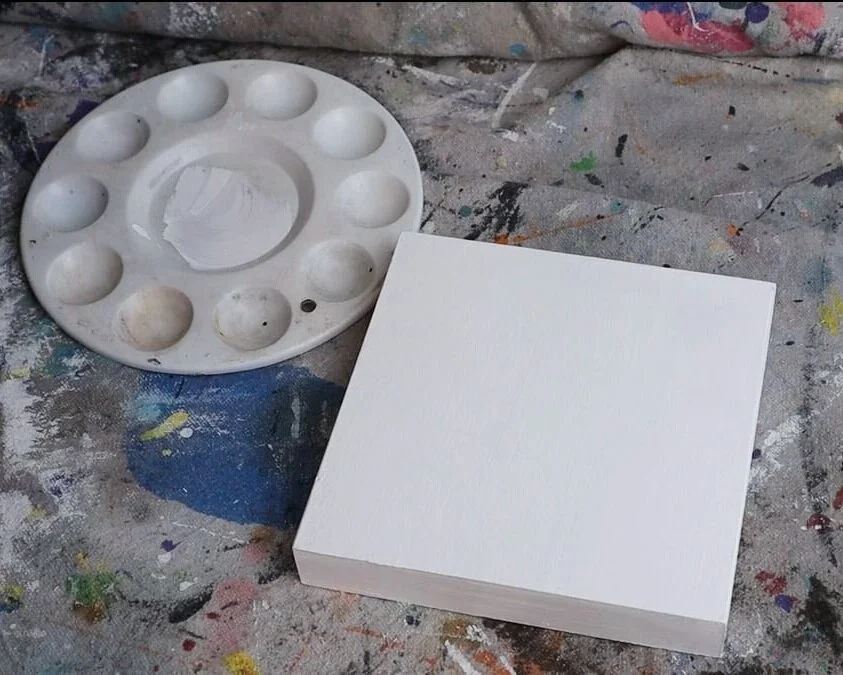
Here’s what my sign base looked like after the first coat of white acrylic paint.

DIY dollar store sign makeover. How to give a dollar tree seasonal free standing faux wood sign a more modern look using your Cricut. DIY vinyl decal using your Cricut 'it's ok to have a bad day' diy sign.

And this is what it looked like after I painted the 3rd coat of white acrylic paint.

4. APPLY THE DECAL

I let my sign base dry overnight before applying my vinyl decal. You just want to be sure your sign is completely dry, vinyl will NOT stick to wet paint. It will peel up and the paint will be stuck to the backside of the vinyl and it will be a mess to fix…trust me I’ve been there and it’s not fun.

DIY dollar store sign makeover. How to give a dollar tree seasonal free standing faux wood sign a more modern look using your Cricut. DIY vinyl decal using your Cricut 'it's ok to have a bad day' diy sign.

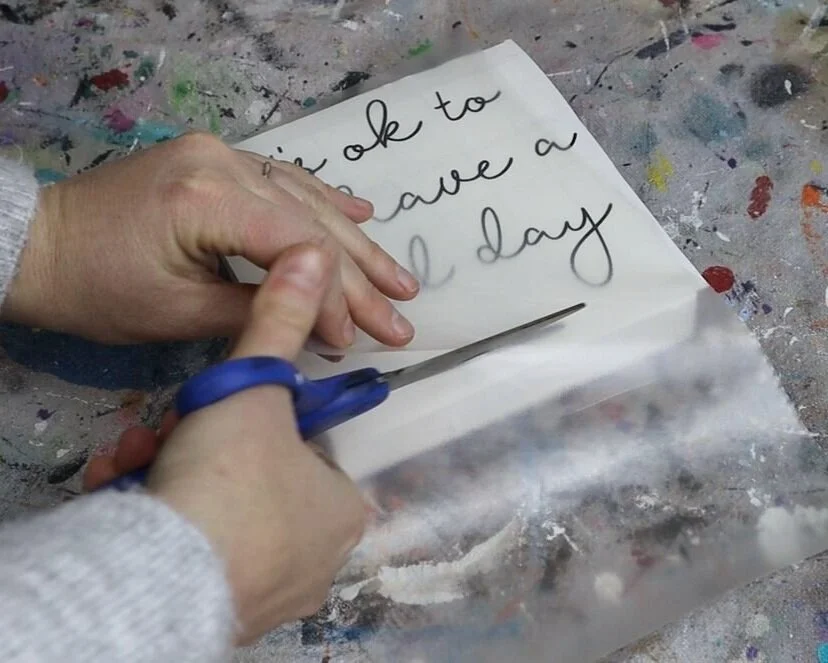
I used my favorite clear transfer tape to apply my decal on to my dollar store base.

DIY dollar store sign makeover. How to give a dollar tree seasonal free standing faux wood sign a more modern look using your Cricut. DIY vinyl decal using your Cricut 'it's ok to have a bad day' diy sign.

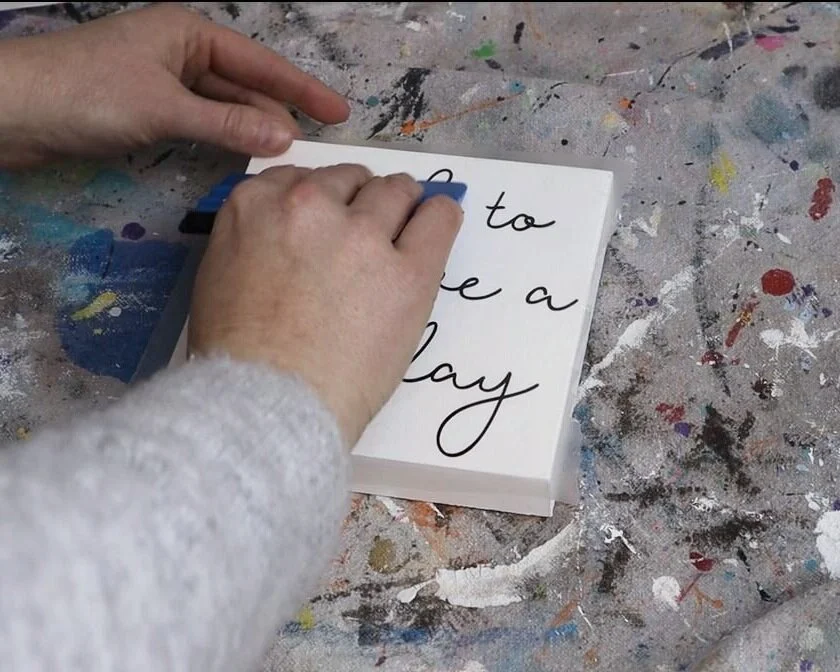
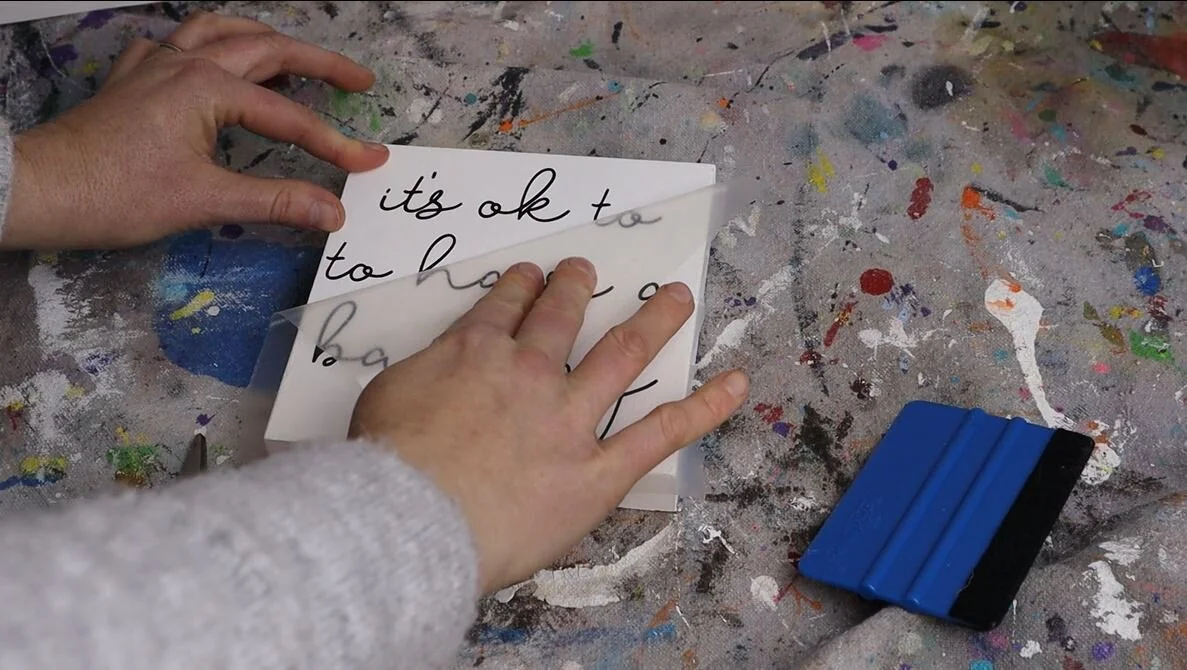
After I was happy with the placement I pressed it down using my trusty blue vinyl squeegee then slowly rolled the transfer tape off of my decal. Be sure when you do this to go VERY SLOW. It’s really easy to go too fast and rip your vinyl. A vinyl squeegee isn’t a must but it does make the job easier. If you don’t have one you an use a library or rewards card.

DIY dollar store sign makeover. How to give a dollar tree seasonal free standing faux wood sign a more modern look using your Cricut. DIY vinyl decal using your Cricut 'it's ok to have a bad day' diy sign.

Then found the perfect spot for it on this industrial ladder tiered shelf I scored off of Amazon. BTW this one is SUPER easy to put together if you’re looking for an easy to assemble tiered shelf. I have bought some DIY shelfs before that were total nightmares…this one was a dream to assemble!

DIY dollar store sign makeover. How to give a dollar tree seasonal free standing faux wood sign a more modern look using your Cricut. DIY vinyl decal using your Cricut 'it's ok to have a bad day' diy sign.

I hope you enjoyed this DIY craft tutorial. If you have any questions please let me know in the comments below. Happy Crafting!

Check out more Cricut craft projects below

Hobby Lobby picture frame makeover

DIY Hobby Lobby clearance picture frame makeover. How to use Dollar Tree office clips to makeover an old picture frame.

EASY CLEARANCE PICTURE FRAME MAKEOVER

I love browsing the clearance aisles. Idk what it is about a good buy but it sure does give this momma a feeling of accomplishment lol! Even if what I find isn’t exactly what I’m looking for it’s usually affordable enough to buy it up and give it a little makeover.

Affiliate Disclosure. Some of the links on this website are affiliate links, which means that I may earn a small commission if you click on the link or make a purchase using the link. If you make a purchase you will not be charged anything additional.

Like these cute floating cubby shelves I picked up at Big Lots. They were nothing close to the color I wanted but the bones were good. With a little paint, my Cricut and some vinyl those boy themed shelves took little effort to transform into boho floating shelves for my girl’s bedroom.

DIY Hobby Lobby clearance picture frame makeover. How to use Dollar Tree office clips to makeover an old picture frame.

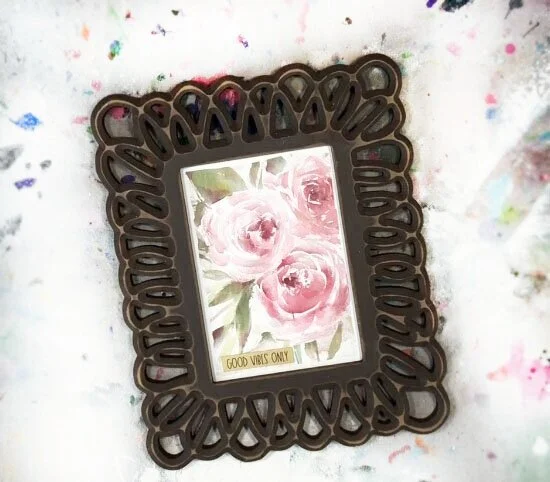
When I found this almost outdated looking frame at Hobby Lobby for $5.49 I wasn’t loving the look it had BUT again, it had good bones so I bought it.

CLEARANCE FIND HOBBY LOBBY PICTURE FRAME MAKEOVER

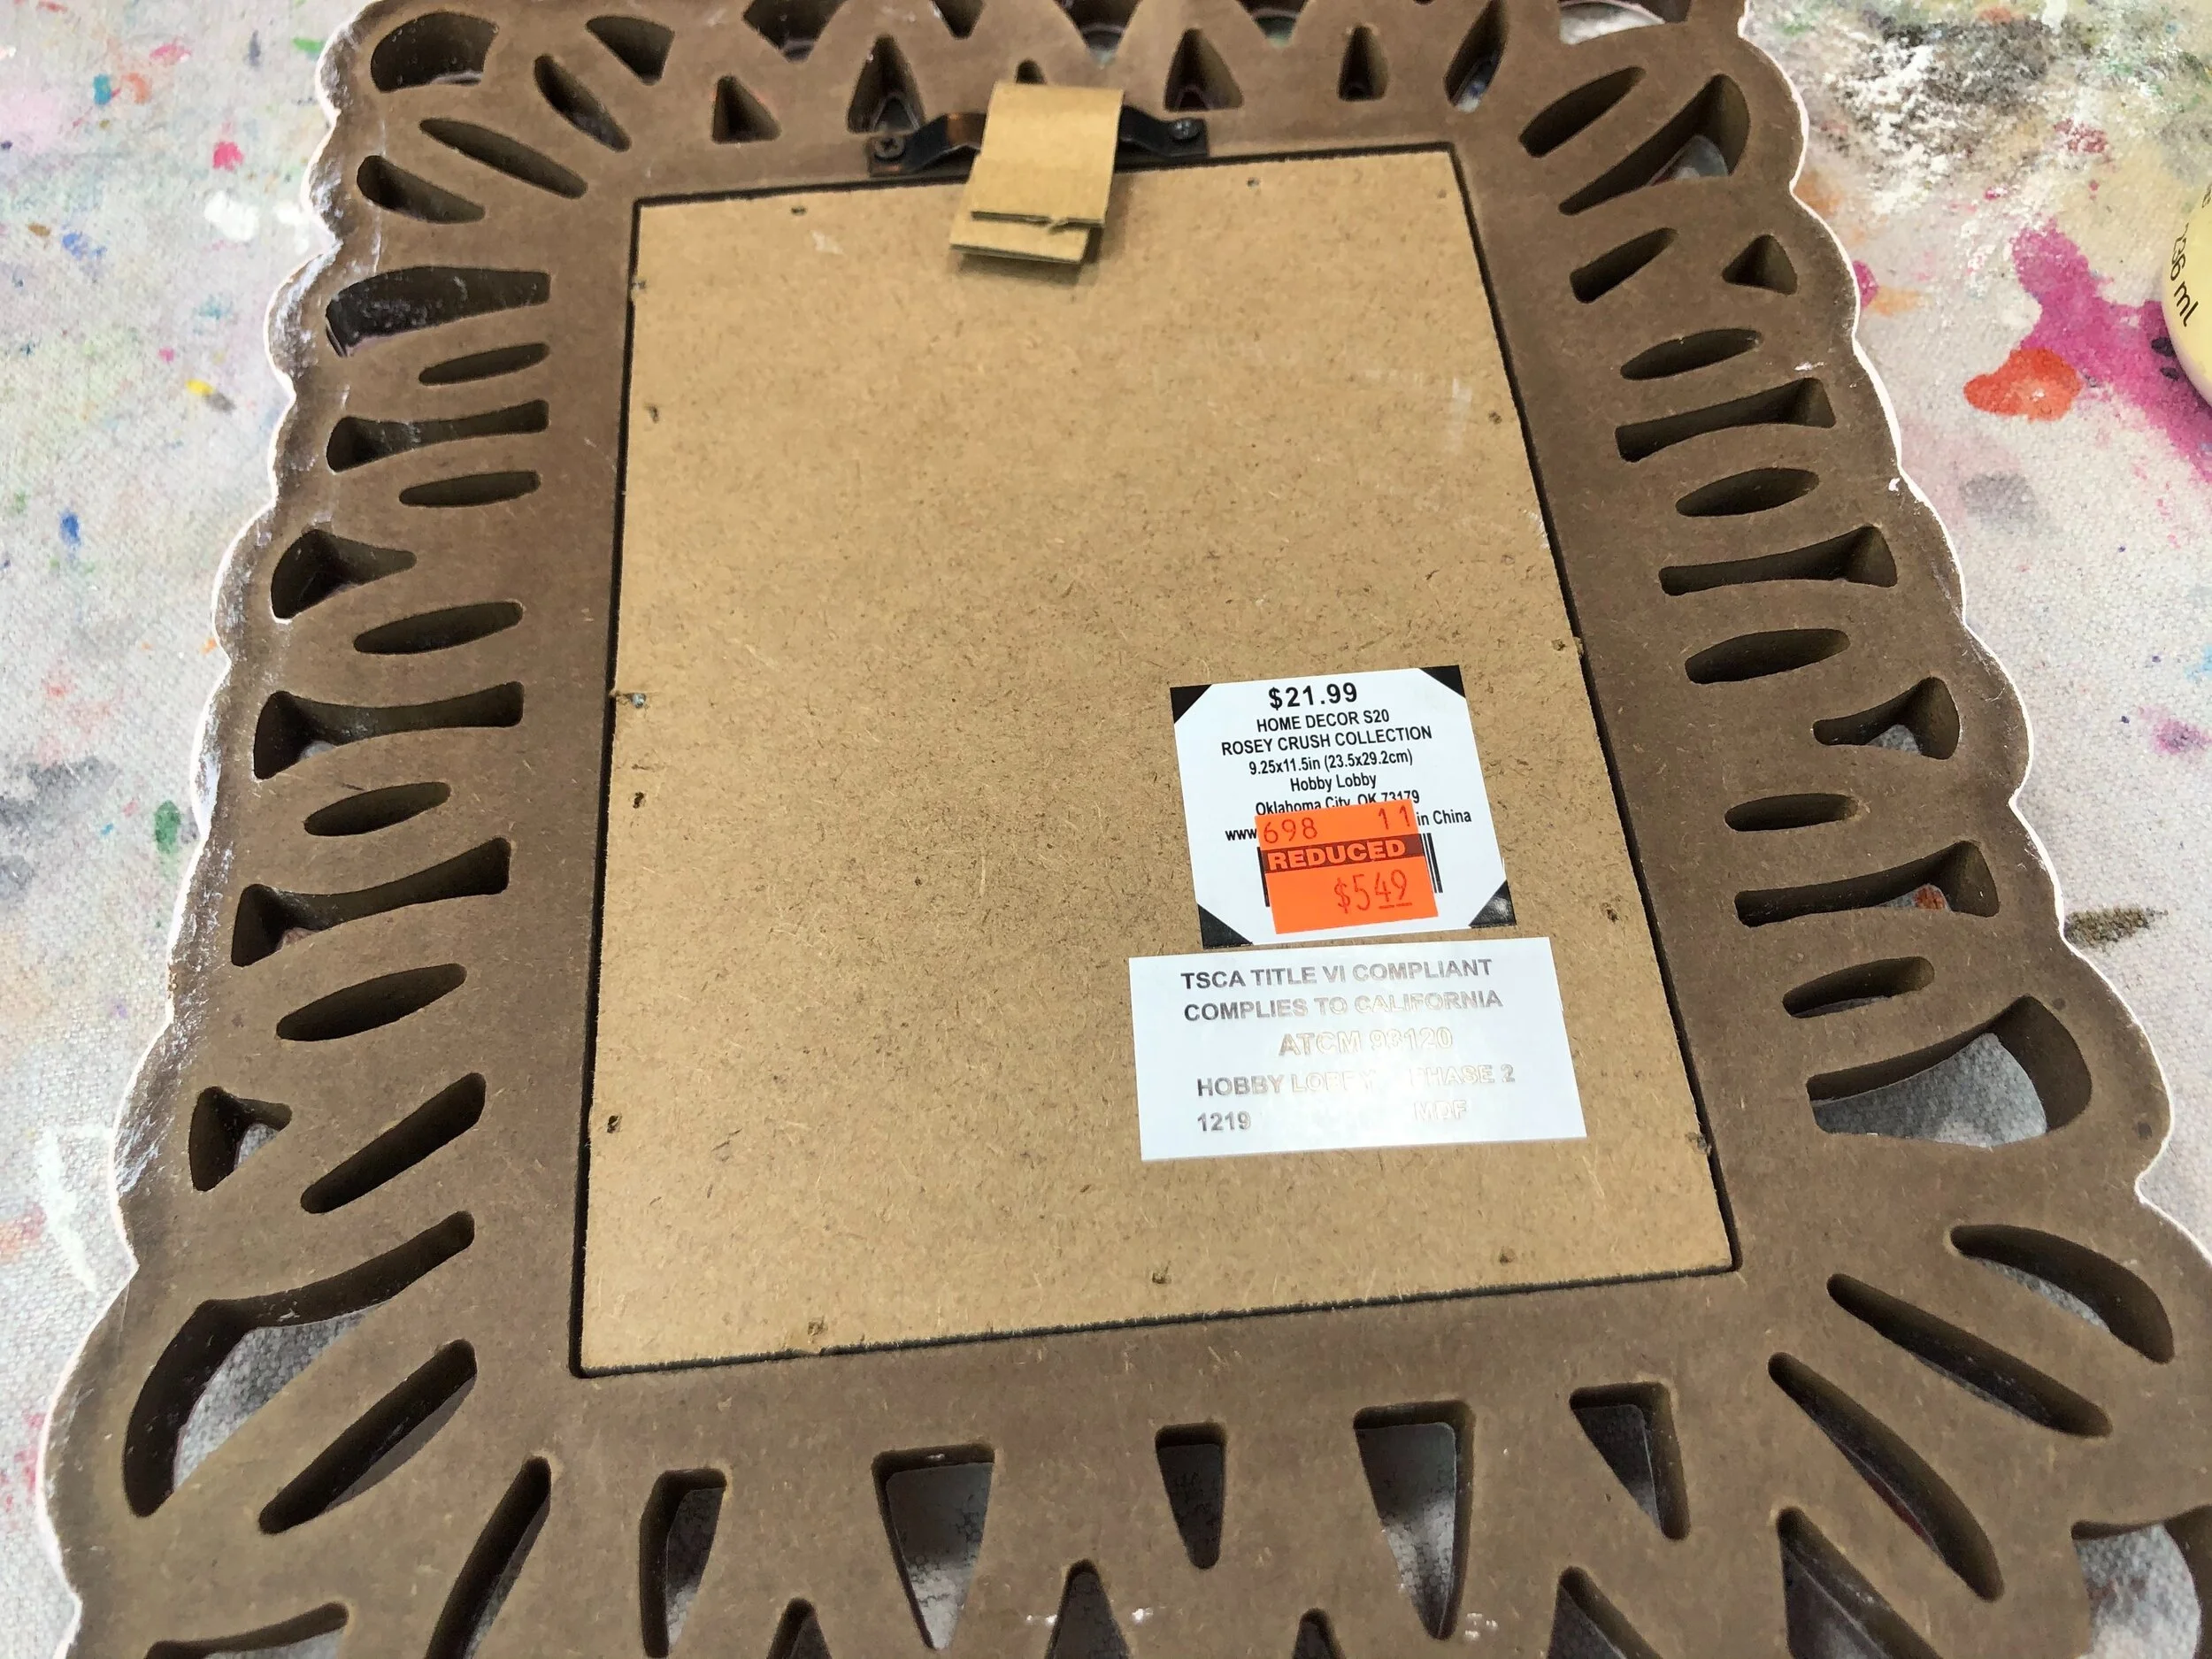
Here’s what the frame looked like when I bought it. I mean, it’s cute because I actually really do love that old lady old fashioned style. But I bought this to put in my girl’s hallway/lounge area and this would totally clash as is.

DIY Hobby Lobby clearance picture frame makeover. How to use Dollar Tree office clips to makeover an old picture frame.

I couldn’t believe this frame was $22! And this is why I love strolling the aisles of the craft stores.

DIY Hobby Lobby clearance picture frame makeover. How to use Dollar Tree office clips to makeover an old picture frame.

This was such an easy craft!

Here’s what I used

1.PAINT THE FRAME

The first thing I did was paint the frame. I wasn’t totally sold on painting over the florals at this point so I wanted to paint the frame first to see how it looked.

I used a paint sample of Valspar pink paint that I found at my local home improvement store. It’s more of a peachy pink color, super soft but not too girly.

DIY Hobby Lobby clearance picture frame makeover. How to use Dollar Tree office clips to makeover an old picture frame.

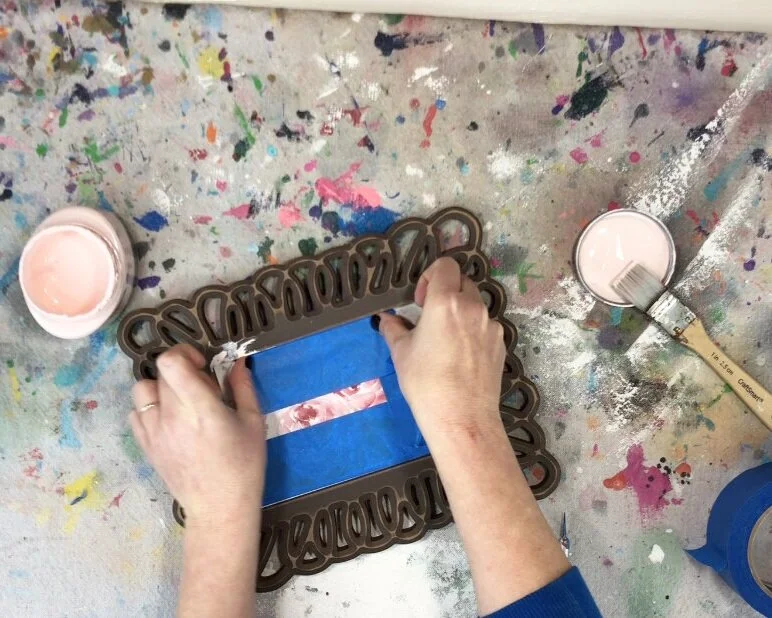
I started painting and realized I forgot to tape off my edges which is why you can see the pink paint along the edges of the frame while I’m taping it off with my wide painters tape.

DIY Hobby Lobby clearance picture frame makeover. How to use Dollar Tree office clips to makeover an old picture frame.

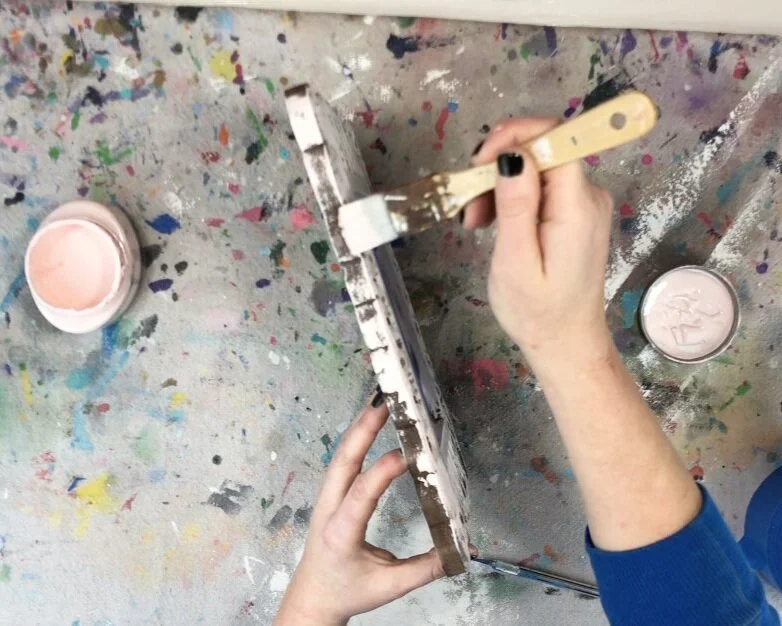
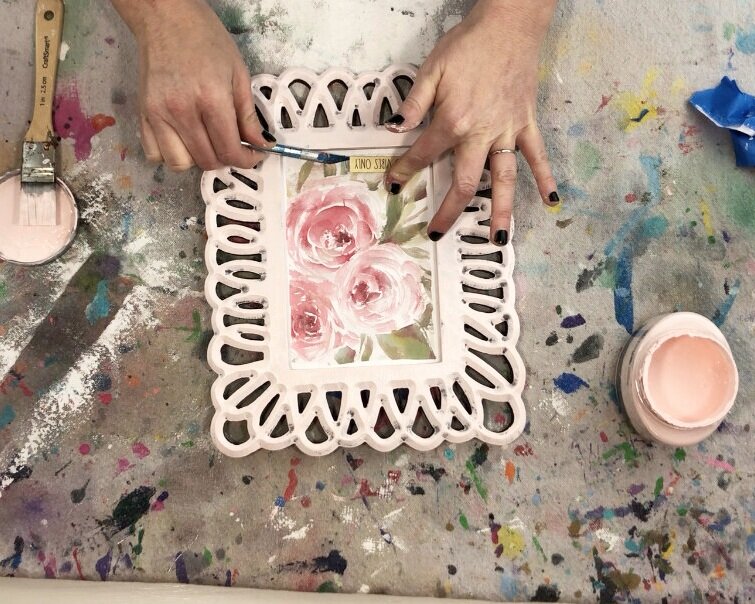
I used a dry 1” paint brush (is my FAVORITE CRAFTY PAINTBRUSH to use) and painted a thin layer of pink paint all over the front and sides of the frame.

DIY Hobby Lobby clearance picture frame makeover. How to use Dollar Tree office clips to makeover an old picture frame.

I didn’t worry about painting inside the cutouts and I painted lightly so that the dark on the frame would show through in some spots.

DIY Hobby Lobby clearance picture frame makeover. How to use Dollar Tree office clips to makeover an old picture frame.

Once the first coat of paint was dry I painted a second coat on my frame.

DIY Hobby Lobby clearance picture frame makeover. How to use Dollar Tree office clips to makeover an old picture frame.

2. PAINT THE INSIDE

After the frame was all dry and the painters tape taken off I removed the little good vibes only decal using my xacto knife. It actually came off pretty easily. I wasn’t sure if I was going to keep it so I set it aside instead of tossing it in the trash.

DIY Hobby Lobby clearance picture frame makeover. How to use Dollar Tree office clips to makeover an old picture frame.

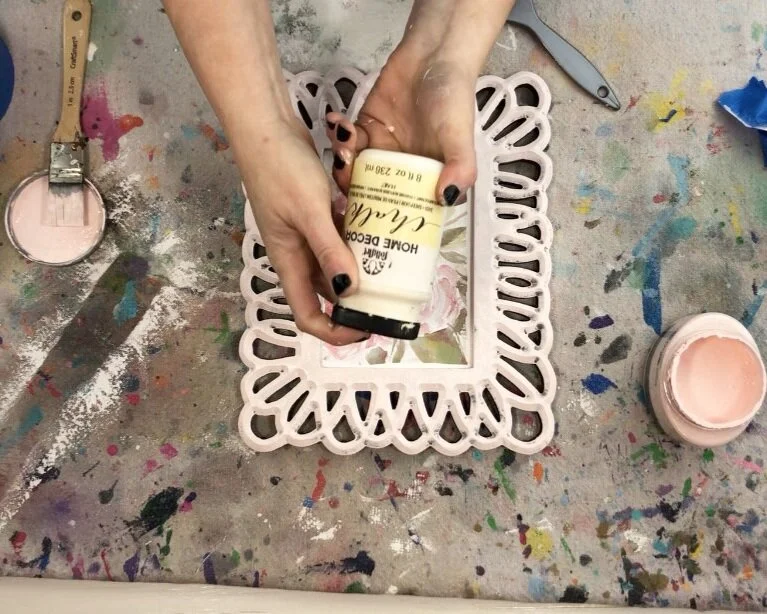
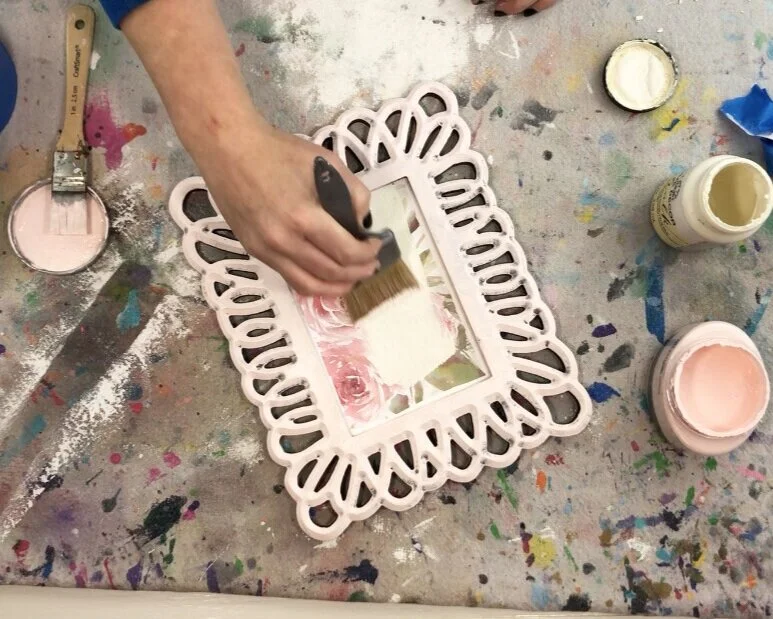
I used chalk paint, the color sheepskin, to paint the frame. I would have preferred white but I didn’t have that on hand so I made do with what I had in my craft room. Sheep skin chalk paint it was!

DIY Hobby Lobby clearance picture frame makeover. How to use Dollar Tree office clips to makeover an old picture frame.

I painted on a super thin layer, just enough to still be able to see the floral print through the paint.

DIY Hobby Lobby clearance picture frame makeover. How to use Dollar Tree office clips to makeover an old picture frame.

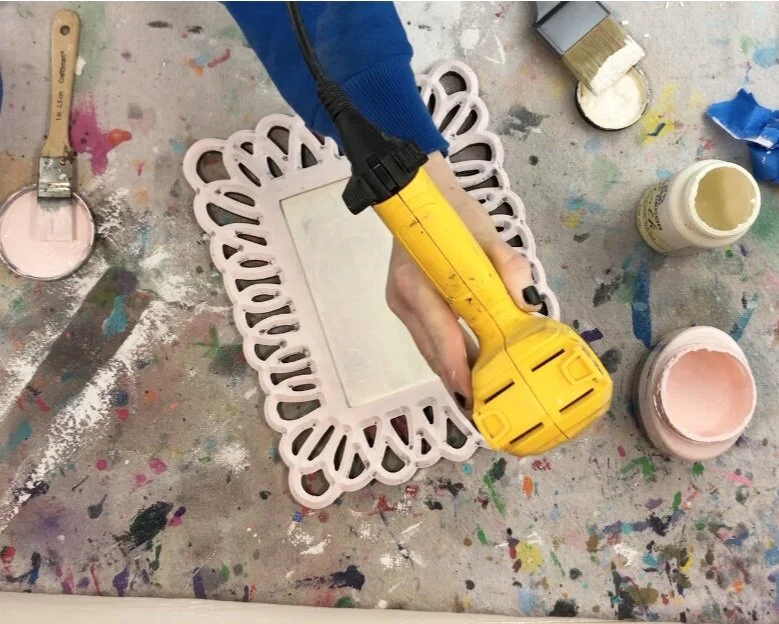
After that was dry I paint a second layer of the chalk paint. I used my handy heat gun to help the paint dry a little faster.

DIY Hobby Lobby clearance picture frame makeover. How to use Dollar Tree office clips to makeover an old picture frame.

3. ADD THE ACCENT & PICTURE CLIP

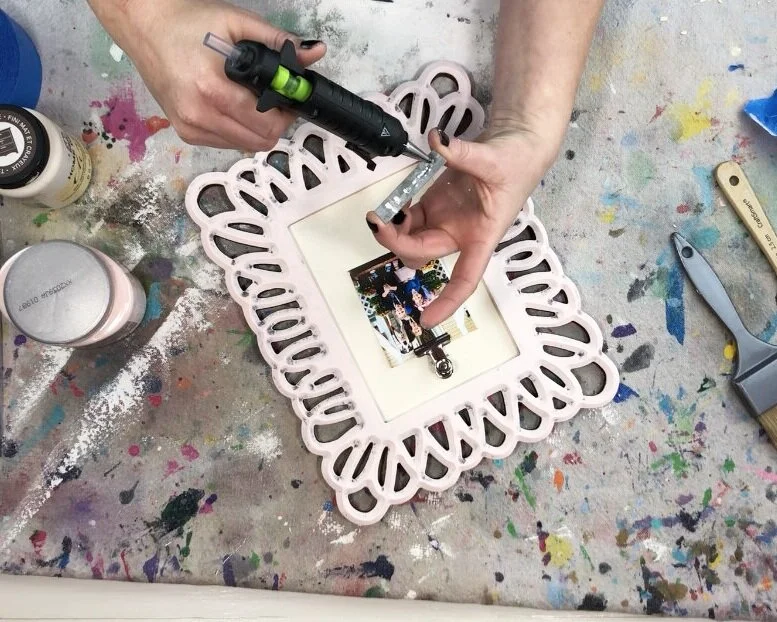
Once my paint was totally dry I used hot glue gun to attach the picture hanging clip and the good vibes only metal decal.

I arranged them on the frame before I glued them down to be sure I was happy with it.

DIY Hobby Lobby clearance picture frame makeover. How to use Dollar Tree office clips to makeover an old picture frame.

I just love how this frame turned out!

DIY Hobby Lobby clearance picture frame makeover. How to use Dollar Tree office clips to makeover an old picture frame.

I hope you enjoyed this frugal crafty makeover. Let me know if you have any questions in the comments below.

Happy Crafting!

Dollar store Christmas star makeover

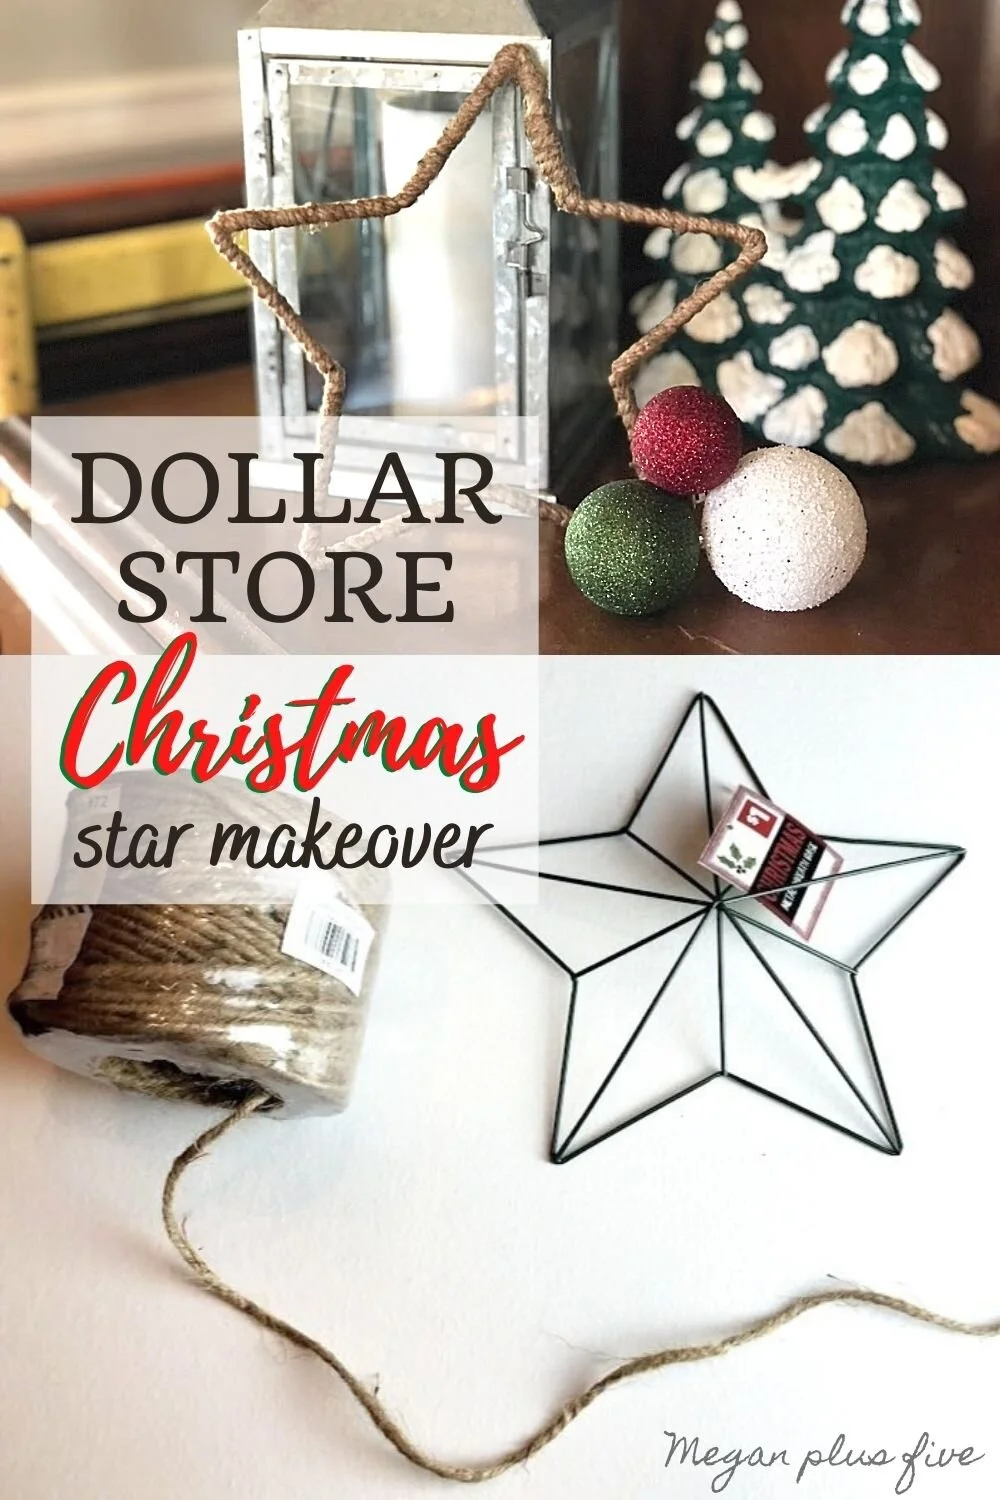
DIY dollar store Christmas decor. Christmas decorations on a budget. How to make a rustic farmhouse style star using twine or just and a wire star form.

The dollar stores are really outdoing themselves lately with their Christmas selections. I have found so many great finds there to either add to my Christmas décor OR give a bit of a makeover then add it to my Christmas decorations.

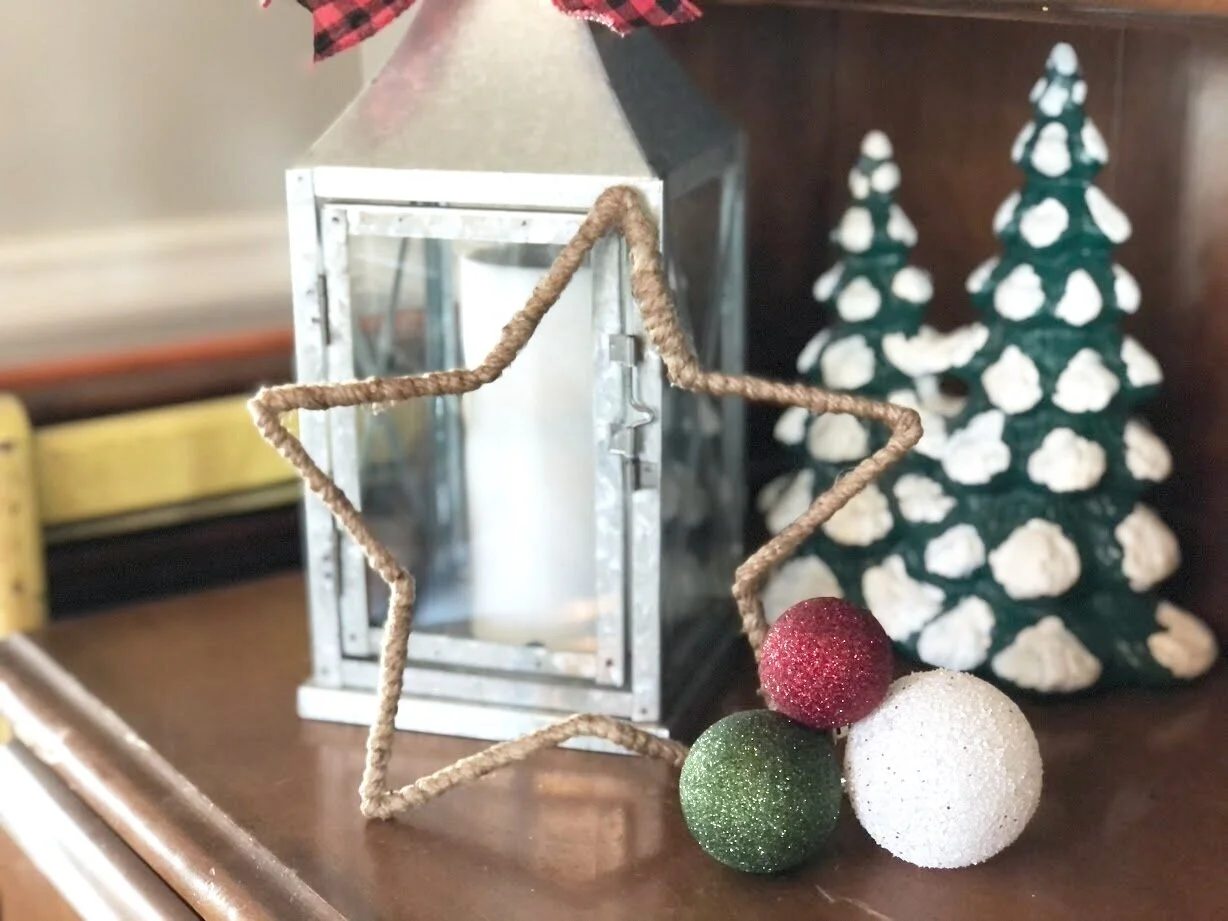
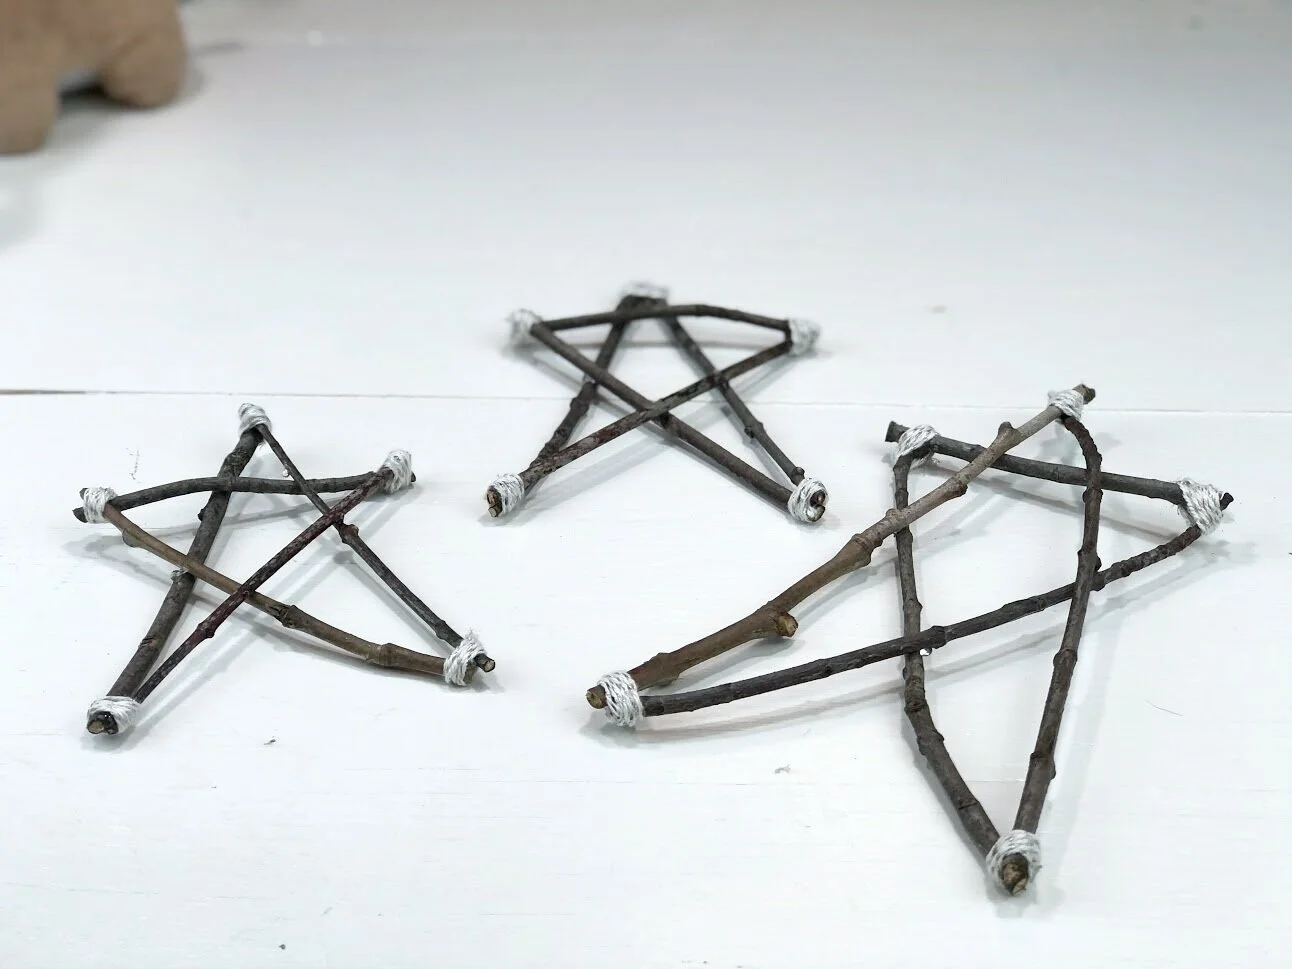
I found this little wire star at the Dollar General last night and since it was just $1 I snagged it up to take it home and give it a little makeover. Frugal living just runs through my veins. If you like this budget friendly Christmas DIY you will probably love these DIY TWIG STARS that basically costs $0 to make.

Affiliate Disclosure. Some of the links on this website are affiliate links, which means that I may earn a small commission if you click on the link or make a purchase using the link. If you make a purchase you will not be charged anything additional.

DIY dollar store Christmas decor. Christmas decorations on a budget. How to make a rustic farmhouse style star using twine or just and a wire star form.

I was originally going to wrap the wire star form in twine but that turned out hideous lol! It was bulky and just plain ugly. So I thought instead to remove the middle pieces and then wrap it and it turned out so simple but perfect for my Christmas decorations.

DOLLAR STORE STAR MAKEOVER

Here’s what you’ll need

DISCLOSURE: not responsible for any damages caused. Please craft at your own risk :)

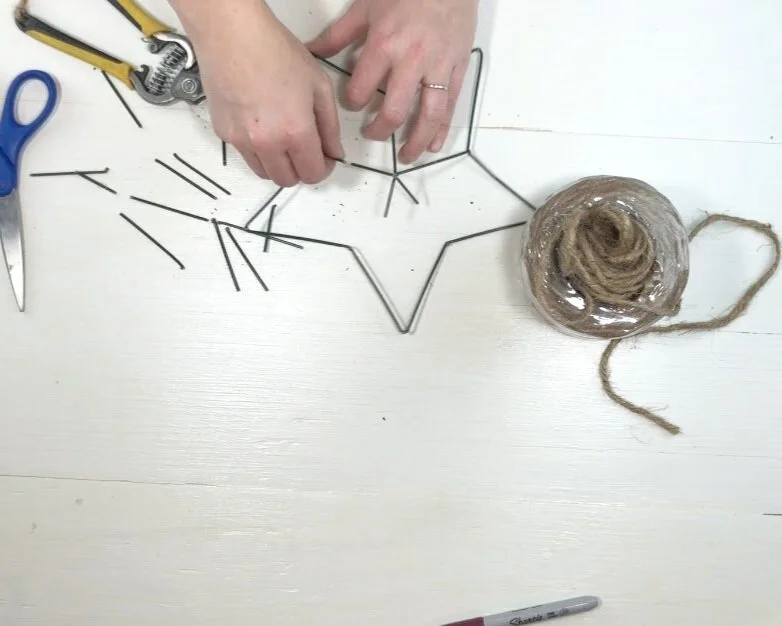
1. REMOVE THE MIDDLE WIRE

This was actually harder than I thought it would be. I had to try and cut it with all my might then bend it away in pieces.

DIY dollar store Christmas decor. Christmas decorations on a budget. How to make a rustic farmhouse style star using twine or just and a wire star form.

2. WRAP THE STAR

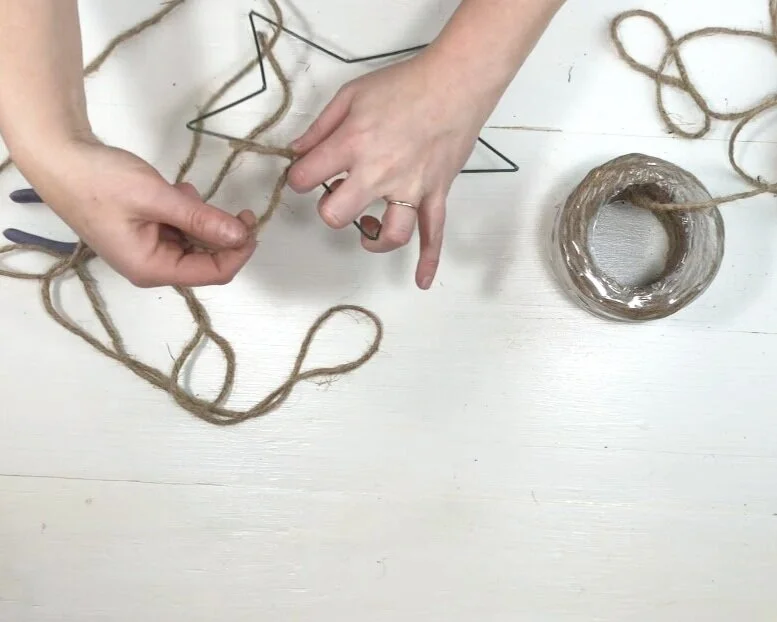
Then I cut a long piece of twine and just wrapped and wrapped and wrapped till I got back to the starting point. Around the corners of the wire star I added hot glue to reinforce the frame then wrapped it in twine.

DIY dollar store Christmas decor. Christmas decorations on a budget. How to make a rustic farmhouse style star using twine or just and a wire star form.

When I got to the very end I secured it in place with hot glue.

3. REMOVE THE FRZZIES

My star had a ton of frizz to it from wrapping and wrapping. So I used my lighter to remove those. I just lightly waved my lighter over the areas that I wanted the frizz gone and was sure to blow as soon as it touched the star so it wouldn’t catch fire.

DIY dollar store Christmas decor. Christmas decorations on a budget. How to make a rustic farmhouse style star using twine or just and a wire star form.

That’s it! Quick and easy dollar store Christmas makeover craft.

DIY dollar store Christmas decor. Christmas decorations on a budget. How to make a rustic farmhouse style star using twine or just and a wire star form.

I hope you enjoyed this crafty tutorial. If you have any questions please leave them in the comments below.

Interchangeable Christmas pallet sign

DIY twig stars for Christmas pallet sign. Interchangeable Christmas home decor on a budget. How to make easy and simple reversible home décor for the holidays. Make a sign from twigs.

INTERCHANGEABLE WINTER PALLET SIGN

I love decorating for the holidays. Especially Christmas. Now that I have a bigger home to decorate I’m finding it a little challenging to do AND keep it in budget. I have always had the heart of a frugal women so spending an arm and a leg to put up Christmas décor just wasn’t happening.

That’s why in the fall I made this lightweight faux pallet sign. It’s a blank pallet style sign that I can change out with the seasons. It’s a big statement type piece that I prop up on my dining room hutch. I love this so much. Best of all the planks I used to make this sign were left over from this plank wall project.

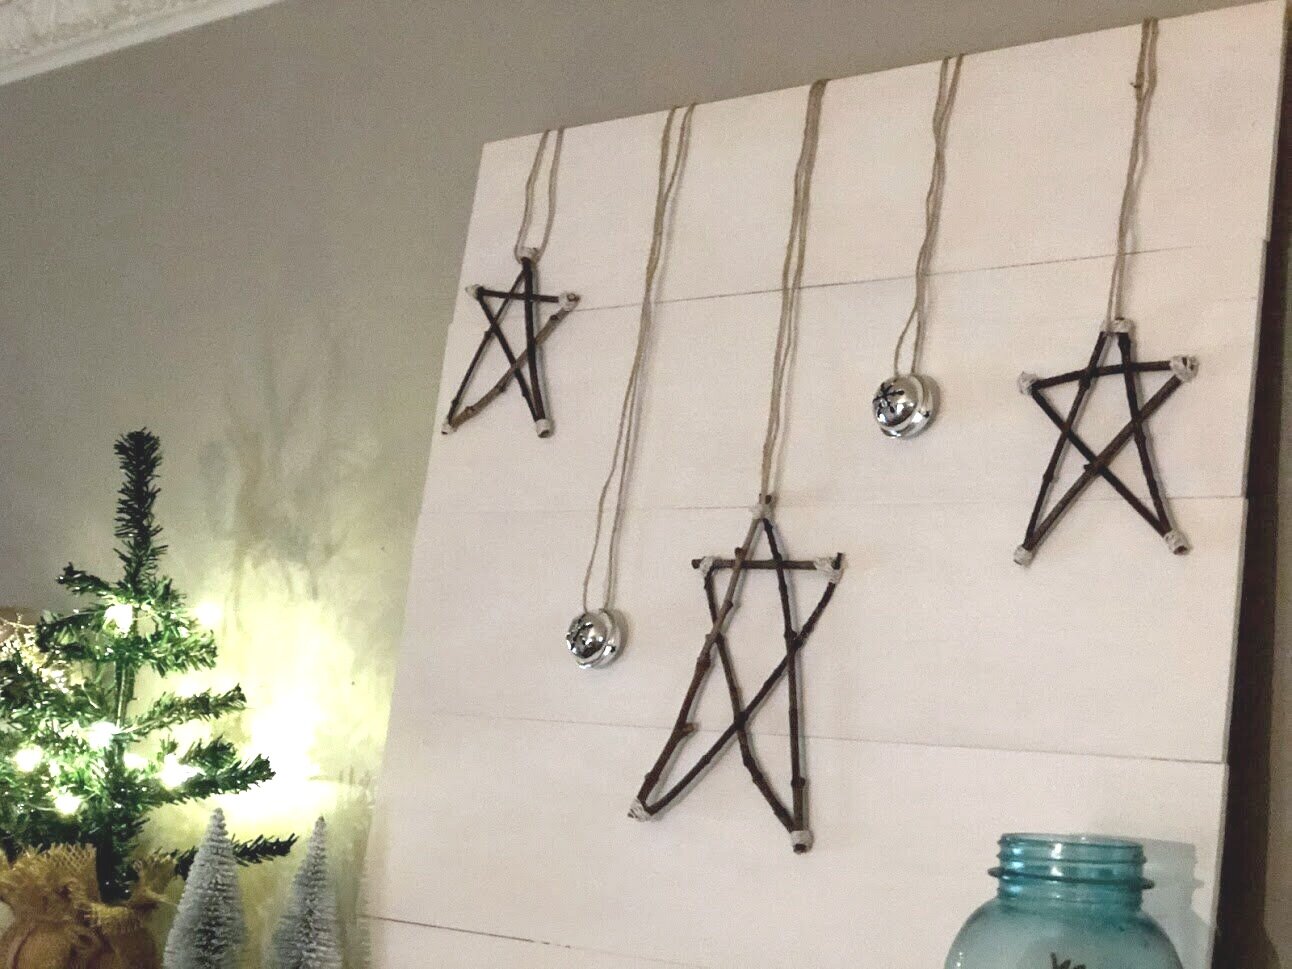
I really tried hard to spend minimal funds for Christmas decorating. So, for Christmas I had this great idea to make stars from twigs I had in the backyard. And they turned out so cute! I want to make more!!

Affiliate Disclosure. Some of the links on this website are affiliate links, which means that I may earn a small commission if you click on the link or make a purchase using the link. If you make a purchase you will not be charged anything additional.

DIY twig stars for Christmas pallet sign. Interchangeable Christmas home decor on a budget. How to make easy and simple reversible home décor for the holidays. Make a sign from twigs.

I made 2 smaller twig stars and 1 medium sized star. You can see how I made my twig stars click here.

I was so glad I snagged up a package of silver bells from the Dollar Tree prior to making this craft because without them I don’t think it would have turned out so cute or looked as festive for Christmas.

DIY twig stars for Christmas pallet sign. Interchangeable Christmas home decor on a budget. How to make easy and simple reversible home décor for the holidays. Make a sign from twigs.

Here’s what I used

1. PLACE THE DECORATIONS

The first thing I did was place my twig stars and bells on my pallet sign to see where I wanted them.

DIY twig stars for Christmas pallet sign. Interchangeable Christmas home decor on a budget. How to make easy and simple reversible home décor for the holidays. Make a sign from twigs.

2. MEASURE

Next I measured out how much jute I would need to hang my decorations from the backside of my sign. I doubled the amount of jute since I was looping it and hanging it from the backside.

DIY twig stars for Christmas pallet sign. Interchangeable Christmas home decor on a budget. How to make easy and simple reversible home décor for the holidays. Make a sign from twigs.

3. ADD THE JUTE

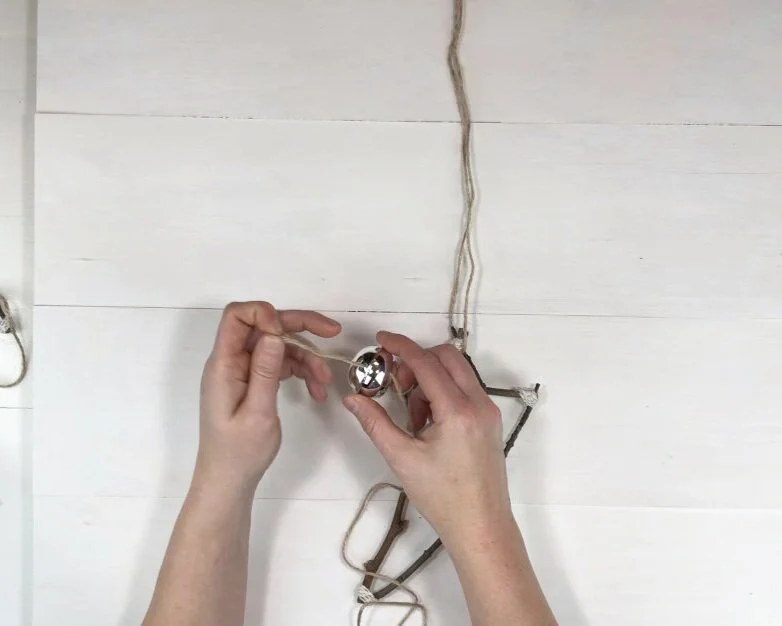
The stars were easy to add the jute to. I just fed the jute through the top of each twig star. The bells were a little more difficult. I wanted to see the snowflakes that were on the bottom side of the bells so I had to hang them sideways.

DIY twig stars for Christmas pallet sign. Interchangeable Christmas home decor on a budget. How to make easy and simple reversible home décor for the holidays. Make a sign from twigs.

I fed the jute through one side of the bell and then out the other side and tied the two ends of the jute together.

DIY twig stars for Christmas pallet sign. Interchangeable Christmas home decor on a budget. How to make easy and simple reversible home décor for the holidays. Make a sign from twigs.

4. HANG

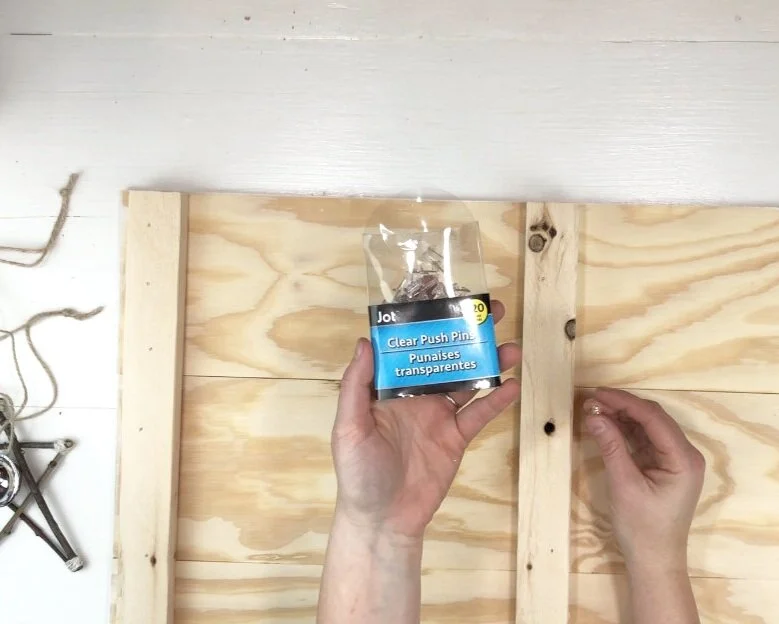
I hung my twig stars and silver bells from the backside of my pallet sign. I just kina eyeballed where I wanted them to be. Placed a pushpin there and pushed it in as far as I could get it.

DIY twig stars for Christmas pallet sign. Interchangeable Christmas home decor on a budget. How to make easy and simple reversible home décor for the holidays. Make a sign from twigs.

Then I looped where I had tied the jute ends together around the pushpin and draped it over to the front side of the pallet sign.

DIY twig stars for Christmas pallet sign. Interchangeable Christmas home decor on a budget. How to make easy and simple reversible home décor for the holidays. Make a sign from twigs.

I prop my pallet sign up on my dining room hutch, which one day I need to make time to give a makeover and I will most definitely post the before and after for you to see on here:)!!

DIY twig stars for Christmas pallet sign. Interchangeable Christmas home decor on a budget. How to make easy and simple reversible home décor for the holidays. Make a sign from twigs.

Happy crafting!

Check out more below

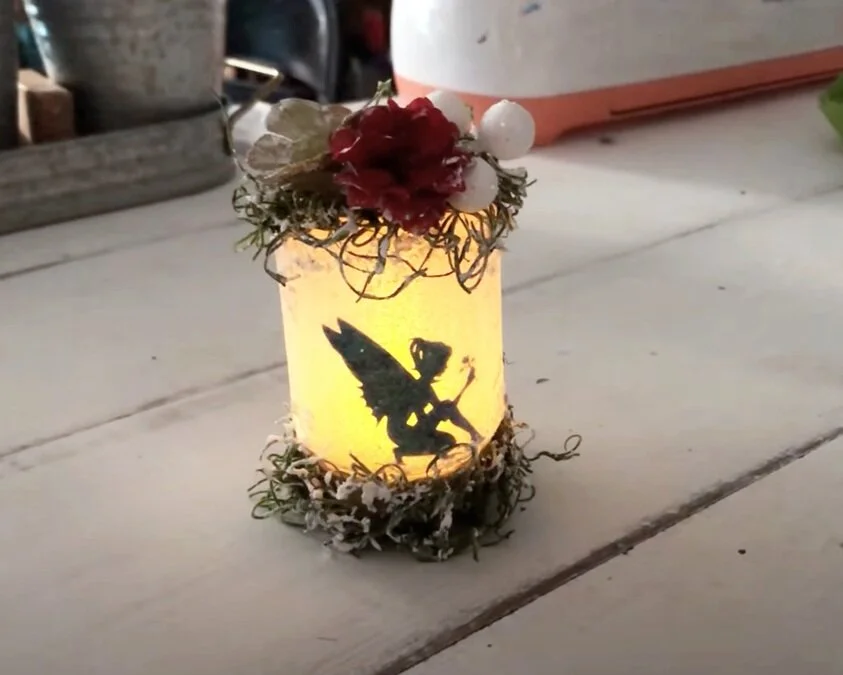
MINI glittery fairy jar Christmas ornament

fairy jar ornament21.jpg

DIY FAIRY JAR CHRISTMAS ORNAMENT

Day 9 of DIY Christmas ornaments

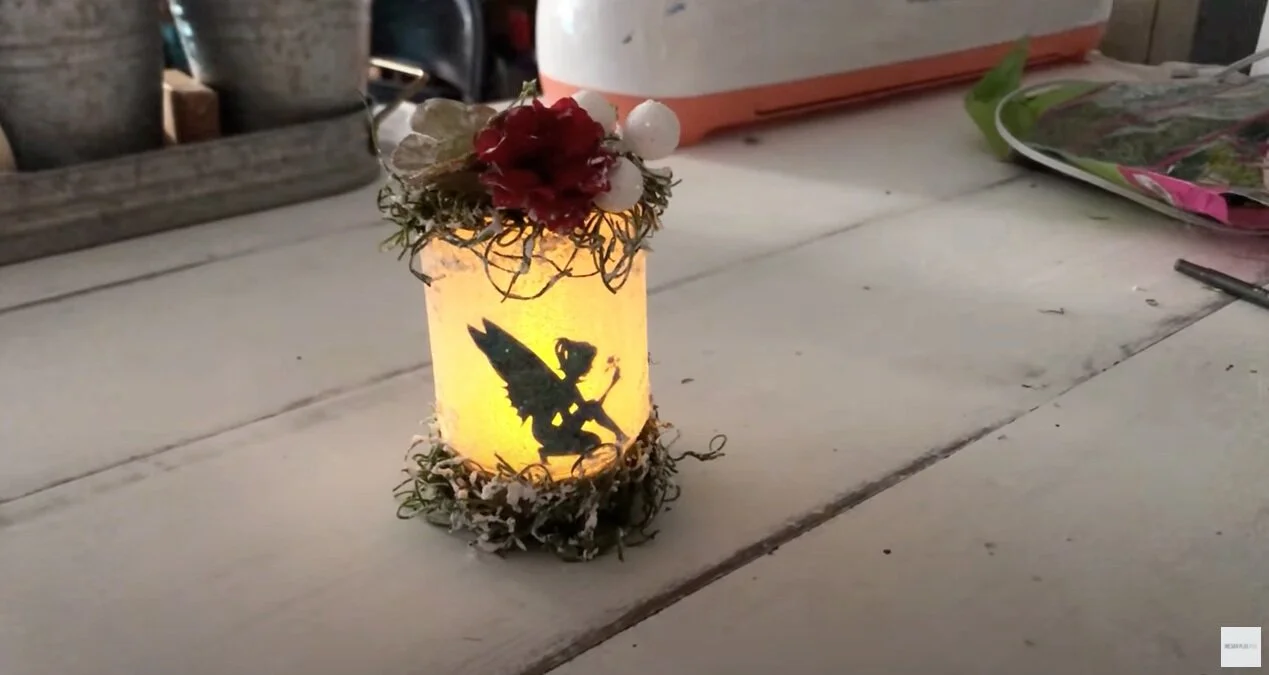
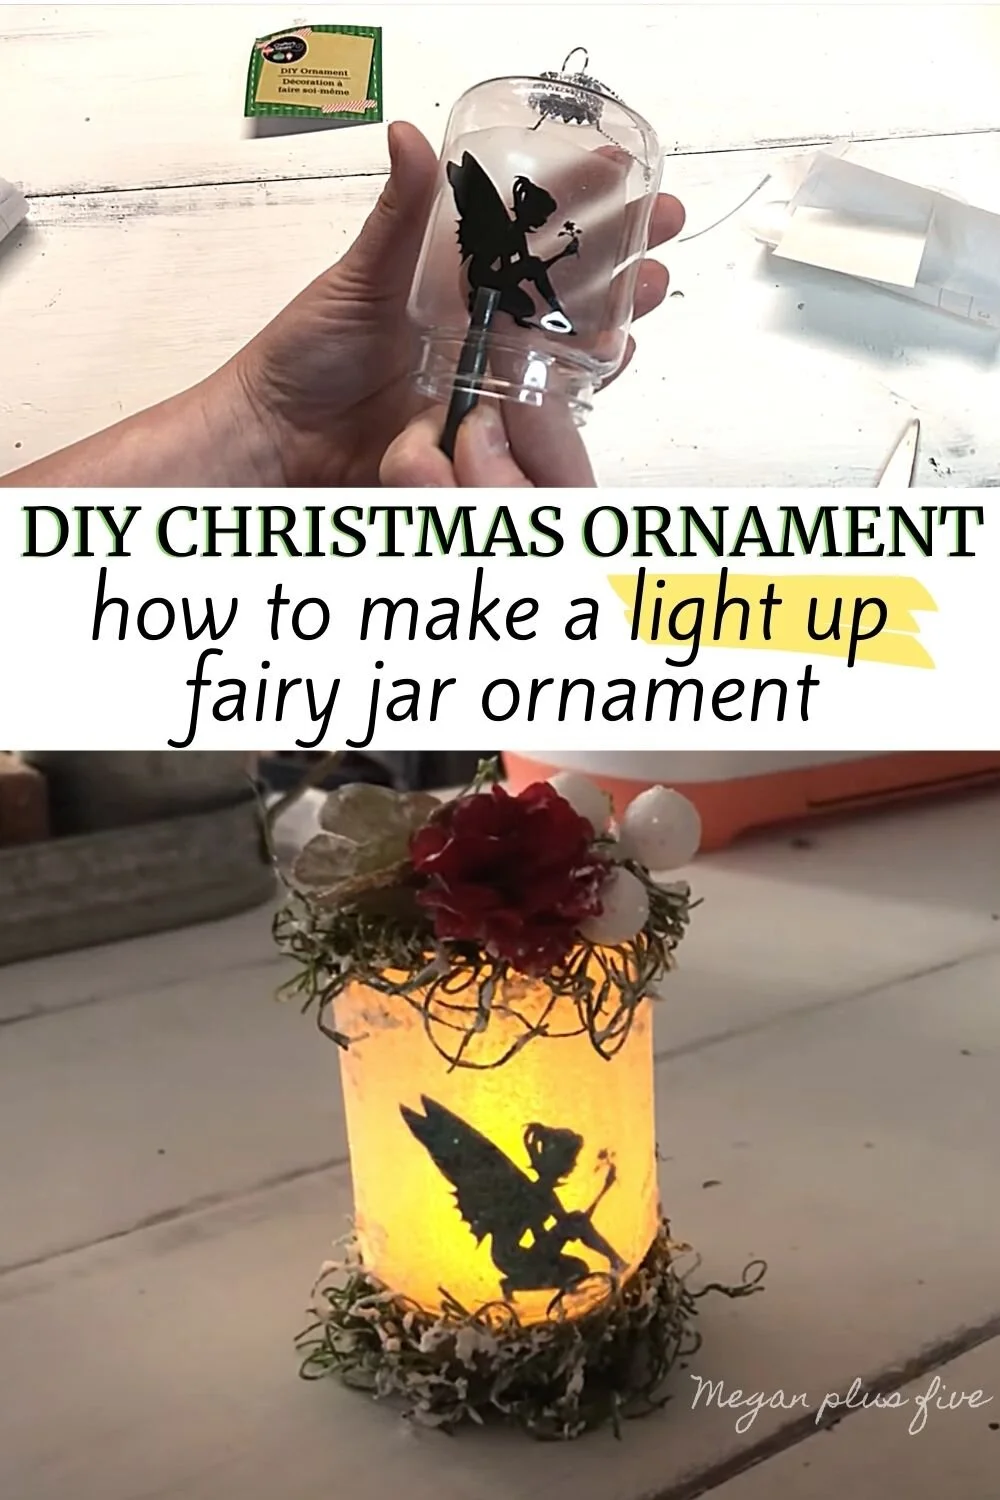
If you enjoyed one of my very first ever craft tutorials that I wrote, HOW TO MAKE GLITTERY LIGHT UP FAIRY JARS, then you will love this Christmas version. It’s such a cute mini version of the large light up fairy jar and I love the winter twist that it has. With the faux glitter snow it makes me think of the winter fairy from Tinker Bell. So adorable!

Affiliate Disclosure. Some of the links on this website are affiliate links, which means that I may earn a small commission if you click on the link or make a purchase using the link. If you make a purchase you will not be charged anything additional.

DIY glittered light up fairy jar Christmas ornament. Super cute Dollar Tree Christmas ornament DIY craft tutorial for the holiday season. How to make inexpensive Christmas ornaments the kids will love. Pretty make your own Christmas tree ornament cr…

I was browsing the aisles of the Dollar Tree last year when I came across a mini plastic looking mason jar in Christmas ornament form. And I instantly knew my girls and I had to make a fairy jar for our Christmas tree.

Click here for 30 days of DIY Christmas ornaments

MINI FAIRY JAR CHRISTMAS ORNAMENT

Here’s what you’ll need

1. CUT OUT DECAL

The first thing I did was cut my fairy decal out using my Cricut cutting machine. I used my GREEN cutting mat for this and THIS SVG CUT FILE (you can use my shareable Cricut link).

I measured how big my jar was then sized my fairy to fit. I used black Oracal 631 to cut my fairy out of. This is one difference from the larger mason jar version. In that version I used a cardstock cut out fairy but for this one I wanted to use sticky vinyl, make it a little easier.

2. APPLY THE FAIRY DECAL

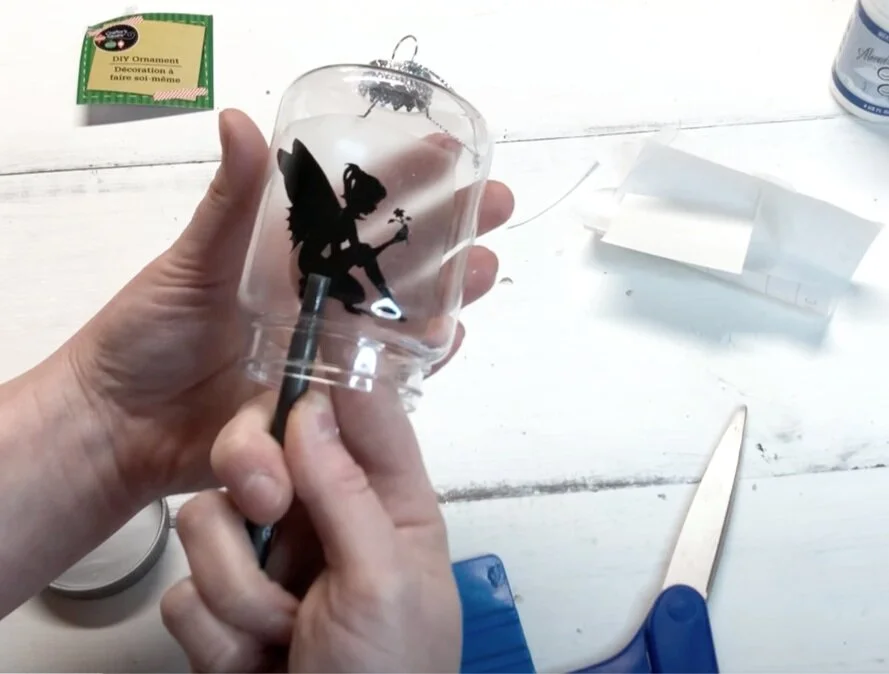
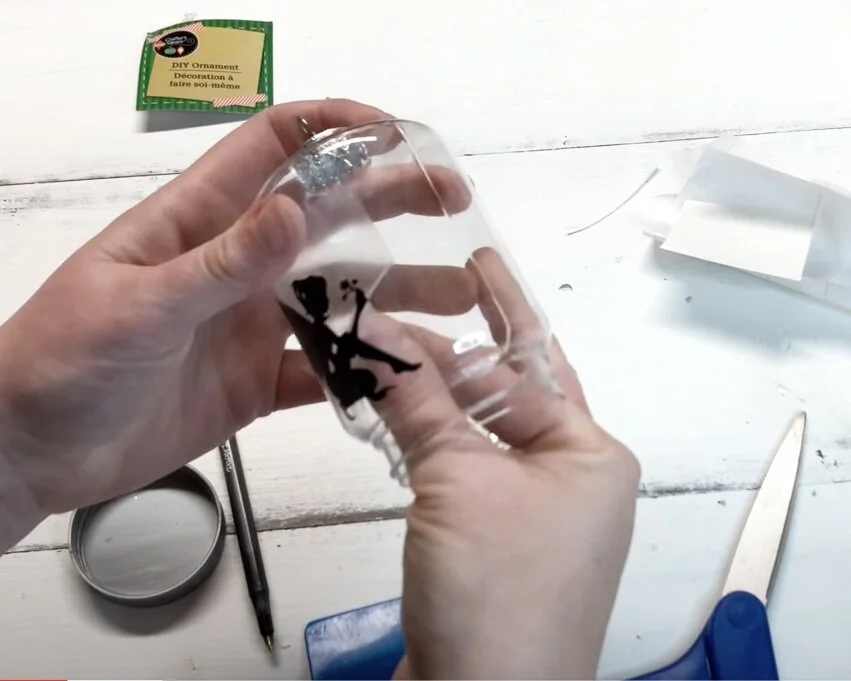
I applied the fairy decal to the INSIDE of the Christmas ornament. I used contact paper as my transfer tape. The end of a pen worked well to help me position the decal before pressing it down. Once I was happy with the placement I used my fingers to work out any airy bubbles.

DIY glittered light up fairy jar Christmas ornament. Super cute Dollar Tree Christmas ornament DIY craft tutorial for the holiday season. How to make inexpensive Christmas ornaments the kids will love. Pretty make your own Christmas tree ornament cr…

Then I slowly rolled the transfer tape, contact paper, off and away from the fairy decal. Since this has some delicate lines it can rip easily so be sure when you do this step to go very slow.

DIY glittered light up fairy jar Christmas ornament. Super cute Dollar Tree Christmas ornament DIY craft tutorial for the holiday season. How to make inexpensive Christmas ornaments the kids will love. Pretty make your own Christmas tree ornament cr…

3. APPLY TISSUE PAPER

To get the frosted look I cut a piece of plain white tissue paper so that it was a little bigger than my mason jar Christmas ornament. I wanted it bigger in case I messed up I would have a little extra to work with. You want you tissue paper to be able to fully wrap around your ornament plus cover the top.

DIY glittered light up fairy jar Christmas ornament. Super cute Dollar Tree Christmas ornament DIY craft tutorial for the holiday season. How to make inexpensive Christmas ornaments the kids will love. Pretty make your own Christmas tree ornament cr…

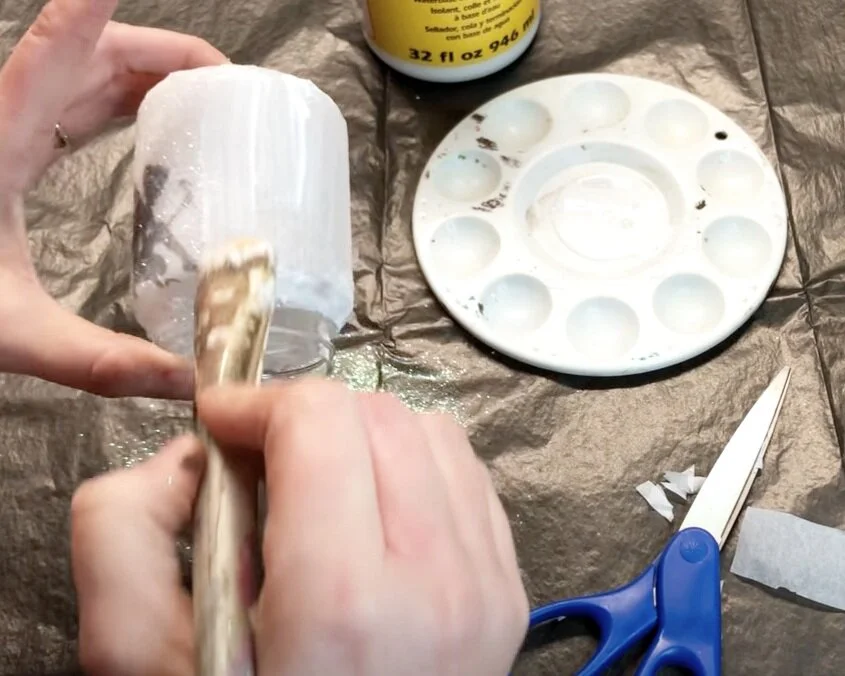
Then I used matte finish mod podge to apply the tissue paper to the Christmas ornament. A regular artist paint brush works great for this. I covered the front of my ornament in sections with the mod podge.

DIY glittered light up fairy jar Christmas ornament. Super cute Dollar Tree Christmas ornament DIY craft tutorial for the holiday season. How to make inexpensive Christmas ornaments the kids will love. Pretty make your own Christmas tree ornament cr…

The I placed the tissue paper on top of it and carefully smoothed it out with my fingers. I did this all the way around the jar.

DIY glittered light up fairy jar Christmas ornament. Super cute Dollar Tree Christmas ornament DIY craft tutorial for the holiday season. How to make inexpensive Christmas ornaments the kids will love. Pretty make your own Christmas tree ornament cr…

Once I got to the top of the jar I cut off so there was just enough to cover it. Then I cut slits in the tissue paper so it would lay down smooth.

DIY glittered light up fairy jar Christmas ornament. Super cute Dollar Tree Christmas ornament DIY craft tutorial for the holiday season. How to make inexpensive Christmas ornaments the kids will love. Pretty make your own Christmas tree ornament cr…

I used my paint brush again to apply mod podge to glue the top pieces down. I trimmed off the excess with my scissors.

DIY glittered light up fairy jar Christmas ornament. Super cute Dollar Tree Christmas ornament DIY craft tutorial for the holiday season. How to make inexpensive Christmas ornaments the kids will love. Pretty make your own Christmas tree ornament cr…

4. ADD GLITTER

After my tissue paper was pretty much dry I applied a thin layer of the matte finish mod podge to the front of the Christmas ornament and then sprinkled it with extra fine translucent glitter. Then I let that dry.

DIY glittered light up fairy jar Christmas ornament. Super cute Dollar Tree Christmas ornament DIY craft tutorial for the holiday season. How to make inexpensive Christmas ornaments the kids will love. Pretty make your own Christmas tree ornament cr…

5. ADD WINTER EMBELLISHMENTS

To make my fairy jar more winter themed I added faux glitter snow to the flowers and moss. I glued the moss down first then glued the florals to the moss.

DIY glittered light up fairy jar Christmas ornament. Super cute Dollar Tree Christmas ornament DIY craft tutorial for the holiday season. How to make inexpensive Christmas ornaments the kids will love. Pretty make your own Christmas tree ornament cr…

I even glued the moss to the bottom piece that screws onto the Christmas mason jar. I added the faux snow here and there.

6. ADD A TEA LIGHT

I let my ornament dry then I added a tea light.

DIY glittered light up fairy jar Christmas ornament. Super cute Dollar Tree Christmas ornament DIY craft tutorial for the holiday season. How to make inexpensive Christmas ornaments the kids will love. Pretty make your own Christmas tree ornament cr…

I think it turned out SO CUTE!

If you have any questions please ask below in the comments.

Happy Crafting!

Check out more DIY Dollar Tree crafts below

Dollar Tree Christmas Tree rustic decoration

DIY Dollar Tree farmhouse Christmas tree. What to do with the mini Christmas trees from the dollar tree. Easy way to use the cheap Christmas trees from the dollar store. Rustic farmhouse Christmas decor on a budget.

Have you been to the Dollar Tree lately? I don’t get there as often as I’d like but I did get a chance to stop in last night and WOW their Christmas supply gets better and better every year!

They have these cute Charlie Brown looking Christmas trees this year and I just couldn’t leave the store without buying a couple of them.

Affiliate Disclosure. Some of the links on this website are affiliate links, which means that I may earn a small commission if you click on the link or make a purchase using the link. If you make a purchase you will not be charged anything additional.

DIY Dollar Tree farmhouse Christmas tree. What to do with the mini Christmas trees from the dollar tree. Easy way to use the cheap Christmas trees from the dollar store. Rustic farmhouse Christmas decor on a budget.

This DIY was SUPER easy! It was almost mess free and it was ready to put on the shelf in just a matter of minutes from taking it out of the plastic Dollar Tree bag.

EASY DOLLAR TREE CHRISTMAS TREE DIY

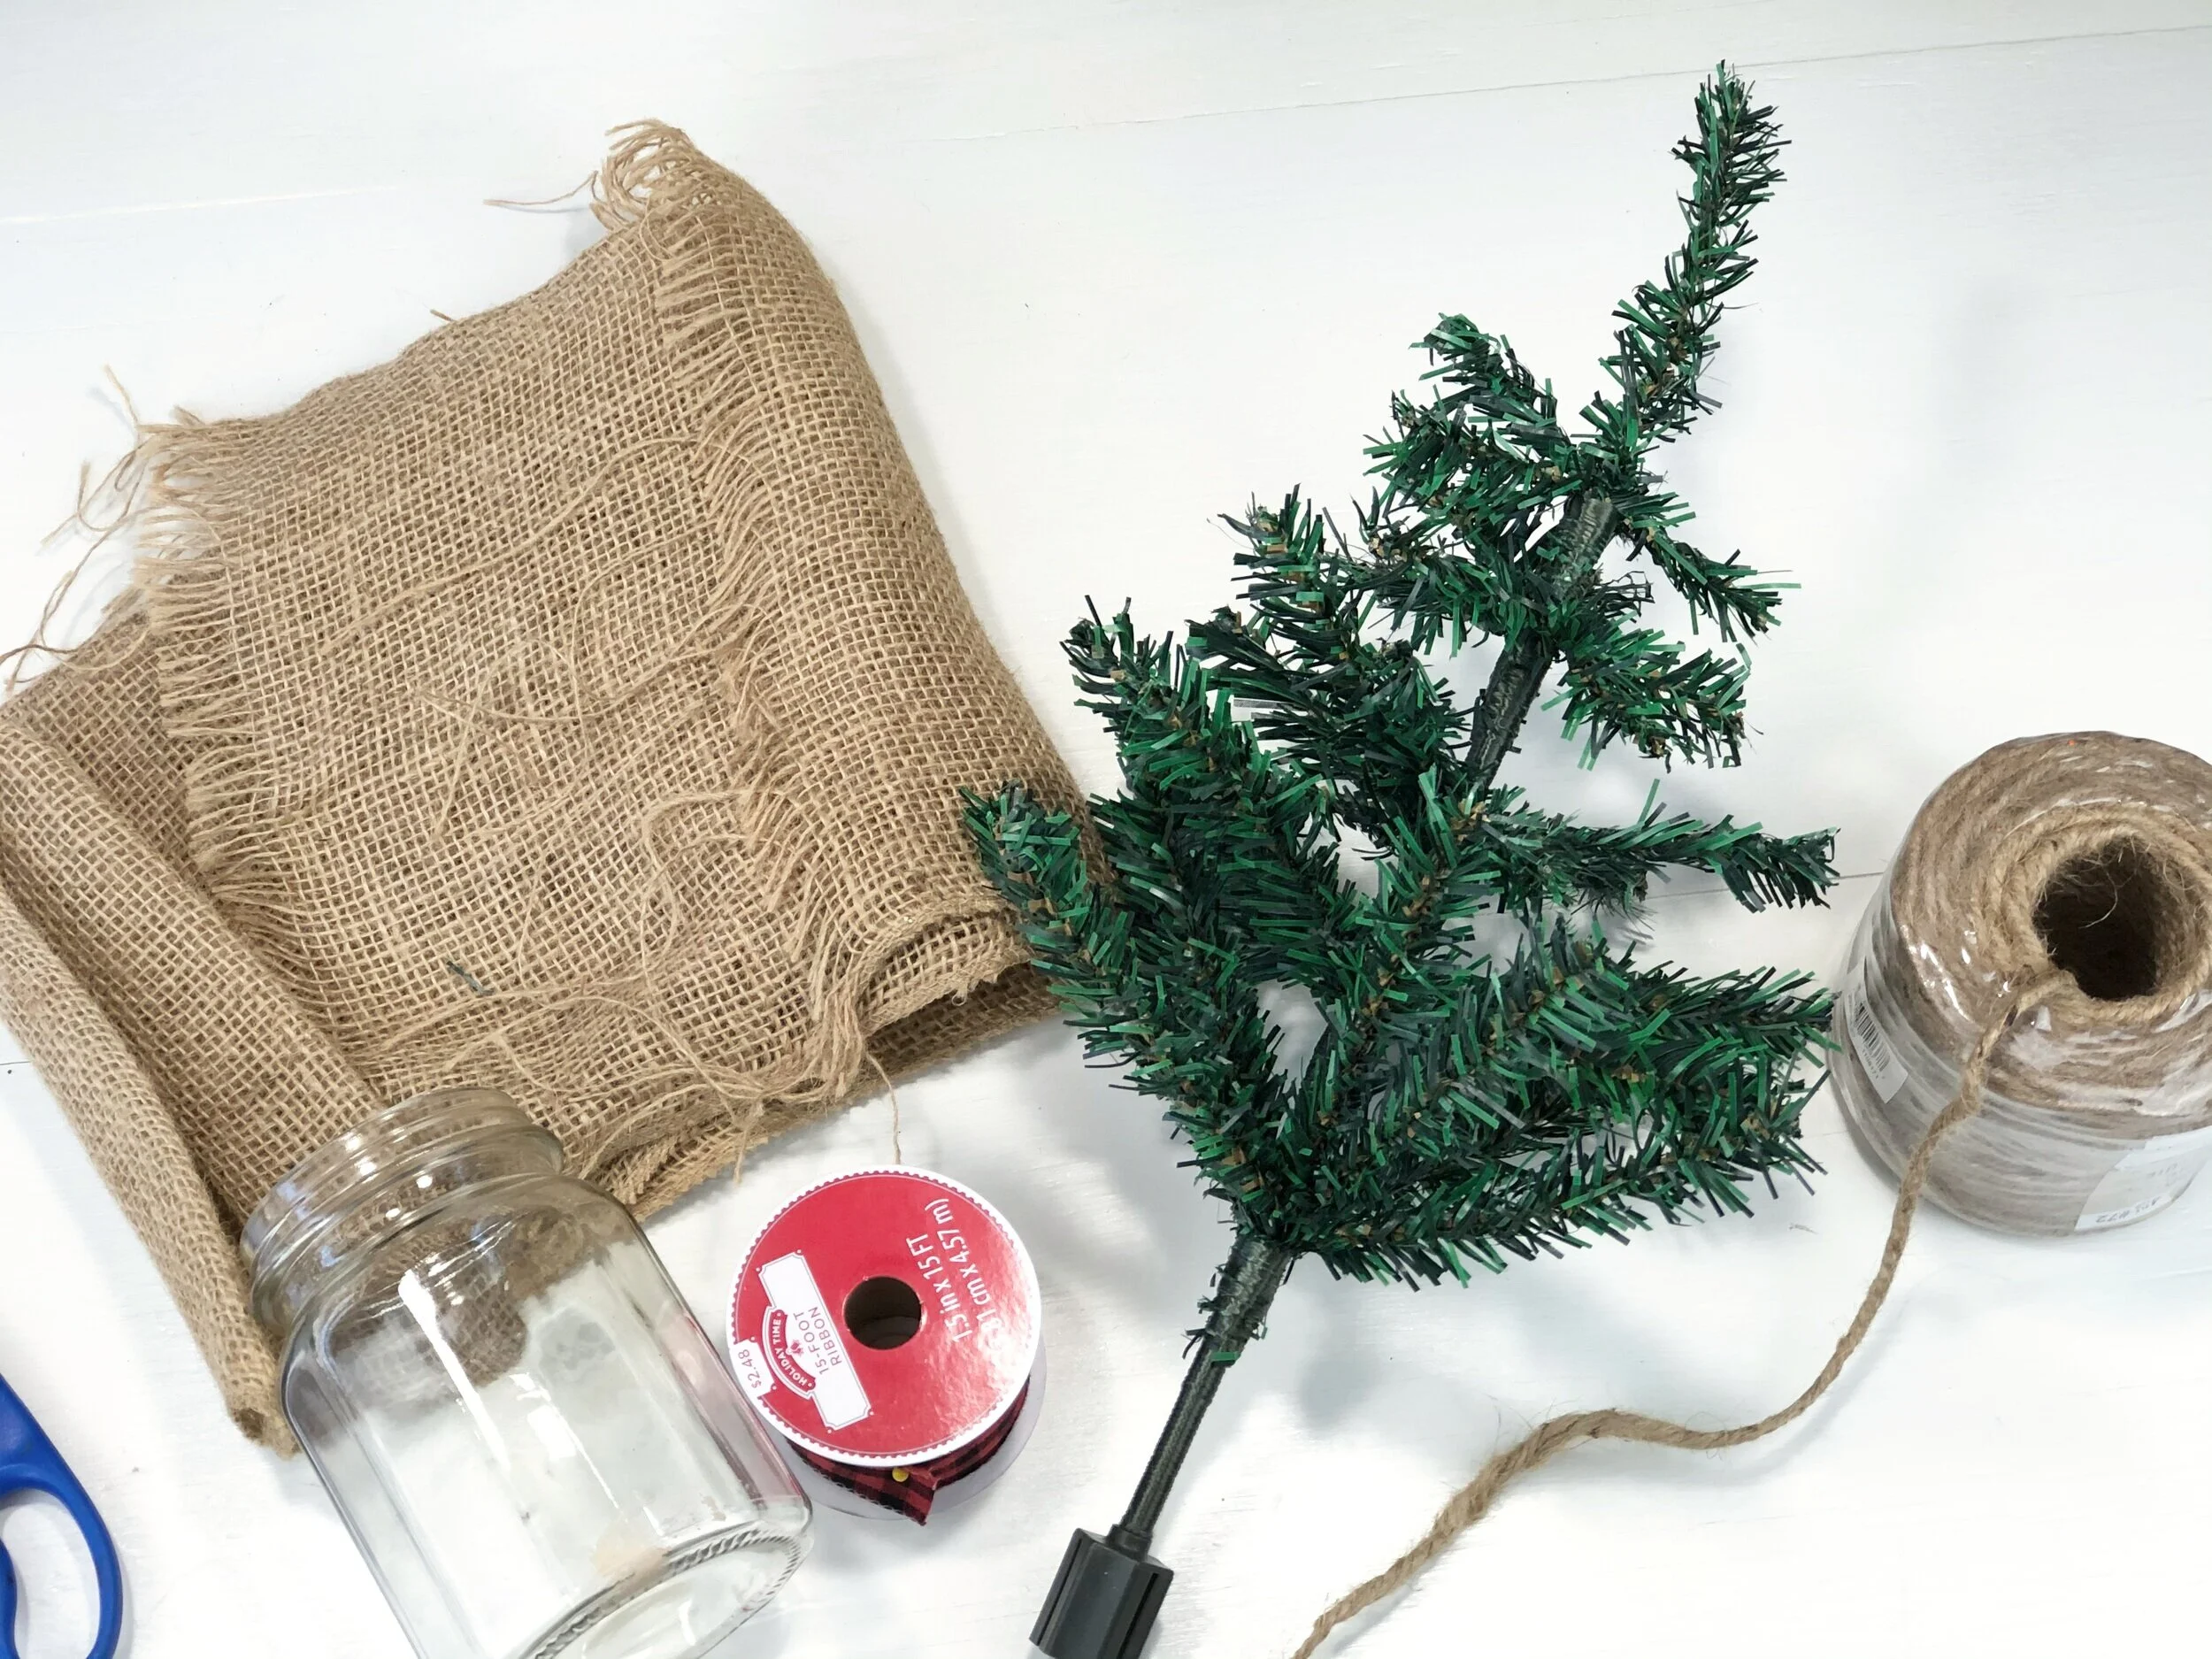
Here’s what I used

DIY Dollar Tree farmhouse Christmas tree. What to do with the mini Christmas trees from the dollar tree. Easy way to use the cheap Christmas trees from the dollar store. Rustic farmhouse Christmas decor on a budget.

I had everything except for the Christmas tree on hand which was awesome because when I bought the tree I had no idea what exactly I was going to do with it. Which is usually how I shop for my projects lol!

1. CUT THE BURLAP TO SIZE

I used a piece of scrap burlap I had from years ago (I don’t throw anything away lol). I placed my old jar on the burlap, pulled the burlap up over the glass so I’d know how big of a piece I’d need.

DIY Dollar Tree farmhouse Christmas tree. What to do with the mini Christmas trees from the dollar tree. Easy way to use the cheap Christmas trees from the dollar store. Rustic farmhouse Christmas decor on a budget.

Then I cut that into a circle. I just eyeballed this. Also, this glass used to hold craft supplies and since I was covering it I didn’t think I needed to give it a bath first.

2. ADD TWINE

DIY Dollar Tree farmhouse Christmas tree. What to do with the mini Christmas trees from the dollar tree. Easy way to use the cheap Christmas trees from the dollar store. Rustic farmhouse Christmas decor on a budget.

I didn’t get super fancy with this at all. I cut off a piece of twine I thought would be long enough to tie around the bottom lip of the glass then then pulled it tight and tied it in a bow.

DIY Dollar Tree farmhouse Christmas tree. What to do with the mini Christmas trees from the dollar tree. Easy way to use the cheap Christmas trees from the dollar store. Rustic farmhouse Christmas decor on a budget.

3. ADD THE TREE

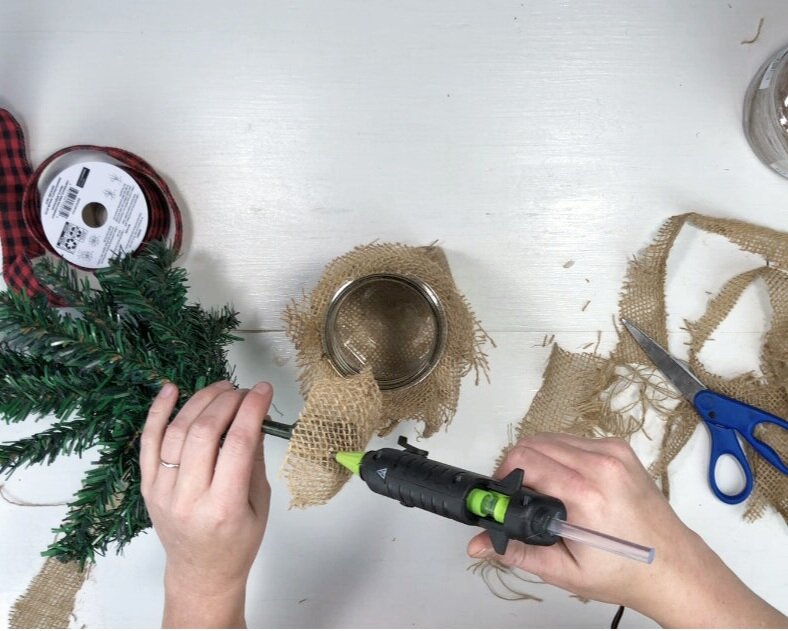
I didn’t want to mess with stuffing anything into the jar to hold the tree up so instead I hot glued it in. This took a bit of trial and error before I finally got it to stick right.

What worked for me was taking a piece of the discarded burlap and hot gluing it to the bottom of the tree.

DIY Dollar Tree farmhouse Christmas tree. What to do with the mini Christmas trees from the dollar tree. Easy way to use the cheap Christmas trees from the dollar store. Rustic farmhouse Christmas decor on a budget.

Then I added more hot glue to the bottom of the burlap and stuck the tree in the glass jar. I held it there till the glue was dry. It didn’t budge after that!

DIY Dollar Tree farmhouse Christmas tree. What to do with the mini Christmas trees from the dollar tree. Easy way to use the cheap Christmas trees from the dollar store. Rustic farmhouse Christmas decor on a budget.

4. LIGHTS

My tree was looking kind of sad so I found some lights I had bought from the Dollar Tree over the summer and strung them on the tree. They are battery operated so I just stuck the battery pack into the glass jar to hide it.

DIY Dollar Tree farmhouse Christmas tree. What to do with the mini Christmas trees from the dollar tree. Easy way to use the cheap Christmas trees from the dollar store. Rustic farmhouse Christmas decor on a budget.

That’s it! It turned out SOOOOO CUTE! And so crazy easy! It’s nice to do a craft sometimes where the results are kinda instant and you don’t have to wash out any paint brushes or clean up hardly anything.

DIY Dollar Tree farmhouse Christmas tree. What to do with the mini Christmas trees from the dollar tree. Easy way to use the cheap Christmas trees from the dollar store. Rustic farmhouse Christmas decor on a budget.

I can’t wait to get more of my Christmas decorations made for my new house! Let me know if you have any questions about this DIY in the comments below.

Happy Crafting!

Check out more Christmas DIY tutorials below


Simple Halloween décor using a witch hat

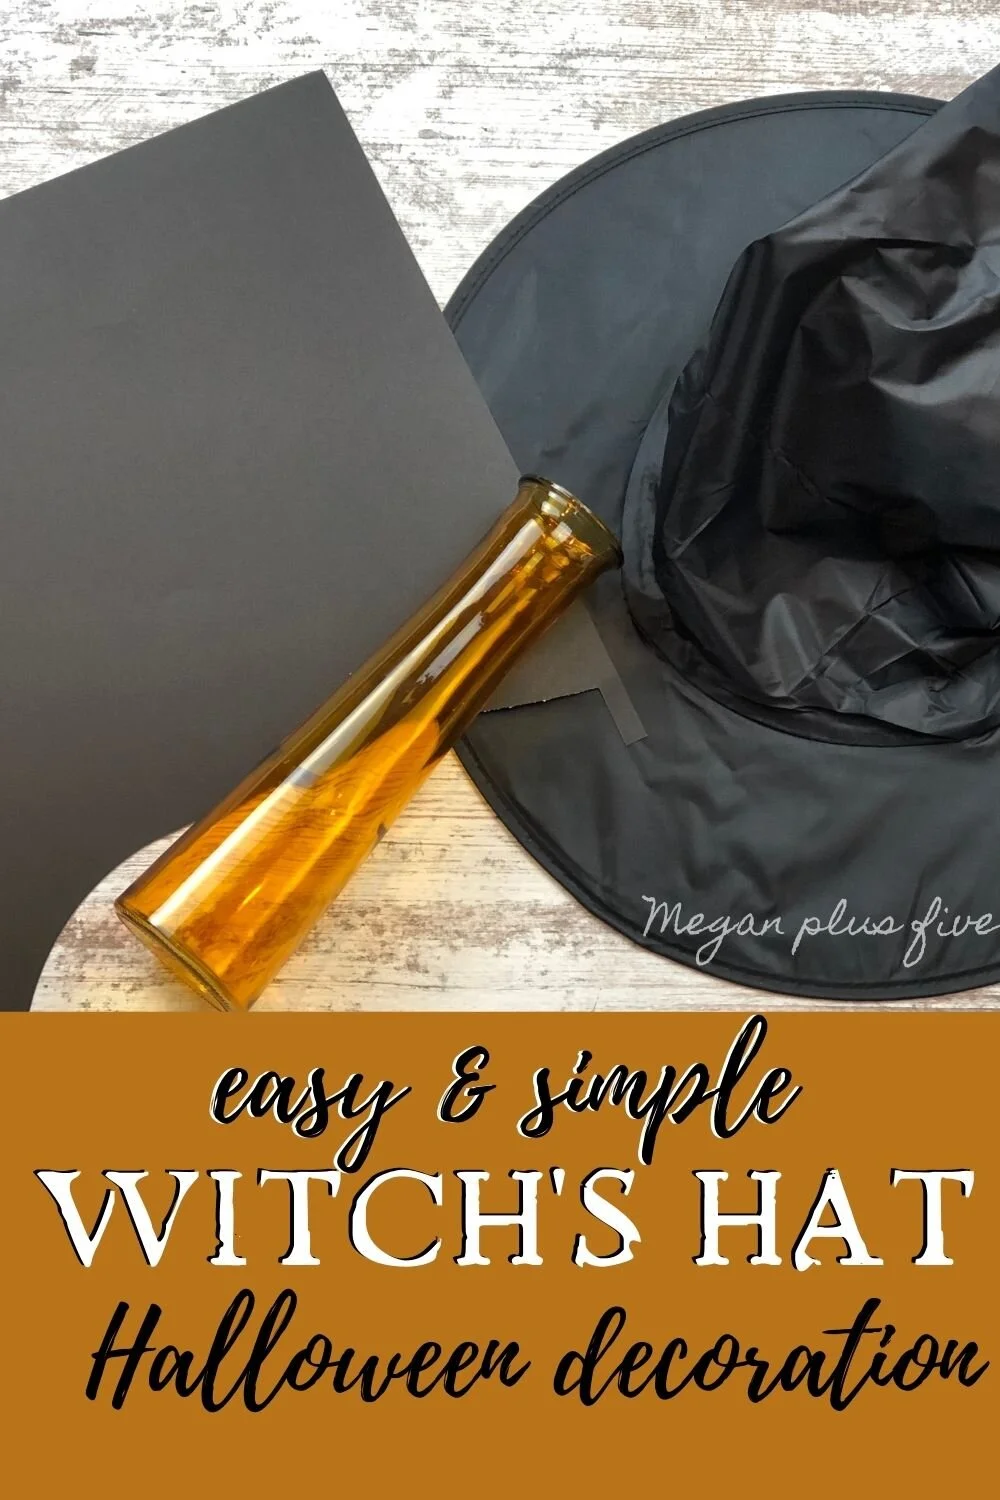
How to make an easy and cute Halloween decoration using a Dollar Tree vase and a witch hat. DIY  Halloween decor using your Cricut cutting machine. Make your own adorable witch hat Halloween decoration.

Easy Witch Hat Halloween Decoration

There are some really super cute Halloween decorations out there. I love simple AND frugal! I’m not one to spend a lot on décor so I really loved this easy and cheap project!

If you want even more fun HALLOWEEN DECOR IDEAS be sure to scroll all the way to the bottom for more DIY’s for the fall season.

Affiliate Disclosure. Some of the links on this website are affiliate links, which means that I may earn a small commission if you click on the link or make a purchase using the link. If you make a purchase you will not be charged anything additional.

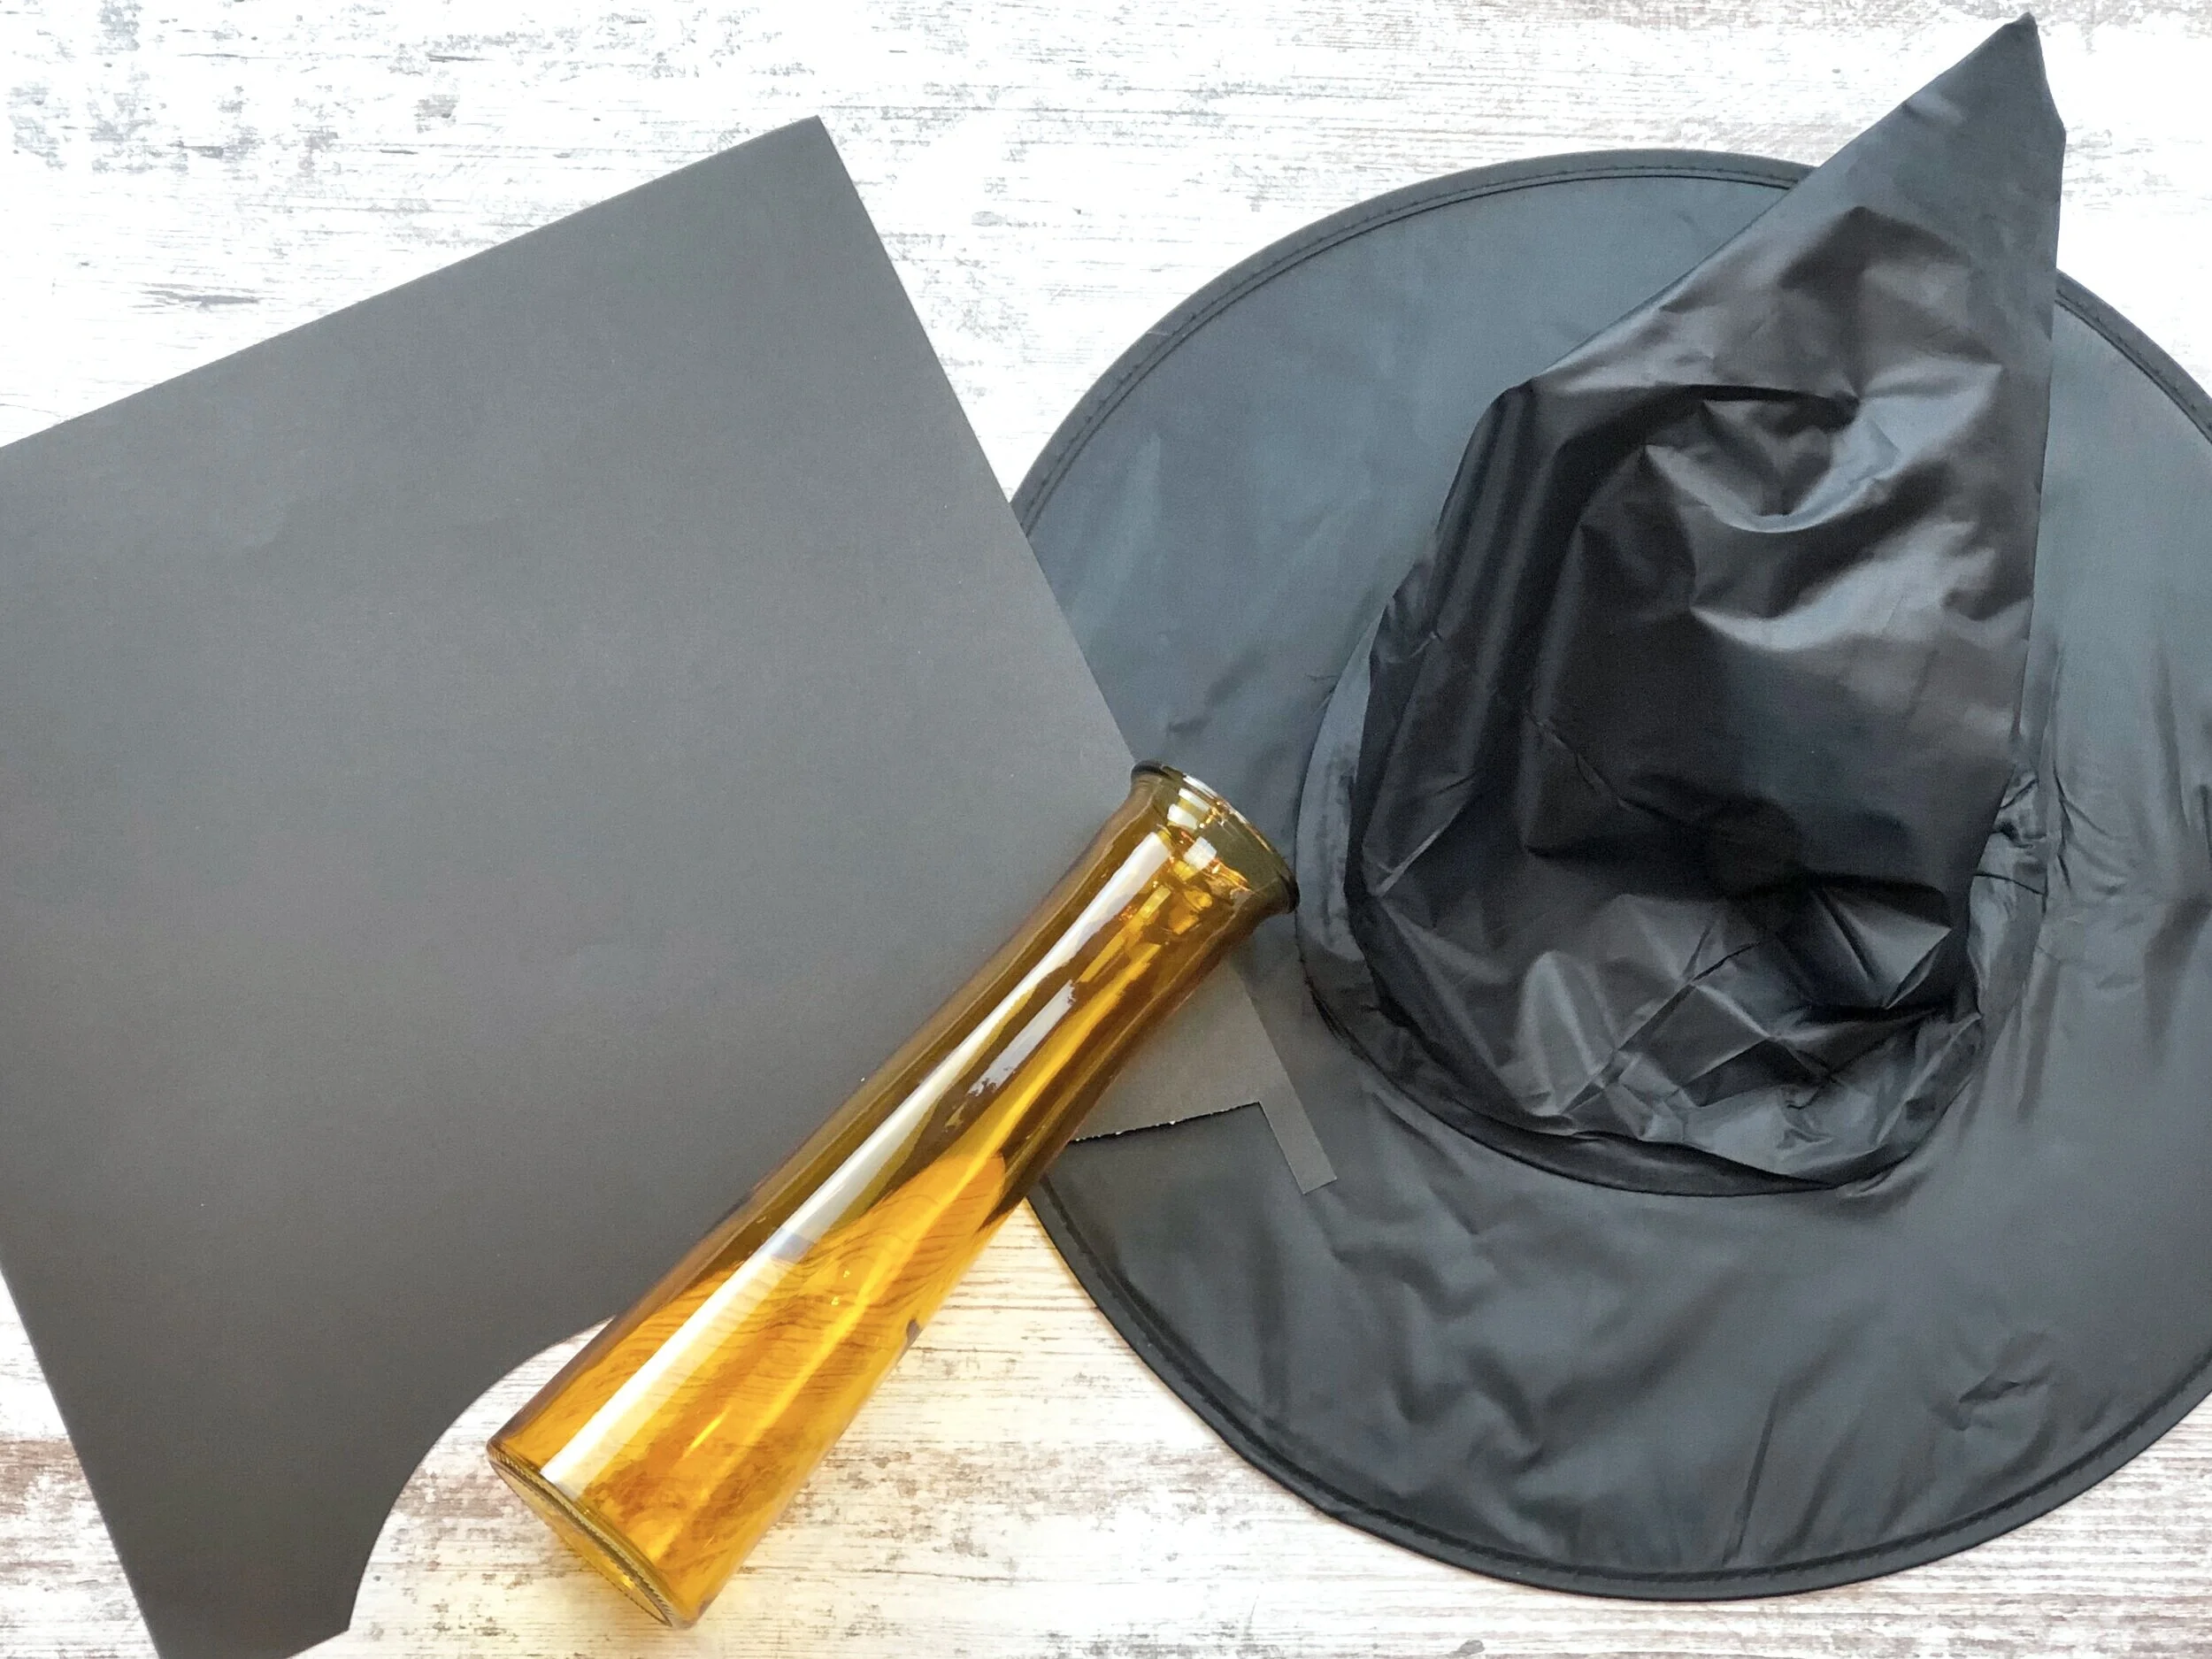
Here’s what you’ll need

How to make an easy and cute Halloween decoration using a Dollar Tree vase and a witch hat. DIY  Halloween decor using your Cricut cutting machine. Make your own adorable witch hat Halloween decoration.

The first thing I did was measure the opening of the witch hat.

How to make an easy and cute Halloween decoration using a Dollar Tree vase and a witch hat. DIY  Halloween decor using your Cricut cutting machine. Make your own adorable witch hat Halloween decoration.

Using Cricut Design Space I made a 9” circle and cut it out on black cardstock using my Cricut Explore.

How to make an easy and cute Halloween decoration using a Dollar Tree vase and a witch hat. DIY  Halloween decor using your Cricut cutting machine. Make your own adorable witch hat Halloween decoration.

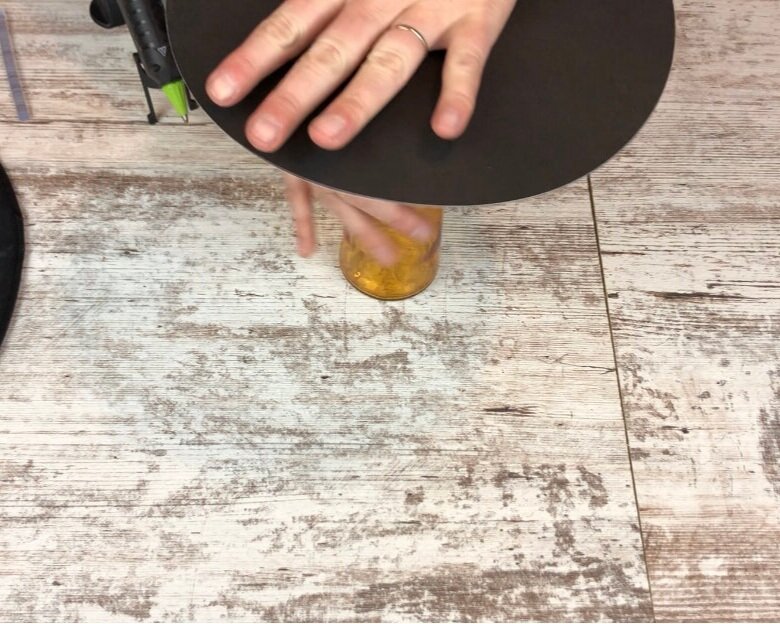
Next I used my glue gun and added hot glue to the top of the vase.

How to make an easy and cute Halloween decoration using a Dollar Tree vase and a witch hat. DIY  Halloween decor using your Cricut cutting machine. Make your own adorable witch hat Halloween decoration.

Then I quickly placed my cardstock circle cut out on top. Be sure to do this step quickly because hot glue can dry fairly fast.

How to make an easy and cute Halloween decoration using a Dollar Tree vase and a witch hat. DIY  Halloween decor using your Cricut cutting machine. Make your own adorable witch hat Halloween decoration.

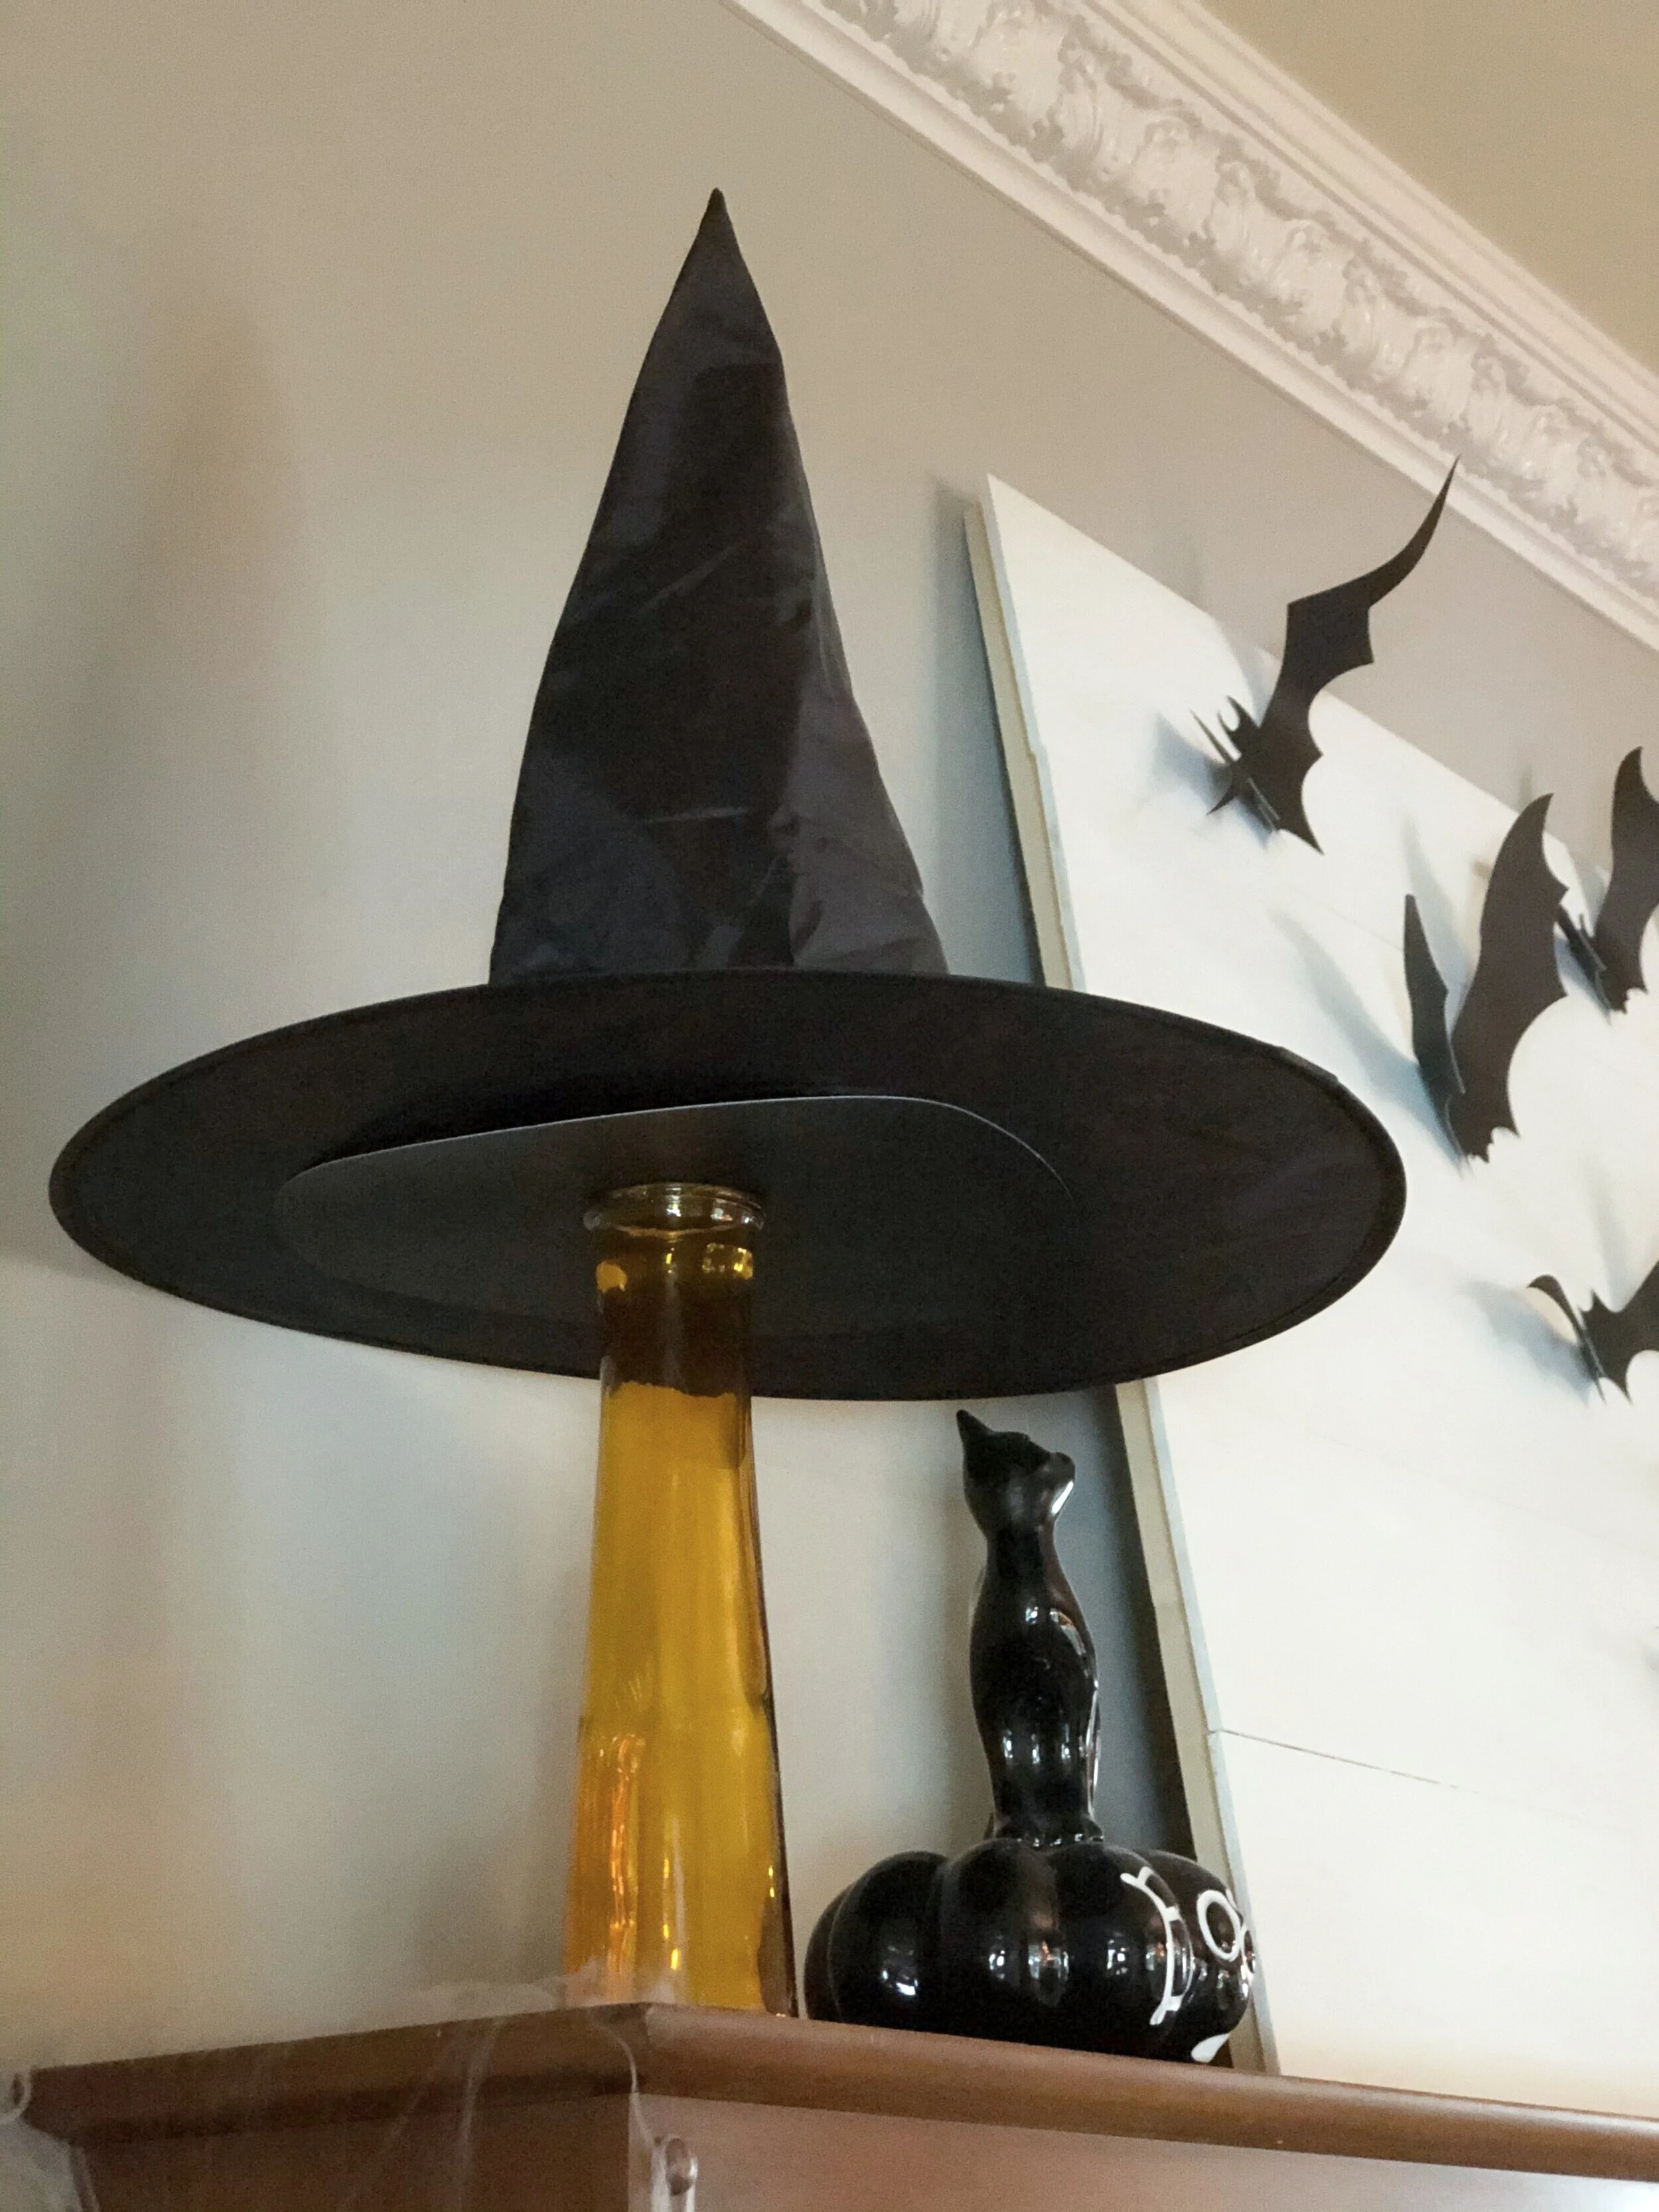
Then I placed it on my hutch and added my witch hat.

How to make an easy and cute Halloween decoration using a Dollar Tree vase and a witch hat. DIY  Halloween decor using your Cricut cutting machine. Make your own adorable witch hat Halloween decoration.

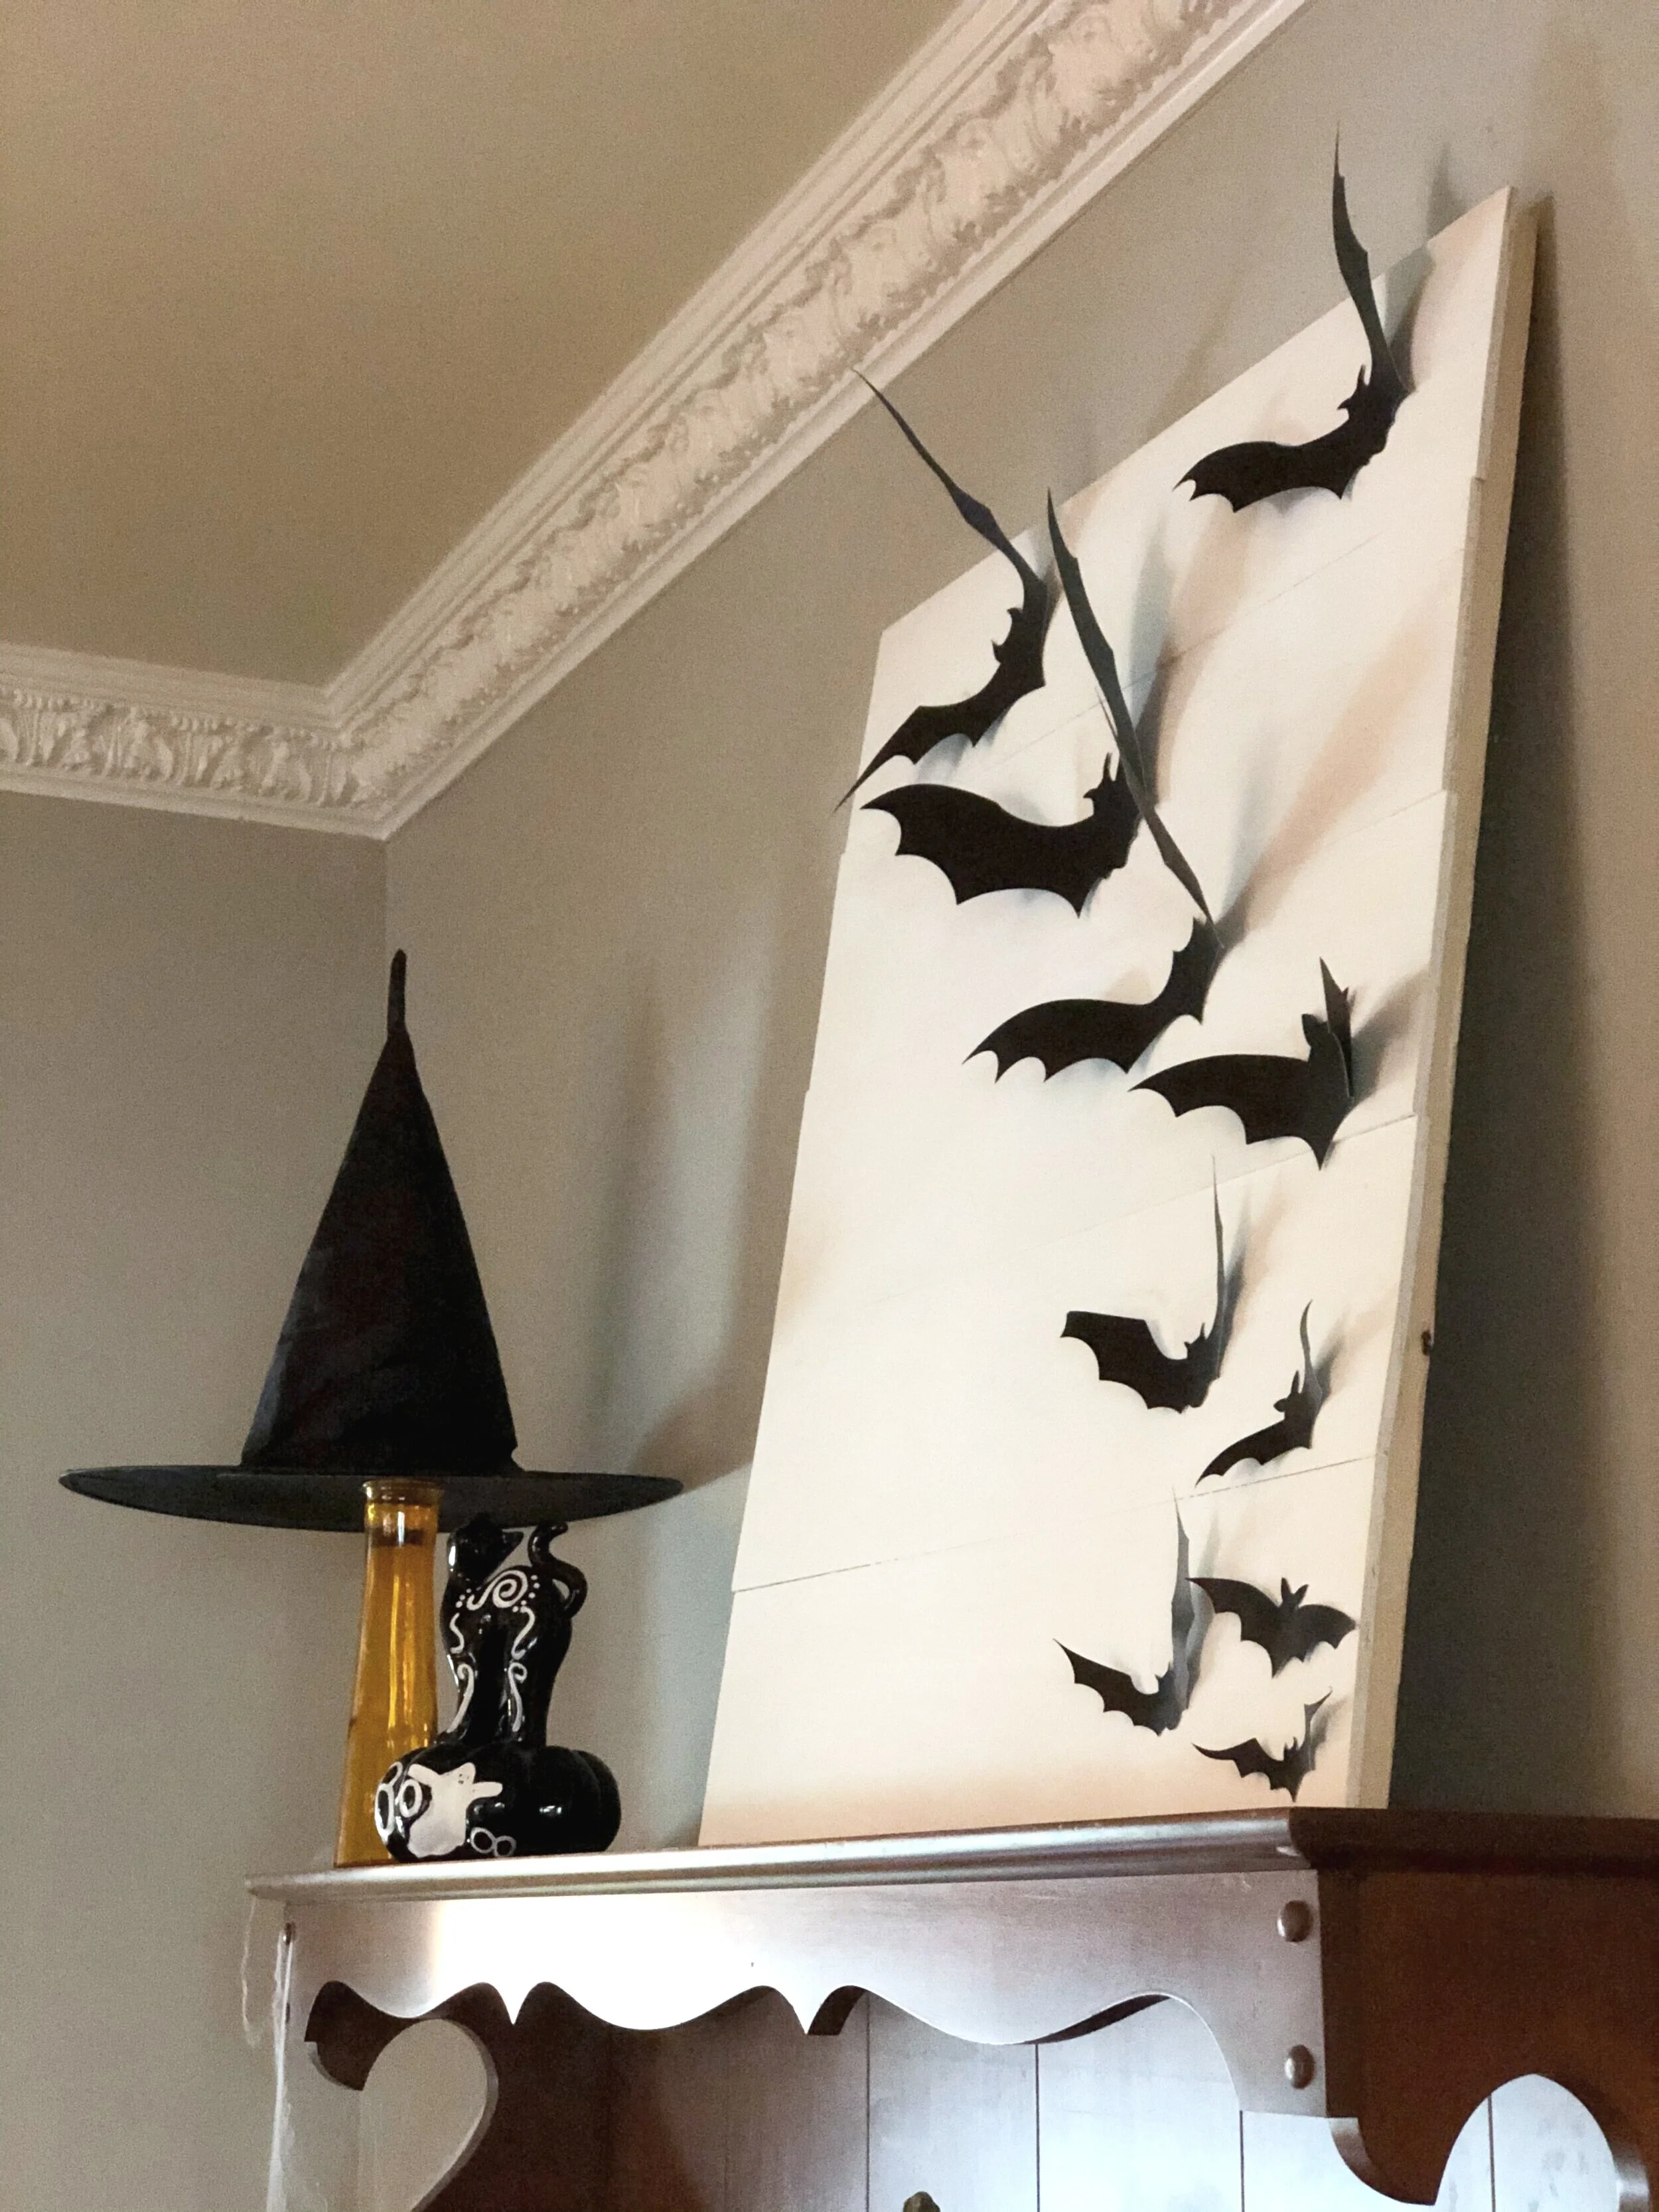
I love it! It was so super easy and adds so much height to my Halloween display.

How to make an easy and cute Halloween decoration using a Dollar Tree vase and a witch hat. DIY  Halloween decor using your Cricut cutting machine. Make your own adorable witch hat Halloween decoration.

I hope you enjoyed this super simple Halloween craft. Let me know if you have any questions in the comments below.

Happy Crafting!

Check out more of my fun Halloween & fall crafts below

How to make your own corsage with faux flowers

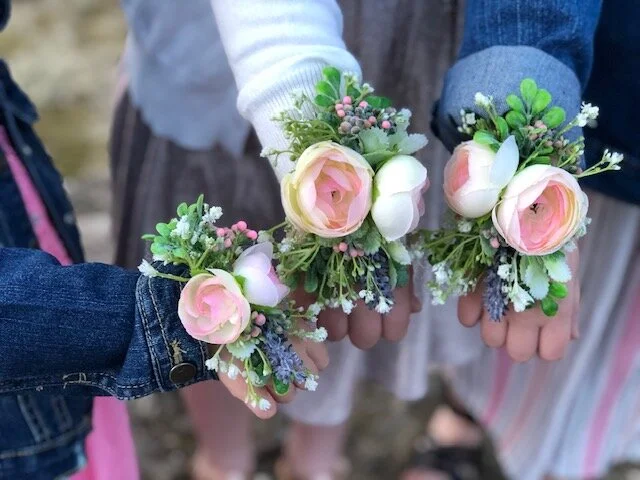
DIY corsage made with faux flowers. How to make a corsage for little girls with fake flowers from Walmart. Silk flower easy corsage for spring, prom, weddings, father daughter dance.

DIY YOUR OWN CORSAGE WITH FAKE FLOWERS

Real corsages are gorgeous! But they can be a little pricey, especially for being a small part of the fancy attire. Our small town held a father daughter dance and I really wanted my girls to feel extra special and wear a corsage. Since my husband was taking three of our four daughters I figured it would be more cost effective if I ordered them from a big chain grocery florist. I looked online and they were $20+ per corsage plus $20 for my husbands boutonniere. A total of $80 for accent flowers…that was not in the budget. What I did instead was take a trip to our local Walmart and picked out some inexpensive flowers, hair ties, and floral tape. I spent a total of $13 and everyone got a beautiful corsage/boutonniere to wear to the fancy daddy daughter dance.

Affiliate Disclosure. Some of the links on this website are affiliate links, which means that I may earn a small commission if you click on the link or make a purchase using the link. If you make a purchase you will not be charged anything additional. This is just a way I can help add to our family finances to raise our four daughters. Please know I would never recommend a product or service I do not totally stand behind.

I’ll be honest, I tried to make one for the oldest of the four daughters when she was in the first grade and it turned out awful! I used a real flower that was WAY too big and it seriously looked like a Pinterest fail! This time around I extra crossed my fingers they would turn out as a win and thank goodness they did! The girls got SO MANY C0MPLIMENTS on them at the dance.

How to make your own corsage using faux flowers. DIY fake flower wrist corsage tutorial using spring florals. Father daughter dance flowers.

DIY FLOWER CORSAGE

Here’s what I used

  • faux round roses

  • faux babies breath

  • faux spring flower bunch

  • green floral tape

  • felt

  • scissors

  • wire cutters

  • black hair tie (pony tail holder)

  • hot glue gun

  • gorilla glue hot glue sticks

Make this DIY even more inexpensive by visiting your local DOLLAR TREE. They have a great floral selection depending on the season.

How to make your own faux flower corsage. Pony tail holder wrist corsage DIY using fake flowers, super inexpensive to make. Spring flower corsage to make for weddings, father daughter dance, or prom.

I found everything I needed at Walmart. I already had the glue, glue gun, and felt on hand so I didn’t need to pick those up. I also had a ton of supplies left over. I used some in their hair for little accents and then still had some left over. I couldn’t believe it cost around $3 per corsage to make. That beats $20/ wrist corsage any day!

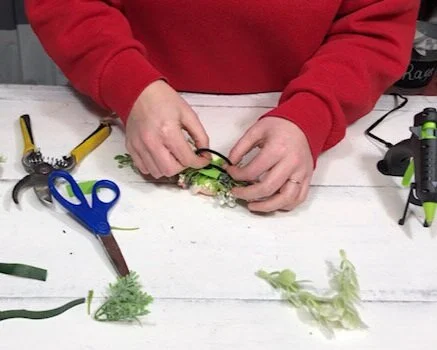
1. I cut a rectangle that was smaller than the width of one of my daughter’s wrist. This is what I glued my flowers to. Then, I cut a second rectangle that was a little smaller than the first rectangle.

DIY corsage made with faux flowers. How to make a corsage for little girls with fake flowers from Walmart. Silk flower easy corsage for spring, prom, weddings, father daughter dance.

2. I picked out 2 main flowers for the corsages. I used these gorgeous round roses I found at my local Walmart that were about $3 per stem. I used 2 per corsage and 1 for my husband’s boutonniere. I made these round roses the focal point and added the other flowers as accents. I pulled the round rose flower heads off of their stems then I cut them flush at the bottom of the flower so that the bottom side of the flower was flat.

DIY corsage made with faux flowers. How to make a corsage for little girls with fake flowers from Walmart. Silk flower easy corsage for spring, prom, weddings, father daughter dance.

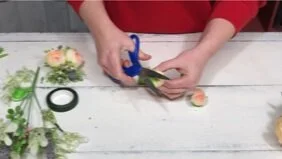
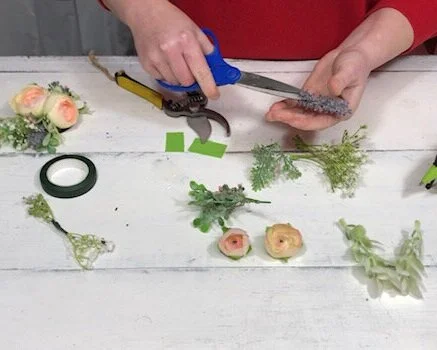
3. I started layering the flowers that surrounded the main flowers. This took me a little while to get the flowers where I wanted them to go. I used a combination of baby’s breath, lavender, and a spring flower bunch. I had to trim them up here and there, so don’t be afraid to do that too. This will keep your corsage from being gigantic. See the picture below, I had to trim down the lavender stems so that they wouldn’t be so long. I did this carefully making sure I wasn’t removing too much.

DIY corsage made with faux flowers. How to make a corsage for little girls with fake flowers from Walmart. Silk flower easy corsage for spring, prom, weddings, father daughter dance.

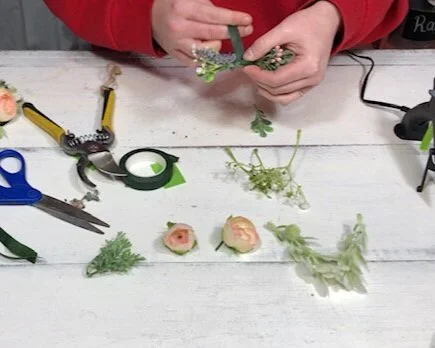
4. I attached the accent flower stems together. Basically I made double ended floral stems. I tried to make them somewhat similar in size in both length and width so that the corsage wasn’t lopsided. I didn’t make them identical, I used different accent flowers on each end but was sure to incorporate baby’s breath on each end. Then I wrapped the middle of the double ended floral stem in green floral tape to keep them together.

DIY corsage made with faux flowers. How to make a corsage for little girls with fake flowers from Walmart. Silk flower easy corsage for spring, prom, weddings, father daughter dance.

5. I placed them on the bigger rectangle to see where exactly I wanted to place them before I started gluing anything down. This is the time to trim your felt down if you need to.

DIY corsage made with faux flowers. How to make a corsage for little girls with fake flowers from Walmart. Silk flower easy corsage for spring, prom, weddings, father daughter dance.

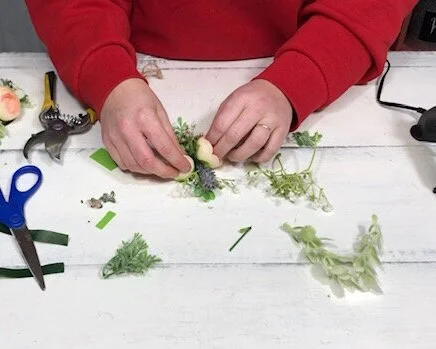
6. Then I used my glue gun to glue everything down to the felt. I first glued down the double ended floral stem I made. Let that dry so that it gets secure. Then I glued down the main focal point flowers, the round roses.

DIY corsage made with faux flowers. How to make a corsage for little girls with fake flowers from Walmart. Silk flower easy corsage for spring, prom, weddings, father daughter dance.

7. Fill in the gaps. After I got the roses glued down and the glue dried I added in more accent flowers where I thought the corsage was bare. I even cut off single leaves, this spring bunch I picked up had the most beautiful soft lambs ear like leaves. I added in several of those leaves where I thought they would look good. I attached some to the sides of the roses. I also did this with the baby’s breath. Before I glued them down I was sure to double check I liked that placement. A tiny dab of glue is all you need for these little pieces.

DIY corsage made with faux flowers. How to make a corsage for little girls with fake flowers from Walmart. Silk flower easy corsage for spring, prom, weddings, father daughter dance.

8. Once I was happy with how it look and the glue was dry I flipped it over and added a thick hair tie. While recording this tutorial I actually attached my hair tie the wrong way. For the most comfort I suggest gluing on the hair tie so that the corsage lays vertically against the wrist. So you would want to attach your hair tie so that it would sit on the rectangle horizontally. Once that glue dries glue the second rectangle on top of the hair tie so that the hair tie is sandwiched in-between the two pieces of felt. This will make it really secure and will be difficult for the elastic to come off.

DIY corsage made with faux flowers. How to make a corsage for little girls with fake flowers from Walmart. Silk flower easy corsage for spring, prom, weddings, father daughter dance.

I hope you enjoyed this inexpensive tutorial. Like with all of my posts, if you have any questions at all please don’t hesitate to ask.

DIY corsage made with faux flowers. How to make a corsage for little girls with fake flowers from Walmart. Silk flower easy corsage for spring, prom, weddings, father daughter dance.

Happy crafting!

DIY Dollar Tree work for hire chore chart

Dollar Tree pizza pan DIY work for hire chore chart. How to make a work for hire board for your kids. Easy Dollar Tree craft.

Easy work for hire board

I don’t know about you but in my house we don’t do allowance. Well, not the traditional allowance anyway. Instead, we have a work for hire board. And I so wish I would have made this sooner. For years my girls have been asking “what needs to be done” for them to earn money for the not so everyday chores around the house. Of course they would ask at the times when my brain was on anything but that and I would have to stop and think hard about what needs to be done and how much to pay for that chore.

Affiliate Disclosure. Some of the links on this website are affiliate links, which means that I may earn a small commission if you click on the link or make a purchase using the link. If you make a purchase you will not be charged anything additional.

Now my brain doesn’t have that extra stress (yes, it’s a stress when your sweet daughter is asking to do work around the house so she can make some cash and your brain just draws a blank :(! ) Having this work for hire board is WONDERFUL! I clip the money to the chore that needs to be done. Then they do the chore and take their earnings. This gives them so much independence and instills a good work ethic that they will carry with them through adulthood. Everyone is happy! They get paid and I didn’t have to wash the windows lol!

Now, I don’t pay the girls to do everyday things like washing dishes, picking up the living room, washing their clothes. Those are everyday kind of chores. The chores on the work for hire board are more like washing the windows, wiping down the baseboards, deep cleaning the bathroom, organizing the stockpile, etc.

And to make it even better was that I picked up the metal tin I used for the work for hire boar from the Dollar Tree! All together this DIY cost less than $5 for everything. See more of my DIY Dollar Tree crafts.

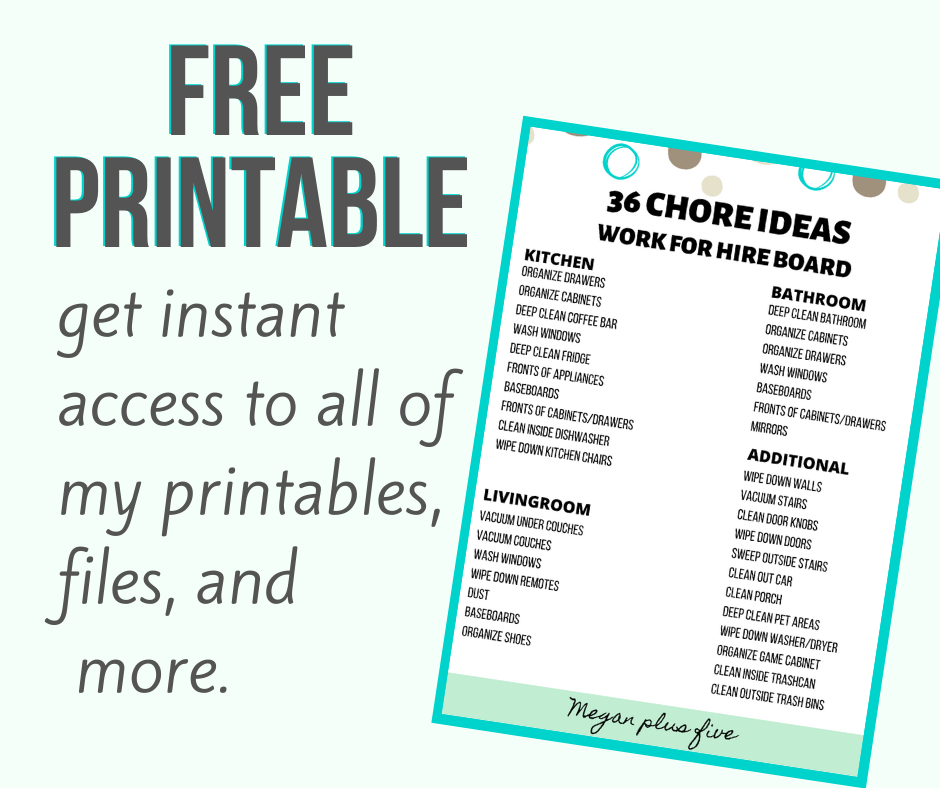
FREE PRINTABLE- 36 work for hire chore ideas for you to print off. Click the photo below to get the password for instant access to my free resource library.

How to make a kid’s work for hire board

Here’s what you’ll need

Helpful tools

ONE-

Use chalk paint and paint the entire front of your pizza pan. I painted two coats on mine, letting the first one dry completely before painting the second coat on. To add a little rustic feel I added some cream colored accent markings to mine. I did this while the second coat of paint was still wet and just liberally added in strokes of the cream colored chalk paint. Let your painted pizza pan dry. I let mine day for several days because I had other things to do before I could finish it up. After mine dried I gave it a quick spray with a clear sealant to give it a protective top coat.

Dollar Tree pizza pan DIY work for hire chore chart. How to make a work for hire board for your kids. Easy Dollar Tree craft.

TWO-

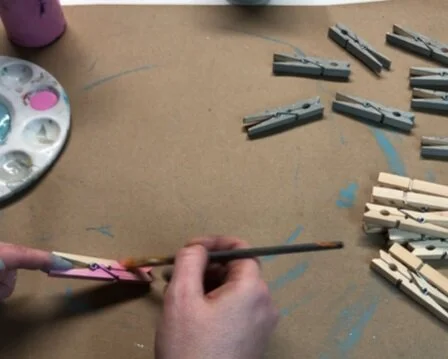
Paint your clothes pins. I just used two colors, pink and gray. I painted my clothespins with two coats of acrylic paint to get a good coverage on them. Let them dry.

Dollar Tree pizza pan DIY work for hire chore chart. How to make a work for hire board for your kids. Easy Dollar Tree craft.

THREE-

Add a vinyl decal to the top that says ‘ work for hire’. You can make your own or grab one similar to the one I used, get it in my FREE RESOURCE LIBRARY. I used gray oracal 651 vinyl for mine. Even though I allowed my painted pizza pan to dry for several days I wasn’t sure if the transfer tape would remove the paint so I applied my decal very gently. I tried not to push the transfer tape down too much and focused on just the decal. Thankfully none of the paint came off of my pizza pan when applying the work for hire decal.

Dollar Tree pizza pan DIY work for hire chore chart. How to make a work for hire board for your kids. Easy Dollar Tree craft.

FOUR-

Write the chores on your clothes pins. Ours don’t change too much, they are pretty much the same things that need to be done every month so I used a fine point sharpie to write on mine. When I made mine I wrote on the painted clothespins after I glued the magnets to them…big mistake. It would have been far easier to write on them first, glued magnets second. But now I know for next time AND I know the right way to tell you how to do it so you don’t make the mistake I did.

Dollar Tree pizza pan DIY work for hire chore chart. How to make a work for hire board for your kids. Easy Dollar Tree craft.

FIVE-

Use E6000 and glue a magnet to the backside of each of your clothespins. If you’ve never heard of E6000 it’s basically a really strong glue. It does take about 24 hours to fully dry though. Oh, and it does have a bit of a weird smell to it but it is good for crafts lol! Set your clothespins somewhere they won’t be disturbed so they can dry properly.

work for hire3.Dollar Tree pizza pan DIY work for hire chore chart. How to make a work for hire board for your kids. Easy Dollar Tree craft.

SIX-

Add a ribbon hanger to the back. Make sure it lines up with the front, you don’t want a lopsided chart hanging up after all this hard work. Use tape to hold the ribbon in place on the backside. Glue to the back side of the pizza pan using E6000. I used the discarded piece of backing from my vinyl to press the ribbon into the glue. I didn’t want all of that on my fingers. That worked great for me! Just like with the clothespins, set the pizza pan in a place it can fully dry without being disturbed.

Dollar Tree pizza pan DIY work for hire chore chart. How to make a work for hire board for your kids. Easy Dollar Tree craft.
work+for+hire9.jpgDollar Tree pizza pan DIY work for hire chore chart. How to make a work for hire board for your kids. Easy Dollar Tree craft.

SEVEN-

After everything is dry hang up and add your clothespins with the money attached to them.

Dollar Tree pizza pan DIY work for hire chore chart. How to make a work for hire board for your kids. Easy Dollar Tree craft.

I hope you enjoyed this crafty tutorial and that it helps and inspires you to create your own. As with all of my posts, if you have any questions please feel free to ask.

Happy crafting!

Want instant access to all of my freebies? Fill out the info below and you instantly get the password to get into my FREE RESOURCE LIBRARY. This is where I share all of my printable, files, more to share with anyone that wants them to use for non commercial use.

DIY Dollar Tree St. Patrick's Day rag wreath

DIY Dollar Tree rag wreath for St. Patrick's Day. How to make an easy rag wreath using a Dollar Tree wire wreath form and scraps of fabric or fat quarters.

How to make a rag wreath using a Dollar Tree wire wreath form

I LOVE shopping at the Dollar Tree. When they put one in our small town my girls and I were EX-CI-TED! It’s not that we lived too far away from the next Dollar Tree but it is so nice to have one that is just a couple minutes away vs having to get on the highway and drive 25+ minutes, we are loving this convenience! I don’t buy everything from the Dollar Tree though, but there are several things I do prefer to pick up from here like wire wreath forms. Here’s my list of the top 15 craft supplies I buy from the Dollar Tree.

Affiliate Disclosure. Some of the links on this website are affiliate links, which means that I may earn a small commission if you click on the link or make a purchase using the link. If you make a purchase you will not be charged anything additional.

There are so many different types of wreaths you can make with the wire wreath forms but my absolute favorite are the rag wreaths. They are so beautifully imperfect and they tie in nicely with my rustic/inexpensive style lol! This is my third rag wreath I’ve posted here on my blog. My first one was this super country cottage chic spring wreath. I really wanted to put it up for Valentine’s day this year but decided against it since it has bunnies for one of the prints. My second rag wreath was this rustic but patriotic red, white, and blue one.

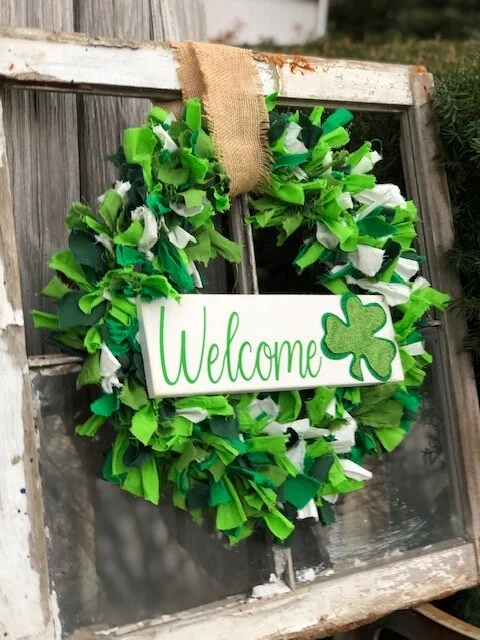
For my St. Patrick’s Day rag wreath, or tied fabric wreath as some call it, I wanted to add a little sign that said welcome. I admit I took the easy way out and didn’t stencil the sign, I made a vinyl decal instead. It is far easier to make these they just don’t last as long as the fully painted signs I create and ship world wide in my handmade business. Check out my handmade signs here. If you’ve been dreaming of making your own hand painted wooden signs but you keep running into problems my sign painters e-course is for you!

Check out the rag wreath video tutorial or keep scrolling for written/picture instructions.

Here’s what you’ll need to make your own St. Patrick’s Day rag wreath

Helpful tools

DIY Dollar Tree rag wreath for St. Patrick's Day. How to make an easy rag wreath using a Dollar Tree wire wreath form and scraps of fabric or fat quarters.

DIY rag wreath for ST. Patrick’s Day

One-

Unfold your fabric. Then about ever 1” or so cut a small slit on one side of the fabric. Now rip those 1” sections so that you have a bunch of strips of fabric. Repeat this step for all of your pieces of fabric. I’ve found fat quarters that you get from Walmart work really well for these wreaths.

DIY Dollar Tree rag wreath for St. Patrick's Day. How to make an easy rag wreath using a Dollar Tree wire wreath form and scraps of fabric or fat quarters.

Two-

Cut your ripped fabric strips into 3-4 inch pieces. These don’t have to be perfect, mine are never the exact same size.

DIY Dollar Tree rag wreath for St. Patrick's Day. How to make an easy rag wreath using a Dollar Tree wire wreath form and scraps of fabric or fat quarters.

Three-

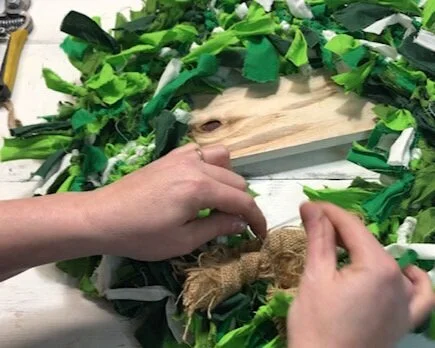
Tie your pieces in a single knot onto your wire wreath form. This took me about 45 minutes to complete.

DIY Dollar Tree rag wreath for St. Patrick's Day. How to make an easy rag wreath using a Dollar Tree wire wreath form and scraps of fabric or fat quarters.

Four-

Once you have all of your fabric pieces tied onto your wire wreath form you flip your wreath over. Then push any long fabric pieces back on to the front.

DIY Dollar Tree rag wreath for St. Patrick's Day. How to make an easy rag wreath using a Dollar Tree wire wreath form and scraps of fabric or fat quarters.

Five-

Set your wreath to the side so you can start on your welcome sign that is going to attach to the front. I used a piece of scrap wood I had in the garage from a previous project. Paint the base white, I used two coats of paint to get a good coverage. Be sure you let both coats dry completely before moving on to step 6.

DIY Dollar Tree rag wreath for St. Patrick's Day. How to make an easy rag wreath using a Dollar Tree wire wreath form and scraps of fabric or fat quarters.

Six-

Instead of stenciling this sign I applied a vinyl decal. I used my Cricut to cut out my vinyl decal. You can get my WELCOME Cricut cut file here.

DIY Dollar Tree rag wreath for St. Patrick's Day. How to make an easy rag wreath using a Dollar Tree wire wreath form and scraps of fabric or fat quarters.

Seven-

I bought a package of foam green clovers at my local Dollar Tree last year and thought these would be super cute to add to one side of my welcome sign. They were the same size so I trimmed down the shamrock I wanted to place on the top so that you could see a little bit the bottom shamrock showing through the edge. I did this same technique on this Rae Dunn inspired fall burlap leaf garland. Then I glued the two together and glued them down to the end of the sign.

DIY Dollar Tree rag wreath for St. Patrick's Day. How to make an easy rag wreath using a Dollar Tree wire wreath form and scraps of fabric or fat quarters.

Eight-

Attach your sign to your wreath. To do this I used a soft wire but I have no idea where I got it from. I would also recommend a floral wire for this step. I drilled holes in the top corners of my sign and used a small piece of wire to attach it to the wreath. Make a U shape to your wire, place one end of the wire in the hole of the sign and feed it to the back then twist the two ends together on the back side so you can’t see them once your wreath is hanging. Do this for both sides of your welcome sign to attach it to your wreath.

DIY Dollar Tree rag wreath for St. Patrick's Day. How to make an easy rag wreath using a Dollar Tree wire wreath form and scraps of fabric or fat quarters.

Nine-

I finished my wreath off with a 4” wide piece of burlap so I could hang it up. I didn’t really like the knot I made in the burlap so I wanted to hide it lol. I just took another piece of wire and secured the knot to the back of the wreath.

DIY Dollar Tree rag wreath for St. Patrick's Day. How to make an easy rag wreath using a Dollar Tree wire wreath form and scraps of fabric or fat quarters.

Now you're ready to hang your wreath for St. Patrick’s Day. I hope you enjoyed this crafty DIY. If you did and make your own St. Patty’s Day wreath I’d love to see pictures of it. As always with all of my tutorials, if you have any questions please don’t hesitate to ask:)!

DIY Dollar Tree rag wreath for St. Patrick's Day. How to make an easy rag wreath using a Dollar Tree wire wreath form and scraps of fabric or fat quarters.

Happy crafting!

Want instant access to my FREE RESOURCE LIBRARY? This is where I share my freebies of cut files, printables, checklists and more. Leave your info below and I will send you the password and link to get instant access into my library.

Easy popsicle stick picture frame for Valentine's Day

Easy popsicle stick picture frame valentine's day. How to make a mess free Valentine's Day craft with your kids and family. Cute and easy popsicle stick frame craft for kids.

We belong to a wonderful little program called Parents as Teachers. If you’ve never heard of this you can check out Parents as Teachers here. Every week our local PAT’s host a play group and during the holiday season they host themed groups with a fun party. This year they asked me again if I would help host the Valentine’s Day craft for the party. Of course I said yes!

Affiliate Disclosure. Some of the links on this website are affiliate links, which means that I may earn a small commission if you click on the link or make a purchase using the link. If you make a purchase you will not be charged anything additional.

I knew I wanted the craft to be a keepsake. Every momma LOVES keepsakes! They are my most favorite thing the girls bring home from school in the early years. So I searched Pinterest looking for an easy to make Valentine’s Day keepsake for little ones. I came across a fun popsicle stick frame and knew this would be something super easy for the kids and moms to make together.

My husband and I premade all the frames so everything was ready to go for the Valentine’s Day party, 30 frames total, and of couse since we live in the center of the USA winter did a little showing off, school got cancelled and so did the party *insert sad momma tears*. But we still had fun making these frames at home and the older three daughters actually had even more fun than I thought they would. They loved decorating their own frames with the Valentine’s Day stickers and cutouts.

How to make a mess free Valentine’s Day keepsake craft

Watch the video below or keep reading for the step by step instructions

Want access to my FREE RESOURCE LIBRARY? This is where I keep all of my files, printables, lists, and more. Get your password to get all the freebies —-> Send me to the FREE RESOURCE LIBRARY

Here’s what you’ll need to make your Valentine’s Day popsicle stick frame

You can find all of these items at the Dollar Tree (except the gorilla glue and glue gun) but I’ve included the links if you prefer your supplies delivered right to your door:)!

DIY popsicle stick picture frame. How to make a Valentine's Day craft with kids mess free. Keepsake art to Valentine's Day

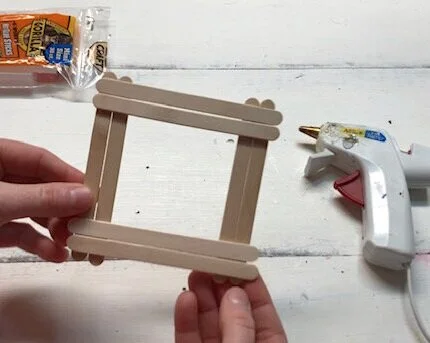
To make 1 popsicle stick picture frame you need 8 popsicle sticks.

  1. The first thing you need to do is put your frame together. This should be done by an adult. I’ve found using gorilla glue sticks vs regular hot glue sticks hold projects together so much better. You want to line your sticks out first before you glue them down. You will need 2 popsicle sticks on each side of the frame.

DIY popsicle stick picture frame. How to make a Valentine's Day craft with kids mess free. Keepsake art to Valentine's Day

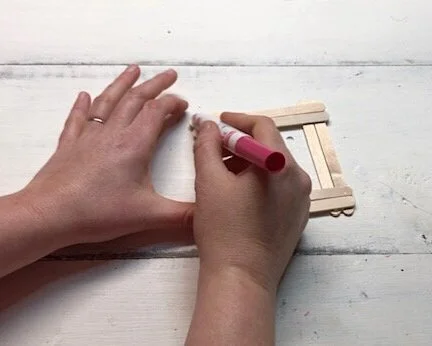
2. Once the glue has set and dried you can start decorating. No need to get out messy paint, although I LOVE paint sometimes it’s nice to not have that mess to clean up. Washable markers work great to give the frame a color and your work area will clean up with a washcloth after with no fuss. This is great for little ones who are working on their fine motor skills too!

DIY popsicle stick picture frame. How to make a Valentine's Day craft with kids mess free. Keepsake art to Valentine's Day

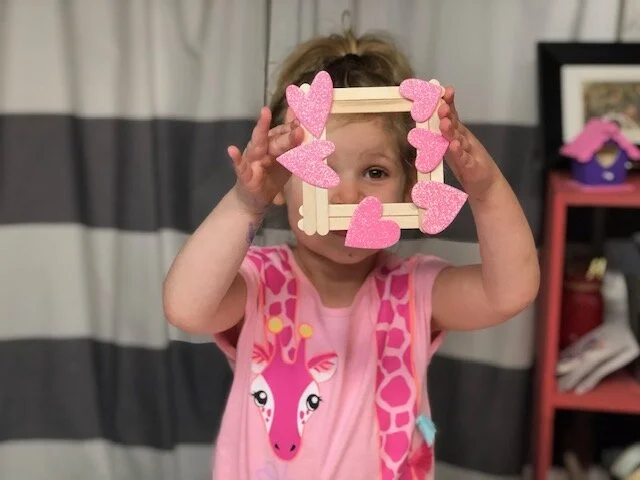
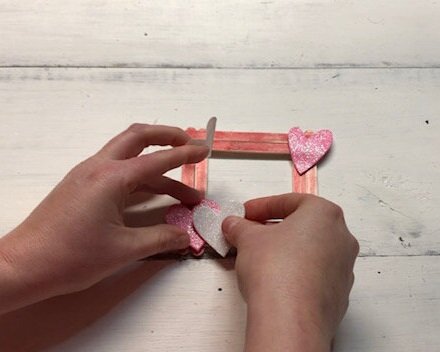
3. Add some more decorations. Stickers are PERFECT for these adorable Valentine’s Day frames! Your kiddos can just peel off the backing and stick them wherever they would like. Let them have fun with this step. If you want you can bring out some rhinestones, sequence, and even glitter (but these will require glue).

DIY popsicle stick picture frame. How to make a Valentine's Day craft with kids mess free. Keepsake art to Valentine's Day

4. Glue a photo or their art work to the back. I just used my hot glue gun to glue a photo of our sweet family to add to the frame I made for this tutorial. If you want you can also add a small magnet so you can hang it on the fridge.

DIY popsicle stick picture frame. How to make a Valentine's Day craft with kids mess free. Keepsake art to Valentine's Day
DIY popsicle stick picture frame craft for kids. Mess free Valentine's Day craft to make with your kiddo

5. Enjoy their art! place it on a shelf and keep it out year round. Now that my girls are getting older I am even more appreciative of all their handmade creations they’ve made me over the years.

DIY popsicle stick picture frame. How to make a Valentine's Day craft with kids mess free. Keepsake art to Valentine's Day

If you have any questions about this DIY craft or any other leave a comment below. Happy Valentine’s Day!

DIY Dollar Tree fall leaf garland

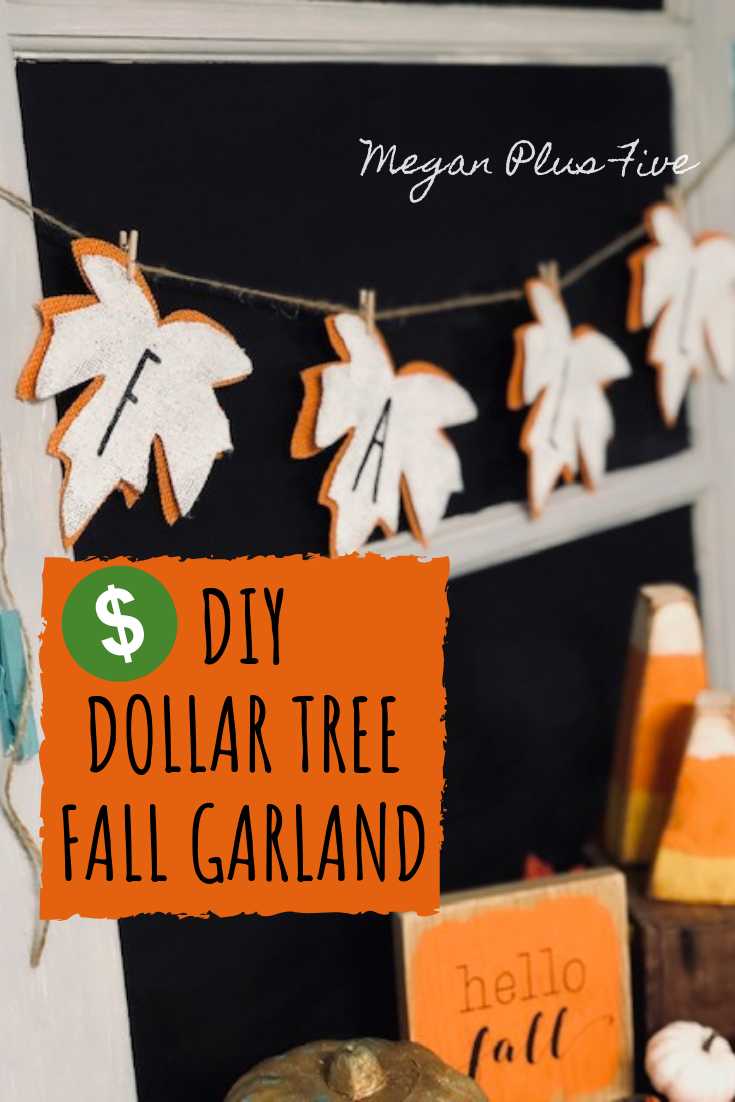
DIY Dollar Tree Fall Garland, easy craft tutorial to make your own rustic decor for the holidays

I just can’t get enough of fall décor! Especially when it literally costs me less than $3 to DIY! My four daughters and I went to the Dollar Tree last week to pick up some things for the oldest daughter’s friend for her birthday {see the fun dollar tree inspired birthday gift we made for her } and of course they had some of their Halloween and fall things out. So naturally we HAD to buy a few things to make some DIY rustic décor and a fun Halloween wreath that I can’t wait to start on. I’ve been on a DIY frenzy trying to get all my fall décor made before school starts back up. The last couple of years have had me so busy I didn’t decorate much for fall…or Christmas for that matter {aside from the traditional tree and stockings}. So this year I am making it my mission to bring the holiday explosion to our home, and I’m doing it the frugal way.

Affiliate Disclosure. Some of the links on this website are affiliate links, which means that I may earn a small commission if you click on the link or make a purchase using the link. If you make a purchase you will not be charged anything additional.

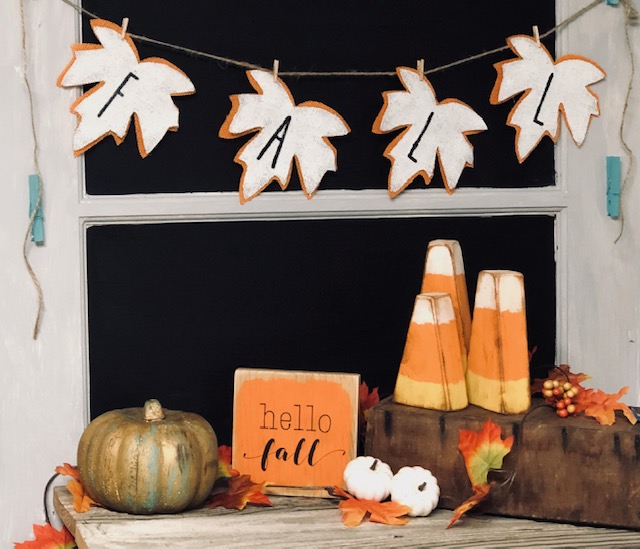
How to make your own Dollar Tree Rae Dunn inspired fall burlap garland

How to make your own Rae Dunn inspired fall burlap garland

Here’s what you need to make your own FALL burlap garland

How to make your on Rae Dunn INSPIRED fall garland from the Dollar Tree

Cut out your stencils. I used a skinny type font and my Cricut Design Space. I made them 2.5” tall and cut them out of cardstock. Before cutting them out I made a line in the “A” so that the middle would stay attached while stenciling and I just free hand painted that small part in once I was done.

Remove the wire “stems” from the burlap leaves. For me, the brown ones peeled away super easy but the orange ones didn’t want to come off without taking the burlap with it. So, I used wire cutters on the orange ones.

Because these Dollar Tree burlap leaves are the exact same size you will want to trim up the brown ones so that you have and orange border going around them once you are finished. Just take a small amount off the edge, following the shape of the leaf.

How to make Rae Dunn inspired fall garland on a budget, from the Dollar Tree

Paint the brown burlap leaves white, even the back. The medium sized brush works great for this step. Let dry.

How to make Rae Dunn inspired fall garland on a budget, from the Dollar Tree

After the white paint is dry you can stencil on your FALL letters. I just held my in place and used a pouncing motion like I did on this stenciled canvas tote bag. Take care not to get outside the cardstock lines. If you need to you can use painter’s tape to tape the stencil off so you won’t have any bleed lines {just don’t press the tape down too much so it doesn’t mess up the work you’ve already done ;) }

How to make Rae Dunn inspired fall garland on a budget, from the Dollar Tree

Once your stenciled area is dry you can glue the white burlap leaves onto the orange burlap leaves. I only applied glue to the center of the white leaves. I didn’t want them to be completely glued down all the way around.

How to make your own Rae Dunn inspired Fall garland from the dollar tree

Measure out how long you need your burlap to be then add a few inches so you can loop the ends to hang. Attach your leaves with the mini clothes pins, or you can hot glue the burlap leaves directly on the twine.

How to make your own Rae Dunn inspired burlap leaf garland using items from the Dollar Tree

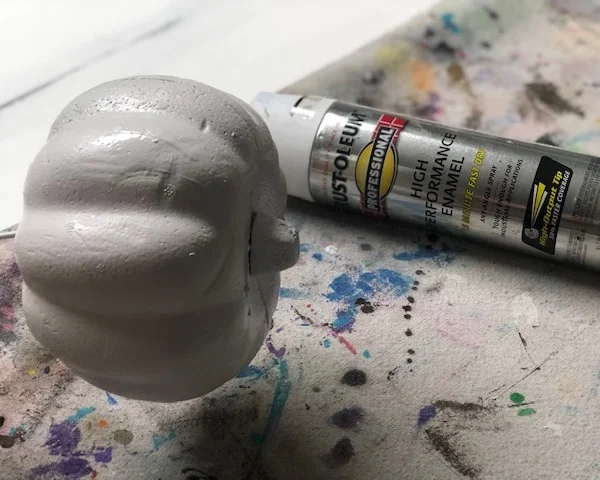
Then you’re all done! SOOO super easy! And it was super inexpensive! Pair this with these rustic candy corns made from a 2x4 or this DOLLAR TREE painted pumpkin DIY makeover.

How to make your own rustic Rae Dunn inspired fall garland on a budget

Check out the full video tutorial to these Rae Dunn inspired DIY burlap Dollar Tree FALL garland

Need more crafty fall ideas? Click here ——> for more DIY Halloween & fall decor


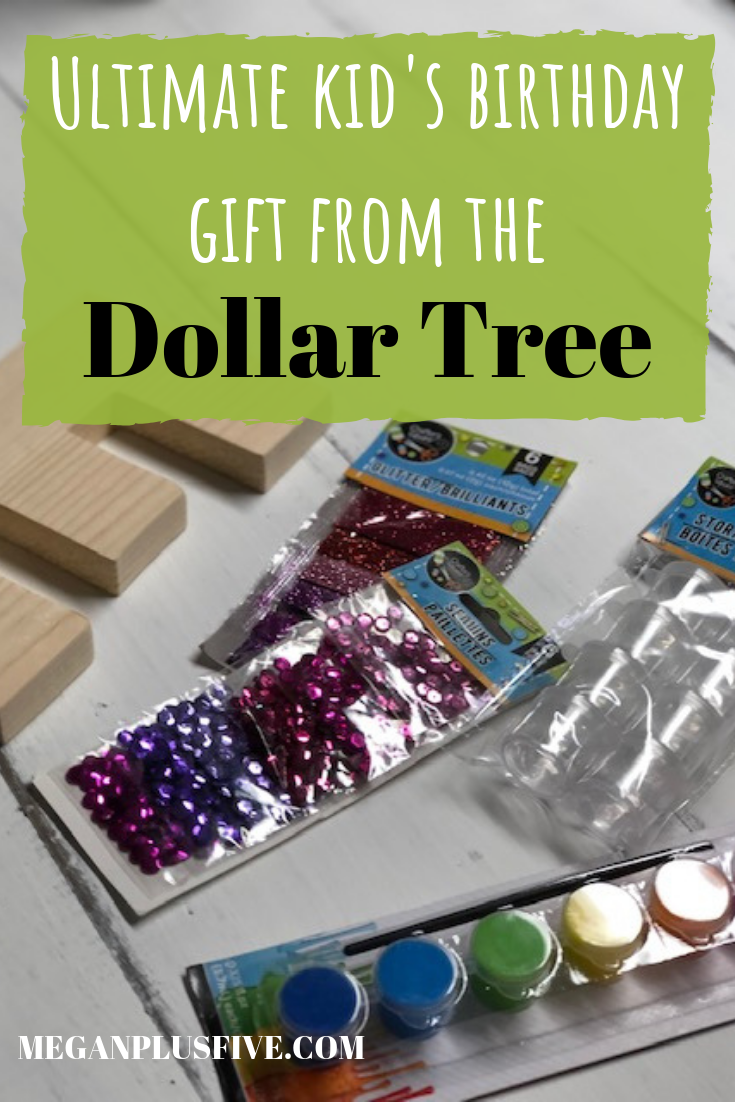
Ultimate Dollar Tree birthday gift idea

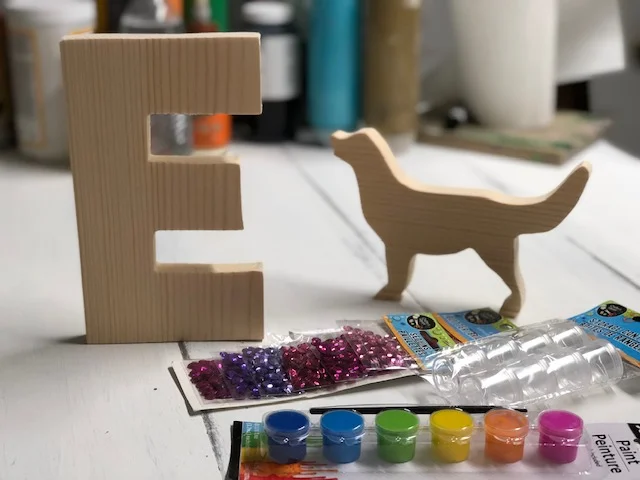
Ultimate kid's birthday gift from the Dollar Tree

The best kid’s birthday gift idea when you’re on a budget

It’s no secret that my girls and I LOVE the dollar tree. Seriously, we were just there today and when we got home my oldest couldn’t believe that we spent and entire HOUR in there and it literally felt like only 20 minutes had past lol! Yep…raising those girls right!

Our sole purpose of the trip was to find a couple gifts for the oldest daughter’s friends for their birthday parties. Raising a family of 6 isn’t a cheap task. So, things like friend’s birthday parties typically have a pretty small budget of $10 per kiddo. At Walmart $10 doesn’t get you much from the toy aisle or any aisle that a kid would be interested in anyway. But, I have to say over the years we have gotten really good at whipping up some amazing birthday gifts on the $10 budget. And I can’t wait to share the latest gift that comes in WAY under budget! Under budget meaning 70% lower than what we typically budget for friend’s birthdays.

Affiliate Disclosure. Some of the links on this website are affiliate links, which means that I may earn a small commission if you click on the link or make a purchase using the link. If you make a purchase you will not be charged anything additional.

How was I able to create two gifts for kids for under $6?

Well, first the Dollar Tree. It is FULL of really amazing things that on their own may not be all that amazing but when paired with something else, like let’s say a personalized wood letter cut out, can be one of the best gifts ever! And second, I just purchased a scroll saw last weekend with the money that comes in from my handmade business so I used that to create the customized gifts for her friends.

The ultimate Dollar Tree birthday gift idea for under $5

My only regret is not buying a scroll saw sooner. If you’re curious about the one I purchased you can see more about the Ryobi scroll saw here. And if you wanna know about the other tools I have in my shop I’ve written a break down of which tools every crafter needs.

I used my Cricut Explore to cut out the letter E and the dog from cardstock. Then I outlined them with a pencil on a scrap piece of 1x8 that had been sitting on the wood shelf in the garage. Using my new handy scroll saw I cut out the shapes. Gave them a light sanding and they were ready to add to the items we picked up at the dollar tree.

Here’s what we picked up from the dollar tree

  • 1 package of purple/pink 6 pk glitter

  • 1 package of blue/green 6 pk glitter

  • 1 package of purple/pink sequence

  • 1 package of small containers

  • 2 paint pots

We bought the small containers to fill with white paint and glue {which we have a TON of at home} . Since the paint pots don’t come with white paint and sequence doesn’t stick well to paint we thought those additions to the birthday gifts would be a good idea. I wrote on the outside of the containers which one was glue and which one was paint so there wasn’t any confusion when the birthday girl goes to use her new craft kit.

The glitters and sequence were individually wrapped so we pulled them off of the original packaging {they were just taped to the thin cardboard} and gave each birthday girl 4 glitters and 2 sequence.

The ultimate DOLLAR TREE birthday gift idea

To keep the birthday crafts looking somewhat professional I packaged the craft supplies in a clear goody bag {the party favor kind} that we already had left over at home.

I am so excited about this new DIY birthday craft idea! It’s absolutely perfect for the crafty kiddo in your life and it costs just a few dollars to create! I can honestly say that our girls loved this idea so much they each want their own.

———> Want more crafty gift giving ideas? Check out my post on these top selling kid approved DIY CRAFT KITS FOR KIDS

——> Also, you don’t want to miss this a great list of the PRE TEEN CRAFT IDEAS, because they can be so hard to buy for sometime

Dollar Tree pumpkins, how to give them a RUSTIC makeover

Frugal fall decorating, how to give a Dollar Tree pumpkin a rustic makeover

Frugal fall decorating, how to give a Dollar Tree pumpkin a rustic makeover

We’ve all seen them the bright orange pumpkins on the shelves at the Dollar Tree. You think to yourself ‘I could paint that up and make it look soooo much better’. Then fall comes and the darn ugly pumpkin is still sitting there untouched by your creativity. Yep…that’s me. I am totally that kind of Dollar Tree shopper and I’m not ashamed to admit it.

After having several of these little pumpkins sit on my craft room shelf for almost a year I decided what better time to give them a makeover than now?! Fall is almost here and I have been working like a busy crafty bee trying to gear up for this season. Check out my latest DIY, 2x4 candy corn they turned out SO stinking cute! AND you don’t want to miss this frugal find, Walmart clearance shoes, that I gave a total makeover to for my 3 year old to wear this fall. She absolutely LOVES them!

How to turn your DOLLAR TREE pumpkins into rustic perfectly distressed pumpkins

Affiliate Disclosure. Some of the links on this website are affiliate links, which means that I may earn a small commission if you click on the link or make a purchase using the link. If you make a purchase you will not be charged anything additional.

I had everything I needed on hand, including the pumpkins, but here’s what I used to turn my pumpkin from bright orange into rustic farmhouse.

First you want to paint your pumpkin white. I used what I found in our garage but you can use any kind of white FLAT spray paint. Stick the skewer in the bottom of the pumpkin so you can hold the pumpkin and spray all around it. Let it dry before you put it down. I used a blow dryer to speed up this process.

Dollar Tree pumpkins, how to give them a rustic makeover

Next you want to paint your pumpkin with your gold chalk paint. I broke 3 small pieces off of the skewer and stuck them in the bottom of the pumpkin so that it would stand up and not touch the table while I was painting it. Let that dry completely before moving on to the next step.

Dollar Tree pumpkins, how to give them a rustic makeover

Once your gold chalk paint is dry you want to very lightly dip the tip of your brush into your teal/blue colored paint. I used a color called lagoon and on it’s own is VERY bright but when used as an accent color it is absolutely gorgeous! You don’t want to completely cover the gold paint but lightly brush over it leaving light streaks of the lagoon colored paint. This will dry pretty quick.

Dollar Tree pumpkins, how to give them a rustic makeover

Next you are going to repeat the previous step but instead you are going to use antiquing wax and your chip brush. I added a little more wax than I did the lagoon colored paint to give it a more rustic look. TIP: trim your chip brush down to about an 1” and it will work MUCH better.

Dollar Tree pumpkins, how to give them a rustic makeover

Once you’re satisfied with your coverage you are all done! I’m not totally loving the stem on this on so I might replace it with a stick from the yard but for now it will tie in perfectly with my fall décor! I paired it next to the glittery gold 2x4 pumpkins I made a while back.

Dollar Tree pumpkins, how to give them a rustic makeover

If you loved this tutorial you will love even more of my DIY fall craft tutorials

Check out the full video tutorial below


Decoupage a wood hanger with a napkin

DIY decoupage, learn how to give an old hanger a fresh new look with a pretty napkin

Decoupaging is much easier than most people think. And it can be done on almost any surface, as long as the surface stays dry. My grandma taught me this technique when I was just a small kid at her kitchen table and it’s one I’ll never forget. And according to good ol’ Google decoupage has been around since the 17th century and a household name by the 20th century. It’s so cool to find out little tid bits of history like this. While the materials they used were a little different than what I’m going to show you to use today it’s still pretty cool that we are using the same crafting techniques they used long, long ago!

Affiliate Disclosure. Some of the links on this website are affiliate links, which means that I may earn a small commission if you click on the link or make a purchase using the link. If you make a purchase you will not be charged anything additional.

Here’s what you’ll need

I did a Facebook live showing all my crafty people how to decoupage using a napkin and I uploaded the video to YouTube. Once you get used to working with delicate paper you will be able to decoupage anything! As soon as you start looking you’ll find there are so many beautiful napkin prints out there too. I like buying mine from the Dollar Tree {read more about the top 15 craft supplies I always buy from the Dollar Tree}.

First you want to be sure your wood hanger is smooth and clean. Your napkin won’t adhere to it if it’s dusty.

You need to separate your napkin. If it’s 2 ply you’ll have two pieces, if it’s 3 ply you’ll have 3 pieces. You ONLY need the piece that has the print on it.

Cut your pieces and work in small sections. Brush on a thin layer of Mod Podge, lay down your napkin piece, then smooth out with your fingers and your vinyl squeegee. Be sure to be super gentle. The last thing you want to do is tear your napkin or cause more wrinkles. Do this till your hanger is completely covered. Be sure while you’re working you aren’t leaving any air bubbles.

Then once your hanger is completely covered with the napkin you’ll need to brush on a thin layer of Mod Podge as a top coat. Don’t go back and forth as you will risk tearing the napkin. Just a light thin layer will do fine.

Here’s the video I did. Remember this was a Facebook live.

Let me know what you think in the comments below.

Top 15 craft supplies you should be buying from the Dollar Tree

15 MUST HAVE craft supplies from the Dollar Tree

The DOLLAR TREE!! I love this place and I actually buy lots of supplies here, especially ones for the kiddos to use. But don’t be fooled by that $1 price tag, not all supplies are a smart buy there.


Here are my top craft supplies that I personally most of the time buy from the Dollar Tree.

CRAFT ROCKS Usually they have a wide variety of rocks. You can find them in the ribbon section. I made some adorable UNICORN PARTY CENTERPIECES using these inside the buckets.

FAUX FLOWERS They alternate these out with the seasons and every year they get prettier! Our girls especially love the ones that have butterflies in them. Check out this DIY LIGHT UP FAIRY JAR and we used flowers picked up from the Dollar Tree on the outside. Super cute!

TISSUE PAPER You can use this for SOOOOOO many different crafts. This is what we use on the outside of those fairy jars.

WOOD SHAPE CUT OUTS this is a must buy here. I have yet to find any place that compares in price to the amount you get per package. Granted, these are thin but for kids crafts these are perfect. These little guys will keep our girls busy for a long time without the ouch effect on the wallet. They can add these to all kinds of arts and crafts projects.

GLUE Our house goes through a ton of glue. We let our girls experiment and explore their creative side often and they use SO much glue during their process lol!

MUFFIN TINS ok, I know this isn't a typical craft supply but read this post on the craft hack you need for your kids and you’ll understand.

SEASONAL BLANKS Every season the Dollar Tree comes out with super trendy, and actually cute, craft blanks. These are inexpensive and you don’t have to pay for shipping. Woohoo!

POM POMS they are all the rage right now and our girls go through them like crazy. Their colors are limited but they are super cheap.

SEASHELLS you can find these right next to the rocks and ribbon. You’ll be surprised what you can use these for. And you don’t feel the pain when your kiddo paints it up unlike the ones from your last beach vacation.

CONDIMENT BOTTLES I use these to hold my acrylic paint. They are half the price of buying them from Walmart and I’m sure WAY cheaper than buying them online. They have held up pretty well too. We originally bought these when we had our brick and mortar craft store, just to see if I’d even like using them for paint, and other than the caps being picked off by little hands they are in perfect working order.

Top 15 craft supplies you should be buying from the Dollar Tree

WIRE WREATH FORM I have yet to find these cheaper any where else. These little guys can be used to make all kinds of different wreaths. Here is a 4th of July rag tie wreath I made using one of these wire forms.

WASHI TAPE the Dollar Tree has all kinds of different prints of washi tape. Our girls love love love to use this to decorate different things. One of their favorite things to use this for is decorating the front covers of notebooks.

STICKERS if you have a toddler who is sticker obsessed the Dollar Tree is the only place to buy these lol. And a side note if your kiddo gets these stuck to your floor a steam mop takes them up effortlessly {just a tip from one mom to another ;)!}

CRAFT STICK aka popsicle sticks. They have a fun colorful assortment too! You can use these for anything from applying AMOUR ETCH to etch glass to letting your kids just go crazy and make whatever their little hearts desire out of them. We always keep these guys on hand.

POSTER BOARD There are so many different uses for this outside of the school project. You can even use this to make a DIY light box for taking pictures in your own crafty business.

Now get to your nearest Dollar Tree and explore all it has to offer. Remember to go beyond the craft aisles as there are so many different things you can use that aren’t considered “craft supplies”.

Let me know below what your favorite Dollar Tree crafty supplies are ;)!