Dollar Tree mini St. Patrick's Day sign makeover + FREE SVG

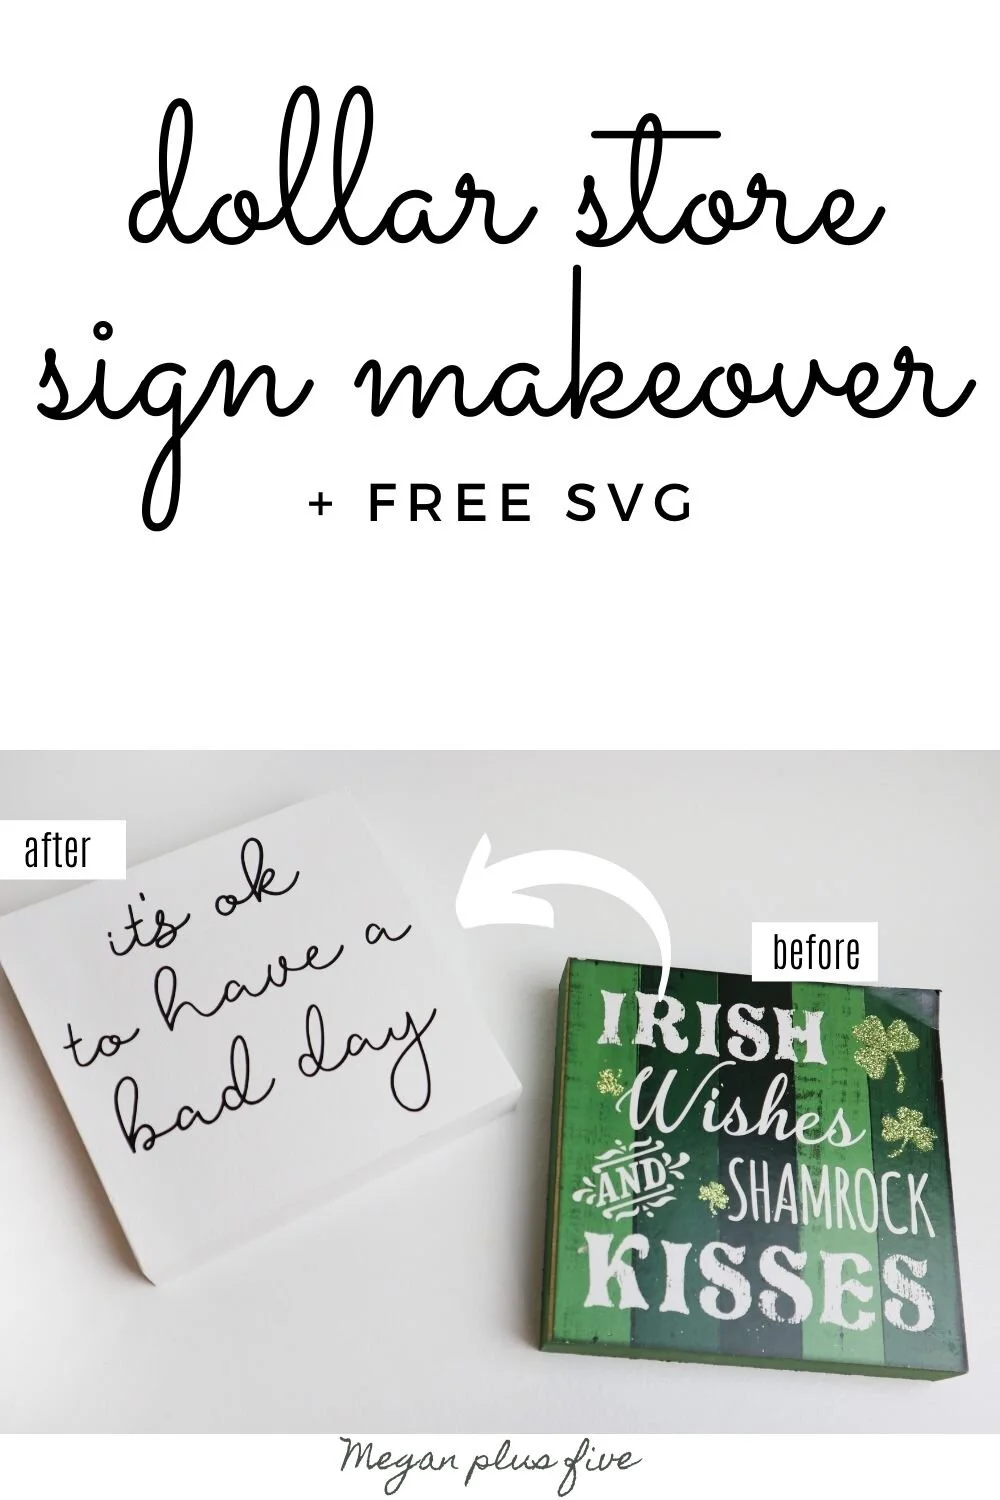
DIY dollar store sign makeover. How to give a dollar tree seasonal free standing faux wood sign a more modern look using your Cricut. DIY vinyl decal using your Cricut 'it's ok to have a bad day' diy sign.

I’ve been working on this little cozy space my girls have claimed in our new home, well it’s actually 100+ year old home but it’s new to us. It’s their play/reading area/hangout zone but I really wanted this space to look like it had more purpose than that. I wanted to create a space that screamed (in a super sweet polite kind of way ;)) “you are loved, you are beautiful, and your heart is amazing, daughter” kind of vibe.

While I’m creating this darling daughter you are loved space I want to share with you not just how I DIY-ed it all but I also want to share with you the same exact cut files and printables I used so you can use them too if you want. You can find all of my freebies in my FREE RESOURCE LIBRARY.

Affiliate Disclosure. Some of the links on this website are affiliate links, which means that I may earn a small commission if you click on the link or make a purchase using the link. If you make a purchase you will not be charged anything additional.
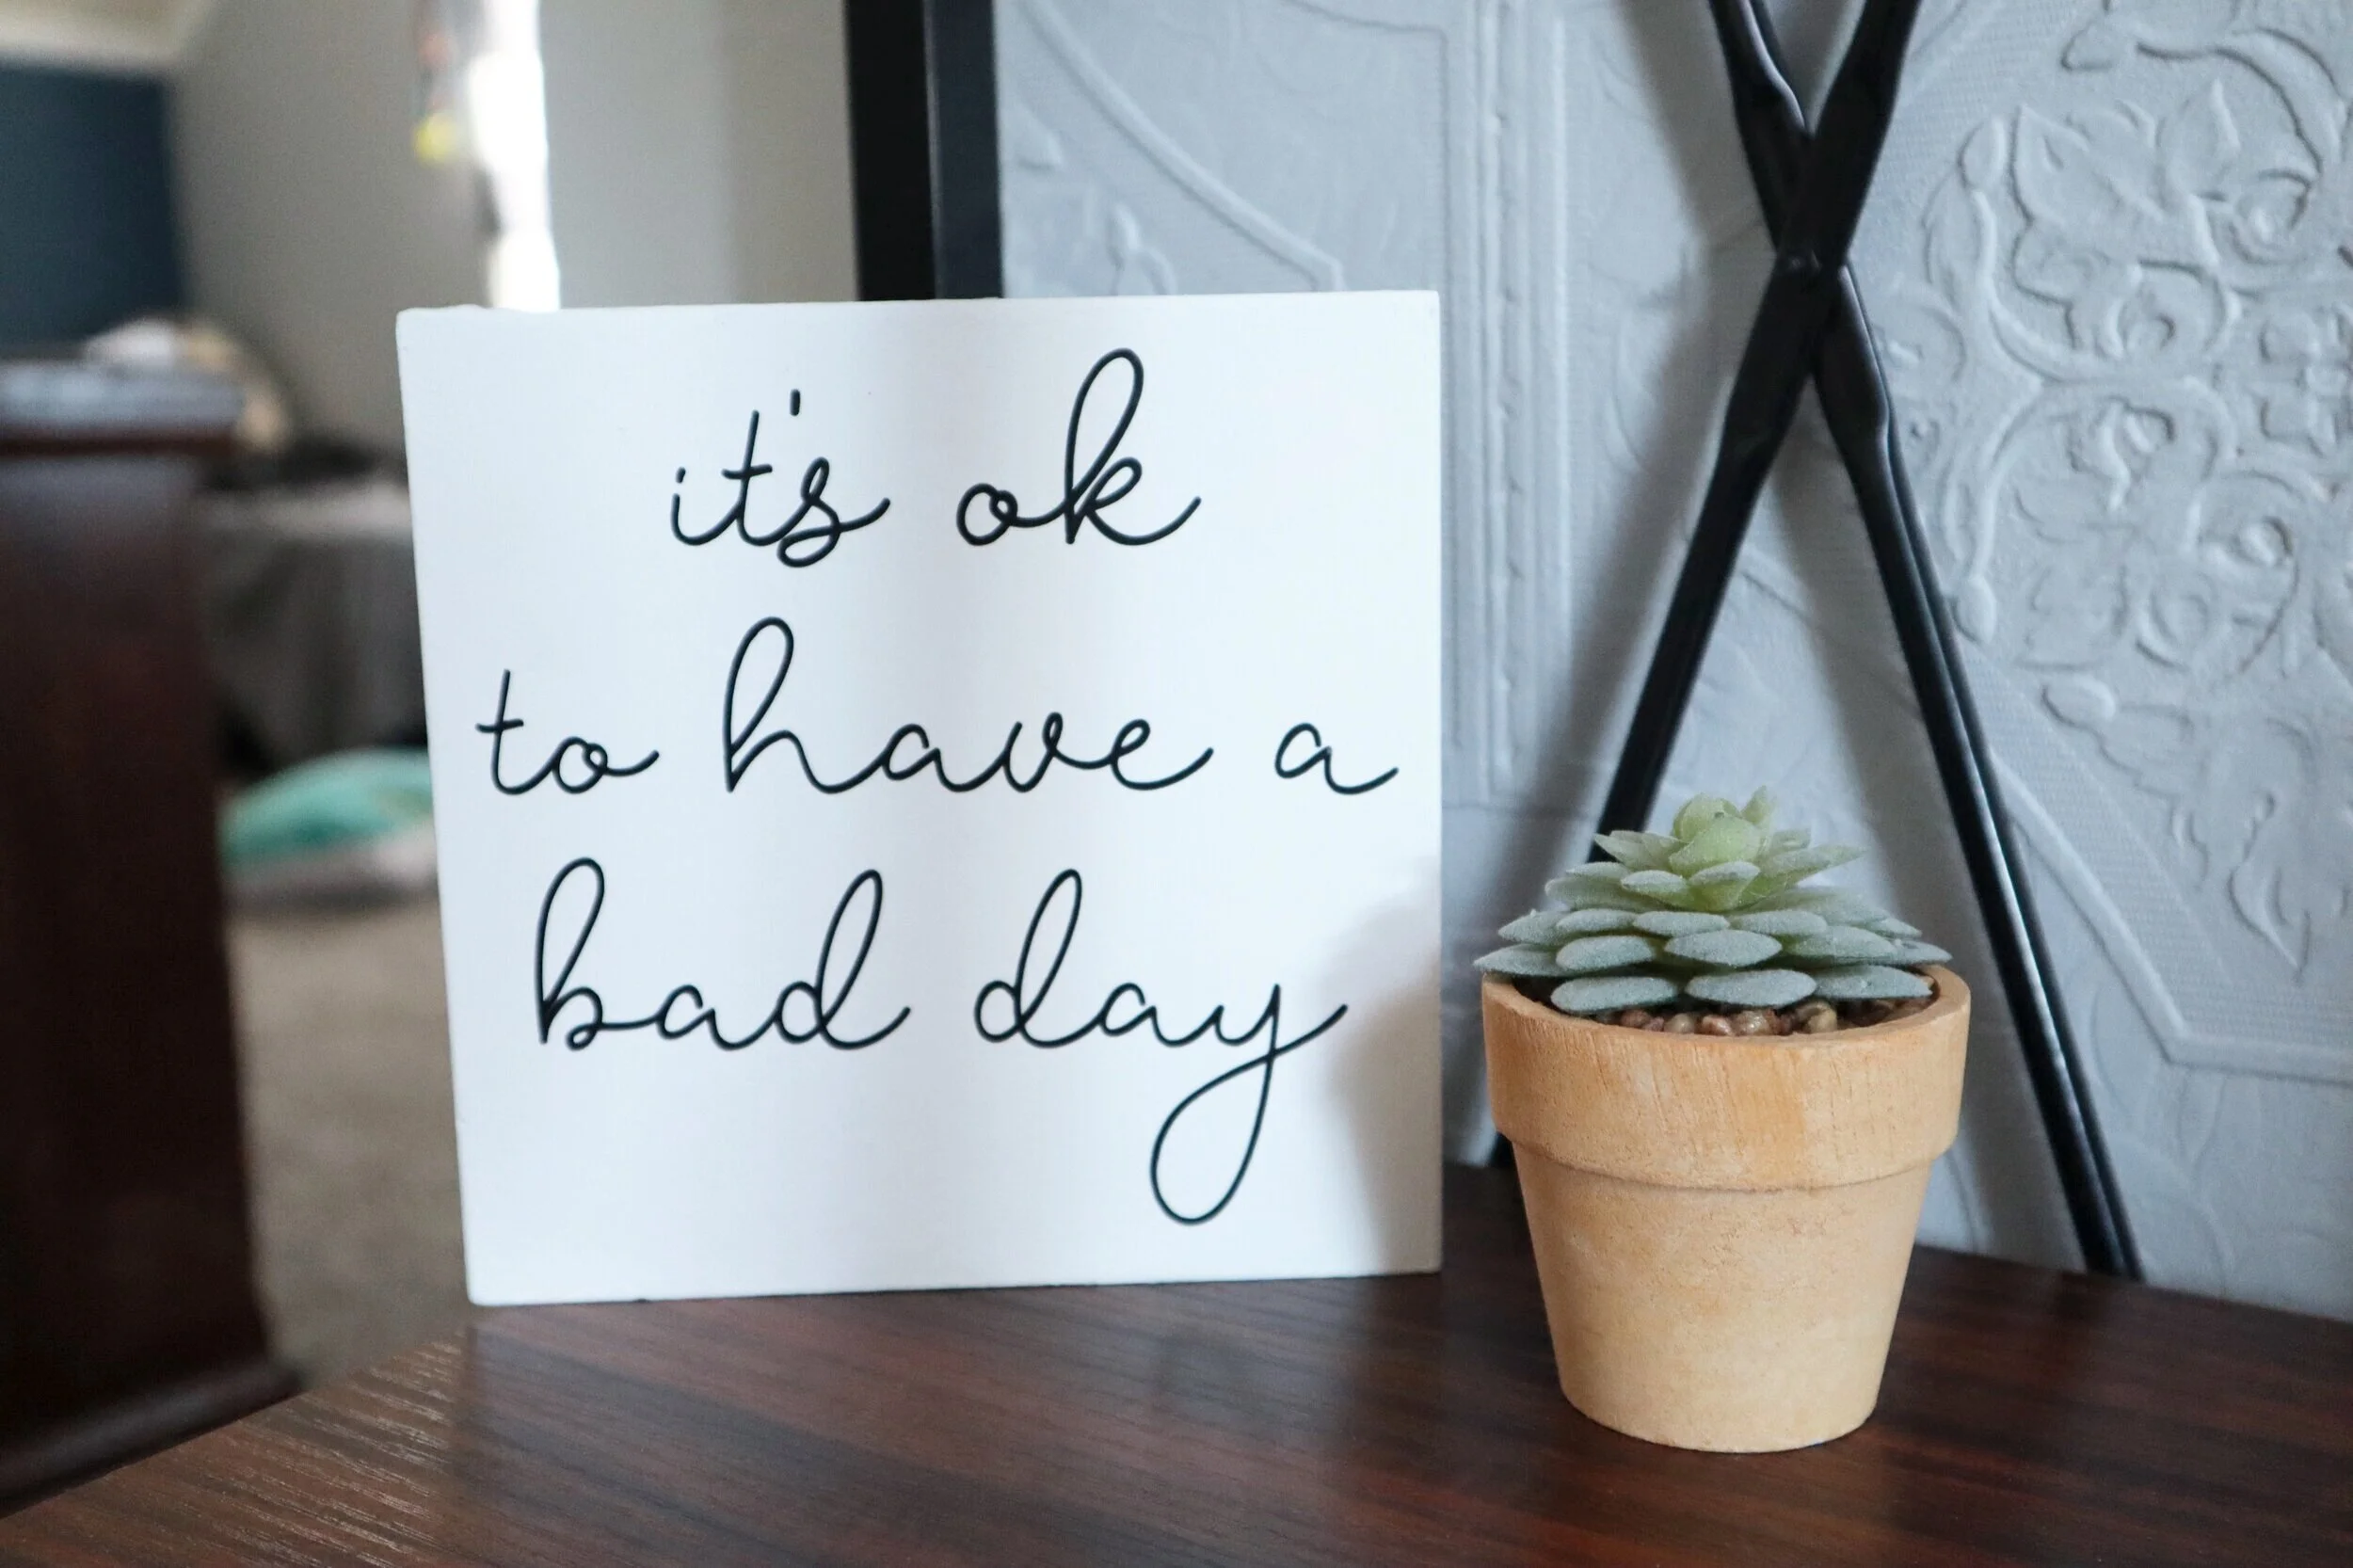
DIY dollar store sign makeover. How to give a dollar tree seasonal free standing faux wood sign a more modern look using your Cricut. DIY vinyl decal using your Cricut 'it's ok to have a bad day' diy sign.

Total transparency here… AFTER I wrote this post (meaning I had already finished the sign, took all the pictures, uploaded everything, pushed publish on the post and posted it to social media) I realized a big UH OH moment! I had added the word to too many times to the “it’s ok to have a bad day” quote. HUGE facepalm to myself. But I have since fixed my error, and honestly though how fitting of a mistake for this project. It really is ok to have a bad day ;)!

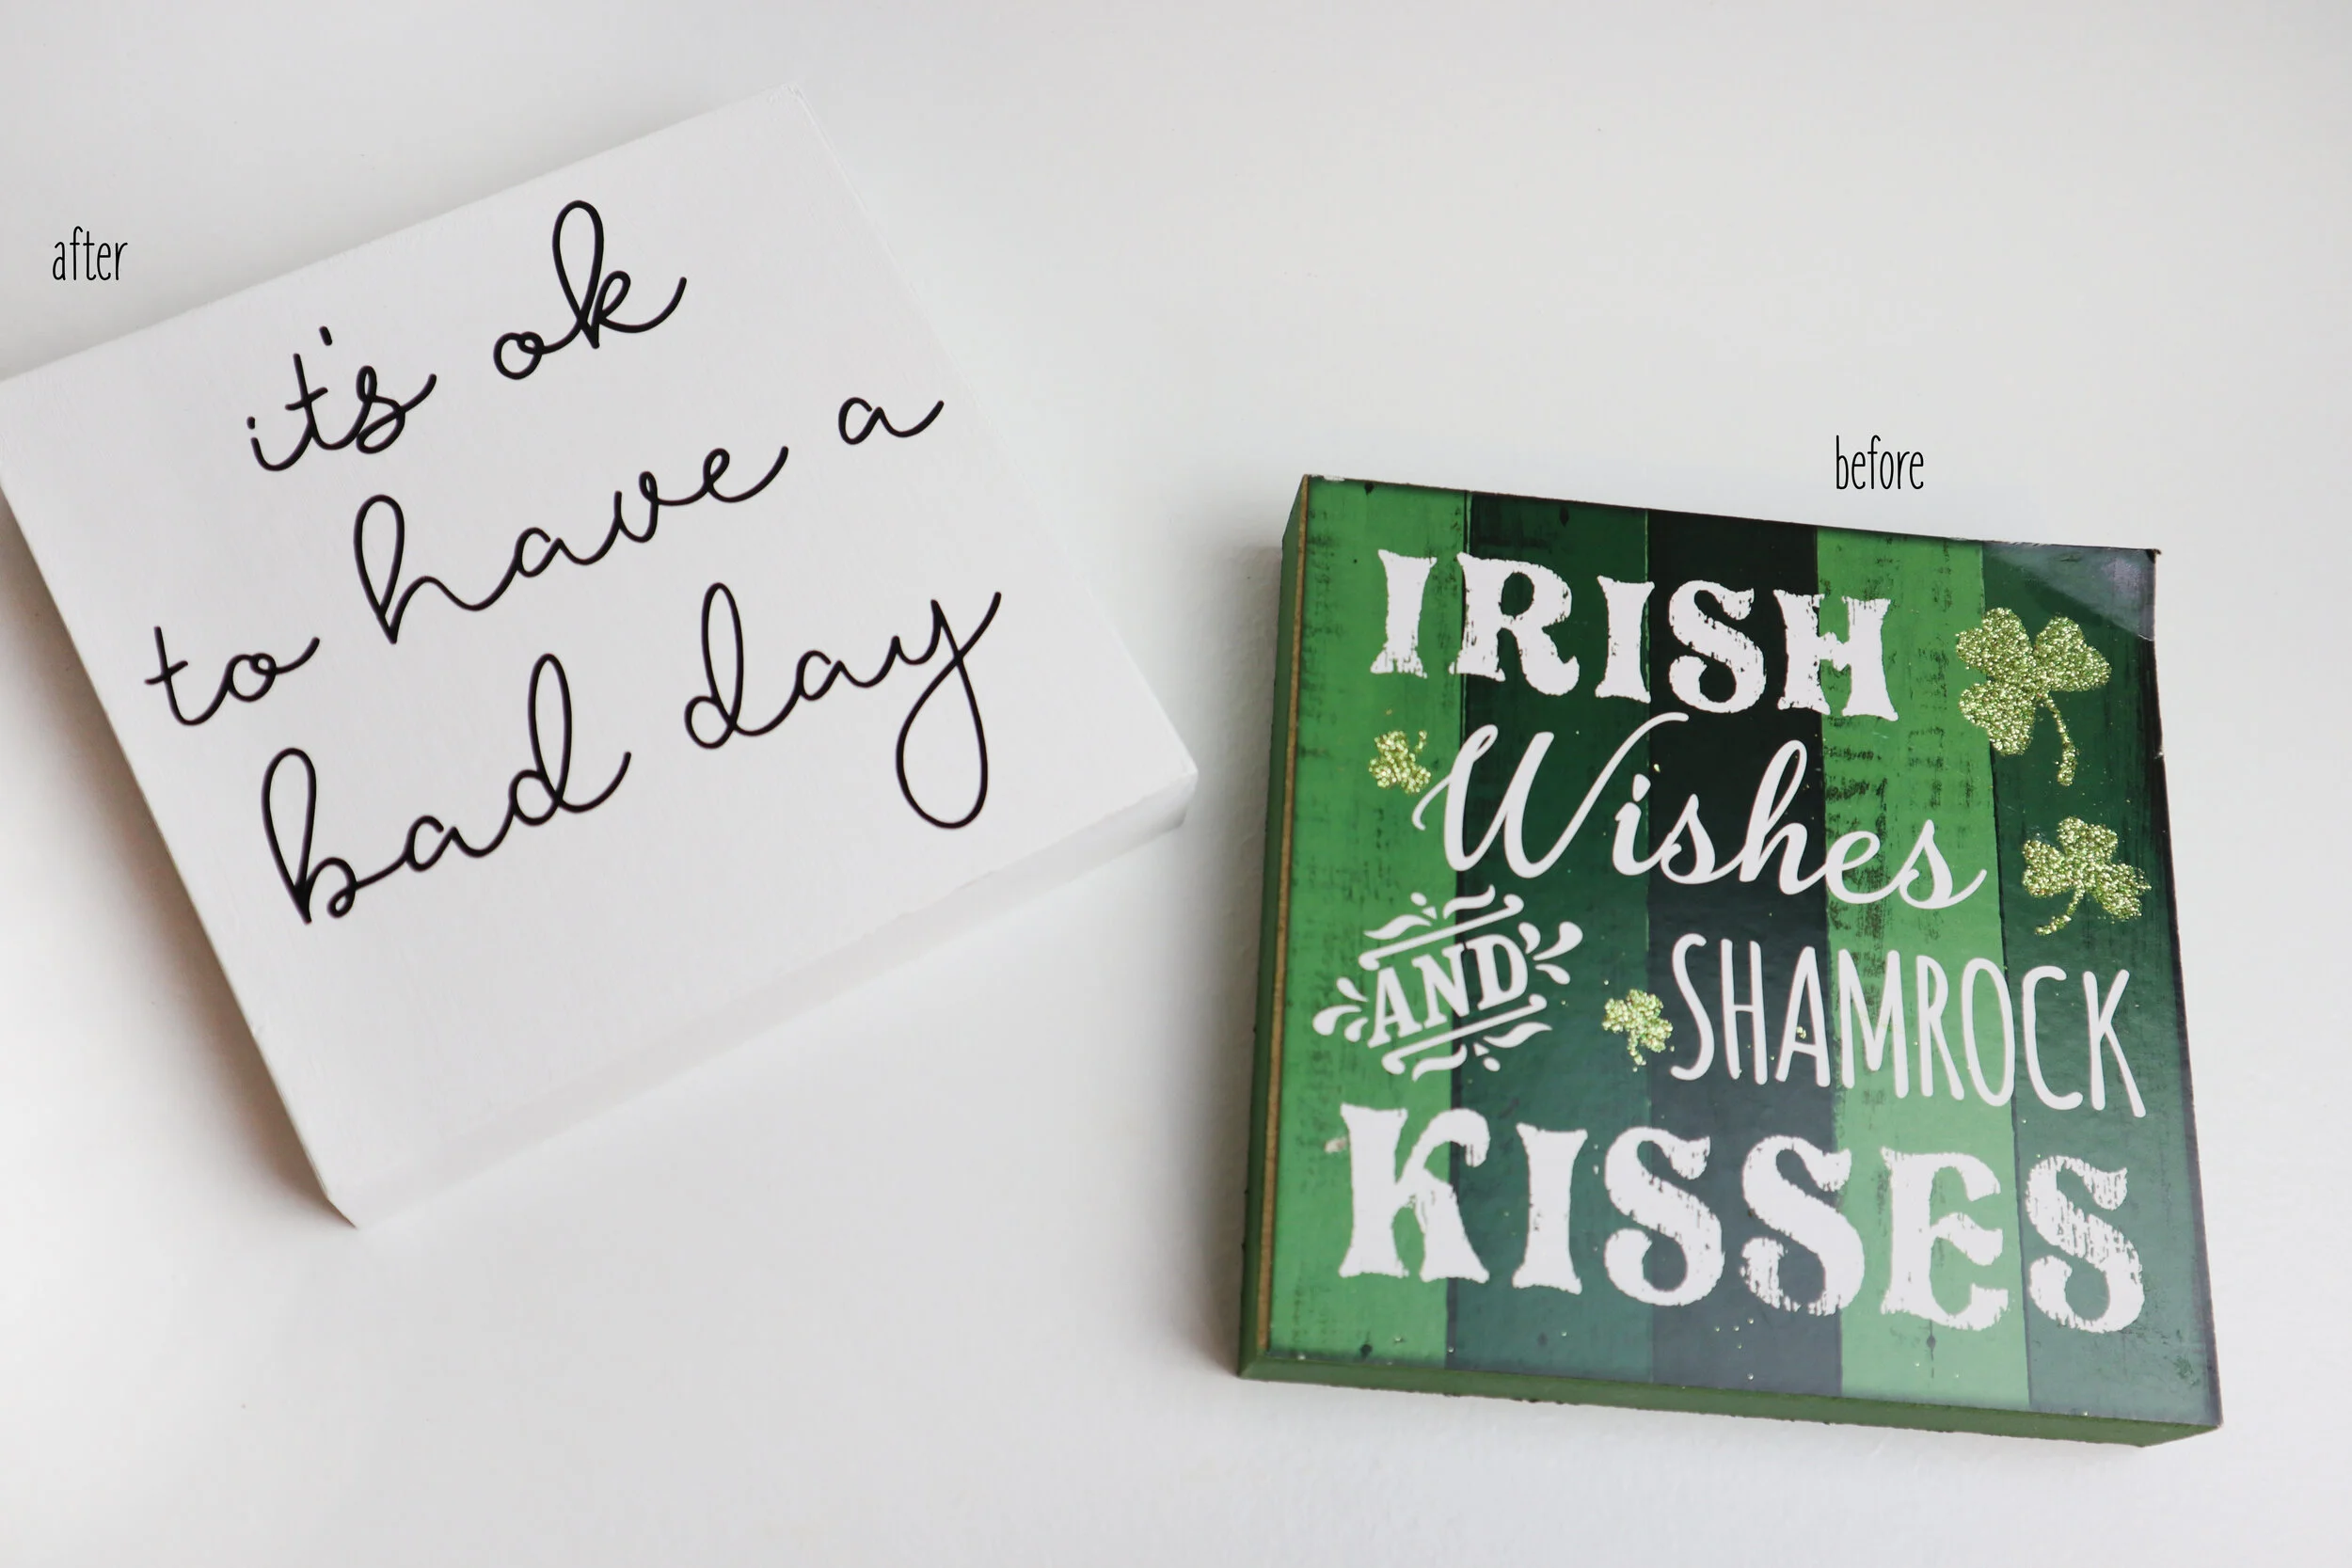
DIY dollar store sign makeover. How to give a dollar tree seasonal free standing faux wood sign a more modern look using your Cricut. DIY vinyl decal using your Cricut 'it's ok to have a bad day' diy sign.

Since I’m a frugal kind of momma I extra love how affordable this sign was to make. While I love using my power tools I didn’t use any to make this sign. I actually bought an already made sign from the Dollar Tree and gave that a little makeover. I spent less than $2 to make this small free standing sign using my Cricut and I want to show you how you can make your own without power tools too.

DIY FREE STANDING SIGN + FREE SVG

See the picture below…I wasn’t going to completely retake every single photo so you see my mistake, it’s ok to to have a bad day lol!!

DIY dollar store sign makeover. How to give a dollar tree seasonal free standing faux wood sign a more modern look using your Cricut. DIY vinyl decal using your Cricut 'it's ok to have a bad day' diy sign.

Here’s what I used

1. CUT & WEED THE DECAL

I used my Cricut to cut out my vinyl decal. I used StarCraft vinyl in matte black but honestly it’s not my favorite. I highly recommend ORACAL 651 (or 631 if you have it since this project is for indoor use). I bought the StarCraft thinking I would love it as much as 651 but sadly I don’t.

Grab the SVG for FREE here.

2. SAND

A drop cloth is a must for this if you don’t want glitter everywhere. I usually always lay down a drop cloth when I crafting. It doesn’t make for a super gorgeous backdrop for my tutorials BUT it keeps my surface clean AND I can throw it in the washer when I’m done.
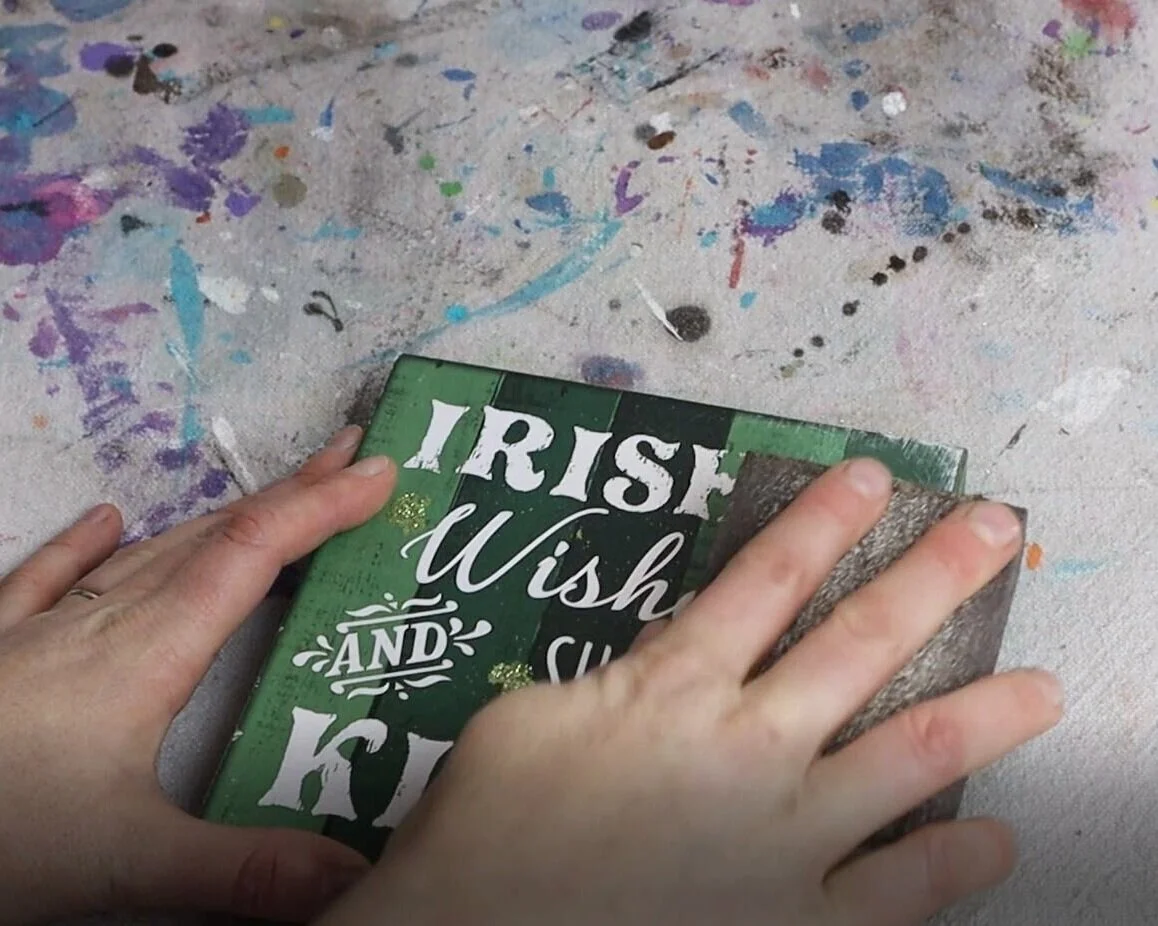
DIY dollar store sign makeover. How to give a dollar tree seasonal free standing faux wood sign a more modern look using your Cricut. DIY vinyl decal using your Cricut 'it's ok to have a bad day' diy sign.

I used a sanding sponge to remove all of the glitter from the Dollar Tree sign first. This surprisingly comes off easily. Then I wiped it down with a paper towel to get all to the sanded stuff off of my sign.
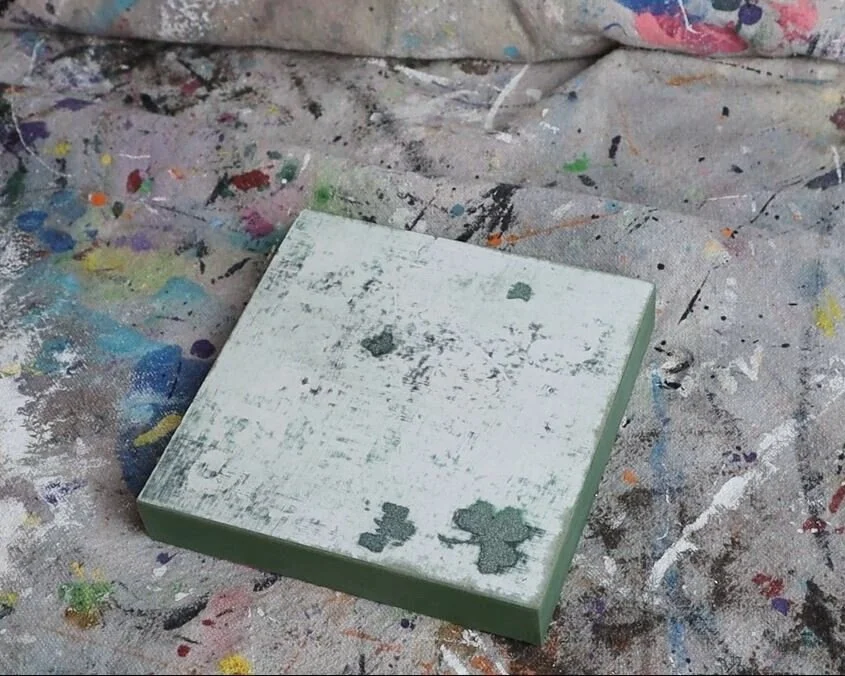
DIY dollar store sign makeover. How to give a dollar tree seasonal free standing faux wood sign a more modern look using your Cricut. DIY vinyl decal using your Cricut 'it's ok to have a bad day' diy sign.

This is what my sign looked like once I sanded it down. I could have sanded more but this much was good enough:)! You mainly want to get all of the glitter off because paint won’t cover over glitter smoothly.

3. PAINT

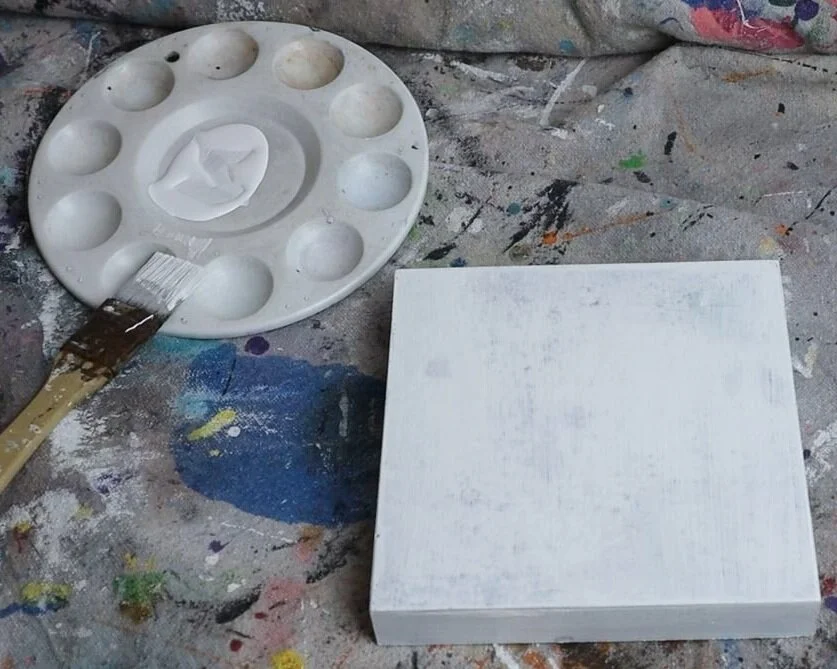
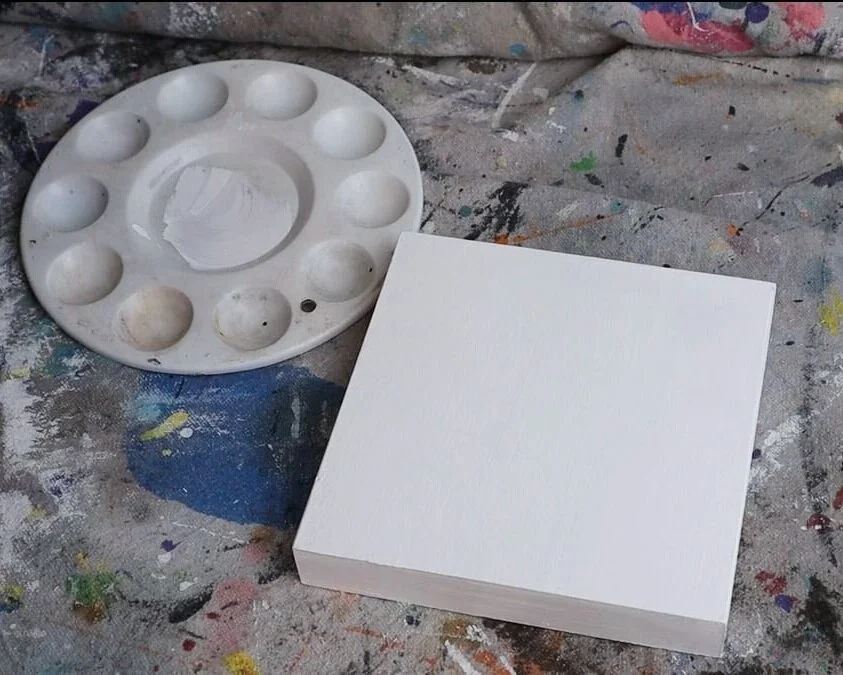
Then I painted my little sign. This took quite a few coats, 3 actually. I did thin layers so that they would dry smooth and fast. Acrylic paint is what I used but if you want better coverage with less coats chalk paint is a great option too. Be sure to let your paint dry fully between coats.
DIY dollar store sign makeover. How to give a dollar tree seasonal free standing faux wood sign a more modern look using your Cricut. DIY vinyl decal using your Cricut 'it's ok to have a bad day' diy sign.

Here’s what my sign base looked like after the first coat of white acrylic paint.
DIY dollar store sign makeover. How to give a dollar tree seasonal free standing faux wood sign a more modern look using your Cricut. DIY vinyl decal using your Cricut 'it's ok to have a bad day' diy sign.

And this is what it looked like after I painted the 3rd coat of white acrylic paint.

4. APPLY THE DECAL

I let my sign base dry overnight before applying my vinyl decal. You just want to be sure your sign is completely dry, vinyl will NOT stick to wet paint. It will peel up and the paint will be stuck to the backside of the vinyl and it will be a mess to fix…trust me I’ve been there and it’s not fun.
DIY dollar store sign makeover. How to give a dollar tree seasonal free standing faux wood sign a more modern look using your Cricut. DIY vinyl decal using your Cricut 'it's ok to have a bad day' diy sign.

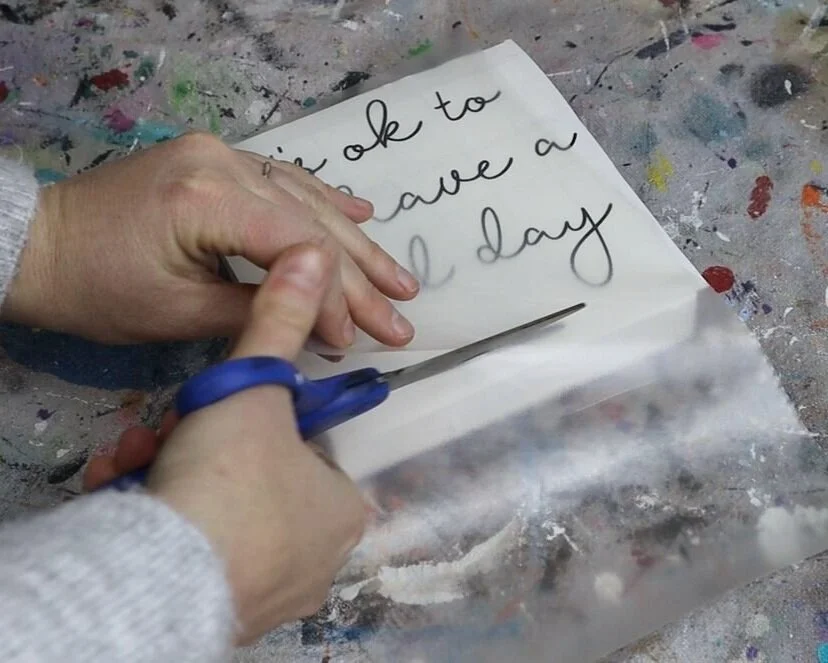
I used my favorite clear transfer tape to apply my decal on to my dollar store base.
DIY dollar store sign makeover. How to give a dollar tree seasonal free standing faux wood sign a more modern look using your Cricut. DIY vinyl decal using your Cricut 'it's ok to have a bad day' diy sign.

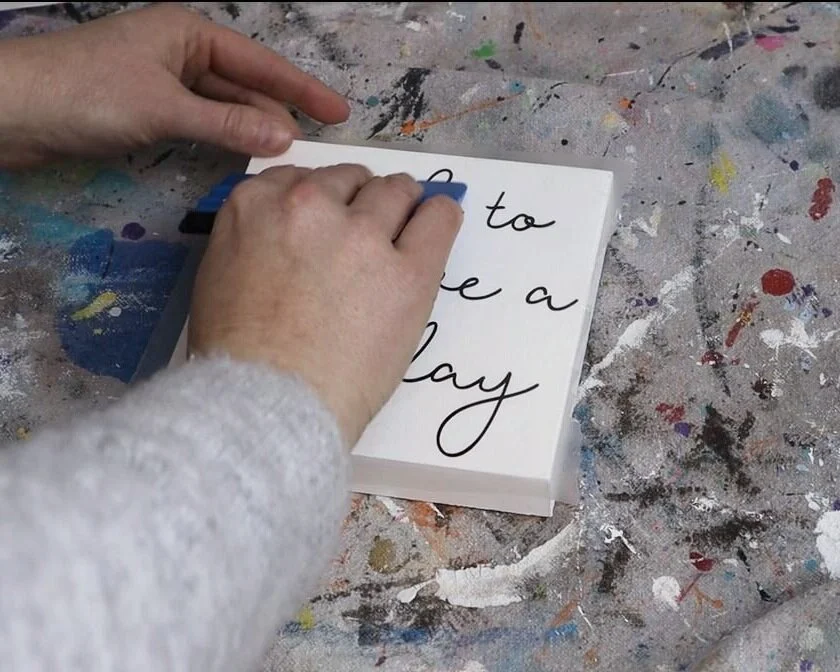
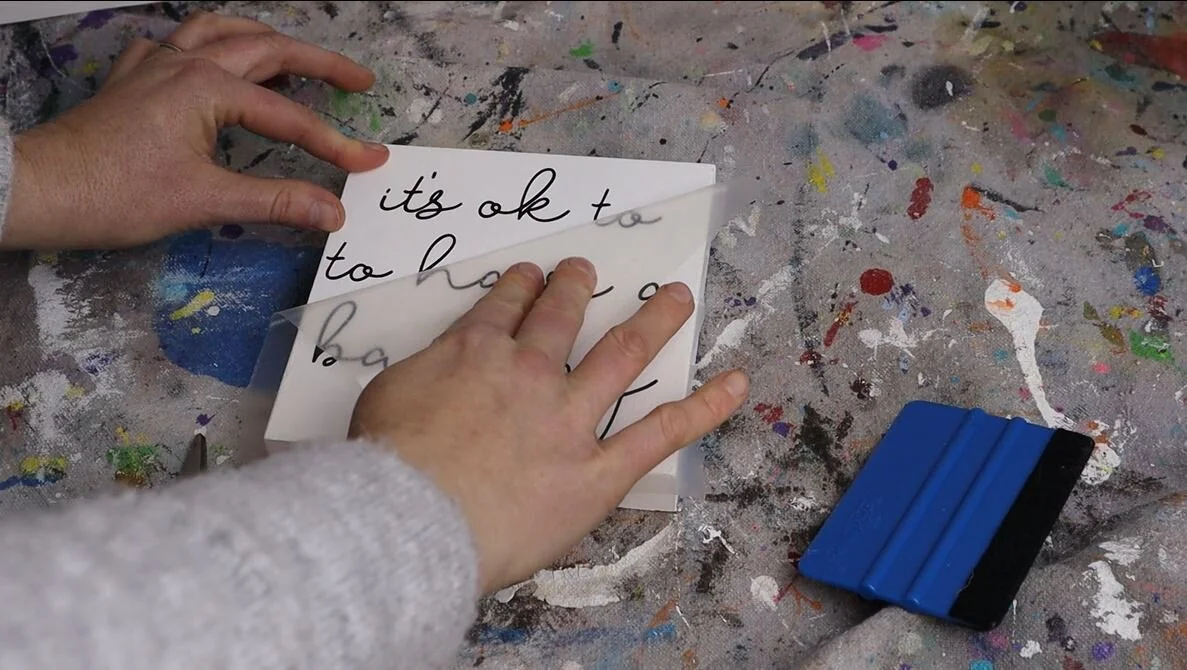
After I was happy with the placement I pressed it down using my trusty blue vinyl squeegee then slowly rolled the transfer tape off of my decal. Be sure when you do this to go VERY SLOW. It’s really easy to go too fast and rip your vinyl. A vinyl squeegee isn’t a must but it does make the job easier. If you don’t have one you an use a library or rewards card.
DIY dollar store sign makeover. How to give a dollar tree seasonal free standing faux wood sign a more modern look using your Cricut. DIY vinyl decal using your Cricut 'it's ok to have a bad day' diy sign.

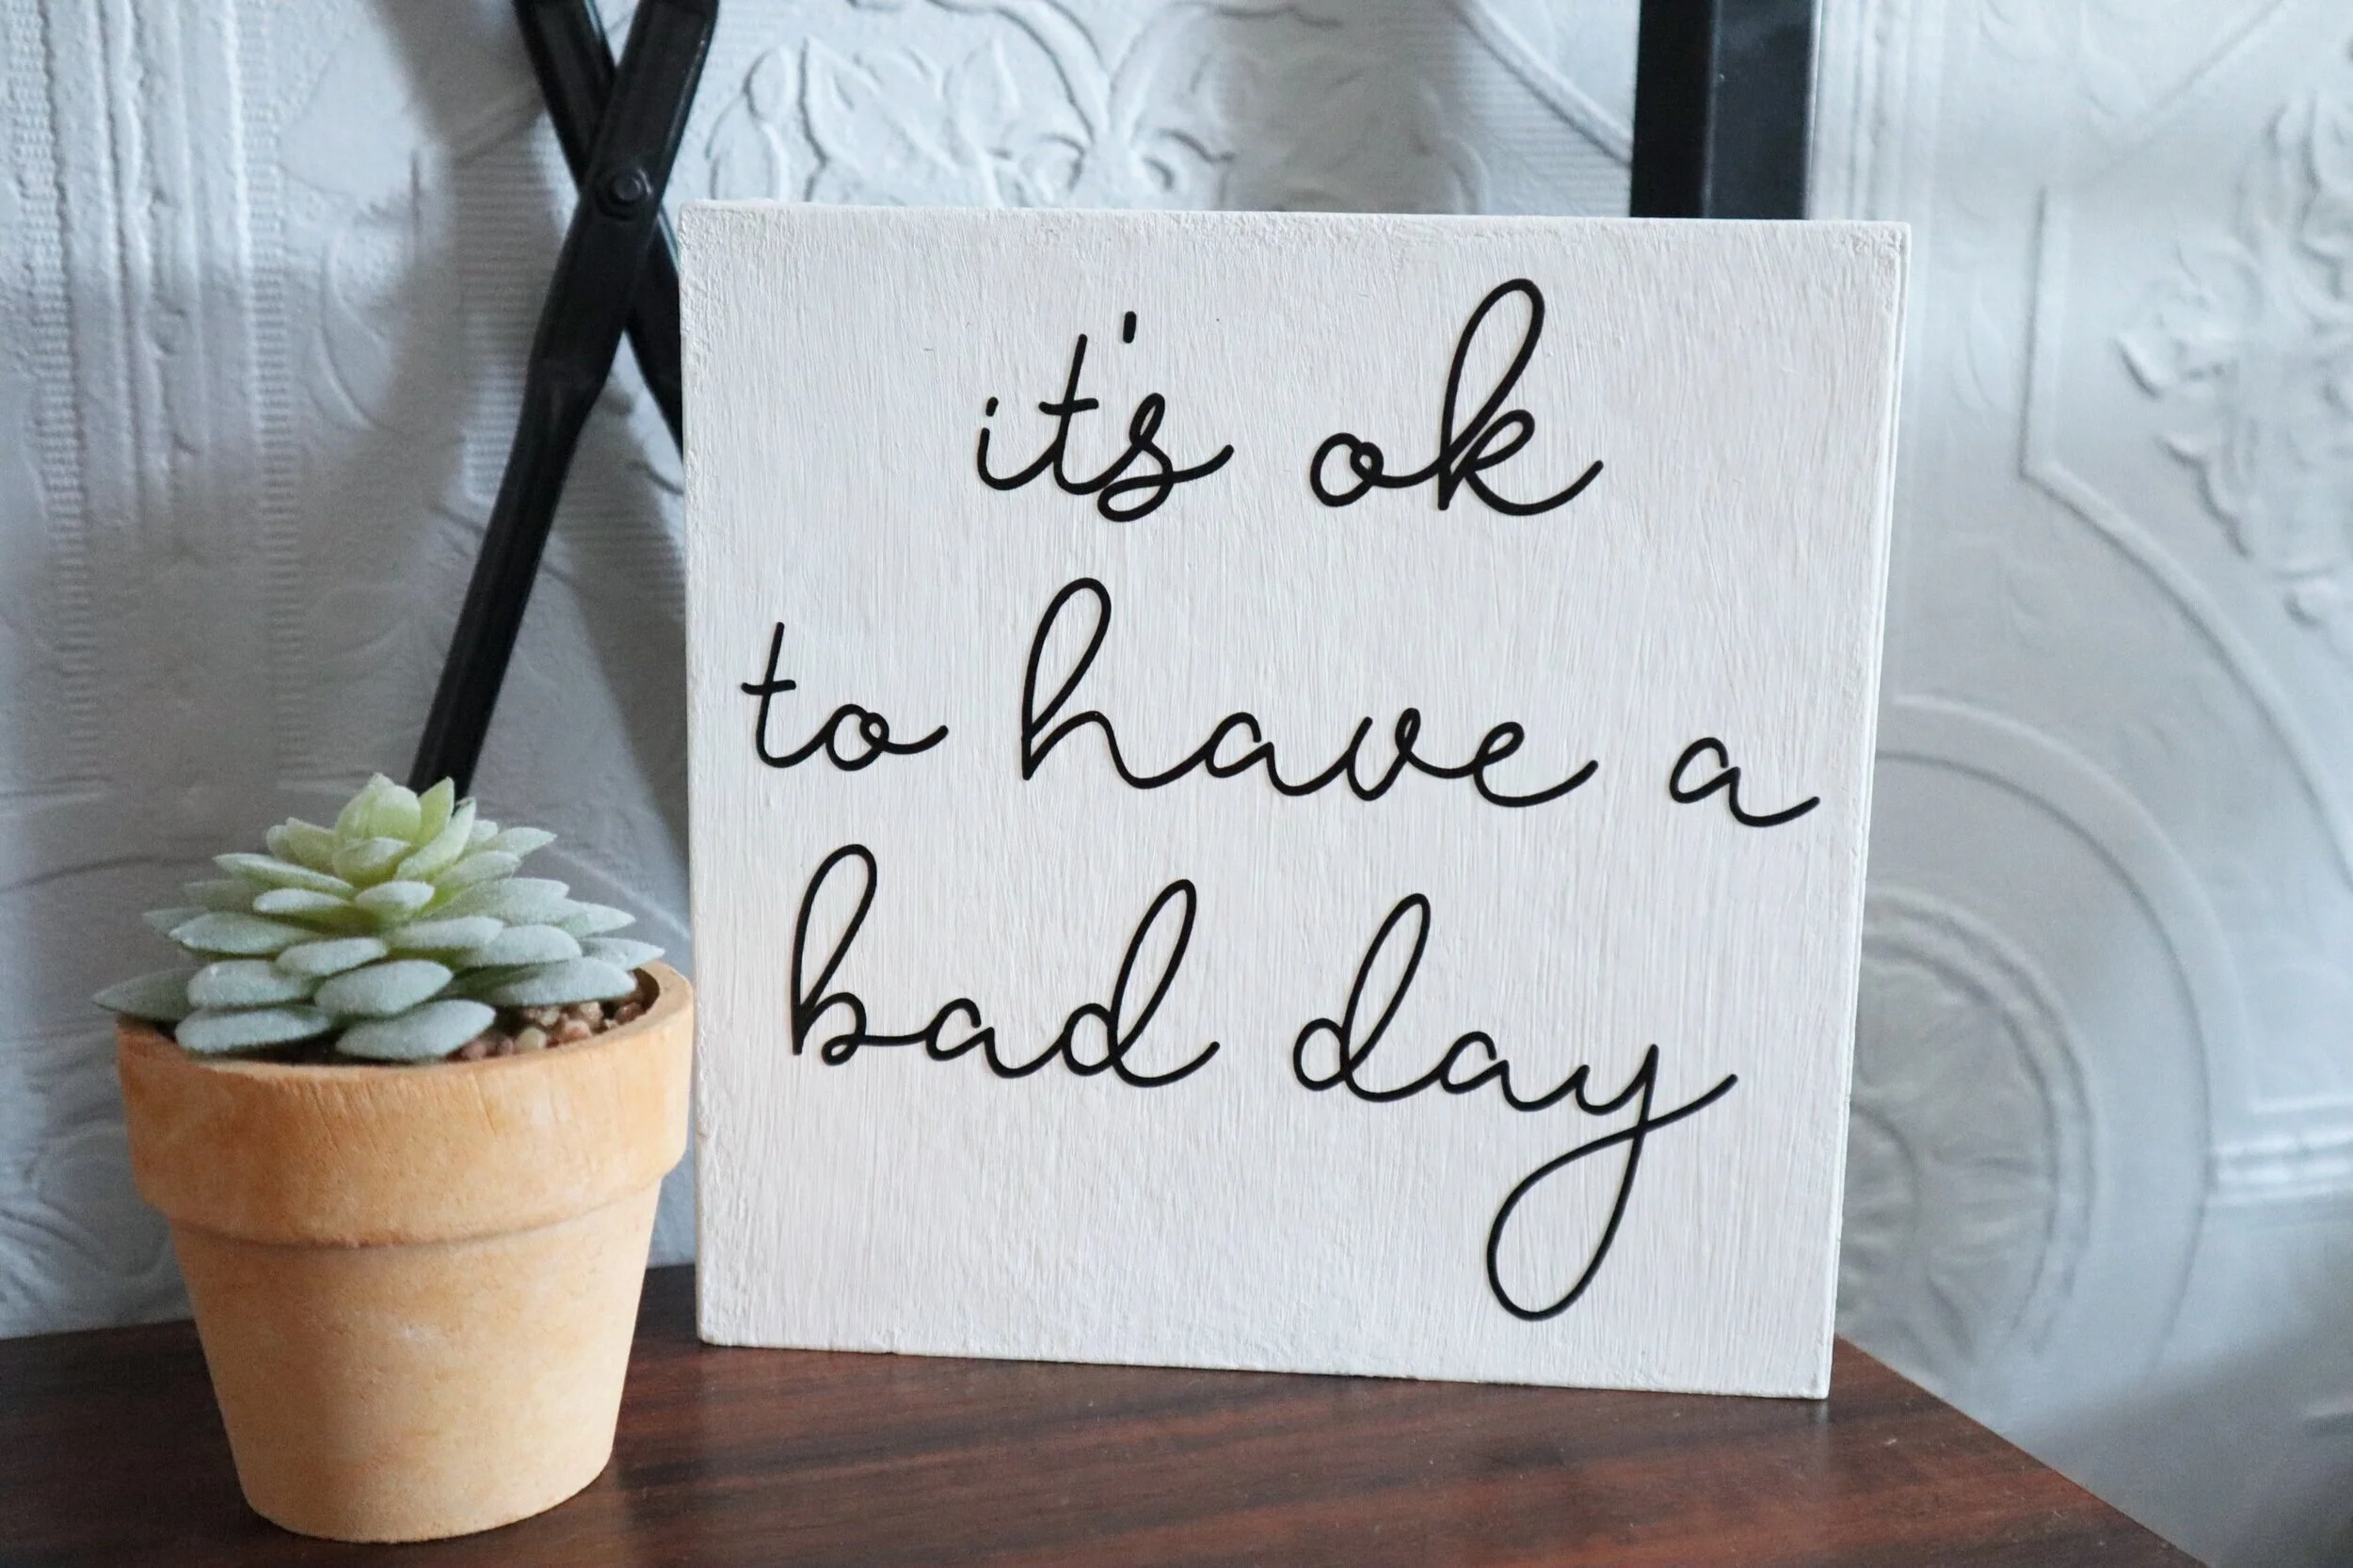
Then found the perfect spot for it on this industrial ladder tiered shelf I scored off of Amazon. BTW this one is SUPER easy to put together if you’re looking for an easy to assemble tiered shelf. I have bought some DIY shelfs before that were total nightmares…this one was a dream to assemble!
DIY dollar store sign makeover. How to give a dollar tree seasonal free standing faux wood sign a more modern look using your Cricut. DIY vinyl decal using your Cricut 'it's ok to have a bad day' diy sign.

I hope you enjoyed this DIY craft tutorial. If you have any questions please let me know in the comments below. Happy Crafting!

Check out more Cricut craft projects below

DIY Dollar Tree St. Patrick's Day rag wreath

DIY Dollar Tree rag wreath for St. Patrick's Day. How to make an easy rag wreath using a Dollar Tree wire wreath form and scraps of fabric or fat quarters.

How to make a rag wreath using a Dollar Tree wire wreath form

I LOVE shopping at the Dollar Tree. When they put one in our small town my girls and I were EX-CI-TED! It’s not that we lived too far away from the next Dollar Tree but it is so nice to have one that is just a couple minutes away vs having to get on the highway and drive 25+ minutes, we are loving this convenience! I don’t buy everything from the Dollar Tree though, but there are several things I do prefer to pick up from here like wire wreath forms. Here’s my list of the top 15 craft supplies I buy from the Dollar Tree.

Affiliate Disclosure. Some of the links on this website are affiliate links, which means that I may earn a small commission if you click on the link or make a purchase using the link. If you make a purchase you will not be charged anything additional.

There are so many different types of wreaths you can make with the wire wreath forms but my absolute favorite are the rag wreaths. They are so beautifully imperfect and they tie in nicely with my rustic/inexpensive style lol! This is my third rag wreath I’ve posted here on my blog. My first one was this super country cottage chic spring wreath. I really wanted to put it up for Valentine’s day this year but decided against it since it has bunnies for one of the prints. My second rag wreath was this rustic but patriotic red, white, and blue one.

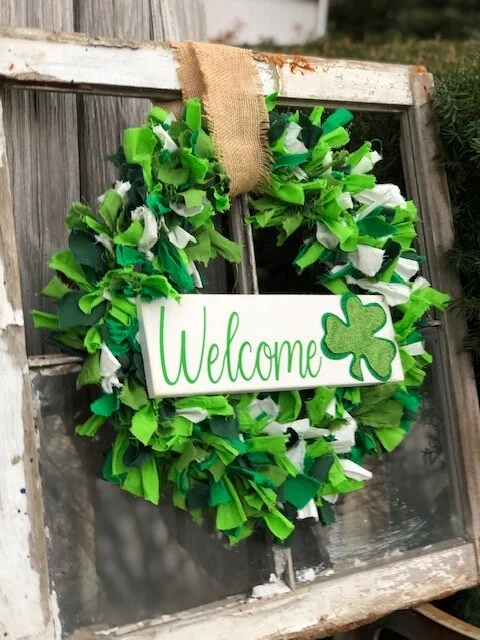
For my St. Patrick’s Day rag wreath, or tied fabric wreath as some call it, I wanted to add a little sign that said welcome. I admit I took the easy way out and didn’t stencil the sign, I made a vinyl decal instead. It is far easier to make these they just don’t last as long as the fully painted signs I create and ship world wide in my handmade business. Check out my handmade signs here. If you’ve been dreaming of making your own hand painted wooden signs but you keep running into problems my sign painters e-course is for you!

Check out the rag wreath video tutorial or keep scrolling for written/picture instructions.

Here’s what you’ll need to make your own St. Patrick’s Day rag wreath

Helpful tools

DIY Dollar Tree rag wreath for St. Patrick's Day. How to make an easy rag wreath using a Dollar Tree wire wreath form and scraps of fabric or fat quarters.

DIY rag wreath for ST. Patrick’s Day

One-

Unfold your fabric. Then about ever 1” or so cut a small slit on one side of the fabric. Now rip those 1” sections so that you have a bunch of strips of fabric. Repeat this step for all of your pieces of fabric. I’ve found fat quarters that you get from Walmart work really well for these wreaths.

DIY Dollar Tree rag wreath for St. Patrick's Day. How to make an easy rag wreath using a Dollar Tree wire wreath form and scraps of fabric or fat quarters.

Two-

Cut your ripped fabric strips into 3-4 inch pieces. These don’t have to be perfect, mine are never the exact same size.

DIY Dollar Tree rag wreath for St. Patrick's Day. How to make an easy rag wreath using a Dollar Tree wire wreath form and scraps of fabric or fat quarters.

Three-

Tie your pieces in a single knot onto your wire wreath form. This took me about 45 minutes to complete.

DIY Dollar Tree rag wreath for St. Patrick's Day. How to make an easy rag wreath using a Dollar Tree wire wreath form and scraps of fabric or fat quarters.

Four-

Once you have all of your fabric pieces tied onto your wire wreath form you flip your wreath over. Then push any long fabric pieces back on to the front.

DIY Dollar Tree rag wreath for St. Patrick's Day. How to make an easy rag wreath using a Dollar Tree wire wreath form and scraps of fabric or fat quarters.

Five-

Set your wreath to the side so you can start on your welcome sign that is going to attach to the front. I used a piece of scrap wood I had in the garage from a previous project. Paint the base white, I used two coats of paint to get a good coverage. Be sure you let both coats dry completely before moving on to step 6.

DIY Dollar Tree rag wreath for St. Patrick's Day. How to make an easy rag wreath using a Dollar Tree wire wreath form and scraps of fabric or fat quarters.

Six-

Instead of stenciling this sign I applied a vinyl decal. I used my Cricut to cut out my vinyl decal. You can get my WELCOME Cricut cut file here.

DIY Dollar Tree rag wreath for St. Patrick's Day. How to make an easy rag wreath using a Dollar Tree wire wreath form and scraps of fabric or fat quarters.

Seven-

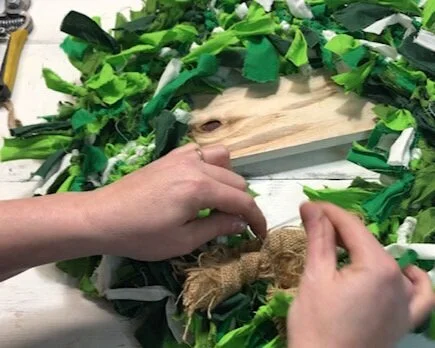
I bought a package of foam green clovers at my local Dollar Tree last year and thought these would be super cute to add to one side of my welcome sign. They were the same size so I trimmed down the shamrock I wanted to place on the top so that you could see a little bit the bottom shamrock showing through the edge. I did this same technique on this Rae Dunn inspired fall burlap leaf garland. Then I glued the two together and glued them down to the end of the sign.

DIY Dollar Tree rag wreath for St. Patrick's Day. How to make an easy rag wreath using a Dollar Tree wire wreath form and scraps of fabric or fat quarters.

Eight-

Attach your sign to your wreath. To do this I used a soft wire but I have no idea where I got it from. I would also recommend a floral wire for this step. I drilled holes in the top corners of my sign and used a small piece of wire to attach it to the wreath. Make a U shape to your wire, place one end of the wire in the hole of the sign and feed it to the back then twist the two ends together on the back side so you can’t see them once your wreath is hanging. Do this for both sides of your welcome sign to attach it to your wreath.

DIY Dollar Tree rag wreath for St. Patrick's Day. How to make an easy rag wreath using a Dollar Tree wire wreath form and scraps of fabric or fat quarters.

Nine-

I finished my wreath off with a 4” wide piece of burlap so I could hang it up. I didn’t really like the knot I made in the burlap so I wanted to hide it lol. I just took another piece of wire and secured the knot to the back of the wreath.

DIY Dollar Tree rag wreath for St. Patrick's Day. How to make an easy rag wreath using a Dollar Tree wire wreath form and scraps of fabric or fat quarters.

Now you're ready to hang your wreath for St. Patrick’s Day. I hope you enjoyed this crafty DIY. If you did and make your own St. Patty’s Day wreath I’d love to see pictures of it. As always with all of my tutorials, if you have any questions please don’t hesitate to ask:)!

DIY Dollar Tree rag wreath for St. Patrick's Day. How to make an easy rag wreath using a Dollar Tree wire wreath form and scraps of fabric or fat quarters.

Happy crafting!

Want instant access to my FREE RESOURCE LIBRARY? This is where I share my freebies of cut files, printables, checklists and more. Leave your info below and I will send you the password and link to get instant access into my library.