DIY hello sunshine stained wood sign + FREE SVG

DIY how to stencil on wood sign painting tutorial. How to make a hello sunshine lettered sign for summer. Using oramask stencil film to paint wood signs without paint bleed. free svg to use with cricut for sign making.

DIY STENCILED HELLO SUNSHINE SIGN

Make this simple and chic hello sunshine sign to display with your warm weathered décor. I used my old school Cricut Explore to make this wood sign but you can use any vinyl cutting machine you have. Be sure to grab the FREE SVG in my free resource library to make this exact design (find the link below;) )

Affiliate Disclosure. Some of the links on this website are affiliate links, which means that I may earn a small commission if you click on the link or make a purchase using the link. If you make a purchase you will not be charged anything additional.

Here’s what you need

Want to learn more techniques for painting wood signs? CLICK HERE to check out my list of DIY sign painting tutorials for the most crisp clean lines for your lettered painted signs.

The type of stenciling I used for this wood HELLO SUNSHINE sign is called REVERSE STENCILING. I also used this stenciling technique on this BLESS OUR NEST wood sign. I love this technique when I’m only using two colors, the base color and the letter color. It gives super crisp lines and is really quick to do.

1.CUT THE STENCIL

Upload the HELLO SUNSHINE SVG into Cricut Design Space (or the program you are using with your fancy cutting machine). Then add a square to the canvas. Size the square so it’s about the same size as the wood base you are using. I sized mine to 7.25” then resized the HELLO SUMMER SVG till I was happy with the size of that. This process isn’t a must, you can just cut the SVG out without a square around it BUT adding this square does make centering your design much easier when you go to stencil the design.

DIY how to stencil on wood sign painting tutorial. How to make a hello sunshine lettered sign for summer. Using oramask stencil film to paint wood signs without paint bleed. free svg to use with cricut for sign making.

Once you happy with the size select both the SVG and the square and center them. After they are centered and still both selected use the Cricut SLICE feature to slice the SVG out of the square.

DIY how to stencil on wood sign painting tutorial. How to make a hello sunshine lettered sign for summer. Using oramask stencil film to paint wood signs without paint bleed. free svg to use with cricut for sign making.

Now you should have 3 images. You will only need the square that has the circle cut out of it so delete the two other circle images.

This is what your canvas should look like when you are ready to hit MAKE IT in Cricut Design Space.

DIY how to stencil on wood sign painting tutorial. How to make a hello sunshine lettered sign for summer. Using oramask stencil film to paint wood signs without paint bleed. free svg to use with cricut for sign making.

I used ORAMASK STENCIM FILM and the Cricut GREEN cutting mat. I set my machine dial to cut vinyl.

2. APPLY THE STENCIL

When weeding this design you want to weed out the CIRCLE and the MIDDLE PIECES from the letters.

DIY how to stencil on wood sign painting tutorial. How to make a hello sunshine lettered sign for summer. Using oramask stencil film to paint wood signs without paint bleed. free svg to use with cricut for sign making.

Use transfer tape to easily transfer the image onto your wood base. I’ve used LOTS of different transfer tapes and this brand is one of my favorites.

PRO TIP: you can reuse your transfer tape over and over again. As long as it is still tacky and fits the design you want to transfer you can use it. I often use my transfer tape 3-4 times before getting a new piece.
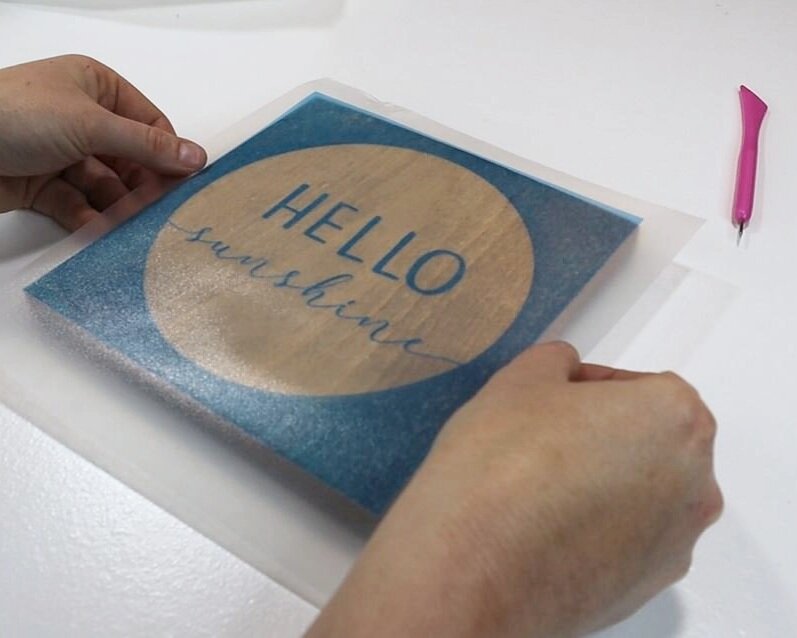
DIY how to stencil on wood sign painting tutorial. How to make a hello sunshine lettered sign for summer. Using oramask stencil film to paint wood signs without paint bleed. free svg to use with cricut for sign making.

Align your stencil then press down using your hand and a vinyl squeegee. Working from the middle and then out press out the air bubbles.

DIY how to stencil on wood sign painting tutorial. How to make a hello sunshine lettered sign for summer. Using oramask stencil film to paint wood signs without paint bleed. free svg to use with cricut for sign making.

Now, roll your transfer tape off your design. Be sure to go slow, especially with this design as it has delicate lines that can rip easily.
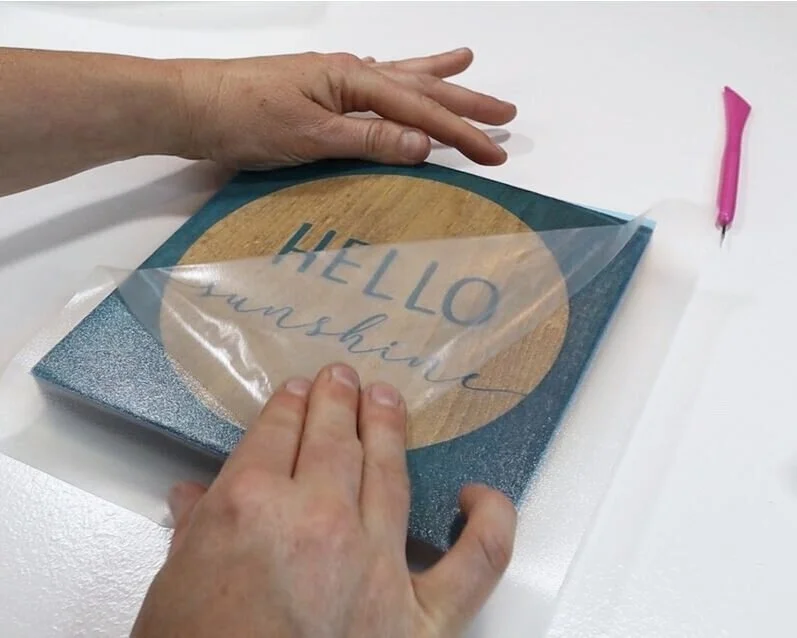
DIY how to stencil on wood sign painting tutorial. How to make a hello sunshine lettered sign for summer. Using oramask stencil film to paint wood signs without paint bleed. free svg to use with cricut for sign making.

3. SEAL THE STENCIL

This step isn’t an absolute must but you’ve already worked this hard why ruin it with paint bleed? I always hate myself when I skip this step so just save yourself from a kick in the butt later and seal your stencil before you paint ;)!

Paint a SUPER THIN layer of matte finish mod podge all over your design. Essentially what you are doing is filling in all of those tiny little air bubbles that you can’t see that are between your stencil and your wood base with a clear layer. This keeps your paint from filling in those air bubbles, aka: paint bleed.

DIY how to stencil on wood sign painting tutorial. How to make a hello sunshine lettered sign for summer. Using oramask stencil film to paint wood signs without paint bleed. free svg to use with cricut for sign making.

Be sure you are painting the thinnest of thin layers when doing this step. If it’s too thick your paint will peel up with your stencil when you remove it…again speaking from LOTS of sign making experience lol! Then let that dry completely before moving on to the next step.
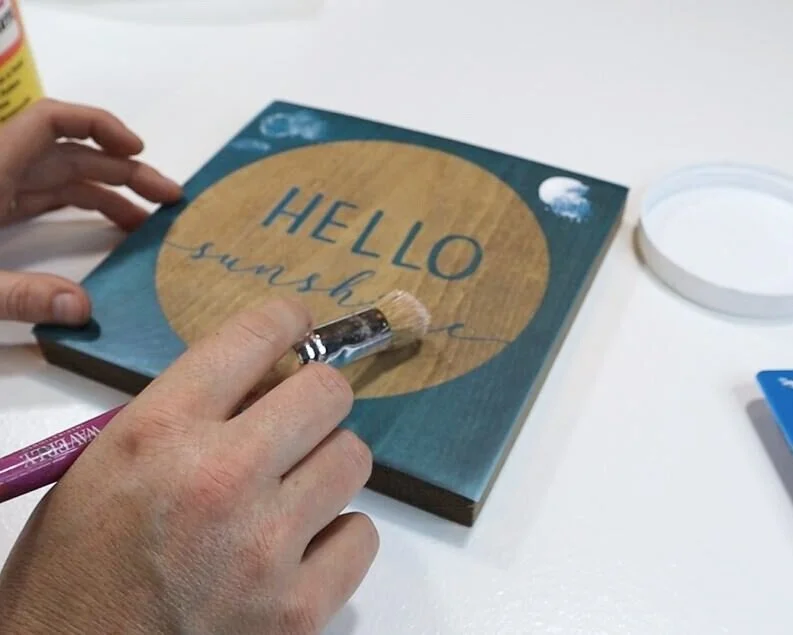
DIY how to stencil on wood sign painting tutorial. How to make a hello sunshine lettered sign for summer. Using oramask stencil film to paint wood signs without paint bleed. free svg to use with cricut for sign making.

4. PAINT YOUR DESIGN

After your mod podge seal has dried you can paint your design. The lighter the color the more layers you will likely need to cover your design completely. For your first layer of paint you want to paint it on thin enough so that you see the wood grain through the paint. I used white acrylic paint for this project and painted 3 coats total.
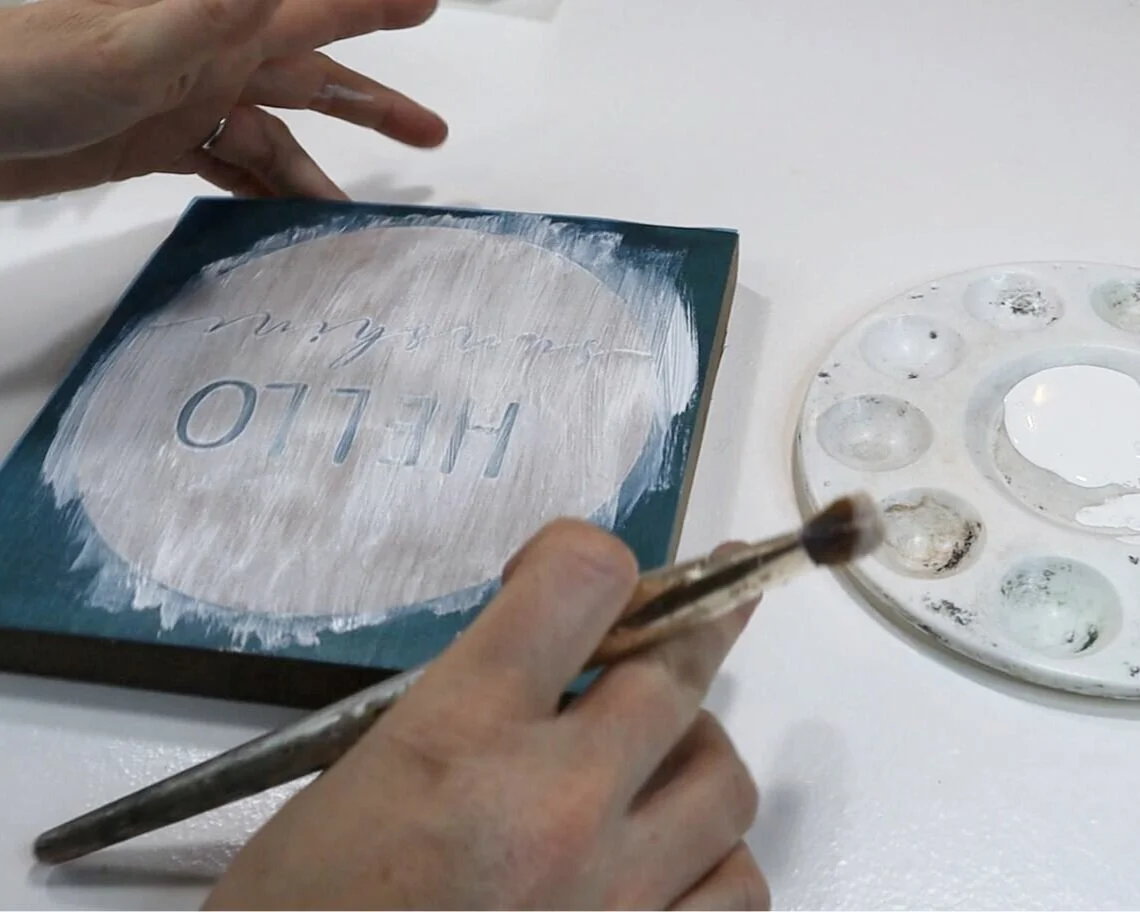
DIY how to stencil on wood sign painting tutorial. How to make a hello sunshine lettered sign for summer. Using oramask stencil film to paint wood signs without paint bleed. free svg to use with cricut for sign making.

After you apply the first layer wait for it to dry completely before moving on to the second coat. If you need a third layer of paint repeat the drying process again then paint the third layer.

5. PEEL UP YOUR STENCIL

After your happy with the paint coverage it’s time to peel up the oramask stencil film. I personally peel my stencils up while my paint is still wet but some prefer to peel after their paint has dried, both ways work. Grab one corner of the stencil and peel it off toward the opposite corner.

DIY how to stencil on wood sign painting tutorial. How to make a hello sunshine lettered sign for summer. Using oramask stencil film to paint wood signs without paint bleed. free svg to use with cricut for sign making.

Then using your weeding tool CAREFULLY peel up the lettering inside of the circle. I ended up grabbing a sewing pin for this as my weeding tool was a little too large for the job.

DIY how to stencil on wood sign painting tutorial. How to make a hello sunshine lettered sign for summer. Using oramask stencil film to paint wood signs without paint bleed. free svg to use with cricut for sign making.

Let your sign sit and dry completely before displaying in your home with the rest of your summer decorations.
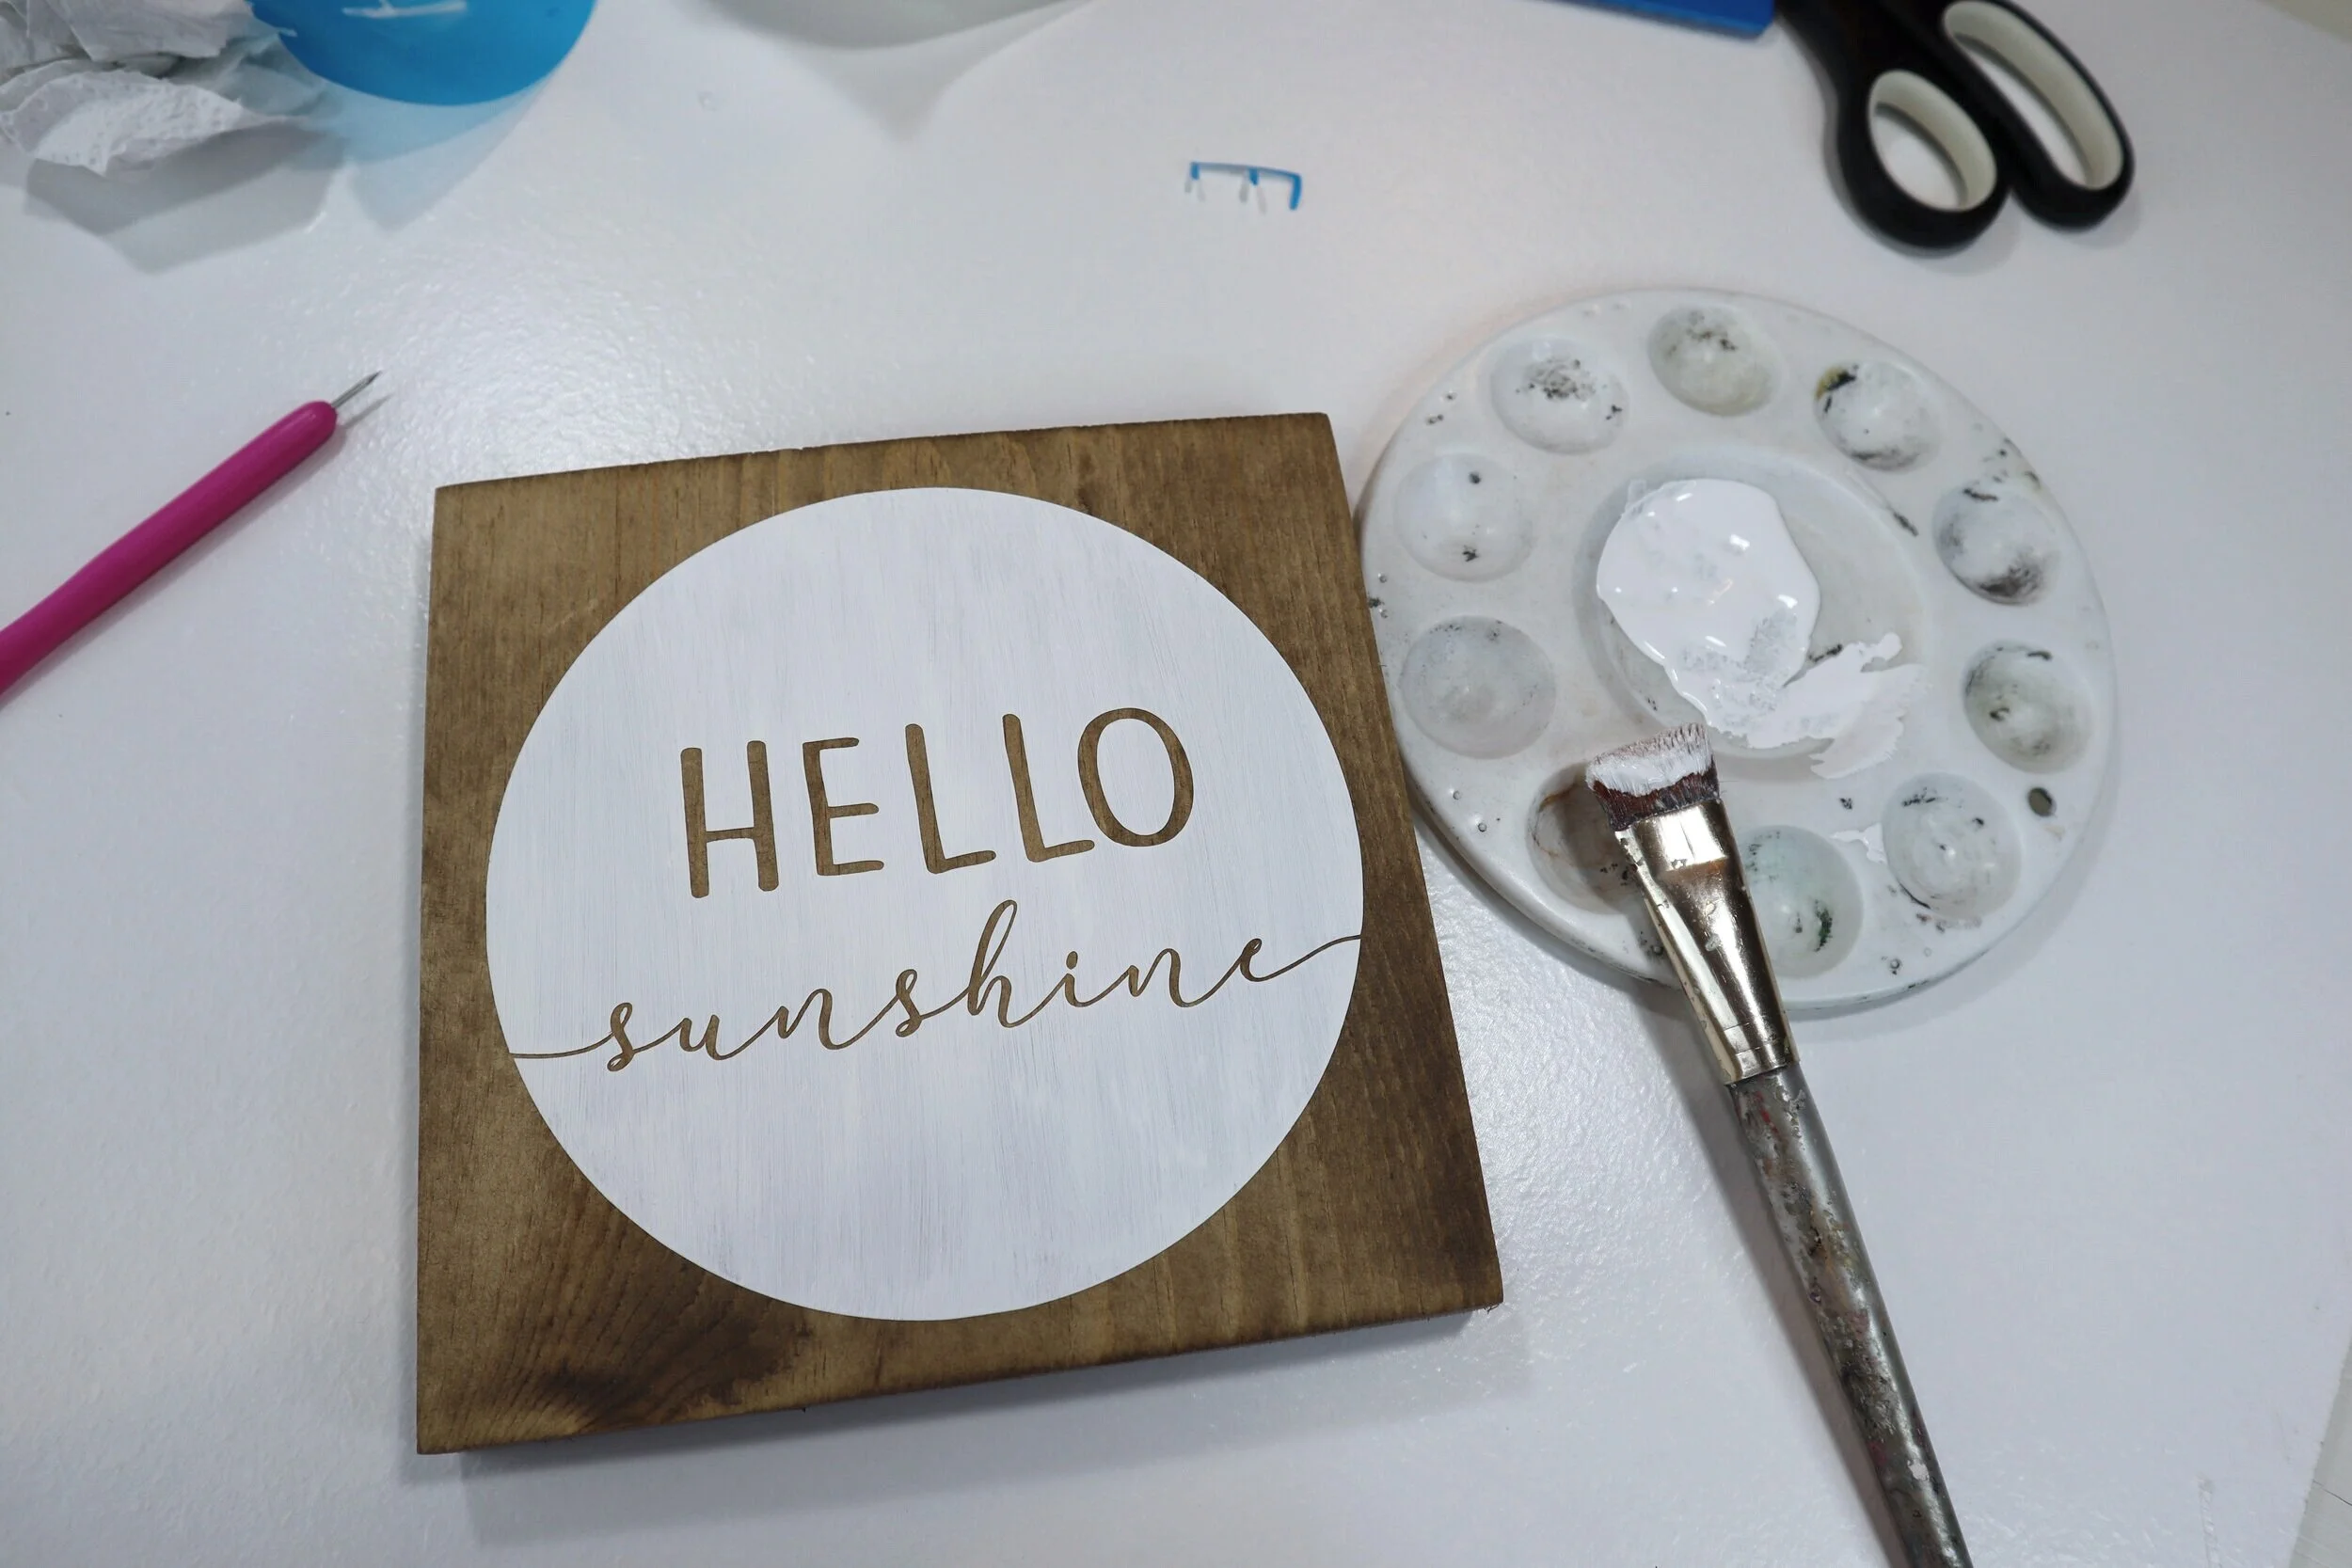
DIY how to stencil on wood sign painting tutorial. How to make a hello sunshine lettered sign for summer. Using oramask stencil film to paint wood signs without paint bleed. free svg to use with cricut for sign making.

I just love how this little sign turned out! It’s so simple and it can be displayed with both spring and summer décor. I extra love double duty decorations!

If you have any questions about this DIY craft tutorial or any others on my blog please reach out.


Check out more sign painting tutorials below. Happy Crafting!!

Interchangeable Christmas pallet sign

DIY twig stars for Christmas pallet sign. Interchangeable Christmas home decor on a budget. How to make easy and simple reversible home décor for the holidays. Make a sign from twigs.

INTERCHANGEABLE WINTER PALLET SIGN

I love decorating for the holidays. Especially Christmas. Now that I have a bigger home to decorate I’m finding it a little challenging to do AND keep it in budget. I have always had the heart of a frugal women so spending an arm and a leg to put up Christmas décor just wasn’t happening.

That’s why in the fall I made this lightweight faux pallet sign. It’s a blank pallet style sign that I can change out with the seasons. It’s a big statement type piece that I prop up on my dining room hutch. I love this so much. Best of all the planks I used to make this sign were left over from this plank wall project.

I really tried hard to spend minimal funds for Christmas decorating. So, for Christmas I had this great idea to make stars from twigs I had in the backyard. And they turned out so cute! I want to make more!!

Affiliate Disclosure. Some of the links on this website are affiliate links, which means that I may earn a small commission if you click on the link or make a purchase using the link. If you make a purchase you will not be charged anything additional.

DIY twig stars for Christmas pallet sign. Interchangeable Christmas home decor on a budget. How to make easy and simple reversible home décor for the holidays. Make a sign from twigs.

I made 2 smaller twig stars and 1 medium sized star. You can see how I made my twig stars click here.

I was so glad I snagged up a package of silver bells from the Dollar Tree prior to making this craft because without them I don’t think it would have turned out so cute or looked as festive for Christmas.

DIY twig stars for Christmas pallet sign. Interchangeable Christmas home decor on a budget. How to make easy and simple reversible home décor for the holidays. Make a sign from twigs.

Here’s what I used

1. PLACE THE DECORATIONS

The first thing I did was place my twig stars and bells on my pallet sign to see where I wanted them.

DIY twig stars for Christmas pallet sign. Interchangeable Christmas home decor on a budget. How to make easy and simple reversible home décor for the holidays. Make a sign from twigs.

2. MEASURE

Next I measured out how much jute I would need to hang my decorations from the backside of my sign. I doubled the amount of jute since I was looping it and hanging it from the backside.

DIY twig stars for Christmas pallet sign. Interchangeable Christmas home decor on a budget. How to make easy and simple reversible home décor for the holidays. Make a sign from twigs.

3. ADD THE JUTE

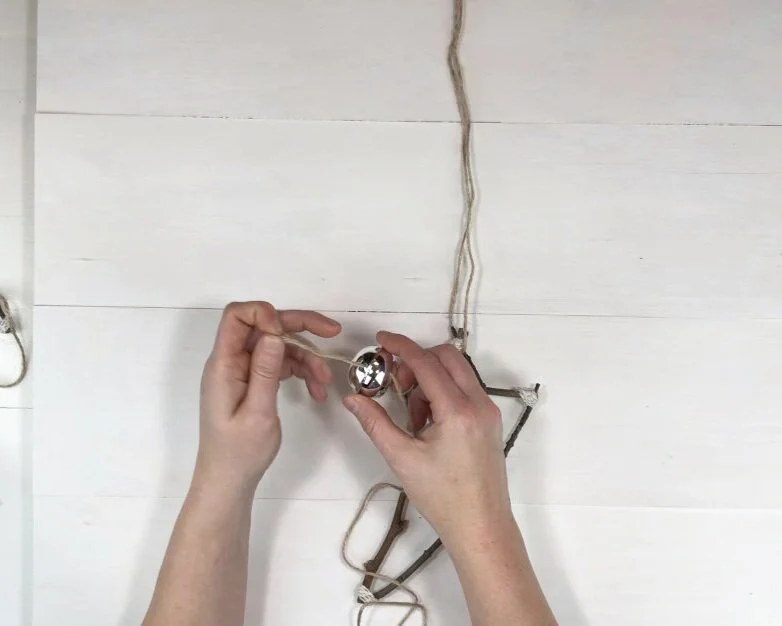
The stars were easy to add the jute to. I just fed the jute through the top of each twig star. The bells were a little more difficult. I wanted to see the snowflakes that were on the bottom side of the bells so I had to hang them sideways.

DIY twig stars for Christmas pallet sign. Interchangeable Christmas home decor on a budget. How to make easy and simple reversible home décor for the holidays. Make a sign from twigs.

I fed the jute through one side of the bell and then out the other side and tied the two ends of the jute together.

DIY twig stars for Christmas pallet sign. Interchangeable Christmas home decor on a budget. How to make easy and simple reversible home décor for the holidays. Make a sign from twigs.

4. HANG

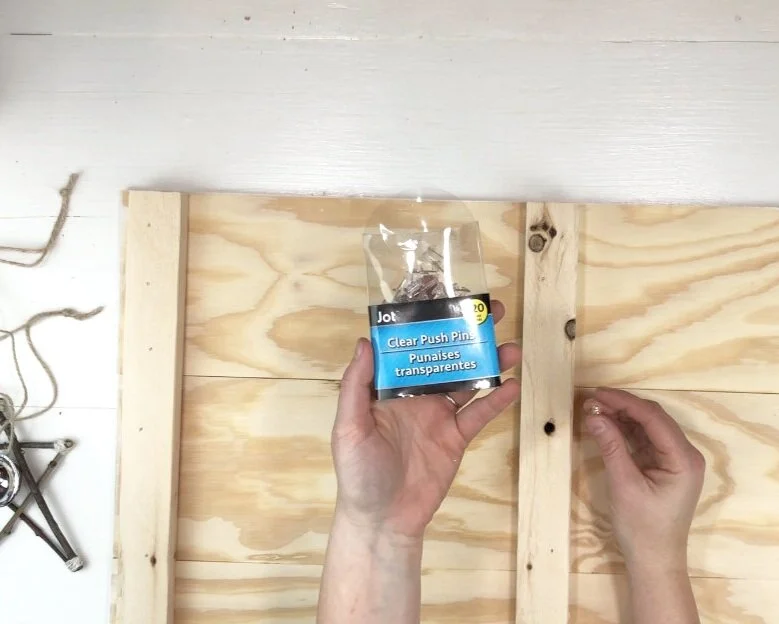
I hung my twig stars and silver bells from the backside of my pallet sign. I just kina eyeballed where I wanted them to be. Placed a pushpin there and pushed it in as far as I could get it.

DIY twig stars for Christmas pallet sign. Interchangeable Christmas home decor on a budget. How to make easy and simple reversible home décor for the holidays. Make a sign from twigs.

Then I looped where I had tied the jute ends together around the pushpin and draped it over to the front side of the pallet sign.

DIY twig stars for Christmas pallet sign. Interchangeable Christmas home decor on a budget. How to make easy and simple reversible home décor for the holidays. Make a sign from twigs.

I prop my pallet sign up on my dining room hutch, which one day I need to make time to give a makeover and I will most definitely post the before and after for you to see on here:)!!

DIY twig stars for Christmas pallet sign. Interchangeable Christmas home decor on a budget. How to make easy and simple reversible home décor for the holidays. Make a sign from twigs.

Happy crafting!

Check out more below

Making leaf art with your kids

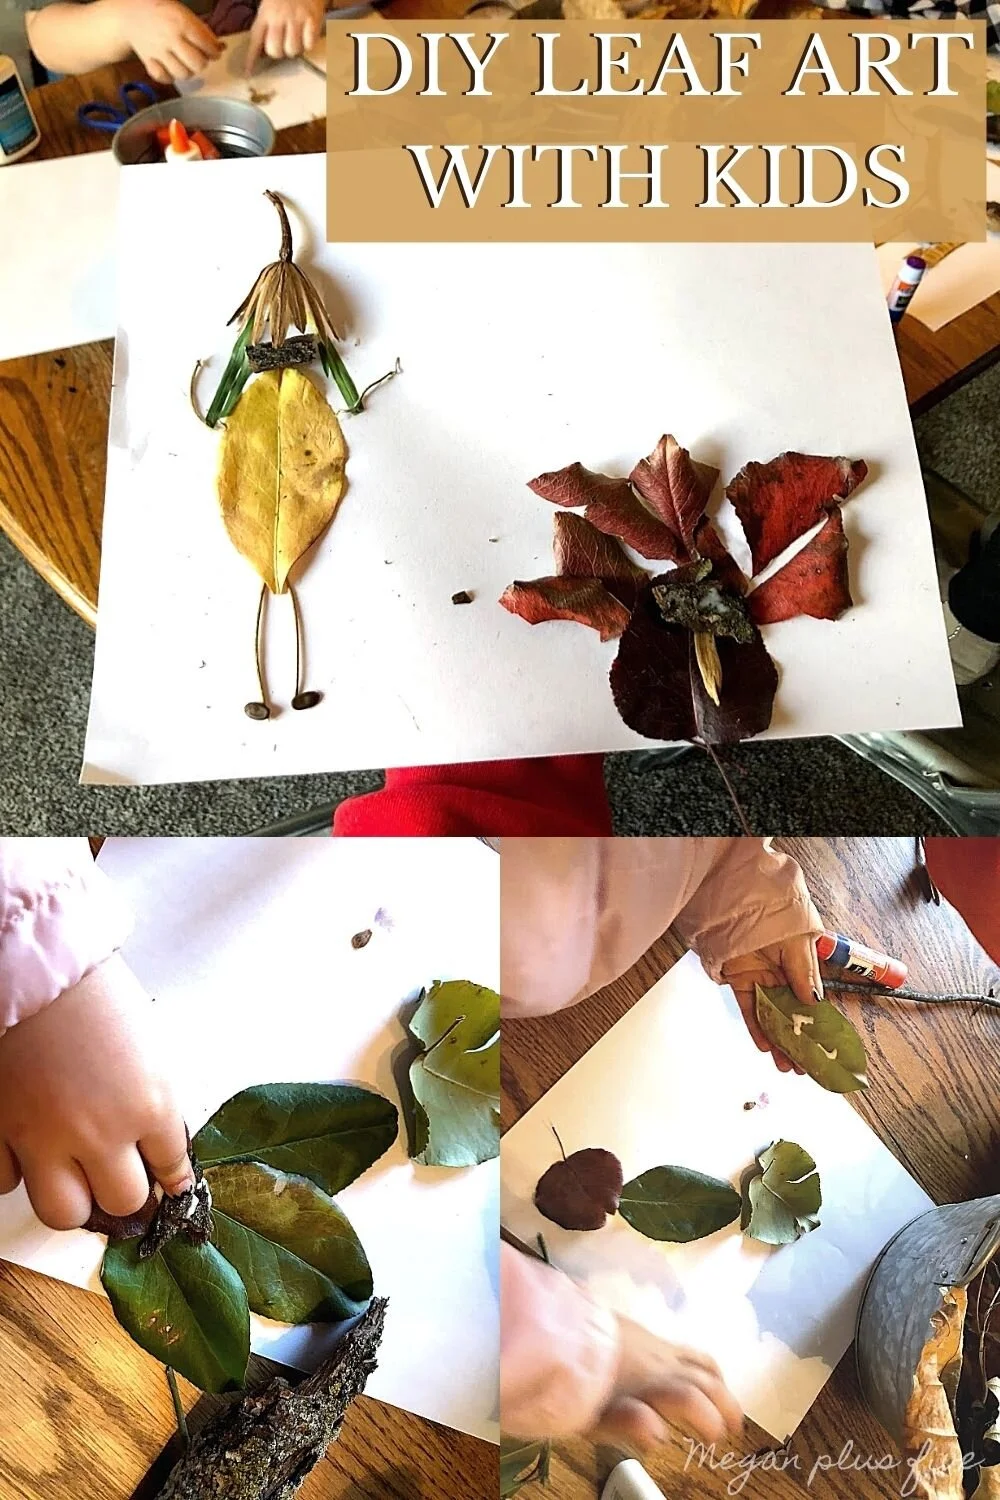
Leaf art with kids. Fun and easy leaf people and leaf turkeys for kids to make with their parents. Fun outdoor fall craft project to do with kids of all ages.

MAKING LEAF ART WITH YOUR KIDDOS

Whoa what a school year this has turned out to be for all of our kiddos. I know that virtual learning can be a lot of screen time but it also means that we get to have a lot of creative fun time with our kids too.

While we are learning at home I’m trying to plan fun things to do for the older kids and also things that will keep daughter #4 busy too since we are doing pre-k at home instead of the traditional pre-k we’ve always done. Today we made art. And not just any art, we made people and animals with leaves and other nature items.

Affiliate Disclosure. Some of the links on this website are affiliate links, which means that I may earn a small commission if you click on the link or make a purchase using the link. If you make a purchase you will not be charged anything additional.

Leaf art with kids. Fun and easy leaf people and leaf turkeys for kids to make with their parents. Fun outdoor fall craft project to do with kids of all ages.

CLICK HERE for more KIDS PROJECTS

And it was SO FUN!

We’ve done something similar before, painting with nature click here to see how fun that turned out. But today we didn’t break out any paints. We just used the colors (and the option for markers for faces) that we found in the things that God gave to our backyard.

The older girls actually enjoyed it way more than my pre-k girl did which completely surprised me. I figured they would think it was “baby-ish” but they fully enjoyed this crafty project.

Making leaf art with your kids

STEP 1

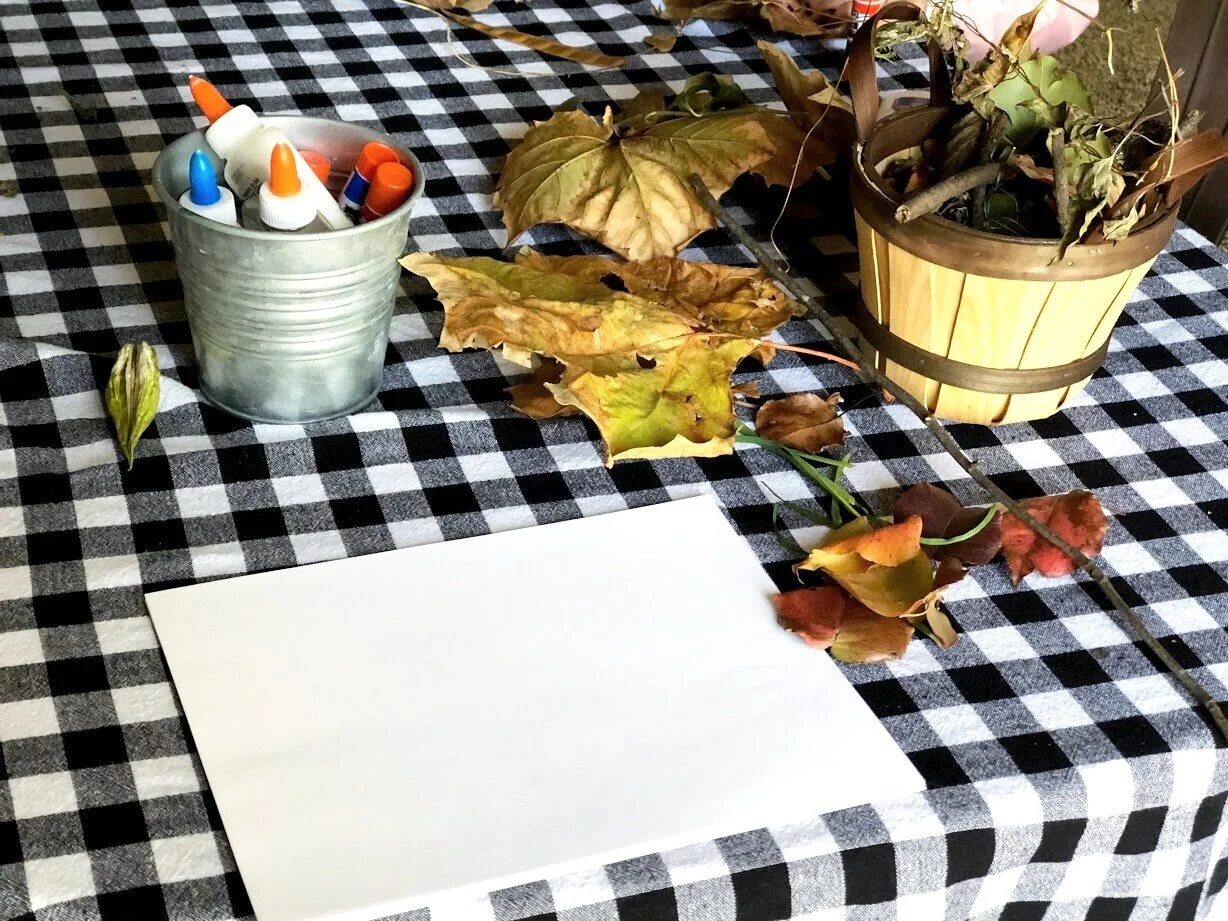
Gather pieces of nature. We took a small basket outside and filled it with all kind of things (I purposefully didn’t take a big basket out there because I knew they would fill it FULL lol! The small one was more than enough materials for them to create with)

  • colorful leaves

  • twigs

  • some pine cone looking things

  • blades of grass

  • berries

  • vines

  • and whatever else the kiddos want to grab

STEP 2

Bring it inside and set up a place where the kids can get messy. We used our dining room table and since we weren’t painting I didn’t mess with putting a drop cloth down.

I brought out our metal bin of glues, squeeze glue bottles and glue sticks, washable markers for if they wanted to add faces or anything their imaginations could think of, kid friendly scissors, and copy paper.

Leaf art with kids. Fun and easy leaf people and leaf turkeys for kids to make with their parents. Fun outdoor fall craft project to do with kids of all ages.

STEP 3

I helped my preschooler at first, showing her how we could create a Thanksgiving Day turkey out of the leaves and although she thought that was really cool she just wanted to glue whatever, and most importantly wherever to her piece of paper.

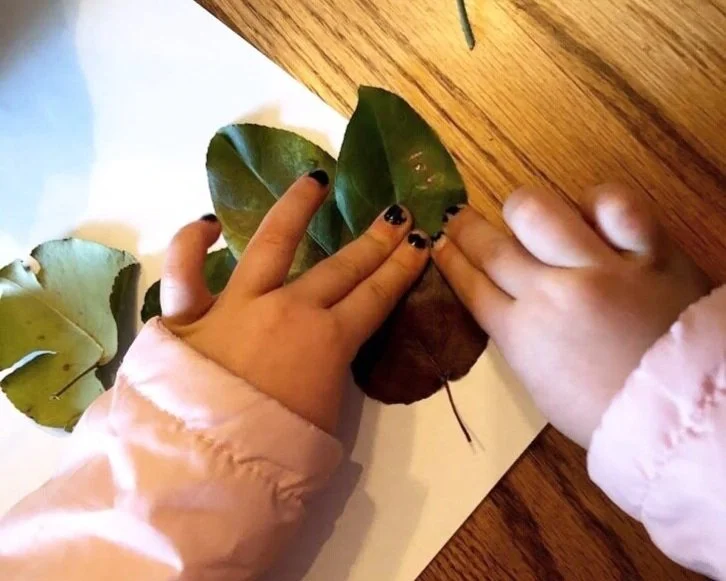
We took a round leaf and glued it down first

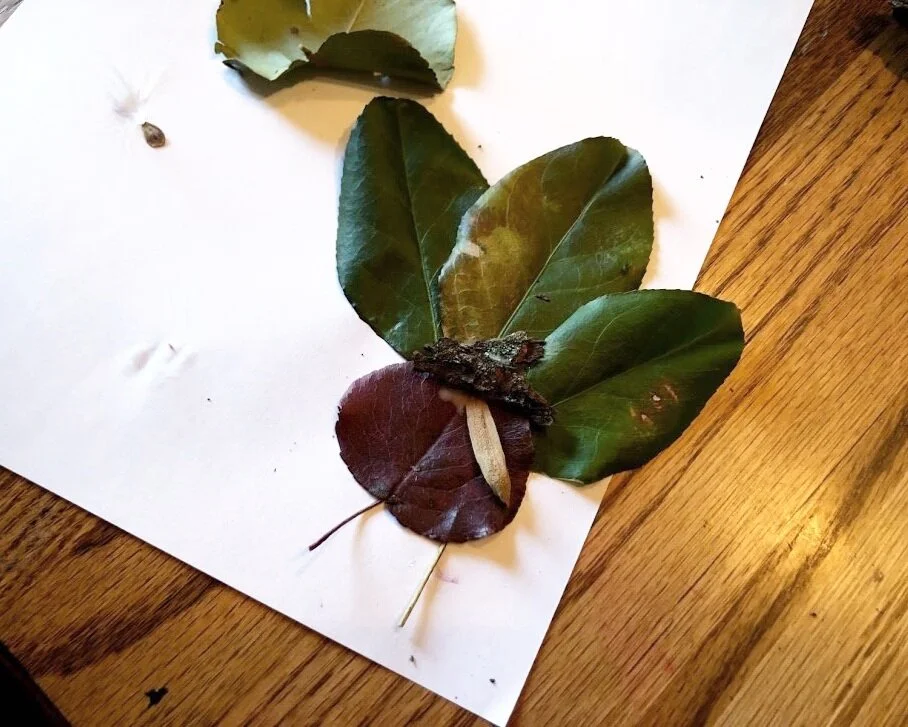
Then we took longer more oblong looking leaves and glued them behind the round leaf for the Turkey feathers.

Leaf art with kids. Fun and easy leaf people and leaf turkeys for kids to make with their parents. Fun outdoor fall craft project to do with kids of all ages.

My pre-k girl wanted to use a piece of bark for the head so that’s what we used.

Leaf art with kids. Fun and easy leaf people and leaf turkeys for kids to make with their parents. Fun outdoor fall craft project to do with kids of all ages.

For the gobble we glued a small skinny leaf like thing down and pushed it up so it was under the bark head.

Leaf art with kids. Fun and easy leaf people and leaf turkeys for kids to make with their parents. Fun outdoor fall craft project to do with kids of all ages.

For the legs we just added a second stem from another leaf and glue it in place using a glue stick.

The most important step of all though is to just enjoy this crafty art time with your kids. Let them make a mess. Let them create. Let them make mistakes and not feel like they have to be perfect.

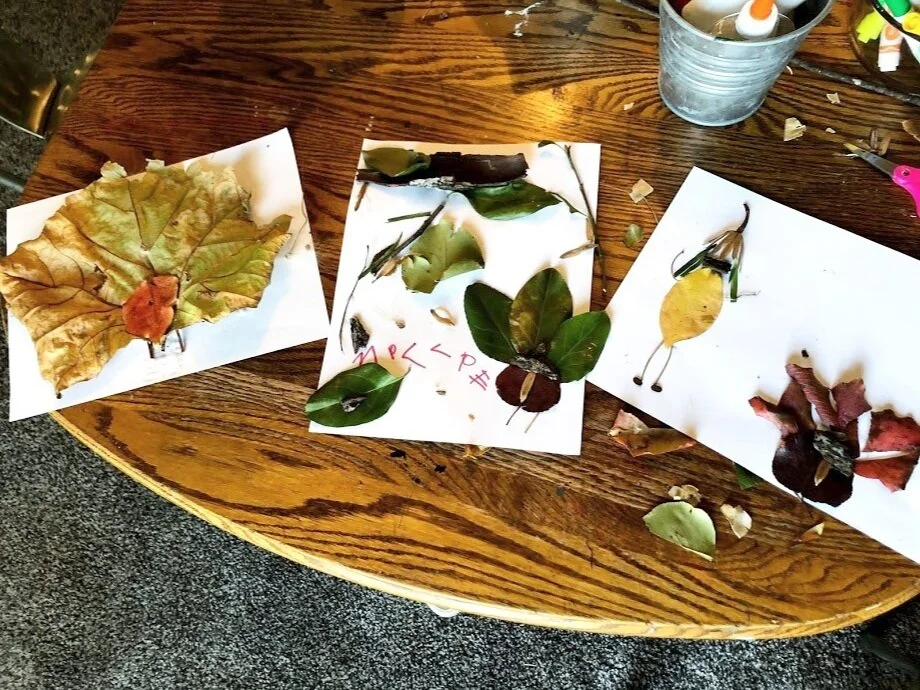
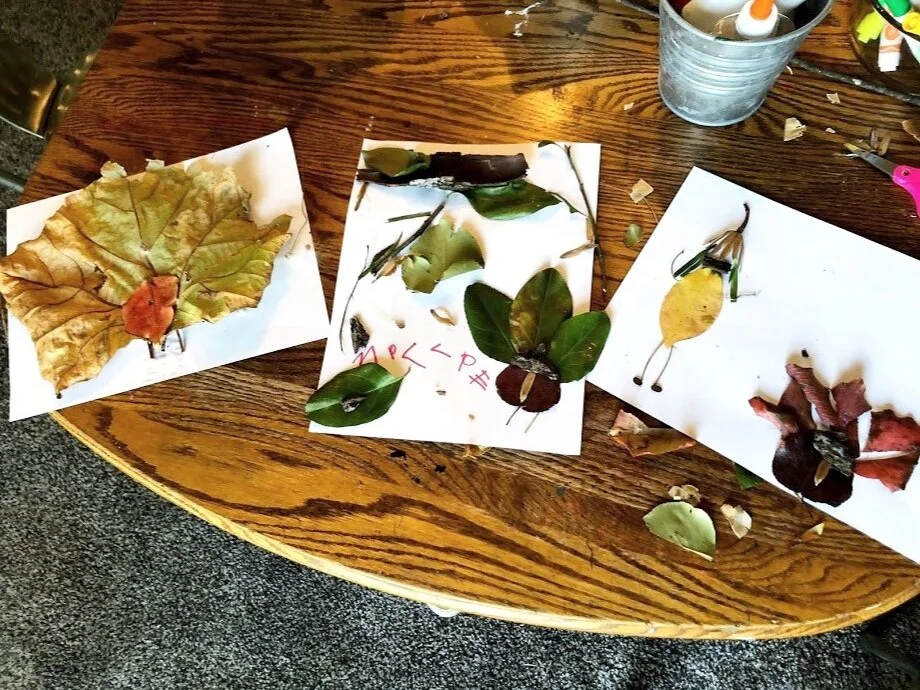
Here are a few finished leaf art pictures my girls made. I LOVE them! They were so creative and really took time to enjoy the whole process of this leaf art project. I can’t wait to do the next just for fun creative activity with them.

Leaf art with kids. Fun and easy leaf people and leaf turkeys for kids to make with their parents. Fun outdoor fall craft project to do with kids of all ages.

If you enjoy this craft with your kiddos be sure to check out this post on painting with nature.

Leaf art with kids. Fun and easy leaf people and leaf turkeys for kids to make with their parents. Fun outdoor fall craft project to do with kids of all ages.

Hot cocoa mini wood rolling pin DIY

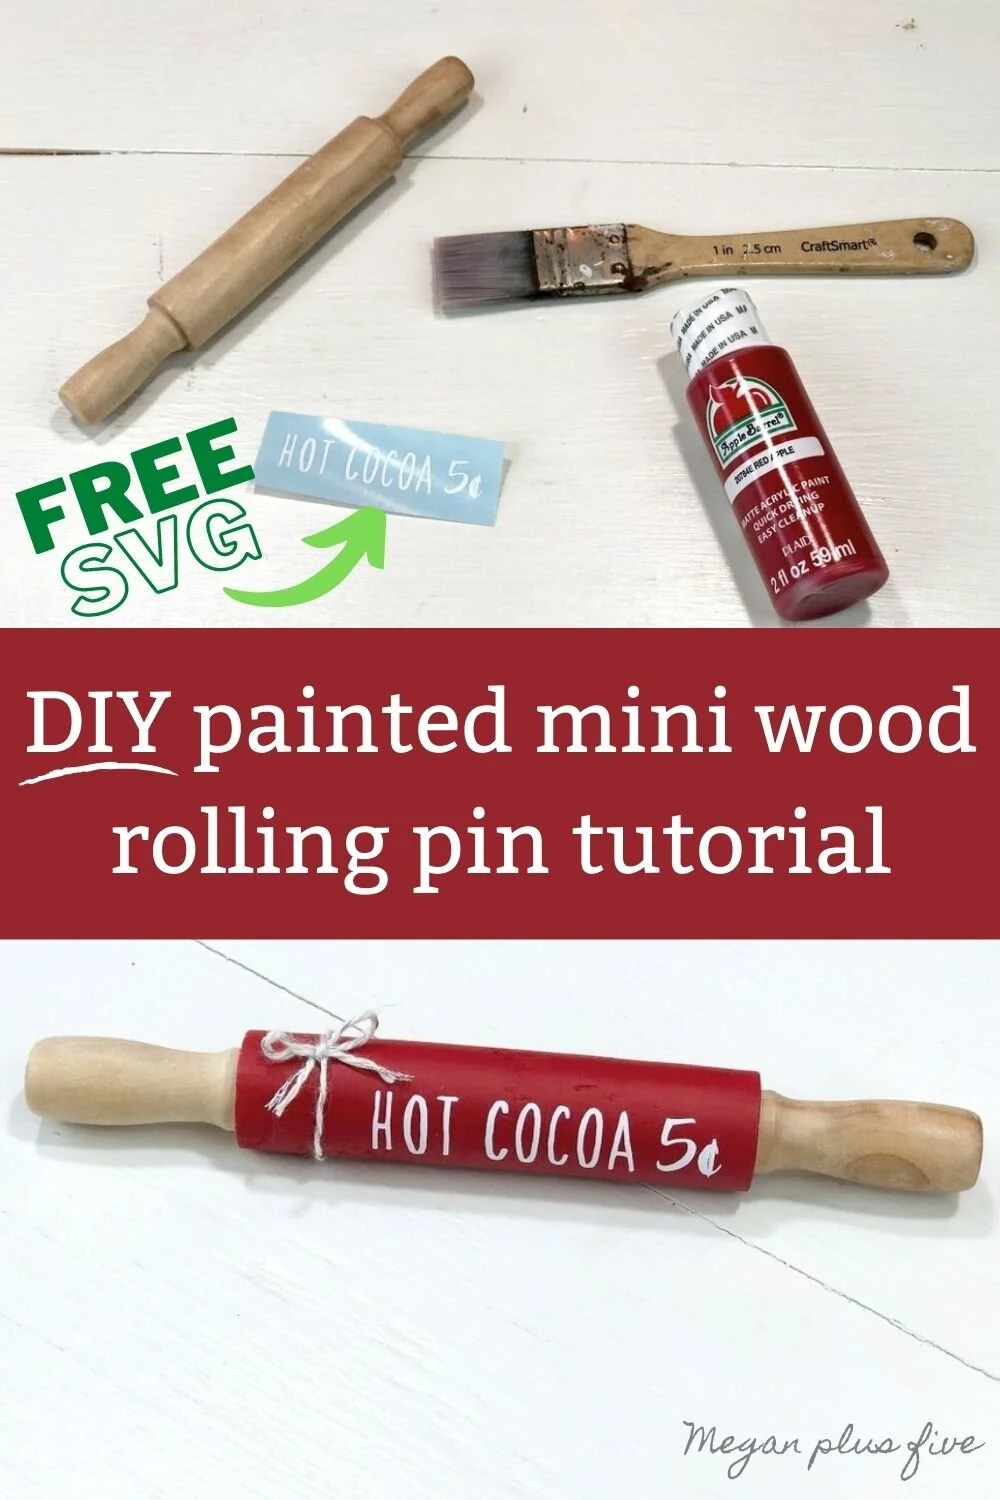
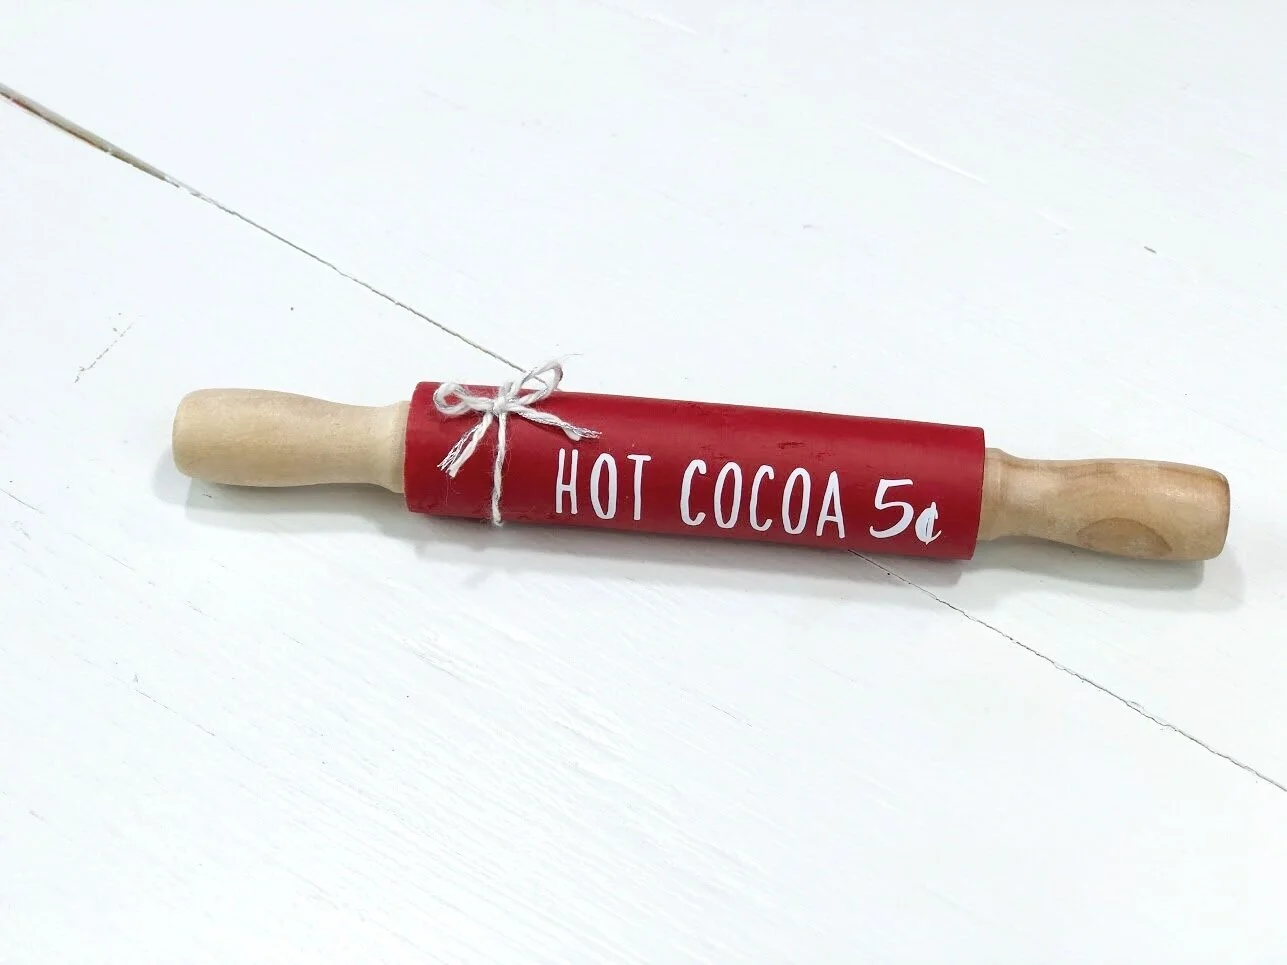
DIY mini wood rolling pin for tiered tray decorations for winter. How to make a hot cocoa themed coffee bar mini rolling pin accent plus free SVG. Make a painted wooden rolling pin for your rustic farmhouse home decor.

Do you have a coffee bar? I hope you said yes because coffee bars are SO fun to decorate! I picked up an old vanity from a garage sale a few years back that I have turned into our coffee bar and oh my goodness it is so cute and fits perfectly in the space we have.

This Christmas season I chose to do a HOT COCOA & COFFEE theme for the old coffee bar. I was inspired by this SVG I created, Baby it’s cold outside warm up here…hot cocoa & coffee. And from there I pinned all the cute hot cocoa themed projects I could find on Pinterest.

Affiliate Disclosure. Some of the links on this website are affiliate links, which means that I may earn a small commission if you click on the link or make a purchase using the link. If you make a purchase you will not be charged anything additional.

DIY mini rolling pin for coffee bar. How to make a hot cocoa mini wood rolling pin for tiered trays. Easy tutorial for wood rolling pin for your Christmas and hot cocoa coffee bar.

This little rolling pin is one of the DIY’s I made for the coffee bar. Seriously, how cute are these wooden rolling pins that seem to be everywhere for every occasion?! I love them!

DIY mini wood rolling pin for tiered tray decorations for winter. How to make a hot cocoa themed coffee bar mini rolling pin accent plus free SVG. Make a painted wooden rolling pin for your rustic farmhouse home decor.

1. CUT OUT THE HOT COCOA DECAL

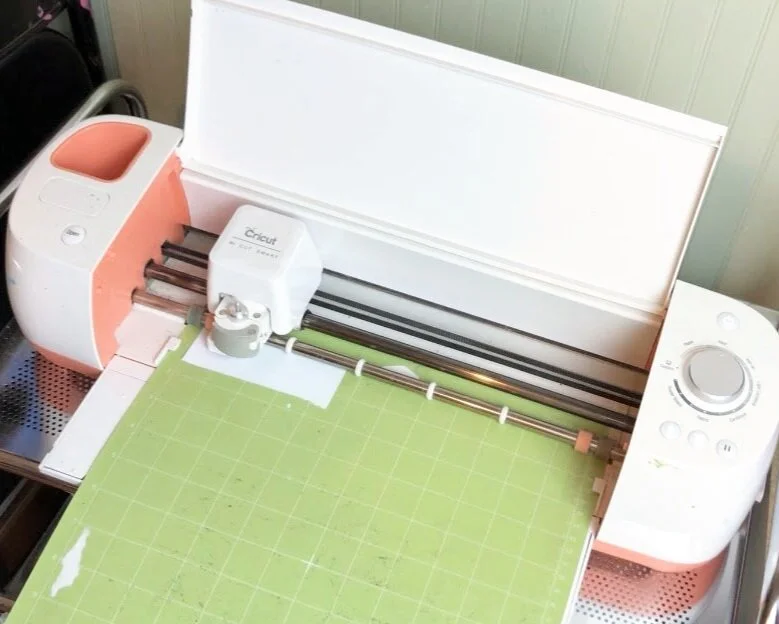
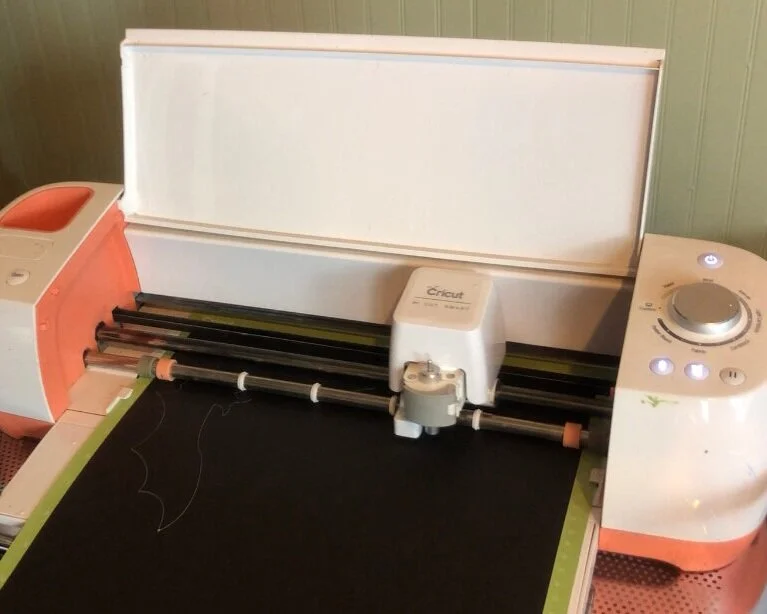
I used my older model Cricut Explore for this and let me tell ya that machine has been pumping out projects for me for YEARS! I upgraded to this little guy when my youngest daughter was a baby. Before I had used the super old model that was around when dinosaurs roamed the earth. I’m joking but really, the older model machines were SOOOOO hard to work with compared to the newer machines.

DIY mini wood rolling pin for tiered tray decorations for winter. How to make a hot cocoa themed coffee bar mini rolling pin accent plus free SVG. Make a painted wooden rolling pin for your rustic farmhouse home decor.

If you are needing a cart to hold your Cricut machine I highly recommend the one in this pic. I know it’s hard to see but it’s a wonderful cart on wheels that will hold 2 machines and has 4 drawers for storage, CLICK HERE.

Grab the SVG file for FREE in my free resource library CLICK HERE. While you’re there take a look at all the other fun things you can make with my free to use files.

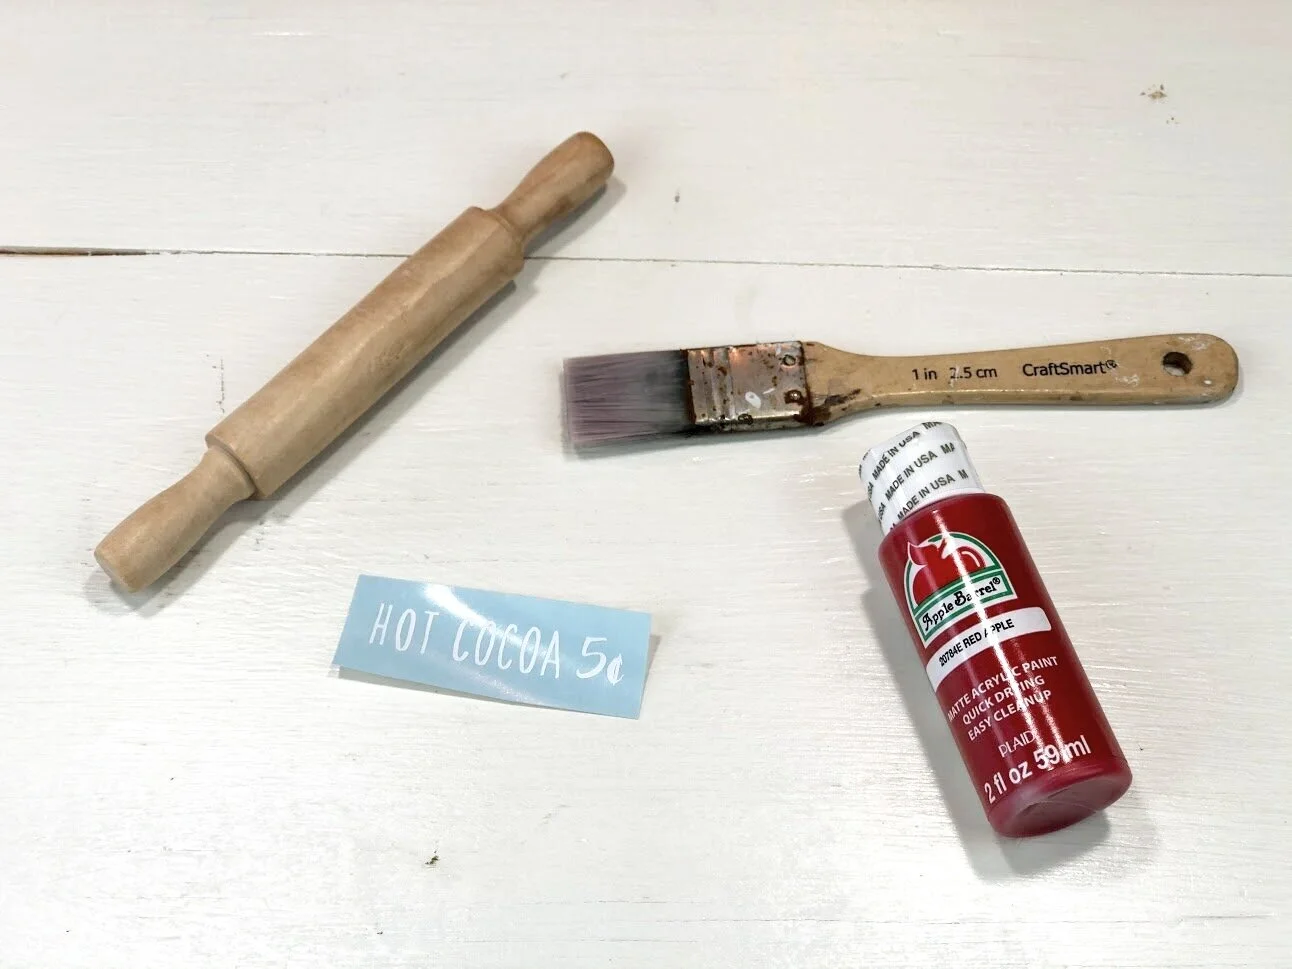
I used a scrap piece of Oracal 651 matte finish white vinyl because that’s what I had on hand.

Once it was done cutting I weeded out the background and all the little middles using a sewing pin.

DIY mini wood rolling pin for tiered tray decorations for winter. How to make a hot cocoa themed coffee bar mini rolling pin accent plus free SVG. Make a painted wooden rolling pin for your rustic farmhouse home decor.

2. PAINT THE ROLLING PIN

I used a red paint I picked up at Walmart but if you prefer to order from Amazon I put a link above for a paint I like to use from there.

DIY mini wood rolling pin for tiered tray decorations for winter. How to make a hot cocoa themed coffee bar mini rolling pin accent plus free SVG. Make a painted wooden rolling pin for your rustic farmhouse home decor.

I only painted the rolling part of the rolling pin. I left the edges and the handles natural. I applied one thin coat of red paint.

DIY mini wood rolling pin for tiered tray decorations for winter. How to make a hot cocoa themed coffee bar mini rolling pin accent plus free SVG. Make a painted wooden rolling pin for your rustic farmhouse home decor.

Then I let it dry. I got a little creative when propping this up. I used the paint bottle and a tin of lotion to prop this little guy up and it worked great.

DIY mini wood rolling pin for tiered tray decorations for winter. How to make a hot cocoa themed coffee bar mini rolling pin accent plus free SVG. Make a painted wooden rolling pin for your rustic farmhouse home decor.

Once the first coat was dry I applied a second coat.

DIY mini wood rolling pin for tiered tray decorations for winter. How to make a hot cocoa themed coffee bar mini rolling pin accent plus free SVG. Make a painted wooden rolling pin for your rustic farmhouse home decor.

BTW this paint brush may look like a hot mess but I LOVE this style of a thin flat paint brush! I left a link to a similar one you can also get on Amazon that will work just like it.

Let the wood rolling pin dry completely before moving on to the next step. Always remember that vinyl will not stick to wet paint, like at all.

3. APPLY THE VINYL DECAL

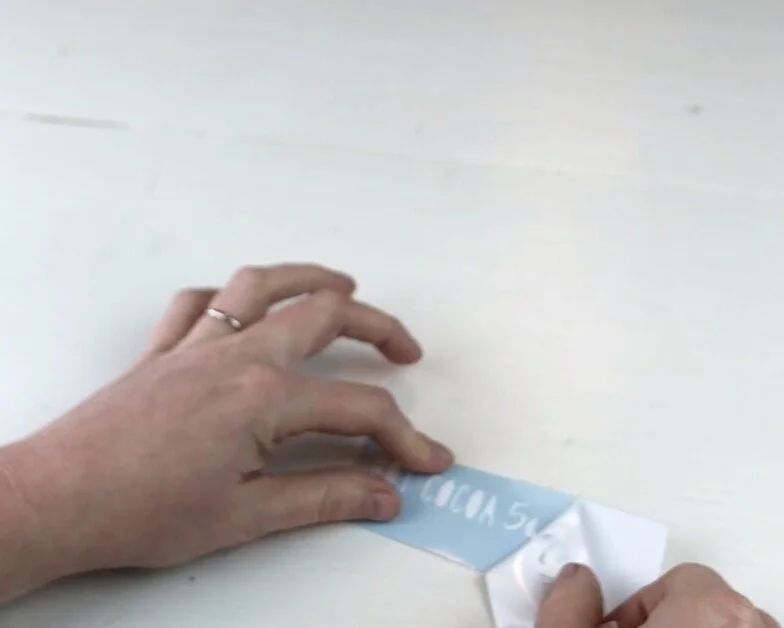
I used this clear transfer tape to help apply my decal to my rolling pin. Be careful when applying these decals because they are so small, it’s very easy to move too fast and mess the decal up.

DIY mini wood rolling pin for tiered tray decorations for winter. How to make a hot cocoa themed coffee bar mini rolling pin accent plus free SVG. Make a painted wooden rolling pin for your rustic farmhouse home decor.

I carefully positioned my decal on the right side of my rolling pin and pressed it down with my hand.

DIY mini wood rolling pin for tiered tray decorations for winter. How to make a hot cocoa themed coffee bar mini rolling pin accent plus free SVG. Make a painted wooden rolling pin for your rustic farmhouse home decor.

Once my decal was in place I used a vinyl squeegee to help press it down a little more then slowly peeled the transfer tape off of the rolling pin leaving the decal on the rolling pin. I’ve found it’s much easier if you roll the transfer tape off and away from the decal.

DIY mini wood rolling pin for tiered tray decorations for winter. How to make a hot cocoa themed coffee bar mini rolling pin accent plus free SVG. Make a painted wooden rolling pin for your rustic farmhouse home decor.

4. ADD BAKERS TWINE

I added a cute little accent bow using bakers twine. I just tied it to the side of the rolling pin that was blank, the left side, and tied it in a bow.

DIY mini wood rolling pin for tiered tray decorations for winter. How to make a hot cocoa themed coffee bar mini rolling pin accent plus free SVG. Make a painted wooden rolling pin for your rustic farmhouse home decor.

This particular bakers twine was giving me a fit so I used my sewing pin to help me get it straightened out and that seemed to work great.

DIY mini wood rolling pin for tiered tray decorations for winter. How to make a hot cocoa themed coffee bar mini rolling pin accent plus free SVG. Make a painted wooden rolling pin for your rustic farmhouse home decor.

That’s it! Super easy craft to make for your tiered tray decor for winter. This craft took me just under an hour, mainly waiting on paint to dry. I think I might even make a couple more to pair with this one. So cute!

DIY mini wood rolling pin for tiered tray decorations for winter. How to make a hot cocoa themed coffee bar mini rolling pin accent plus free SVG. Make a painted wooden rolling pin for your rustic farmhouse home decor.

I can’t wait to finish the rest of my hot cocoa & coffee winter themed coffee bar.

I hope you enjoyed this crafty tutorial. If you have any questions please ask away in the comments below.

Happy crafting!

Check out more DIY crafts using my CRICUT cutting machine

Simple Halloween décor using a witch hat

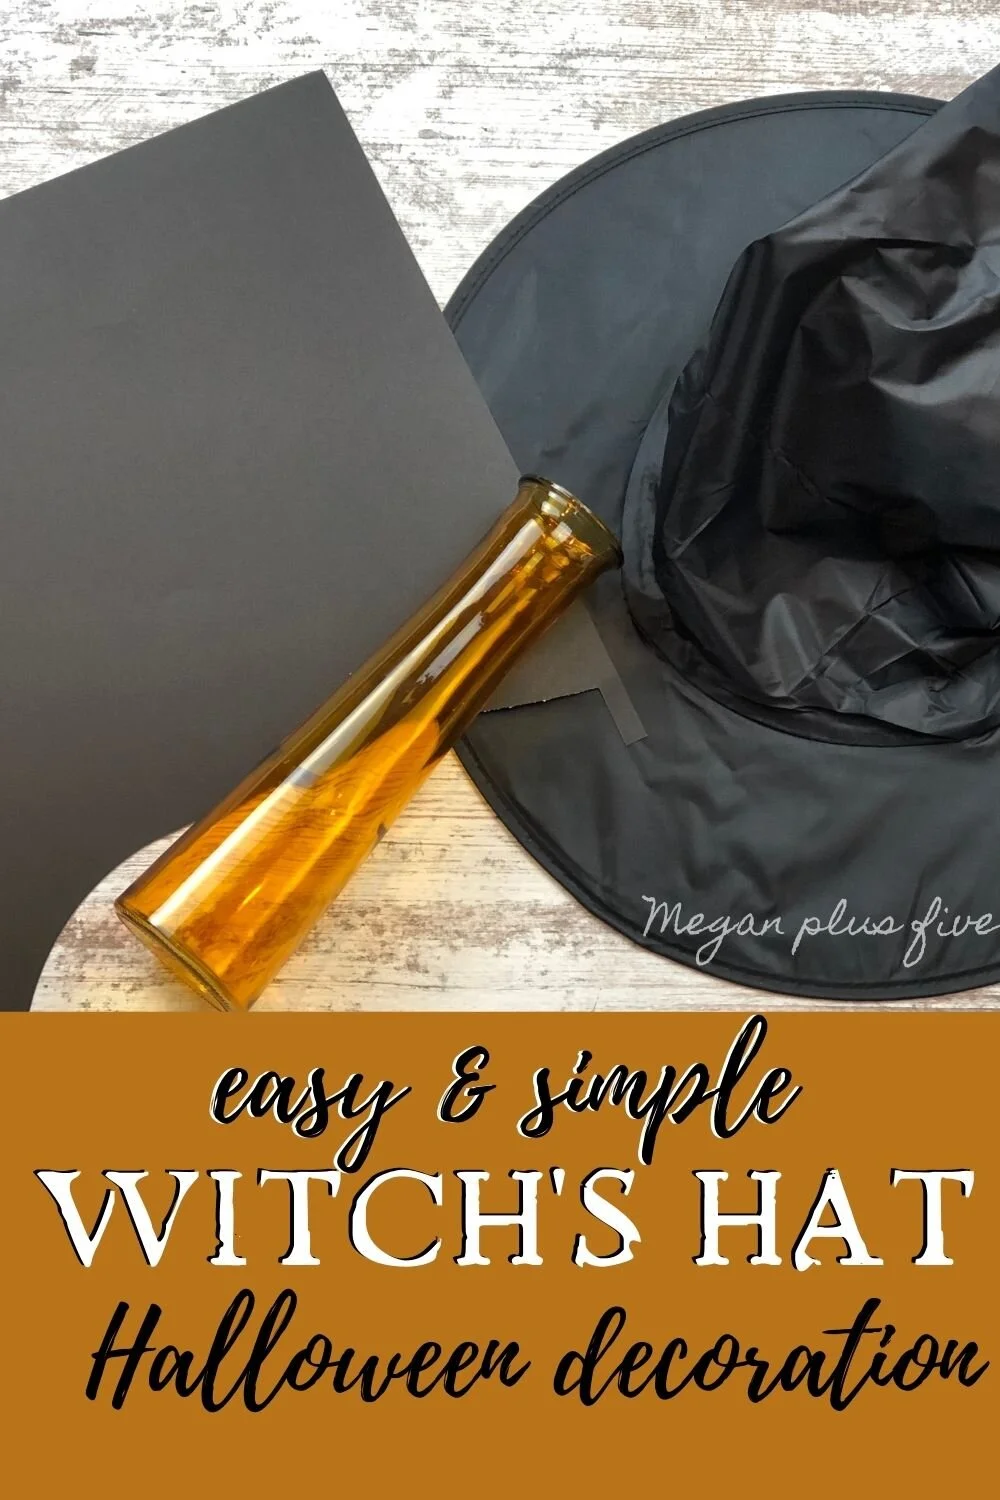
How to make an easy and cute Halloween decoration using a Dollar Tree vase and a witch hat. DIY  Halloween decor using your Cricut cutting machine. Make your own adorable witch hat Halloween decoration.

Easy Witch Hat Halloween Decoration

There are some really super cute Halloween decorations out there. I love simple AND frugal! I’m not one to spend a lot on décor so I really loved this easy and cheap project!

If you want even more fun HALLOWEEN DECOR IDEAS be sure to scroll all the way to the bottom for more DIY’s for the fall season.

Affiliate Disclosure. Some of the links on this website are affiliate links, which means that I may earn a small commission if you click on the link or make a purchase using the link. If you make a purchase you will not be charged anything additional.

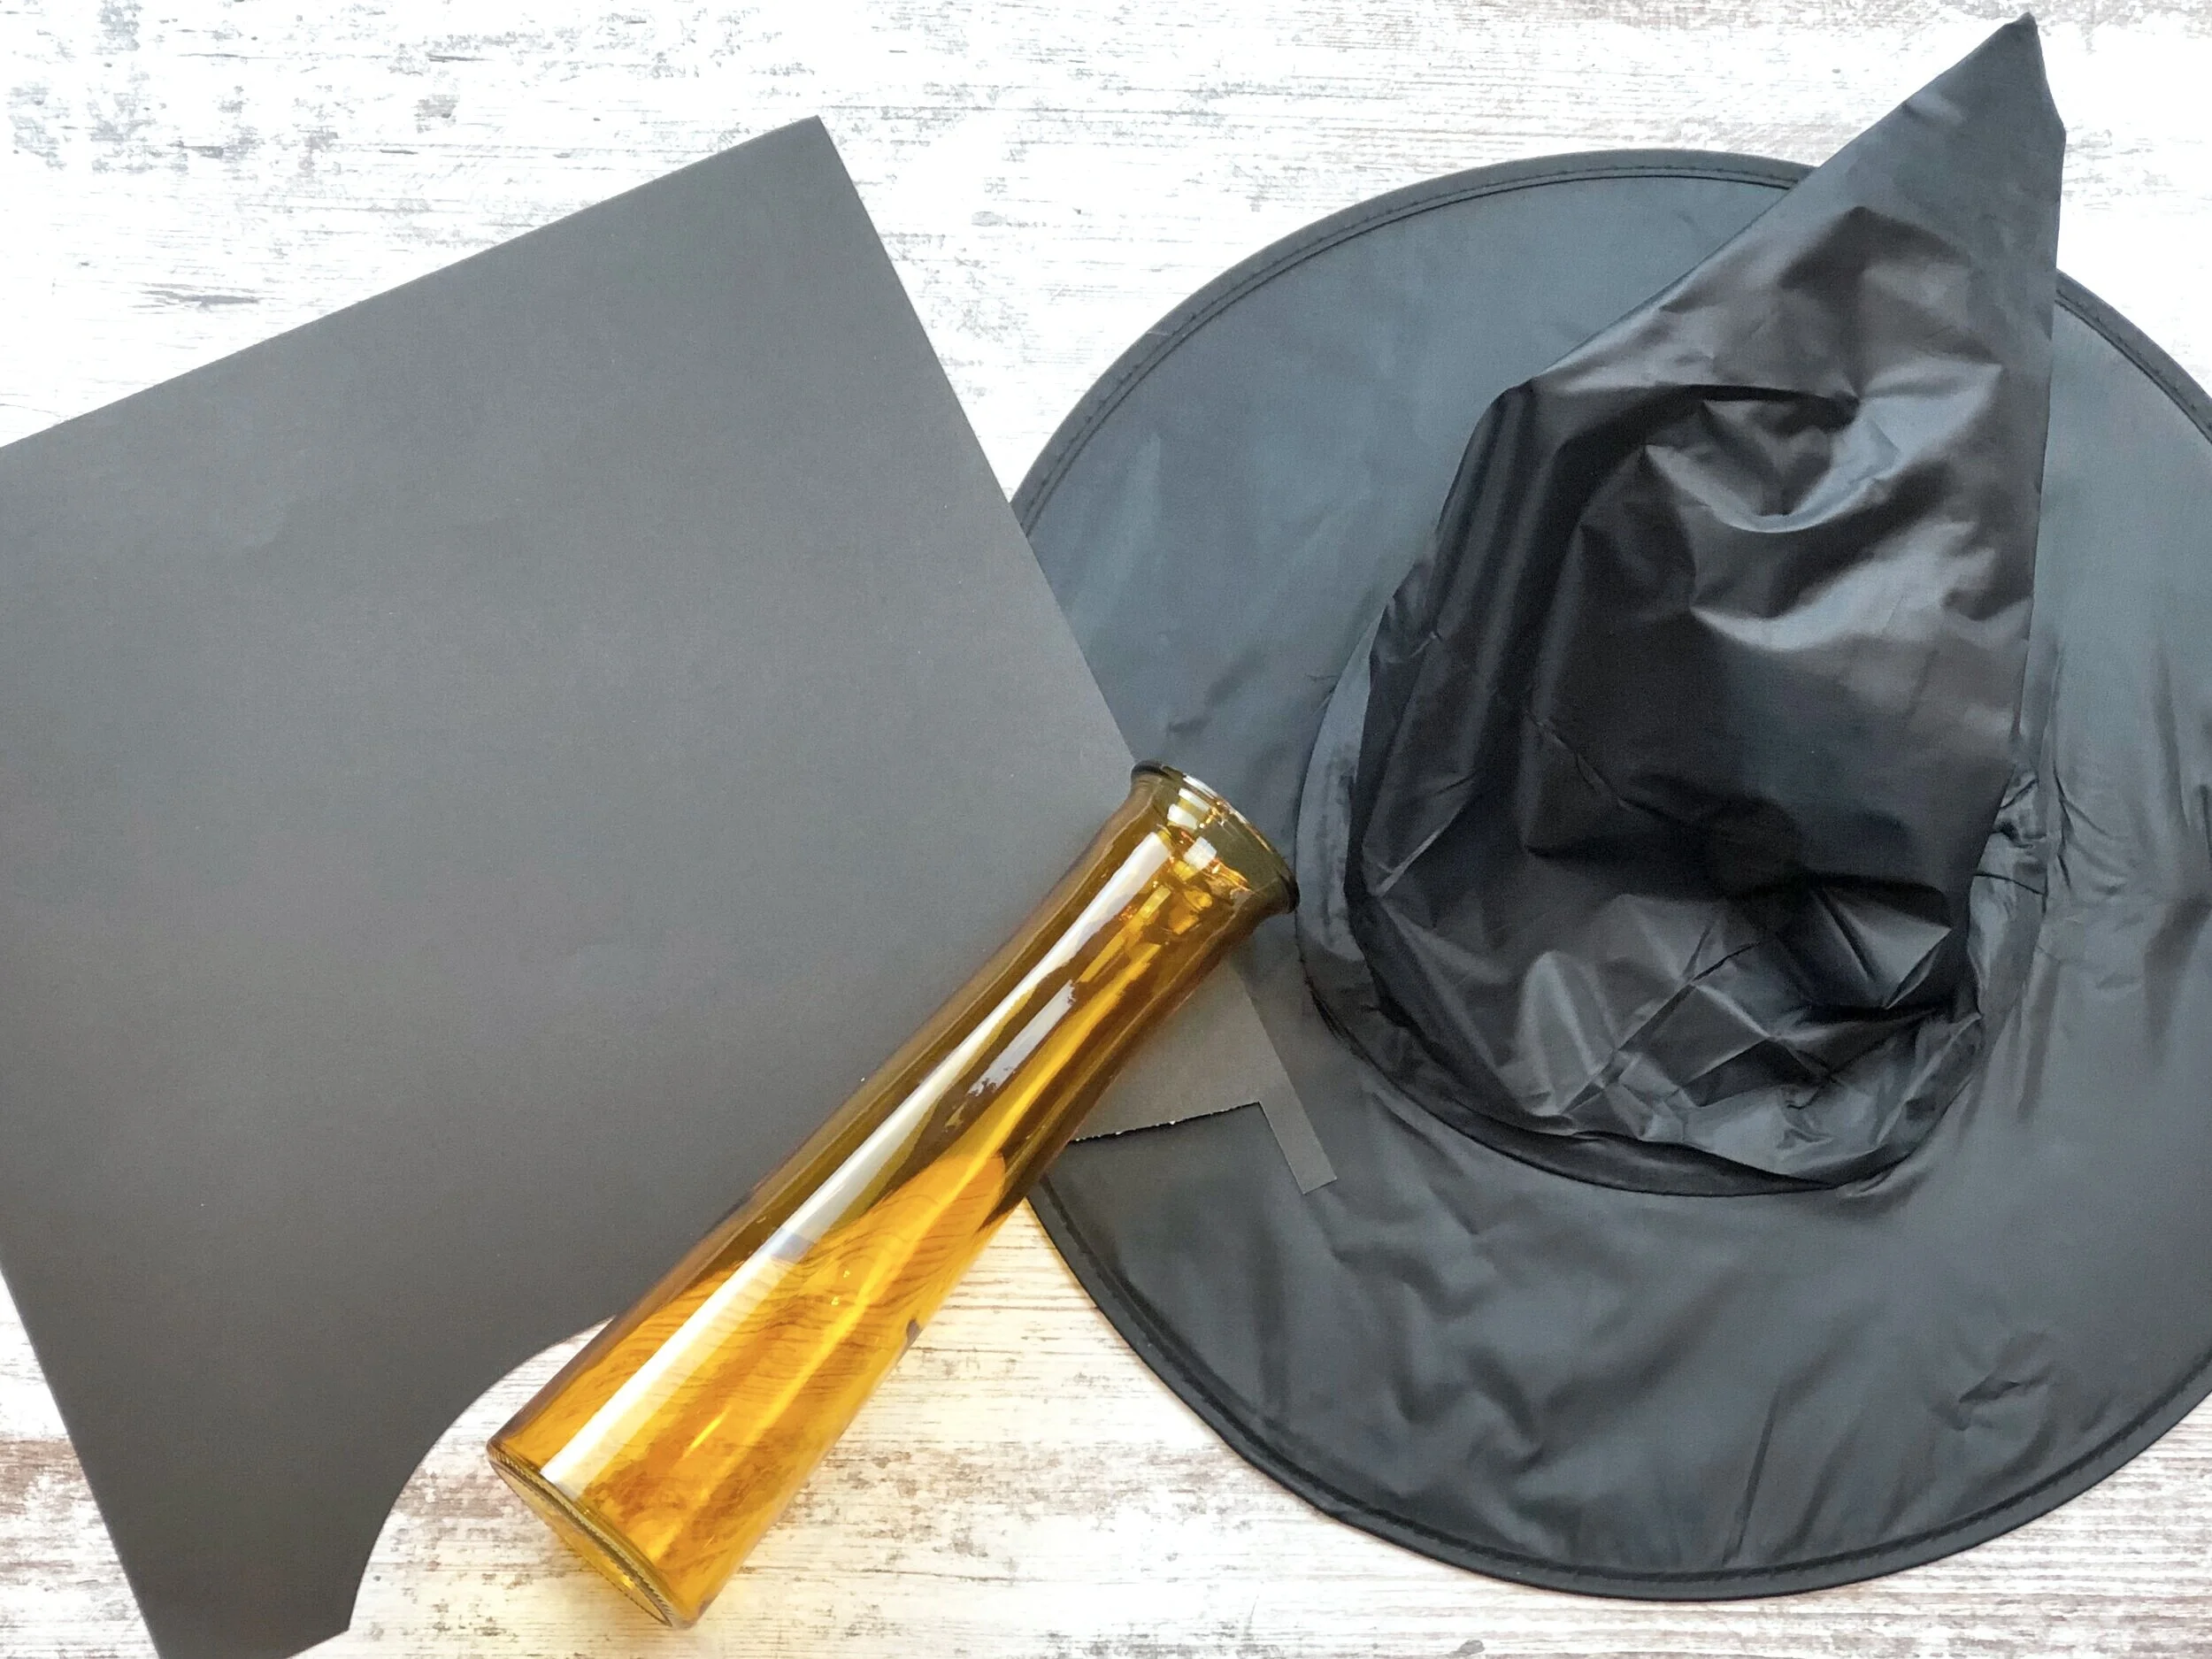
Here’s what you’ll need

How to make an easy and cute Halloween decoration using a Dollar Tree vase and a witch hat. DIY  Halloween decor using your Cricut cutting machine. Make your own adorable witch hat Halloween decoration.

The first thing I did was measure the opening of the witch hat.

How to make an easy and cute Halloween decoration using a Dollar Tree vase and a witch hat. DIY  Halloween decor using your Cricut cutting machine. Make your own adorable witch hat Halloween decoration.

Using Cricut Design Space I made a 9” circle and cut it out on black cardstock using my Cricut Explore.

How to make an easy and cute Halloween decoration using a Dollar Tree vase and a witch hat. DIY  Halloween decor using your Cricut cutting machine. Make your own adorable witch hat Halloween decoration.

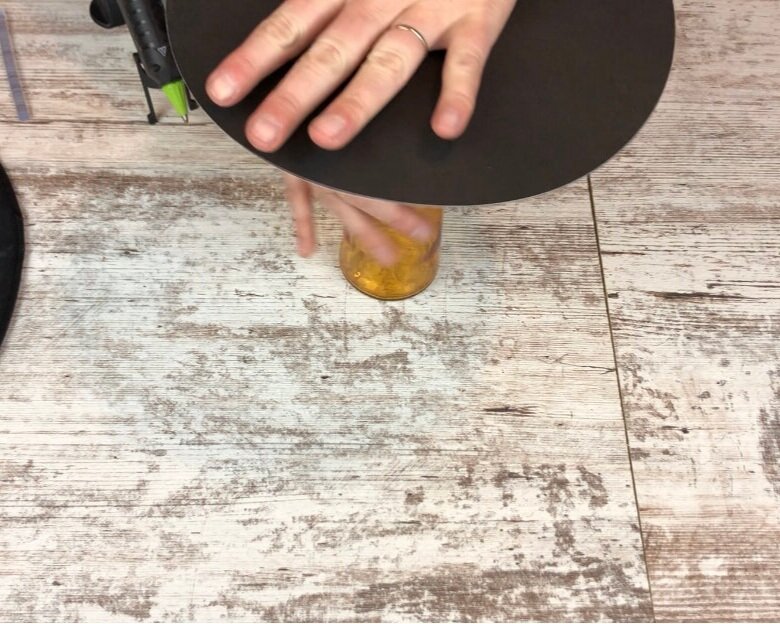
Next I used my glue gun and added hot glue to the top of the vase.

How to make an easy and cute Halloween decoration using a Dollar Tree vase and a witch hat. DIY  Halloween decor using your Cricut cutting machine. Make your own adorable witch hat Halloween decoration.

Then I quickly placed my cardstock circle cut out on top. Be sure to do this step quickly because hot glue can dry fairly fast.

How to make an easy and cute Halloween decoration using a Dollar Tree vase and a witch hat. DIY  Halloween decor using your Cricut cutting machine. Make your own adorable witch hat Halloween decoration.

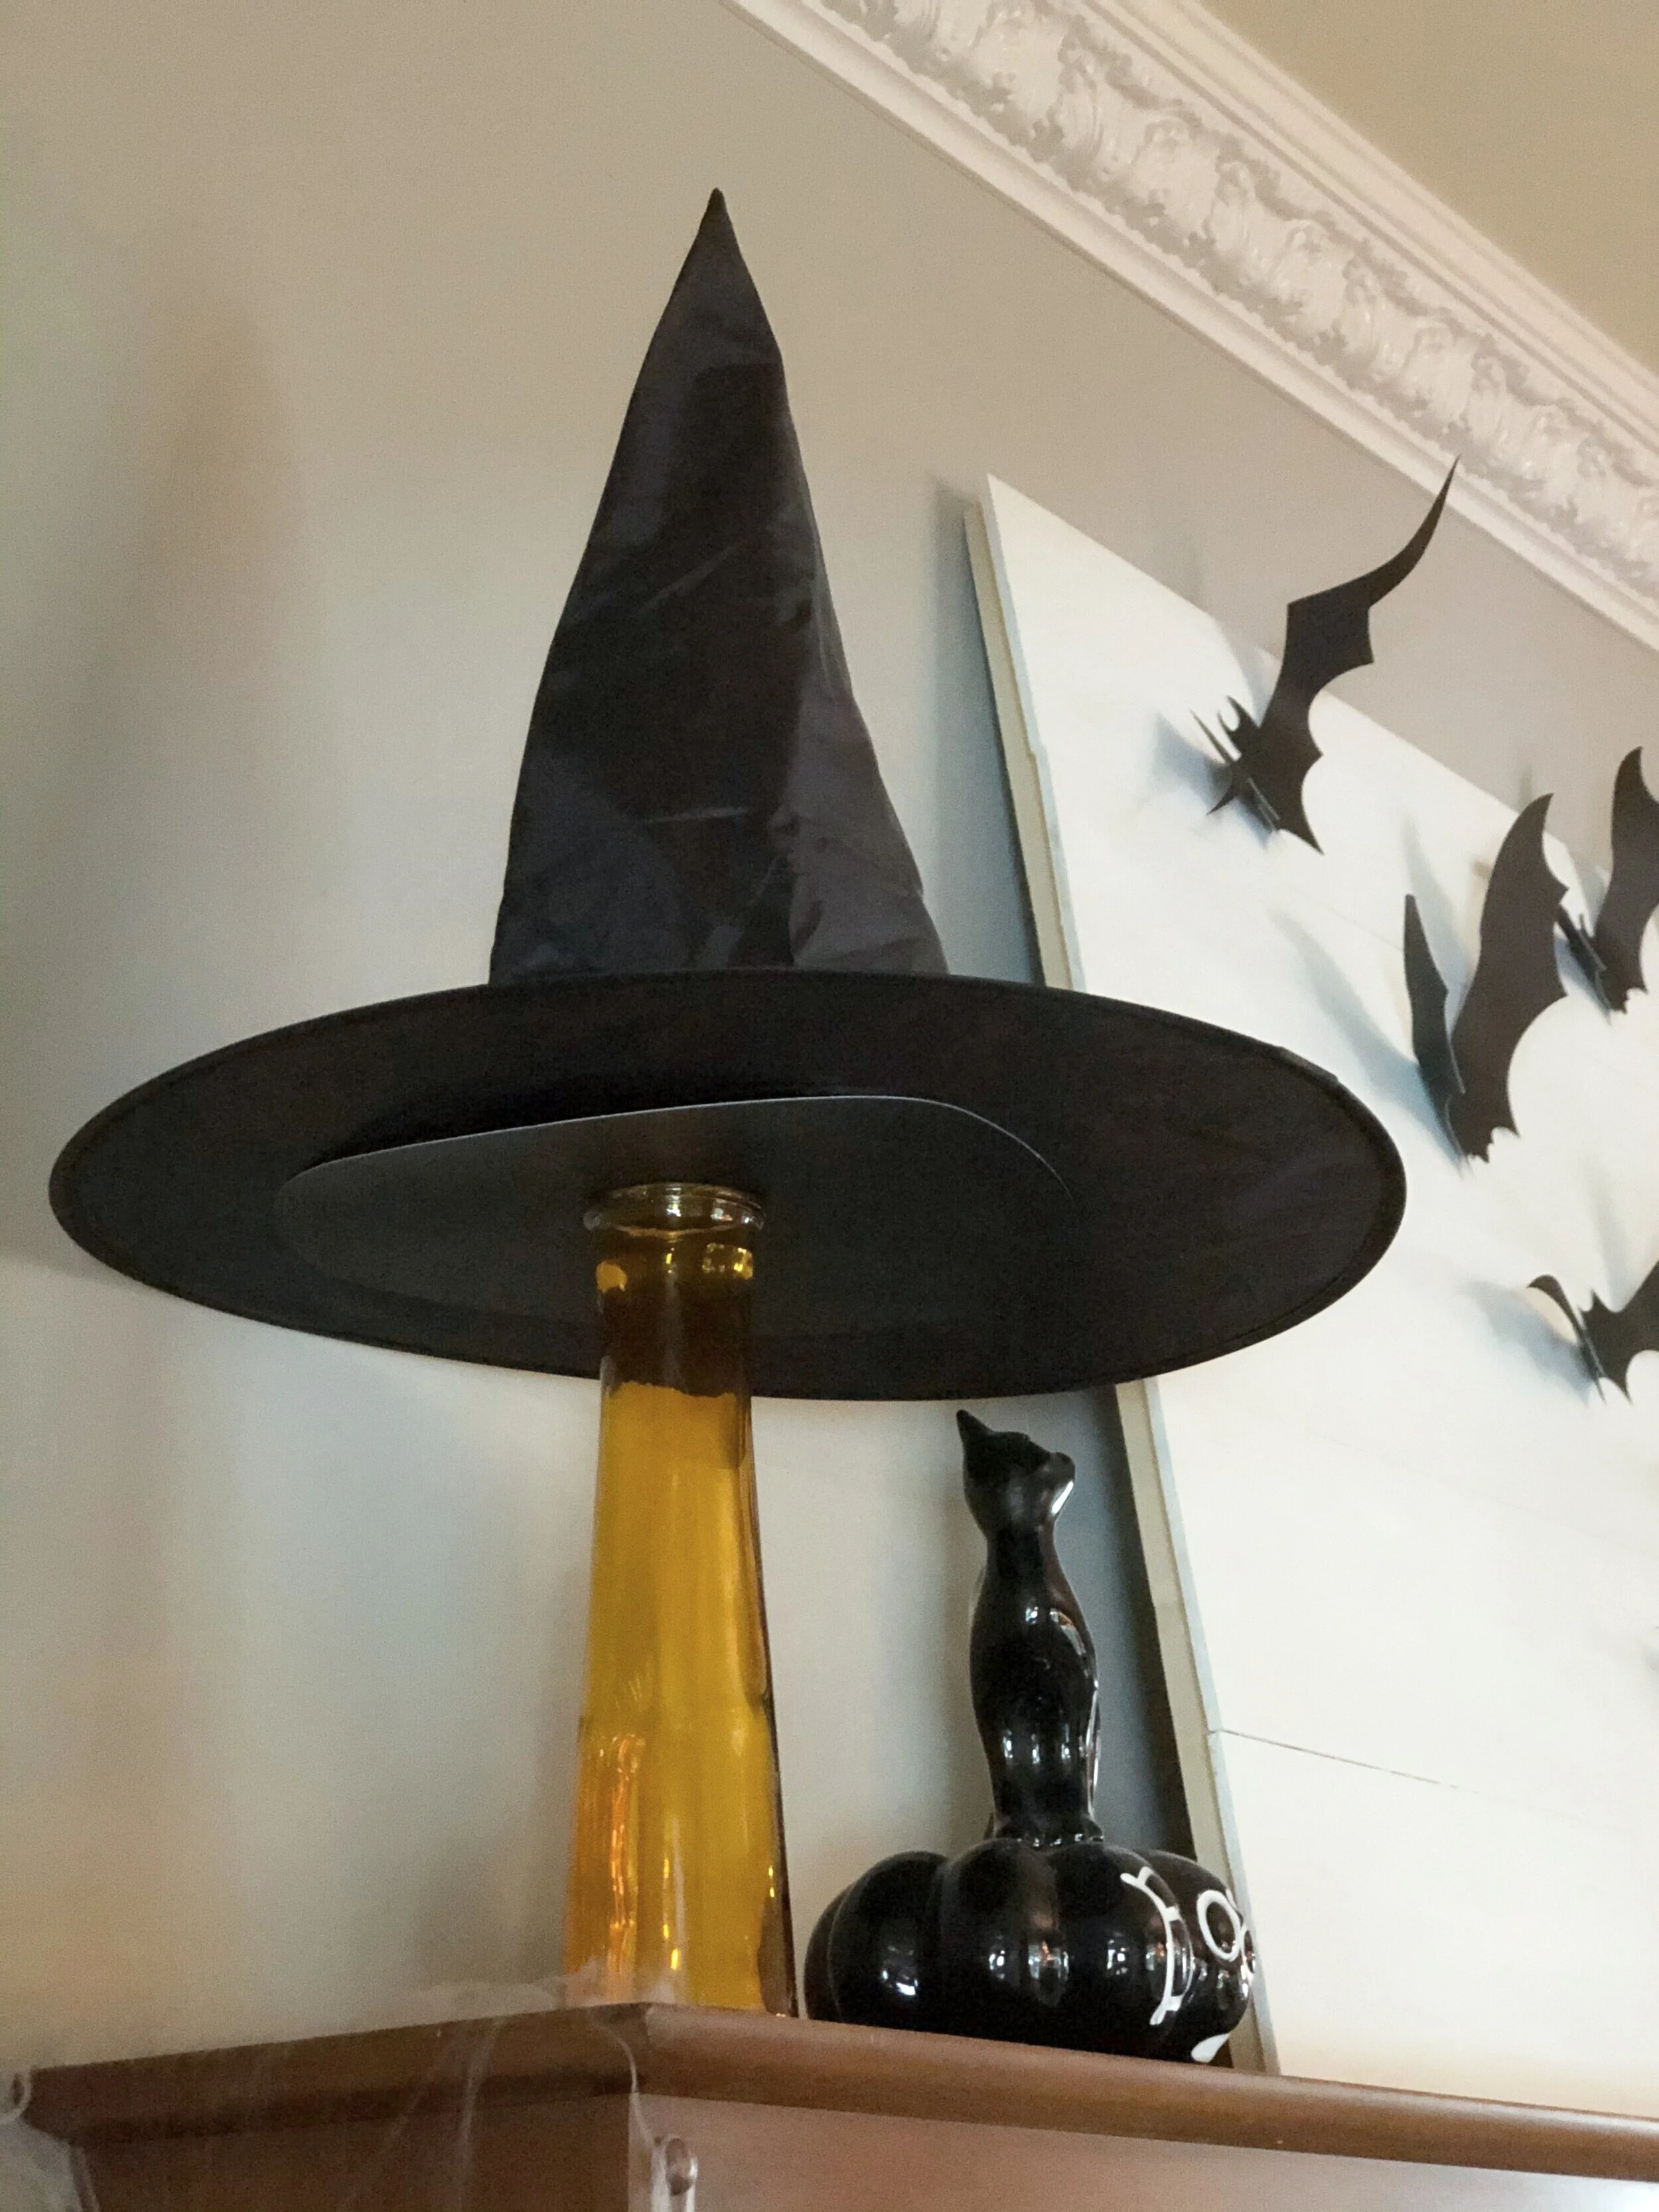
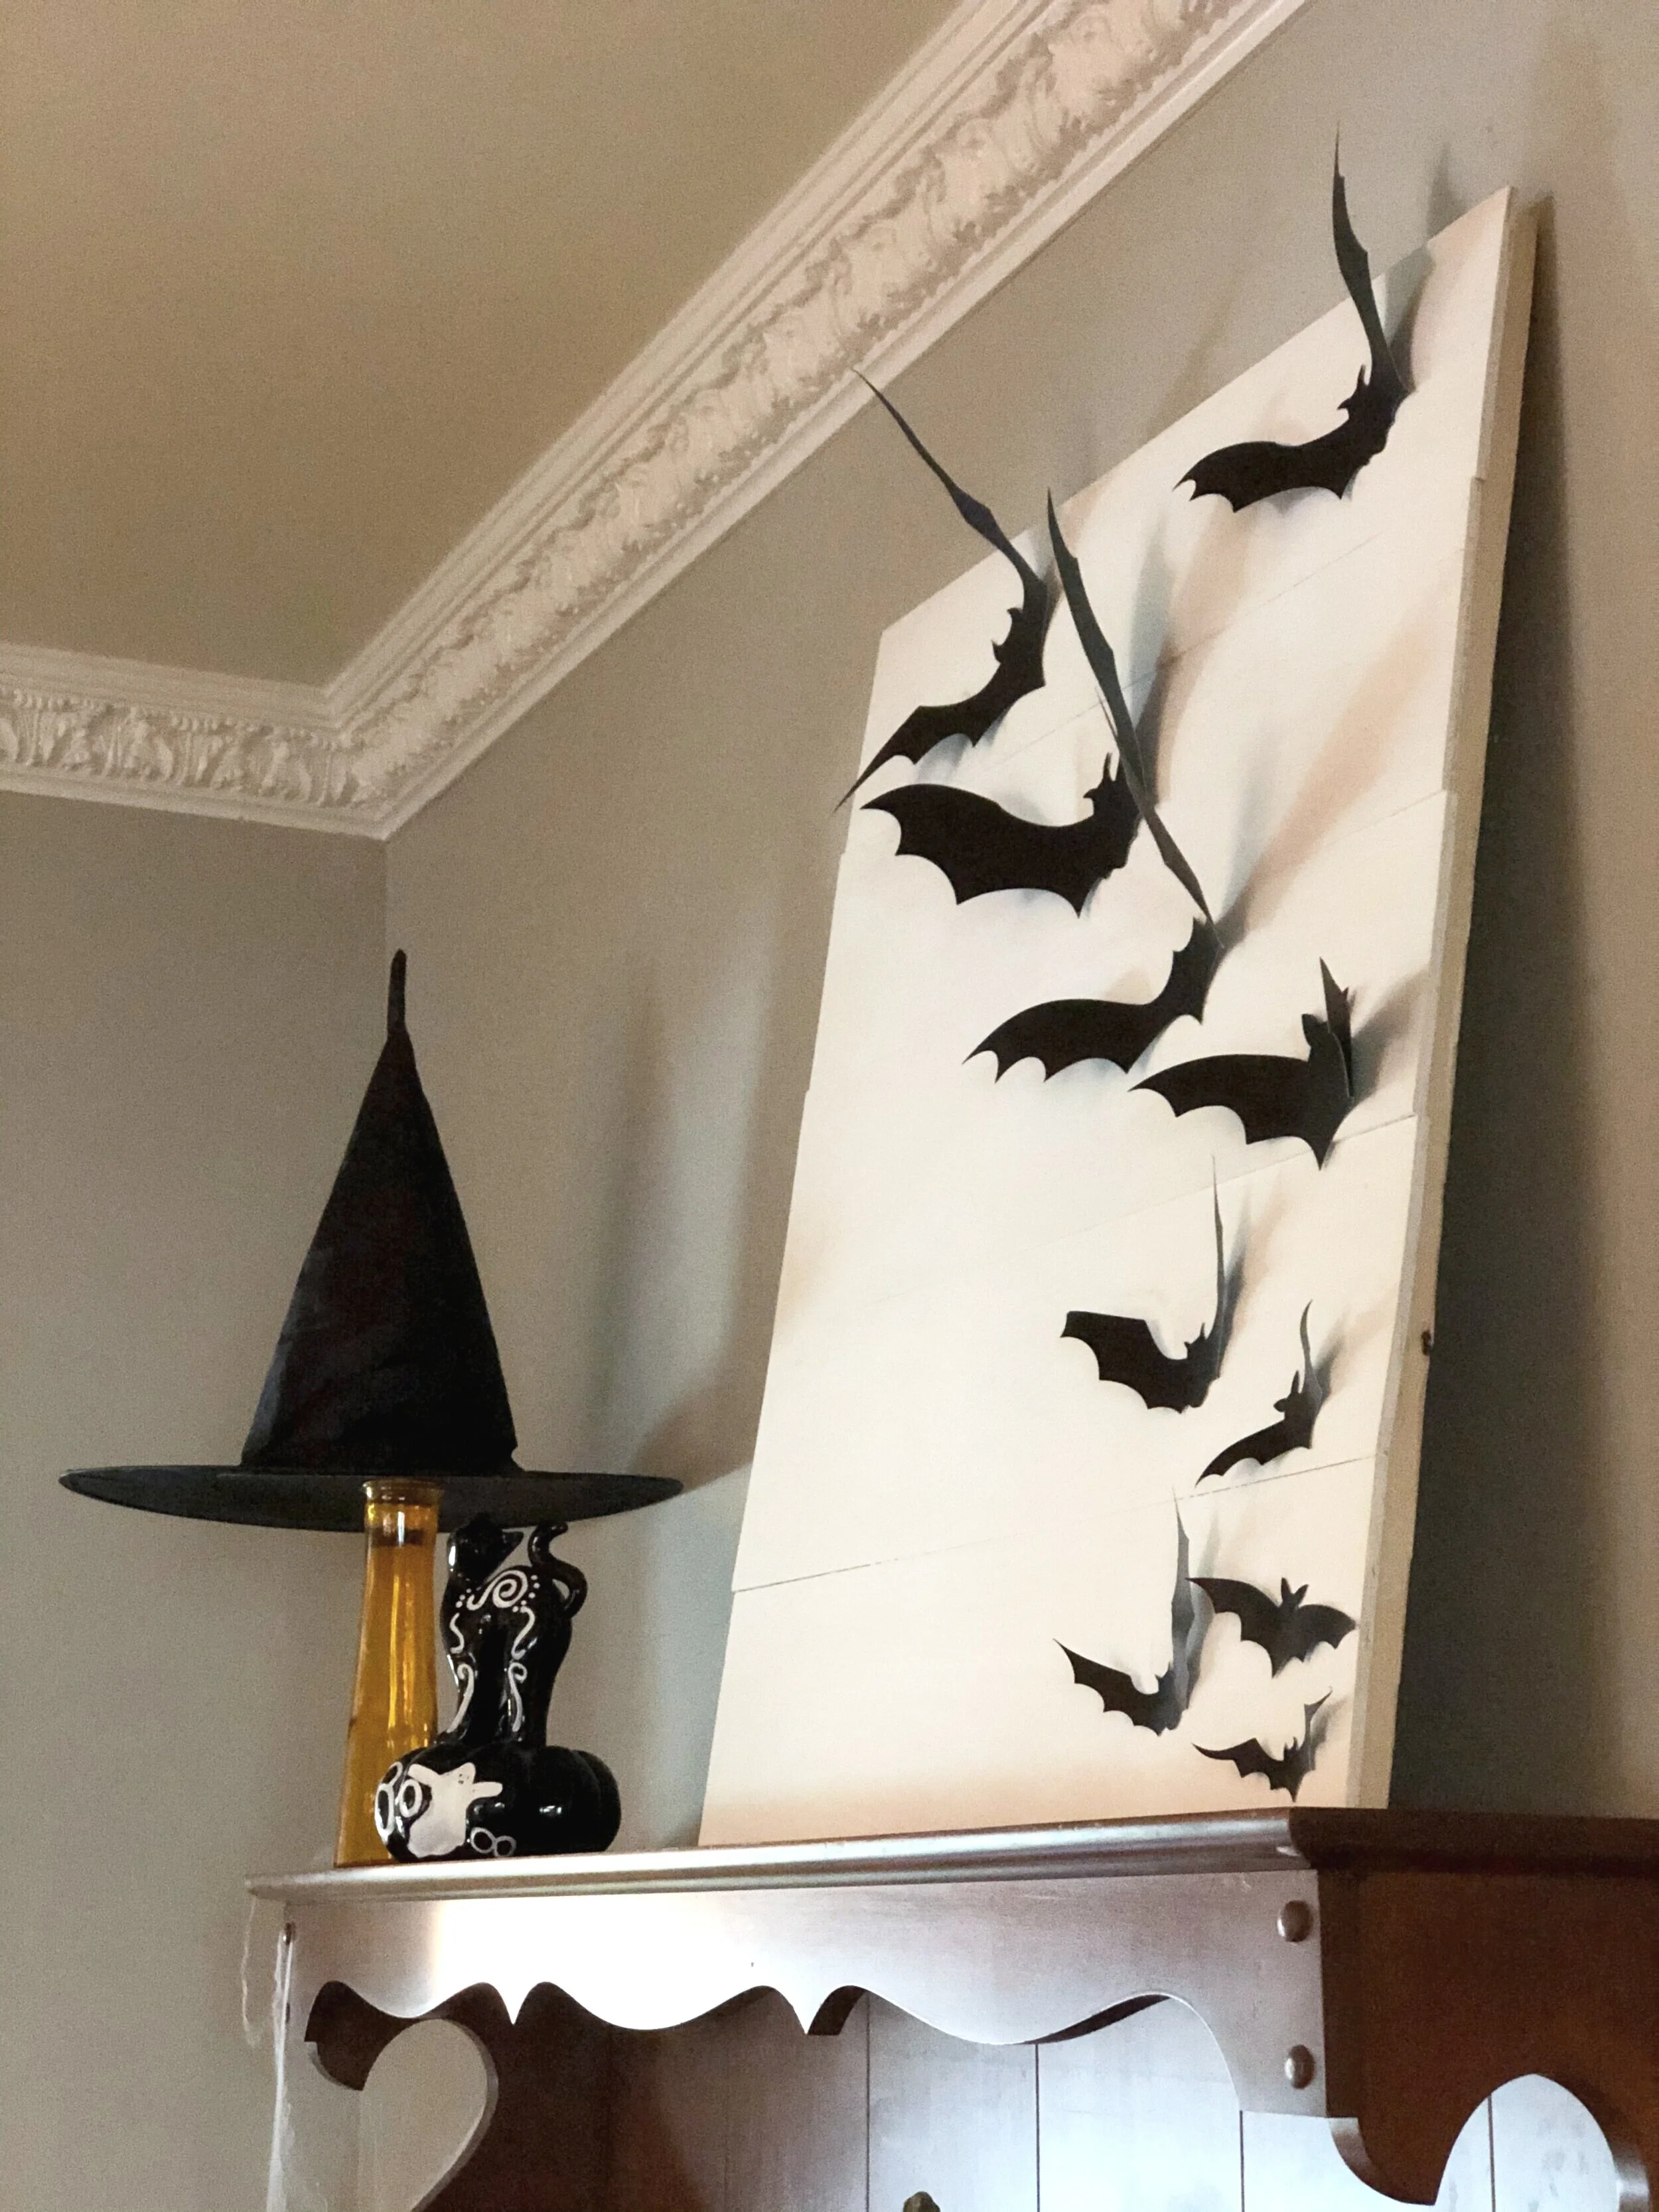
Then I placed it on my hutch and added my witch hat.

How to make an easy and cute Halloween decoration using a Dollar Tree vase and a witch hat. DIY  Halloween decor using your Cricut cutting machine. Make your own adorable witch hat Halloween decoration.

I love it! It was so super easy and adds so much height to my Halloween display.

How to make an easy and cute Halloween decoration using a Dollar Tree vase and a witch hat. DIY  Halloween decor using your Cricut cutting machine. Make your own adorable witch hat Halloween decoration.

I hope you enjoyed this super simple Halloween craft. Let me know if you have any questions in the comments below.

Happy Crafting!

Check out more of my fun Halloween & fall crafts below

Interchangeable pallet style wall sign

DIY interchangeable seasonal sign. How to make a blank sign to change out throughout the year. DIY holiday seasonal sign

Interchangeable wood signs are all the rage right now. And honestly who doesn’t want to have less seasonal décor to store?

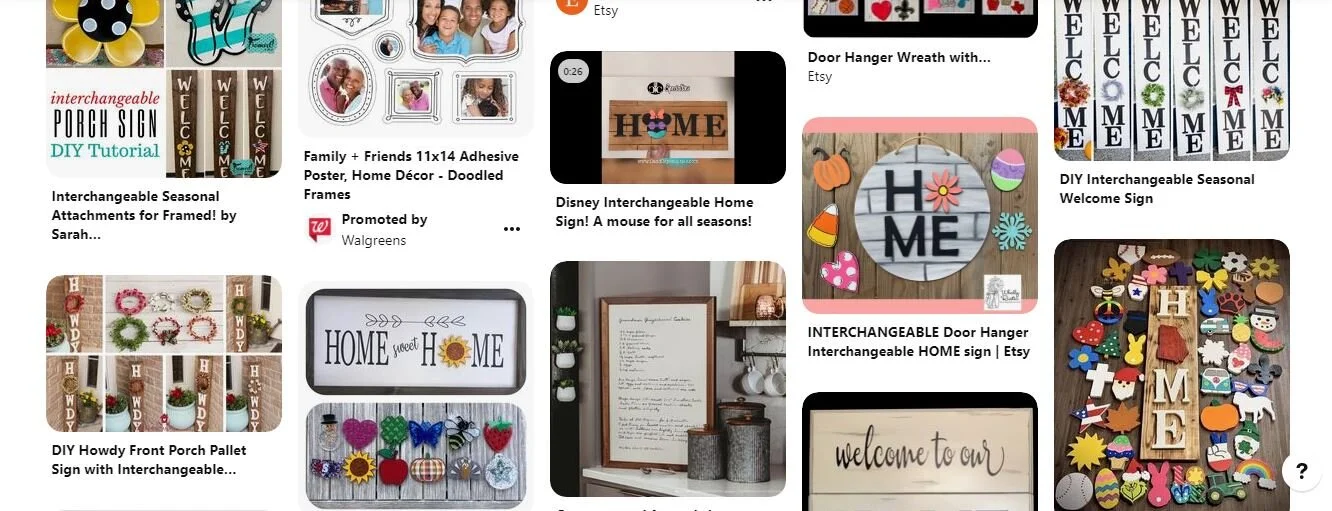
Don’t get me wrong they are SO CUTE but I’ve seen them everywhere, including a similar version when I was growing up. I just wanted something different. If you haven’t see these adorable signs here’s a screenshot I took from Pinterest when I searched interchangeable seasonal signs. Super cute, just not what I was wanting in my new home.

Affiliate Disclosure. Some of the links on this website are affiliate links, which means that I may earn a small commission if you click on the link or make a purchase using the link. If you make a purchase you will not be charged anything additional.

Interchangeable seasonal home décor. Pinterest welcome sign change it out for the seasons. Make your own seasonal home decor.

I thought ‘why not just put up a blank white sign?’ Not really genius but I sure felt that way lol!

Here’s what you’ll need to make a light weight blank faux pallet sign to change out through the seasons

DIY FAUX PALLET STYLE SIGN USING PLYWOOD

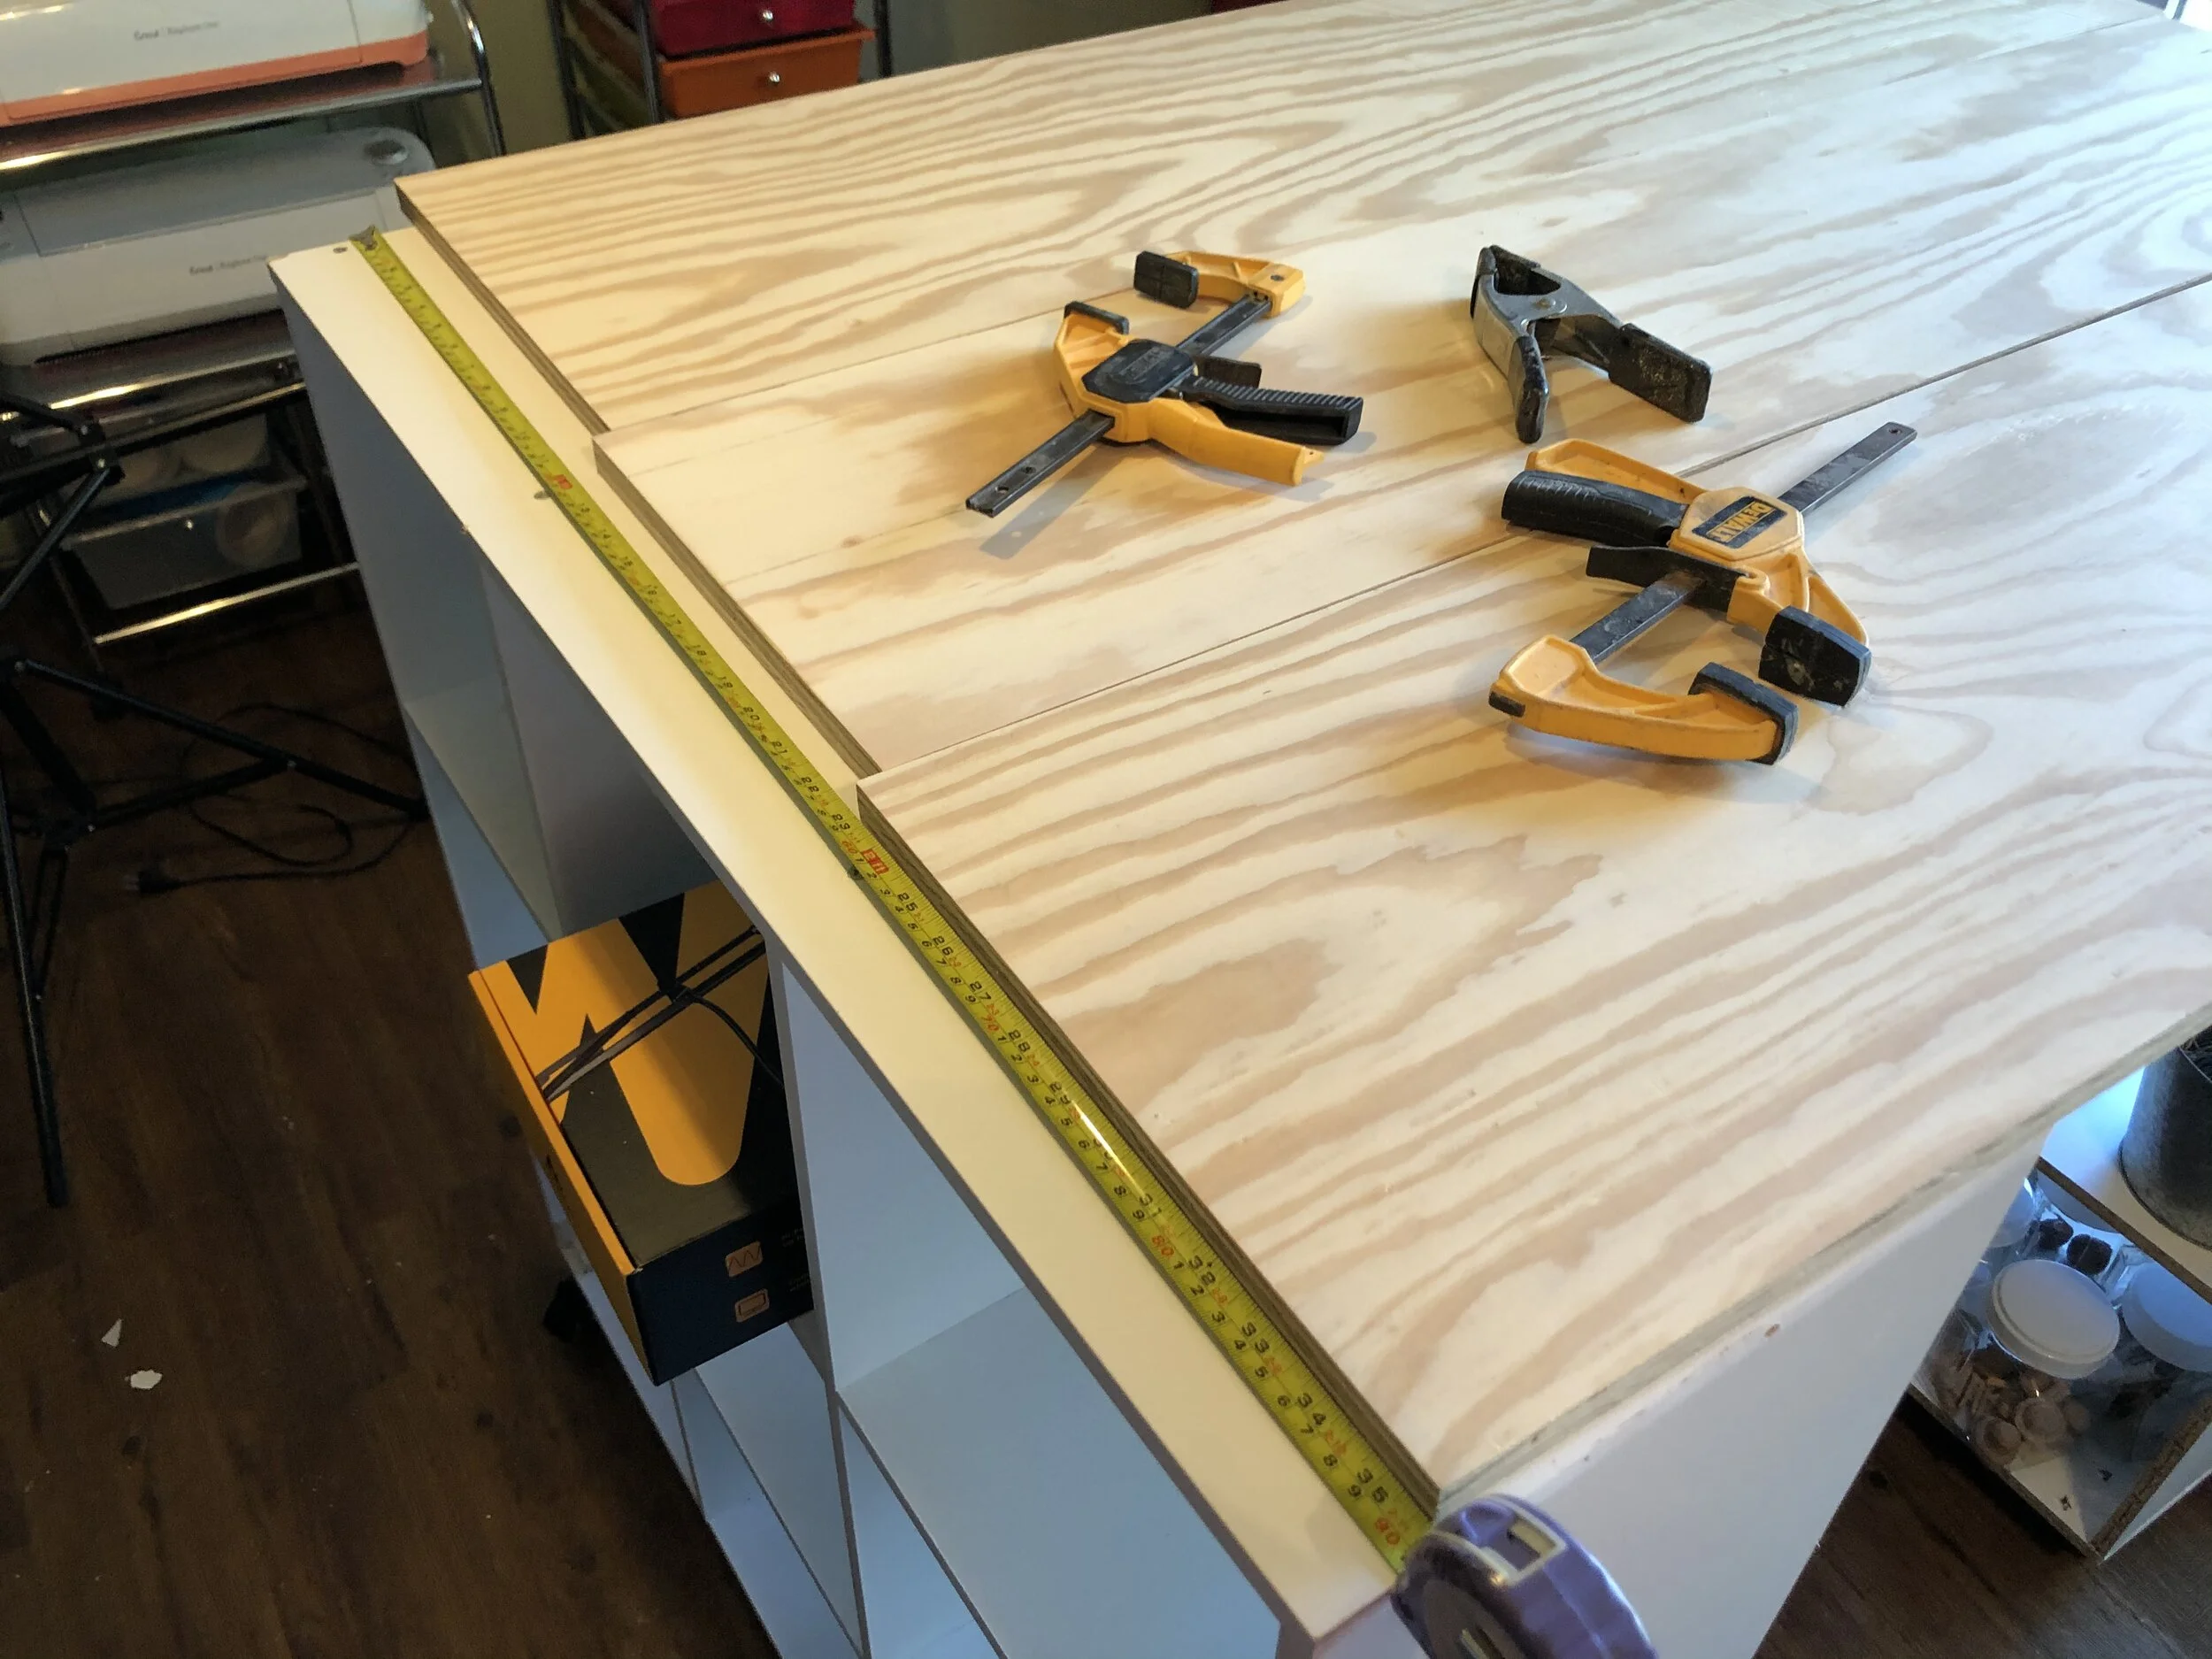
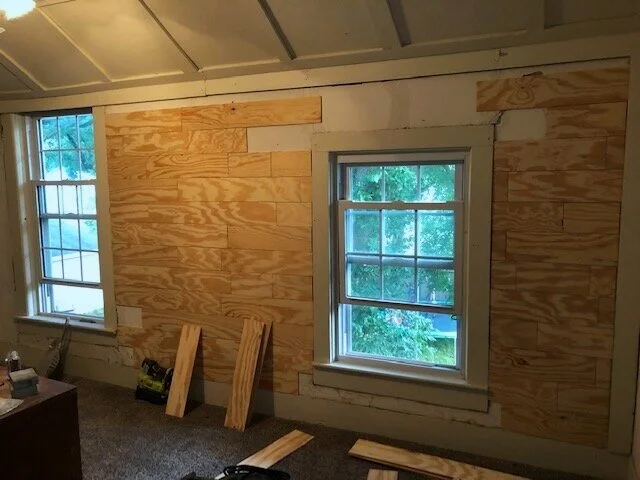
I had some faux planks already cut to the width I wanted. They were leftover from this budget friendly bedroom faux plank wall DIY that we did.

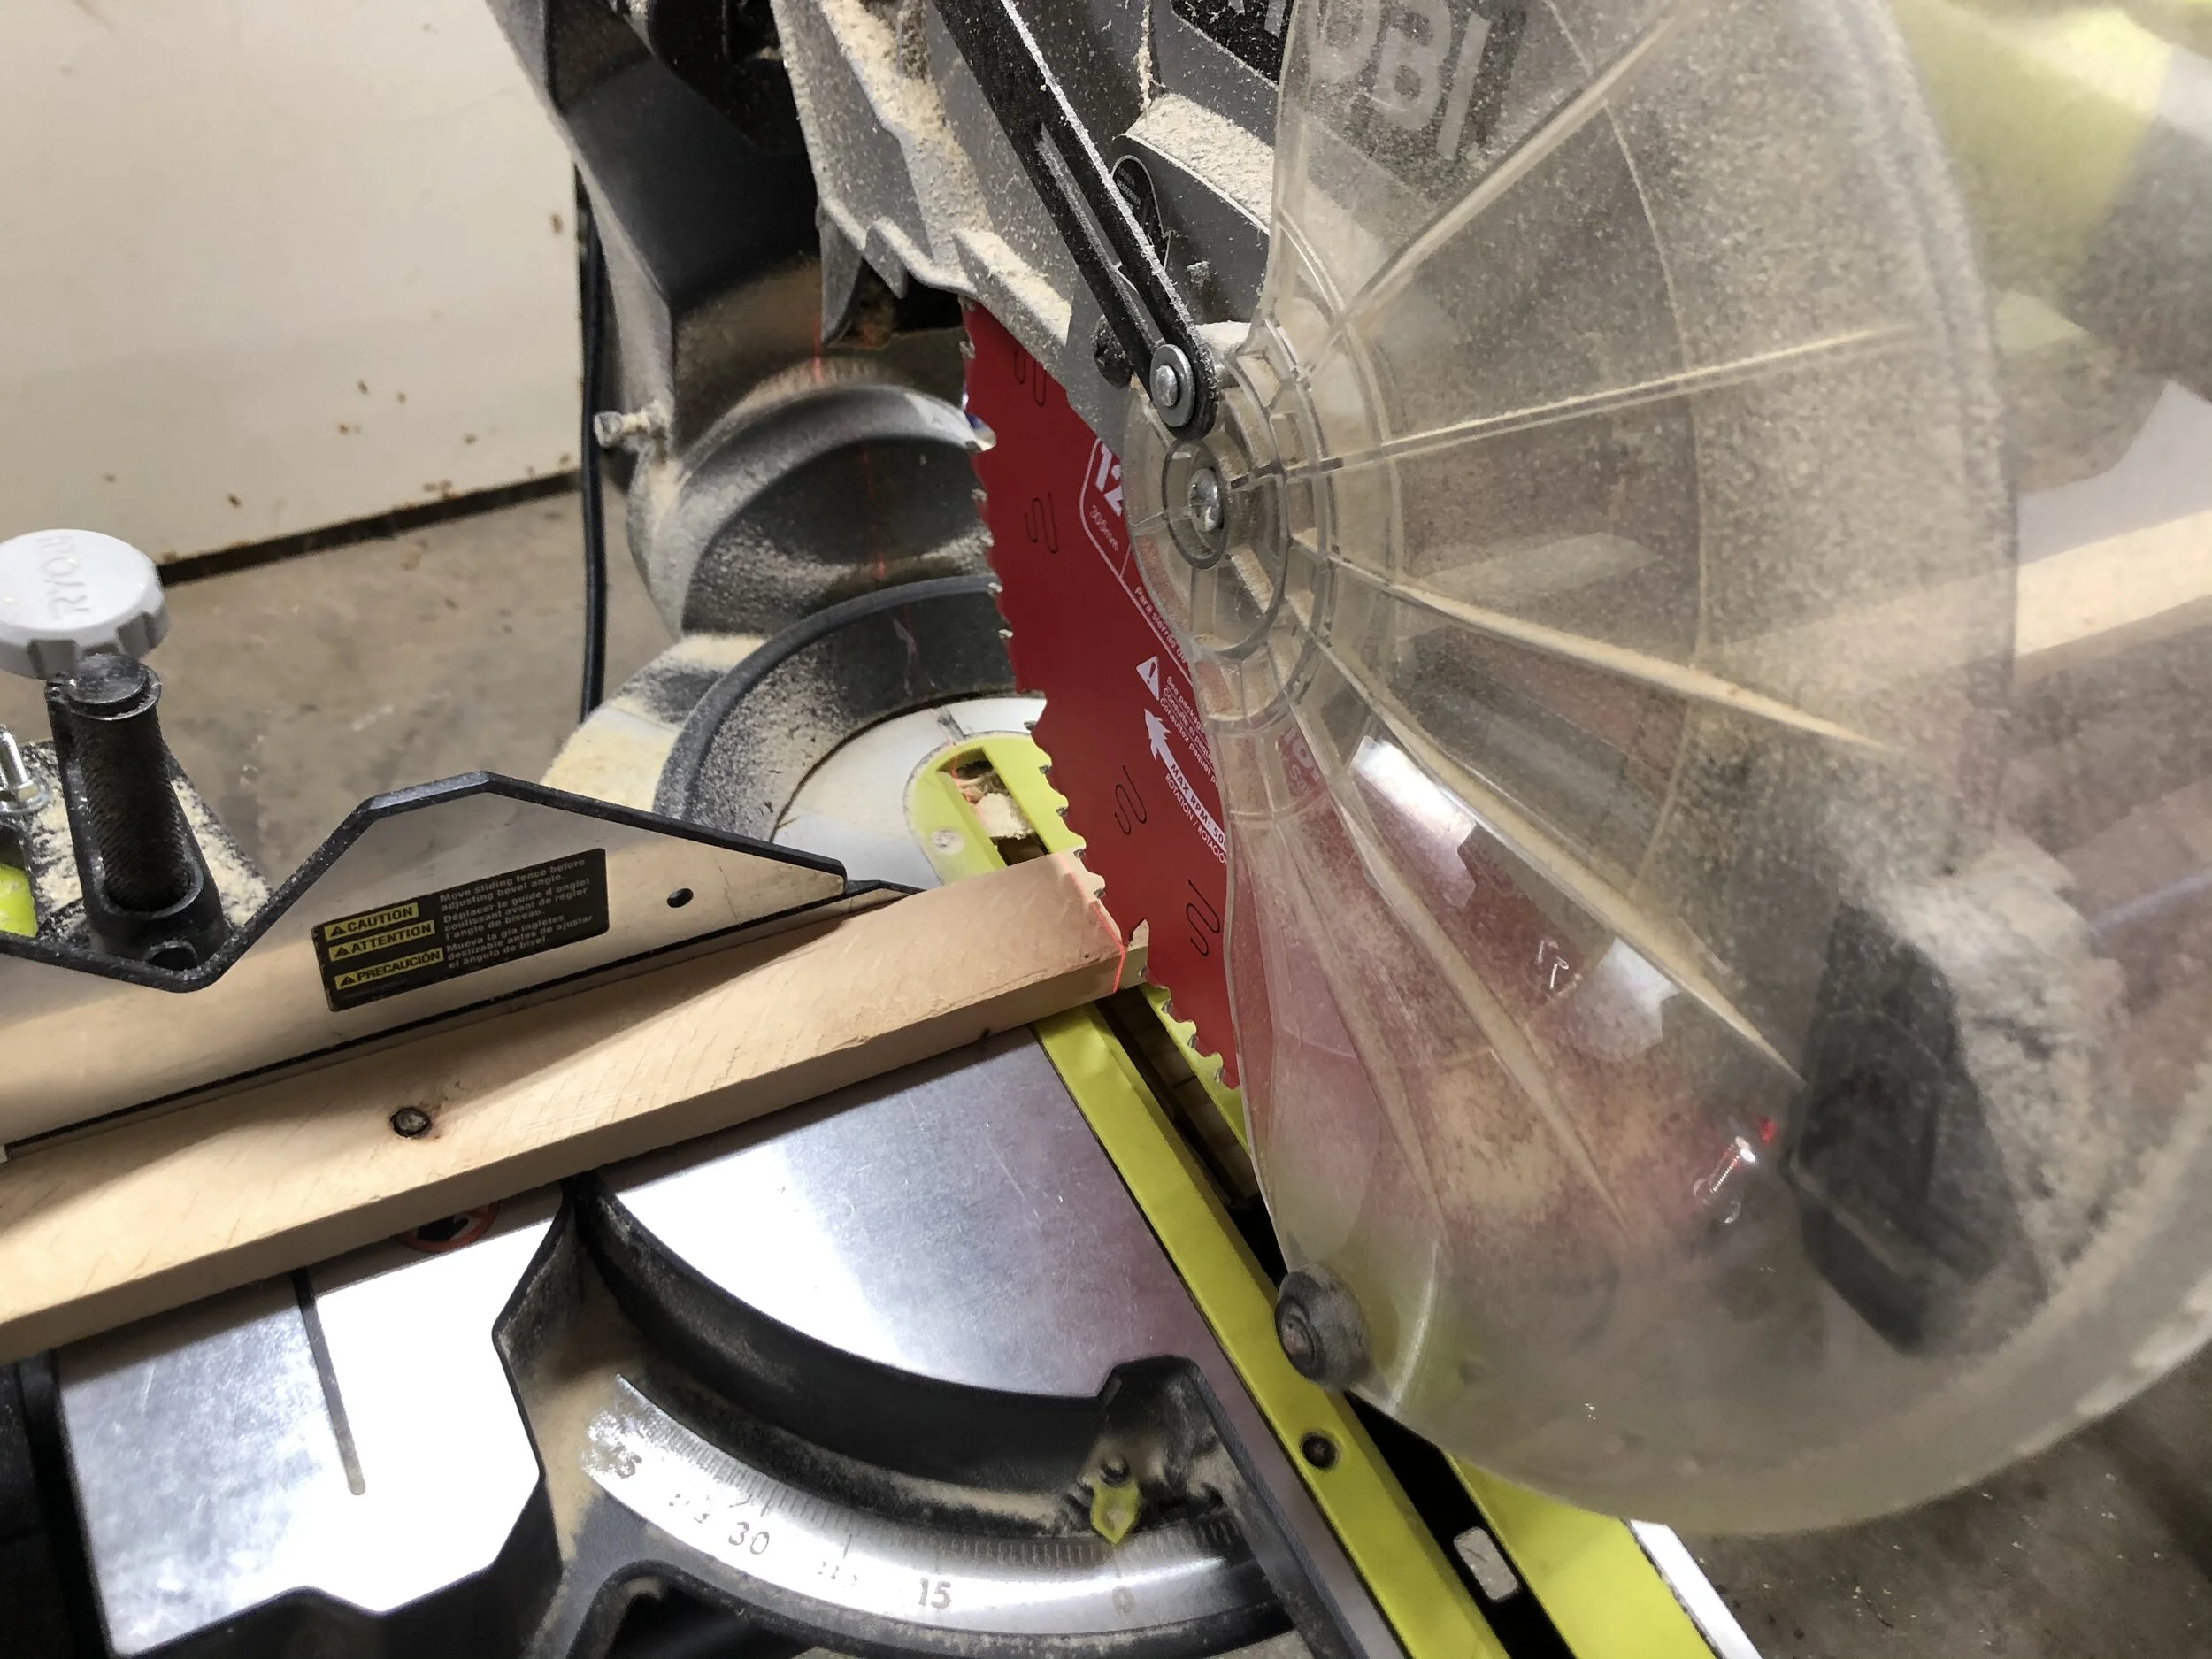
My planks were precut to 5” wide. Then I used my miter saw to cut them to approx 20” strips.

DIY interchangeable seasonal sign. How to make a blank sign to change out throughout the year. DIY holiday seasonal sign

I wanted my sign to be fairly large because I was propping it up on a buffet in my dining room (btw I need to take some paint to it because I’m not loving the outdated brown). I have old house with pretty high ceilings so I also needed the sign to be tall enough to fill the blank space on the wall.

I ended up using 5 planks to make my sign. They aren’t perfectly even on the sides and I’m totally ok with that since I’m not a perfectionist by any stretch of the imagination.

blank sign6.DIY interchangeable seasonal sign. How to make a blank sign to change out throughout the year. DIY holiday seasonal sign

After I got my faux strips cut the length I wanted I gave them a quick sanding with my orbit sander and 120 grit sandpaper. This was just to knock down any little splinters and make the sign somewhat smooth.

DIY interchangeable seasonal sign. How to make a blank sign to change out throughout the year. DIY holiday seasonal sign

I laid them out on my table and placed the sides I liked the best faced down.

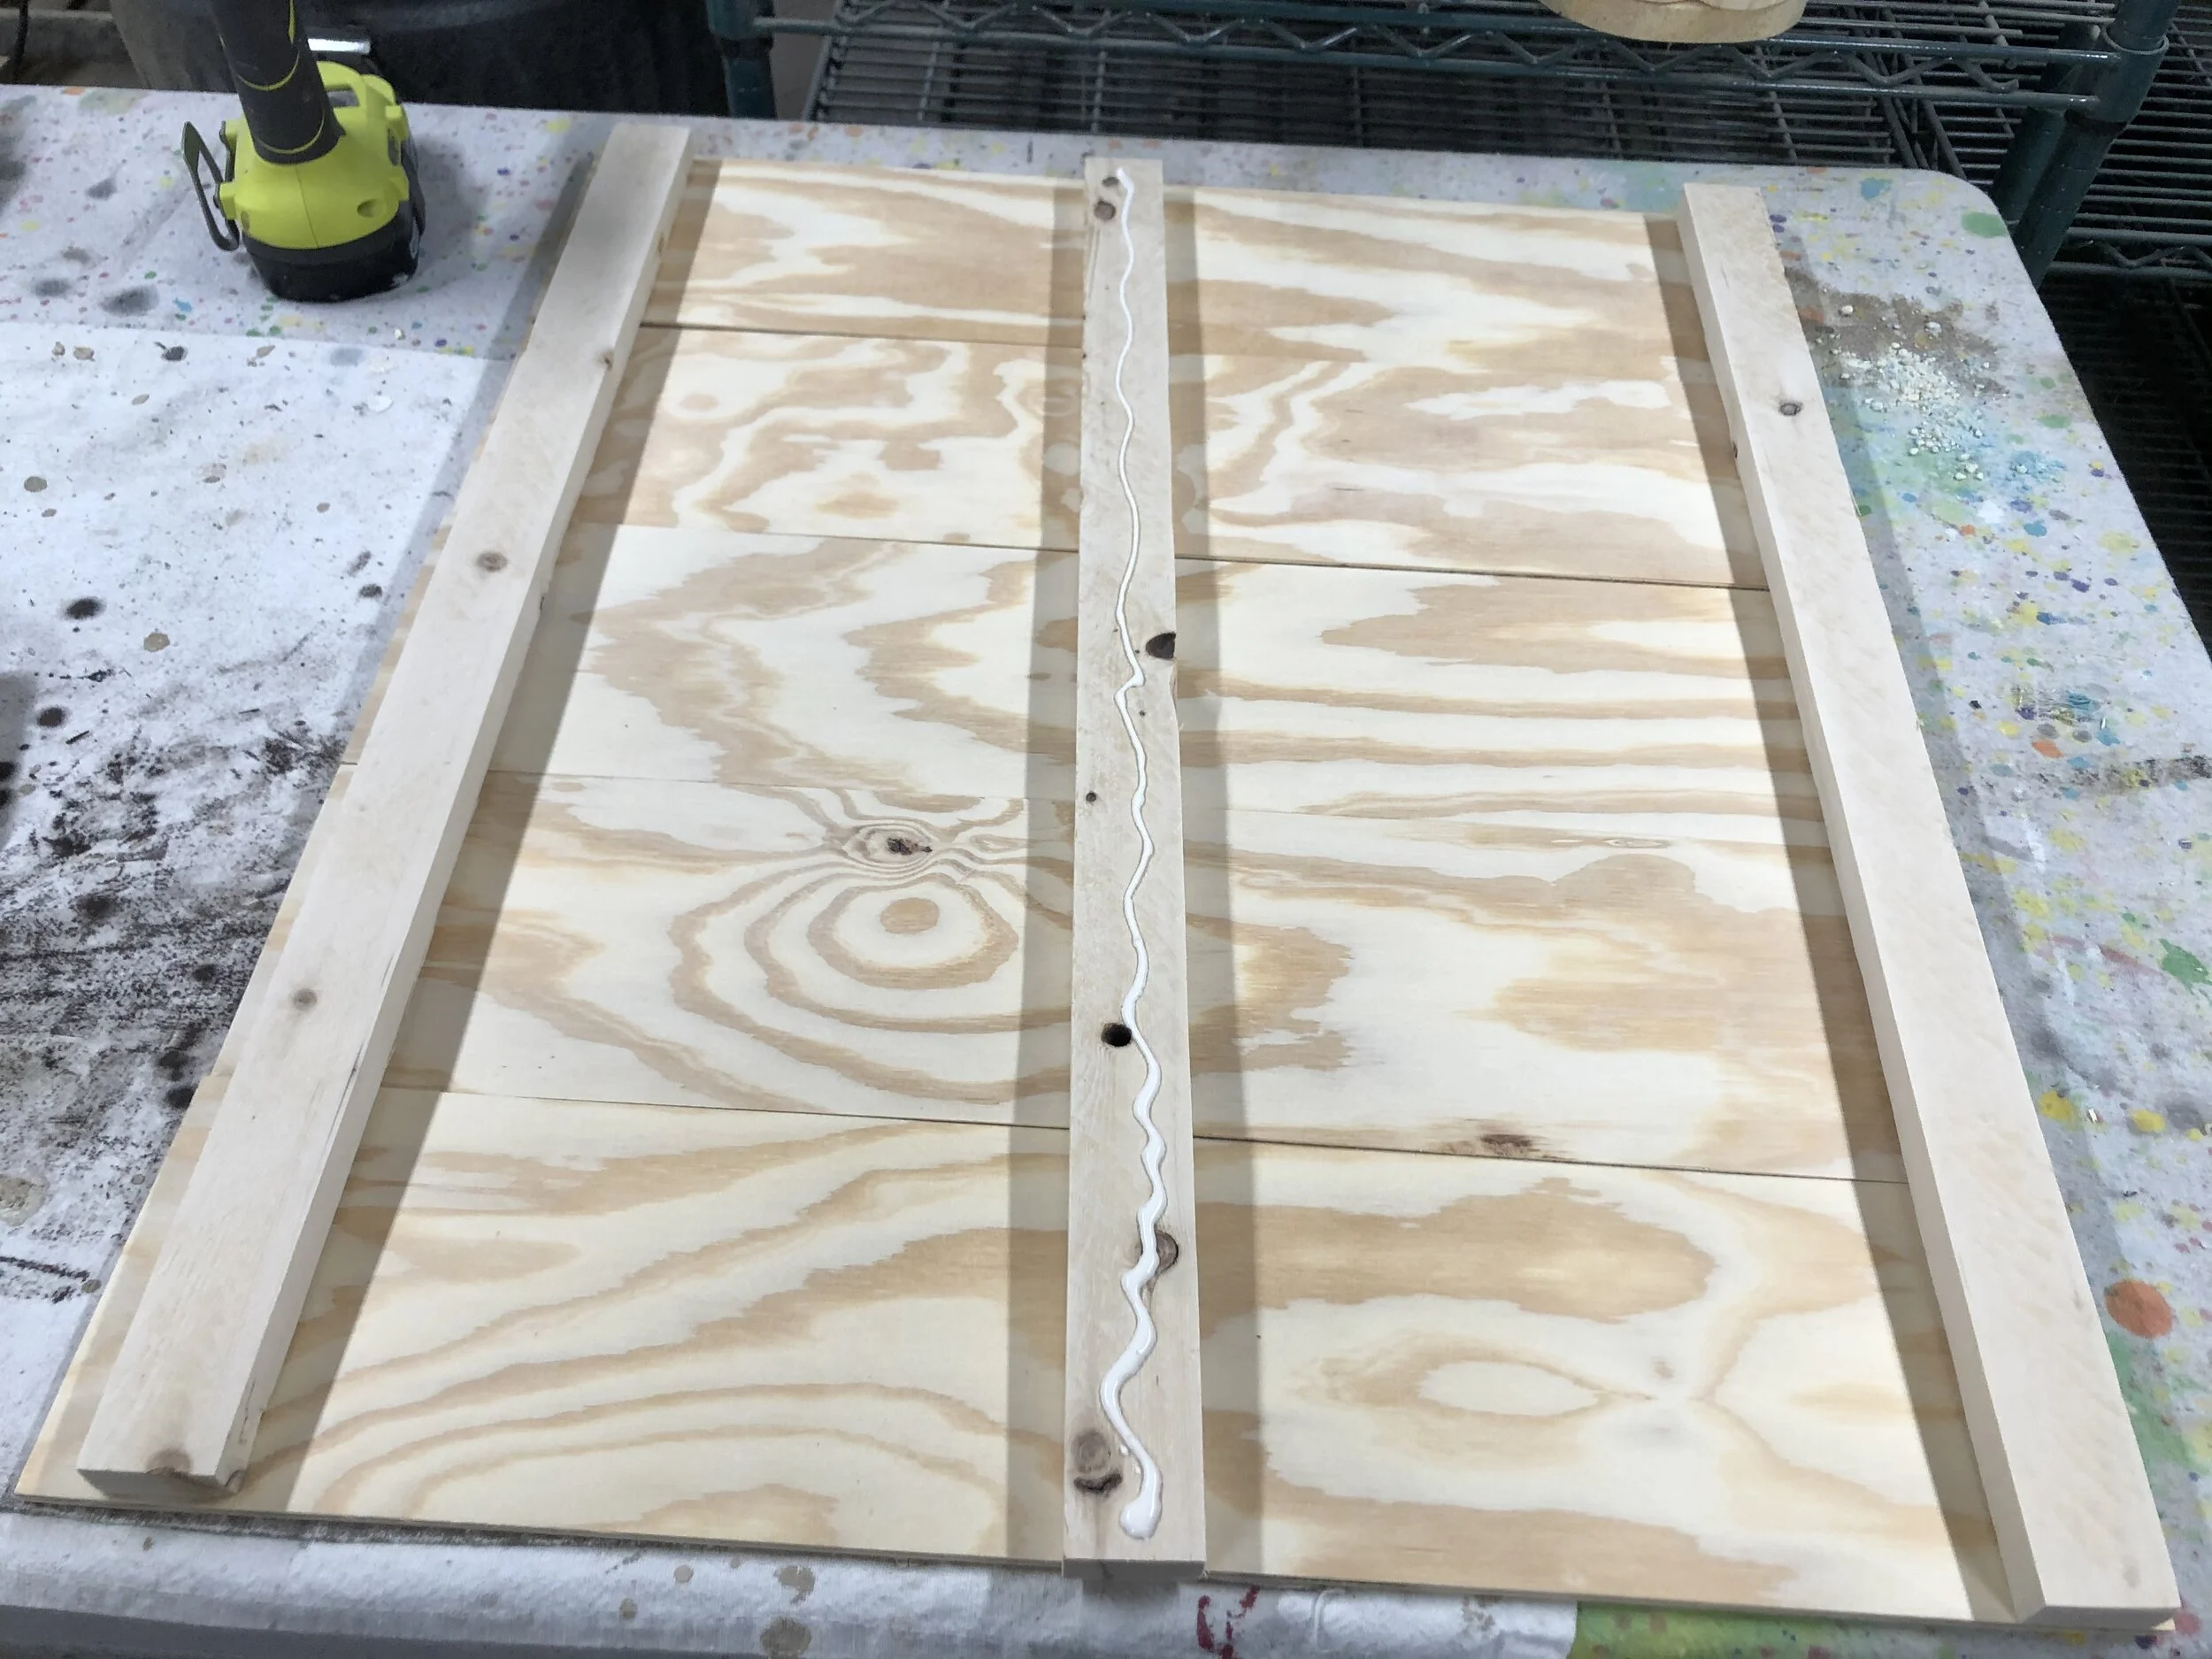
Then I took my 1x2 pieces, I cut three of these, and used them for the backing. My planks went horizontally so my brace pieces, the 1x2’s were made to go vertically (the height of the sign).

DIY interchangeable seasonal sign. How to make a blank sign to change out throughout the year. DIY holiday seasonal sign

I placed one in the middle and one on each side.

DIY interchangeable seasonal sign. How to make a blank sign to change out throughout the year. DIY holiday seasonal sign

I used wood glue to attach them to the back and my Ryobi brad nailer to really attach them so they wouldn’t be going anywhere.

DIY interchangeable seasonal sign. How to make a blank sign to change out throughout the year. DIY holiday seasonal sign

I’m going to be totally transparent here…my first plan was to use a white wash stain. I’d never used it before and had this beautiful picture in my head of how it would turn out. Yeah, I don’t think plywood was my best choice for this stain. It just left it kinda blah looking so I wiped it all off.

DIY interchangeable seasonal sign. How to make a blank sign to change out throughout the year. DIY holiday seasonal sign

Paint to the rescue! I took some leftover wall paint, that I’ve been using for everything including this framed Halloween porch signbtw there’s a free SVG for that sign … , and painted a couple of coats on the plank sign. Painting it worked MUCH better!

DIY interchangeable seasonal sign. How to make a blank sign to change out throughout the year. DIY holiday seasonal sign

That’s it. I didn’t do anything else to it. I’m so glad I used plywood planks for this project. A regular pallet pine sign like this one, would have been far too heavy to prop up. I’m a momma of 4, enough said lol!

I was so excited to decorate it for my first holiday in my new home!

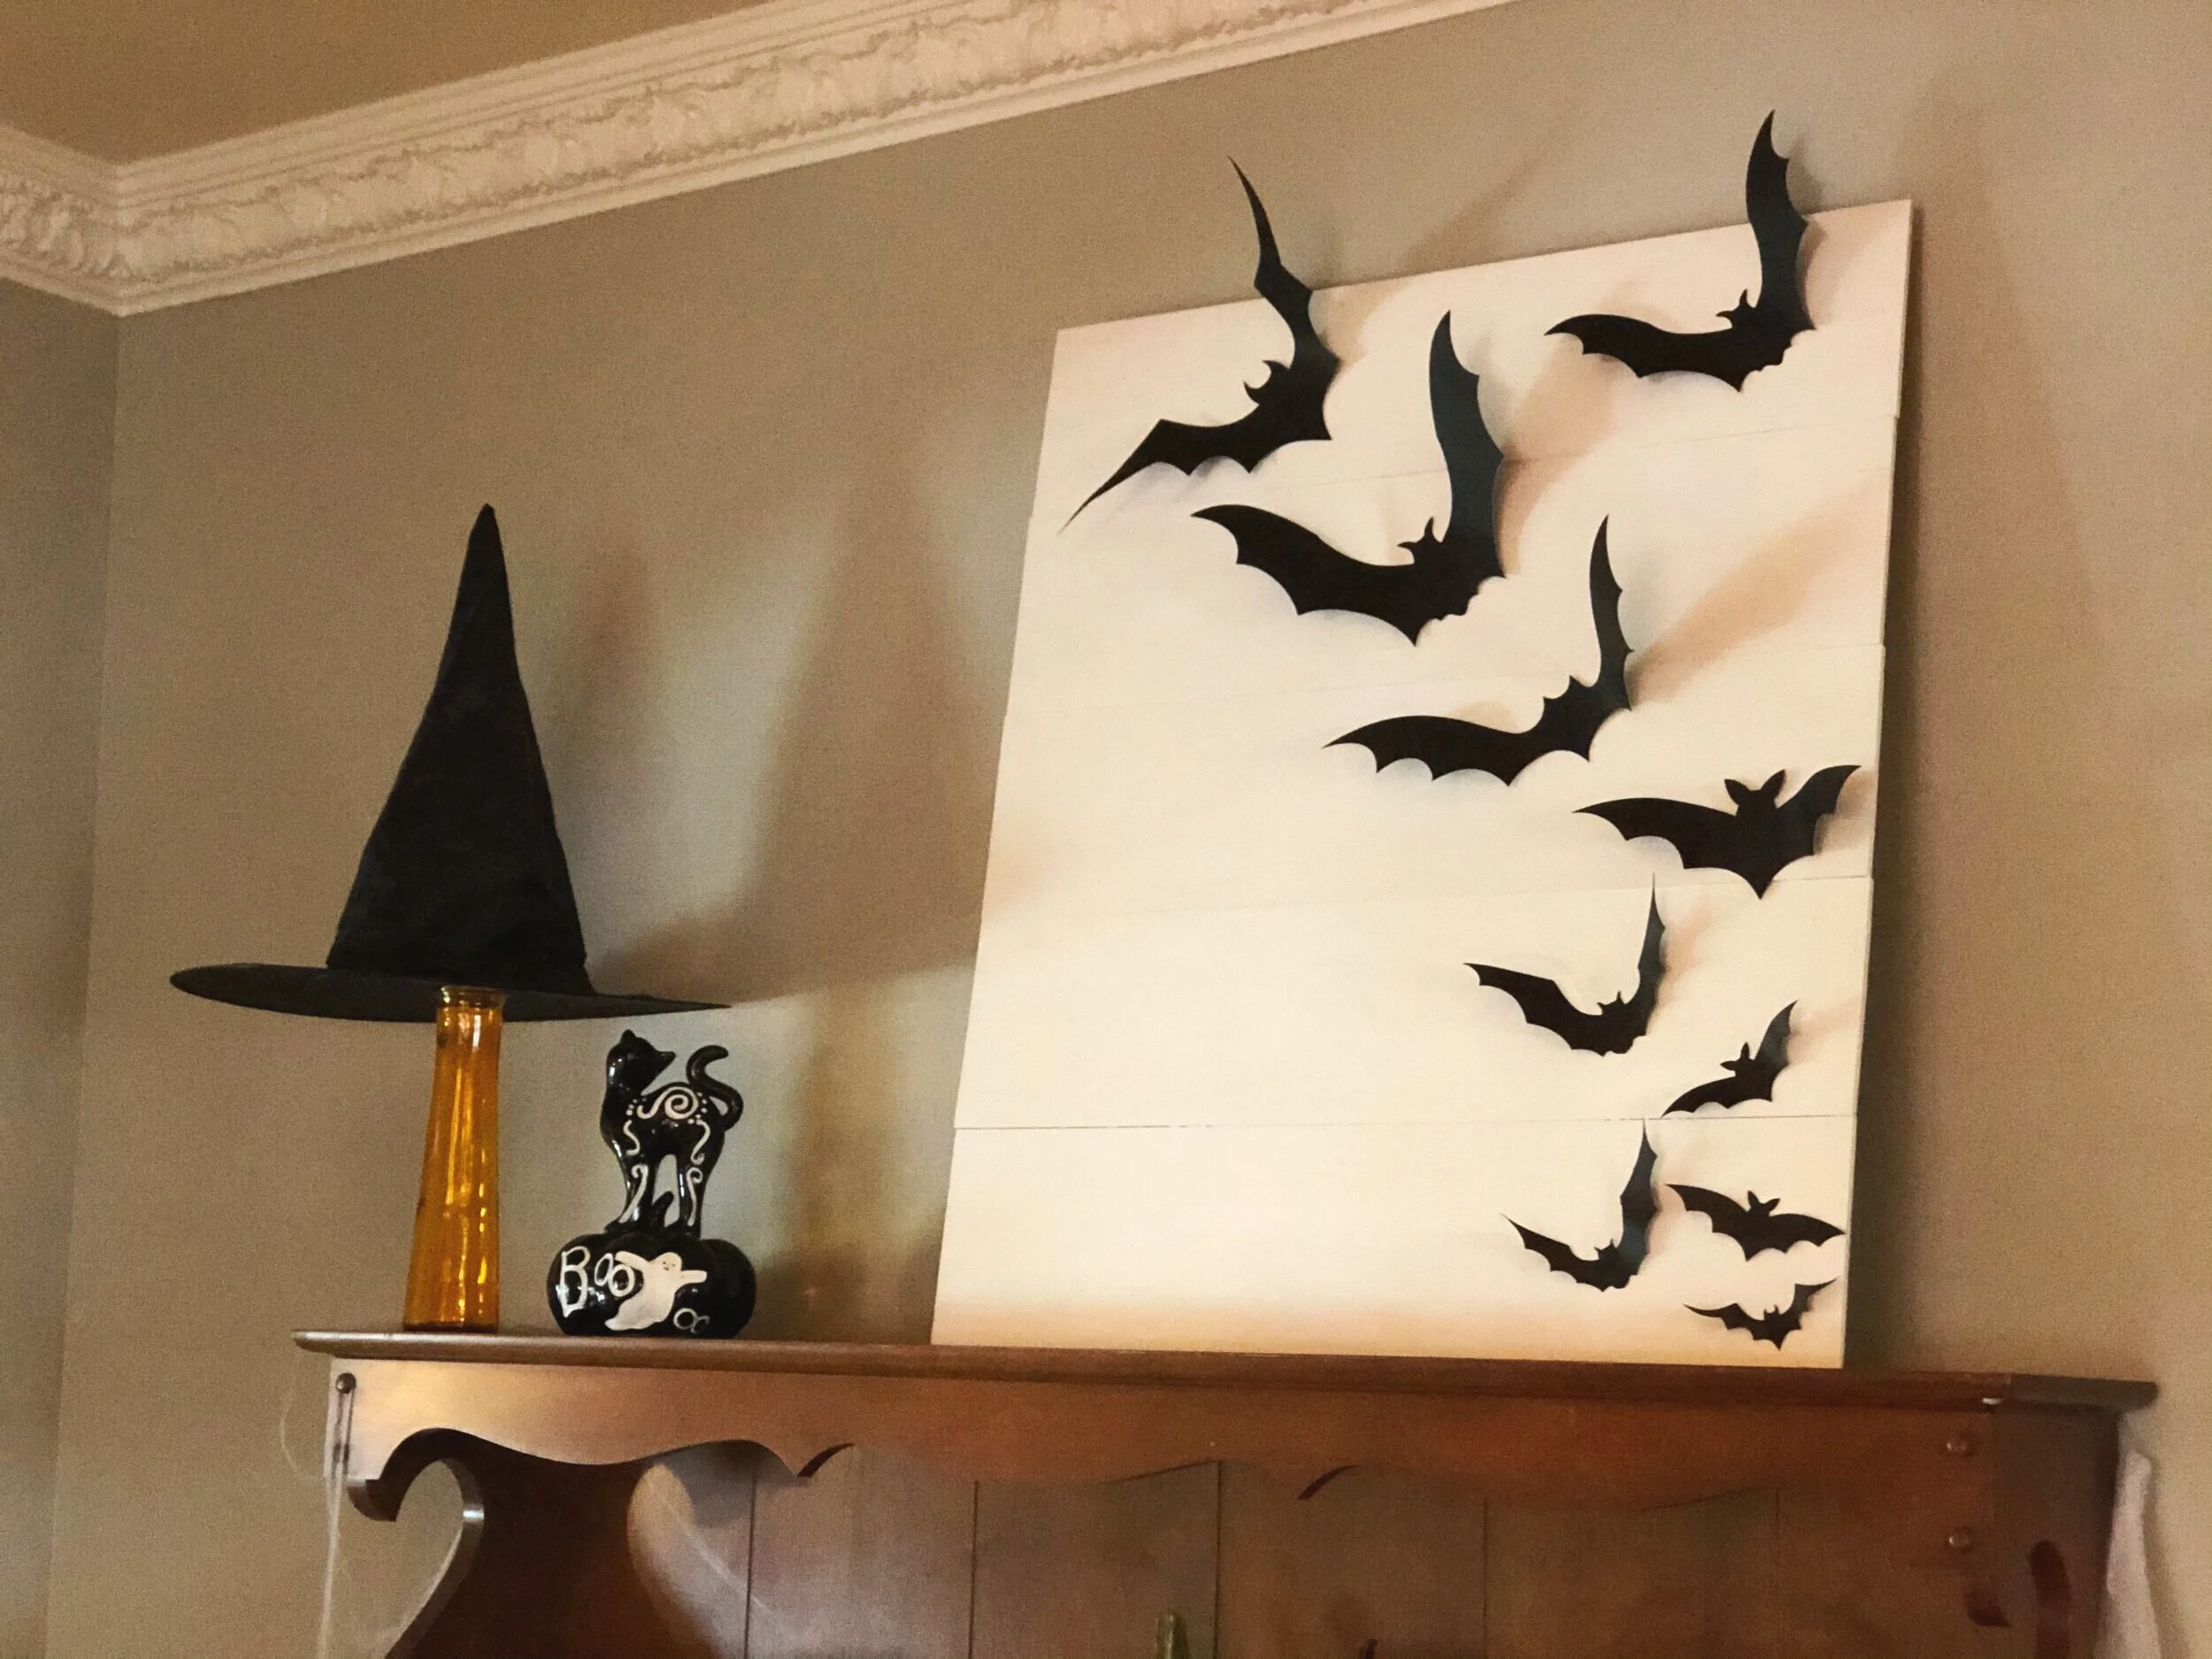
Check out the flying bats post I made for this blank wood sign.

Check out more DIY power tool projects

Flying bat sign, easy DIY sign for Halloween

DIY flying bat sign using your Cricut cutting machine. How to make cardstock flying bats for Halloween. Easy and simple rustic Halloween Decor for your farmhouse style

DIY - Super simple Halloween sign

This year I decorated for Halloween instead of my typical fall only décor. My girls are loving it! One piece they have especially loved, and I must say I do too, is my flying bat sign I made. It was so crazy simple to make too!

The best part of this wooden Halloween sign is that once Halloween is over I can simply take the bats off and replace them with something else.

If you love this DIY be sure to check out this framed Halloween sign I made for my front porch…p.s. it has a FREE SVG to use ;)!

Affiliate Disclosure. Some of the links on this website are affiliate links, which means that I may earn a small commission if you click on the link or make a purchase using the link. If you make a purchase you will not be charged anything additional.

The Best Machine for DIY Projects

MAKE YOUR OWN FLYING BAT SIGN

Here’s what you’ll need

If you’re new to the Cricut crafting world be sure to check out my post on 10 must have supplies and accessories when starting out using a Cricut cutting machine.

1. CUT OUT CARDSTOCK BATS

I used my older model Cricut Explore to cut out my cardstock bats. If you have Cricut Access you can use the Cricut image, click here for the link.

DIY flying bat sign using your Cricut cutting machine. How to make cardstock flying bats for Halloween. Easy and simple rustic Halloween Decor for your farmhouse style

2. REMOVE THE BAT CUT OUTS FROM YOUR GREEN CUTTING MAT

It’s easier to flip the cardstock facedown on your table then slowly roll the mat away from the material you’ve just cut.

DIY flying bat sign using your Cricut cutting machine. How to make cardstock flying bats for Halloween. Easy and simple rustic Halloween Decor for your farmhouse style

3. ARRANGE THE BATS

Before you put tape on the back of them decide where you want them to go. This took me entirely too long lol!

DIY flying bat sign using your Cricut cutting machine. How to make cardstock flying bats for Halloween. Easy and simple rustic Halloween Decor for your farmhouse style

4. MAKE THE BATS FLY

Give the bats some movement by gently curving their wings upward. I used a pencil to curl the wings up so they didn’t have creases.

DIY flying bat sign using your Cricut cutting machine. How to make cardstock flying bats for Halloween. Easy and simple rustic Halloween Decor for your farmhouse style

5. TAPE THE BATS DOWN

I used double sided tape to temporarily tape them to my wooden pallet style sign.

DIY flying bat sign using your Cricut cutting machine. How to make cardstock flying bats for Halloween. Easy and simple rustic Halloween Decor for your farmhouse style

This is seriously my favorite piece in the house for Halloween! It’s crazy simple but it gives the spooky décor a little something extra ya know?! I love it!

DIY flying bat sign using your Cricut cutting machine. How to make cardstock flying bats for Halloween. Easy and simple rustic Halloween Decor for your farmhouse style

I hope you loved this simple decoration to add to your own home for the Halloween season. Let me know if you have any questions in the comments below.

Happy Crafting!

Check out more of my Halloween & fall craft tutorials

Decorating your porch for FALL on a BUDGET

How to decorate your porch for fall on a budget. Your don't have to spend an arm and a leg to decorate for the seasons. See how this mom spent less than $20 to decorate her porch for fall.

I’ve never been one to spend a lot of money on decorations. And this year is even more a reason to keep the fall decorations budget to a minimum. My husband and I are on track to be totally debt free by the end of 2019! This is something we’ve been working on for awhile {with a few setbacks though} and we are seeing the light at the end of the tunnel! So this year for the fall decorating budget we put aside $20…yes TWENTY dollars to create a beautiful fall scenery on our uncovered front porch.

And truthfully I wasn’t worried at all because I knew I could make that happen! A few things I knew I wanted were fresh mums and pumpkins. A bale of straw and some dried corn stalks would have been icing on the cake but sadly there was no room to splurge for these…maybe next year.

How to decorate your uncovered front porch on a BUDGET for fall

Decorating your porch for fall on a budget. See  how this mom spent $20 to spruce up her uncorvered front porch to decorate for the fall season. Mums and pumpkins included.

If you’re like me and don’t have a lot of money {or maybe nothing at all} to put toward your fall porch decorations here are some tips to help you to create a beautiful porch on a budget.

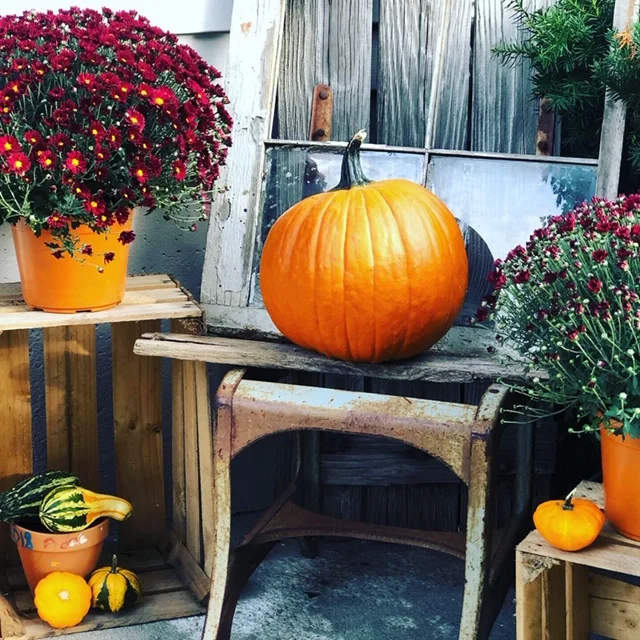
FIRST use what you have. This is a rule I use for decorating year round. If you incorporate things you already have you are literally spending nothing.

SECOND this one is a favorite of mine…if you have relatives that are tossing things out ask if you can have them. My father in law had this AMAZING pile of, well junk, on his property and every time we would go over there I would search through his junk pile lol! He gave me full permission to take whatever my little heart wanted and boy did I always find good stuff to take home. My husband didn’t always agree ha! A couple things I picked from his pile that I used in my fall porch décor

  • the rusty old chair

  • old broken window

Both of these things I keep on the porch year round and thank goodness I rescued them because they are absolutely perfect!

THIRD check your Facebook swap n shop pages/groups. People love getting rid of things, even for free. This is so my personality type too! When I’m tired of looking at the clutter I go in full on purge mode lol! Just this last weekend the overwhelm from daughter # 4’s bedroom was really getting to me. So, naturally like a lot of moms do, I took in the roll of trash bags and just started tossing anything and everything that I hadn’t seen her play with since the start of summer. It’s a little embarrassing but I filled 7 kitchen sized trash bags full of gently used toys and some clothes that he had outgrown.

FOURTH shop around for the best prices. Even though supporting small business is always on my mind because I own a small business, I do shop at Walmart. And I don’t feel guilty about it. One day when we are rich we will be able to shop small all day everyday but for now, while raising four daughters, I have to pick and choose when we can afford to support small business.

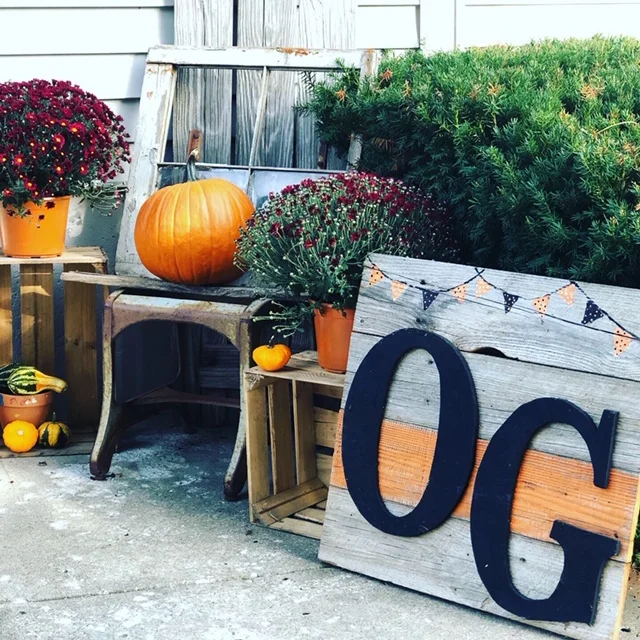
FIFTH make your own décor. If you’re crafty jump on some DIY PINTEREST boards to get some ideas of what to make. I suggest skimming your crafty stash to see what you have too. The OG barn wood looking sign is one I made, DIY PALLET SIGN for our front porch for fall. It’s actually a school spirit sign. We live in a pretty small town and school spirit is alive and well here. Since our school colors are orange and black I try to incorporate school spirit into our décor. It makes it a little more fun for our girls too because we are visually saying ‘go school’ and I know that’s encouraging for them. Just be sure whatever pieces you put out there that they are protected from the elements if needed. To make this sign I just used leftover pieces from other projects, check out these SCRAP WOOD PUMPKINS

Now that you have some tips on how to make the most of your budget here’s how I spent my $20 for my DIY fall porch decorating

  • $3.98 large pumpkin at Walmart

  • $2.98 bag of mini gourds

  • $4.84 mum x2

  • 3.96 orange spray paint, I only used 1/3 of it

Technically I went over the $20 by .60 BUT I do have 2/3 of a can of spray paint left over for another project, so in my mind I only spent 1/3 of the price for this project lol!!

I really wanted fresh mums but I couldn’t afford the GORGEOUS ones from the local farms. Just one mum would have taken up my entire budget. I opted for the cheapest large mums I could find at Walmart but they had UGLY bases. The green/brown color that just screams cheap flowers. I loved the more decorative bases but those too were not in the budget. Instead I grabbed a can of spray paint, and not the $1 can because I knew the coverage on that would be awful, and sprayed the bases orange in matte finish. This was the PERFECT solution!

See my video below on how to easily spray paint your ugly fall flower bases.

I’d love to hear how you are planning to decorate your front porch for fall. Leave a comment below ;)!

DIY CRAFT KIT how to paint your free standing BOO wood cutouts

how to paint your diy craft kit, BOO wood letters. DIY craft kits for adults. Halloween wood letter cutouts diy projects

How to paint your DIY CRAFT KIT, BOO WOOD CUTOUTS

I just love these little wood cutouts. They are so adorable and tie in perfectly with our simple Halloween décor. I primarily decorate for fall but I do like to add touches of Halloween to our decorations because I have little kiddos and they LOVE the Halloween stuff far more than the traditional fall décor. So we compromise and get the best of both worlds.

Affiliate Disclosure. Some of the links on this website are affiliate links, which means that I may earn a small commission if you click on the link or make a purchase using the link. If you make a purchase you will not be charged anything additional.

If you love this DIY CRAFT KIT check out another popular fall craft kit, DIY FREE STANDING PUMPKINS

Don’t feel like reading the tutorial? No worries I have a short video tutorial on my YouTube channel. Scroll to the bottom to catch it or click here to view the HOW TO PAINT YOUR CRAFT KIT, DIY BOO WOOD CUTOUTS

If you need a CRAFT KIT you can order yours here —-> DIY CRAFT KIT BOO WOOD CUTOUTS FOR HALLOWEEN

If you want to make yours from scratch check out this post on how to make your own BOO WOOD CUTOUTS using a Cricut cutting machine and a Ryobi scroll saw. I show you exactly how I make my BOO cutout sets and if you have the tools you can make your own too! There’s even a video tutorial at the end ;)!

How to paint your BOO wood cutouts

If you didn’t but the DIY CRAFT KIT here’s what you’ll need


Real quick…if you have ever wanted to learn how to paint wood signs, the way the PROs do, you don’t want to miss my complete guide to sign painting. It is a whole course that you complete on your time. I am teaching you EVERYTHING I know without you having to go through the headache and expense of trial and error. If you’ve struggled with paint bleed, designs not lining up, paint peel up, sticky residue left behind you are in for a treat! Click on the image below or go here for more info.


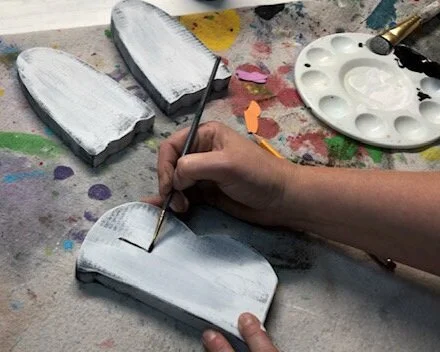
First you want to decide if you want to paint white or black letters. Heck, you could even mix it up and do both! I chose to do white ghosts but I wanted black distressing on my cutouts. There are lots of different ways to achieve this look but my favorite is to paint the distressing color first then paint my project whatever color I want it to actually be.

So on these BOO cutouts I first painted them with a SUPER thin layer of black paint {remember this is going to be the underneath/distressed color}.

How to paint your adult DIY CRAFT KIT, BOO wood cutouts for Halloween.

After the underneath color is dry you can paint your wood cutouts the actual color you want them to be.

Some important things to know:

  • use a VERY LIGHT hand when painting the top color. You do not want to press hard as this will put too much paint on your wood cutouts and it is far easier to add more paint than it is to take too much paint off.

  • do NOT get your brush wet. For almost all of my paint projects I always use a DRY brush.

  • use very little paint, dab off excess paint before applying

  • work from the middle out

  • paint lightly around the edges as this is where the “natural” wear would be

  • if you need a little more coverage wait till your paint is dry then add more paint

Paint all sides of each cutout this way.

How to paint your adult DIY CRAFT KIT, BOO wood cutouts for Halloween.

Trace around your cardstock cutouts. You will have a total of 5 - 2 cutouts for the letter B and 3 cutouts for the ghosts {you will reuse the ghost cutouts for both ghosts}. Place them where they need to go on your cutouts then trace around them with a pencil. This does not have to be perfect ;)!

How to paint your adult DIY CRAFT KIT, BOO wood cutouts for Halloween.

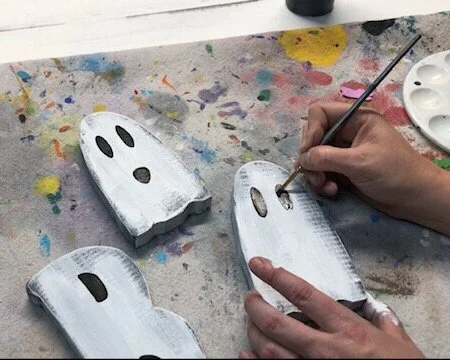
Using a fine paintbrush paint inside the traced lines with the same colored paint you used for your distressing color. I used black for my distressing color so I also used black for areas I traced around.

How to paint your adult DIY CRAFT KIT, BOO wood cutouts for Halloween.

And then you’re done! If you have sandpaper on hand you can lightly give it a little more distressing but that is totally up to you.

Click here to shop even more DIY CRAFT KITS

Check out the full video tutorial

If you have any questions about your DIY CRAFT KIT please leave a comment below or feel free to send me a message. If you purchased through my Etsy shop please message via their platform to stay in compliance with Etsy’s policy.

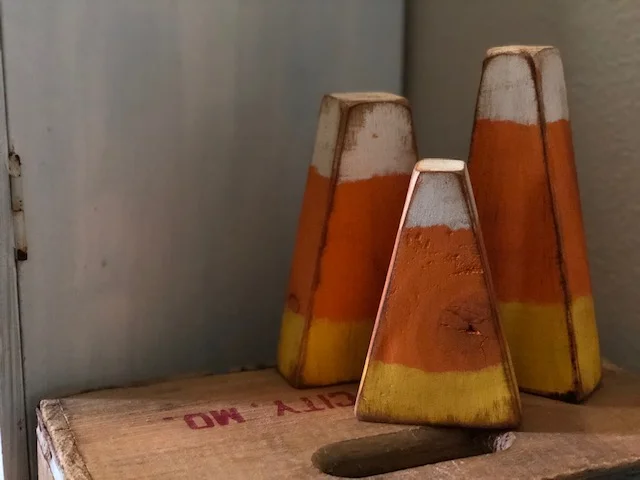
DIY how to make 2x4 wood candy corn

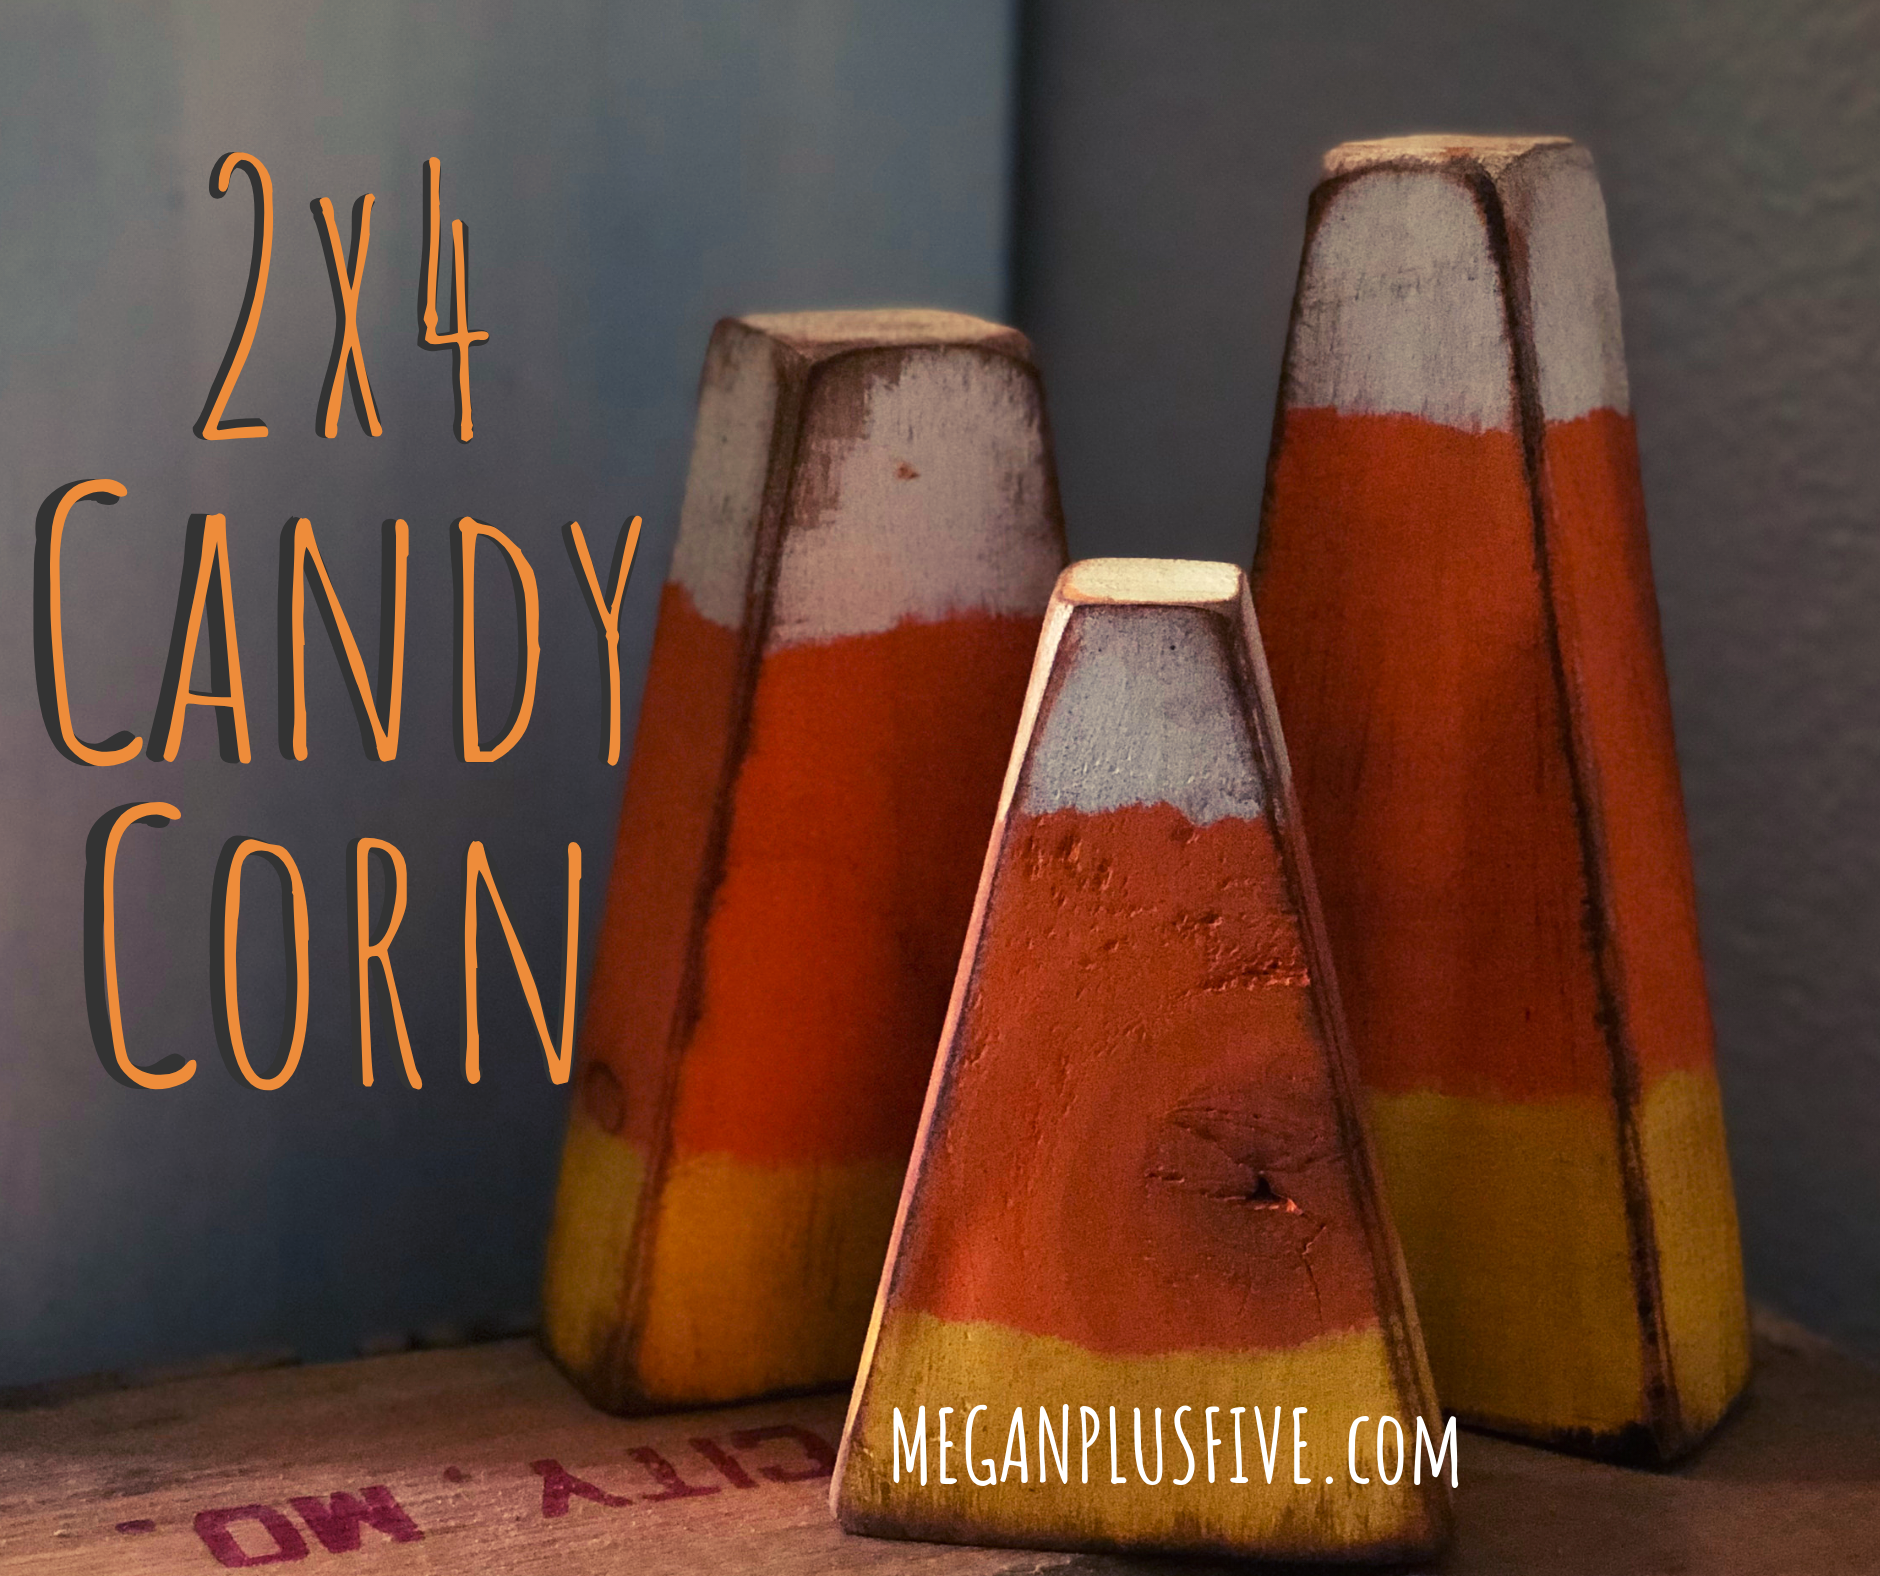
DIY 2x4 candy corn, how to make easy primitive fall decor

DIY EASY 2x4 primitive wood candy corn

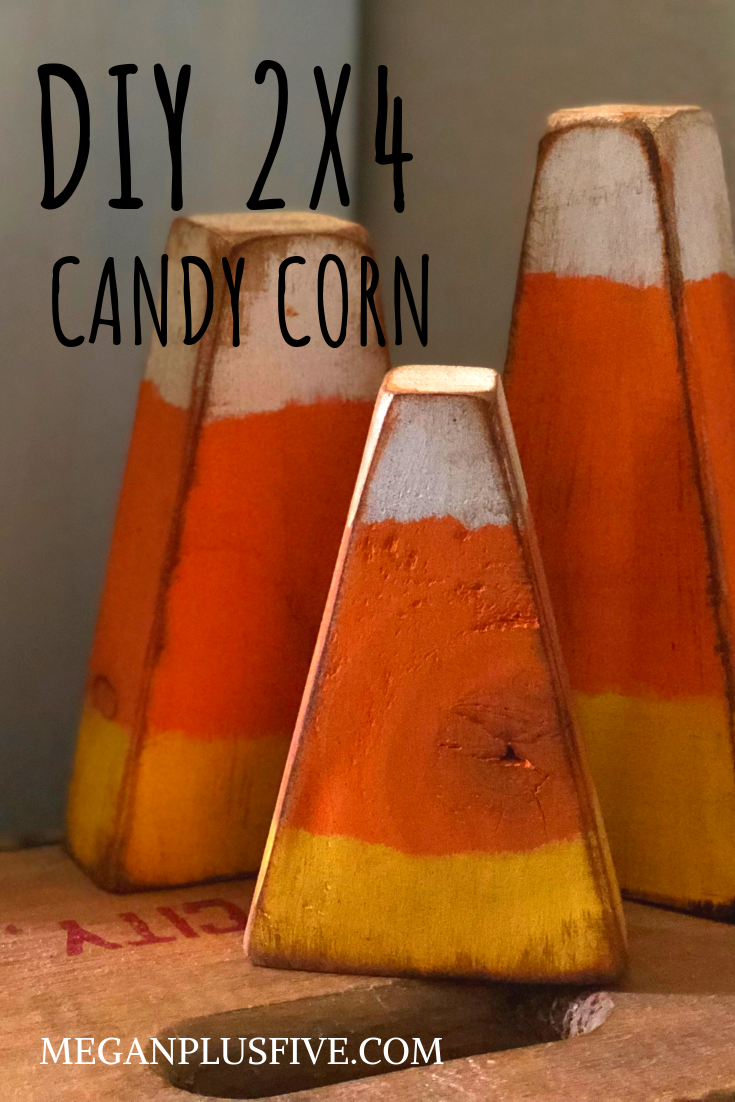
DIY primitive candy corn, aren’t they soooo cute?! The last couple of years have been a little busier than normal at our house and I haven’t been decorating for the holidays like I normally do. So this summer I decided I’m going to make time to get back into the festive decorating. And with that I need to make lots of new pieces to decorate the seasons with. Including these adorable wood candy corn. Check out this fun TRICK OR TREAT shelf sitter set I made a few weeks ago.

I’ve had these on my craft to do list for a looooong time and just hadn’t made time to make myself a set. And now I do! I LOVE them! They turned out even better than I thought they were going to! And I can keep them up for the entire fall season.

DIY easy primitive wood 2x4 candy corn for your fall decorations

How to make your own set of primitive candy corn from a 2x4

And it was super easy to DIY. I was a bit nervous cutting the angles but I think they turned out so great!

If you don’t have the space or tools to DIY this from start to finish you can get one of my easy CANDY CORN CRAFT KIT. Everything you need to make these at home is included in your own candy corn craft kit.

Don’t have all the tools needed to complete this craft? Snag one of my easy DIY craft kit from my Etsy shop. Click CANDY CORN CRAFT KIT to get yours. Want to send it as a gift? During checkout mark that you would like to send it as a gift, leave their address and a sweet note to them and we’ll take care of the rest.

Affiliate Disclosure. Some of the links on this website are affiliate links, which means that I may earn a small commission if you click on the link or make a purchase using the link. If you make a purchase you will not be charged anything additional.

If you want to make them from scratch here’s what you’ll need

First cut your pieces into 4”, 5.5”, & 7” lengths. The angles I cut: 4”= 15°, 5.5”= 10°, 7”=10°. After you cut them give them a quick sanding. You don’t want to sand them super smooth as this will take away so much of the wood’s natural character. Be sure to wipe away the sawdust with a lint free cloth after you sand your candy corn.

DIY candy corn decorations. How this mom made her own from a scrap 2x4

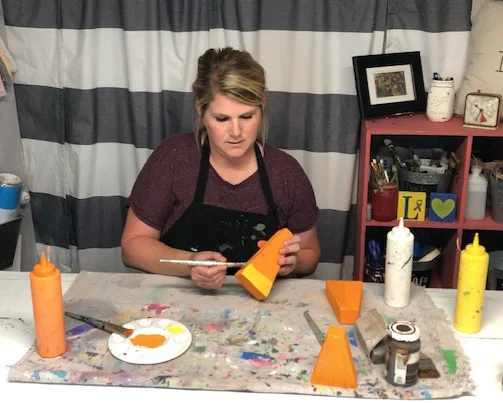
Now paint all three with a thin coat of orange paint.

DIY candy corn decorations. How this mom made her own from a scrap 2x4

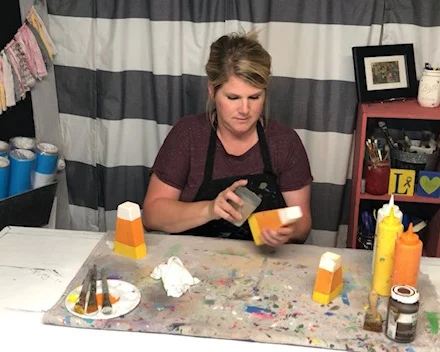
After the orange paint dries paint the bottoms yellow. You will likely need 2 coats for this. Let the first coat dry completely before applying the second coat.

DIY candy corn decorations. How this mom made her own from a scrap 2x4

Now, paint the tops white. Again, you'll need to paint two coats making sure your let the first coat dry completely before applying the second coat of white paint.

DIY candy corn decorations. How this mom made her own from a scrap 2x4

Once all of your candy corn are completely dry you can start distressing them with your 120 grit sand paper. Focus on the edges, corners, and lightly sand the fronts and sides. Then wipe the dust away with your lint free cloth.

DIY candy corn decorations. How this mom made her own from a scrap 2x4

Now you can apply your antiquing wax. A little bit of wax goes a VERY long way. Just like when sanding, you want to focus more on the edges and corners and give a light swipe with your chip brush on the fronts and sides. TIP: if you trim your chip brush down a little you will get a more stiff brush that you can better control your wax with.

DIY candy corn decorations. How this mom made her own from a scrap 2x4

If you don’t like the look of the antiquing wax you can opt for a clear wax. I LOVE antiquing wax and use it on TONS of my projects it highlights so much of the wood’s character. You can see the difference it makes. Check out my DIY American Flag tutorial where I use this same dark wax.

DIY candy corn decorations. How this mom made her own from a scrap 2x4

Now you’re ready to display them! I am soooo happy with the way these little 2x4 candy corns turned out {I think that’s the plural from lol}! I have a few more DIY fall projects yet to tackle before the season arrives so be sure to check back for more tutorials to make your own decorations for the upcoming season.

DIY candy corn decorations. How this mom made her own from a scrap 2x4

Catch the video tutorial below. If you LOVE it I would very much love if you would subscribe to my YouTube channel where I share all of my crafty video tutorials.


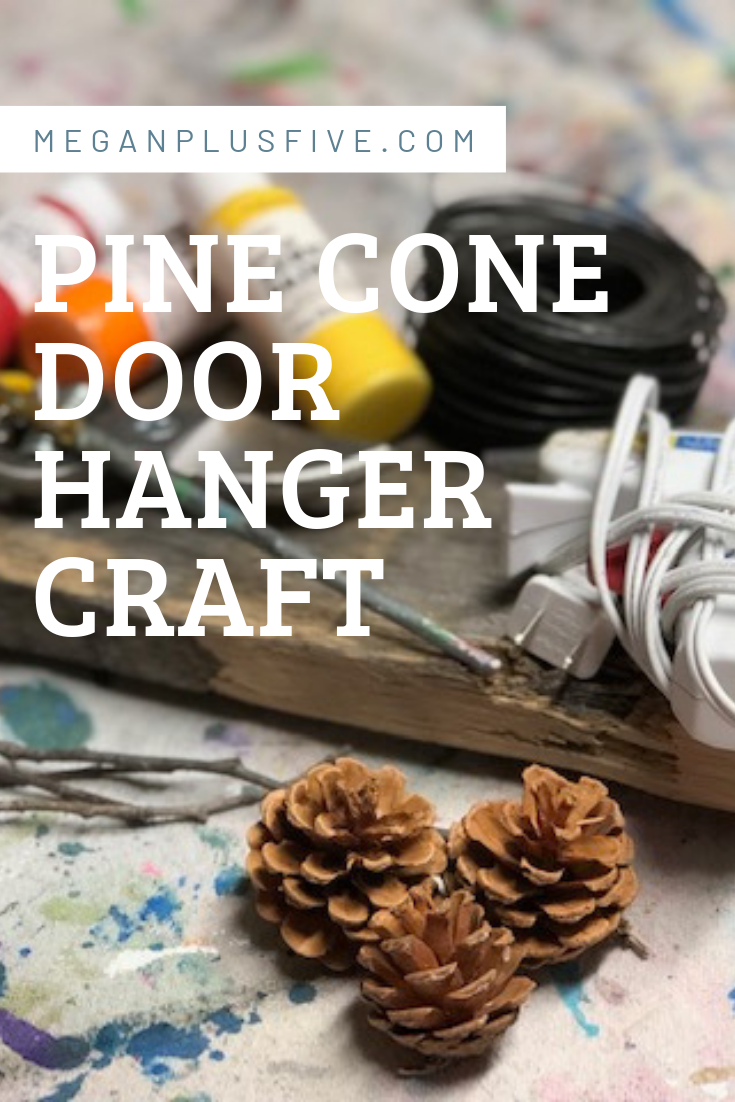
Easy pine cone door hanger DIY

PINE CONE DOOR HANGER CRAFT

How to make an easy pine cone door hanger

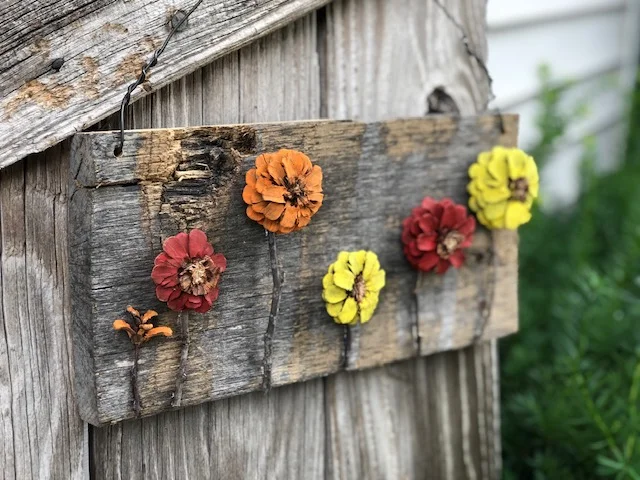
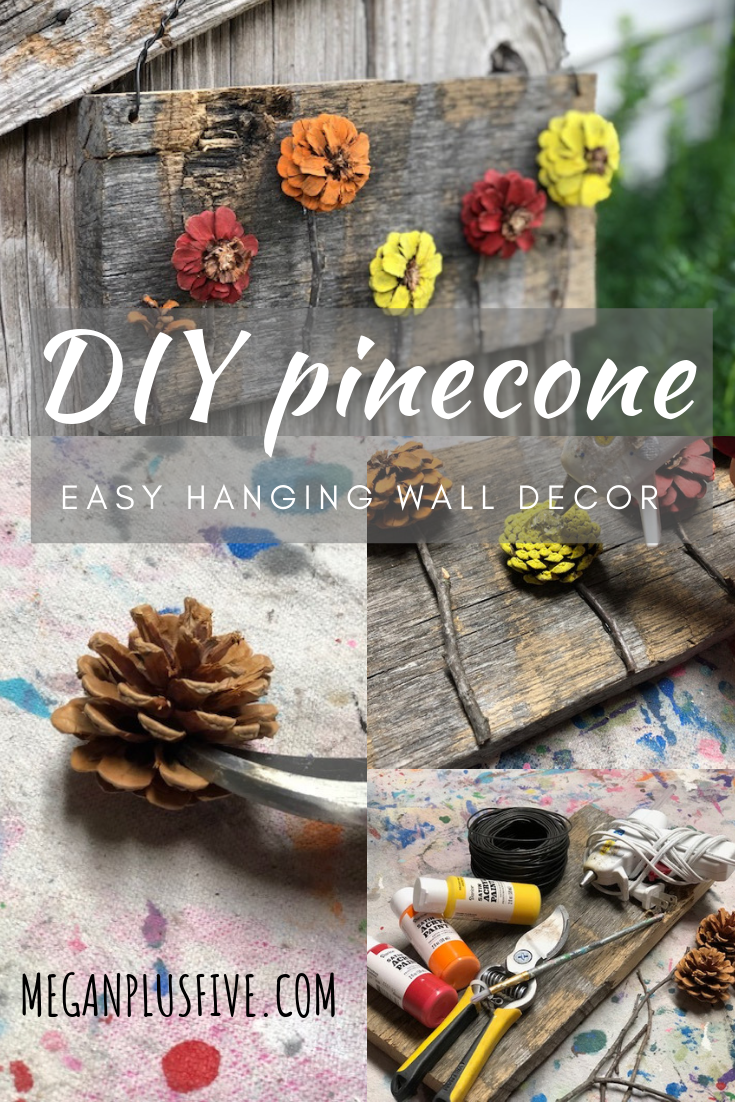
There are so many pine cone crafts I want to try but I thought I would try these adorable pine cone flowers first. I was really surprised at how easy they were to make myself and I plan to make SO many more!

If you’re looking for a more kid friendly project be sure to check out mess free pine cone art using a box. This was a favorite with our girls, and me too because it was literally mess free!

Here in the Midwest we have an abundant supply of pine cones so I didn’t have to search too far to find these little guys. I had great luck at my local park but here are some other places you can find pine cones *remember to always ask permission prior to collecting any pine cones

  • family

  • friends

  • local nature park {although ours doesn’t allow this yours might}

  • neighbors

  • shopping malls that have pine trees in the landscaping

After you’ve collected your pine cones you’ll want to make sure they aren’t covered in gross stuff, honestly I just wouldn’t pick up the ones that need super cleaned anyway lol! Leave those for the critters. I personally didn’t clean any of the pine cones we collected because they were in pretty good shape but if your pine cones have visible dirt or anything it’s a good idea to clean them prior to use.

Affiliate Disclosure. Some of the links on this website are affiliate links, which means that I may earn a small commission if you click on the link or make a purchase using the link. If you make a purchase you will not be charged anything additional.

Easy pine cone door hanger DIY

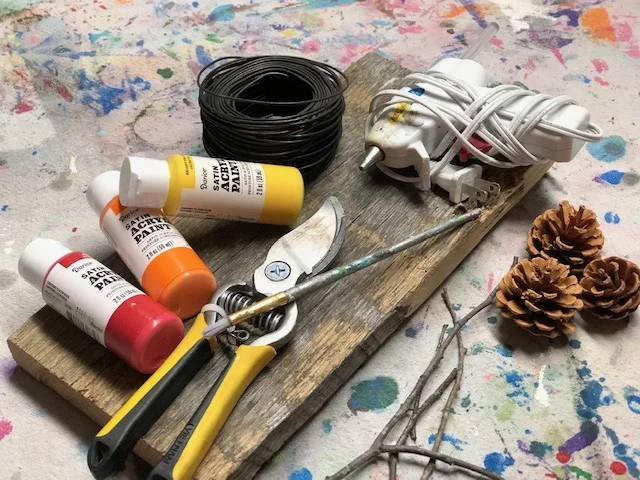
Here’s what you’ll need

Helpful tools

How to make flowers from pine cones

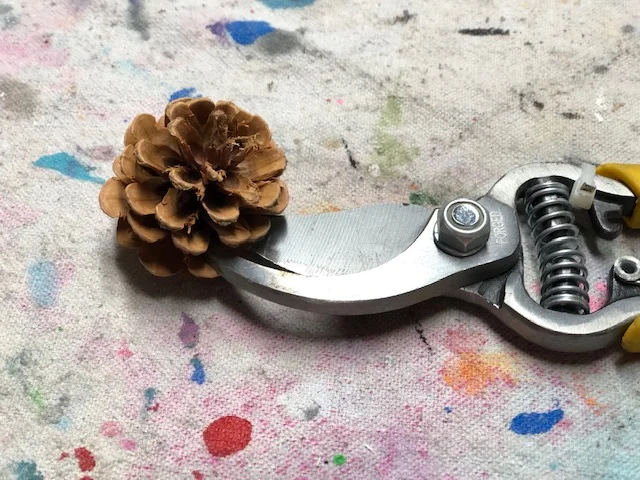
First you need to break apart your pine cones. This is a little harder than it looks and takes a lot of patients. Using your wire cutting slowing wedge them into the pinecone where you want it to break apart then use those muscles to cut. You might have to do this a few times before it comes completely apart.

easy pine cone door hanger

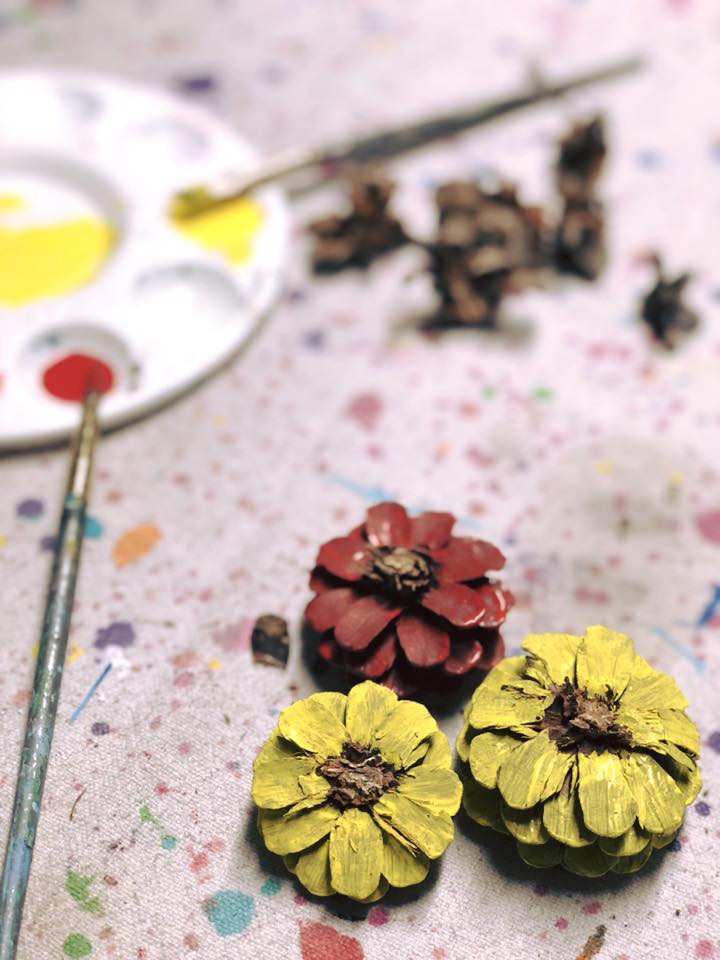
Now paint them. I just used a small paint brush and carefully painted all around the pine cone EXCEPT the middle. Leaving the middles unpainted they will look like adorable little flowers! I chose to paint mine in fall colors, red, yellow, and orange, but you can use whatever colors you’d like. I even painted the bottom as you’ll be able to see that once it’s glued down because it’s curved. I just did one coat on mine but if you don’t like the coverage of one coat on your pine cones you can give yours two coats.

Easy pine cone door hanger DIY

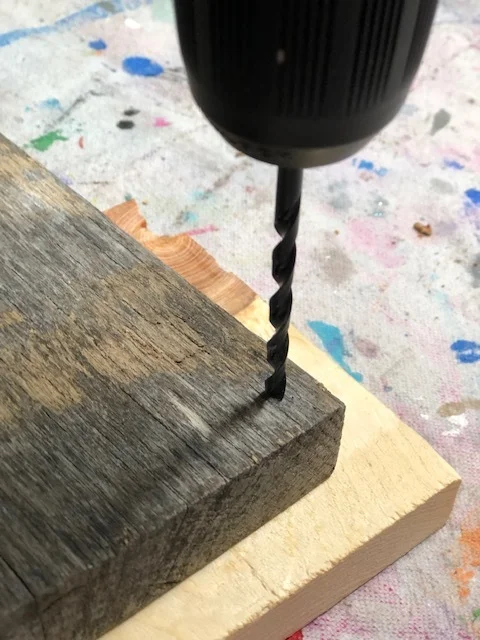
I used an old piece of wood for my base but you can use any wood base you’d like. Because I wanted to hang mine I went ahead and drilled the holes using my Ryobi drill, for the wire to go through before I started gluing the pine cones and sticks down.

easy pine cone door hanger DIY

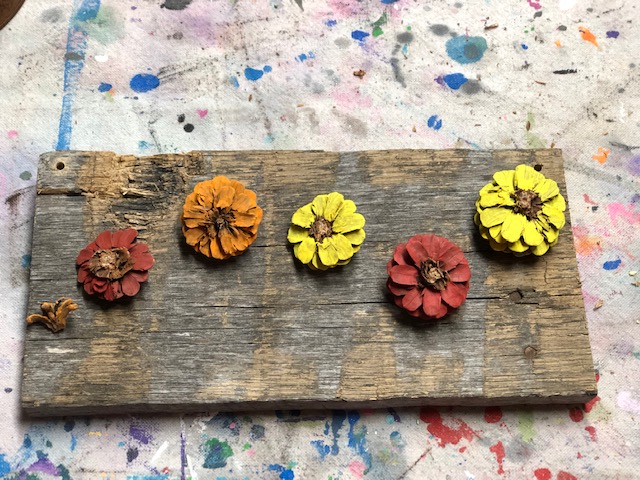
While my glue gun was warming up I laid out the painted pine cone flowers where I wanted them to go. See how gorgeous this old piece of wood is! It even still has the nails in it, see them on the right. Granted it’s a little warped but it’s perfect for a scrappy craft like this.

Easy pine cone door hanger DIY

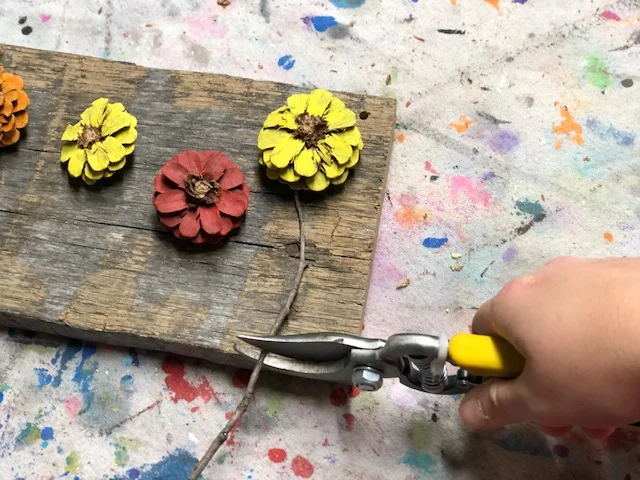
Then I used my wire cutters to cut the sticks down to size for the stems. I just eyeballed this, it doesn’t have to be exact. The sticks I used were pretty thin. You could also use some of the discarded pine cone pieces and make green leaves to glue by the stems. That would have made this project even better!

easy pine cone door handger DIY

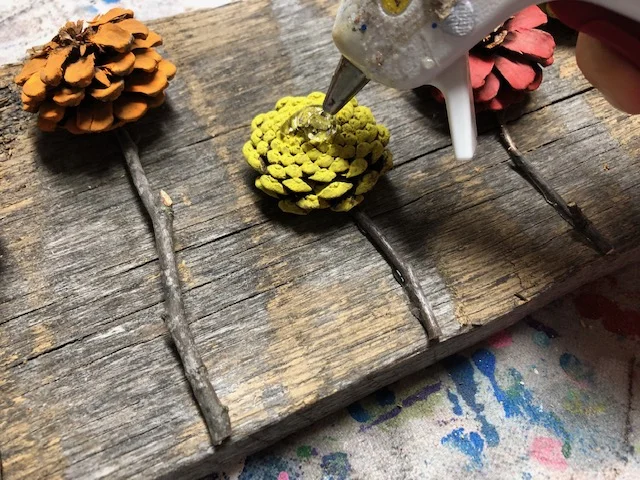
Then start hot gluing down all the pieces. I put a fairly good amount on the pine cones because they were heavier than the sticks and I didn’t want them falling off as soon as I hung the door hanger up. You’ll want this to totally dry before hanging just incase the glue underneath isn’t all the way dry you don’t want it to start slipping and your pine cone fall off.

easy pine cone door hanger

Add your wire and you’re done. One of the easiest craft projects and you probably didn’t have to spend a penny!

Easy pine cone door hanger DIY

Pin this for later

easy pine cone door hanger, flower pine cones

DIY 4th of July rag wreath

DIY 4th of Julyl Rag Wreath, easy how to make your own

I love the shabby chic look for many reasons but mainly because that look is totally imperfect just like me. I’m a busy momma to four little girls so there’s no room in our beautiful chaos for absolute perfection.

Affiliate Disclosure. Some of the links on this website are affiliate links, which means that I may earn a small commission if you click on the link or make a purchase using the link. If you make a purchase you will not be charged anything additional.

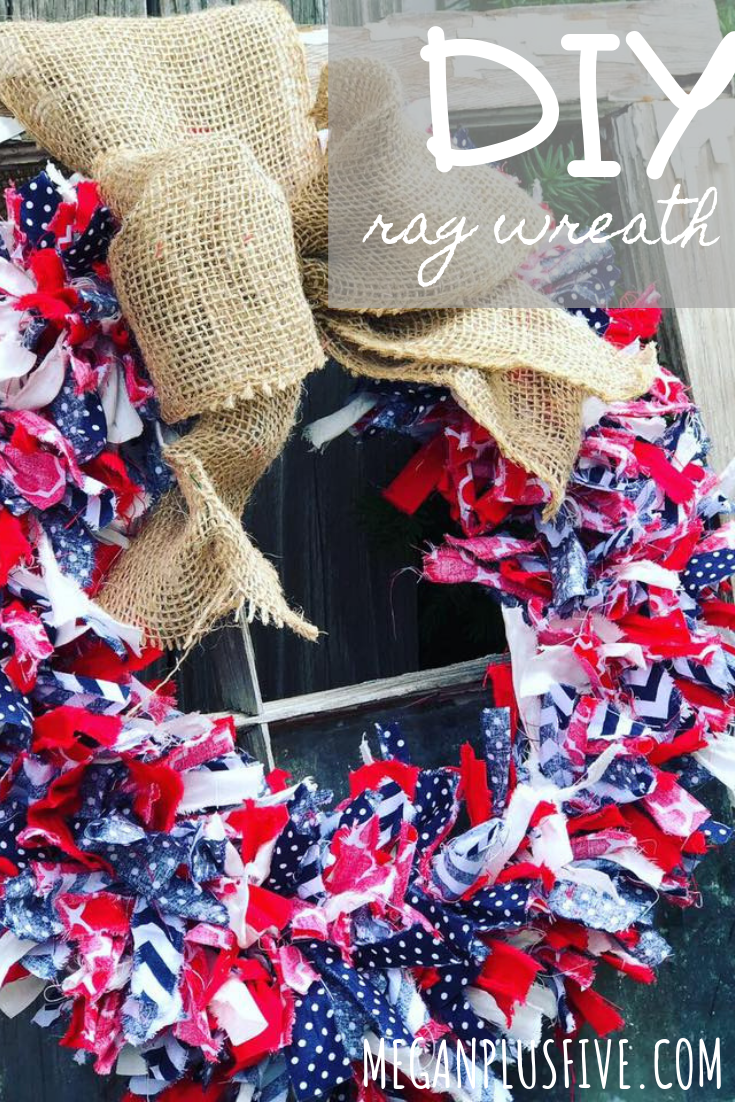
I needed a new wreath for our front door for the 4th of July. I have been truly slacking in the red, white, and blue décor the last few years and really needed a spruce up. But I didn’t have the time to make anything big and wonderful and it’s not in our budget to make a ton of new decorations. So I decided on a RAG WREATH for our front door and I’m so glad I did! If you like this tutorial check out the DIY spring rag wreath I made.

save on Pinterest for later

DIY Fourth of July rag wreath

Here’s what you’ll need

  • 5 fat quarters of fabric, I found these at my local Walmart and even better I got a few of them in the clearance aisle!

  • wire wreath form, I found mine at Dollar Tree

  • scissors

If you love the big burlap bow go here ———-> to my HOW TO MAKE A BURLAP BOW tutorial.

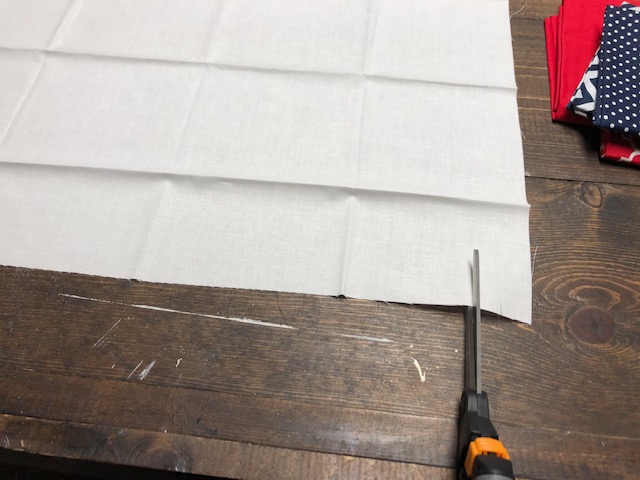
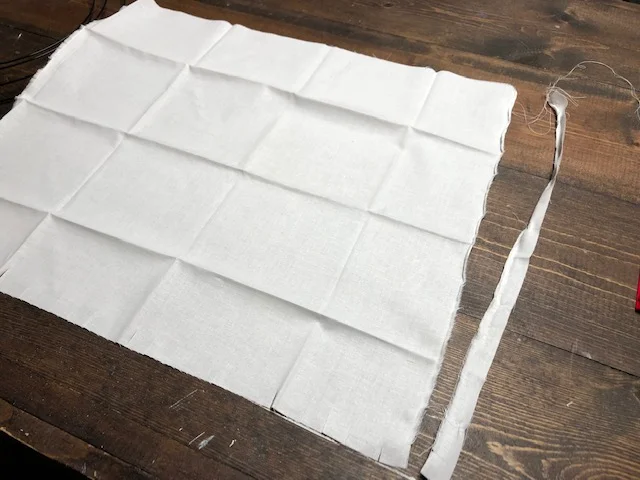
Working with one fat quarter at a time, unfold and don’t worry about the creases. You won’t be able to see these. Going along the bottom make a small cut every .75”-1”. If you want your tie pieces to be larger make your cuts farther apart.

DIY 4th of July rag wreath

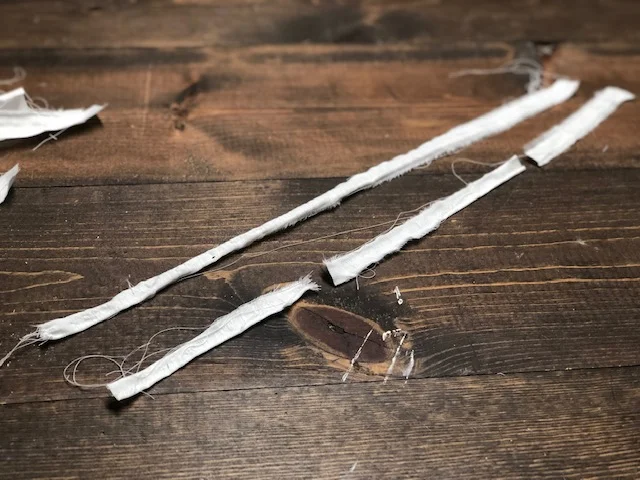
Now rip each of those cuts all the way to the other end using your hands, not your scissors. This will give your fabric a frayed looked.

DIY 4th of July rag wreath

After you have all your small cuts ripped cut each strip into 3rds like the picture below. Because I am a far cry from a perfectionist none of mine were the same size. If you like things a little more perfect than this you can measure these out.

Repeat these steps for ALL the fabric quarters.

DIY Fourth of July rag wreath

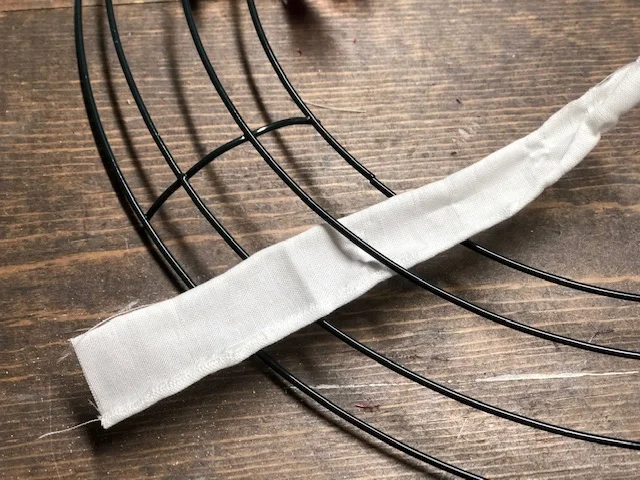
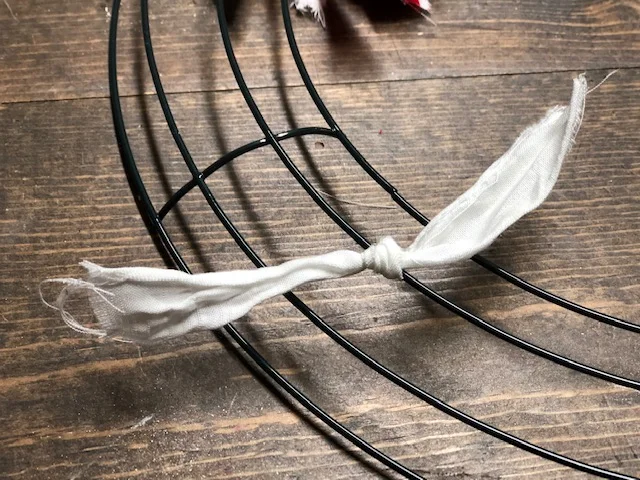
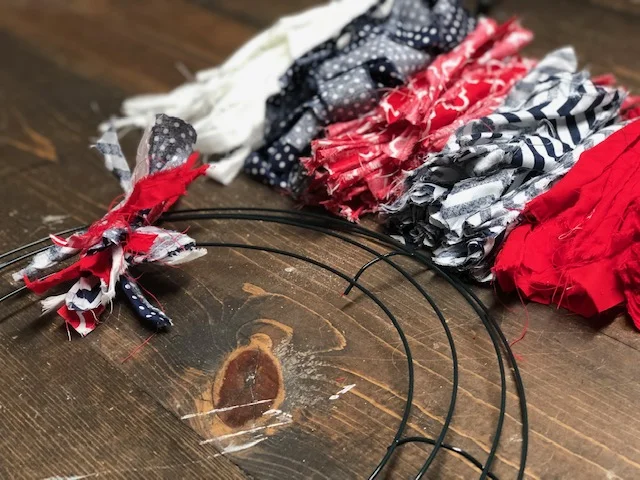
After you have all your pieces ripped and cut into thirds start tying them to your wire wreath form. To make sure I had enough fabric to cover the entire wire form I moved to the next section before it was full and did that for all the sections. Then I went around and filled in the blank spaces.

DIY 4th of July rag wreath

Be sure you are staggering out your fabric prints. You don’t want too many of the same print in one spot.

DIY 4th of July rag wreath

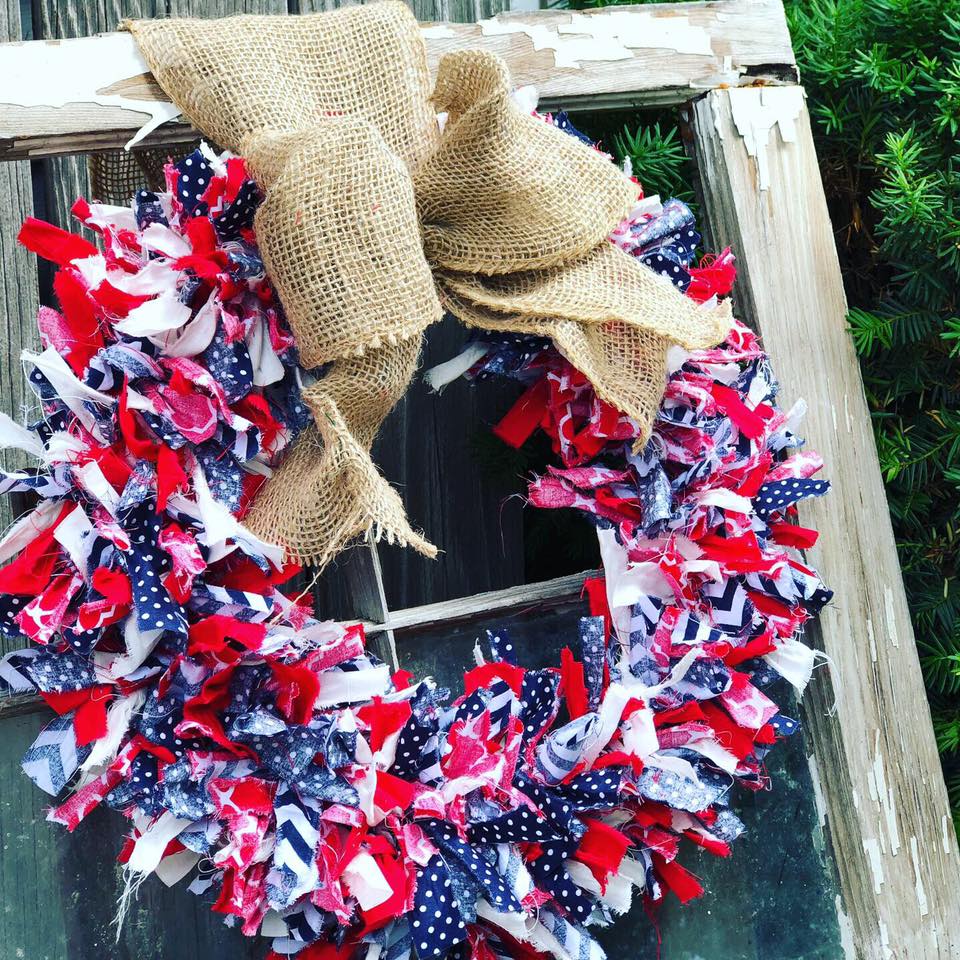
You can leave it plain and simple or tie a bow to it like the burlap bow I tied to this one.

DIY 4th of July rag wreath

What do you think? Super adorable and SUPER easy to DIY at home!


Check out these other 4th of July DIY crafts.

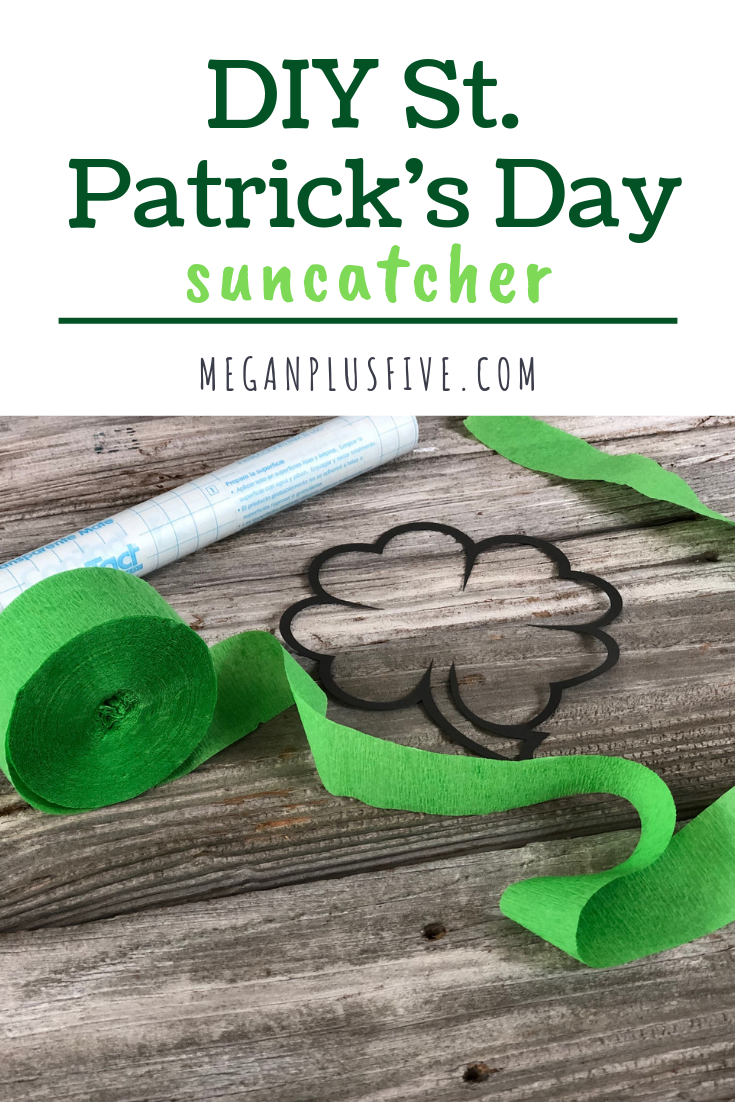
DIY St. Patrick's Day suncatcher, easy tutorial to make your own with your kiddos

DIY St. Patrick's Day suncatcher, easy tutorial to make your own with your kiddos

St. Patrick’s Day isn’t a super big deal around our house but we do enjoy the holiday. We always wear green and we try to make tasty green foods {that doesn’t always happen}. But this year we did get around to making some fun green crafts for the occasion!

Each week we host a toddler day in our CRAFT STUDIO called TOTS IN THE SHOP and I needed to plan for the events for the upcoming months. I try to coincide our weeks with the holidays when they come up and St. Patrick’s Day is coming up so I scoured Pinterest to see what I could find. I came across this adorable suncatcher by Julie from Director Jewels and I knew we had to make one too! I did change up ours a bit to make it easier/simpler for the tots to make.

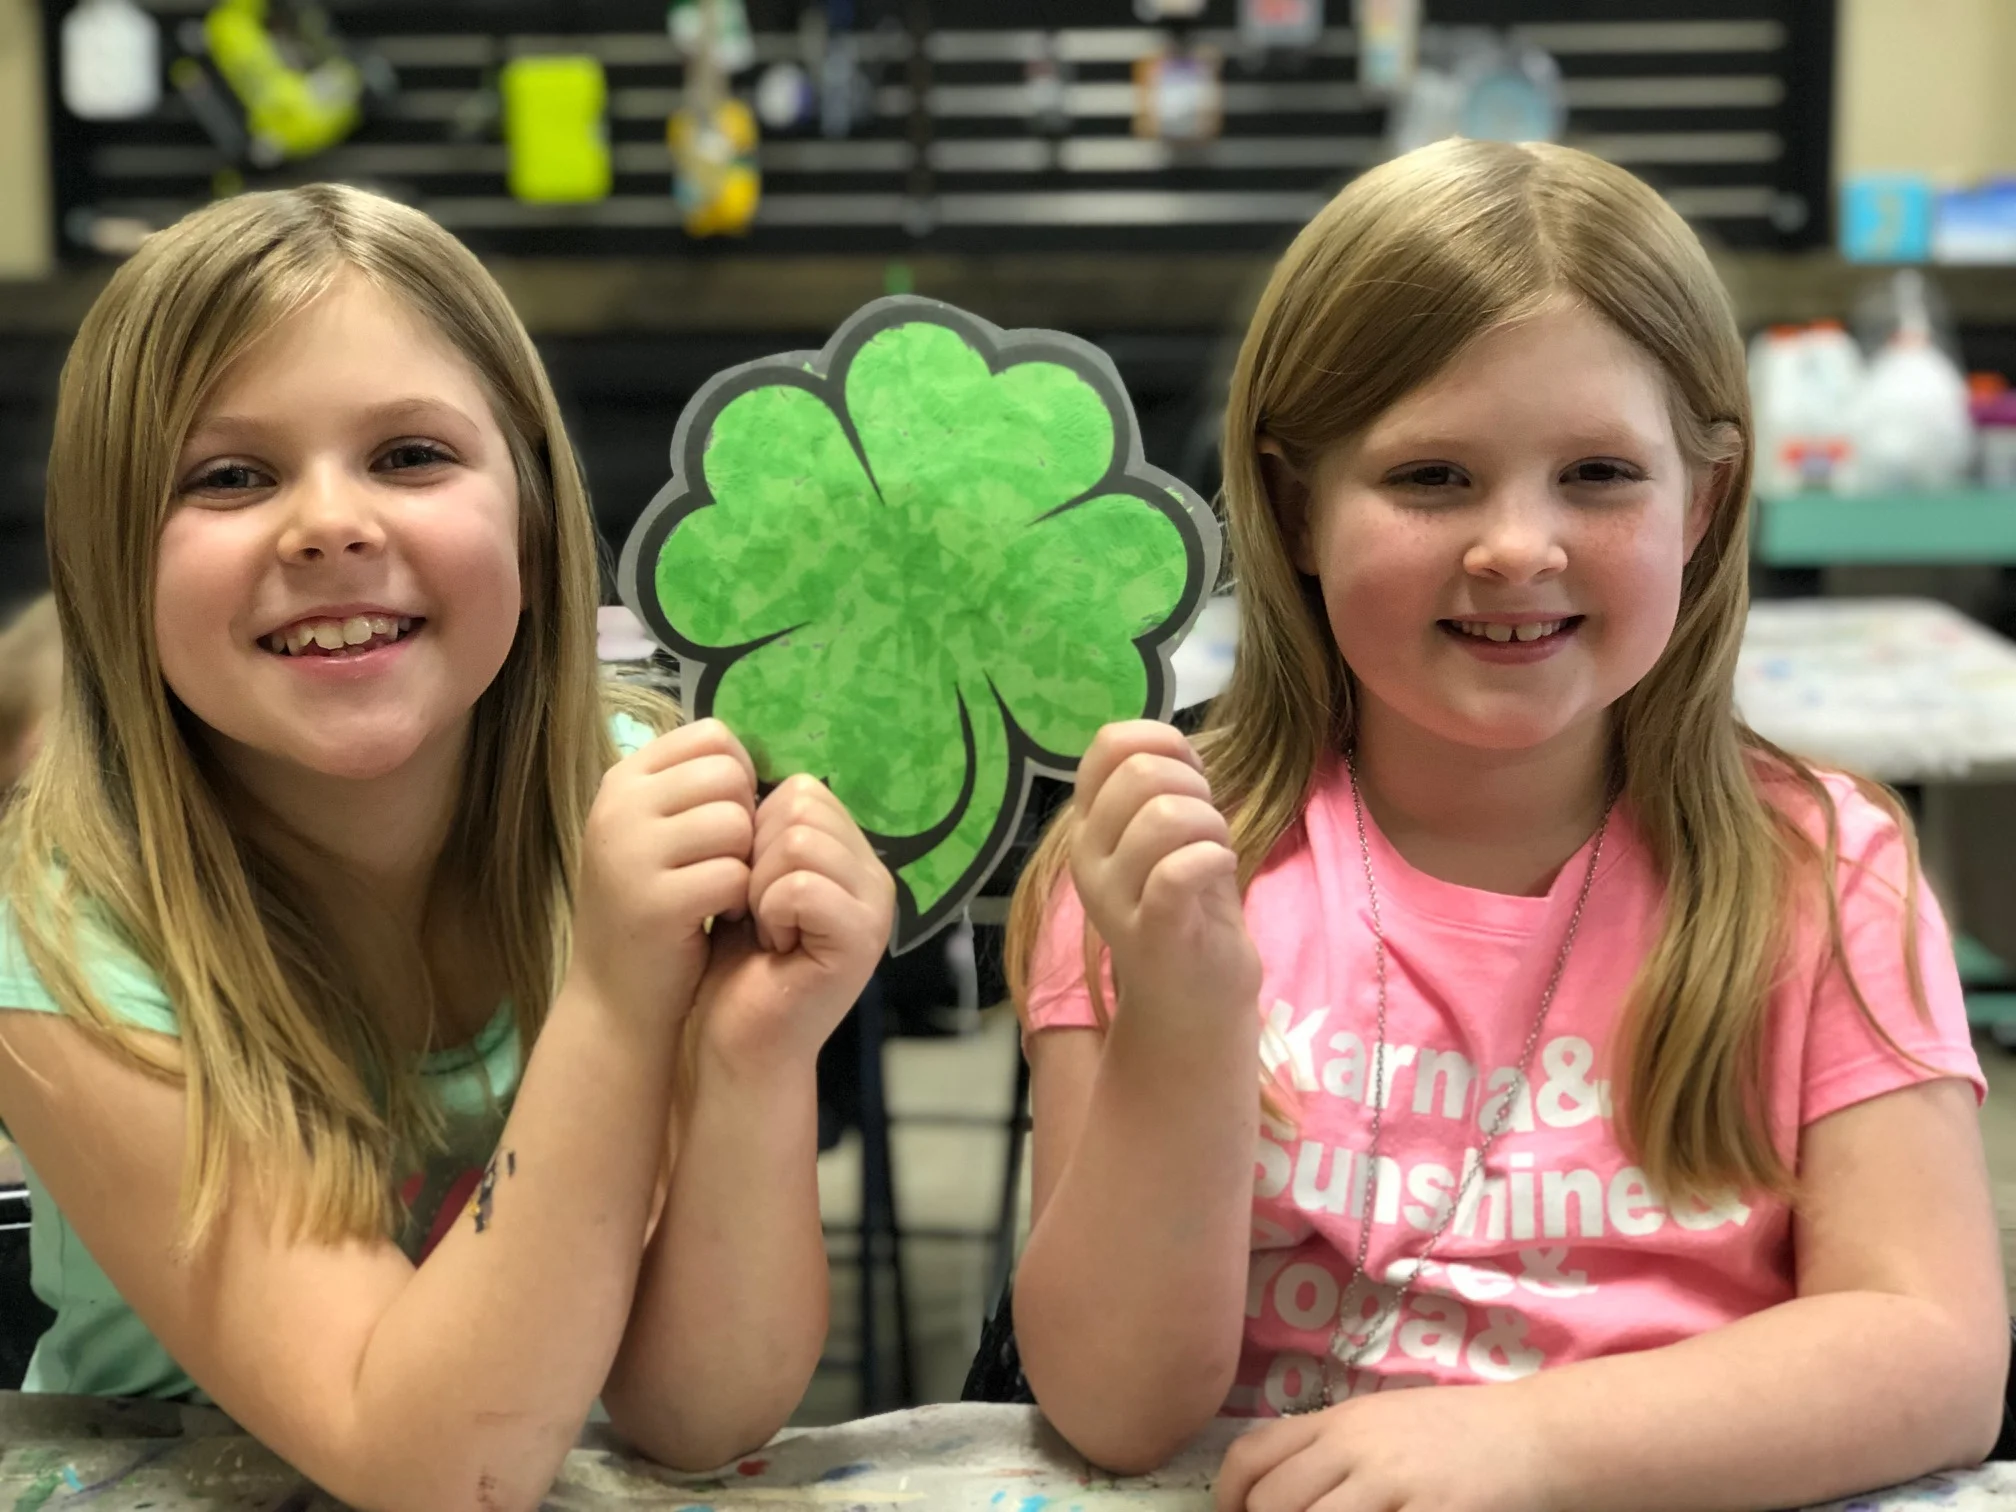
Before we host our workshops our four daughters and I create mockups for them. I have to say our girls LOVED making this one. I was actually pretty surprised though. I thought for sure the older girls would be too “grown up” for this one but they loved making it more than our three year old. Woohoo!

This craft was so super easy to make too. I didn’t really do much except show them how to do it and they took it from there.

DIY St. Patrick's Day suncatcher, easy tutorial to make your own with your kiddos

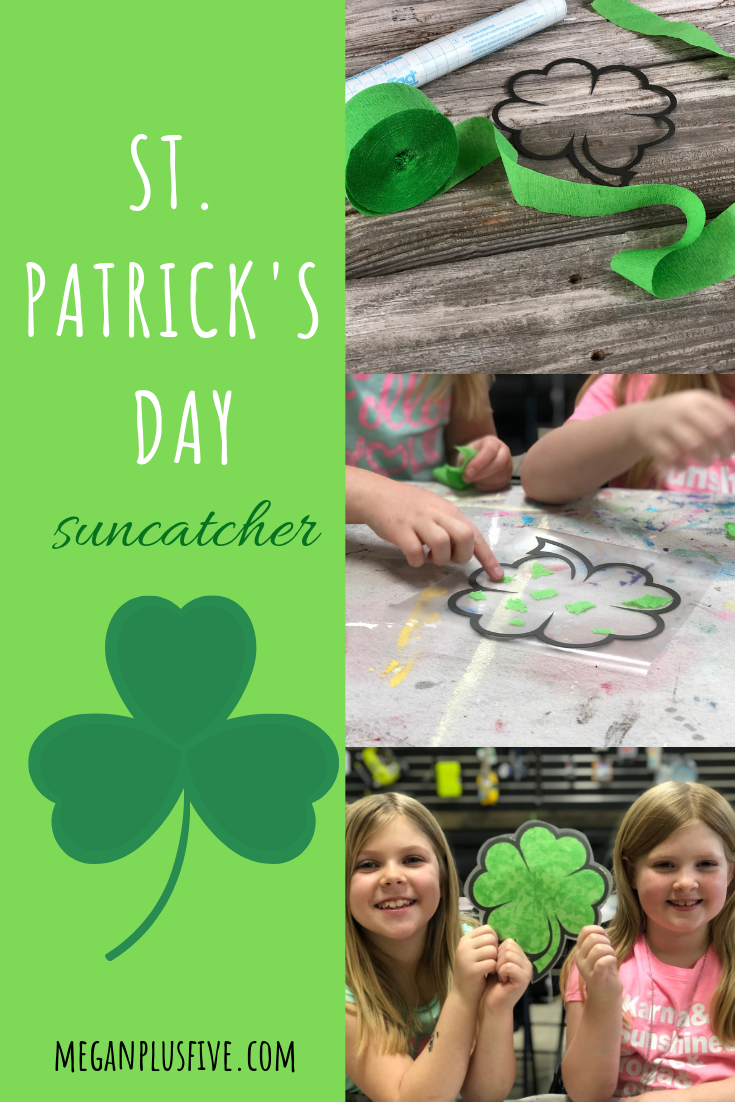
Here’s what you’ll need

  • contact paper

  • green crepe paper

  • a shamrock with a hollow middle {I cut mine out using my cricut}

  • scissors

I used my trusty Cricut to cut out my shamrock. I found the image in design space and adjusted it to be approx. 7” wide. You can always print your own and use scissors to cut out the middle. Julie has a printable linked on her website if you click her link above.

Then you need to measure out your contact paper. You want it to be larger than your shamrock.

DIY St. Patrick's Day suncatcher, easy tutorial to make your own with your kiddos

You’ll need to cut TWO pieces of contact paper that are larger than your shamrock.

DIY St. Patrick's Day suncatcher, easy tutorial to make your own with your kiddos

Remove the paper backing from your contact paper and place your shamrock in the middle. Then start tearing pieces of the crepe paper off and sticking them inside of the shamrock.

DIY St. Patrick's Day suncatcher, easy tutorial to make your own with your kiddos

Once your shamrock is covered remove the paper from the second piece of contact paper and lay it sticky side down onto the shamrock, essentially you are making a shamrock sandwich with the contact paper. Then trim off the extra leaving a 1/4 of and inch of contact paper all the way around the paper shamrock.

DIY St. Patrick's Day suncatcher, easy tutorial to make your own with your kiddos

And you’re done! SO EASY!!

St. Patrick's Day suncatcher, easy how to make this fun DIY

Easy and adorable mini mum planters for less than $2, get the look with this tutorial

Easy and adorable mini mum planters for less than $2, get the look with this tutorial

DIY cheap fall porch décor

I love finding new ways to decorate on the cheap! Having 4 kids…especially girls…is expensive. From clothes to medical expenses these girls can drain a wallet! So I get a little creative when it comes to buying decorations, especially if they are seasonal ones.

A few years ago I wanted to spruce up our front porch with some fall colored mums. I LOVE them, they scream FALL IS HERE! I was shopping around Walmart had the mums loaded in my basket and they come with the standard ugly stamped containers so I thought I’d pick up some inexpensive pots to put them in. Our porch decorating budget wasn’t a whole lot and I was already spending a big portion of it on the flowers. I found the pots and was floored at how expensive they were. They were twice as much as the flowers! Being raised to be super frugal by my mom and insanely CRAFTY grandma my wheels got to turning. I walked around the store looking for ideas of what I could stick these flowers in. Got to the Halloween aisle and BAM! There they were. Perfect round containers that looked like they were made to put those flowers in!!

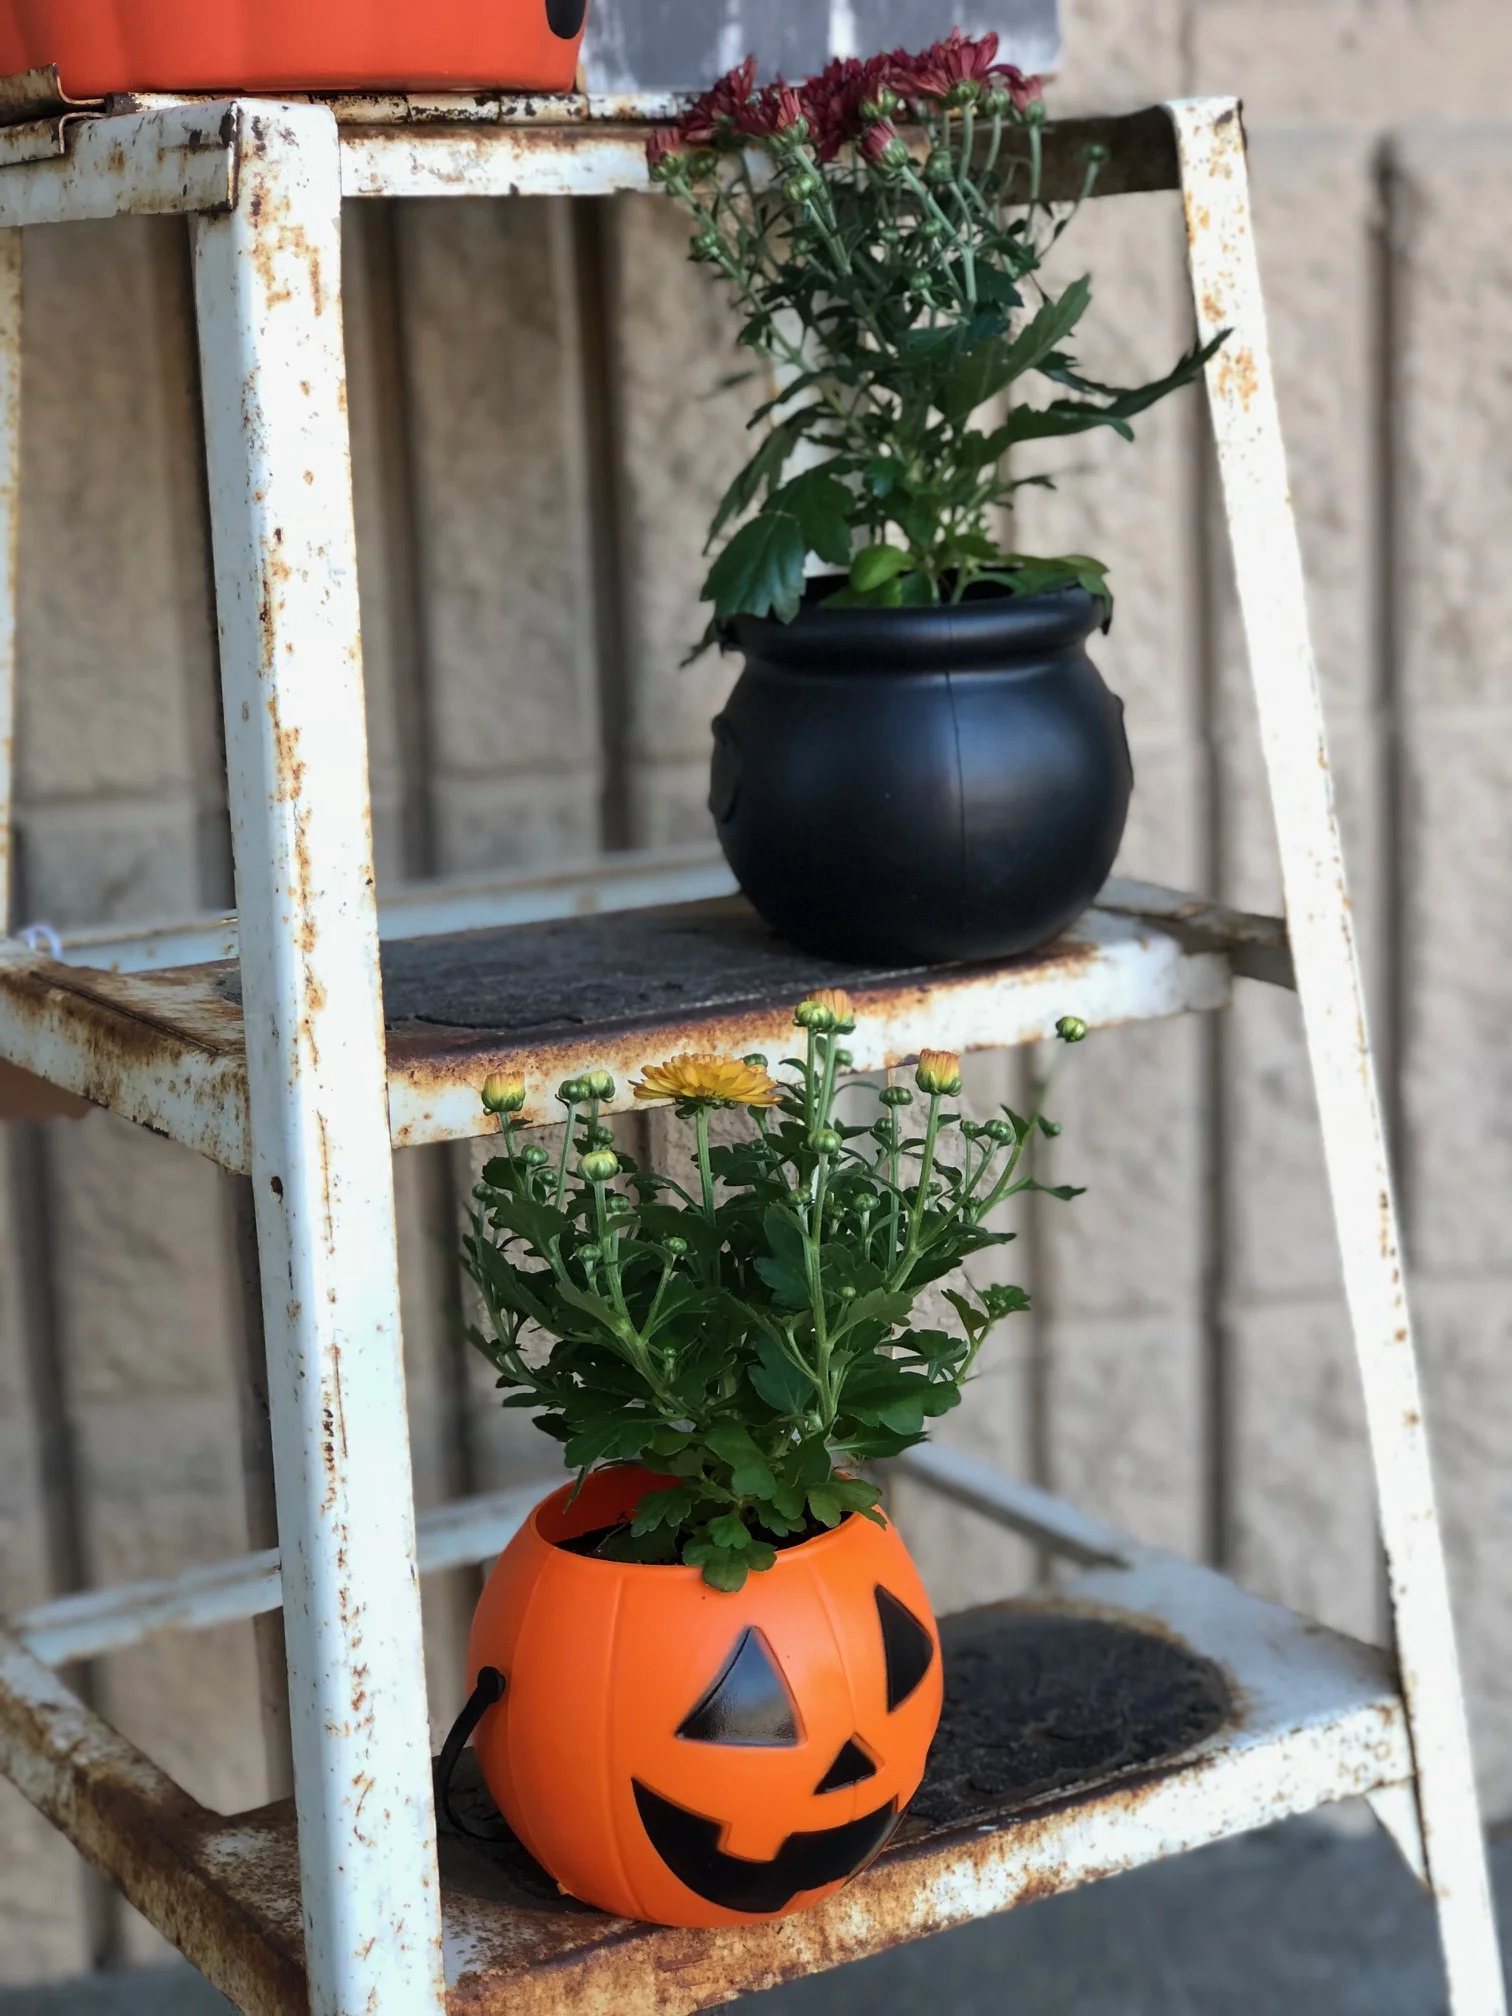
This year I wanted to recreate those because they unfortunately didn’t last more than that season. I went to Walmart and the regular sized pumpkin buckets were no where to be found but they had mini ones which were the PERFECT size for the mini mum flowers…and a fraction of the cost! And did I mention they were MINI which automatically makes them even more adorable!

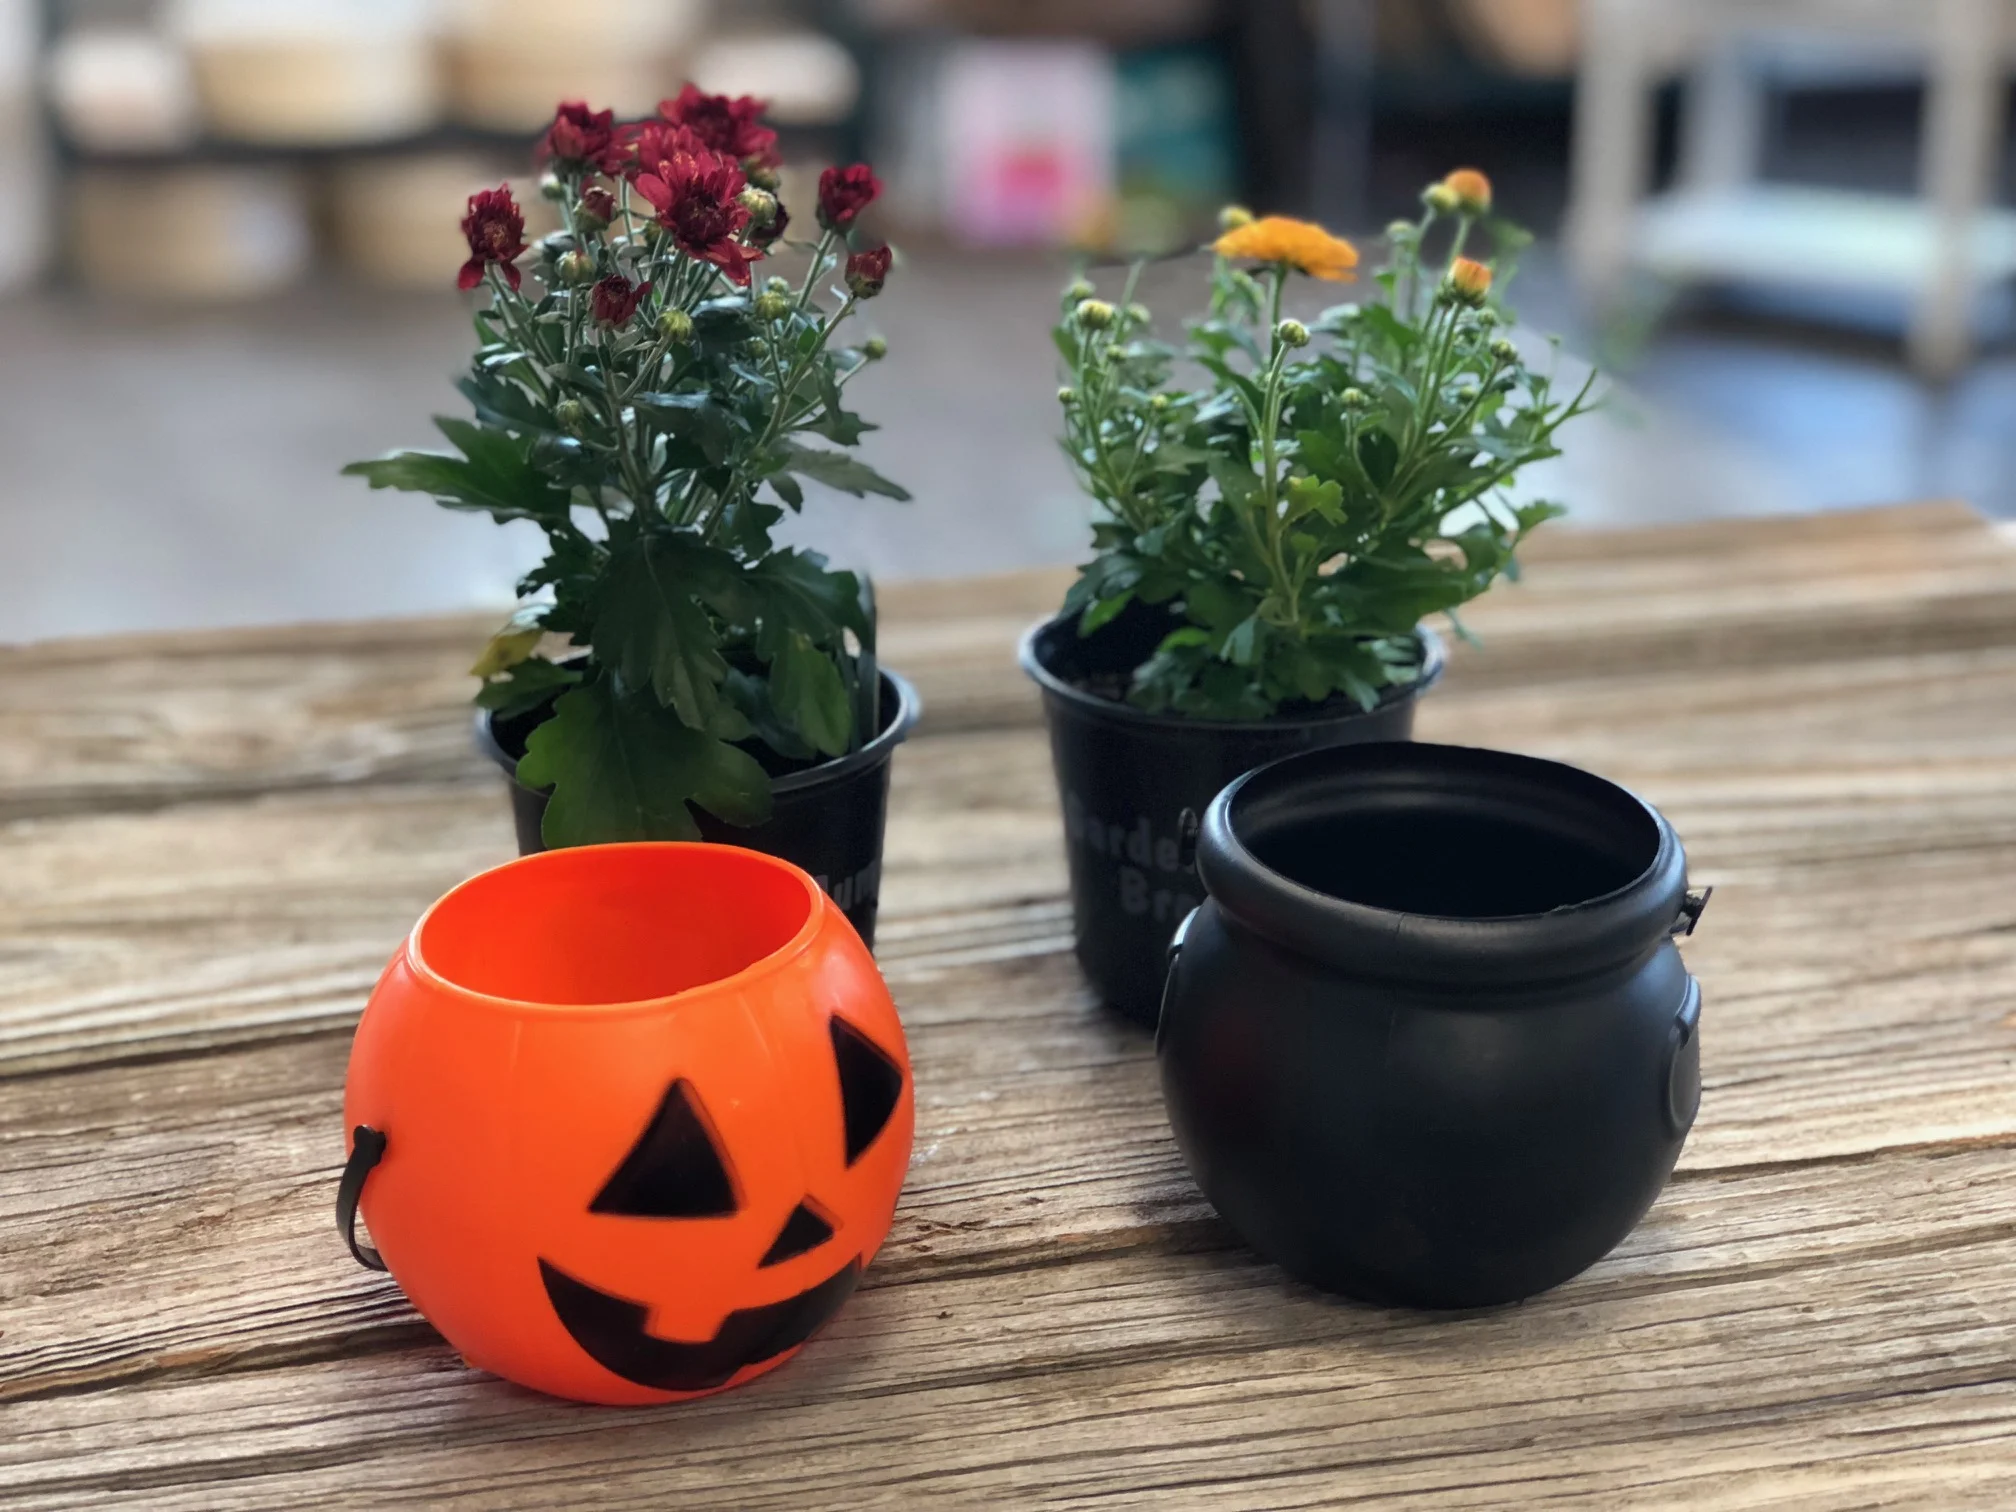
So I grabbed the mums, a mini pumpkin and a mini cauldron treat buckets and set back to our brick and mortar shop to make some cute planters!

Affiliate Disclosure. Some of the links on this website are affiliate links, which means that I may earn a small commission if you click on the link or make a purchase using the link. If you make a purchase you will not be charged anything additional. This is just a way I can help add to our family finances to raise our four daughters. Please know I would never recommend a product or service I do not totally stand behind.


Here’s what you’ll need

I picked everything up from my local Walmart.

2 mini MUM planted flowers, $.97 each {I picked mine up at our local Walmart, but they are not listed online

2 mini Halloween treat buckets $.74 each {I bought a pumpkin & cauldron}

scissors

It cost $1.71 {plus taxes} to make one flower pot. SUPER CHEAP for cute décor, and the kids will love them. I did mine by myself because my kiddos were at school, but you could totally make this a fun family thing and have everyone pot their own.

These are so super simple, literally 2 steps!

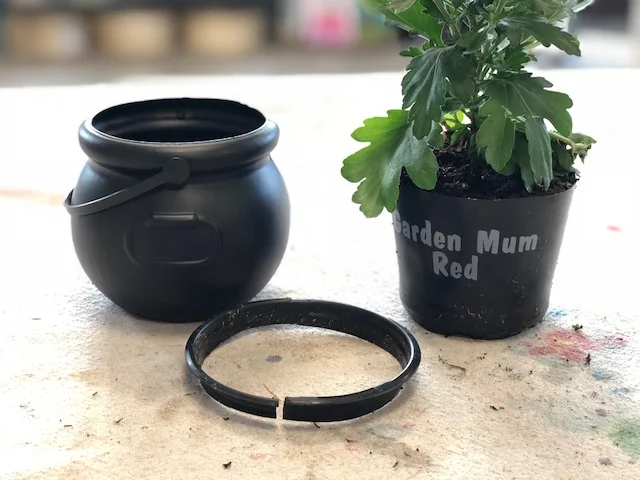
First you need to cut the top lip off of the pot the flowers are currently in. This can be hard to get the initial cut so I advise this step for adults.

Easy and adorable mini mum planters for less than $2, get the look with this tutorial

Now shove those babies in the treat bucket and you’re done! If yours are going to stay outside all the time you can drill 2 holes in the bottom to let them drain but I will be bringing mine in and out of our shop and I don’t want the water to drip everywhere so I will manually drain ours.

Easy and adorable mini mum planters for less than $2, get the look with this tutorial

I can’t wait for these to bloom and be even CUTER!

Check out more fall & Halloween themed posts below