Christmas stocking party with the kids

How to have a stress free stocking party with your kids. Make cute Christmas stockings out of drop cloths. DIY Christmas stockings plus a free sock stocking SVG to use with your Cricut.

KID MADE CHRISTMAS STOCKINGS

Making Christmas stockings with my girls is one of my most favorite Christmas traditions we do. Every year my four daughters and I sit around the table that is basically a big mess of Christmas craft supplies and make stockings. We break out the glitter, felt, ribbons, fabric markers, bells, buttons… all the things. And I let them create whatever their little hearts want.

Granted they don’t look perfect or match lol but we have so much fun and the memories are priceless. Sometimes I’ll give my momma input as to what might look good but mostly I’m there to help, encourage, and tell them their stockings look amazing.

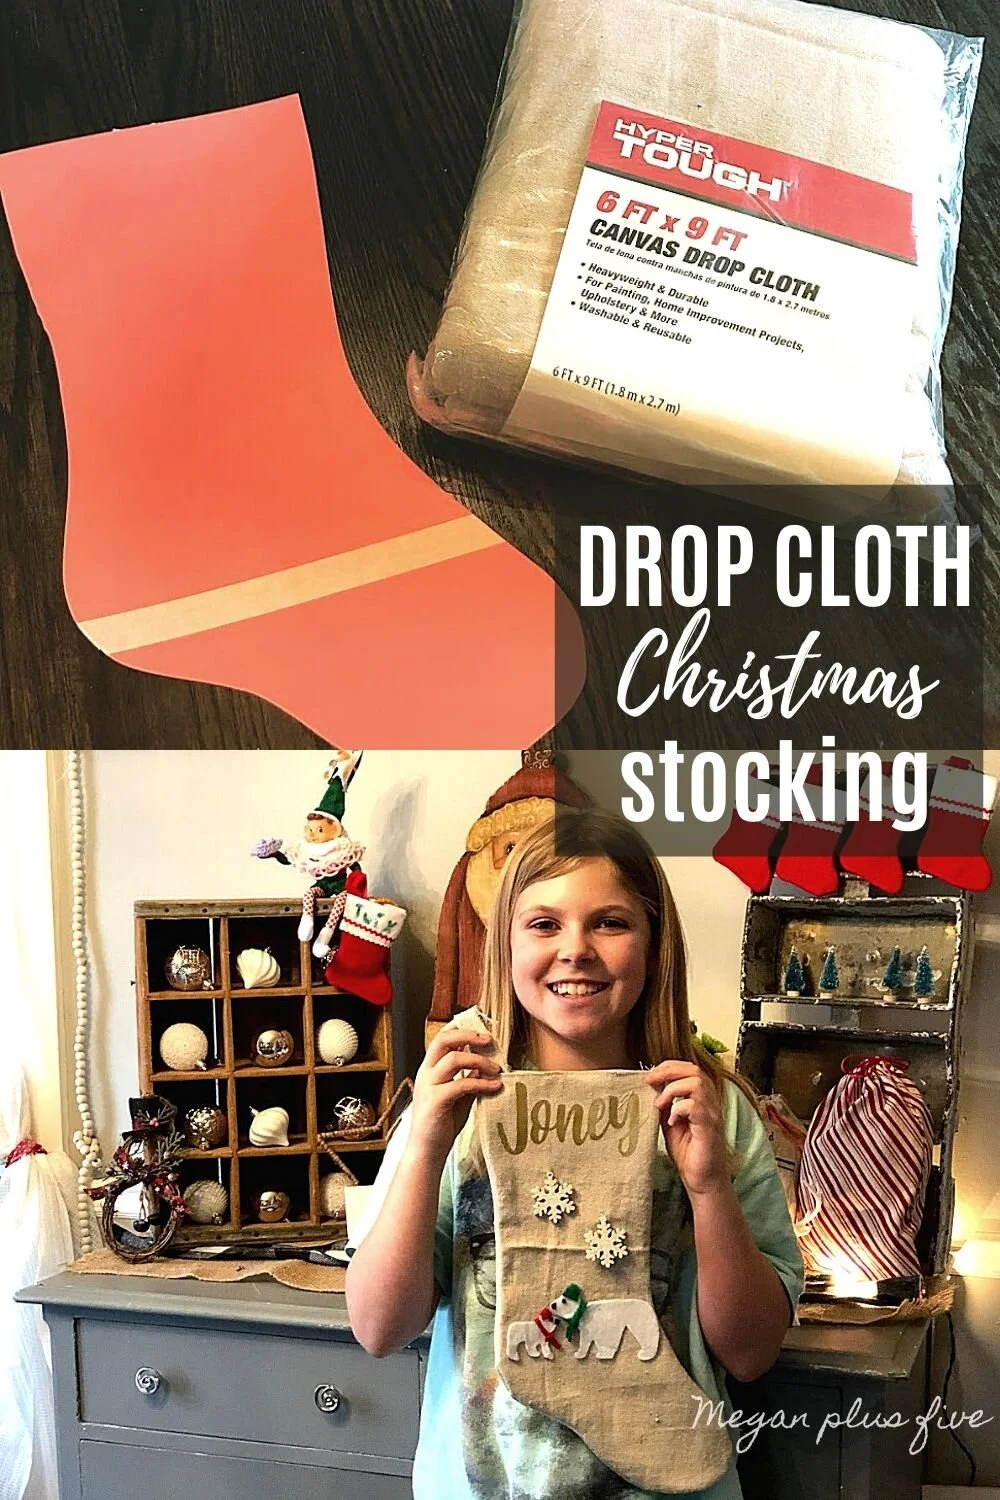
This year I was browsing Instagram and came across Heide’s post from Everyday Cookies- Heide. She shared a gorgeous pic of her handmade Christmas stockings that she had made from a DROP CLOTH! You guys, my mind was blown!

Affiliate Disclosure. Some of the links on this website are affiliate links, which means that I may earn a small commission if you click on the link or make a purchase using the link. If you make a purchase you will not be charged anything additional.
How to have a stress free stocking party with your kids. Make cute Christmas stockings out of drop cloths. DIY Christmas stockings plus a free sock stocking SVG to use with your Cricut.

I honestly never thought to use a drop cloth for a Christmas stocking! But it was SO PERFECT. The natural color of the drop cloth was just what I had in mind for making our stockings this year.

The best part is that the drop cloth was cheaper than buying traditional fabric and I have so much left over for LOTS more projects.

Use the same Christmas stocking SVG I used for free —-> CLICK HERE

HOW TO HAVE A CHRISTMAS STOCKING PARTY

Here are some basic supplies you need

1. SEW STOCKINGS

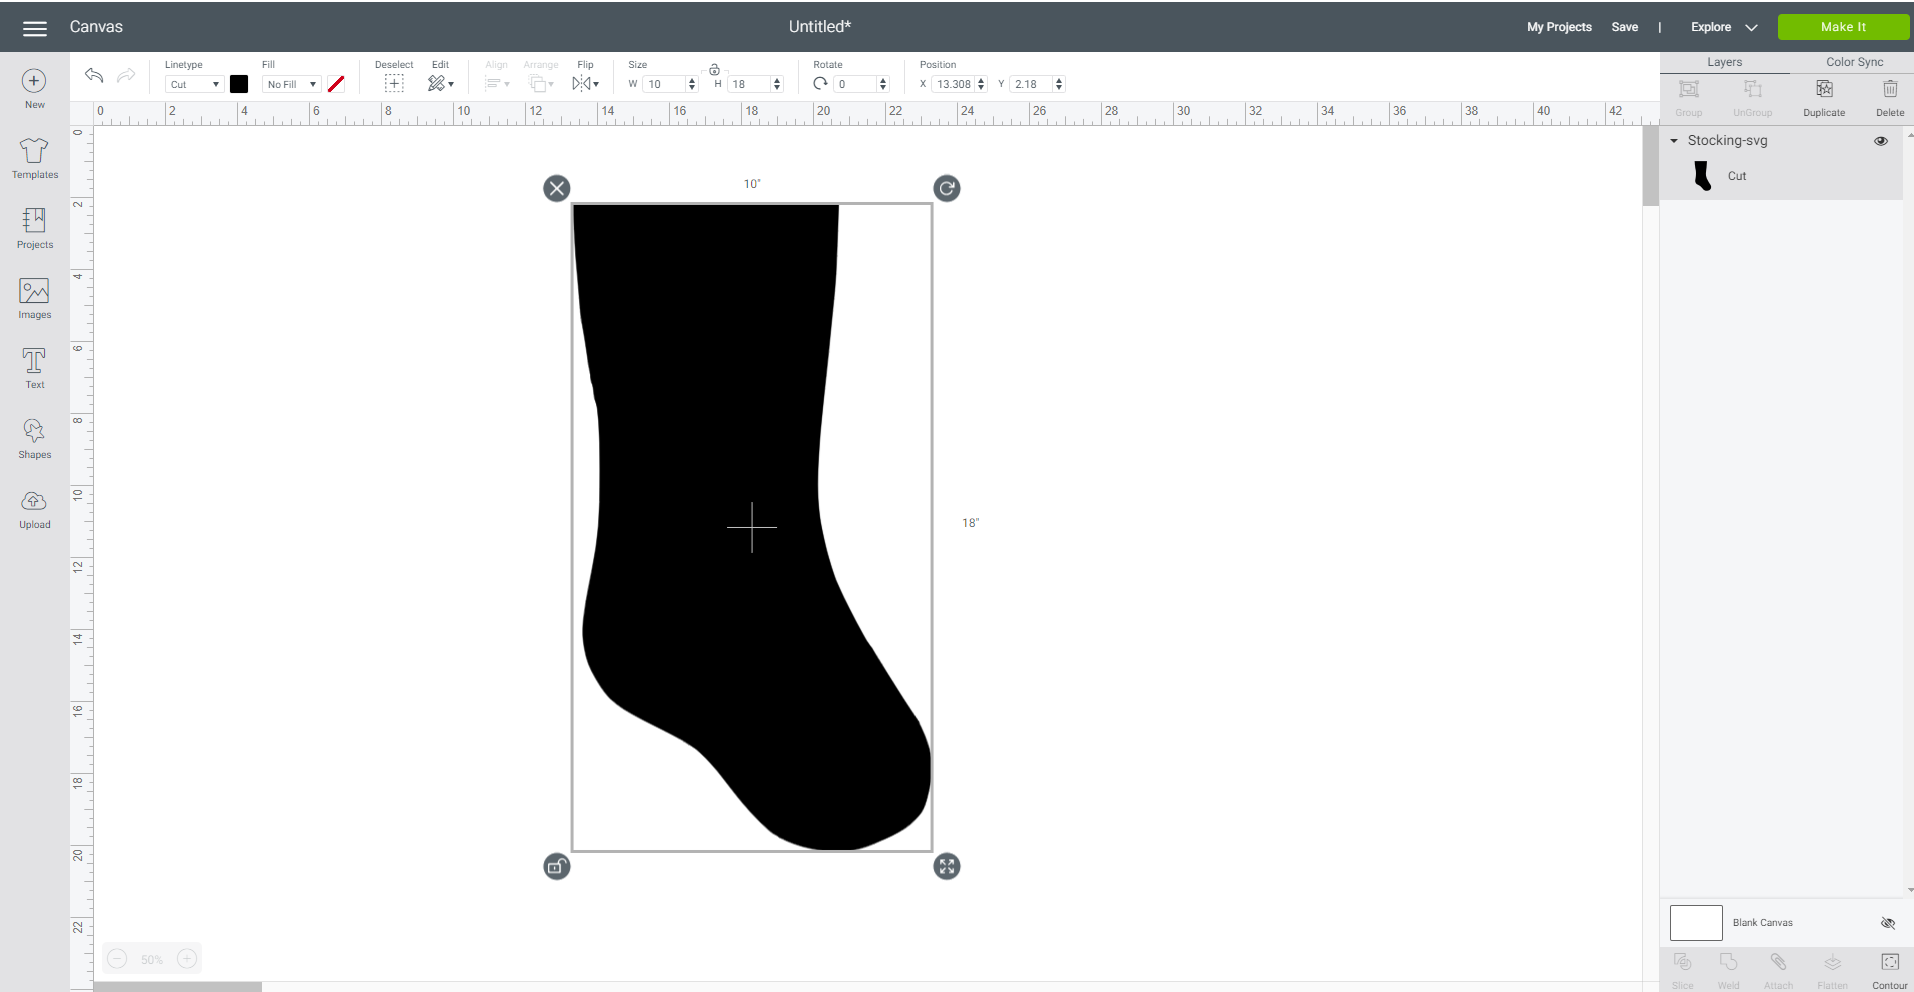
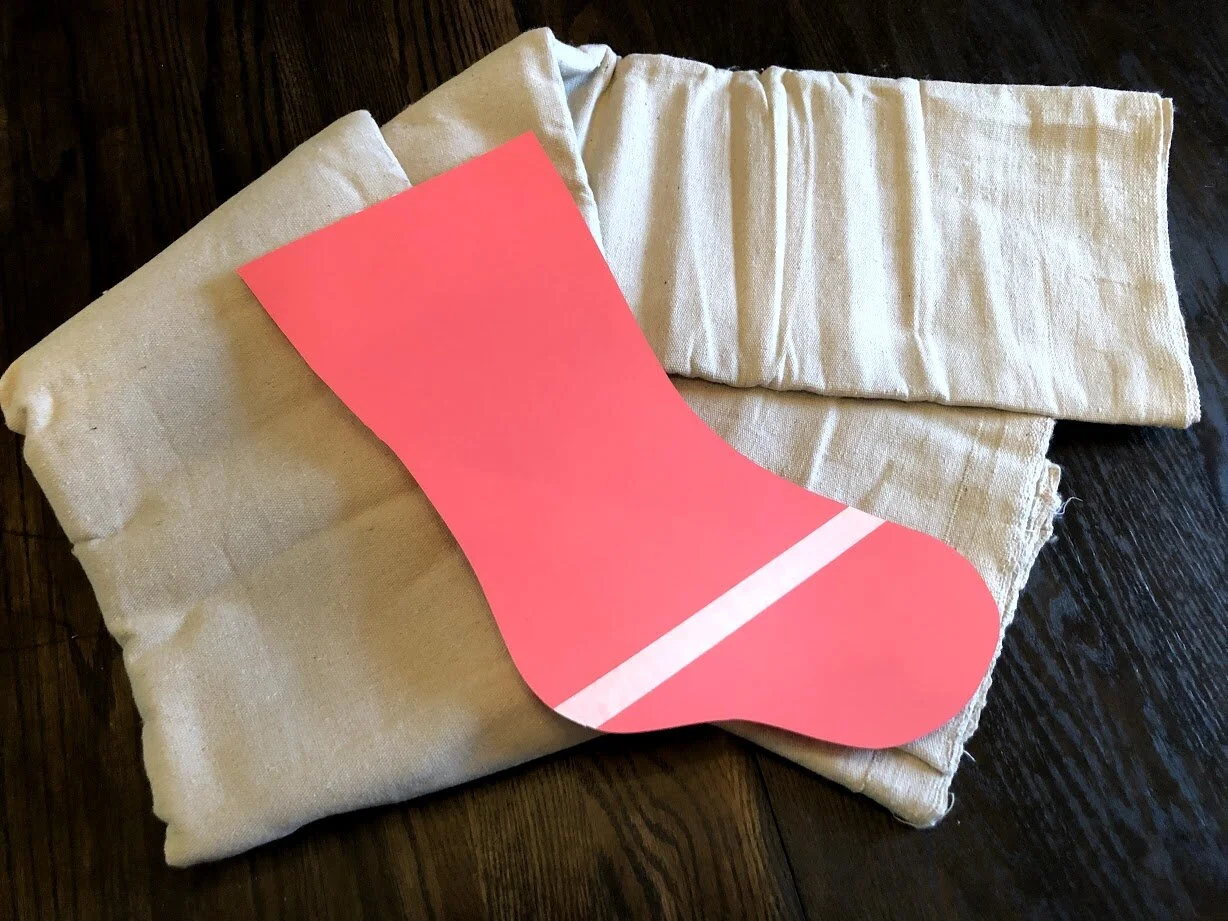
I made a template on my computer then I cut it out on cardstock using my Cricut cutting machine. I didn’t have long enough cardstock so I butted two pieces of 12”x12” cardstock and taped them together. I used this same style when I made this wooden mermaid tale cupcake stand.

I re-sized my stocking template to 10”wide by 18” long in Cricut Design space.
How to have a stress free stocking party with your kids. Make cute Christmas stockings out of drop cloths. DIY Christmas stockings plus a free sock stocking SVG to use with your Cricut.

I don’t have a video, or pictures of this but it was pretty simple. You will need to cut out two stockings, one for the front and one for the back. The pin them together and sew around the stocking leaving the top open. Then turn the stocking inside out so that the sewed seam is now on the inside of the stocking. I will get a video of this process up asap.
How to have a stress free stocking party with your kids. Make cute Christmas stockings out of drop cloths. DIY Christmas stockings plus a free sock stocking SVG to use with your Cricut.

2. ADD NAMES

I used my Cricut to cut names out of HTV (heat transfer vinyl) prior to the girls decorating their Christmas stockings.

To keep it easy, because I was cutting out 5 names (my four girls plus a friend), I had them agree on a color that all 5 names would be cut from. They chose a gold color.

We used my mini Cricut EasyPress to press the names on the stockings. I let the older girls do this and helped when they needed it. If you don’t have a mini EasyPress I highly recommend getting one if you do a lot of little crafty projects that require HTV. I have used this little handy press more than I actually thought I would. And it’s perfect for my teen & preteen to use because it’s easy to hold and manage.


3. DECORATE

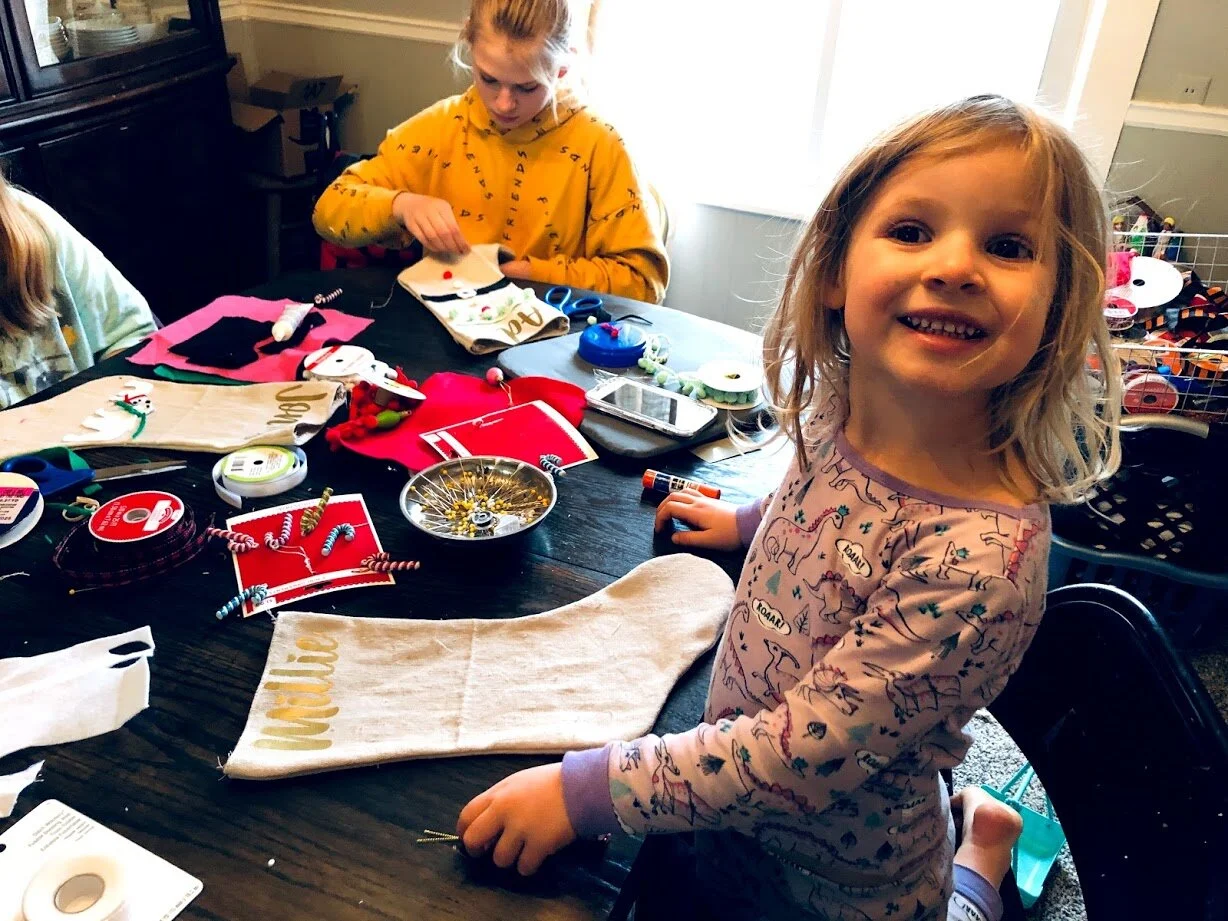
I picked up several packages of mini Christmas embellishments at my local Walmart of snowflakes, candy canes, vintage looking lights, and a few more.
How to have a stress free stocking party with your kids. Make cute Christmas stockings out of drop cloths. DIY Christmas stockings plus a free sock stocking SVG to use with your Cricut.

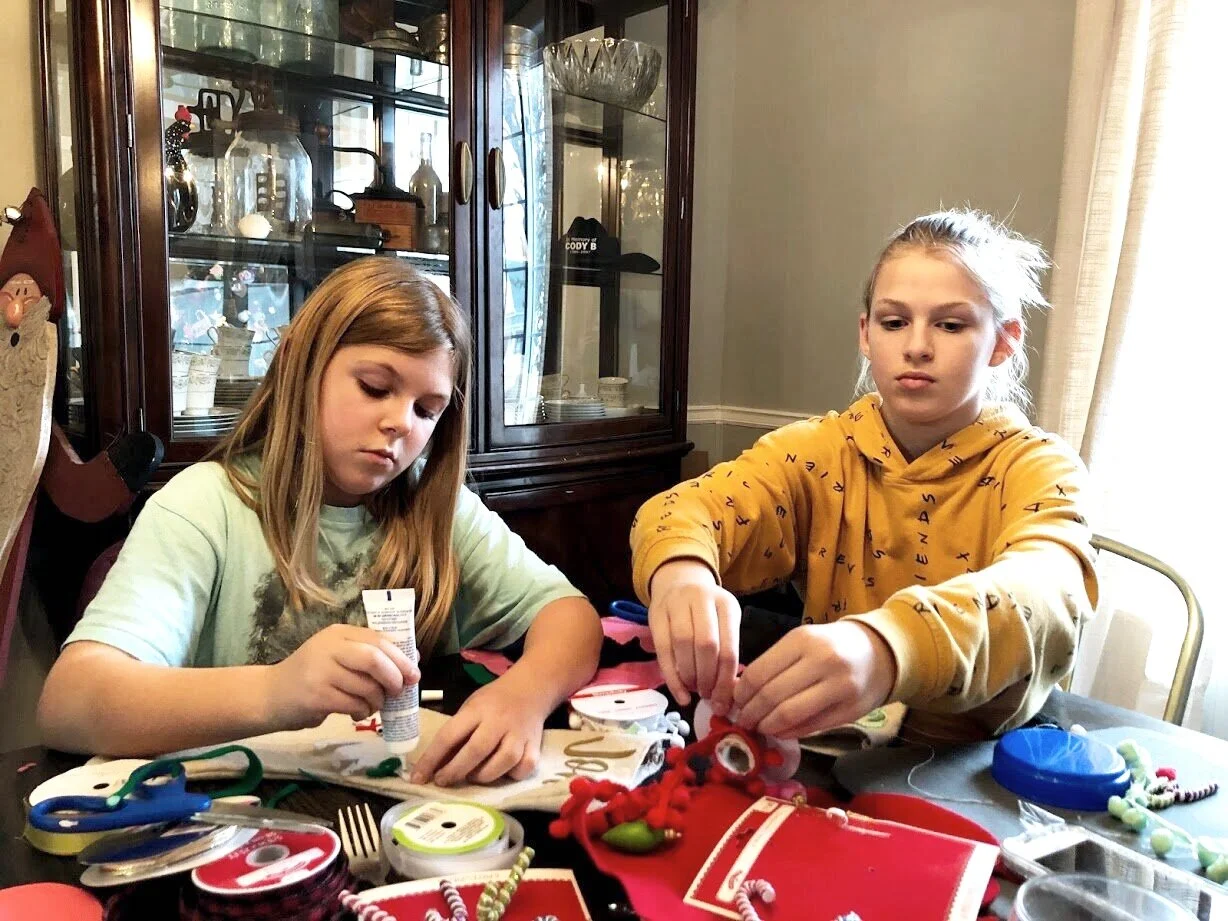
We also pulled out my ribbons, felts, yarns, and buttons. Everything was put on the table in one big beautiful Christmas craft explosion. Sometimes it’s just better to embrace the mess than it is to try and keep all the things organized and tidy. They even brought out a fork to make pom poms (just in case you noticed there was a fork in the picture below lol).
How to have a stress free stocking party with your kids. Make cute Christmas stockings out of drop cloths. DIY Christmas stockings plus a free sock stocking SVG to use with your Cricut.

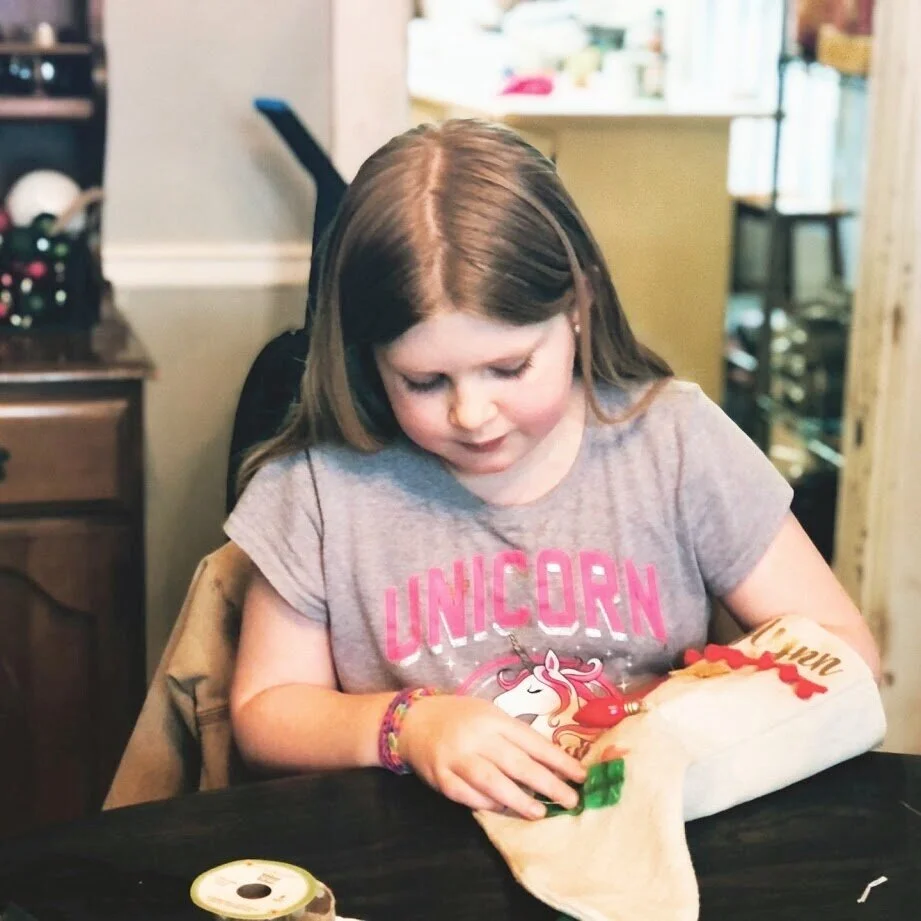
I encourage my girls to try using the tools, like my daughter in the pic below hand sewing on an embellishment, before I step in and help. It’s so important for us parents to let our kiddos do things on their own so they can learn.
How to have a stress free stocking party with your kids. Make cute Christmas stockings out of drop cloths. DIY Christmas stockings plus a free sock stocking SVG to use with your Cricut.

4. ADD HANGER

Don’t forget to add a hanger. We did this step last and all of the girls came up with something different. One used yarn, two of the girls used a piece of the drop cloth, and the other two used different kinds of ribbon. We tacked these on using a needle and thread then I reinforced them with the hot glue gun.

How to have a stress free stocking party with your kids. Make cute Christmas stockings out of drop cloths. DIY Christmas stockings plus a free sock stocking SVG to use with your Cricut.

Didn’t their Christmas stockings turn out SO cute?!

My girls and I enjoy this so much every single year. Mostly because I let them just go to town and create whatever their little hearts want on their Christmas stockings. Let me know if you have any questions in the comments below.

Happy Crafting!

Interchangeable Christmas pallet sign

DIY twig stars for Christmas pallet sign. Interchangeable Christmas home decor on a budget. How to make easy and simple reversible home décor for the holidays. Make a sign from twigs.

INTERCHANGEABLE WINTER PALLET SIGN

I love decorating for the holidays. Especially Christmas. Now that I have a bigger home to decorate I’m finding it a little challenging to do AND keep it in budget. I have always had the heart of a frugal women so spending an arm and a leg to put up Christmas décor just wasn’t happening.

That’s why in the fall I made this lightweight faux pallet sign. It’s a blank pallet style sign that I can change out with the seasons. It’s a big statement type piece that I prop up on my dining room hutch. I love this so much. Best of all the planks I used to make this sign were left over from this plank wall project.

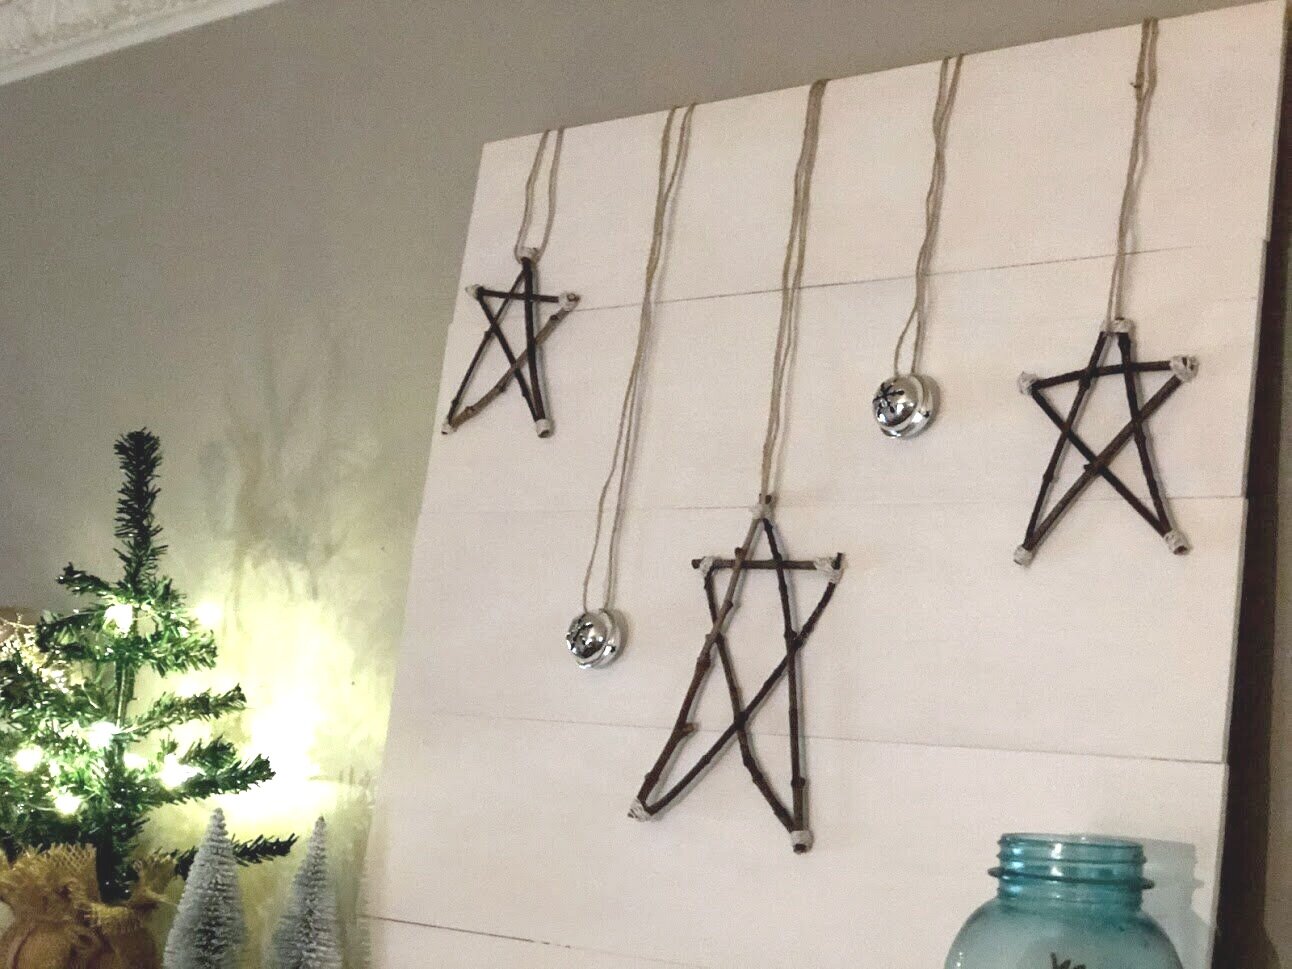
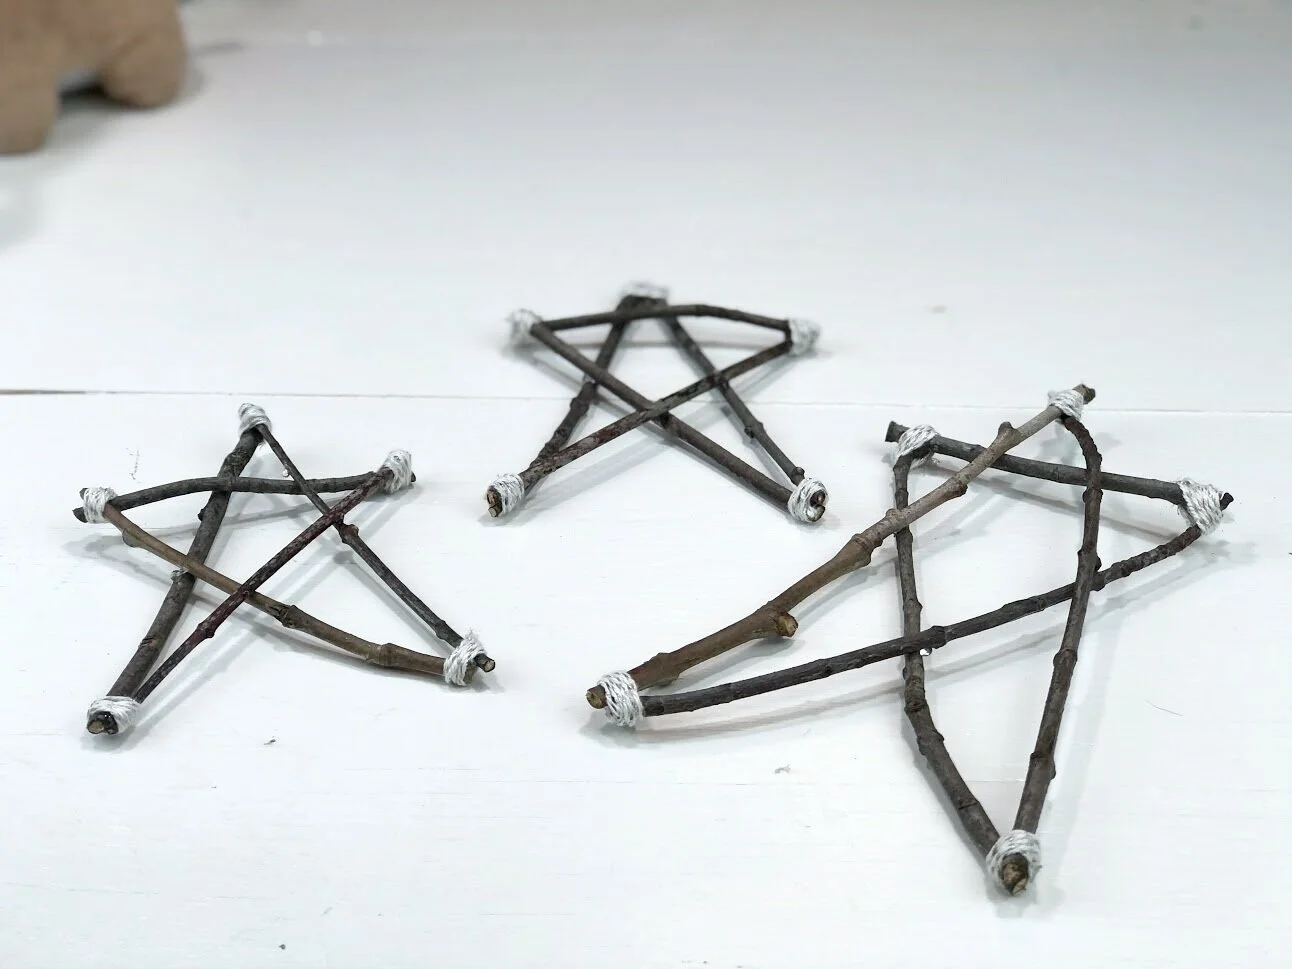
I really tried hard to spend minimal funds for Christmas decorating. So, for Christmas I had this great idea to make stars from twigs I had in the backyard. And they turned out so cute! I want to make more!!

Affiliate Disclosure. Some of the links on this website are affiliate links, which means that I may earn a small commission if you click on the link or make a purchase using the link. If you make a purchase you will not be charged anything additional.

DIY twig stars for Christmas pallet sign. Interchangeable Christmas home decor on a budget. How to make easy and simple reversible home décor for the holidays. Make a sign from twigs.

I made 2 smaller twig stars and 1 medium sized star. You can see how I made my twig stars click here.

I was so glad I snagged up a package of silver bells from the Dollar Tree prior to making this craft because without them I don’t think it would have turned out so cute or looked as festive for Christmas.

DIY twig stars for Christmas pallet sign. Interchangeable Christmas home decor on a budget. How to make easy and simple reversible home décor for the holidays. Make a sign from twigs.

Here’s what I used

1. PLACE THE DECORATIONS

The first thing I did was place my twig stars and bells on my pallet sign to see where I wanted them.

DIY twig stars for Christmas pallet sign. Interchangeable Christmas home decor on a budget. How to make easy and simple reversible home décor for the holidays. Make a sign from twigs.

2. MEASURE

Next I measured out how much jute I would need to hang my decorations from the backside of my sign. I doubled the amount of jute since I was looping it and hanging it from the backside.

DIY twig stars for Christmas pallet sign. Interchangeable Christmas home decor on a budget. How to make easy and simple reversible home décor for the holidays. Make a sign from twigs.

3. ADD THE JUTE

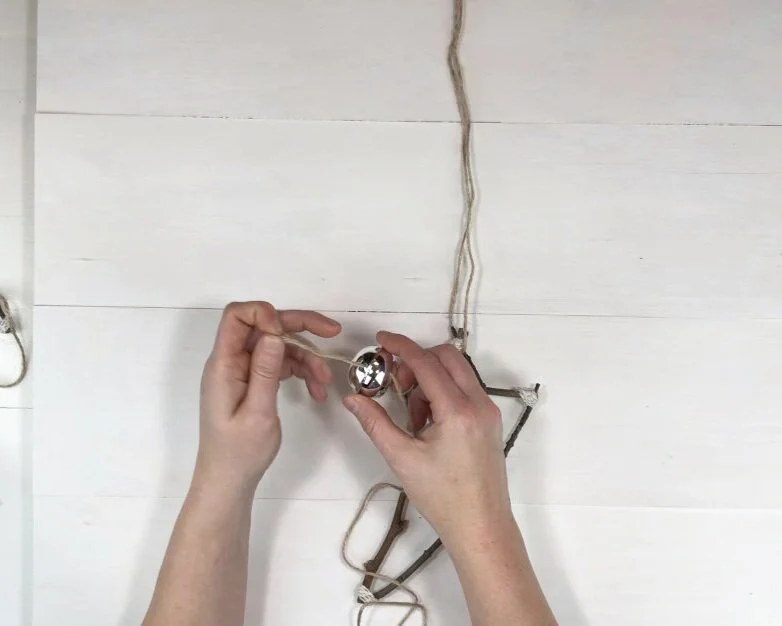
The stars were easy to add the jute to. I just fed the jute through the top of each twig star. The bells were a little more difficult. I wanted to see the snowflakes that were on the bottom side of the bells so I had to hang them sideways.

DIY twig stars for Christmas pallet sign. Interchangeable Christmas home decor on a budget. How to make easy and simple reversible home décor for the holidays. Make a sign from twigs.

I fed the jute through one side of the bell and then out the other side and tied the two ends of the jute together.

DIY twig stars for Christmas pallet sign. Interchangeable Christmas home decor on a budget. How to make easy and simple reversible home décor for the holidays. Make a sign from twigs.

4. HANG

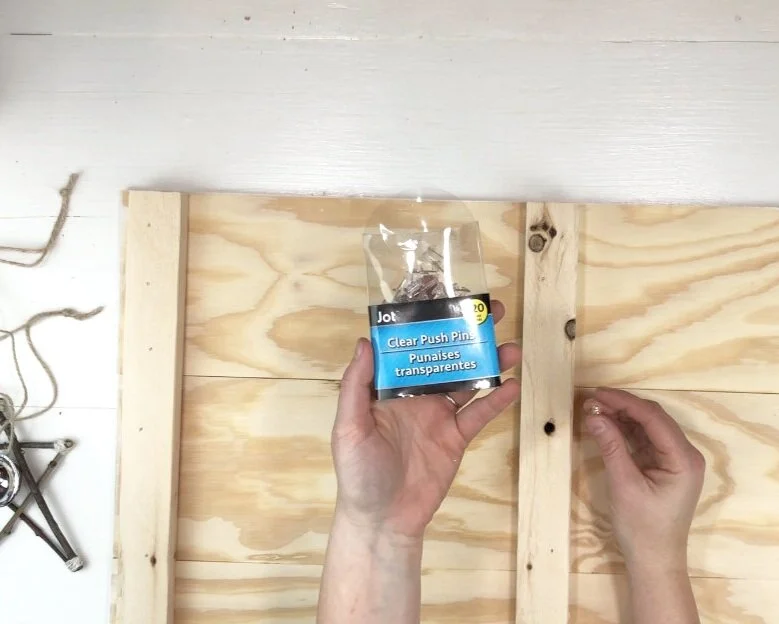
I hung my twig stars and silver bells from the backside of my pallet sign. I just kina eyeballed where I wanted them to be. Placed a pushpin there and pushed it in as far as I could get it.

DIY twig stars for Christmas pallet sign. Interchangeable Christmas home decor on a budget. How to make easy and simple reversible home décor for the holidays. Make a sign from twigs.

Then I looped where I had tied the jute ends together around the pushpin and draped it over to the front side of the pallet sign.

DIY twig stars for Christmas pallet sign. Interchangeable Christmas home decor on a budget. How to make easy and simple reversible home décor for the holidays. Make a sign from twigs.

I prop my pallet sign up on my dining room hutch, which one day I need to make time to give a makeover and I will most definitely post the before and after for you to see on here:)!!

DIY twig stars for Christmas pallet sign. Interchangeable Christmas home decor on a budget. How to make easy and simple reversible home décor for the holidays. Make a sign from twigs.

Happy crafting!

Check out more below

Baby it's cold outside warm up with hot cocoa & coffee DIY sign wood sign + free SVG

DIY baby it's cold outside warm up here hot cocoa & coffee bar wood sign. Free SVG for winter coffee bar sign. How to stencil on wood with no paint bleed. DIY wood sign painted stenciled sign with acrylic paint and oramask stencil film.

Winter coffee bar sign + free SVG

We bought a 120 yr old house over the summer. It’s a much bigger house than we’ve ever lived in AND I have space for an actual coffee bar now!! I’m so excited to decorate it for the winter & Christmas season.

DIY baby it's cold outside warm up here hot cocoa & coffee bar wood sign. Free SVG for winter coffee bar sign. How to stencil on wood with no paint bleed. DIY wood sign painted stenciled sign with acrylic paint and oramask stencil film.

I thought long and hard about how I would decorate my new rustic looking coffee bar and I opted for a winter hot cocoa & coffee theme instead of just decorating it for the Christmas season. That way I can keep my display up longer.

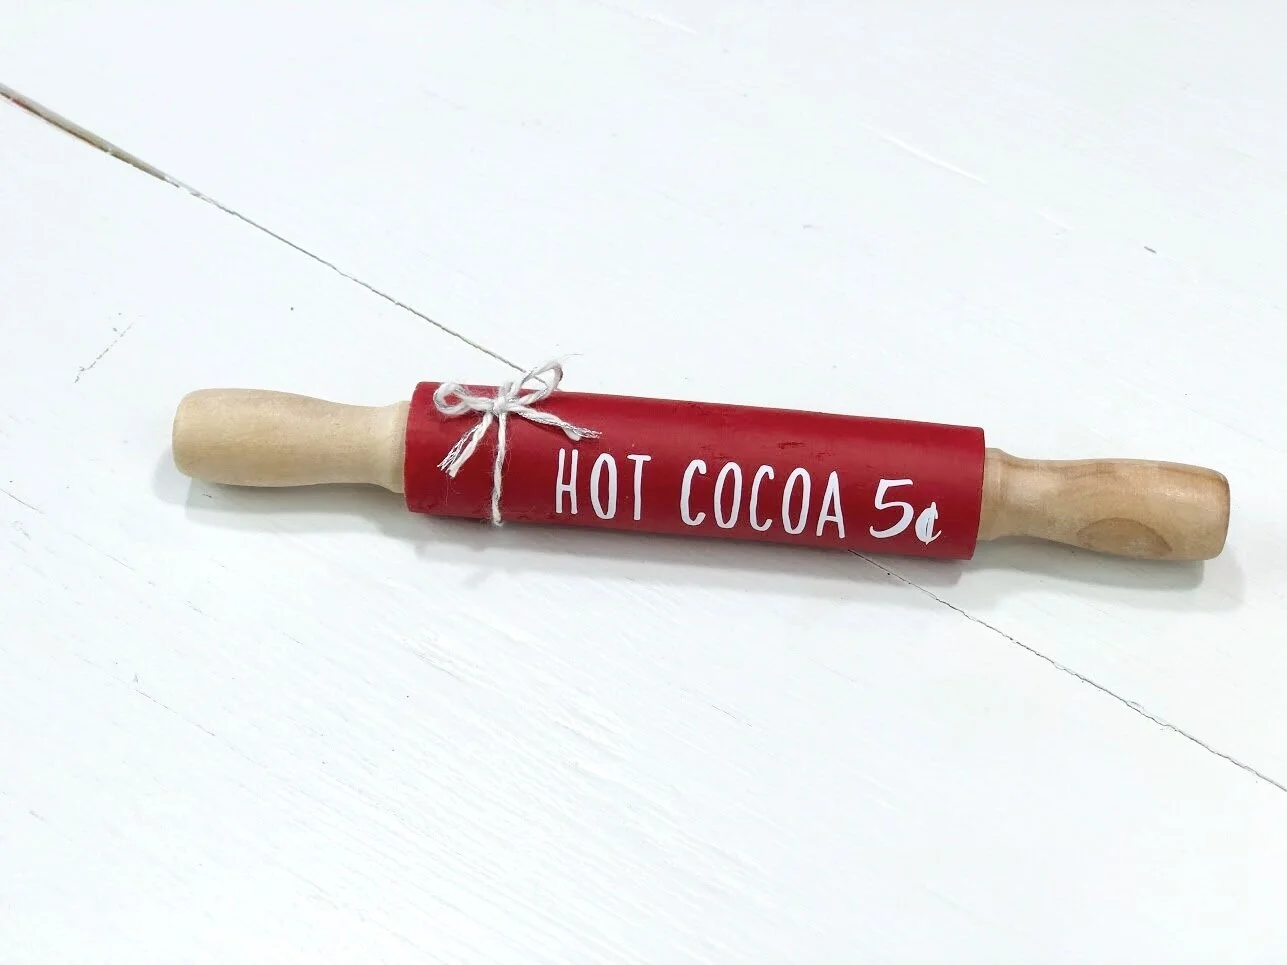
I also made this cute mini wood rolling pin to go on my winter coffee bar and I have a FREE SVG to go with it too.

If you’re just now starting out on your journey into the world of fancy cutting machines (aka a Cricut, Silhouette, or any other brand) be sure to read this post 10 MUST HAVE SUPPLIES & ACCESSORIES TO GET YOU STARTED WITH YOUR CRICUT.

Here’s what I used to make my mini wood winter sign

DIY baby it's cold outside warm up here hot cocoa & coffee bar wood sign. Free SVG for winter coffee bar sign. How to stencil on wood with no paint bleed. DIY wood sign painted stenciled sign with acrylic paint and oramask stencil film.


1.CUT & WEED THE STENCIL

The SVG I used for this sign can be found in my FREE resource library click here, or you can purchase the SVG here. I uploaded it into Cricut Design Space and adjusted it to fit perfectly onto my 5.5”x5.5” wood pine base.

DIY baby it's cold outside warm up here hot cocoa & coffee bar wood sign. Free SVG for winter coffee bar sign. How to stencil on wood with no paint bleed. DIY wood sign painted stenciled sign with acrylic paint and oramask stencil film.

I cut my stencil out on ORAMASK 813 STENCIL FILM. I know, my mat is very loved lol! You can definitely tell I get a lot of use out of my craft supplies.

DIY baby it's cold outside warm up here hot cocoa & coffee bar wood sign. Free SVG for winter coffee bar sign. How to stencil on wood with no paint bleed. DIY wood sign painted stenciled sign with acrylic paint and oramask stencil film.

Typically I suggest using an xacto knife to weed stenciled designs but since this design is so small with lots of lettering I am using a sewing pin instead. This isn’t my go to but for small designs it works much better than an xacto knife.

DIY baby it's cold outside warm up here hot cocoa & coffee bar wood sign. Free SVG for winter coffee bar sign. How to stencil on wood with no paint bleed. DIY wood sign painted stenciled sign with acrylic paint and oramask stencil film.

2. PAINT THE BASE

After my stencil was cut and weeded I painted my wood piece. I used matte finish black acrylic paint for this and my rusty but trusty 1” paint brush. This brush is one of my FAVORITE paint brushes! It may look like a hot mess but it paints beautifully!

DIY baby it's cold outside warm up here hot cocoa & coffee bar wood sign. Free SVG for winter coffee bar sign. How to stencil on wood with no paint bleed. DIY wood sign painted stenciled sign with acrylic paint and oramask stencil film.

I wanted this to look a little more rustic without having to take my sander to it. Instead of a painting all the way to the edges of the wood base I left a slight border around it and I made it super uneven to give it an even more farmhouse-y look. Then I let it dry completely.

3. APPLY THE STENCIL

After my base coat was completely dry I applied my stencil. Be sure when you do this step that your paint is TOTALLY dry. If it’s not the stencil film will peel up the base coat and it will be an ugly mess.

DIY baby it's cold outside warm up here hot cocoa & coffee bar wood sign. Free SVG for winter coffee bar sign. How to stencil on wood with no paint bleed. DIY wood sign painted stenciled sign with acrylic paint and oramask stencil film.

I cut my stencil so it would perfectly fit on my wood base that way I wouldn’t have to stress about centering it and making it all even.

DIY baby it's cold outside warm up here hot cocoa & coffee bar wood sign. Free SVG for winter coffee bar sign. How to stencil on wood with no paint bleed. DIY wood sign painted stenciled sign with acrylic paint and oramask stencil film.

I aligned the stencil on the base and used my vinyl squeegee to press out all the air bubbles. PRO TIP: work from the middle out to press out air bubbles.

DIY baby it's cold outside warm up here hot cocoa & coffee bar wood sign. Free SVG for winter coffee bar sign. How to stencil on wood with no paint bleed. DIY wood sign painted stenciled sign with acrylic paint and oramask stencil film.

Then I removed my stencil film. This removes best when you roll it away from your stencil vs trying to peel it up and off of your stencil.

DIY baby it's cold outside warm up here hot cocoa & coffee bar wood sign. Free SVG for winter coffee bar sign. How to stencil on wood with no paint bleed. DIY wood sign painted stenciled sign with acrylic paint and oramask stencil film.

4. SEAL THE STENCIL

Sealing your stencil isn’t 100% necessary but it does help to keep the paint bleed to a minimum. I use MATTE FINISH MOD PODGE for this.

DIY baby it's cold outside warm up here hot cocoa & coffee bar wood sign. Free SVG for winter coffee bar sign. How to stencil on wood with no paint bleed. DIY wood sign painted stenciled sign with acrylic paint and oramask stencil film.

I paint a super thin coat of mod podge onto my exposed areas of my stencil. Making sure I am almost pushing the mod podge into the stencil creases. Then I let it dry completely. Again, use a SUPER THIN COAT of mod podge if you do this step.

DIY baby it's cold outside warm up here hot cocoa & coffee bar wood sign. Free SVG for winter coffee bar sign. How to stencil on wood with no paint bleed. DIY wood sign painted stenciled sign with acrylic paint and oramask stencil film.

5.PAINT THE STENCIL

After my mod podge was dry I painted the exposed areas of my stencil with white acrylic paint.

DIY baby it's cold outside warm up here hot cocoa & coffee bar wood sign. Free SVG for winter coffee bar sign. How to stencil on wood with no paint bleed. DIY wood sign painted stenciled sign with acrylic paint and oramask stencil film.

I let the first coat dry then I painted a second coat.

DIY baby it's cold outside warm up here hot cocoa & coffee bar wood sign. Free SVG for winter coffee bar sign. How to stencil on wood with no paint bleed. DIY wood sign painted stenciled sign with acrylic paint and oramask stencil film.

Be sure when you do this step that you paint SUPER THIN layers. If your paint layers are too thick then your paint will peel up with you peel up your stencil.

6. PEEL UP THE STENCIL

Everyone is different but for me I always peel up my stencil while my paint is still wet. This method has worked for me on the THOUSANDS of signs I have painted so this is the method that I always recommend.

DIY baby it's cold outside warm up here hot cocoa & coffee bar wood sign. Free SVG for winter coffee bar sign. How to stencil on wood with no paint bleed. DIY wood sign painted stenciled sign with acrylic paint and oramask stencil film.

Start from one corner and peel toward the opposite corner.

Then use your sewing pin or an xacto knife to take out all of the little middle pieces. If you accidently get paint on your base paint no worries. When the paint is all dry just take a paint brush and paint over all of the little mistakes.

DIY baby it's cold outside warm up here hot cocoa & coffee bar wood sign. Free SVG for winter coffee bar sign. How to stencil on wood with no paint bleed. DIY wood sign painted stenciled sign with acrylic paint and oramask stencil film.

7. TOUCH UP

When the paint is all dry just take a paint brush and paint over all of the little mistakes.

After my sign was dry I put it up on my coffee bar even though it was almost 11pm lol!! No wonder my pic turned out super blah and yellow with the lighting . That’s ok!

DIY baby it's cold outside warm up here hot cocoa & coffee bar wood sign. Free SVG for winter coffee bar sign. How to stencil on wood with no paint bleed. DIY wood sign painted stenciled sign with acrylic paint and oramask stencil film.

Let me know what you think in the comments below.

Check out more DIY sign painting projects

DIY dowel rod snowman ornament DAY 8

DIY Christmas ornaments to make with kids. Easy snowman (snowmen) Christmas tree hanging ornament to make from a dowel rod. How to paint a snowman on a Christmas ornament easy craft tutorial.

This DIY Christmas ornament is SUPER EASY! Similar to the square snowmen ornaments I made last year. Only this time they are round and they have cute rosy cheeks like these mason jar snowmen I showed how to make on my blog. There are differences of course but all three of these snowmen are so adorable.

If you are a craft-aholic like myself, then you probably hang on to EVERYTHING. The dowels I’m using for this snowman ornament were actually leftover stems from a larger version of these 2x4 wood pumpkins. Really, I probably should have tossed these scraps BUT then I wouldn’t have been inspired to create this Christmas ornament tutorial to share here on my blog.

DIY Christmas ornaments to make with kids. Easy snowman (snowmen) Christmas tree hanging ornament to make from a dowel rod. How to paint a snowman on a Christmas ornament easy craft tutorial.

See more of my 30 DAYS OF DIY CHRISTMAS ORNAMENTS here

Here’s what you need to make a dowel rod snowman ornament

DIY Christmas ornaments to make with kids. Easy snowman (snowmen) Christmas tree hanging ornament to make from a dowel rod. How to paint a snowman on a Christmas ornament easy craft tutorial.

This ornament is so fun, easy and a wonderful Christmas craft to make with the kids. Don’t sweat it if they don’t come out perfect. Lord knows when we craft with our kids it’s never about the perfection, rather it’s about the memories and bond you’re building with your children.

1.PAINT

The first thing I did was paint the dowel rod piece all white, including the top and bottom. I let the first coat dry then I applied a second coat for a little more coverage then I let that coat dry before moving on to step 2.

DIY Christmas ornaments to make with kids. Easy snowman (snowmen) Christmas tree hanging ornament to make from a dowel rod. How to paint a snowman on a Christmas ornament easy craft tutorial.

2. CHEEKS

Because I want the nose to go over the cheek I painted the snowman’s cheeks first. This takes a TINY amount of paint, like a teeny tiny amount. I lightly tapped the tip of my paint brush into the pink paint then into the white paint, but less white paint than pink paint on my brush.

DIY Christmas ornaments to make with kids. Easy snowman (snowmen) Christmas tree hanging ornament to make from a dowel rod. How to paint a snowman on a Christmas ornament easy craft tutorial.

Then I made swirly circles with my brush. I probably should have used a round tipped brush for this but I grabbed a pointy tipped one and just didn’t want to hunt for a new brush so I went with it. It worked but not as good as it could have with a round tipped brush.

I kept added white and pink paint to the cheeks till I was happy with the way they looked.

3. NOSE

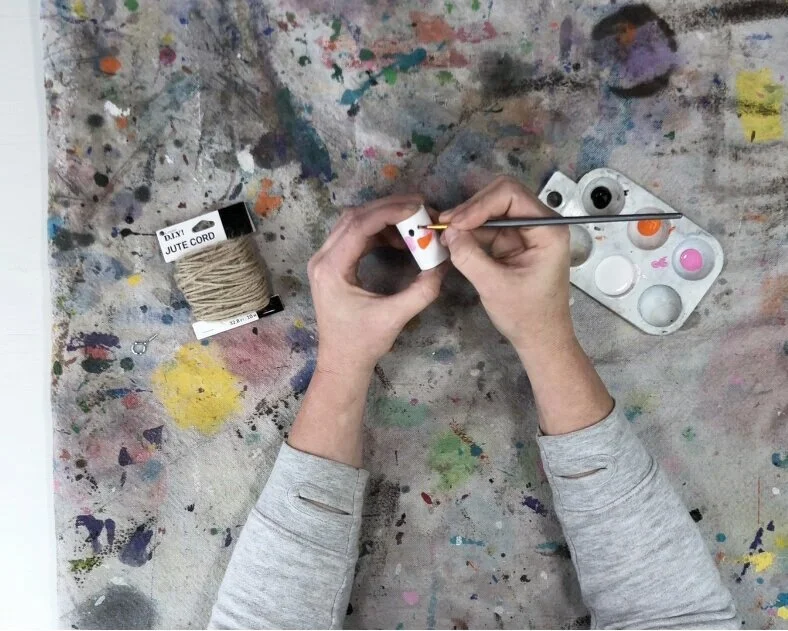
After the cheeks were dry I painted on an orange nose. I used the same pointy brush for this. I made a sideways triangle then filled it in with orange paint. I added a tiny bit of black paint to give it a little depth.

DIY Christmas ornaments to make with kids. Easy snowman (snowmen) Christmas tree hanging ornament to make from a dowel rod. How to paint a snowman on a Christmas ornament easy craft tutorial.

4.EYES & MOUTH

Using the same brush I painted on irregular looking circles for the eyes and for the mouth in black. I really tried to make them look like coal.

DIY Christmas ornaments to make with kids. Easy snowman (snowmen) Christmas tree hanging ornament to make from a dowel rod. How to paint a snowman on a Christmas ornament easy craft tutorial.

After the black paint was dry I used the end of my paint brush to make accent dots on the eyes and mouth.

DIY Christmas ornaments to make with kids. Easy snowman (snowmen) Christmas tree hanging ornament to make from a dowel rod. How to paint a snowman on a Christmas ornament easy craft tutorial.

5. SCREW EYE AND JUTE

I screwed the hanger (screw eye) into the top of my snowman ornament to hang it. Then I added a piece of jute to hang it from the Christmas tree.

DIY Christmas ornaments to make with kids. Easy snowman (snowmen) Christmas tree hanging ornament to make from a dowel rod. How to paint a snowman on a Christmas ornament easy craft tutorial.

I hope you enjoyed this crafty Christmas ornament tutorial. Let me know if you have any questions in the comments below.

Don’t forget to pin the image below to save for later :)!

DIY Christmas ornaments to make with kids. Easy snowman (snowmen) Christmas tree hanging ornament to make from a dowel rod. How to paint a snowman on a Christmas ornament easy craft tutorial.

Happy Crafting!

Check out more Christmas posts below

DIY wood spool ornament, DAY 5

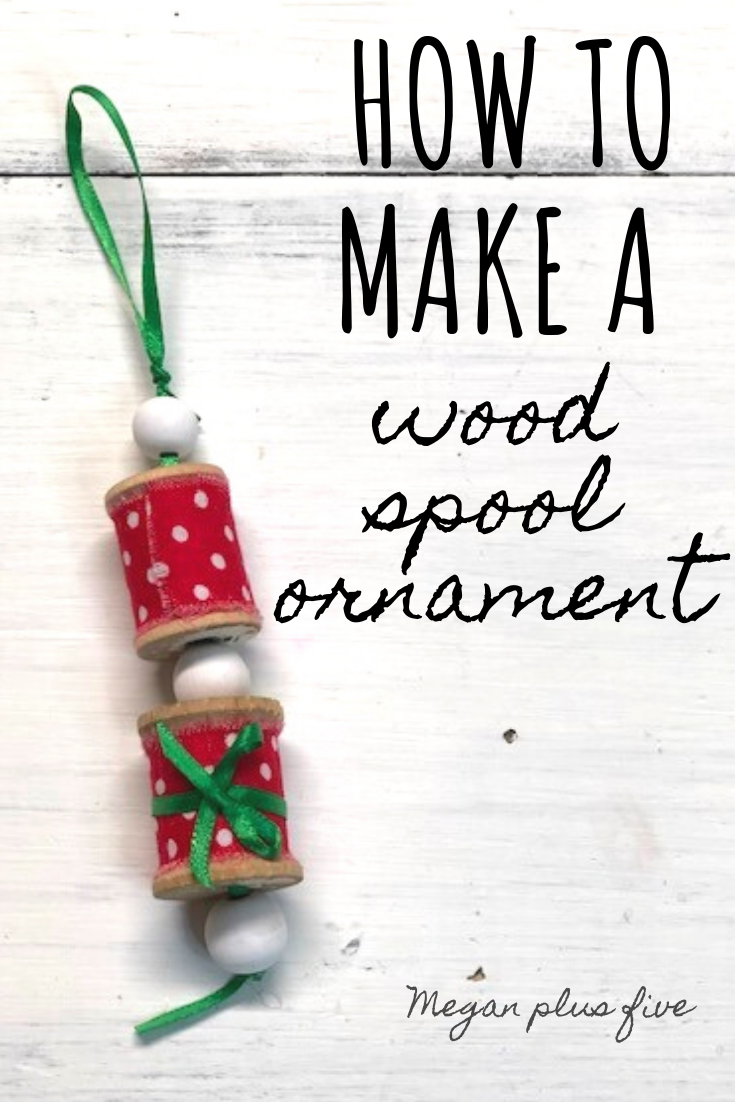
Easy Christmas ornament. How to make an upcycled wood spool Christmas ornament. Simple ornanments to DIY at home with the kids.

DIY WOOD SPOOL CHRISTMAS ORNAMENT

Day 5 of 30 days of DIY Christmas ornaments

Hey guys! Day 5 of 30 days of DIY Christmas ornaments is a really special one for me. I have several of these old wood spools that were given to me by my grandma, the mother of all things crafty! This women could paint a masterpiece with mud and sew like no ones business! She was the most talented and creative soul I have ever met in my lifetime and I’m thankful to have been given a small fraction of her wonderful God given talents.
Affiliate Disclosure. Some of the links on this website are affiliate links, which means that I may earn a small commission if you click on the link or make a purchase using the link. If you make a purchase you will not be charged anything additional. This is just a way I can help add to our family finances to raise our four daughters. Please know I would never recommend a product or service I do not totally stand behind.

In her old sewing basket she had held on to some super old wooden thread spools. Did I mention my grandma also kept everything??? I think this is a crafter gene lol! Must not throw anything away because you just never know when you’ll need it! So these little wooden beauties were among the wonderful treasures she kept in her old wicker sewing basket. I, of course, could not ever get rid of such gems! So they’ve been sitting in that basket till now. I didn’t want to alter them too much so painting them was out of the question. But glue a piece of fabric would cause too much damage so I thought ‘why not make a fun little Christmas ornament out of a couple of them?’ And so I did!

Day 5 of DIY Christmas ornaments is probably the easiest ornament I’ve made so far on my 30 days of ornament making. If you can use a glue gun and thread a bead you are a shoe in!

You can watch the WOOD SPOOL DIY CHRISTMAS ORNMENT video

Here’s what you’ll need to make your own wood spool DIY Christmas ornament

DIY wood spool Christmas ornament. How to make an easy Christmas tree ornament with old wooden spools. Scrap piece ornament making.

First you need to cover your wood spools in fabric. I used a scrap piece of fabric I had left over from when I made this DIY 4TH OF JULY TIE RAG WREATH. I don’t think I included this particular fabric in my tie wreath but I bought it the the intent to use it for that lol. It never hurts to have extra pretty fabrics on hand!

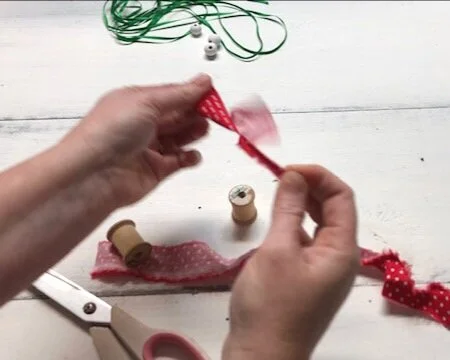
Cut your fabric piece so it’s the size of the middle party of your wooden spool. I really like the frayed edges so I cut a tiny slit in the fabric then I ripped it the rest of the way to give it that frayed look.

DIY Christmas ornament craft, how to make your own Christmas ornaments easy tutorial. Wood spool craft to do at home. DIY rustic and farmhouse Christmas decor

If you are more of a visual learner {this is totally me!} be sure to check out my YouTube channel. This is THE hub I use to hold all of my DIY CRAFTY VIDEO TUTORIALS


Then glue your fabric pieces to your wood thread spools. I used as little glue as possible for this so I didn’t ruin the wooden spool.

*crafty tip- if you are making this with little ones be sure you are using a LOW temp glue gun. I have found that using the mini glue guns they don’t get as hot as the larger full sized glue guns.

DIY Christmas ornament craft, how to make your own Christmas ornaments easy tutorial. Wood spool craft to do at home. DIY rustic and farmhouse Christmas decor

I added a small ribbon bow around the larger of the two wood spools. I didn’t want them to look identical and thought this little bow broke it up just enough.

DIY Christmas ornament craft, how to make your own Christmas ornaments easy tutorial. Wood spool craft to do at home. DIY rustic and farmhouse Christmas decor

Now your DIY wood spool Christmas ornament is ready to put together. The wooden beads I used I had already painted from a previous project I did, unfortunately I don’t have a tutorial for this :/ but it’s super easy to paint them. I used white acrylic paint and painted two thin coats on each bead. To make it even easier I set the beads on the tip of an xacto knife to hold on to it while I painted. I just placed the sharp pointy end of the xacto knife in the hole of the bead and it was perfect!

You’ll need to cut a piece of ribbon that is 3x the length of what your ornament will be. Thread on one of your painted beads on the bottom, leaving an inch or so. Then tie the bottom piece of the ribbon in a couple of knots. Next place the knot so that it is just under the opening of the hole on the bead, apply a decent sized drop of hot glue and let it dry completely. This will keep your ornament from falling apart.

I tried to just tie a ton of knots that I thought were bigger than the hole of the wood bead but the giant knot kept slipping through, so I gave up and the hot glue worked SO much better!

DIY Christmas ornament craft, how to make your own Christmas ornaments easy tutorial. Wood spool craft to do at home. DIY rustic and farmhouse Christmas decor

After the hot glue is dry you can string on the rest of the pieces of your ornament. Here’s the order mine were in from top to bottom

  • bead

  • wood spool

  • bead

  • wood spool

  • bead

Then tie what’s left of the ribbon on the top part of the ornament into a loop. Be sure you don’t pull the ribbon clean through the wood spools and beads. I held the ribbon at the base of then pulled it tight.

DIY Christmas ornament craft, how to make your own Christmas ornaments easy tutorial. Wood spool craft to do at home. DIY rustic and farmhouse Christmas decor

And that’s it. Your DIY wood spool Christmas ornament is finished:)!! I hope you enjoyed this easy craft tutorial and I would LOVE to hear how yours turns out if you make your own.

If you have any questions please feel free to reach out to me. Leave a comment below or send me an email.

Check out more posts below

DIY embroidery hoop winter wall hanging

DIY EMBROIDERY HOOP WINTER WALL HANGING. Fun embroidery hoop craft that is so easy to make at home for the holidays

How to make an EMBROIDERY HOOP wall hanging for winter

Embroidery hoops are such a versatile craft tool. You can use them for the obvious of embroidery OR you can use them for so many other projects. Like a nursery mobile, a hoop to hold your screen for faux screen printing, or this fun winter wall hanging that you’re reading.

If you love the little pinecone accents check out this EASY PINECONE DOOR HANGER. And if you have little ones you HAVE to try this EASY & MESS FREE PINECONE ART! My older girls had SO much fun making their own pinecone paintings.

Affiliate Disclosure. Some of the links on this website are affiliate links, which means that I may earn a small commission if you click on the link or make a purchase using the link. If you make a purchase you will not be charged anything additional.

Don’t have access to the right tools or just don’t have time to gather the supplies? No problem:)! I’ve put together this super easy craft kit just for times like this! Click I NEED A CRAFT KIT below to order yours from my Etsy shop.

Don’t need a craft kit? Here’s what you’ll need

Skip to the bottom to catch the full video tutorial


First you need to stain your wood base and your hoop. I recommend using a quick dry stain. Let dry

DIY embroidery hoop winter wall hanging. How to make your own winter decor with pinecones.

Next, after your wood base is dry you want to distress it. I used my Ryobi sander for this step but you can use a piece of 120 grit sandpaper. Focus on the edges and corners and lightly sand the sides and front

DIY embroiery hoop wall hanging for winter. How to use your Ryobi sander to distress your winter decor.

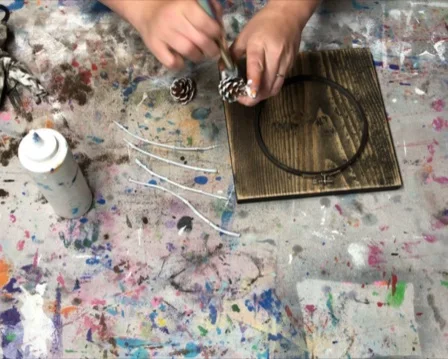
Now paint your sticks completely white and the outer edges of your pine cones white. Use a dabbing motion when painting the pinecones.

DIY embroidery hoop winter wall hanging. How to paint pinecones to add to your winter decorations.

Measure out how long you would like your bells to hang down then add a couple of inches. I made my bells to hang at staggering lengths.

Feed one end of the twin into the hanging part of the bell and tie it off. Repeat this step for all three.

DIY embroidery hoop winter wall hanging. How to add rustic craft bells to your farmhouse and country chic winter decorations.

After your stick are dry gather them together and wrap the green floral wire around the center. This will help to keep them together while you are placing the accents on. Then place your accent pieces on top of the sticks and wrap the middle section of the sticks and accents with twine.

DIY embroidery hoop winter wall hanging. How to add sticks adn twine to your rustic farmhouse winter decorations.

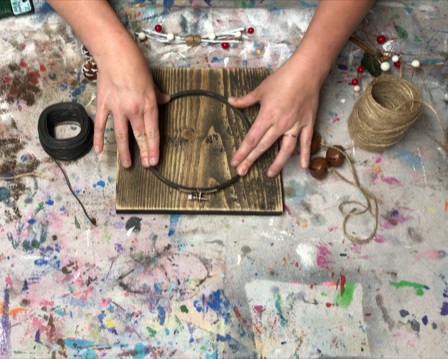
Now glue down your embroidery hoop to your wood base. Apply glue to back side of the hoop {whichever side you prefer} then place it on your wood base and press down firmly.

DIY embroidery hoop winter wall hanging. How to use an embroidery hoop to make your own rustic winter decor for your farmhouse or country chic style.

Tie your bells around the metal part on the top section of the embroidery hoop. Pull this very tight. Add a dab of hot glue to the knot and pull it tight again.

DIY embroidery hoop winter wall hanging. How to add rustic bells to your farmhouse or country chic winter decorations. Easy craft tutorial.

Use your glue gun to glue down your accents. To get a secure hold, hold the accents in place till the hot glue is completely dry.

DIY embroidery hoop winter wall hanging. How to make your own farmhouse and country chic winter and Christmas decorations.

Trim down the pieces of twine from where you tied them onto the embroidery hoop and the you are done!

DIY embroidery hoop wall hanging. How to make your own farmhouse and country chic winter and Christmas decorations.

Check out the full video tutorial below

Snowman snack, easy, simple and mess free

Snowman snack, easy, simple and mess free

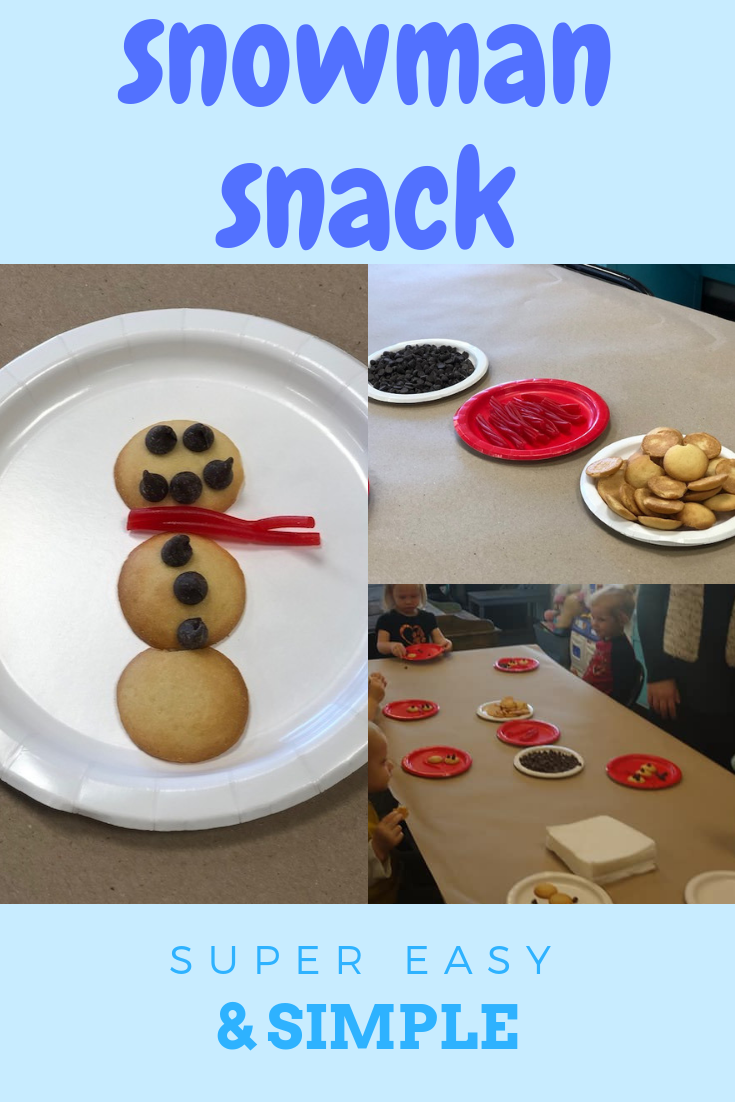
Here’s a fun snack for those little ones that LOVE fun foods! It’s SUPER easy, almost totally mess free {you might have some crumbs but that will pretty much be it}, very friendly on the wallet and honestly you probably already have these items on hand.

Snowman snack,  easy, simple & mess free

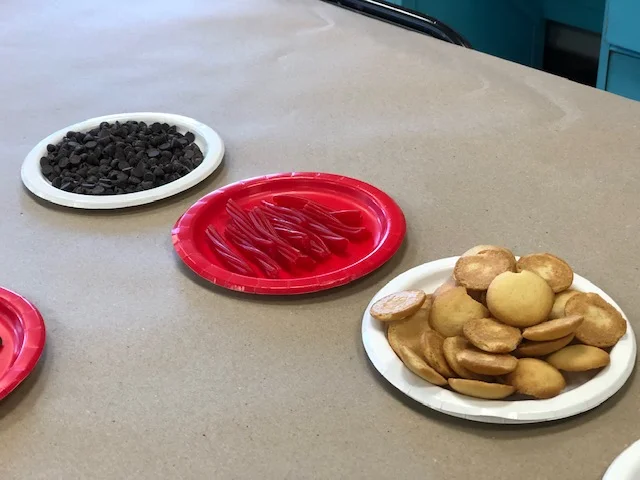
Here’s what you’ll need

  • vanilla wafers

  • chocolate chips {we used regular ones but the mini’s would have been PERFECT for this snack}

  • twizzlers pull & peel

That’s it! There aren’t a whole lot of steps to this adorable little snack.

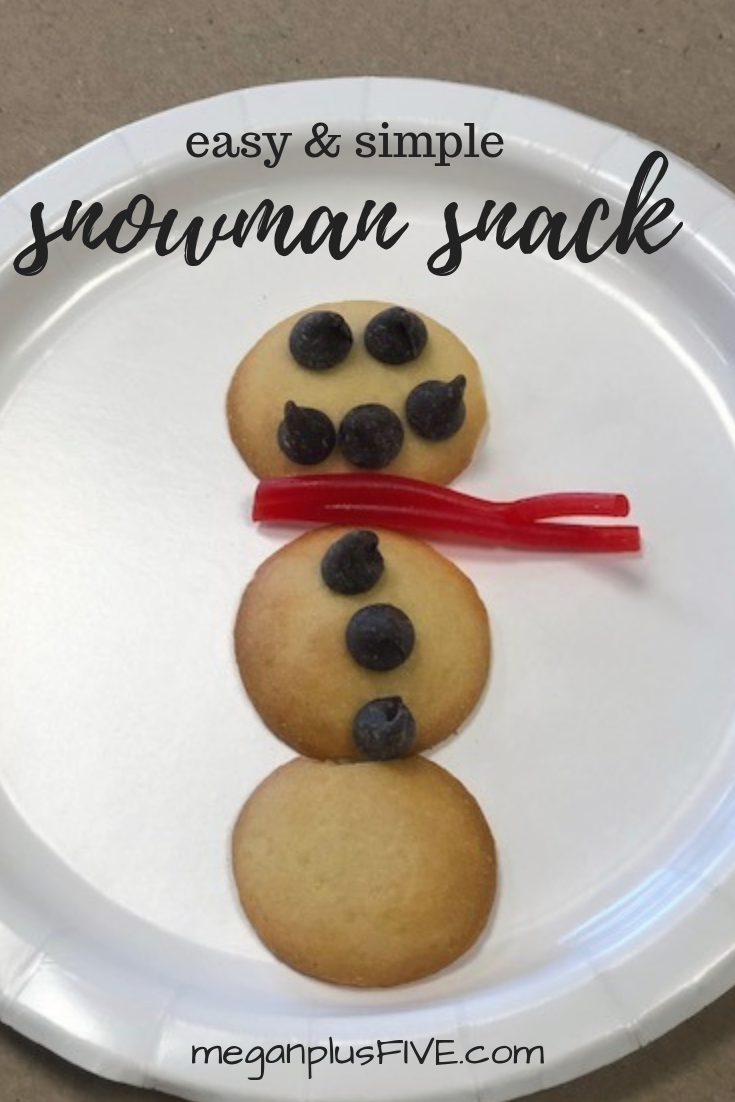
First, place three vanilla wafers in a line, like a snowman. Then use the chocolate chips to make a cute face. Last peel off a couple pieces of the twizzlers for a scarf. Put them in in between the first and second wafers and viola you have your very own snowman snack!

I told you it was super simple. Enjoy!

easy & simple snowman snack

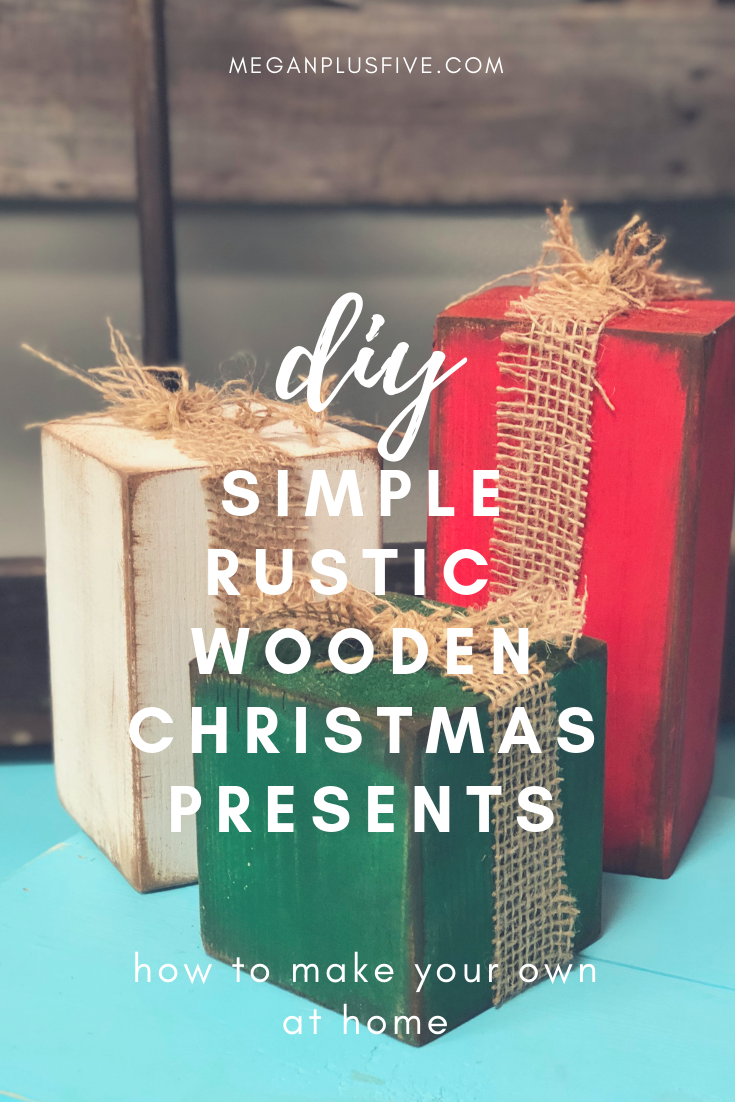
DIY simple rustic wooden Christmas presents, how to make your own

DIY simple rustic wooden Christmas presents, how to make your own

DIY FAUX WOOD CHRISTMAS PRESENTS

I’m a busy wife, momma, and business owner so naturally I LOVE a good craft that I can whip out really fast and that makes the heads turn. These little guys are just the perfect DIY for the job!

In our studio I try to reuse the same base sizes over and over again. This makes for a smooth operation. I try to create pieces from the basic bases we have on hand at the shop. When I stumbled across something similar on Pinterest I had to make my own version of these adorable faux presents.

I know not everyone has the resources or expensive tools to make all their crafty dreams happen so I’ve put together CRAFT KITS for our most popular DIY’s. You can pick up our FAUX PRESENT KIT HERE

DIY simple rustic wooden Christmas presents, how to make your own

If you wanna start from scratch here’s what you’ll need:

DIY simple rustic wooden Christmas presents, how to make your own

These are SO super simple, once you do one set you’ll be making them for everyone for Christmas! So let’s get started.

First, you want to be sure all your pieces are sanded to knock any splintery ends. If you purchased our CRAFT KIT you do not need to do this step as it’s already been done for you:)!

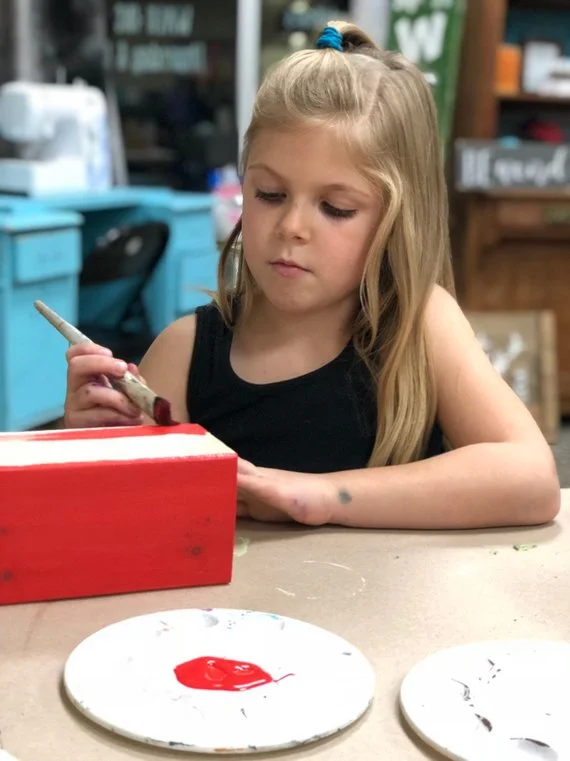
Next, you want to paint each block a different color. I did two coats on mine. Be sure you wait till the first coat is TOTALLY DRY before applying the second coat. If you don’t, applying wet paint on top of wet paint tends to pull up the layer underneath.

DIY simple rustic wooden Christmas presents, how to make your own

Can we just take a minute and adore this girl! Isn’t my little helper so stinking CUTE! She’s always up for being my little crafting model Ok, back to the tutorial…

Once your paint is dry and you are happy with the coverage you’ll need to sand on the edges and the corners of your blocks. Take your 120 grit sand paper and go over the areas that would be naturally worn. You don’t have to use 120, that’s just my go to grit. Any grit of sandpaper will work, just go slow at first to see how much pressure you need to apply. I used my RYOBI cordless sander for this step.

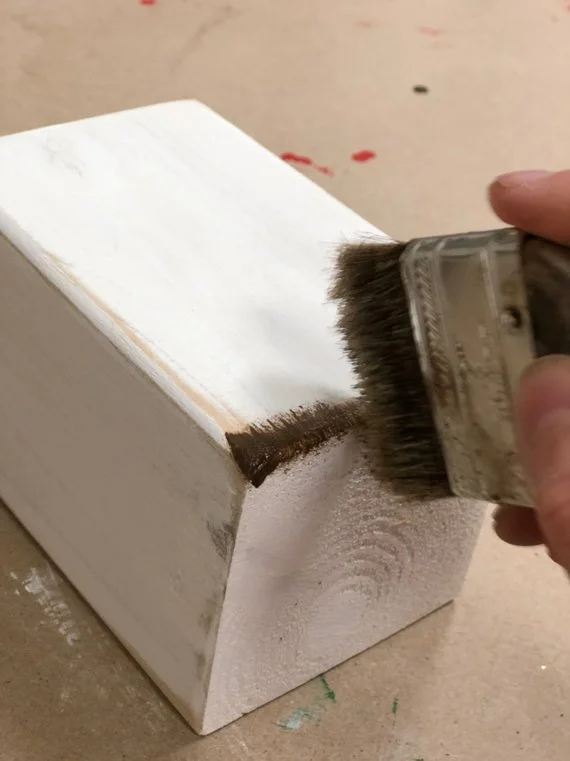
Next you want to apply the dark wax to your blocks. If you’ve never worked with dark wax before you might want to test it out on a piece of paper first. A little wax goes a long way.

Take your chip brush and barely dip your bristles in, dab off onto a piece of paper or paper towel. Just like you did when sanding, focus on applying the wax to the areas that would be naturally worn. You’ll want to apply to the corners, edges, then do a light quick swipe on all the sides. This will give it a real natural rustic finish. The wax gets into all those uneven areas, much like how dirt would, and make it look old.

faux wooden presents4.jpgDIY simple rustic wooden Christmas presents, how to make your own

After you have your wax applied to all of your block the last step is to add your burlap “bow”. I picked up a roll of looser knit burlap at my local Walmart but any burlap will work. Fun fact, the looser the knit the easier it will unravel when cut. I cut my burlap into 2” wide strips and measured their length so they stuck up 3”-4” above the blocks like shown below. Now tie those two pieces in a knot. You’ll do the same on the last two blocks. And you’re done! Literally can’t get any easier.

DIY simple rustic wooden Christmas presents, how to make your own

Place them beside your tree, on your kitchen counter, or your mantle and admire them all Christmas season!

DIY simple rustic wooden Christmas presents, how to make your own

These little guys make such great gifts, a fun craft night with the family, or crack open a couple bottles of your fave wine with your fave girlfriends and make it a moms night in Pinterest party!

I hope you love this DIY! If you did I’d love to hear your feedback…even better, I’d LOVE to see pics of your finished faux presents.