DIY wood spool ornament, DAY 5

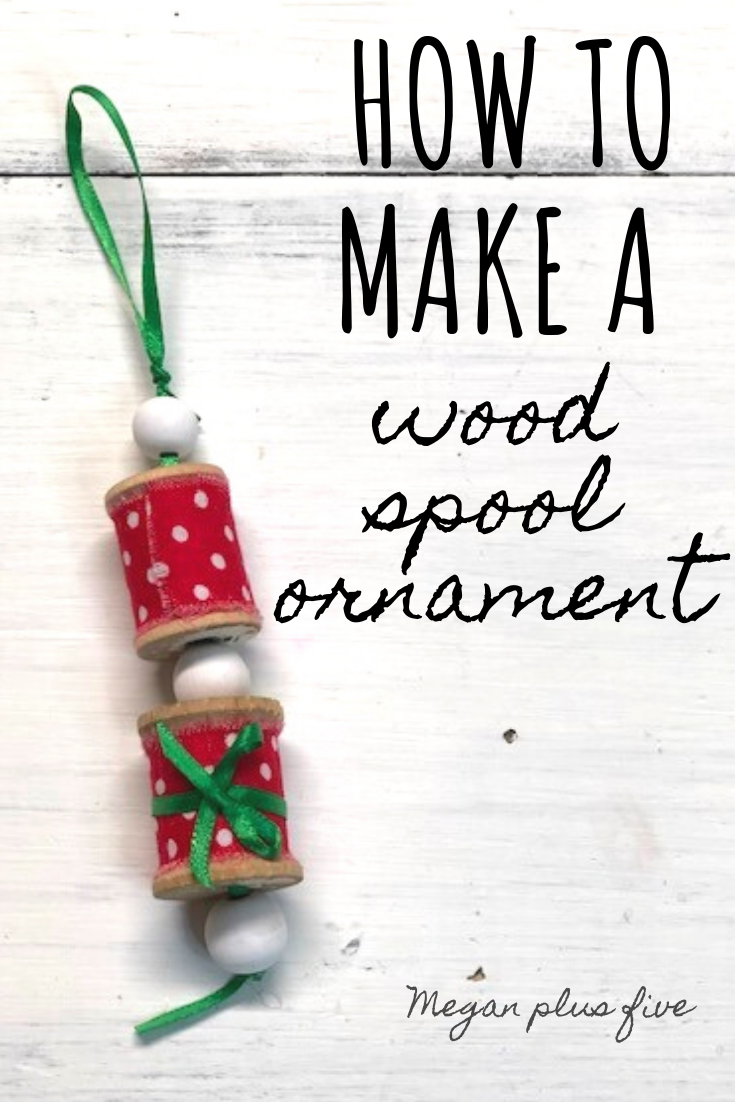
Easy Christmas ornament. How to make an upcycled wood spool Christmas ornament. Simple ornanments to DIY at home with the kids.

DIY WOOD SPOOL CHRISTMAS ORNAMENT

Day 5 of 30 days of DIY Christmas ornaments

Hey guys! Day 5 of 30 days of DIY Christmas ornaments is a really special one for me. I have several of these old wood spools that were given to me by my grandma, the mother of all things crafty! This women could paint a masterpiece with mud and sew like no ones business! She was the most talented and creative soul I have ever met in my lifetime and I’m thankful to have been given a small fraction of her wonderful God given talents.

Affiliate Disclosure. Some of the links on this website are affiliate links, which means that I may earn a small commission if you click on the link or make a purchase using the link. If you make a purchase you will not be charged anything additional. This is just a way I can help add to our family finances to raise our four daughters. Please know I would never recommend a product or service I do not totally stand behind.

In her old sewing basket she had held on to some super old wooden thread spools. Did I mention my grandma also kept everything??? I think this is a crafter gene lol! Must not throw anything away because you just never know when you’ll need it! So these little wooden beauties were among the wonderful treasures she kept in her old wicker sewing basket. I, of course, could not ever get rid of such gems! So they’ve been sitting in that basket till now. I didn’t want to alter them too much so painting them was out of the question. But glue a piece of fabric would cause too much damage so I thought ‘why not make a fun little Christmas ornament out of a couple of them?’ And so I did!

Day 5 of DIY Christmas ornaments is probably the easiest ornament I’ve made so far on my 30 days of ornament making. If you can use a glue gun and thread a bead you are a shoe in!

You can watch the WOOD SPOOL DIY CHRISTMAS ORNMENT video

Here’s what you’ll need to make your own wood spool DIY Christmas ornament

DIY wood spool Christmas ornament. How to make an easy Christmas tree ornament with old wooden spools. Scrap piece ornament making.

First you need to cover your wood spools in fabric. I used a scrap piece of fabric I had left over from when I made this DIY 4TH OF JULY TIE RAG WREATH. I don’t think I included this particular fabric in my tie wreath but I bought it the the intent to use it for that lol. It never hurts to have extra pretty fabrics on hand!

Cut your fabric piece so it’s the size of the middle party of your wooden spool. I really like the frayed edges so I cut a tiny slit in the fabric then I ripped it the rest of the way to give it that frayed look.

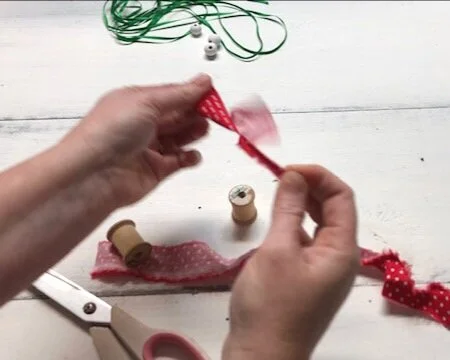
DIY Christmas ornament craft, how to make your own Christmas ornaments easy tutorial. Wood spool craft to do at home. DIY rustic and farmhouse Christmas decor

If you are more of a visual learner {this is totally me!} be sure to check out my YouTube channel. This is THE hub I use to hold all of my DIY CRAFTY VIDEO TUTORIALS


Then glue your fabric pieces to your wood thread spools. I used as little glue as possible for this so I didn’t ruin the wooden spool.

*crafty tip- if you are making this with little ones be sure you are using a LOW temp glue gun. I have found that using the mini glue guns they don’t get as hot as the larger full sized glue guns.

DIY Christmas ornament craft, how to make your own Christmas ornaments easy tutorial. Wood spool craft to do at home. DIY rustic and farmhouse Christmas decor

I added a small ribbon bow around the larger of the two wood spools. I didn’t want them to look identical and thought this little bow broke it up just enough.

DIY Christmas ornament craft, how to make your own Christmas ornaments easy tutorial. Wood spool craft to do at home. DIY rustic and farmhouse Christmas decor

Now your DIY wood spool Christmas ornament is ready to put together. The wooden beads I used I had already painted from a previous project I did, unfortunately I don’t have a tutorial for this :/ but it’s super easy to paint them. I used white acrylic paint and painted two thin coats on each bead. To make it even easier I set the beads on the tip of an xacto knife to hold on to it while I painted. I just placed the sharp pointy end of the xacto knife in the hole of the bead and it was perfect!

You’ll need to cut a piece of ribbon that is 3x the length of what your ornament will be. Thread on one of your painted beads on the bottom, leaving an inch or so. Then tie the bottom piece of the ribbon in a couple of knots. Next place the knot so that it is just under the opening of the hole on the bead, apply a decent sized drop of hot glue and let it dry completely. This will keep your ornament from falling apart.

I tried to just tie a ton of knots that I thought were bigger than the hole of the wood bead but the giant knot kept slipping through, so I gave up and the hot glue worked SO much better!

DIY Christmas ornament craft, how to make your own Christmas ornaments easy tutorial. Wood spool craft to do at home. DIY rustic and farmhouse Christmas decor

After the hot glue is dry you can string on the rest of the pieces of your ornament. Here’s the order mine were in from top to bottom

  • bead

  • wood spool

  • bead

  • wood spool

  • bead

Then tie what’s left of the ribbon on the top part of the ornament into a loop. Be sure you don’t pull the ribbon clean through the wood spools and beads. I held the ribbon at the base of then pulled it tight.

DIY Christmas ornament craft, how to make your own Christmas ornaments easy tutorial. Wood spool craft to do at home. DIY rustic and farmhouse Christmas decor

And that’s it. Your DIY wood spool Christmas ornament is finished:)!! I hope you enjoyed this easy craft tutorial and I would LOVE to hear how yours turns out if you make your own.

If you have any questions please feel free to reach out to me. Leave a comment below or send me an email.

Check out more posts below

DIY embroidery hoop winter wall hanging

DIY EMBROIDERY HOOP WINTER WALL HANGING. Fun embroidery hoop craft that is so easy to make at home for the holidays

How to make an EMBROIDERY HOOP wall hanging for winter

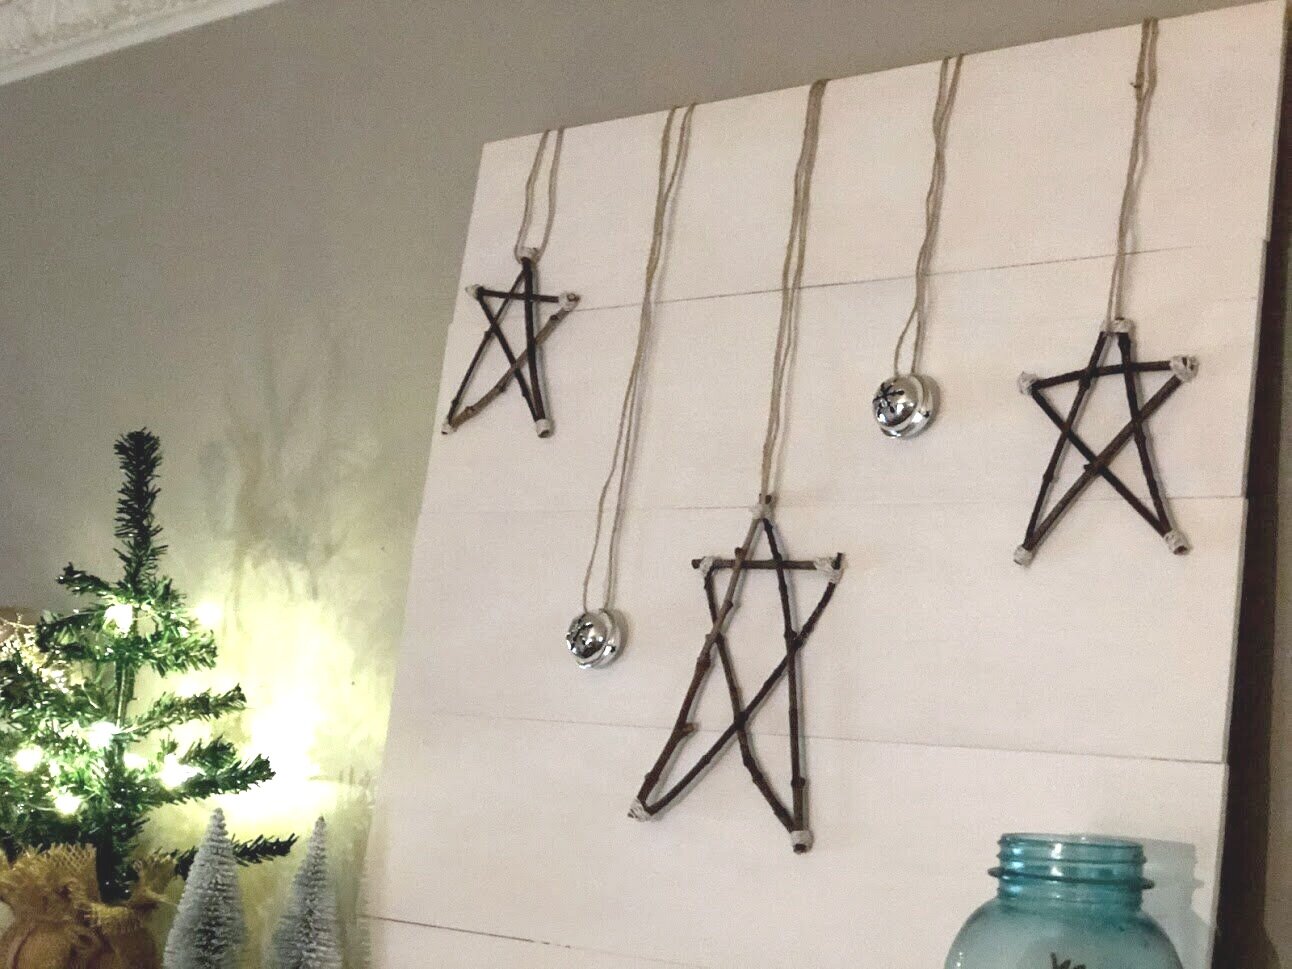
Embroidery hoops are such a versatile craft tool. You can use them for the obvious of embroidery OR you can use them for so many other projects. Like a nursery mobile, a hoop to hold your screen for faux screen printing, or this fun winter wall hanging that you’re reading.

If you love the little pinecone accents check out this EASY PINECONE DOOR HANGER. And if you have little ones you HAVE to try this EASY & MESS FREE PINECONE ART! My older girls had SO much fun making their own pinecone paintings.

Affiliate Disclosure. Some of the links on this website are affiliate links, which means that I may earn a small commission if you click on the link or make a purchase using the link. If you make a purchase you will not be charged anything additional.

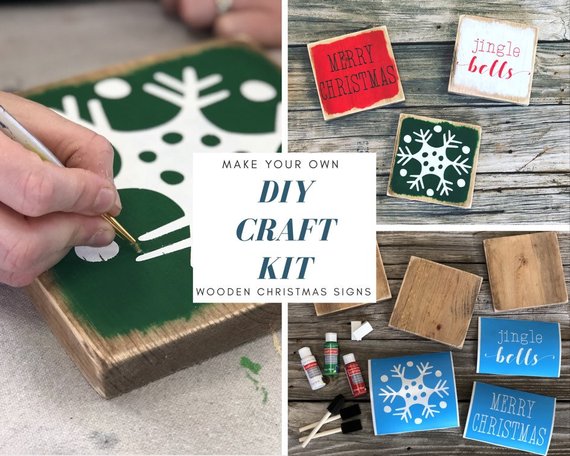
Don’t have access to the right tools or just don’t have time to gather the supplies? No problem:)! I’ve put together this super easy craft kit just for times like this! Click I NEED A CRAFT KIT below to order yours from my Etsy shop.
Don’t need a craft kit? Here’s what you’ll need

Skip to the bottom to catch the full video tutorial


First you need to stain your wood base and your hoop. I recommend using a quick dry stain. Let dry

DIY embroidery hoop winter wall hanging. How to make your own winter decor with pinecones.

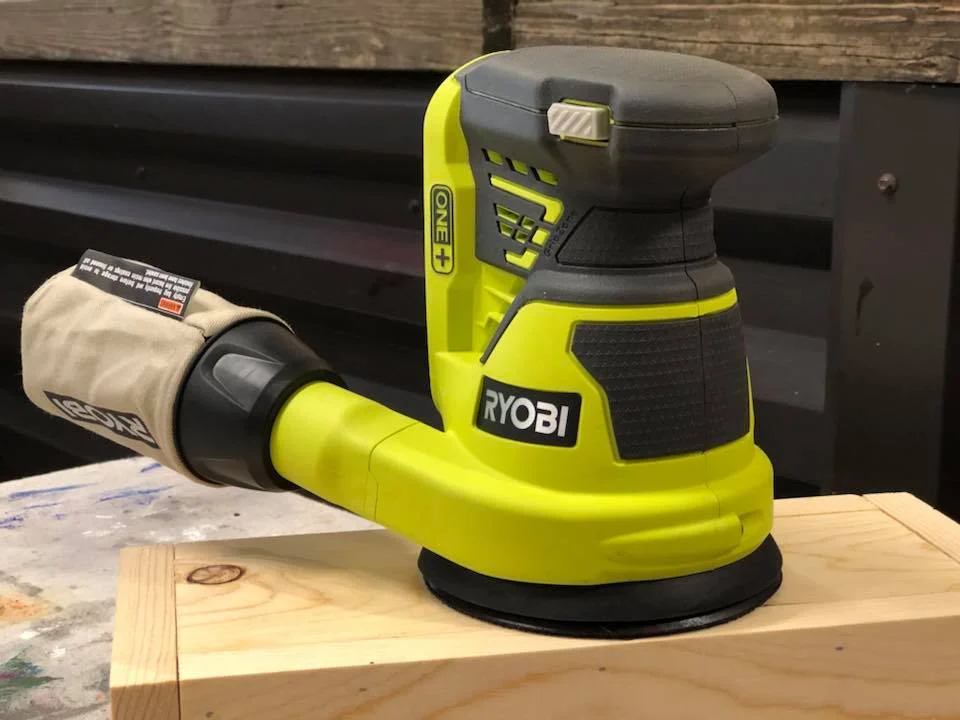
Next, after your wood base is dry you want to distress it. I used my Ryobi sander for this step but you can use a piece of 120 grit sandpaper. Focus on the edges and corners and lightly sand the sides and front

DIY embroiery hoop wall hanging for winter. How to use your Ryobi sander to distress your winter decor.

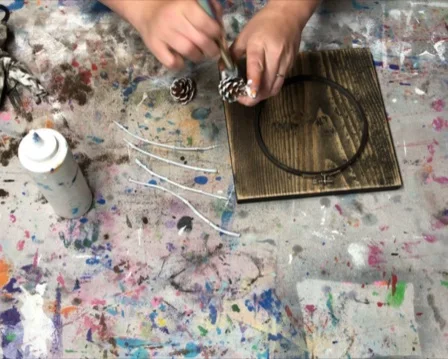
Now paint your sticks completely white and the outer edges of your pine cones white. Use a dabbing motion when painting the pinecones.

DIY embroidery hoop winter wall hanging. How to paint pinecones to add to your winter decorations.

Measure out how long you would like your bells to hang down then add a couple of inches. I made my bells to hang at staggering lengths.

Feed one end of the twin into the hanging part of the bell and tie it off. Repeat this step for all three.

DIY embroidery hoop winter wall hanging. How to add rustic craft bells to your farmhouse and country chic winter decorations.

After your stick are dry gather them together and wrap the green floral wire around the center. This will help to keep them together while you are placing the accents on. Then place your accent pieces on top of the sticks and wrap the middle section of the sticks and accents with twine.

DIY embroidery hoop winter wall hanging. How to add sticks adn twine to your rustic farmhouse winter decorations.

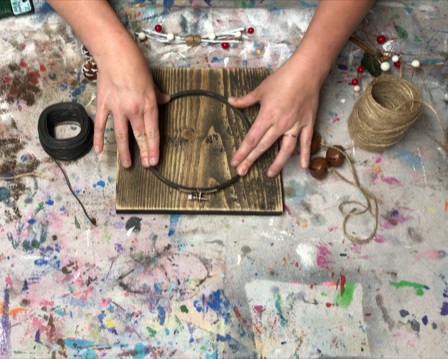
Now glue down your embroidery hoop to your wood base. Apply glue to back side of the hoop {whichever side you prefer} then place it on your wood base and press down firmly.

DIY embroidery hoop winter wall hanging. How to use an embroidery hoop to make your own rustic winter decor for your farmhouse or country chic style.

Tie your bells around the metal part on the top section of the embroidery hoop. Pull this very tight. Add a dab of hot glue to the knot and pull it tight again.

DIY embroidery hoop winter wall hanging. How to add rustic bells to your farmhouse or country chic winter decorations. Easy craft tutorial.

Use your glue gun to glue down your accents. To get a secure hold, hold the accents in place till the hot glue is completely dry.

DIY embroidery hoop winter wall hanging. How to make your own farmhouse and country chic winter and Christmas decorations.

Trim down the pieces of twine from where you tied them onto the embroidery hoop and the you are done!

DIY embroidery hoop wall hanging. How to make your own farmhouse and country chic winter and Christmas decorations.

Check out the full video tutorial below
DIY mini stenciled Christmas signs

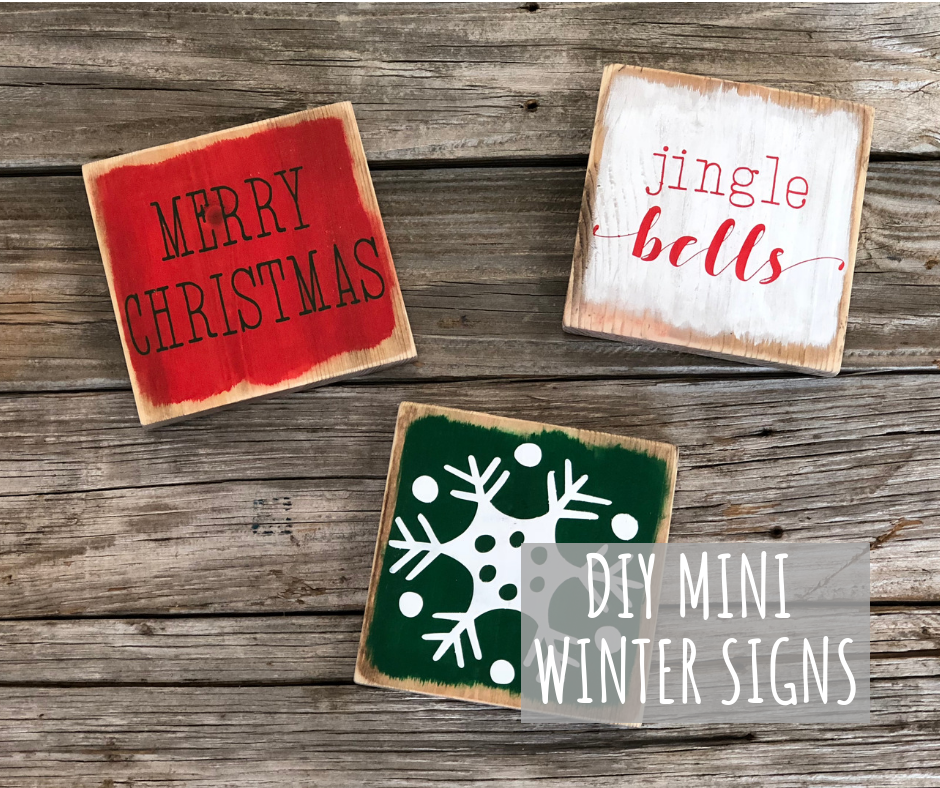
DIY Mini Wooden Winter Signs

Painting & stenciling mini wood Christmas signs

Do you LOVE those little mini signs like I do? They are so perfect because they don’t take up a lot of space, you can store them easily when they aren’t in season, and they are SO simple to make yourself.

Affiliate Disclosure. Some of the links on this website are affiliate links, which means that I may earn a small commission if you click on the link or make a purchase using the link. If you make a purchase you will not be charged anything additional. This is just a way I can help add to our family finances to raise our four daughters. Please know I would never recommend a product or service I do not totally stand behind.

Here’s what you’ll need to make your own at home. To make it even easier we’ve put together a CRAFT kit that has everything you need for project here.

HOW TO STENCIL ON WOOD

winter craft kit.jpgDIY Mini Wooden Winter Signs

MAKE YOUR OWN MINI STENCILED WOOD CHRISTMAS SIGNS FOR YOUR RUSTIC HOME DECOR

You’ll need

3 - 5.5x5.5 wooden pieces {I got a 1x6 from the local hardware store}

stain, rags, and gloves {here’s what I used}

stencils {you can buy ours here, or make your own}

3 - brushes {you can use sponge brushes or here’s what I use}

white, red, & green acrylic paint {here’s what I used}

2 makeup sponges {you can pick them up at your local dollar store}

sander or 120 grit sandpaper

DIY Mini Wooden Winter Signs

After you’ve cut and sanded your 5.5”x5.5” pieces stain them and let them dry for 24 hours. After they’ve dried sand around the edges, corners, and a light sanding on the front, be sure to wipe them down so you get all of the sawdust off of them. I LOVE my RYOBI CORDLESS SANDER , it is what I use for all of my wooden projects. But, if you don’t have a sander you can get the job done with 120 grit sand paper.

DIY Mini Wooden Winter Signs

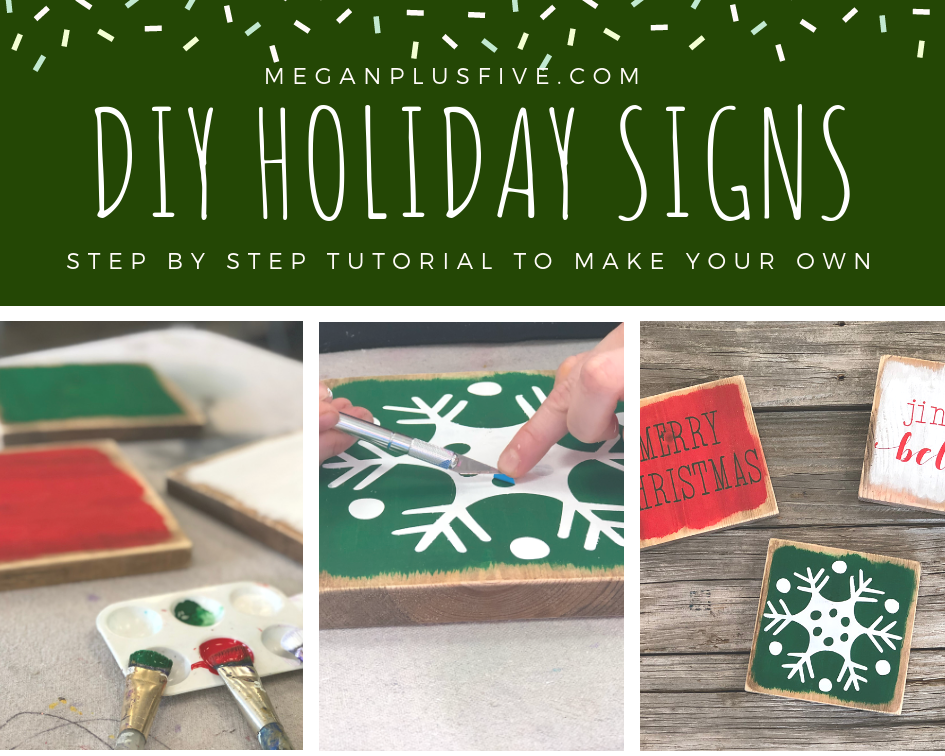
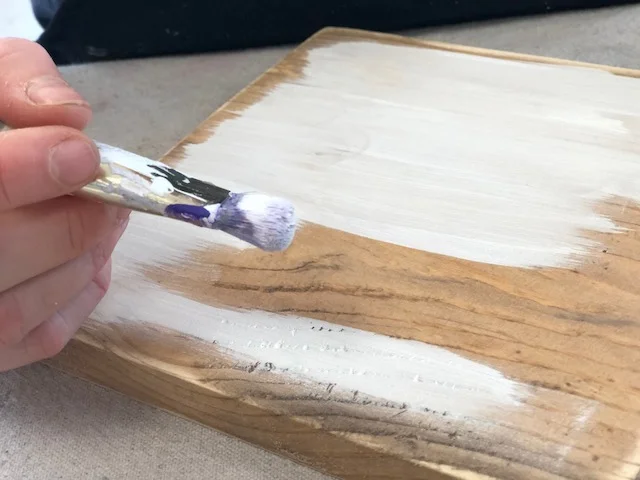
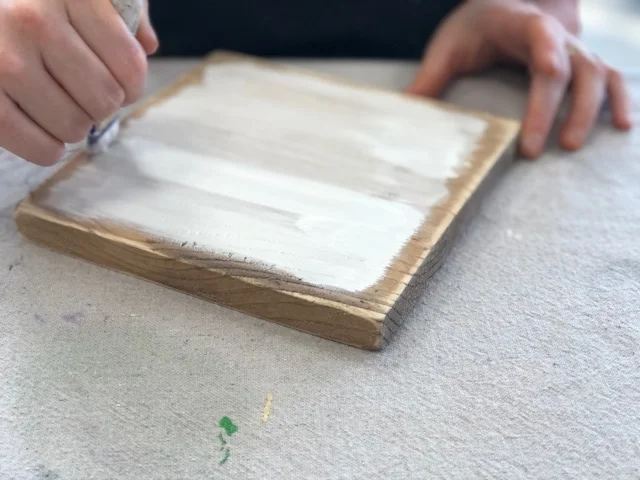
Now it’s time for the painting! You’ll paint each wooden sign a different background color. Start with a DRY brush and using a little bit of paint at a time apply a THIN coat of paint to one side of your board. Leave .25” border all the way around each piece. I don’t measure this, just eyeball it. This will give you that rustic uneven look.

DIY Mini Wooden Winter Signs

After your fist THIN coat is totally dry you can apply the second coat, be sure to apply using the same technique as you did with the first coat.

DIY Mini Wooden Winter Signs

Repeat this step for all 3 signs. Once they are all TOTALLY DRY you are ready for stenciling. They must be completely dry otherwise your stencil will not stick to the wood and it will be an ugly mess.

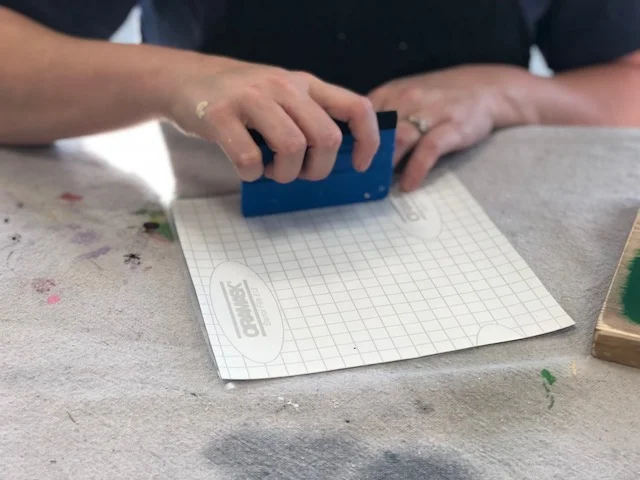
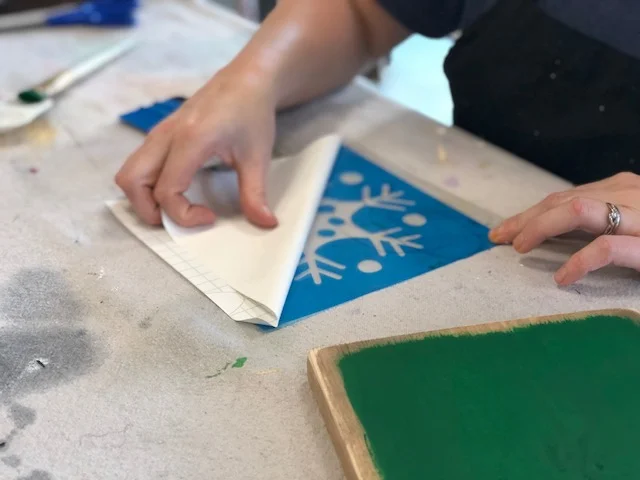
Start by removing the paper backing from your stencil. This works best if you use a vinyl applicator {here’s what I use} or you can use a stiff store rewards card, I don’t recommend using your bank card as it could break during the process.

If you’re using your own stencils you’ll need transfer tape to transfer your stencil onto the wood in one piece.

DIY Mini Wooden Winter Signs

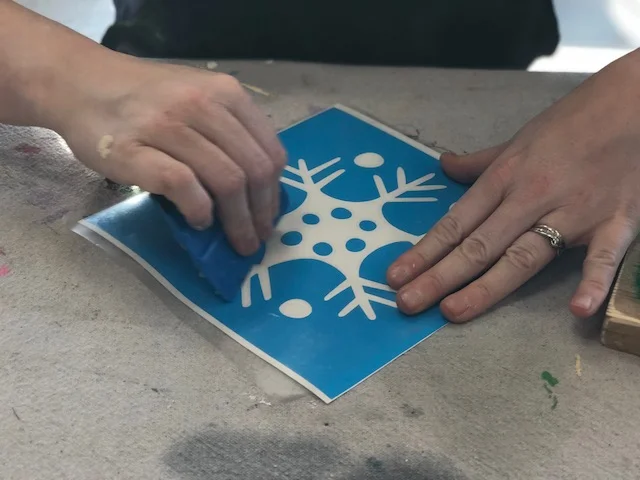
Start by rubbing the front of the stencil with your vinyl applicator. Be sure you move in one direction.

DIY Mini Wooden Winter Signs

Then flip it over and do the same to the back.

DIY Mini Wooden Winter Signs

Now slowly peel the paper backing away from the stencil. This works best if you start at one corner and peel away at a sharp 90 degree angle. Go SLOW.

Before you start applying your stencils decided which stencil you will put on each board.

DIY Mini Wooden Winter Signs

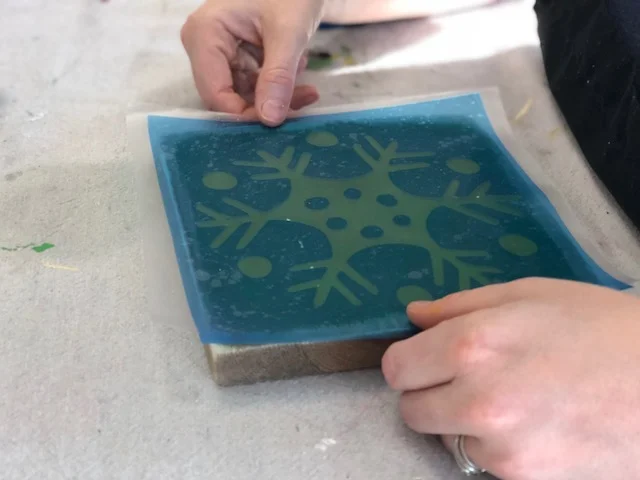
First, you’ll want to place your stencil where you want it on your board. I wanted mine to all be centered so that’s what I did but you can place them anywhere on the board you’d like. I just recommend keeping the image within the painted part of the wood.

DIY Mini Wooden Winter Signs

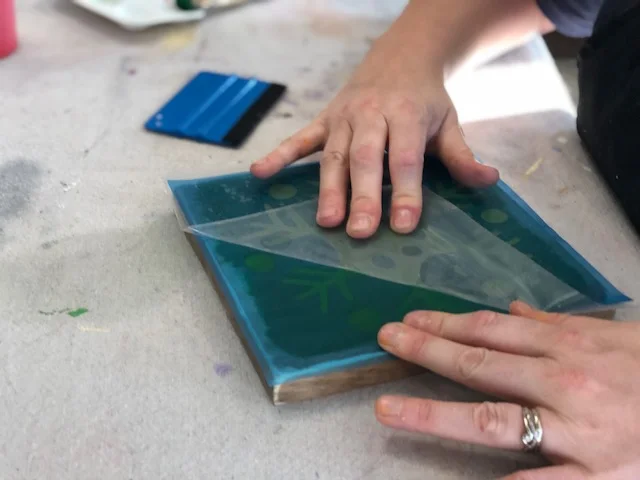
Using your vinyl tool rub the stencil, using the same technique as before. Now SLOWLY peel the transfer tape {the clear sticky stuff} away from your stencil. I do this at a sharp angle and I will slowly roll it off of the stencil.

DIY Mini Wooden Winter Signs

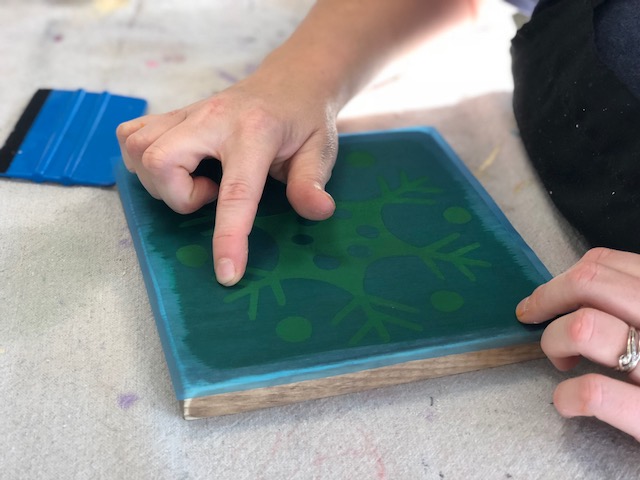
After you get the transfer tape off rub your finger along all the exposed stencil edges {anywhere there is wood showing thru}. this helps to get s good seal on your stencil.

Now you’re ready to start painting your stencil!

DIY Mini Wooden Winter Signs

Use one end of your cosmetic sponge LIGHTLY dip it in the paint color you’d like your design. BE SURE TO USE VERY LITTLE PAINT, this is key to getting little to no paint bleed under your stencil. Dab the sponge on a paper towel a couple times then onto your stencil, do this till you have a very THIN even coat {you should be able to see thru the first coat}. LET DRY, repeat till you are happy with the coverage.

DIY Mini Wooden Winter Signs

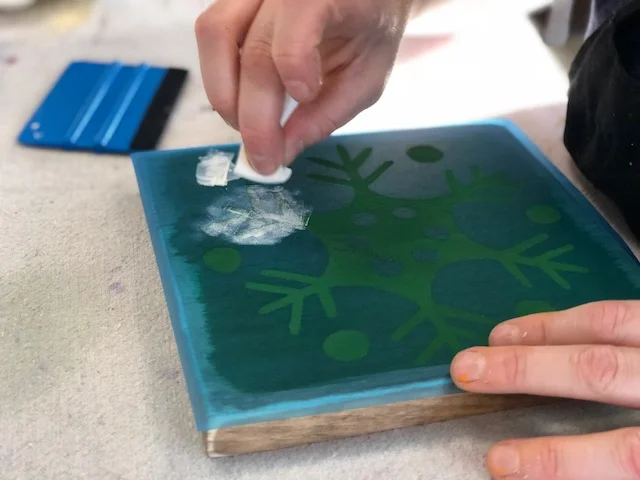
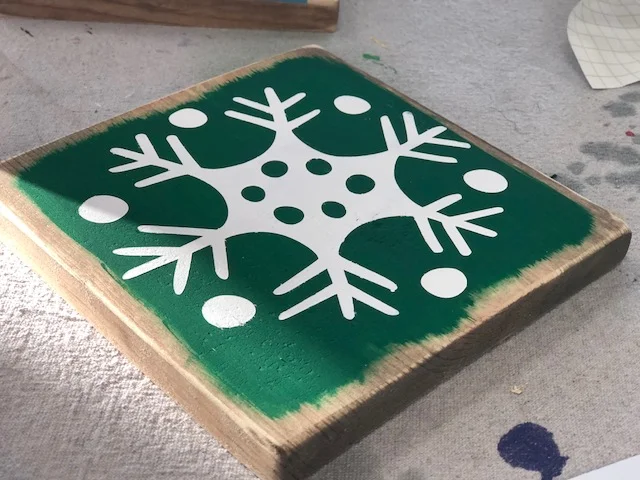
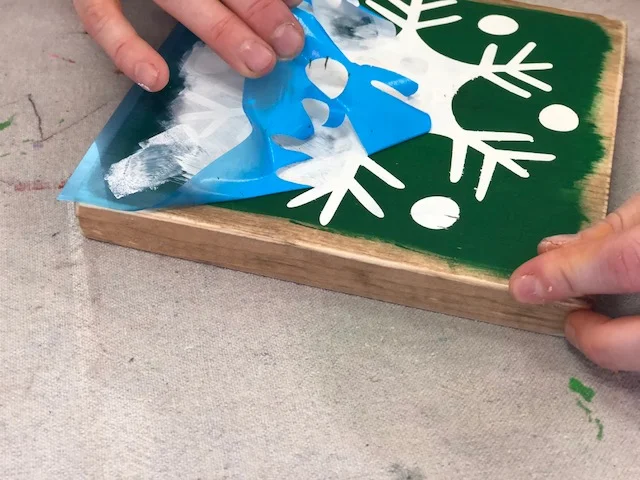
Now peel up your stencil.

DIY Mini Wooden Winter Signs

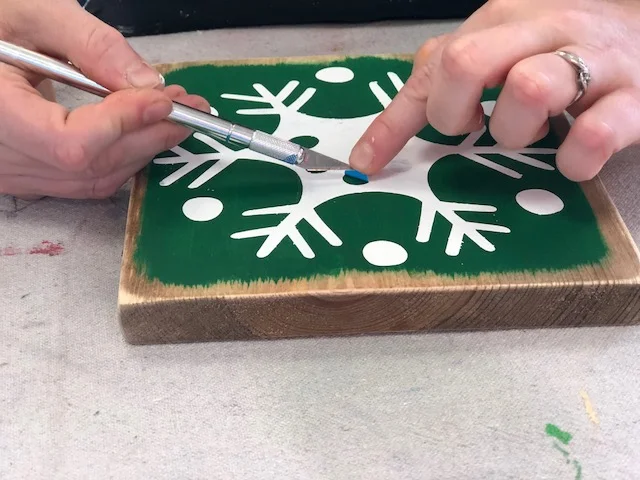
I use an xacto knife to get up all the little pieces. If you don’t have one of these a sewing pin/needle works great for this as well.

If you have any paint bleed just go over those with a small paint brush and your background color.

DIY Mini Wooden Winter Signs

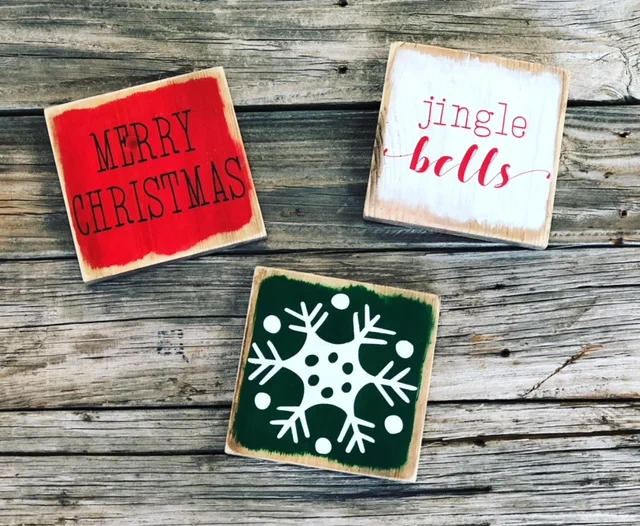
Now finish the other two and you're ready to put them up to enjoy this holiday season.

DIY Mini Wooden Winter Signs