Life is short lick the spoon wood sign + FREE SVG

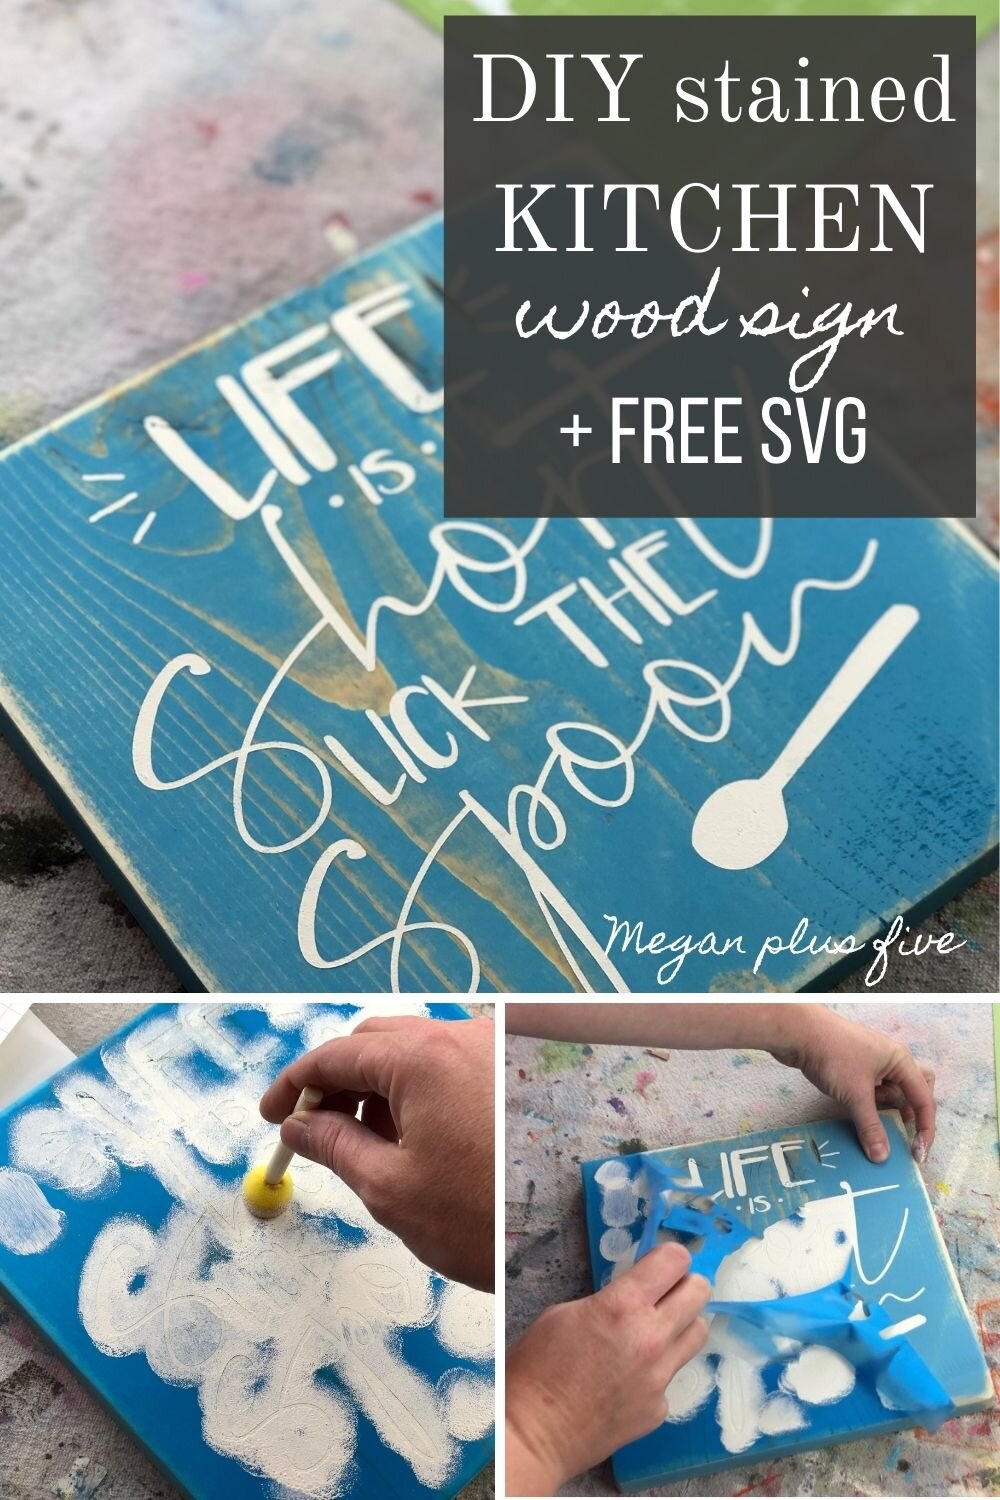
Life is short lick the spoon wood sign. How to paint a wooden kitchen sign with a humorous saying. Stained aqua sign with a white stenciled saying

Life is short lick the spoon wood sign + FREE SVG

Use this free life is short lick the spoon FREE SVG to make your own decal or painted wood sign.

Life is short lick the spoon wood sign. How to paint a wooden kitchen sign with a humorous saying. Stained aqua sign with a white stenciled saying

DIY HUMOROUS KITCHEN SIGN

I’m sure you’ve seen all those gorgeous gallery walls on Pinterest. You know the ones that have all the perfectly placed together farmhouse pieces. If you still aren’t sure what I’m talking about here are some awesome kitchen gallery walls on Pinterest.

Anyway, my friend is making one in her home…in her beautiful home that really probably was a true farmhouse in its day… and she asked me to make her a final piece to finish it up.

Affiliate Disclosure. Some of the links on this website are affiliate links, which means that I may earn a small commission if you click on the link or make a purchase using the link. If you make a purchase you will not be charged anything additional.

She sent me a pic of a sign that said “life is short don’t lick the spoon” and asked if I could make one like it. Of course I said yes!

I used the photo she sent me as inspiration and created my own SVG for the painted wood sign. You can get the same SVG I used here in my free resource library.

Life is short lick the spoon wood sign. How to paint a wooden kitchen sign with a humorous saying. Stained aqua sign with a white stenciled saying

DIY - LIFE IS SHORT LICK THE SPOON aqua stained wood kitchen sign

Here’s what you need

1.CUT THE WOOD & STAIN

I used a 1x10 and used my Ryobi miter saw to cut it square. If you aren’t familiar with lumber it actually doesn’t measure 1”x10” it’s more like .75”x9.25”. So, I cut my piece to measure 9.25”x9.25”. Then gave it a light sanding using 120 grit sand paper.

My friend asked for AQUA STAIN which is a gorgeous color! I had it on hand so I stained it up then let it dry. After it was completely dry I took my Ryobi sander and sanded around the edges and corners then lightly over the front. This gives it a more rustic farmhouse look.

Life is short lick the spoon wood sign. How to paint a wooden kitchen sign with a humorous saying. Stained aqua sign with a white stenciled saying

2.CUT OUT & WEED THE STENCIL

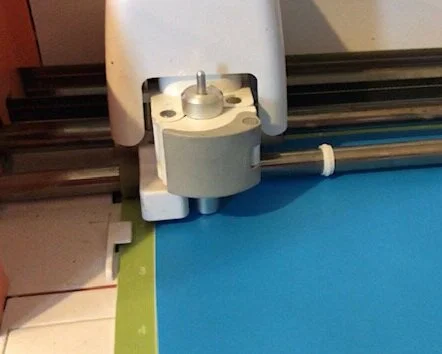
While your wood base is drying cut your stencil out. I used my older model Cricut Explore and it still works like a champ! If you don’t have a fancy cutting machine I highly recommend getting one, even if you can’t afford the Maker (there’s no shame in that I still don’t even have the Maker lol!). Be sure to read 10 must have supplies and accessories to get started using a Cricut. 

Life is short lick the spoon wood sign. How to paint a wooden kitchen sign with a humorous saying. Stained aqua sign with a white stenciled saying

I use Oramask stencil film for most all of my stenciled projects. If you plan to make LOTS of painted wood signs check out this post I wrote on where I buy my stencil film in bulk to save a ton of money.

3. APPLY THE STENCIL

Apply your clear transfer tape onto the front of your stencil. Remove the paper backing from your stencil. Place your stencil sticky side down onto your wood base.

Rub your stencil with your vinyl squeegee and slowly roll your transfer tape off of your stencil. FUN FACT: you CAN reuse your transfer tape over and over again.

Go over the stencil with your finger or your vinyl squeegee to make sure there aren’t any air bubbles. If there are smooth them out.

Click here to see how I made this gorgeous baby stat sign using plywood

Life is short lick the spoon wood sign. How to paint a wooden kitchen sign with a humorous saying. Stained aqua sign with a white stenciled saying

4. PAINT THE STENCIL

I used chalk paint to paint my stencil. If you want to use the same color it’s called SHEEPSKIN.

A dabber like this one is great for stenciling. For the best results and virtually no paint bleed lightly dip your dabber into your chalk paint then dab off the excess, you want very little paint left on the round sponge dabber. Using a pouncing motion paint the exposed areas of the stencil.

Life is short lick the spoon wood sign. How to paint a wooden kitchen sign with a humorous saying. Stained aqua sign with a white stenciled saying

Let dry, then repeat till you are satisfied with the coverage. Typically 2 coats is the perfect amount needed.

5. PEEL UP THE STENCIL

I will usually always peel my stencil up while the stencil paint is still wet. While this is my preferred method this may not work for everyone, and that’s totally ok.

Life is short lick the spoon wood sign. How to paint a wooden kitchen sign with a humorous saying. Stained aqua sign with a white stenciled saying

Start by peeling up one corner of the stencil and peel it off toward the opposite corner.

Use a sewing pin or xacto knife to peel up all the middle areas.

Let your painted areas dry then you are ready to display in your home.

Life is short lick the spoon wood sign. How to paint a wooden kitchen sign with a humorous saying. Stained aqua sign with a white stenciled saying

I hope you enjoyed this sign painting tutorial. Let me know if you have any questions in the comments below.

Check out more DIY SIGN PAINTING TUTORIALS

DIY painted & distressed laundry room sign + FREE SVG

DIY WOOD SIGN TUTORIAL, how to make a wooden stenciled sign for your laundry room. Larger than mat sign tutorial. Oversized sign making step by step tutorial using your Cricut or Silhouette vinyl cutting machine.

DIY painted & distressed laundry room sign + FREE SVG

Make your own stenciled and distressed laundry room sign. BONUS: grab the FREE to use SVG in my free resource library.

Easy stenciled wood sign for your laundry room

Want to make a simple yet large sign for your laundry room? You’ve come to the right place! I’ve been making this exact LAUNDRY sign in my shop for a couple of years now and really wanted to share with you how I make it because it’s super easy and simple. Not a whole lot of fuss goes into making this larger than mat wooden sign using your Cricut.

Affiliate Disclosure. Some of the links on this website are affiliate links, which means that I may earn a small commission if you click on the link or make a purchase using the link. If you make a purchase you will not be charged anything additional.

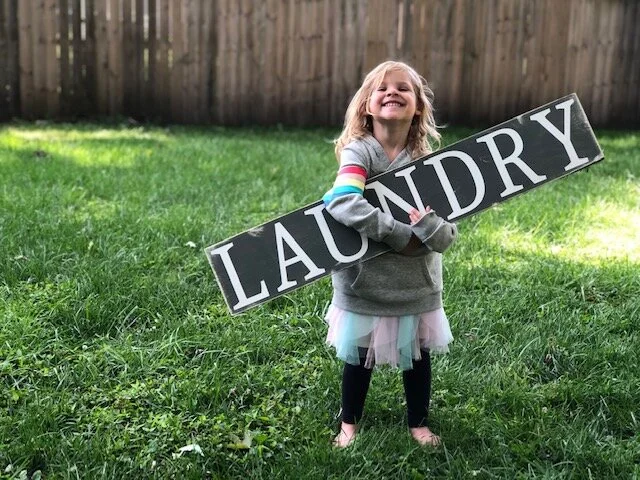
By the way…how cute is my little model?! This is the youngest of my four daughters and she always wants to help me work. She doesn’t care what it is she just wants in on all the fun and exciting things of momma’s business. She was absolutely thrilled when I asked her to hold the sign so I could snap a pic.

DIY WOOD SIGN TUTORIAL, how to make a wooden stenciled sign for your laundry room. Larger than mat sign tutorial. Oversized sign making step by step tutorial using your Cricut or Silhouette vinyl cutting machine.

Look at that big cheesy smile! Melts my momma heart! Barefoot, girly dress with a unicorn hoodie over it and let’s not forget the wild hair. Oh the life!

If you want to DIY a wood sign but don’t have all the tools be sure to check out my DIY CRAFT KITS.

HOW TO STENCIL A SIGN FOR YOUR LAUNDRY ROOM

Here’s what you’ll need

If you’re new to the Cricut world be sure to check out my Cricut newbie post.

PAINTED LAUNDRY SIGN TUTORIAL

1.CUT OUT THE STENCIL

I cut my stencil out using Oramask 813 stencil film. This is my go to for most all of the stenciled wood signs I make. If you plan to make a lot of wooden signs you’ll want to read my post on how to save money on stencil film.

Because I did a reverse stencil method, not a traditional stencil method, I added lines onto my stencil to make it super easy to align on my wood base. Then I set my stencils aside till I needed them.

Because I did a reverse stencil method, not a traditional traditional stencil methodmethod, I added lines onto my stencil to make it super easy to align on my wood base. Then I set my stencils aside till I needed them.

DIY WOOD SIGN TUTORIAL, how to make a wooden stenciled sign for your laundry room. Larger than mat sign tutorial. Oversized sign making step by step tutorial using your Cricut or Silhouette vinyl cutting machine.

I used and xacto knife to weed the stencils. Be sure to leave the letters and remove the background of the stencil. Since this is a reverse stencil it will look different than a typical stencil does.

Because I did a reverse stencil method, not a traditional stencil method, I added lines onto my stencil to make it super easy to align on my wood base. Then I set my stencils aside till I needed them.

2.PAINT THE LETTER COLOR

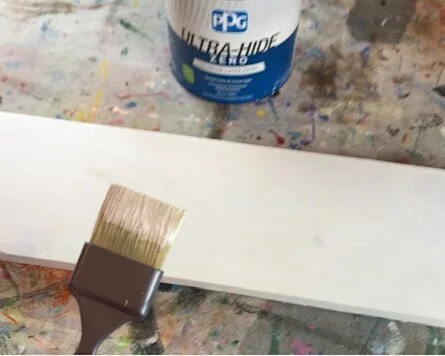
Typically I would use acrylic paints for this but I was all out of white acrylic paint. Instead I used a white wall paint that is actually better than acrylic to use for this sign.

Because I did a reverse stencil method, not a traditional stencil method, I added lines onto my stencil to make it super easy to align on my wood base. Then I set my stencils aside till I needed them.

I painted the sides with one coat of paint and I painted two coats on the front of the sign. Letting it dry completely between coats.

Because I did a reverse stencil method, not a traditional stencil method, I added lines onto my stencil to make it super easy to align on my wood base. Then I set my stencils aside till I needed them.

3. APPLY THE STENCIL

I applied transfer tape to one stencil then reused that same transfer tape for the next stencil. Did you know you can reuse transfer tape till it doesn’t work anymore? You sure can!

DIY WOOD SIGN TUTORIAL, how to make a wooden stenciled sign for your laundry room. Larger than mat sign tutorial. Oversized sign making step by step tutorial using your Cricut or Silhouette vinyl cutting machine.

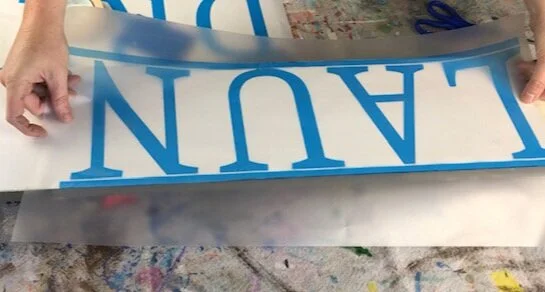
After I rubbed the stencil with my vinyl squeegee I flipped my stencil over and removed the paper backing.

DIY WOOD SIGN TUTORIAL, how to make a wooden stenciled sign for your laundry room. Larger than mat sign tutorial. Oversized sign making step by step tutorial using your Cricut or Silhouette vinyl cutting machine.

Then I flipped the stencil over so that the sticky side was down and I placed the stencil where I wanted it on my wood base. This is where the lines on the stencil come in handy. This allows me to center the lettering without any stress. I made my stencil to the exact size of my wood board, with the extra lines, so that when I went to apply the stencil I wouldn’t have to worry about letters being uneven.

DIY WOOD SIGN TUTORIAL, how to make a wooden stenciled sign for your laundry room. Larger than mat sign tutorial. Oversized sign making step by step tutorial using your Cricut or Silhouette vinyl cutting machine.

Then I pressed it down with my vinyl squeegee to remove any air bubbles then removed the transfer tape. PRO TIP: rolling the transfer tape off of the stencil works best and it won’t lift your design up and off of the wood.

DIY WOOD SIGN TUTORIAL, how to make a wooden stenciled sign for your laundry room. Larger than mat sign tutorial. Oversized sign making step by step tutorial using your Cricut or Silhouette vinyl cutting machine.

I did the same process for the other part of my stencil. Then I removed the lines on the tops and bottoms because I didn’t need them anymore and didn’t want them to be apart of my design.

DIY WOOD SIGN TUTORIAL, how to make a wooden stenciled sign for your laundry room. Larger than mat sign tutorial. Oversized sign making step by step tutorial using your Cricut or Silhouette vinyl cutting machine.

3. SEAL THE STENCIL

The key to no paint bleed is to seal the stencil before you paint it. Essentially what you are doing is filling in any tiny air bubbles that paint could get under with the same color as your lettering. So in my case I sealed my stencil with white paint. It just takes a TINY bit of paint, you want to paint into the direction of your stencil. I let this dry completely.

DIY WOOD SIGN TUTORIAL, how to make a wooden stenciled sign for your laundry room. Larger than mat sign tutorial. Oversized sign making step by step tutorial using your Cricut or Silhouette vinyl cutting machine.

4. PAINT THE SIGN

After the sealing was dry I painted my sign gray. I also paint the back because I think this gives pieces a more finished look but it’s all personal preference. I did two layers of gray paint. I let the first one dry totally before applying the second coat on top of it.

DIY WOOD SIGN TUTORIAL, how to make a wooden stenciled sign for your laundry room. Larger than mat sign tutorial. Oversized sign making step by step tutorial using your Cricut or Silhouette vinyl cutting machine.

5. PEEL THE STENCIL

While my paint was still wet I peeled the stencil up. Some people choose to do this after their paint is dry and that is totally ok, this is just my personal preference after making thousands of handmade signs over the last few years. Using an xacto knife or a sewing pin works great for this step.

DIY WOOD SIGN TUTORIAL, how to make a wooden stenciled sign for your laundry room. Larger than mat sign tutorial. Oversized sign making step by step tutorial using your Cricut or Silhouette vinyl cutting machine.

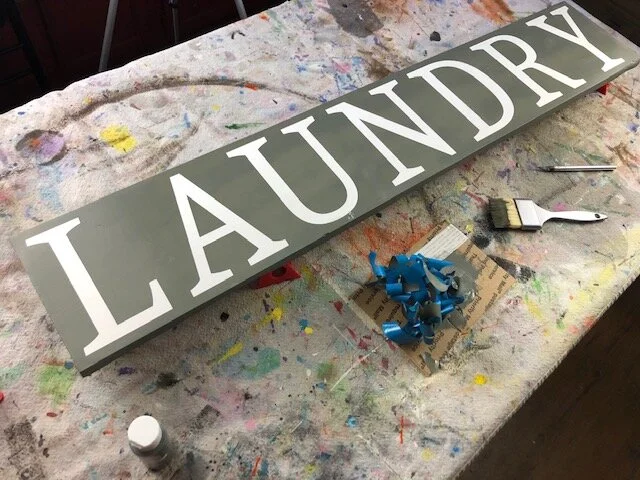
After I got all the stencil pieces removed from the wood base I let it dry.

DIY WOOD SIGN TUTORIAL, how to make a wooden stenciled sign for your laundry room. Larger than mat sign tutorial. Oversized sign making step by step tutorial using your Cricut or Silhouette vinyl cutting machine.

6. DISTRESSING

This is totally optional. If you don’t want to distress your sign you can choose not to and be done. But if you do want to distress your painted wood sign I recommend using a sander for this step. Mainly because I really don’t like sanding anything with a piece of sandpaper. It’s so much easier to do this with a sander. Focus on the edges and anywhere that would naturally be worn. I also lightly go across the front of my pieces with my sander.

DIY WOOD SIGN TUTORIAL, how to make a wooden stenciled sign for your laundry room. Larger than mat sign tutorial. Oversized sign making step by step tutorial using your Cricut or Silhouette vinyl cutting machine.

The last thing I do is to wipe it with a lint free cloth to get all the dust off from sanding. Super simple and easy! I told ya, it’s pretty much no fuss.

DIY WOOD SIGN TUTORIAL, how to make a wooden stenciled sign for your laundry room. Larger than mat sign tutorial. Oversized sign making step by step tutorial using your Cricut or Silhouette vinyl cutting machine.

If you have any questions about this tutorial let me know in the comments below.

Happy Crafting!

DIY embroidery hoop winter wall hanging

DIY EMBROIDERY HOOP WINTER WALL HANGING. Fun embroidery hoop craft that is so easy to make at home for the holidays

How to make an EMBROIDERY HOOP wall hanging for winter

Embroidery hoops are such a versatile craft tool. You can use them for the obvious of embroidery OR you can use them for so many other projects. Like a nursery mobile, a hoop to hold your screen for faux screen printing, or this fun winter wall hanging that you’re reading.

If you love the little pinecone accents check out this EASY PINECONE DOOR HANGER. And if you have little ones you HAVE to try this EASY & MESS FREE PINECONE ART! My older girls had SO much fun making their own pinecone paintings.

Affiliate Disclosure. Some of the links on this website are affiliate links, which means that I may earn a small commission if you click on the link or make a purchase using the link. If you make a purchase you will not be charged anything additional.

Don’t have access to the right tools or just don’t have time to gather the supplies? No problem:)! I’ve put together this super easy craft kit just for times like this! Click I NEED A CRAFT KIT below to order yours from my Etsy shop.

Don’t need a craft kit? Here’s what you’ll need

Skip to the bottom to catch the full video tutorial


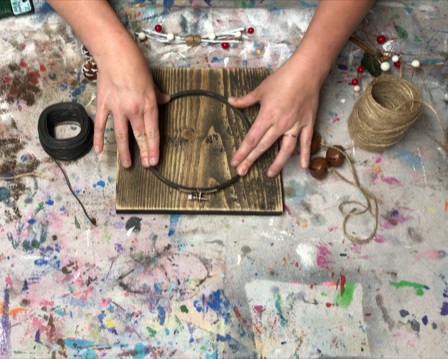
First you need to stain your wood base and your hoop. I recommend using a quick dry stain. Let dry

DIY embroidery hoop winter wall hanging. How to make your own winter decor with pinecones.

Next, after your wood base is dry you want to distress it. I used my Ryobi sander for this step but you can use a piece of 120 grit sandpaper. Focus on the edges and corners and lightly sand the sides and front

DIY embroiery hoop wall hanging for winter. How to use your Ryobi sander to distress your winter decor.

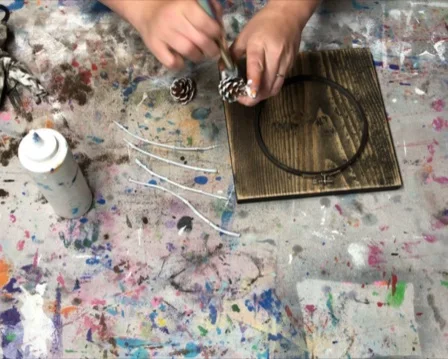
Now paint your sticks completely white and the outer edges of your pine cones white. Use a dabbing motion when painting the pinecones.

DIY embroidery hoop winter wall hanging. How to paint pinecones to add to your winter decorations.

Measure out how long you would like your bells to hang down then add a couple of inches. I made my bells to hang at staggering lengths.

Feed one end of the twin into the hanging part of the bell and tie it off. Repeat this step for all three.

DIY embroidery hoop winter wall hanging. How to add rustic craft bells to your farmhouse and country chic winter decorations.

After your stick are dry gather them together and wrap the green floral wire around the center. This will help to keep them together while you are placing the accents on. Then place your accent pieces on top of the sticks and wrap the middle section of the sticks and accents with twine.

DIY embroidery hoop winter wall hanging. How to add sticks adn twine to your rustic farmhouse winter decorations.

Now glue down your embroidery hoop to your wood base. Apply glue to back side of the hoop {whichever side you prefer} then place it on your wood base and press down firmly.

DIY embroidery hoop winter wall hanging. How to use an embroidery hoop to make your own rustic winter decor for your farmhouse or country chic style.

Tie your bells around the metal part on the top section of the embroidery hoop. Pull this very tight. Add a dab of hot glue to the knot and pull it tight again.

DIY embroidery hoop winter wall hanging. How to add rustic bells to your farmhouse or country chic winter decorations. Easy craft tutorial.

Use your glue gun to glue down your accents. To get a secure hold, hold the accents in place till the hot glue is completely dry.

DIY embroidery hoop winter wall hanging. How to make your own farmhouse and country chic winter and Christmas decorations.

Trim down the pieces of twine from where you tied them onto the embroidery hoop and the you are done!

DIY embroidery hoop wall hanging. How to make your own farmhouse and country chic winter and Christmas decorations.

Check out the full video tutorial below