DIY hello sunshine stained wood sign + FREE SVG

DIY how to stencil on wood sign painting tutorial. How to make a hello sunshine lettered sign for summer. Using oramask stencil film to paint wood signs without paint bleed. free svg to use with cricut for sign making.

DIY STENCILED HELLO SUNSHINE SIGN

Make this simple and chic hello sunshine sign to display with your warm weathered décor. I used my old school Cricut Explore to make this wood sign but you can use any vinyl cutting machine you have. Be sure to grab the FREE SVG in my free resource library to make this exact design (find the link below;) )

Affiliate Disclosure. Some of the links on this website are affiliate links, which means that I may earn a small commission if you click on the link or make a purchase using the link. If you make a purchase you will not be charged anything additional.

Here’s what you need

Want to learn more techniques for painting wood signs? CLICK HERE to check out my list of DIY sign painting tutorials for the most crisp clean lines for your lettered painted signs.

The type of stenciling I used for this wood HELLO SUNSHINE sign is called REVERSE STENCILING. I also used this stenciling technique on this BLESS OUR NEST wood sign. I love this technique when I’m only using two colors, the base color and the letter color. It gives super crisp lines and is really quick to do.

1.CUT THE STENCIL

Upload the HELLO SUNSHINE SVG into Cricut Design Space (or the program you are using with your fancy cutting machine). Then add a square to the canvas. Size the square so it’s about the same size as the wood base you are using. I sized mine to 7.25” then resized the HELLO SUMMER SVG till I was happy with the size of that. This process isn’t a must, you can just cut the SVG out without a square around it BUT adding this square does make centering your design much easier when you go to stencil the design.

DIY how to stencil on wood sign painting tutorial. How to make a hello sunshine lettered sign for summer. Using oramask stencil film to paint wood signs without paint bleed. free svg to use with cricut for sign making.

Once you happy with the size select both the SVG and the square and center them. After they are centered and still both selected use the Cricut SLICE feature to slice the SVG out of the square.

DIY how to stencil on wood sign painting tutorial. How to make a hello sunshine lettered sign for summer. Using oramask stencil film to paint wood signs without paint bleed. free svg to use with cricut for sign making.

Now you should have 3 images. You will only need the square that has the circle cut out of it so delete the two other circle images.

This is what your canvas should look like when you are ready to hit MAKE IT in Cricut Design Space.

DIY how to stencil on wood sign painting tutorial. How to make a hello sunshine lettered sign for summer. Using oramask stencil film to paint wood signs without paint bleed. free svg to use with cricut for sign making.

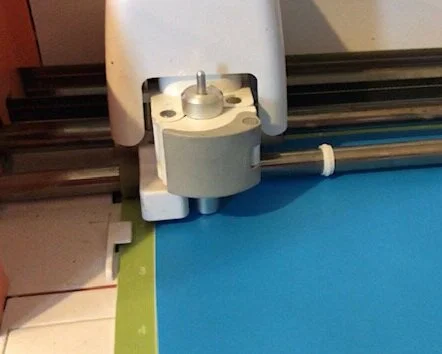
I used ORAMASK STENCIM FILM and the Cricut GREEN cutting mat. I set my machine dial to cut vinyl.

2. APPLY THE STENCIL

When weeding this design you want to weed out the CIRCLE and the MIDDLE PIECES from the letters.

DIY how to stencil on wood sign painting tutorial. How to make a hello sunshine lettered sign for summer. Using oramask stencil film to paint wood signs without paint bleed. free svg to use with cricut for sign making.

Use transfer tape to easily transfer the image onto your wood base. I’ve used LOTS of different transfer tapes and this brand is one of my favorites.

PRO TIP: you can reuse your transfer tape over and over again. As long as it is still tacky and fits the design you want to transfer you can use it. I often use my transfer tape 3-4 times before getting a new piece.
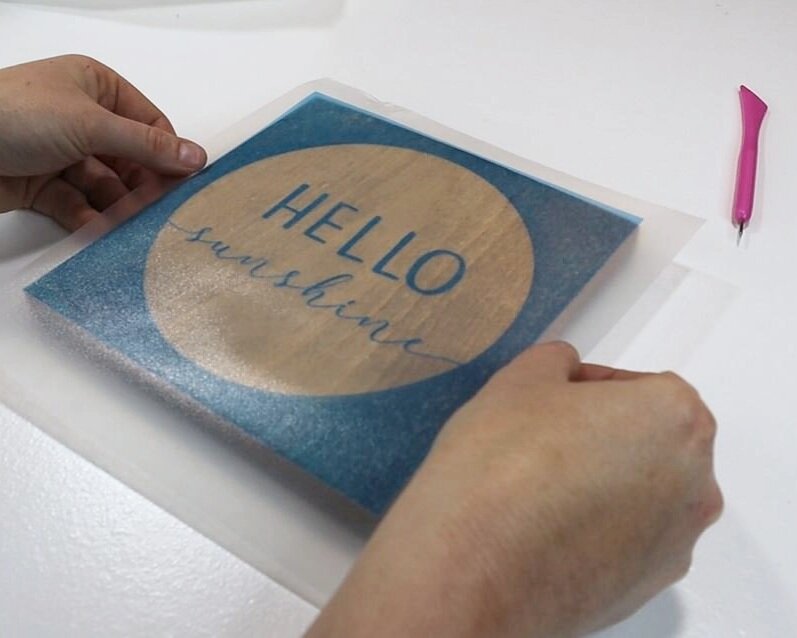
DIY how to stencil on wood sign painting tutorial. How to make a hello sunshine lettered sign for summer. Using oramask stencil film to paint wood signs without paint bleed. free svg to use with cricut for sign making.

Align your stencil then press down using your hand and a vinyl squeegee. Working from the middle and then out press out the air bubbles.

DIY how to stencil on wood sign painting tutorial. How to make a hello sunshine lettered sign for summer. Using oramask stencil film to paint wood signs without paint bleed. free svg to use with cricut for sign making.

Now, roll your transfer tape off your design. Be sure to go slow, especially with this design as it has delicate lines that can rip easily.
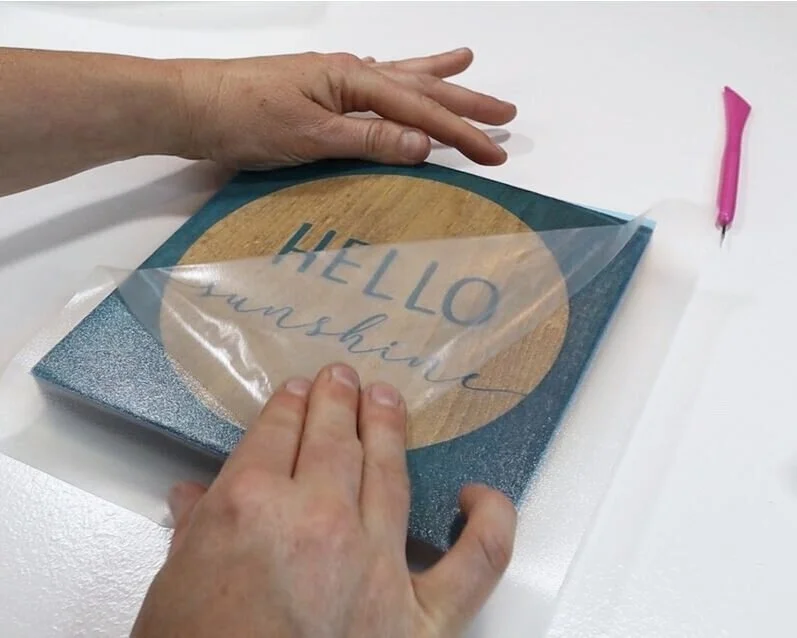
DIY how to stencil on wood sign painting tutorial. How to make a hello sunshine lettered sign for summer. Using oramask stencil film to paint wood signs without paint bleed. free svg to use with cricut for sign making.

3. SEAL THE STENCIL

This step isn’t an absolute must but you’ve already worked this hard why ruin it with paint bleed? I always hate myself when I skip this step so just save yourself from a kick in the butt later and seal your stencil before you paint ;)!

Paint a SUPER THIN layer of matte finish mod podge all over your design. Essentially what you are doing is filling in all of those tiny little air bubbles that you can’t see that are between your stencil and your wood base with a clear layer. This keeps your paint from filling in those air bubbles, aka: paint bleed.

DIY how to stencil on wood sign painting tutorial. How to make a hello sunshine lettered sign for summer. Using oramask stencil film to paint wood signs without paint bleed. free svg to use with cricut for sign making.

Be sure you are painting the thinnest of thin layers when doing this step. If it’s too thick your paint will peel up with your stencil when you remove it…again speaking from LOTS of sign making experience lol! Then let that dry completely before moving on to the next step.
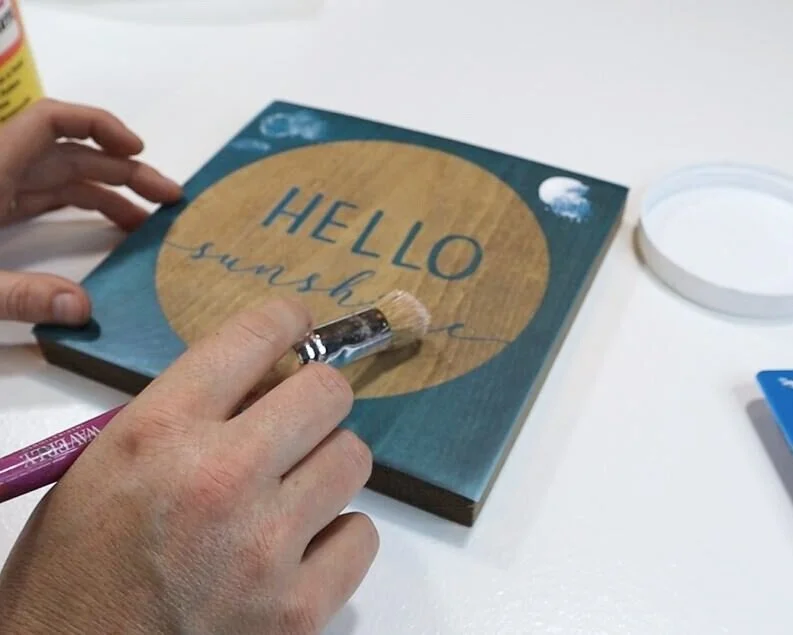
DIY how to stencil on wood sign painting tutorial. How to make a hello sunshine lettered sign for summer. Using oramask stencil film to paint wood signs without paint bleed. free svg to use with cricut for sign making.

4. PAINT YOUR DESIGN

After your mod podge seal has dried you can paint your design. The lighter the color the more layers you will likely need to cover your design completely. For your first layer of paint you want to paint it on thin enough so that you see the wood grain through the paint. I used white acrylic paint for this project and painted 3 coats total.
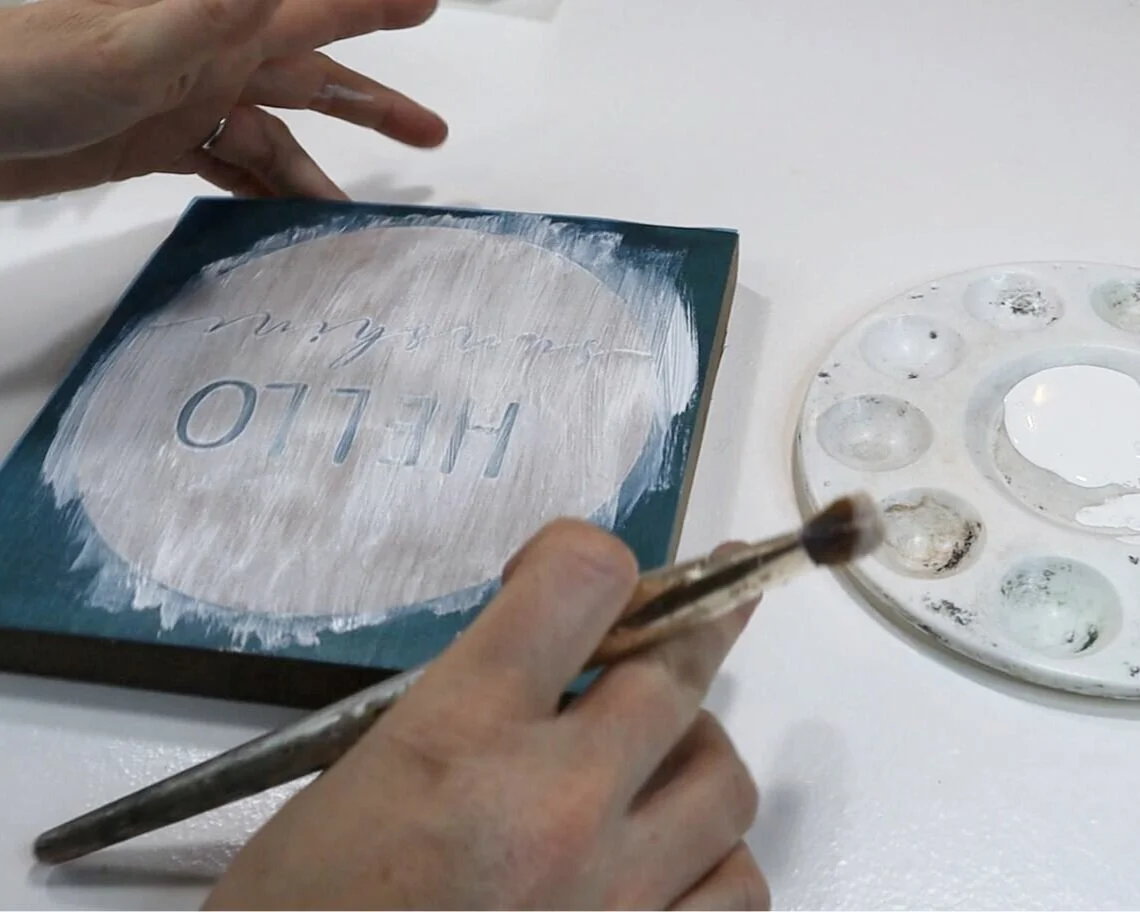
DIY how to stencil on wood sign painting tutorial. How to make a hello sunshine lettered sign for summer. Using oramask stencil film to paint wood signs without paint bleed. free svg to use with cricut for sign making.

After you apply the first layer wait for it to dry completely before moving on to the second coat. If you need a third layer of paint repeat the drying process again then paint the third layer.

5. PEEL UP YOUR STENCIL

After your happy with the paint coverage it’s time to peel up the oramask stencil film. I personally peel my stencils up while my paint is still wet but some prefer to peel after their paint has dried, both ways work. Grab one corner of the stencil and peel it off toward the opposite corner.

DIY how to stencil on wood sign painting tutorial. How to make a hello sunshine lettered sign for summer. Using oramask stencil film to paint wood signs without paint bleed. free svg to use with cricut for sign making.

Then using your weeding tool CAREFULLY peel up the lettering inside of the circle. I ended up grabbing a sewing pin for this as my weeding tool was a little too large for the job.

DIY how to stencil on wood sign painting tutorial. How to make a hello sunshine lettered sign for summer. Using oramask stencil film to paint wood signs without paint bleed. free svg to use with cricut for sign making.

Let your sign sit and dry completely before displaying in your home with the rest of your summer decorations.
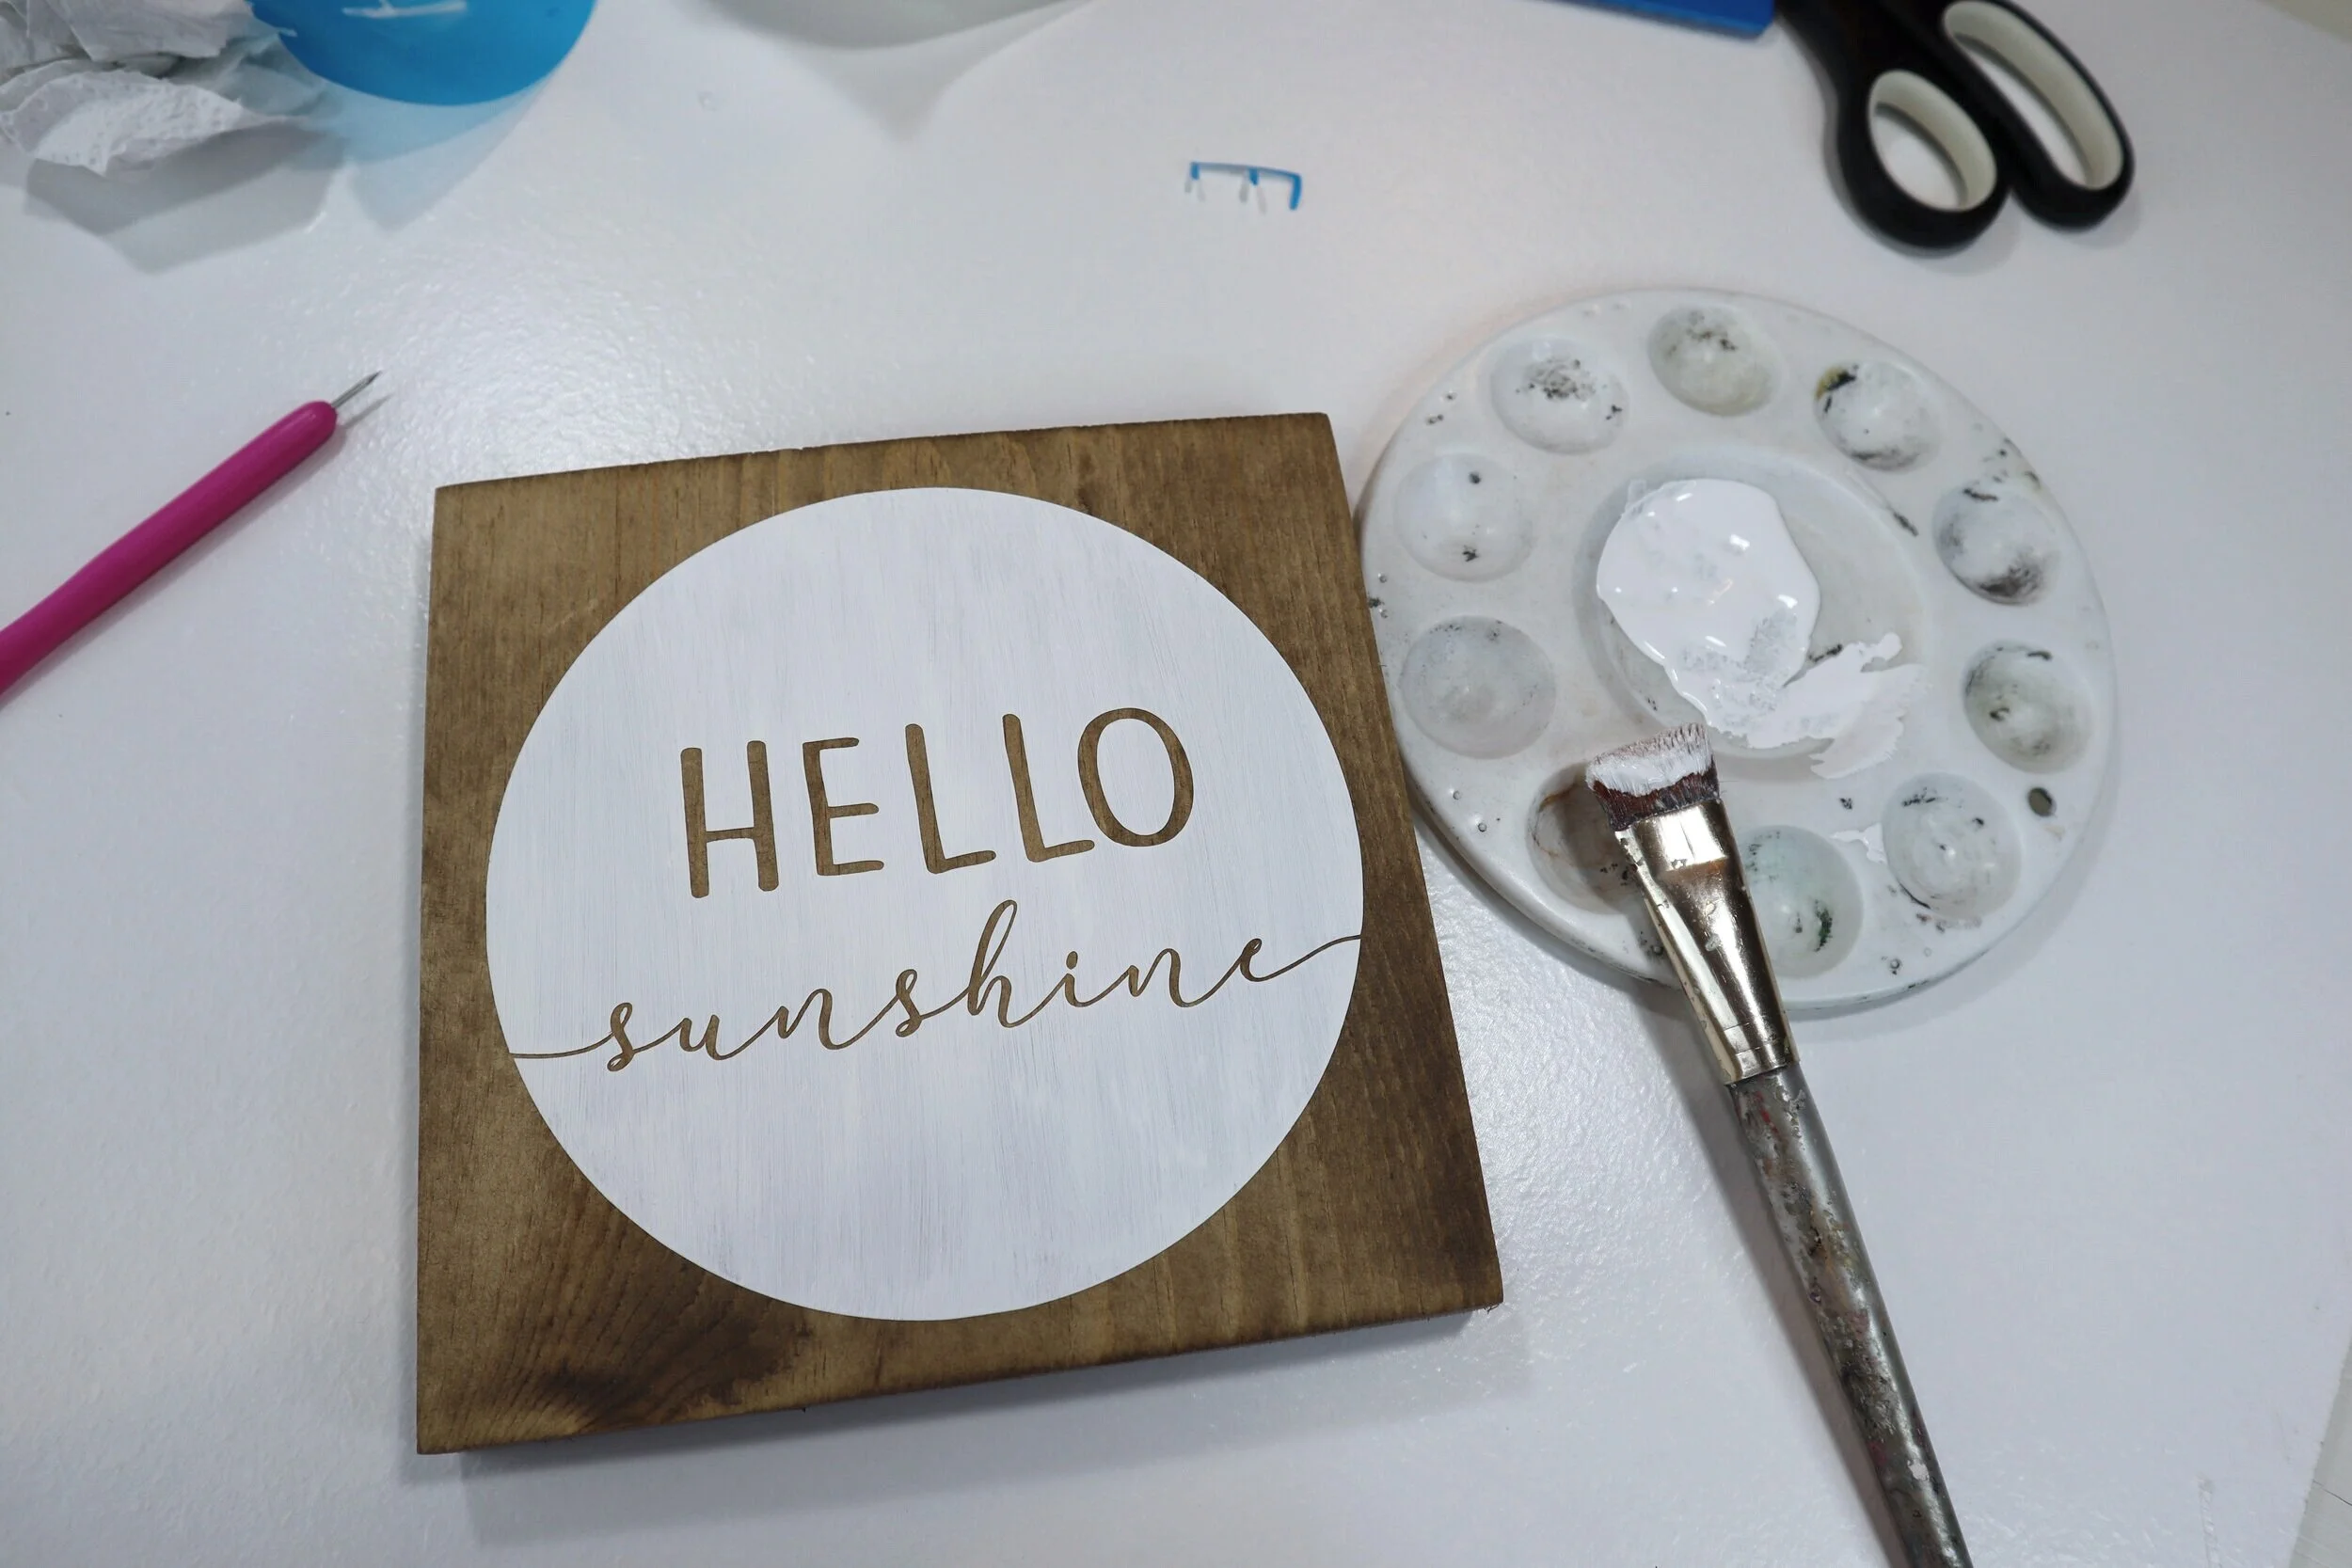
DIY how to stencil on wood sign painting tutorial. How to make a hello sunshine lettered sign for summer. Using oramask stencil film to paint wood signs without paint bleed. free svg to use with cricut for sign making.

I just love how this little sign turned out! It’s so simple and it can be displayed with both spring and summer décor. I extra love double duty decorations!

If you have any questions about this DIY craft tutorial or any others on my blog please reach out.


Check out more sign painting tutorials below. Happy Crafting!!

DIY painted & distressed laundry room sign + FREE SVG

DIY WOOD SIGN TUTORIAL, how to make a wooden stenciled sign for your laundry room. Larger than mat sign tutorial. Oversized sign making step by step tutorial using your Cricut or Silhouette vinyl cutting machine.

DIY painted & distressed laundry room sign + FREE SVG

Make your own stenciled and distressed laundry room sign. BONUS: grab the FREE to use SVG in my free resource library.

Easy stenciled wood sign for your laundry room

Want to make a simple yet large sign for your laundry room? You’ve come to the right place! I’ve been making this exact LAUNDRY sign in my shop for a couple of years now and really wanted to share with you how I make it because it’s super easy and simple. Not a whole lot of fuss goes into making this larger than mat wooden sign using your Cricut.

Affiliate Disclosure. Some of the links on this website are affiliate links, which means that I may earn a small commission if you click on the link or make a purchase using the link. If you make a purchase you will not be charged anything additional.

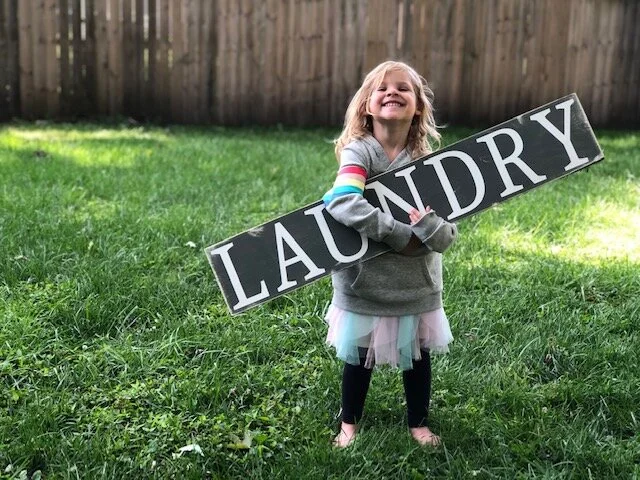
By the way…how cute is my little model?! This is the youngest of my four daughters and she always wants to help me work. She doesn’t care what it is she just wants in on all the fun and exciting things of momma’s business. She was absolutely thrilled when I asked her to hold the sign so I could snap a pic.

DIY WOOD SIGN TUTORIAL, how to make a wooden stenciled sign for your laundry room. Larger than mat sign tutorial. Oversized sign making step by step tutorial using your Cricut or Silhouette vinyl cutting machine.

Look at that big cheesy smile! Melts my momma heart! Barefoot, girly dress with a unicorn hoodie over it and let’s not forget the wild hair. Oh the life!

If you want to DIY a wood sign but don’t have all the tools be sure to check out my DIY CRAFT KITS.

HOW TO STENCIL A SIGN FOR YOUR LAUNDRY ROOM

Here’s what you’ll need

If you’re new to the Cricut world be sure to check out my Cricut newbie post.

PAINTED LAUNDRY SIGN TUTORIAL

1.CUT OUT THE STENCIL

I cut my stencil out using Oramask 813 stencil film. This is my go to for most all of the stenciled wood signs I make. If you plan to make a lot of wooden signs you’ll want to read my post on how to save money on stencil film.

Because I did a reverse stencil method, not a traditional stencil method, I added lines onto my stencil to make it super easy to align on my wood base. Then I set my stencils aside till I needed them.

Because I did a reverse stencil method, not a traditional traditional stencil methodmethod, I added lines onto my stencil to make it super easy to align on my wood base. Then I set my stencils aside till I needed them.

DIY WOOD SIGN TUTORIAL, how to make a wooden stenciled sign for your laundry room. Larger than mat sign tutorial. Oversized sign making step by step tutorial using your Cricut or Silhouette vinyl cutting machine.

I used and xacto knife to weed the stencils. Be sure to leave the letters and remove the background of the stencil. Since this is a reverse stencil it will look different than a typical stencil does.

Because I did a reverse stencil method, not a traditional stencil method, I added lines onto my stencil to make it super easy to align on my wood base. Then I set my stencils aside till I needed them.

2.PAINT THE LETTER COLOR

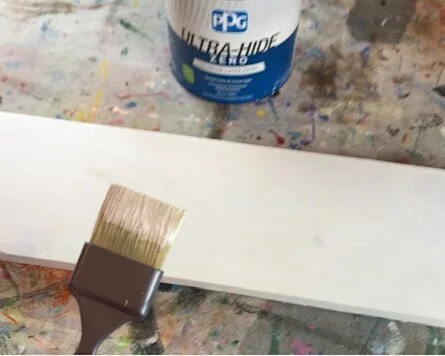
Typically I would use acrylic paints for this but I was all out of white acrylic paint. Instead I used a white wall paint that is actually better than acrylic to use for this sign.

Because I did a reverse stencil method, not a traditional stencil method, I added lines onto my stencil to make it super easy to align on my wood base. Then I set my stencils aside till I needed them.

I painted the sides with one coat of paint and I painted two coats on the front of the sign. Letting it dry completely between coats.

Because I did a reverse stencil method, not a traditional stencil method, I added lines onto my stencil to make it super easy to align on my wood base. Then I set my stencils aside till I needed them.

3. APPLY THE STENCIL

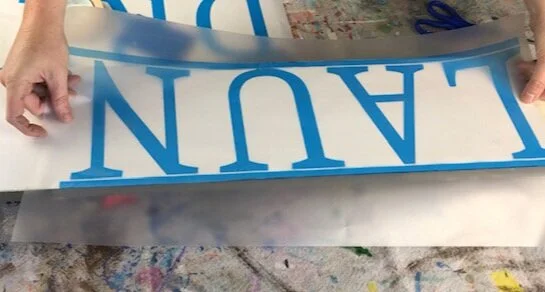
I applied transfer tape to one stencil then reused that same transfer tape for the next stencil. Did you know you can reuse transfer tape till it doesn’t work anymore? You sure can!

DIY WOOD SIGN TUTORIAL, how to make a wooden stenciled sign for your laundry room. Larger than mat sign tutorial. Oversized sign making step by step tutorial using your Cricut or Silhouette vinyl cutting machine.

After I rubbed the stencil with my vinyl squeegee I flipped my stencil over and removed the paper backing.

DIY WOOD SIGN TUTORIAL, how to make a wooden stenciled sign for your laundry room. Larger than mat sign tutorial. Oversized sign making step by step tutorial using your Cricut or Silhouette vinyl cutting machine.

Then I flipped the stencil over so that the sticky side was down and I placed the stencil where I wanted it on my wood base. This is where the lines on the stencil come in handy. This allows me to center the lettering without any stress. I made my stencil to the exact size of my wood board, with the extra lines, so that when I went to apply the stencil I wouldn’t have to worry about letters being uneven.

DIY WOOD SIGN TUTORIAL, how to make a wooden stenciled sign for your laundry room. Larger than mat sign tutorial. Oversized sign making step by step tutorial using your Cricut or Silhouette vinyl cutting machine.

Then I pressed it down with my vinyl squeegee to remove any air bubbles then removed the transfer tape. PRO TIP: rolling the transfer tape off of the stencil works best and it won’t lift your design up and off of the wood.

DIY WOOD SIGN TUTORIAL, how to make a wooden stenciled sign for your laundry room. Larger than mat sign tutorial. Oversized sign making step by step tutorial using your Cricut or Silhouette vinyl cutting machine.

I did the same process for the other part of my stencil. Then I removed the lines on the tops and bottoms because I didn’t need them anymore and didn’t want them to be apart of my design.

DIY WOOD SIGN TUTORIAL, how to make a wooden stenciled sign for your laundry room. Larger than mat sign tutorial. Oversized sign making step by step tutorial using your Cricut or Silhouette vinyl cutting machine.

3. SEAL THE STENCIL

The key to no paint bleed is to seal the stencil before you paint it. Essentially what you are doing is filling in any tiny air bubbles that paint could get under with the same color as your lettering. So in my case I sealed my stencil with white paint. It just takes a TINY bit of paint, you want to paint into the direction of your stencil. I let this dry completely.

DIY WOOD SIGN TUTORIAL, how to make a wooden stenciled sign for your laundry room. Larger than mat sign tutorial. Oversized sign making step by step tutorial using your Cricut or Silhouette vinyl cutting machine.

4. PAINT THE SIGN

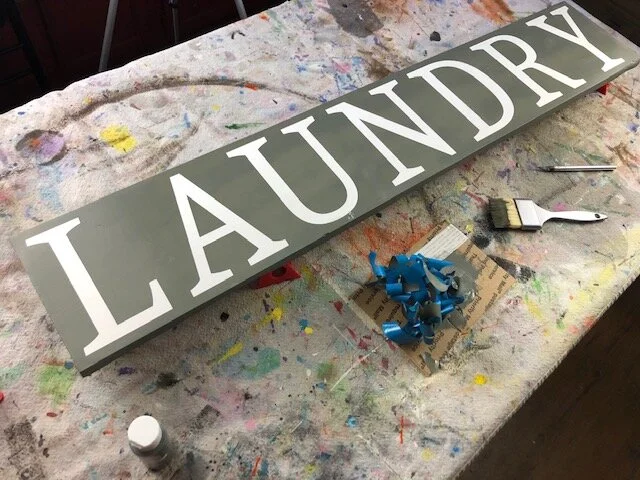
After the sealing was dry I painted my sign gray. I also paint the back because I think this gives pieces a more finished look but it’s all personal preference. I did two layers of gray paint. I let the first one dry totally before applying the second coat on top of it.

DIY WOOD SIGN TUTORIAL, how to make a wooden stenciled sign for your laundry room. Larger than mat sign tutorial. Oversized sign making step by step tutorial using your Cricut or Silhouette vinyl cutting machine.

5. PEEL THE STENCIL

While my paint was still wet I peeled the stencil up. Some people choose to do this after their paint is dry and that is totally ok, this is just my personal preference after making thousands of handmade signs over the last few years. Using an xacto knife or a sewing pin works great for this step.

DIY WOOD SIGN TUTORIAL, how to make a wooden stenciled sign for your laundry room. Larger than mat sign tutorial. Oversized sign making step by step tutorial using your Cricut or Silhouette vinyl cutting machine.

After I got all the stencil pieces removed from the wood base I let it dry.

DIY WOOD SIGN TUTORIAL, how to make a wooden stenciled sign for your laundry room. Larger than mat sign tutorial. Oversized sign making step by step tutorial using your Cricut or Silhouette vinyl cutting machine.

6. DISTRESSING

This is totally optional. If you don’t want to distress your sign you can choose not to and be done. But if you do want to distress your painted wood sign I recommend using a sander for this step. Mainly because I really don’t like sanding anything with a piece of sandpaper. It’s so much easier to do this with a sander. Focus on the edges and anywhere that would naturally be worn. I also lightly go across the front of my pieces with my sander.

DIY WOOD SIGN TUTORIAL, how to make a wooden stenciled sign for your laundry room. Larger than mat sign tutorial. Oversized sign making step by step tutorial using your Cricut or Silhouette vinyl cutting machine.

The last thing I do is to wipe it with a lint free cloth to get all the dust off from sanding. Super simple and easy! I told ya, it’s pretty much no fuss.

DIY WOOD SIGN TUTORIAL, how to make a wooden stenciled sign for your laundry room. Larger than mat sign tutorial. Oversized sign making step by step tutorial using your Cricut or Silhouette vinyl cutting machine.

If you have any questions about this tutorial let me know in the comments below.

Happy Crafting!

How to make an American Flag leaning porch sign

How to make an American Flag porch sign DIY tutorial

I just can’t seem to get enough of the patriotic décor these days! It started a few months ago when I made these fun fireworks from a wood 4x4 . Then I added this old classic to the blog, a hanging wood flag made from 1x4’s {you can find this handmade piece in my Etsy shop that sells like crazy this time of year}. And I had to make a tutorial of a red, white, and blue rag wreath. I tell ya, I’ve been obsessed lately with making these tutorials! And I have another one ;)!!!

Affiliate Disclosure. Some of the links on this website are affiliate links, which means that I may earn a small commission if you click on the link or make a purchase using the link. If you make a purchase you will not be charged anything additional.

I had everything I needed on hand to make this but I’ve included the links where you can get some of these supplies. Yes, those are affiliate links but not to worry, you will not be charged anything extra if you make a purchase through them. They are just a way for this stay at home momma to help with the daily bills of raising our four little girls :)!
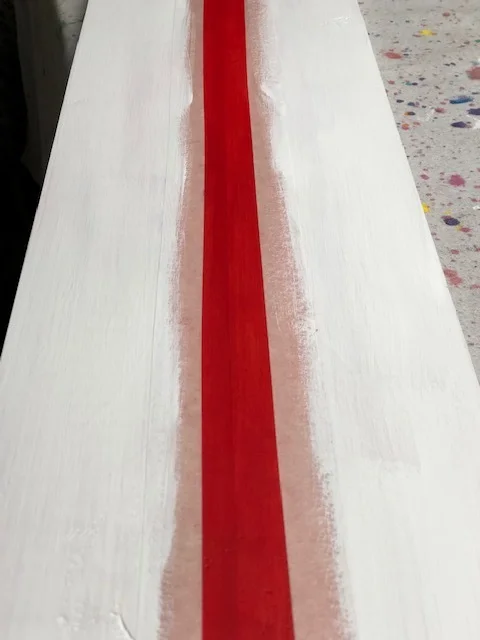
I promise this sign is SUPERRRRR easy!

Here’s what you’ll need

Handy tools


First you need to cut your board and give it a quick sanding with 120 grit sandpaper. I personally LOVE working with Ryobi Power Tools. For years I used my husband much more industrial strength tools {he works commercial construction so his tools need to be crazy powerful} till I found these little gems and I have no plans of ever letting these guys go!

Then you need to paint your ENTIRE board white. Do one very thin coat, once dry add a second coat.

How to make an American flag leaning porch sign, DIY tutorial

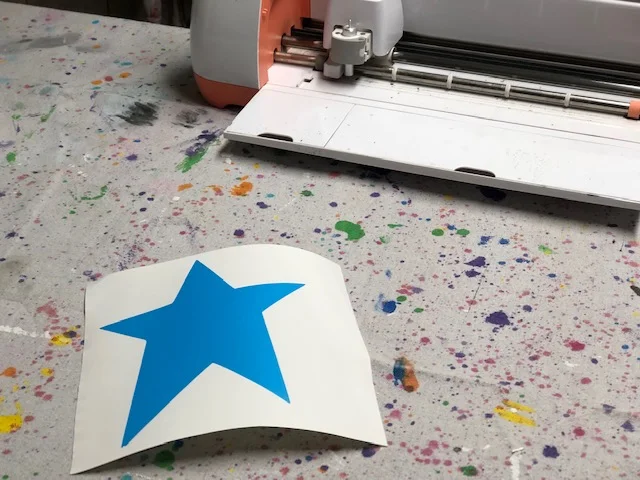
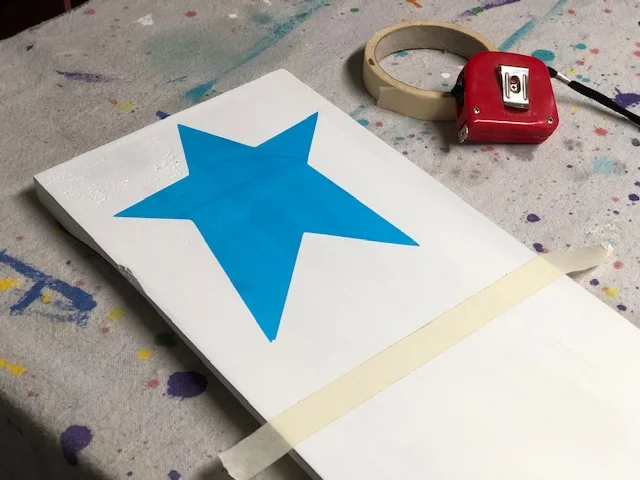
If you’re using a stencil cut it out while your board dries. I use my Cricut but you can use any vinyl cutting machine. The star I cut out was approx. 6” wide. If you don’t have access to one you can free hand your star. If going this route I recommend using a pencil when you do the outline.

American flag18.jpg

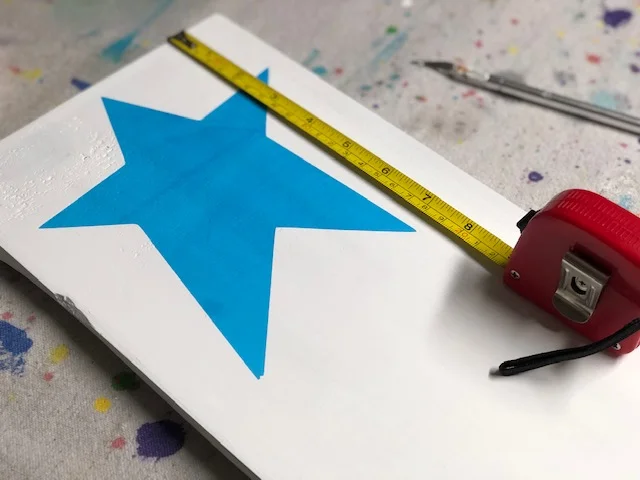
Apply your star stencil to your board. Then decide where you want your blue line to stop below it. Measure that distance and make a mark on each side. I made mine approx. 9” from the top.

How to make an American flag leaning porch sign, DIY tutorial

Now run a piece of tape from side to side where you made those marks. This will help to keep your line crisp.

How to make an American flag leaning porch sign, DIY tutorial

Paint the entire top area blue. I used a royal blue but any blue shade that you like will be perfect. I painted two coats of blue, allowing it to dry completely between coats.

How to make an American flag leaning porch sign, DIY tutorial

Remove the star and the tape.

How to make an American flag leaning porch sign, DIY tutorial

I at first planned to paint two stripes of white and two stripes of red going down my board…big mistake. It was not as cute so I had to repaint it. I had to paint the bottom part red, because it is far easier to cover white with red than to cover red with white.

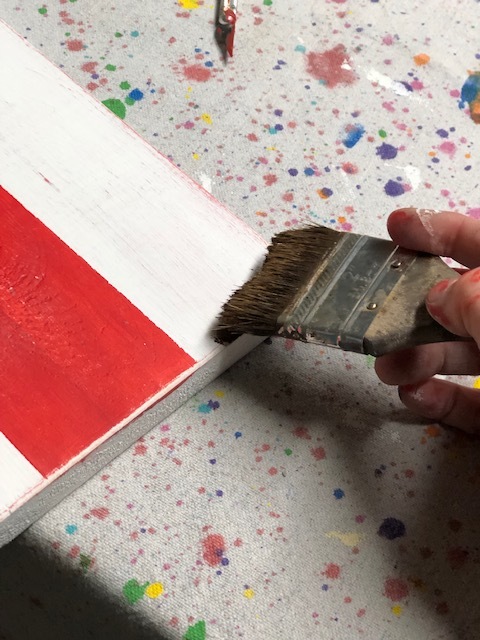
Using the same measuring technique as above but going vertically instead of horizontally, tape off the bottom so you have three equal stripes. If I wouldn’t have messed my stripes up from the beginning I would have taped them off the opposite from pictured below and painted inside the tape lines red. Instead I had to make more work for myself. I hope that makes sense. Just like with the blue, paint two coats and let dry between coats.

How to make an American flag leaning porch sign, DIY tutorial

Then peel off the tape. Go in with a small paint brush and fix any mistakes if necessary.

How to make an American flag leaning porch sign, DIY tutorial

Using your sander, sand around the edges, corners, and give the front a super quick once over. Then you’re ready to apply your wax. Check out my DIY mini wood pumpkin tutorial for a more in-depth how to on applying antiquing wax.

How to make an American flag leaning porch sign, DIY tutorial

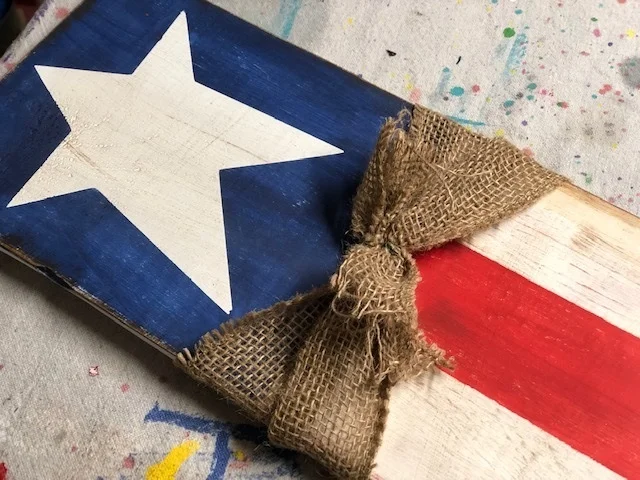
Add a piece of burlap. I tied mine off with a piece of floral wire but you can tie yours in a bow or a knot.

How to make an American flag leaning porch sign, DIY tutorial

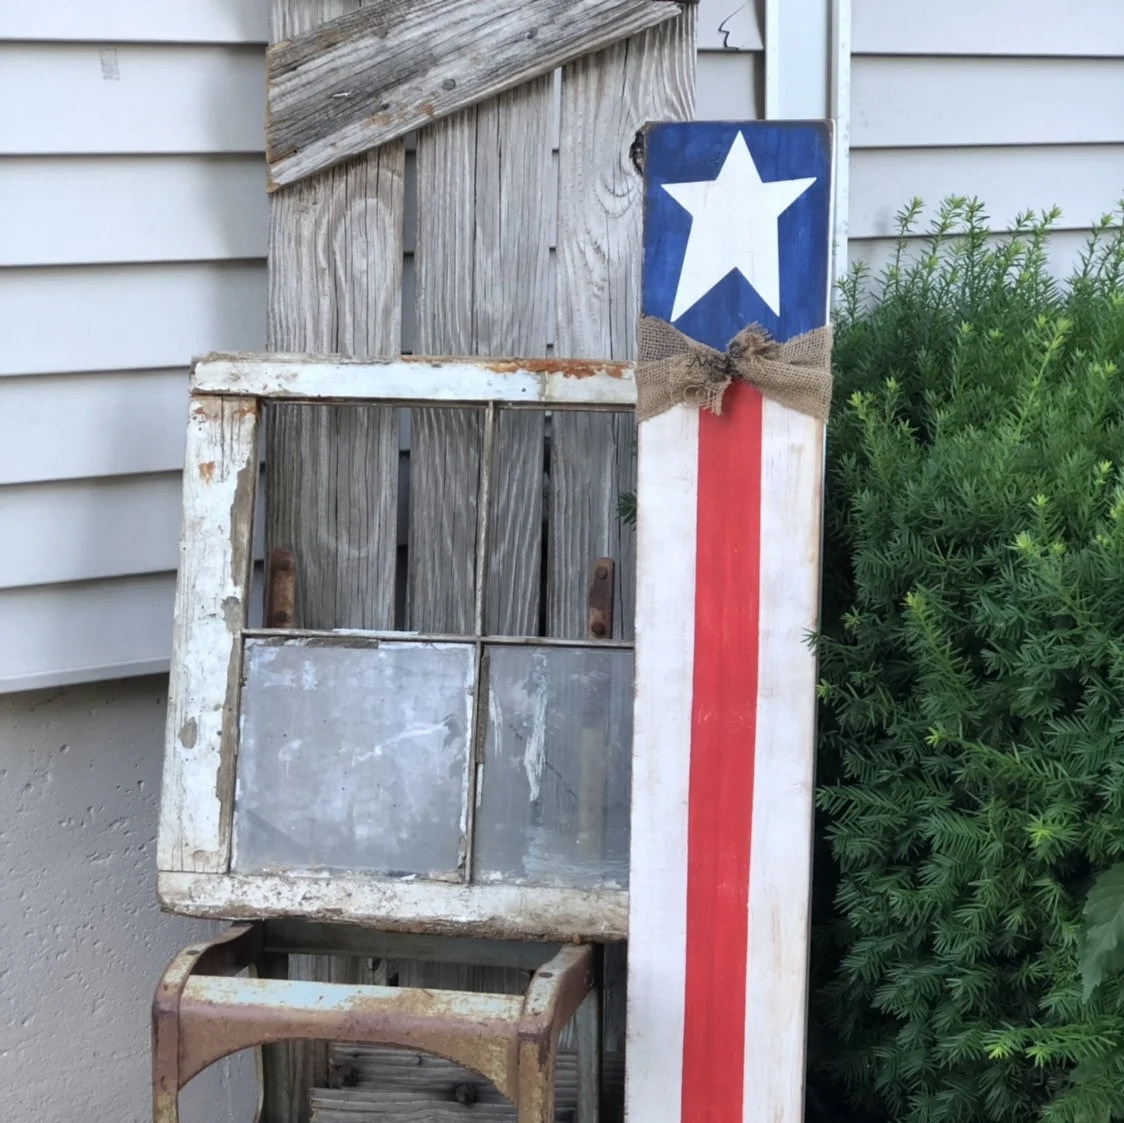
I added a couple pieces of baling wire just to give it a little extra cuteness!

How to make an American Flag leaning porch sign, DIY tutorial

If you love this piece but don’t have the time to make it and NEED it in your life ;) you can purchase one personally made by me here ————> AMERICAN FLAG LEANING PORCH SIGN