DIY hello sunshine stained wood sign + FREE SVG

DIY how to stencil on wood sign painting tutorial. How to make a hello sunshine lettered sign for summer. Using oramask stencil film to paint wood signs without paint bleed. free svg to use with cricut for sign making.

DIY STENCILED HELLO SUNSHINE SIGN

Make this simple and chic hello sunshine sign to display with your warm weathered décor. I used my old school Cricut Explore to make this wood sign but you can use any vinyl cutting machine you have. Be sure to grab the FREE SVG in my free resource library to make this exact design (find the link below;) )

Affiliate Disclosure. Some of the links on this website are affiliate links, which means that I may earn a small commission if you click on the link or make a purchase using the link. If you make a purchase you will not be charged anything additional.

Here’s what you need

Want to learn more techniques for painting wood signs? CLICK HERE to check out my list of DIY sign painting tutorials for the most crisp clean lines for your lettered painted signs.

The type of stenciling I used for this wood HELLO SUNSHINE sign is called REVERSE STENCILING. I also used this stenciling technique on this BLESS OUR NEST wood sign. I love this technique when I’m only using two colors, the base color and the letter color. It gives super crisp lines and is really quick to do.

1.CUT THE STENCIL

Upload the HELLO SUNSHINE SVG into Cricut Design Space (or the program you are using with your fancy cutting machine). Then add a square to the canvas. Size the square so it’s about the same size as the wood base you are using. I sized mine to 7.25” then resized the HELLO SUMMER SVG till I was happy with the size of that. This process isn’t a must, you can just cut the SVG out without a square around it BUT adding this square does make centering your design much easier when you go to stencil the design.

DIY how to stencil on wood sign painting tutorial. How to make a hello sunshine lettered sign for summer. Using oramask stencil film to paint wood signs without paint bleed. free svg to use with cricut for sign making.

Once you happy with the size select both the SVG and the square and center them. After they are centered and still both selected use the Cricut SLICE feature to slice the SVG out of the square.

DIY how to stencil on wood sign painting tutorial. How to make a hello sunshine lettered sign for summer. Using oramask stencil film to paint wood signs without paint bleed. free svg to use with cricut for sign making.

Now you should have 3 images. You will only need the square that has the circle cut out of it so delete the two other circle images.

This is what your canvas should look like when you are ready to hit MAKE IT in Cricut Design Space.

DIY how to stencil on wood sign painting tutorial. How to make a hello sunshine lettered sign for summer. Using oramask stencil film to paint wood signs without paint bleed. free svg to use with cricut for sign making.

I used ORAMASK STENCIM FILM and the Cricut GREEN cutting mat. I set my machine dial to cut vinyl.

2. APPLY THE STENCIL

When weeding this design you want to weed out the CIRCLE and the MIDDLE PIECES from the letters.

DIY how to stencil on wood sign painting tutorial. How to make a hello sunshine lettered sign for summer. Using oramask stencil film to paint wood signs without paint bleed. free svg to use with cricut for sign making.

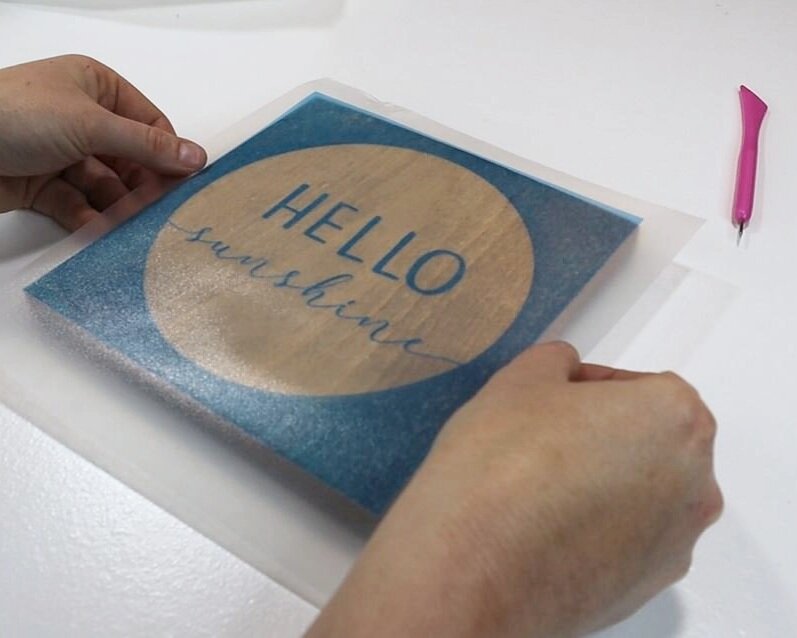
Use transfer tape to easily transfer the image onto your wood base. I’ve used LOTS of different transfer tapes and this brand is one of my favorites.

PRO TIP: you can reuse your transfer tape over and over again. As long as it is still tacky and fits the design you want to transfer you can use it. I often use my transfer tape 3-4 times before getting a new piece.
DIY how to stencil on wood sign painting tutorial. How to make a hello sunshine lettered sign for summer. Using oramask stencil film to paint wood signs without paint bleed. free svg to use with cricut for sign making.

Align your stencil then press down using your hand and a vinyl squeegee. Working from the middle and then out press out the air bubbles.

DIY how to stencil on wood sign painting tutorial. How to make a hello sunshine lettered sign for summer. Using oramask stencil film to paint wood signs without paint bleed. free svg to use with cricut for sign making.

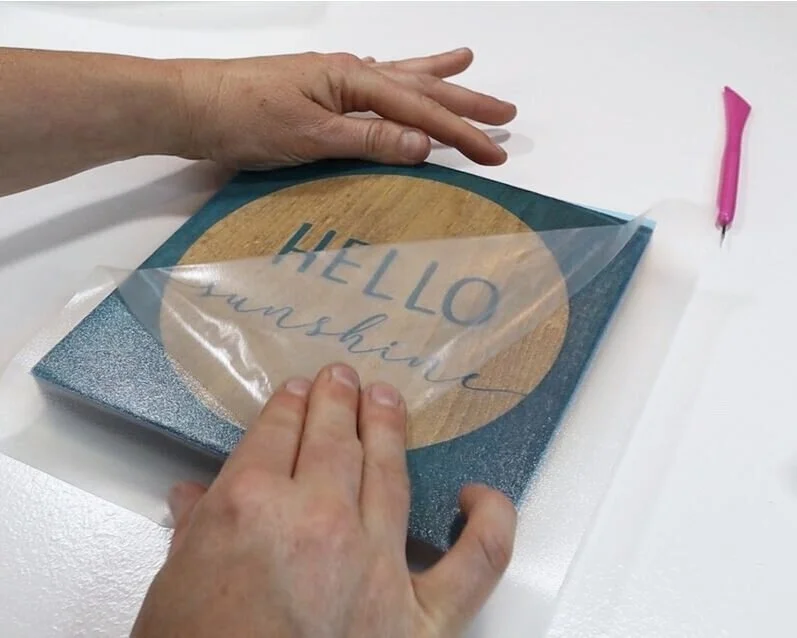
Now, roll your transfer tape off your design. Be sure to go slow, especially with this design as it has delicate lines that can rip easily.
DIY how to stencil on wood sign painting tutorial. How to make a hello sunshine lettered sign for summer. Using oramask stencil film to paint wood signs without paint bleed. free svg to use with cricut for sign making.

3. SEAL THE STENCIL

This step isn’t an absolute must but you’ve already worked this hard why ruin it with paint bleed? I always hate myself when I skip this step so just save yourself from a kick in the butt later and seal your stencil before you paint ;)!

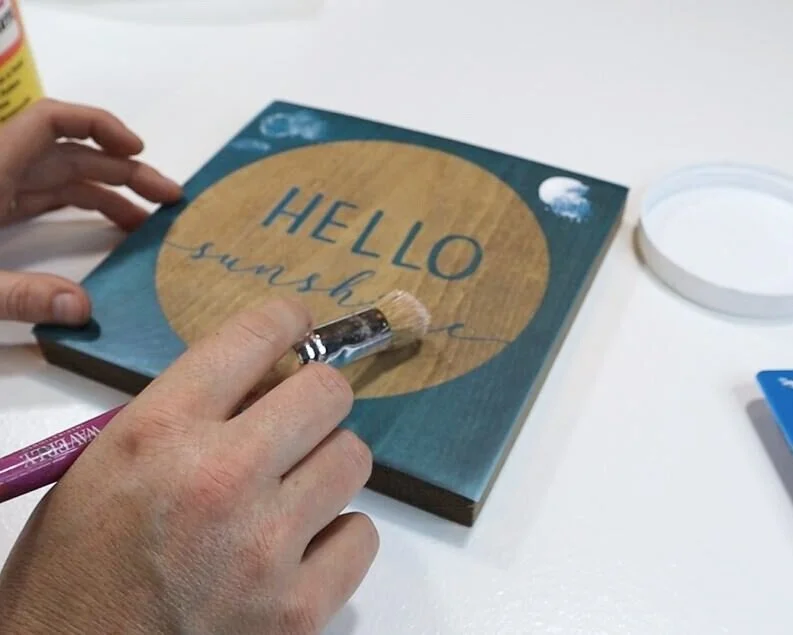
Paint a SUPER THIN layer of matte finish mod podge all over your design. Essentially what you are doing is filling in all of those tiny little air bubbles that you can’t see that are between your stencil and your wood base with a clear layer. This keeps your paint from filling in those air bubbles, aka: paint bleed.

DIY how to stencil on wood sign painting tutorial. How to make a hello sunshine lettered sign for summer. Using oramask stencil film to paint wood signs without paint bleed. free svg to use with cricut for sign making.

Be sure you are painting the thinnest of thin layers when doing this step. If it’s too thick your paint will peel up with your stencil when you remove it…again speaking from LOTS of sign making experience lol! Then let that dry completely before moving on to the next step.
DIY how to stencil on wood sign painting tutorial. How to make a hello sunshine lettered sign for summer. Using oramask stencil film to paint wood signs without paint bleed. free svg to use with cricut for sign making.

4. PAINT YOUR DESIGN

After your mod podge seal has dried you can paint your design. The lighter the color the more layers you will likely need to cover your design completely. For your first layer of paint you want to paint it on thin enough so that you see the wood grain through the paint. I used white acrylic paint for this project and painted 3 coats total.
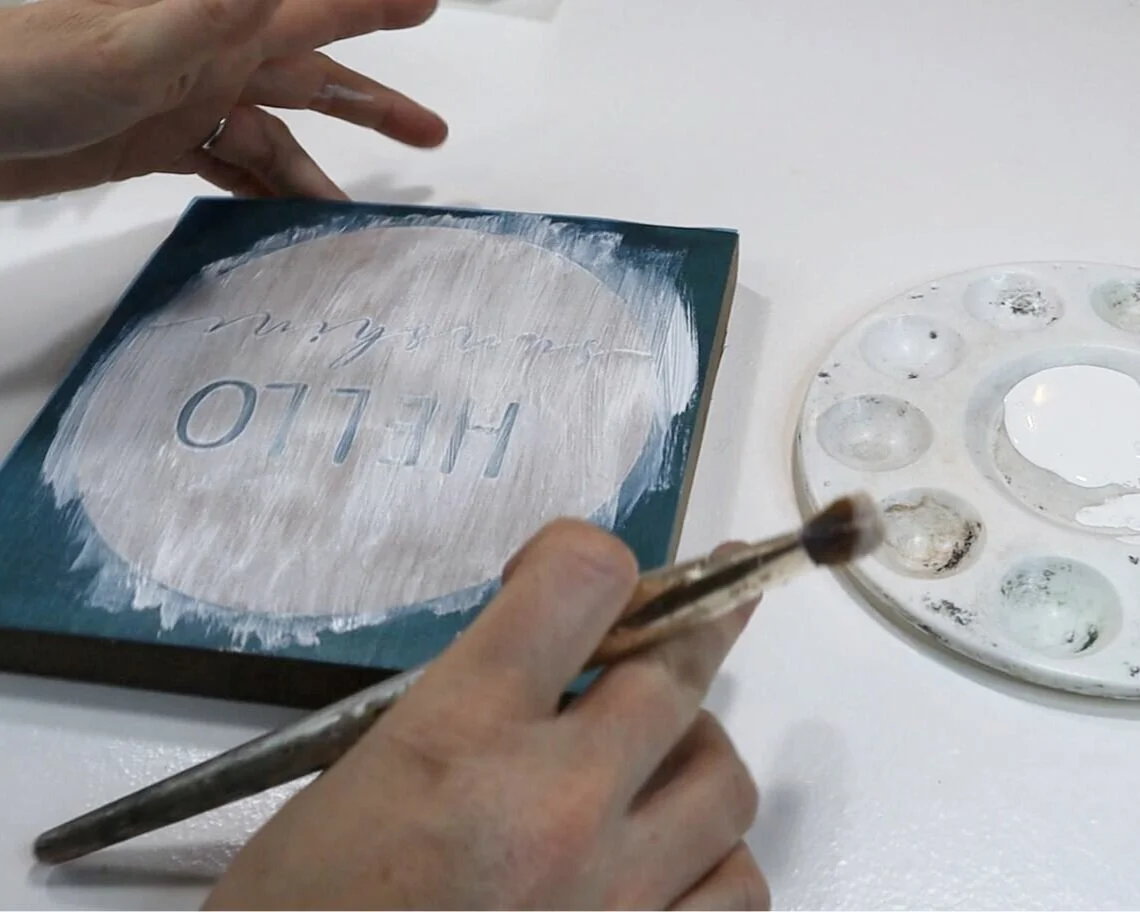
DIY how to stencil on wood sign painting tutorial. How to make a hello sunshine lettered sign for summer. Using oramask stencil film to paint wood signs without paint bleed. free svg to use with cricut for sign making.

After you apply the first layer wait for it to dry completely before moving on to the second coat. If you need a third layer of paint repeat the drying process again then paint the third layer.

5. PEEL UP YOUR STENCIL

After your happy with the paint coverage it’s time to peel up the oramask stencil film. I personally peel my stencils up while my paint is still wet but some prefer to peel after their paint has dried, both ways work. Grab one corner of the stencil and peel it off toward the opposite corner.

DIY how to stencil on wood sign painting tutorial. How to make a hello sunshine lettered sign for summer. Using oramask stencil film to paint wood signs without paint bleed. free svg to use with cricut for sign making.

Then using your weeding tool CAREFULLY peel up the lettering inside of the circle. I ended up grabbing a sewing pin for this as my weeding tool was a little too large for the job.

DIY how to stencil on wood sign painting tutorial. How to make a hello sunshine lettered sign for summer. Using oramask stencil film to paint wood signs without paint bleed. free svg to use with cricut for sign making.

Let your sign sit and dry completely before displaying in your home with the rest of your summer decorations.
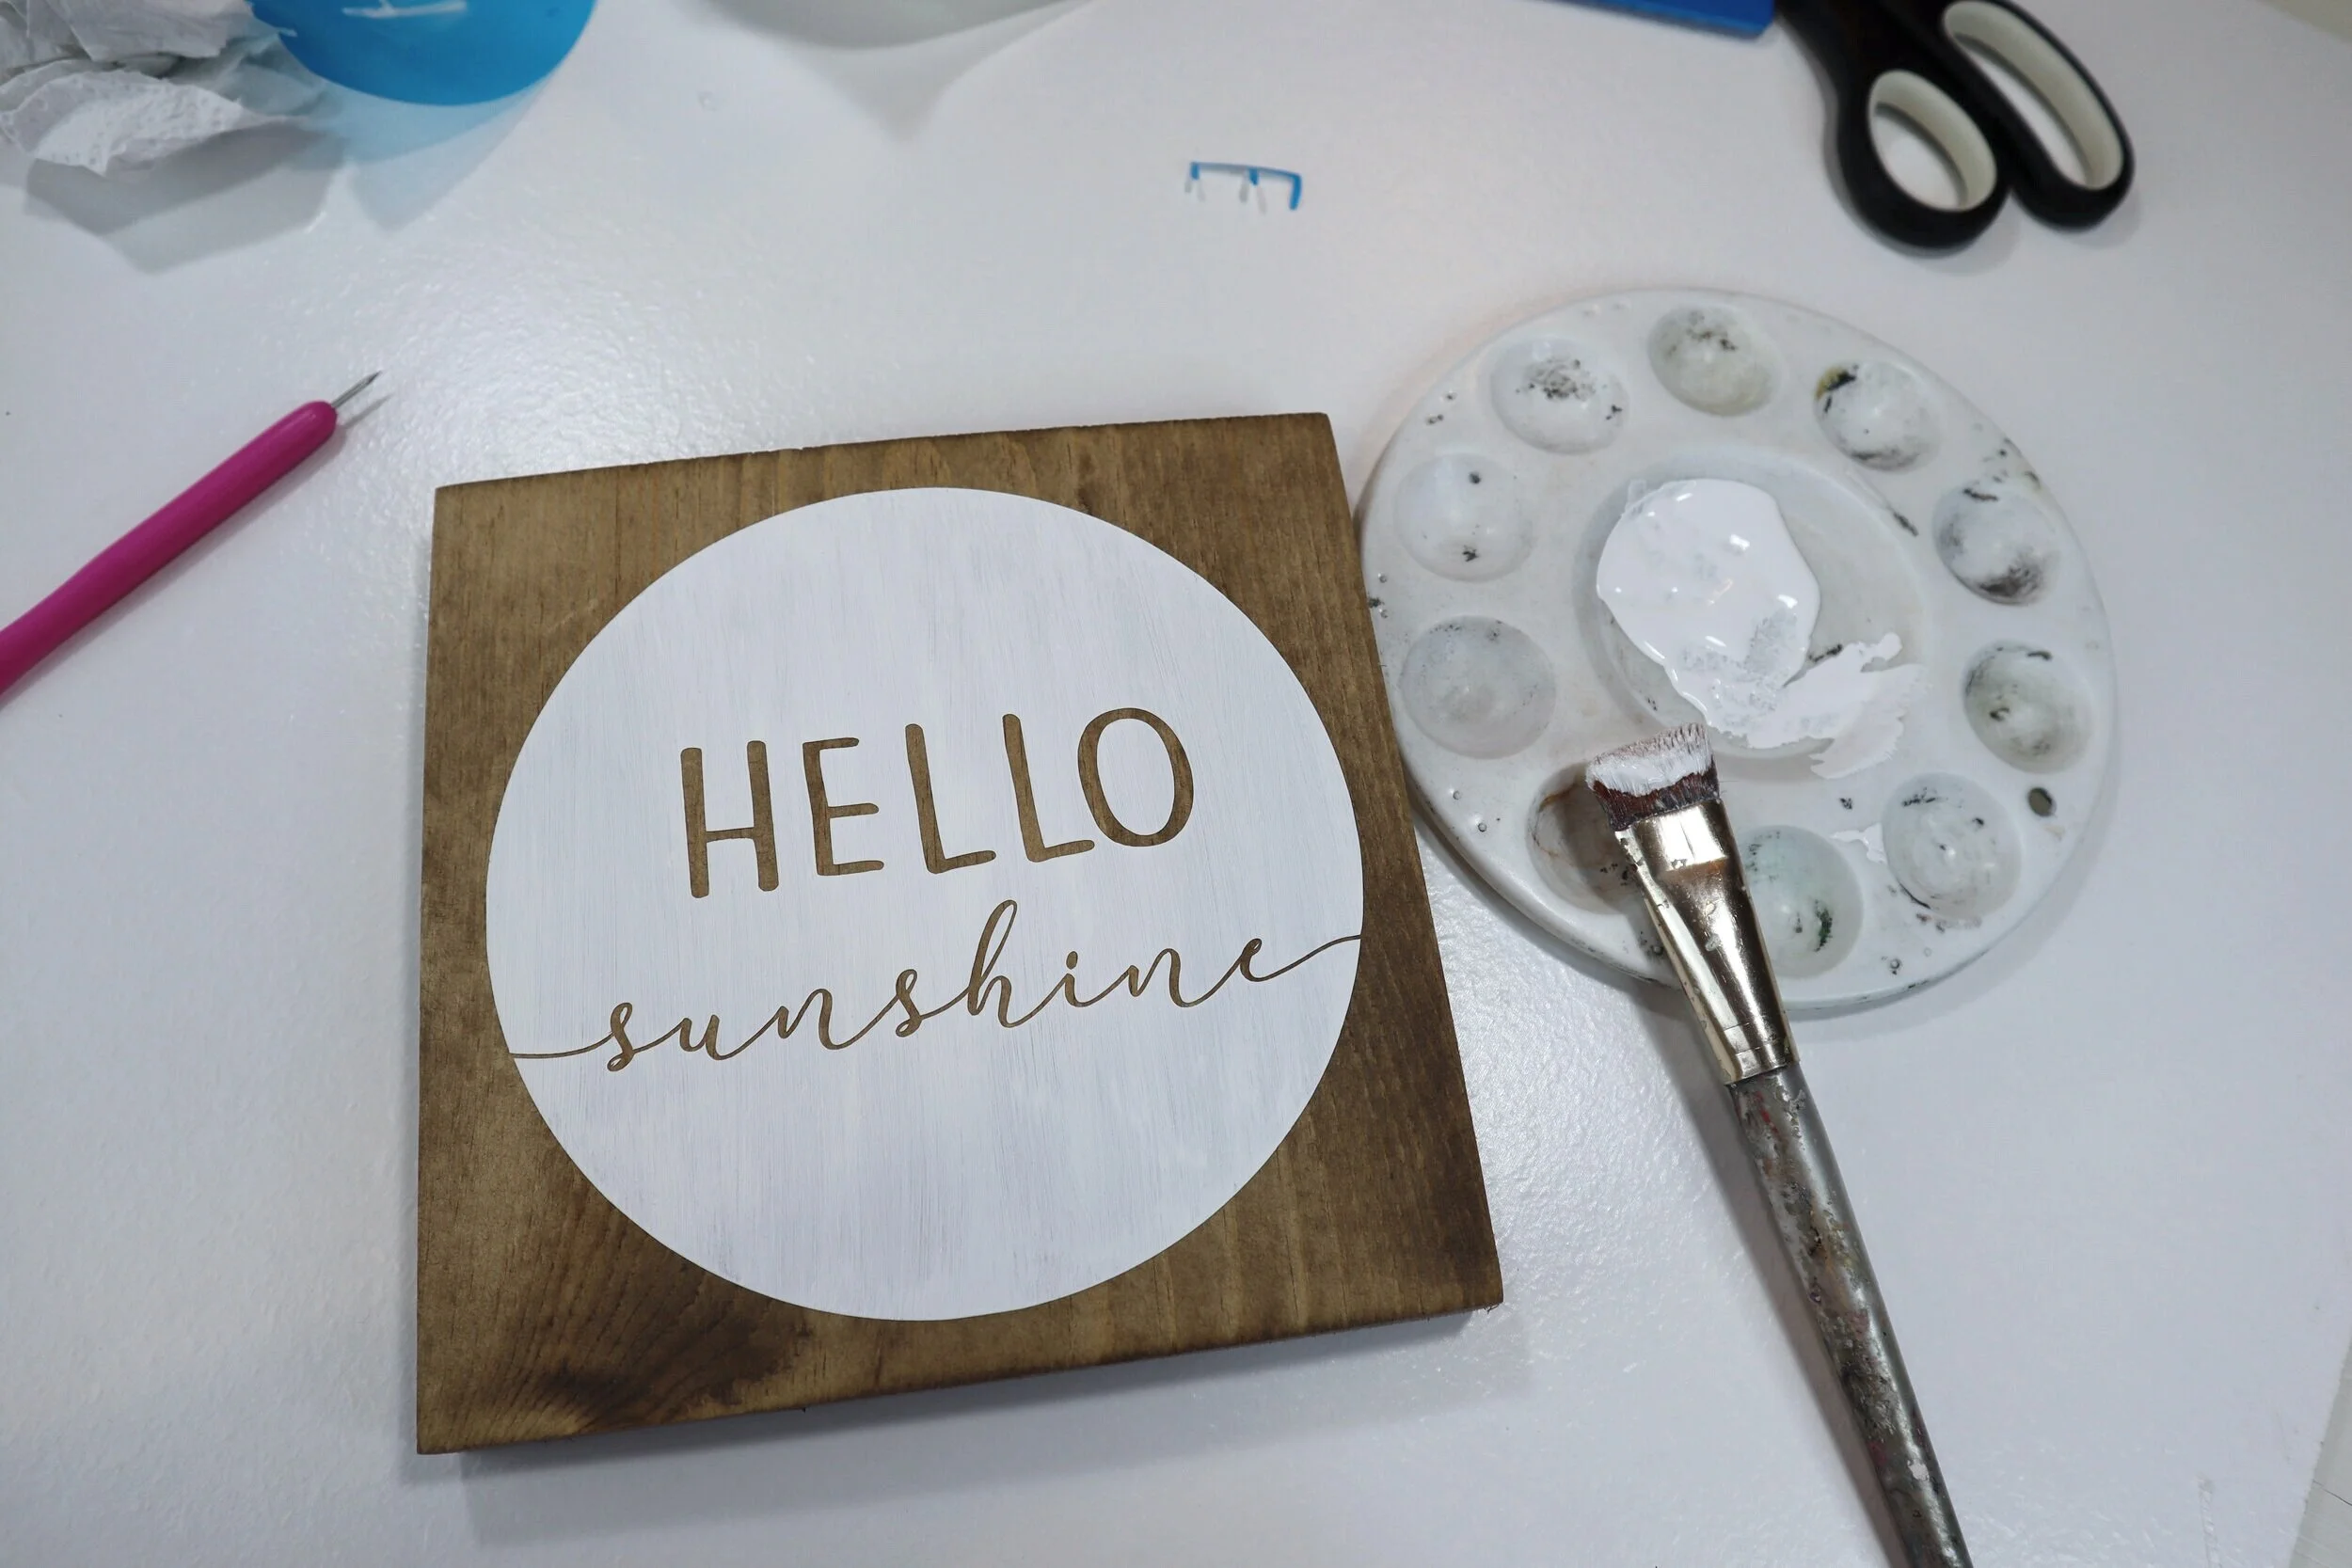
DIY how to stencil on wood sign painting tutorial. How to make a hello sunshine lettered sign for summer. Using oramask stencil film to paint wood signs without paint bleed. free svg to use with cricut for sign making.

I just love how this little sign turned out! It’s so simple and it can be displayed with both spring and summer décor. I extra love double duty decorations!

If you have any questions about this DIY craft tutorial or any others on my blog please reach out.


Check out more sign painting tutorials below. Happy Crafting!!

Dollar Tree moss bunny peeps on wood + FREE SVG

EASY SPRING CRAFT

DIY spring Easter Dollar Tree craft, easy and simple peep bunny craft made out of sheet moss. Frugal Easter craft for spring using your Cricut or vinyl cutting machine. Scrap wood craft project

DIY DOLLAR TREE SHEET MOSS BUNNIES + FREE SVG

Need an easy & inexpensive spring or Easter craft? This little moss bunny sign will fit in perfectly with your farmhouse or rustic decorations! And it won’t break the bank!

I love the Dollar Tree and I also love my Cricut machine. So when I can make projects combining the two it’s like fireworks in my craft room! Today I made little moss peep bunny cutouts using both my Dollar Tree find and the help of my never fail me Cricut machine. Be sure to check out this DOLLAR TREE BOOK STACK if you love this spring dollar store craft.

DIY spring Easter Dollar Tree craft, easy and simple peep bunny craft made out of sheet moss. Frugal Easter craft for spring using your Cricut or vinyl cutting machine. Scrap wood craft project

This spring Easter craft was super easy, crazy quick and it represents my gaggle of girls. I am a momma to four daughters so I wanted there to be four little moss bunny peeps to represent them <3 !! It just so happened to work out perfectly that I had a 10” piece of scrap wood I originally made for a different craft over a year ago {yes I’m one of those craft hoarder ladies} to use for this simple DIY. So there was no need to cut, paint, or stain anything today at least.

Affiliate Disclosure. Some of the links on this website are affiliate links, which means that I may earn a small commission if you click on the link or make a purchase using the link. If you make a purchase you will not be charged anything additional.

DIY spring Easter Dollar Tree craft, easy and simple peep bunny craft made out of sheet moss. Frugal Easter craft for spring using your Cricut or vinyl cutting machine. Scrap wood craft project

1. WOOD BASE

I used a piece of scrap wood from another project. It was already cut, stained, and painted so I didn’t need to do that for this project. If you want to know how to get that distressed wood look check out this DIY sign painting post.

2. CARDSTOCK BUNNY

I used my Cricut to cut out a cardstock template. You can grab the same SVG I used from my FREE RESOURCE LIBRARY. That is my personal library where I share all of my free printables, SVG cut files, and patterns. This is a much easier way for my readers to get access to my freebies rather than filtering through emails or worse deleting an email that contains a file you needed.

DIY spring Easter Dollar Tree craft, easy and simple peep bunny craft made out of sheet moss. Frugal Easter craft for spring using your Cricut or vinyl cutting machine. Scrap wood craft project

You will only need ONE cardstock bunny no matter how many bunnies you plan on cutting out of the sheet moss.

If you are new to the Cricut world be sure to check out my post on the top 10 supplies & accessories you need to get started using your Cricut cutting machine.

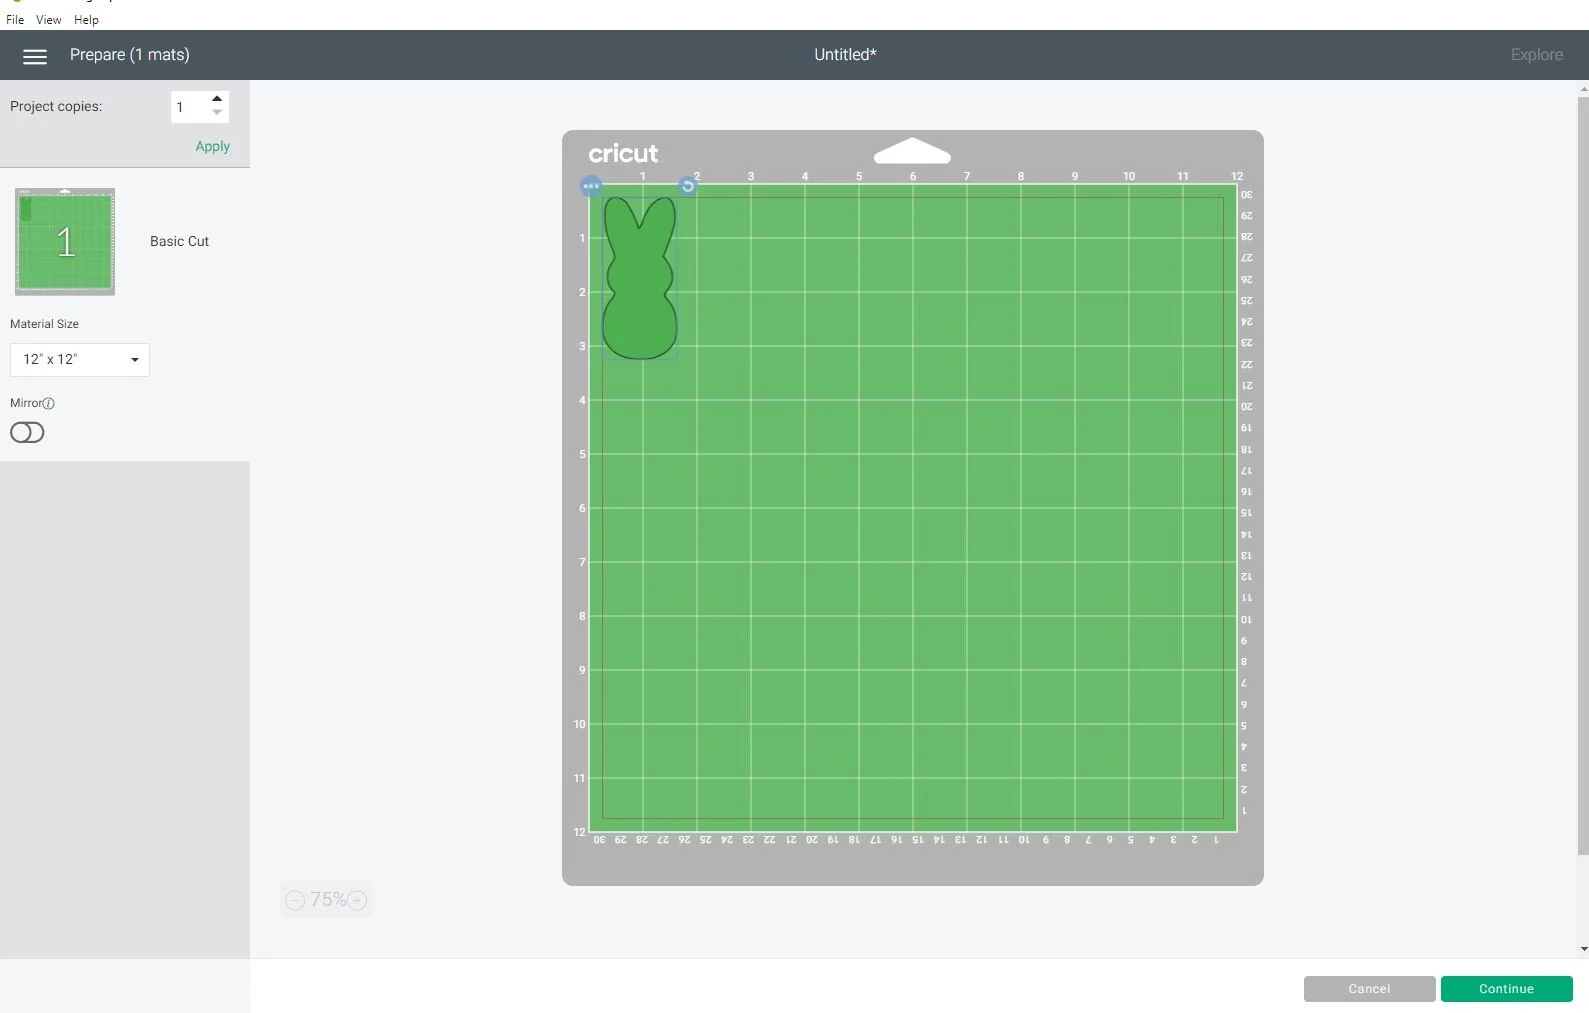
2. TRACE

I flipped my sheet of moss upside down on my craft surface. Then I traced around it using a dark colored permanent thick marker. I tried doing this with a pen but it didn’t work out so great so I grabbed the closest thing to me I could find that would work, a permanent marker. This was a little tricky only because the moss backing is so uneven but since I’m not a perfectionist it worked just fine.

DIY spring Easter Dollar Tree craft, easy and simple peep bunny craft made out of sheet moss. Frugal Easter craft for spring using your Cricut or vinyl cutting machine. Scrap wood craft project

I tried to fit all four bunnies on one side of the sheet so I could make the most of my $1 find lol!
3. CUT THE MOSS BUNNIES OUT

Using a pair of regular scissors I cut the peep bunnies out of the moss sheet. Some of the moss fell off in some pieces leaving it looking a little bare in spots but don’t worry if that happens to you. You can fix that at the very end.

DIY spring Easter Dollar Tree craft, easy and simple peep bunny craft made out of sheet moss. Frugal Easter craft for spring using your Cricut or vinyl cutting machine. Scrap wood craft project

4. GLUE

Before I glued my moss bunnies down I placed them on my piece of wood so I could make adjustments before they were glued down.

DIY spring Easter Dollar Tree craft, easy and simple peep bunny craft made out of sheet moss. Frugal Easter craft for spring using your Cricut or vinyl cutting machine. Scrap wood craft project

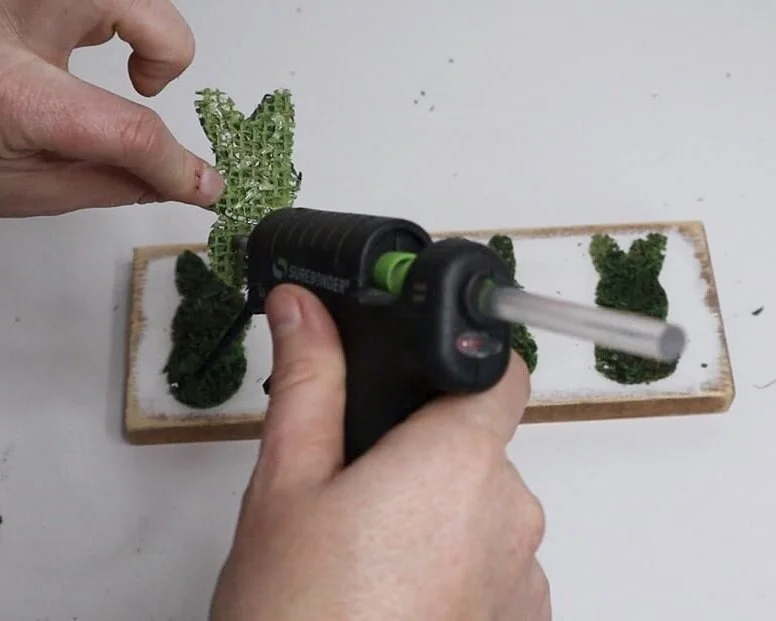
Then I used my fine tipped hot glue gun to glue them in place.

DIY spring Easter Dollar Tree craft, easy and simple peep bunny craft made out of sheet moss. Frugal Easter craft for spring using your Cricut or vinyl cutting machine. Scrap wood craft project

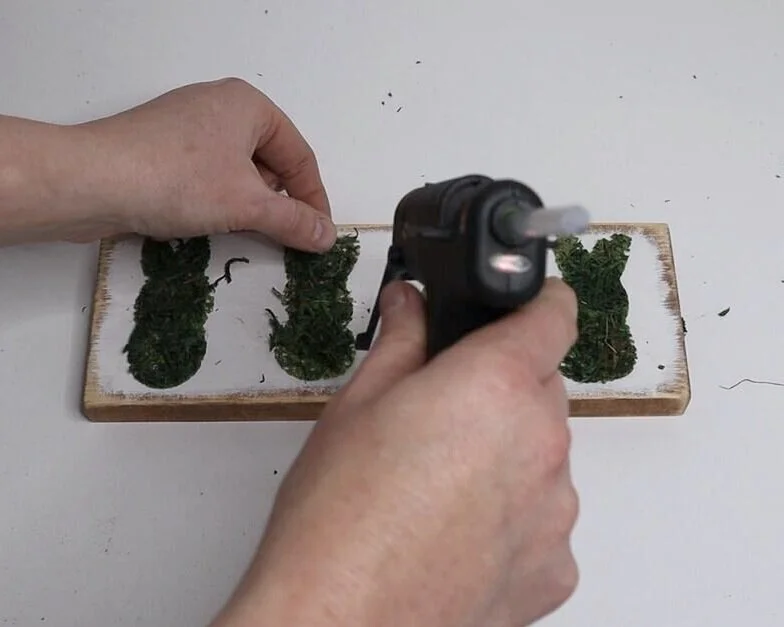
For the little areas that were bare I glue some leftover moss in those spots. You couldn’t even tell once I was finished that I had to add moss.

DIY spring Easter Dollar Tree craft, easy and simple peep bunny craft made out of sheet moss. Frugal Easter craft for spring using your Cricut or vinyl cutting machine. Scrap wood craft project

That’s it! So quick and easy. Click here for more DIY DOLLAR TREE CRAFTS.

DIY spring Easter Dollar Tree craft, easy and simple peep bunny craft made out of sheet moss. Frugal Easter craft for spring using your Cricut or vinyl cutting machine. Scrap wood craft project

Let me know if you have any questions in the comments below.

DIY Tiered Tray signs for 4th of July with Rae Dunn inspired SKINNY FONT

4th of July tiered tray sign, Rustic farmhouse style patriotic decor for Independence day. Make your own painted signs for the 4th of July. This DIY wood sign craft kit for adults  is perfect to make your own wooden mini signs.

DIY 4TH OF JULY TIERED TRAY WOOD SIGN

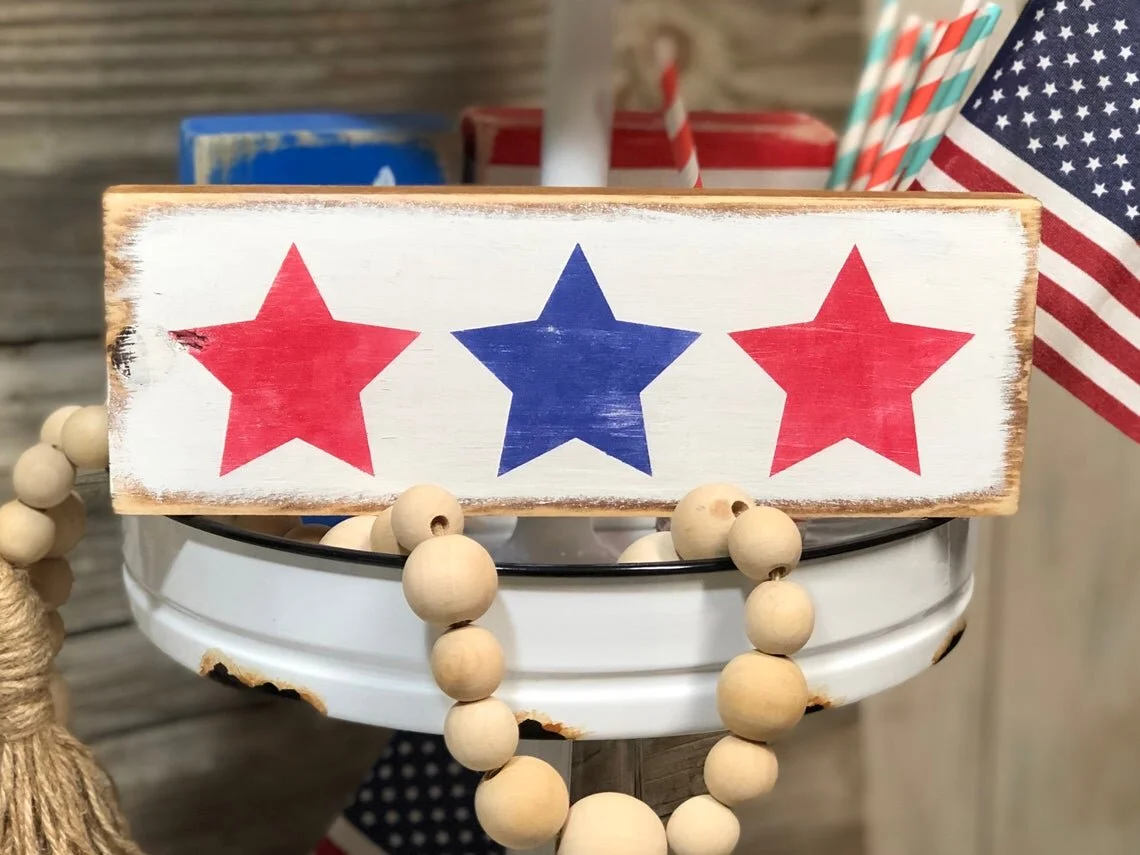
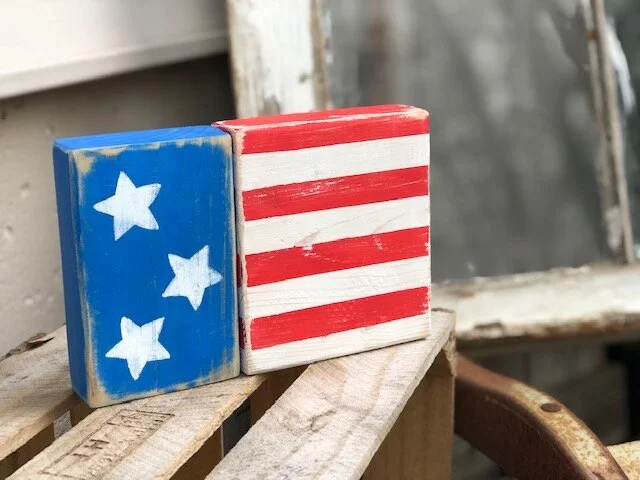
RED, WHITE, AND BLUE rustic mini signs… yes!! Tiered tray signs are all the rage right now. If you’ve been on Pinterest, Etsy, or anywhere in between then you’ve definitely seen these little farmhouse looking beauties! They are usually made using a simple design and just tie in perfectly with the whole clean rustic look that’s in right now.

4th of July tiered tray sign, Rustic farmhouse style patriotic decor for Independence day. Make your own painted signs for the 4th of July. This DIY wood sign craft kit for adults  is perfect to make your own wooden mini signs.

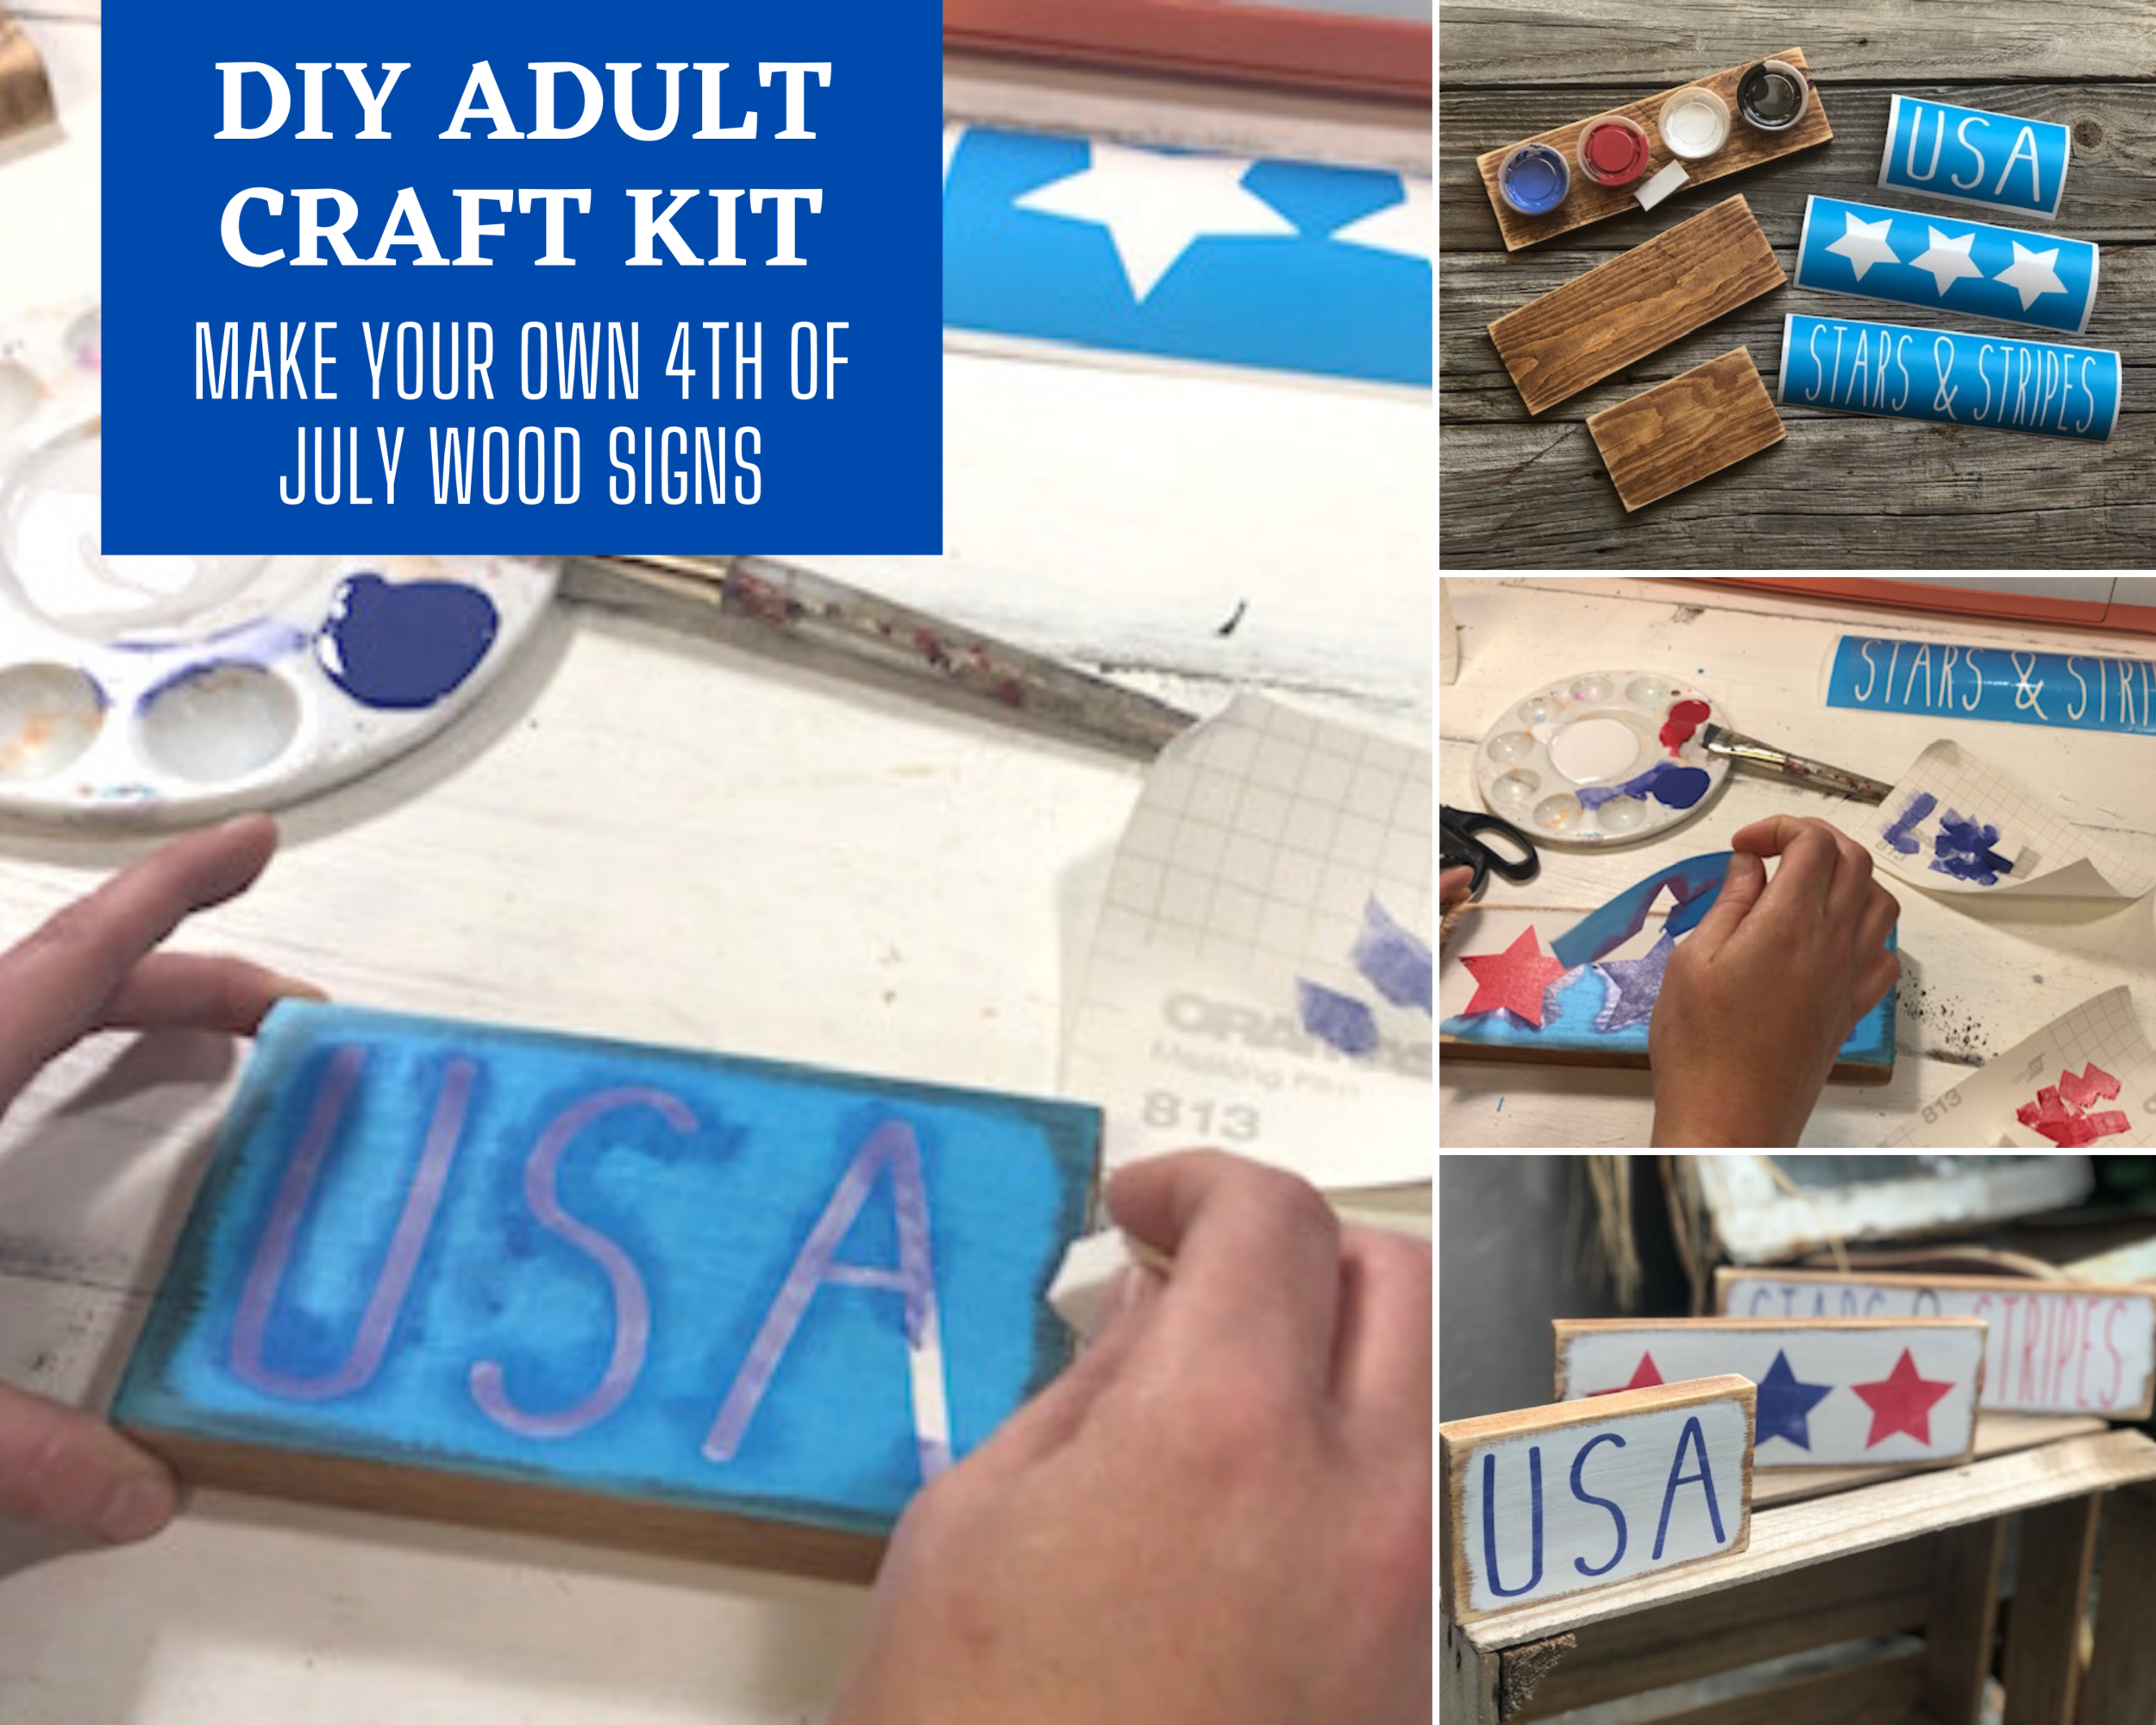
If you’re wanting to make your own mini wood signs it’s actually pretty easy to do. I make my tiered tray signs from 1x4’s that I cut down using my miter saw BUT even if you don’t have access to power tool you can still make your own mini wood signs! I’ve put together this DIY PATRIOTIC CRAFT KIT you can grab online in my shop. It comes with everything (except paint brushes) you need to make your own Independence Day signs at home. No need to go out and buy any fancy equipment or tools, especially if you don’t plan on making a ton of DIY craft projects.

If you are wanting to take the sign painting world by the horns be sure to read these 6 must haves for painting wood signs. I share the basic must haves to get you started on your own sign painting journey.

Affiliate Disclosure. Some of the links on this website are affiliate links, which means that I may earn a small commission if you click on the link or make a purchase using the link. If you make a purchase you will not be charged anything additional. This is just a way I can help add to our family finances to raise our four daughters. Please know I would never recommend a product or service I do not totally stand behind.

DIY 4TH OF JULY WOOD SIGNS FOR TIERED TRAYS

Here’s what you’ll need to make your own set of patriotic wooden signs

If you purchased the PATRIOTIC DIY SIGN PAINTING KIT your wood blanks will come pre-stained. You can skip to the step #3

4th of July tiered tray sign, Rustic farmhouse style patriotic decor for Independence day. Make your own painted signs for the 4th of July. This DIY wood sign craft kit for adults  is perfect to make your own wooden mini signs.
Cricut is Easy as 123

1. CUT & PREP YOUR WOOD PIECES

If you purchased the 4TH OF JULY DIY CRAFT KIT you can skip this step. If not you need to cut your 1x4’s to 6”, 10” and 12”. I use a miter saw to cut mine then give them a quick sanding with120 grit sand paper using my orbit sander. I stain my pieces then let dry for 24 hours. Once dry I sand around the edges to give it a distressed look. Now they are ready for paint :)!

4th of July tiered tray sign, Rustic farmhouse style patriotic decor for Independence day. Make your own painted signs for the 4th of July. This DIY wood sign craft kit for adults  is perfect to make your own wooden mini signs.

2. CUT YOUR STENCILS

Cut out your stencils on your cutting machine, I use an older model Cricut explore and it always does a perfect job! I highly recommend using Oramask stencil film to cut your stencils out of. This material is specifically made for stenciling and performs very well. Weed your design and apply transfer tape to it so it is ready to go. Get your FREE Cricut cut files here to use for this exact 4th of July project.

4th of July tiered tray sign, Rustic farmhouse style patriotic decor for Independence day. Make your own painted signs for the 4th of July. This DIY wood sign craft kit for adults  is perfect to make your own wooden mini signs.

3. PAINT YOUR BACKGROUND COLOR

Using a dry brush apply a THIN coat of paint on the front side of your wooden bases. For a more rustic look apply the paint so that it doesn’t touch the edge of the wood base and so that it a little uneven. Let that dry then paint a second coat. Let the second coat completely dry.

4th of July tiered tray sign, Rustic farmhouse style patriotic decor for Independence day. Make your own painted signs for the 4th of July. This DIY wood sign craft kit for adults  is perfect to make your own wooden mini signs.

4. APPLY YOUR STENCIL

Using your vinyl squeegee apply your stencil to your painted wood base. Once you feel it is adhered good slowly remove the transfer tape off of your stencil. The best way to do this is to start at one corner and slowly roll the transfer tape off of your blue stencil material. PRO TIP: you never want to pull up when removing your transfer tape, this will cause your stencil to pull up as well. Use your finger to rub the exposed area of the stencil to work out any puckers or air bubbles.

4th of July tiered tray sign, Rustic farmhouse style patriotic decor for Independence day. Make your own painted signs for the 4th of July. This DIY wood sign craft kit for adults  is perfect to make your own wooden mini signs.

5. PAINT YOUR STENCIL

Cut your stencil sponge into 3-4 sections, depending on the number of different colors you plan to use. Lightly dip the end of one of your stenciling sponges into your paint of choice, dab off excess paint onto a scrap piece of cardboard (or something similar) then using an up and down dabbing motion dab it onto the exposed areas of your stencil. Your paint coverage should be super thin, you want to be able to see the background color at this point. Let dry. Once dry dab on a second thin layer. If you are happy with the coverage you can move on to step 6. If you want a little more coverage wait for the second layer to dry then dab on a third layer of pain

4th of July tiered tray sign, Rustic farmhouse style patriotic decor for Independence day. Make your own painted signs for the 4th of July. This DIY wood sign craft kit for adults  is perfect to make your own wooden mini signs.

6. REMOVE YOUR STENCIL

Using a sharp xacto knife or sewing pin peel your stencil up while your paint is still wet. Be careful not to touch the wet paint. Let your painted wood sign dry.

4th of July tiered tray sign, Rustic farmhouse style patriotic decor for Independence day. Make your own painted signs for the 4th of July. This DIY wood sign craft kit for adults  is perfect to make your own wooden mini signs.

7. DISTRESS

This step is completely optional. If you want a little more rustic look lightly go over the front of your wooden sign with a sanding sponge or piece of sandpaper. I personally like adding this touch to my signs to give it a more farmhouse look. Wipe off the dust with a lint free cloth and you are ready to display them on your tiered tray.


DIY repurpose an old drawer into an American Flag

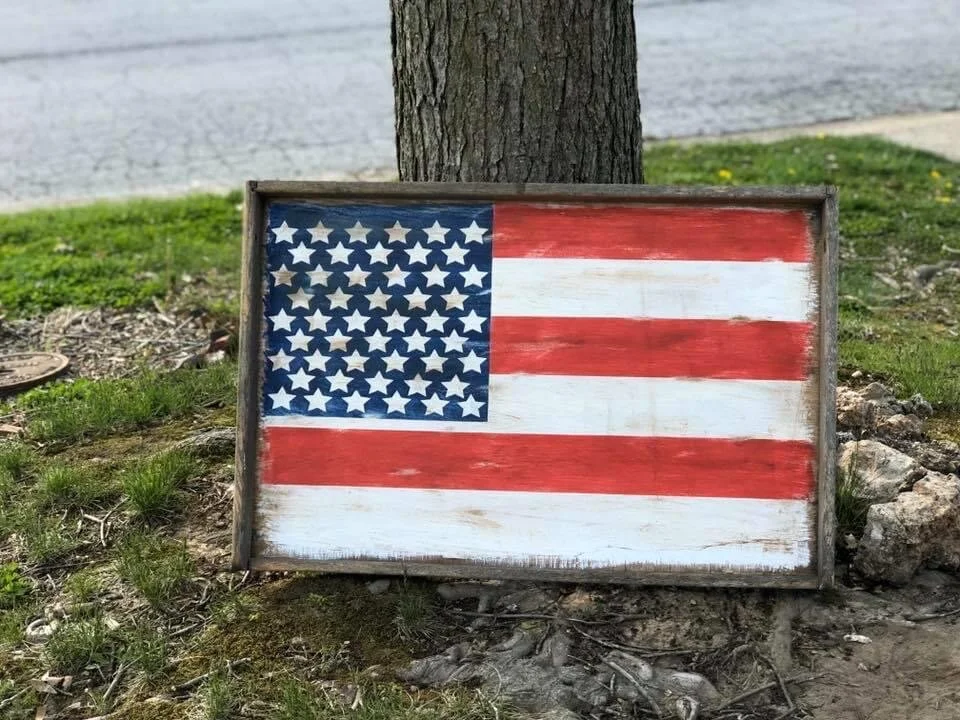
Turn an old drawer into a rustic Ameican flag. It doesn't take much to repurose a drawer that's been collecting dust. If you have some paint and a little creativity you can make your own farmhouse style old looking flag for your home decor.

HOW TO REPURPOSE AN OLD DRAWER INTO AN AMERICAN FLAG

Before you pass up on the dusty old drawer that’s sitting on the side of the road you might want to think of all the amazing things you could turn that in to. Years ago my father in law had a huge old drawer sitting under his carport just collecting dirt and debris. I loved it! Even covered in gross beat-up contact paper I could still see the it’s potential of being something beautiful He told me I could take it home and then it sat in the basement collecting even more dust for years. Finally I pulled it out from the depths of the basement over the weekend and told myself I WOULD transform this old drawer this week!

 Affiliate Disclosure. Some of the links on this website are affiliate links, which means that I may earn a small commission if you click on the link or make a purchase using the link. If you make a purchase you will not be charged anything additional.

I really wanted to paint something American on it and after going back and forth in my own head I decided a simple flag would be perfect for this old drawer. I had thought about stenciling a big US map on it or even some lettering but with everything I already have on my plate I decided I should just keep it simple. Besides I don’t have a ton of vinyl and transfer tape to spare since I’m running low and shipments are taking a little longer than normal at the moment. With a little painters tape and a bit of vinyl I was on my way to making a simple rustic American flag.

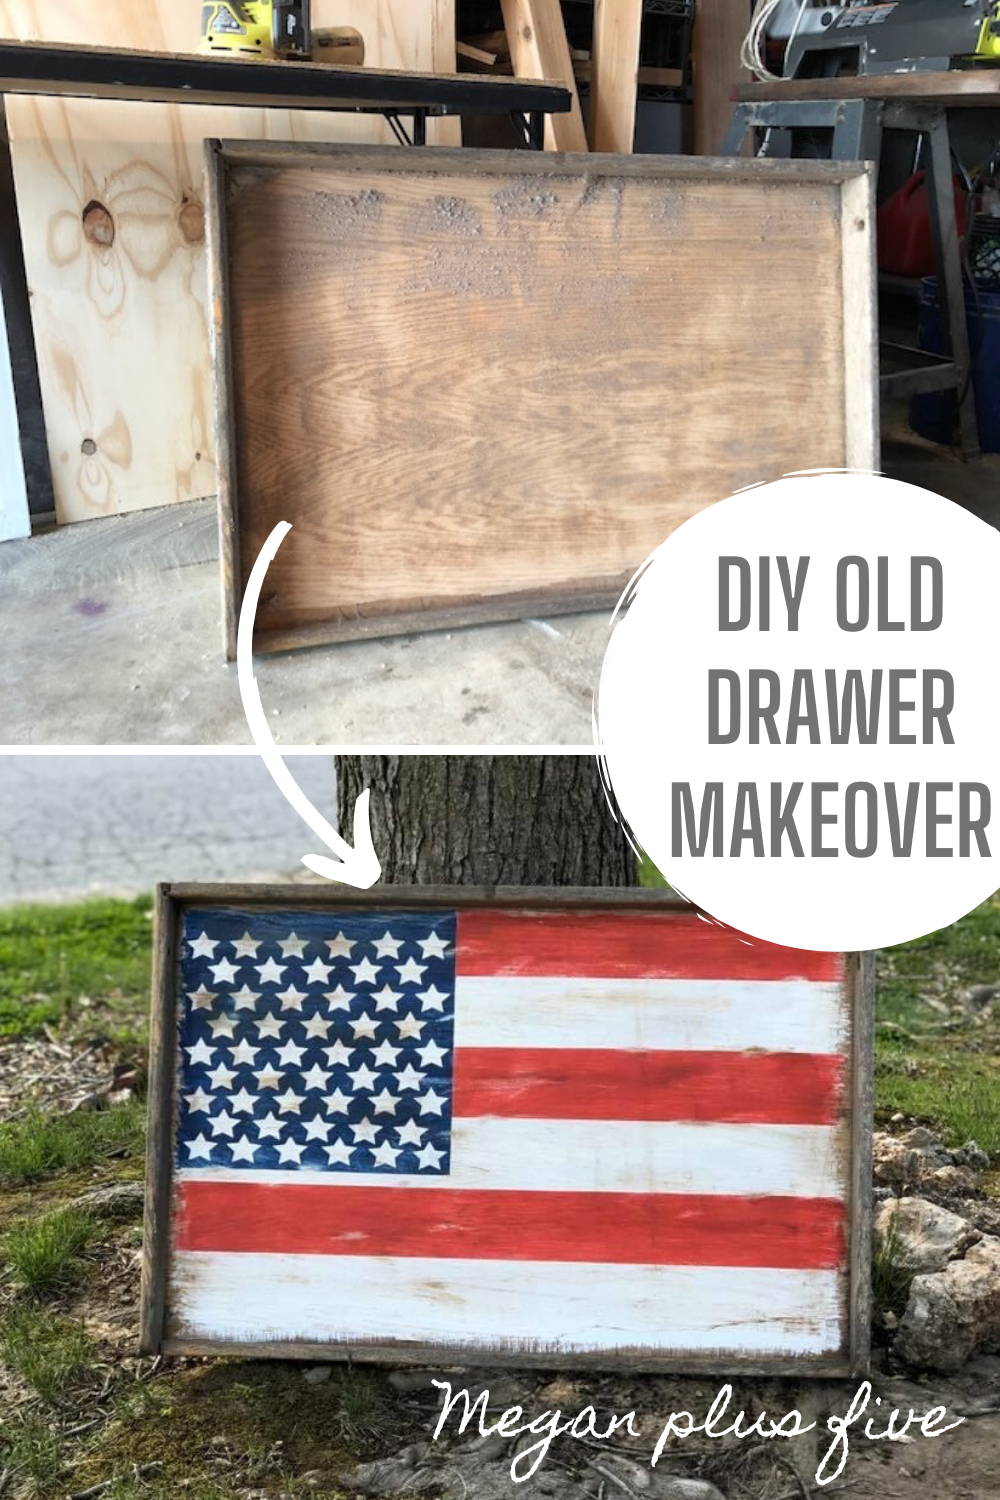
Here’s what the old drawer looked like before I gave it a full facelift.

Turn an old drawer into a rustic Ameican flag. It doesn't take much to repurose a drawer that's been collecting dust. If you have some paint and a little creativity you can make your own farmhouse style old looking flag for your home decor.

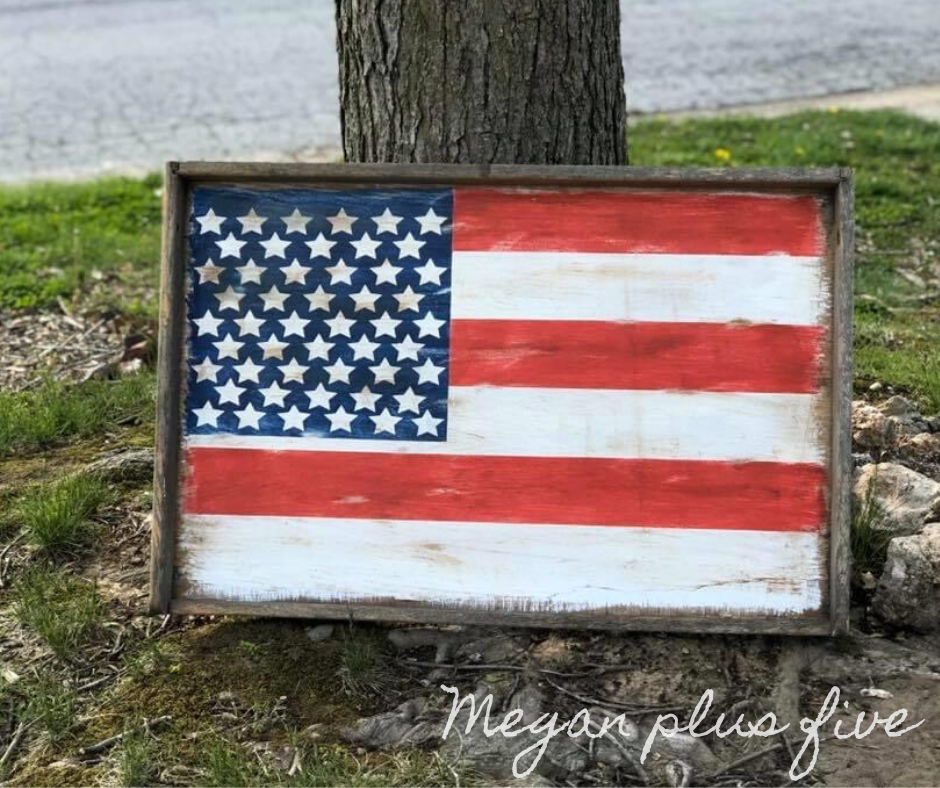
And this is what the old drawer looks like now. I definitely made a few mistakes but overall I’m loving how this rustic flag turned out.

How to repurpose an old dusty drawer into an American flag for your rustic style home decor. DIY farmhouse style 4th of July decor. Paint your own USA flag using your Cricut. Easy distressed wood flag, repuposed decoratoins.

If you are planning on doing a lot of stenciling on wood click here to read this post on how I save money on stenciling film.

How to make your own rustic flag

If you have an old drawer hanging around and collecting dust you can transform it into a rustic looking flag like I did with this one.

Here’s what you’ll need

Helpful tools

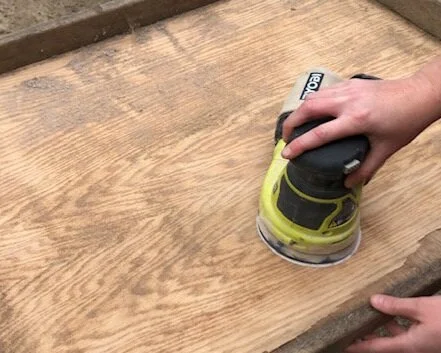
ONE-The first thing I had to do was sand it down. This drawer originally came with some gross contact paper attached to it. I had done the majority of taking all of that off when I first got the drawer. I removed the contact paper as much as I could then used the sander to help take off the rest. I started with 60 grit sandpaper on my handheld sander then worked my way up to 120 grit. the contact paper left behind some sticky residue but with a little elbow grease I was able to get all of it off. Then I used a lint free cloth and a vacuum to get off all the dust.

Turn an old drawer into a rustic Ameican flag. It doesn't take much to repurose a drawer that's been collecting dust. If you have some paint and a little creativity you can make your own farmhouse style old looking flag for your home decor.

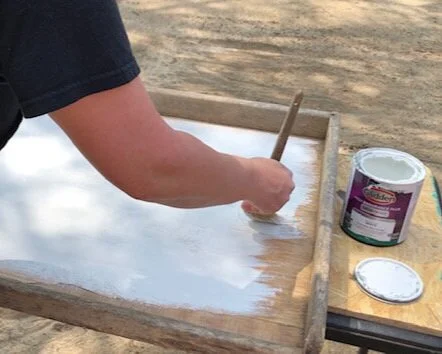
TWO- Using a dry brush I painted the inside of the drawer white. I used flat white indoor paint for this. When I brushed on the white base I made sure that all four sides didn’t get painted right up to the edge and I made the edges really uneven. I wanted it to look rough.

Turn an old drawer into a rustic Ameican flag. It doesn't take much to repurose a drawer that's been collecting dust. If you have some paint and a little creativity you can make your own farmhouse style old looking flag for your home decor.

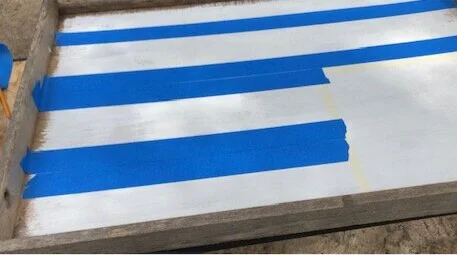
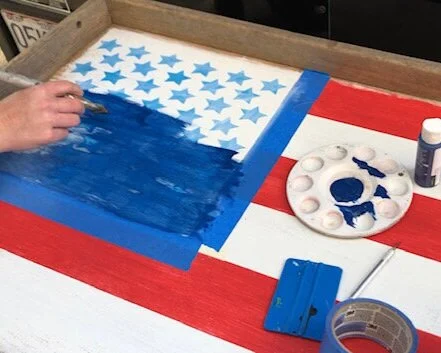
THREE- I measured out how big I wanted the blue area on my flag to be. I am not 100% happy with the size of this but it’s there to stay now lol! I taped that square off then started taping off my lines for my red and white stripes. I did this the same way I did this scrap wood 2x4 flag. I didn’t measure out my lines, mainly because I’m not a super precise person. I used the top edge of the drawer as my guide then taped off my stripes using wide painters tape. I did not make a true American flag though I only have 7 stripes total on mine.

Turn an old drawer into a rustic Ameican flag. It doesn't take much to repurose a drawer that's been collecting dust. If you have some paint and a little creativity you can make your own farmhouse style old looking flag for your home decor.

FOUR- Once I had my stripes taped off I painted the exposed stripes red. Then let them dry and painted then with a second coat of red paint. I peeled my tape up while my paint was still wet.

Turn an old drawer into a rustic Ameican flag. It doesn't take much to repurose a drawer that's been collecting dust. If you have some paint and a little creativity you can make your own farmhouse style old looking flag for your home decor.

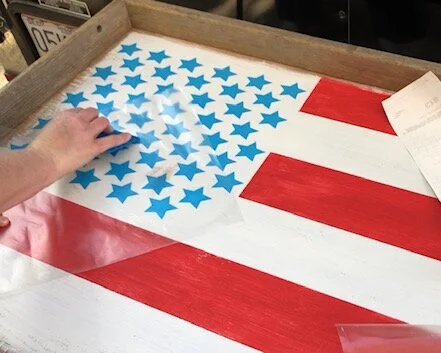
FIVE- I stenciled the 50 stars on this rustic flag but did it a little differently than a typical stencil. I did what’s called a reverse stencil on this just like I did with this 4th of July leaning porch sign . I used my Cricut and Cricut design space to cut out 50 stars. You can get my free Cricut cut file here. Since my stars were wider than 11.5” I had to cut them out on two separate pieces of stencil material. But it wasn’t bad at all to piece them together. I did have a big OOPS moment when I weeded away a star. Thank goodness for an honest husband who told me it looked good other than missing a star! I was able to paint in the missing star before I had applied the wax, praise the Lord!

Turn an old drawer into a rustic Ameican flag. It doesn't take much to repurose a drawer that's been collecting dust. If you have some paint and a little creativity you can make your own farmhouse style old looking flag for your home decor.

SIX- Using transfer tape I applied the star stencils to my flag then taped off the stripes. To cut down on paint bleed I sealed them with a thin layer of white paint. After that was dry I painted that part of my flag blue, let dry, then painted another layer of blue. While the paint was still wet I peel up the star stencils and the tape. I did have a little paint bleed but nothing too serious. This is when I added the last star that I missed :/.

Turn an old drawer into a rustic Ameican flag. It doesn't take much to repurose a drawer that's been collecting dust. If you have some paint and a little creativity you can make your own farmhouse style old looking flag for your home decor.

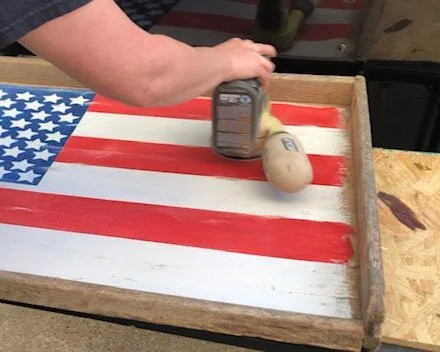
SEVEN- I used my Ryobi sander to distress my rustic drawer flag. I used 120 grit sandpaper and lightly went over the entire flag then focused on random areas here and there. After I was happy with the distressing I wiped the sawdust off with a lint free cloth.

Turn an old drawer into a rustic Ameican flag. It doesn't take much to repurose a drawer that's been collecting dust. If you have some paint and a little creativity you can make your own farmhouse style old looking flag for your home decor.

EIGHT- If you’ve read any of my other tutorials you probably know LOVE my antiquing wax. I use it for so many of my craft projects and of course used it for this one too. I used a chip brush and lightly applied the dark wax to my flag. If you’ve never used this stuff before please be aware that a little goes a LONG way. I usually dab the end of my brush into the lid then dab off on a cloth. Since I didn’t have a cloth handy for this DIY I used my apron.

Turn an old drawer into a rustic Ameican flag. It doesn't take much to repurose a drawer that's been collecting dust. If you have some paint and a little creativity you can make your own farmhouse style old looking flag for your home decor.

I can’t wait to hang this rustic flag in our living room! We plan to keep it up year round and I know every time we look it we will think of fond memories of my father in la

I hope this post inspires you to give an old drawer a makeover! If you have any questions on this DIY or any of my other tutorials please feel free to ask away:)!

Happy Crafting!

Turn an old drawer into a rustic Ameican flag. It doesn't take much to repurose a drawer that's been collecting dust. If you have some paint and a little creativity you can make your own farmhouse style old looking flag for your home decor.

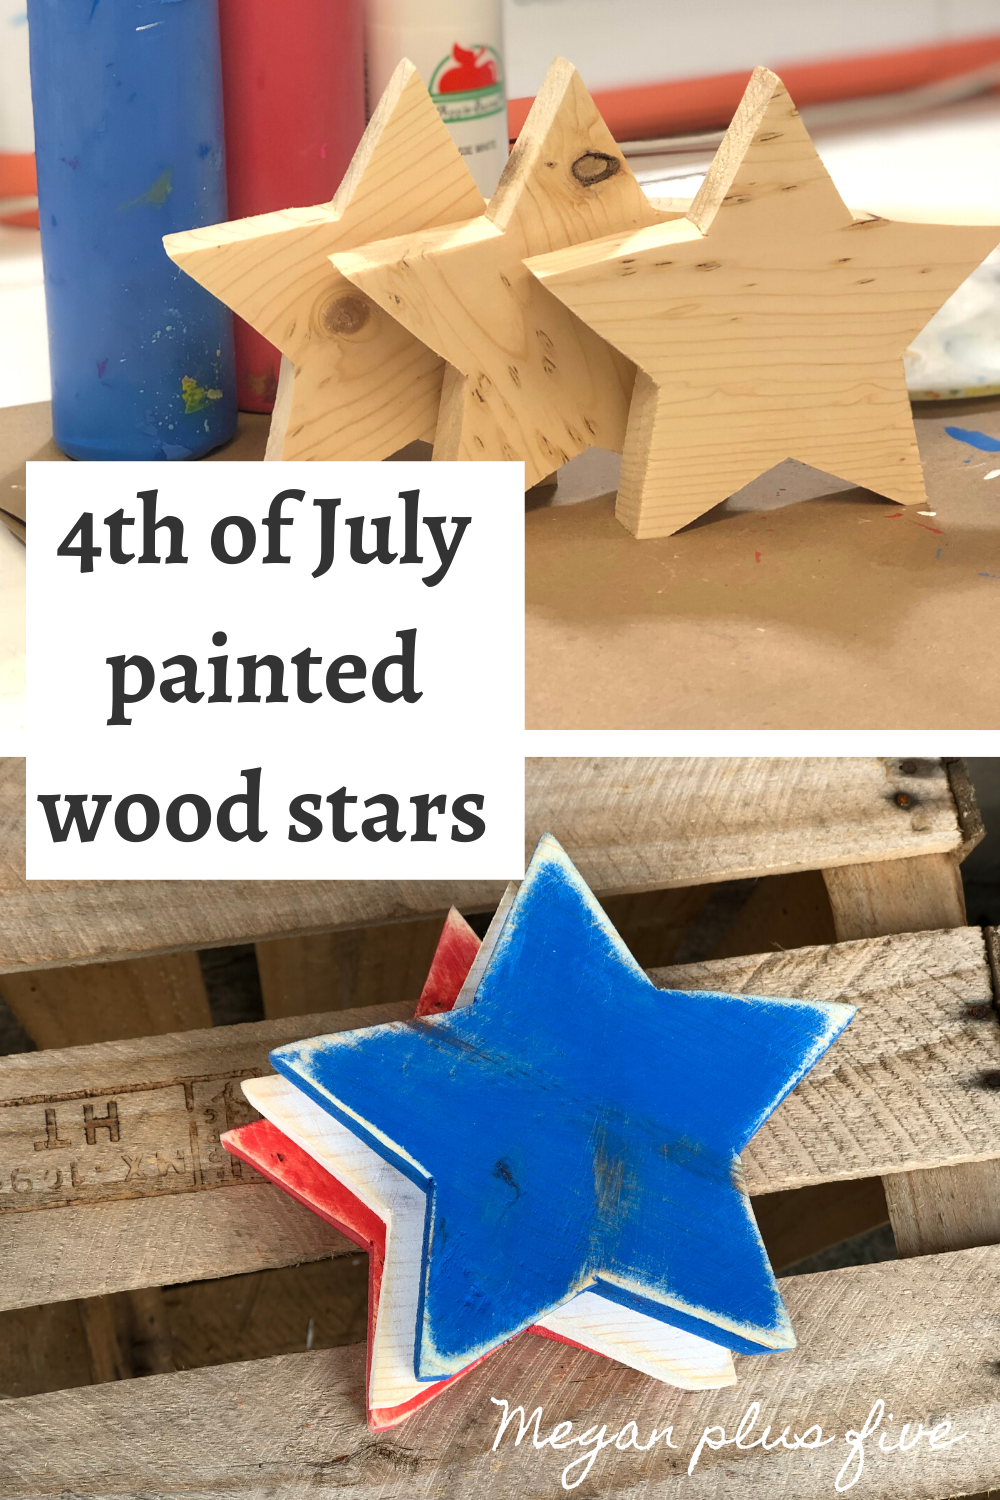
DIY 4th of July painted wood stars

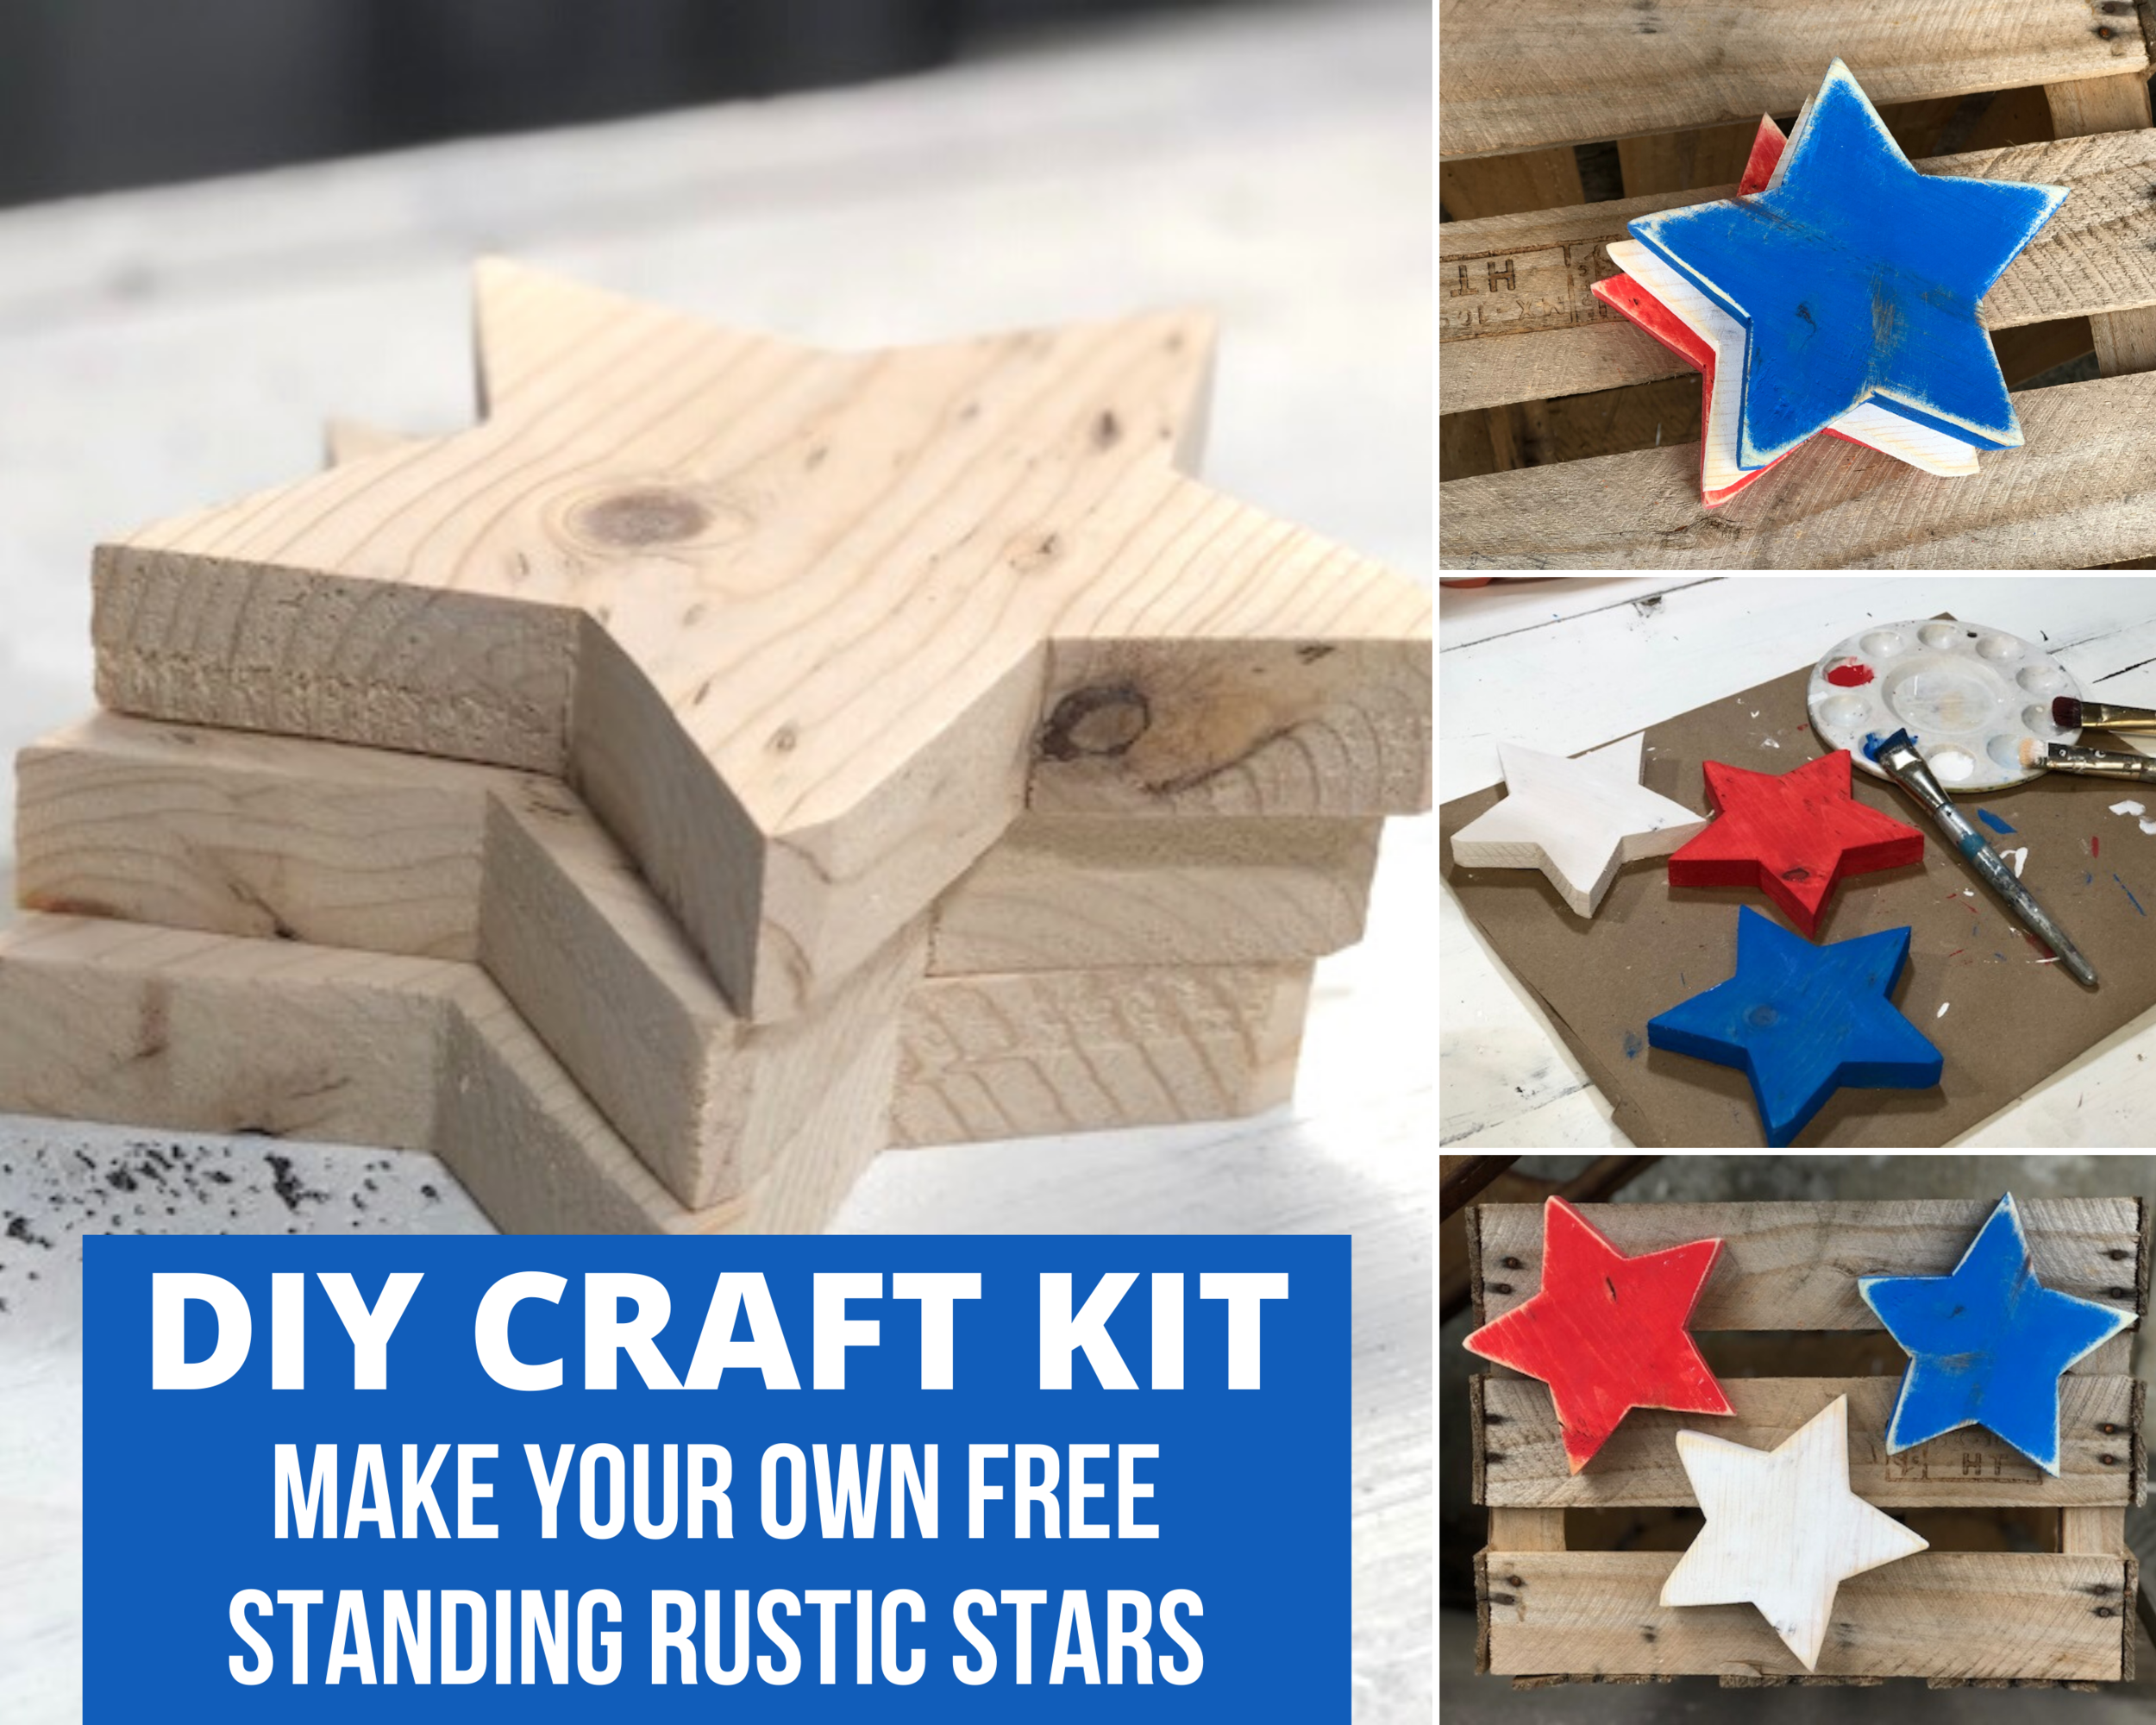
4th of July painted wood stars. How to paint and distress wooden stars for your Independence Day decor. DIY craft kit for adults. DIY farmhouse style decorations for your patriotic decor.

HOW TO PAINT FREE STANDING RUSTIC WOOD STARS FOR YOUR INDEPENDENCE DAY DECOR

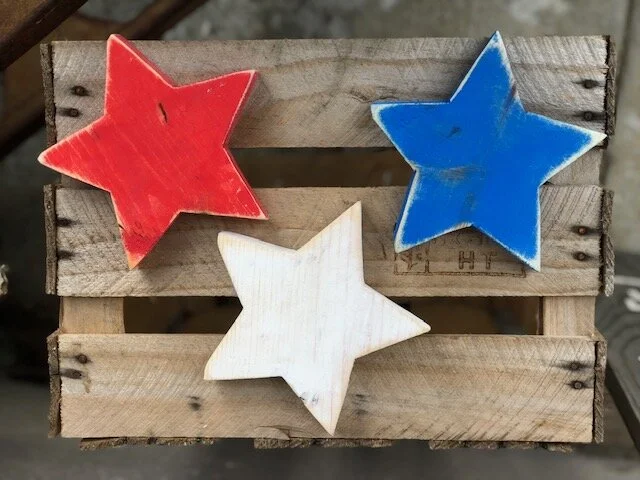
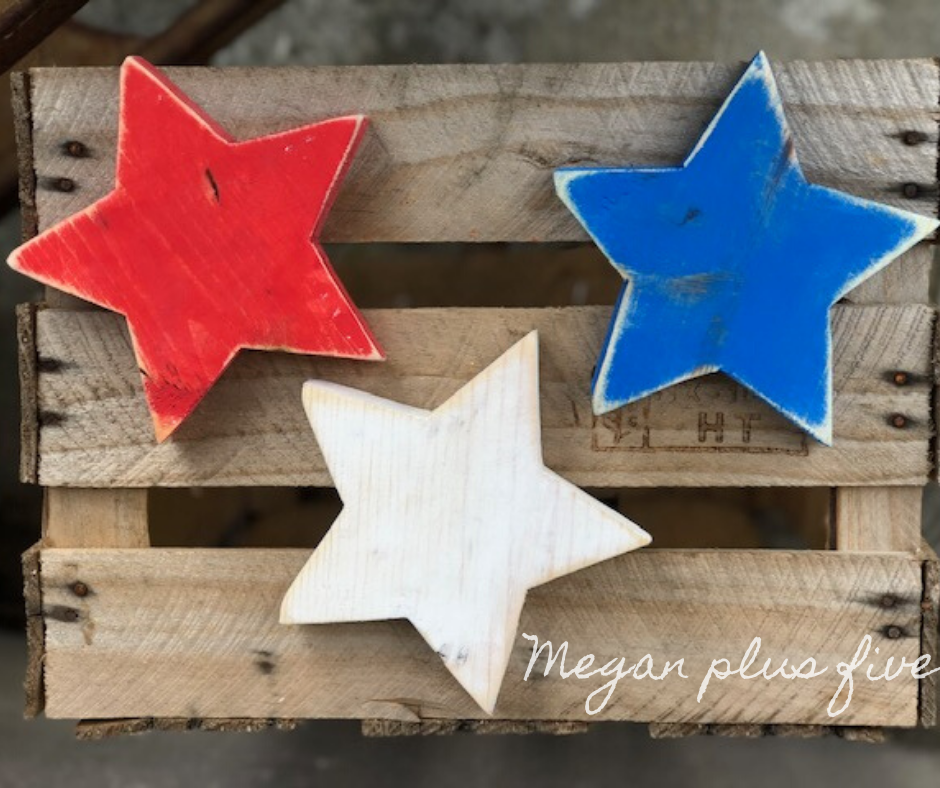
These DIY wooden stars are sure to tie in perfectly with your patriotic décor. Whether your red, white, and blue decorations are seasonal or you leave them up all year round you'll definitely want to add these adorable wood stars.

Affiliate Disclosure. Some of the links on this website are affiliate links, which means that I may earn a small commission if you click on the link or make a purchase using the link. If you make a purchase you will not be charged anything additional.

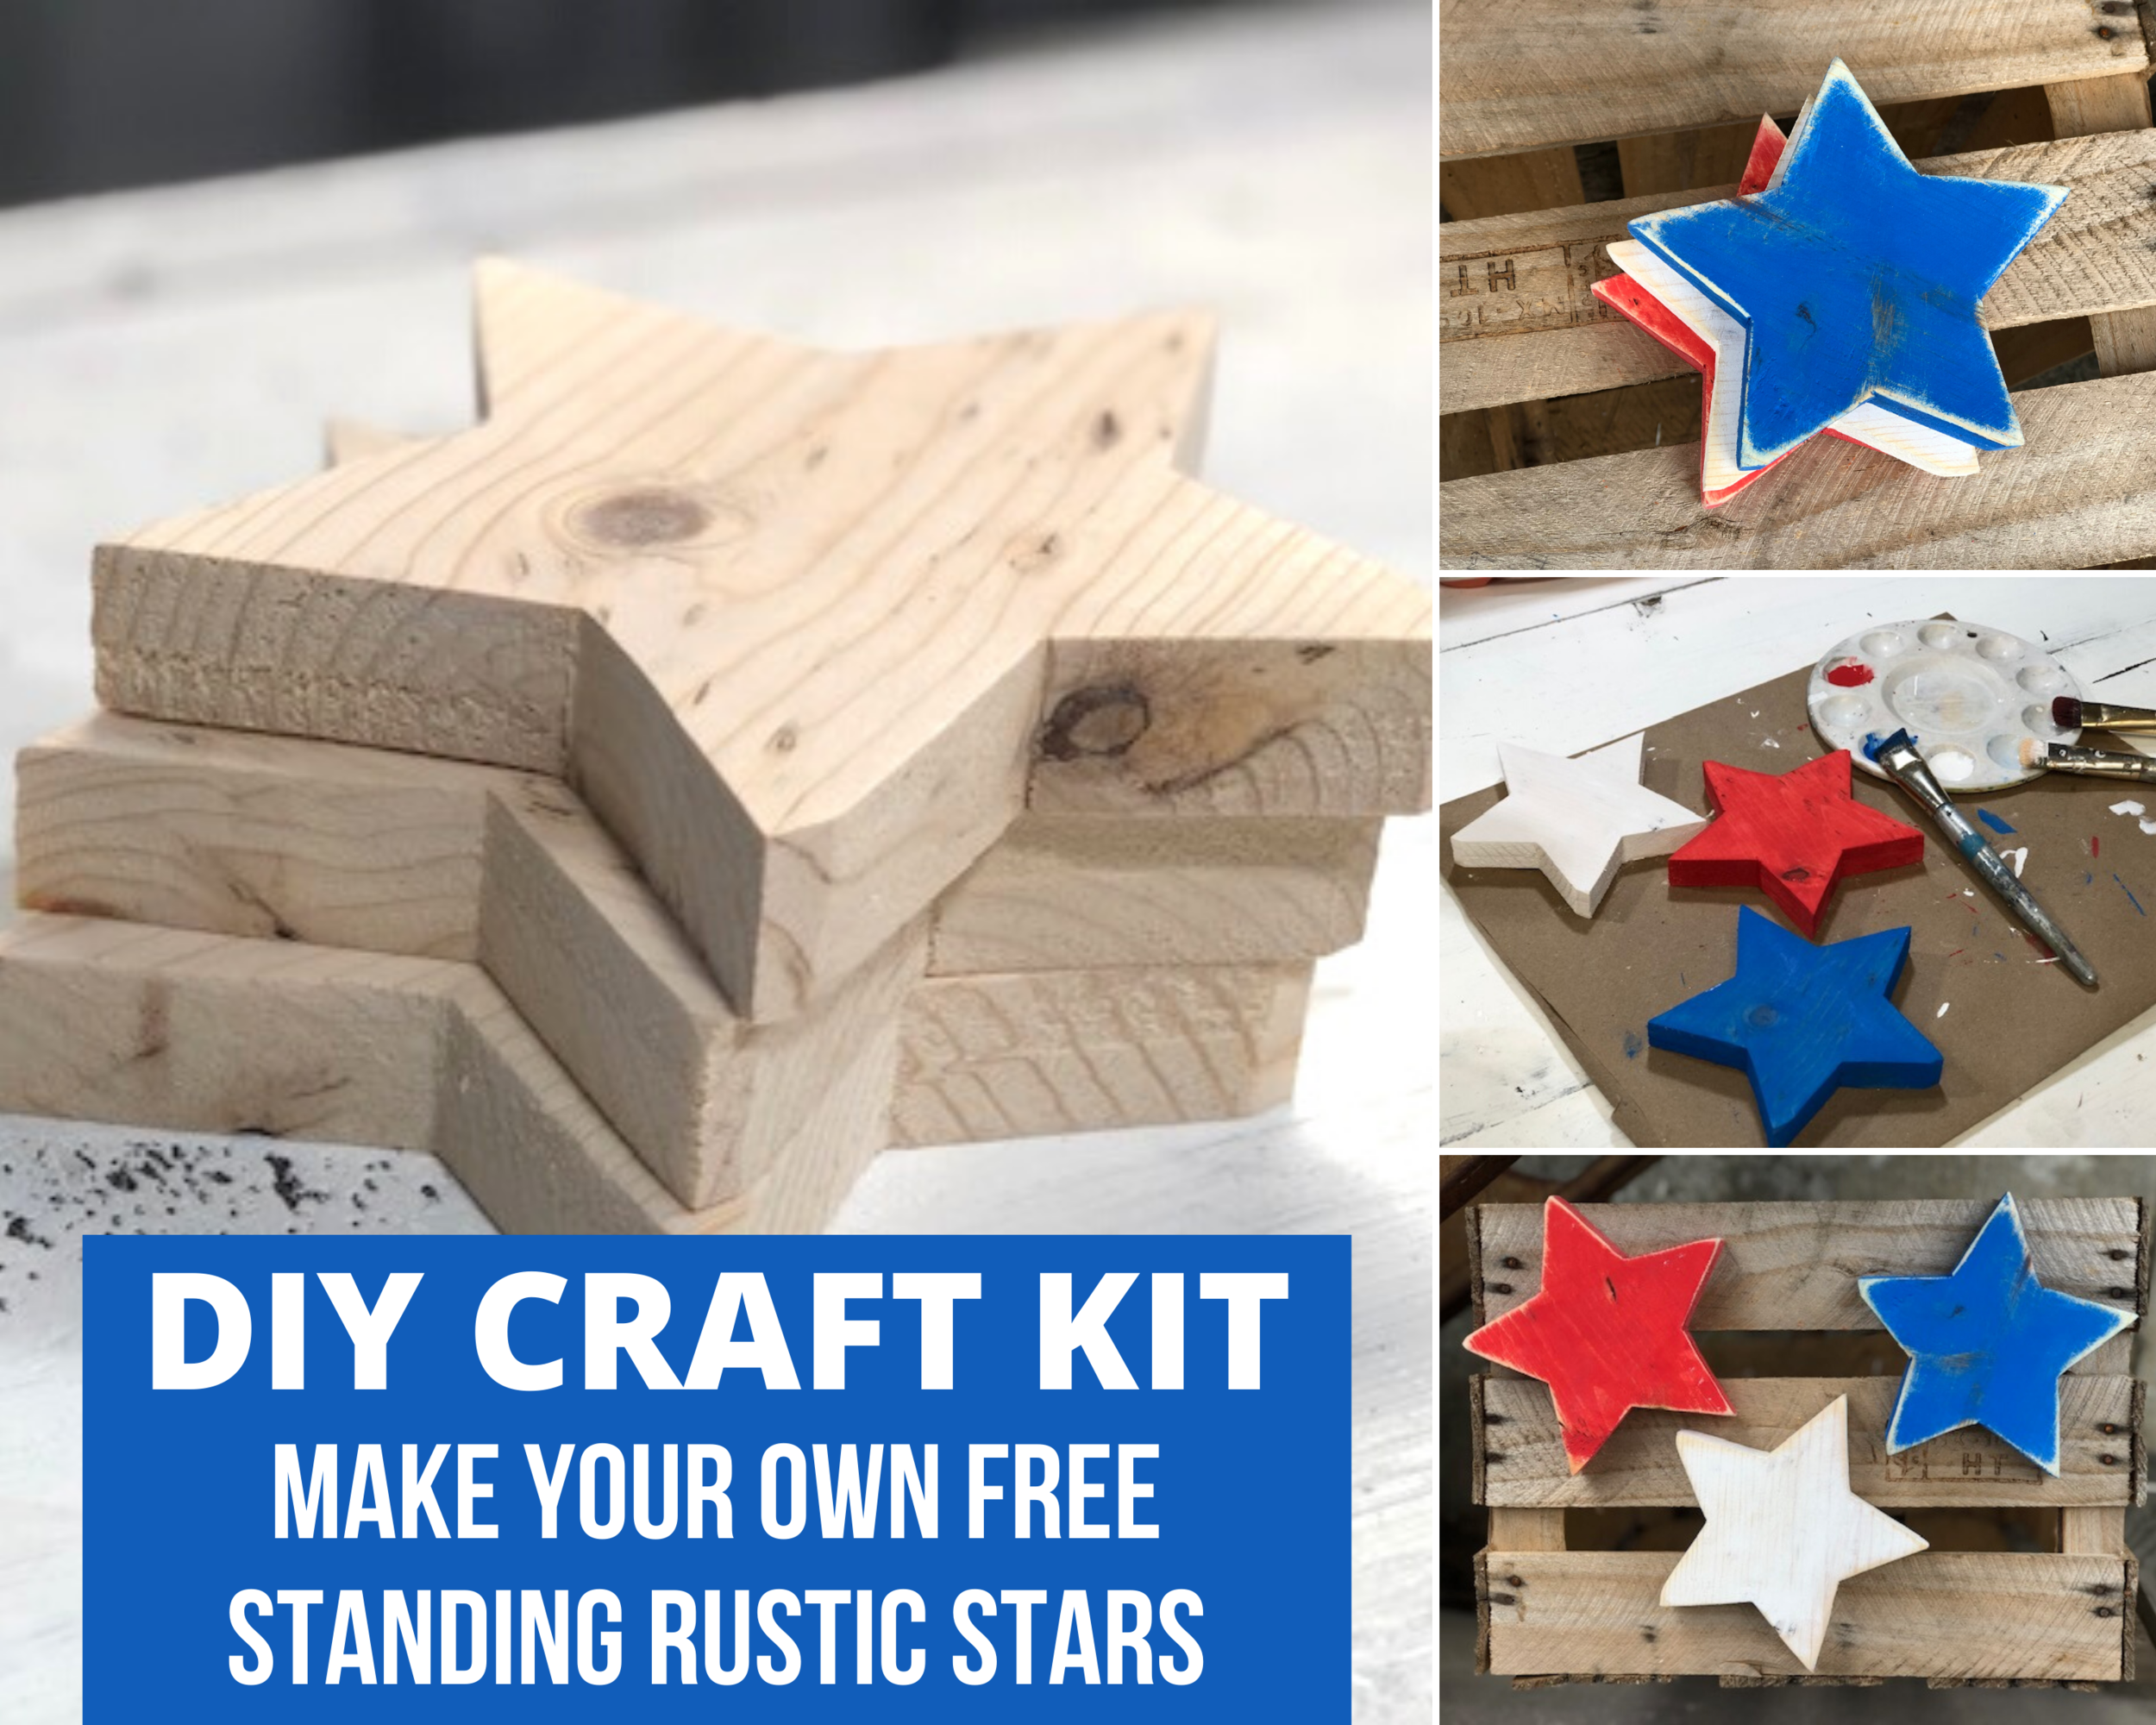
These are especially a perfect project for those scrap pieces leftover from other DIY projects. Click here to see how I cut these out using my Cricut machine and Ryobi scroll saw. If you don’t have all the tools to make this craft happen or just don’t have the time you can grab your DIY craft kit here.

Watch the how to video below or keep scrolling for the written rustic 4th of July stars tutorial

4th of July painted wood stars. How to paint and distress wooden stars for your Independence Day decor. DIY craft kit for adults. DIY farmhouse style decorations for your patriotic decor.

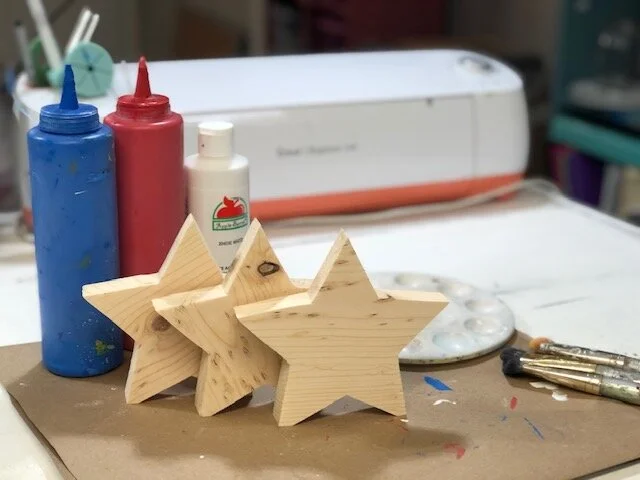
Here’s what you’ll need:

4th of July painted wood stars. How to paint and distress wooden stars for your Independence Day decor. DIY craft kit for adults. DIY farmhouse style decorations for your patriotic decor.

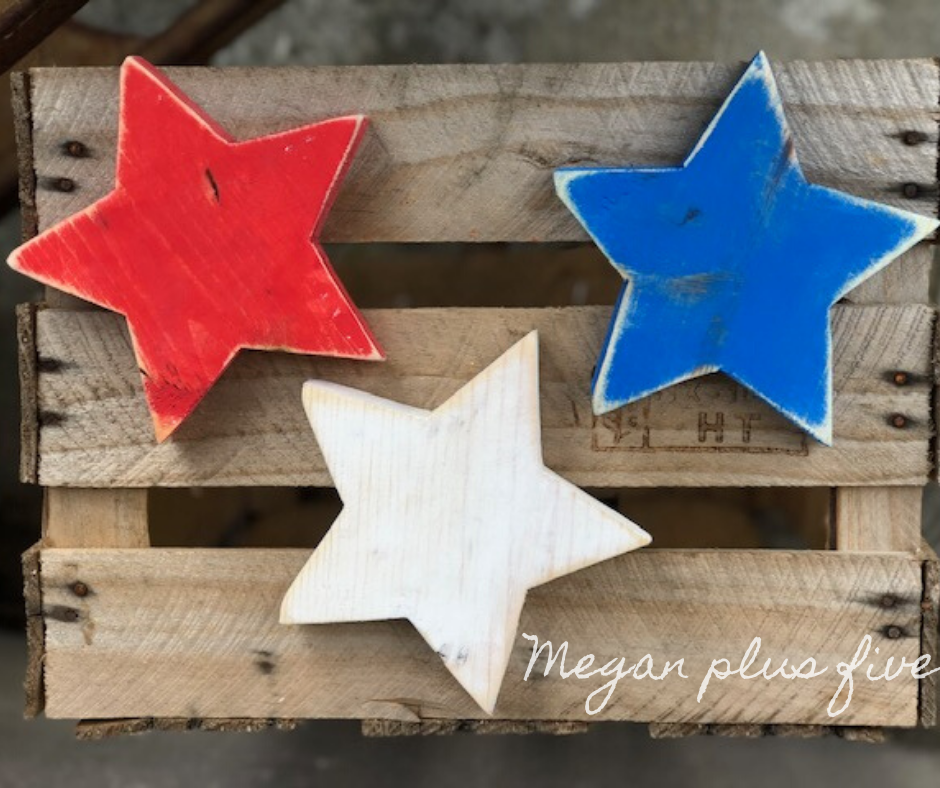
These little rustic wooden stars are SUPER EASY to paint. I am actually thinking about making a few more and staining them instead of using paint. But for now I’ll admire the red, white, and blue ones.

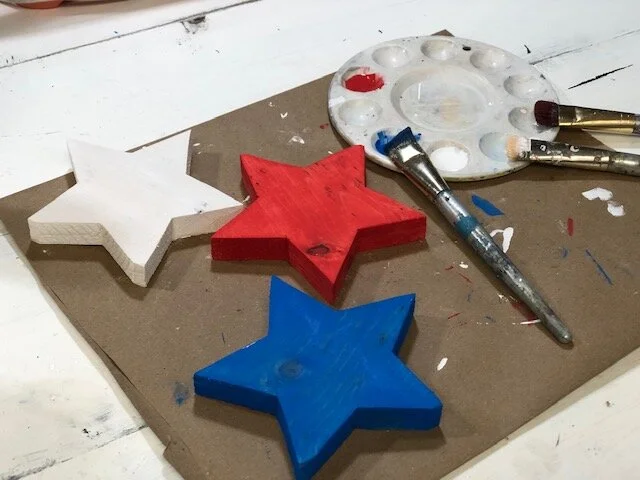
ONE- Paint a thin layer of RED, WHITE, or BLUE paint on each star. Let dry. After the first coat is dry go back and add a second layer of paint on each of the three stars. Let dry.

wood+star15.jpg4th of July painted wood stars. How to paint and distress wooden stars for your Independence Day decor. DIY craft kit for adults. DIY farmhouse style decorations for your patriotic decor.
4th of July painted wood stars. How to paint and distress wooden stars for your Independence Day decor. DIY craft kit for adults. DIY farmhouse style decorations for your patriotic decor.

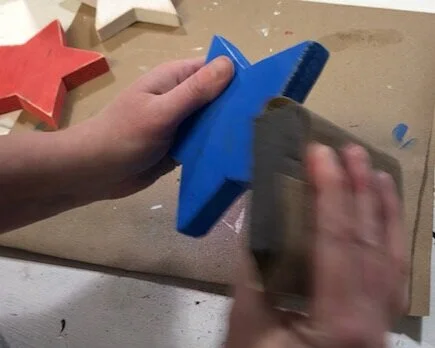
TWO- Once your stars are completely dry use your sandpaper to distress them. Focus on the edges, corners and lightly on the front/back of each wood star. I use 100-150 grit sandpaper when sanding these by hand. If I use my orbit sander I use 120 grit.

4th of July painted wood stars. How to paint and distress wooden stars for your Independence Day decor. DIY craft kit for adults. DIY farmhouse style decorations for your patriotic decor.

THREE- Use a lint free cloth to remove all the dust from sanding the wood stars. You can finish them off with a polycrylic spray or wax. I didn’t use antiquing wax on these but if you wanted to make them extra rustic try using these techniques for dark wax.

4th of July painted wood stars. How to paint and distress wooden stars for your Independence Day decor. DIY craft kit for adults. DIY farmhouse style decorations for your patriotic decor.

Free standing wood stars using your Cricut

How to use your Cricut to make wood star cutouts. Learn how to make templates with your vinyl cutting machine to cut shapes and letters out of wood.

One thing I never thought I’d be doing is using my Cricut to help me cut out shapes and letters from pine boards. When I got my very first Cricut machine about a decade ago I always thought I’d just be using my new fancy cutting machine to cut paper and make decorations for my kid’s birthday parties. That’s was the case for the first few years. But now my Cricut craft horizon has been broadened and I’m using it for more than I could have dreamed!

Pairing this wonderful little machine of magic with my power tools has been a GAME CHANGER for my crafting abilities. And it can be for you too!

If you’re not totally comfortable using power tools I totally understand and know it’s a very real fear. I was in that same boat not that long ago and slowly was able to put that fear behind me. Here’s a list a power tools that I recommend all lady crafters get. I started off small, mastering the handheld sander, this thing can be SUPER intimidating, then worked my way up to being able to using all the power tools with no hesitation.

Affiliate Disclosure. Some of the links on this website are affiliate links, which means that I may earn a small commission if you click on the link or make a purchase using the link. If you make a purchase you will not be charged anything additional.

USE YOUR CRICUT TO HELP YOU CUT OUT WOOD PROJECTS

Here’s what I used:

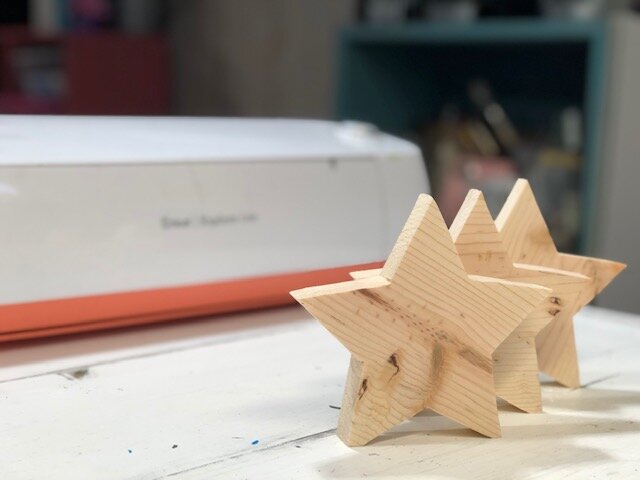
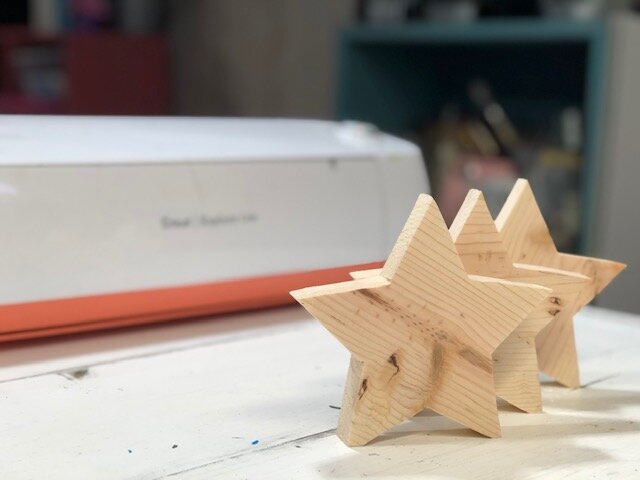
The first thing I did was decide how big I wanted my wooden stars to be. I always have scraps of 1x6 boards so I decided 5.4” at the star’s widest would be a good size. I opened up my Cricut app on my computer and added a simple star from the shapes section.

I highlighted it and clicked on the width, since that had the biggest number, and changed it to 5.4”. I left the image locked so that it would be proportionate.

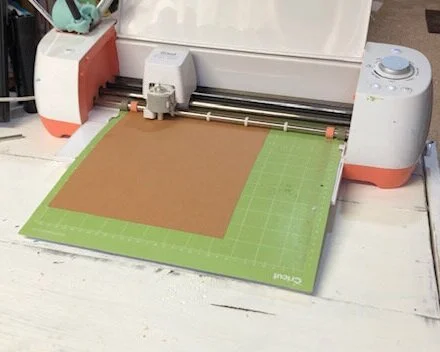
I set my image to cut. Added a piece of cardstock to my green mat and set my blade to light cardstock then hit cut. I also want to add that you can use an older machine like I’m using. I have yet to buy a Cricut Maker, even though I would LOVE to have one but my Cricut Explore is getting everything done for now.

How to use your Cricut to make wood star cutouts. Learn how to make templates with your vinyl cutting machine to cut shapes and letters out of wood.

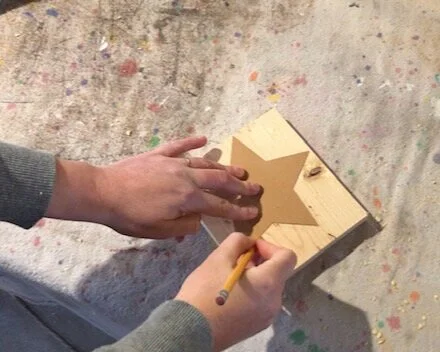
After my cardstock template was cut out I used that to help me cut out the a wood star from a piece of pine.

How to use your Cricut to make wood star cutouts. Learn how to make templates with your vinyl cutting machine to cut shapes and letters out of wood.

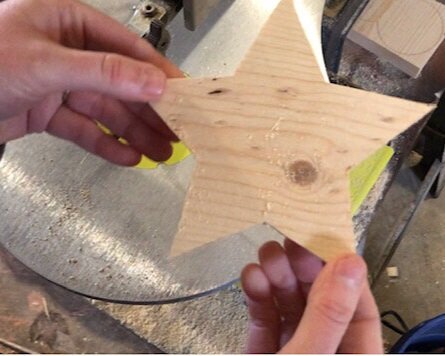
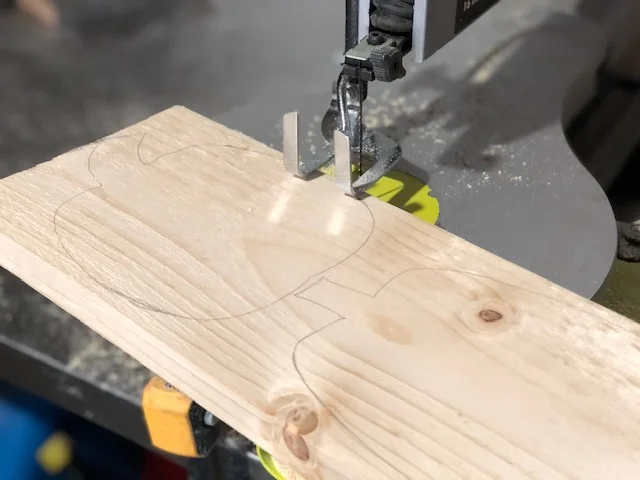
I traced around the star using a pencil then used my Ryobi scroll saw to cut the shape. If you’ve never used a scroll saw it’s a lot like using a sewing machine. Don’t go too fast or you will not get as precise of a cut.

How to use your Cricut to make wood star cutouts. Learn how to make templates with your vinyl cutting machine to cut shapes and letters out of wood.

When I’m cutting out shapes that have lots of angles I don’t do one continuous cut. I cut till I get to an angle then back out. Then make another cut from the opposite side to meet at that angle point. This is just works for me, I know everyone is different so you'll have to find your own rhythm.

How to use your Cricut to make wood star cutouts. Learn how to make templates with your vinyl cutting machine to cut shapes and letters out of wood.

I hope you can use this new information to help you explore all the possibilities of what your Cricut can do. You can take it so much further than just card making and vinyl projects.

How to use your Cricut to make wood star cutouts. Learn how to make templates with your vinyl cutting machine to cut shapes and letters out of wood.

Like with all of my tutorials if you have any questions please ask away. I am happy to try and answer :)! Click here to check out how I finished my wood star cutouts.

DIY mini Easter wooden tags

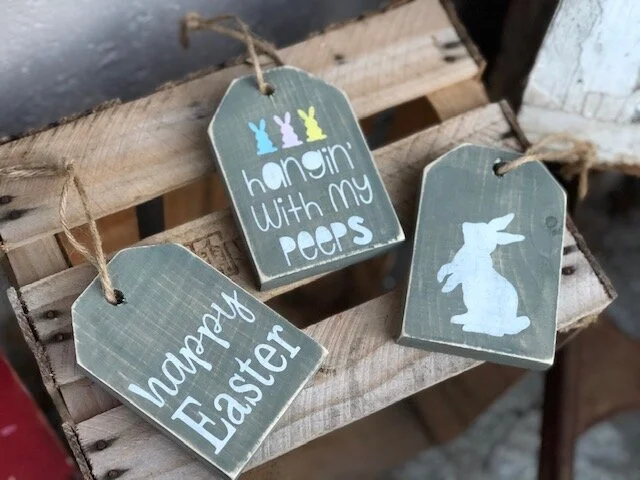
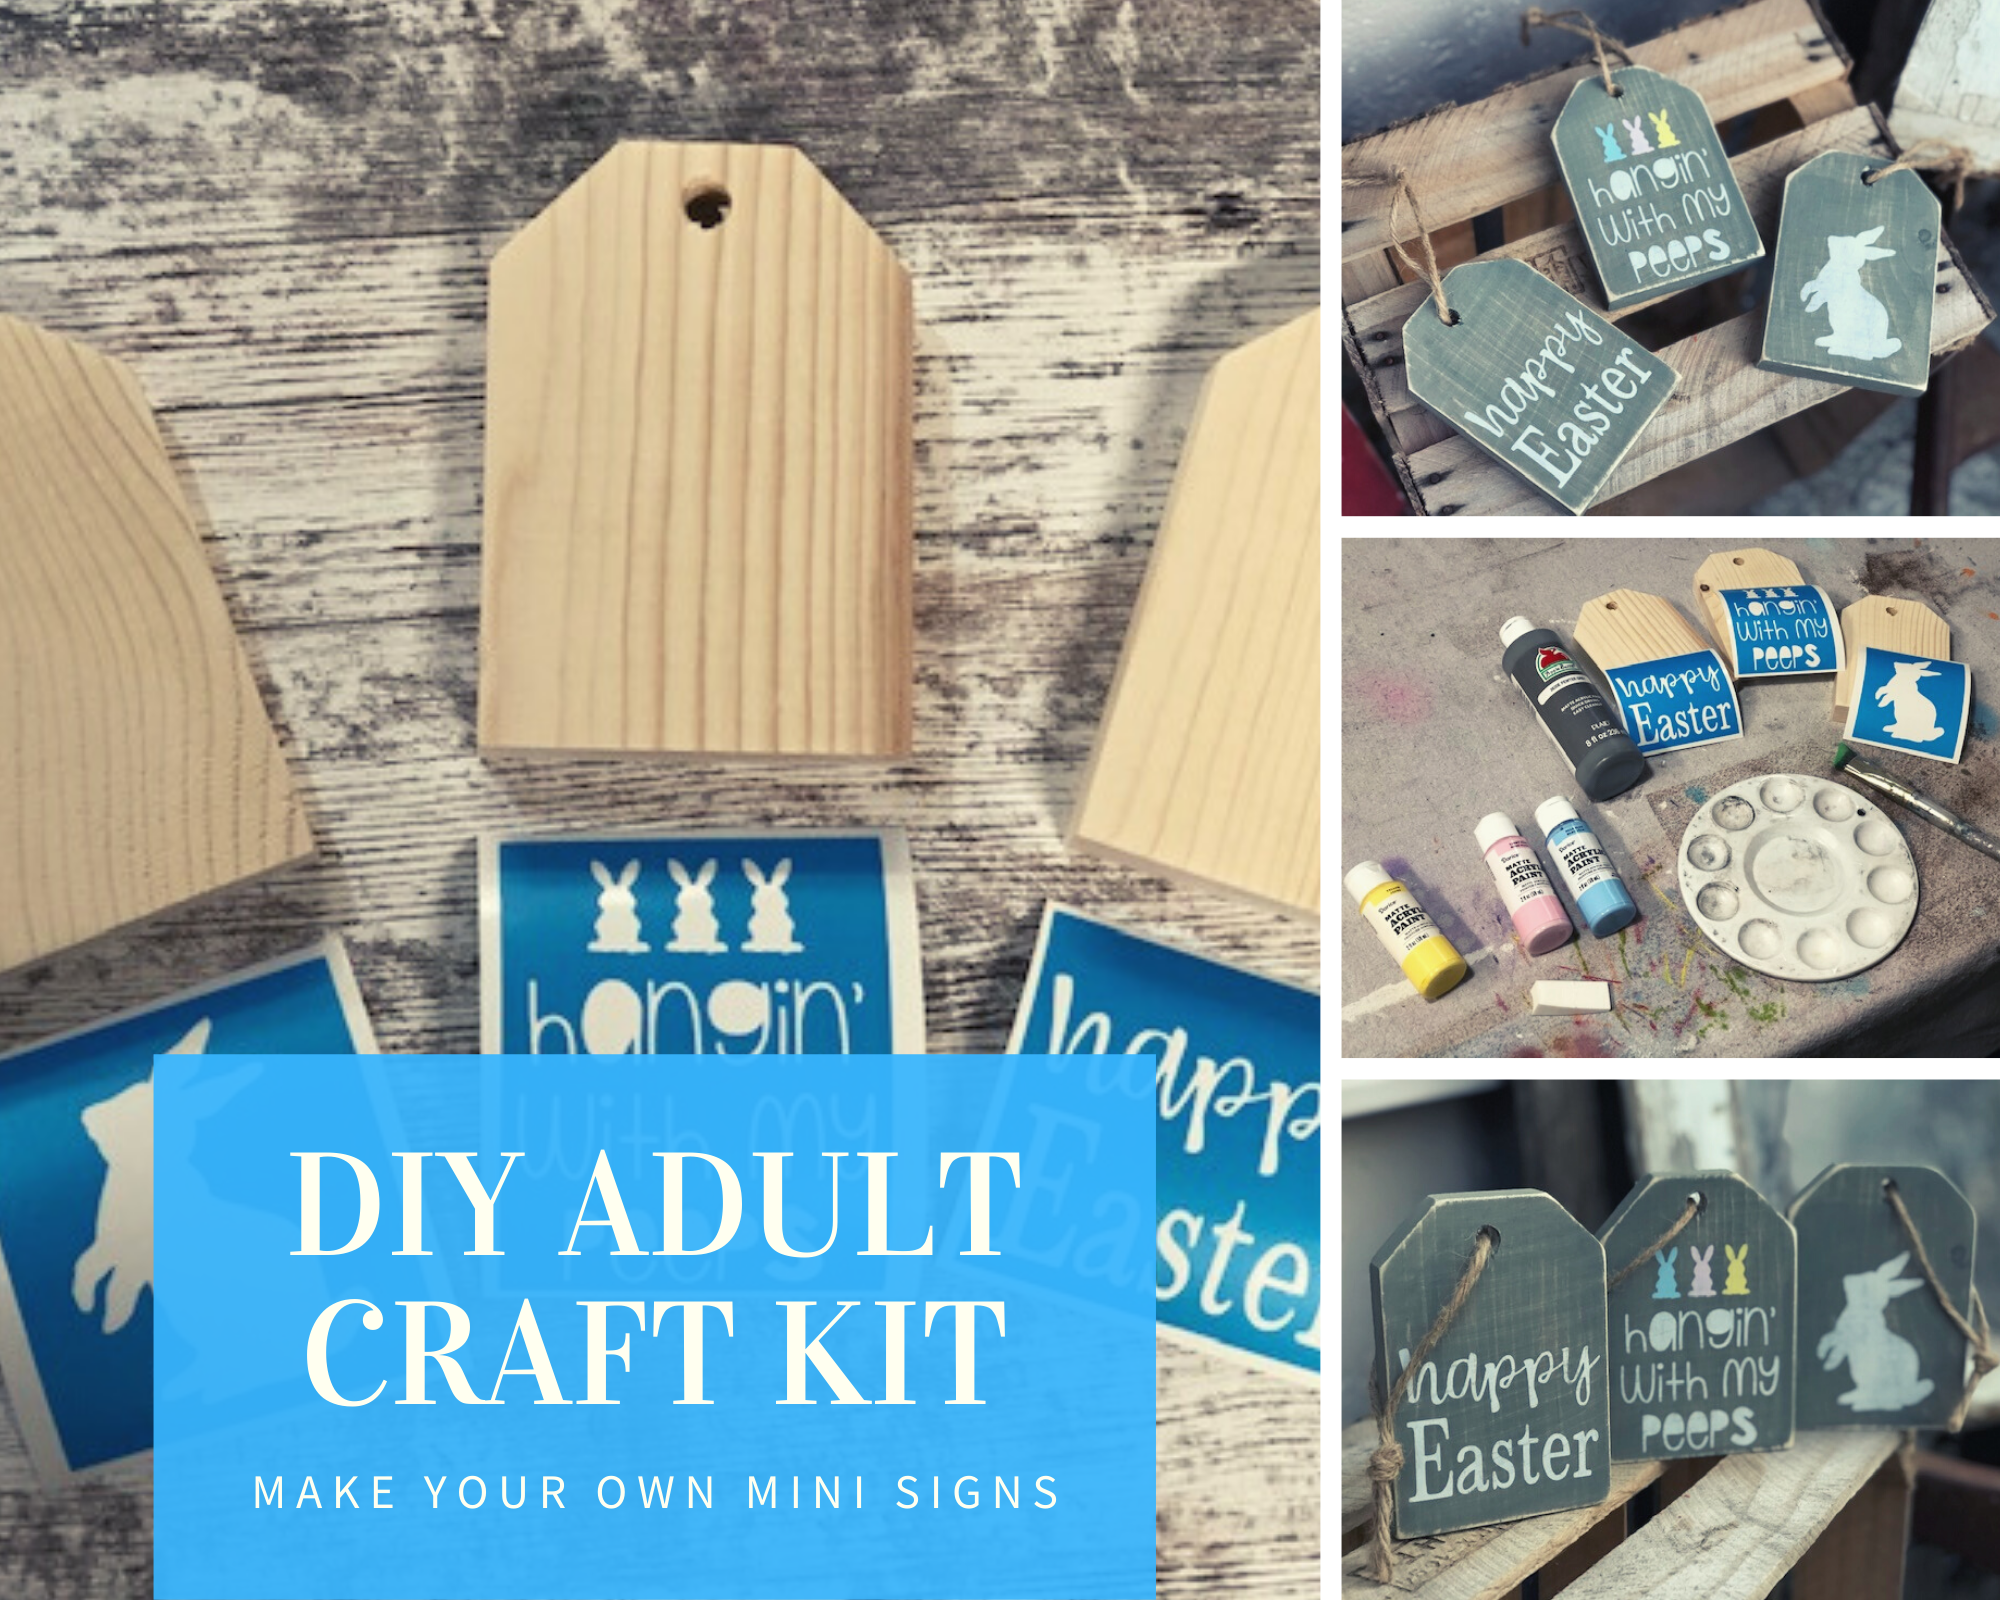
DIY mini wood tags for Easter. How to use your Cricut to make wood signs for Easter. Make your own farmhouse tray mini signs for spring.

MAKE YOUR OWN RUSTIC WOOD TAGS FOR EASTER

DIY mini wood tags for Easter. How to use your Cricut to make wood signs for Easter. Make your own farmhouse tray mini signs for spring.

I can’t believe how popular these little wood tags for Easter are! I keep selling out of this spring DIY craft kit almost daily. Since the entire country is basically on lockdown this kit is giving people a much needed creative outlet. I am SO happy to be able to provide this joy to so many around our nation, especially at a time like this.

Affiliate Disclosure. Some of the links on this website are affiliate links, which means that I may earn a small commission if you click on the link or make a purchase using the link. If you make a purchase you will not be charged anything additional.

In this crafty tutorial I’m going to show you how to stencil these wood tags for Easter. If you’re wanting a tutorial on how to cut wood tags you’ll want to go here. I share the measurements, angles, and even the drill bit size to make the twine hole in the middle.

DIY RUSTIC WOOD TAGS FOR EASTER

Here’s what you’ll need


Other helpful tools I used

If you love these rustic wood spring tags be sure to check out this super easy Dollar Tree moss bunny craft.

Cutting your wood pieces

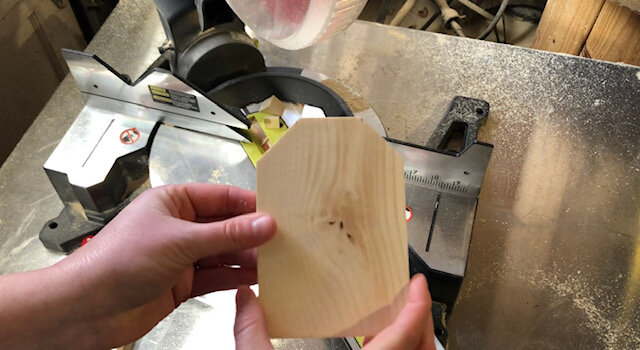
  1. First you want to cut out your wood tags. I used my Ryobi miter saw to do this. Cut a 1x4 in to 3 5” long pieces. On the top of each 5” piece measure in 1” and make a mark. Set your miter saw to 45 degrees, line it up with your 1” mark and cut. Flip your tag over and do the same to the other side. 

  2. Now drill a hole in the middle of the top of each piece. This is for your twine holder to go through.

  3. After you have that done give each piece a quick sanding. You don’t have to get crazy with this, it’s not a fine piece of furniture. I use 120 grit sandpaper for this and that’s it. Just enough to take off that shine it has when you get it from the lumberyard.

    WATCH THE VIDEO OF HOW I MADE THESE USING MY MITER SAW

Stencils

You can use any cutting machine to create your Easter themed stencils. I use my Cricut Explore to make all of mine. If you have and are using a Cricut you can get the HANGIN’ WITH MY PEEPS image to use here. You can use my FREE SVG’s for the bunny image & happy Easter cutting files here. I use Oramask stenciling film to make my stencils. While it is a little more expensive than other materials I have found it works the absolute best for stenciling.

Painting (the fun part!)

First a thin layer of gray paint on each wood tag. Be sure it is a thin layer, you will still be able to see the wood grain through the paint. After the first thin layer is dry you can paint a second thin layer. You don’t want more than two layers of base paint on your wooden tags, or any painted wood sign. Too much paint will cause issues when stenciling with base paint peel up, which can be impossible to fix sometimes and honestly it just plain sucks to have to go back and fix.

DIY mini wood tags for Easter. How to use your Cricut to make wood signs for Easter. Make your own farmhouse tray mini signs for spring. Fun rustic Easter and spring craft for adults.

2. After your base paint is completely dry you can apply your stencils to all three wood blanks. Apply your transfer tape to your stencils (if you bought my DIY CRAFT KIT this step has already been done for you). Peel the paper backing from your stencil/transfer tape. Go slow.  Place your stencils sticky side down on the front of your painted wood tag. The front is just whichever side you prefer best ;). Using your vinyl squeegee, if you don’t have one you can use a plastic store rewards card, and rub the stencil to that it adheres to the wood. Slowly peel the transfer tape away from the wood leaving your stencil attached to the wood. I find that it works best when I roll the transfer tape away, check out this DIY PAINTED WOOD SIGN TUTORIAL for  a closer look at how to do this.

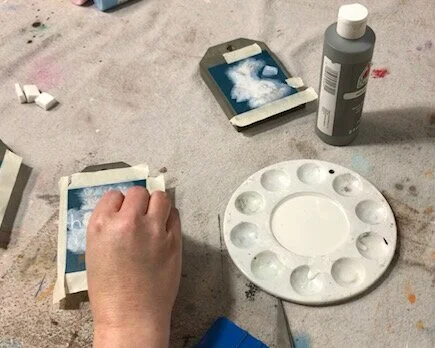
3. Use masking tape to tape off the edges of your stencil so you don’t get paint on areas of the wood tags that you don’t want paint on.

DIY mini wood tags for Easter. How to use your Cricut to make wood signs for Easter. Make your own farmhouse tray mini signs for spring. Fun rustic Easter and spring craft for adults.

4. Using one end of one of the sponges dip it in the white paint. You need very little paint, the more paint you use the more paint bleed you will likely have. Dab your sponge onto the exposed areas of your stencil. The coverage should be VERY faint. Let that dry and repeat up to three times. You don’t want to apply more than three coats as this could cause issues with paint peel up where you just stenciled. If you want the cute little bunnies to be different colors paint them white first then finish them with two layers of your preferred paint color. I painted mine in pink, blue, and yellow. Giving them a white base first will allow the colors to really pop if you are painting on a dark base.

DIY mini wood tags for Easter. How to use your Cricut to make wood signs for Easter. Make your own farmhouse tray mini signs for spring. Fun rustic Easter and spring craft for adults.

5. Peel up your stencils and tape. Using an xacto knife helps to remove the middle piece of the stencils.

DIY mini wood tags for Easter. How to use your Cricut to make wood signs for Easter. Make your own farmhouse tray mini signs for spring. Fun rustic Easter and spring craft for adults.

Distressing

After your paint completely dries from stenciling you can start distressing your wood Easter tags. I LOVE this technique because it’s super easy and quick. Using sand paper or your sander give a quick sanding to the edges, corners, and lightly on the front of each wooden tag. Wipe off and dust.

DIY mini wood tags for Easter. How to use your Cricut to make wood signs for Easter. Make your own farmhouse tray mini signs for spring. Fun rustic Easter and spring craft for adults.

Adding twine

Probably the easiest step is adding the twine. Decide how long you would like your twine hangers to be. I think I measured mine at 12” or so. You’ll need 3 pieces, one for each wood tag. Feed one piece of twine through the hole in one of the wood tags then tie it in a knot.

DIY mini wood tags for Easter. How to use your Cricut to make wood signs for Easter. Make your own farmhouse tray mini signs for spring. Fun rustic Easter and spring craft for adults.

You’re ready to display your Easter wood tags in your home. I know it may seem like a lot of steps written out but really these are super easy and quick to DIY once you get going on them.

DIY mini wood tags for Easter. How to use your Cricut to make wood signs for Easter. Make your own farmhouse tray mini signs for spring. Fun rustic Easter and spring craft for adults.

Like with all of my DIY tutorials if you have any questions please reach out. Leave a comment below or send me a message on one of my social media pages. You can find my links at the top.

Happy Crafting!