DIY hello sunshine stained wood sign + FREE SVG

DIY how to stencil on wood sign painting tutorial. How to make a hello sunshine lettered sign for summer. Using oramask stencil film to paint wood signs without paint bleed. free svg to use with cricut for sign making.

DIY STENCILED HELLO SUNSHINE SIGN

Make this simple and chic hello sunshine sign to display with your warm weathered décor. I used my old school Cricut Explore to make this wood sign but you can use any vinyl cutting machine you have. Be sure to grab the FREE SVG in my free resource library to make this exact design (find the link below;) )

Affiliate Disclosure. Some of the links on this website are affiliate links, which means that I may earn a small commission if you click on the link or make a purchase using the link. If you make a purchase you will not be charged anything additional.

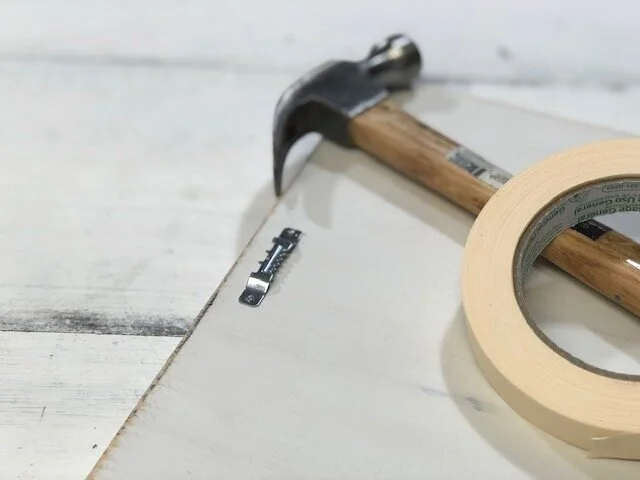
Here’s what you need

Want to learn more techniques for painting wood signs? CLICK HERE to check out my list of DIY sign painting tutorials for the most crisp clean lines for your lettered painted signs.

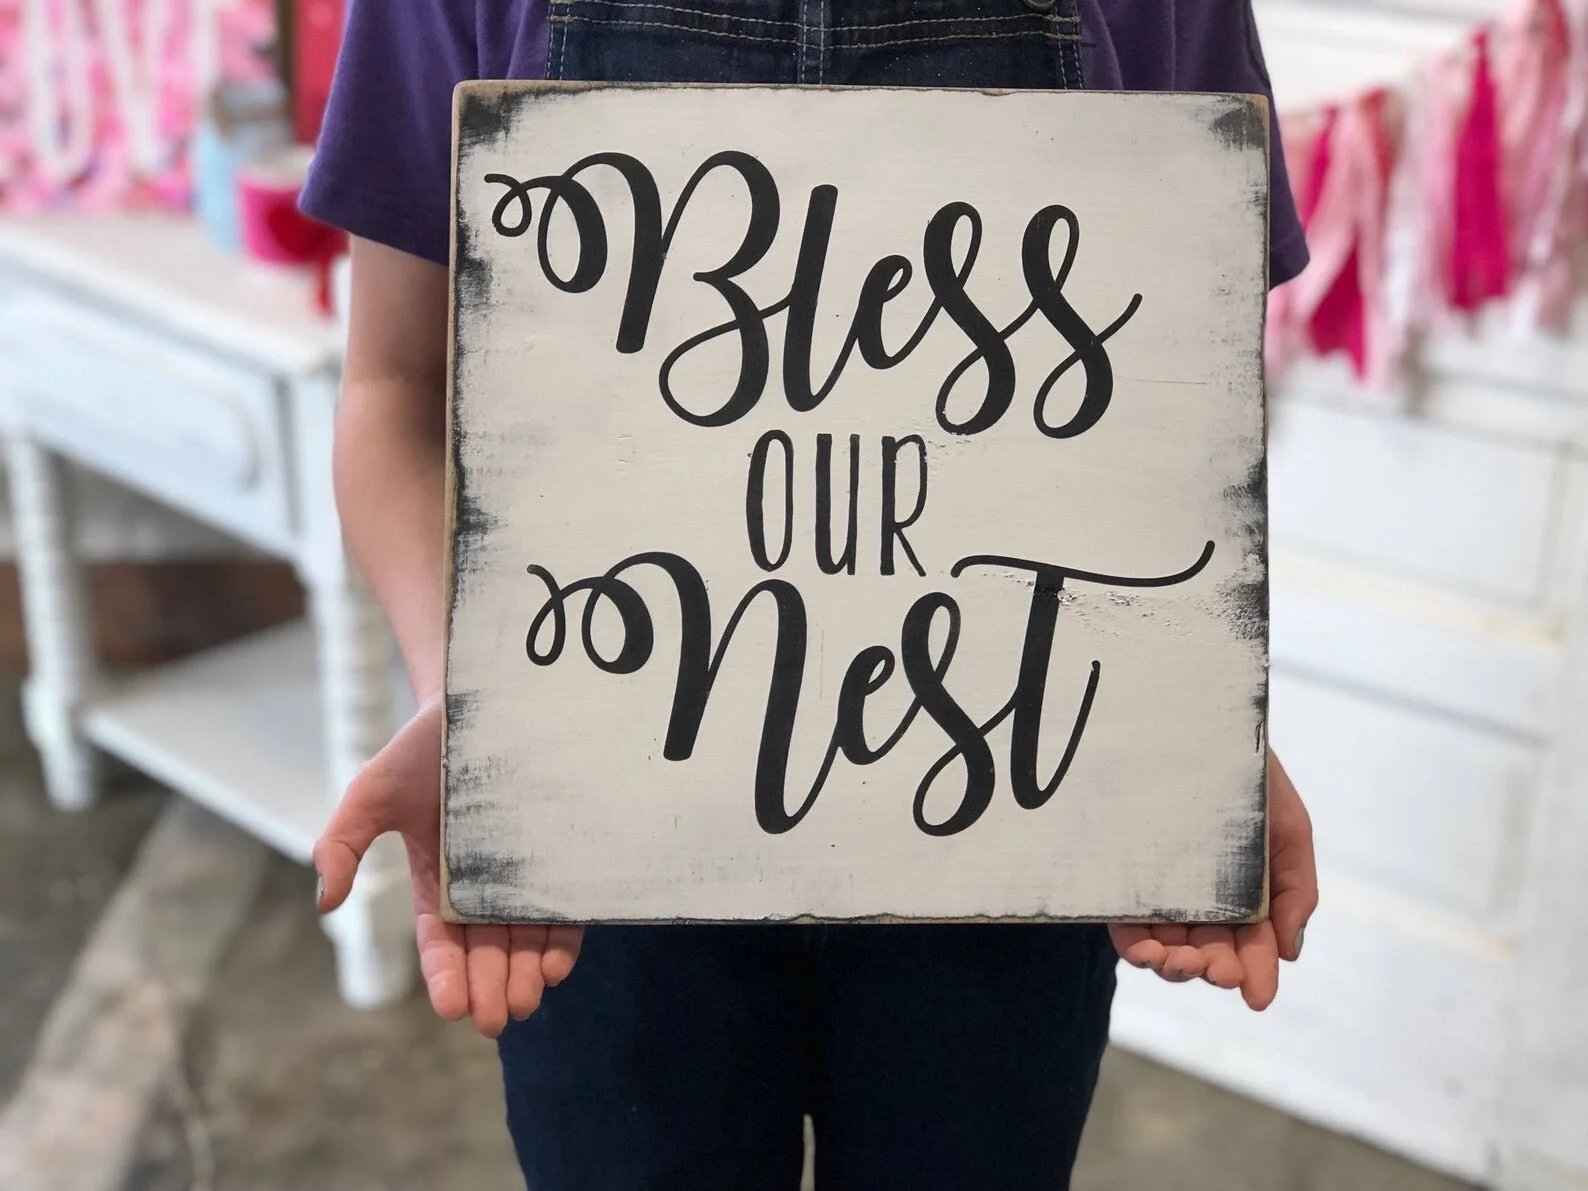
The type of stenciling I used for this wood HELLO SUNSHINE sign is called REVERSE STENCILING. I also used this stenciling technique on this BLESS OUR NEST wood sign. I love this technique when I’m only using two colors, the base color and the letter color. It gives super crisp lines and is really quick to do.

1.CUT THE STENCIL

Upload the HELLO SUNSHINE SVG into Cricut Design Space (or the program you are using with your fancy cutting machine). Then add a square to the canvas. Size the square so it’s about the same size as the wood base you are using. I sized mine to 7.25” then resized the HELLO SUMMER SVG till I was happy with the size of that. This process isn’t a must, you can just cut the SVG out without a square around it BUT adding this square does make centering your design much easier when you go to stencil the design.

DIY how to stencil on wood sign painting tutorial. How to make a hello sunshine lettered sign for summer. Using oramask stencil film to paint wood signs without paint bleed. free svg to use with cricut for sign making.

Once you happy with the size select both the SVG and the square and center them. After they are centered and still both selected use the Cricut SLICE feature to slice the SVG out of the square.

DIY how to stencil on wood sign painting tutorial. How to make a hello sunshine lettered sign for summer. Using oramask stencil film to paint wood signs without paint bleed. free svg to use with cricut for sign making.

Now you should have 3 images. You will only need the square that has the circle cut out of it so delete the two other circle images.

This is what your canvas should look like when you are ready to hit MAKE IT in Cricut Design Space.

DIY how to stencil on wood sign painting tutorial. How to make a hello sunshine lettered sign for summer. Using oramask stencil film to paint wood signs without paint bleed. free svg to use with cricut for sign making.

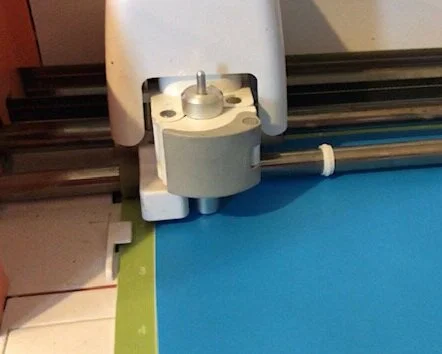
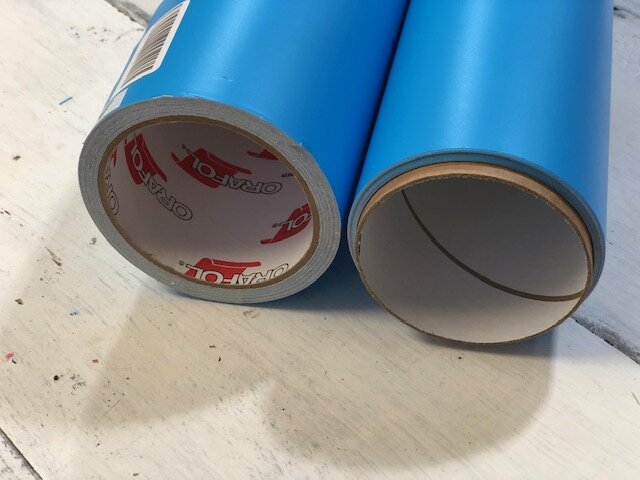
I used ORAMASK STENCIM FILM and the Cricut GREEN cutting mat. I set my machine dial to cut vinyl.

2. APPLY THE STENCIL

When weeding this design you want to weed out the CIRCLE and the MIDDLE PIECES from the letters.

DIY how to stencil on wood sign painting tutorial. How to make a hello sunshine lettered sign for summer. Using oramask stencil film to paint wood signs without paint bleed. free svg to use with cricut for sign making.

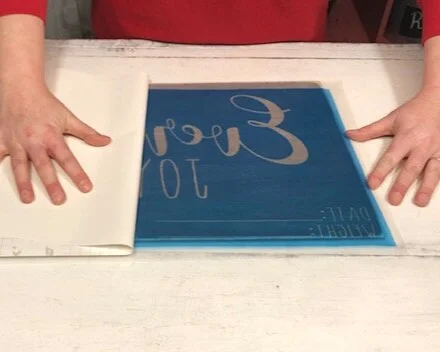
Use transfer tape to easily transfer the image onto your wood base. I’ve used LOTS of different transfer tapes and this brand is one of my favorites.

PRO TIP: you can reuse your transfer tape over and over again. As long as it is still tacky and fits the design you want to transfer you can use it. I often use my transfer tape 3-4 times before getting a new piece.
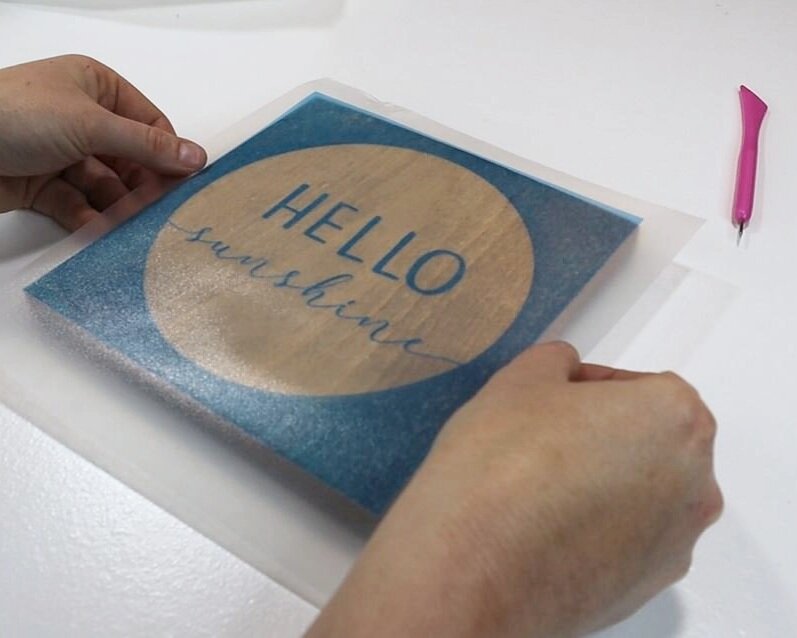
DIY how to stencil on wood sign painting tutorial. How to make a hello sunshine lettered sign for summer. Using oramask stencil film to paint wood signs without paint bleed. free svg to use with cricut for sign making.

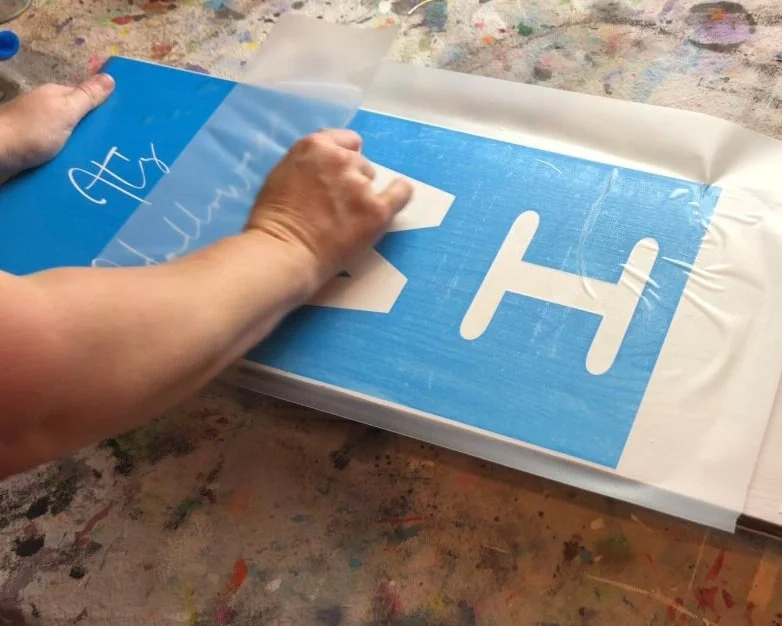
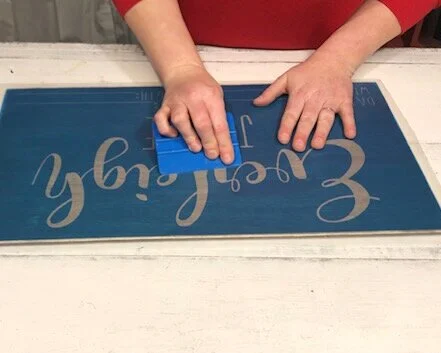
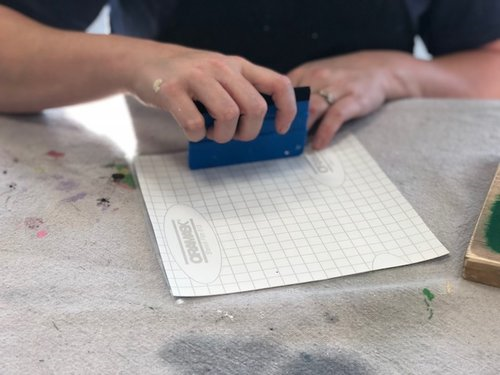
Align your stencil then press down using your hand and a vinyl squeegee. Working from the middle and then out press out the air bubbles.

DIY how to stencil on wood sign painting tutorial. How to make a hello sunshine lettered sign for summer. Using oramask stencil film to paint wood signs without paint bleed. free svg to use with cricut for sign making.

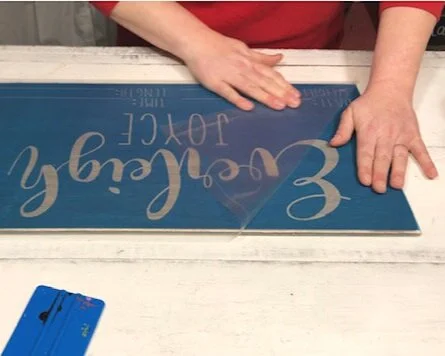
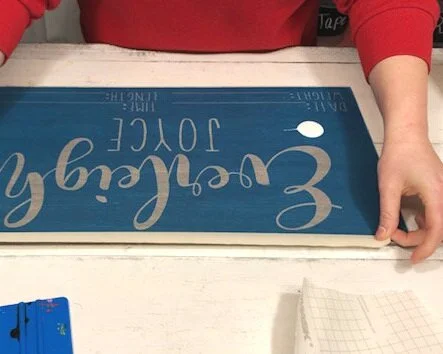
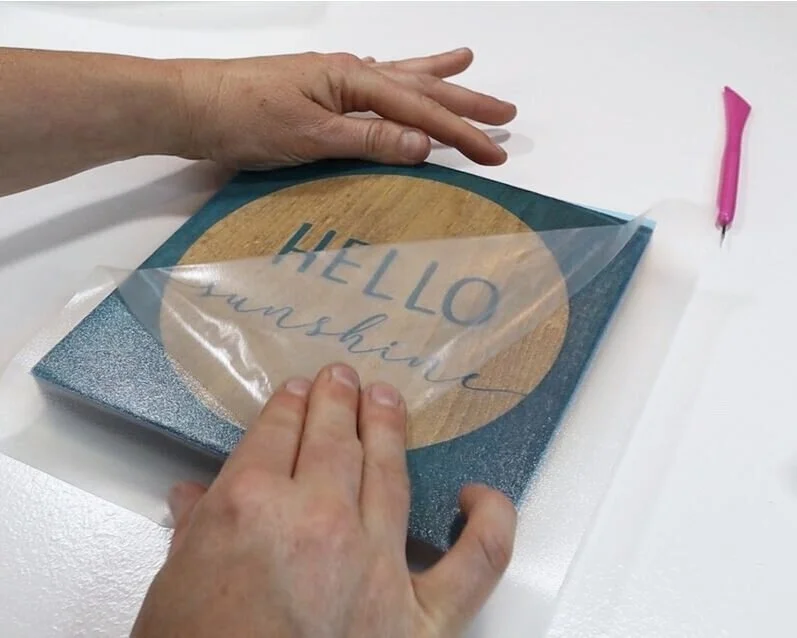
Now, roll your transfer tape off your design. Be sure to go slow, especially with this design as it has delicate lines that can rip easily.
DIY how to stencil on wood sign painting tutorial. How to make a hello sunshine lettered sign for summer. Using oramask stencil film to paint wood signs without paint bleed. free svg to use with cricut for sign making.

3. SEAL THE STENCIL

This step isn’t an absolute must but you’ve already worked this hard why ruin it with paint bleed? I always hate myself when I skip this step so just save yourself from a kick in the butt later and seal your stencil before you paint ;)!

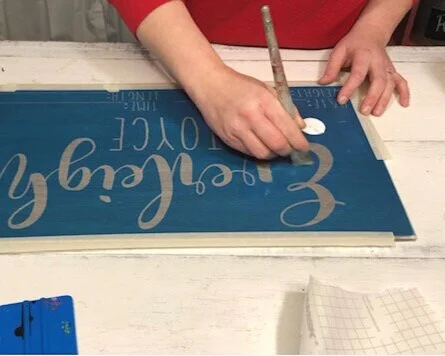
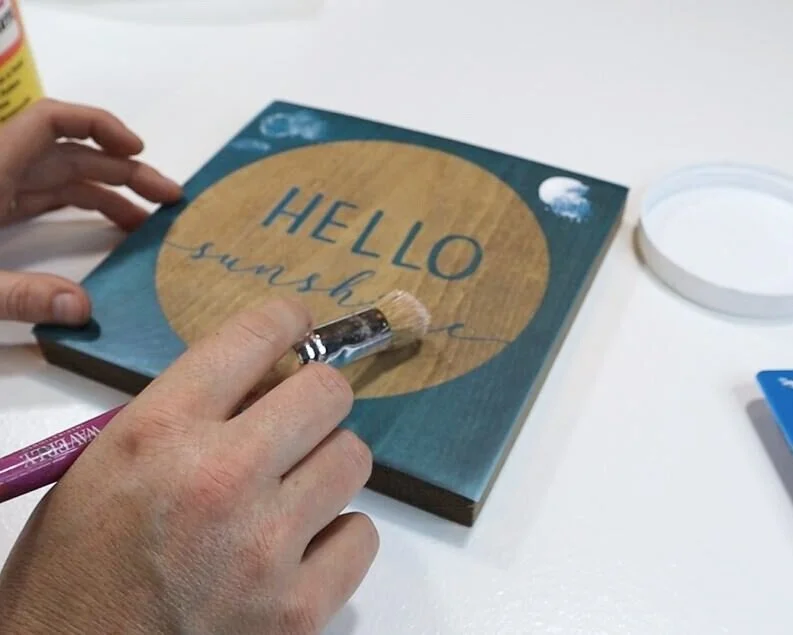
Paint a SUPER THIN layer of matte finish mod podge all over your design. Essentially what you are doing is filling in all of those tiny little air bubbles that you can’t see that are between your stencil and your wood base with a clear layer. This keeps your paint from filling in those air bubbles, aka: paint bleed.

DIY how to stencil on wood sign painting tutorial. How to make a hello sunshine lettered sign for summer. Using oramask stencil film to paint wood signs without paint bleed. free svg to use with cricut for sign making.

Be sure you are painting the thinnest of thin layers when doing this step. If it’s too thick your paint will peel up with your stencil when you remove it…again speaking from LOTS of sign making experience lol! Then let that dry completely before moving on to the next step.
DIY how to stencil on wood sign painting tutorial. How to make a hello sunshine lettered sign for summer. Using oramask stencil film to paint wood signs without paint bleed. free svg to use with cricut for sign making.

4. PAINT YOUR DESIGN

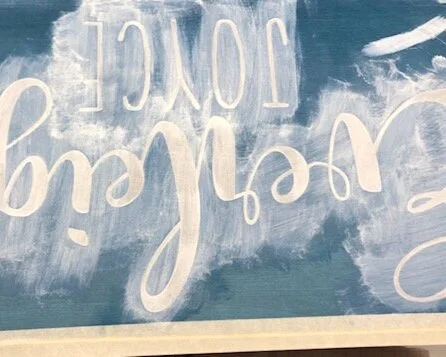
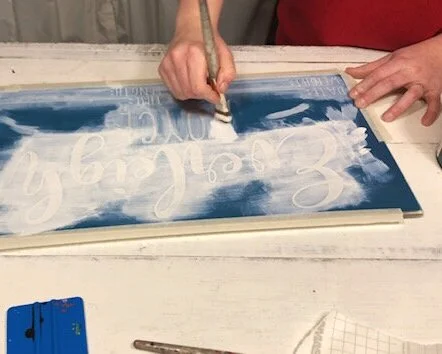
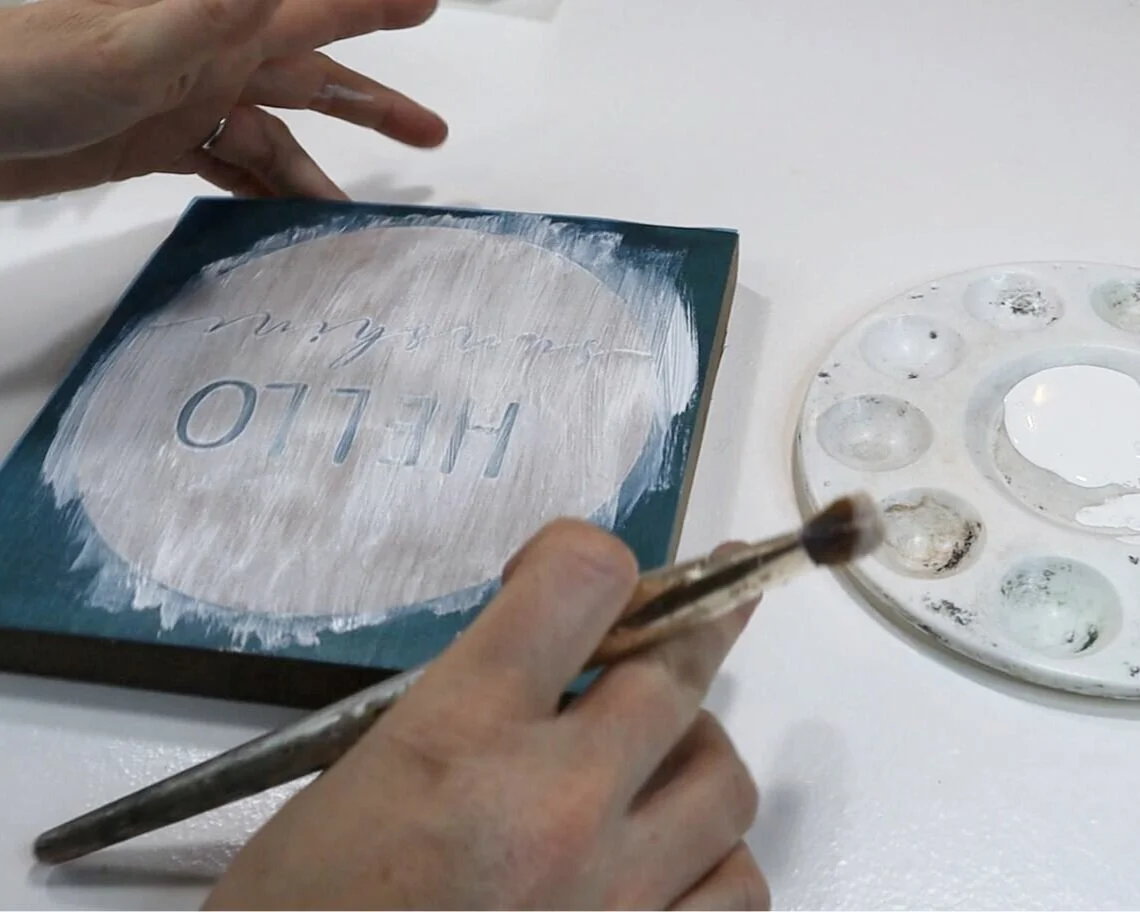
After your mod podge seal has dried you can paint your design. The lighter the color the more layers you will likely need to cover your design completely. For your first layer of paint you want to paint it on thin enough so that you see the wood grain through the paint. I used white acrylic paint for this project and painted 3 coats total.
DIY how to stencil on wood sign painting tutorial. How to make a hello sunshine lettered sign for summer. Using oramask stencil film to paint wood signs without paint bleed. free svg to use with cricut for sign making.

After you apply the first layer wait for it to dry completely before moving on to the second coat. If you need a third layer of paint repeat the drying process again then paint the third layer.

5. PEEL UP YOUR STENCIL

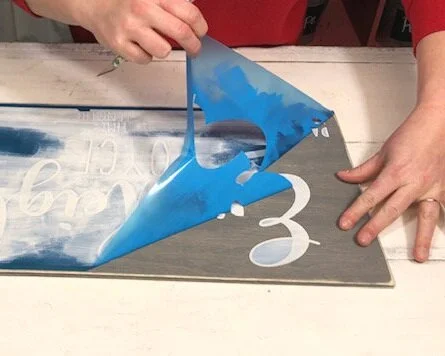
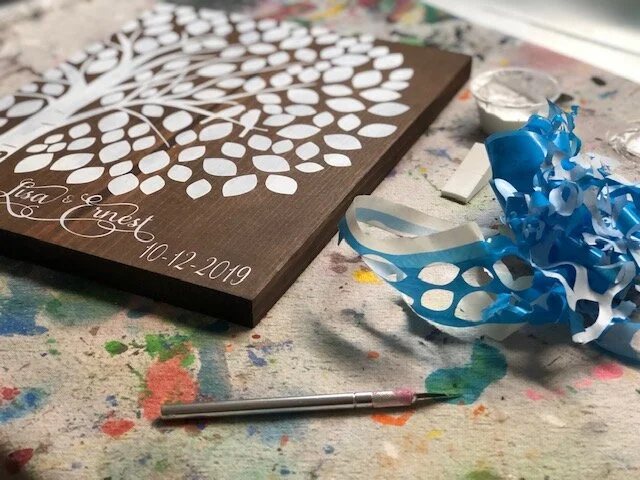
After your happy with the paint coverage it’s time to peel up the oramask stencil film. I personally peel my stencils up while my paint is still wet but some prefer to peel after their paint has dried, both ways work. Grab one corner of the stencil and peel it off toward the opposite corner.

DIY how to stencil on wood sign painting tutorial. How to make a hello sunshine lettered sign for summer. Using oramask stencil film to paint wood signs without paint bleed. free svg to use with cricut for sign making.

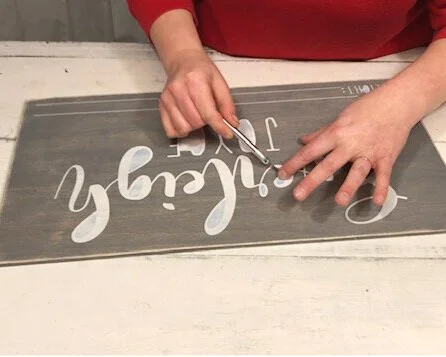
Then using your weeding tool CAREFULLY peel up the lettering inside of the circle. I ended up grabbing a sewing pin for this as my weeding tool was a little too large for the job.

DIY how to stencil on wood sign painting tutorial. How to make a hello sunshine lettered sign for summer. Using oramask stencil film to paint wood signs without paint bleed. free svg to use with cricut for sign making.

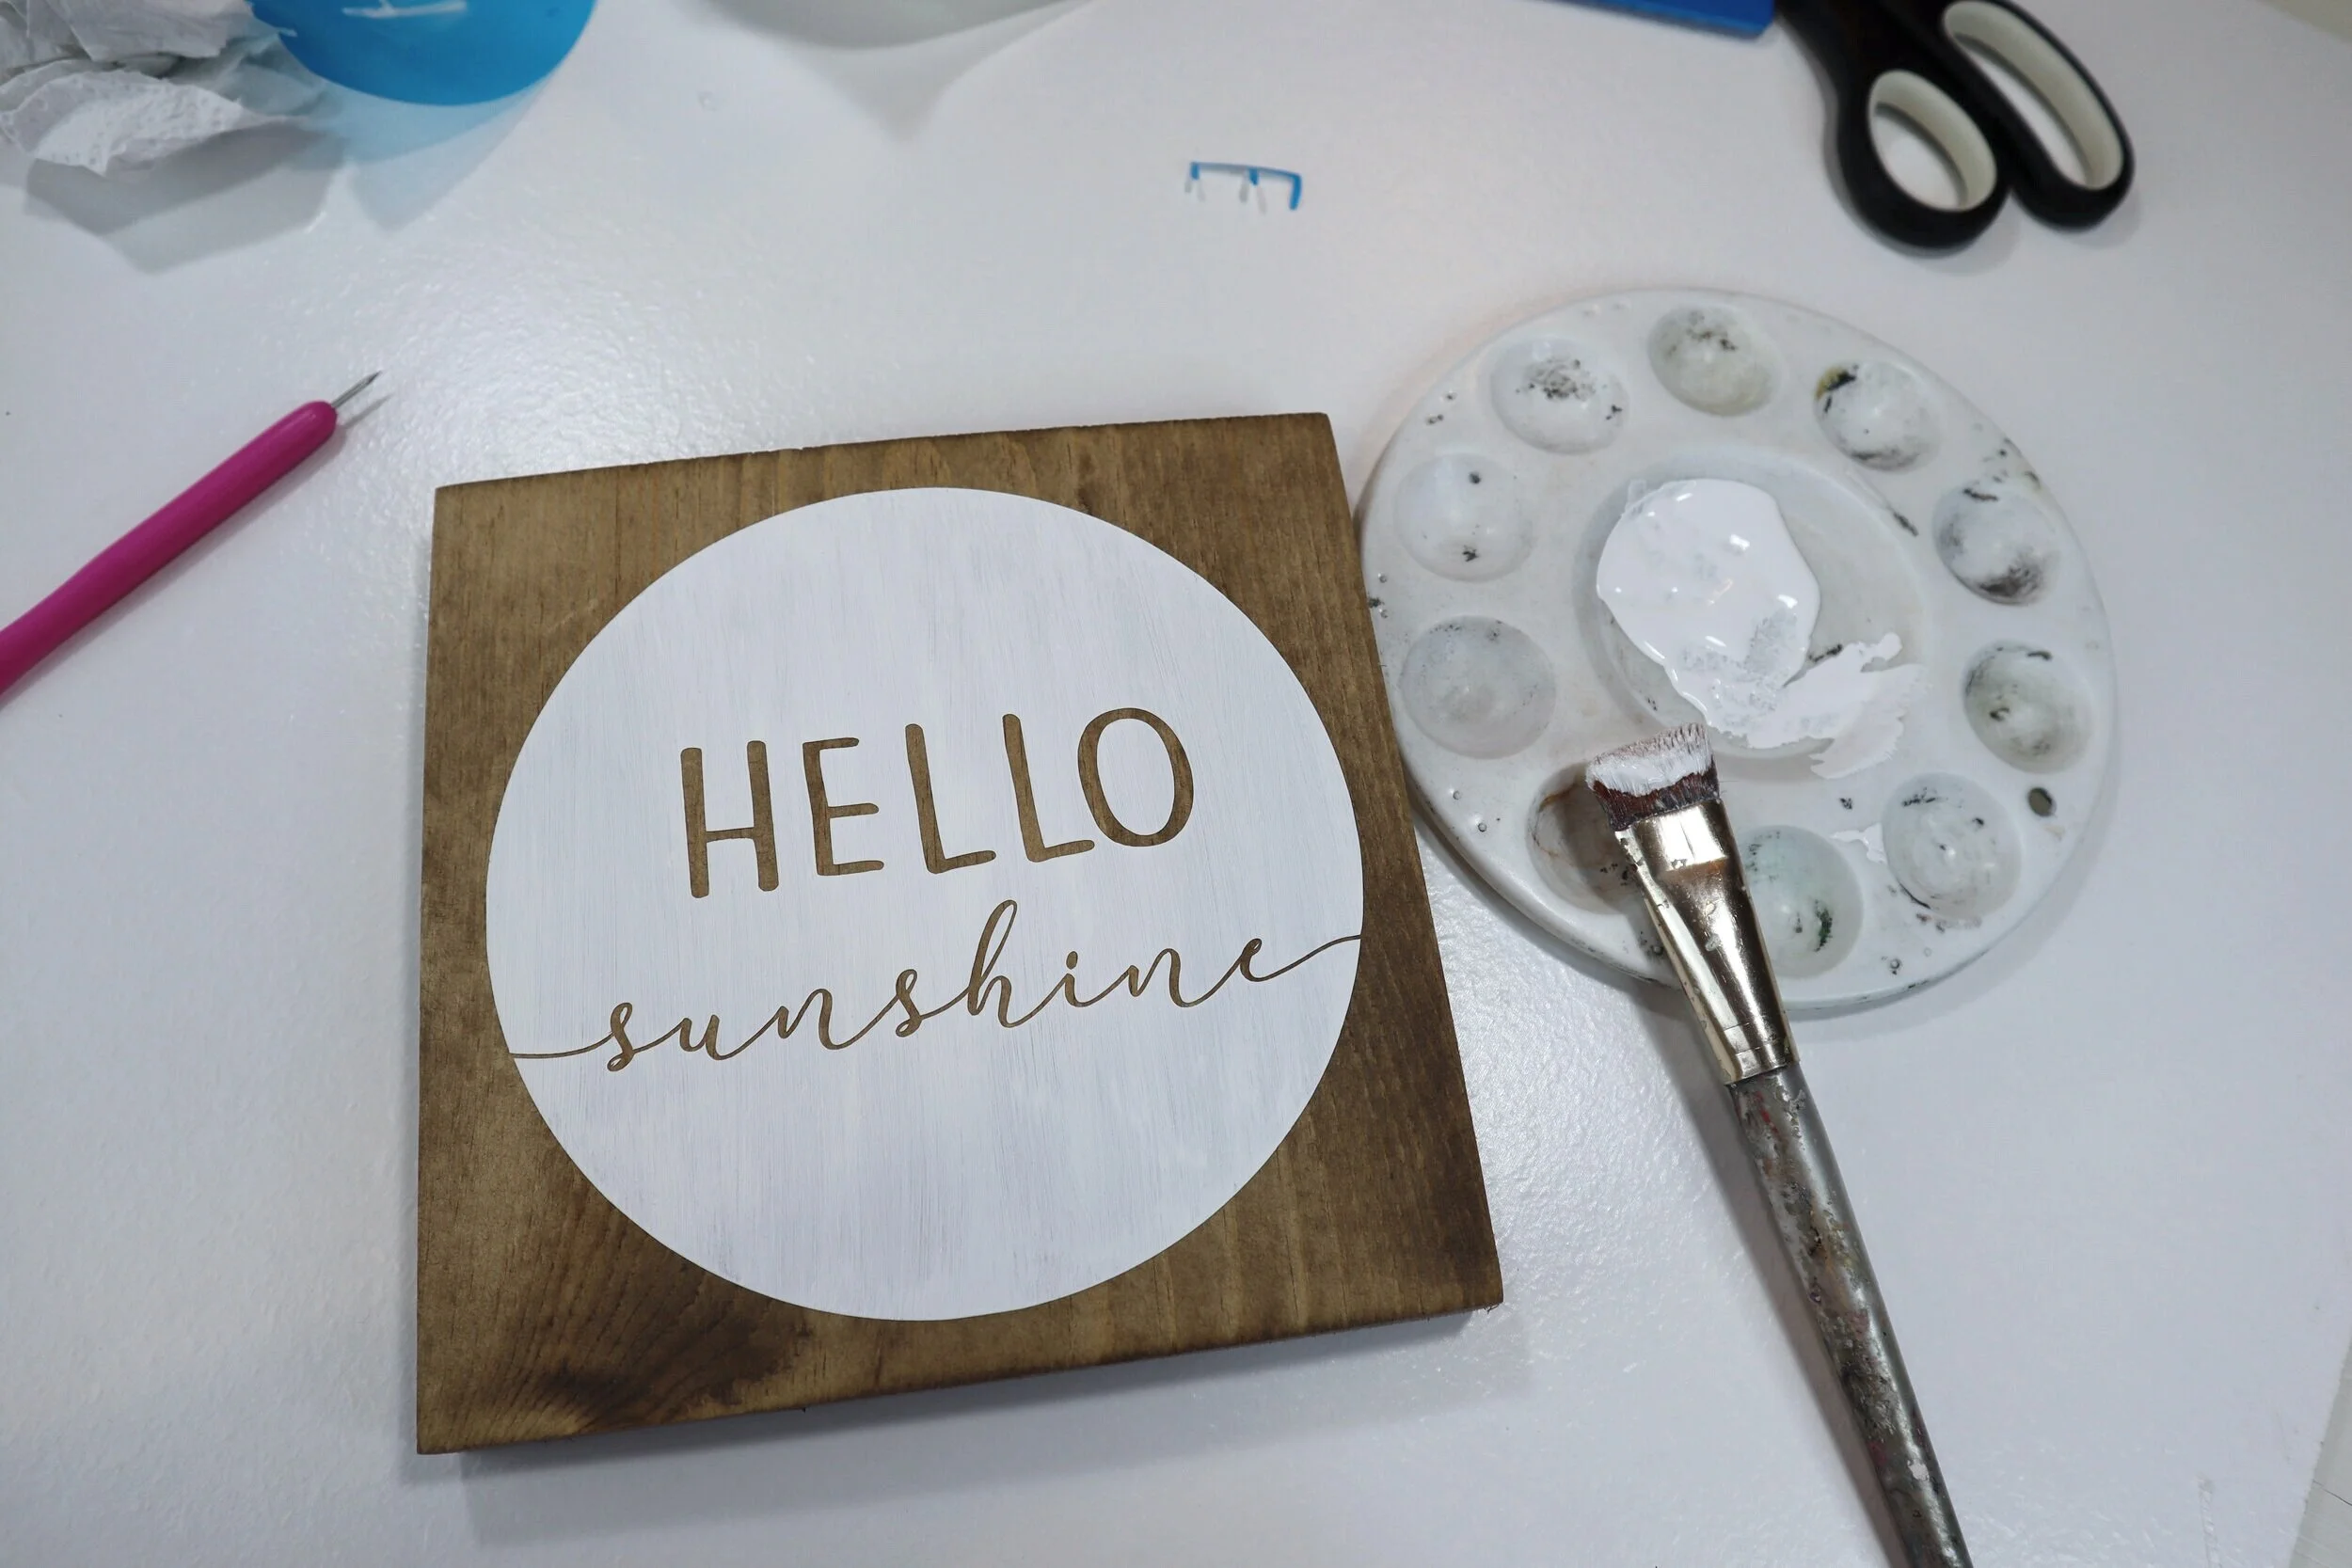
Let your sign sit and dry completely before displaying in your home with the rest of your summer decorations.
DIY how to stencil on wood sign painting tutorial. How to make a hello sunshine lettered sign for summer. Using oramask stencil film to paint wood signs without paint bleed. free svg to use with cricut for sign making.

I just love how this little sign turned out! It’s so simple and it can be displayed with both spring and summer décor. I extra love double duty decorations!

If you have any questions about this DIY craft tutorial or any others on my blog please reach out.


Check out more sign painting tutorials below. Happy Crafting!!

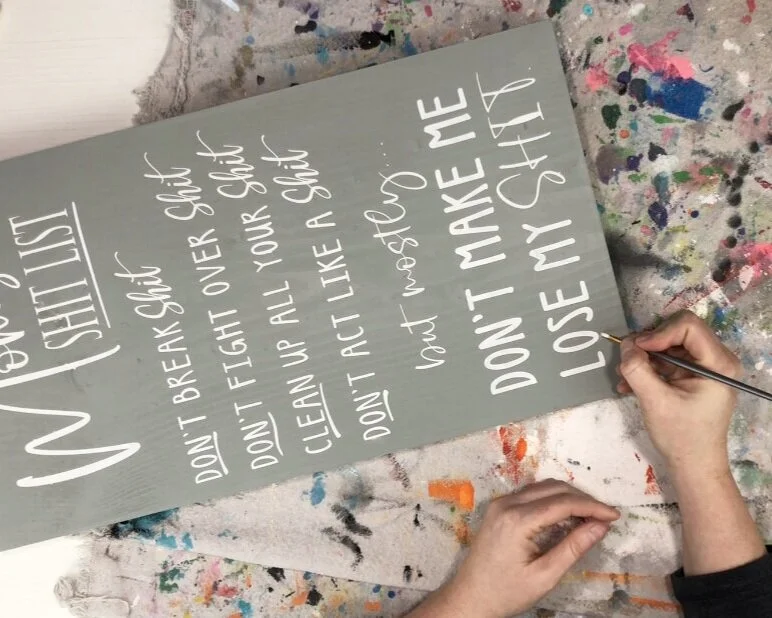
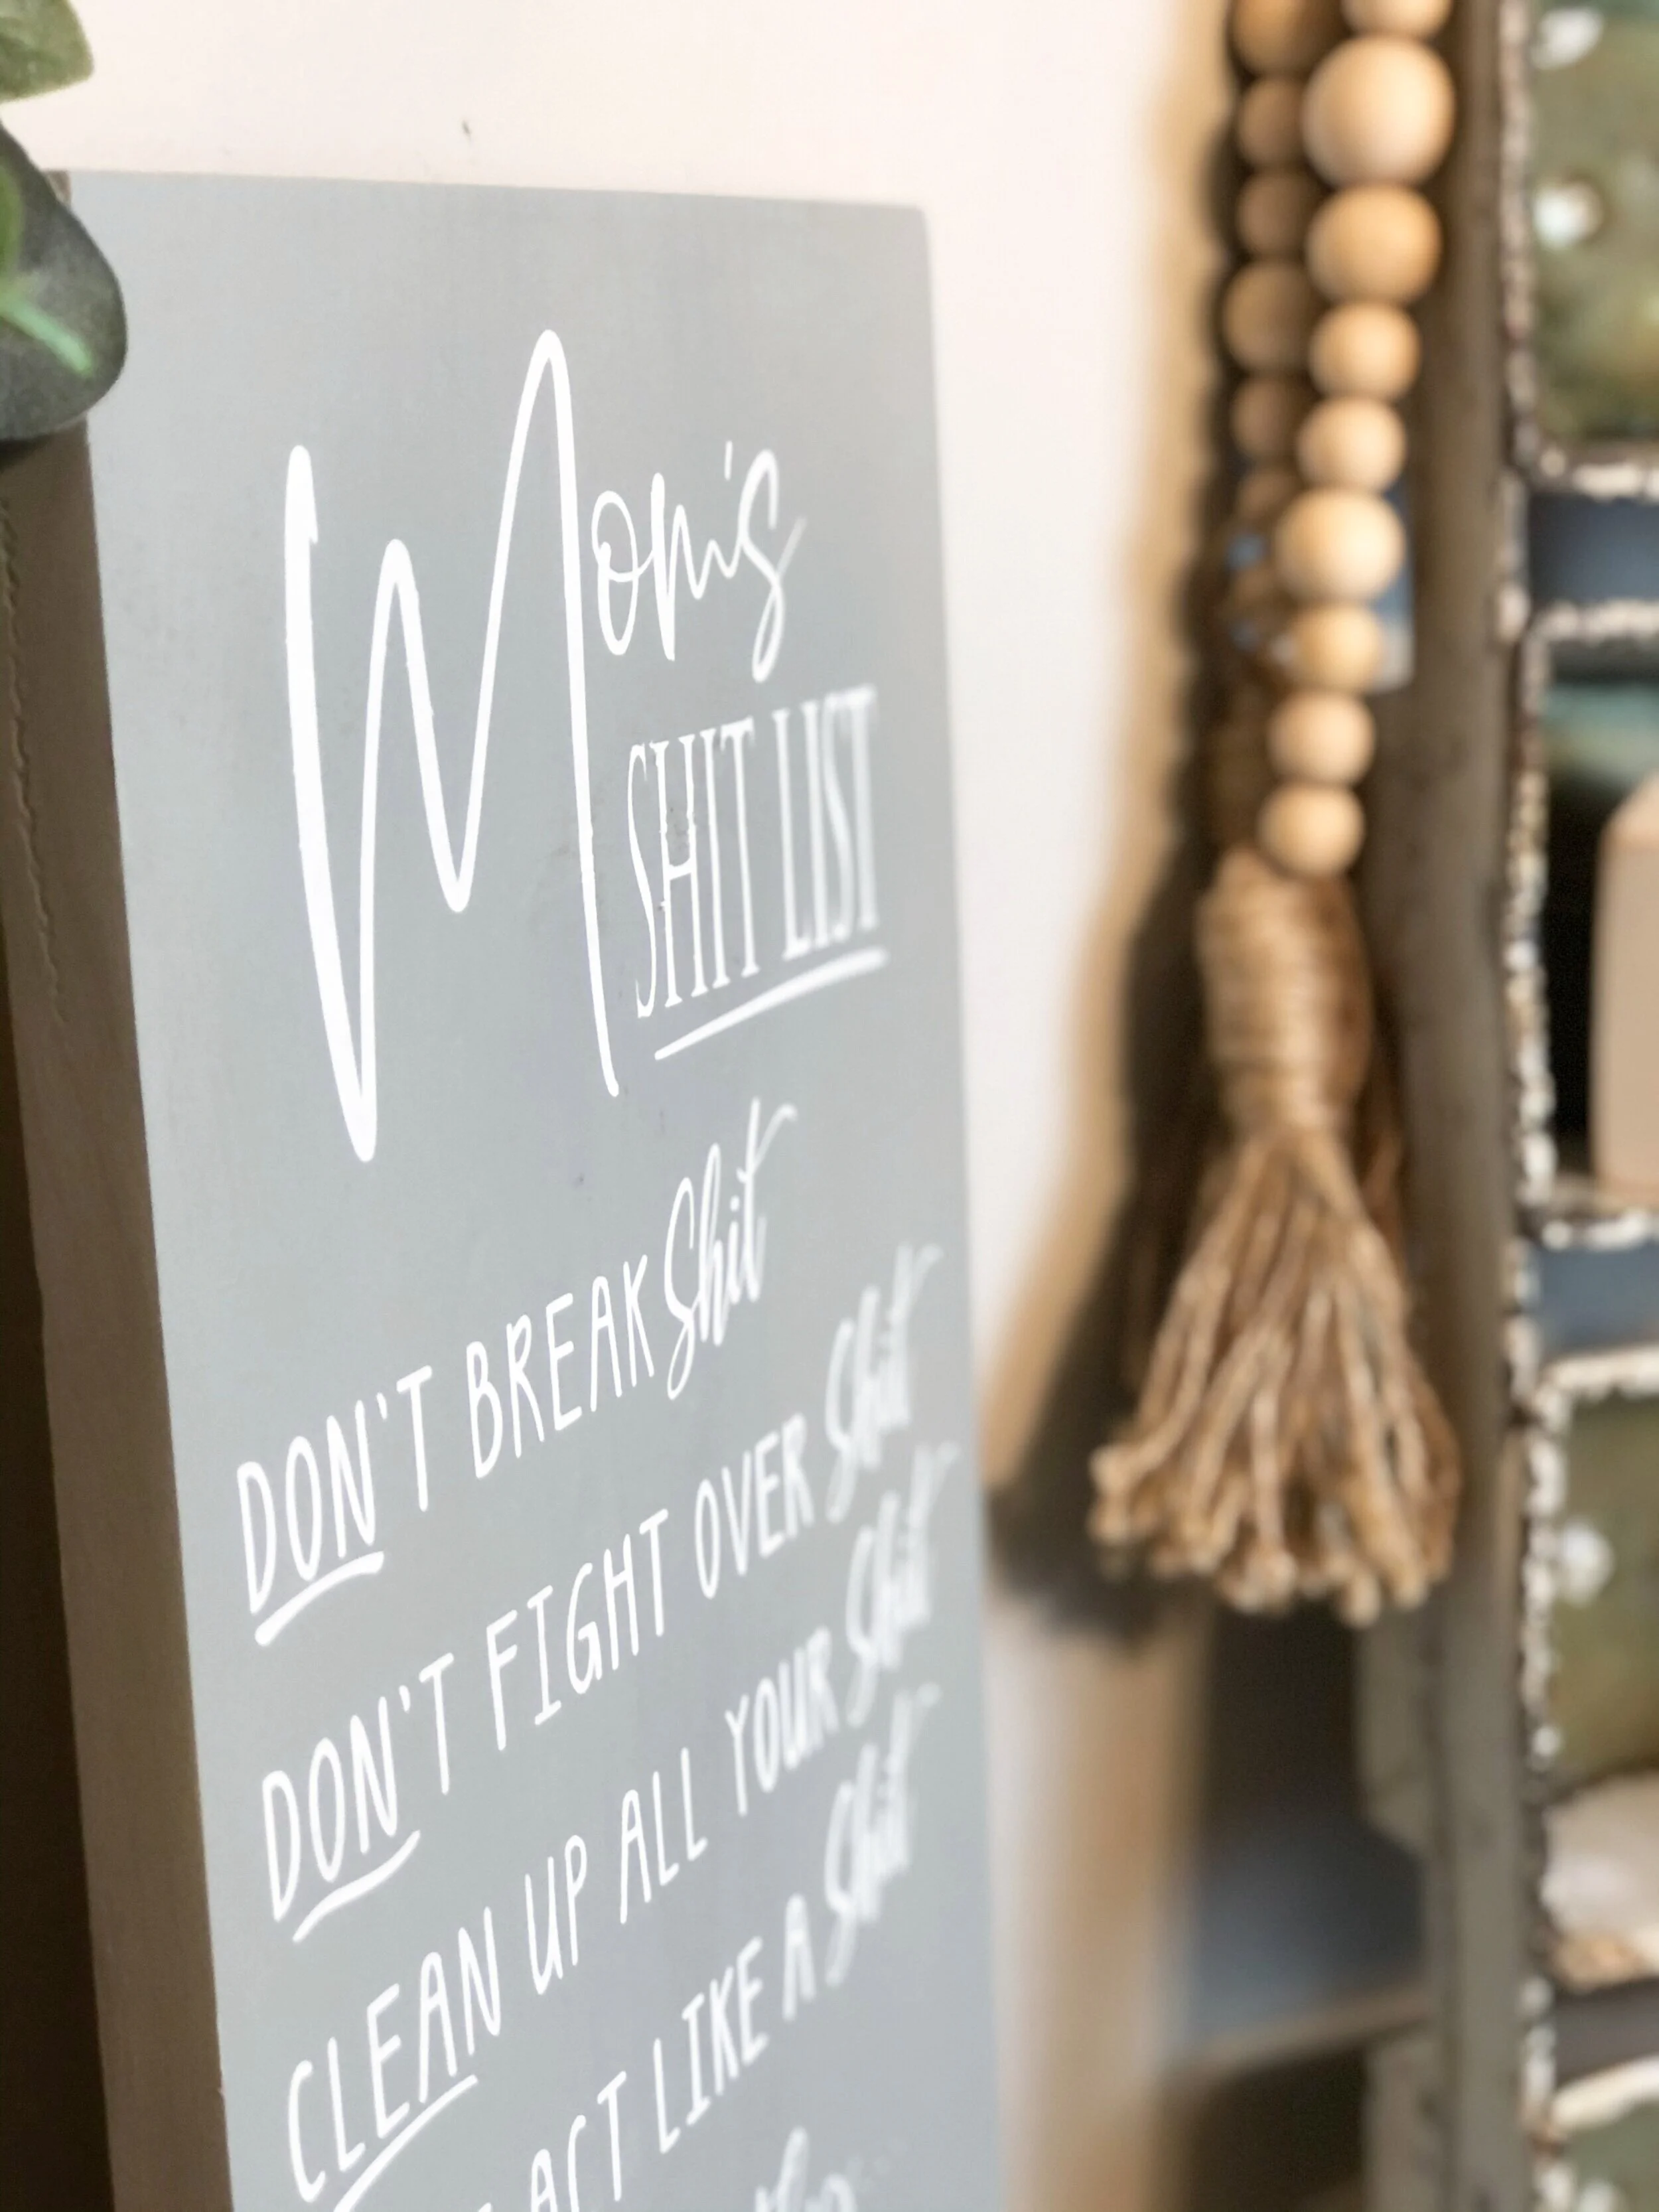
Humorous wood sign for mom - mom's shit list sign + FREE SVG

How to stencil on wood using your Cricut. DIY mom's shit list wood sign free SVG. How to paint a lettered wood sign step by step tutorial with pictures.

Humorous wood sign for mom - mom's shit list sign + FREE SVG

Learn how to stencil and make a humorous sign for you or another fellow mom with a sense of humor. BONUS grab the FREE SVG for this MOM’S SHIT LIST SIGN in my resource library (find the link below).

How to stencil on wood using your Cricut. DIY mom's shit list wood sign free SVG. How to paint a lettered wood sign step by step tutorial with pictures.

Oh boy does this sign ring so much truth. I’m a Christian lady BUT also cuss a little.. well, sometimes a lot or at least more than I should. And I think that’s ok.

My friend asked me to make this funny sign and of course I said a big YES! Probably because I can relate so much to it but also, because I really wanted to share the SVG with all of my fellow SVG loving crafters that read my blog.

Affiliate Disclosure. Some of the links on this website are affiliate links, which means that I may earn a small commission if you click on the link or make a purchase using the link. If you make a purchase you will not be charged anything additional.

A couple months back I also made another humorous sign for her: life is short lick the spoon (which I also shared the SVG for in my library for you to use for free). She always has great ideas on what she wants me to make her:)!!

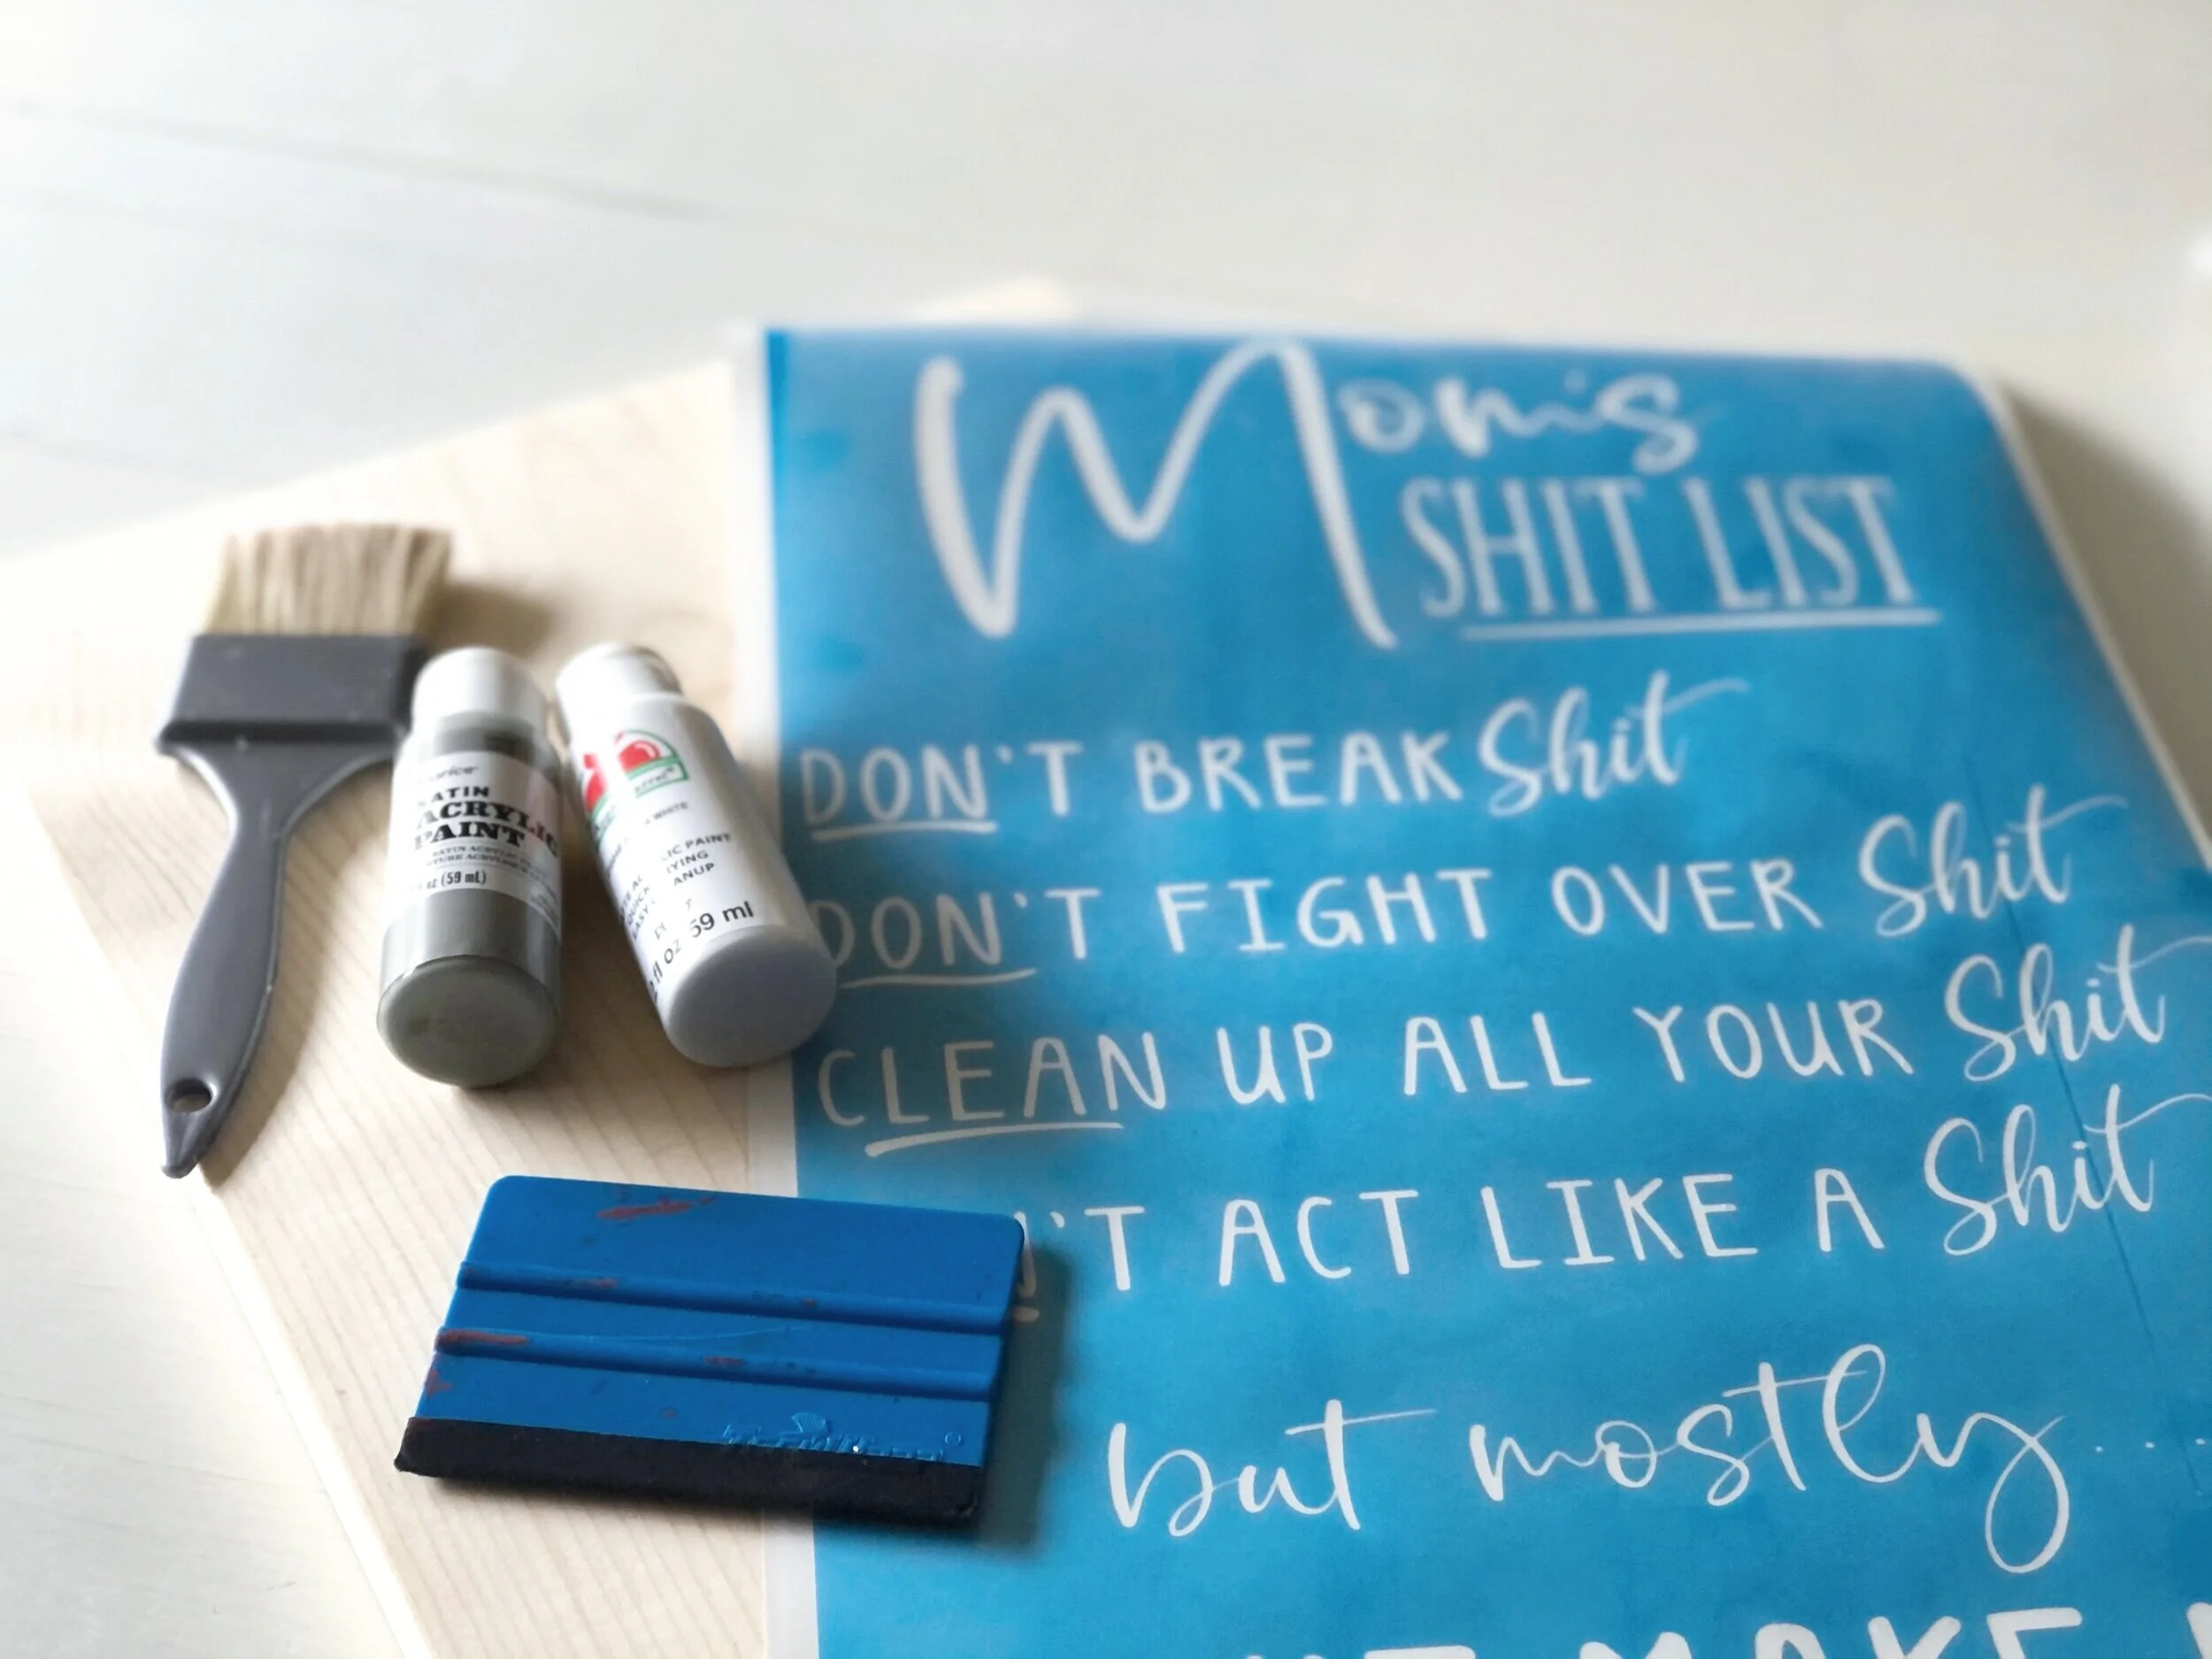
Ok so here’s what you need to make your own Mom’s shit list wood sign.

BONUS: you can get this EXACT file I made for FREE in my password protected resource library. Just click on the button below and it will take you there. These files are for free PERSONAL use only.

HOW TO MAKE A HUMOROUS STENCILED WOOD SIGN FOR MOM

HERE’S WHAT YOU NEED:

If you’re new to the world of fancy cutting machines aka vinyl cutters aka a Cricut or Silhouette be sure to check out my post on 10 must have supplies & accessories to get you started when you’re new to using a Cricut. Also if you plan on using a LOT of stencil film and you want to save some money $$ be sure to read this post on where to buy ORAMASK 813 stencil material in bulk to save you TONS of money.

How to stencil on wood using your Cricut. DIY mom's shit list wood sign free SVG. How to paint a lettered wood sign step by step tutorial with pictures.

STENCILING ON WOOD- THE NO PAINT BLEED METHOD

1. CUT & SAND THE BASE

The first thing I did was cut and sand my wooden base. I used a 1x12 to make my sign out of. If you are new to the lumber world a 1x12 doesn’t actually measure 12” wide, it’s more like 11.25” or in my case it was 11”. I cut my wood to 20” then sanded it semi smooth with 120 grit sandpaper using my Ryobi cordless sander. I LOVE this little light weight sander and the fact that it’s not corded so I can move around with it without tripping on cords or trying to find a plugin close by.

2. PAINT THE BASE

How to stencil on wood using your Cricut. DIY mom's shit list wood sign free SVG. How to paint a lettered wood sign step by step tutorial with pictures.

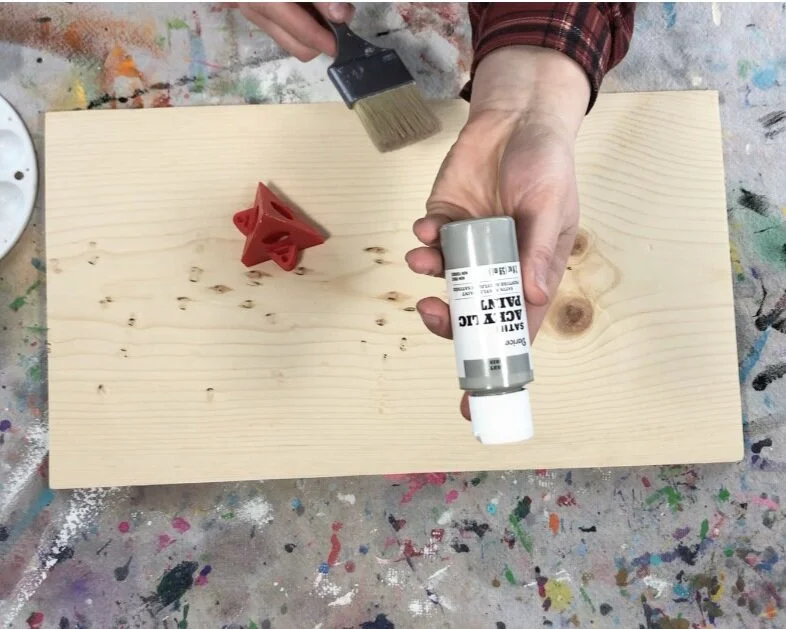
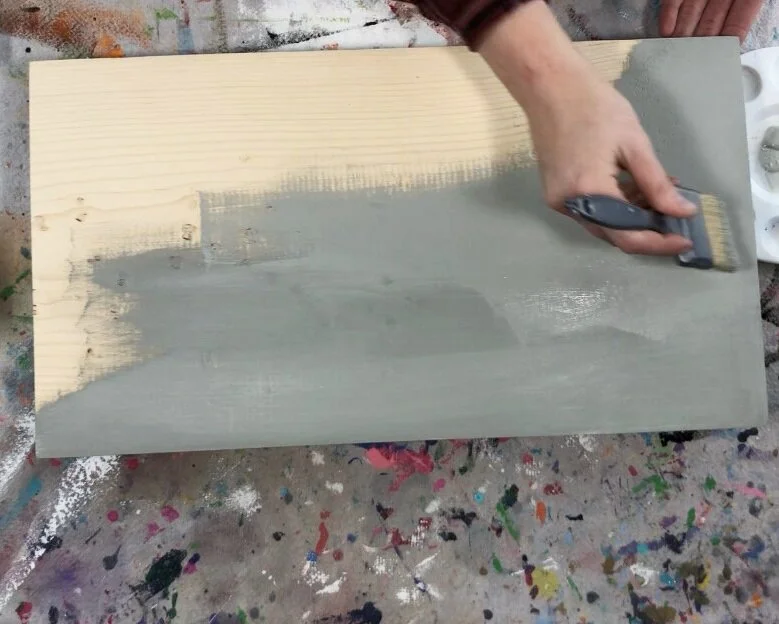
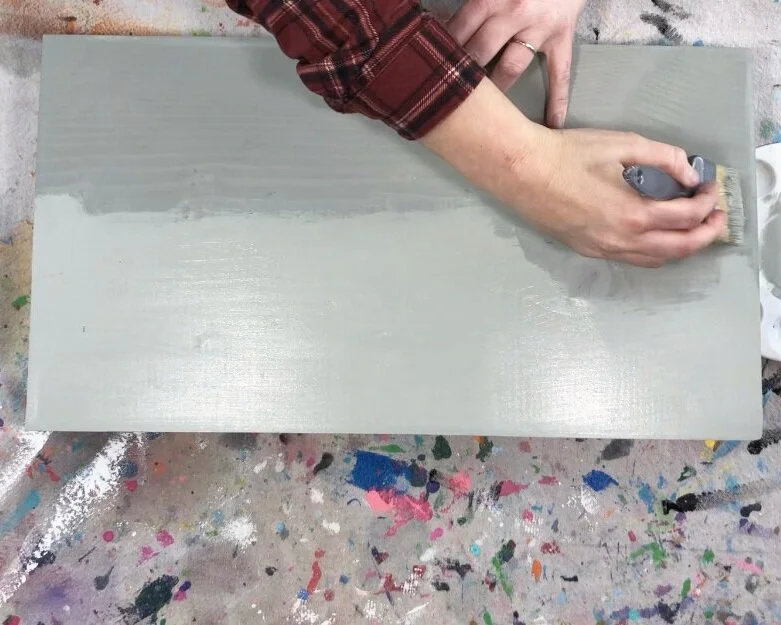
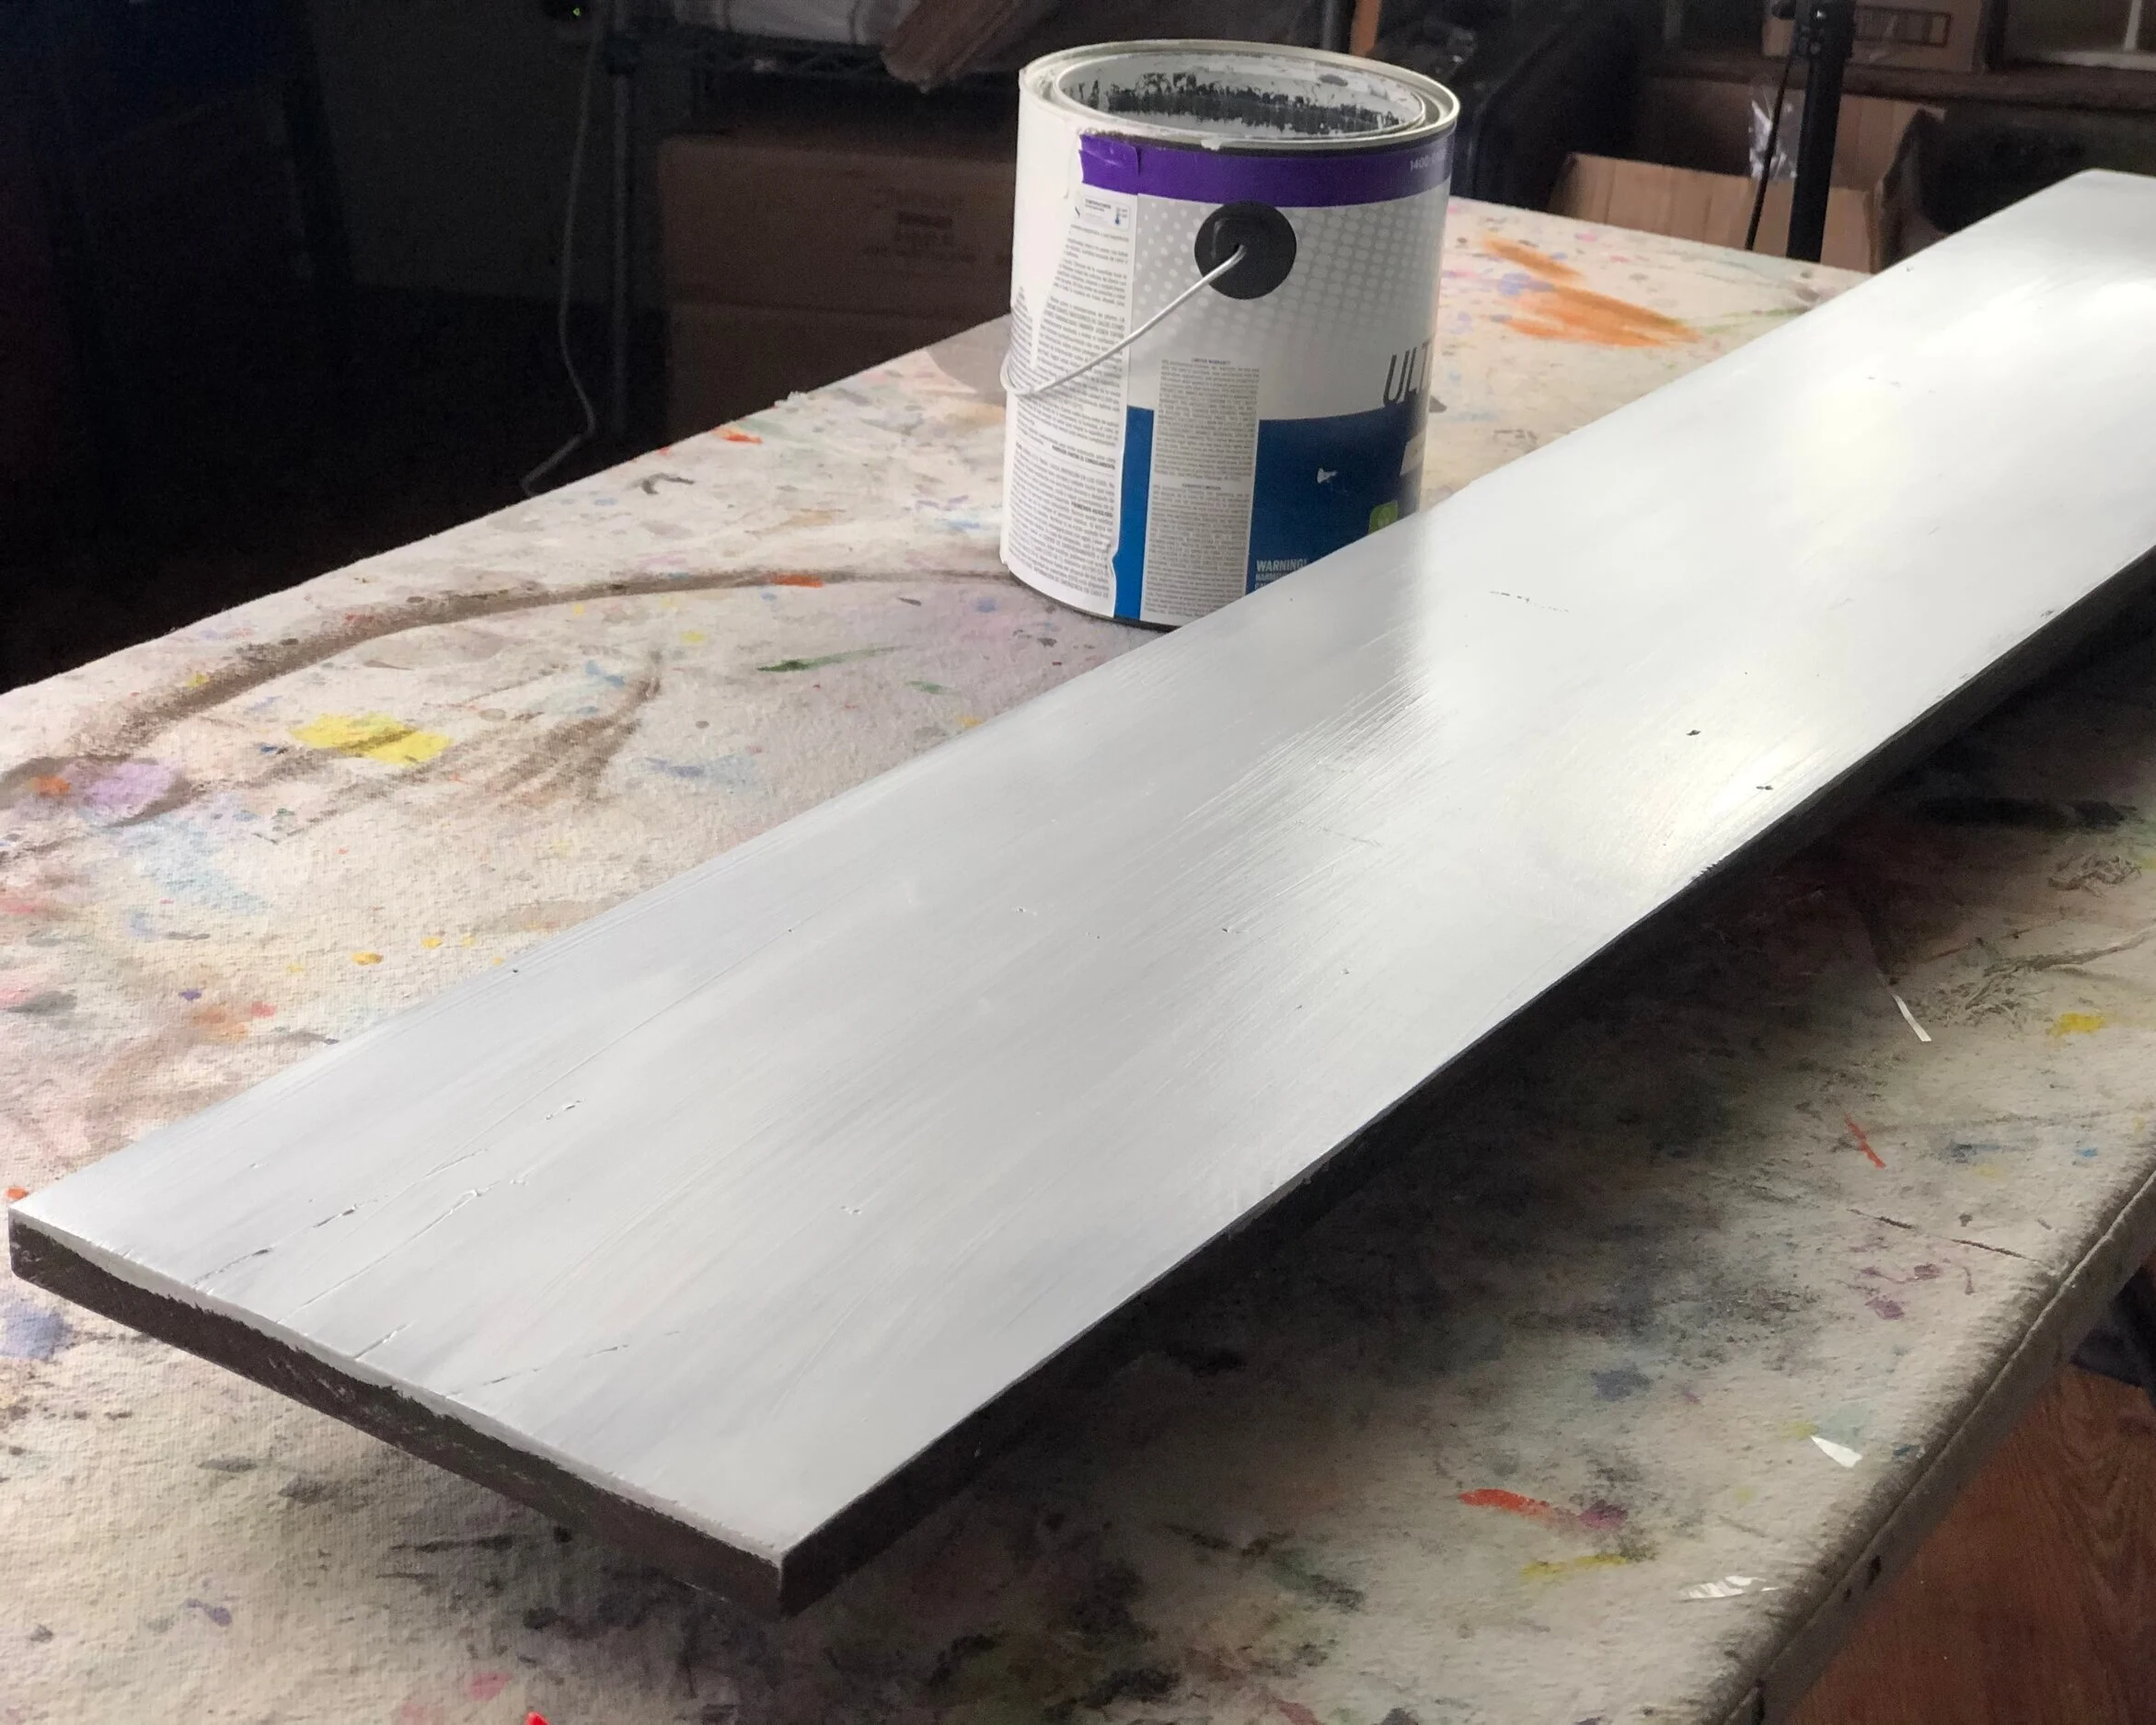
For this sign my friend requested a gray painted background with white lettering. I painted a really THIN coat of gray acrylic paint on my base. I used these awesome paint stands to keep my board up and off of my work surface. I can’t believe I’ve been painting wood signs for YEARS and didn’t have these until recently! They are something that I didn’t even know I needed till I used them.
How to stencil on wood using your Cricut. DIY mom's shit list wood sign free SVG. How to paint a lettered wood sign step by step tutorial with pictures.

Once the first layer of paint was dry I went back a painted a second THIN layer of paint. Usually you just need two coats, or sometimes even just one if you’re using black. But if you aren’t happy with the coverage you can go back after the second coat is dry and paint a third coat of thin paint on there.

How to stencil on wood using your Cricut. DIY mom's shit list wood sign free SVG. How to paint a lettered wood sign step by step tutorial with pictures.

I let my base dry for 24 hours. Not because it needed to dry that long but because I’m a momma to four girls, am a mompreneur {a momma with a business ;) }, and trying my best to school my girls at home right now (thanks to you know what). Sometimes we are just walking hot messes around here lol!

3. CUT & WEED THE STENCIL

I used my trusty Cricut to cut my stencil on ORAMASK 813 STENCILM FILM. I have been using a Cricut for a loooooong long time, back when they had key pads and you didn’t use a computer and Design Space to do all the amazing things they can do now. Since my design was large I used a 24” GREEN cutting mat to cut my stencil on. You can use my same MOM’S SHIT LIST SVG here in my free resource library. It’s password protected so you’ll need to fill out the boxes to get the password. Once you are on the resource library page scroll down till you see the photo of the Mom’s shit list sign design. Click on it and the SVG will pop up in another window, you can save it to your computer from there then upload it into whatever program you are using to cut your design.

How to stencil on wood using your Cricut. DIY mom's shit list wood sign free SVG. How to paint a lettered wood sign step by step tutorial with pictures.

3. APPLY THE STENCIL

I applied my stencil to my wood base using clear transfer tape. I LOVE and swear by this clear transfer tape. I have used MANY different types trying to find the right one for me and this one was it.

How to stencil on wood using your Cricut. DIY mom's shit list wood sign free SVG. How to paint a lettered wood sign step by step tutorial with pictures.

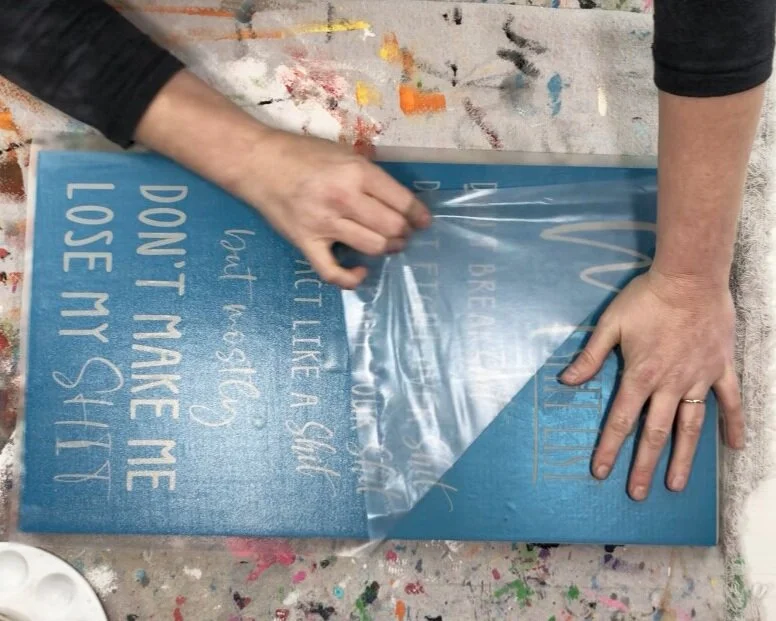
Using a vinyl squeegee I pressed out any air bubbles then slowly rolled the transfer tape off of my design. Rolling vs pulling the transfer tape off is KEY. If you pull it up and off of your stencil your stencil will likely come up and off of your wood base too. Take your time on this step, if you don’t I promise you will kick yourself and possibly a lot of curse words will come out lol! Just speaking from experience here.

How to stencil on wood using your Cricut. DIY mom's shit list wood sign free SVG. How to paint a lettered wood sign step by step tutorial with pictures.

After the transfer tape is off I carefully press out all of the air bubbles again using my vinyl squeegee.

How to stencil on wood using your Cricut. DIY mom's shit list wood sign free SVG. How to paint a lettered wood sign step by step tutorial with pictures.

4. SEAL THE STENCIL

Sealing the stencil is KEY to no paint bleed. If you take just one thing away from this tutorial let THIS TIP be IT! I have built a business on painting wooden signs and this is by far the most important step I take to having crisp clean no paint bleed lines.

How to stencil on wood using your Cricut. DIY mom's shit list wood sign free SVG. How to paint a lettered wood sign step by step tutorial with pictures.

How do you seal a stencil? It’s simple, use a light hand (I’m talking SUPER LIGHT) and paint your stencil using the same color that you painted your background. Let it dry. What this does is it fills in all of those tiny little bitty air holes that you can’t see. It may look like there aren’t any air holes but trust me they are there. Your paint will find them and you’ll spend hours trying to fix the mess…again, speaking from experience.

Let that dry completely.

5. PAINT THE DESIGN

After the sealing is dry I painted my design color. My friend requested white lettering so I used white acrylic paint for the job. I painted a SUPER THIN layer of white paint using a stiff-ish paint brush. You want to be able to see the base color through your paint. You can use those stenciling brushes but I have found a paint brush like this works much better than any stenciling brush I have ever used.

How to stencil on wood using your Cricut. DIY mom's shit list wood sign free SVG. How to paint a lettered wood sign step by step tutorial with pictures.

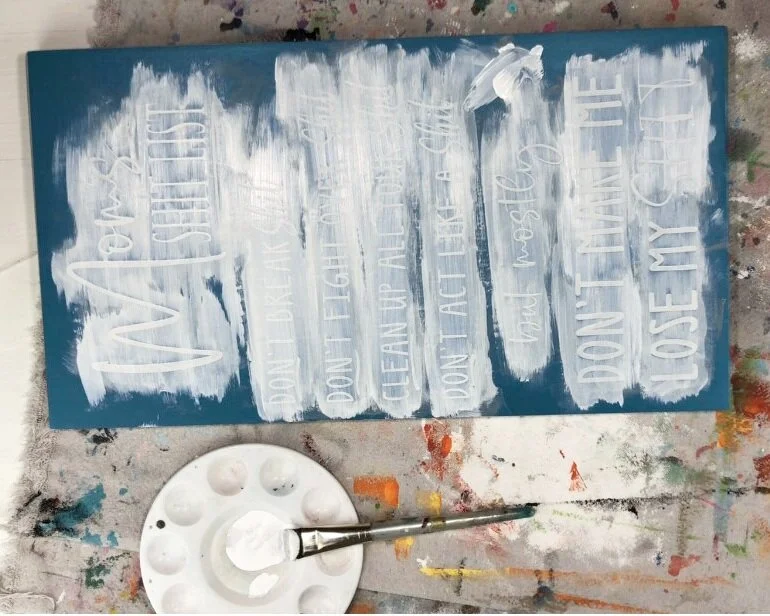
Once the first layer of paint was dry I went back over my design and paint a second THIN layer of white paint.

How to stencil on wood using your Cricut. DIY mom's shit list wood sign free SVG. How to paint a lettered wood sign step by step tutorial with pictures.

Here’s what my stencil looked like when I was finished painting the second layer of paint.

How to stencil on wood using your Cricut. DIY mom's shit list wood sign free SVG. How to paint a lettered wood sign step by step tutorial with pictures.

6. PEEL UP THE STENCIL

Everyone does this step differently. Some wait till their paint is dry and others peel while their paint is still wet. I have found that peeling up my stencil while my paint is still wet works best for me. But if you find that doesn’t work for you change it up:). I encourage my readers to do like I did and do trial and error if something doesn’t work change it up until you get the perfect way it works for you.

How to stencil on wood using your Cricut. DIY mom's shit list wood sign free SVG. How to paint a lettered wood sign step by step tutorial with pictures.

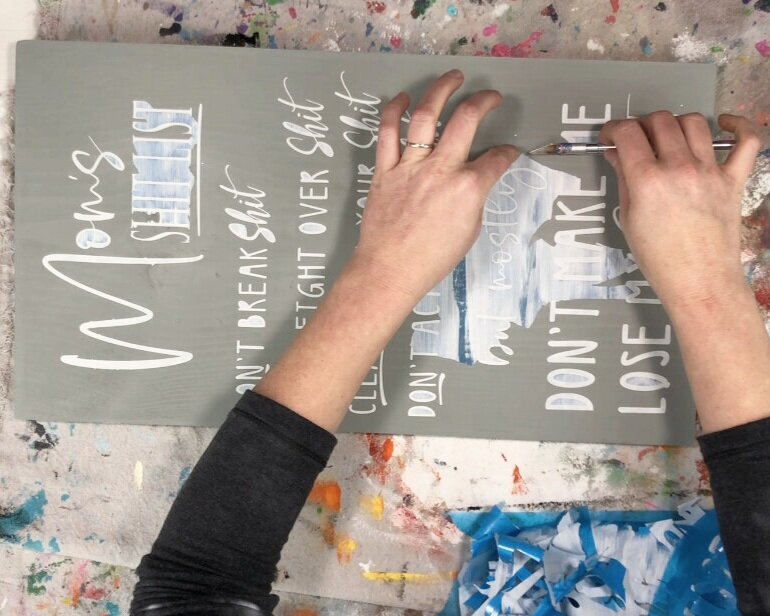
I use an xacto knife to help get up all the bigger pieces of stencil film that didn’t come off initially.

How to stencil on wood using your Cricut. DIY mom's shit list wood sign free SVG. How to paint a lettered wood sign step by step tutorial with pictures.

Then I go in with a sewing pin, I know super fancy tools lol, and pick out all of the little middle pieces. This works better than the xacto knife in these areas because an xacto knife tends to gauge the wood and scratch the paint since it’s usually a tight area to work in.

How to stencil on wood using your Cricut. DIY mom's shit list wood sign free SVG. How to paint a lettered wood sign step by step tutorial with pictures.

7. FIX ERRORS

Since I don’t sand my boards down to complete smoothness I will get tiny amounts of paint bleed where there are divots in the wood. You can certainly sand those out but I personally keep those spots because I feel like it adds a lot more character to the piece. Those spots are minimal and totally fixable.

If there’s a lot of paint I will use my xacto knife to lightly scrape off excess paint. Then I go in with a fine tipped paint brush and paint over the area with the background color. Let dry. That’s it! It’s super easy to fix those small areas of paint bleed mistakes.

How to stencil on wood using your Cricut. DIY mom's shit list wood sign free SVG. How to paint a lettered wood sign step by step tutorial with pictures.

If you want to take a deep dive into the sign painting world and know EVERYTHING I know about making wood signs you need my LETTERED SIGN PAINTER’S COURSE. I teach you all I know. All the mistakes, trials and errors, and SUCCESS I’ve had with sign making has led me to create a course for people just like you who need to know how to paint signs but need to know EXACTLY what to do to get there. Where to buy all their materials, what paints to use, what brushes to use, how to make stencils, how to do it all in the sign painting world.

I will go in depth on all of the topics and so much more.

How to stencil on wood using your Cricut. DIY mom's shit list wood sign free SVG. How to paint a lettered wood sign step by step tutorial with pictures.

I know my friend is loving her new sign. I think she said she was gifting it to her daughter, what a fun gift!

Let me know if you have any questions in the comments below. Be sure to check out more of my DIY sign painting tutorials.

Happy Crafting!

HOW TO STENCIL WOOD SIGNS- using adhesive stencils

DIY painted wood sign using your Cricut. How to get crisp lines when stenciling using stencil film.

HOW TO STENCIL WOOD SIGNS TO GET STRAIGHT CLEAN LINES WITH NO PAINT BLEED

Have you struggled with getting those super straight crisp lines when making your painted lettered wood signs?

Oh girl, I have been there too! I began my sign painting journey when the youngest of my 4 daughters was a brand new baby. Let me tell ya the trials and errors seemed to be never ending! I was using a dinosaur of a Cricut machine, the Cricut Expression (I’m sure most people haven’t even heard of that one lol!!). My budget for materials was basically non existent so I was using what I had on hand to make stencils : cardstock and shelf liner paper. Eventually I started ordering vinyl and stencil film online as my business and my skills grew. The one BIG change to my sign painting game… ORAMASK STENCIL FILM.

Affiliate Disclosure. Some of the links on this website are affiliate links, which means that I may earn a small commission if you click on the link or make a purchase using the link. If you make a purchase you will not be charged anything additional.

DIY painted wood sign using your Cricut. How to get crisp lines when stenciling using stencil film.

While I am glad now that I had all of those issues in the beginning with paint bleed, my stencil material not sticking down, sticky residue left behind, paint peel up… at the time I was not. I just wanted to turn out successful painted signs. I would get so frustrated I wanted to cry or throw my project across the room or sometimes even both.

DIY painted wood sign using your Cricut. How to get crisp lines when stenciling using stencil film.

What I didn’t realize at that time was that all of tears and days of wanting to throw my projects out the window were actually setting me up for something much bigger than making a sale to help pay off debt. Those early days were teaching me how to do it all the wrong way so I could learn how to do it the right way AND how I can teach others what I know.

So paint bleed no more! Now my lines are crisp and clean each and every time I make a hand painted wood sign. And I love that I can share with you how you too can have super crisp lettering on your wooden signs.

If you’re new to the Cricut world be sure to check out my post on the 10 must have supplies & accessories you need when you’re just starting out using your cutting machine.

I do use a couple different techniques to achieve my perfectly crisp lines. Here are some of my sign painting projects below. I walk you through every tutorial on how I made each sign. To read them in full detail either click on the picture or click on a link below it.

My top 4 products to sign painting success:

  1. ORAMASK STENCIL FILM

  2. VINYL SQUEEGEE

  3. CLEAR TRANSFER TAPE

  4. XACTO KNIFE

If you plan to make a lot of stenciled wood signs buying your materials in bulk will save you SO MUCH MONEY. This is one tip I wish I would have known about sooner. My profit margins would have been a lot bigger if I knew where I could buy my oramask stencil film in large quantities for a fraction of the price. Click HERE to see where I buy my stencil film for sign painting.

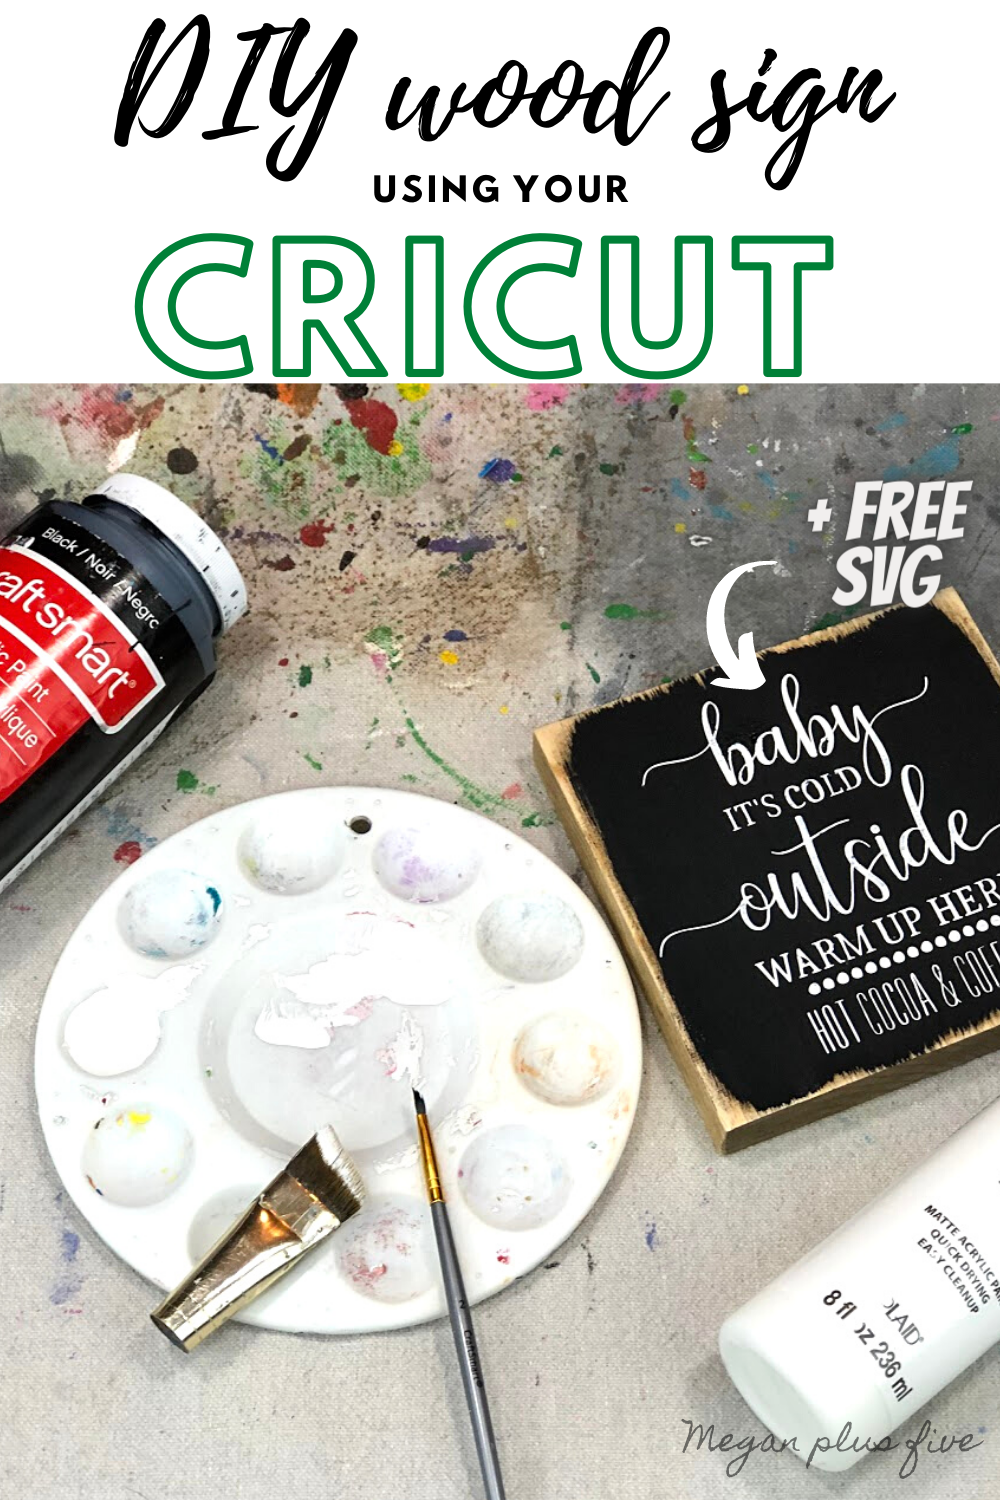
1. DIY WOOD SIGN: MINI STENCILED SIGN WITH DISTRESSED EDGING

This was such a cute little sign I put up on my coffee bar this winter. You can read the tutorial HERE for the Baby it’s cold outside warm up here hot cocoa & coffee wood sign.

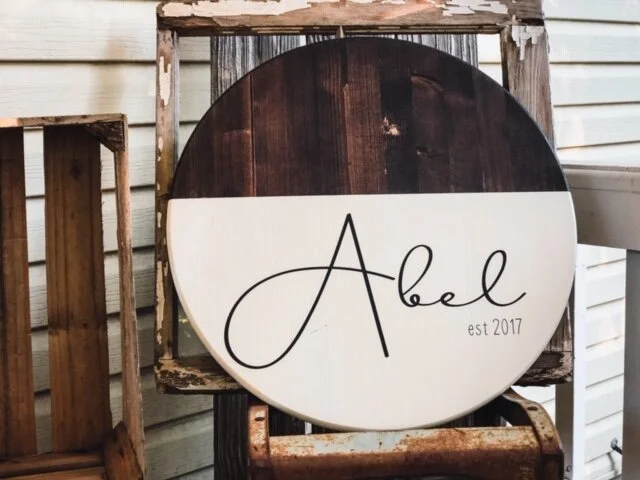
2. DIY WOOD SIGN: MODERN FARMHOUSE STYLE ROUND LAST NAME ESTABLISHED SIGN

This round last name established sign has to be one of my favorite signs I’ve ever written a tutorial for. This was a sign I made for our realtor after we bought our home. The amount of work she put into making it the best experience for us was amazing. I really wanted to gift her something super personal and gorgeous. You can read the full tutorial HERE DIY wooden round last name established sign.

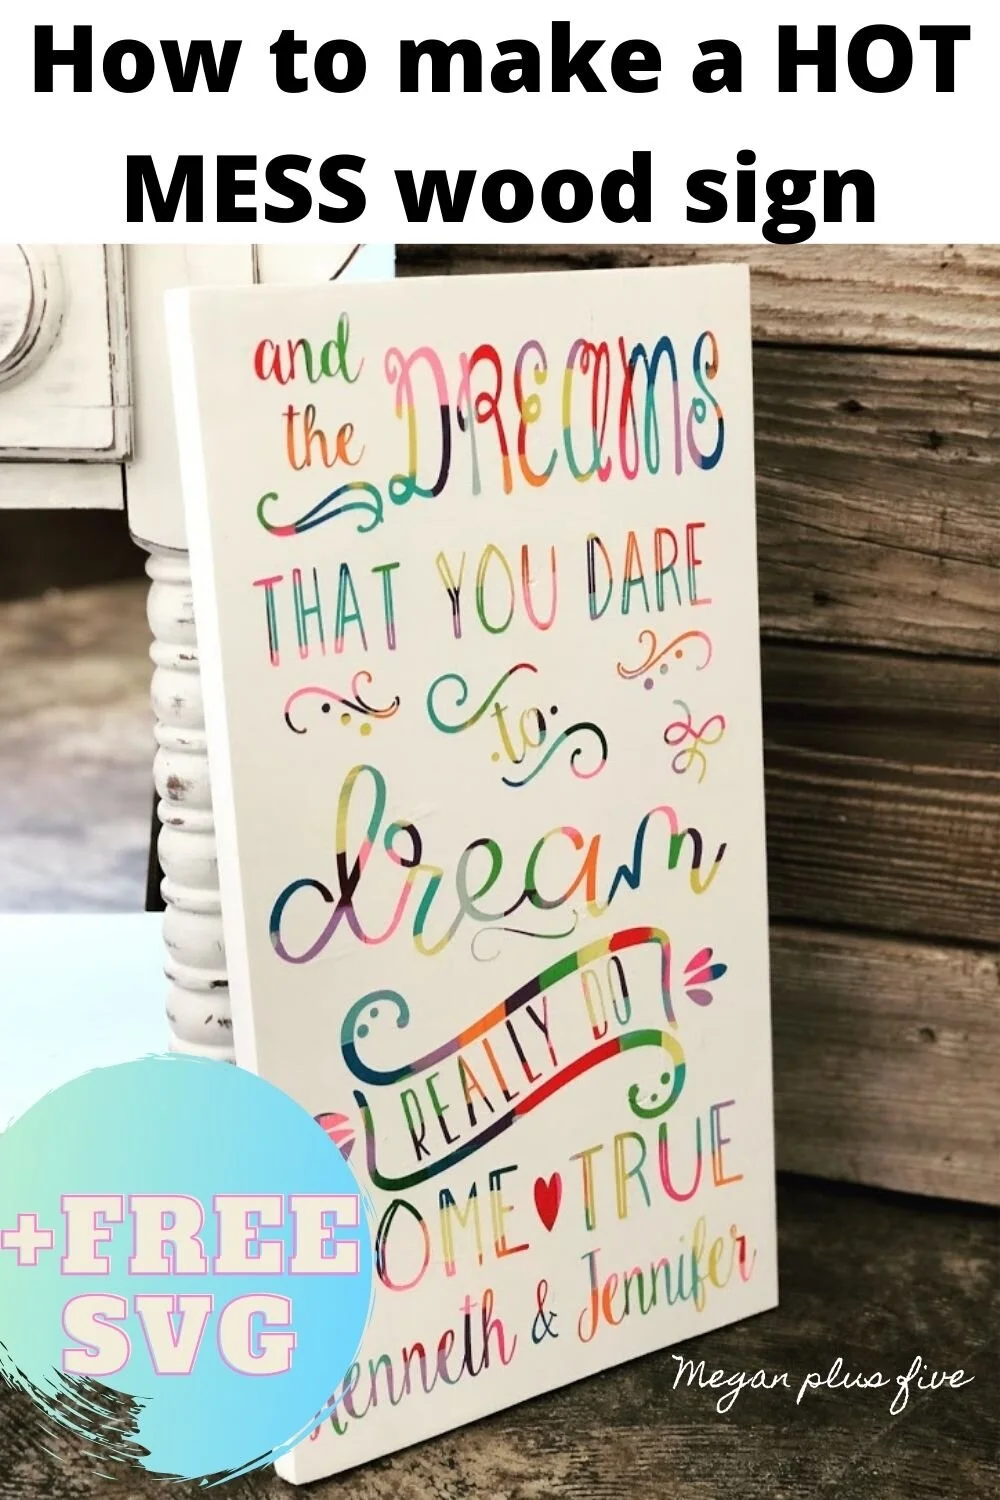
3. DIY WOOD SIGN: COLORFUL HOT MESS METHOD

This was such a fun sign to make. Usually the HOT MESS method is seen done on a canvas, or it was when I made this sign. See all those crisp colorful lines? Yup, all thanks to Oramask stencil film. You can read the full tutorial HERE hot mess painted wood sign.

4. DIY WOOD SIGN: BLESS OUR NEST REVERSE STENCIL METHOD

I love this reverse stencil method for when I only using two different colors of paint. It’s quick and easy! You can read the full tutorial HERE bless our nest wood sign reverse stencil method.

5. DIY WOOD SIGN: LARGER THAN MAT LAUNDRY SIGN

Larger than mat projects don’t have to be intimidating. Learn how I made this big laundry room sign that exceeds the boundaries of my Cricut cutting mat. You can read the full tutorial HERE make your own easy laundry room sign using your Cricut.

6. DIY WOOD SIGN: STAINED BACKGROUND WITH PAINTED LETTERING

This was a fun project that a friend of mine asked me to make for her. The aqua stain color on this piece was a great way for her to add a pop of color to her gallery wall in her kitchen. Read the full tutorial HERE life is good lick

7. DIY WOOD SIGN: FRAMED LEANING PORCH SIGN

Oh my goodness I was SO in love with this framed it’s Halloween witches sign I made for my front porch! You can read the full tutorial Here DIY leaning Halloween porch sign.

I hope you enjoyed these sign painting tips to make your sign painting journey successful. If you have any questions please let me know in the comments below. Happy Crafting!

DIY hot mess method for a wood sign

Hot mess painting method DIY craft tutorial. How to make a hot mess wood sign or canvas using a stencil and your Cricut cutting machine. Easy hot mess painting instructions.

MAKE YOUR OWN HOT MESS STENCILED SIGN

Have you seen the HOT MESS paint method? It’s not a look everyone loves but there are a lot of people out there who are in total love with this colorful way of stenciling.

A couple years ago my cousin got married and I was asked to make her a special personalized gift for her wedding shower. I had never done the hot mess canvas method before so this was totally new to me. But it worked great and I want to share with you how I stenciled her wood sign using that technique.

Hot mess painting method DIY craft tutorial. How to make a hot mess wood sign or canvas using a stencil and your Cricut cutting machine. Easy hot mess painting instructions.

I made this before I was a serious craft blogger so I don’t have step by step pictures but I will explain how to do the whole hot mess process below.

Affiliate Disclosure. Some of the links on this website are affiliate links, which means that I may earn a small commission if you click on the link or make a purchase using the link. If you make a purchase you will not be charged anything additional.

—-> New to Cricut? Read my post on the top 10 accessories and supplies you need to get started using your vinyl cutting machine<—-

If you want to save money on ORAMASK STENCIL FILM for you Cricut or other vinyl cutting machine be sure to check out this post on where I buy my stencil film in bulk. It saves me TONS of money on my hand painted wood signs.

DIY HOT MESS SIGN PAINT METHOD

Here’s what you’ll need

1. PAINT

The first thing you want to do is paint your base (whether that be a canvas or a piece of wood like I’m using) all different colors. You can get as creative as you want with this. My cousin is really into The Wizard of Oz so I used all the colors of the rainbow for her hot mess wood sign.

Hot mess painting method DIY craft tutorial. How to make a hot mess wood sign or canvas using a stencil and your Cricut cutting machine. Easy hot mess painting instructions.

Usually I like to use reusable brushes but for this I used sponge brushes because I had so many different colors to paint.

I randomly painted different colors of acrylic paint until my wood was completely covered in colorful brush strokes. The lighter colors I had to apply a couple of coats for them to be seen. Then I let it dry.

2. APPLY THE STENCIL

I used my Cricut cutting machine to cut out my stencil. This is a REVERSE STENCIL METHOD so I weeded out the background and left the letters. CLICK HERE to learn more about REVERSE STENCILING on wood signs.
How to apply the stencil: Place your transfer tape sticky side down onto your stencil. Rub out any air bubbles with your vinyl squeegee. Remove the paper backing. Then place your stencil onto your canvas/wood base. Rub again with your vinyl squeegee. Remove your transfer tape.

3. SEAL YOUR STENCIL

After I pushed out any air bubbles I sealed my stencil with matte finish mod podge. This is key to having zero paint bleed. I let that dry.

Hot mess painting method DIY craft tutorial. How to make a hot mess wood sign or canvas using a stencil and your Cricut cutting machine. Easy hot mess painting instructions.

4. PAINT

After my matte finish mod podge was dry I painted over the entire sign with white chalk paint.

You can use acrylic paint for this but in my opinion chalk paint is better for this particular project because it has great coverage.

I painted one really thing layer, you can still see the stencil and colors through my paint and that is exactly what you want for the first layer. Then I let that dry completely.

Hot mess painting method DIY craft tutorial. How to make a hot mess wood sign or canvas using a stencil and your Cricut cutting machine. Easy hot mess painting instructions.

Be sure you aren’t applying your chalk paint too thick. If chalk paint is applied in too thick of layers it will crack as it dries. For some projects that will look good but not typically on a painted wood sign like this hot mess method.

After the chalk paint dried I painted a second thin layer on top of that. Then I used an xacto knife to peel up my stencil.

Hot mess painting method DIY craft tutorial. How to make a hot mess wood sign or canvas using a stencil and your Cricut cutting machine. Easy hot mess painting instructions.

This isn’t a project I would typically hang in my own home but I do love how colorful it is! And how it looks kinda polished but also a hot mess at the same time which is a great description of my life with four daughters.

Hot mess painting method DIY craft tutorial. How to make a hot mess wood sign or canvas using a stencil and your Cricut cutting machine. Easy hot mess painting instructions.

I hope you enjoyed this sign painting tutorial. If you have any questions please ask them in the comments below.

Want to know all of my sign painting secrets? Get them here —-> SIGN PAINTING E-COURSE <——

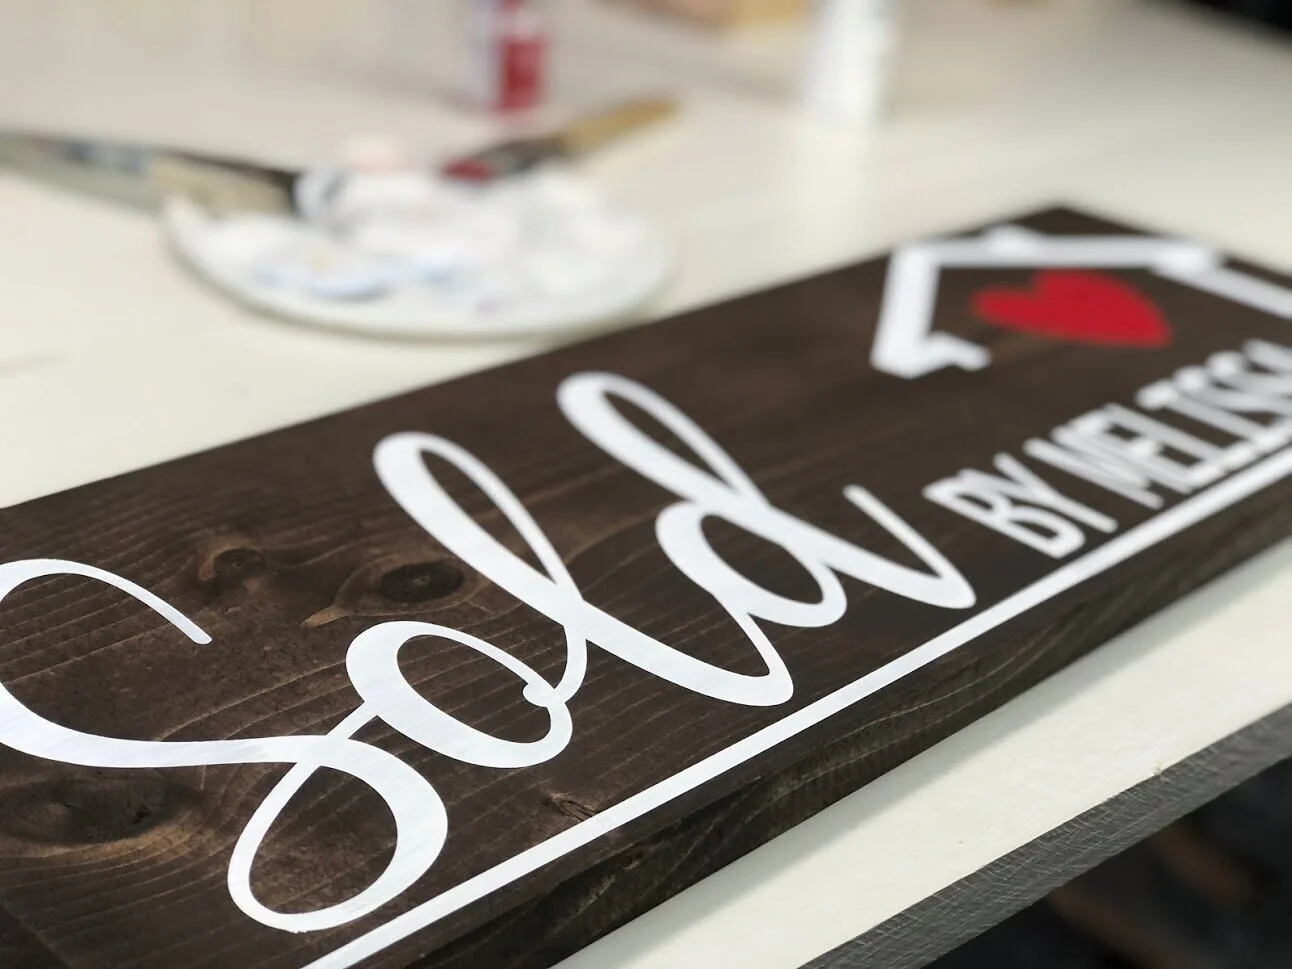
DIY sold by realtor sign + FREE SVG

DIY sold by realtor sign using your Cricut or Silhouette cutting machine. Use this free SVG to make a realtor sold by sign photo opp prop. DIY painted wood sign for a real estate agent gift.

DIY SOLD BY REALTOR SIGN + FREE SVG

Learn how to make your own sold by realtor sign + grab my FREE to use SVG in my resource library

Create a personalized SOLD BY (insert name here) sign for your realtor. Or if you’re a realtor create one for yourself.

These are wonderful and unique additions to the house selling world. You can gift them to your favorite realtor use them for a photo prop, or hang them in your office to give it a personalized and cozy touch.

Affiliate Disclosure. Some of the links on this website are affiliate links, which means that I may earn a small commission if you click on the link or make a purchase using the link. If you make a purchase you will not be charged anything additional.

DIY sold by realtor sign using your Cricut or Silhouette cutting machine. Use this free SVG to make a realtor sold by sign photo opp prop. DIY painted wood sign for a real estate agent gift.

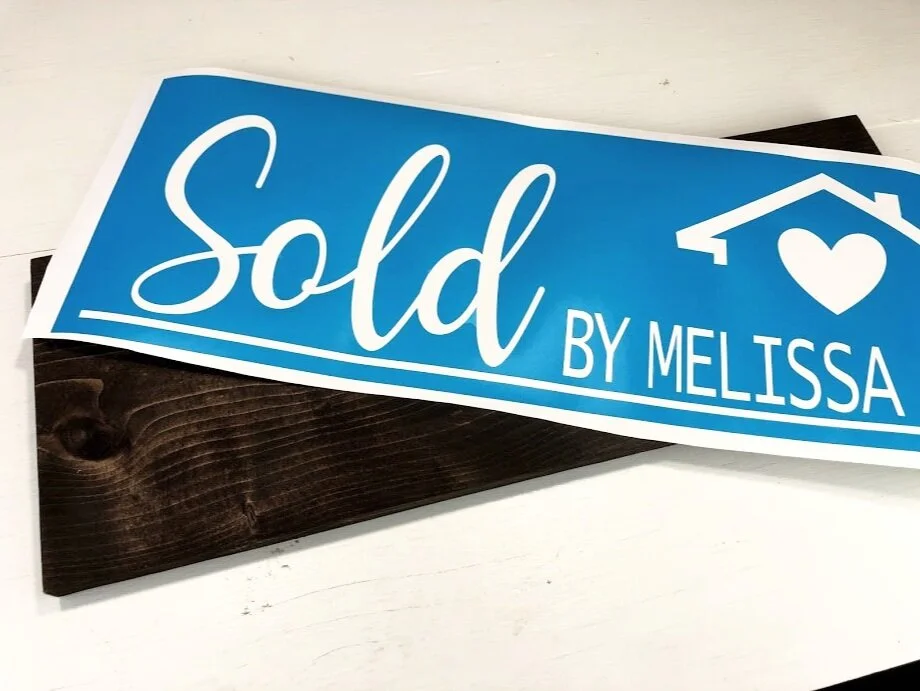
A realtor friend of mine reached out to me and asked me to make her a personalized SOLD BY MELISSA sign and of course I said yes! Her mom is also a realtor and the person who sold us our beautiful old home. I made her this gorgeous thank you gift, a ROUND LAST NAME SIGN, she made the whole home buying process seamless for us.

I was excited when her realtor daughter messaged me asking for a personalized realtor sign for herself. And excited to share the SVG I used with you to use for free. You can find the SVG in my free resource library. This is where I keep all of my free printables, cut files, and more.

HOW TO MAKE YOUR OWN SOLD BY REALTOR SIGN

What you’ll need

1. CUT & STAIN THE WOOD BASE

The first thing I did was cut and stain my wooden base. I made my SOLD BY realtor sign from a 1x8 (which actually measures 7.5” not 8” if you are new to using lumber to make things). I cut it to measure 21”. I thought was a good size for photo opps.

DIY sold by realtor sign using your Cricut or Silhouette cutting machine. Use this free SVG to make a realtor sold by sign photo opp prop. DIY painted wood sign for a real estate agent gift.

CLICK HERE TO LEARN HOW TO STAIN A PIECE OF WOOD

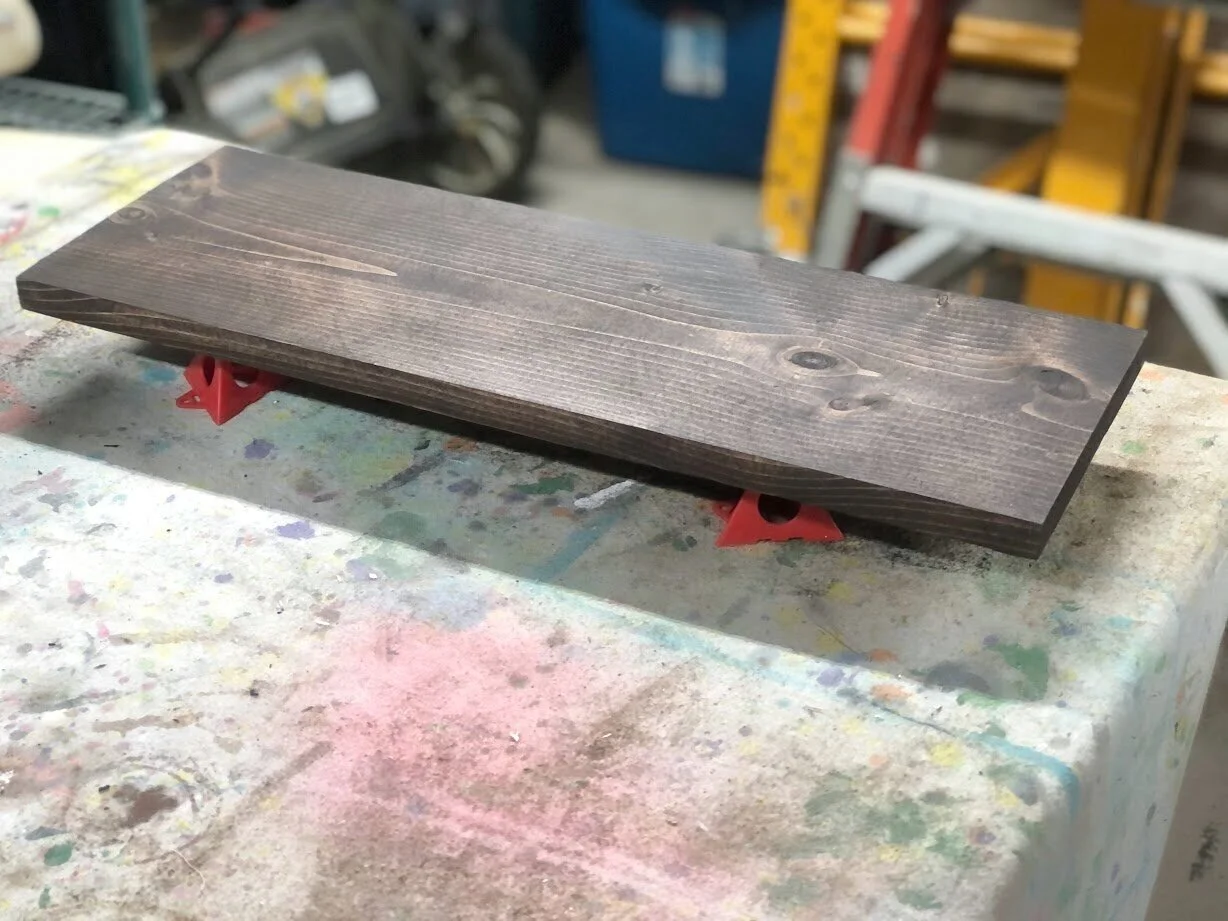
Then I stained it in KONA using my lint free rags. Even though it was a 1 hour dry stain I let my sign dry for 24 hours and used these super helpful paint stand gems I found on Amazon.

DIY sold by realtor sign using your Cricut or Silhouette cutting machine. Use this free SVG to make a realtor sold by sign photo opp prop. DIY painted wood sign for a real estate agent gift.

2. CUT & APPLY THE STENCIL

After the stain was COMPLETELY DRY I cut out my stencil and applied it to my wood base.

PRO TIP: stencil material will not adhere to a wet surface. It doesn’t matter if it is slightly wet or super wet, it’s not going to stick down. Think of it like a sticker, essentially that is what a stencil is except you remove it.

DIY sold by realtor sign using your Cricut or Silhouette cutting machine. Use this free SVG to make a realtor sold by sign photo opp prop. DIY painted wood sign for a real estate agent gift.

I applied my clear transfer tape to the front of my stencil then removed the paper backing from the backside of the stencil.

DIY sold by realtor sign using your Cricut or Silhouette cutting machine. Use this free SVG to make a realtor sold by sign photo opp prop. DIY painted wood sign for a real estate agent gift.

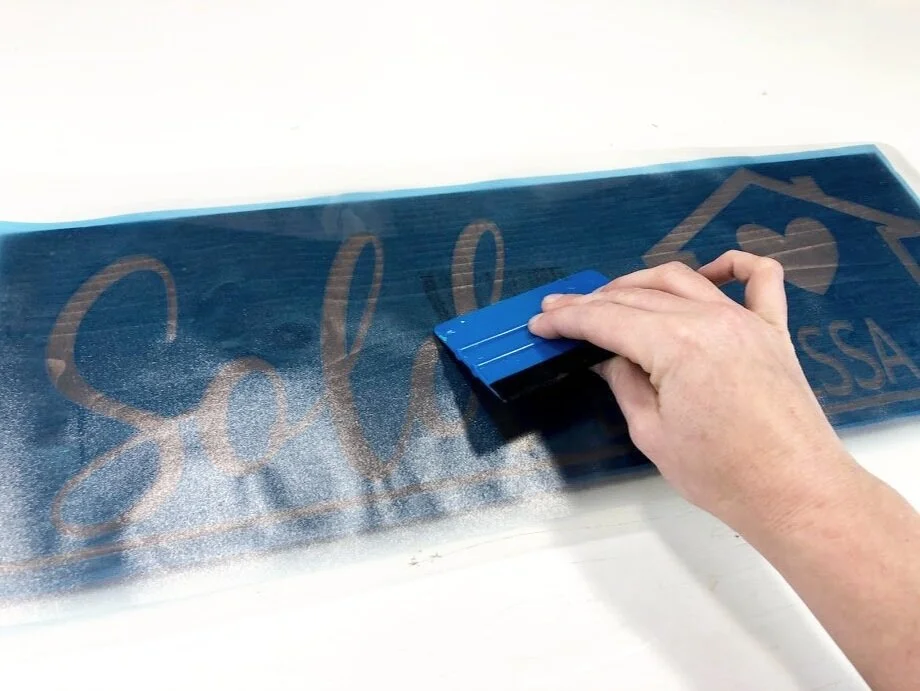
Then I placed the stencil stick side down onto my wood base. Once I was happy with the placement of the stencil I used my vinyl squeegee to press out any air bubbles.

DIY sold by realtor sign using your Cricut or Silhouette cutting machine. Use this free SVG to make a realtor sold by sign photo opp prop. DIY painted wood sign for a real estate agent gift.

I removed the clear transfer tape from my stencil, leaving the stencil adhered to my wood base. When you do this it’s best to start from one corner of the sign then roll it toward the opposite corner SLOWLY. Don’t go too fast, this can cause a fat mistake and leave you cursing your sign and possibly ruining your entire day lol! Seriously, this has happened to me LOTS of times and after that my day just went downhill from there.

3. REMOVE AIR BUBBLES & SEAL THE STENCIL

I used my vinyl squeegee to help press out any noticeable air bubbles.

Then I sealed my stencil with matte finish mod podge

DIY sold by realtor sign using your Cricut or Silhouette cutting machine. Use this free SVG to make a realtor sold by sign photo opp prop. DIY painted wood sign for a real estate agent gift.

I painted on a SUPER THIN layer of the matte finish mod podge. This fills in all of the tiny little air bubbles that you can’t really tell that are there BUT once you peel your stencil up you see where they were because your paint has bled into all of those little spots.

This is what my stencil looked like once I was done applying the mod podge.

DIY sold by realtor sign using your Cricut or Silhouette cutting machine. Use this free SVG to make a realtor sold by sign photo opp prop. DIY painted wood sign for a real estate agent gift.

4. PAINT THE STENCIL

After the mod podge was dry I painted my stencil. I chose white for the lettering and the house image and red for the heart.

I painted a SUPER THIN coat of white paint on the entire stencil, even the heart that I will paint red later.

You want to see the wood grain through your paint.

DIY sold by realtor sign using your Cricut or Silhouette cutting machine. Use this free SVG to make a realtor sold by sign photo opp prop. DIY painted wood sign for a real estate agent gift.

It didn’t take long for that to dry then I painted second coat of white and painted the heart red.

DIY sold by realtor sign using your Cricut or Silhouette cutting machine. Use this free SVG to make a realtor sold by sign photo opp prop. DIY painted wood sign for a real estate agent gift.

5. PEEL UP THE STENCIL

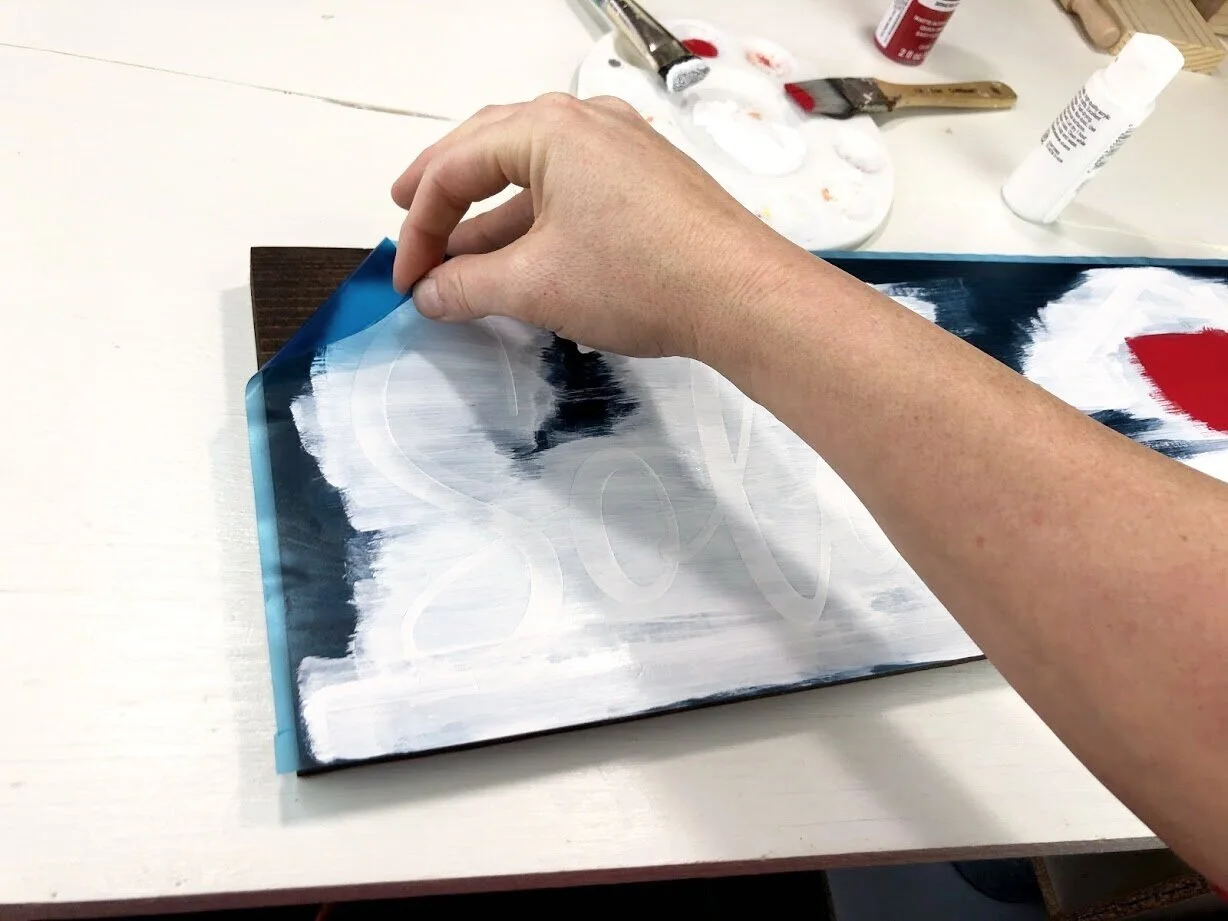
I will almost always peel my stencil up while the paint is still wet. Some people wait for their paint to dry but I’ve found my projects turn out better when I peel the stencil up with wet paint.

Start from one corner and peel toward the opposite corner.

DIY sold by realtor sign using your Cricut or Silhouette cutting machine. Use this free SVG to make a realtor sold by sign photo opp prop. DIY painted wood sign for a real estate agent gift.

Then I used a sewing pin to peel up all the little middle pieces.

DIY sold by realtor sign using your Cricut or Silhouette cutting machine. Use this free SVG to make a realtor sold by sign photo opp prop. DIY painted wood sign for a real estate agent gift.

6. LET DRY

After I removed my stencil I let it dry completely and then sealed it with some clear matte finish spray.

DIY sold by realtor sign using your Cricut or Silhouette cutting machine. Use this free SVG to make a realtor sold by sign photo opp prop. DIY painted wood sign for a real estate agent gift.

I hope you enjoyed this sign painting tutorial. If you did be sure to sign up for my SIGN PAINTING COURSE teaching you EVERYTHING I know about sign making without the headache and stress it can be when you are first learning how to paint wood signs.

Baby it's cold outside warm up with hot cocoa & coffee DIY sign wood sign + free SVG

DIY baby it's cold outside warm up here hot cocoa & coffee bar wood sign. Free SVG for winter coffee bar sign. How to stencil on wood with no paint bleed. DIY wood sign painted stenciled sign with acrylic paint and oramask stencil film.

Winter coffee bar sign + free SVG

We bought a 120 yr old house over the summer. It’s a much bigger house than we’ve ever lived in AND I have space for an actual coffee bar now!! I’m so excited to decorate it for the winter & Christmas season.

DIY baby it's cold outside warm up here hot cocoa & coffee bar wood sign. Free SVG for winter coffee bar sign. How to stencil on wood with no paint bleed. DIY wood sign painted stenciled sign with acrylic paint and oramask stencil film.

I thought long and hard about how I would decorate my new rustic looking coffee bar and I opted for a winter hot cocoa & coffee theme instead of just decorating it for the Christmas season. That way I can keep my display up longer.

I also made this cute mini wood rolling pin to go on my winter coffee bar and I have a FREE SVG to go with it too.

If you’re just now starting out on your journey into the world of fancy cutting machines (aka a Cricut, Silhouette, or any other brand) be sure to read this post 10 MUST HAVE SUPPLIES & ACCESSORIES TO GET YOU STARTED WITH YOUR CRICUT.

Here’s what I used to make my mini wood winter sign

DIY baby it's cold outside warm up here hot cocoa & coffee bar wood sign. Free SVG for winter coffee bar sign. How to stencil on wood with no paint bleed. DIY wood sign painted stenciled sign with acrylic paint and oramask stencil film.


1.CUT & WEED THE STENCIL

The SVG I used for this sign can be found in my FREE resource library click here, or you can purchase the SVG here. I uploaded it into Cricut Design Space and adjusted it to fit perfectly onto my 5.5”x5.5” wood pine base.

DIY baby it's cold outside warm up here hot cocoa & coffee bar wood sign. Free SVG for winter coffee bar sign. How to stencil on wood with no paint bleed. DIY wood sign painted stenciled sign with acrylic paint and oramask stencil film.

I cut my stencil out on ORAMASK 813 STENCIL FILM. I know, my mat is very loved lol! You can definitely tell I get a lot of use out of my craft supplies.

DIY baby it's cold outside warm up here hot cocoa & coffee bar wood sign. Free SVG for winter coffee bar sign. How to stencil on wood with no paint bleed. DIY wood sign painted stenciled sign with acrylic paint and oramask stencil film.

Typically I suggest using an xacto knife to weed stenciled designs but since this design is so small with lots of lettering I am using a sewing pin instead. This isn’t my go to but for small designs it works much better than an xacto knife.

DIY baby it's cold outside warm up here hot cocoa & coffee bar wood sign. Free SVG for winter coffee bar sign. How to stencil on wood with no paint bleed. DIY wood sign painted stenciled sign with acrylic paint and oramask stencil film.

2. PAINT THE BASE

After my stencil was cut and weeded I painted my wood piece. I used matte finish black acrylic paint for this and my rusty but trusty 1” paint brush. This brush is one of my FAVORITE paint brushes! It may look like a hot mess but it paints beautifully!

DIY baby it's cold outside warm up here hot cocoa & coffee bar wood sign. Free SVG for winter coffee bar sign. How to stencil on wood with no paint bleed. DIY wood sign painted stenciled sign with acrylic paint and oramask stencil film.

I wanted this to look a little more rustic without having to take my sander to it. Instead of a painting all the way to the edges of the wood base I left a slight border around it and I made it super uneven to give it an even more farmhouse-y look. Then I let it dry completely.

3. APPLY THE STENCIL

After my base coat was completely dry I applied my stencil. Be sure when you do this step that your paint is TOTALLY dry. If it’s not the stencil film will peel up the base coat and it will be an ugly mess.

DIY baby it's cold outside warm up here hot cocoa & coffee bar wood sign. Free SVG for winter coffee bar sign. How to stencil on wood with no paint bleed. DIY wood sign painted stenciled sign with acrylic paint and oramask stencil film.

I cut my stencil so it would perfectly fit on my wood base that way I wouldn’t have to stress about centering it and making it all even.

DIY baby it's cold outside warm up here hot cocoa & coffee bar wood sign. Free SVG for winter coffee bar sign. How to stencil on wood with no paint bleed. DIY wood sign painted stenciled sign with acrylic paint and oramask stencil film.

I aligned the stencil on the base and used my vinyl squeegee to press out all the air bubbles. PRO TIP: work from the middle out to press out air bubbles.

DIY baby it's cold outside warm up here hot cocoa & coffee bar wood sign. Free SVG for winter coffee bar sign. How to stencil on wood with no paint bleed. DIY wood sign painted stenciled sign with acrylic paint and oramask stencil film.

Then I removed my stencil film. This removes best when you roll it away from your stencil vs trying to peel it up and off of your stencil.

DIY baby it's cold outside warm up here hot cocoa & coffee bar wood sign. Free SVG for winter coffee bar sign. How to stencil on wood with no paint bleed. DIY wood sign painted stenciled sign with acrylic paint and oramask stencil film.

4. SEAL THE STENCIL

Sealing your stencil isn’t 100% necessary but it does help to keep the paint bleed to a minimum. I use MATTE FINISH MOD PODGE for this.

DIY baby it's cold outside warm up here hot cocoa & coffee bar wood sign. Free SVG for winter coffee bar sign. How to stencil on wood with no paint bleed. DIY wood sign painted stenciled sign with acrylic paint and oramask stencil film.

I paint a super thin coat of mod podge onto my exposed areas of my stencil. Making sure I am almost pushing the mod podge into the stencil creases. Then I let it dry completely. Again, use a SUPER THIN COAT of mod podge if you do this step.

DIY baby it's cold outside warm up here hot cocoa & coffee bar wood sign. Free SVG for winter coffee bar sign. How to stencil on wood with no paint bleed. DIY wood sign painted stenciled sign with acrylic paint and oramask stencil film.

5.PAINT THE STENCIL

After my mod podge was dry I painted the exposed areas of my stencil with white acrylic paint.

DIY baby it's cold outside warm up here hot cocoa & coffee bar wood sign. Free SVG for winter coffee bar sign. How to stencil on wood with no paint bleed. DIY wood sign painted stenciled sign with acrylic paint and oramask stencil film.

I let the first coat dry then I painted a second coat.

DIY baby it's cold outside warm up here hot cocoa & coffee bar wood sign. Free SVG for winter coffee bar sign. How to stencil on wood with no paint bleed. DIY wood sign painted stenciled sign with acrylic paint and oramask stencil film.

Be sure when you do this step that you paint SUPER THIN layers. If your paint layers are too thick then your paint will peel up with you peel up your stencil.

6. PEEL UP THE STENCIL

Everyone is different but for me I always peel up my stencil while my paint is still wet. This method has worked for me on the THOUSANDS of signs I have painted so this is the method that I always recommend.

DIY baby it's cold outside warm up here hot cocoa & coffee bar wood sign. Free SVG for winter coffee bar sign. How to stencil on wood with no paint bleed. DIY wood sign painted stenciled sign with acrylic paint and oramask stencil film.

Start from one corner and peel toward the opposite corner.

Then use your sewing pin or an xacto knife to take out all of the little middle pieces. If you accidently get paint on your base paint no worries. When the paint is all dry just take a paint brush and paint over all of the little mistakes.

DIY baby it's cold outside warm up here hot cocoa & coffee bar wood sign. Free SVG for winter coffee bar sign. How to stencil on wood with no paint bleed. DIY wood sign painted stenciled sign with acrylic paint and oramask stencil film.

7. TOUCH UP

When the paint is all dry just take a paint brush and paint over all of the little mistakes.

After my sign was dry I put it up on my coffee bar even though it was almost 11pm lol!! No wonder my pic turned out super blah and yellow with the lighting . That’s ok!

DIY baby it's cold outside warm up here hot cocoa & coffee bar wood sign. Free SVG for winter coffee bar sign. How to stencil on wood with no paint bleed. DIY wood sign painted stenciled sign with acrylic paint and oramask stencil film.

Let me know what you think in the comments below.

Check out more DIY sign painting projects

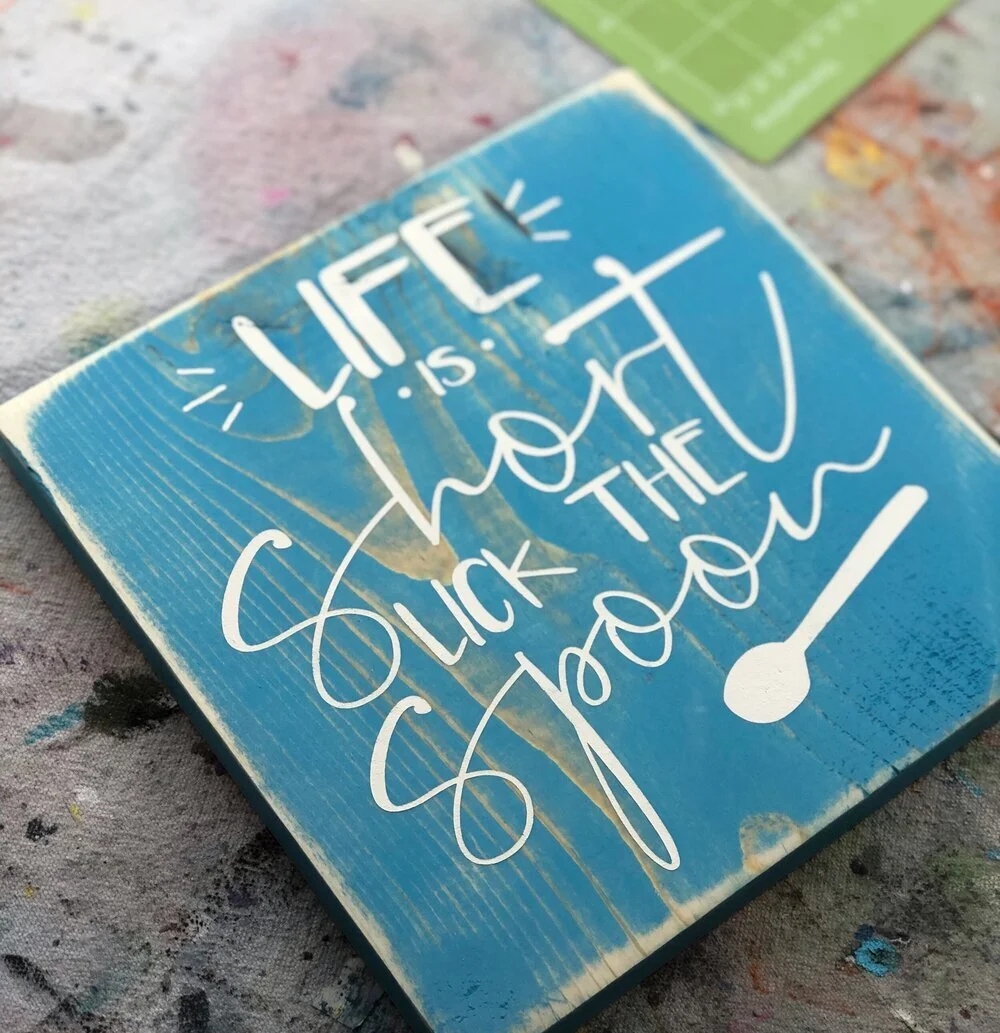
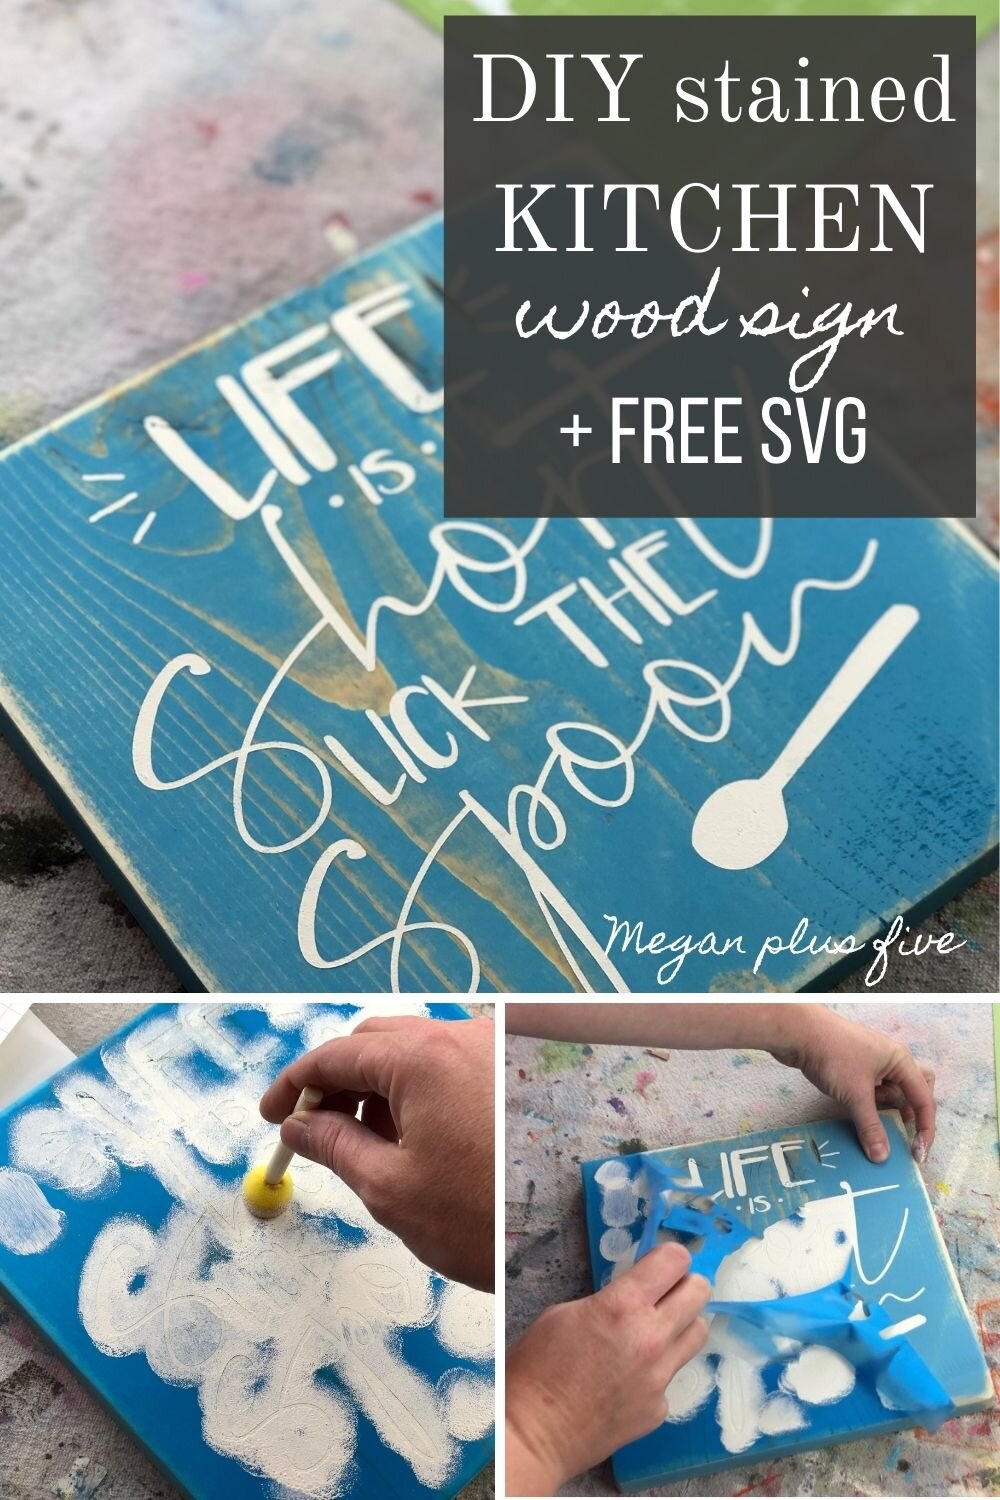
Life is short lick the spoon wood sign + FREE SVG

Life is short lick the spoon wood sign. How to paint a wooden kitchen sign with a humorous saying. Stained aqua sign with a white stenciled saying

Life is short lick the spoon wood sign + FREE SVG

Use this free life is short lick the spoon FREE SVG to make your own decal or painted wood sign.

Life is short lick the spoon wood sign. How to paint a wooden kitchen sign with a humorous saying. Stained aqua sign with a white stenciled saying

DIY HUMOROUS KITCHEN SIGN

I’m sure you’ve seen all those gorgeous gallery walls on Pinterest. You know the ones that have all the perfectly placed together farmhouse pieces. If you still aren’t sure what I’m talking about here are some awesome kitchen gallery walls on Pinterest.

Anyway, my friend is making one in her home…in her beautiful home that really probably was a true farmhouse in its day… and she asked me to make her a final piece to finish it up.

Affiliate Disclosure. Some of the links on this website are affiliate links, which means that I may earn a small commission if you click on the link or make a purchase using the link. If you make a purchase you will not be charged anything additional.

She sent me a pic of a sign that said “life is short don’t lick the spoon” and asked if I could make one like it. Of course I said yes!

I used the photo she sent me as inspiration and created my own SVG for the painted wood sign. You can get the same SVG I used here in my free resource library.

Life is short lick the spoon wood sign. How to paint a wooden kitchen sign with a humorous saying. Stained aqua sign with a white stenciled saying

DIY - LIFE IS SHORT LICK THE SPOON aqua stained wood kitchen sign

Here’s what you need

1.CUT THE WOOD & STAIN

I used a 1x10 and used my Ryobi miter saw to cut it square. If you aren’t familiar with lumber it actually doesn’t measure 1”x10” it’s more like .75”x9.25”. So, I cut my piece to measure 9.25”x9.25”. Then gave it a light sanding using 120 grit sand paper.

My friend asked for AQUA STAIN which is a gorgeous color! I had it on hand so I stained it up then let it dry. After it was completely dry I took my Ryobi sander and sanded around the edges and corners then lightly over the front. This gives it a more rustic farmhouse look.

Life is short lick the spoon wood sign. How to paint a wooden kitchen sign with a humorous saying. Stained aqua sign with a white stenciled saying

2.CUT OUT & WEED THE STENCIL

While your wood base is drying cut your stencil out. I used my older model Cricut Explore and it still works like a champ! If you don’t have a fancy cutting machine I highly recommend getting one, even if you can’t afford the Maker (there’s no shame in that I still don’t even have the Maker lol!). Be sure to read 10 must have supplies and accessories to get started using a Cricut. 

Life is short lick the spoon wood sign. How to paint a wooden kitchen sign with a humorous saying. Stained aqua sign with a white stenciled saying

I use Oramask stencil film for most all of my stenciled projects. If you plan to make LOTS of painted wood signs check out this post I wrote on where I buy my stencil film in bulk to save a ton of money.

3. APPLY THE STENCIL

Apply your clear transfer tape onto the front of your stencil. Remove the paper backing from your stencil. Place your stencil sticky side down onto your wood base.

Rub your stencil with your vinyl squeegee and slowly roll your transfer tape off of your stencil. FUN FACT: you CAN reuse your transfer tape over and over again.

Go over the stencil with your finger or your vinyl squeegee to make sure there aren’t any air bubbles. If there are smooth them out.

Click here to see how I made this gorgeous baby stat sign using plywood

Life is short lick the spoon wood sign. How to paint a wooden kitchen sign with a humorous saying. Stained aqua sign with a white stenciled saying

4. PAINT THE STENCIL

I used chalk paint to paint my stencil. If you want to use the same color it’s called SHEEPSKIN.

A dabber like this one is great for stenciling. For the best results and virtually no paint bleed lightly dip your dabber into your chalk paint then dab off the excess, you want very little paint left on the round sponge dabber. Using a pouncing motion paint the exposed areas of the stencil.

Life is short lick the spoon wood sign. How to paint a wooden kitchen sign with a humorous saying. Stained aqua sign with a white stenciled saying

Let dry, then repeat till you are satisfied with the coverage. Typically 2 coats is the perfect amount needed.

5. PEEL UP THE STENCIL

I will usually always peel my stencil up while the stencil paint is still wet. While this is my preferred method this may not work for everyone, and that’s totally ok.

Life is short lick the spoon wood sign. How to paint a wooden kitchen sign with a humorous saying. Stained aqua sign with a white stenciled saying

Start by peeling up one corner of the stencil and peel it off toward the opposite corner.

Use a sewing pin or xacto knife to peel up all the middle areas.

Let your painted areas dry then you are ready to display in your home.

Life is short lick the spoon wood sign. How to paint a wooden kitchen sign with a humorous saying. Stained aqua sign with a white stenciled saying

I hope you enjoyed this sign painting tutorial. Let me know if you have any questions in the comments below.

Check out more DIY SIGN PAINTING TUTORIALS

Rustic It's Halloween Witches framed leaning porch sign + FREE SVG

DIY Halloween framed leaning porch sign for your fall rustic farmhouse home decor. How to paint a Halloween front porch sign. It's Halloween witches large Halloween sign

Rustic It's Halloween Witches framed leaning porch sign + FREE SVG

Make your own vertical rustic farmhouse leaning porch sign for Halloween. Bonus: grab the It’s Halloween Witches FREE SVG in my free to use resource library

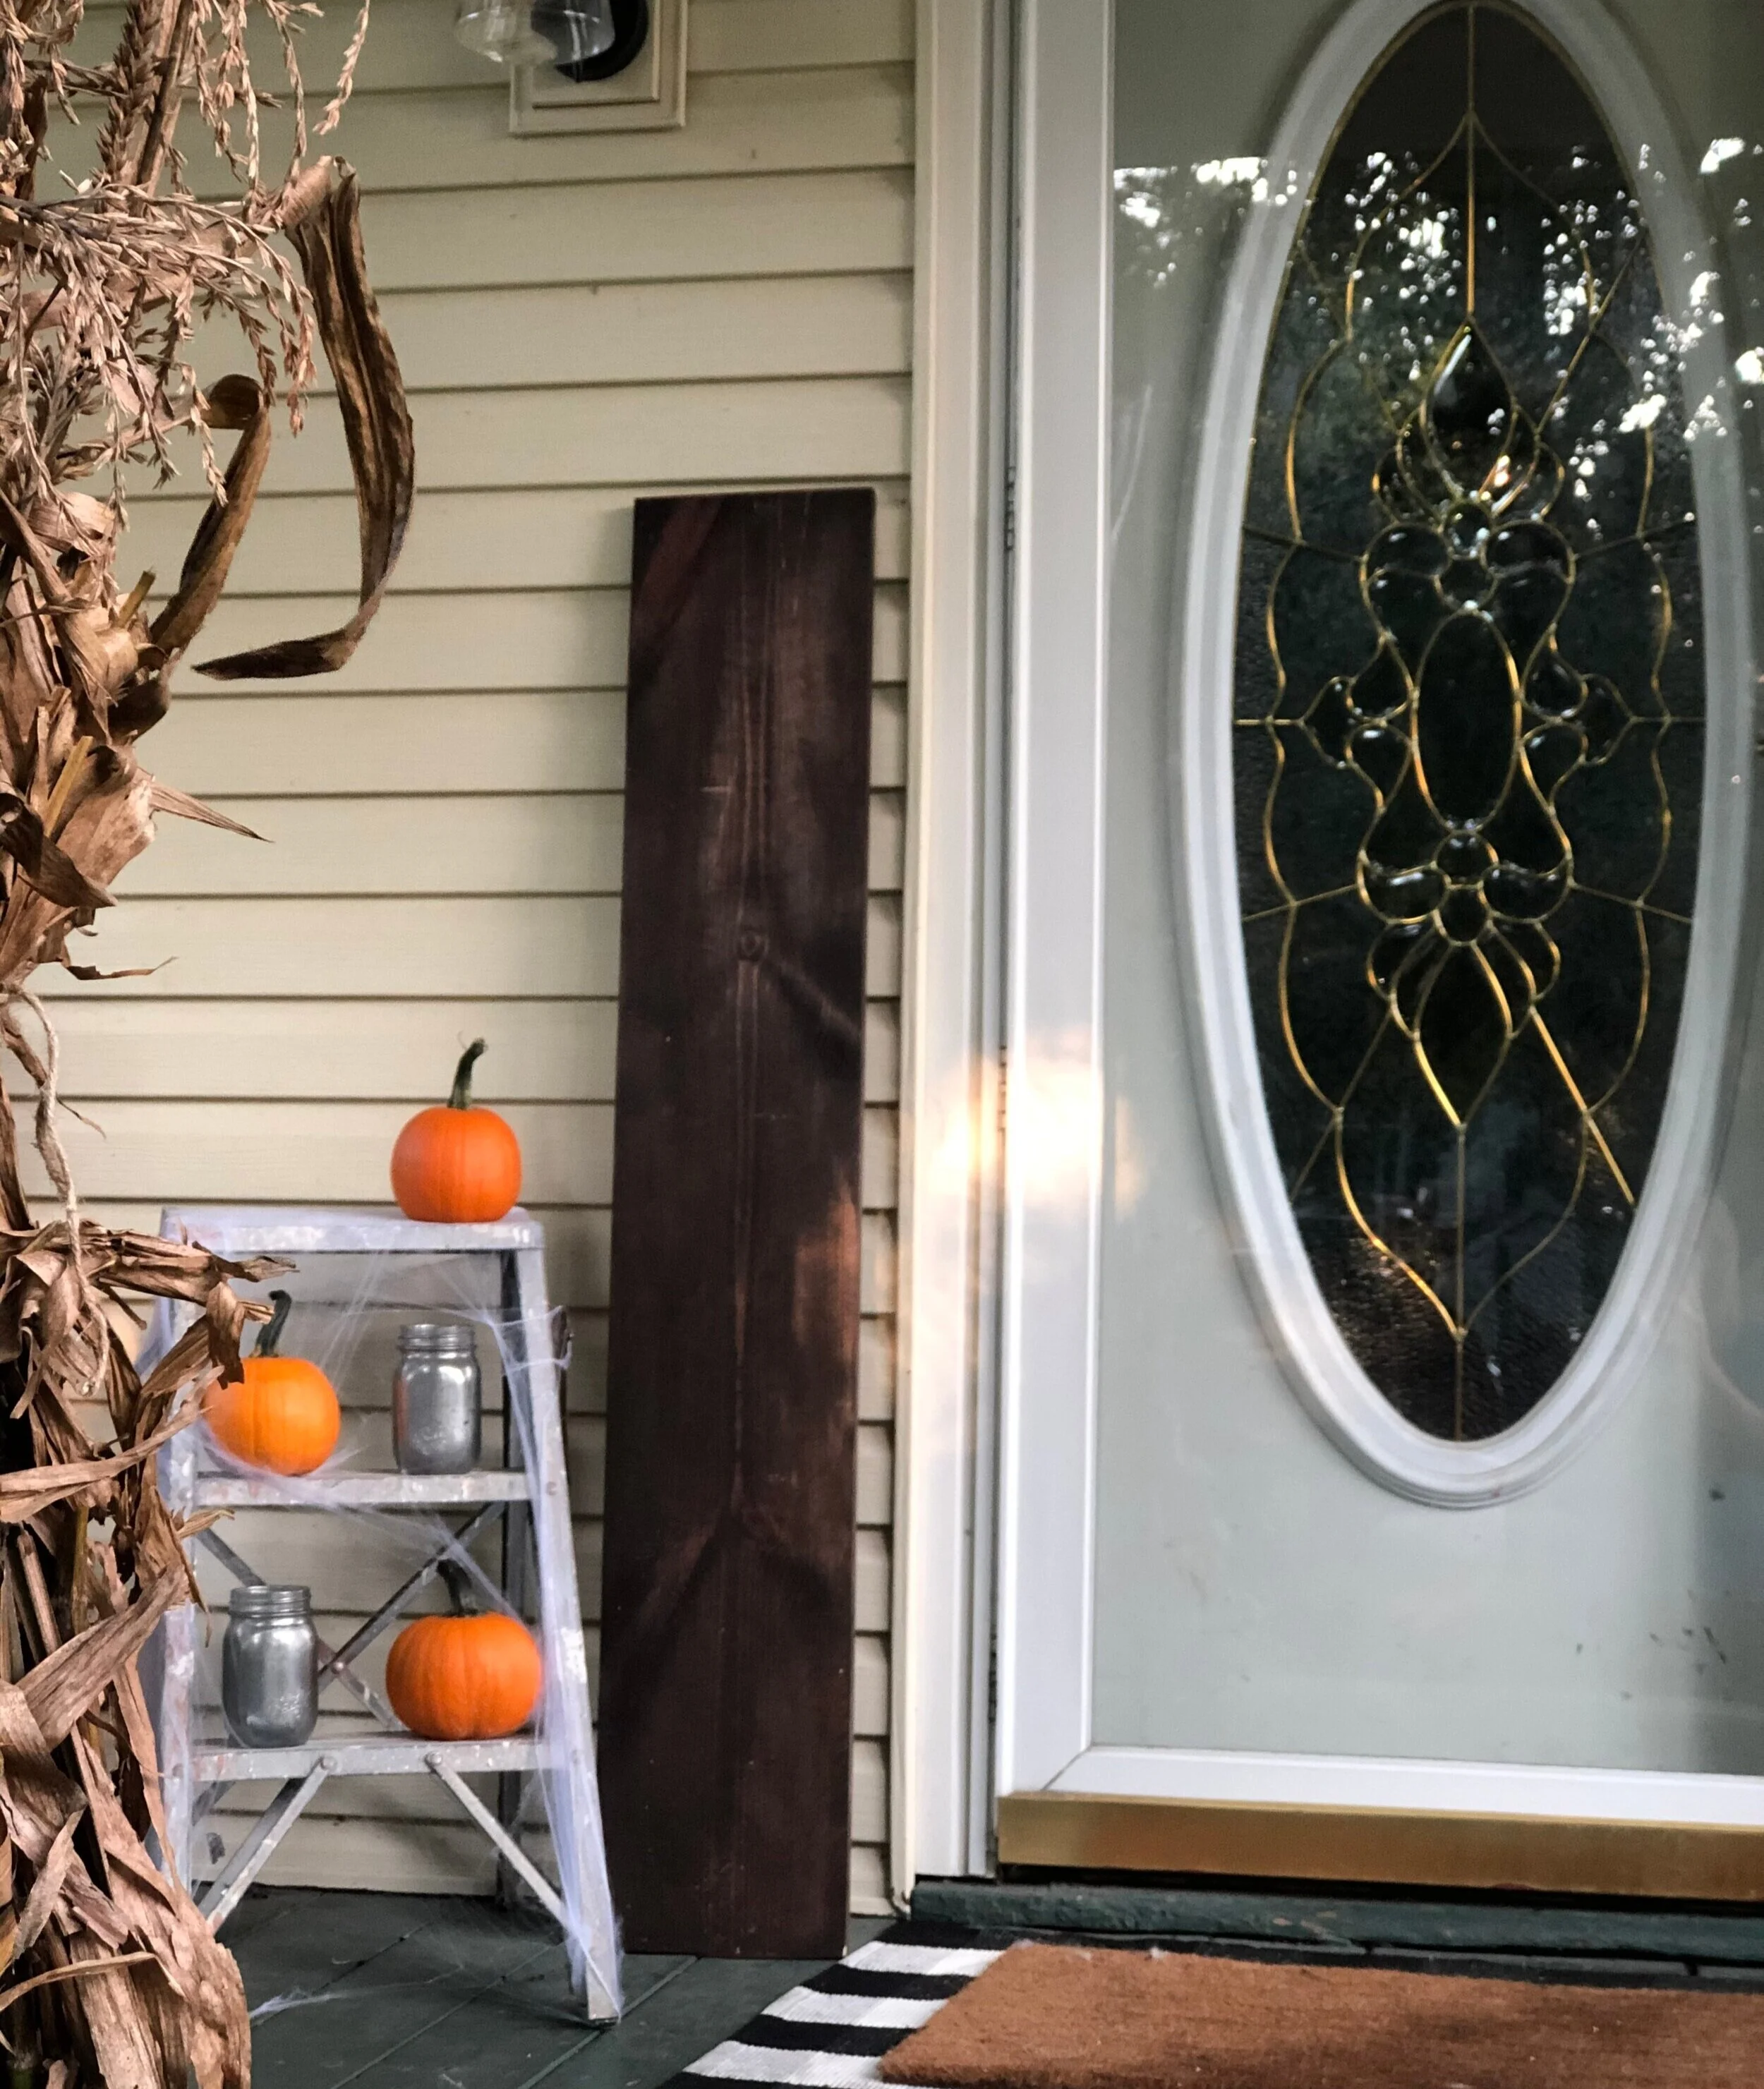
It’s Halloween Witches! YES! I can’t believe how amazing this painted sign turned out. It has all the gorgeous elements of farmhouse basics but a not so common (on a porch sign) Halloween saying…which makes me extra love it! I could have went with a basic cutesy saying like “boo” or “trick or treat” but I wanted my porch sign to have just a bit of sass to it! And it totally does and fits my family SO well. We are a bit sarcastic and sassy lol!

DIY Halloween framed leaning porch sign for your fall rustic farmhouse home decor. How to paint a Halloween front porch sign. It's Halloween witches large Halloween sign

Affiliate Disclosure. Some of the links on this website are affiliate links, which means that I may earn a small commission if you click on the link or make a purchase using the link. If you make a purchase you will not be charged anything additional.

And I kept the back of it blank, well I went ahead and painted it white, so I could make it a reversible fall leaning sign later on. I’m all about getting double use out of my décor. I’m a momma of 4, double sided or dual purpose décor is wonderful in my world. Less to store and less to change out when the seasons change.

I have actually had this piece of 1x10 pine hanging around forever! I stained it when I stained this round wood base for this last name sign a couple years ago and am just now getting around to creating on them. Life of a mom and entrepreneur! Here’s what it looked like before I smothered it in creativity. Just a blank stained piece of wood. You can’t see it in this pic but it had a ton of scratches and some gouges on it from being moved around so much in my craft room over the last couple of years.

DIY Halloween framed leaning porch sign for your fall rustic farmhouse home decor. How to paint a Halloween front porch sign. It's Halloween witches large Halloween sign

If you don’t already have a Cricut I HIGHLY recommend getting one. I still create on my old Cricut Explore and create some pretty awesome projects to share with the world ;) Cricut newbie? Read this post on 10 supplies and accessories you need to get started with your cutting machine.

Side note… If you need the checkered rug that’s on my porch get this one. I looked for hours trying to find the exact one and this one is perfect. I don’t have OCD but I really specifically wanted one that had the same stripe on the top and bottom so that it looked even and this one was the only one I came across that that did in the size that I needed it.

How to make a rustic farmhouse leaning Halloween porch sign you will love

Here’s what you’ll need

1.PAINT THE BASE

I chose to use a board that was already stained. This is not a must but I do like that the stain peaks through the sanded bits of my sign. I painted my wood sign with two coats of white wall paint. You can use acrylic paint too. I didn’t have white acrylic to use so I used the wall paint instead and it works just as great.

DIY Halloween framed leaning porch sign for your fall rustic farmhouse home decor. How to paint a Halloween front porch sign. It's Halloween witches large Halloween sign

After my first coat was dry I applied a second coat of white paint then let that completely dry.

DIY Halloween framed leaning porch sign for your fall rustic farmhouse home decor. How to paint a Halloween front porch sign. It's Halloween witches large Halloween sign

2. APPLY THE STENCIL

I cut my stencils out on my Cricut then weeded the letters out with a sewing pin. If you want to know how to make a reverse stencil sign be sure to check out this laundry sign tutorial.

DIY Halloween framed leaning porch sign for your fall rustic farmhouse home decor. How to paint a Halloween front porch sign. It's Halloween witches large Halloween sign

Because this sign was so large I had to break it up into three separate pieces in Design Space.

DIY Halloween framed leaning porch sign for your fall rustic farmhouse home decor. How to paint a Halloween front porch sign. It's Halloween witches large Halloween sign

I added masking tape to the sides and the seams where the stencils touch just in case I got paint a little too far outside of the stencil I wouldn’t have a big mess to clean up.

3.PAINT THE STENCIL

I used acrylic paint to paint the lettering of my stencil. The first thing I did was seal my stencil so that I would get minimal to no paint bleed. This isn’t a must but it does help to get super crisp lines.

DIY Halloween framed leaning porch sign for your fall rustic farmhouse home decor. How to paint a Halloween front porch sign. It's Halloween witches large Halloween sign

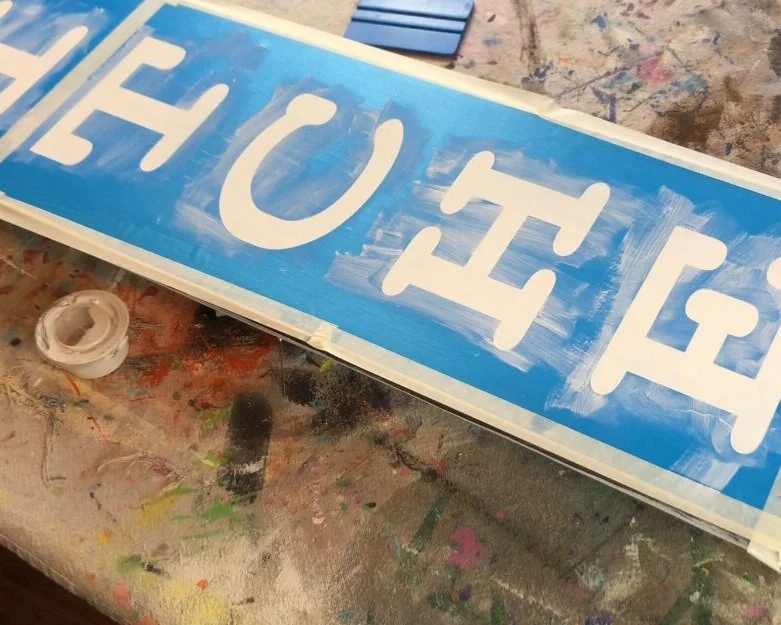
I just painted of paint on the lettering. I painted IT’S and WITCHES with black acrylic paint and HALLOWEEN with orange acrylic paint.

DIY Halloween framed leaning porch sign for your fall rustic farmhouse home decor. How to paint a Halloween front porch sign. It's Halloween witches large Halloween sign

4. PEEL UP THE STENCIL

I always peel up my stencils while my paint is wet. I started with the small lettering first then worked my way down the wood sign.

DIY Halloween framed leaning porch sign for your fall rustic farmhouse home decor. How to paint a Halloween front porch sign. It's Halloween witches large Halloween sign

I used a sewing pin to lift out all the little middle pieces

DIY Halloween framed leaning porch sign for your fall rustic farmhouse home decor. How to paint a Halloween front porch sign. It's Halloween witches large Halloween sign

If you love this tutorial be sure to check out how to make these super cute Halloween wood tags

5.CUT & STAIN THE FRAME

After my sign was dry I measured a 1x2 and cut pieces for my frame. Here’s what it looked like once I got my pieces cut and stained.

I had 2 pieces that were cut at 52” and 2 pieces that were cut at 10.75”.

DIY Halloween framed leaning porch sign for your fall rustic farmhouse home decor. How to paint a Halloween front porch sign. It's Halloween witches large Halloween sign

Before I attached my framed pieces to my Halloween sign I distressed the 1x2’s with my sander and 120 grit sandpaper

DIY Halloween framed leaning porch sign for your fall rustic farmhouse home decor. How to paint a Halloween front porch sign. It's Halloween witches large Halloween sign

7. ATTACH THE FRAME

I attached the two long side pieces first. I used a little bit of wood glue then used my Ryobi brad nailer to attach them to the sign.

DIY Halloween framed leaning porch sign for your fall rustic farmhouse home decor. How to paint a Halloween front porch sign. It's Halloween witches large Halloween sign

Don’t worry if you miss cut your wood frame pieces. I do this ALL the time. Just use your miter saw to square it up after you get them attached.

DIY Halloween framed leaning porch sign for your fall rustic farmhouse home decor. How to paint a Halloween front porch sign. It's Halloween witches large Halloween sign

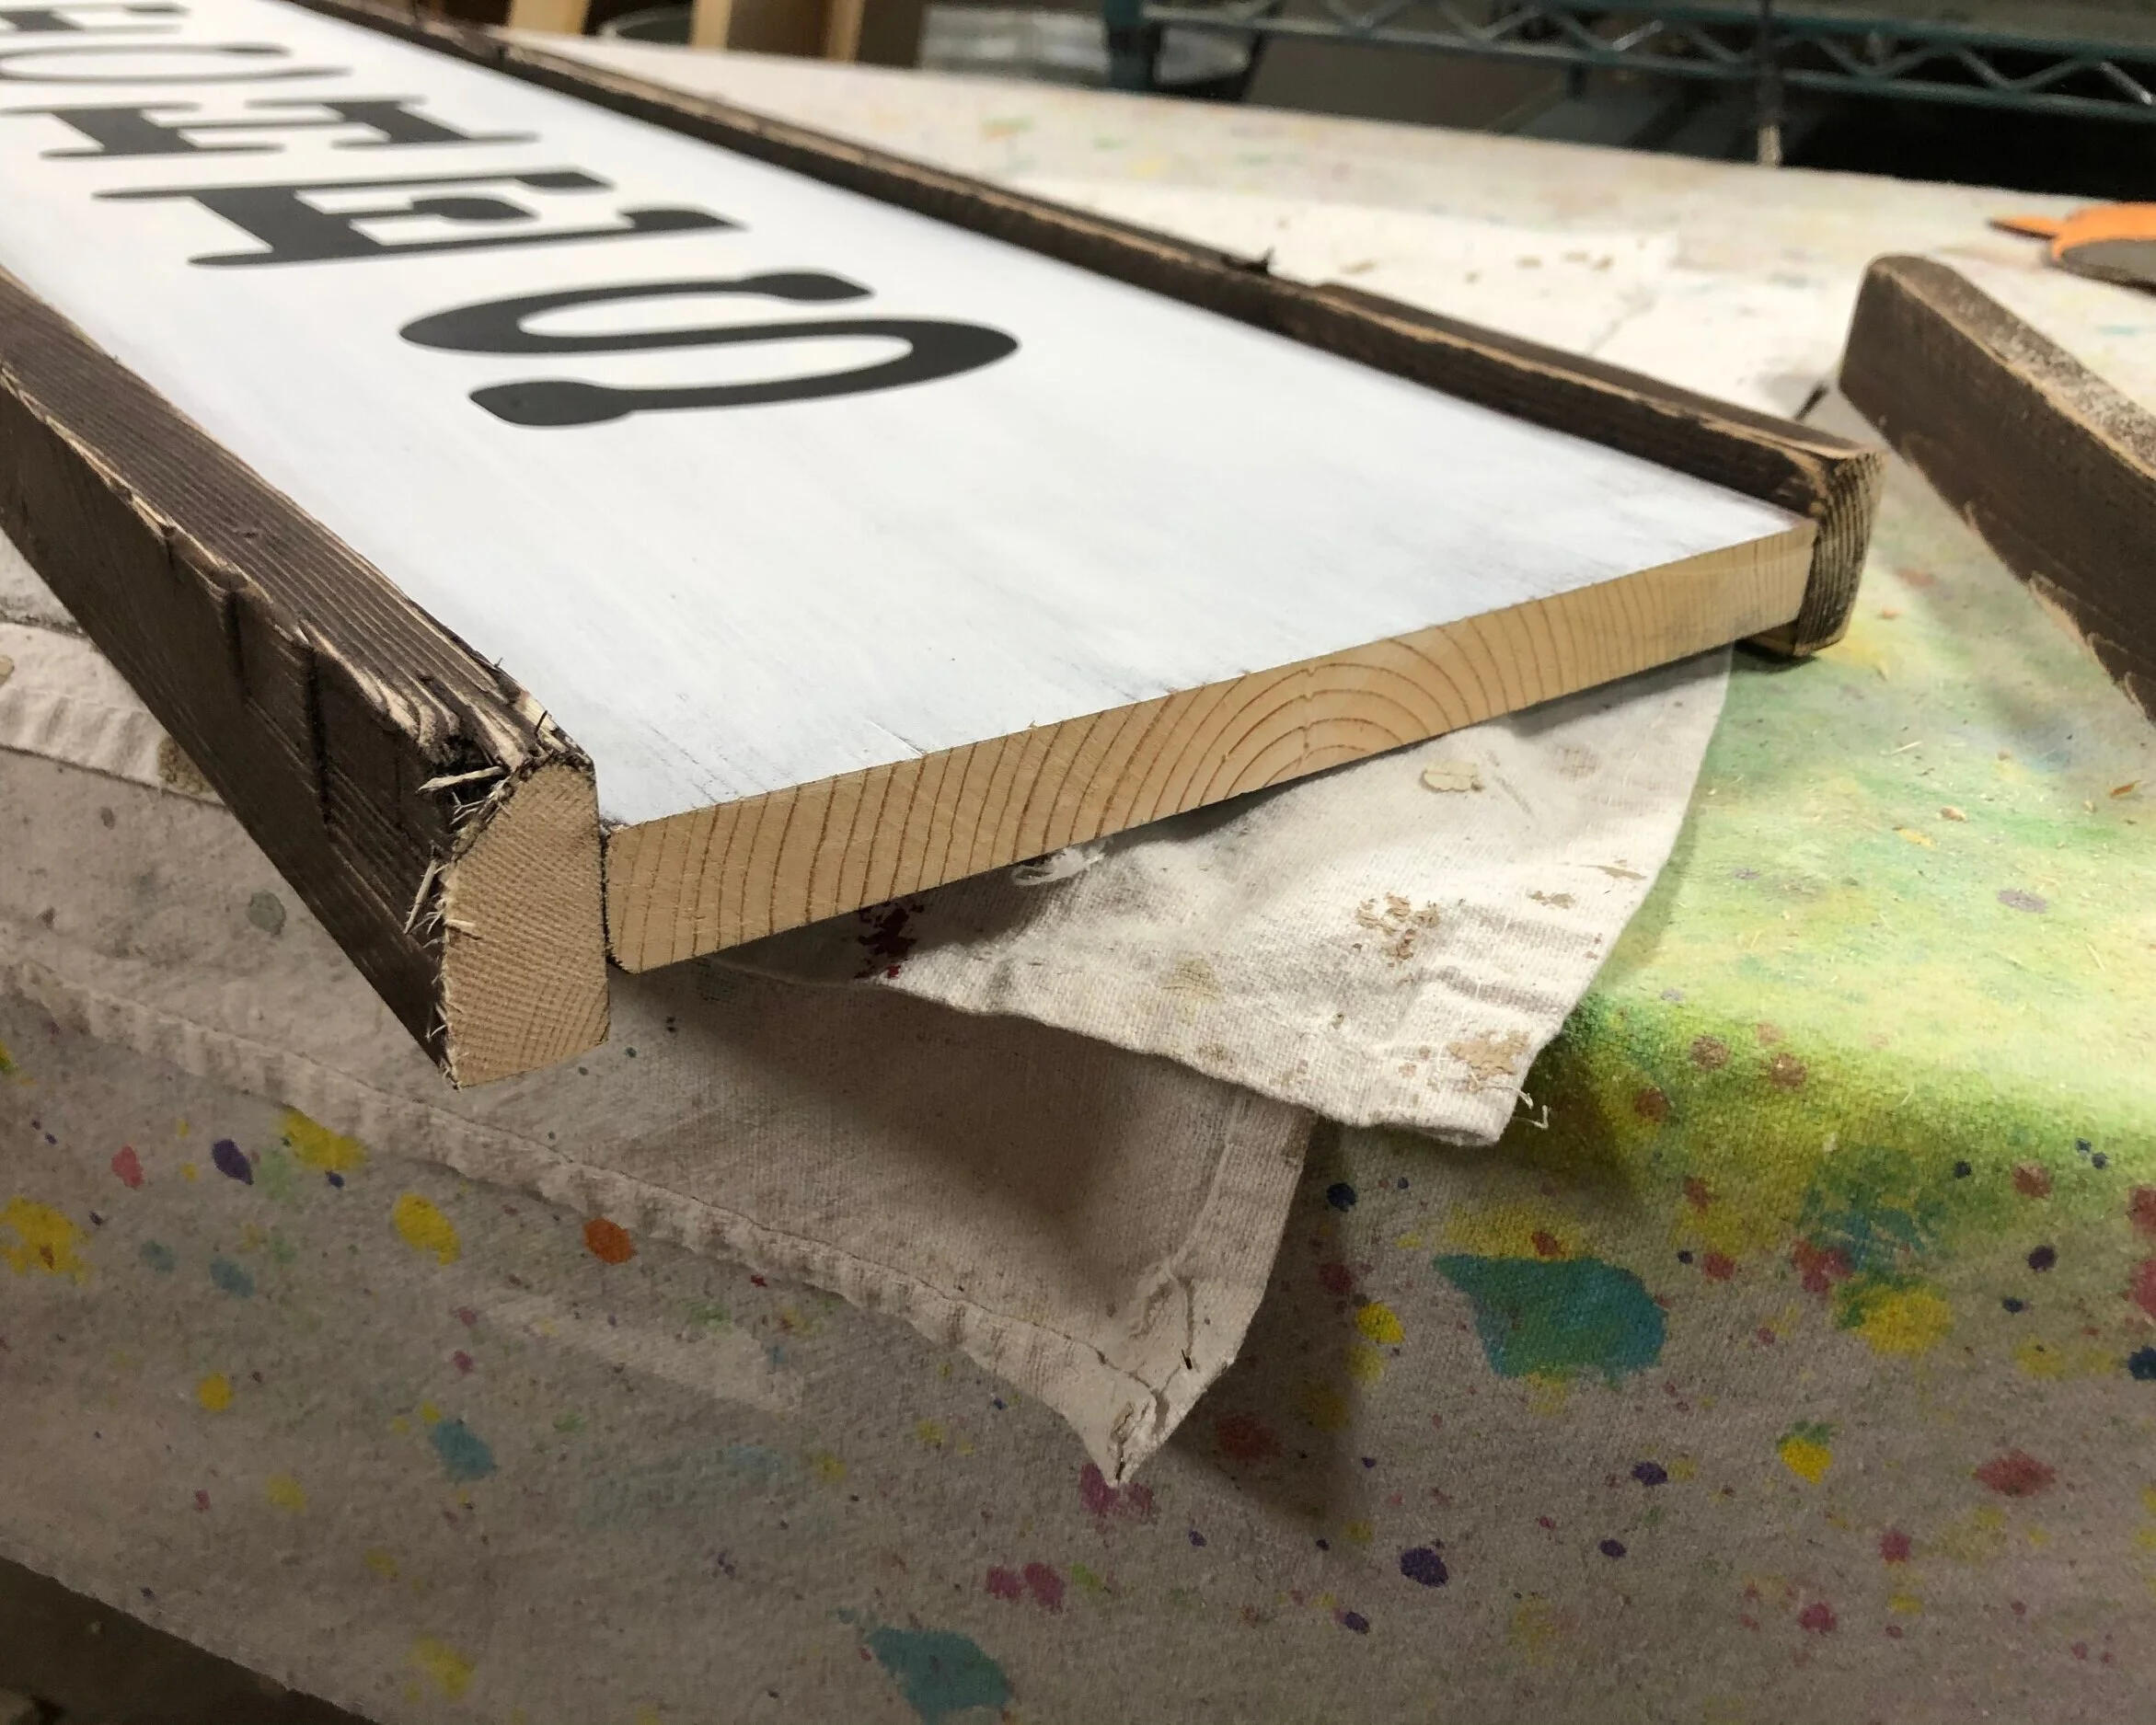
Here’s what my sign looked like once I got the side frame pieces attached. I framed the sign so that the sign would be in the middle of the framed pieces instead of flush with the back. You can also see where I used my miter saw to cut off the uneven parts.

DIY Halloween framed leaning porch sign for your fall rustic farmhouse home decor. How to paint a Halloween front porch sign. It's Halloween witches large Halloween sign

I did the same thing for the top and bottom pieces. Added the wood glue, my husband says to apply it in a squiggle line, idk if this is really how you’re supposed to do it or if he’s just messing with me lol but whatever it is this seems to work.

DIY Halloween framed leaning porch sign for your fall rustic farmhouse home decor. How to paint a Halloween front porch sign. It's Halloween witches large Halloween sign

8.SEAL THE FINISHED SIGN

If you want to protect your sign from the elements I recommend sealing it with an outdoor sealant like this one. I did not do this step because I plan to paint a fall themed stencil on the other side of this Halloween porch sign. But after I finish the other side I’ll seal it with the outdoor spray.

DIY Halloween framed leaning porch sign for your fall rustic farmhouse home decor. How to paint a Halloween front porch sign. It's Halloween witches large Halloween sign

Then you’re all done. I hope you enjoyed this DIY craft tutorial :)! If you have any questions please ask them in the comments below.

Happy crafting!

DIY painted & distressed laundry room sign + FREE SVG

DIY WOOD SIGN TUTORIAL, how to make a wooden stenciled sign for your laundry room. Larger than mat sign tutorial. Oversized sign making step by step tutorial using your Cricut or Silhouette vinyl cutting machine.

DIY painted & distressed laundry room sign + FREE SVG

Make your own stenciled and distressed laundry room sign. BONUS: grab the FREE to use SVG in my free resource library.

Easy stenciled wood sign for your laundry room

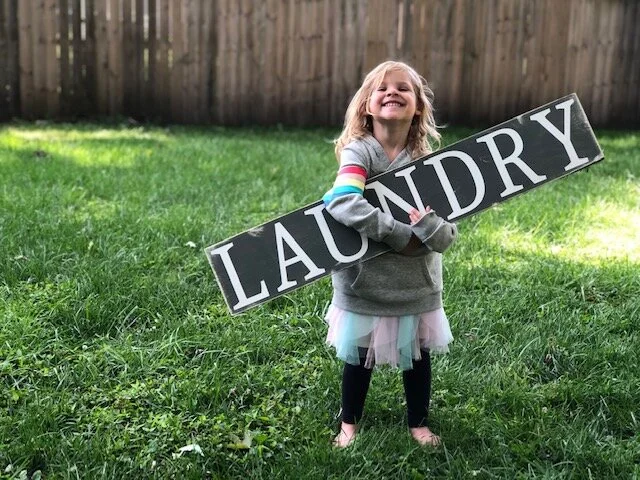
Want to make a simple yet large sign for your laundry room? You’ve come to the right place! I’ve been making this exact LAUNDRY sign in my shop for a couple of years now and really wanted to share with you how I make it because it’s super easy and simple. Not a whole lot of fuss goes into making this larger than mat wooden sign using your Cricut.

Affiliate Disclosure. Some of the links on this website are affiliate links, which means that I may earn a small commission if you click on the link or make a purchase using the link. If you make a purchase you will not be charged anything additional.

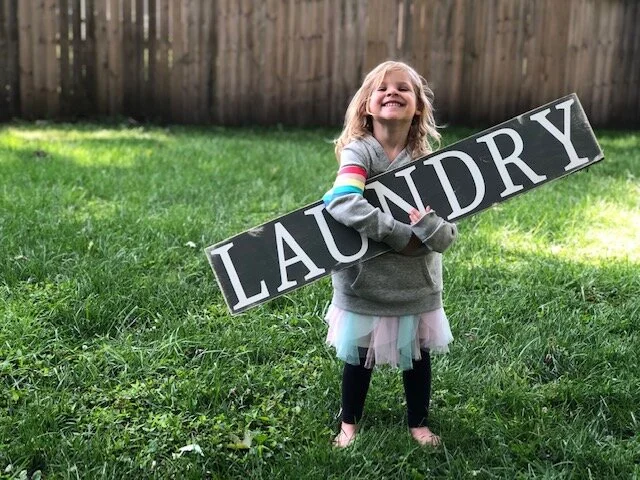
By the way…how cute is my little model?! This is the youngest of my four daughters and she always wants to help me work. She doesn’t care what it is she just wants in on all the fun and exciting things of momma’s business. She was absolutely thrilled when I asked her to hold the sign so I could snap a pic.

DIY WOOD SIGN TUTORIAL, how to make a wooden stenciled sign for your laundry room. Larger than mat sign tutorial. Oversized sign making step by step tutorial using your Cricut or Silhouette vinyl cutting machine.

Look at that big cheesy smile! Melts my momma heart! Barefoot, girly dress with a unicorn hoodie over it and let’s not forget the wild hair. Oh the life!

If you want to DIY a wood sign but don’t have all the tools be sure to check out my DIY CRAFT KITS.

HOW TO STENCIL A SIGN FOR YOUR LAUNDRY ROOM

Here’s what you’ll need

If you’re new to the Cricut world be sure to check out my Cricut newbie post.

PAINTED LAUNDRY SIGN TUTORIAL

1.CUT OUT THE STENCIL

I cut my stencil out using Oramask 813 stencil film. This is my go to for most all of the stenciled wood signs I make. If you plan to make a lot of wooden signs you’ll want to read my post on how to save money on stencil film.

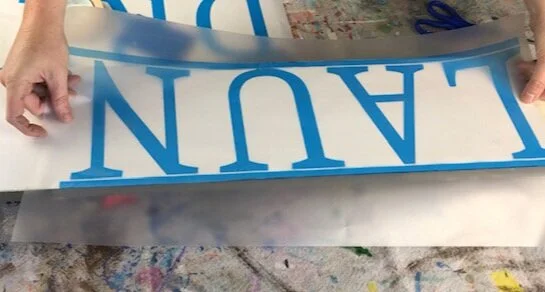
Because I did a reverse stencil method, not a traditional stencil method, I added lines onto my stencil to make it super easy to align on my wood base. Then I set my stencils aside till I needed them.

Because I did a reverse stencil method, not a traditional traditional stencil methodmethod, I added lines onto my stencil to make it super easy to align on my wood base. Then I set my stencils aside till I needed them.

DIY WOOD SIGN TUTORIAL, how to make a wooden stenciled sign for your laundry room. Larger than mat sign tutorial. Oversized sign making step by step tutorial using your Cricut or Silhouette vinyl cutting machine.

I used and xacto knife to weed the stencils. Be sure to leave the letters and remove the background of the stencil. Since this is a reverse stencil it will look different than a typical stencil does.

Because I did a reverse stencil method, not a traditional stencil method, I added lines onto my stencil to make it super easy to align on my wood base. Then I set my stencils aside till I needed them.

2.PAINT THE LETTER COLOR

Typically I would use acrylic paints for this but I was all out of white acrylic paint. Instead I used a white wall paint that is actually better than acrylic to use for this sign.

Because I did a reverse stencil method, not a traditional stencil method, I added lines onto my stencil to make it super easy to align on my wood base. Then I set my stencils aside till I needed them.

I painted the sides with one coat of paint and I painted two coats on the front of the sign. Letting it dry completely between coats.

Because I did a reverse stencil method, not a traditional stencil method, I added lines onto my stencil to make it super easy to align on my wood base. Then I set my stencils aside till I needed them.

3. APPLY THE STENCIL

I applied transfer tape to one stencil then reused that same transfer tape for the next stencil. Did you know you can reuse transfer tape till it doesn’t work anymore? You sure can!

DIY WOOD SIGN TUTORIAL, how to make a wooden stenciled sign for your laundry room. Larger than mat sign tutorial. Oversized sign making step by step tutorial using your Cricut or Silhouette vinyl cutting machine.

After I rubbed the stencil with my vinyl squeegee I flipped my stencil over and removed the paper backing.

DIY WOOD SIGN TUTORIAL, how to make a wooden stenciled sign for your laundry room. Larger than mat sign tutorial. Oversized sign making step by step tutorial using your Cricut or Silhouette vinyl cutting machine.

Then I flipped the stencil over so that the sticky side was down and I placed the stencil where I wanted it on my wood base. This is where the lines on the stencil come in handy. This allows me to center the lettering without any stress. I made my stencil to the exact size of my wood board, with the extra lines, so that when I went to apply the stencil I wouldn’t have to worry about letters being uneven.

DIY WOOD SIGN TUTORIAL, how to make a wooden stenciled sign for your laundry room. Larger than mat sign tutorial. Oversized sign making step by step tutorial using your Cricut or Silhouette vinyl cutting machine.

Then I pressed it down with my vinyl squeegee to remove any air bubbles then removed the transfer tape. PRO TIP: rolling the transfer tape off of the stencil works best and it won’t lift your design up and off of the wood.

DIY WOOD SIGN TUTORIAL, how to make a wooden stenciled sign for your laundry room. Larger than mat sign tutorial. Oversized sign making step by step tutorial using your Cricut or Silhouette vinyl cutting machine.

I did the same process for the other part of my stencil. Then I removed the lines on the tops and bottoms because I didn’t need them anymore and didn’t want them to be apart of my design.

DIY WOOD SIGN TUTORIAL, how to make a wooden stenciled sign for your laundry room. Larger than mat sign tutorial. Oversized sign making step by step tutorial using your Cricut or Silhouette vinyl cutting machine.

3. SEAL THE STENCIL

The key to no paint bleed is to seal the stencil before you paint it. Essentially what you are doing is filling in any tiny air bubbles that paint could get under with the same color as your lettering. So in my case I sealed my stencil with white paint. It just takes a TINY bit of paint, you want to paint into the direction of your stencil. I let this dry completely.

DIY WOOD SIGN TUTORIAL, how to make a wooden stenciled sign for your laundry room. Larger than mat sign tutorial. Oversized sign making step by step tutorial using your Cricut or Silhouette vinyl cutting machine.

4. PAINT THE SIGN

After the sealing was dry I painted my sign gray. I also paint the back because I think this gives pieces a more finished look but it’s all personal preference. I did two layers of gray paint. I let the first one dry totally before applying the second coat on top of it.

DIY WOOD SIGN TUTORIAL, how to make a wooden stenciled sign for your laundry room. Larger than mat sign tutorial. Oversized sign making step by step tutorial using your Cricut or Silhouette vinyl cutting machine.

5. PEEL THE STENCIL

While my paint was still wet I peeled the stencil up. Some people choose to do this after their paint is dry and that is totally ok, this is just my personal preference after making thousands of handmade signs over the last few years. Using an xacto knife or a sewing pin works great for this step.

DIY WOOD SIGN TUTORIAL, how to make a wooden stenciled sign for your laundry room. Larger than mat sign tutorial. Oversized sign making step by step tutorial using your Cricut or Silhouette vinyl cutting machine.

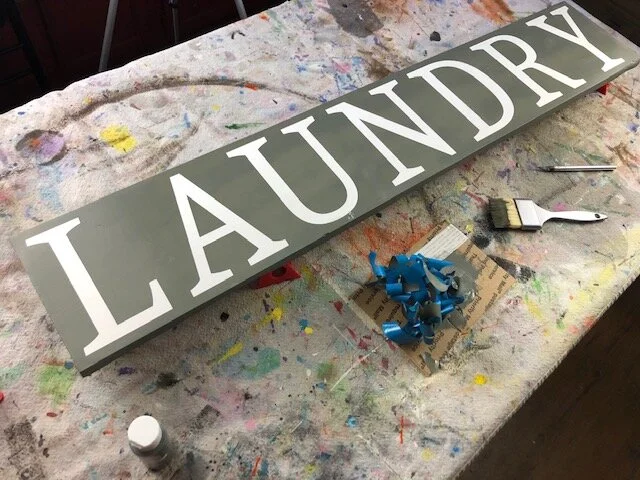
After I got all the stencil pieces removed from the wood base I let it dry.

DIY WOOD SIGN TUTORIAL, how to make a wooden stenciled sign for your laundry room. Larger than mat sign tutorial. Oversized sign making step by step tutorial using your Cricut or Silhouette vinyl cutting machine.

6. DISTRESSING

This is totally optional. If you don’t want to distress your sign you can choose not to and be done. But if you do want to distress your painted wood sign I recommend using a sander for this step. Mainly because I really don’t like sanding anything with a piece of sandpaper. It’s so much easier to do this with a sander. Focus on the edges and anywhere that would naturally be worn. I also lightly go across the front of my pieces with my sander.

DIY WOOD SIGN TUTORIAL, how to make a wooden stenciled sign for your laundry room. Larger than mat sign tutorial. Oversized sign making step by step tutorial using your Cricut or Silhouette vinyl cutting machine.

The last thing I do is to wipe it with a lint free cloth to get all the dust off from sanding. Super simple and easy! I told ya, it’s pretty much no fuss.

DIY WOOD SIGN TUTORIAL, how to make a wooden stenciled sign for your laundry room. Larger than mat sign tutorial. Oversized sign making step by step tutorial using your Cricut or Silhouette vinyl cutting machine.

If you have any questions about this tutorial let me know in the comments below.

Happy Crafting!

DIY How to make a RUSTIC UNICORN sign + FREE SVG

How to make rustic unicorn sign. DIY easy tutorial for stenciling a wooden unicorn sign for your little gilr's bedroom decor. Painted unicorn wall art with flowers. Always believe in magical things wall art.

Unicorns…my third daughter is OBSESSED with these magical creators and has been for years. She was the inspiration behind these rustic looking glittery unicorn themed mason jars that we found on Pinterest and HAD to make our own. Everything is unicorn theme from her bedroom décor to her birthday party themes to her clothing. So, this year for her birthday of course she asked for…you guessed it UNICORN themed presents!

With all the craziness going on the world in the year of 2020 she couldn’t have a traditional birthday party. BOO! Instead she had a small but SUPER FUN day at home filled with a unicorn shaped cake made by her older sisters and LOTS of fun outdoor activities.

While she did get a few store bought gifts I thought it would be so fun to make her a rustic looking unicorn sign to hang in her unicorn themed side of the bedroom. She already has this gorgeous unicorn themed bedspread and SO many other purple glittery unicorn knick knacks I thought this sign would tie in perfectly with all of it.

Affiliate Disclosure. Some of the links on this website are affiliate links, which means that I may earn a small commission if you click on the link or make a purchase using the link. If you make a purchase you will not be charged anything additional.

How to make rustic unicorn sign. DIY easy tutorial for stenciling a wooden unicorn sign for your little gilr's bedroom decor. Painted unicorn wall art with flowers. Always believe in magical things wall art.

And she LOVED it! I was so happy because sometimes you make or buy something for your kid and you don’t always get the reaction you were hoping for. You know the one where they give you a huge smile and a thank you but you can tell deep down that it really wasn’t what they were expecting. Thank goodness my sweet girl BEAMED with unicorn excitement when she got her handmade rustic always believe in magical things sign from her momma! YAY a mom WIN!!

If you want to make this exact unicorn SVG you can get it for FREE here in my FREE RESOURCE LIBRARY. If you’re new to the blog my resource library is where I share all of my freebies. It’s all in one place so you can access it super easy. Just click here to get my password. If you already have the password click here and it will take you to my secure page.

How to make rustic unicorn sign. DIY easy tutorial for stenciling a wooden unicorn sign for your little gilr's bedroom decor. Painted unicorn wall art with flowers. Always believe in magical things wall art.

HOW TO MAKE A RUSTIC PALLET STYLE UNICORN SIGN

For this tutorial I’m starting with a pre built, stained, and painted pallet style sign. If you’ve never built a pallet style sign before not worries they are actually really easy to make. You can read my post on how to built your own pallet style sign here. I also used a weathered gray stain on this wood unicorn sign along with white paint for the background colors.

1. CUT OUT YOUR UNICORN STENCIL

The first thing I did was cut out my stencil on ORAMASK STENCIL FILM. If you plan to cut out a ton of stencils and want to buy stencil film even cheaper you must read my oramask stencil film post on how I dramatically my out of pocket on this material for my small business. I used my Cricut to cut out my stencil and weeded my unicorn themed stencil with a super sharp exacto knife.

If you’re new to the Cricut world here are 10 must have to get you started on you Cricut journey.

How to make rustic unicorn sign. DIY easy tutorial for stenciling a wooden unicorn sign for your little gilr's bedroom decor. Painted unicorn wall art with flowers. Always believe in magical things wall art.

2. APPLY YOUR UNICORN STENCIL

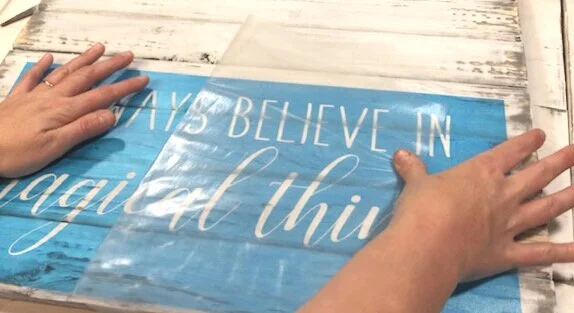
Using transfer tape apply your unicorn stencil to your wood base. When removing the transfer tape it’s easiest to roll the transfer tape off your of stencil film. Use your vinyl squeegee to get your stencil good and adhered to the base of your unicorn sign.

How to make rustic unicorn sign. DIY easy tutorial for stenciling a wooden unicorn sign for your little gilr's bedroom decor. Painted unicorn wall art with flowers. Always believe in magical things wall art.

3. PAINT YOUR STENCIL

To prevent tons of paint bleed you can seal your unicorn stencil first with the same color paint that you used for your background color. In my case I used white paint because my background is white. The wood I used to make my daughter’s rustic unicorn sign was EXTRA RUSTIC. Meaning it had lots of imperfections. The wood was very uneven, rounded on the edges, and had small and large gouges all over. I knew even with sealing my stencil I would still have paint bleed unless I took extra time to paint the sign very slowing. I’m a momma of 4, I don’t have time to be that perfect lol so my sign had more than usual paint bleed. When painting your stencil you can use a cosmetic sponge or a paint brush. If using a cosmetic sponge you want to make an up and down dabbing motion to paint the stencil. Do very THIN even coats and layer up to 3 THIN layers but no more than that. I promise the coverage will be darker once the stencil is removed.

How to make rustic unicorn sign. DIY easy tutorial for stenciling a wooden unicorn sign for your little gilr's bedroom decor. Painted unicorn wall art with flowers. Always believe in magical things wall art.

4. REMOVE YOUR STENCIL

An xacto knife works great for removing stencils. Just be sure is super sharp. If you don’t have an xacto knife you can also use a sewing pin. You want to gently lift the stencil film up and off your wood base without causing damage.

How to make rustic unicorn sign. DIY easy tutorial for stenciling a wooden unicorn sign for your little gilr's bedroom decor. Painted unicorn wall art with flowers. Always believe in magical things wall art.

5. DISTRESS YOUR UNICORN SIGN

I used a sanding sponge to lightly sand over my lettering on my unicorn pallet sign once my paint was dry. Just to give it a little more rustic look. I didn’t want my sign to be all gorgeously distressed and the lettering be crisp.

How to make rustic unicorn sign. DIY easy tutorial for stenciling a wooden unicorn sign for your little gilr's bedroom decor. Painted unicorn wall art with flowers. Always believe in magical things wall art.

6. PAINT ON UNICORN EARS

I almost forgot to do this part…insert facepalm!… I freehanded the ears with a pencil then painted them in with light pink paint. I added a little detail with a little bit of gray paint while the pink paint was still wet just so they didn’t look so flat. Then I distressed them with the sponge sander.

How to make rustic unicorn sign. DIY easy tutorial for stenciling a wooden unicorn sign for your little gilr's bedroom decor. Painted unicorn wall art with flowers. Always believe in magical things wall art.

7. MAKE THE HORN

I used a foam cone for this and cut it down to the size I needed. I used craft paint for this instead of spray painting it (check out my tips for spray painting Styrofoam here). Let dry. Once dry wrap it in tulle, I did this several times to get a good coverage.

How to make rustic unicorn sign. DIY easy tutorial for stenciling a wooden unicorn sign for your little gilr's bedroom decor. Painted unicorn wall art with flowers. Always believe in magical things wall art.

8. ADD ACCENTS TO THE HORN

I only needed a small piece of wire for this project so I used what I had on hand. I only had silver or green floral wire so I painted a piece of the silver wire with glittery nail polish and let it dry. Then I wrapped it around the horn and secured the ends inside of the foam. This really made a big difference in how the unicorn horn looked overall. Without this piece of glittery wire I don’t think it would have turned out as cute.

How to make rustic unicorn sign. DIY easy tutorial for stenciling a wooden unicorn sign for your little gilr's bedroom decor. Painted unicorn wall art with flowers. Always believe in magical things wall art.

9. GLUE ON FLORAL UNICORN CROWN

I picked up my floral accents from Walmart. It’s spring/summer so they had a great selection of florals that had a magical unicorn vibe. I used gorilla hot glue in my glue gun to attach them to my wood base. I highly suggest doing a dry run with the floral crown before you actually glue them down. You want to make sure you are going to like the placement before you commit to the glue. Don’t be afraid to cut down your florals. Sometimes you just need a small piece of baby’s breath instead of a whole piece of it.

Some of the florals I used on this unicorn crown were leftover from these DIY corsages I made from my youngest three daughters for the daddy daughter dance. I love that I could also incorporate them into this piece. They were such beautiful florals and my store was completely out of them so I couldn’t get any more for this sign.

How to make rustic unicorn sign. DIY easy tutorial for stenciling a wooden unicorn sign for your little gilr's bedroom decor. Painted unicorn wall art with flowers. Always believe in magical things wall art.

Now you’re ready to give this gorgeously rustic unicorn sign to your sweetest unicorn obsessed little girl to hang in her room. I hope you enjoyed this crafty tutorial. If you have any questions please leave them in the comments below.

Happy Crafting!

DIY mini wood house family number sign

How to make mini wood houses from a 1x4. Stenciling a wood family number sign. DIY rustic farmhouse decorations to make at home, easy

DIY how to make a rustic wood house sign for your farmhouse style home decor

How to make mini wood houses from a 1x4. Stenciling a wood family number sign. DIY rustic farmhouse decorations to make at home, easy

Have you seen those adorable tiered tray signs on Pinterest? They are oh so tiny and oh so ADORABLE! They tie in perfectly with any rustic farmhouse style décor. If you have a miter saw you can make these little beauties at home.

If you don’t have a miter saw but still want to DIY these mini wood houses no worries! You can grab these precut unfinished wooden houses in my shop.

I used a scrap piece of 1x4 to make mine. Click here to read more of my SCRAP WOOD PROJECTS.

Affiliate Disclosure. Some of the links on this website are affiliate links, which means that I may earn a small commission if you click on the link or make a purchase using the link. If you make a purchase you will not be charged anything additional

Are you planning on making LOTS of signs using stencil film? You must read how I save TONS of money by buying my oramask stencil film this way.

Click here to grab your own rustic wooden mini house DIY CRAFT KIT

How to make mini wood houses from a 1x4. Stenciling a wood family number sign. DIY rustic farmhouse decorations to make at home, easy

Make your own tiered tray mini house signs

  1. CUT OUT YOUR WOOD HOUSE

The first thing I did was to cut my wood house out of 1x4 scrap piece of pine. Well, my husband cut mine out because he was bored lol. He cut them using a 30 degree angle on the miter saw. Then cut them to the length you want. The one I’m making for this rustic craft tutorial measured approx. 4” in length. Then I sanded it down using my Ryobi orbit sander and 120 grit sandpaper.

How to make mini wood houses from a 1x4. Stenciling a wood family number sign. DIY rustic farmhouse decorations to make at home, easy

2. CUT OUR YOUR STENCIL

I used my Cricut explore to cut out my stencil. I have yet to get a Cricut maker because my Explore is still going strong :)! I used a scrap piece of ORAMASK STENCIL FILM and this FAMILY NUMBER SIGN SVG. I’ve found that using an xacto knife to weed your designs works even better than traditional weeding tools. If you’re new to CRICUT be sure to check out these 10 supplies and accessories you need to get started with your Cricut.

How to make mini wood houses from a 1x4. Stenciling a wood family number sign. DIY rustic farmhouse decorations to make at home, easy

3. PAINT YOUR WOOD HOUSE BASE

I chose to keep my mini wood house sign simple and paint it all white. I used acrylic paint and painted two coats for a decent coverage. Let completely dry.

How to make mini wood houses from a 1x4. Stenciling a wood family number sign. DIY rustic farmhouse decorations to make at home, easy

4. STENCIL YOUR WOOD HOUSE

I stenciled a family number sign on my wood house and I love how cute it turned out. I applied my stencil using transfer tape and a vinyl squeegee. Then removed my transfer tape once it was properly adhered. If you don’t want any paint bleed be sure to seal your stencil. you can do this using the same paint as your background color. See how I also did this on a reverse stenciled sign to get crisp no paint bleed lines. Let dry.

How to make mini wood houses from a 1x4. Stenciling a wood family number sign. DIY rustic farmhouse decorations to make at home, easy

5. PAINT YOUR STENCIL

I kept it safe and painted my family number stencil with black acrylic paint. I did one thin coat. Let dry completely. Then painted a second thin layer.

How to make mini wood houses from a 1x4. Stenciling a wood family number sign. DIY rustic farmhouse decorations to make at home, easy

6. PEEL UP YOUR STENCIL

While your stencil paint is still wet use a sharp xacto knife OR sewing pin to peel up your stencil. Be careful not to guage the wood underneath. You want to carefully lift the stencil film up off the wood then grab it and peel away.

How to make mini wood houses from a 1x4. Stenciling a wood family number sign. DIY rustic farmhouse decorations to make at home, easy

7. DISTRESS

If you like your sign without distressing then you are ready to display it once the lettering is dry. But if you’d like to add a little more rustic charm to it you can do so with your sander, after your lettering is dry of course. I use 120 grit sandpaper for pretty much all of my craft projects and it’s what I used to distress this mini wood house sign too. Focus around the edges and corners then lightly go over the front of the sign. I went a little crazy on my mini wood sign but I still like it. I think it just adds that much more character.

How to make mini wood houses from a 1x4. Stenciling a wood family number sign. DIY rustic farmhouse decorations to make at home, easy

CLICK HERE TO GET INSTANT ACCESS TO ALL OF MY FREE SVG’S, PRINTABLES, AND MORE

Now you're ready to display it in your home. I hope you enjoyed this crafty tutorial. If you have any questions please ask them in the comments.

Happy Crafting!

REVERSE STENCIL, the NO paint bleed method

DIY wood sign, how to paint a reverse stenciled wooden sign. Make your own rustic wooden sign using your Cricut. Bless our nest wooden sign to hang with your farmhouse style decor. How to stencil on wood, a sign painting tutorial with video.

How to paint a REVERSE STENCIL wood sign, easy tutorial plus video

Have you tried stenciling wood signs but keep running into issues like paint bleed or your paint peeling up? I completely understand your frustration when that happens when painting signs. I have been there and am so glad I learned how to paint signs without these issues now AND I’m happy I get to show you how to paint wood signs without the headache.

One of the easiest methods to stenciling painted wood signs is the REVERSE STENCIL METHOD. It’s the method I suggest people start with when they are just learning how to paint signs. No matter if you are wanting to learn how to paint signs for a hobby or you are wanting to start your own momma side hustle this is THE sign painting tutorial you need to start with. I don’t want to overwhelm you with too much sign painting lingo but this is also referred to as the PVPP method. Or in other words, Paint Vinyl Paint Peel. But I like to call it a reverse stencil because that just sounds better to me ;).

DIY REVERSE STENCIL WITH YOUR CRICUT, the NO paint bleed method

Affiliate Disclosure. Some of the links on this website are affiliate links, which means that I may earn a small commission if you click on the link or make a purchase using the link. If you make a purchase you will not be charged anything additional.

After making thousands of hand painted wood signs for my own business I think I’ve pickex up a thing or two about how to paint signs and I am so excited to be sharing my tips, tricks, and techniques with you. So hopefully you don’t make the same mistakes that I did starting out.

If you have a Cricut or Silhouette cutting machine you can purchase the SVG FILE for BLESS OUR NEST here. If you’re just getting started with your Cricut I highly recommend you read this list of 10 things you need to get started with your Cricut. .

If you’re planning to make lots of signs like I do you may want to consider ordering stencil film in bulk to save some money. Here’s how I save 40% on my Oramask 813 stencil film.

Watch the video below or keep scrolling to read the written sign making tutorial.

1. CUT AND WEED YOUR DESIGN

The first thing you want to do is cut your design out. I use my Cricut to do this on Oramask 813 stencil film. After having issues with pretty much any other kind of “stenciling” material, I have found this stuff truly works and does the job it was made to do. Using things like shelf liner, aka contact paper, and oracal 631 they can cause so many issues and a giant headache. So now I just stick to what works and Oramask 813 works! Instead of weeding out the letters like you would on a typical stencil you will actually weed out the background, leaving the letters.

Bless our nest wood sign, how to paint a sign with no paint bleed. Reverse stencil method is perfect for new sign painters to get their feet wet in the sign painting world. Grab your FREE wooden sign svg for stenciling. Make your own rustic bless ou…

2. PAINT YOUR LETTER COLOR

I know this is going to sound super backwards BUT you want to paint your wood sign base whatever color you want your lettering to be. I have to add that if you are wanting your lettering/design to be multi colored this method will not work. But, if you want one solid color like the design I’m showing here this reverse stencil method is perfect. Let your paint dry.

DIY sign painting tutorial. How to make a reverse stenciled sign. Painting a wood sign with no paint bleed, paint peel up, crisp lines.

3. APPLY YOUR STENCIL

After your letter color paint is dry you want to apply your stencil. This can be tricky to get on there straight at first. If it makes it easier you can measure or use tape as a guide line. Place your transfer tape over your design, use your vinyl squeegee to gently remove any air. Flip your stencil over and carefully remove the paper backing. Go slow you don’t want to rip your design. After you’ve removed the paper backing place your stencil down on your wood sign base sticky side down. Use your vinyl squeegee to remove any air bubbles then remove the transfer tape from your design, leaving your stencil film on your wood sign base.

DIY sign painting tutorial. How to make a reverse stenciled sign. Painting a wood sign with no paint bleed, paint peel up, crisp lines.
DIY sign painting tutorial. How to make a reverse stenciled sign. Painting a wood sign with no paint bleed, paint peel up, crisp lines.DIY sign painting tutorial. How to make a reverse stenciled sign. Painting a wood sign with no paint bleed, paint …
DIY sign painting tutorial. How to make a reverse stenciled sign. Painting a wood sign with no paint bleed, paint peel up, crisp lines.

4. SEAL YOUR STENCIL

This is THE STEP to do if you want ZERO PAINT BLEED. I don’t know about you but I’m a busy momma and business owner and I don’t have time to daintily paint around stencils then cross my fingers that it won’t bleed. Nope! Instead, I seal my stencils with the same color that is under the stencil. So in this case I sealed my stencil with black paint. You want to paint a SUPER THIN layer of paint over your stencil. Be sure it’s a thin layer, this step does not need a lot of paint.

DIY sign painting tutorial. How to make a reverse stenciled sign. Painting a wood sign with no paint bleed, paint peel up, crisp lines.

5. PAINT THE BACK

This step isn’t a must but I always finish the backside of all of my signs. It gives my signs a more polished look. When the sealing step is dry just flip your sign over and paint the back the same color you are going to paint the front. I just do one layer of paint for this step. I also paint a layer of paint on the sides while I’m on this step.

DIY sign painting tutorial. How to make a reverse stenciled sign. Painting a wood sign with no paint bleed, paint peel up, crisp lines.

6. PAINT THE FRONT

Once the front is dry flip your sign over and paint a SUPER THIN layer of whatever color you would like your background color of your sign to be. Let that dry completely. After the first layer is dry you can add a second layer if you’d like more coverage.

DIY sign painting tutorial. How to make a reverse stenciled sign. Painting a wood sign with no paint bleed, paint peel up, crisp lines.

7. PEEL UP YOUR STENCIL

While your paint is still WET peel up your stencil. I find that a sharp xacto knife works perfectly for this step. It easily gets under the stencil film without damaging your wood sign so you can lift the stencil up and off your wood base.

DIY sign painting tutorial. How to make a reverse stenciled sign. Painting a wood sign with no paint bleed, paint peel up, crisp lines.

8. FINISH

Let your sign dry completely. You can leave it as is or your can sand around the edges to give it a more distressed look like the Bless our Nest wood sign I made.

DIY sign painting tutorial. How to make a reverse stenciled sign. Painting a wood sign with no paint bleed, paint peel up, crisp lines.

I hope you enjoyed this sign painting tutorial and it helps you on your sign painting journey. As with all of my tutorials, if you have any questions please leave them below in the comments.

DIY repurpose an old drawer into an American Flag

Turn an old drawer into a rustic Ameican flag. It doesn't take much to repurose a drawer that's been collecting dust. If you have some paint and a little creativity you can make your own farmhouse style old looking flag for your home decor.

HOW TO REPURPOSE AN OLD DRAWER INTO AN AMERICAN FLAG

Before you pass up on the dusty old drawer that’s sitting on the side of the road you might want to think of all the amazing things you could turn that in to. Years ago my father in law had a huge old drawer sitting under his carport just collecting dirt and debris. I loved it! Even covered in gross beat-up contact paper I could still see the it’s potential of being something beautiful He told me I could take it home and then it sat in the basement collecting even more dust for years. Finally I pulled it out from the depths of the basement over the weekend and told myself I WOULD transform this old drawer this week!

 Affiliate Disclosure. Some of the links on this website are affiliate links, which means that I may earn a small commission if you click on the link or make a purchase using the link. If you make a purchase you will not be charged anything additional.

I really wanted to paint something American on it and after going back and forth in my own head I decided a simple flag would be perfect for this old drawer. I had thought about stenciling a big US map on it or even some lettering but with everything I already have on my plate I decided I should just keep it simple. Besides I don’t have a ton of vinyl and transfer tape to spare since I’m running low and shipments are taking a little longer than normal at the moment. With a little painters tape and a bit of vinyl I was on my way to making a simple rustic American flag.

Here’s what the old drawer looked like before I gave it a full facelift.

Turn an old drawer into a rustic Ameican flag. It doesn't take much to repurose a drawer that's been collecting dust. If you have some paint and a little creativity you can make your own farmhouse style old looking flag for your home decor.

And this is what the old drawer looks like now. I definitely made a few mistakes but overall I’m loving how this rustic flag turned out.

How to repurpose an old dusty drawer into an American flag for your rustic style home decor. DIY farmhouse style 4th of July decor. Paint your own USA flag using your Cricut. Easy distressed wood flag, repuposed decoratoins.

If you are planning on doing a lot of stenciling on wood click here to read this post on how I save money on stenciling film.

How to make your own rustic flag

If you have an old drawer hanging around and collecting dust you can transform it into a rustic looking flag like I did with this one.

Here’s what you’ll need

Helpful tools

ONE-The first thing I had to do was sand it down. This drawer originally came with some gross contact paper attached to it. I had done the majority of taking all of that off when I first got the drawer. I removed the contact paper as much as I could then used the sander to help take off the rest. I started with 60 grit sandpaper on my handheld sander then worked my way up to 120 grit. the contact paper left behind some sticky residue but with a little elbow grease I was able to get all of it off. Then I used a lint free cloth and a vacuum to get off all the dust.

Turn an old drawer into a rustic Ameican flag. It doesn't take much to repurose a drawer that's been collecting dust. If you have some paint and a little creativity you can make your own farmhouse style old looking flag for your home decor.

TWO- Using a dry brush I painted the inside of the drawer white. I used flat white indoor paint for this. When I brushed on the white base I made sure that all four sides didn’t get painted right up to the edge and I made the edges really uneven. I wanted it to look rough.

Turn an old drawer into a rustic Ameican flag. It doesn't take much to repurose a drawer that's been collecting dust. If you have some paint and a little creativity you can make your own farmhouse style old looking flag for your home decor.

THREE- I measured out how big I wanted the blue area on my flag to be. I am not 100% happy with the size of this but it’s there to stay now lol! I taped that square off then started taping off my lines for my red and white stripes. I did this the same way I did this scrap wood 2x4 flag. I didn’t measure out my lines, mainly because I’m not a super precise person. I used the top edge of the drawer as my guide then taped off my stripes using wide painters tape. I did not make a true American flag though I only have 7 stripes total on mine.

Turn an old drawer into a rustic Ameican flag. It doesn't take much to repurose a drawer that's been collecting dust. If you have some paint and a little creativity you can make your own farmhouse style old looking flag for your home decor.

FOUR- Once I had my stripes taped off I painted the exposed stripes red. Then let them dry and painted then with a second coat of red paint. I peeled my tape up while my paint was still wet.

Turn an old drawer into a rustic Ameican flag. It doesn't take much to repurose a drawer that's been collecting dust. If you have some paint and a little creativity you can make your own farmhouse style old looking flag for your home decor.

FIVE- I stenciled the 50 stars on this rustic flag but did it a little differently than a typical stencil. I did what’s called a reverse stencil on this just like I did with this 4th of July leaning porch sign . I used my Cricut and Cricut design space to cut out 50 stars. You can get my free Cricut cut file here. Since my stars were wider than 11.5” I had to cut them out on two separate pieces of stencil material. But it wasn’t bad at all to piece them together. I did have a big OOPS moment when I weeded away a star. Thank goodness for an honest husband who told me it looked good other than missing a star! I was able to paint in the missing star before I had applied the wax, praise the Lord!

Turn an old drawer into a rustic Ameican flag. It doesn't take much to repurose a drawer that's been collecting dust. If you have some paint and a little creativity you can make your own farmhouse style old looking flag for your home decor.

SIX- Using transfer tape I applied the star stencils to my flag then taped off the stripes. To cut down on paint bleed I sealed them with a thin layer of white paint. After that was dry I painted that part of my flag blue, let dry, then painted another layer of blue. While the paint was still wet I peel up the star stencils and the tape. I did have a little paint bleed but nothing too serious. This is when I added the last star that I missed :/.

Turn an old drawer into a rustic Ameican flag. It doesn't take much to repurose a drawer that's been collecting dust. If you have some paint and a little creativity you can make your own farmhouse style old looking flag for your home decor.

SEVEN- I used my Ryobi sander to distress my rustic drawer flag. I used 120 grit sandpaper and lightly went over the entire flag then focused on random areas here and there. After I was happy with the distressing I wiped the sawdust off with a lint free cloth.

Turn an old drawer into a rustic Ameican flag. It doesn't take much to repurose a drawer that's been collecting dust. If you have some paint and a little creativity you can make your own farmhouse style old looking flag for your home decor.

EIGHT- If you’ve read any of my other tutorials you probably know LOVE my antiquing wax. I use it for so many of my craft projects and of course used it for this one too. I used a chip brush and lightly applied the dark wax to my flag. If you’ve never used this stuff before please be aware that a little goes a LONG way. I usually dab the end of my brush into the lid then dab off on a cloth. Since I didn’t have a cloth handy for this DIY I used my apron.

Turn an old drawer into a rustic Ameican flag. It doesn't take much to repurose a drawer that's been collecting dust. If you have some paint and a little creativity you can make your own farmhouse style old looking flag for your home decor.

I can’t wait to hang this rustic flag in our living room! We plan to keep it up year round and I know every time we look it we will think of fond memories of my father in la

I hope this post inspires you to give an old drawer a makeover! If you have any questions on this DIY or any of my other tutorials please feel free to ask away:)!

Happy Crafting!

Turn an old drawer into a rustic Ameican flag. It doesn't take much to repurose a drawer that's been collecting dust. If you have some paint and a little creativity you can make your own farmhouse style old looking flag for your home decor.

DIY painted baby name and stats sign

How to stencil a wood sign with NO paint bleed. Using mod podge to paint wooden signs is a good way to get perfectly crisp lines. Make your own personalized baby gift sign using your cricut. DIY baby stats sign.

DIY painted baby name sign with newborn stats

A couple weeks ago a sweet friend of mine from grade school messaged and asked me to help in creating a wreath she’s having made for her very first baby! Of course I said YES! I am just so happy for her as she’s waited a very long time to become a mom and was so honored she asked me to be apart of something she will be hanging in her precious daughter’s room. She sent me all the details she wanted for the sign part of the wreath and I recreated something similar personalized just for her little one.

Affiliate Disclosure. Some of the links on this website are affiliate links, which means that I may earn a small commission if you click on the link or make a purchase using the link. If you make a purchase you will not be charged anything additional. This is just a way I can help add to our family finances to raise our four daughters. Please know I would never recommend a product or service I do not totally stand behind.

I created my template in CRICUT DESIGN SPACE and of course used my Cricut to cut it out. By the way, I have an older style Cricut and still create AMAZING projects with it, although I’d love a Maker just to have one I don’t need one to make all the wonderful things I share on my crafty blog. I often see others get discouraged because they can’t afford the newest machine out there but you can find GREAT deals on older style machines and they do just as much as the newer models :)! If you’re just getting started using your Cricut read this list of 10 things you need to get you started on your Cricut crafting journey.

If you want a more in-depth teaching on SIGN PAINTING you need to get on my list for my DIY SIGN PAINTERS E-COURSE. Click here to get on the list so you’re first to know when it opens back up.

When you’re all finished up reading this tutorial and need help attaching hanging hardware be sure to read this post on how to easily and quickly attach a sawtooth hanger to wood signs

How to paint wood signs with no paint bleed

Here’s what you’ll need

Helpful tools

How to stencil wood signs without paint bleed. Make your own painted wood signs for baby. Personalized baby shower gift with baby's name and stats on it.

For this tutorial I’m focusing on the painting techniques of making a personalized baby sign. CLICK HERE for my tutorial on how to stain wood.

ONE- Start with a pre-stained wood base. See my video on how to stain wood click here. Be sure you are allowing your stained base to dry for at least 24 hours prior to stenciling on it. Stencils will not adhere to a base that isn’t fully dry.

TWO- Apply your stencil. To do this you need transfer tape. Transfer tape allows us to take a stencil and apply it in one whole piece without a headache, we LOVE whoever invented this product! Place your transfer tape sticky side down onto your stencil. Gently push out any air bubbles on the front with your hands, then flip it ver and use your vinyl squeegee and rub the back of it. Slowly remove the paper backing leaving the stencil (blue part) and the clear transfer tape still intact.

How to stencil a wood sign with NO paint bleed. Using mod podge to paint wooden signs is a good way to get perfectly crisp lines. Make your own personalized baby gift sign using your cricut. DIY baby stats sign.

THREE- Flip your stencil over and position it on your wood base. Once you are happy with the placement working from the middle of the stencil out press it down with your hands. Then use your vinyl squeegee and do the same thing.

How to stencil a wood sign with NO paint bleed. Using mod podge to paint wooden signs is a good way to get perfectly crisp lines. Make your own personalized baby gift sign using your cricut. DIY baby stats sign.

FOUR- After you’ve pressed down your stencil you can remove your transfer tape. I’ve found the easiest way to do this is to roll your transfer tape off of your stencil. Start from one corner and slowly roll is off. You can reuse your transfer tape over and over again. I like to place my used transfer tape back on the roll I cut it off of and use it for the next project.

How to stencil a wood sign with NO paint bleed. Using mod podge to paint wooden signs is a good way to get perfectly crisp lines. Make your own personalized baby gift sign using your cricut. DIY baby stats sign.

FIVE- If you have any gaps/air bubbles use an xacto knife to remove those. Use an xacto knife to make a small slit in the stencil film where the gap/air bubble is. This will make the stencil film lay flat.

How to stencil a wood sign with NO paint bleed. Using mod podge to paint wooden signs is a good way to get perfectly crisp lines. Make your own personalized baby gift sign using your cricut. DIY baby stats sign.

SIX- Tape off any area that you don’t want to get paint on, like the sides of your stencil. It is a lot easier to take the time to tape this off than it is to try to clean off paint where you don’t want it.

How to stencil a wood sign with NO paint bleed. Using mod podge to paint wooden signs is a good way to get perfectly crisp lines. Make your own personalized baby gift sign using your cricut. DIY baby stats sign.

SEVEN- Using MATTE FINISH MOD PODGE seal your stencil. You do this by taking a DRY paint brush, dipping it into a little bit of the mod podge, and brushing it in all directions on the exposed areas of your stencil. Be sure you are painting on a VERY THIN LAYER of mod podge. This step is KEY to the no paint bleed painted sign. The mod podge is filling in all of those tiny air bubbles that you can’t see. Let this dry, usually this takes just a couple of minutes.

How to stencil a wood sign with NO paint bleed. Using mod podge to paint wooden signs is a good way to get perfectly crisp lines. Make your own personalized baby gift sign using your cricut. DIY baby stats sign.

EIGHT- I highly recommend using either flat or eggshell finish for your paint. Gloss paint tends to pull up when you remove the stencil. Using a different DRY paint brush paint on your first THIN layer of paint. You want to see the base color/wood grain through the paint.

How to stencil a wood sign with NO paint bleed. Using mod podge to paint wooden signs is a good way to get perfectly crisp lines. Make your own personalized baby gift sign using your cricut. DIY baby stats sign.

NINE- After your first layer is completely dry you can paint on a second thin layer of paint. The first layer should dry VERY fast.

How to stencil a wood sign with NO paint bleed. Using mod podge to paint wooden signs is a good way to get perfectly crisp lines. Make your own personalized baby gift sign using your cricut. DIY baby stats sign.

TEN- After you’re done painting on the second layer of paint on your stencil you can immediately pull up your stencil. I prefer to do this step while the paint is still wet. Use an xacto knife to remove all the small stencil pieces.

How to stencil a wood sign with NO paint bleed. Using mod podge to paint wooden signs is a good way to get perfectly crisp lines. Make your own personalized baby gift sign using your cricut. DIY baby stats sign.

Let your sign dry then you’re ready to use it. I hope that you found this DIY SIGN PAINTING TUTORIAL helpful. If you did I’d LOVE to hear your feedback:)!! If you have any questions please feel free to ask.

How to stencil a wood sign with NO paint bleed. Using mod podge to paint wooden signs is a good way to get perfectly crisp lines. Make your own personalized baby gift sign using your cricut. DIY baby stats sign.

DIY painted wood funny cactus signs

DIY painted wood sign tutorial. How to stencil and paint mini wood signs. Funny cactus signs to make.

DIY PAINTED MINI CACTUS WOOD SIGNS

I don’t know about you but my family has a good sense of humor. So, naturally these signs were a hit around our house! How can you not laugh at a painted wood sign that reads “don’t be a prick” with a picture of a cactus?! Or “free hugs” lol!!

Affiliate Disclosure. Some of the links on this website are affiliate links, which means that I may earn a small commission if you click on the link or make a purchase using the link. If you make a purchase you will not be charged anything additional. This is just a way I can help add to our family finances to raise our four daughters. Please know I would never recommend a product or service I do not totally stand behind

They were such a hit that I added them to my online shop, funny painted cactus signs. If you don’t have time to DIY this hilarious set of 3 mini wooden signs you can buy a premade set here —-> I NEED FUNNY CACTUS SIGNS.

If you plan to hang your newly painted wood signs check out this quick and easy tutorial for attaching sawtooth hangers to signs

If you purchase the DIY craft kit from my handmade online shop here’s what’s inlcuded

  • 3 precut, lightly sanded, stained, distressed wood 5.5”x5.5” wood bases

  • 3 stencils with transfer tape applied - go sit on a cactus, don’t be a prick, free hugs

  • 1 sponge brush

  • 1 stenciling sponge

  • white & black acrylic paints

  • printed instructions


If you are struggling with your sign painting adventure I would LOVE to teach you all in-depth steps I use in my own business. when I first started out I had issues with paint bleed, paint peeling up, sticky residue getting left behind but by doing a TON of trail and error, and thousands of hand painted signs later I have perfected my sign painting skills and want to teach you all the things I didn’t when I first started out.


If you didn’t snag up a DIY CRAFT KIT here’s what you’ll need

Helpful tools I used to make my set

If you’re starting from scratch you’ll want to cut, sand, and stain your wood pieces at least 24 hrs prior to painting them, if you are going to be staining them first. Stain needs to fully dry before painting any project.

Once your wood pieces are dry you can start painting them. Start with a DRY brush and using a little bit of paint at a time, apply a THIN layer of paint to one side of your board. Leave a small border all the way around each wood base. I don’t measure this, just eyeball it. This will give you that rustic uneven look. Do this with each wooden base. You do not need to paint any of the other sides, just one side per base.

After your fist THIN coat is totally dry you can apply the second coat, be sure to apply using the same technique as you did with the first coat.

DIY mini wood sign tutorial. How to make hand painted wood signs with stencils, funny cactus signs, Don't be a prick, go sit on a cactus, free hugs cactus decor

Once they are all TOTALLY DRY you are ready for stenciling. They must be completely dry otherwise your stencil will not stick to the wood and it will be an ugly mess.

Start by removing the paper backing from your stencil. This works best if you use a vinyl applicator, or you can use a stiff store rewards card,  I don’t recommend using your bank card as it could break during the process.

Rub the front of the stencil

Rub the front of the stencil

Flip it over and do the same on the back

Flip it over and do the same on the back

Now slowly peel the paper backing away from the stencil. This works best if you start at one corner and peel away at a sharp 90 degree angle. Go SLOW.

Now slowly peel the paper backing away from the stencil. This works best if you start at one corner and peel away at a sharp 90 degree angle. Go SLOW.

First, you’ll want to place your stencil where you want it on your board. I wanted mine to all be centered so that’s what I did but you can place them anywhere on the board you’d like. I just recommend keeping the image within the painted part of the wood.

DIY mini wood sign tutorial. How to make hand painted wood signs with stencils, funny cactus signs, Don't be a prick, go sit on a cactus, free hugs cactus decor

Using your vinyl tool rub the stencil, using the same technique as before. Now SLOWLY peel the transfer tape {the clear sticky stuff} away from your stencil. I do this at a sharp angle and I will slowly roll it off of the stencil.

DIY mini wood sign tutorial. How to make hand painted wood signs with stencils, funny cactus signs, Don't be a prick, go sit on a cactus, free hugs cactus decor

After you get the transfer tape off rub your finger along all the exposed stencil edges {anywhere there is wood showing thru}. this helps to get a good seal on your stencil.

mini+cactus+sign4.jpgDIY mini wood sign tutorial. How to make hand painted wood signs with stencils, funny cactus signs, Don't be a prick, go sit on a cactus, free hugs cactus decor

To help prevent paint bleed you can take the white paint, the base color, and lightly go over the exposed areas of your stencil. This will help to fill in tiny air bubbles that you may have missed in the previous step. You want this to be a very LIGHT LAYER of paint, you barely want to see it on your stencil.

To help prevent paint bleed you can take the white paint, the base color, and lightly go over the exposed areas of your stencil. This will help to fill in tiny air bubbles that you may have missed in the previous step. You want this to be a very LIG…

Use one end of your cosmetic sponge LIGHTLY dip it in the black paint. BE SURE TO USE VERY LITTLE PAINT, this is key to getting little to no paint bleed under your stencil. Dab the sponge on a paper towel a couple times then onto your stencil, do this till you have a very THIN even coat {you should be able to see thru the first coat}. LET DRY, repeat till you are happy with the coverage.

DIY mini wood sign tutorial. How to make hand painted wood signs with stencils, funny cactus signs, Don't be a prick, go sit on a cactus, free hugs cactus decor

Now peel up your stencil. I use an xacto knife to get up all the little pieces. If you don’t have one of these a sewing pin/needle works great for this as well. If you have any paint bleed just go over those with a small paint brush and your background color.

DIY mini wood sign tutorial. How to make hand painted wood signs with stencils, funny cactus signs, Don't be a prick, go sit on a cactus, free hugs cactus decor
cactus sigDIY mini wood sign tutorial. How to make hand painted wood signs with stencils, funny cactus signs, Don't be a prick, go sit on a cactus, free hugs cactus decorn3.jpg

Please feel free to message me if you have any questions once your kit arrives. I want your DIY projects to turn out AMAZING and will help you in any way I can to make that happen. If you ordered from the website shoot me an email BUT if you ordered from my ETSY shop please message me on there. In order to keep in compliance with Etsy all convos must be kept on their platform

DIY wedding guestbook alternative

DIY wedding tree guest book. How yo make your own painted wood signs for your wedding. Making your custom wedding signs.

Oh how I wish I had something gorgeous like this when my husband and I married almost 11 years ago. Back in those days, ha I say that like it was so long ago, but truthfully back then personalized wedding décor was not an affordable option. Our young selves scrimped together $2k for our wedding, that included the dress, the rings, and all the food, so buying a fancy sign like the ones I make for other newlyweds today was not in our wedding budget.

Affiliate Disclosure. Some of the links on this website are affiliate links, which means that I may earn a small commission if you click on the link or make a purchase using the link. If you make a purchase you will not be charged anything additional. This is just a way I can help add to our family finances to raise our four daughters. Please know I would never recommend a product or service I do not totally stand behind.

But despite our small budget our wedding was beautiful. We got married on my father-in-law’s property in the fall, back before outdoor rustic weddings were a thing. I always knew I wanted to marry my husband outside surrounded by nature and God. Something about that just sings happiness. And that’s exactly what it was <3!

I know some brides are like me, and are on a little tighter budget so saving here and there really adds up. That’s why I wanted to offer this DIY PAINTED WOOD WEDDING TREE SIGN KIT. It’s an affordable option to the ones we paint for you. Instead of us making them we send you everything so you can save a little money and DIY your own.

How to paint your own wood wedding tree sign

DIY wedding tree craft kit. How to make your own wedding guestbook alternative for your rustic themed wedding. DIY wedding tree with birds, how to paint your own wood wedding signs

DIY PREMIUM KIT includes everything you need to make your own sign but you can opt for other kit styles to include just the stencil or just the stencil and board.

  • prestained board

  • personalized stencil on professional quality stencil film with transfer tape attached

  • white paint

  • stenciling sponge

Helpful tools not included

If you just need the stencil we can accommodate that too. But to make it super easy for you we recommend opting for the kit that includes the prestained board. If you don’t allow enough time for your stained board to dry prior to stenciling you can run into a lot of problems :/.


Want to learn how to paint signs like a professional? Join my SIGN PAINTING ECOURSE where I teach you everything I know about sign painting. Painting thousands of signs over the last couple of years for my online business I’ve had to teach myself A LOT and boy do I wish I had a course like this when I started out. I would have saved so much time, energy and so much money!


If you don’t need a DIY craft kit and have all the tools to make your own stencils/prep your own board here’s what you’ll need

  • 11.5”x14.5” stencil, cut and weeded {you want it slightly larger than your board so that your wedding tree will hang off of your piece of wood]

  • transfer tape

  • 11.25”x14” sanded and pre-stained. You want to wait a full 24 hours before painting on stained wood. You will have a very difficult time getting the stencil to stick if the wood is not full dry.

  • white acrylic paint

  • stenciling sponge

DIY wedding guestbook alternative, how to make your own wood sign for your wedding. Personalized painted wedding tree with birds.

Painting your own wedding guestbook alternative

Your stencil will come with three pieces

  • white paper backing

  • blue stencil film

  • clear transfer tape {this is what will enable you to easily transfer your stencil to the board in one piece without any issues, do not remove this till after the stencil is applied to your board}

DIY wedding tree craft kit. How to make your own wedding guestbook alternative for your rustic themed wedding. DIY wedding tree with birds, how to paint your own wood wedding signs

Using either a vinyl squeegee {here is the exact vinyl squeegee I use for my sign painting business} or a rewards card rub the front and back of your stencil. This will help the stencil adhere even more to the transfer tape and for the paper backing to release a little easier when you remove it.

DIY wedding tree craft kit. How to make your own wedding guestbook alternative for your rustic themed wedding. DIY wedding tree with birds, how to paint your own wood wedding signs

Flip your stencil over so that the paper backing is facing up and peel the backing away from the stencil, leaving the stencil attached to the transfer tape.

PRO TIP: rolling it away works best. You don’t want to pull it up, this will cause the stencil to tear. Instead roll it off. If you have little pieces that stick just push them back down and keep rolling the paper away {see the video above for a visual of how to easily remove the paper stencil backing}

DIY wedding tree craft kit. How to make your own wedding guestbook alternative for your rustic themed wedding. DIY wedding tree with birds, how to paint your own wood wedding signs

After you’ve removed the paper back from your wedding tree stencil you can discard the paper, you won’t need it again. Flip your stencil over so it’s sticky side is on the wood. Align the bottom and left sides of your stencil with the bottom and left sides of your wood base. Then pull the stencil to the left so it overhangs on the wood base, this will make it so that your tree branches are hanging off the sign and you won’t have a weird edge where the tree branches just suddenly stop.

Starting from the middle and working your way out press your stencil to your board using your vinyl squeegee or rewards card. You want to apply a fair amount of pressure for this step so that you work out the air bubbles. The less air bubbles the less paint bleed you’ll have.

DIY wedding tree craft kit. How to make your own wedding guestbook alternative for your rustic themed wedding. DIY wedding tree with birds, how to paint your own wood wedding signs

Then remove the transfer tape the same way you removed the paper backing. Start from one corner and work your way to the opposite corner.

PRO TIP: GO SLOW! If you do this step too quickly you will likely tear your stencil and you definitely don’t want that to happen.

DIY wedding tree craft kit. How to make your own wedding guestbook alternative for your rustic themed wedding. DIY wedding tree with birds, how to paint your own wood wedding signs

Give your board a once over to make sure there aren’t any air bubbles or areas that need to be flattened. Use your squeegee if you need to take care of those spots.

To paint your wedding tree board you will need to use the FLAT end of your stenciling sponge. To keep the paint bleed at a super minimum you are going to paint 3 SUPER LIGHT layers.

Dip the end of your stenciling sponge into your paint. If you ordered the PREMIUM WEDDING GUESTBOOK DIY CRAFT KIT you will have a lot more paint than you will actually need. You will literally use a TINY amount of paint on your sign but I always send more than enough paint for our DIY CRAFT KITS.

Dab off the excess paint, you don’t want there to be any globs on there. Then dab the paint onto the areas that need to be stenciled. Try to get an even coat.

DIY wedding tree craft kit. How to make your own wedding guestbook alternative for your rustic themed wedding. DIY wedding tree with birds, how to paint your own wood wedding signs

You want to be able to see the wood grain still through the first couple of layers of paint. Here’s what mine looked like on the lettering after the first coat.

DIY wedding tree craft kit. How to make your own wedding guestbook alternative for your rustic themed wedding. DIY wedding tree with birds, how to paint your own wood wedding signs

After the first layer is dry you can apply a second layer, using the same technique. It will be super tempting to apply a heavier amount of paint but you definitely do NOT want to do this. All that extra paint will seep under your stencil and it will just be a big ugly mess and you’ll cry. ugly cry at that.

This is what my wedding guestbook looked like after the second layer. It obviously needs another coat. Just keep applying coats until you are happy with the coverage. You can apply up to 4 thin coats.

PRO TIP: the coverage will actually be darker than it appears while the stencil is still on the wood base.

DIY wedding tree craft kit. How to make your own wedding guestbook alternative for your rustic themed wedding. DIY wedding tree with birds, how to paint your own wood wedding signs

After you’re satisfied with the coverage you need to peel up the stencil. PEEL IT UP WHILE THE PAINT IS STILL WET. I know other tutorials suggest to peel after the paint dries but in my professional opinion dry peeling does not give good results. I have painted THOUSANDS of signs over the last couple of years and had LOTS of trial and error in this department ——> if you want to take your sign painting journey even further check out my SIGN PAINTING ECOURSE

Remove the taped off areas then to peel the stencil start from one corner and peel at a sharp angle, do not peel in the up direction rather in the pull toward you direction.

DIY wedding tree craft kit. How to make your own wedding guestbook alternative for your rustic themed wedding. DIY wedding tree with birds, how to paint your own wood wedding signs

Use and xacto knife to get up and under the stencil film. Do not force it under as this will gouge your board.

DIY wedding tree craft kit. How to make your own wedding guestbook alternative for your rustic themed wedding. DIY wedding tree with birds, how to paint your own wood wedding signs

After you’ve removed all of the stencil film your sign needs to cure for about 24 hours before using it. You can spray your sign with either a matte or satin finish but this is not necessary. Here’s the one I use for my signs, satin finishing spray.

DIY wedding tree craft kit. How to make your own wedding guestbook alternative for your rustic themed wedding. DIY wedding tree with birds, how to paint your own wood wedding signs

Please let me know if you have any questions on how to paint your wedding guestbook alternative. If you want to take your sign painting journey even further you can’t miss my sign painting E-course. I spent endless amounts money {seriously more than I’d like to admit}, wasted a ridiculous amount of time and energy to find the exact way to easily and efficiently paint wood signs for my sign painting business. I don’t want you to have the same stress. I wish I stumbled across a course like this when I was starting out. Someone to tell me and SHOW me exactly what to do {bc let’s be honest some tutorials are just WAY off on their DIY sign painting}. And not only that but tell me EXACTLY what to buy. I could have been making a HUGE profit a lot sooner if I didn’t have to go through all the trial and error.

Save yourself the headache learn the RIGHT WAY to create professional one of a kind signs.