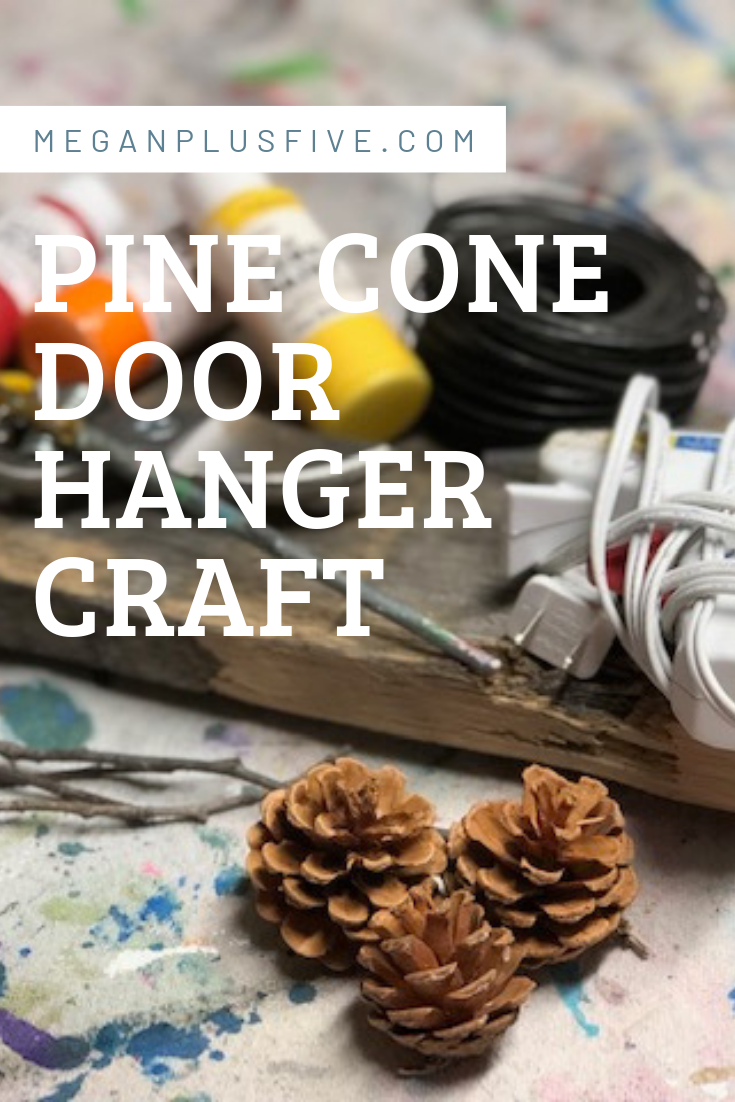
DIY how to make 2x4 wood candy corn

DIY 2x4 candy corn, how to make easy primitive fall decor

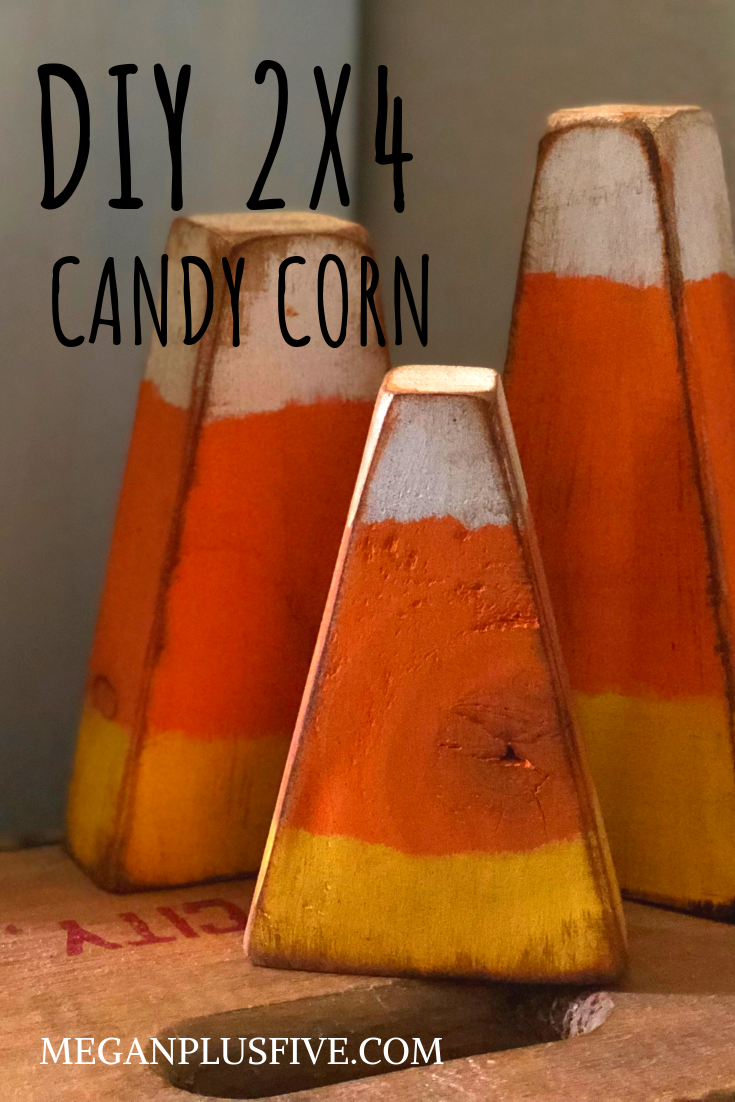
DIY EASY 2x4 primitive wood candy corn

DIY primitive candy corn, aren’t they soooo cute?! The last couple of years have been a little busier than normal at our house and I haven’t been decorating for the holidays like I normally do. So this summer I decided I’m going to make time to get back into the festive decorating. And with that I need to make lots of new pieces to decorate the seasons with. Including these adorable wood candy corn. Check out this fun TRICK OR TREAT shelf sitter set I made a few weeks ago.

I’ve had these on my craft to do list for a looooong time and just hadn’t made time to make myself a set. And now I do! I LOVE them! They turned out even better than I thought they were going to! And I can keep them up for the entire fall season.

DIY easy primitive wood 2x4 candy corn for your fall decorations

How to make your own set of primitive candy corn from a 2x4

And it was super easy to DIY. I was a bit nervous cutting the angles but I think they turned out so great!

If you don’t have the space or tools to DIY this from start to finish you can get one of my easy CANDY CORN CRAFT KIT. Everything you need to make these at home is included in your own candy corn craft kit.

Don’t have all the tools needed to complete this craft? Snag one of my easy DIY craft kit from my Etsy shop. Click CANDY CORN CRAFT KIT to get yours. Want to send it as a gift? During checkout mark that you would like to send it as a gift, leave their address and a sweet note to them and we’ll take care of the rest.

Affiliate Disclosure. Some of the links on this website are affiliate links, which means that I may earn a small commission if you click on the link or make a purchase using the link. If you make a purchase you will not be charged anything additional.

If you want to make them from scratch here’s what you’ll need

First cut your pieces into 4”, 5.5”, & 7” lengths. The angles I cut: 4”= 15°, 5.5”= 10°, 7”=10°. After you cut them give them a quick sanding. You don’t want to sand them super smooth as this will take away so much of the wood’s natural character. Be sure to wipe away the sawdust with a lint free cloth after you sand your candy corn.

DIY candy corn decorations. How this mom made her own from a scrap 2x4

Now paint all three with a thin coat of orange paint.

DIY candy corn decorations. How this mom made her own from a scrap 2x4

After the orange paint dries paint the bottoms yellow. You will likely need 2 coats for this. Let the first coat dry completely before applying the second coat.

DIY candy corn decorations. How this mom made her own from a scrap 2x4

Now, paint the tops white. Again, you'll need to paint two coats making sure your let the first coat dry completely before applying the second coat of white paint.

DIY candy corn decorations. How this mom made her own from a scrap 2x4

Once all of your candy corn are completely dry you can start distressing them with your 120 grit sand paper. Focus on the edges, corners, and lightly sand the fronts and sides. Then wipe the dust away with your lint free cloth.

DIY candy corn decorations. How this mom made her own from a scrap 2x4

Now you can apply your antiquing wax. A little bit of wax goes a VERY long way. Just like when sanding, you want to focus more on the edges and corners and give a light swipe with your chip brush on the fronts and sides. TIP: if you trim your chip brush down a little you will get a more stiff brush that you can better control your wax with.

DIY candy corn decorations. How this mom made her own from a scrap 2x4

If you don’t like the look of the antiquing wax you can opt for a clear wax. I LOVE antiquing wax and use it on TONS of my projects it highlights so much of the wood’s character. You can see the difference it makes. Check out my DIY American Flag tutorial where I use this same dark wax.

DIY candy corn decorations. How this mom made her own from a scrap 2x4

Now you’re ready to display them! I am soooo happy with the way these little 2x4 candy corns turned out {I think that’s the plural from lol}! I have a few more DIY fall projects yet to tackle before the season arrives so be sure to check back for more tutorials to make your own decorations for the upcoming season.

DIY candy corn decorations. How this mom made her own from a scrap 2x4

Catch the video tutorial below. If you LOVE it I would very much love if you would subscribe to my YouTube channel where I share all of my crafty video tutorials.


Easy pine cone door hanger DIY

PINE CONE DOOR HANGER CRAFT

How to make an easy pine cone door hanger

There are so many pine cone crafts I want to try but I thought I would try these adorable pine cone flowers first. I was really surprised at how easy they were to make myself and I plan to make SO many more!

If you’re looking for a more kid friendly project be sure to check out mess free pine cone art using a box. This was a favorite with our girls, and me too because it was literally mess free!

Here in the Midwest we have an abundant supply of pine cones so I didn’t have to search too far to find these little guys. I had great luck at my local park but here are some other places you can find pine cones *remember to always ask permission prior to collecting any pine cones

  • family

  • friends

  • local nature park {although ours doesn’t allow this yours might}

  • neighbors

  • shopping malls that have pine trees in the landscaping

After you’ve collected your pine cones you’ll want to make sure they aren’t covered in gross stuff, honestly I just wouldn’t pick up the ones that need super cleaned anyway lol! Leave those for the critters. I personally didn’t clean any of the pine cones we collected because they were in pretty good shape but if your pine cones have visible dirt or anything it’s a good idea to clean them prior to use.

Affiliate Disclosure. Some of the links on this website are affiliate links, which means that I may earn a small commission if you click on the link or make a purchase using the link. If you make a purchase you will not be charged anything additional.

Easy pine cone door hanger DIY

Here’s what you’ll need

Helpful tools

How to make flowers from pine cones

First you need to break apart your pine cones. This is a little harder than it looks and takes a lot of patients. Using your wire cutting slowing wedge them into the pinecone where you want it to break apart then use those muscles to cut. You might have to do this a few times before it comes completely apart.

easy pine cone door hanger

Now paint them. I just used a small paint brush and carefully painted all around the pine cone EXCEPT the middle. Leaving the middles unpainted they will look like adorable little flowers! I chose to paint mine in fall colors, red, yellow, and orange, but you can use whatever colors you’d like. I even painted the bottom as you’ll be able to see that once it’s glued down because it’s curved. I just did one coat on mine but if you don’t like the coverage of one coat on your pine cones you can give yours two coats.

Easy pine cone door hanger DIY

I used an old piece of wood for my base but you can use any wood base you’d like. Because I wanted to hang mine I went ahead and drilled the holes using my Ryobi drill, for the wire to go through before I started gluing the pine cones and sticks down.

easy pine cone door hanger DIY

While my glue gun was warming up I laid out the painted pine cone flowers where I wanted them to go. See how gorgeous this old piece of wood is! It even still has the nails in it, see them on the right. Granted it’s a little warped but it’s perfect for a scrappy craft like this.

Easy pine cone door hanger DIY

Then I used my wire cutters to cut the sticks down to size for the stems. I just eyeballed this, it doesn’t have to be exact. The sticks I used were pretty thin. You could also use some of the discarded pine cone pieces and make green leaves to glue by the stems. That would have made this project even better!

easy pine cone door handger DIY

Then start hot gluing down all the pieces. I put a fairly good amount on the pine cones because they were heavier than the sticks and I didn’t want them falling off as soon as I hung the door hanger up. You’ll want this to totally dry before hanging just incase the glue underneath isn’t all the way dry you don’t want it to start slipping and your pine cone fall off.

easy pine cone door hanger

Add your wire and you’re done. One of the easiest craft projects and you probably didn’t have to spend a penny!

Easy pine cone door hanger DIY

Pin this for later

easy pine cone door hanger, flower pine cones

DIY simple rustic wooden Christmas presents, how to make your own

DIY simple rustic wooden Christmas presents, how to make your own

DIY FAUX WOOD CHRISTMAS PRESENTS

I’m a busy wife, momma, and business owner so naturally I LOVE a good craft that I can whip out really fast and that makes the heads turn. These little guys are just the perfect DIY for the job!

In our studio I try to reuse the same base sizes over and over again. This makes for a smooth operation. I try to create pieces from the basic bases we have on hand at the shop. When I stumbled across something similar on Pinterest I had to make my own version of these adorable faux presents.

I know not everyone has the resources or expensive tools to make all their crafty dreams happen so I’ve put together CRAFT KITS for our most popular DIY’s. You can pick up our FAUX PRESENT KIT HERE

DIY simple rustic wooden Christmas presents, how to make your own

If you wanna start from scratch here’s what you’ll need:

DIY simple rustic wooden Christmas presents, how to make your own

These are SO super simple, once you do one set you’ll be making them for everyone for Christmas! So let’s get started.

First, you want to be sure all your pieces are sanded to knock any splintery ends. If you purchased our CRAFT KIT you do not need to do this step as it’s already been done for you:)!

Next, you want to paint each block a different color. I did two coats on mine. Be sure you wait till the first coat is TOTALLY DRY before applying the second coat. If you don’t, applying wet paint on top of wet paint tends to pull up the layer underneath.

DIY simple rustic wooden Christmas presents, how to make your own

Can we just take a minute and adore this girl! Isn’t my little helper so stinking CUTE! She’s always up for being my little crafting model Ok, back to the tutorial…

Once your paint is dry and you are happy with the coverage you’ll need to sand on the edges and the corners of your blocks. Take your 120 grit sand paper and go over the areas that would be naturally worn. You don’t have to use 120, that’s just my go to grit. Any grit of sandpaper will work, just go slow at first to see how much pressure you need to apply. I used my RYOBI cordless sander for this step.

Next you want to apply the dark wax to your blocks. If you’ve never worked with dark wax before you might want to test it out on a piece of paper first. A little wax goes a long way.

Take your chip brush and barely dip your bristles in, dab off onto a piece of paper or paper towel. Just like you did when sanding, focus on applying the wax to the areas that would be naturally worn. You’ll want to apply to the corners, edges, then do a light quick swipe on all the sides. This will give it a real natural rustic finish. The wax gets into all those uneven areas, much like how dirt would, and make it look old.

faux wooden presents4.jpgDIY simple rustic wooden Christmas presents, how to make your own

After you have your wax applied to all of your block the last step is to add your burlap “bow”. I picked up a roll of looser knit burlap at my local Walmart but any burlap will work. Fun fact, the looser the knit the easier it will unravel when cut. I cut my burlap into 2” wide strips and measured their length so they stuck up 3”-4” above the blocks like shown below. Now tie those two pieces in a knot. You’ll do the same on the last two blocks. And you’re done! Literally can’t get any easier.

DIY simple rustic wooden Christmas presents, how to make your own

Place them beside your tree, on your kitchen counter, or your mantle and admire them all Christmas season!

DIY simple rustic wooden Christmas presents, how to make your own

These little guys make such great gifts, a fun craft night with the family, or crack open a couple bottles of your fave wine with your fave girlfriends and make it a moms night in Pinterest party!

I hope you love this DIY! If you did I’d love to hear your feedback…even better, I’d LOVE to see pics of your finished faux presents.

Christmas wish list, 100 gift ideas to get the CRAFT obsessed kid in your life

Christmas wish list, 100 gift ideas to get the CRAFT obsessed kid in your life

What do you give the craft obsessed kid? We have 3 crafty girls {the fourth one isn’t too far behind though} and own a family friendly CRAFT STUDIO so we have a pretty good idea of what kids LOVE to create with. Most kids love cutting, gluing, and adding as much paint to things as they can. They are just figuring out how to use different tools and exploring different colors, textures, and possibilities.

Did you know there are ALL kinds of different everyday items you can use to create with? Take a toothbrush for instance. This is one of those things we have in our studio that makes everyone say “ummmm do you brush your teeth here?” and the answer is always “no, we use it to paint”. A fun technique my grandma taught me when I was very young, to use a toothbrush to add little specs and small splatters of paint. It is the best tool for this so we keep several toothbrushes in shop just for this. I am so proud to pass down that little technique to so many.

Our older girls and I worked on this list just for you! They really enjoyed listing off all of their favorite supplies to create with. We hope you can use this to put together a really awesome CRAFT GIFT for your crafty kiddo! Let them explore. Let them make a mess. Let them be creative.

Christmas wish list, 100 gift ideas to get the CRAFT obsessed kid in your life

Our family trip to the pumpkin patch, 5 reasons why we support small local farms each and every fall

Our family trip to the pumpkin patch, 5 reasons why we support small local farms each and every fall

Here in the Midwest EVERYONE with kids visits the pumpkin patch every single fall. It’s like our own little way of officially welcoming in the fall season.

If you’ve never been to a pumpkin patch you are surely missing out. It’s a whole experience that you will look back on and remember fondly. And you’ll get some really great pictures because pumpkins make all fall pictures 100% better!

This year we visited a fairly new pumpkin patch, The Pumpkin Pad, and I have to say it was even better than we expected! This was their second year being open so we were expecting them to have a few activities for the kids but we were so wrong! They had an inflatable jumping pad, bounce house, super awesome round swings made from sturdy netting, tractor rides, giant slide, a huge corn pit to dig in, bean bag toss, a tall grass maze {which my husband and I weren’t totally accepting of but the girls LOVED it} and so much more! All for $10/person, they let our 2 yr old in for free and their pumpkins were SUPER AFFORDABLE…say what!

Here are my top 5 reasons why we choose to support a small local farm each year vs a big oversized money maker

1. Owning our own brick & mortar shop we know the importance of supporting small local business. We try to shop small as much and often as we can. At the end of the day I would rather our hard earned money go to supporting a family rather than some super rich person, whenever we can.

Our family trip to the pumpkin patch, 5 reasons why we support small local farms each and every fall

2. When you visit a big name patch, especially if you go on a weekend, it will likely be crowded. But at a small family owned pumpkin patch the people come in much lower numbers. You have room to roam and enjoy your time there without your anxiety going through the roof {or the clouds because you are outside ;) }

Our family trip to the pumpkin patch, 5 reasons why we support small local farms each and every fall

3. The prices are usually WAY more affordable overall. We have a bigger family so anytime we do anything like this it usually puts a small dent in the wallet. The small farm we visited this year had GREAT prices on their admission and their pumpkins! We were pleasantly surprised! Everyone got pumpkins, our two year old got a few, all for $20! We couldn’t have gone to Walmart and got everyone a pumpkin for that price.

Our family trip to the pumpkin patch, 5 reasons why we support small local farms each and every fall

4. They are usually a TRUE PUMPKIN PATCH! Meaning the pumpkins are still on the vine and you cut them off yourself. This is a fun experience for everyone. We’ve been to other big name patches with our girl’s school field trips that have already precut ALL the pumpkins and leave them in the fields or they don’t have the patch at all and have the pumpkins ready for “picking” on bales of straw all around the farm. There’s nothing wrong with either of those ways but we enjoy picking them straight off the vine.

We’ve found that the small farms are usually the true YOU PICK farm. Which for our family never gets old!

Our family trip to the pumpkin patch, 5 reasons why we support small local farms each and every fall

5. The owners put so much love and their own hard work into their farms! As soon as you walk up you are welcomed with a big smile from likely the owner of the farm. They are so proud of what they have created for your family to come and enjoy and make endless memories.

Our family trip to the pumpkin patch, 5 reasons why we support small local farms each and every fall

I hope this encourages you to support your own local farms. Knowing you are supporting another family is something so special! Each and every local farmer we’ve met has been genuinely kind and grateful to all in the community that supports their small business.