Kid's gingerbread house decorating party

Kid friendly gingerbread house decorating party using graham crackers. How to have a stress free Christmas tradition party with your kids. Decorating gingerbread houses as a family. How to make easy gingerbread houses for kids.

Kid friendly gingerbread decorating party using graham crackers

Christmas with kids is always fun. There’s so many traditions you can start with them. Like baking cookies, making Christmas stockings, and decorating gingerbread houses to name a few.

We made graham cracker gingerbread houses last night and it was so much fun! And my stress level was at a ZERO! Yes, a zero. If you are a momma of multiples, especially multiples that are stair steps, you know what I’m talking about. Things like this can stress us out. My secret to a no stress gingerbread making party? Let the kids have fun and don’t worry about any of it being pretty or perfect. That’s it!

Affiliate Disclosure. Some of the links on this website are affiliate links, which means that I may earn a small commission if you click on the link or make a purchase using the link. If you make a purchase you will not be charged anything additional.
Kid friendly gingerbread house decorating party using graham crackers. How to have a stress free Christmas tradition party with your kids. Decorating gingerbread houses as a family. How to make easy gingerbread houses for kids.

Don’t get me wrong the pictures on Pinterest with the perfectly decorated “kid” made gingerbread houses are absolutely adorable. A picture perfect graham cracker house with a tiny little spill of sprinkles on the table and a dab of out of place frosting is oh so cute…but let’s be honest that’s not likely to happen in most homes with little ones. As a mom of 4 I KNOW this lol! And really, where’s the fun if there’s not a GIANT MESS of sprinkles, crumbs of graham crackers, frosting smeared on their faces and broken candy canes to pick up?

Kid friendly gingerbread house decorating party using graham crackers. How to have a stress free Christmas tradition party with your kids. Decorating gingerbread houses as a family. How to make easy gingerbread houses for kids.

So let’s ditch the vision of perfectly put together Christmas gingerbread houses and embrace that beautiful chaos. Those are the moments you are connecting with kids. Those are the moments your kids are learning. Those are the moments that matter.

GRAHAM CRACKER GINGERBREAD HOUSE YOUR KIDS WILL ENJOY MAKING

Most of the supplies I picked up at my local Dollar Tree. Here’s what we used

Kid friendly gingerbread house decorating party using graham crackers. How to have a stress free Christmas tradition party with your kids. Decorating gingerbread houses as a family. How to make easy gingerbread houses for kids.
  • graham crackers

  • 2 tubs of cream cheese frosting

  • green food coloring

  • mini candy canes

  • gumdrops

  • assorted hard candies

  • large spree candies

  • twizzlers pull and peel

  • red and white round peppermints

  • green and white peppermints

  • mini & regular sized marshmallows

  • jellybeans

  • traditional pretzels

  • large & mini pretzel sticks

  • sprinkles

Other supplies that we used:

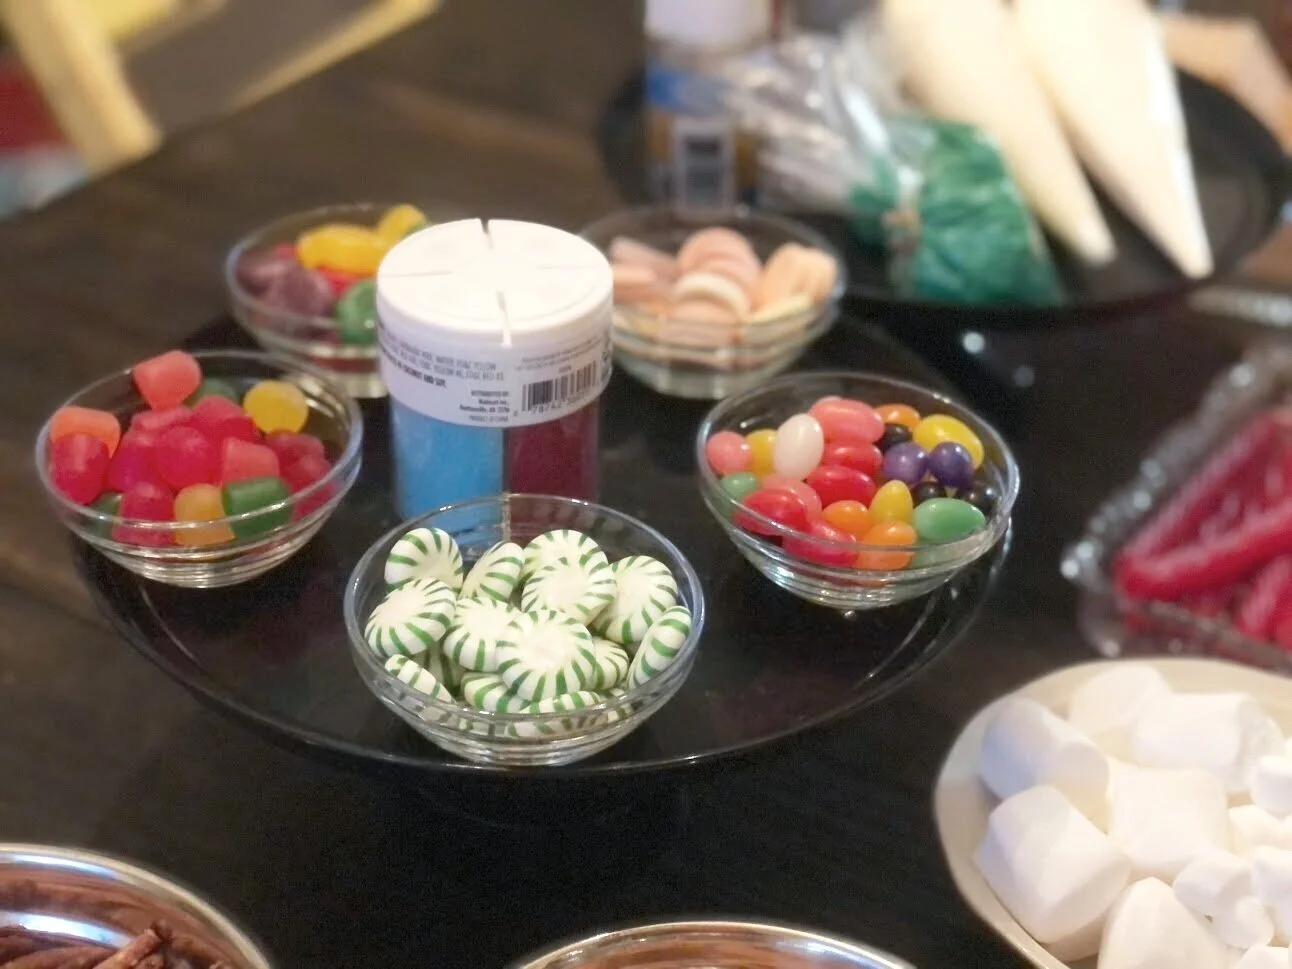
To free up space we used cake stands to hold the candies that were in these little glass condiment dishes. I love these little dishes. They are super cheap, only $.25 each! This got them up and off of the table so that the girls would have more space to create.
Kid friendly gingerbread house decorating party using graham crackers. How to have a stress free Christmas tradition party with your kids. Decorating gingerbread houses as a family. How to make easy gingerbread houses for kids.

We used another cake stand to hold the sprinkles and the bags of frosting. The frosting I used, generic cream cheese frosting in a can, wasn’t really the best for this but it works. It doesn’t set up/dry super fast but it works. We also stuck the bags of frosting in the fridge about an hour before we started decorating so that the icing would be more firm to work with.
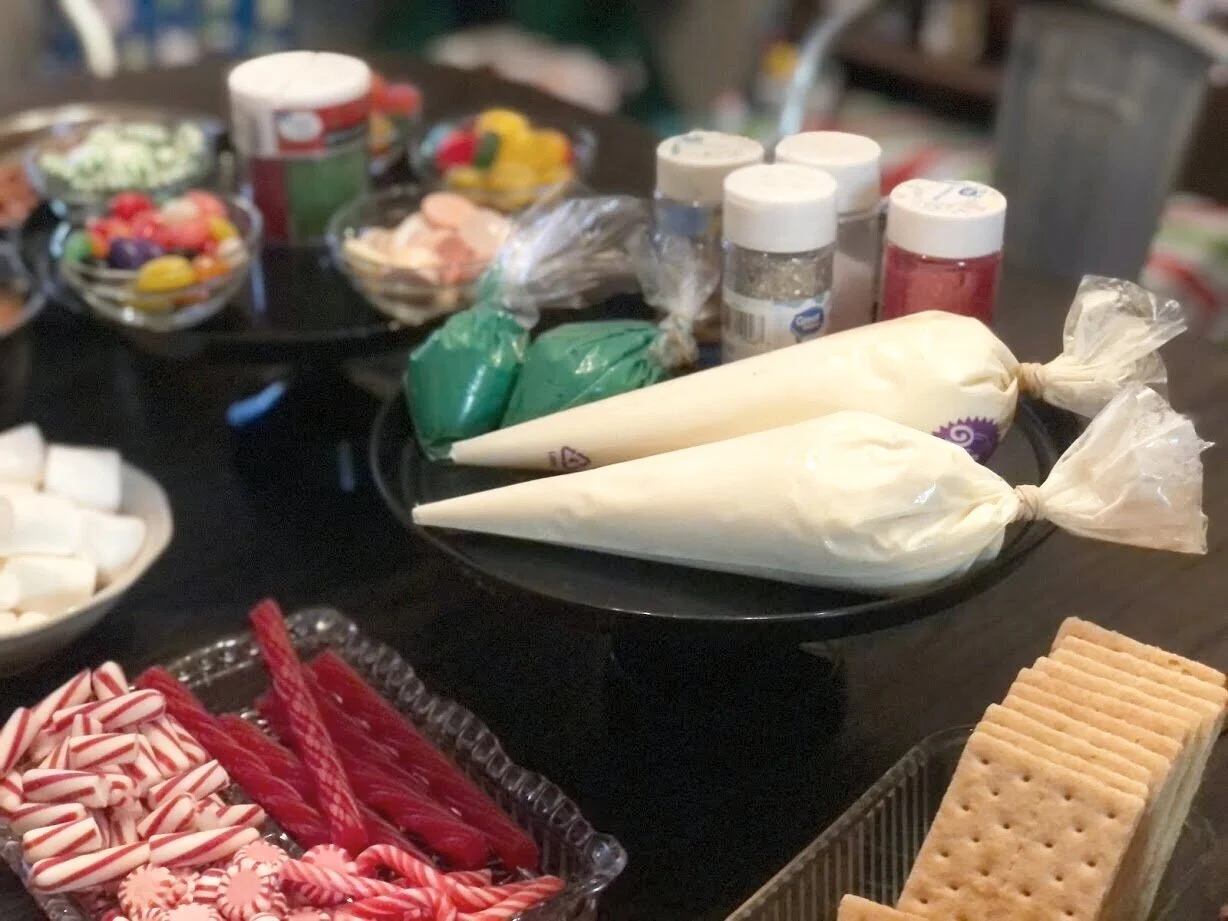
Kid friendly gingerbread house decorating party using graham crackers. How to have a stress free Christmas tradition party with your kids. Decorating gingerbread houses as a family. How to make easy gingerbread houses for kids.

Each daughter got a paper plate to make their gingerbread house on.

Kid friendly gingerbread house decorating party using graham crackers. How to have a stress free Christmas tradition party with your kids. Decorating gingerbread houses as a family. How to make easy gingerbread houses for kids.

They played around with different designs then started “gluing” their pieces together using the bags of icing.

Kid friendly gingerbread house decorating party using graham crackers. How to have a stress free Christmas tradition party with your kids. Decorating gingerbread houses as a family. How to make easy gingerbread houses for kids.

After their houses set up, the frosting had hardened a bit, they decorated their little hearts out!

Kid friendly gingerbread house decorating party using graham crackers. How to have a stress free Christmas tradition party with your kids. Decorating gingerbread houses as a family. How to make easy gingerbread houses for kids.

I always love seeing their creativity take flight. They kept adding and adding candies thinking of new ways they could use all the different colors and shapes.

Kid friendly gingerbread house decorating party using graham crackers. How to have a stress free Christmas tradition party with your kids. Decorating gingerbread houses as a family. How to make easy gingerbread houses for kids.

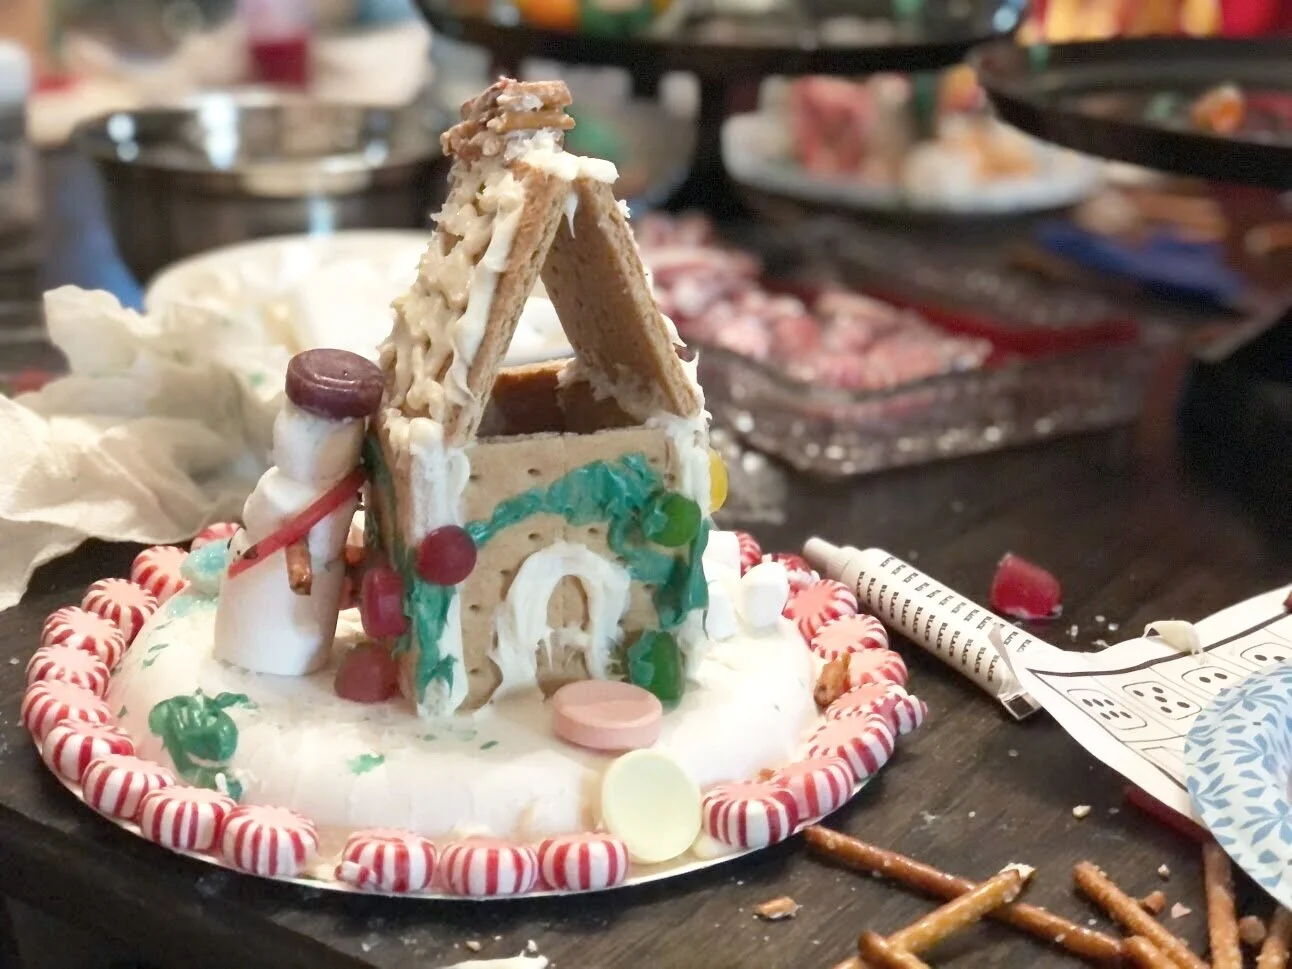
My third daughter was the only one to make a snowman out of the marshmallows. He was adorable with his little hard candy hat and twizzler scarf.

Kid friendly gingerbread house decorating party using graham crackers. How to have a stress free Christmas tradition party with your kids. Decorating gingerbread houses as a family. How to make easy gingerbread houses for kids.

I love the doorway my first born daughter made using the marshmallows.

Kid friendly gingerbread house decorating party using graham crackers. How to have a stress free Christmas tradition party with your kids. Decorating gingerbread houses as a family. How to make easy gingerbread houses for kids.

And this super creative door crafted by daughter number 2 made into the shape of a heart using mini peppermint sticks. Adorable!

Kid friendly gingerbread house decorating party using graham crackers. How to have a stress free Christmas tradition party with your kids. Decorating gingerbread houses as a family. How to make easy gingerbread houses for kids.

Last but not least is the masterpiece from daughter number 4. Oh the love that was put into this. It may look like a mess to others but she had THE MOST fun making this. After her original house fell she turned the rubble into a work of gingerbread house art!

Sure our houses weren’t perfect by Pinterest standards but it doesn’t even matter. For a couple of hours our family sat around our kitchen table and had the best time singing random songs, cracking jokes, teasing one another, and making memories. AND there wasn’t an argument one! I know, super rare for a family with 4 kiddos. It was a perfect Christmas themed evening.

Check out more kid friendly crafts below.

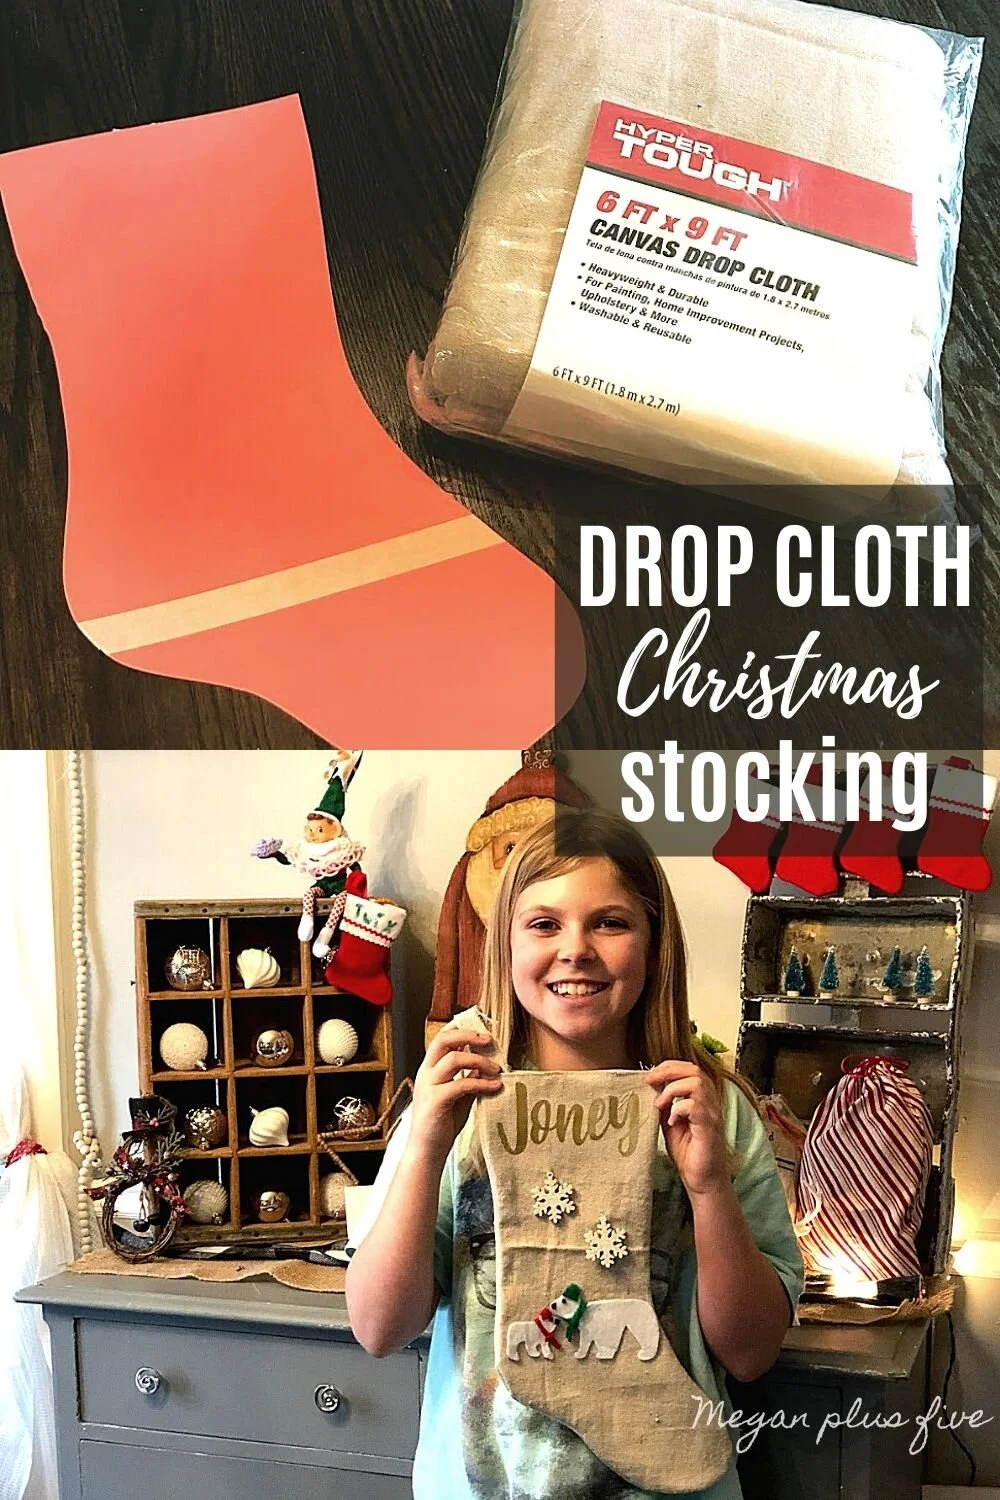
Christmas stocking party with the kids

How to have a stress free stocking party with your kids. Make cute Christmas stockings out of drop cloths. DIY Christmas stockings plus a free sock stocking SVG to use with your Cricut.

KID MADE CHRISTMAS STOCKINGS

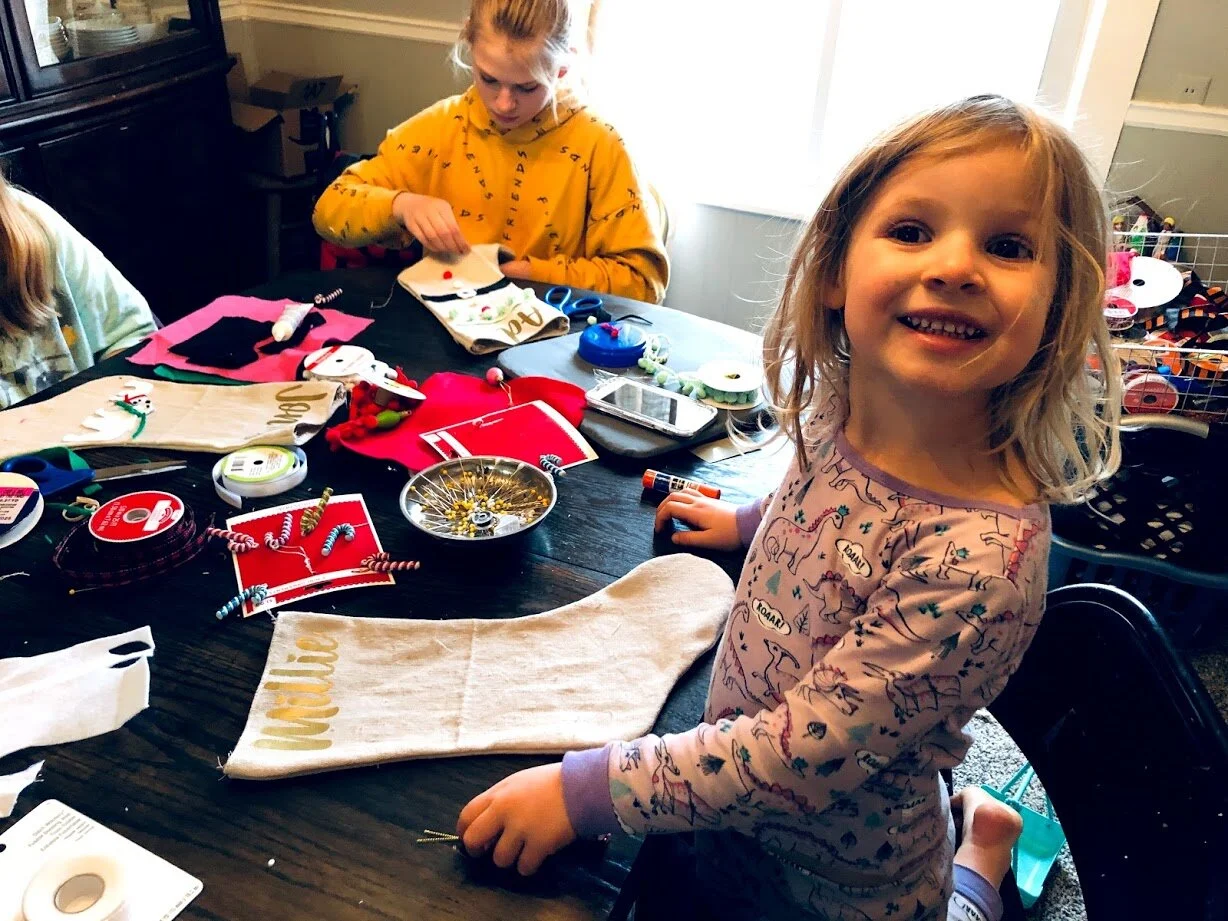
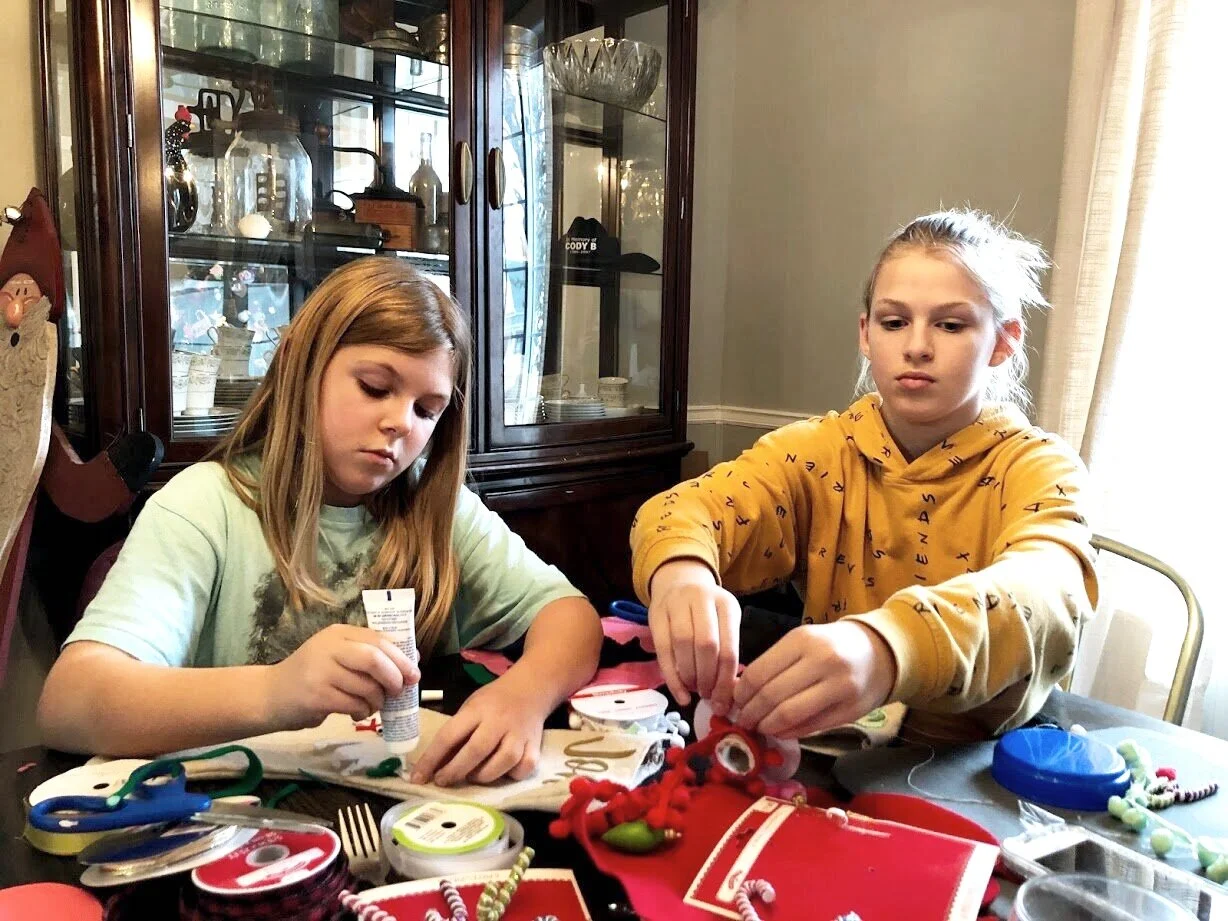
Making Christmas stockings with my girls is one of my most favorite Christmas traditions we do. Every year my four daughters and I sit around the table that is basically a big mess of Christmas craft supplies and make stockings. We break out the glitter, felt, ribbons, fabric markers, bells, buttons… all the things. And I let them create whatever their little hearts want.

Granted they don’t look perfect or match lol but we have so much fun and the memories are priceless. Sometimes I’ll give my momma input as to what might look good but mostly I’m there to help, encourage, and tell them their stockings look amazing.

This year I was browsing Instagram and came across Heide’s post from Everyday Cookies- Heide. She shared a gorgeous pic of her handmade Christmas stockings that she had made from a DROP CLOTH! You guys, my mind was blown!

Affiliate Disclosure. Some of the links on this website are affiliate links, which means that I may earn a small commission if you click on the link or make a purchase using the link. If you make a purchase you will not be charged anything additional.

How to have a stress free stocking party with your kids. Make cute Christmas stockings out of drop cloths. DIY Christmas stockings plus a free sock stocking SVG to use with your Cricut.

I honestly never thought to use a drop cloth for a Christmas stocking! But it was SO PERFECT. The natural color of the drop cloth was just what I had in mind for making our stockings this year.

The best part is that the drop cloth was cheaper than buying traditional fabric and I have so much left over for LOTS more projects.

Use the same Christmas stocking SVG I used for free —-> CLICK HERE

HOW TO HAVE A CHRISTMAS STOCKING PARTY

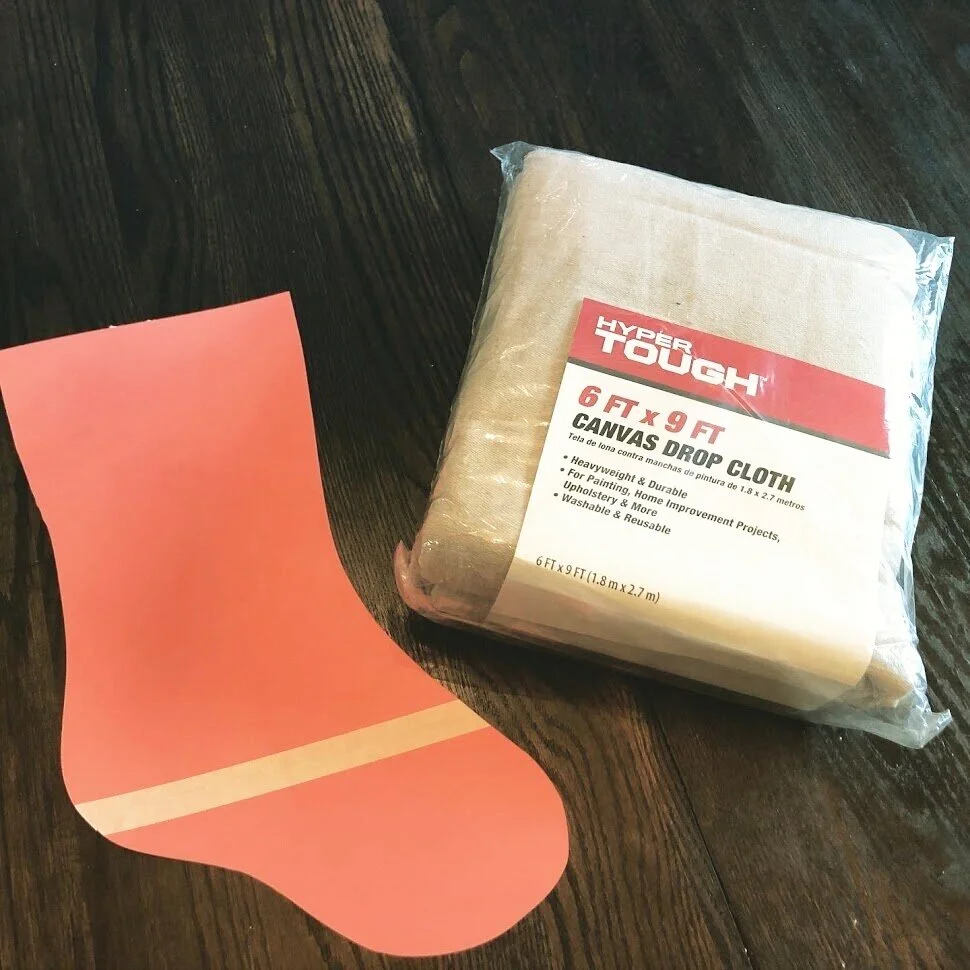
Here are some basic supplies you need

1. SEW STOCKINGS

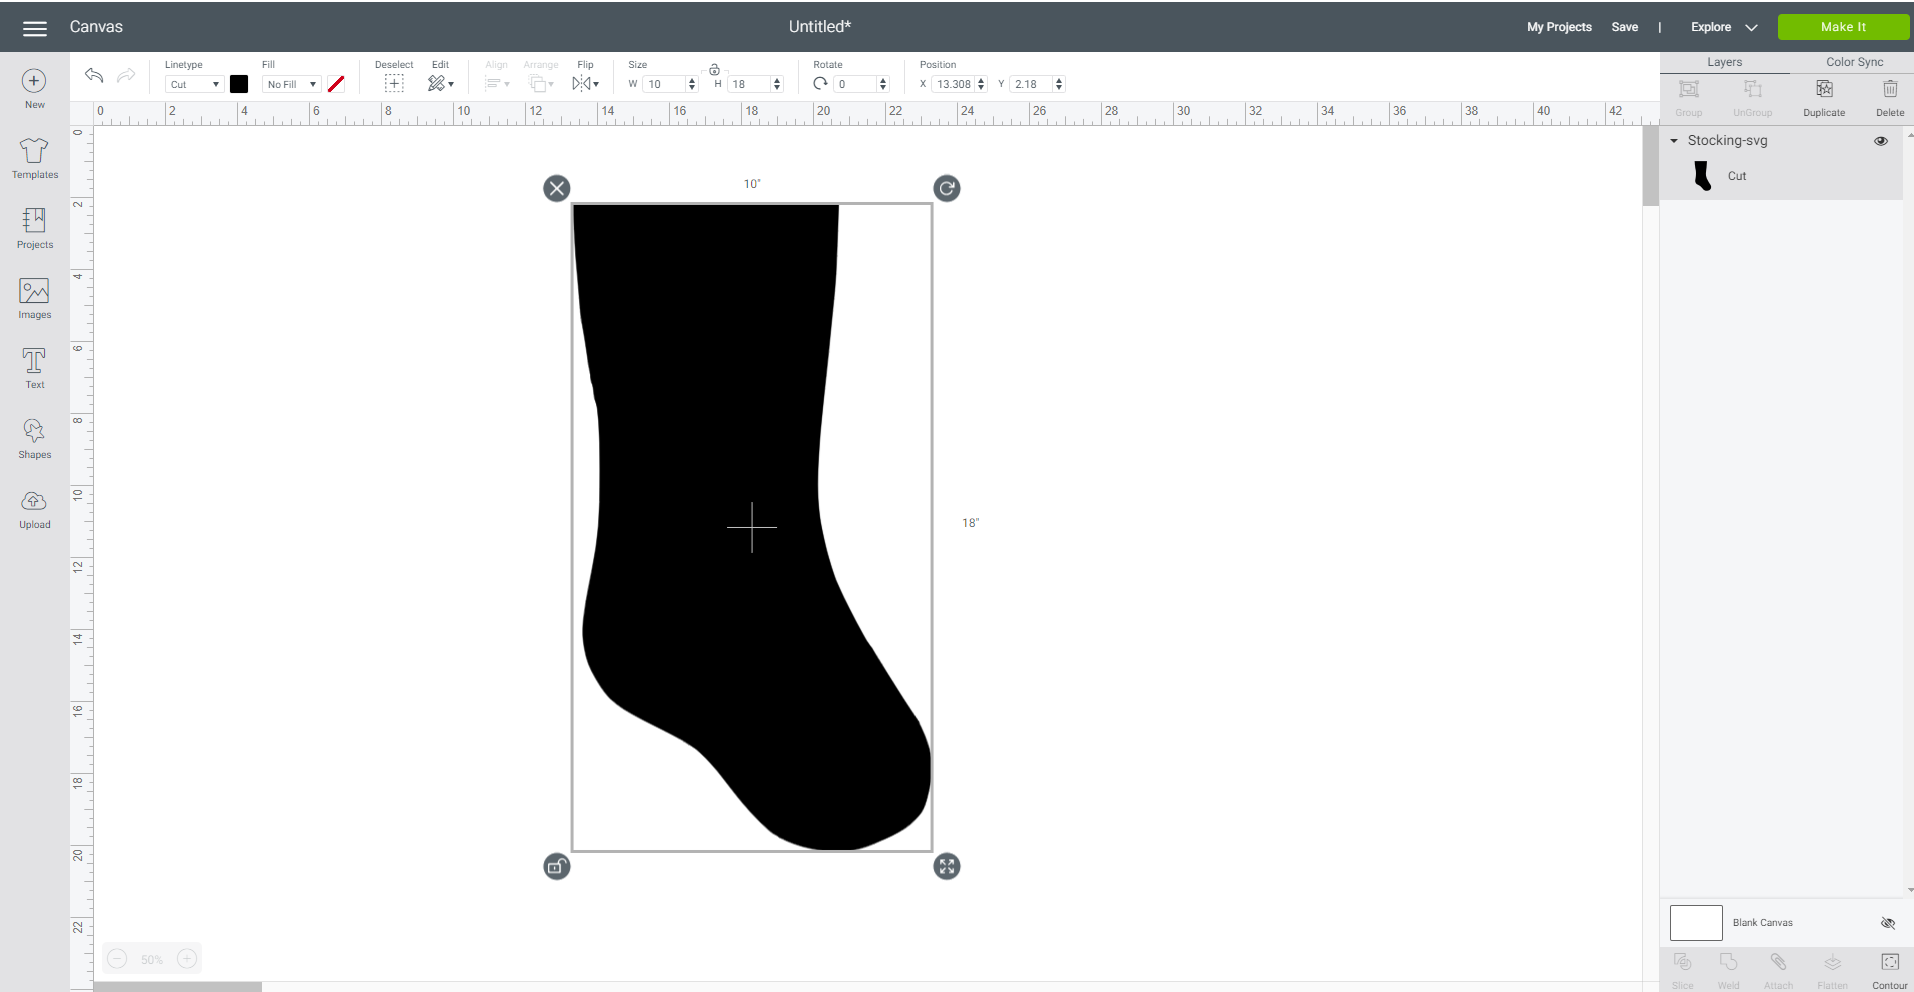
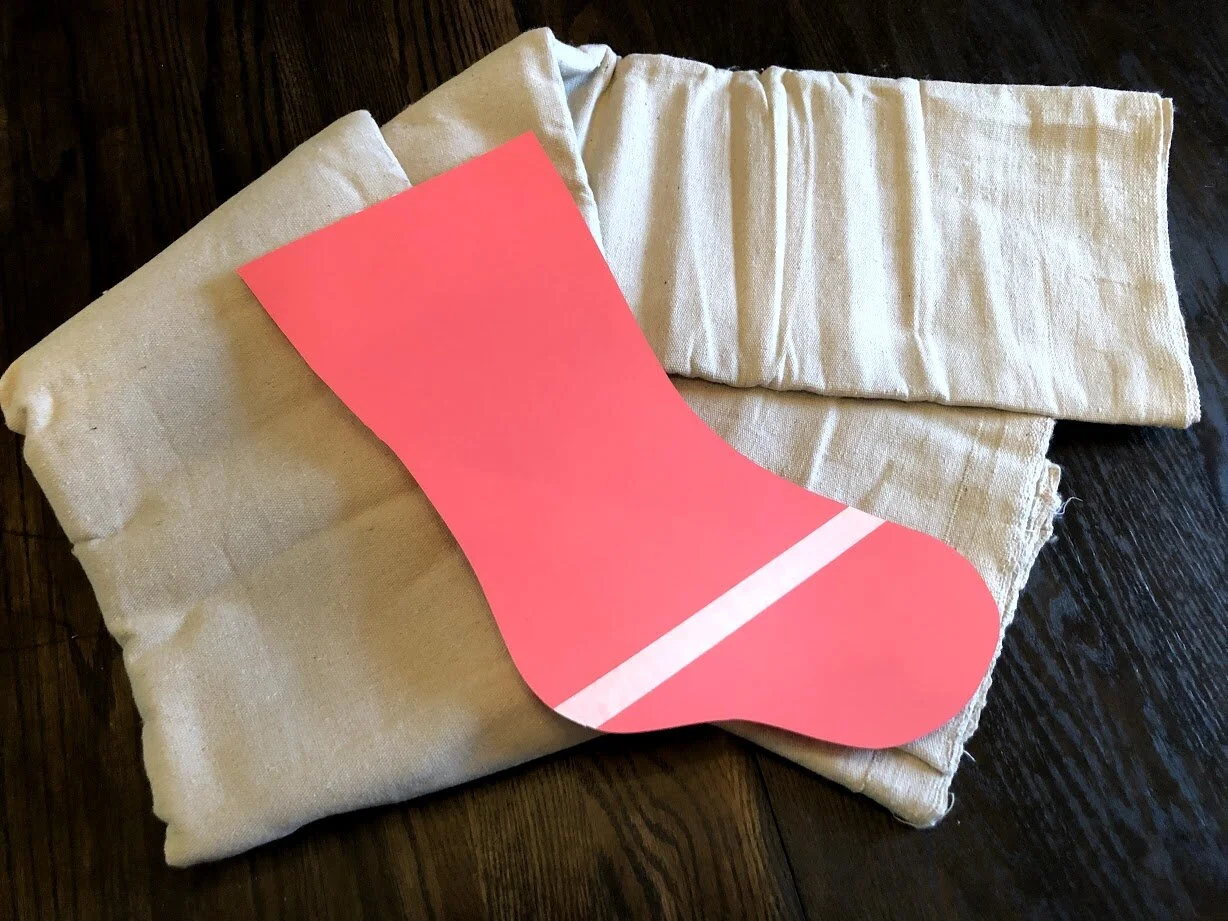
I made a template on my computer then I cut it out on cardstock using my Cricut cutting machine. I didn’t have long enough cardstock so I butted two pieces of 12”x12” cardstock and taped them together. I used this same style when I made this wooden mermaid tale cupcake stand.

I re-sized my stocking template to 10”wide by 18” long in Cricut Design space.

How to have a stress free stocking party with your kids. Make cute Christmas stockings out of drop cloths. DIY Christmas stockings plus a free sock stocking SVG to use with your Cricut.

I don’t have a video, or pictures of this but it was pretty simple. You will need to cut out two stockings, one for the front and one for the back. The pin them together and sew around the stocking leaving the top open. Then turn the stocking inside out so that the sewed seam is now on the inside of the stocking. I will get a video of this process up asap.

How to have a stress free stocking party with your kids. Make cute Christmas stockings out of drop cloths. DIY Christmas stockings plus a free sock stocking SVG to use with your Cricut.

2. ADD NAMES

I used my Cricut to cut names out of HTV (heat transfer vinyl) prior to the girls decorating their Christmas stockings.

To keep it easy, because I was cutting out 5 names (my four girls plus a friend), I had them agree on a color that all 5 names would be cut from. They chose a gold color.

We used my mini Cricut EasyPress to press the names on the stockings. I let the older girls do this and helped when they needed it. If you don’t have a mini EasyPress I highly recommend getting one if you do a lot of little crafty projects that require HTV. I have used this little handy press more than I actually thought I would. And it’s perfect for my teen & preteen to use because it’s easy to hold and manage.


3. DECORATE

I picked up several packages of mini Christmas embellishments at my local Walmart of snowflakes, candy canes, vintage looking lights, and a few more.

How to have a stress free stocking party with your kids. Make cute Christmas stockings out of drop cloths. DIY Christmas stockings plus a free sock stocking SVG to use with your Cricut.

We also pulled out my ribbons, felts, yarns, and buttons. Everything was put on the table in one big beautiful Christmas craft explosion. Sometimes it’s just better to embrace the mess than it is to try and keep all the things organized and tidy. They even brought out a fork to make pom poms (just in case you noticed there was a fork in the picture below lol).

How to have a stress free stocking party with your kids. Make cute Christmas stockings out of drop cloths. DIY Christmas stockings plus a free sock stocking SVG to use with your Cricut.

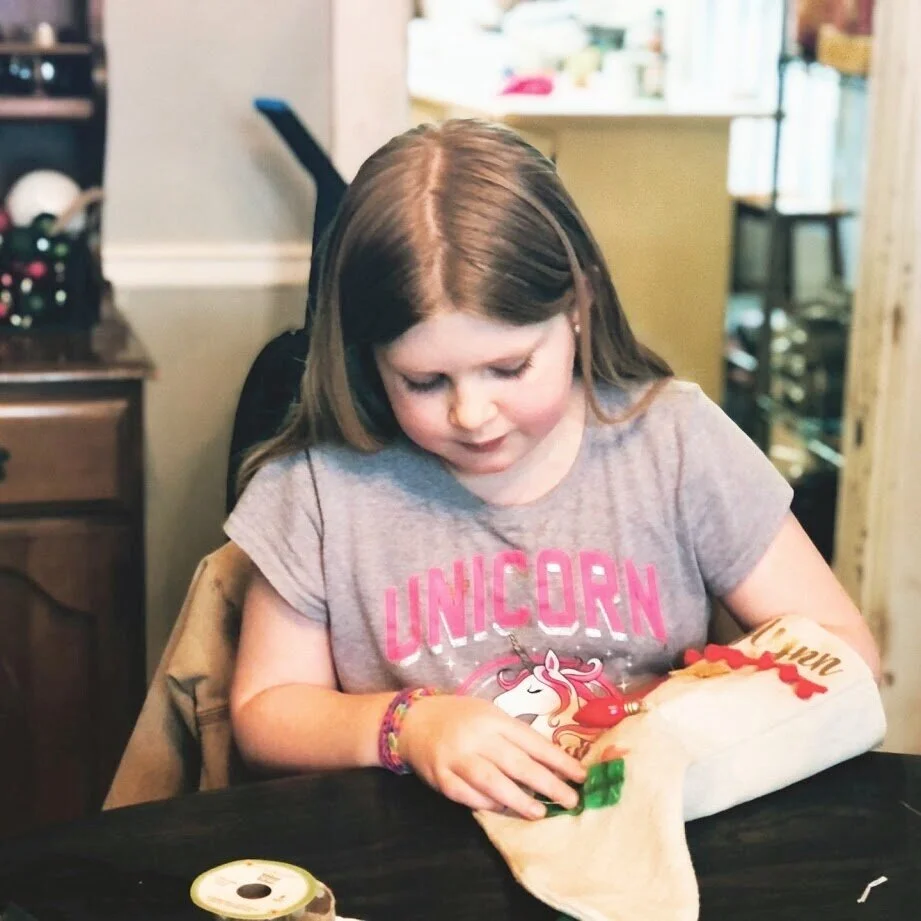
I encourage my girls to try using the tools, like my daughter in the pic below hand sewing on an embellishment, before I step in and help. It’s so important for us parents to let our kiddos do things on their own so they can learn.

How to have a stress free stocking party with your kids. Make cute Christmas stockings out of drop cloths. DIY Christmas stockings plus a free sock stocking SVG to use with your Cricut.

4. ADD HANGER

Don’t forget to add a hanger. We did this step last and all of the girls came up with something different. One used yarn, two of the girls used a piece of the drop cloth, and the other two used different kinds of ribbon. We tacked these on using a needle and thread then I reinforced them with the hot glue gun.

How to have a stress free stocking party with your kids. Make cute Christmas stockings out of drop cloths. DIY Christmas stockings plus a free sock stocking SVG to use with your Cricut.

Didn’t their Christmas stockings turn out SO cute?!

My girls and I enjoy this so much every single year. Mostly because I let them just go to town and create whatever their little hearts want on their Christmas stockings. Let me know if you have any questions in the comments below.

Happy Crafting!

Making leaf art with your kids

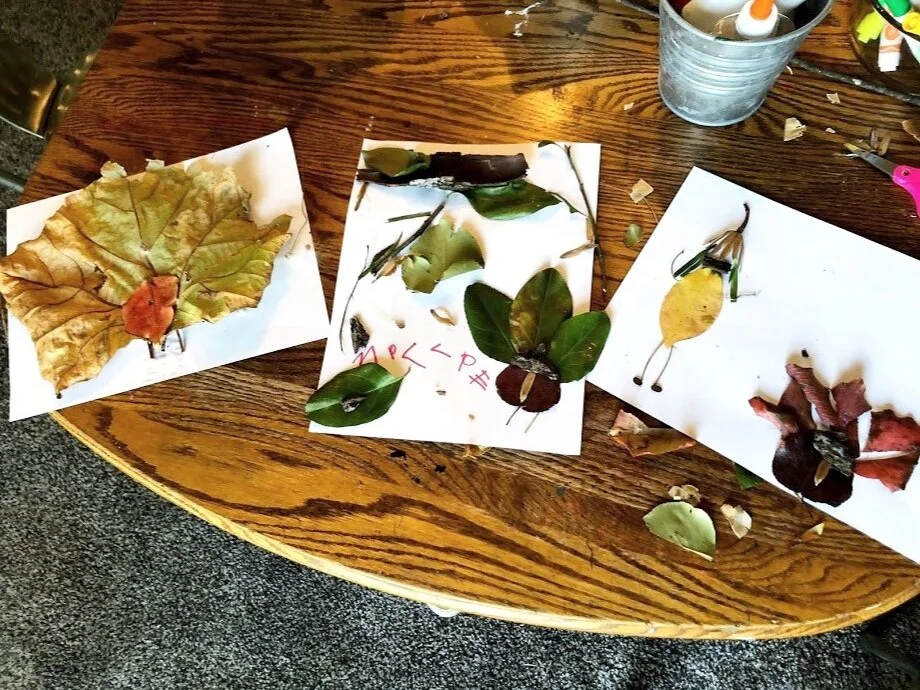
Leaf art with kids. Fun and easy leaf people and leaf turkeys for kids to make with their parents. Fun outdoor fall craft project to do with kids of all ages.

MAKING LEAF ART WITH YOUR KIDDOS

Whoa what a school year this has turned out to be for all of our kiddos. I know that virtual learning can be a lot of screen time but it also means that we get to have a lot of creative fun time with our kids too.

While we are learning at home I’m trying to plan fun things to do for the older kids and also things that will keep daughter #4 busy too since we are doing pre-k at home instead of the traditional pre-k we’ve always done. Today we made art. And not just any art, we made people and animals with leaves and other nature items.

Affiliate Disclosure. Some of the links on this website are affiliate links, which means that I may earn a small commission if you click on the link or make a purchase using the link. If you make a purchase you will not be charged anything additional.

Leaf art with kids. Fun and easy leaf people and leaf turkeys for kids to make with their parents. Fun outdoor fall craft project to do with kids of all ages.

CLICK HERE for more KIDS PROJECTS

And it was SO FUN!

We’ve done something similar before, painting with nature click here to see how fun that turned out. But today we didn’t break out any paints. We just used the colors (and the option for markers for faces) that we found in the things that God gave to our backyard.

The older girls actually enjoyed it way more than my pre-k girl did which completely surprised me. I figured they would think it was “baby-ish” but they fully enjoyed this crafty project.

Making leaf art with your kids

STEP 1

Gather pieces of nature. We took a small basket outside and filled it with all kind of things (I purposefully didn’t take a big basket out there because I knew they would fill it FULL lol! The small one was more than enough materials for them to create with)

  • colorful leaves

  • twigs

  • some pine cone looking things

  • blades of grass

  • berries

  • vines

  • and whatever else the kiddos want to grab

STEP 2

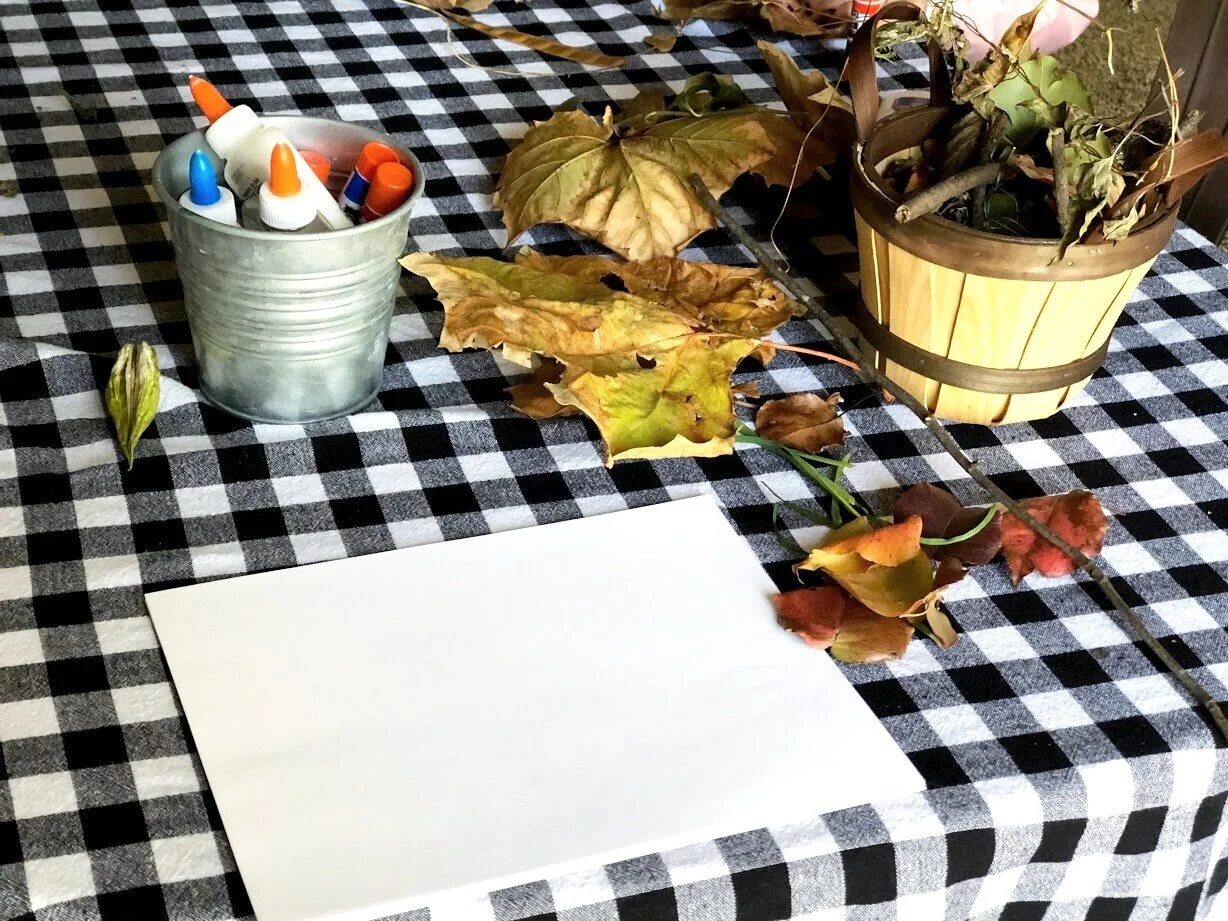
Bring it inside and set up a place where the kids can get messy. We used our dining room table and since we weren’t painting I didn’t mess with putting a drop cloth down.

I brought out our metal bin of glues, squeeze glue bottles and glue sticks, washable markers for if they wanted to add faces or anything their imaginations could think of, kid friendly scissors, and copy paper.

Leaf art with kids. Fun and easy leaf people and leaf turkeys for kids to make with their parents. Fun outdoor fall craft project to do with kids of all ages.

STEP 3

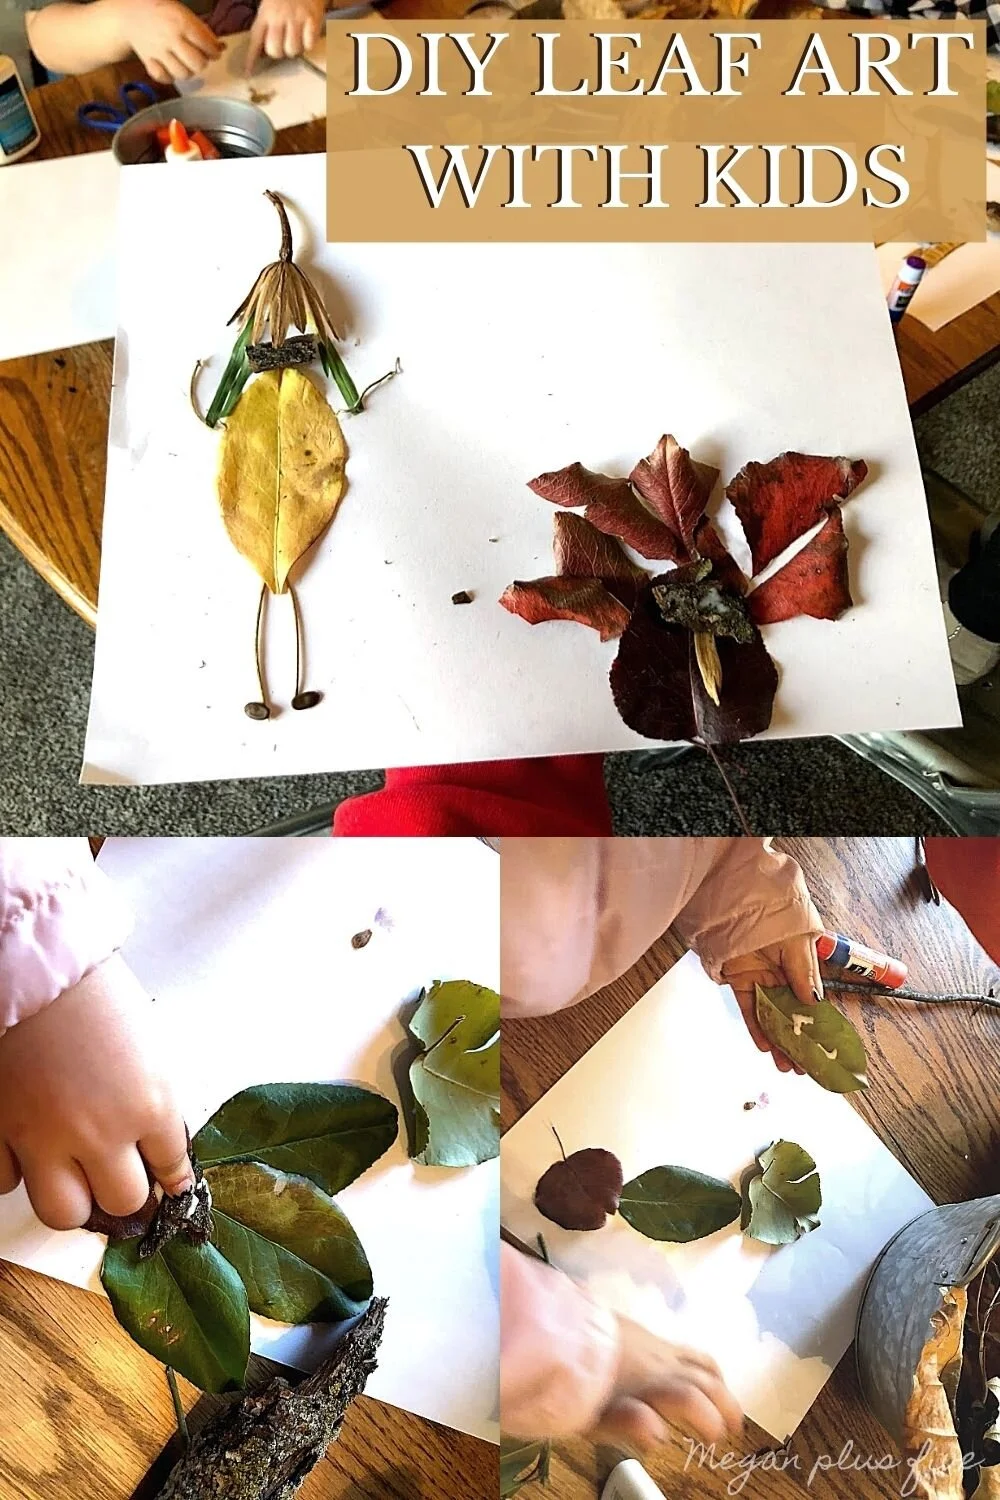
I helped my preschooler at first, showing her how we could create a Thanksgiving Day turkey out of the leaves and although she thought that was really cool she just wanted to glue whatever, and most importantly wherever to her piece of paper.

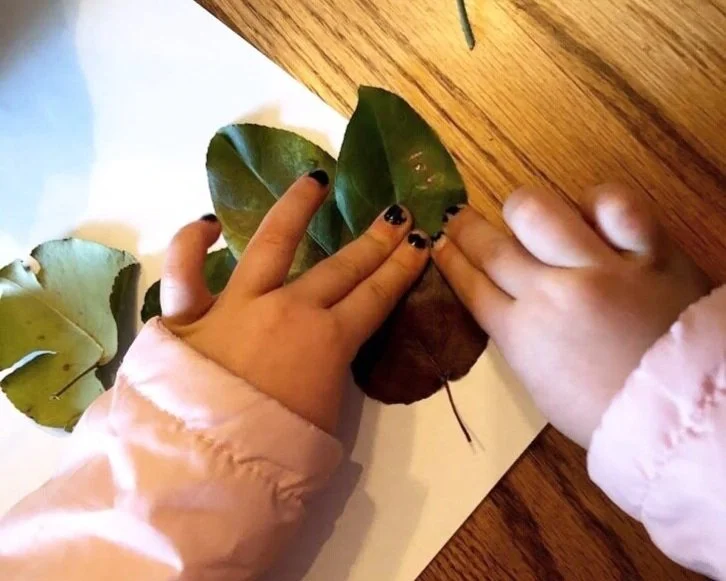
We took a round leaf and glued it down first

Then we took longer more oblong looking leaves and glued them behind the round leaf for the Turkey feathers.

Leaf art with kids. Fun and easy leaf people and leaf turkeys for kids to make with their parents. Fun outdoor fall craft project to do with kids of all ages.

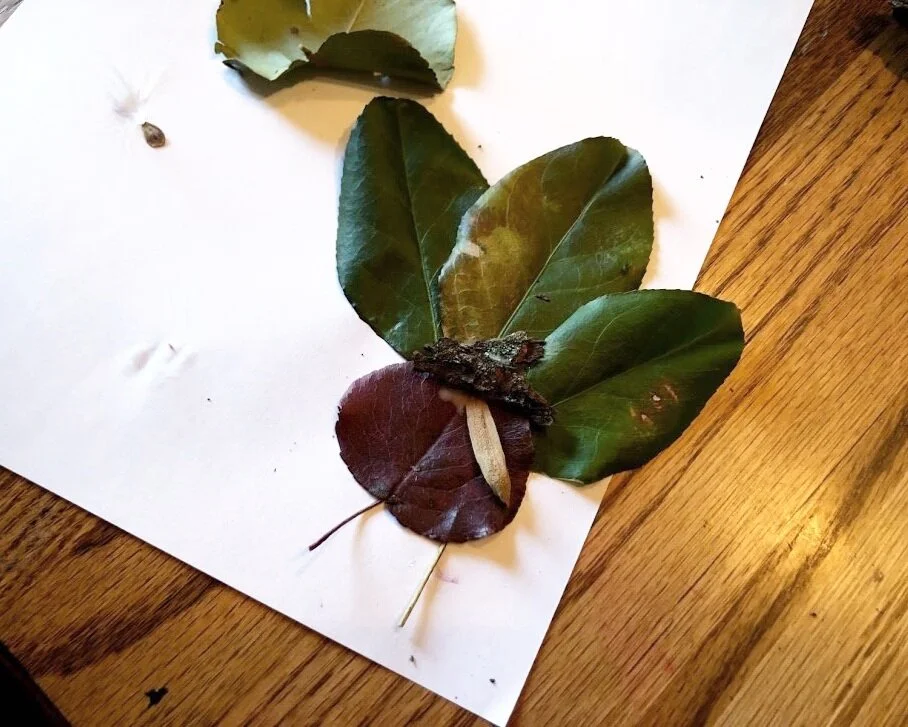
My pre-k girl wanted to use a piece of bark for the head so that’s what we used.

Leaf art with kids. Fun and easy leaf people and leaf turkeys for kids to make with their parents. Fun outdoor fall craft project to do with kids of all ages.

For the gobble we glued a small skinny leaf like thing down and pushed it up so it was under the bark head.

Leaf art with kids. Fun and easy leaf people and leaf turkeys for kids to make with their parents. Fun outdoor fall craft project to do with kids of all ages.

For the legs we just added a second stem from another leaf and glue it in place using a glue stick.

The most important step of all though is to just enjoy this crafty art time with your kids. Let them make a mess. Let them create. Let them make mistakes and not feel like they have to be perfect.

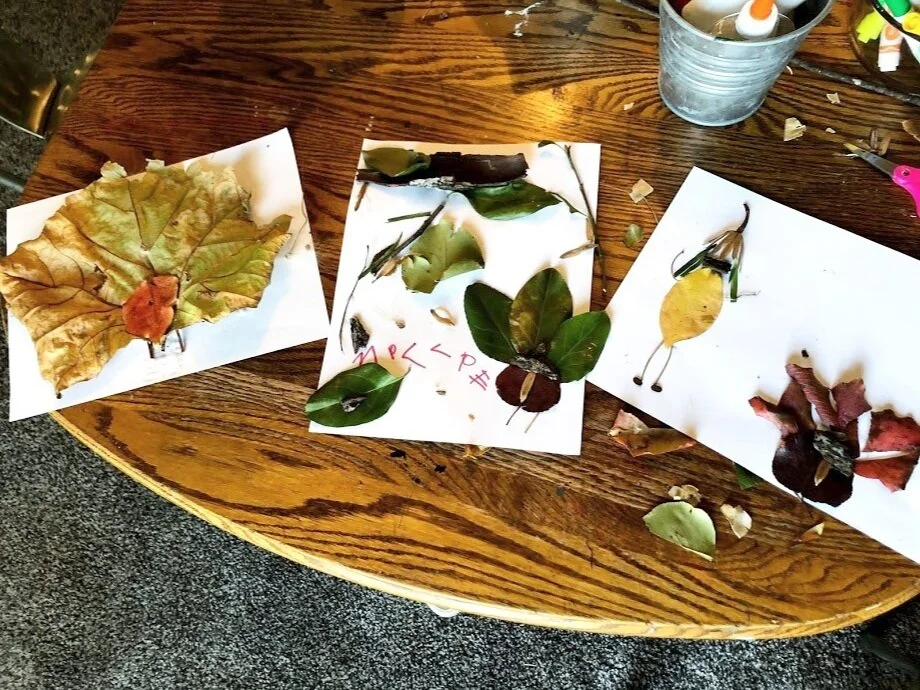
Here are a few finished leaf art pictures my girls made. I LOVE them! They were so creative and really took time to enjoy the whole process of this leaf art project. I can’t wait to do the next just for fun creative activity with them.

Leaf art with kids. Fun and easy leaf people and leaf turkeys for kids to make with their parents. Fun outdoor fall craft project to do with kids of all ages.

If you enjoy this craft with your kiddos be sure to check out this post on painting with nature.

Leaf art with kids. Fun and easy leaf people and leaf turkeys for kids to make with their parents. Fun outdoor fall craft project to do with kids of all ages.

A Christmas gift teens & tweens will LOVE!

DIY spa kits for teens. Great gift to give teens and tweens for Christmas is a DIY spa experiment recipe kit. Let them make their own lotions, bathbombs, essential oil sprays, soaps, face masks, and more.

DIY SPA KITS FOR TEENS

What does you preteen (tween), or teen want for Christmas? I don’t know about your kiddos but my girls are getting harder and harder to buy for the older they get.

I’m a momma of 4 girls, three of which are all with in 3 years of one another. They are stair steps and I love having them so close in age. One of the benefits is they are all kind of into the same things at the same time. But, this year the older 3 girls had just a few items on their Christmas wish lists, which isn’t a bad thing but it does make for more challenging shopping.

Affiliate Disclosure. Some of the links on this website are affiliate links, which means that I may earn a small commission if you click on the link or make a purchase using the link. If you make a purchase you will not be charged anything additional.

Anyway, I thought long and hard about what to get the girls for Christmas. I just know with 2020 being what it is, that we are going to have a TON of time at home.

So I decided we would gift them things they that would keep them busy over winter. On the list of items bought so far are lots of books, board games, art supplies and….. a SPA KIT! But not just any spa kit, this is like the ULTIMATE SPA KIT for teens!

I looked online and didn’t really find exactly what I was looking for so I thought I’d put together my own. So fitting for a frugal DIY momma.

So, how do you make a DIY SPA KIT you ask?

It might be easier than you think. If you are great at shopping online you can easily put one together too!

I started with this book, Girls' Home Spa Lab: All-Natural Recipes, Healthy Habits, and Feel-Good Activities to Make You Glow

It’s amazing! It has tons of recipes and other good for you activities. And since it’s written and illustrated for teen and tween girls they will extra love it. There’s no old fashioned old lady vibe with this DIY book. It has a fresh and modern look to it that’s super attractive and it makes me want to read all of it and make my own spa products.

Since this was just the book, no ingredients or anything, I read through it and picked out ingredients that were repetitive throughout the book. I didn’t want to buy every single ingredient in the book because that would be expensive and we keep several of the ingredients like olive oil and witch hazel on hand at home. I bought the main ones I kept seeing that we don’t usually have at home.

Here’s what I bought

1. ESSENTIAL OILS


Non ingredient items I ordered:

1. MORTAR & PESTLE

I have a fancy Kitchen Aid stand mixer but I really didn’t want it taken over. I opted for this handheld mixer AND I was sure to get the one that has attached storage for the beaters. That way there’s less chance they will loose them.

3. DOUBLE BOILER

Just like with the mixer I really didn’t want the girls to use my double boiler for bath and body ingredients. I looked on good ole Amazon for double boilers and found this gem! It was exactly what I wanted!

This pot is great because it will fit in any pot we have at home. We have a few different small sauce pans and this double boiler option will work perfectly with all three of them.


Of course the spa kit wouldn’t be complete without containers to put all their new spa products in. If you search on Amazon there’s a ton of different things to choose from. Here’s what I ordered for my girls. No judgements on the glass containers please ;) if you don’t feel comfortable with yours teens having glass there are other options out there. We typically will always choose glass over plastic, it’s just a personal preference.

4. SMALL PLASTIC CONTAINERS WITH SCREW ON LIDS


As I’m writing this it’s early November so I have not packaged any of the gifts yet to put under the Christmas tree.

The girls know that one of their gifts is one big gift to share. So I think I’m going to wrap all the spa ingredients individually then put everything in a big box that will be wrapped too. You know, make it more fun for them to open it.

This gift is going to be amazing for the girls this winter and I can’t wait for them to start experimenting in the kitchen making their own bath and body products.

I’d love to know, is this something your teens/tweens would love? Let me know in the comments.

DIY dowel rod snowman ornament DAY 8

DIY Christmas ornaments to make with kids. Easy snowman (snowmen) Christmas tree hanging ornament to make from a dowel rod. How to paint a snowman on a Christmas ornament easy craft tutorial.

This DIY Christmas ornament is SUPER EASY! Similar to the square snowmen ornaments I made last year. Only this time they are round and they have cute rosy cheeks like these mason jar snowmen I showed how to make on my blog. There are differences of course but all three of these snowmen are so adorable.

If you are a craft-aholic like myself, then you probably hang on to EVERYTHING. The dowels I’m using for this snowman ornament were actually leftover stems from a larger version of these 2x4 wood pumpkins. Really, I probably should have tossed these scraps BUT then I wouldn’t have been inspired to create this Christmas ornament tutorial to share here on my blog.

DIY Christmas ornaments to make with kids. Easy snowman (snowmen) Christmas tree hanging ornament to make from a dowel rod. How to paint a snowman on a Christmas ornament easy craft tutorial.

See more of my 30 DAYS OF DIY CHRISTMAS ORNAMENTS here

Here’s what you need to make a dowel rod snowman ornament

DIY Christmas ornaments to make with kids. Easy snowman (snowmen) Christmas tree hanging ornament to make from a dowel rod. How to paint a snowman on a Christmas ornament easy craft tutorial.

This ornament is so fun, easy and a wonderful Christmas craft to make with the kids. Don’t sweat it if they don’t come out perfect. Lord knows when we craft with our kids it’s never about the perfection, rather it’s about the memories and bond you’re building with your children.

1.PAINT

The first thing I did was paint the dowel rod piece all white, including the top and bottom. I let the first coat dry then I applied a second coat for a little more coverage then I let that coat dry before moving on to step 2.

DIY Christmas ornaments to make with kids. Easy snowman (snowmen) Christmas tree hanging ornament to make from a dowel rod. How to paint a snowman on a Christmas ornament easy craft tutorial.

2. CHEEKS

Because I want the nose to go over the cheek I painted the snowman’s cheeks first. This takes a TINY amount of paint, like a teeny tiny amount. I lightly tapped the tip of my paint brush into the pink paint then into the white paint, but less white paint than pink paint on my brush.

DIY Christmas ornaments to make with kids. Easy snowman (snowmen) Christmas tree hanging ornament to make from a dowel rod. How to paint a snowman on a Christmas ornament easy craft tutorial.

Then I made swirly circles with my brush. I probably should have used a round tipped brush for this but I grabbed a pointy tipped one and just didn’t want to hunt for a new brush so I went with it. It worked but not as good as it could have with a round tipped brush.

I kept added white and pink paint to the cheeks till I was happy with the way they looked.

3. NOSE

After the cheeks were dry I painted on an orange nose. I used the same pointy brush for this. I made a sideways triangle then filled it in with orange paint. I added a tiny bit of black paint to give it a little depth.

DIY Christmas ornaments to make with kids. Easy snowman (snowmen) Christmas tree hanging ornament to make from a dowel rod. How to paint a snowman on a Christmas ornament easy craft tutorial.

4.EYES & MOUTH

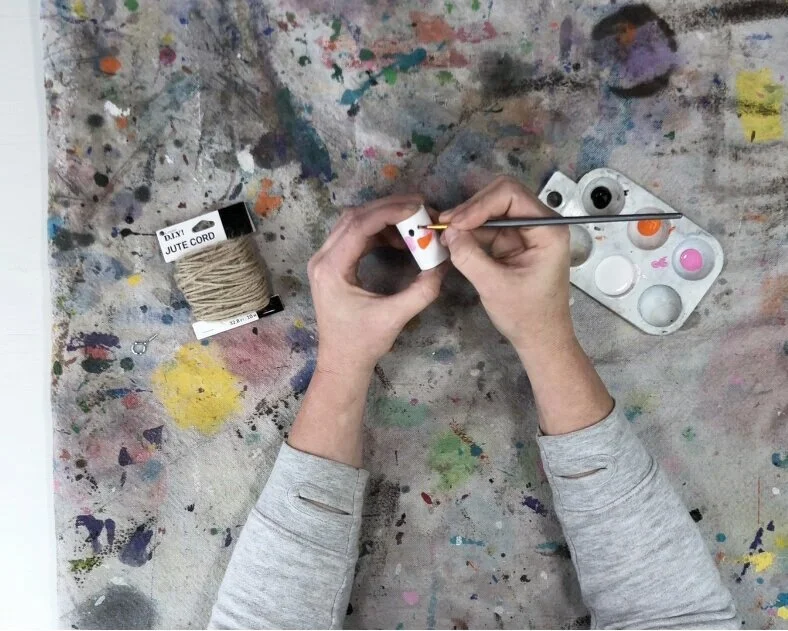
Using the same brush I painted on irregular looking circles for the eyes and for the mouth in black. I really tried to make them look like coal.

DIY Christmas ornaments to make with kids. Easy snowman (snowmen) Christmas tree hanging ornament to make from a dowel rod. How to paint a snowman on a Christmas ornament easy craft tutorial.

After the black paint was dry I used the end of my paint brush to make accent dots on the eyes and mouth.

DIY Christmas ornaments to make with kids. Easy snowman (snowmen) Christmas tree hanging ornament to make from a dowel rod. How to paint a snowman on a Christmas ornament easy craft tutorial.

5. SCREW EYE AND JUTE

I screwed the hanger (screw eye) into the top of my snowman ornament to hang it. Then I added a piece of jute to hang it from the Christmas tree.

DIY Christmas ornaments to make with kids. Easy snowman (snowmen) Christmas tree hanging ornament to make from a dowel rod. How to paint a snowman on a Christmas ornament easy craft tutorial.

I hope you enjoyed this crafty Christmas ornament tutorial. Let me know if you have any questions in the comments below.

Don’t forget to pin the image below to save for later :)!

DIY Christmas ornaments to make with kids. Easy snowman (snowmen) Christmas tree hanging ornament to make from a dowel rod. How to paint a snowman on a Christmas ornament easy craft tutorial.

Happy Crafting!

Check out more Christmas posts below

Painting with nature, a creative and fun experience to enjoy with your kids

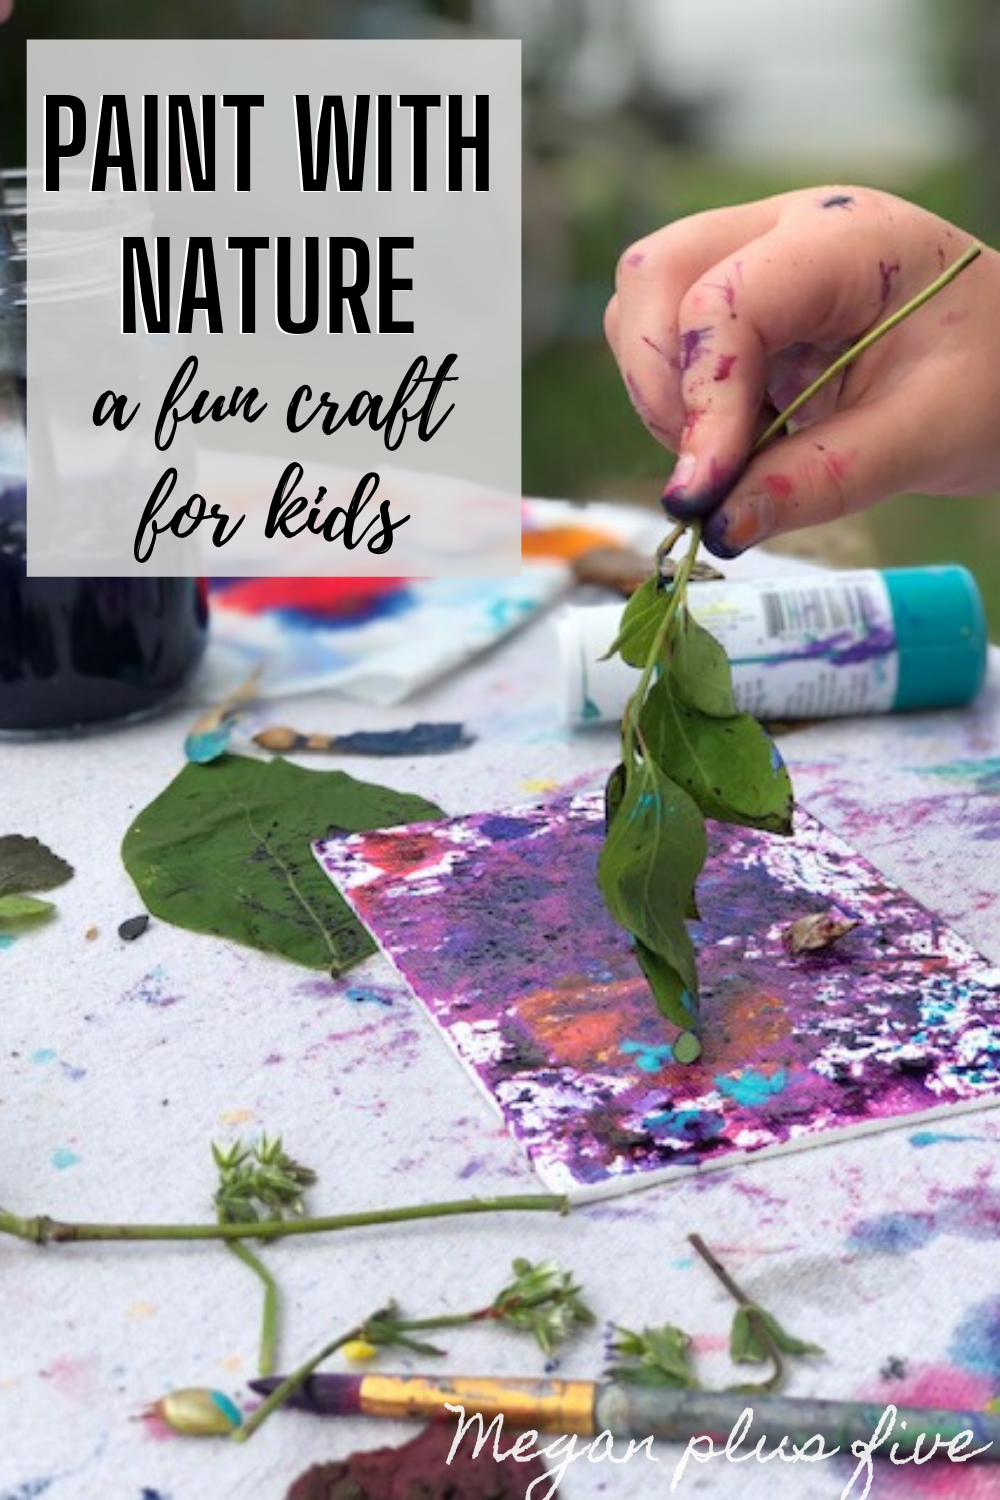
Painting with nature, have you tried this with your kids? If not you are totally missing out on a ton of fun and creativity! I’m a momma to four girls and I LOVE that my almost preschooler loved it just as much as my middle schooler. So this craft is truly one for all ages.

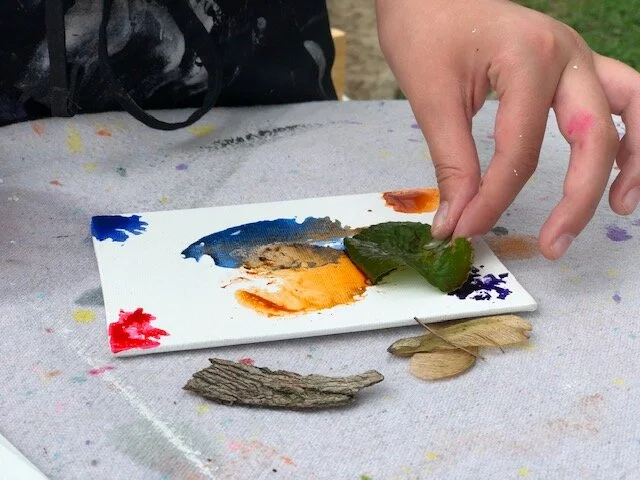
What made this even more fun was that the girls gathered their own materials. They each went hunting in the yard and selected some really cool pieces of nature to paint with. Some of the nature items they found were dandelions, tree leaves, clovers, broken acorn shells, seeds from inside of pods, tree bark, and I know there’s more I’m forgetting. They really enjoyed this part. Watching them pick up the different materials that nature was offering and thinking how that would look on their paint canvas was too cool to see.

If you want to paint with nature but you need a mess free option be sure to check out my post on how we painted with pine cones. I don’t think my girls got a drop of paint on them for that project.

After you read this kid friendly DIY craft be sure to check out my other fun projects that are kid approved. Click here to go to my kids craft projects.

How to paint with nature. Use twings, leaves, cloves, flowers, anythgin you find in nature to make a painted canvas masterpiece. Use food coloring or acrylic paint and let your kids explore the power of painting with items that aren't the normal pai…

 Affiliate Disclosure. Some of the links on this website are affiliate links, which means that I may earn a small commission if you click on the link or make a purchase using the link. If you make a purchase you will not be charged anything additional.

This is such a great activity to do outside if you can. If you can’t no worries I promise it will be just as fun! We gathered our nature painting pieces from our backyard but if you don’t have a backyard you can take a stroll around the park or even just down the sidewalk. The kids are sure to find some useful nature pieces there, even just a twig and a dandelion are perfect for this craft.

HOW TO PAINT WITH NATURE, AN EASY AND FUN CRAFT FOR KIDS

Here’s what you’ll need

How to paint with nature, a fun outdoor craft to do with your kids. Paint on a dollar tree canvas with nature using food coloring, flowers, twigs, leaves.

Let the kids get messy! Getting messy is all part of the creative process. We kept our nature painting outside. I put a drop cloth over our patio table and had my girls wear aprons. The older three daughters wear adult aprons like these that we tie up on the neck and the youngest daughter wears a kids apron. With all the crafting we’ve done over the years these aprons have held up really well.

We used a combination of food coloring and acrylic paint to paint our nature canvases. I thought a watercolor look to these would be really pretty but we didn’t have any watercolors paints to use. Food coloring on the canvases turned out AMAZING! They looked just like watercolors, well they did at first but then the girls kept painting over their masterpieces to get them just right lol! We also used food coloring during our TIE DYE experiment and those turned out way better than I thought they were going to. Read about how to TIE DYE with food coloring here.

Painting with nature process is overall pretty simple, here’s how-

ONE- Gather your pieces of nature, canvas, paint and other materials and prep your work area

How to paint with nature, a fun outdoor craft to do with your kids. Paint on a dollar tree canvas with nature using food coloring, flowers, twigs, leaves.

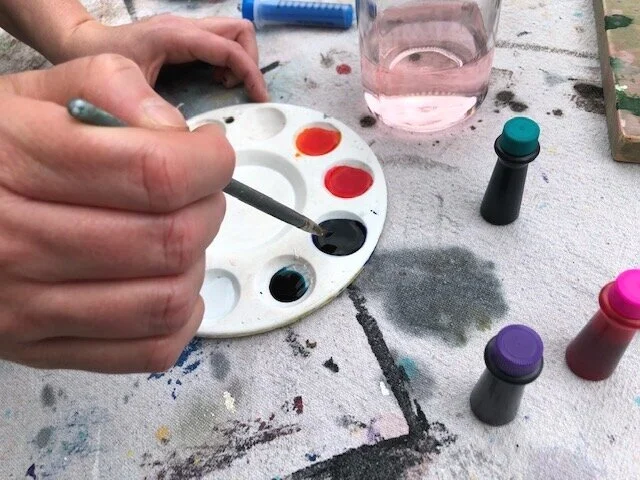
TWO- If you’re using food coloring you can mix that in your paint wells on your paint tray. I used a medical syringe, like the kind you get from the pharmacy, to squirt water into the paint well, this way I didn’t overfill them, then added drops of food coloring. I used a paintbrush to mix the water and food coloring together and that worked great.

How to paint with nature, a fun outdoor craft to do with your kids. Paint on a dollar tree canvas with nature using food coloring, flowers, twigs, leaves.

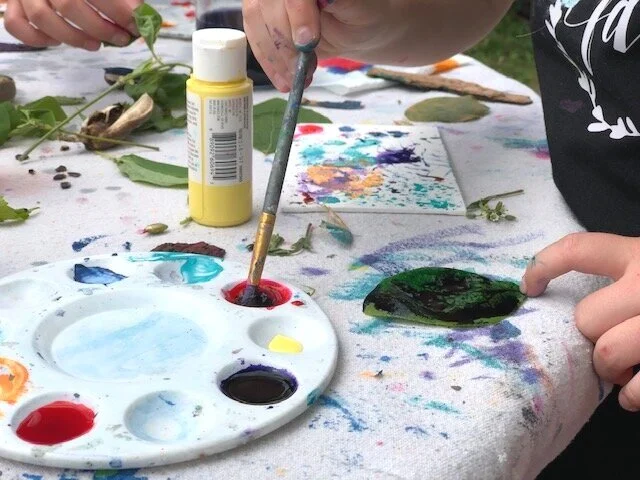
THREE- Get creative and start painting with nature. I just let my girls paint with whatever and however they wanted. The only rule I had was to not argue lol! Let’s be real here, crafting with multiple kids, especially preteens, isn’t always the most enjoyable when the bickering starts. My girls know that if they start arguing with one another there's a good chance momma will make them pick up and put everything away. It’s a wonderful way to keep the peace.

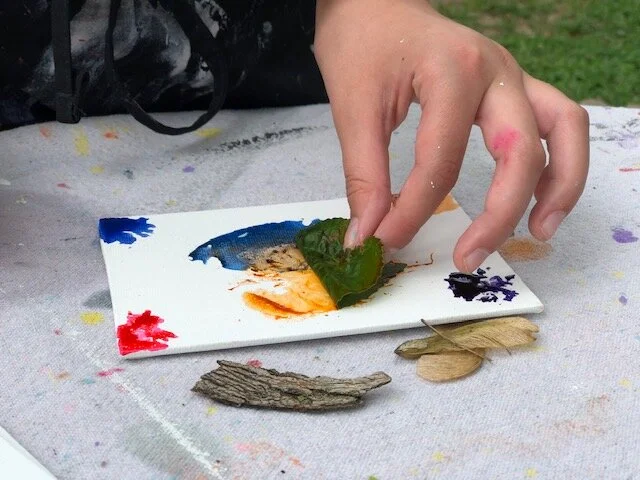
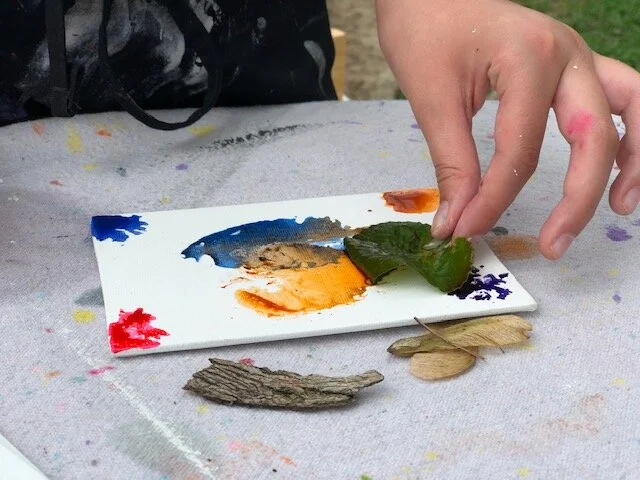
We found that painting on the leaves worked really great for making prints of them. The key was to not apply too much of the food coloring mixture/paint.

How to paint with nature, a fun outdoor craft to do with your kids. Paint on a dollar tree canvas with nature using food coloring, flowers, twigs, leaves.

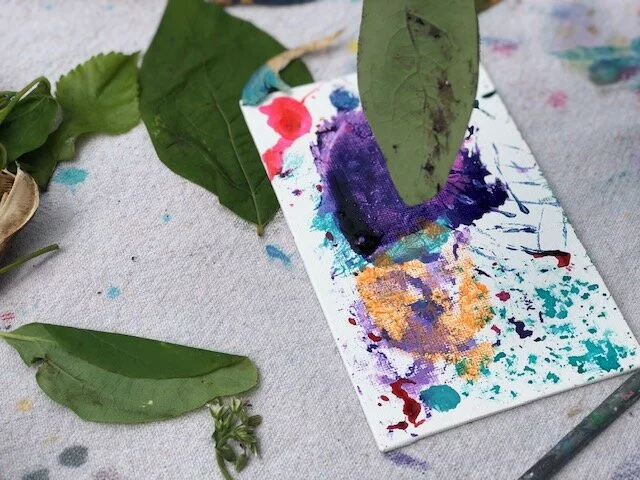
Then press the leaves, or other nature items, onto the canvas.

How to paint with nature, a fun outdoor craft to do with your kids. Paint on a dollar tree canvas with nature using food coloring, flowers, twigs, leaves.

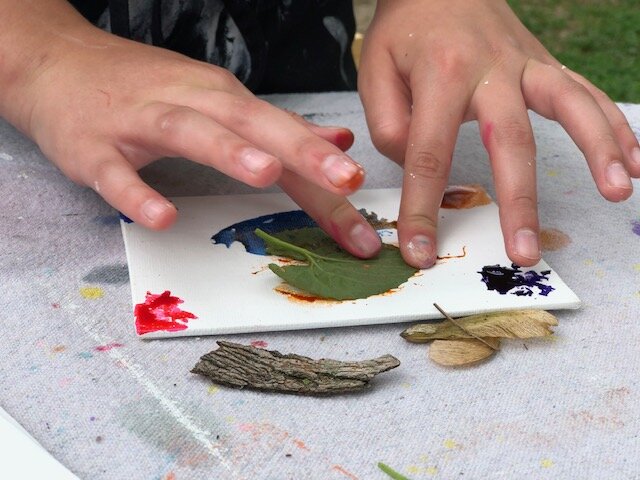
If you want a good print of it press gently, don’t push it around this will cause the paint/food coloring to smear and will not give a good crisp print.

How to paint with nature, a fun outdoor craft to do with your kids. Paint on a dollar tree canvas with nature using food coloring, flowers, twigs, leaves.

Here’s a leaf print my oldest daughter, who’s in middle school, made. I was actually surprised at how much she enjoyed this nature painting craft. She took her time and carefully picked her nature pieces, colors, and placement of all the things.

How to paint with nature, a fun outdoor craft to do with your kids. Paint on a dollar tree canvas with nature using food coloring, flowers, twigs, leaves.

Just remember, if their projects turn out to be a crazy dark blog looking painting embrace it! Tell them they did a BEAUTIFUL job and enjoy the time you spend together creating. These are special memories you’ll look back on <3!

Let me know if you have any questions about painting with nature. Happy crafting!

How I made super girly dinosaurs for my daughter's bedroom

Make your little girl's dinosaur room dreams come true. How to spray paint cheap plastic dinosaurs to make them girly. DIY girl themed dinosaur bedroom for your daughter.

DIY GIRLY DINOSAURS

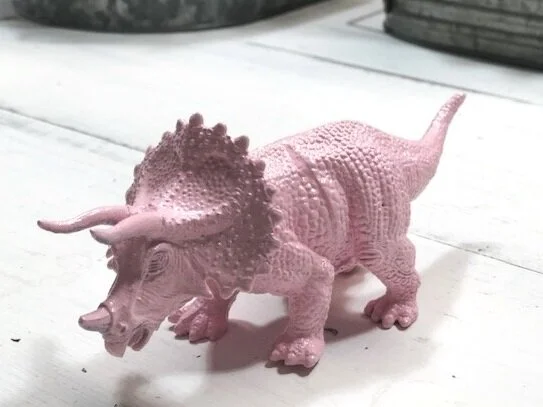
My youngest daughter is obsessed with dinosaurs. But she’s also really into things that are sparkly, pink, and super girly! While we were taking a wonderful stroll around Hobby Lobby we came across this adorable dino display. It was full of these really cool signs, garland, figurines, and more. The only thing was that everything was dark blue, orange, dark green, red. Which are great colors but her favorites are pink, mint, purple, light green…and glitter lol! Hobby Lobby didn’t have any dinosaur décor in those colors. One of the things she really really really loved were these ceramic dinos. Again, they were in the typical “boy” colors. So I thought ‘Megan, just buy some plastic ones and paint them’. So I did just that!

Affiliate Disclosure. Some of the links on this website are affiliate links, which means that I may earn a small commission if you click on the link or make a purchase using the link. If you make a purchase you will not be charged anything additional. This is just a way I can help add to our family finances to raise our four daughters. Please know I would never recommend a product or service I do not totally stand behind.

Make your little girl's dinosaur room dreams come true. How to spray paint cheap plastic dinosaurs to make them girly. DIY girl themed dinosaur bedroom for your daughter.

See, super adorable dinosaur décor but it doesn’t really go with glittery unicorns and magical butterflies.

The next day we took a trip to our local Walmart to find some inexpensive dinosaurs and spray paint. My sweet girl was so excited! She got to pick which dinosaurs she wanted AND she got to pick the colors. It was so cute watching her little face light up choosing things for her room.

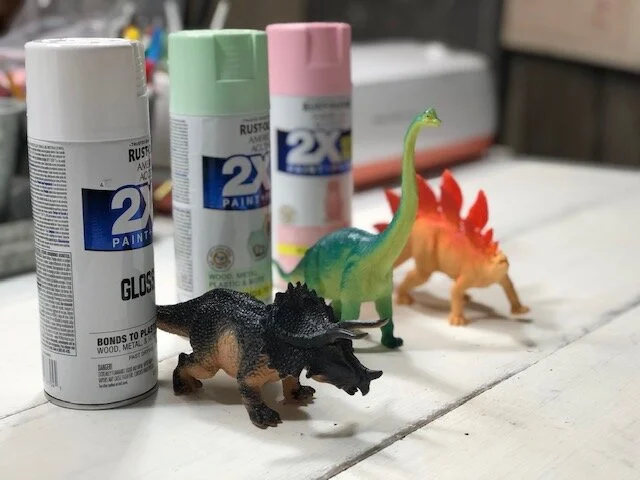
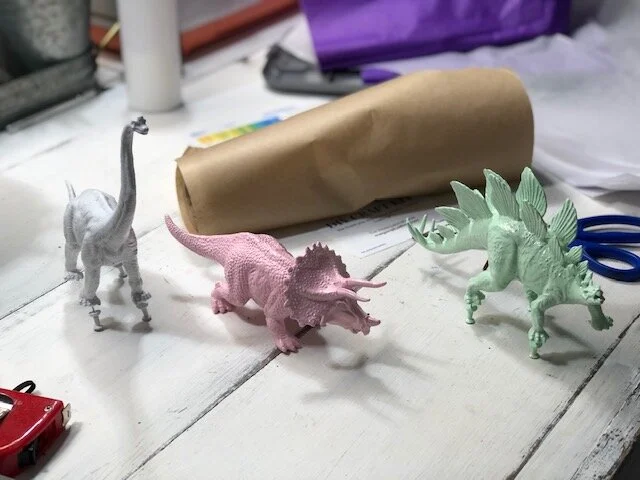
She picked out three different dinosaurs and chose the colors light pink, mint green, and white.

Make super girly dinosaurs for your daughter’s bedroom

Here’s what you’ll need

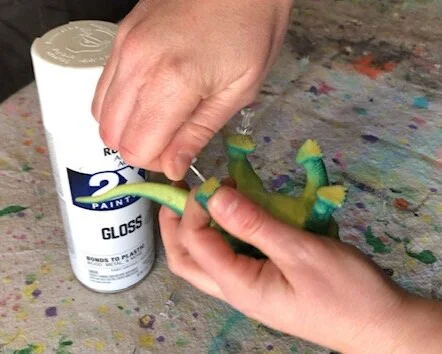
ONE- The first thing I did was place a push pin in each dinosaur foot. Since the dinosaurs are hard plastic it was a little difficult to get them in.

Make your little girl's dinosaur room dreams come true. How to spray paint cheap plastic dinosaurs to make them girly. DIY girl themed dinosaur bedroom for your daughter.

TWO- Shake the can really well then spray a layer of paint on each dinosaur. I bought the “fancy” spray paint, as I like to call it, because it has primer already in it. It’s cheaper and easier in the long run to just buy the more expensive spray paint so you have less layers to paint and it takes less time to finish your project.

Make your little girl's dinosaur room dreams come true. How to spray paint cheap plastic dinosaurs to make them girly. DIY girl themed dinosaur bedroom for your daughter.

THREE- Let that layer completely dry. I let mine dry overnight just to be sure it was fully dry.

FOUR- Spray a second layer on each dinosaur.

FIVE- Let your dinosaurs dry. Since I used gloss spray paint it seemed to take the dinosaurs a long time for the second layer to dry. I let them sit for a full 48 hours before taking the pushpins out of their feet. Because my daughter will be playing with them I am letting them cure for 30 days.

Make your little girl's dinosaur room dreams come true. How to spray paint cheap plastic dinosaurs to make them girly. DIY girl themed dinosaur bedroom for your daughter.

Seriously, these are the CUTEST dinosaurs!!

Make your little girl's dinosaur room dreams come true. How to spray paint cheap plastic dinosaurs to make them girly. DIY girl themed dinosaur bedroom for your daughter.

I have plans to make her MANY more girly dinosaur decorations for her room soon. One that will include some glitter too!

I hope this inspires you to create some adorable dino décor for your own little girl. If you do GIRL UP your dinos I’d love to see what you come up with! As with all of my DIY posts if you have any questions please ask away. I’m always happy to help.

Easy popsicle stick picture frame for Valentine's Day

Easy popsicle stick picture frame valentine's day. How to make a mess free Valentine's Day craft with your kids and family. Cute and easy popsicle stick frame craft for kids.

We belong to a wonderful little program called Parents as Teachers. If you’ve never heard of this you can check out Parents as Teachers here. Every week our local PAT’s host a play group and during the holiday season they host themed groups with a fun party. This year they asked me again if I would help host the Valentine’s Day craft for the party. Of course I said yes!

Affiliate Disclosure. Some of the links on this website are affiliate links, which means that I may earn a small commission if you click on the link or make a purchase using the link. If you make a purchase you will not be charged anything additional.

I knew I wanted the craft to be a keepsake. Every momma LOVES keepsakes! They are my most favorite thing the girls bring home from school in the early years. So I searched Pinterest looking for an easy to make Valentine’s Day keepsake for little ones. I came across a fun popsicle stick frame and knew this would be something super easy for the kids and moms to make together.

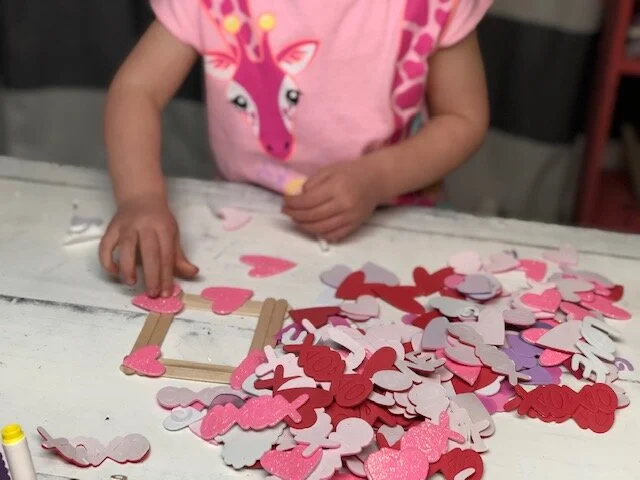
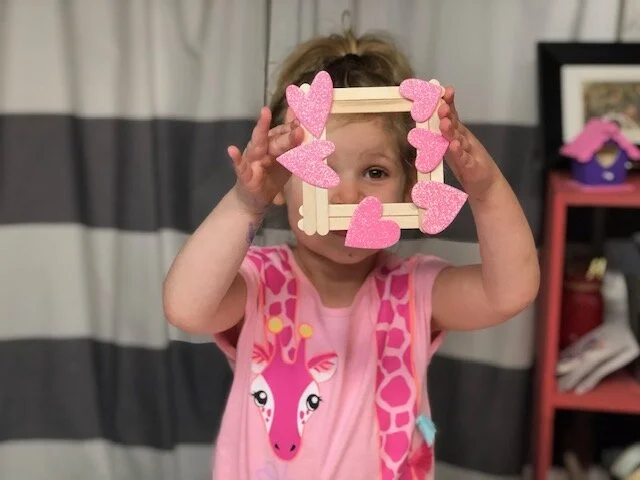
My husband and I premade all the frames so everything was ready to go for the Valentine’s Day party, 30 frames total, and of couse since we live in the center of the USA winter did a little showing off, school got cancelled and so did the party *insert sad momma tears*. But we still had fun making these frames at home and the older three daughters actually had even more fun than I thought they would. They loved decorating their own frames with the Valentine’s Day stickers and cutouts.

How to make a mess free Valentine’s Day keepsake craft

Watch the video below or keep reading for the step by step instructions

Want access to my FREE RESOURCE LIBRARY? This is where I keep all of my files, printables, lists, and more. Get your password to get all the freebies —-> Send me to the FREE RESOURCE LIBRARY

Here’s what you’ll need to make your Valentine’s Day popsicle stick frame

You can find all of these items at the Dollar Tree (except the gorilla glue and glue gun) but I’ve included the links if you prefer your supplies delivered right to your door:)!

DIY popsicle stick picture frame. How to make a Valentine's Day craft with kids mess free. Keepsake art to Valentine's Day

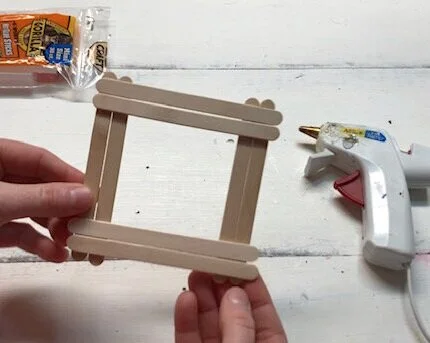
To make 1 popsicle stick picture frame you need 8 popsicle sticks.

  1. The first thing you need to do is put your frame together. This should be done by an adult. I’ve found using gorilla glue sticks vs regular hot glue sticks hold projects together so much better. You want to line your sticks out first before you glue them down. You will need 2 popsicle sticks on each side of the frame.

DIY popsicle stick picture frame. How to make a Valentine's Day craft with kids mess free. Keepsake art to Valentine's Day

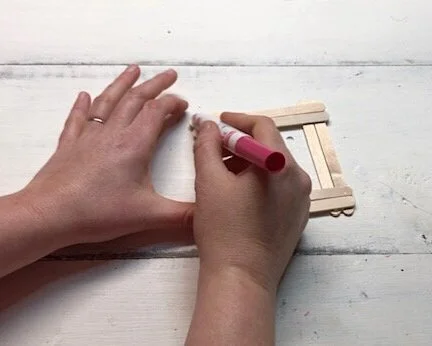
2. Once the glue has set and dried you can start decorating. No need to get out messy paint, although I LOVE paint sometimes it’s nice to not have that mess to clean up. Washable markers work great to give the frame a color and your work area will clean up with a washcloth after with no fuss. This is great for little ones who are working on their fine motor skills too!

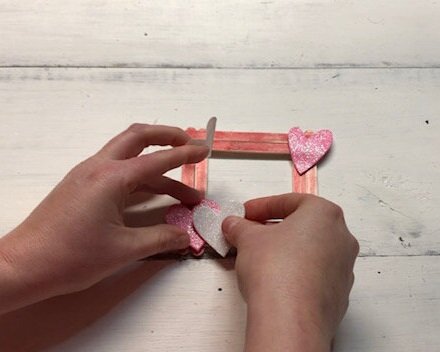
DIY popsicle stick picture frame. How to make a Valentine's Day craft with kids mess free. Keepsake art to Valentine's Day

3. Add some more decorations. Stickers are PERFECT for these adorable Valentine’s Day frames! Your kiddos can just peel off the backing and stick them wherever they would like. Let them have fun with this step. If you want you can bring out some rhinestones, sequence, and even glitter (but these will require glue).

DIY popsicle stick picture frame. How to make a Valentine's Day craft with kids mess free. Keepsake art to Valentine's Day

4. Glue a photo or their art work to the back. I just used my hot glue gun to glue a photo of our sweet family to add to the frame I made for this tutorial. If you want you can also add a small magnet so you can hang it on the fridge.

DIY popsicle stick picture frame. How to make a Valentine's Day craft with kids mess free. Keepsake art to Valentine's Day
DIY popsicle stick picture frame craft for kids. Mess free Valentine's Day craft to make with your kiddo

5. Enjoy their art! place it on a shelf and keep it out year round. Now that my girls are getting older I am even more appreciative of all their handmade creations they’ve made me over the years.

DIY popsicle stick picture frame. How to make a Valentine's Day craft with kids mess free. Keepsake art to Valentine's Day

If you have any questions about this DIY craft or any other leave a comment below. Happy Valentine’s Day!

DIY easy dinosaur claw gloves, simple sewing project

DIY Dinosaur Gloves, easy sewing project for Halloween costumes, how to sew claws onto gloves. Monster glove tutorial.

Halloween can be a tricky thing to plan for here in the Midwest. Some years we are blessed with AMAZING weather and we don’t have to fret with lots of layers. I have to say that is not what is typical here, although that would be pretty great! Most years we are bundled up with boots, wool socks, and coats. That’s why these DIY DINOSAUR GLOVES were the perfect addition to daughter #4’s handmade costume.

—>Click here to see even more Halloween & Fall DIY projects <—

Affiliate Disclosure. Some of the links on this website are affiliate links, which means that I may earn a small commission if you click on the link or make a purchase using the link. If you make a purchase you will not be charged anything additional. This is just a way I can help add to our family finances to raise our four daughters. Please know I would never recommend a product or service I do not totally stand behind.

These gloves were such a HUGE hit too! She got so many comments at how adorable her little dinosaur claws were reaching into the bowls of candy after she said “trick or treat”. And she is going to LOVE wearing them all winter long.

How to sew claws onto winter gloves

These gloves are SOOOOO super easy to make and you just need a few supplies. You can pick these up at a local store or click the links to see what I recommend to purchase online.

Here’s what you’ll need

Check out the video tutorial from my YouTube channel. Be sure to like and subscribe, this helps me so much to continue to share crafty tutorials and reach even more fellow moms and help them with their own craft projects.


1. CUT OUT CLAWS

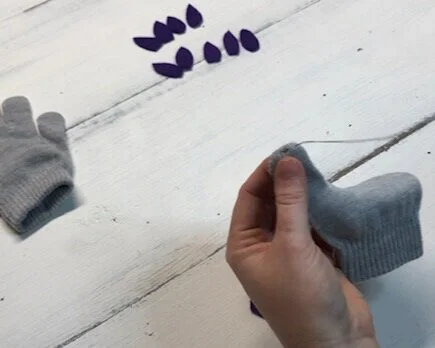
First, cut out one tear drop shape from your felt.

DIY dinosaur gloves, how to add claws to winter gloves. Easy sewing projects for beginers. DIY Dino costume for kids. Easy felt projects

Then use that claw as your template to cut out 9 more felt dinosaur claws

DIY dinosaur gloves, how to add claws to winter gloves. Easy sewing projects for beginers. DIY Dino costume for kids. Easy felt projects

2. SEW THEM ON

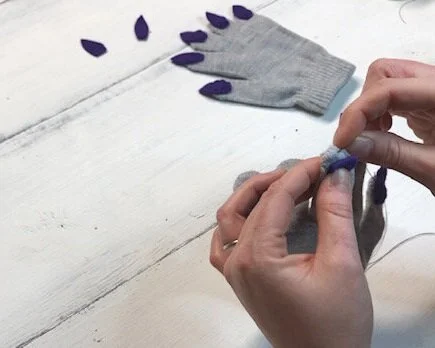
After you have all 10 dinosaur claws {or monster claws they can be for LOTS of different costumes} you are ready to start sewing them on. Thread your needle using your coordinating thread. Instead of placing the knot inside the glove I suggest hiding it under the dino nail.

This way the knot won’t irritate your kiddo. I know lots of kids have sensory issues, while my daughters don’t have this too bad I was one of those kids. I HATED jeans because the inseam “hurt” and I HAD to wear my socks inside out because I couldn’t handle the way that seam felt on my toes. Back then they didn’t call it sensory issues they called it being picky. So If your kiddo has any kind of sensory issue be sure to place the know on the outside, not the inside of the glove.

DIY dinosaur gloves, how to add claws to winter gloves. Easy sewing projects for beginers. DIY Dino costume for kids. Easy felt projects

Now place one felt dinosaur nail on the glove so that half of it is on the glove and half is hanging off. Then stitch it on using a simple stitch. You don’t have to get fancy with the stitch, just a simple straight will be perfect for this. BE SURE YOU ARE NOT STITCHING THROUGH BOTH SIDES OF THE GLOVE. You just want to go thru the very first layer of the glove. Repeat this for all 5 dinosaur nails on the first glove.


When you get to the second glove don’t just start sewing dino claws on it. Trust me I totally made the mistake of starting on the second glove and I didn’t realize till my daughter tried them on that I had sewn claws on them and made 2 RIGHT HANDED GLOVES. So before you start the second glove lay them both out in front of you so that you have one right glove and one left glove. It totally sucked to take the claws off of the second glove right after I just thought I had finished lol!

DIY dinosaur gloves, how to add claws to winter gloves. Easy sewing projects for beginers. DIY Dino costume for kids. Easy felt projects

When you have the second glove facing the correct way you can start sewing the dinosaur claws onto that glove the same way you sewed them onto the first glove.

DIY dinosaur gloves, how to add claws to winter gloves. Easy sewing projects for beginers. DIY Dino costume for kids. Easy felt projects

After you finish sewing the second glove you are done! If you have any questions about this Halloween themed sewing project please reach out to me. Leave your questions below or feel free to message me.

Ultimate Dollar Tree birthday gift idea

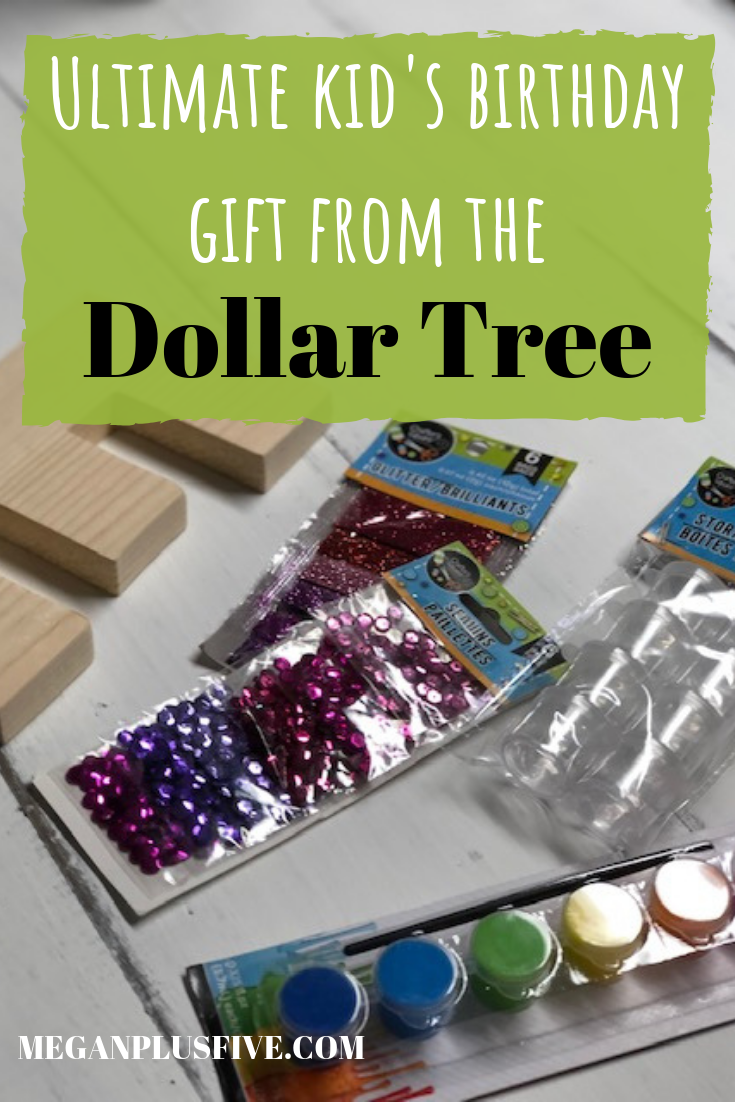
Ultimate kid's birthday gift from the Dollar Tree

The best kid’s birthday gift idea when you’re on a budget

It’s no secret that my girls and I LOVE the dollar tree. Seriously, we were just there today and when we got home my oldest couldn’t believe that we spent and entire HOUR in there and it literally felt like only 20 minutes had past lol! Yep…raising those girls right!

Our sole purpose of the trip was to find a couple gifts for the oldest daughter’s friends for their birthday parties. Raising a family of 6 isn’t a cheap task. So, things like friend’s birthday parties typically have a pretty small budget of $10 per kiddo. At Walmart $10 doesn’t get you much from the toy aisle or any aisle that a kid would be interested in anyway. But, I have to say over the years we have gotten really good at whipping up some amazing birthday gifts on the $10 budget. And I can’t wait to share the latest gift that comes in WAY under budget! Under budget meaning 70% lower than what we typically budget for friend’s birthdays.

Affiliate Disclosure. Some of the links on this website are affiliate links, which means that I may earn a small commission if you click on the link or make a purchase using the link. If you make a purchase you will not be charged anything additional.

How was I able to create two gifts for kids for under $6?

Well, first the Dollar Tree. It is FULL of really amazing things that on their own may not be all that amazing but when paired with something else, like let’s say a personalized wood letter cut out, can be one of the best gifts ever! And second, I just purchased a scroll saw last weekend with the money that comes in from my handmade business so I used that to create the customized gifts for her friends.

The ultimate Dollar Tree birthday gift idea for under $5

My only regret is not buying a scroll saw sooner. If you’re curious about the one I purchased you can see more about the Ryobi scroll saw here. And if you wanna know about the other tools I have in my shop I’ve written a break down of which tools every crafter needs.

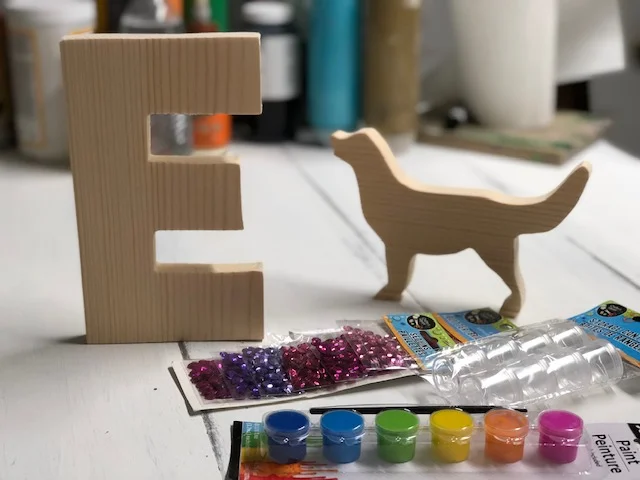
I used my Cricut Explore to cut out the letter E and the dog from cardstock. Then I outlined them with a pencil on a scrap piece of 1x8 that had been sitting on the wood shelf in the garage. Using my new handy scroll saw I cut out the shapes. Gave them a light sanding and they were ready to add to the items we picked up at the dollar tree.

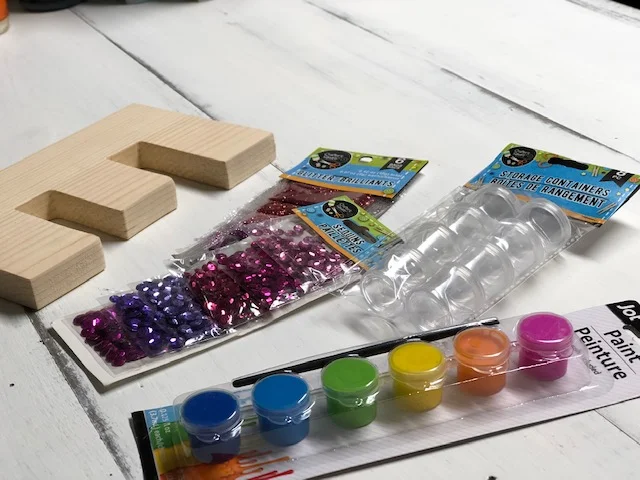
Here’s what we picked up from the dollar tree

  • 1 package of purple/pink 6 pk glitter

  • 1 package of blue/green 6 pk glitter

  • 1 package of purple/pink sequence

  • 1 package of small containers

  • 2 paint pots

We bought the small containers to fill with white paint and glue {which we have a TON of at home} . Since the paint pots don’t come with white paint and sequence doesn’t stick well to paint we thought those additions to the birthday gifts would be a good idea. I wrote on the outside of the containers which one was glue and which one was paint so there wasn’t any confusion when the birthday girl goes to use her new craft kit.

The glitters and sequence were individually wrapped so we pulled them off of the original packaging {they were just taped to the thin cardboard} and gave each birthday girl 4 glitters and 2 sequence.

The ultimate DOLLAR TREE birthday gift idea

To keep the birthday crafts looking somewhat professional I packaged the craft supplies in a clear goody bag {the party favor kind} that we already had left over at home.

I am so excited about this new DIY birthday craft idea! It’s absolutely perfect for the crafty kiddo in your life and it costs just a few dollars to create! I can honestly say that our girls loved this idea so much they each want their own.

———> Want more crafty gift giving ideas? Check out my post on these top selling kid approved DIY CRAFT KITS FOR KIDS

——> Also, you don’t want to miss this a great list of the PRE TEEN CRAFT IDEAS, because they can be so hard to buy for sometime

How to stencil on a canvas bag

How to stencil on a canvas bag. Faux screen printing on a canvas bag

Learn how to stencil on a canvas bag

Have you been wanting to learn how to stencil on a canvas tote? It’s actually super easy! Make it an even more fun with a DIY CANVAS TOTE PAINT PARTY. I’ve put together this DIY canvas bag craft kit to make it even easier. There’s no guess work for you. Just choose your stencil and I’ll send you everything you need to make your party a hit!

If you love this tutorial you’ll probably love this other stenciling project I did a tutorial on. I show you how to make a custom name canvas and it is one of my most popular posts on my blog AND one of the most popular craft kits I sell in my Etsy shop.

Affiliate Disclosure. Some of the links on this website are affiliate links, which means that I may earn a small commission if you click on the link or make a purchase using the link. If you make a purchase you will not be charged anything additional.

What’s included in the DIY canvas tote craft kit?

If you don’t purchase the kit here’s what you’ll need

How to stencil on a canvas bag tote. Paint on a canvas bag to personalize it.

A tip before you start… to get the best outcome you will want to use a contrasting paint color so that your colors really pop.

Ok, let’s get started painting on this canvas bag.

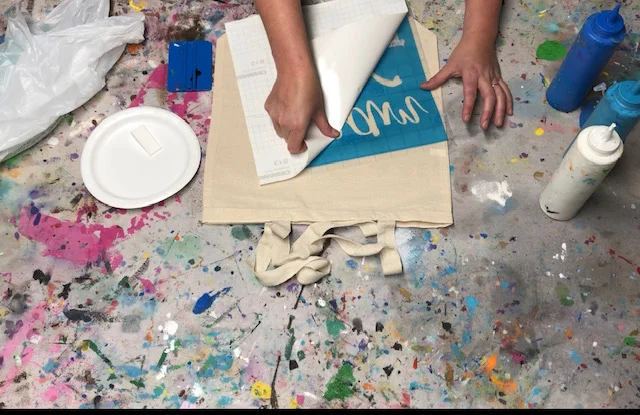
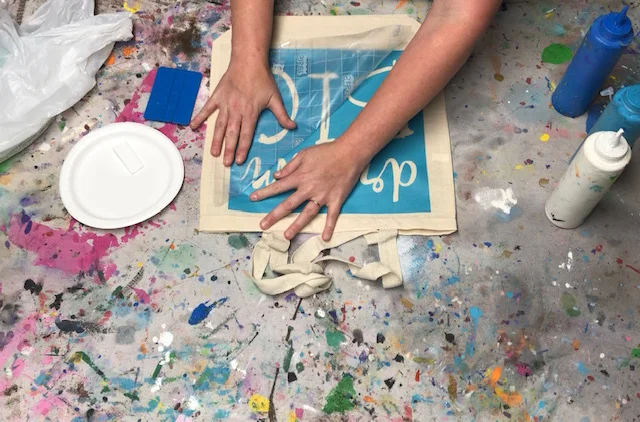
1. Flip your stencil over so that the white paper backing is facing up.  Then using your vinyl squeegee {burnishing tool} rub the stencil  backing.

How to stencil on a canvas bag. Learn how to faux screen print to personalize your canvas totes.

2. Slowly peel the paper backing away from the stencil and transfer  tape {the blue & clear pieces}. GO SLOW and work from one corner  across to the corner diagonal from it. Another tip is to peel it away  at a very sharp angle, it helps to glide it across itself.

How to stencil on a canvas bag. Learn how to faux screen print to personalize your canvas totes.

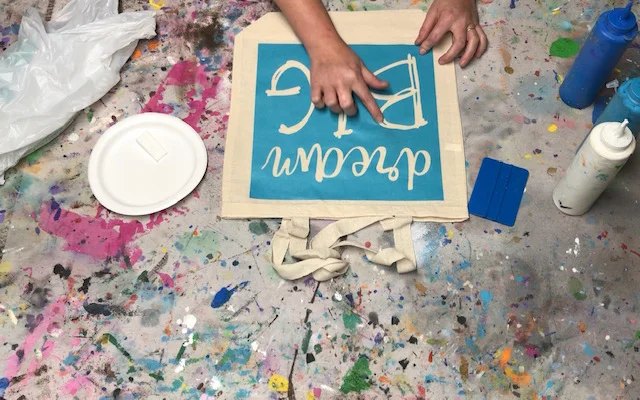
3. Flip you stencil over so that the sticky side is facing down. Now  place it on your bag. Use your vinyl squeegee to help press it to the  bag.

How to stencil on a canvas bag. Learn how to faux screen print to personalize your canvas totes.

4. Slowly peel off the clear transfer tape. Use the same technique that  you did when taking off the paper backing. GO SLOW and peel  from corner to corner at a very sharp angle

How to stencil on a canvas bag. Learn how to faux screen print to personalize your canvas totes.

5. Run your finger along all the exposed areas of your stencil. This will  help control the paint bleed and keep it minimal. If there are any air  pockets just press them out with our finger or squeegee.

How to stencil on a canvas bag. Learn how to faux screen print to personalize your canvas totes.

6. Before you start painting you need a barrier between the two layers  of your bag so you don’t have paint bleeding onto the other side.  You can do this by placing a plastic bag inside your canvas bag,  making sure it is in the same place as the stenciled area.

How to stencil on a canvas bag. Learn how to faux screen print to personalize your canvas totes.

7. Put a small amount of your paint colors on your paper plate. Using  a stenciling sponge LIGHTLY dip the bottom of the sponge into  your paint. Dab it off. You want VERY LITTLE paint on your sponge.  Too much paint will cause paint bleed.

How to stencil on a canvas bag. Learn how to faux screen print to personal your canvas totes.

8. Using an up and down pouncing motion apply the paint with the  stenciling sponge onto the exposed areas of the stencil. You do not  want to rub or make a back and forth motion. This will force the  paint up and under your stencil. Repeat this step until you have  painted all the exposed areas inside your stencil.

How to stencil on a canvas bag. Learn how to faux screen print to personalize your canvas totes.

9. After you have your entire stencil painted it’s time to peel it up. You  do not need to wait for your paint to dry for this step. Just like you  peeled the paper backing and transfer tape, start in one corner and  peel to the opposite corner. Be sure not to drop your stencil  material on your bag as you peel. Use your xacto knife to take up all  the middles out of your design. THIS STEP MUST BE DONE BY AN  ADULT.

How to stencil on a canvas bag. Learn how to faux screen print so you can personalize your canvas totes.

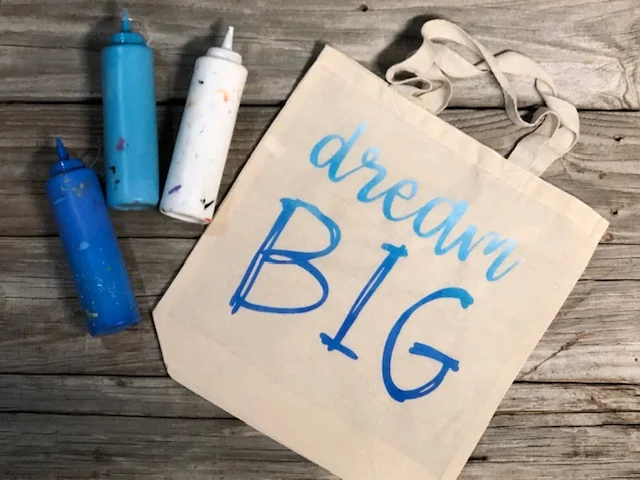
10. After your design dries REMOVE the plastic bag. It is best to seal  your design with heat prior to washing it. You can do this by simply  ironing it, do not iron directly on the painted area always use a  pillow case or tea towel between the iron and your design.

How to stencil on a canvas bag. Learn how to faux screen print to personalize all your canvas totes.

How to TIE DYE using food coloring

How to tie dye using food coloing. An easy way for kids to learn the techniques of tie dying chemical free.

Teach your kids the techniques of tie dying using food coloring

For a long while now my girls have been wanting to try their hand at tie dying so we thought why not make tie dye red, white, and blue shirts for the 4th of July that was coming up. But there was one slight problem, we were pressed for time and I had NEVER tried to tie dye before…ever. So we did some searching on Pinterest and found a TON of tutorials. We came across ones that used food coloring and I thought that would be a perfect starting point for us since we’d never tried this whole thing before.

It was a pretty great experience too! I’m so glad we tried this method first. I need to add that the food coloring does NOT stay in the fabric after being washed. There are steps that we could have taken to make it stay but I wanted their shirts to rinse clean so they could try other folding techniques and not have a million tie dye shirts in their closet.

Affiliate Disclosure. Some of the links on this website are affiliate links, which means that I may earn a small commission if you click on the link or make a purchase using the link. If you make a purchase you will not be charged anything additional. This is just a way I can help add to our family finances to raise our four daughters. Please know I would never recommend a product or service I do not totally stand behind.

Click here for more kid friendly craft tutorials. If you enjoyed this TIE DYE craft watch the video below on how to stencil on a canvas bag. This is a HUGE hit for a birthday party craft.

Here’s what you’ll need

I picked everything up from my local Walmart & Dollar Tree, but I’ve included links if you prefer to order these items on Amazon and have them delivered right to your door.

EASILY TIE DYE WITH FOOD COLORING

1. TWIST YOUR SHIRT

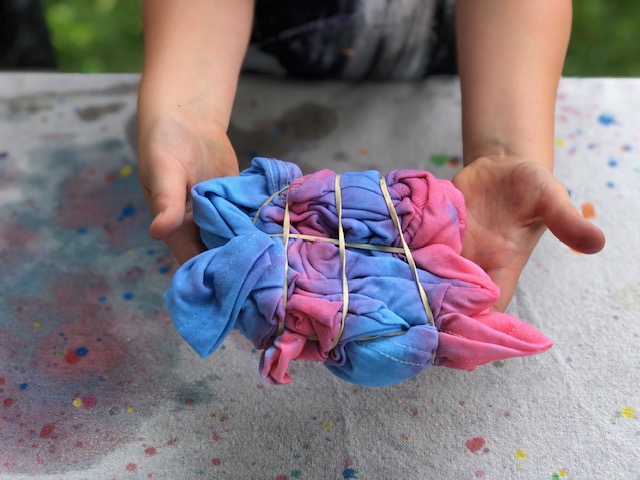
First you want to unfold your t-shirt so it is laying flat in front of you. Then pinch the middle and twist the shirt so it coils into itself. This was a little difficult for my girls to do so I did this step for them. But with a little practice I think they will master it in no time.

How to tie dye using food coloring. The perfect method for kids to practice how to DIY tie dye at home.
How to tie dye using food coloring. The perfect method for kids to easily learn tie dying techniques.

2. WRAP WITH RUBBER BANDS

Next, wrap a rubber band around the circumference of the coiled shirt. Then add several rubber bands going the other direction around the shirt so it doesn’t come undone. The method gives the shirt a traditional spiral look but if you want to learn other techniques I recommend reading Stephanie Lynn’s blog post about other tie dye folding techniques.

How to tie dye using food coloring. Easy method for kids to practice the tie dying technique.

3. TIE DYE FOOD COLORING MIXTURE

Now you’re ready to start mixing the food color mixture.

I read another tutorial they recommended 8 drops of food coloring to 1/2 C of water. We mixed that at first but it didn’t seem like the colors were very bright. So we doubled the food coloring drops.

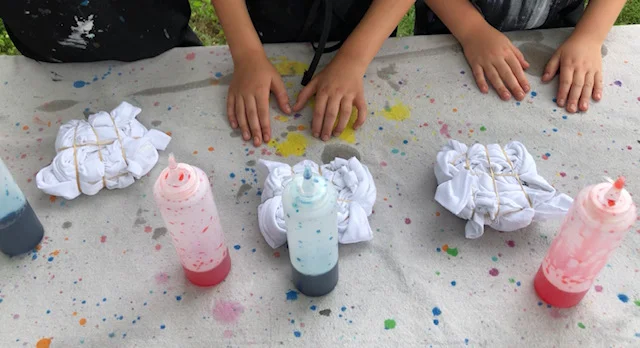
You’ll need to mix 16 drops of food coloring:1/2 C water we just poured it all into our squeeze bottles and gave them a good shake. I wasn’t sure how much solution we would use since we had 3 shirts to do and we ended up having to refill one red bottle and one blue bottle.

How to tie dye using food coloring. Easy method for kids to practice the tie dying technique.

Their little setup was so cute I had to snap lots of pics!

How to tie dye using food coloring. Easy method for kids to practice the tie dying technique.

4. APPLY THE FOOD COLOR MIXTURE

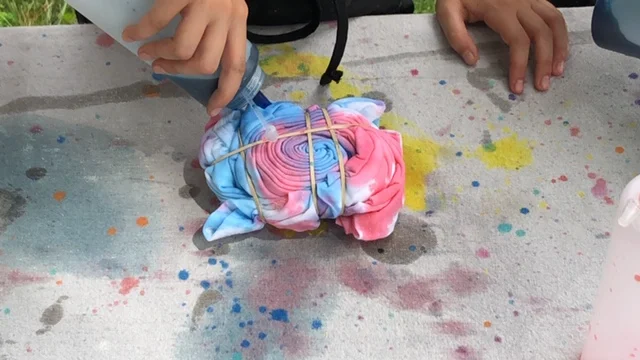
Then start squirting on the food coloring solution. If you don’t prewash your shirt you might have a hard time getting your shirt to absorb the liquid. This was us lol! So we gave our shirts a quick misting with a spray bottle with water in it and after that it soaked the food color water up just fine.

How to tie dye using food coloring. Easy method for kids to practice the tie dying technique.

Keep squirting on the solution until your shirt looks like the one below. Again, we are first timers here but this worked for us so this is what we are recommending ;)!

How to tie dye using food coloring. Easy method for kids to practice the tie dying technique.

5. LET IT SET

Other tutorials we read said to soak the shirt in salt water after you’re done squirting on the food color mixture. Then remove it after so many hours and let it sit for at least 12 hours…but we didn’t do that lol! We were pressed for time and this was a just for fun tie dye experiment to get our feet wet with the whole tie dying experience. But we did let our shirts set for 24 hours, mainly because we had a million other things to do {momma of 4 life}.

Keeping your shirt coiled up with the rubber bands still on it, place it inside a plastic bag and wrap the bag tight squeezing out all the air. Let sit for at least 12 hours.

How to tie dye using food coloring. Easy method for kids to practice the tie dying technique.

6. READY TO WEAR

After it has sat, take it out and hang it inside to dry, away from sunlight. Once dry you can wear your freshly food colored tie dyed shirt right away.

My girls did some fancy cutting and tying on their shirts. The middle two even used some of their discarded pieces to make fun headbands to match their shirts!

Like I said above, this method is not permanent. It WILL wash out. But it was so fun for the girls to test the waters of tie dyeing. Look how adorable they are!! BTW the youngest of the four daughters didn’t want any part of the whole thing….life with a toddler lol!

How to tie dye using food coloring. Easy method for kids to practice the tie dying technique.

In my opinion this is THE perfect way for kids to experiment with tie dying. They can do so many wrapping and folding techniques and if they don’t like it it will wash right out. And if they find a technique they love they can try their hand at the permanent stuff.

I hope you enjoyed reading this tutorial. My girls had so much fun with this!

Let me know if you have any questions below.

5 awesome craft kits your kids will love

5 awesome craft kits your kids will love. Totally kid approved

Craft kits kids will love

Kids love to create. They have creativity coming out their ears it seems like. Back when we had our brick and mortar craft studio we would sell these kits like crazy! And now we have them online so kids all across the world can enjoy them.

Don’t want to buy the kits but want to know how to make the craft? I’ve got ya covered! After the end of the descriptions I’ve included the link to the tutorial here on my blog.

Here are our top 5 craft kits that have been kid tested and APPROVED!

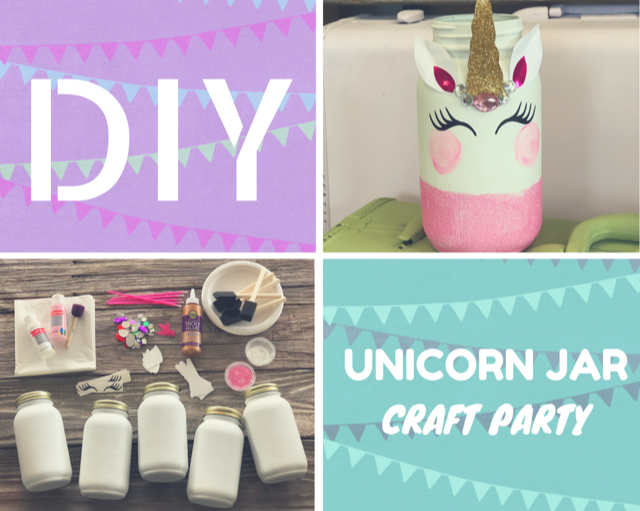
  1. DIY glittery unicorn mason jar

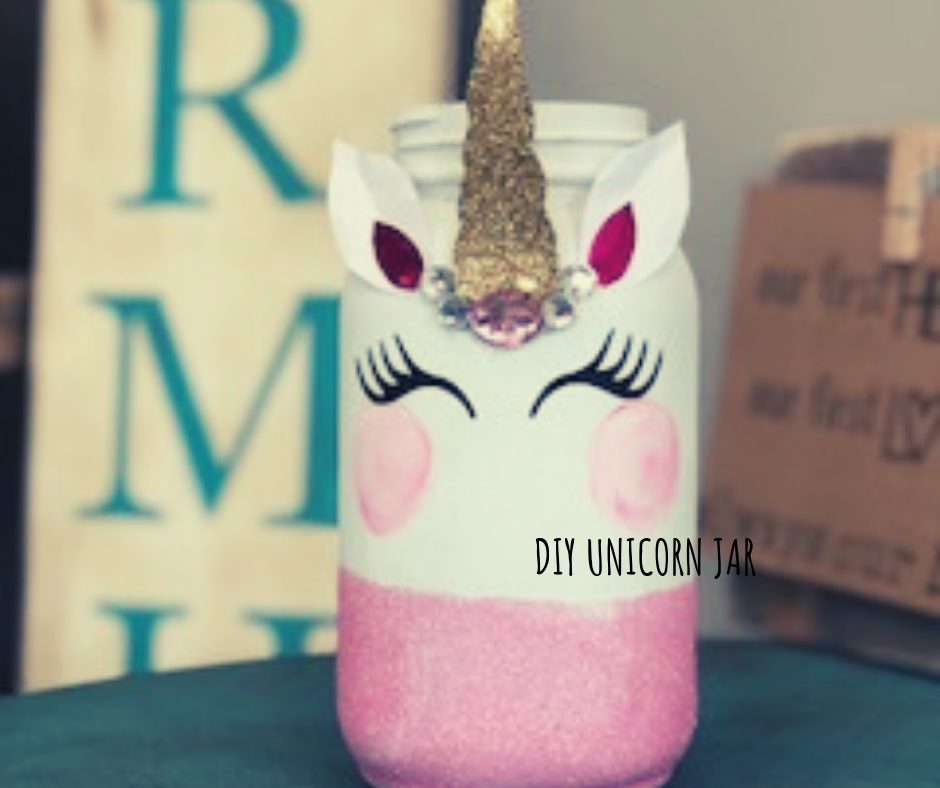
This unicorn mason jar craft kit is one of our top selling craft kits we ship. Each kit comes with a pre-painted mason jar so you don’t even have to worry about that step {painting mason jars can be a challenge due to curing times in between coats}. Upgrade to a unicorn mason jar craft party size

Check out the DIY glittery unicorn jar tutorial

2. CUSTOM name canvas art

What kid doesn’t want their name on a beautiful canvas that they paint? This custom name art canvas craft kit comes with everything your kiddo needs to have a personalized canvas art. Your name of choice comes already attached to the canvas so it’s ready to go right out of the box. Once your kiddo paints their canvas you simply peel up the stencil to reveal the white lettering underneath. This custom name art craft is also available in party sized, actually this a great option for family get togethers to give the little ones something fun to do.

Check out the DIY custom canvas art tutorial

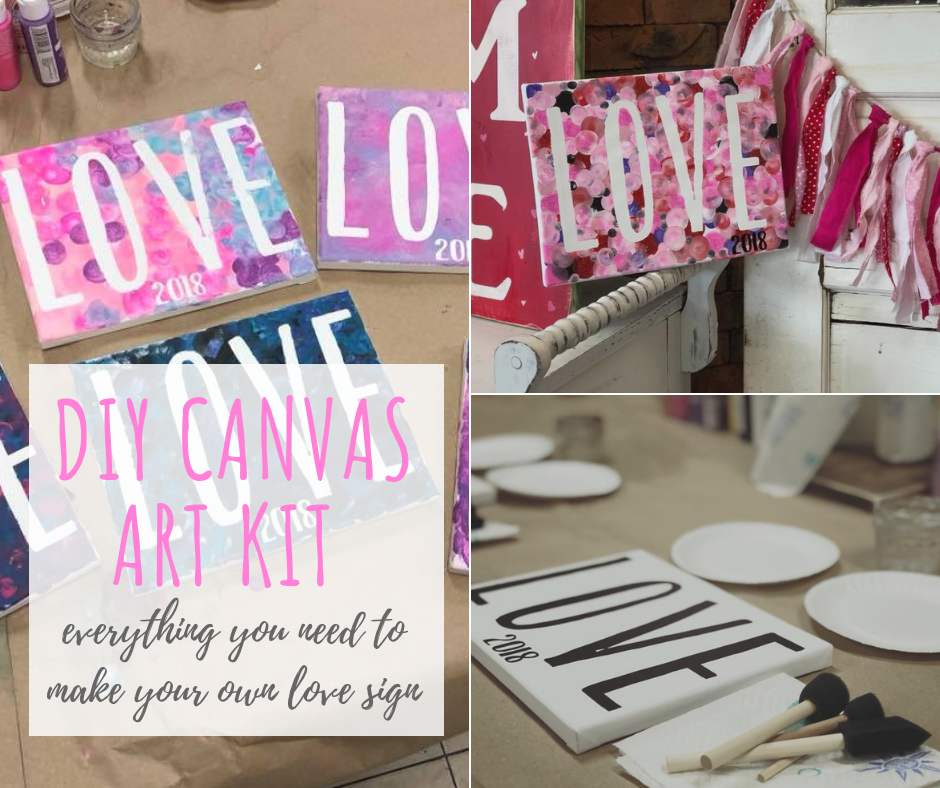
3. LOVE canvas art craft kit

Much like the craft kit above this canvas art come with the stencil already applied and ready to create right out of the box. This Valentine’s Day canvas art craft kit is always a big winner with moms and kids!

Check out the DIY canvas art tutorial

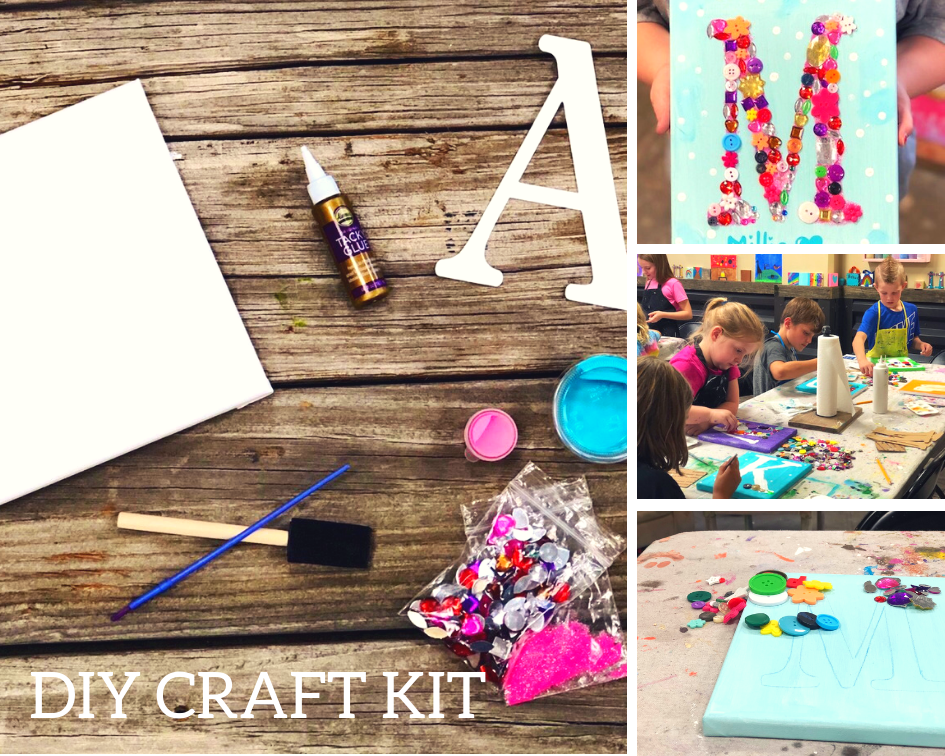
4. Mixed media canvas art craft kit

I can’t tell you enough how much kids LOVE this custom initial craft kit. The get to choose their own colors, buttons, rhinestones, and glitter and totally make it their own. This kit is so much fun and more!

Check out the DIY custom mixed media name canvas art tutorial

5. DIY light up fairy jar

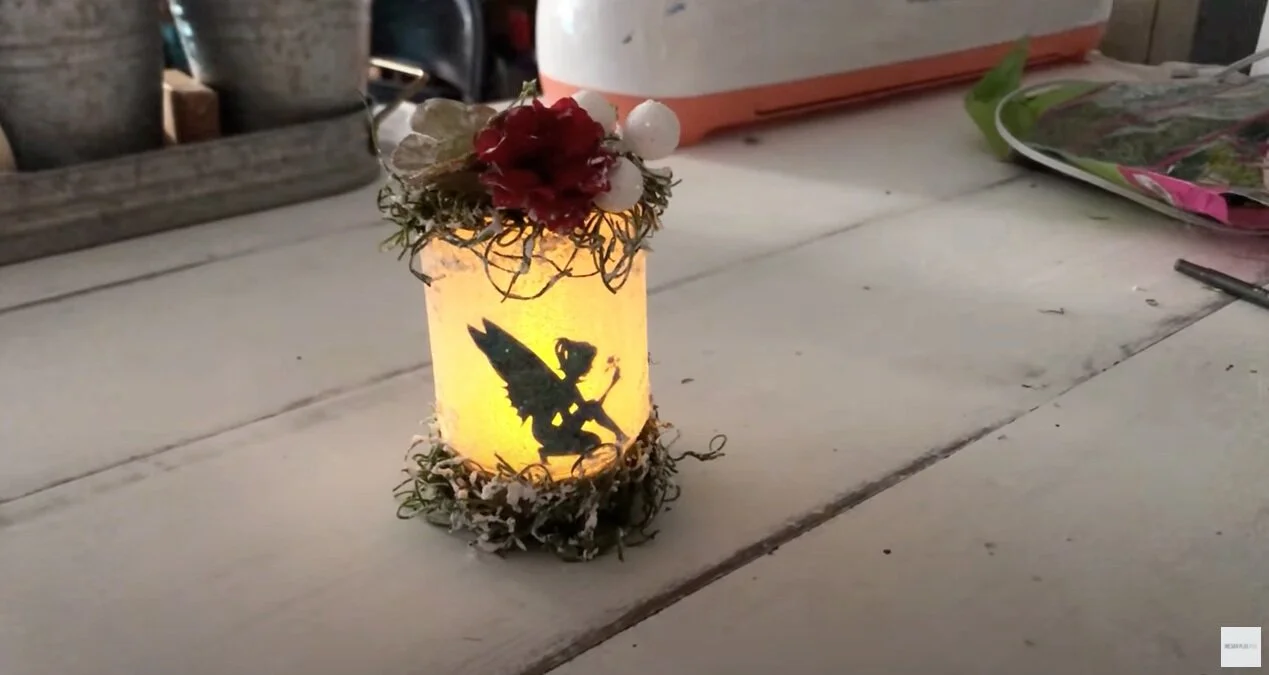
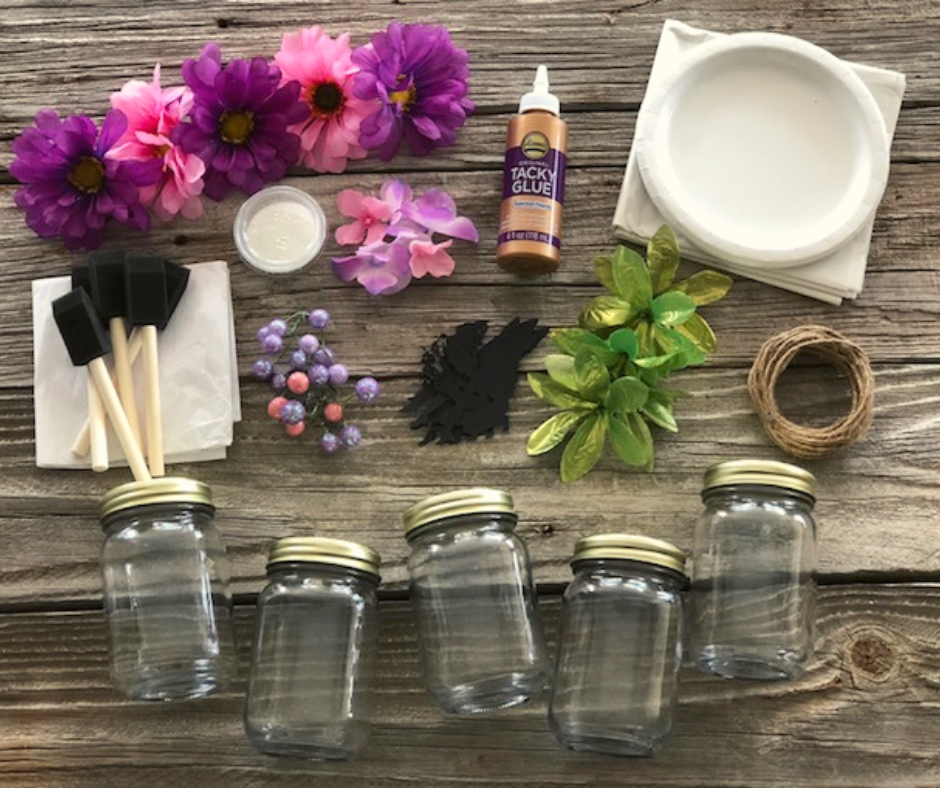
Calling all whimsical fairy believers! This light up fairy jar craft kit will make a perfect gift for the fairy lover in your life. This kit includes a smooth mason jar, embellishments, cardstock fairy, glitter, twine, tissue paper, and a battery operated light. Full picture instructions are included.

Check out the DIY glittered light up fairy jar tutorial

There you have it our top 5 craft kits approved by kids! Each and every one of these kits was a top seller in our brick and mortar craft studio and they each continue to be top sellers in our online shop.

If you have any questions on the craft kits please feel free to reach out to me. Each one come will full picture instructions and materials to complete each craft. Please note tools such as a glue gun are not included inside our DIY kits.


DIY sensory activites your toddler will love

DIY sensory activities your toddler will love. How to make sensory bins for you tot.

What is sensory play for toddlers?

Sensory play is crucial for your child’s development. I’m not going to spout out all the scientific reasonings sensory play is huge for your toddler…because I am not a doctor or licensed in this field in any way. I am, however, a momma of 4 and have seen what it’s done for our own daughters. And since I’m super frugal and crafty I am going to share with you how you can make your own DIY sensory activities on a dime! If you’d like to read a little more science behind sensory importance read this article from Heather at Growing Hands-On Kids.

Sensory play touches on these five senses

  • sight

  • smell

  • touch

  • taste

  • hearing

When we let our kiddos explore the things around them they start to understand their bodies. They start to understand just how all these different things work. So when all you see is a mess what they “see” is so much more. They are learning through play. Just as you would learn through doing something, say a new craft technique, or a task at work. We learn when we do and our babies and toddlers are no different. So, don’t focus on the mess. Focus on the wonderful things that are happening inside your little one’s brain.

And a plus is that it’s SO easy to make your own sensory activities at home. More than likely you already have everything you need to create these too.

Affiliate Disclosure. Some of the links on this website are affiliate links, which means that I may earn a small commission if you click on the link or make a purchase using the link. If you make a purchase you will not be charged anything additional. This is just a way I can help add to our family finances to raise our four daughters. Please know I would never recommend a product or service I do not totally stand behind.

If you love this article you’ll also love my post on toddler apple stamping canvas art. This is sensory oriented and makes an adorable keepsake for you!

Here are my top sensory activities to do at home for toddlers

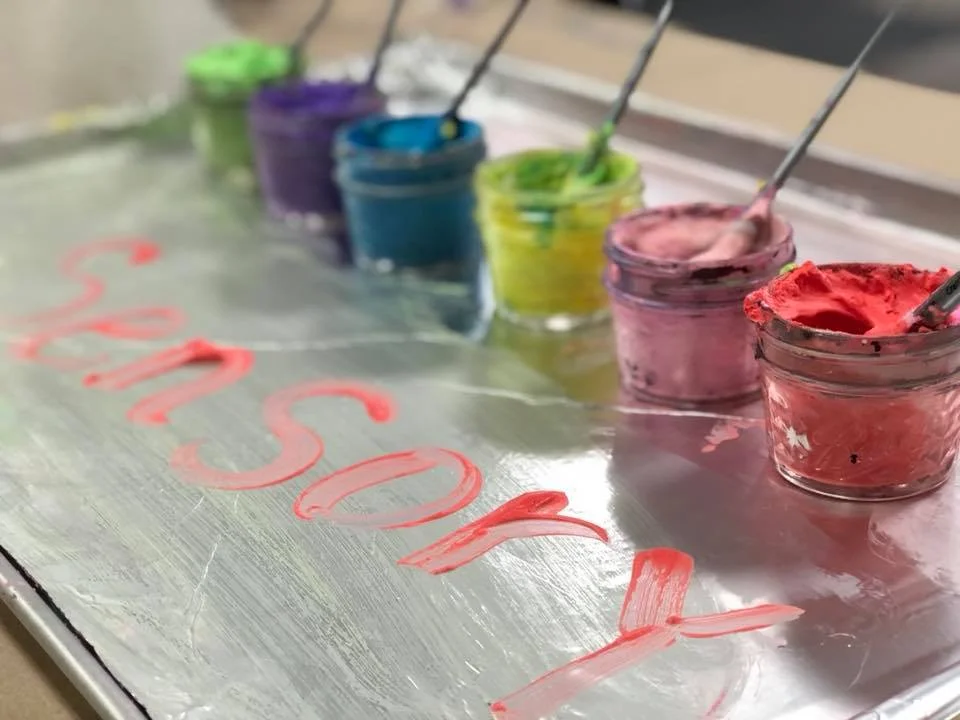
1. Colorful fluffy paint on foil

Here’s what you need

  • containers

  • paint brushes {or they can use their fingers}

  • pan

  • foil

  • food coloring

  • cool whip

Cover a metal pan in foil. Fill containers half way with cool whip. Add a few drops of food coloring. Let them paint. You can wipe off the foil if there gets to be too much cool whip “paint” on it and let them do it all over again.

DIY sensory activites for your toddler that you can do at home

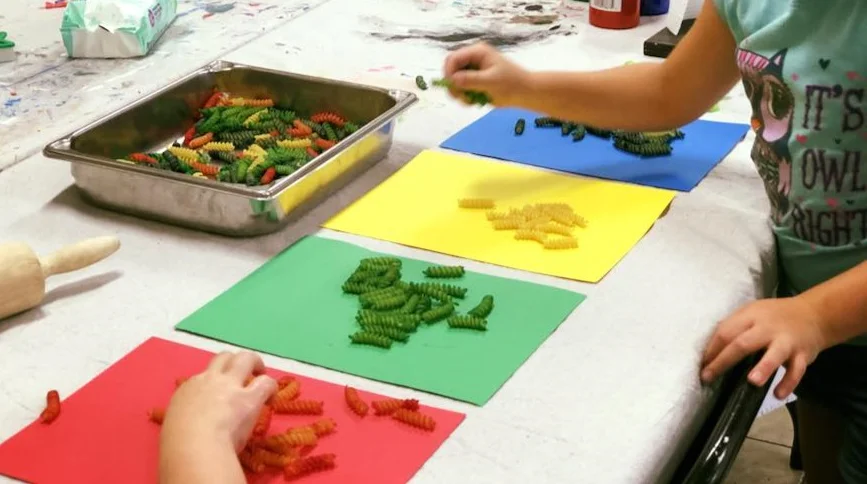
2. Color sorting with noodles

Here’s what you’ll need

  • colored noodles. I made these by placing them in ziplock bags, adding food coloring and shaking. Allow them to dry overnight prior to using.

  • bin or bowl

  • colored paper to coordinate with the colors of noodles you have

This is a really fun game for kids. This would literally keep our youngest daughter busy for a solid hour! You can even add some drops of essential oil to the noodles when you color them to make it an even better experience for your tot.

DIY+sensory+activities+your+toddler+will+love%2C+how+to+make+sensory+games+for+toddlers

3. Racing cars in paint

Here’s what you’ll need

Cut the bottom off your trash bag and a slit in the side, so that the bag opens flat. Tape it to the floor, a solid ground not the carpet. Add some paint and let your kiddos explore what it looks and feels like to run wheeled things through it. Even better because they see what it looks like when they start mixing the different colors together. This is super fun!

DIY sensory activitiy for your toddler, how to make your own sensory fun at home

4. Scented Playdough

Here’s the recipe I used for DIY playdough. I did add food safe scented oils to mine. You can see this one is still a big hit with our older daughters. We bring out the cookie cutters, rolling pins when we play with our DIY playdough. Don’t worry if they mix all the colors together, it’s apart of the fun for them.

DIY sensory activities for your toddler, how to make sensory days at home for your kids

5. Water Play

Here’s what you’ll need

  • bins

  • water

  • measuring cups

  • floating balls

  • large kitchen ladles and anything else that looks like fun to use in the water

This one was HUGE with kids! They love playing in the water. Show them how they can pour a scoop of water from one thing to the other. There are so many senses that are used during water play.

DIY sensory activities for your toddler, how to make sensory bins at home

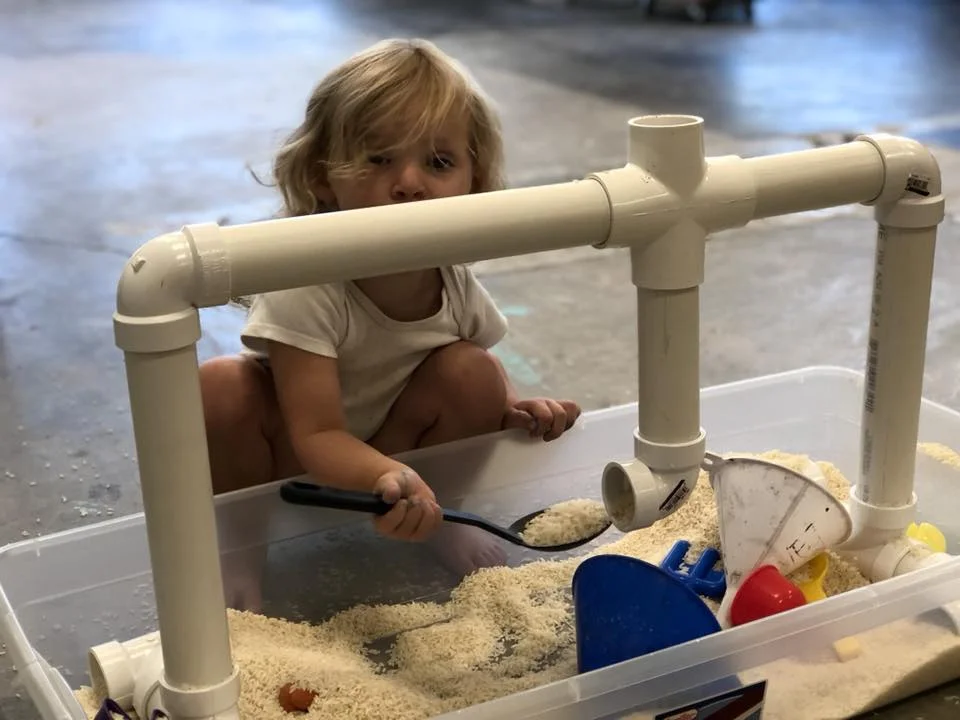
6. Rice Bin

Here’s what you’ll need

  • rice, LOTS of rice

  • pvc, solid pieces, elbows, and T’s

  • funnels

  • scoop spoons

  • large bin

I saved this one for last because is has been the ALL TIME FAVORITE with the girls! I don’t have exact plans for this DIY sensory rice bin but it didn’t take too much thinking to put together. I just cut pieces for sides, two pieces for the top bar, added some elbow’s, t’s and it was ready to go. I did not glue this together as I wanted to be able to take this apart to store away. You could even do something like this for water play!

DIY sensory activities your toddler will love and how you can make them at home

There you have it, my top 6 sensory play activities for toddlers from a mom’s point of view. Most of the materials for these activities you probably have around the house, talk about frugal toddler fun! Yes, they are messy but let them get messy. Let them learn. Let them explore. Let them be toddlers and enjoy this time you have with them.

Check out more kid friendly posts below

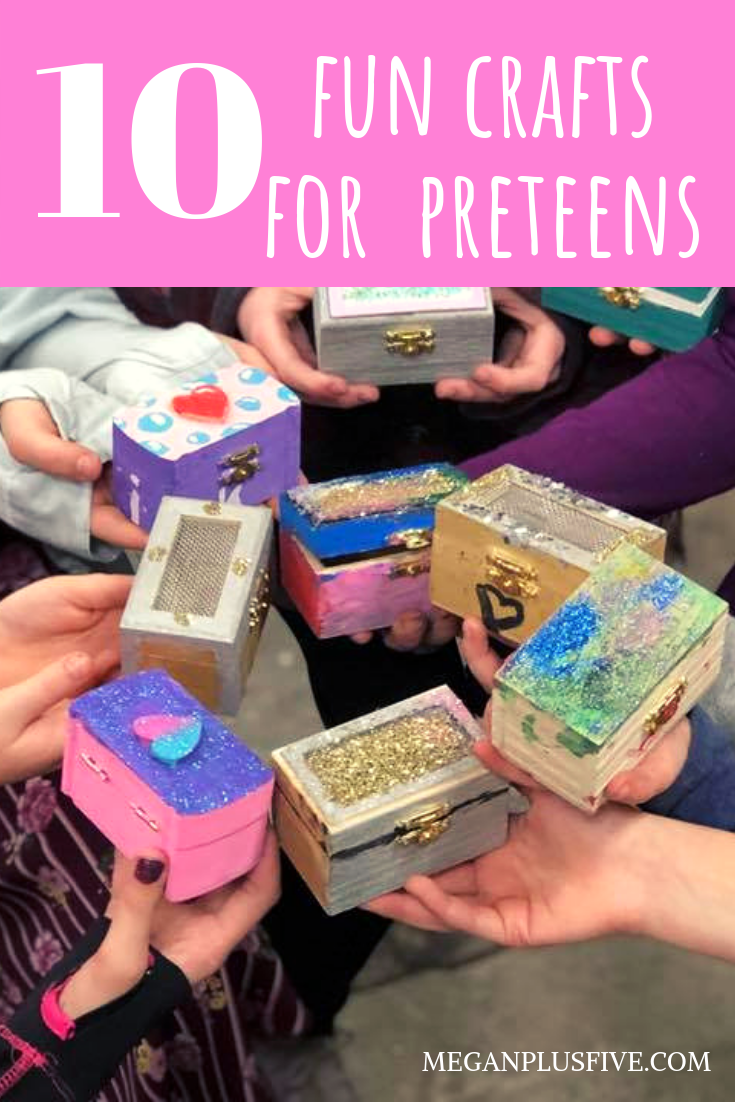
10 fun crafts for preteens...from a preteen

10 fun crafts for preteens, by a preteen

FUN CRAFTS YOUR PRETEEN & TEENS WILL LOVE

I don’t know about you but our three older girls love Pinterest. They always ask to pin on there and honestly I don’t mind because it gives me a little insight into what they are into. What sparks their interest. And I love to see the varied levels of interest from each daughter. Some days they are all about pinning slime recipes and others they are decorating their dream house lol! But I especially love it because it helps me to see what craft projects they might be into so I can buy supplies when I see it go on sale.

So I thought I’d share on here 10 crafty projects that PRETEENS are into, from a preteen’s point of view. These are all projects they have either done and LOVED or projects they’ve seen on Pinterest that they have pinned…more than once {this happens a lot with these three}.

Affiliate Disclosure. Some of the links on this website are affiliate links, which means that I may earn a small commission if you click on the link or make a purchase using the link. If you make a purchase you will not be charged anything additional.

I think it’s important that I also share I have not collaborated in any way with the other crafty sites I’m sharing. These are all pins our preteens found on Pinterest and I want to give credit where credit is due. So please check them out. Just click on either the highlighted link or the pictures themselves and it will link back to their websites.

If your preteen / teen is into DIY lotions, bath bombs, lotions, lip balms, basically DIY SPA products for teens —-> click here.

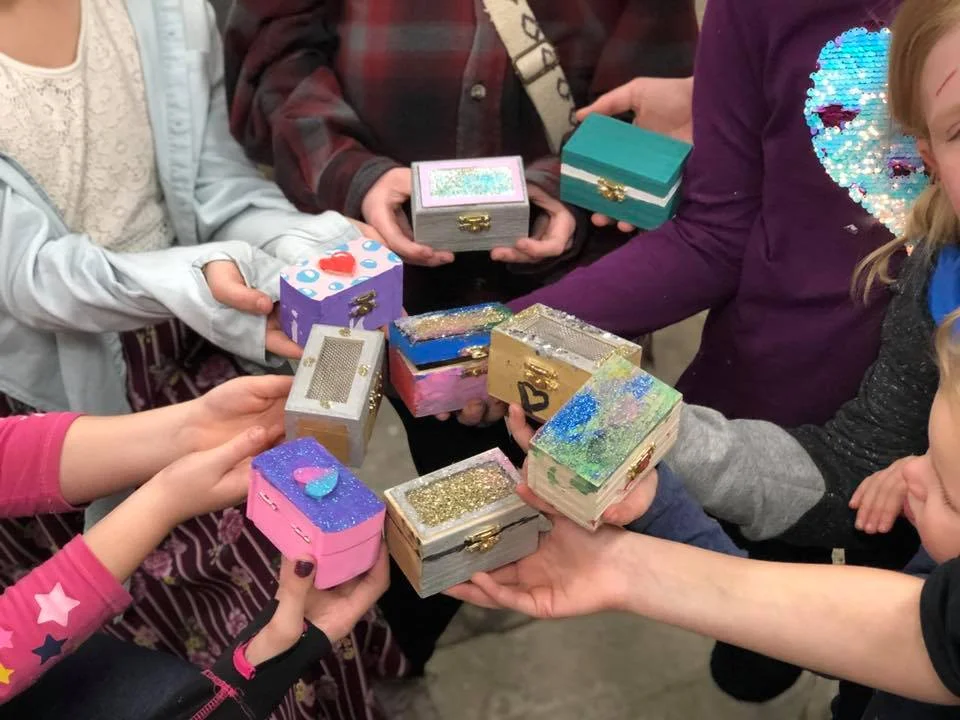
1.Treasure Boxes

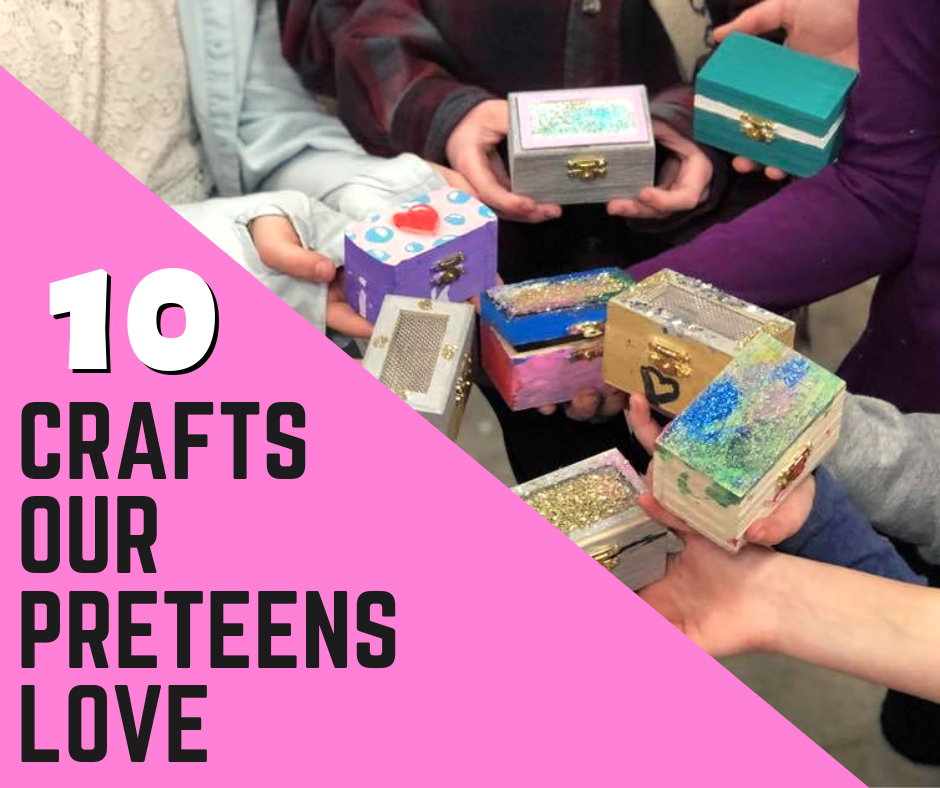
First up are these wonderful little treasure chest boxes. We made these for our oldest daughter’s birthday party. She had a scavenger hunt themed party so we thought why not have the treasure be mini treasure boxes! The kids loved them, even the boys which totally surprised me. We don’t have boys so it’s always super difficult for me to plan things that are gender neutral like that.

10 fun crafts for preteens, from a preteen

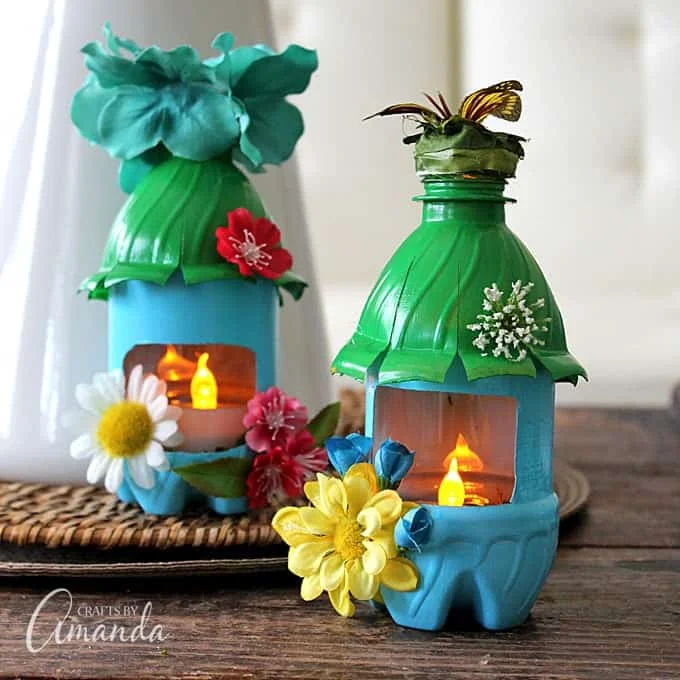
2. Fairy Houses

I don’t care how old you are fairies are fun! And these recycled fairy houses are sooooo adorable! Be sure to stop by Crafts By Amanda

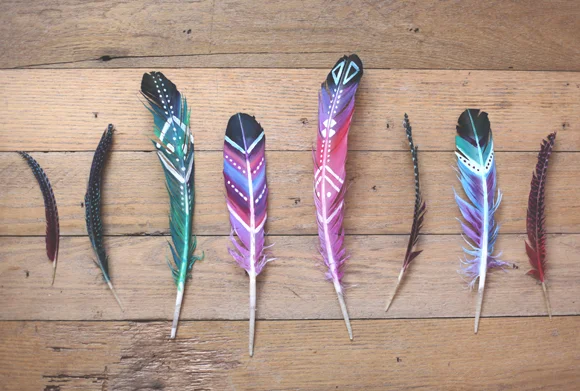
3. Painted Feathers

These are gorgeous! Preteens could do so much with these painted feathers and they would be so easy to make. Check out BLD 25 and the rest of their DIY projects.

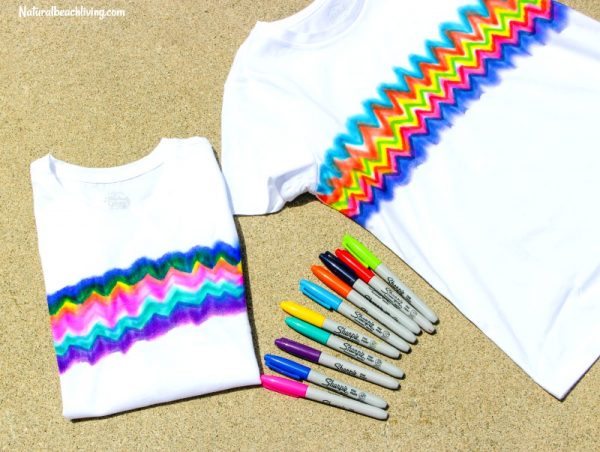
4. Sharpie Tie Dye

This looks like so much fun! Traditional tye dye can be messy but Natural Beach Living makes this craft look easy peasy!

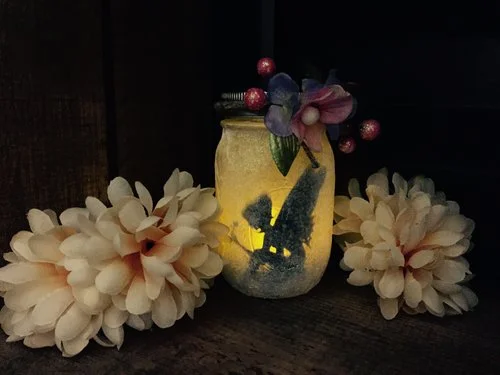
5. Light Up Fairy Jar

I have watched LOTS of preteens make this craft and they love it so much! Fairies are so fun no matter your age! Our girls have made several of these over the years and each time they get more and more creative with it.

6. DIY Bath Bombs

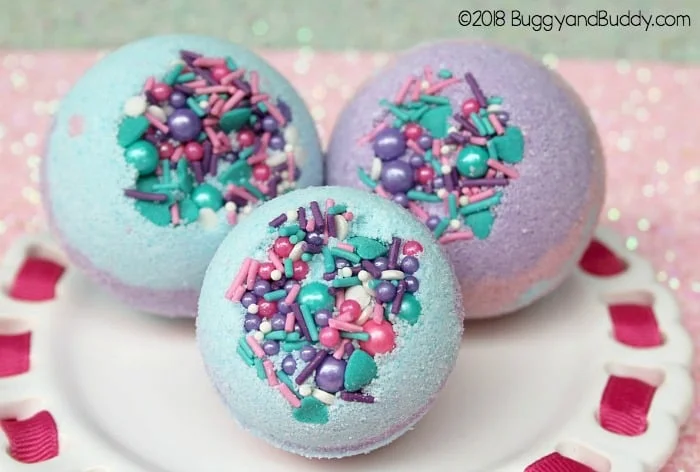
So this has been on our older girl’s list of things to do for awhile and I’ll be honest I have no idea why we haven’t tried these yet. Chelsey from Buggy & Buddy has a great tutorial the girls and I will have to make over this summer!

7. Cracked Glass Jewelry

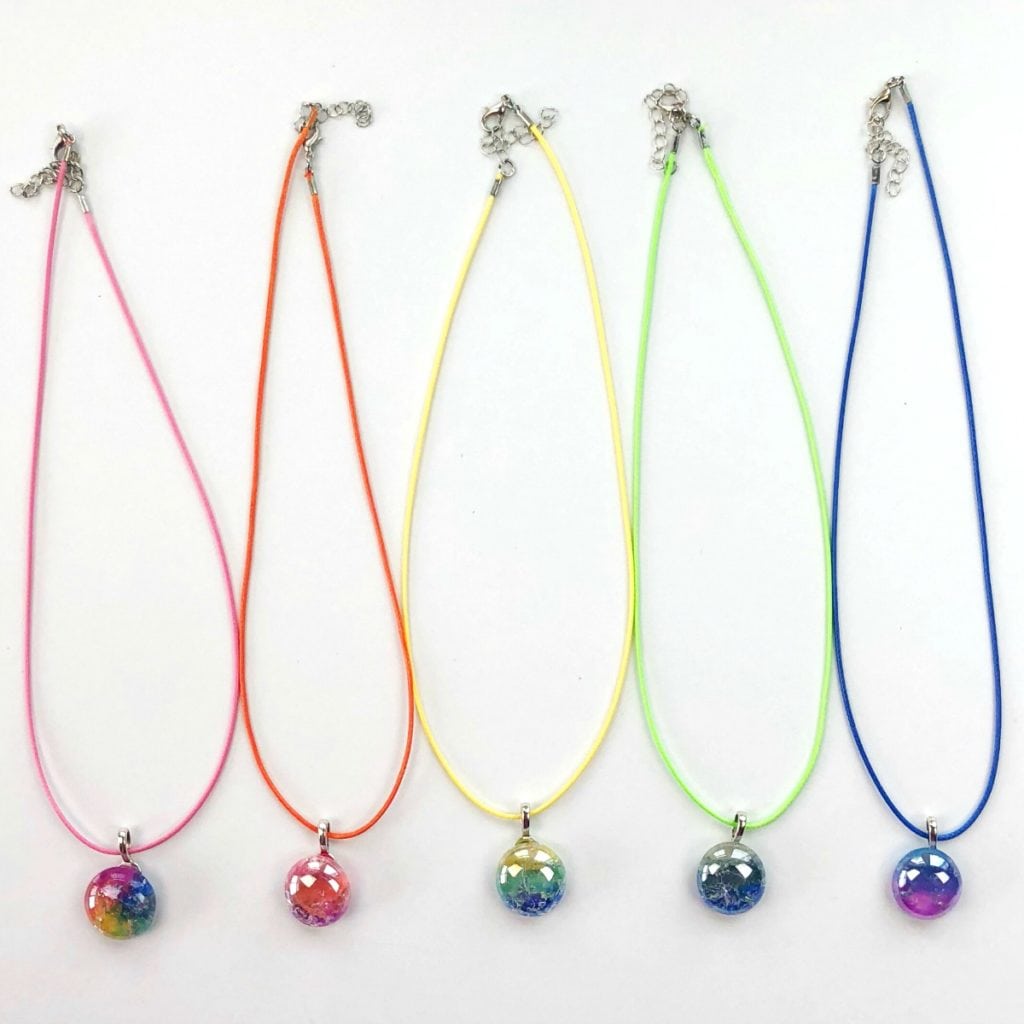
OMG this looks like a lot of fun! This project from Color Made Happy will require adult supervision but what a fun thing to make. I can’t wait to do this one with our girls.


8. DIY Constellation Jar : Glowing Science Fun

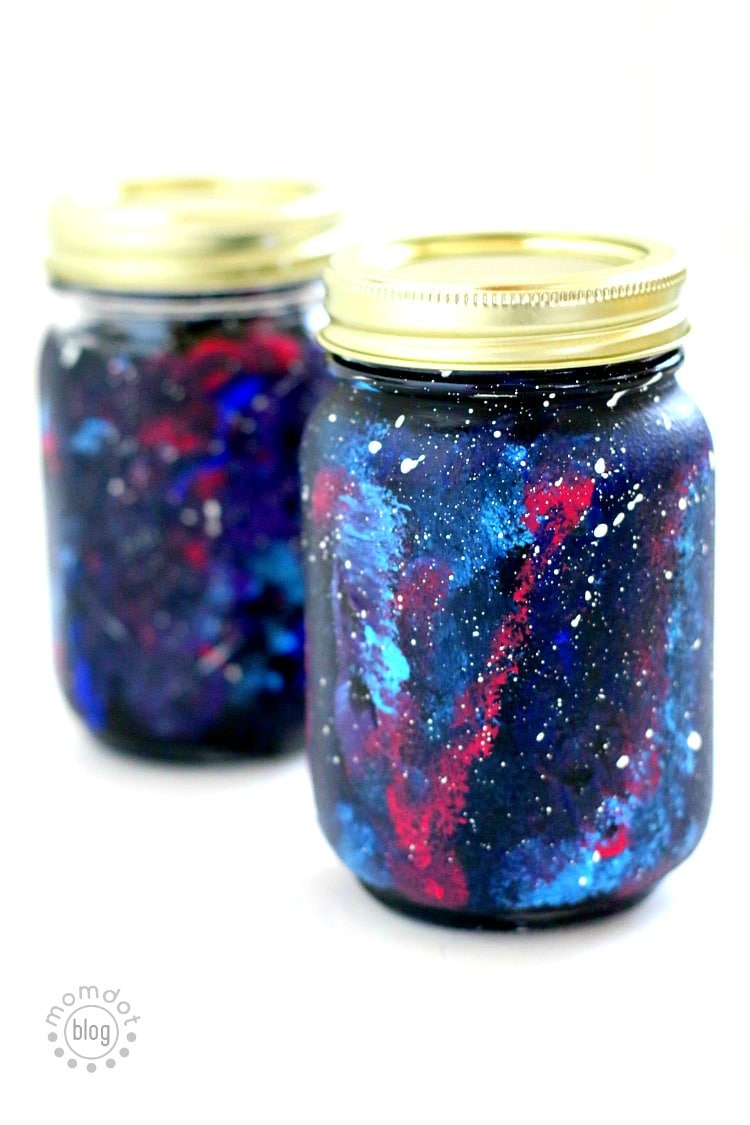
These look like a TON of fun! Your preteen could even upcycle an old sauce or pickle jar for this craft. Stephanie from Mom Dot did a great job with this creative project.

9. Polymer Clay Owl Necklace

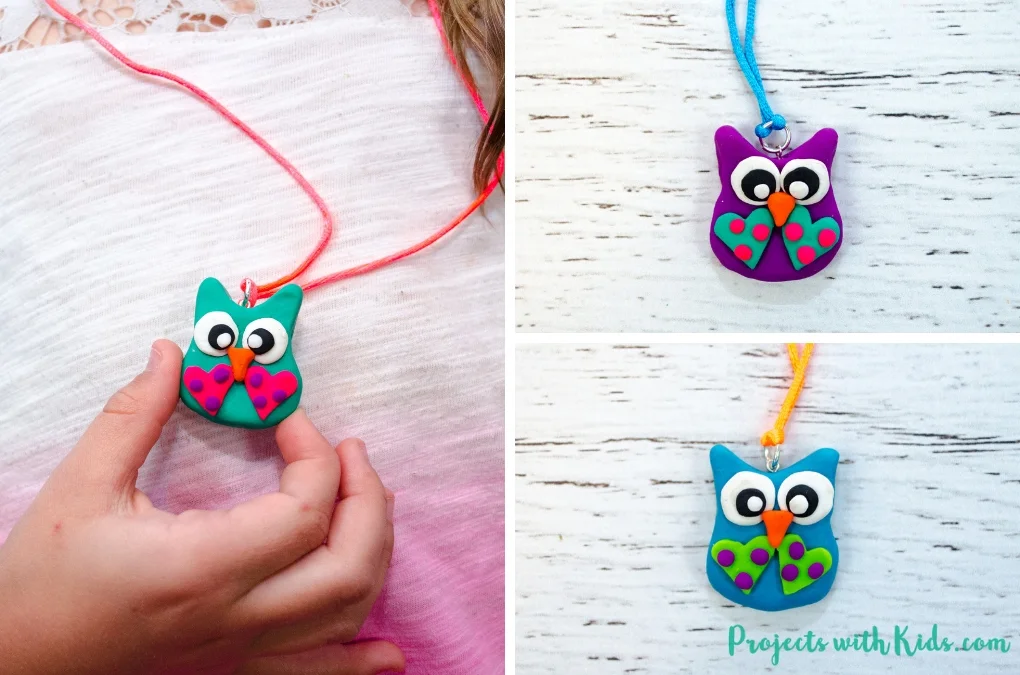
Our girls got a ton of clay for Christmas last year so they are pinning like crazy all the different things they can make out of it. Probably one of the best gifts we’ve ever given them lol! They stay busy for hours with this stuff! Check out Angela from Projects With Kids and her polymer clay necklace tutorial

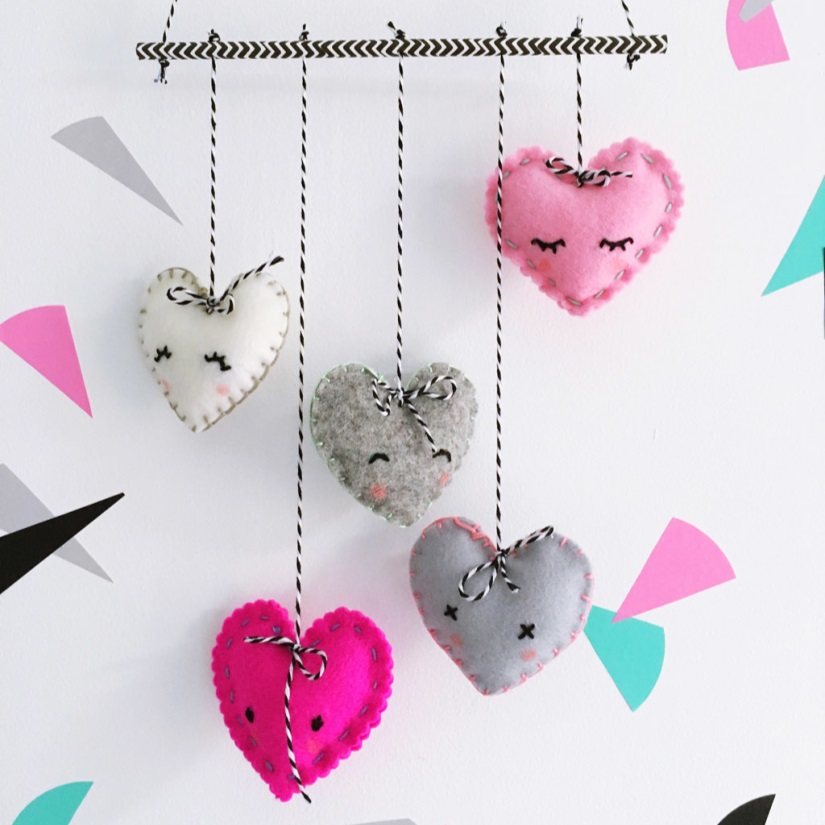
10. Wall Mobile

This is a must do craft for your tween. Especially if they are wanting to learn how to sew. I’ve taught all my older girls how to sew, the youngest will learn as soon as she’s ready, and they LOVE to explore what they can make with their learned skills. Sew Yeah has lots of great projects to check out including this heart wall mobile.

Be sure to check out all the amazing craft tutorials that our sweet girls found on Pinterest. I’d love to hear from you. What crafts does your preteen like?

Here are more kid themed crafts your kiddos may enjoy

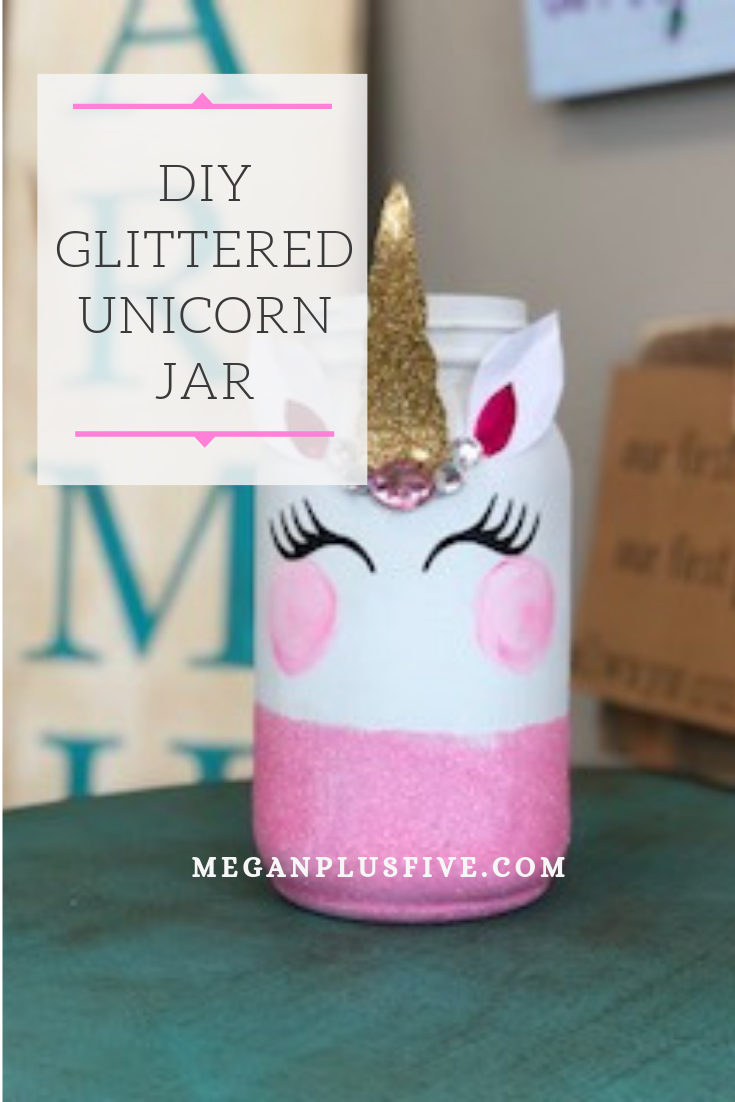
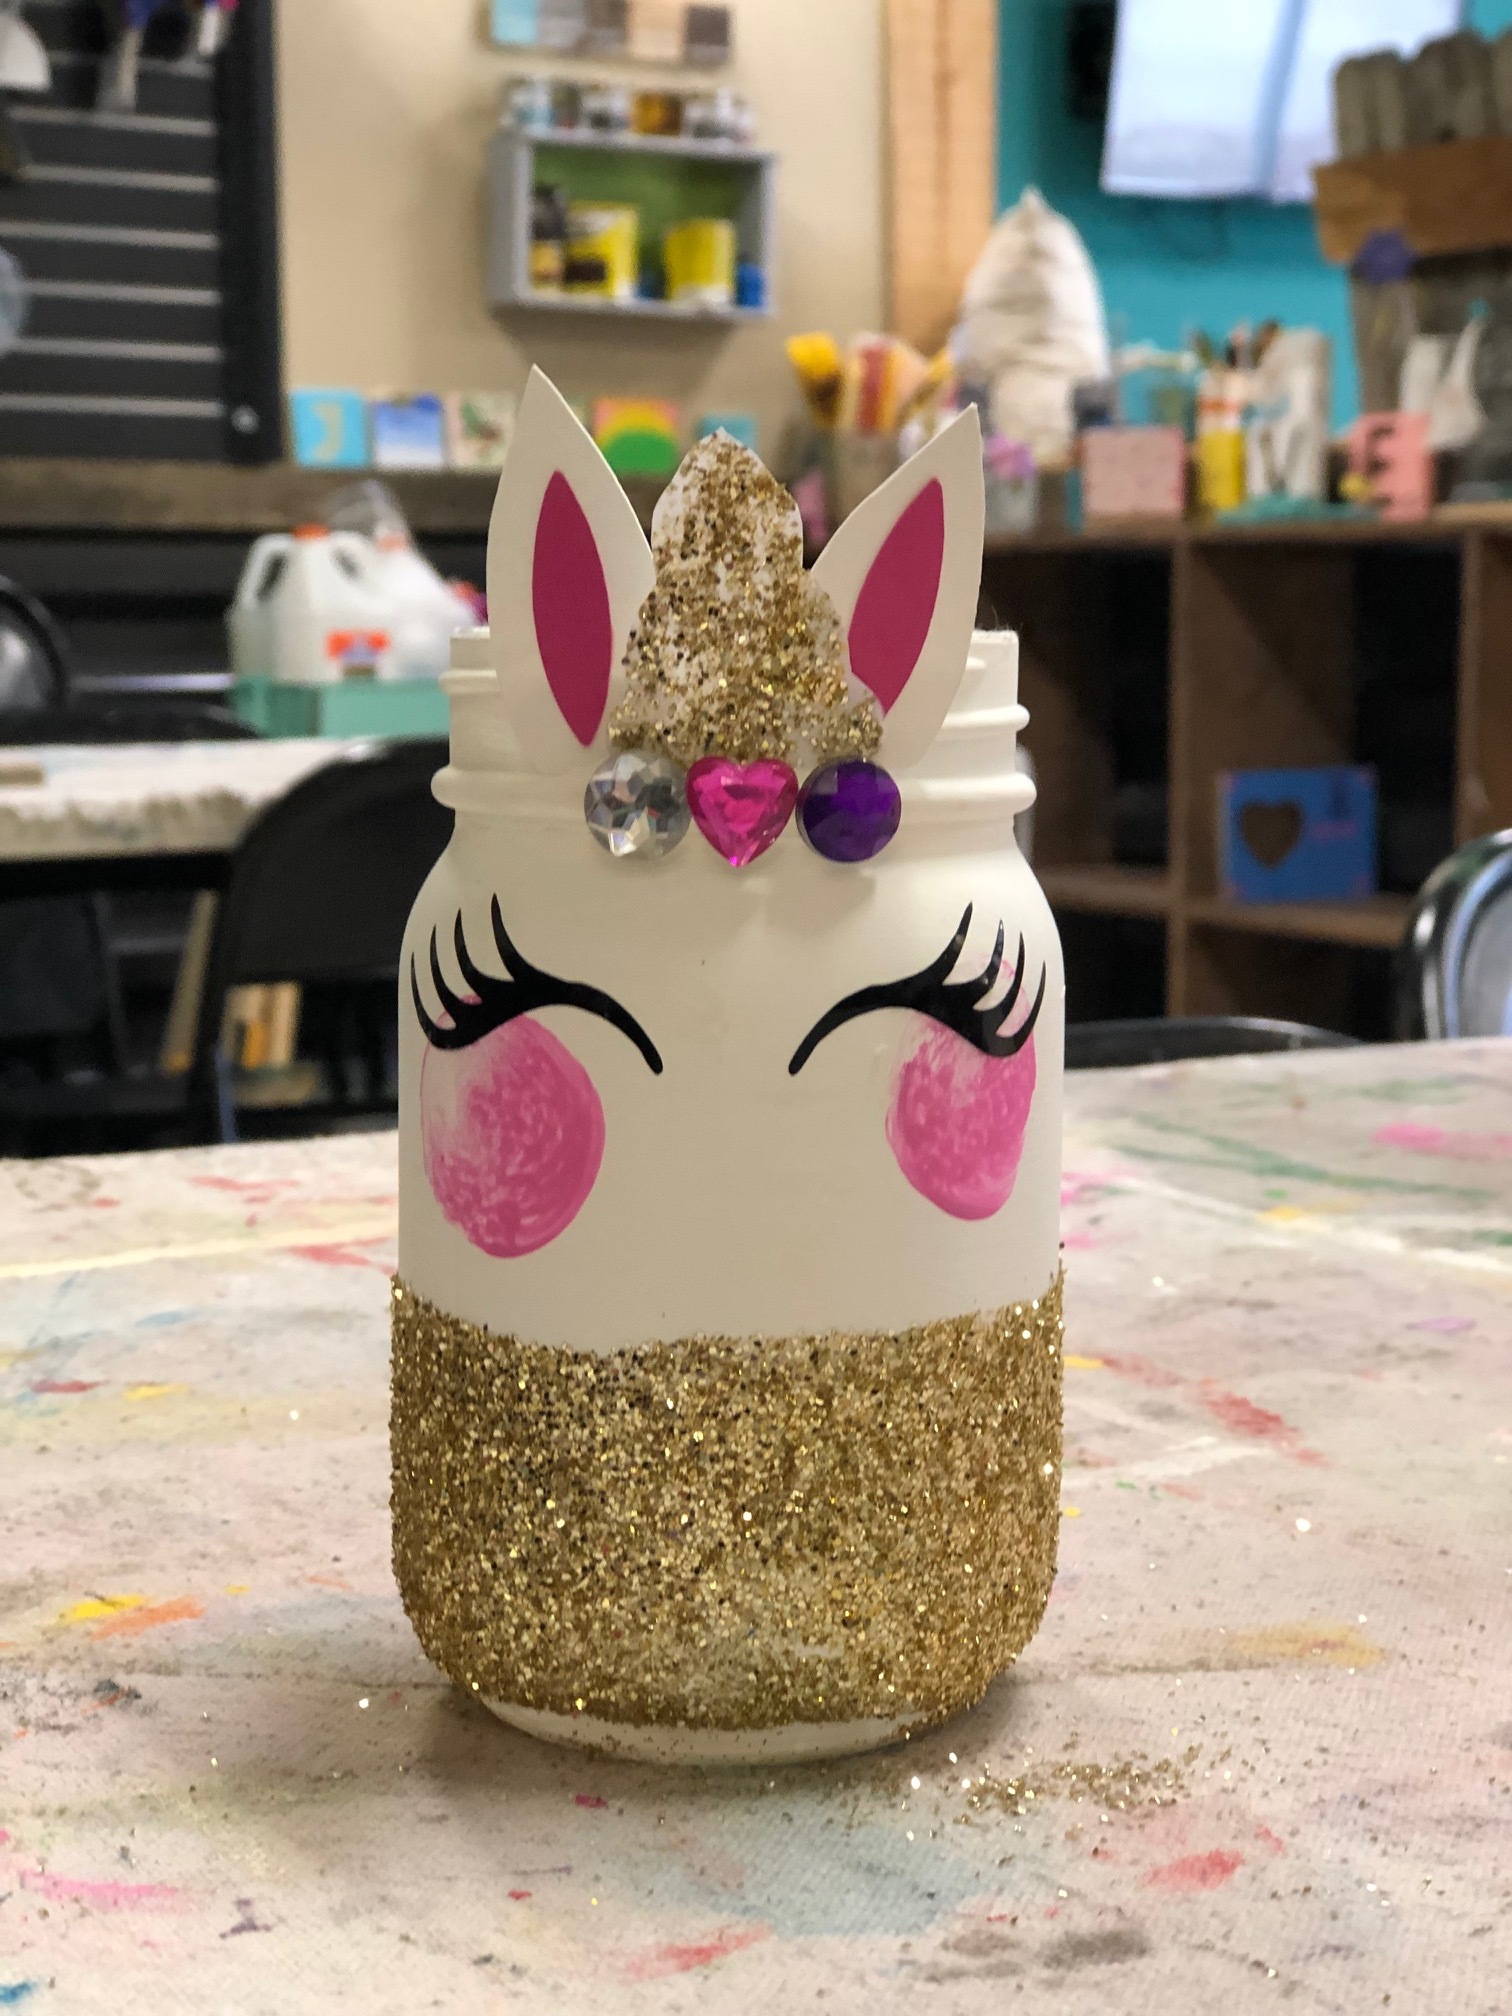
DIY Glittered Unicorn Jar

DIY Glittered Unicorn Jar

DIY UNICORN MASON JAR

Looking for a fun UNICORN themed craft to do with your unicorn obsessed little one {or by yourself ;)}? These jars are such perfect little project! You can use them as a money bank, colored pencil holder, stick a battery operated candle inside to make a fun and unique night light or be like our girls and keep little trinkets you find inside your jar. Whatever you use it for it will be oh so cute!

Affiliate Disclosure. Some of the links on this website are affiliate links, which means that I may earn a small commission if you click on the link or make a purchase using the link. If you make a purchase you will not be charged anything additional.

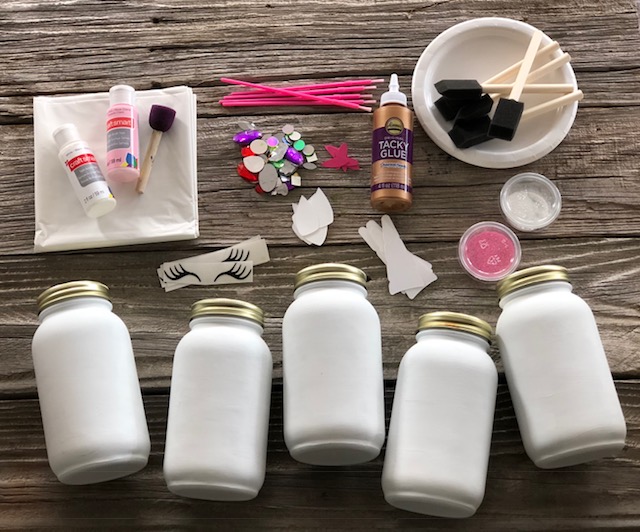
Here’s what you’ll need

Need a no stress craft kit for this project? You can purchase a UNICORN JAR CRAFT KIT in my shop. Everything you need to complete this project at home. It’s always an option to send this packaged as a gift. If you’re planning a birthday party here is my no stress UNICORN CRAFT PARTY IN A BOX.

unicorn jar kit.jpg

You want to start with a PRE PAINTED mason jar. I always use chalk paint to paint my jars. It goes on nice and even and has great coverage. You can use regular acrylic paint but you will not get the same coverage as the jar above. Your jar will need to cure for at least 24 hours prior. If it does not get proper curing time the paint can peel from the glass jar. I used both pint and quart sized mason jars for this project and they both turned out super cute! This is also a great way to use up an empty sauce or salsa jar from the kitchen.

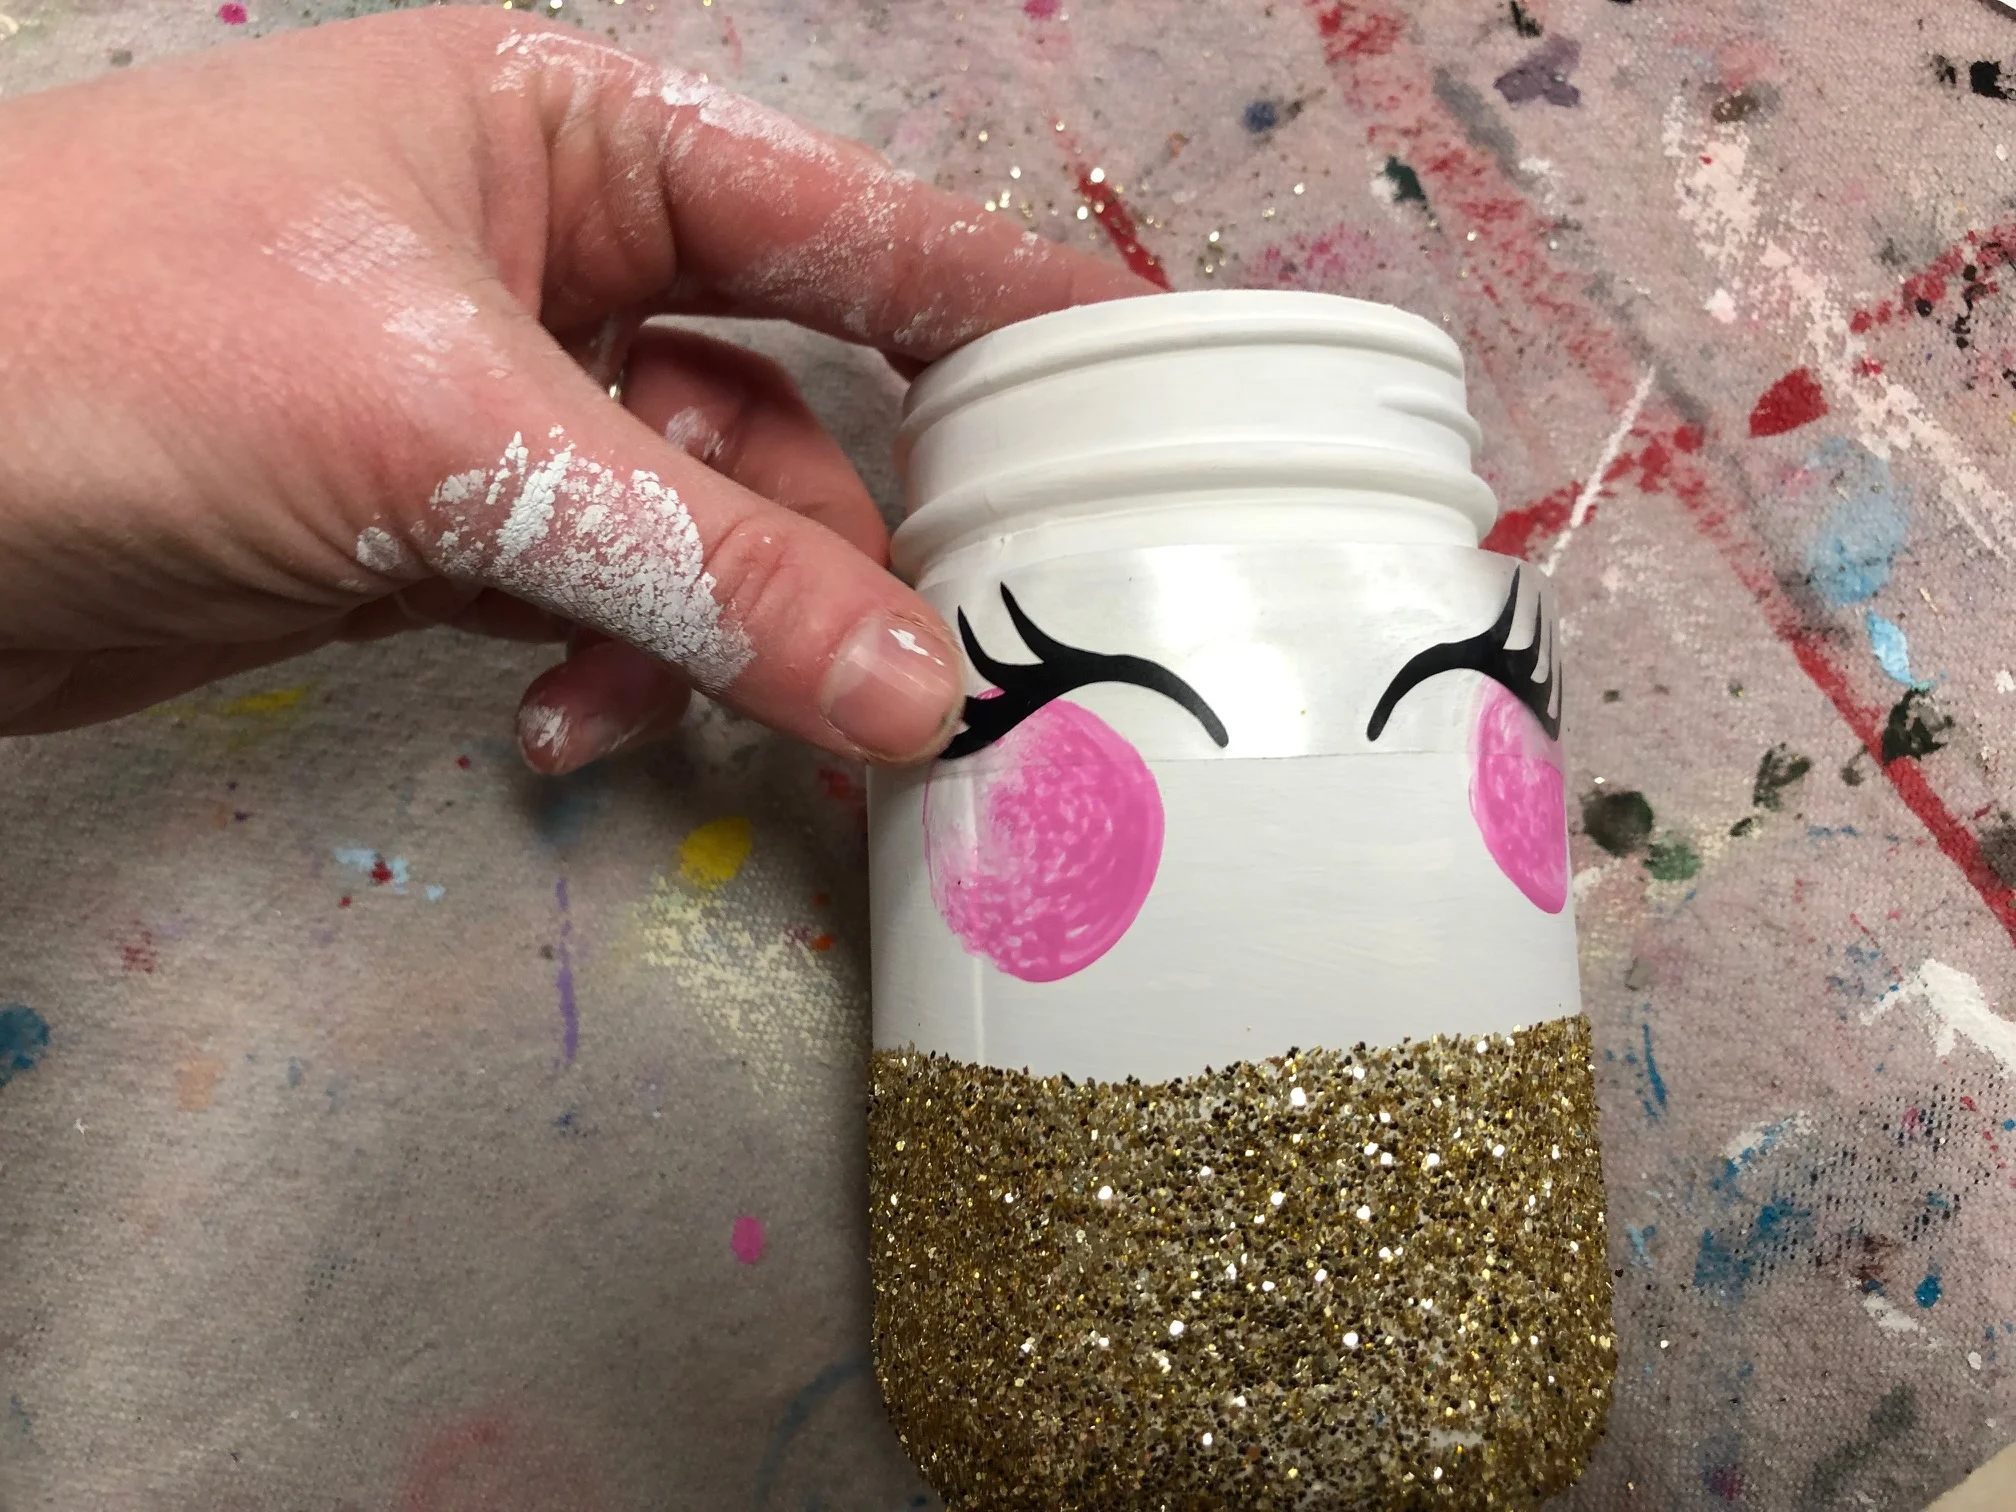
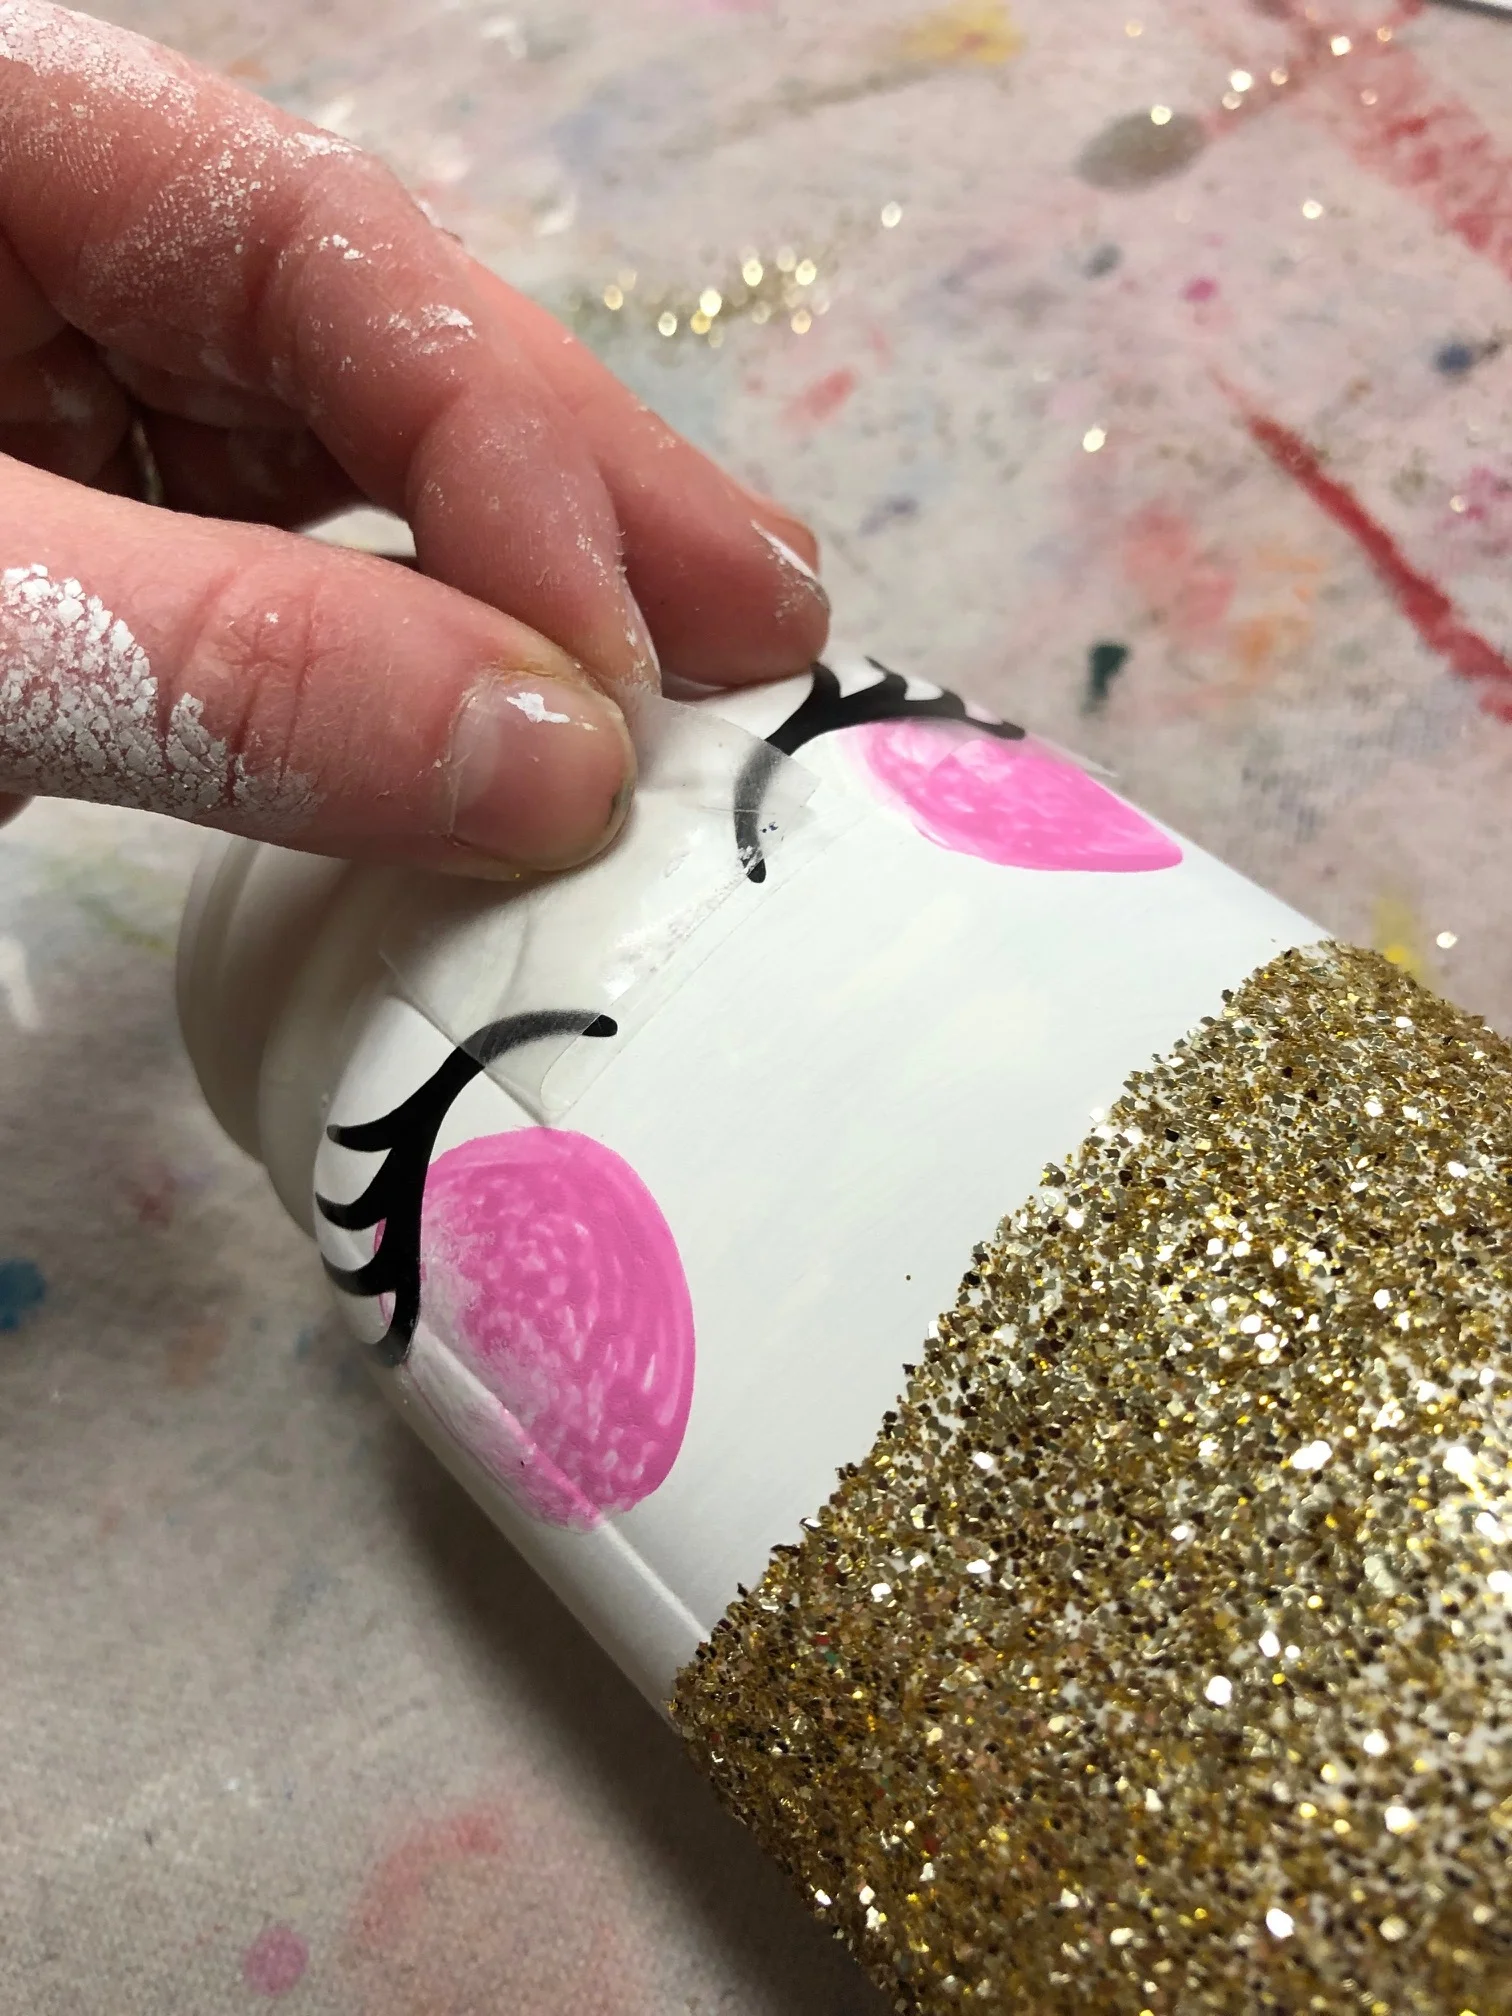
I used my CRICUT CUTTING MACHINE to cut out all the facial features. I used cardstock for the ears and horn and black vinyl for the eyes. If you don’t have a cutting machine you can cut these by hand and draw/paint on the eyes.

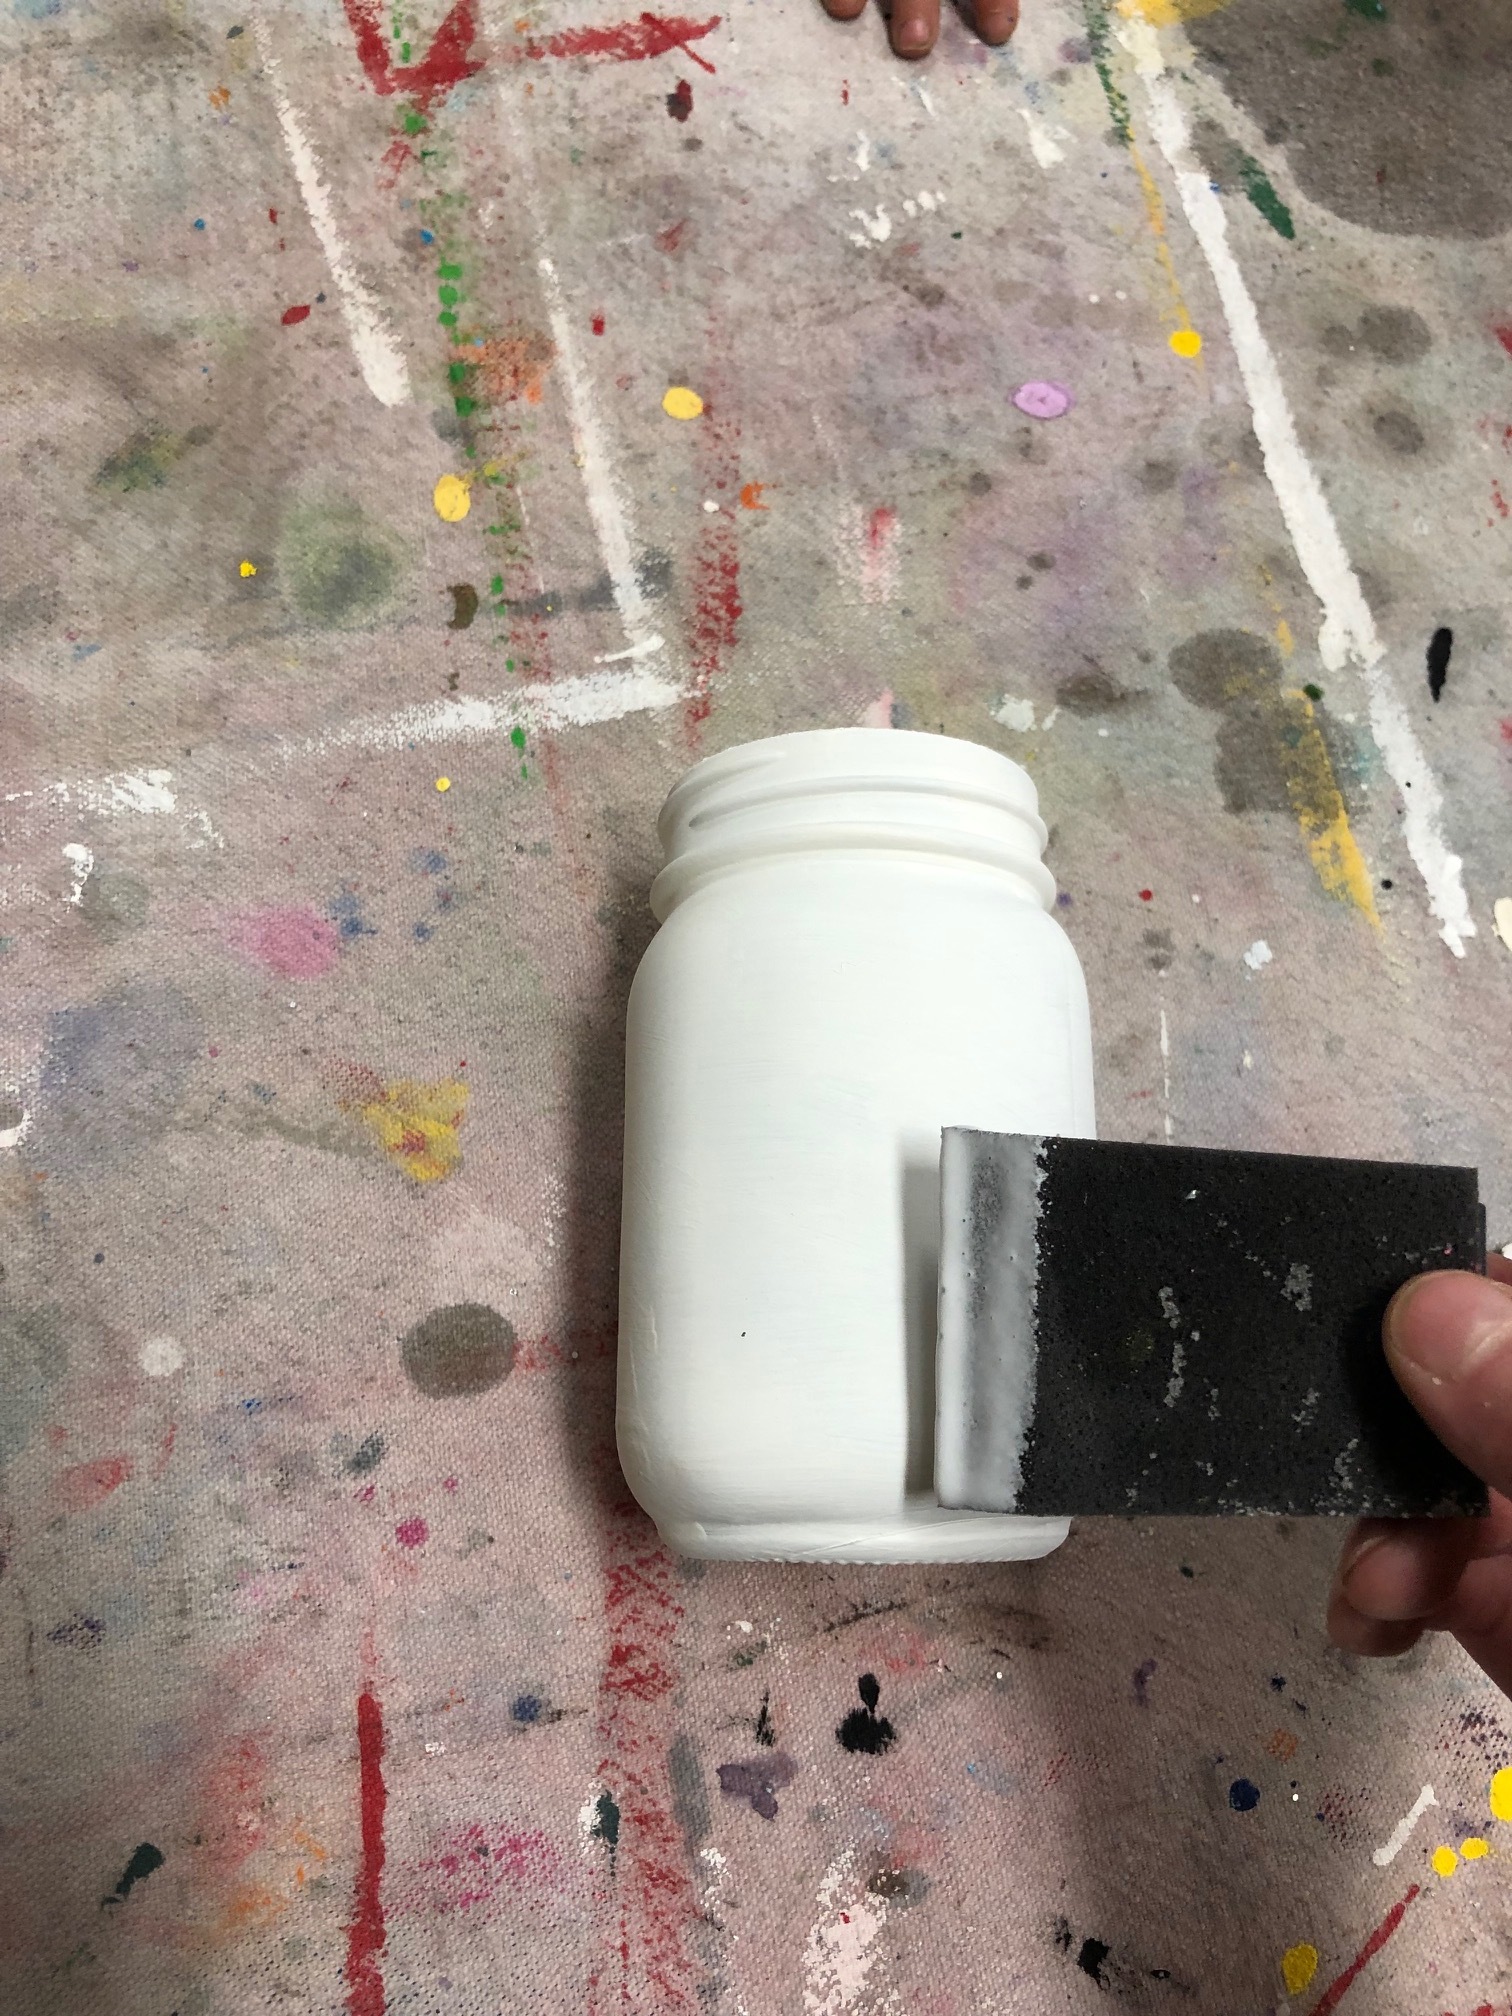
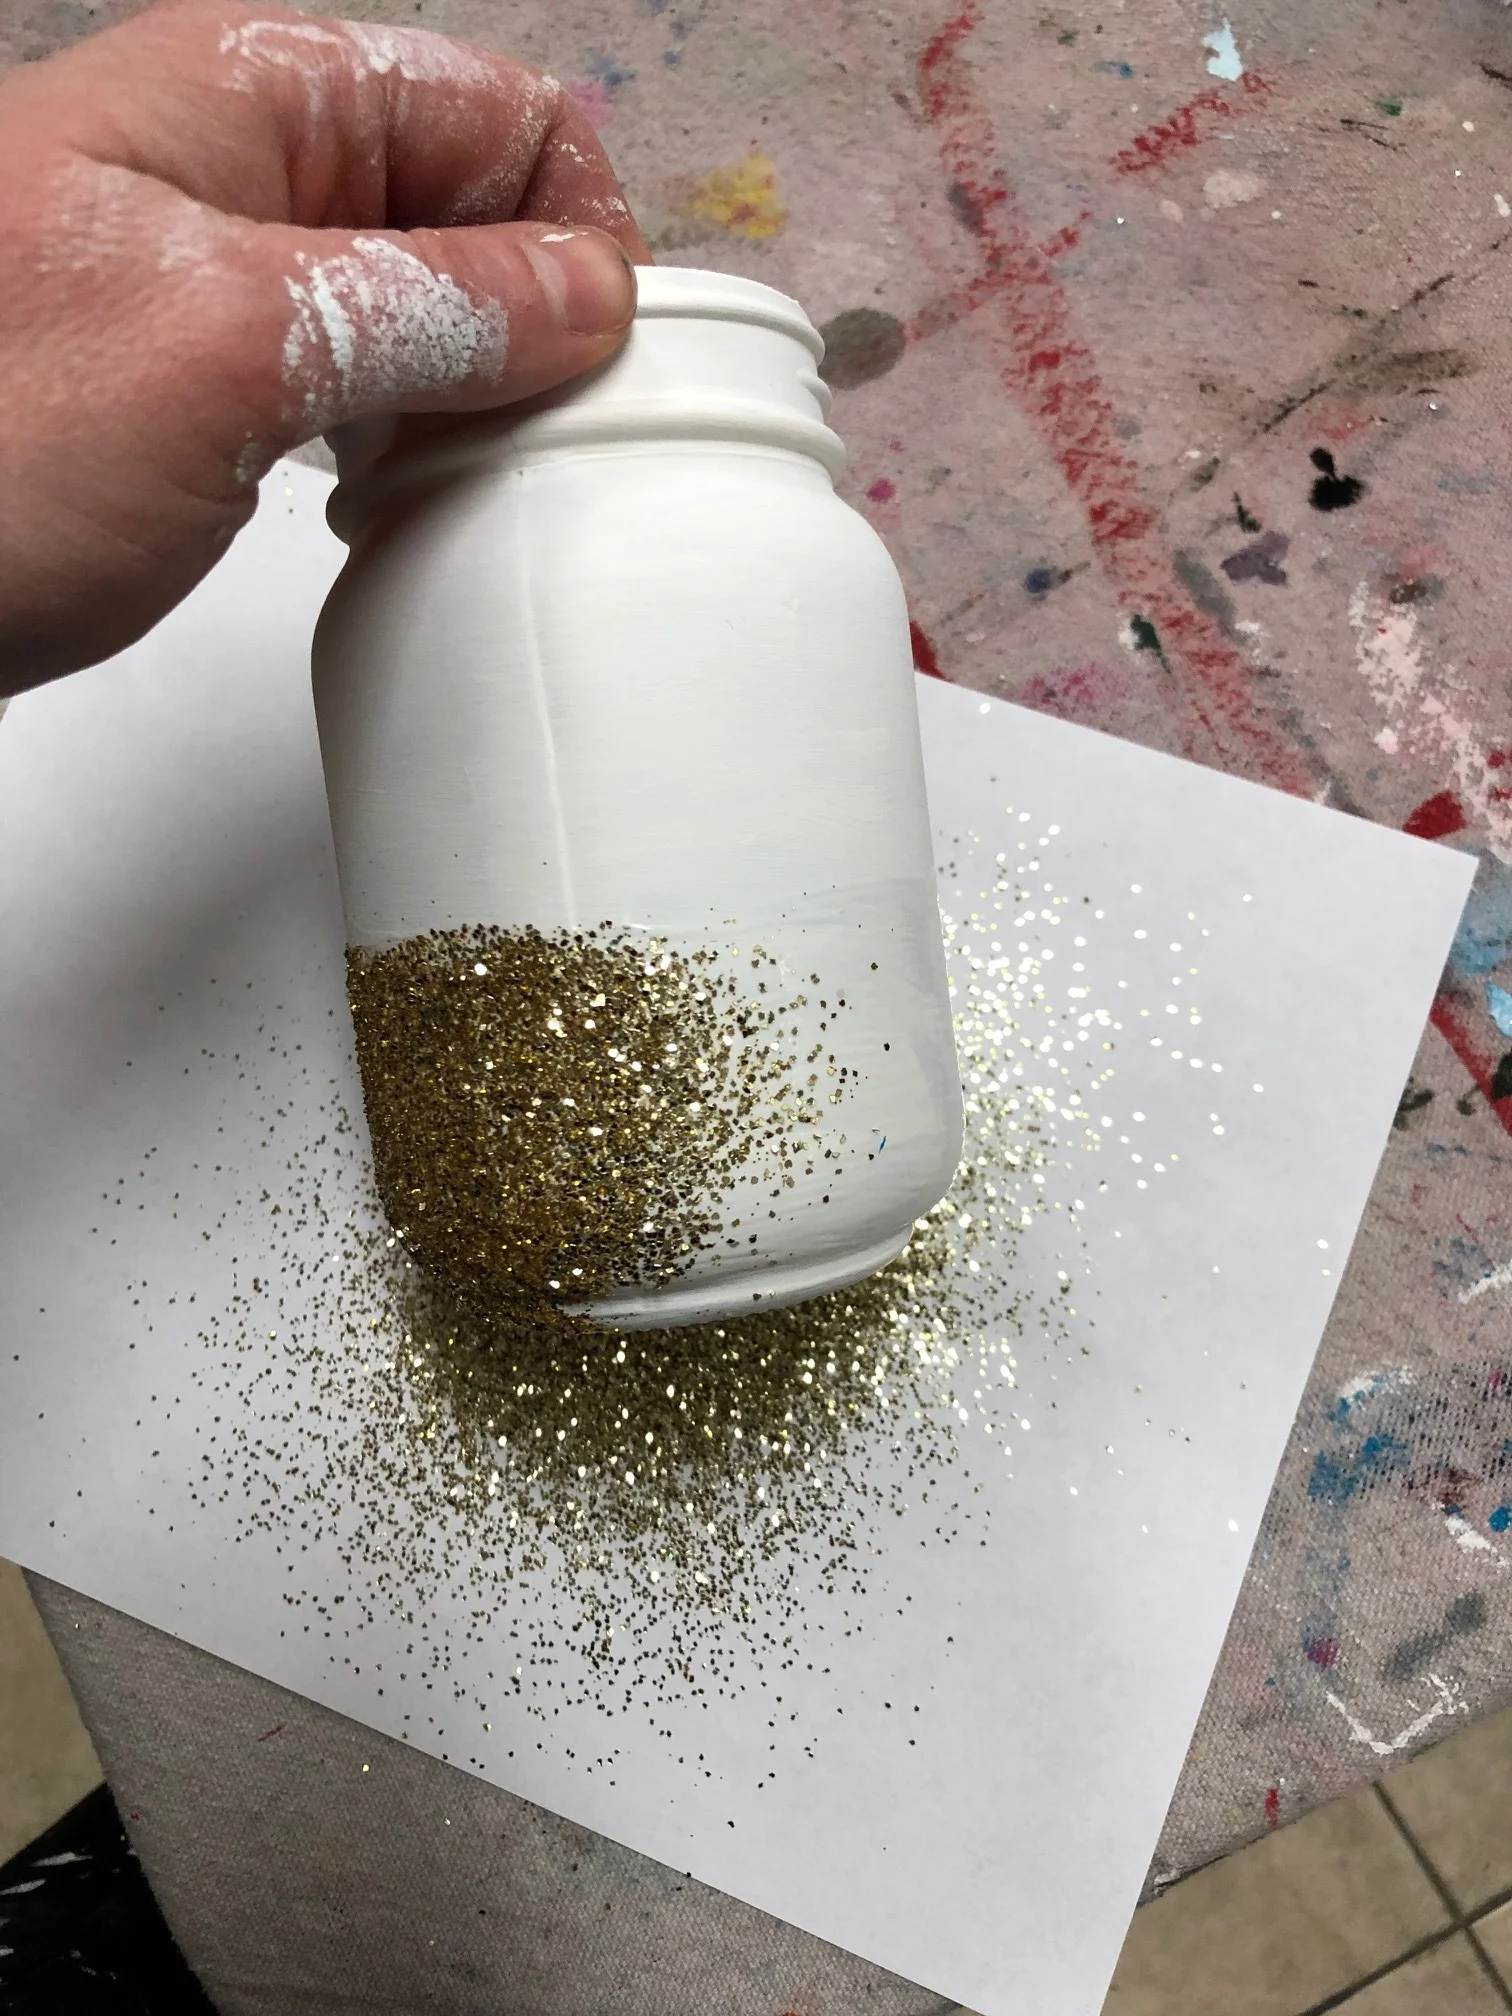
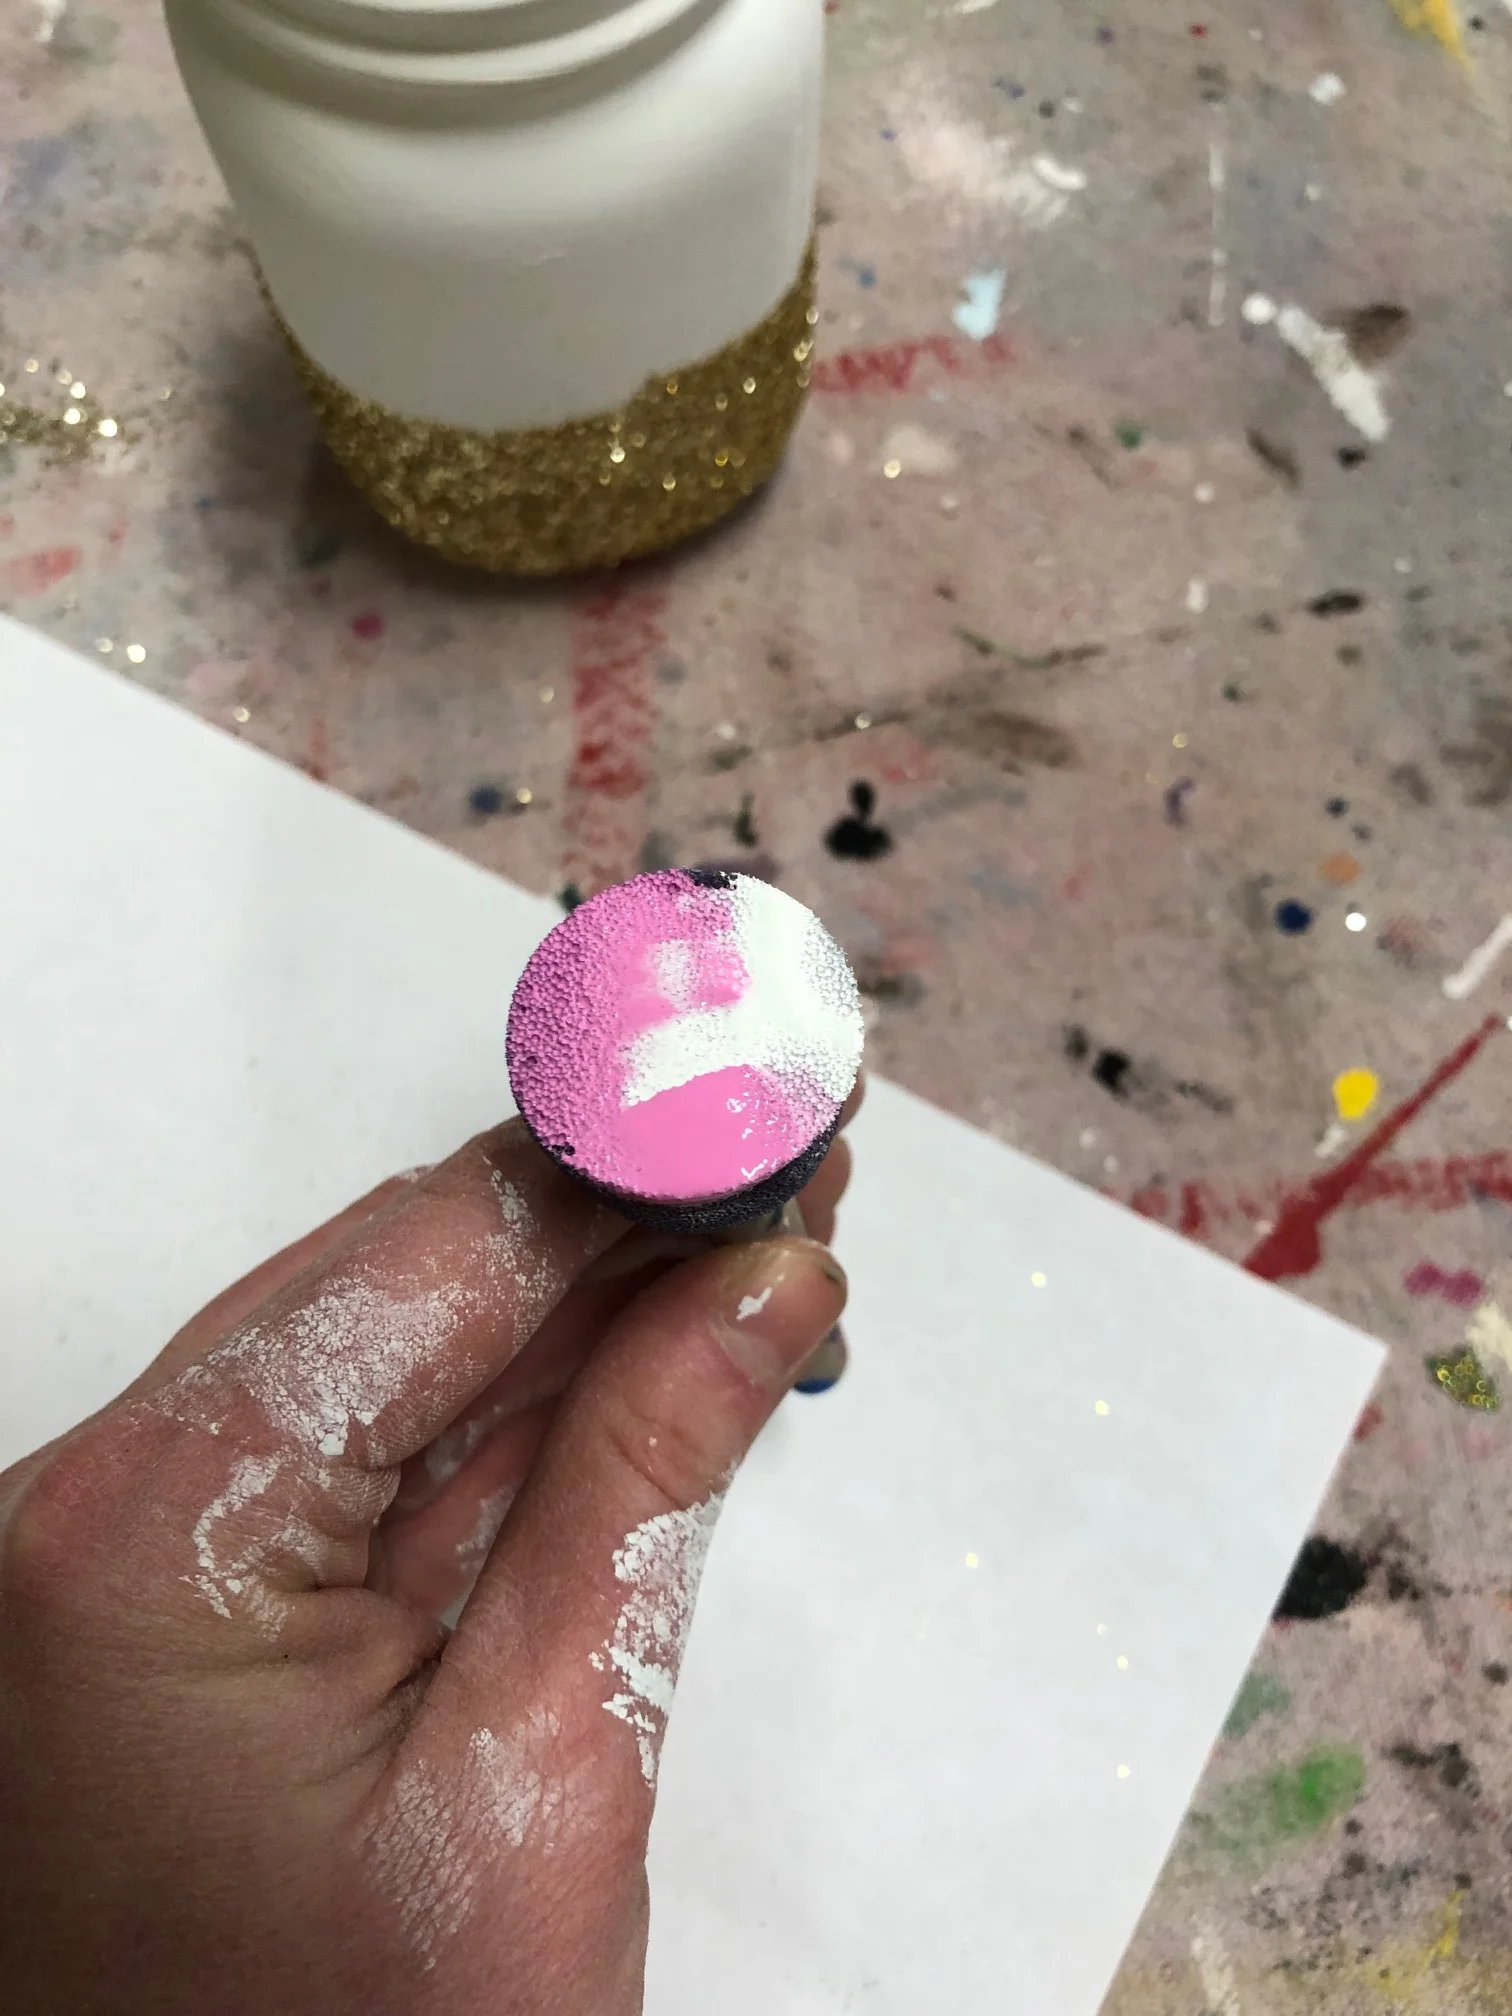
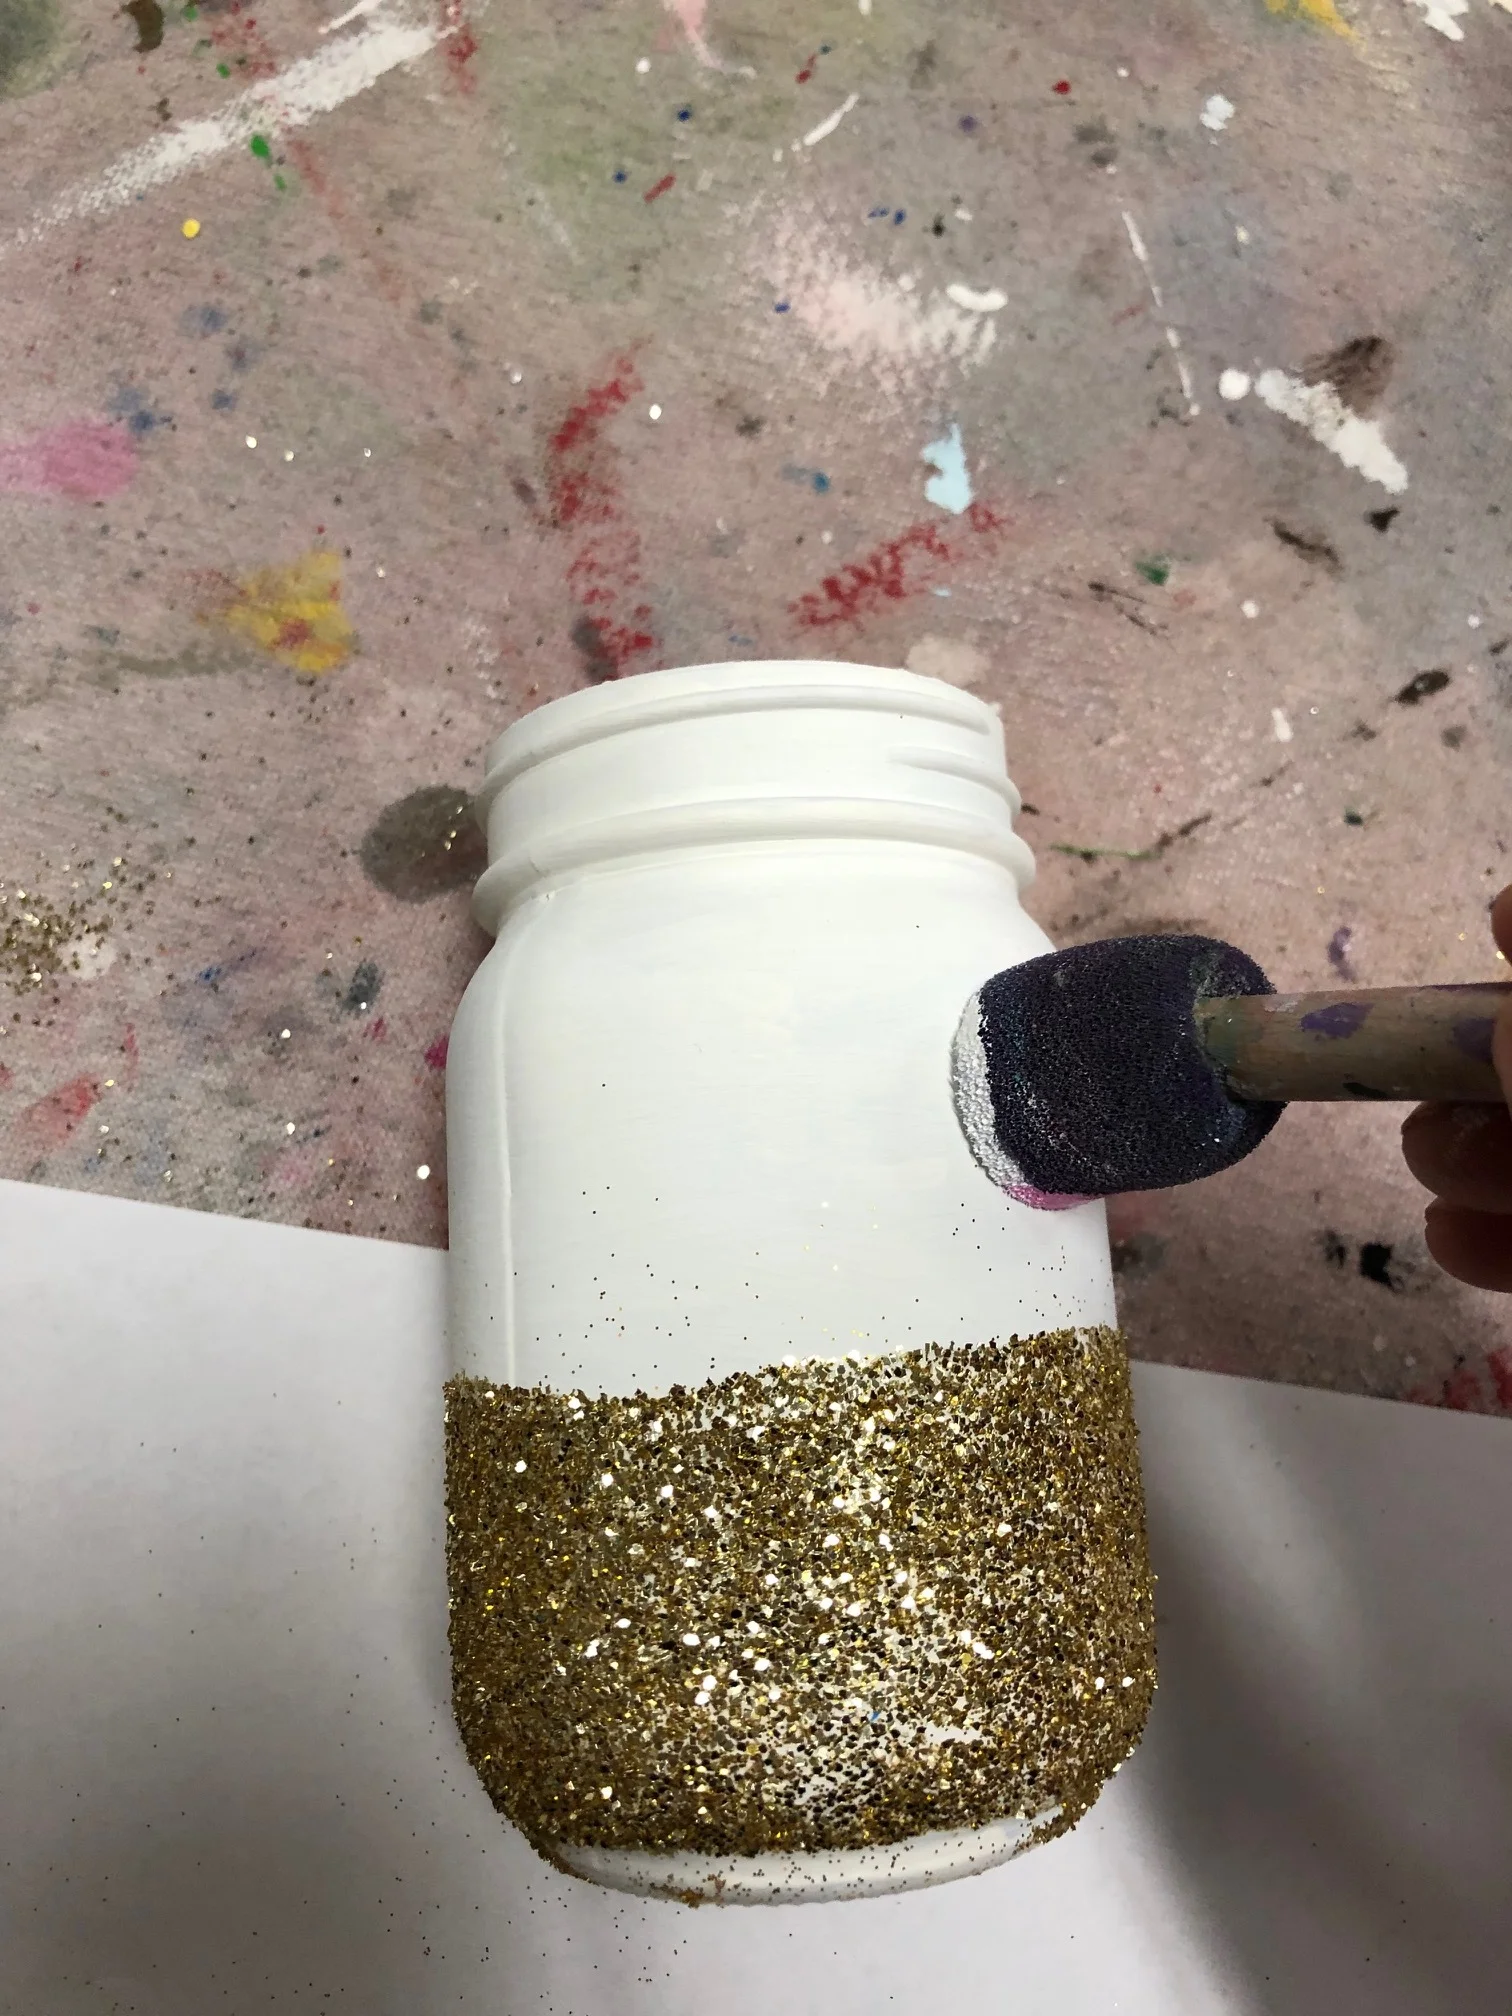
Paint a thick layer of mod podge on the bottom of your jar. A wide 3” sponge brush works great for this. You can use the width as a guide for how high up to go on the jar.

DIY glittered unicorn jar

Place a piece of paper under your jar and sprinkle it with glitter. The paper will catch a good amount of the glitter that doesn’t make it on the jar so you can reuse it. You’ll want to work quickly so your mod podge doesn’t dry before you get done glittering.

DIY glittered unicorn jar

Once that is dry you will paint on the cheeks. Dip half of your round sponge brush into the pink paint and the other half into the white paint. When you apply the paint you will make a slight twist motion to get the swirly effect.

DIY glittered unicorn jar

After you paint is COMPLETELY DRY you can add the eye decals. It is important you wait for these to dry as the vinyl will NOT  stick to wet paint. Remove the white paper backing first, the clear transfer tape and the eyes are attached. Then place it on your jar. Give it a good rub with your thumb or a plastic card then slowly remove the clear transfer tape off. This works great if you peel it at a very sharp angle like pictured.

DIY glittered unicorn jar

Glue the pink ear piece onto the middle of the white earpiece with your detail brush. Apply glitter to or paint the horn. Then attach the ears, horn and rhinestones above the eyes. You can apply these anywhere you see fit, have fun with it:)! A glue gun works best for this but you can use the tacky glue to attach these pieces to your jar

DIY glittered unicorn jar
DIY Glittered Unicorn Jar

I hope you love creating this craft as much as my girls and I did! Don’t be afraid to veer off this tutorial and really make it your own.

Check out more craft kid posts below

One fish two fish, perfect Dr. Seuss keepsake craft to make with your kids

One fish two fish, perfect Dr. Seuss keepsake craft to make with your kids

A person’s a person no matter how small

-Dr. Seuss

Our family loves Dr. Seuss so naturally every year on his birthday, March 2nd, we celebrate him in some way. Usually we read his books and make a fun snack or just for fun craft in honor of him.

But this year we went a little extra with it. Our oldest daughter is getting older, about to hit middle school next year {I have no idea where that time went} so I know that the days of doing fun keepsake projects with her handprints are numbered. I fully took advantage of the opportunity to make this adorable ONE FISH TWO FISH craft with all four of my sweet daughters handprints.

Affiliate Disclosure. Some of the links on this website are affiliate links, which means that I may earn a small commission if you click on the link or make a purchase using the link. If you make a purchase you will not be charged anything additional.

Here’s how you can make your own at home

supplies you’ll need:

1. CUT OUT DECALS

Using my Cricut cutting machine I cut all the lettering out first. My projects usually go much smoother if I have all of the decals and accents cut out before I start staining and painting. If you don’t have a cutting machine you can always write the lettering with a chalk pen or permanent marker. My hand writing isn’t so neat but my Cricut does a great job ;)!

2. CUT & STAIN WOOD

One fish two fish, perfect Dr. Seuss keepsake craft to make with your kids

First give your board a light sanding, then stain. Be sure to watch my HOW TO STAIN WOOD video if you’ve never done this before. Let your board dry for 24 hours before the next step.

3. DISTRESS EDGES

One fish two fish, perfect Dr. Seuss keepsake craft to make with your kids

After your board has dried you’ll want to give it a quick sanding on all surfaces of the board. I always focus more on the edges and corners. Using a RYOBI cordless sander works great for this but you can use regular sandpaper if you need to. Wipe with a lint free cloth to get all the dust off, you don’t want this on there when you go to paint.

4. PAINT

One fish two fish, perfect Dr. Seuss keepsake craft to make with your kids

You’ll need RED, BLUE, GREEN, and YELLOW for this next step. I went ahead and made pencil marks for where I wanted the girl’s hands to hit. That way I could map out where they would be and I wouldn’t have either too much space or not enough space left.

One fish two fish, perfect Dr. Seuss keepsake craft to make with your kids

You’ll want to do one handprint at a time. Coat the hand in a fairly good amount of paint but not too much, you don’t want a glob of paint to be left on the board.

Gently guide their hands down on the board and press them lightly.

One fish two fish, perfect Dr. Seuss keepsake craft to make with your kids

Before you add any facial features/gills you want their handprints to totally dry. If you don’t let them dry you will smudge the colors together.

5. APPLY VINYL DECALS

One fish two fish, perfect Dr. Seuss keepsake craft to make with your kids

After all the paint is dry, totally 100% dry, add your vinyl decals. If your paint is not completely dry the vinyl will not stick to the board. I use a vinyl squeegee to help get the decals down really good. Then peel the transfer tape off.

Now it’s ready for you to hang and enjoy in your home.

One fish two fish, perfect Dr. Seuss keepsake craft to make with your kids

Click here for more crafty kid posts

Check out the latest posts on the blog

The hack you didn't know you needed for your crafty kids

Crafting hack, simple storage to use while your kids craft

It’s not a secret I LOVE creating and letting my girls create. But one thing I don’t particularly love is when the craft supplies go everywhere. I think moms everywhere can agree. Something about knowing that all those rhinestones and beads and giant sequence that are all over the place just occupies your mind instead of focusing on your precious babes making masterpieces.

I need to clarify that I’m not a clean freak, not even in the slightest. After all I’m a mom of 4, three of which are within 4 years of one another…so yeah I’m totally not a clean freak. Now, I also don’t keep a dirty home. We call it lived in {can I get and AMEN?!}.

How to make painted wood signs, all the tips and tricks the pro's won't tell you

But going back to that first paragraph it makes for a much more enjoyable crafting experience when I’m not focused on the 8 million beads that just fell off the side of the table because the entire jar spilled. Ok, maybe 8 million is a little exaggeration but it’s pretty close ;).

And you know what, I’m not the only mom who feels this way. I’ve talked to countless moms this last year who all agree, they have a really hard time enjoying art at home with their kids because their brain will focus on the mess instead of their kids. It’s natural. As parents, we have so much on our plates the last thing we want to do is chase rolling tiny itty bitty beads all of the kitchen floor.

So here’s my craft hack that you NEED in your life when you create with your kids at home…are you ready? MUFFIN TINS! Yes, you read it right, muffin tins. I know it sounds so simple and maybe a little crazy that muffin tins can help you enjoy art time with your sweet kiddos but I’m telling you they are just the thing you need!

I was in Dollar Tree {my second favorite store on the planet} one day shopping for supplies for crafting event we were putting on and I was trying to find something that would hold all the little cut outs because I didn’t want to scatter them on the table but I also didn’t want to use bowls because they just take up way too much room. I walked down the kitchen aisle and there they were, almost like a ray from the heavens shined upon them, and it hit! Muffin tins are small enough they don’t take up all the space on the table, big enough to hold lots of supplies, and shallow enough that kids can easily get to the supplies without getting their little hands stuck or having to dump it all out.

The hack you didn't know you needed for your crafty kids

I can not tell you the number of parents that commented on how perfect the muffin tins worked.

These little guys are so cheap too! I picked ours up for $1 but I’m sure you can find some at local garage sales and thrift stores for next to nothing.

I’d love to hear your favorite at home crafting tips. Leave them in the comments below.

PERFECT CRAFT ORGNAIZATION HACK

DIY St. Patrick's Day suncatcher, easy tutorial to make your own with your kiddos

DIY St. Patrick's Day suncatcher, easy tutorial to make your own with your kiddos
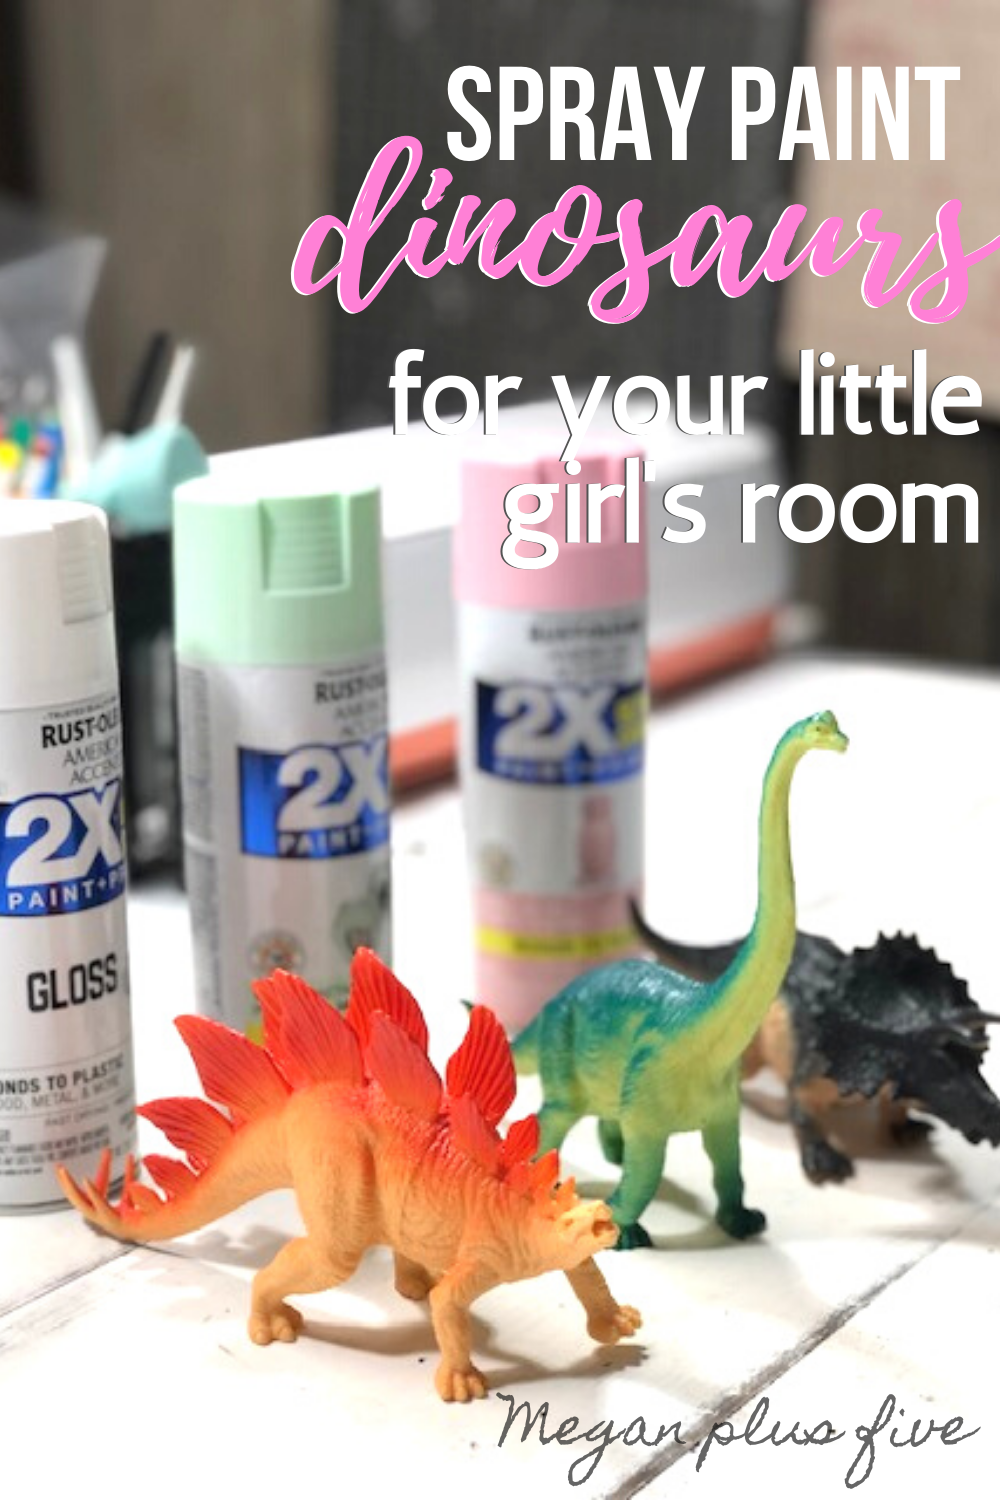
St. Patrick’s Day isn’t a super big deal around our house but we do enjoy the holiday. We always wear green and we try to make tasty green foods {that doesn’t always happen}. But this year we did get around to making some fun green crafts for the occasion!

Each week we host a toddler day in our CRAFT STUDIO called TOTS IN THE SHOP and I needed to plan for the events for the upcoming months. I try to coincide our weeks with the holidays when they come up and St. Patrick’s Day is coming up so I scoured Pinterest to see what I could find. I came across this adorable suncatcher by Julie from Director Jewels and I knew we had to make one too! I did change up ours a bit to make it easier/simpler for the tots to make.

Before we host our workshops our four daughters and I create mockups for them. I have to say our girls LOVED making this one. I was actually pretty surprised though. I thought for sure the older girls would be too “grown up” for this one but they loved making it more than our three year old. Woohoo!

This craft was so super easy to make too. I didn’t really do much except show them how to do it and they took it from there.

DIY St. Patrick's Day suncatcher, easy tutorial to make your own with your kiddos

Here’s what you’ll need

  • contact paper

  • green crepe paper

  • a shamrock with a hollow middle {I cut mine out using my cricut}

  • scissors

I used my trusty Cricut to cut out my shamrock. I found the image in design space and adjusted it to be approx. 7” wide. You can always print your own and use scissors to cut out the middle. Julie has a printable linked on her website if you click her link above.

Then you need to measure out your contact paper. You want it to be larger than your shamrock.

DIY St. Patrick's Day suncatcher, easy tutorial to make your own with your kiddos

You’ll need to cut TWO pieces of contact paper that are larger than your shamrock.

DIY St. Patrick's Day suncatcher, easy tutorial to make your own with your kiddos

Remove the paper backing from your contact paper and place your shamrock in the middle. Then start tearing pieces of the crepe paper off and sticking them inside of the shamrock.

DIY St. Patrick's Day suncatcher, easy tutorial to make your own with your kiddos

Once your shamrock is covered remove the paper from the second piece of contact paper and lay it sticky side down onto the shamrock, essentially you are making a shamrock sandwich with the contact paper. Then trim off the extra leaving a 1/4 of and inch of contact paper all the way around the paper shamrock.

DIY St. Patrick's Day suncatcher, easy tutorial to make your own with your kiddos

And you’re done! SO EASY!!

St. Patrick's Day suncatcher, easy how to make this fun DIY

DIY Valentine's Caterpillar, easy simple step by step tutorial

DIY Valentine's Caterpillar, easy simple step by step tutorial

Quick and simple crafts…I love them! Especially when they are quick crafts for the kiddos. Let’s face it their attention span isn’t always the longest and usually half way through the craft they’ve already found something shiny to play with on the other side of the room.

This project won’t take up a ton of their time and will most definitely be a sweet keepsake for you for years to come.

Some links may contain affiliate content meaning if you click the link and make a purchase I will get a small commission from this, at no extra cost to you. Please know that I would never endorse anything I don’t believe in or use in my own life.

DIY Valentine's Caterpillar, easy simple step by step tutorial

Here’s what you’ll need

  • piece of paper, we used cardstock

  • black marker

  • googly eyes

  • glue stick

  • valentine themed stickers

  • heart cut outs,. I used my Cricut to make ours but you can make your own by hand

DIY Valentine's Caterpillar, easy simple step by step tutorial

Start by cutting out your hearts. I used my Cricut Explore to do this task. I absolutely LOVE my Cricut machines, and have been using one for MANY years.

DIY Valentine's Caterpillar, easy simple step by step tutorial

Next, using your marker, draw a line horizontally on your paper. I did this to keep the hearts straight on the paper.

DIY Valentine's Caterpillar, easy simple step by step tutorial

Starting on the left glue several hearts one after the other on to the paper till you’ve reached the end of your line.

DIY Valentine's Caterpillar, easy simple step by step tutorial

Using a slightly larger heart for the head of the caterpillar, glue that under the first heart on the left and slightly tilted like above.

DIY Valentine's Caterpillar, easy simple step by step tutorial

Draw two lines going out of the top for the antennas.

DIY Valentine's Caterpillar, easy simple step by step tutorial

Glue on the eyes then draw on the smile with the marker.

DIY Valentine's Caterpillar, easy simple step by step tutorial

Add a couple tiny hearts {I cut these from larger ones} to the antennas, draw on some feet, and add any other little accents to your page and your done.

See I told you that would be sooooo super easy!! Your kiddos can even do this one all by themselves.