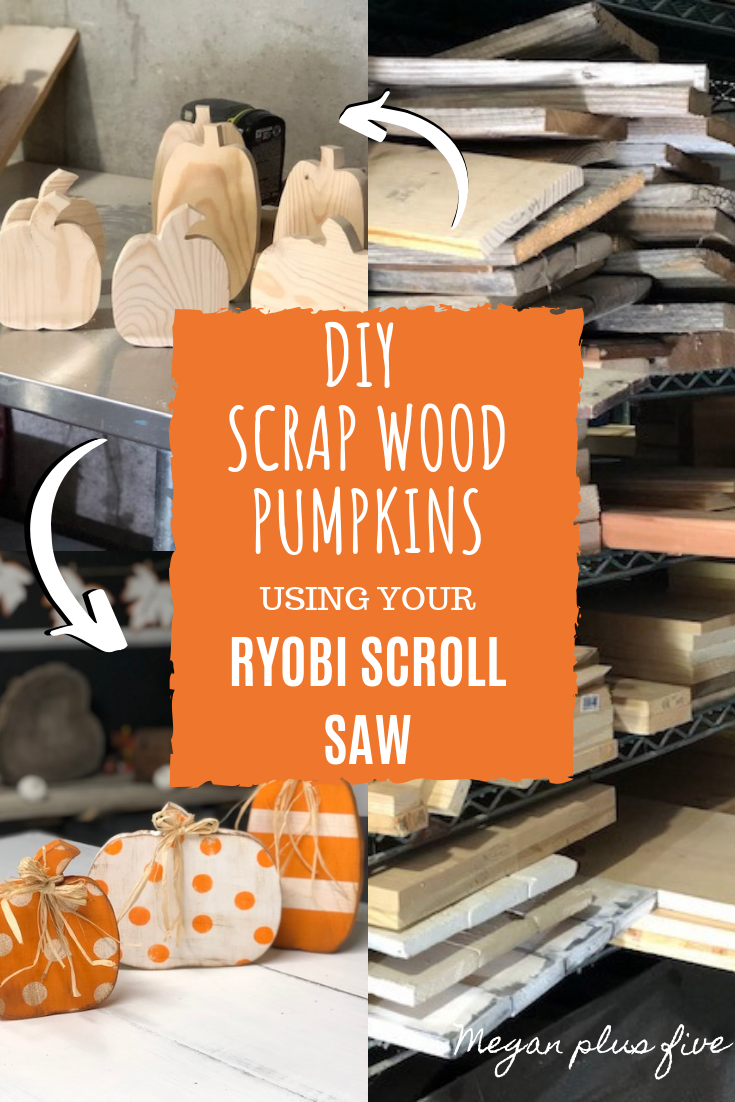
Easy scrap wood pumpkins using a RYOBI scroll saw

DIY scrap wood pumpkins using your ryobi scroll saw.png

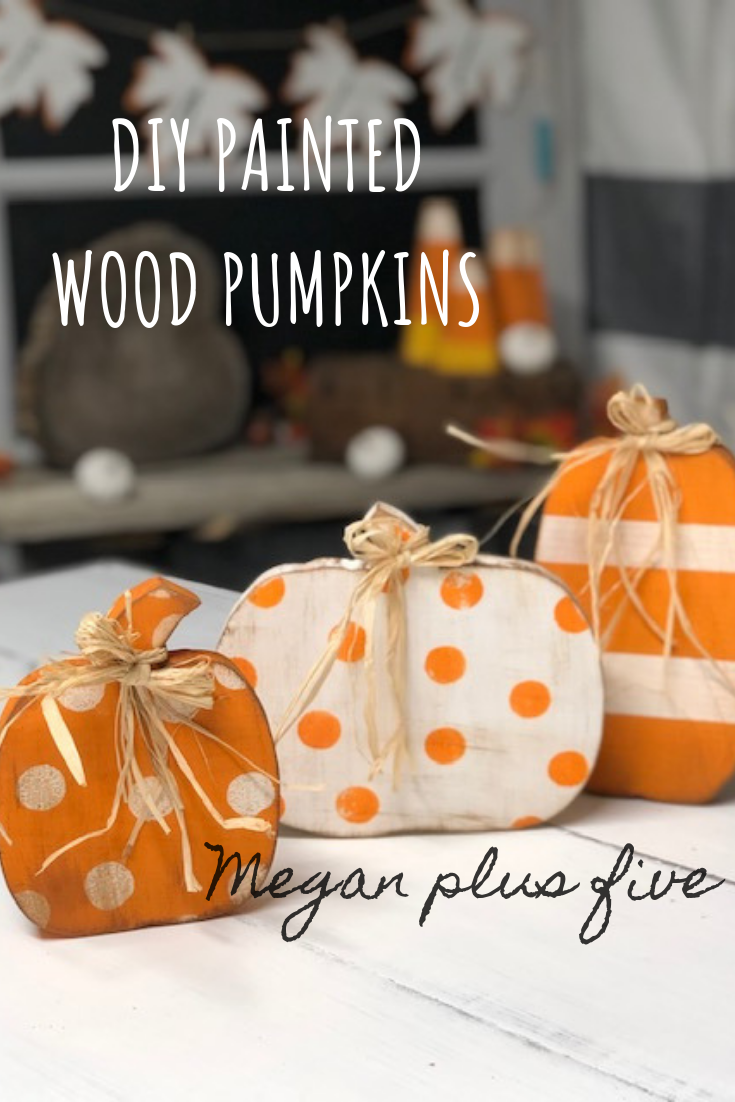
How to cut out pumpkins from scrap pieces using your RYOBI scroll saw

Are you like me and have a TON of scrap wood on the wood pile? I seriously have a hard time tossing perfectly good scrap pieces. You just never know when a piece will come in handy. But I also know my crafty business is hitting it’s busiest season of the year and there’s no way I can hang on to all of those scrap pieces if I want a functioning wood working space. So I needed to find something to do with them.

I decided to make these adorable free standing wood pumpkin cutouts. They turned out even cuter than I imagined they would! So much that I added them to my DIY CRAFT KITS and they have been selling like crazy!

Affiliate Disclosure. Some of the links on this website are affiliate links, which means that I may earn a small commission if you click on the link or make a purchase using the link. If you make a purchase you will not be charged anything additional.

How to use your Cricut and Ryobi scroll saw to make free standing wood pumpkins

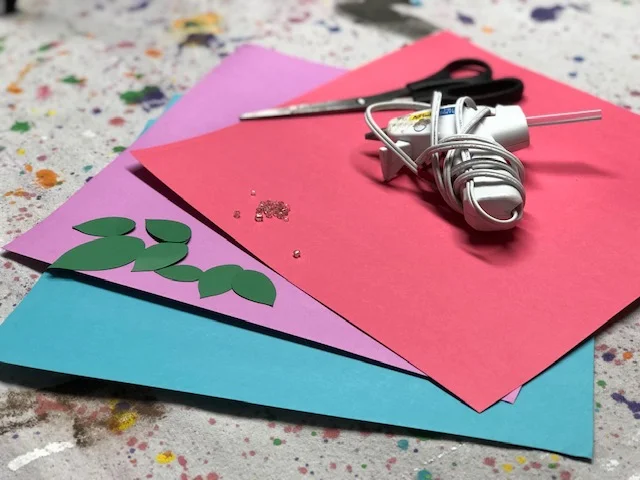
Here’s what you need

If you’re not in the reading mood skip to the bottom to catch the video tutorial ;)


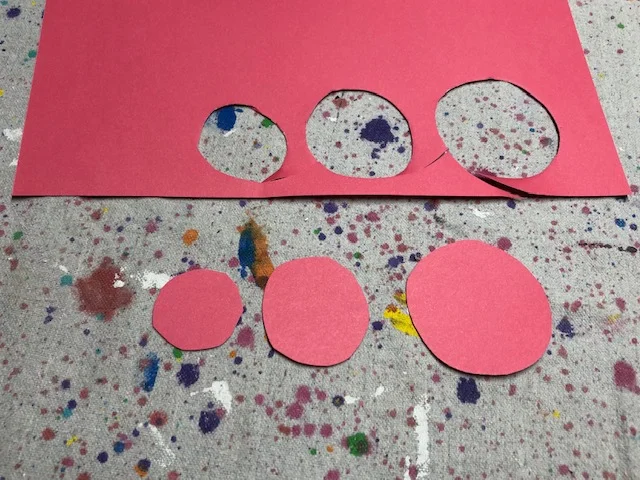
First you want to cut out your pumpkins on cardstock. You can free hand them on your scrap wood pieces but honestly getting the sides even isn’t really a strong suit of mine lol. I used some scrap pieces of cardstock I had on hand to cut these out on.

After you cut your templates out trace them on your scrap pieces.

Easy scrap wood pumpkins using your Ryobi scroll saw. How to cut out pumpkin cutouts for your fall decor using your scroll saw.

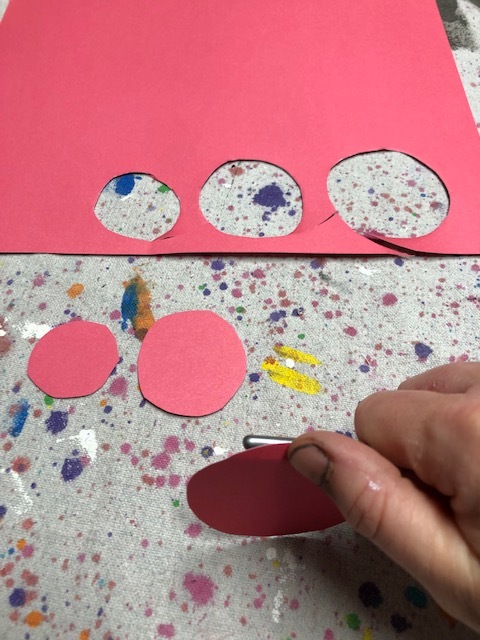
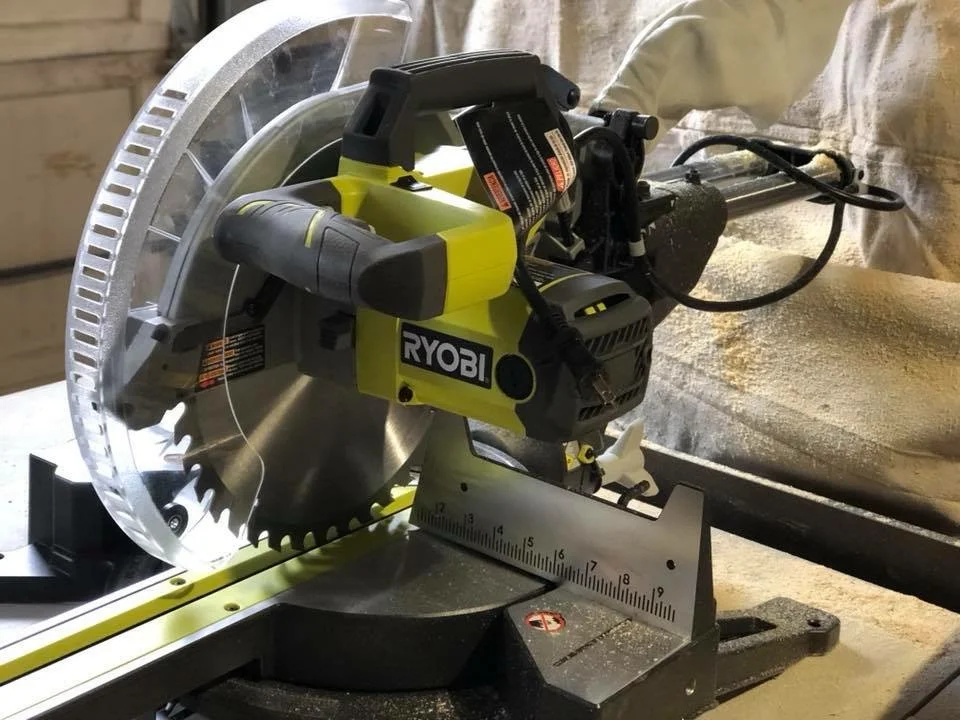
Next, making sure you are following the manufactures instructions, cut out the pumpkins you just traced using your scroll saw. If you’ve never used a scroll saw before this is a pretty easy project to start get some practice with. It’s a lot like using a sew machine. Just remember to go slow and the more you do it the better you will get at it.
Easy scrap wood pumpkins using your Ryobi scroll saw. How to cut out pumpkin cutouts for your fall decor using your scroll saw.

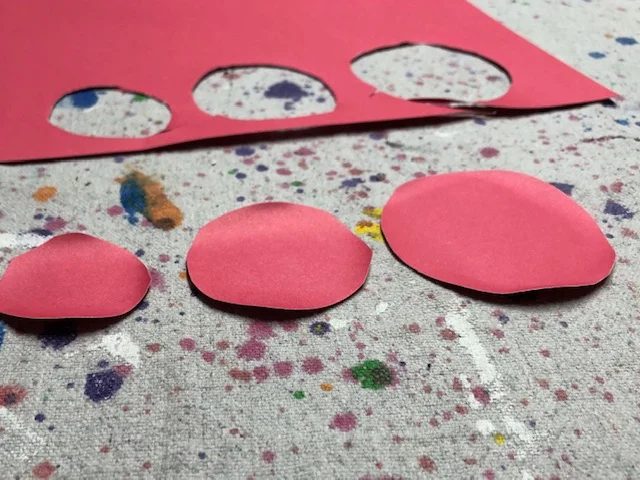
After you have your scrap pumpkins cut out you’ll want to give them a light sanding. Try not to sand the bottoms too much as you don’t want the surface to get uneven so they won’t be able to stand.

Easy scrap wood pumpkins using your Ryobi scroll saw. How to cut out pumpkin cutouts for your fall decor using your scroll saw.

After you have them sanded you can stain, paint, or decorate them however you want to match them to your décor.

These little guys are perfect for

  • your own décor

  • gift giving

  • Thanksgiving Day hostess present

  • ladies craft night

  • mom and me craft {my four daughters and I painted these on a facebook live and they turned out adorable!}

  • so much more

The possibilities are endless on how you can decorate these hand cut wood pumpkins.

Check out the VIDEO tutorial below.

Don’t forget to visit my YouTube channel and subscribe there so you never miss when I upload a new one.

Confused about what power tools to buy to make even more amazing crafts? This is a must read especially if you’re planning on starting a new business adventure with your handmade crafts click here ——-> WHAT ARE THE BEST POWER TOOLS FOR CRAFTERS?
DIY CRAFT KIT how to paint your standing wood pumpkin cutouts

DIY CRAFT KIT how to paint your standing wood pumpkin cut outs. This craft is perfect for you to DIY for your rustic fall decor.

DIY how to paint your free standing wood pumpkin cut outs

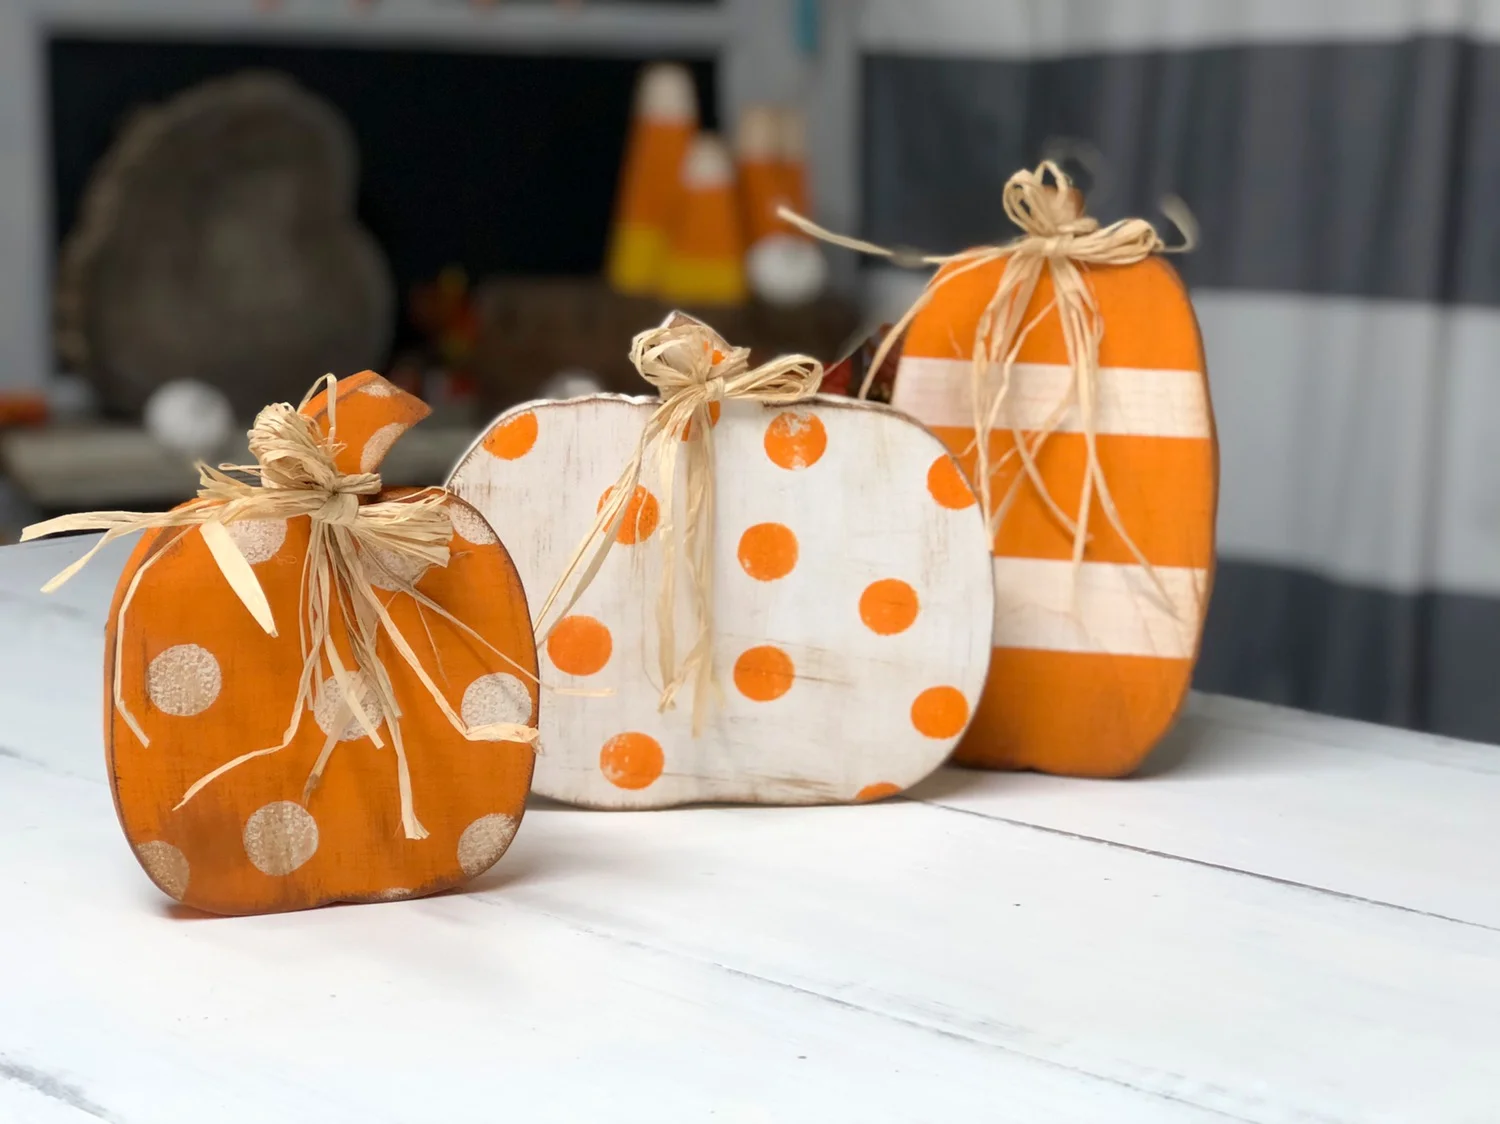
I’m LOVING these little wood pumpkin cutouts! Seriously, what’s not to love?! The polk-a-dots? The stripes? The raffia? Yup! I love everything about these handmade pumpkins. And I know yours will turn out just as adorable as these guys.

If you haven’t ordered your DIY PUMPKIN CUTOUT CRAFT KIT be sure to grab yours so you can get started on your fall décor.

Affiliate Disclosure. Some of the links on this website are affiliate links, which means that I may earn a small commission if you click on the link or make a purchase using the link. If you make a purchase you will not be charged anything additional.

CHOOSE YOUR CRAFT KIT

BASIC KIT:
3 wood cutouts

PREMIUM KIT:
3 wood cutouts
2 oz orange acrylic paint
2 oz white acrylic paint
2 foam brushes
1 round foam brush
raffia
sandpaper

Please feel free to message me if you have any questions once your kit arrives. I want your DIY projects to turn out AMAZING and will help you in any way I can to make that happen. If you order from the website shoot me an email BUT if you ordered from my handmade ETSY shop please message me on there. In order to keep in compliance with Etsy all convos must be kept on their platform.

If you want to skip the written tutorial and get right to the video tutorial shoot to the bottom of this page and you’ll find my youtube thumbnail for the DIY wood pumpkin cutout craft tutorial.

How to paint wood pumpkin cutouts. This easy DIY kit has everything you need to DIY this sweet and simple rustic  fall decor.

First you want to paint your wood pumpkin bases. I chose to paint the tallest and shortest pumpkins orange and the medium sized pumpkin white. Paint a THIN layer on all sides of each pumpkin. Once the fronts are dry you can paint a second THIN layer to get more coverage.

How to paint wood pumpkin cutouts. This easy DIY kit has everything you need to DIY this sweet and simple rustic  fall decor.

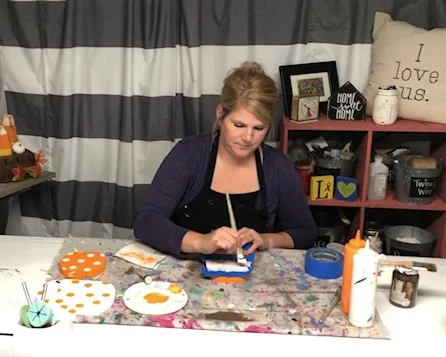
Next, after your base coat is completely dry, using your round sponge brush make polk a dots on your pumpkins. If using the same round brush to make the different colored dots do NOT rinse. You don’t want all that water in your foam round brush. Just dab it off onto a paper towel until all the paint is gone then you can use it in the second color.

TIP: to avoid a messy blog don’t push your round brush all the way down onto your wood pumpkin. Instead, lightly dab, even using a slight twisting motion works MUCH better to achieve a non-blobby polk a dot ;)!

How to paint wood pumpkin cutouts. This easy DIY kit has everything you need to DIY this sweet and simple rustic  fall decor. How to paint polk a dots on pumpkins

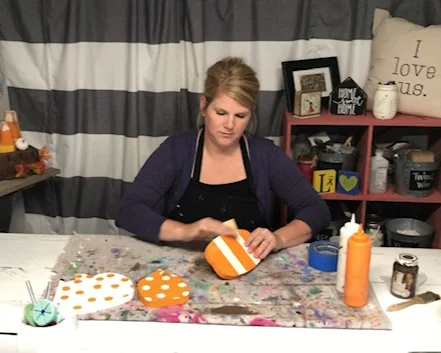
Now for the striped pumpkin. I used wide painter’s tape to achieve this look. Tape off the bottom, lining it up with the bottom of the pumpkin { you can get out a ruler if you want this to be exact but honestly just eye balling it works great too}. Then I placed a piece close to the top, but not all the way at the top. I wanted a little of the stem to be white. Then I place another piece in between those two pieces.

Paint the areas that are not taped off. Paint two THIN layers, allowing them to dry in between coats.

TIP: to avoid paint bleed brush with the tape not into the tape.

How to paint wood pumpkin cutouts. This easy DIY kit has everything you need to DIY this sweet and simple rustic  fall decor.
How to paint wood pumpkin cutouts. This easy DIY kit has everything you need to DIY this sweet and simple rustic  fall decor. How to paint stripes on pumpkins.

Let all three pumpkins dry. Now’s a perfect time for a glass of wine!

After they are dry you can start distressing them. A good rule to remember when distressing is that you want to distress where things would naturally be worn. Around edges, corners, and lightly on the fronts. Use your sand paper and distress along the edges and lightly pass it along the front {I also lightly distress the back to keep the look cohesive}. Wipe the sawdust off with a lint free cloth.

How to paint wood pumpkin cutouts. This easy DIY kit has everything you need to DIY this sweet and simple rustic  fall decor. How to distress wood pumpkins.

Applying the antiquing wax really gives these little guys life! Take your chip brush and lightly dip just the tip of it into the wax, then brush off most of it onto a paper towel. You do this so you do not end up with way too much wax on your project. It is far easier to apply more than it is to remove it from your project. You want to apply the wax the same way you sanded your pumpkins. Focus on the edges and lightly brush on the front/back.

TIP: trimming down your chip brush will give you better control over the bristles and will prevent them from making your wax so wispy when you apply it to your pumpkins.

How to paint wood pumpkin cutouts. This easy DIY kit has everything you need to DIY this sweet and simple rustic  fall decor. How to apply antiquing wax to wood pumpkins.

Tie a couple stands of raffia around the stems and you’re done! Trim the ends if needed. Since raffia tends to come in long strands you’ll want to cut the strands in half, and even in thirds in some cases. Then tie in a bow around the wood stem.

How to paint wood pumpkin cutouts. This easy DIY kit has everything you need to DIY this sweet and simple rustic  fall decor. How to add raffia to your wood pumpkins.

And you’re done! If you loved this tutorial please let me know in the comments. If you’re on social media don’t forget to follow me there FACEBOOK, INSTAGRAM, PINTEREST, YOUTUBE

Pin the image below for later ;)

How to paint wood pumpkins for your rustic decor. Distressing and applying wax to make them even more adorable. Add some stripes and polk-a-dots too to give them a modern twist.

Watch the full video tutorial below

Check out my other crafty fall tutorials

DIY Dollar Tree fall leaf garland

DIY Dollar Tree Fall Garland, easy craft tutorial to make your own rustic decor for the holidays

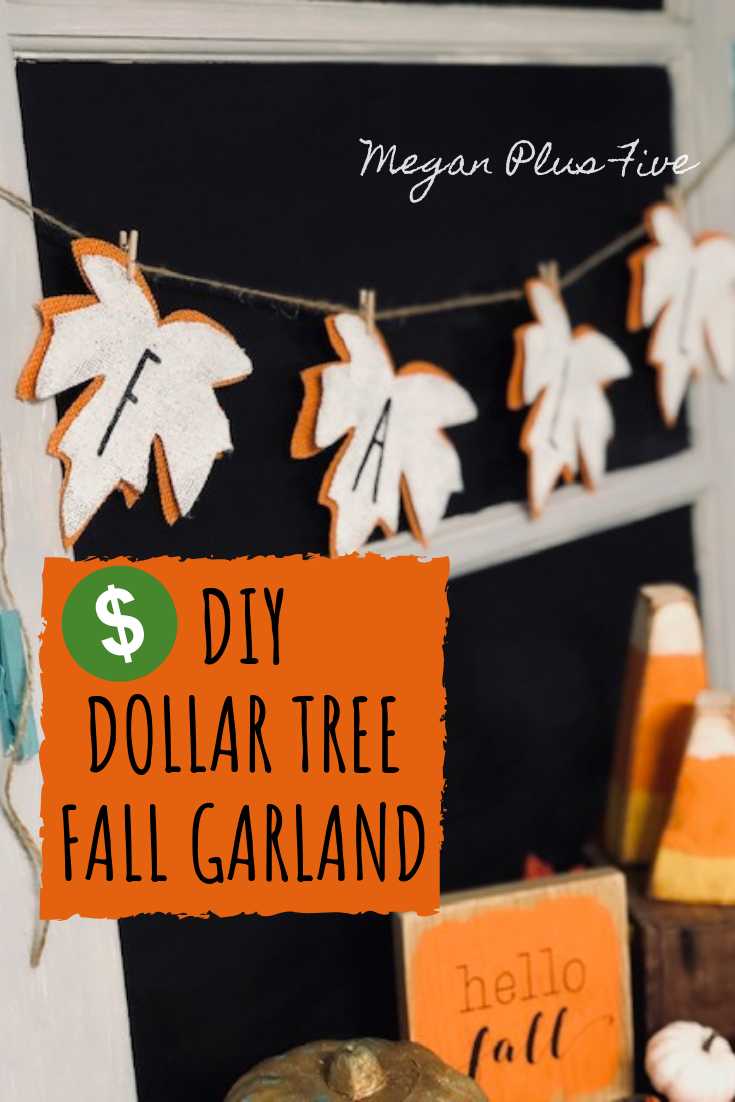
I just can’t get enough of fall décor! Especially when it literally costs me less than $3 to DIY! My four daughters and I went to the Dollar Tree last week to pick up some things for the oldest daughter’s friend for her birthday {see the fun dollar tree inspired birthday gift we made for her } and of course they had some of their Halloween and fall things out. So naturally we HAD to buy a few things to make some DIY rustic décor and a fun Halloween wreath that I can’t wait to start on. I’ve been on a DIY frenzy trying to get all my fall décor made before school starts back up. The last couple of years have had me so busy I didn’t decorate much for fall…or Christmas for that matter {aside from the traditional tree and stockings}. So this year I am making it my mission to bring the holiday explosion to our home, and I’m doing it the frugal way.

Affiliate Disclosure. Some of the links on this website are affiliate links, which means that I may earn a small commission if you click on the link or make a purchase using the link. If you make a purchase you will not be charged anything additional.

How to make your own Dollar Tree Rae Dunn inspired fall burlap garland

How to make your own Rae Dunn inspired fall burlap garland

Here’s what you need to make your own FALL burlap garland

How to make your on Rae Dunn INSPIRED fall garland from the Dollar Tree

Cut out your stencils. I used a skinny type font and my Cricut Design Space. I made them 2.5” tall and cut them out of cardstock. Before cutting them out I made a line in the “A” so that the middle would stay attached while stenciling and I just free hand painted that small part in once I was done.

Remove the wire “stems” from the burlap leaves. For me, the brown ones peeled away super easy but the orange ones didn’t want to come off without taking the burlap with it. So, I used wire cutters on the orange ones.

Because these Dollar Tree burlap leaves are the exact same size you will want to trim up the brown ones so that you have and orange border going around them once you are finished. Just take a small amount off the edge, following the shape of the leaf.

How to make Rae Dunn inspired fall garland on a budget, from the Dollar Tree

Paint the brown burlap leaves white, even the back. The medium sized brush works great for this step. Let dry.

How to make Rae Dunn inspired fall garland on a budget, from the Dollar Tree

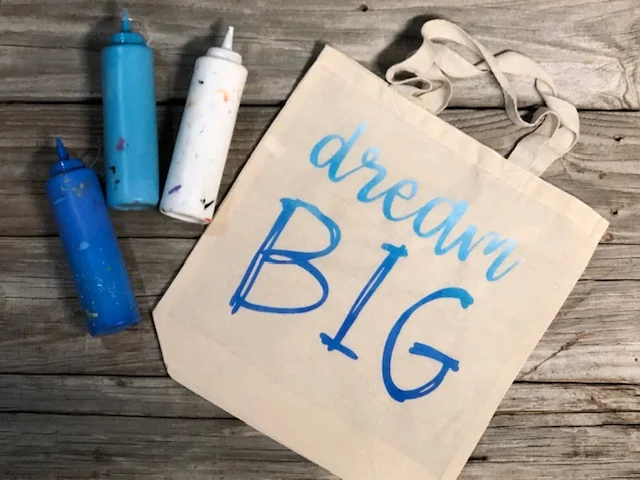
After the white paint is dry you can stencil on your FALL letters. I just held my in place and used a pouncing motion like I did on this stenciled canvas tote bag. Take care not to get outside the cardstock lines. If you need to you can use painter’s tape to tape the stencil off so you won’t have any bleed lines {just don’t press the tape down too much so it doesn’t mess up the work you’ve already done ;) }

How to make Rae Dunn inspired fall garland on a budget, from the Dollar Tree

Once your stenciled area is dry you can glue the white burlap leaves onto the orange burlap leaves. I only applied glue to the center of the white leaves. I didn’t want them to be completely glued down all the way around.

How to make your own Rae Dunn inspired Fall garland from the dollar tree

Measure out how long you need your burlap to be then add a few inches so you can loop the ends to hang. Attach your leaves with the mini clothes pins, or you can hot glue the burlap leaves directly on the twine.

How to make your own Rae Dunn inspired burlap leaf garland using items from the Dollar Tree

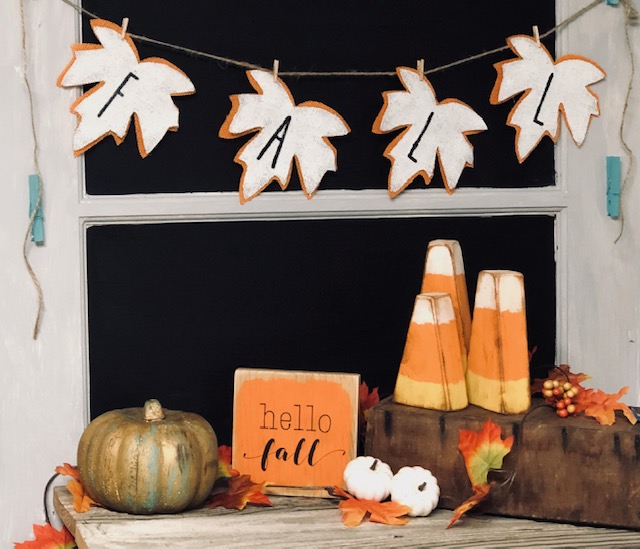
Then you’re all done! SOOO super easy! And it was super inexpensive! Pair this with these rustic candy corns made from a 2x4 or this DOLLAR TREE painted pumpkin DIY makeover.

How to make your own rustic Rae Dunn inspired fall garland on a budget

Check out the full video tutorial to these Rae Dunn inspired DIY burlap Dollar Tree FALL garland

Need more crafty fall ideas? Click here ——> for more DIY Halloween & fall decor


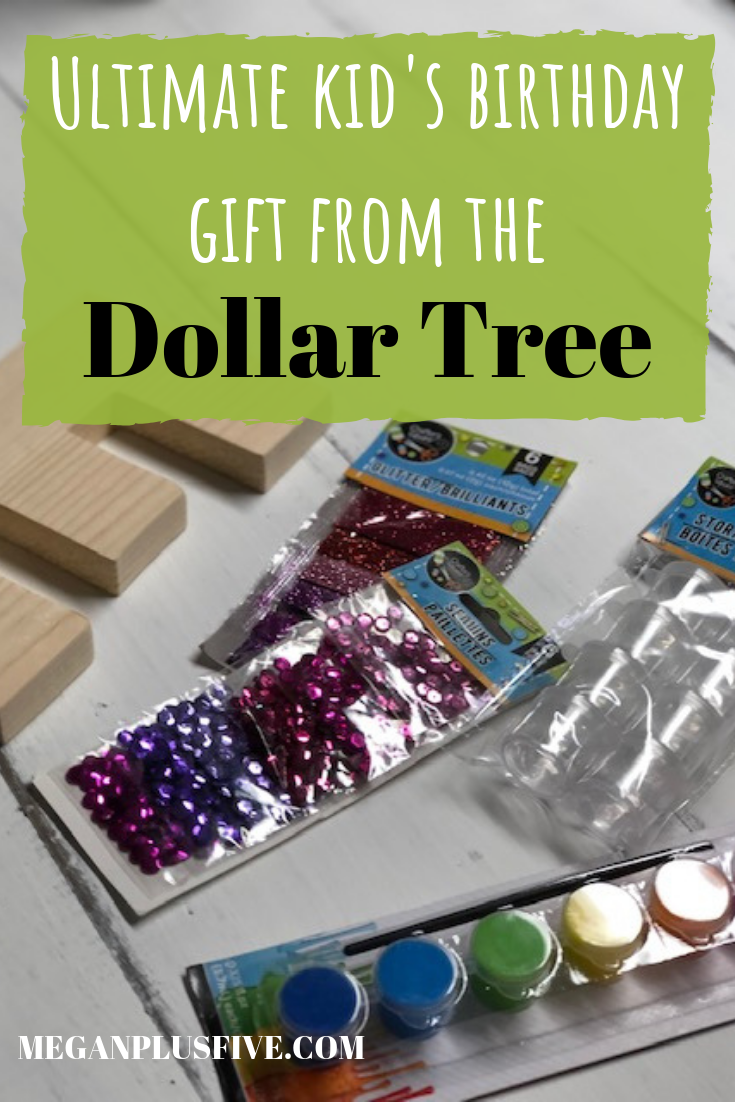
Ultimate Dollar Tree birthday gift idea

Ultimate kid's birthday gift from the Dollar Tree

The best kid’s birthday gift idea when you’re on a budget

It’s no secret that my girls and I LOVE the dollar tree. Seriously, we were just there today and when we got home my oldest couldn’t believe that we spent and entire HOUR in there and it literally felt like only 20 minutes had past lol! Yep…raising those girls right!

Our sole purpose of the trip was to find a couple gifts for the oldest daughter’s friends for their birthday parties. Raising a family of 6 isn’t a cheap task. So, things like friend’s birthday parties typically have a pretty small budget of $10 per kiddo. At Walmart $10 doesn’t get you much from the toy aisle or any aisle that a kid would be interested in anyway. But, I have to say over the years we have gotten really good at whipping up some amazing birthday gifts on the $10 budget. And I can’t wait to share the latest gift that comes in WAY under budget! Under budget meaning 70% lower than what we typically budget for friend’s birthdays.

Affiliate Disclosure. Some of the links on this website are affiliate links, which means that I may earn a small commission if you click on the link or make a purchase using the link. If you make a purchase you will not be charged anything additional.

How was I able to create two gifts for kids for under $6?

Well, first the Dollar Tree. It is FULL of really amazing things that on their own may not be all that amazing but when paired with something else, like let’s say a personalized wood letter cut out, can be one of the best gifts ever! And second, I just purchased a scroll saw last weekend with the money that comes in from my handmade business so I used that to create the customized gifts for her friends.

The ultimate Dollar Tree birthday gift idea for under $5

My only regret is not buying a scroll saw sooner. If you’re curious about the one I purchased you can see more about the Ryobi scroll saw here. And if you wanna know about the other tools I have in my shop I’ve written a break down of which tools every crafter needs.

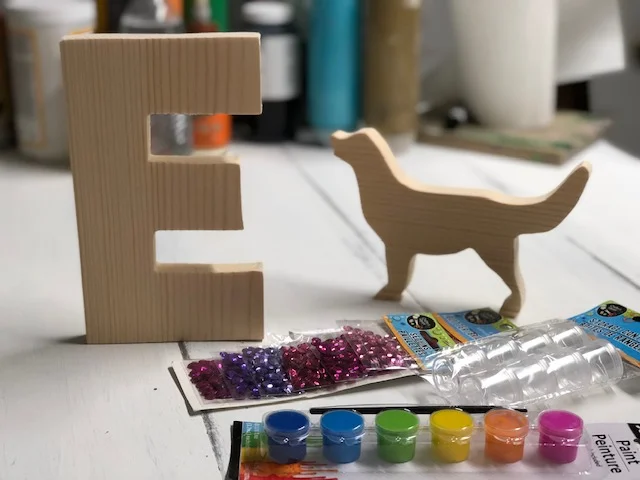
I used my Cricut Explore to cut out the letter E and the dog from cardstock. Then I outlined them with a pencil on a scrap piece of 1x8 that had been sitting on the wood shelf in the garage. Using my new handy scroll saw I cut out the shapes. Gave them a light sanding and they were ready to add to the items we picked up at the dollar tree.

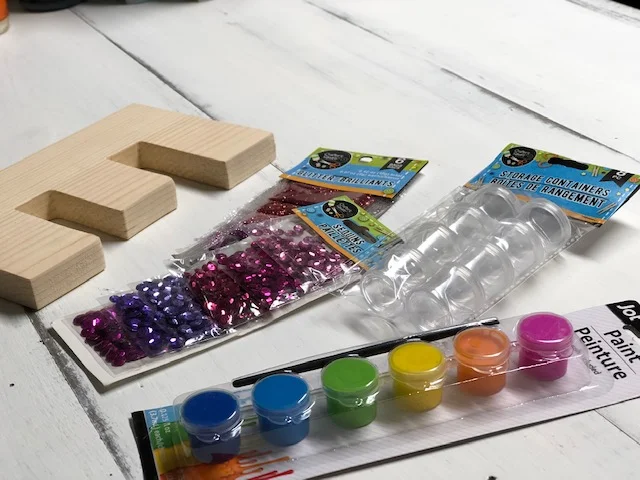
Here’s what we picked up from the dollar tree

  • 1 package of purple/pink 6 pk glitter

  • 1 package of blue/green 6 pk glitter

  • 1 package of purple/pink sequence

  • 1 package of small containers

  • 2 paint pots

We bought the small containers to fill with white paint and glue {which we have a TON of at home} . Since the paint pots don’t come with white paint and sequence doesn’t stick well to paint we thought those additions to the birthday gifts would be a good idea. I wrote on the outside of the containers which one was glue and which one was paint so there wasn’t any confusion when the birthday girl goes to use her new craft kit.

The glitters and sequence were individually wrapped so we pulled them off of the original packaging {they were just taped to the thin cardboard} and gave each birthday girl 4 glitters and 2 sequence.

The ultimate DOLLAR TREE birthday gift idea

To keep the birthday crafts looking somewhat professional I packaged the craft supplies in a clear goody bag {the party favor kind} that we already had left over at home.

I am so excited about this new DIY birthday craft idea! It’s absolutely perfect for the crafty kiddo in your life and it costs just a few dollars to create! I can honestly say that our girls loved this idea so much they each want their own.

———> Want more crafty gift giving ideas? Check out my post on these top selling kid approved DIY CRAFT KITS FOR KIDS

——> Also, you don’t want to miss this a great list of the PRE TEEN CRAFT IDEAS, because they can be so hard to buy for sometime

Dollar Tree pumpkins, how to give them a RUSTIC makeover

Frugal fall decorating, how to give a Dollar Tree pumpkin a rustic makeover

Frugal fall decorating, how to give a Dollar Tree pumpkin a rustic makeover

We’ve all seen them the bright orange pumpkins on the shelves at the Dollar Tree. You think to yourself ‘I could paint that up and make it look soooo much better’. Then fall comes and the darn ugly pumpkin is still sitting there untouched by your creativity. Yep…that’s me. I am totally that kind of Dollar Tree shopper and I’m not ashamed to admit it.

After having several of these little pumpkins sit on my craft room shelf for almost a year I decided what better time to give them a makeover than now?! Fall is almost here and I have been working like a busy crafty bee trying to gear up for this season. Check out my latest DIY, 2x4 candy corn they turned out SO stinking cute! AND you don’t want to miss this frugal find, Walmart clearance shoes, that I gave a total makeover to for my 3 year old to wear this fall. She absolutely LOVES them!

How to turn your DOLLAR TREE pumpkins into rustic perfectly distressed pumpkins

Affiliate Disclosure. Some of the links on this website are affiliate links, which means that I may earn a small commission if you click on the link or make a purchase using the link. If you make a purchase you will not be charged anything additional.

I had everything I needed on hand, including the pumpkins, but here’s what I used to turn my pumpkin from bright orange into rustic farmhouse.

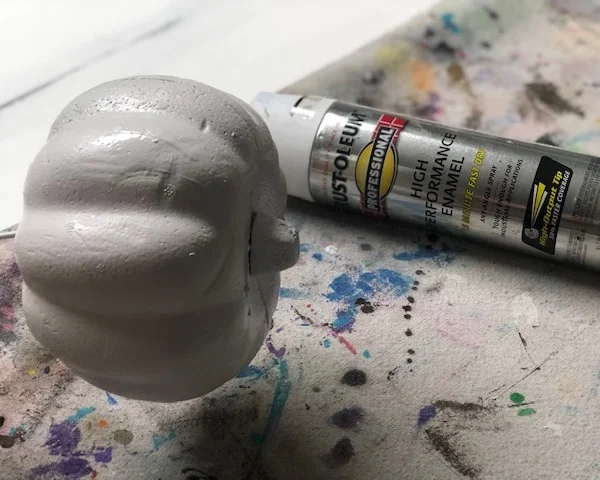
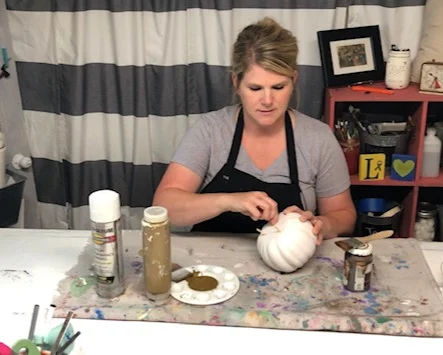
First you want to paint your pumpkin white. I used what I found in our garage but you can use any kind of white FLAT spray paint. Stick the skewer in the bottom of the pumpkin so you can hold the pumpkin and spray all around it. Let it dry before you put it down. I used a blow dryer to speed up this process.

Dollar Tree pumpkins, how to give them a rustic makeover

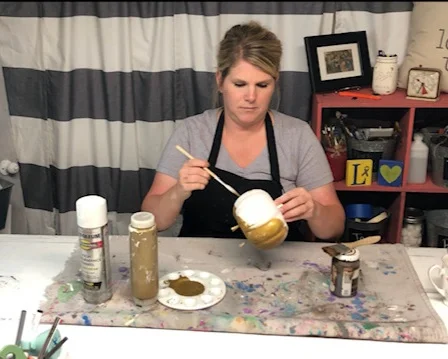
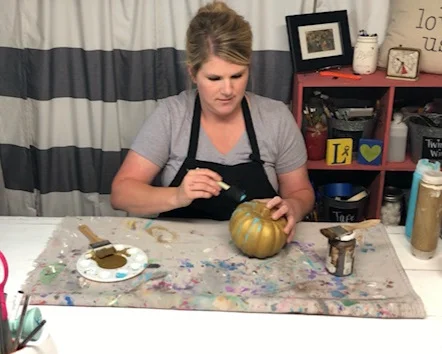
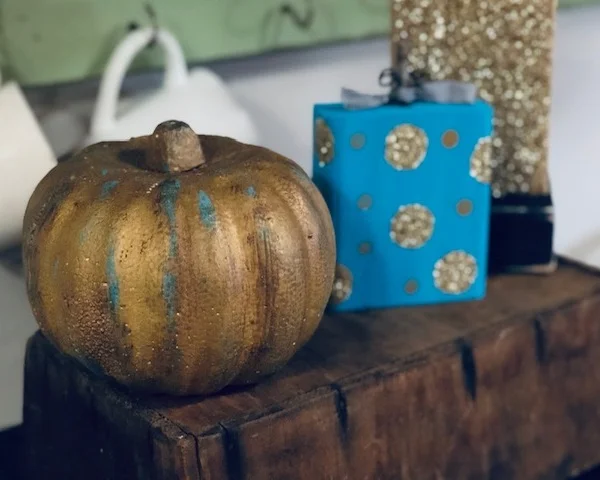
Next you want to paint your pumpkin with your gold chalk paint. I broke 3 small pieces off of the skewer and stuck them in the bottom of the pumpkin so that it would stand up and not touch the table while I was painting it. Let that dry completely before moving on to the next step.

Dollar Tree pumpkins, how to give them a rustic makeover

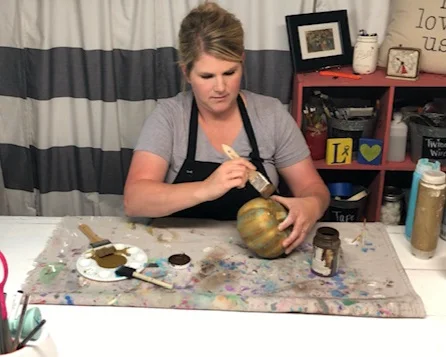
Once your gold chalk paint is dry you want to very lightly dip the tip of your brush into your teal/blue colored paint. I used a color called lagoon and on it’s own is VERY bright but when used as an accent color it is absolutely gorgeous! You don’t want to completely cover the gold paint but lightly brush over it leaving light streaks of the lagoon colored paint. This will dry pretty quick.

Dollar Tree pumpkins, how to give them a rustic makeover

Next you are going to repeat the previous step but instead you are going to use antiquing wax and your chip brush. I added a little more wax than I did the lagoon colored paint to give it a more rustic look. TIP: trim your chip brush down to about an 1” and it will work MUCH better.

Dollar Tree pumpkins, how to give them a rustic makeover

Once you’re satisfied with your coverage you are all done! I’m not totally loving the stem on this on so I might replace it with a stick from the yard but for now it will tie in perfectly with my fall décor! I paired it next to the glittery gold 2x4 pumpkins I made a while back.

Dollar Tree pumpkins, how to give them a rustic makeover

If you loved this tutorial you will love even more of my DIY fall craft tutorials

Check out the full video tutorial below


DIY how to make 2x4 wood candy corn

DIY 2x4 candy corn, how to make easy primitive fall decor

DIY EASY 2x4 primitive wood candy corn

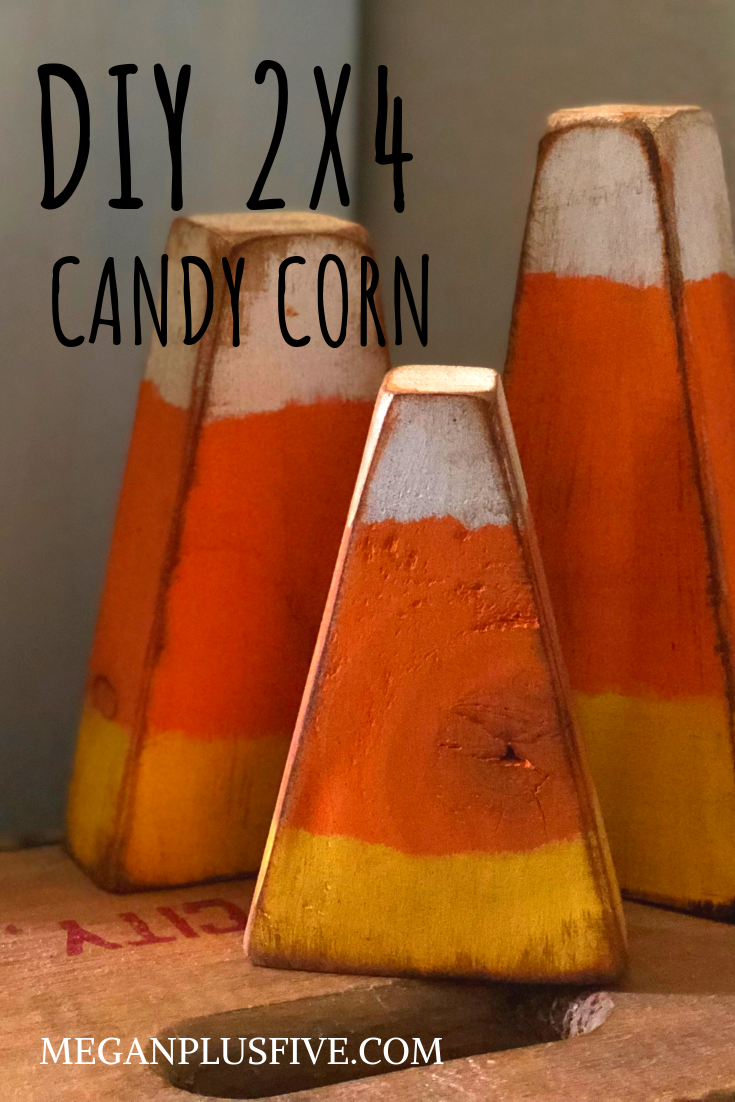
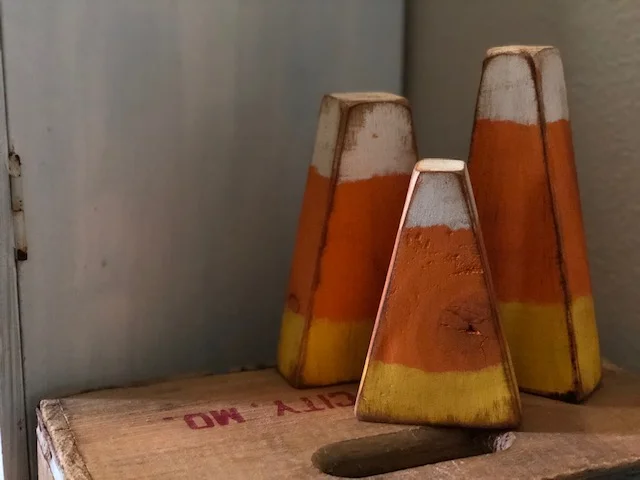
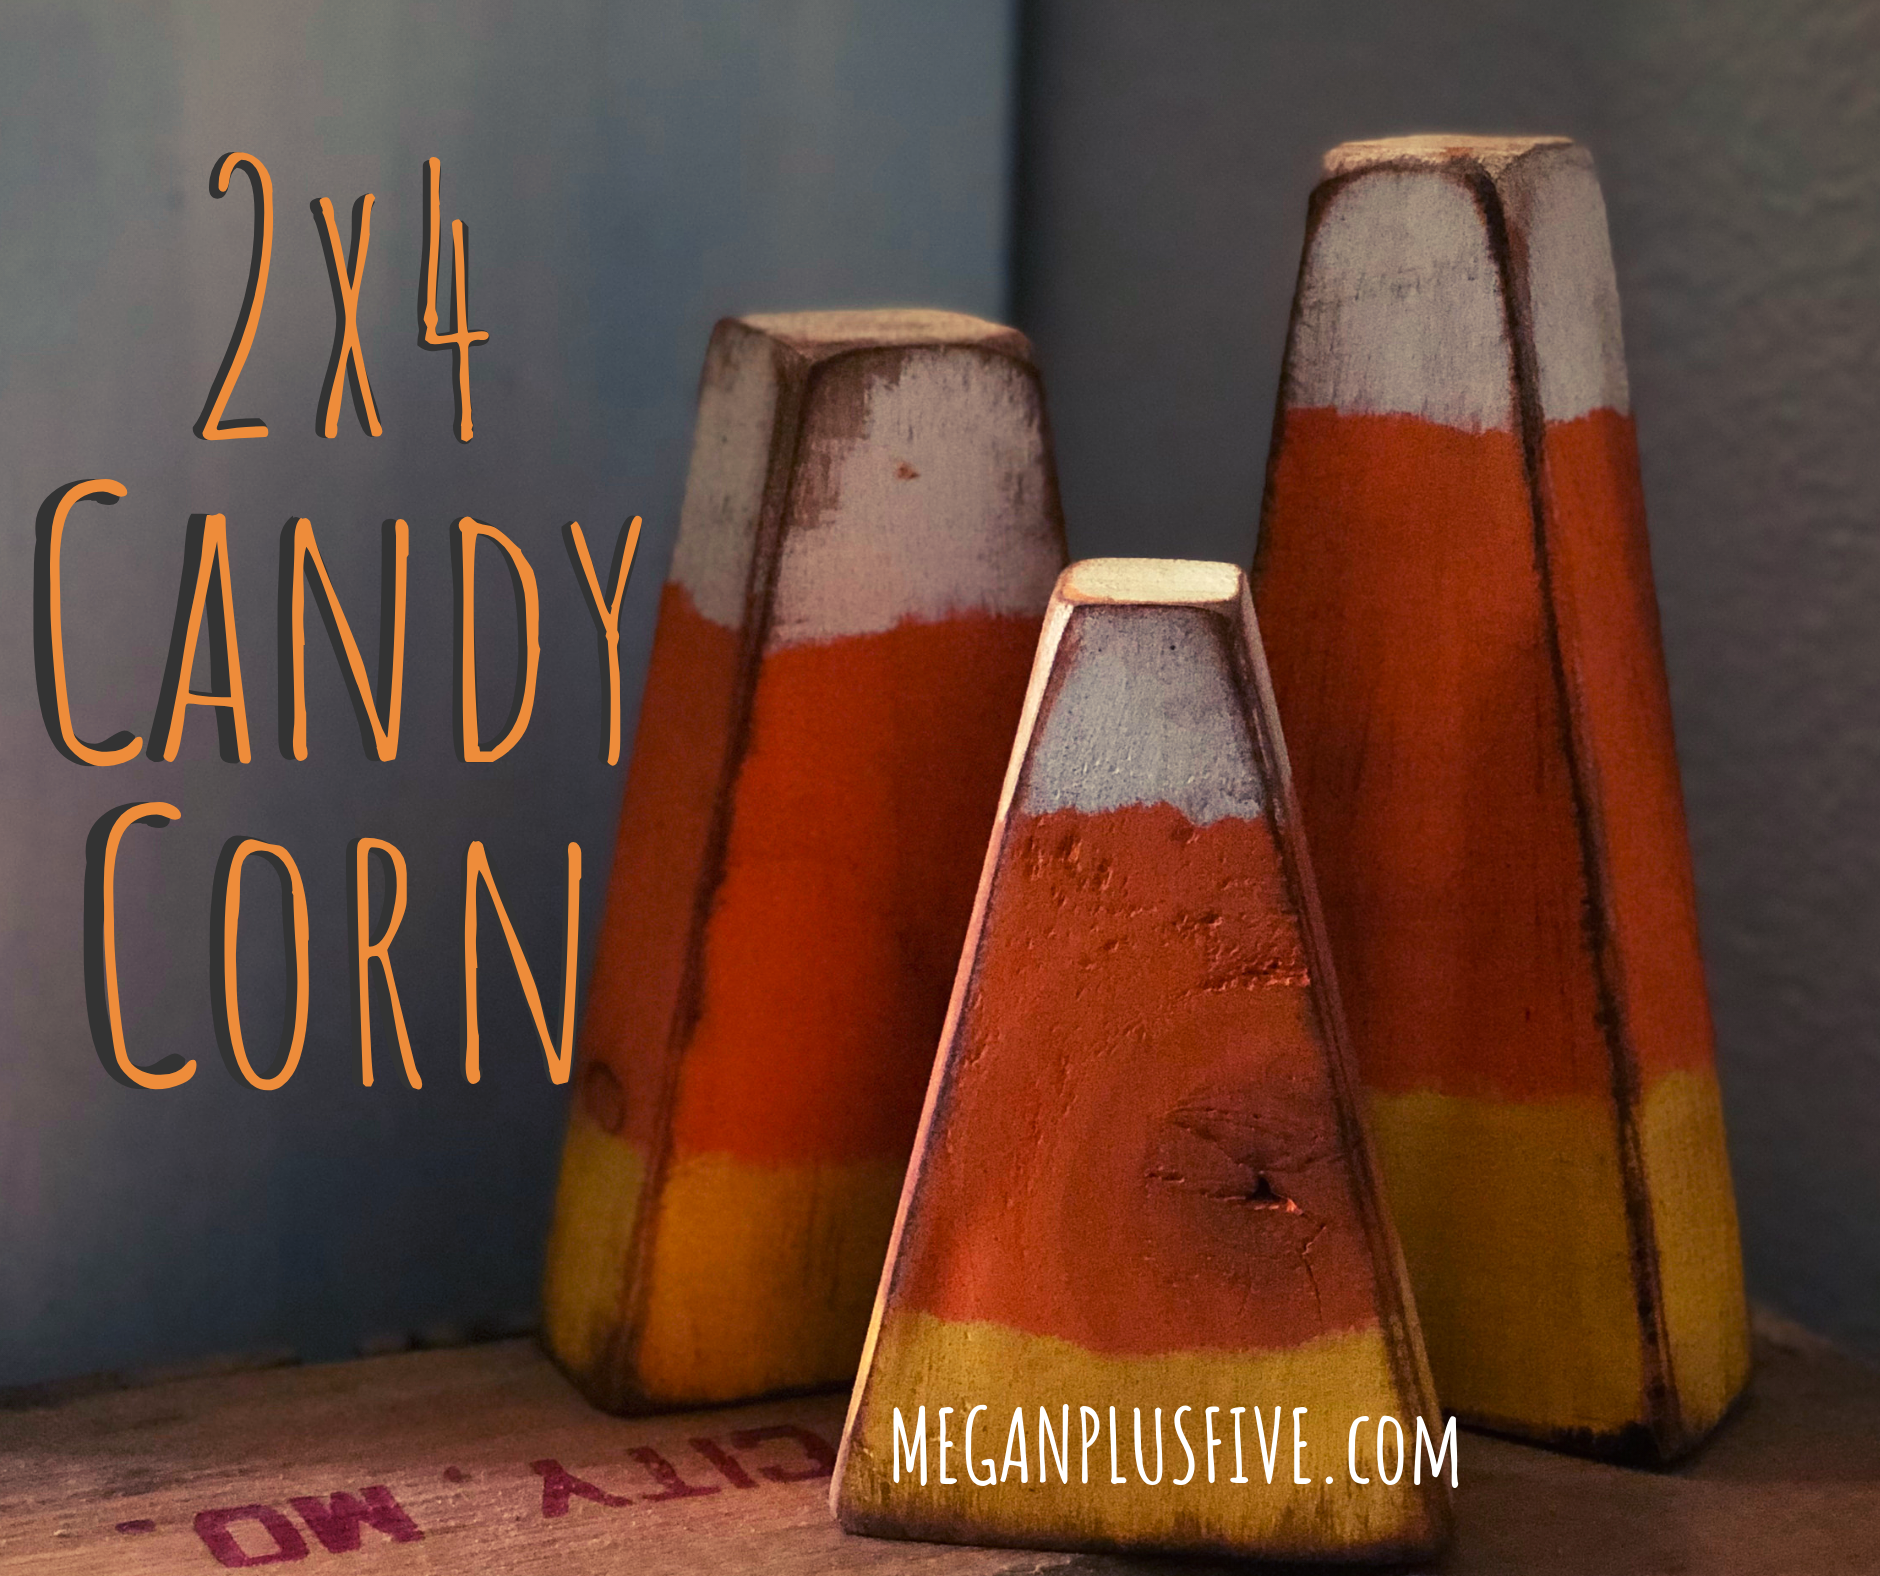
DIY primitive candy corn, aren’t they soooo cute?! The last couple of years have been a little busier than normal at our house and I haven’t been decorating for the holidays like I normally do. So this summer I decided I’m going to make time to get back into the festive decorating. And with that I need to make lots of new pieces to decorate the seasons with. Including these adorable wood candy corn. Check out this fun TRICK OR TREAT shelf sitter set I made a few weeks ago.

I’ve had these on my craft to do list for a looooong time and just hadn’t made time to make myself a set. And now I do! I LOVE them! They turned out even better than I thought they were going to! And I can keep them up for the entire fall season.

DIY easy primitive wood 2x4 candy corn for your fall decorations

How to make your own set of primitive candy corn from a 2x4

And it was super easy to DIY. I was a bit nervous cutting the angles but I think they turned out so great!

If you don’t have the space or tools to DIY this from start to finish you can get one of my easy CANDY CORN CRAFT KIT. Everything you need to make these at home is included in your own candy corn craft kit.

Don’t have all the tools needed to complete this craft? Snag one of my easy DIY craft kit from my Etsy shop. Click CANDY CORN CRAFT KIT to get yours. Want to send it as a gift? During checkout mark that you would like to send it as a gift, leave their address and a sweet note to them and we’ll take care of the rest.

Affiliate Disclosure. Some of the links on this website are affiliate links, which means that I may earn a small commission if you click on the link or make a purchase using the link. If you make a purchase you will not be charged anything additional.

If you want to make them from scratch here’s what you’ll need

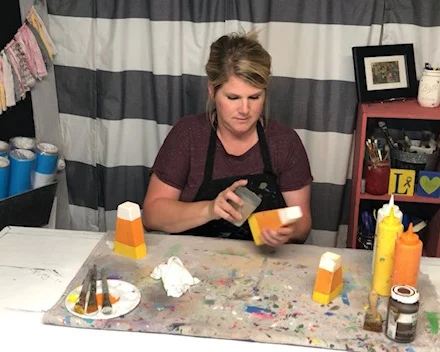
First cut your pieces into 4”, 5.5”, & 7” lengths. The angles I cut: 4”= 15°, 5.5”= 10°, 7”=10°. After you cut them give them a quick sanding. You don’t want to sand them super smooth as this will take away so much of the wood’s natural character. Be sure to wipe away the sawdust with a lint free cloth after you sand your candy corn.

DIY candy corn decorations. How this mom made her own from a scrap 2x4

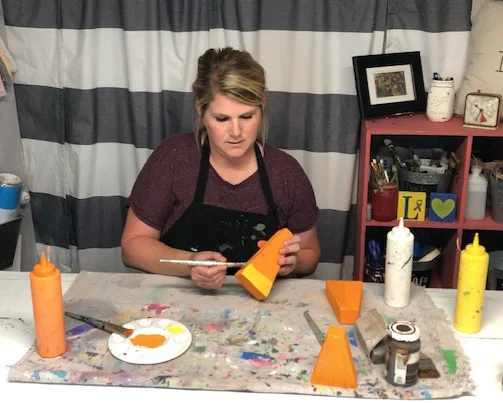
Now paint all three with a thin coat of orange paint.

DIY candy corn decorations. How this mom made her own from a scrap 2x4

After the orange paint dries paint the bottoms yellow. You will likely need 2 coats for this. Let the first coat dry completely before applying the second coat.

DIY candy corn decorations. How this mom made her own from a scrap 2x4

Now, paint the tops white. Again, you'll need to paint two coats making sure your let the first coat dry completely before applying the second coat of white paint.

DIY candy corn decorations. How this mom made her own from a scrap 2x4

Once all of your candy corn are completely dry you can start distressing them with your 120 grit sand paper. Focus on the edges, corners, and lightly sand the fronts and sides. Then wipe the dust away with your lint free cloth.

DIY candy corn decorations. How this mom made her own from a scrap 2x4

Now you can apply your antiquing wax. A little bit of wax goes a VERY long way. Just like when sanding, you want to focus more on the edges and corners and give a light swipe with your chip brush on the fronts and sides. TIP: if you trim your chip brush down a little you will get a more stiff brush that you can better control your wax with.

DIY candy corn decorations. How this mom made her own from a scrap 2x4

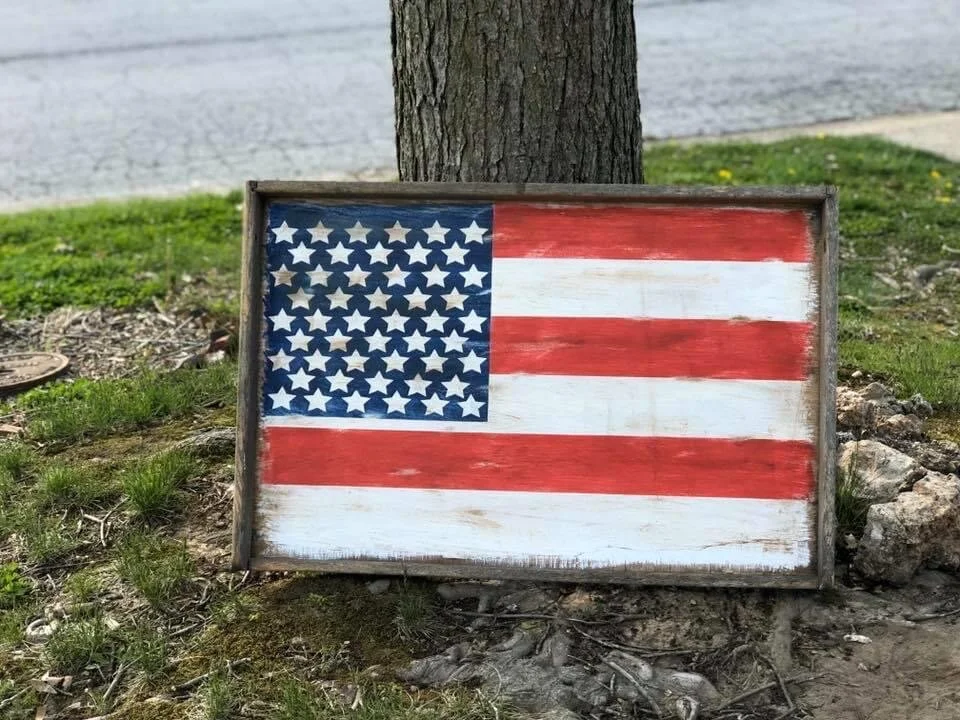
If you don’t like the look of the antiquing wax you can opt for a clear wax. I LOVE antiquing wax and use it on TONS of my projects it highlights so much of the wood’s character. You can see the difference it makes. Check out my DIY American Flag tutorial where I use this same dark wax.

DIY candy corn decorations. How this mom made her own from a scrap 2x4

Now you’re ready to display them! I am soooo happy with the way these little 2x4 candy corns turned out {I think that’s the plural from lol}! I have a few more DIY fall projects yet to tackle before the season arrives so be sure to check back for more tutorials to make your own decorations for the upcoming season.

DIY candy corn decorations. How this mom made her own from a scrap 2x4

Catch the video tutorial below. If you LOVE it I would very much love if you would subscribe to my YouTube channel where I share all of my crafty video tutorials.


DIY clearance shoes, how to paint them for fall

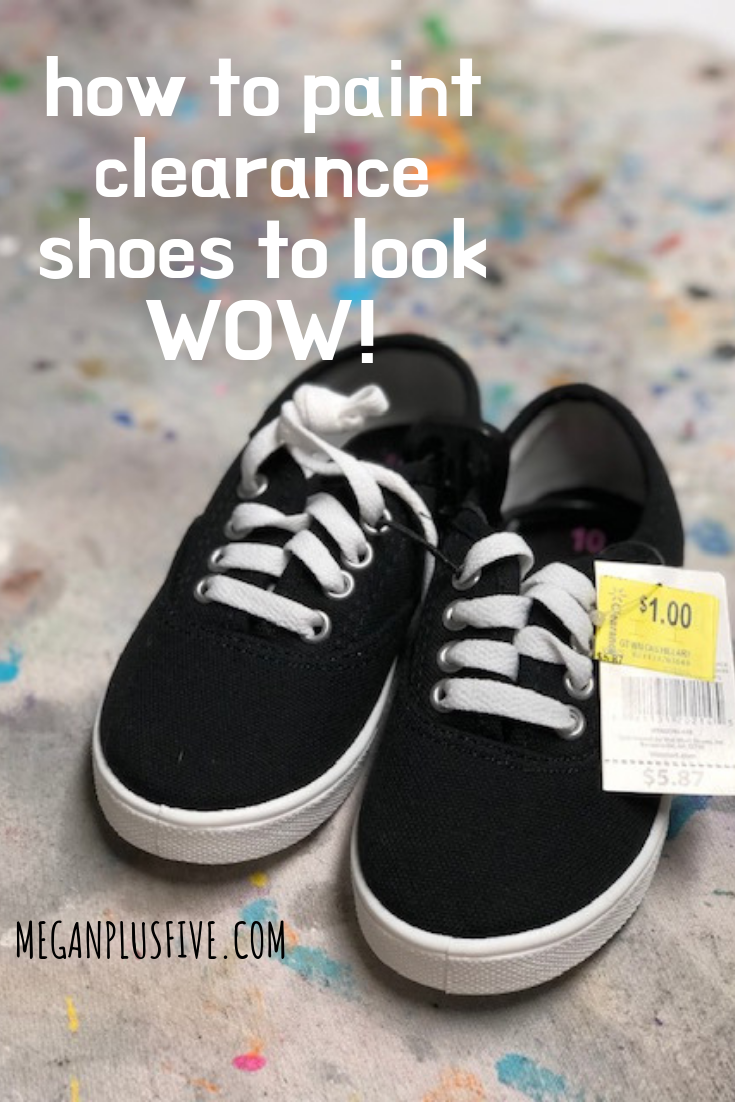
how to paint on clearance shoes to make them look wow

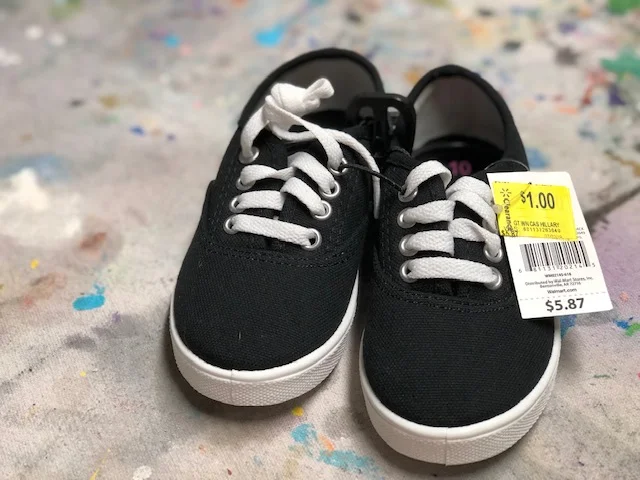
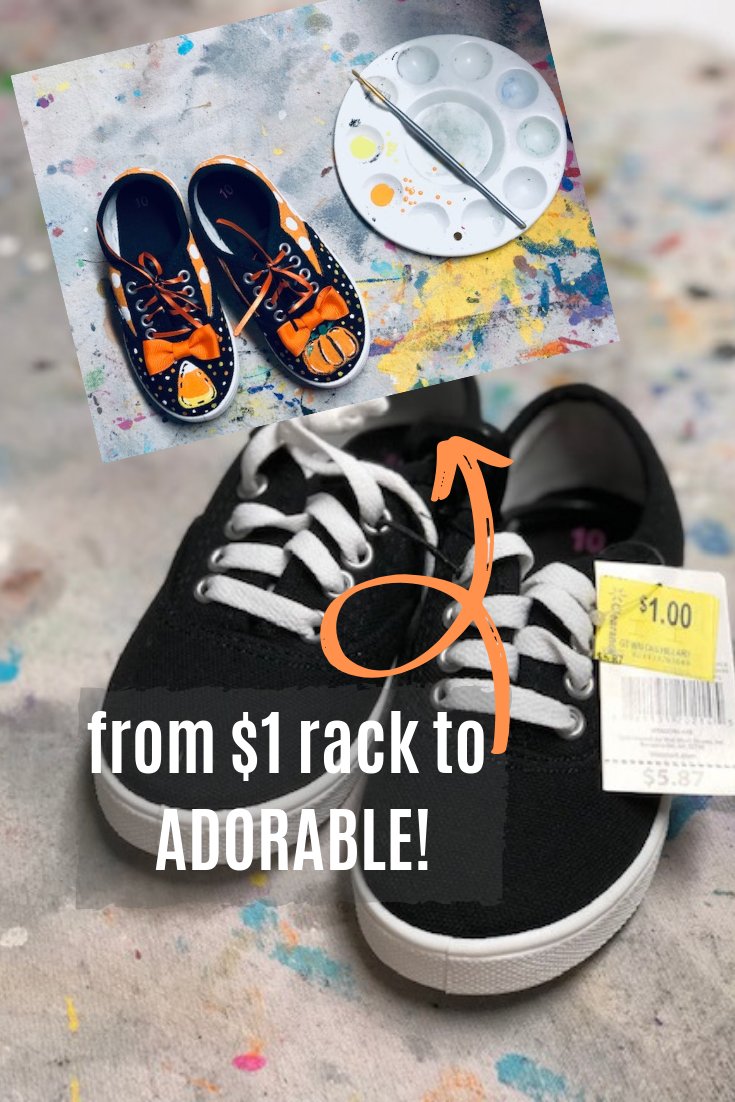
I LOVE the frugal life. So when my friends tagged me in a post about our local Walmart putting select kids clothes and shoes on the $1 clearance rack I couldn’t get there fast enough! Thank you sweet friends btw! Boy did we find some good deals! Including these adorable little black shoes for my 3 year old daughter.

I had never painted on shoes before but I was up for the challenge. Such a perfect blank canvas and even if I mess them up they were only a DOLLAR so it’s totally ok and I wouldn’t feel one bit bad lol.

Affiliate Disclosure. Some of the links on this website are affiliate links, which means that I may earn a small commission if you click on the link or make a purchase using the link. If you make a purchase you will not be charged anything additional.

DIY clearance shoes makeover. How to paint on canvas shoes.

I’m sure I didn’t use the right kind of paint {I used straight acrylic paint, not watered down} but that’s ok. My daughter won’t be wearing them very long, she’s three after all lol so she’ll outgrow them in no time.

Here’s what I used

Pin me for later

DIY painted shoes. From $1 rack to ADORABLE

How to paint on canvas shoes for fall

1. REMOVE THE LACES before you start painting so you don’t get paint all over them.

2. THEME unless you are just going to let the creative juices flow as you go along it is best if you have a plan prior to painting on your canvas shoes. I had an idea right before I started painting and I ended up changing it up as I went because I wasn’t totally loving the way it looked. I painted more on the back and sides and moved the bows and added the front dots after I filmed this tutorial. I LOVE the way they turned out and more importantly my toddler does too!

3. PAINTING TIPS

  • if you are painting on black shoes it is best to paint a base layer of white then once that’s dry paint the actual color you want. So on mine I wanted the backs orange, I painted them white first then after they dried I painted them orange. This will help your colors to not be dark and diluted.

  • use a variety of brush sizes to fit your painting needs

  • don’t use too much paint. Paint in thin layers and if doing more than one layer only paint over dry paint.

  • paint pens are your friends <3 ! I used paint pens to add the lines on the candy corn and pumpkin after painting them their main colors.

  • use both end of your paint brush. I used the non brush end of my brush to make the small dots on the front of the shoes. This was the perfect size for these cute little dots.

4. ADDING ACCENTS if you add any accents E6000 works great to have a long lasting hold. I’ll warn ya though, it doesn’t dry fast at all.

5. LACES I opted for a more untraditional lace for these shoes but you can keep the original laces in. I thought they would be too white for this pair so I traded them out for 2 thin pieces of ribbon in orange and black on each shoe. They actually hold up pretty well too! And this type of ribbon is really inexpensive so it wouldn’t cost much to replace if I need to.

Didn’t these clearance shoes turn out sooooo adorable?!!! I wasn’t sure how I’d like that they don’t match on the fronts but I actually do love it. It screams “I don’t have perfection issues” lol!!!

DIY how to paint Walmart clearance shoes to give them an upgrade

I hope you find this tutorial helpful for your shoe painting adventure! I’d love to see how yours turn out! Share a pic in the comments.

Check out the video tutorial below

How to stencil on a canvas bag

How to stencil on a canvas bag. Faux screen printing on a canvas bag

Learn how to stencil on a canvas bag

Have you been wanting to learn how to stencil on a canvas tote? It’s actually super easy! Make it an even more fun with a DIY CANVAS TOTE PAINT PARTY. I’ve put together this DIY canvas bag craft kit to make it even easier. There’s no guess work for you. Just choose your stencil and I’ll send you everything you need to make your party a hit!

If you love this tutorial you’ll probably love this other stenciling project I did a tutorial on. I show you how to make a custom name canvas and it is one of my most popular posts on my blog AND one of the most popular craft kits I sell in my Etsy shop.

Affiliate Disclosure. Some of the links on this website are affiliate links, which means that I may earn a small commission if you click on the link or make a purchase using the link. If you make a purchase you will not be charged anything additional.

What’s included in the DIY canvas tote craft kit?

If you don’t purchase the kit here’s what you’ll need

How to stencil on a canvas bag tote. Paint on a canvas bag to personalize it.

A tip before you start… to get the best outcome you will want to use a contrasting paint color so that your colors really pop.

Ok, let’s get started painting on this canvas bag.

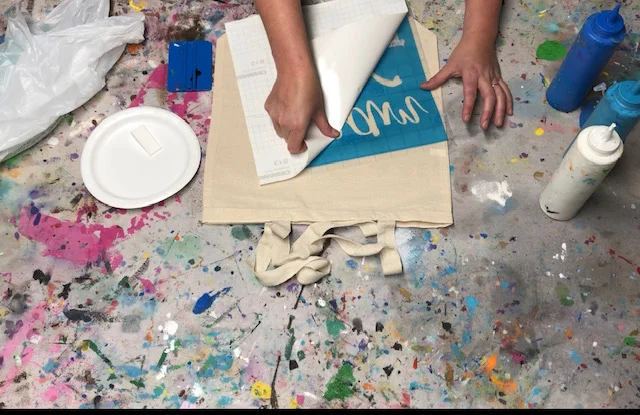
1. Flip your stencil over so that the white paper backing is facing up.  Then using your vinyl squeegee {burnishing tool} rub the stencil  backing.

How to stencil on a canvas bag. Learn how to faux screen print to personalize your canvas totes.

2. Slowly peel the paper backing away from the stencil and transfer  tape {the blue & clear pieces}. GO SLOW and work from one corner  across to the corner diagonal from it. Another tip is to peel it away  at a very sharp angle, it helps to glide it across itself.

How to stencil on a canvas bag. Learn how to faux screen print to personalize your canvas totes.

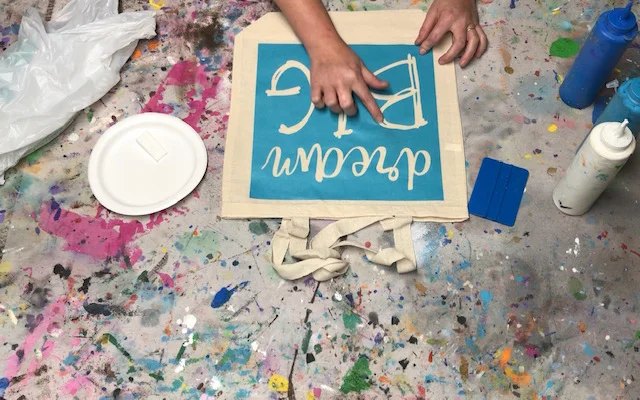
3. Flip you stencil over so that the sticky side is facing down. Now  place it on your bag. Use your vinyl squeegee to help press it to the  bag.

How to stencil on a canvas bag. Learn how to faux screen print to personalize your canvas totes.

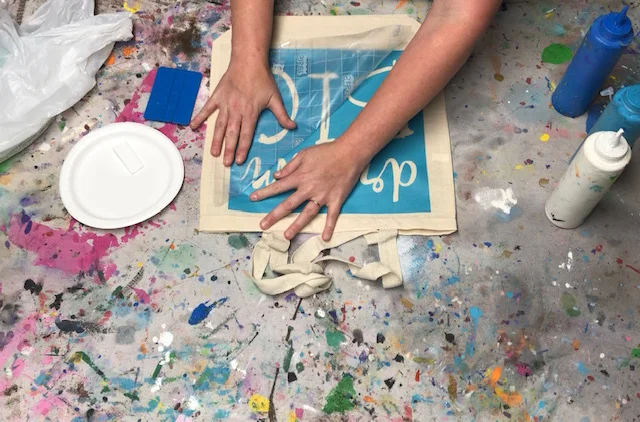
4. Slowly peel off the clear transfer tape. Use the same technique that  you did when taking off the paper backing. GO SLOW and peel  from corner to corner at a very sharp angle

How to stencil on a canvas bag. Learn how to faux screen print to personalize your canvas totes.

5. Run your finger along all the exposed areas of your stencil. This will  help control the paint bleed and keep it minimal. If there are any air  pockets just press them out with our finger or squeegee.

How to stencil on a canvas bag. Learn how to faux screen print to personalize your canvas totes.

6. Before you start painting you need a barrier between the two layers  of your bag so you don’t have paint bleeding onto the other side.  You can do this by placing a plastic bag inside your canvas bag,  making sure it is in the same place as the stenciled area.

How to stencil on a canvas bag. Learn how to faux screen print to personalize your canvas totes.

7. Put a small amount of your paint colors on your paper plate. Using  a stenciling sponge LIGHTLY dip the bottom of the sponge into  your paint. Dab it off. You want VERY LITTLE paint on your sponge.  Too much paint will cause paint bleed.

How to stencil on a canvas bag. Learn how to faux screen print to personal your canvas totes.

8. Using an up and down pouncing motion apply the paint with the  stenciling sponge onto the exposed areas of the stencil. You do not  want to rub or make a back and forth motion. This will force the  paint up and under your stencil. Repeat this step until you have  painted all the exposed areas inside your stencil.

How to stencil on a canvas bag. Learn how to faux screen print to personalize your canvas totes.

9. After you have your entire stencil painted it’s time to peel it up. You  do not need to wait for your paint to dry for this step. Just like you  peeled the paper backing and transfer tape, start in one corner and  peel to the opposite corner. Be sure not to drop your stencil  material on your bag as you peel. Use your xacto knife to take up all  the middles out of your design. THIS STEP MUST BE DONE BY AN  ADULT.

How to stencil on a canvas bag. Learn how to faux screen print so you can personalize your canvas totes.

10. After your design dries REMOVE the plastic bag. It is best to seal  your design with heat prior to washing it. You can do this by simply  ironing it, do not iron directly on the painted area always use a  pillow case or tea towel between the iron and your design.

How to stencil on a canvas bag. Learn how to faux screen print to personalize all your canvas totes.

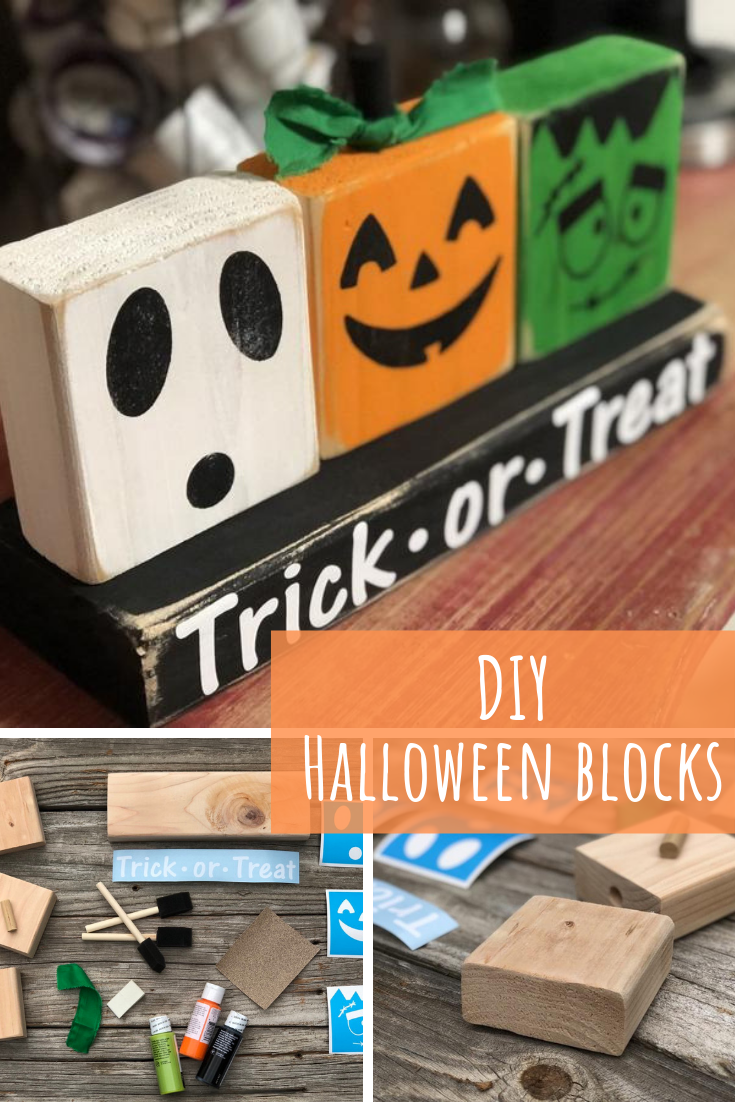
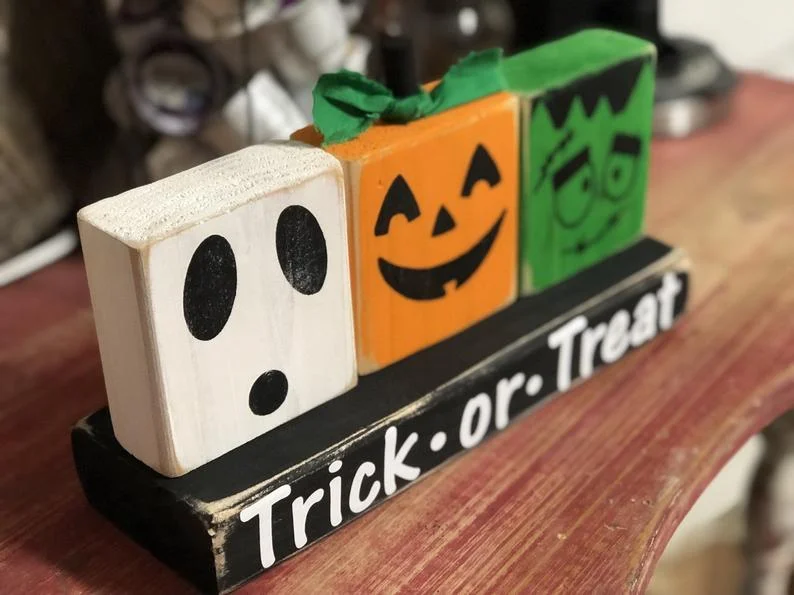
DIY 2x4 painted Halloween blocks

DIY Halloween shelt sitter 2x4 craft. How to make Halloween Decor, ghost, pumpkin, Frankenstein trick or treat craft

Easy Halloween Craft for Adults

Oh my goodness! I can’t believe it’s already time to start thinking about Halloween! Last year I was so crazy busy I didn’t hardly have time to decorate our home for fall let alone get new craft kits put together and listed in our Etsy shop. So this year I’m getting a super early start on all my DIY Halloween décor. And I’ve started with this super cute 2x4 craft.

Already know you want this? Skip this article and get your DIY HALLOWEEN CRAFT KIT

Cute Halloween shelf sitter DIY craft kit for adults

I try to keep my craft kits pretty simple and easy to DIY and this one is no exception. This craft really takes me back to my childhood watching my grandma make all her primitive décor. She could free hand ANYTHING and it always looked amazing. But not to worry because with this craft kit you won’t have to free hand a single thing and your craft will turn out just as AMAZING!

So, what comes in this Halloween craft kit?

DIY Halloween craft kit for adults. How to make 2x4 crafts for Halloween

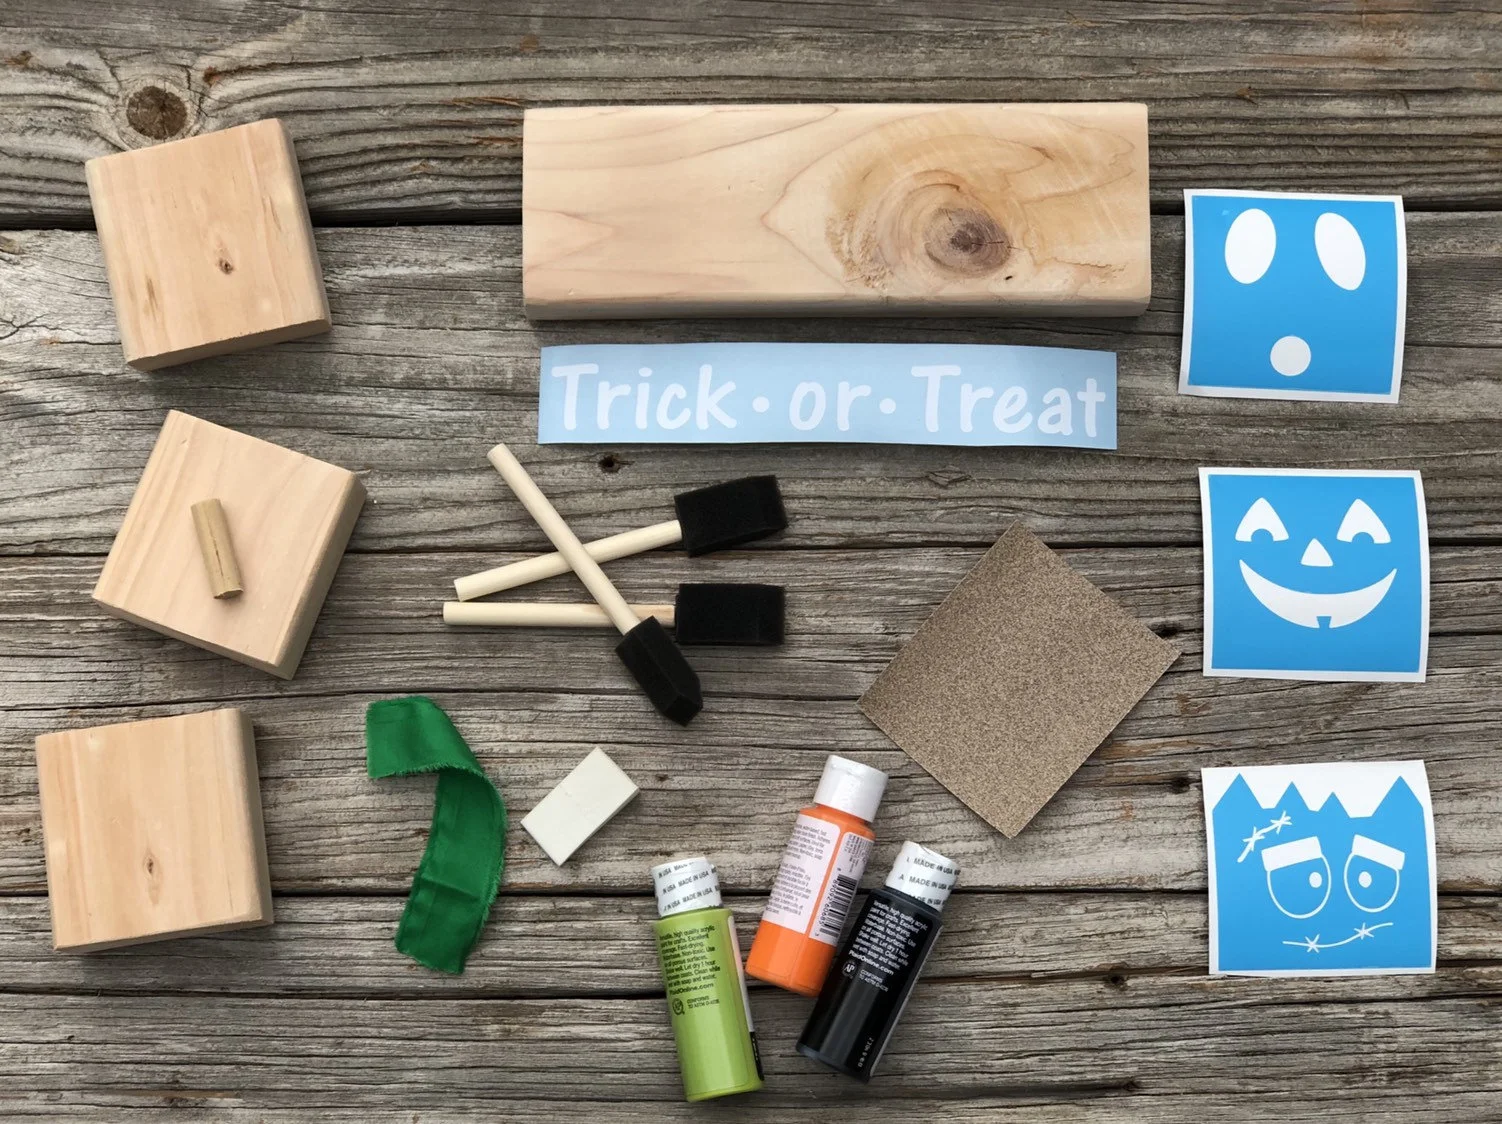
BASIC KIT includes
• 3 - 3.5x3.5x1.5 pre-sanded blank wood pieces
• 1 - 10.5x3.5x1.5 pre-sanded blank wood piece
• 3 stencils: ghost, pumpkin, frankenstein {no transfer tape attached as these are little detail and do not require it to transfer on to wood}
•wood stem
•fabric piece {color will vary}
•professional quality vinyl decal: Trick •or• Treat
•detailed instructions PLUS a video link for video instructions on our DIY website.

PREMIUM KIT includes
•basic kit
• acrylic paints: black, white, orange, green
•sandpaper
•3 sponge brushes
•stenciling sponge


Grab your girlfriends, some wine and catch up while each making your own set of these adorable ghosts, pumpkins, and Frankensteins.

Already have the paint/brushes and just need the wood and stencils? Perfect! You get to choose the type of kit you receive, pick from basic or premium. No matter which kit you choose it will come with printed picture instructions and a video link, in case you need a little more visual {which is totally the kind of learner I am!}.

Click the link ——> DIY HALLOWEEN CRAFT KIT to snag your craft kit before the holiday season so you are just as prepared as I am this year.

If you love more traditional Halloween décor check out these super cute DIY wood pumpkins

How to TIE DYE using food coloring

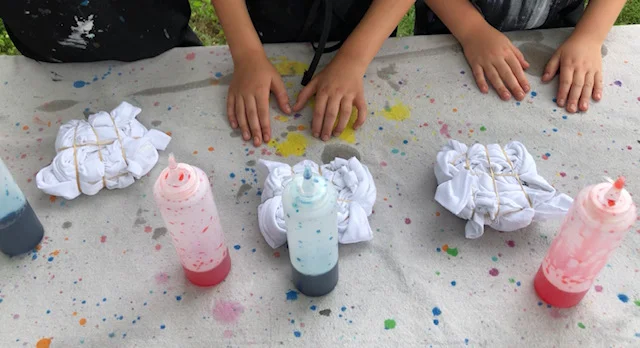
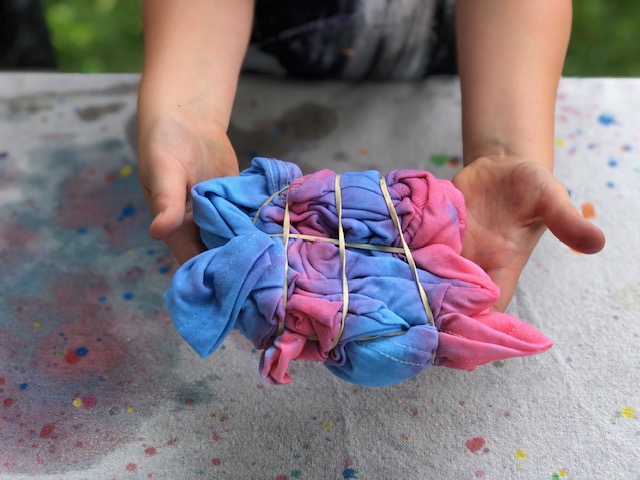
How to tie dye using food coloing. An easy way for kids to learn the techniques of tie dying chemical free.

Teach your kids the techniques of tie dying using food coloring

For a long while now my girls have been wanting to try their hand at tie dying so we thought why not make tie dye red, white, and blue shirts for the 4th of July that was coming up. But there was one slight problem, we were pressed for time and I had NEVER tried to tie dye before…ever. So we did some searching on Pinterest and found a TON of tutorials. We came across ones that used food coloring and I thought that would be a perfect starting point for us since we’d never tried this whole thing before.

It was a pretty great experience too! I’m so glad we tried this method first. I need to add that the food coloring does NOT stay in the fabric after being washed. There are steps that we could have taken to make it stay but I wanted their shirts to rinse clean so they could try other folding techniques and not have a million tie dye shirts in their closet.

Affiliate Disclosure. Some of the links on this website are affiliate links, which means that I may earn a small commission if you click on the link or make a purchase using the link. If you make a purchase you will not be charged anything additional. This is just a way I can help add to our family finances to raise our four daughters. Please know I would never recommend a product or service I do not totally stand behind.

Click here for more kid friendly craft tutorials. If you enjoyed this TIE DYE craft watch the video below on how to stencil on a canvas bag. This is a HUGE hit for a birthday party craft.

Here’s what you’ll need

I picked everything up from my local Walmart & Dollar Tree, but I’ve included links if you prefer to order these items on Amazon and have them delivered right to your door.

EASILY TIE DYE WITH FOOD COLORING

1. TWIST YOUR SHIRT

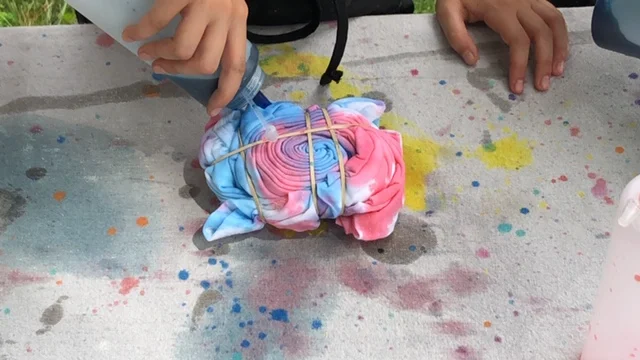
First you want to unfold your t-shirt so it is laying flat in front of you. Then pinch the middle and twist the shirt so it coils into itself. This was a little difficult for my girls to do so I did this step for them. But with a little practice I think they will master it in no time.

How to tie dye using food coloring. The perfect method for kids to practice how to DIY tie dye at home.
How to tie dye using food coloring. The perfect method for kids to easily learn tie dying techniques.

2. WRAP WITH RUBBER BANDS

Next, wrap a rubber band around the circumference of the coiled shirt. Then add several rubber bands going the other direction around the shirt so it doesn’t come undone. The method gives the shirt a traditional spiral look but if you want to learn other techniques I recommend reading Stephanie Lynn’s blog post about other tie dye folding techniques.

How to tie dye using food coloring. Easy method for kids to practice the tie dying technique.

3. TIE DYE FOOD COLORING MIXTURE

Now you’re ready to start mixing the food color mixture.

I read another tutorial they recommended 8 drops of food coloring to 1/2 C of water. We mixed that at first but it didn’t seem like the colors were very bright. So we doubled the food coloring drops.

You’ll need to mix 16 drops of food coloring:1/2 C water we just poured it all into our squeeze bottles and gave them a good shake. I wasn’t sure how much solution we would use since we had 3 shirts to do and we ended up having to refill one red bottle and one blue bottle.

How to tie dye using food coloring. Easy method for kids to practice the tie dying technique.

Their little setup was so cute I had to snap lots of pics!

How to tie dye using food coloring. Easy method for kids to practice the tie dying technique.

4. APPLY THE FOOD COLOR MIXTURE

Then start squirting on the food coloring solution. If you don’t prewash your shirt you might have a hard time getting your shirt to absorb the liquid. This was us lol! So we gave our shirts a quick misting with a spray bottle with water in it and after that it soaked the food color water up just fine.

How to tie dye using food coloring. Easy method for kids to practice the tie dying technique.

Keep squirting on the solution until your shirt looks like the one below. Again, we are first timers here but this worked for us so this is what we are recommending ;)!

How to tie dye using food coloring. Easy method for kids to practice the tie dying technique.

5. LET IT SET

Other tutorials we read said to soak the shirt in salt water after you’re done squirting on the food color mixture. Then remove it after so many hours and let it sit for at least 12 hours…but we didn’t do that lol! We were pressed for time and this was a just for fun tie dye experiment to get our feet wet with the whole tie dying experience. But we did let our shirts set for 24 hours, mainly because we had a million other things to do {momma of 4 life}.

Keeping your shirt coiled up with the rubber bands still on it, place it inside a plastic bag and wrap the bag tight squeezing out all the air. Let sit for at least 12 hours.

How to tie dye using food coloring. Easy method for kids to practice the tie dying technique.

6. READY TO WEAR

After it has sat, take it out and hang it inside to dry, away from sunlight. Once dry you can wear your freshly food colored tie dyed shirt right away.

My girls did some fancy cutting and tying on their shirts. The middle two even used some of their discarded pieces to make fun headbands to match their shirts!

Like I said above, this method is not permanent. It WILL wash out. But it was so fun for the girls to test the waters of tie dyeing. Look how adorable they are!! BTW the youngest of the four daughters didn’t want any part of the whole thing….life with a toddler lol!

How to tie dye using food coloring. Easy method for kids to practice the tie dying technique.

In my opinion this is THE perfect way for kids to experiment with tie dying. They can do so many wrapping and folding techniques and if they don’t like it it will wash right out. And if they find a technique they love they can try their hand at the permanent stuff.

I hope you enjoyed reading this tutorial. My girls had so much fun with this!

Let me know if you have any questions below.

DIY 2x4 glittered pumpkins

DIY glitter pumpkins. How to make your own nontraditional pumpkins for fall.

How to make 2x4 glitter pumpkins

These 2x4 pumpkins are one of the easiest fall crafts you can make yourself. If the glitter and sea blue isn’t really your thing you can make these more traditional rustic orange and white pumpkins I posted last year. But I really wanted to make a set of nontraditional glittery pumpkins, well because why not? I love rustic décor but I also LOVE glitter! So I went for it and I’m so glad I did because they turned out soooo super cute!

Affiliate Disclosure. Some of the links on this website are affiliate links, which means that I may earn a small commission if you click on the link or make a purchase using the link. If you make a purchase you will not be charged anything additional. This is just a way I can help add to our family finances to raise our four daughters. Please know I would never recommend a product or service I do not totally stand behind.

You’ll need a few power tools for this DIY craft and I recommend hands down using Ryobi power tools, you can read my article on what power tools does a crafter need?

No matter what style of decorating you have these pumpkins are really fun to make and if they don’t fit in with your décor you can always gift them to a loved one.

Don’t have time to DIY them but NEED them in your life? You can buy a set of these glittery pumpkins in our Etsy shop.

Here’s what you’ll need

DIY 2x4 glittered pumpkins how to make untraditional pumpkins for fall

So, how do you make these gorgeous nontraditional fall glitter pumpkins?

First you need to cut your 2x4 into 3 pieces. You’ll need a 7”, 5.5”, and a 4”. These are the sizes I used and they seem to be the perfect size. Give them a quick sanding to knock down the rough edges. I used my Ryobi Cordless Sander for this but you can use a piece of 120 grit sand paper.

Next you need to drill a hole for your stems. I matched my stick up to a drill bit that was about the same size. Drill a hole in the middle of each top of your pumpkins.

DIY 2x4 glittered pumpkins. How to make a nontraditional set of pumpkins for fall.

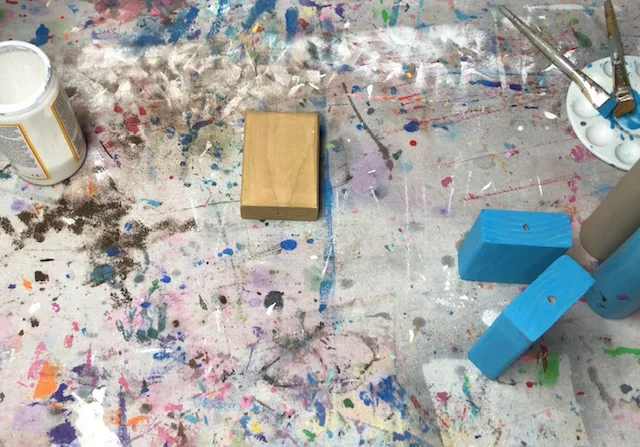
Then paint each pumpkin. I painted the largest and smallest blue and the middle sized one gold. Be sure to let them dry COMPLETELY between coats.

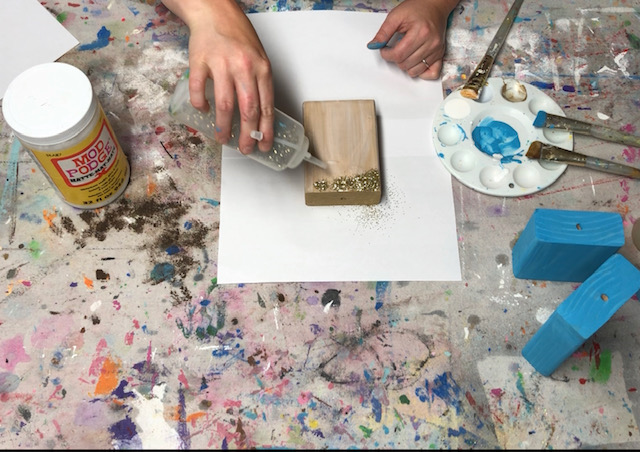
Once your gold pumpkin is dry add a layer of Mod Podge to the front of it, be sure you get an even coat. Then add glitter right on top of that. I place paper under my projects when using glitter to catch the excess that doesn’t stick. Then I empty it back into the glitter container.

DIY 2X4 gliltter pumpkins. How to make nontraditional pumpkins for fall.

Using the round sponge brush add some circles to the smallest block. I used both ends of the brush to add two different sizes of circles.

DIY 2x4 glitter pumpkins. How to make nontraditional pumpkins for fall.

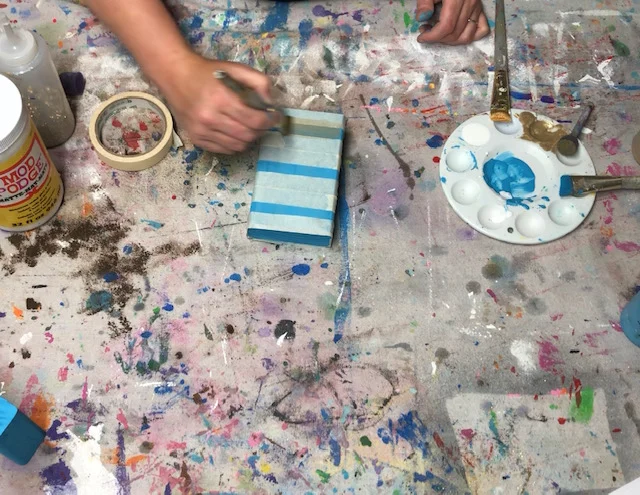
Tape off the largest pumpkin so it has 3 stripes. Paint a thin layer of gold, let dry.

DIY 2x4 glitter pumpkins. How to make nontraditional pumpmkins for fall.

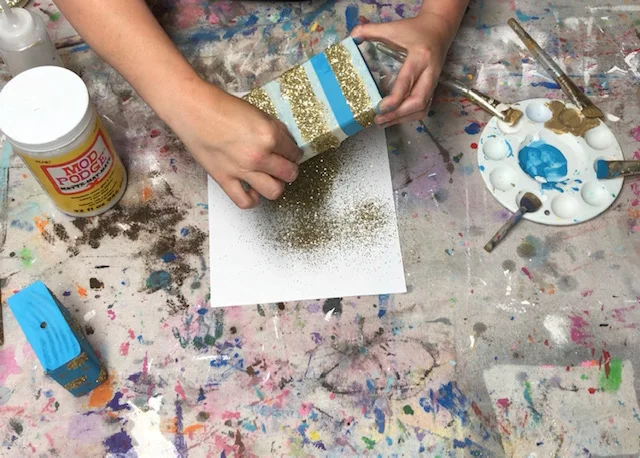
Add a layer of Mod Podge to the large circles then add glitter. Add a layer of Mod Podge to the gold stripes, add glitter, then peel the tape off carefully.

DIY 2x4 glitter pumpkins. How to make nontraditional pumpmkins for fall.

Add a dab of glue inside the hole you drilled then place the stick inside. Doing it this way will give your stick more stability.

DIY 2x4 glitter pumpkins. How to make nontraditional pumpmkins for fall.

Add a piece of rustic wire and a scrap piece of fabric and you’re done. Super easy!

DIY 2x4 glitter pumpkins. How to make nontraditional pumpmkins for fall.

Click below for the full video on how to make your own nontraditional glitter 2x4 pumpkins

5 awesome craft kits your kids will love

5 awesome craft kits your kids will love. Totally kid approved

Craft kits kids will love

Kids love to create. They have creativity coming out their ears it seems like. Back when we had our brick and mortar craft studio we would sell these kits like crazy! And now we have them online so kids all across the world can enjoy them.

Don’t want to buy the kits but want to know how to make the craft? I’ve got ya covered! After the end of the descriptions I’ve included the link to the tutorial here on my blog.

Here are our top 5 craft kits that have been kid tested and APPROVED!

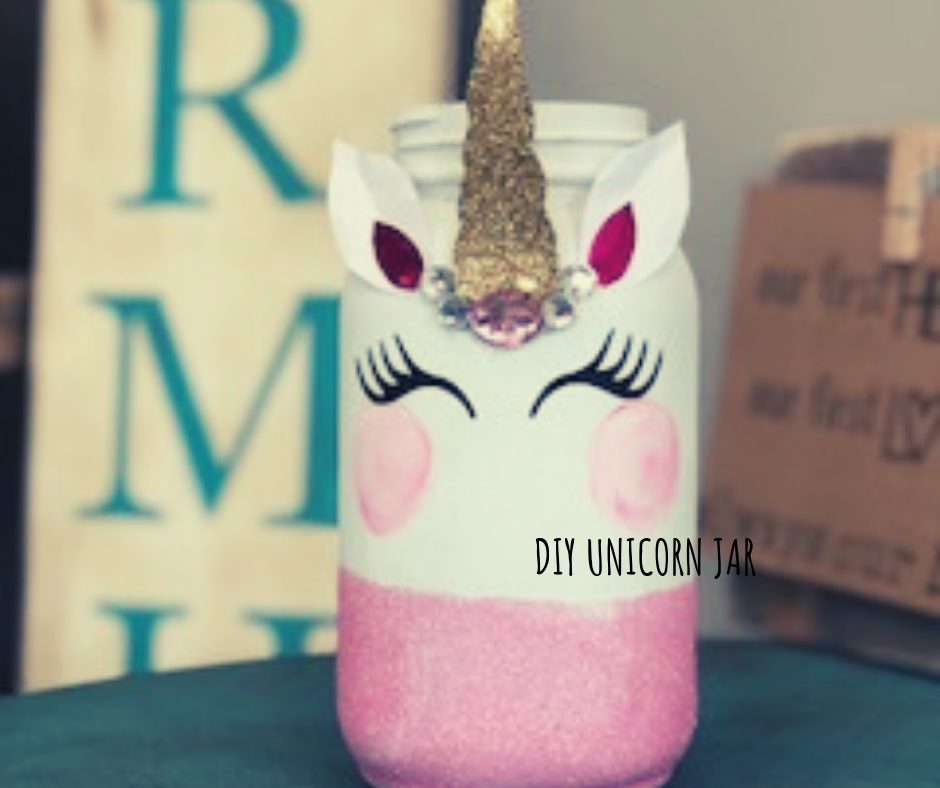
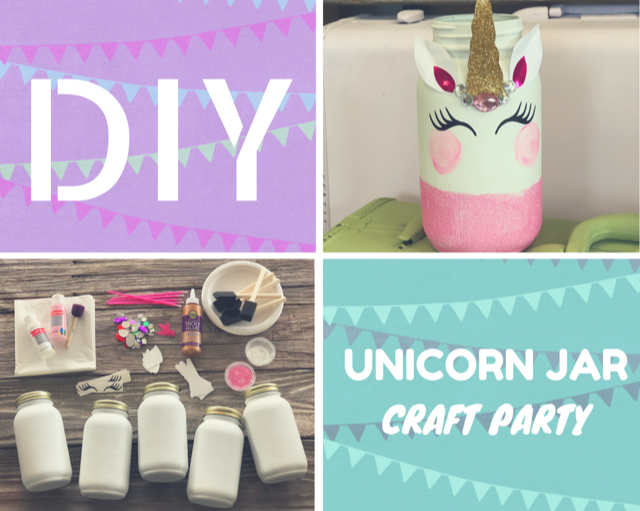
  1. DIY glittery unicorn mason jar

This unicorn mason jar craft kit is one of our top selling craft kits we ship. Each kit comes with a pre-painted mason jar so you don’t even have to worry about that step {painting mason jars can be a challenge due to curing times in between coats}. Upgrade to a unicorn mason jar craft party size

Check out the DIY glittery unicorn jar tutorial

2. CUSTOM name canvas art

What kid doesn’t want their name on a beautiful canvas that they paint? This custom name art canvas craft kit comes with everything your kiddo needs to have a personalized canvas art. Your name of choice comes already attached to the canvas so it’s ready to go right out of the box. Once your kiddo paints their canvas you simply peel up the stencil to reveal the white lettering underneath. This custom name art craft is also available in party sized, actually this a great option for family get togethers to give the little ones something fun to do.

Check out the DIY custom canvas art tutorial

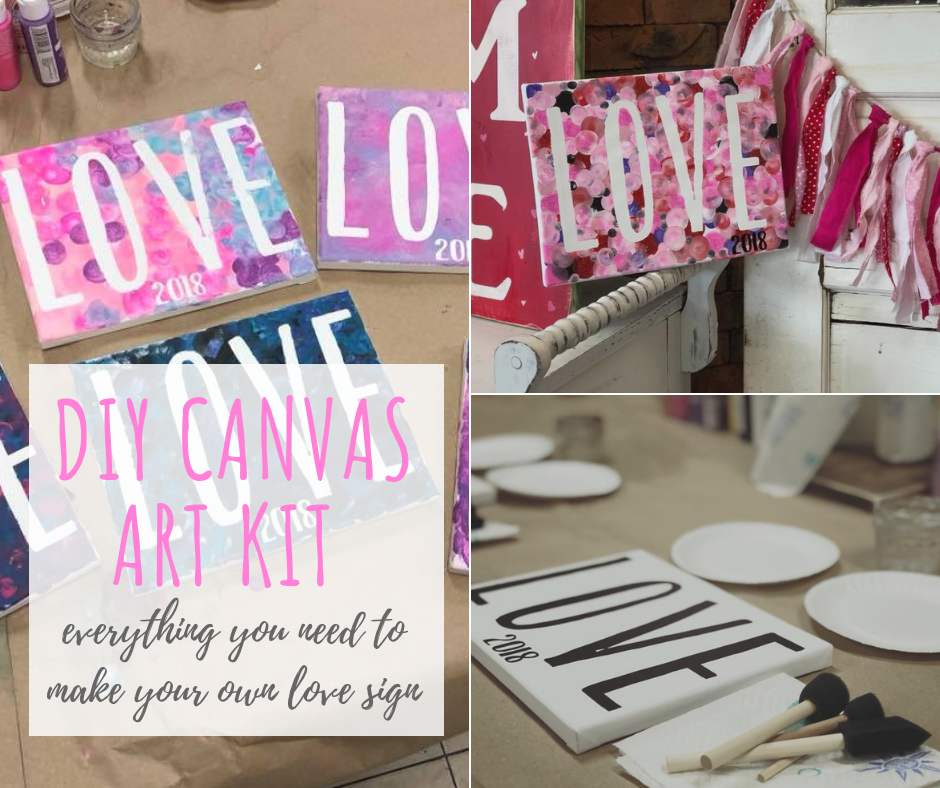
3. LOVE canvas art craft kit

Much like the craft kit above this canvas art come with the stencil already applied and ready to create right out of the box. This Valentine’s Day canvas art craft kit is always a big winner with moms and kids!

Check out the DIY canvas art tutorial

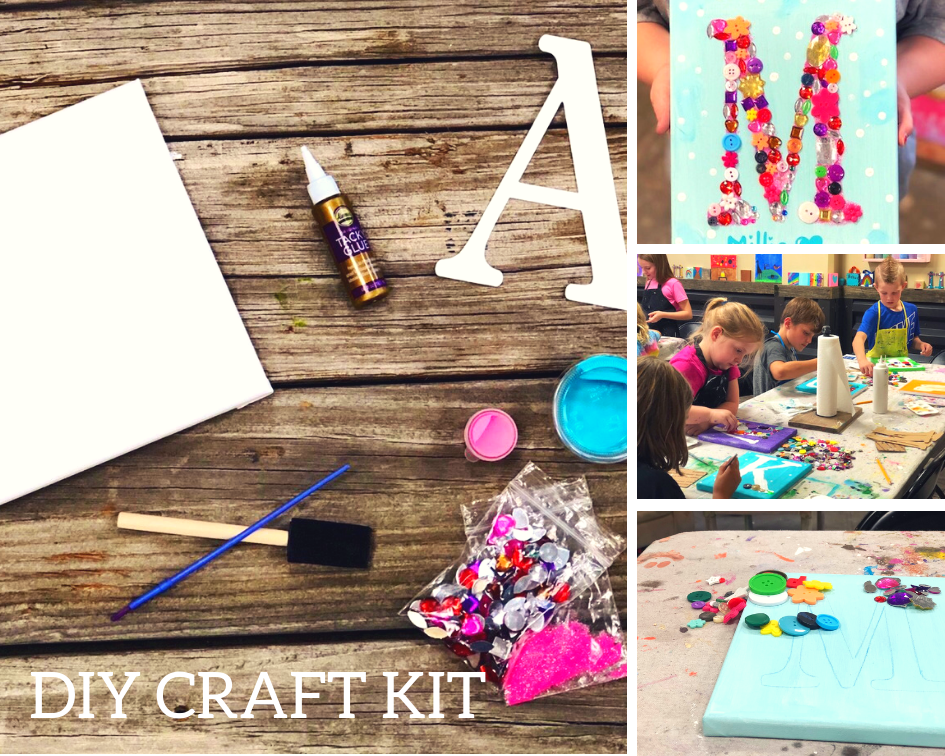
4. Mixed media canvas art craft kit

I can’t tell you enough how much kids LOVE this custom initial craft kit. The get to choose their own colors, buttons, rhinestones, and glitter and totally make it their own. This kit is so much fun and more!

Check out the DIY custom mixed media name canvas art tutorial

5. DIY light up fairy jar

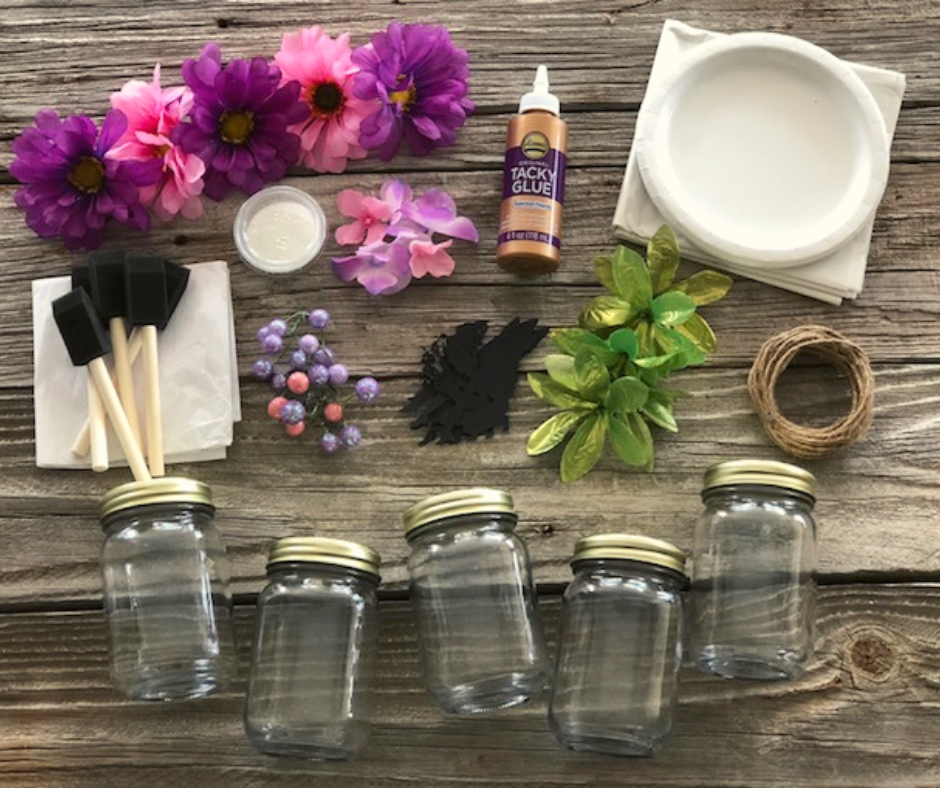
Calling all whimsical fairy believers! This light up fairy jar craft kit will make a perfect gift for the fairy lover in your life. This kit includes a smooth mason jar, embellishments, cardstock fairy, glitter, twine, tissue paper, and a battery operated light. Full picture instructions are included.

Check out the DIY glittered light up fairy jar tutorial

There you have it our top 5 craft kits approved by kids! Each and every one of these kits was a top seller in our brick and mortar craft studio and they each continue to be top sellers in our online shop.

If you have any questions on the craft kits please feel free to reach out to me. Each one come will full picture instructions and materials to complete each craft. Please note tools such as a glue gun are not included inside our DIY kits.


DIY sensory activites your toddler will love

DIY sensory activities your toddler will love. How to make sensory bins for you tot.

What is sensory play for toddlers?

Sensory play is crucial for your child’s development. I’m not going to spout out all the scientific reasonings sensory play is huge for your toddler…because I am not a doctor or licensed in this field in any way. I am, however, a momma of 4 and have seen what it’s done for our own daughters. And since I’m super frugal and crafty I am going to share with you how you can make your own DIY sensory activities on a dime! If you’d like to read a little more science behind sensory importance read this article from Heather at Growing Hands-On Kids.

Sensory play touches on these five senses

  • sight

  • smell

  • touch

  • taste

  • hearing

When we let our kiddos explore the things around them they start to understand their bodies. They start to understand just how all these different things work. So when all you see is a mess what they “see” is so much more. They are learning through play. Just as you would learn through doing something, say a new craft technique, or a task at work. We learn when we do and our babies and toddlers are no different. So, don’t focus on the mess. Focus on the wonderful things that are happening inside your little one’s brain.

And a plus is that it’s SO easy to make your own sensory activities at home. More than likely you already have everything you need to create these too.

Affiliate Disclosure. Some of the links on this website are affiliate links, which means that I may earn a small commission if you click on the link or make a purchase using the link. If you make a purchase you will not be charged anything additional. This is just a way I can help add to our family finances to raise our four daughters. Please know I would never recommend a product or service I do not totally stand behind.

If you love this article you’ll also love my post on toddler apple stamping canvas art. This is sensory oriented and makes an adorable keepsake for you!

Here are my top sensory activities to do at home for toddlers

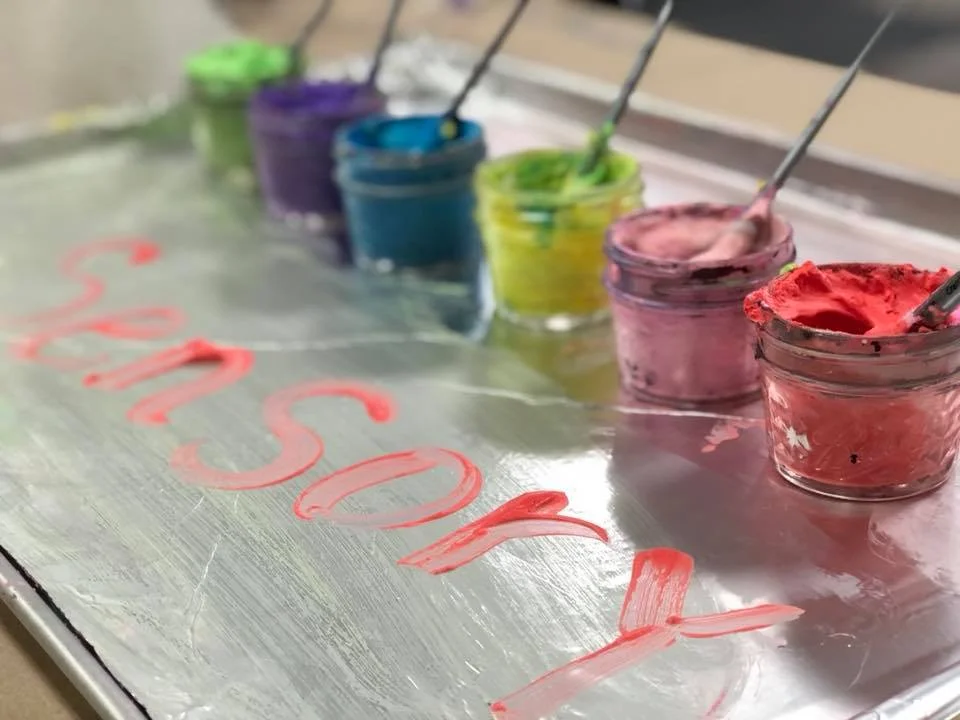
1. Colorful fluffy paint on foil

Here’s what you need

  • containers

  • paint brushes {or they can use their fingers}

  • pan

  • foil

  • food coloring

  • cool whip

Cover a metal pan in foil. Fill containers half way with cool whip. Add a few drops of food coloring. Let them paint. You can wipe off the foil if there gets to be too much cool whip “paint” on it and let them do it all over again.

DIY sensory activites for your toddler that you can do at home

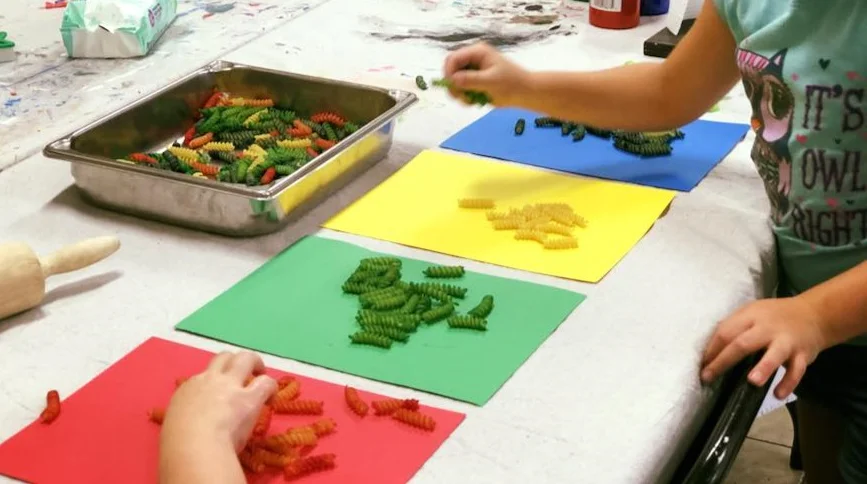
2. Color sorting with noodles

Here’s what you’ll need

  • colored noodles. I made these by placing them in ziplock bags, adding food coloring and shaking. Allow them to dry overnight prior to using.

  • bin or bowl

  • colored paper to coordinate with the colors of noodles you have

This is a really fun game for kids. This would literally keep our youngest daughter busy for a solid hour! You can even add some drops of essential oil to the noodles when you color them to make it an even better experience for your tot.

DIY+sensory+activities+your+toddler+will+love%2C+how+to+make+sensory+games+for+toddlers

3. Racing cars in paint

Here’s what you’ll need

Cut the bottom off your trash bag and a slit in the side, so that the bag opens flat. Tape it to the floor, a solid ground not the carpet. Add some paint and let your kiddos explore what it looks and feels like to run wheeled things through it. Even better because they see what it looks like when they start mixing the different colors together. This is super fun!

DIY sensory activitiy for your toddler, how to make your own sensory fun at home

4. Scented Playdough

Here’s the recipe I used for DIY playdough. I did add food safe scented oils to mine. You can see this one is still a big hit with our older daughters. We bring out the cookie cutters, rolling pins when we play with our DIY playdough. Don’t worry if they mix all the colors together, it’s apart of the fun for them.

DIY sensory activities for your toddler, how to make sensory days at home for your kids

5. Water Play

Here’s what you’ll need

  • bins

  • water

  • measuring cups

  • floating balls

  • large kitchen ladles and anything else that looks like fun to use in the water

This one was HUGE with kids! They love playing in the water. Show them how they can pour a scoop of water from one thing to the other. There are so many senses that are used during water play.

DIY sensory activities for your toddler, how to make sensory bins at home

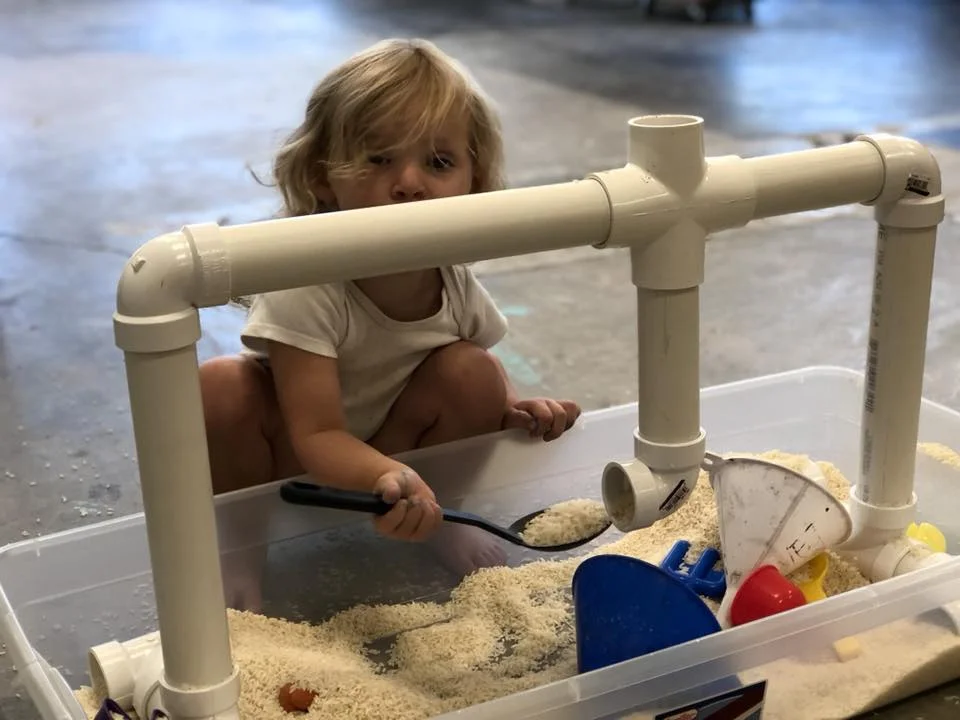
6. Rice Bin

Here’s what you’ll need

  • rice, LOTS of rice

  • pvc, solid pieces, elbows, and T’s

  • funnels

  • scoop spoons

  • large bin

I saved this one for last because is has been the ALL TIME FAVORITE with the girls! I don’t have exact plans for this DIY sensory rice bin but it didn’t take too much thinking to put together. I just cut pieces for sides, two pieces for the top bar, added some elbow’s, t’s and it was ready to go. I did not glue this together as I wanted to be able to take this apart to store away. You could even do something like this for water play!

DIY sensory activities your toddler will love and how you can make them at home

There you have it, my top 6 sensory play activities for toddlers from a mom’s point of view. Most of the materials for these activities you probably have around the house, talk about frugal toddler fun! Yes, they are messy but let them get messy. Let them learn. Let them explore. Let them be toddlers and enjoy this time you have with them.

Check out more kid friendly posts below

How to juggle it all during the summer when you're a WAHM

5 must have tips for WAHMs to survive the summer months

Is it possible to be a mompreneur during the summer months?

Yes, absolutely! Working from home during summertime with kiddos is, let’s just say a little crazy sometimes, but it’s still possible. I haven’t always been a WAHM so I’ve definitely had to adjust how we “summer” these days. And after a few years I think I finally found our happy middle. As long as I keep these 5 tips for how to juggle it all I can keep my sanity too.

Here are 5 tips to help you “summer” better as a work at home mom.

  1. Set a MOM IS WORKING schedule.

This does not have to be the same every single day. In fact, ours changes daily. I create handmade décor & craft kits so my days are really pretty flexible and this type of scheduling works well for our family. If your schedule can’t be as flexible decide what days you need to work and be sure the ENTIRE family is on board. And then implement the schedule all summer long. I personally have chosen to work 3 days a week and scheduled off 2 fun days per week.

2. Let them help

If your kiddos are old enough and your type of business allows for it let them help you. Take the time to show them what it is you do. They will have a much bigger appreciation for your work AND they will love that they got to be involved. Some things our girls help me with in our crafty business is organize invoices, write thank you notes to our customers, and help with packaging.

3. Plan a bucket list

Planning a summer bucket list will give them something to look forward to all summer long. Even better, plan it together. Here is the summer bucket list that our family planned. They are all FREE things to do so I don’t even have the stress about finding room in the budget for a ton of summer activities.

4. Take an hour a day to tidy up the house

Keeping a tidy house will help you keep your mind clear. It’s when the laundry starts to pile up, the toys are scattered everywhere, and the bathroom counter looks like an explosion…don’t judge lol we’ve all been there…that your mind starts focusing on those items instead of what’s on the calendar for the day, whether it’s a fun or a work day. I take 20 minutes each morning to do some light chores and 40 minutes before my husband gets home from work we do the rest of the chores that need to be done that day. This has really helped me from getting distracted and staying on task for the day. We are a chore family so all of our girls, even our 3 year old, get involved in the housework.

5.. Take the time to unwind

For the most part I stop working my crafty job when my husband gets home from work. Although I could craft and create all day everyday it’s so important for my sanity, my marriage, and my job as a mom to take time to just let my brain unwind and breath. Enjoy a drink with your husband on the patio talking about your day. Jump on the trampoline with your kids. Take a walk as a family around the block. No matter what it is, take the time to be present with them every day.

I hope this list of managing your summer as a work at home mom helps. Remember to enjoy those precious babies, work will always be there but they won’t be little forever.

What are the best power tools for crafters?

What are the best power tools for crafters? Which Ryobi power tools should I buy?

Power tools for the crafty girl

I haven’t always been super comfortable with power tools. In fact I didn’t use a miter saw with confidence till I was in my 30’s {which is crazy because I grew up with a grandma who most definitely knew her way around lots of heavy duty power tools that she had for her own crafty business}! My husband would do all the cutting because I was so afraid I was going to have a freak accident and cut my entire body in half…I know it sounds completely ridiculous but it was a very real fear that I had.

The problem was, other than my way over thought fear, was that my husband used to work out of town a lot and obviously couldn’t cut anything while he was gone. Our handmade online business was picking up major steam so, eventually I did get over my fear and I’m so glad I did because I was missing out on so much. Being able to cut anything to any size at any time has been a game changer for me and our family’s business.

Instead of going with the same brand of tools my husband has I chose a more budget friendly, less intimidating brand, RYOBI. I couldn’t be happier with this decision.

Affiliate Disclosure. Some of the links on this website are affiliate links, which means that I may earn a small commission if you click on the link or make a purchase using the link. If you make a purchase you will not be charged anything additional. This is just a way I can help add to our family finances to raise our four daughters. Please know I would never recommend a product or service I do not totally stand behind.

So what power tools does a crafter need?

Here are the basic power tools I started out with

Miter Saw

I really LOVE this saw! If you plan on cutting anything wider than 7” then you absolutely need a 12” SLIDING miter saw. This saw also has a laser on it making it really easy to line up your cuts. My husband’s miter does not have a sliding arm and I can not tell you enough what a pain in the butt it was to have to flip all the boards that were over 7” because the blade wasn’t wide enough to cut through the entire width of the board.

CORDLESS SANDER

Another must have is a sander. I have used both the corder and the cordless and I prefer the cordless by far. Granted to have to keep batteries charged but you also aren’t confined to sanding near a power outlet. There are lots of times when I just need to sand a quick spot where I’ve made a mistake or I just need a quick distressing and it’s just so much easier to not have to mess with a cord.

CORDLESS DRILL

This is your basic drill but it is mighty. I use this almost daily and it has yet to disappoint me.

  • BRAD NAILER

If you plan on using a nail and hammer to attach anything then you might as well save yourself some time and energy and pick up one of these. I use this tool a lot in my business. Actually, more than I thought I would. You can adjust the depth of which the nails shoot in and change up the size of brads you use.

  • REPLACEMENT BATTERIES

    Replacement batteries are a must. I have 3 that I rotate and I really need more. Although they are a little pricey you’ll be glad you have at least 2. My husband had to convince me to get additional batteries because he knew how annoyed I’d be the first time I had to wait for the only battery I had to recharge. He was right lol! So thankful I have more than one battery.

So those are the basics. As you get more comfortable using these power tools you’ll probably want to add even more to your list like a scroll saw or this trim router.

I hope this list helps you to decide which power tools is the best fit for you.

The EASIEST way to remove labels from wine bottles

Easily remove labels from glass wine bottles

Remove labels from wine bottles the super easy way

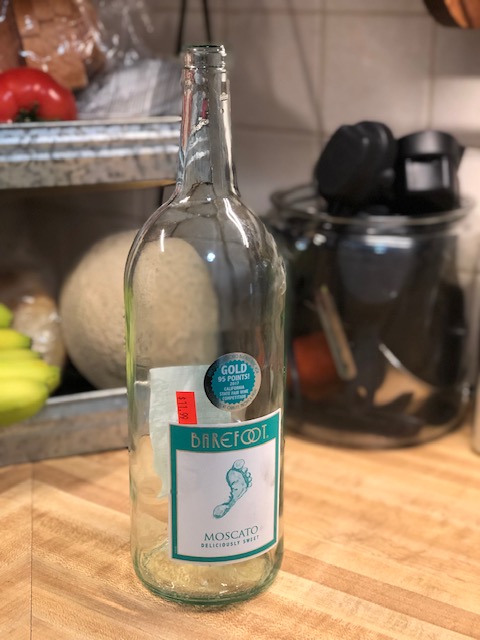
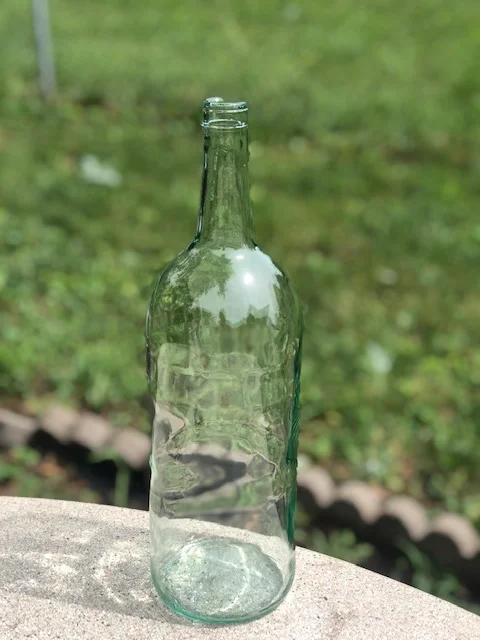
Old wine bottles and glass jars can be used for SO many different craft projects. The possibilities are endless. Take an empty pickle jar and turn it into a fairy lantern or make an adorable set of pumpkins from wine bottles. But you’re probably thinking that removing the labels from the empty glass containers is just too much headache.

But, I’m here to tell you taking the labels off of glass is actually much easier than you think!

How to remove labels from glass bottles

Here’s what you’ll need

the best way to remove labels from wine bottles

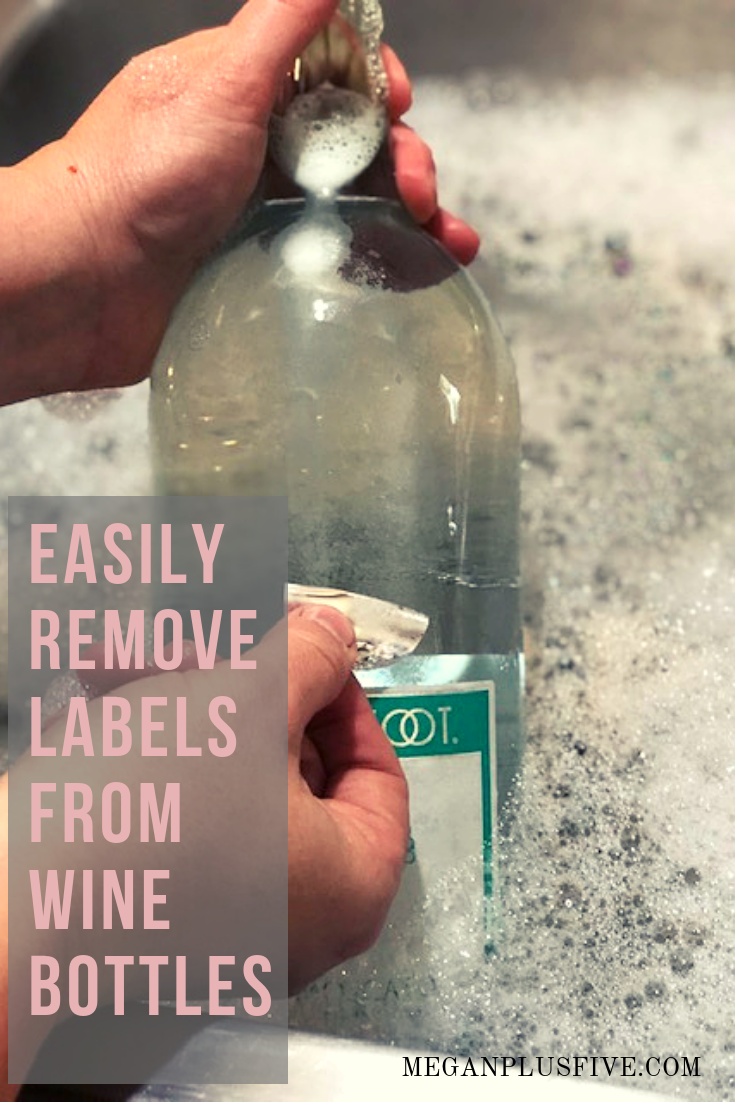
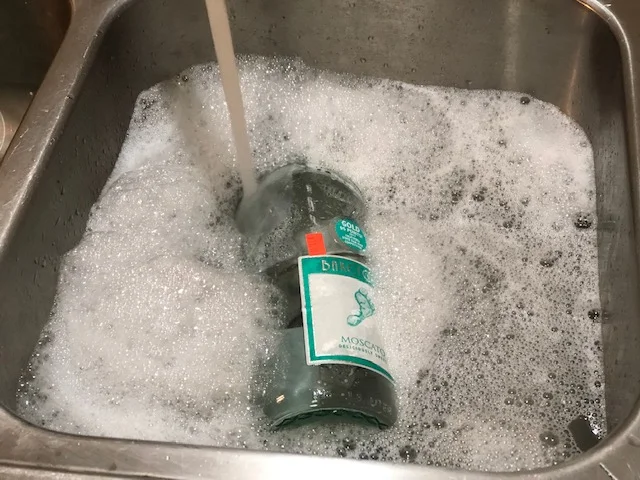
Fill your sink with hot water, as hot as your hands can handle, WEARING KITCHEN GLOVES IS A GREAT IDEA BUT I DIDN’T HAVE ANY ON HAND FOR THIS TUTORIAL. Add a several drops of Dawn dishsoap

Apply Dawn dish soap all over the label then slowly submerge it into the water letting the inside of the bottle fill with water. You want your bottle to sink to the bottom and be completely submerged in the hot soapy water, not floating on the top.

The  best way to remove adhesive labels from glass

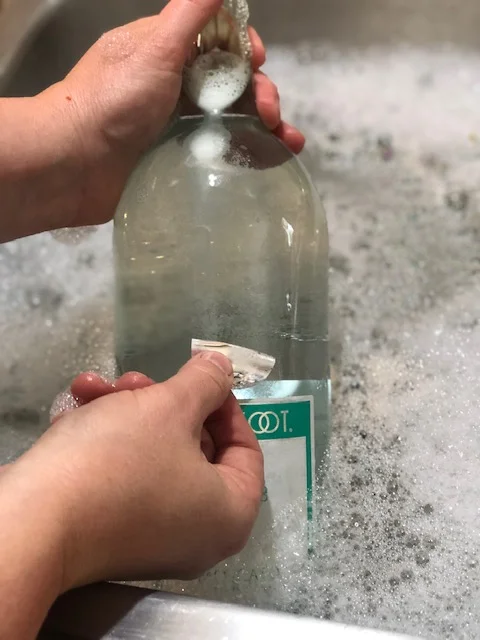
Let it sit for at least 10 minutes. Lift the bottle out of the water and start peeling off the labels. It’s so important to know that not all labels are put on with the same glue and also, glue clings more to different label materials. Like with this bottle the circle label came off with no problems and took all of the glue with it. But the paper labels left some of the glue behind.

The best way to remove glue from glass bottles
How to remove labels from wine bottles

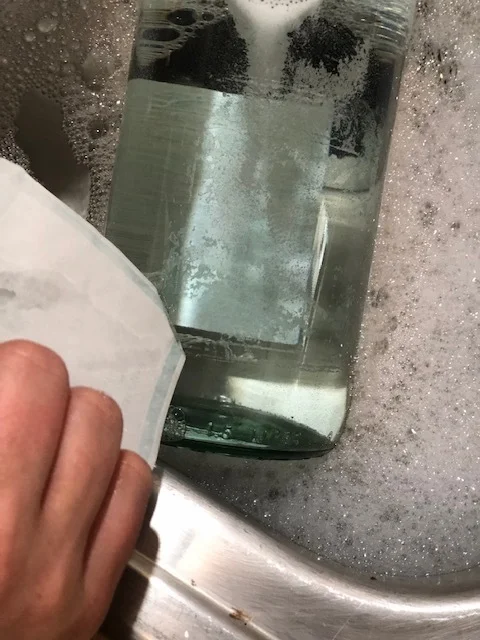
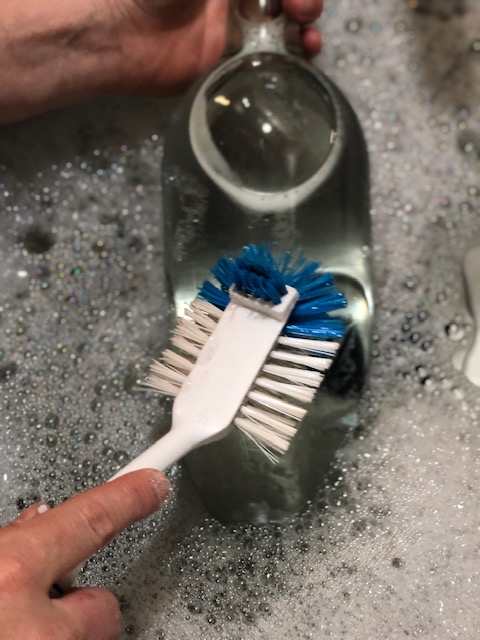
After you remove all of the labels from the glass bottle take your scrub brush and just give it a good scrub. The glue will come right off with the Dawn dish soap.

How to remove labels from glass jars

Once all the adhesive is gone, empty the bottle, rinse and dry it with a dish cloth.

Now you have a squeaky clean jar to reuse!

How to remove labels from jars the easy way

Want instant access to all of my printables, files, checklists and more? Grab the code to my FREE RESOURCE LIBRARY by filling out your info below.

Easy pine cone door hanger DIY

PINE CONE DOOR HANGER CRAFT

How to make an easy pine cone door hanger

There are so many pine cone crafts I want to try but I thought I would try these adorable pine cone flowers first. I was really surprised at how easy they were to make myself and I plan to make SO many more!

If you’re looking for a more kid friendly project be sure to check out mess free pine cone art using a box. This was a favorite with our girls, and me too because it was literally mess free!

Here in the Midwest we have an abundant supply of pine cones so I didn’t have to search too far to find these little guys. I had great luck at my local park but here are some other places you can find pine cones *remember to always ask permission prior to collecting any pine cones

  • family

  • friends

  • local nature park {although ours doesn’t allow this yours might}

  • neighbors

  • shopping malls that have pine trees in the landscaping

After you’ve collected your pine cones you’ll want to make sure they aren’t covered in gross stuff, honestly I just wouldn’t pick up the ones that need super cleaned anyway lol! Leave those for the critters. I personally didn’t clean any of the pine cones we collected because they were in pretty good shape but if your pine cones have visible dirt or anything it’s a good idea to clean them prior to use.

Affiliate Disclosure. Some of the links on this website are affiliate links, which means that I may earn a small commission if you click on the link or make a purchase using the link. If you make a purchase you will not be charged anything additional.

Easy pine cone door hanger DIY

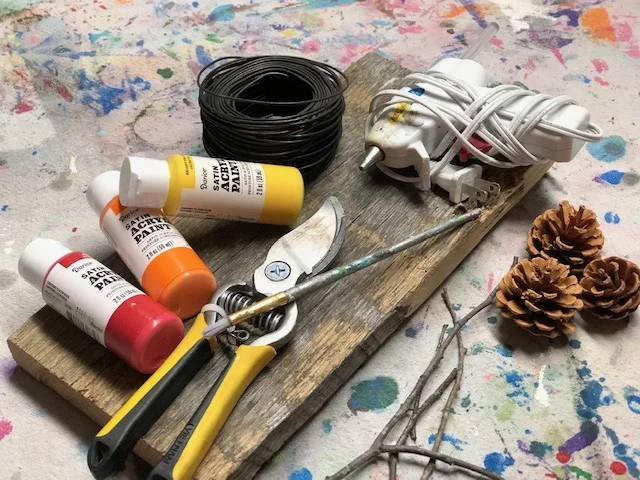
Here’s what you’ll need

Helpful tools

How to make flowers from pine cones

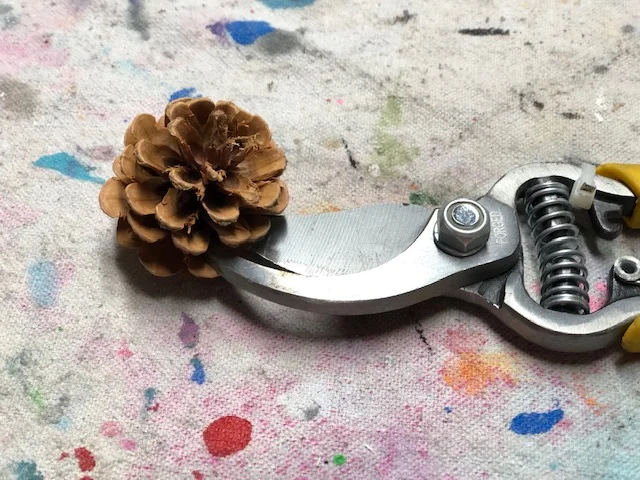
First you need to break apart your pine cones. This is a little harder than it looks and takes a lot of patients. Using your wire cutting slowing wedge them into the pinecone where you want it to break apart then use those muscles to cut. You might have to do this a few times before it comes completely apart.

easy pine cone door hanger

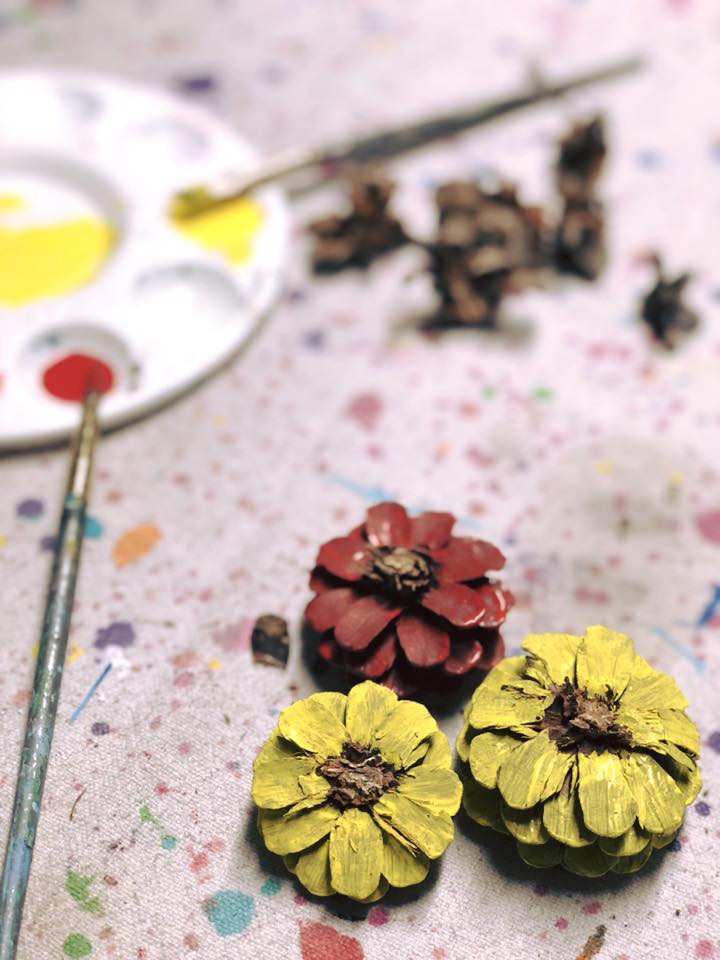
Now paint them. I just used a small paint brush and carefully painted all around the pine cone EXCEPT the middle. Leaving the middles unpainted they will look like adorable little flowers! I chose to paint mine in fall colors, red, yellow, and orange, but you can use whatever colors you’d like. I even painted the bottom as you’ll be able to see that once it’s glued down because it’s curved. I just did one coat on mine but if you don’t like the coverage of one coat on your pine cones you can give yours two coats.

Easy pine cone door hanger DIY

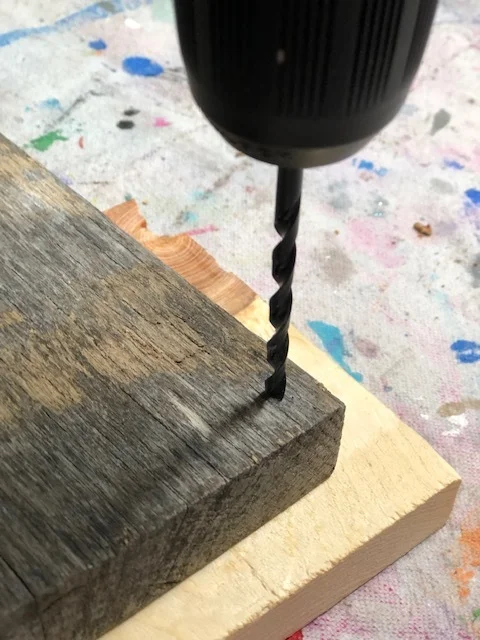
I used an old piece of wood for my base but you can use any wood base you’d like. Because I wanted to hang mine I went ahead and drilled the holes using my Ryobi drill, for the wire to go through before I started gluing the pine cones and sticks down.

easy pine cone door hanger DIY

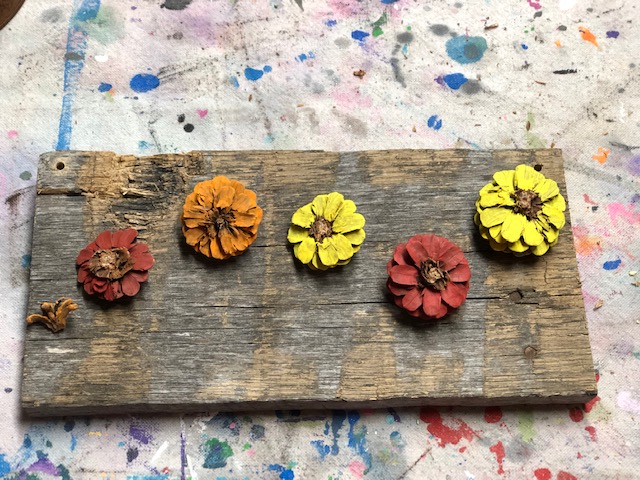
While my glue gun was warming up I laid out the painted pine cone flowers where I wanted them to go. See how gorgeous this old piece of wood is! It even still has the nails in it, see them on the right. Granted it’s a little warped but it’s perfect for a scrappy craft like this.

Easy pine cone door hanger DIY

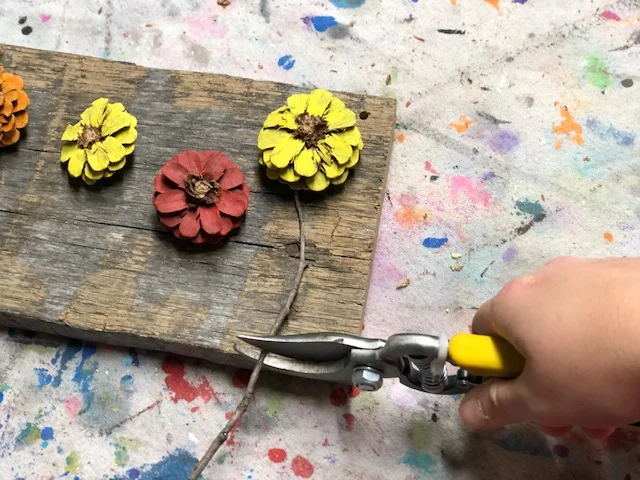
Then I used my wire cutters to cut the sticks down to size for the stems. I just eyeballed this, it doesn’t have to be exact. The sticks I used were pretty thin. You could also use some of the discarded pine cone pieces and make green leaves to glue by the stems. That would have made this project even better!

easy pine cone door handger DIY

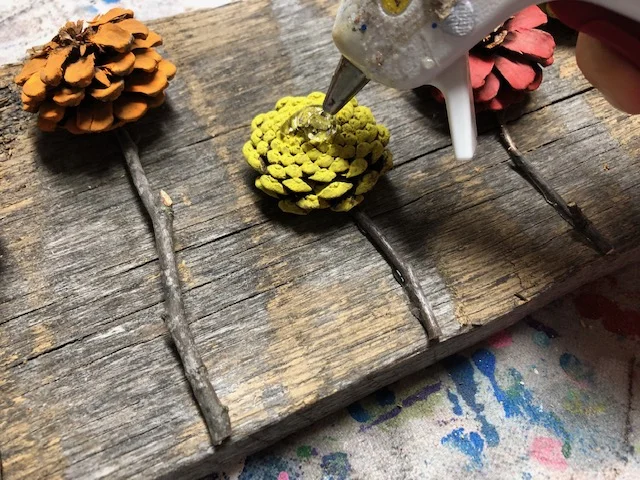
Then start hot gluing down all the pieces. I put a fairly good amount on the pine cones because they were heavier than the sticks and I didn’t want them falling off as soon as I hung the door hanger up. You’ll want this to totally dry before hanging just incase the glue underneath isn’t all the way dry you don’t want it to start slipping and your pine cone fall off.

easy pine cone door hanger

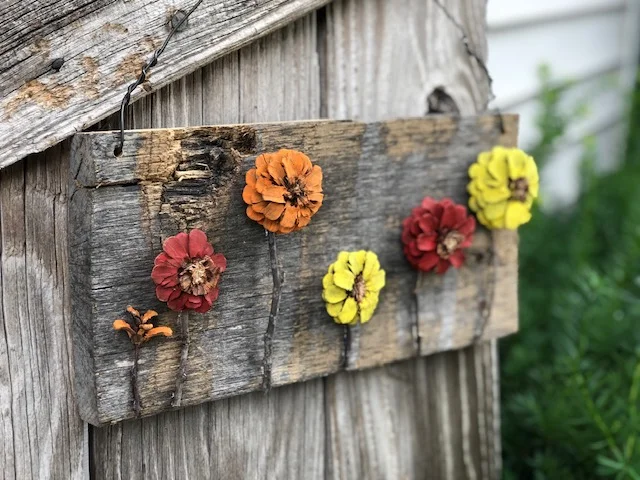
Add your wire and you’re done. One of the easiest craft projects and you probably didn’t have to spend a penny!

Easy pine cone door hanger DIY

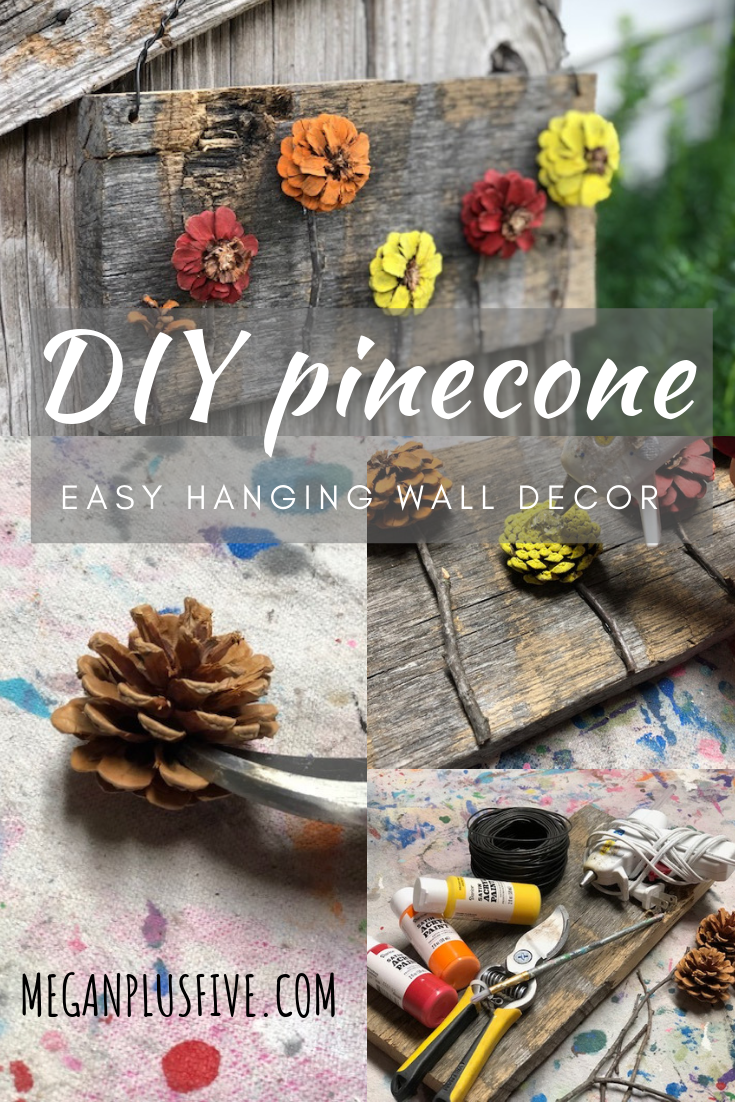
Pin this for later

easy pine cone door hanger, flower pine cones

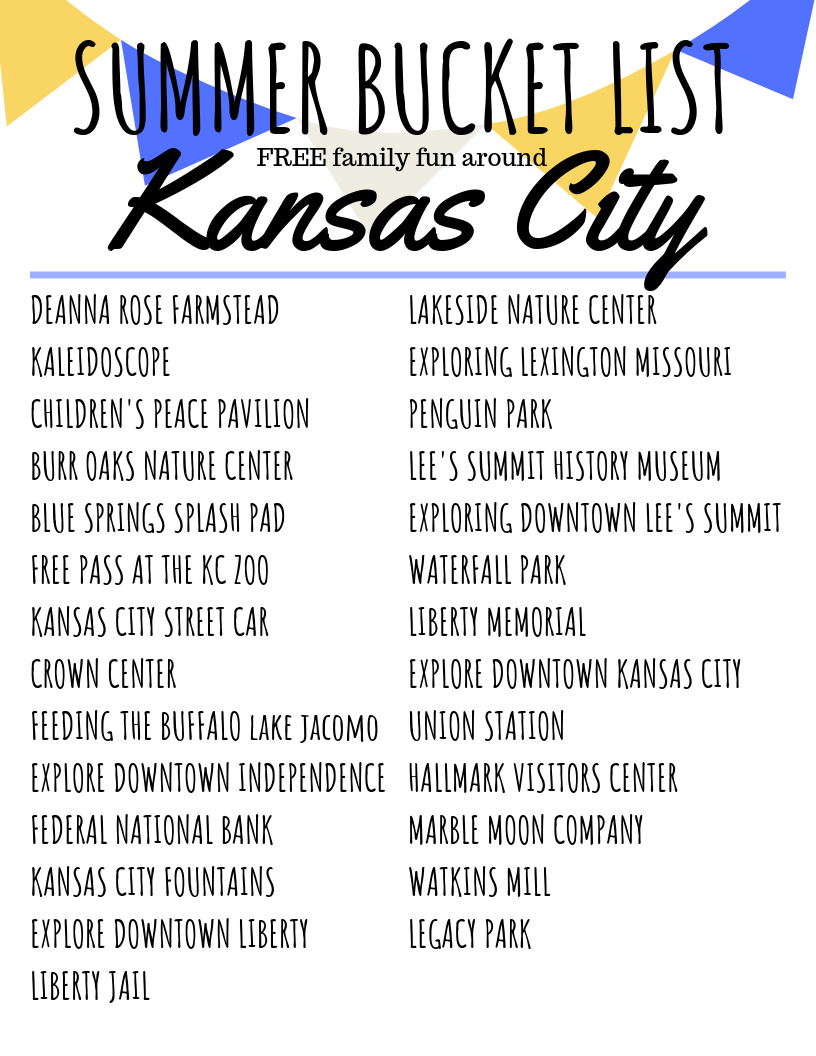
Summer 2019 Bucket List FREE things to do in KC

Summer Bucket List 2019 FREE things to do in Kansas City

27 FREE THINGS TO DO IN AND AROUND KANSAS CITY THIS SUMMER WITH THE KIDS, especially if you’re a SAHM {stay at home mom}

Ahhhh summer! As a mom of 4 I know it can be super difficult to plan a summer on a really tight budget. And when I say a tight budget I mean spending ZERO dollars. I know it sounds like it’s impossible but with a little bit of planning it can be done. But after reading this you won’t be asking yourself or googling “what is there to do in Kansas City with kids”.

Before school let out I was on the hunt for all kinds of amazing adventures to take our girls on during our days while my husband was at work. But not just fun, I was specifically looking for FREE things. It was actually a little more difficult than I thought. I thought I could just google FREE THINGS TO DO IN KANSAS CITY and a magical list would pop up, I’d hit print and away we’d go. Nope, it didn’t happen like that. While there are great lists out there none were exactly what I was looking for for our family. The more I dug into these lists the more I found that a lot of the things listed weren’t open during the weekdays, they weren’t actually free {free with a membership doesn’t count if you have to buy the membership}, the places were way too far for us to drive, or they weren’t in operation anymore.

So my husband and I brain stormed and thanks to google we came up with a pretty decent list of things I could take the girls to during the weekdays. I promised them 2 days of fun each week and so far it is going great! And we thought how fun would it be to just explore the historic downtown areas of some local towns?! So we put that on our list too!

GRAB YOUR FREE PRINTABLE FOR KANSAS CITY SUMMER FUN

Be sure to check out other ways to get in some family time without breaking the bank .

So, here’s our list. 27 totally FREE things to do with kids in and around Kansas City.

DEANNA ROSE FARMSTEAD

Deanna Rose Farmstead is one I hear people talking about a lot. It is FREE when you attend M-TH after 2pm. Otherwise it is $3

KALEIDOSCOPE

Is always FREE. It is a magical place that lets kids create to their heart’s content. I advise you go early in the day, the earlier the better, and just a warning it can get a little crazy with field trips. But their staff does a great job at handling it all.

CHILDREN’S PEACE PAVILION

General public tours are held on Wednesdays & Fridays 9-4. While it is technically FREE they do accept donations.

BURR OAKS NATURE CENTER

It is open T-S 8-5 and has so much to offer families. Kids and grown up of all ages are sure to enjoy this if they are a nature lover. They have numerous trails, and outdoor kid’s discovery area, indoor kid’s discovery area, bird watching, snake feedings and so much more.

THE SPLASH PAD AT BURRUS OLD MILL PARK

This splash pad is new to Blue Springs and is something our girls can’t wait to enjoy. It is totally free unless you would like to rent a shelter house.

FREE PASS AT THE KANSAS CITY ZOO

If you live in JACKSON or CLAY counties the KC zoo MAILS out FREE passes for the residents in those counties to use during certain months. During the summer months they send out a FREE pass for JULY and AUGUST. Be sure to make your trip the best it can be with my tips for a stress free trip to the zoo

KANSAS CITY STREET CAR

The Kansas City street car is a wonderful addition to KC! It’s a FREE 2 mile ride through the heart of downtown. Definitely a must do in KC!

CROWN CENTER

While we don’t visit Crown Center for it’s shopping, it does offer some great things for families to do for free. Be sure you get your FREE 3 hour parking pass by getting a merchant to validate it, no purchase necessary.

NATIVE HOOVED ANIMAL ENCLOSURE {FEEDING THE BUFFALO}

This one is tucked away so be sure you use GPS to help get you there. Also, bring fresh veggies like carrots as there isn’t a place to buy feed once you’re there.

EXPLORE DOWNTOWN INDEPENDENCE

The historic Independence Square has SO much history to explore. This is truly one of our favorite historic places. Aside from Harry S Truman’s home there are so many things to see in such a small area. AND there are lots of unique photo ops too! Take your time and really explore this area.

FEDERAL NATIONAL BANK

This museum is FREE 9:30-4 M-F. Be sure to bring your photo ID. It is located right by Crown Center so make a day of it and visit all the things that area has to offer.

KANSAS CITY FOUNTAINS

Spend the day driving around looking at all the wonderful fountains that Kansas City has to offer. With over 200 fountains this is sure to keep you busy all day. Be sure to get this Kansas City Fountain Guide to assist you on your adventure.

EXPLORE DOWNTOWN LIBERTY

Downtown Liberty is truly a beautiful place. With so much history you’re sure to learn something new.

LIBERTY JAIL

The Liberty Jail is ran by the LDS Church. I’m going to be honest I had a hard time finding info on this one but we think it will be interesting to see.

LAKESIDE NATURE CENTER

Open to the public TUES-SAT 9-4. It is one of Missouri’s largest wildlife rehabilitation facilities and provides educational and recreational opportunities that focus on the environment.

EXPLORING LEXINGTON MISSOURI

Take a day and explore this beautiful town. There is a ton of history and beautiful houses galore.

PENGUIN PARK

Penguin Park is located in Kansas City and is one unlike any others around.

LEE'S SUMMIT HISTORY MUSEUM

It is open Thursdays & Fridays from 10-2 and Saturdays 10-4 and admission is totally FREE. Learn about the early days of Lee’s Summit.

EXPLORING DOWNTOWN LEE'S SUMMIT

While you’re at the Lee’s Summit History Museum explore the rest of what downtown Lee’s Summit has to offer.

WATERFALL PARK

Waterfall Park is located in Independence right off of Bass Pro. It features a pond, playground, small rock climbing wall, picnic area, and a walking trail. This park is very shaded which makes it nice on super hot and sunny days.

LIBERTY MEMORIAL

The Liberty Memorial is a MUST to take your kiddos to. While there is a museum you can pay to see, just visiting the FREE outdoor attraction is pretty amazing.

EXPLORE DOWNTOWN KANSAS CITY

See the fun sites of big city life in downtown Kansas City. Park the car and take a walk around.

UNION STATION

Such a wonderful place to take your kids! While Science City and other attractions aren’t free walking around and seeing all the amazing beauty and it’s history is enough reason to take a trip there.

HALLMARK VISITORS CENTER

The Hallmark Visitors Center is located right next to Kaleidoscope. It is open 9:30-4 M-Sat and is completely FREE.

MARBLE MOON COMPANY

Visit the Marble Moon Company M-Sat 10-5. Catch a marble making demo on Tuesdays, Fridays & Saturdays from 10:30-3.

WATKINS MILL

Take a trip back to the 1800’s and visit Watkins Mill. While the guided tours do cost money just driving through and looking around is FREE.

LEGACY PARK

Legacy Park is located in Lee’s Summit on 692 acres. The kiddos will love their destination playground.


I hope you enjoy this list our family put together. Everything I shared here is completely FREE unless you opt for the extras, those do cost money and I’ve listed them where they are applicable. Fill up the gas tank, pack a lunch and get ready explore the Greater Kansas City area. Let me know what else we should add to our list:)!

27 totally FREE things to do with your kids in Kansas City

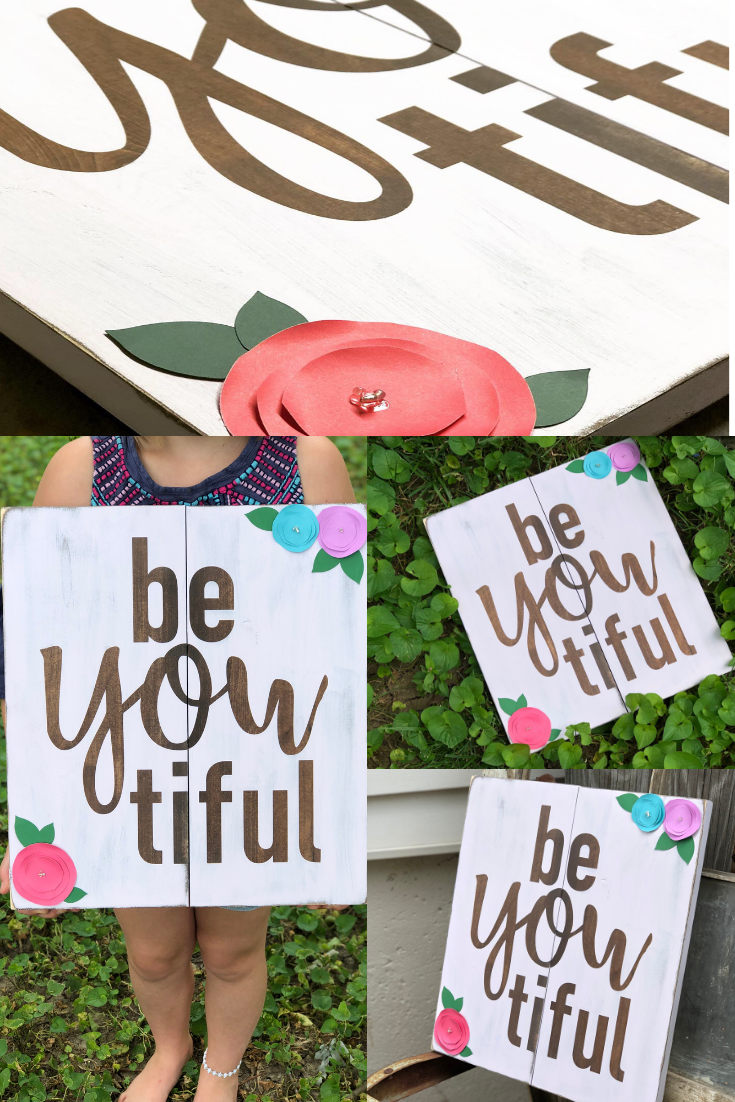
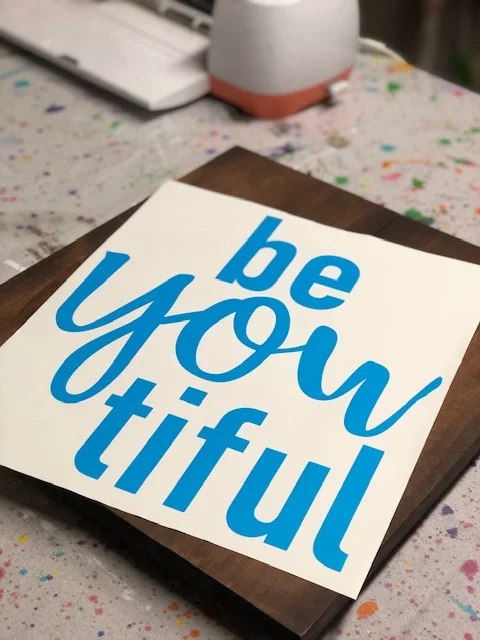
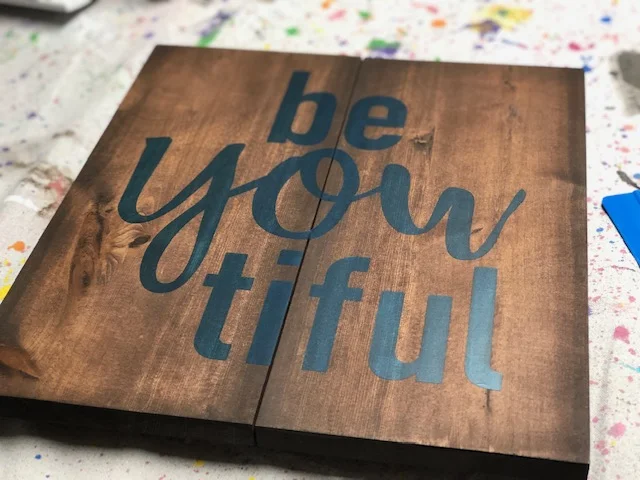
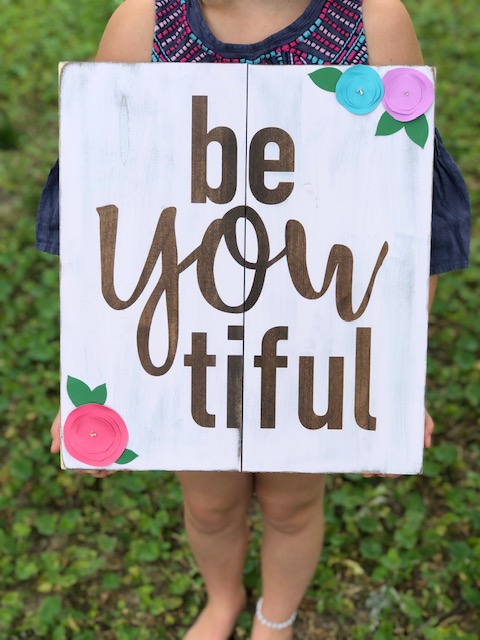
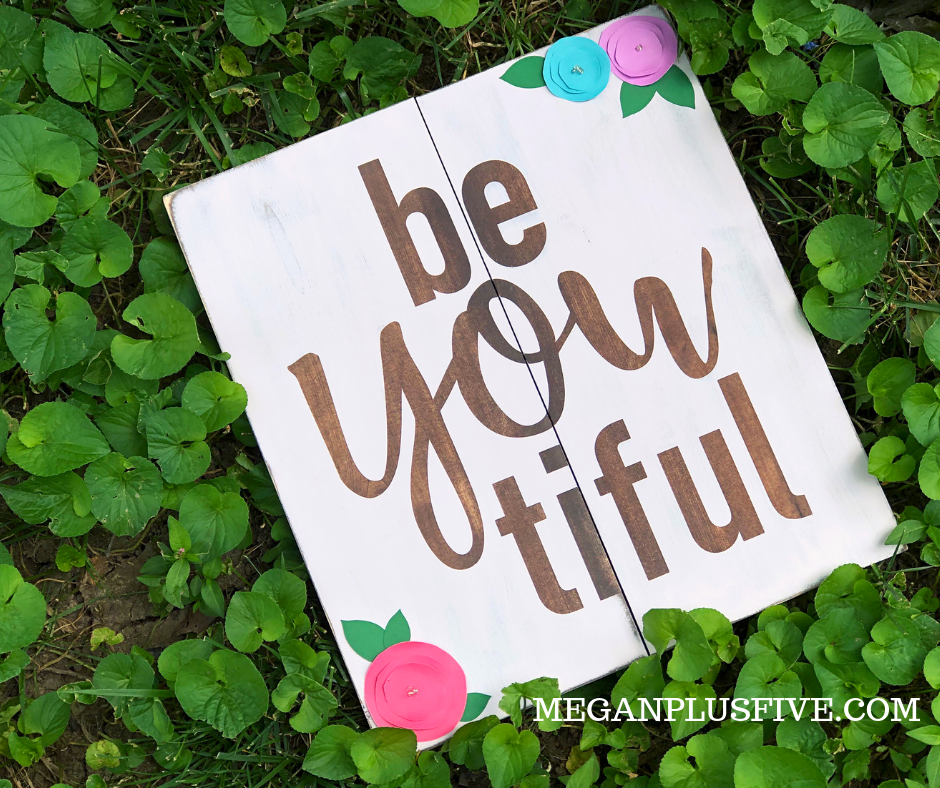
DIY stenciled beYOUtiful pallet style wood sign

DIY beYOUtiful pallet style wood sign

HOW TO REVERSE STENCIL A WOOD SIGN

Being a mom of four little girls isn’t always easy. It’s definitely not constant tea parties and princess power all day every day like some think. It’s a ball of emotions, an unspoken comparison of one another, living in a world that constantly judges them for not being identical. People think that because you have a sister you should be so much alike. Your looks, your personality, the way you learn. That couldn’t be farther from the truth. But honestly our girls have shed some tears over this and it breaks my heart. I try to remind them daily that they are unique and one of a kind amazing humans. One way I try to promote self positivity with our girls is through our home décor.

I had this quote “ be YOU tiful” on our wall right by our front door for years. It was just a quick decal I made up using removable vinyl and after I put it up I was instantly under impressed by it. But I left it up because I wanted our girls to see that message every day when they walked out the door. To remind them that they are them, there is no one else in the world that could ever take their place. That God put them here to be them. Three years passed and I decided it needed to come down and I was going to make a much prettier version, a happier version, one that they will look at and rays of beauty will flow from it.

Click this link to buy your own handmade beYOUtiful sign on my Etsy shop

beYOUtiful wood sign, how to make your own painted pallet sign

Affiliate Disclosure. Some of the links on this website are affiliate links, which means that I may earn a small commission if you click on the link or make a purchase using the link. If you make a purchase you will not be charged anything additional.

I had everything I needed on hand to make this but I’ve included the links where you can get some of these supplies. Yes, those are affiliate links but not to worry, you will not be charged anything extra if you make a purchase through them. They are just a way for this stay at home momma to help with the daily bills of raising our four little girls :)!

Here’s what you’ll need


First you want to come up with your design. I use Cricut Design Space for this. My computer wasn’t cooperating so I opened the saved file from the app on my phone and blue toothed my machine and phone together so I could cut it wirelessly {technology has come a long way since growing up in the 80’s and 90’s!}.

Fun note, I actually made this design for our third daughter’s talent show outfit. She was singing Scars to Your Beautiful by Alessia Cara which is an amazing song that tells girls to love all their flaws and imperfections, those are apart of their own beautiful.

beYOUtiful+cricut+design+space

If you’re thinking about getting a Cricut I recommend the Explore, click this link to read more about CRICUT EXPLORE AIR 2 {the difference between the explore and the air is that the explore does not have bluetooth built in so you have to buy this bluetooth cricut adapter, but the air’s have bluetooth already built in so you don’t have to purchase anything extra for it.} but any cutting machine you have that you’re comfortable using will work.

DIY beYOUtiful pallet style wood sign

Follow this link to my YouTube channel for tips on how to stain a wood sign

Apply your stencil to a dry prestained board.

DIY beYOUtiful pallet style wood sign

Then paint your board with whatever color you’d like. I wanted a big contrast between the stained wood and the paint color so that the stain would really pop. So I used LILAC colored paint. It’s not too pink/purple but it’s not white, our walls are white so I didn’t want to hang a white sign on the white wall. This color is perfectly shabby chic! See my YouTube video for a full tutorial on how to do this, how to stencil a stained wood sign.

After I stenciled my board and it was totally dry I added these adorable hand cut paper flowers. These little guys are so super easy to make! See my how to make hand cut paper flower tutorial for a step by step guide.

How to make paper flowers to add to a rustic sign
DIY beYOUtiful pallet style wood sign with paper flowers
How to make painted wood signs, all the tips and tricks the pro's won't tell you

If you’ve been wanting to learn even more pro tips on how to make and paint wood signs be sure to get on my waiting list for my Learn How to Paint Wood Signs, all the tips the pro’s won’t tell you.


How to make paper flowers without a cutting machine

How to make paper flowers without a cutting machine

I absolutely LOVE my Cricut cutting machine and use it almost daily but there are certain projects when it’s much easier to hand cut things myself. Being a buys momma of 4 I don’t always have time to wait on technology lol. Because we all know when we are rushed for getting a project done something is going to go wrong, like the app needing updated or the computer taking forever to start…that kind of stuff always happens, never fails.

I appreciate the simplicity of making hand cut flowers. There’s no need for technology. Each flower turns out totally and 100% unique. And it’s just plain fun! These small flowers are super simple and make a great starting point of learning how to make flowers by hand. If you can cut a circle and hold a paint brush then you don’t have any worries!

Affiliate Disclosure. Some of the links on this website are affiliate links, which means that I may earn a small commission if you click on the link or make a purchase using the link. If you make a purchase you will not be charged anything additional.

I had everything I needed on hand to make this but I’ve included the links where you can get some of these supplies. Yes, those are affiliate links but not to worry, you will not be charged anything extra if you make a purchase through them. They are just a way for this stay at home momma to help with the daily bills of raising our four little girls :)!

How to make hand cut paper flowers, no cutting machine required

How to make paper flowers without a cutting machine

Here’s what you’ll need

  • scissors

  • cardstock

  • a small paint brush, pencil, or pen {you won’t be painting or writing with this}

  • small beads

  • LOW TEMP GLUE GUN

Start by cutting out three circles that are just a tiny bit smaller as the last one. I always cut the biggest one first then work my way to the smallest. I eyeball how big of a diameter I need for the space I’m filling. They will almost look like you are cutting out circles to build a paper snowman.

I chose cardstock to make my flowers out of but you can truly use any kind of paper you’d like. If you choose cardstock there are a few things you should know. One, it’s fancy a fancy name for thick paper {or at least that’s what I think of it}. Two, it comes in a wide variety of colors, thickness, prints, and textures. Three, it can be a little pricey but if you catch it on sale at Michael’s or any other craft store you can stock up at a really low price. This is what I do. Anytime I find cardstock on sale I grab what I can afford because I make so many different projects using cardstock. Like this DIY LIGHT UP FAIRY JAR , or this DIY VALENTINE’S DAY PALLET SIGN, or this adorable KIDS CATERPILLAR CRAFT. I used cardstock I had on hand to create all of those fun projects. And since I’m an impulse maker lol, I hardly ever plan my projects out ahead of time so having things on hand is just apart of my create process;)!

How to make paper flowers without a cutting machine

Taking your paintbrush, pen, or pencil and roll just the edges of each circle. I used a paint brush but a pen or pencil will work just fine too. don’t roll them too much as they’ll end up too curled under. If you don’t have any of these on hand you can always just use your finger to curl up the edges of your paper pedals.

How to make paper flowers without a cutting machine

This is what your circles should look like once you’ve rolled the edges. You can see they are starting to look like paper flowers already! I love you uneven the circles are, it makes them so unique!

How to make paper flowers without a cutting machine

Then glue the circles on top of one another, starting with the biggest circle as the base, the medium circle in the middle and the smallest circle on top. Just a small dab of hot glue from a low temp glue gun will work great. Add another dab of glue to top of the smallest circle and add some beads.

How to make paper flowers without a cutting machine

And your hand cut paper flowers are done. So cute right?!!! I added a few green leaves that I had already cut form a prior project using my Cricut cutting machine.

How to make paper flowers without a cutting machine.

You can add these hand cut flowers to almost anything. I used them for this beYOUtiful sign that you can purchase in my Etsy shop.

How to make paper flowers without a cutting machine

Be sure to leave your pictures below of the gorgeous hand cut paper flowers you make using this tutorial.