Decoupage a wood hanger with a napkin

DIY decoupage, learn how to give an old hanger a fresh new look with a pretty napkin

Decoupaging is much easier than most people think. And it can be done on almost any surface, as long as the surface stays dry. My grandma taught me this technique when I was just a small kid at her kitchen table and it’s one I’ll never forget. And according to good ol’ Google decoupage has been around since the 17th century and a household name by the 20th century. It’s so cool to find out little tid bits of history like this. While the materials they used were a little different than what I’m going to show you to use today it’s still pretty cool that we are using the same crafting techniques they used long, long ago!

Affiliate Disclosure. Some of the links on this website are affiliate links, which means that I may earn a small commission if you click on the link or make a purchase using the link. If you make a purchase you will not be charged anything additional.

Here’s what you’ll need

I did a Facebook live showing all my crafty people how to decoupage using a napkin and I uploaded the video to YouTube. Once you get used to working with delicate paper you will be able to decoupage anything! As soon as you start looking you’ll find there are so many beautiful napkin prints out there too. I like buying mine from the Dollar Tree {read more about the top 15 craft supplies I always buy from the Dollar Tree}.

First you want to be sure your wood hanger is smooth and clean. Your napkin won’t adhere to it if it’s dusty.

You need to separate your napkin. If it’s 2 ply you’ll have two pieces, if it’s 3 ply you’ll have 3 pieces. You ONLY need the piece that has the print on it.

Cut your pieces and work in small sections. Brush on a thin layer of Mod Podge, lay down your napkin piece, then smooth out with your fingers and your vinyl squeegee. Be sure to be super gentle. The last thing you want to do is tear your napkin or cause more wrinkles. Do this till your hanger is completely covered. Be sure while you’re working you aren’t leaving any air bubbles.

Then once your hanger is completely covered with the napkin you’ll need to brush on a thin layer of Mod Podge as a top coat. Don’t go back and forth as you will risk tearing the napkin. Just a light thin layer will do fine.

Here’s the video I did. Remember this was a Facebook live.

Let me know what you think in the comments below.

Top 15 craft supplies you should be buying from the Dollar Tree

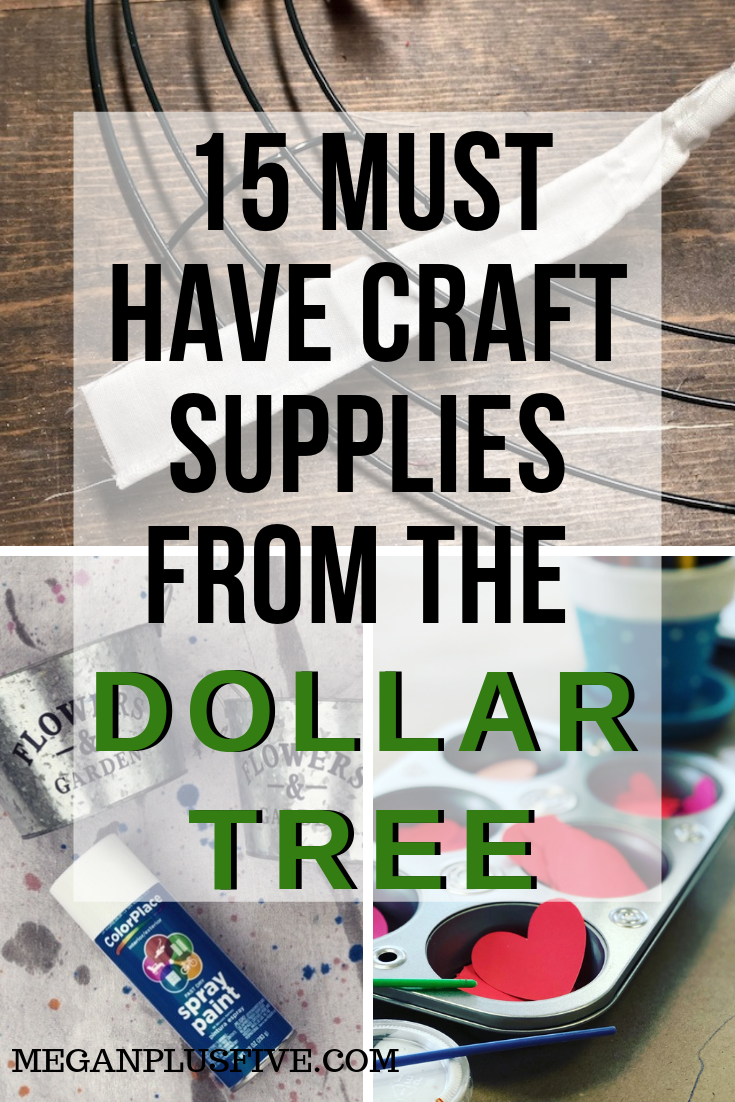
15 MUST HAVE craft supplies from the Dollar Tree

The DOLLAR TREE!! I love this place and I actually buy lots of supplies here, especially ones for the kiddos to use. But don’t be fooled by that $1 price tag, not all supplies are a smart buy there.

Here are my top craft supplies that I personally most of the time buy from the Dollar Tree.

CRAFT ROCKS Usually they have a wide variety of rocks. You can find them in the ribbon section. I made some adorable UNICORN PARTY CENTERPIECES using these inside the buckets.

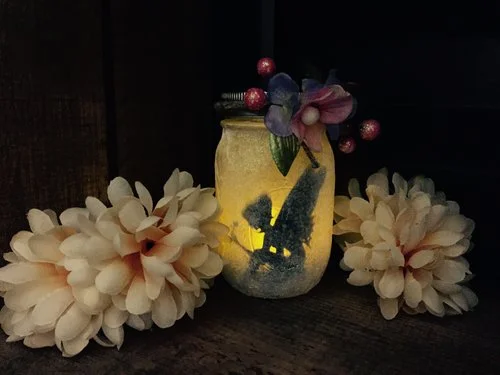
FAUX FLOWERS They alternate these out with the seasons and every year they get prettier! Our girls especially love the ones that have butterflies in them. Check out this DIY LIGHT UP FAIRY JAR and we used flowers picked up from the Dollar Tree on the outside. Super cute!

TISSUE PAPER You can use this for SOOOOOO many different crafts. This is what we use on the outside of those fairy jars.

WOOD SHAPE CUT OUTS this is a must buy here. I have yet to find any place that compares in price to the amount you get per package. Granted, these are thin but for kids crafts these are perfect. These little guys will keep our girls busy for a long time without the ouch effect on the wallet. They can add these to all kinds of arts and crafts projects.

GLUE Our house goes through a ton of glue. We let our girls experiment and explore their creative side often and they use SO much glue during their process lol!

MUFFIN TINS ok, I know this isn't a typical craft supply but read this post on the craft hack you need for your kids and you’ll understand.

SEASONAL BLANKS Every season the Dollar Tree comes out with super trendy, and actually cute, craft blanks. These are inexpensive and you don’t have to pay for shipping. Woohoo!

POM POMS they are all the rage right now and our girls go through them like crazy. Their colors are limited but they are super cheap.

SEASHELLS you can find these right next to the rocks and ribbon. You’ll be surprised what you can use these for. And you don’t feel the pain when your kiddo paints it up unlike the ones from your last beach vacation.

CONDIMENT BOTTLES I use these to hold my acrylic paint. They are half the price of buying them from Walmart and I’m sure WAY cheaper than buying them online. They have held up pretty well too. We originally bought these when we had our brick and mortar craft store, just to see if I’d even like using them for paint, and other than the caps being picked off by little hands they are in perfect working order.

Top 15 craft supplies you should be buying from the Dollar Tree

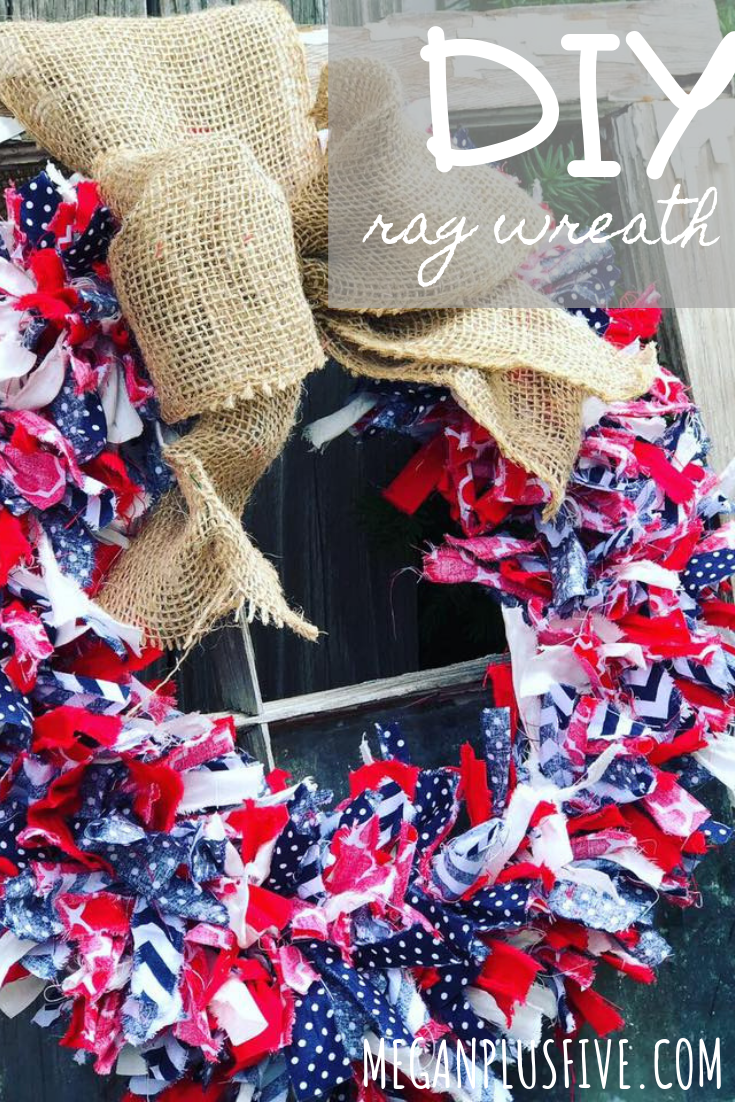
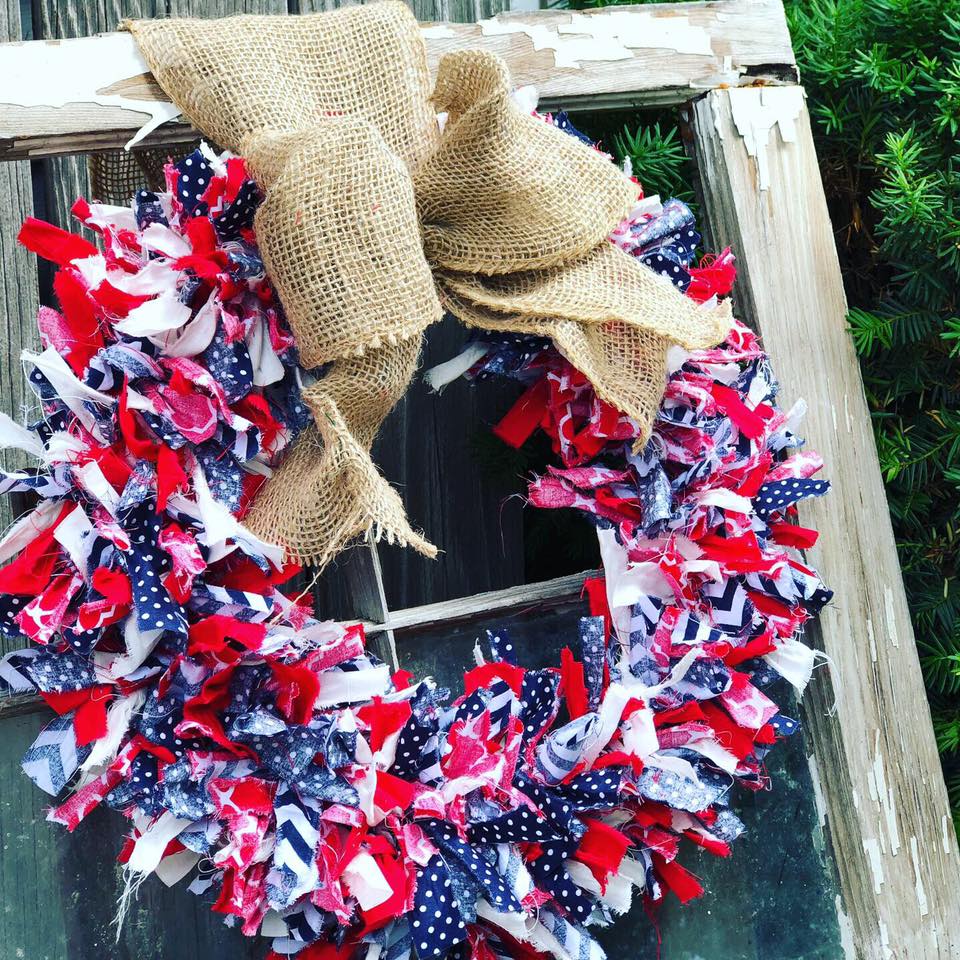
WIRE WREATH FORM I have yet to find these cheaper any where else. These little guys can be used to make all kinds of different wreaths. Here is a 4th of July rag tie wreath I made using one of these wire forms.

WASHI TAPE the Dollar Tree has all kinds of different prints of washi tape. Our girls love love love to use this to decorate different things. One of their favorite things to use this for is decorating the front covers of notebooks.

STICKERS if you have a toddler who is sticker obsessed the Dollar Tree is the only place to buy these lol. And a side note if your kiddo gets these stuck to your floor a steam mop takes them up effortlessly {just a tip from one mom to another ;)!}

CRAFT STICK aka popsicle sticks. They have a fun colorful assortment too! You can use these for anything from applying AMOUR ETCH to etch glass to letting your kids just go crazy and make whatever their little hearts desire out of them. We always keep these guys on hand.

POSTER BOARD There are so many different uses for this outside of the school project. You can even use this to make a DIY light box for taking pictures in your own crafty business.

Now get to your nearest Dollar Tree and explore all it has to offer. Remember to go beyond the craft aisles as there are so many different things you can use that aren’t considered “craft supplies”.

Let me know below what your favorite Dollar Tree crafty supplies are ;)!

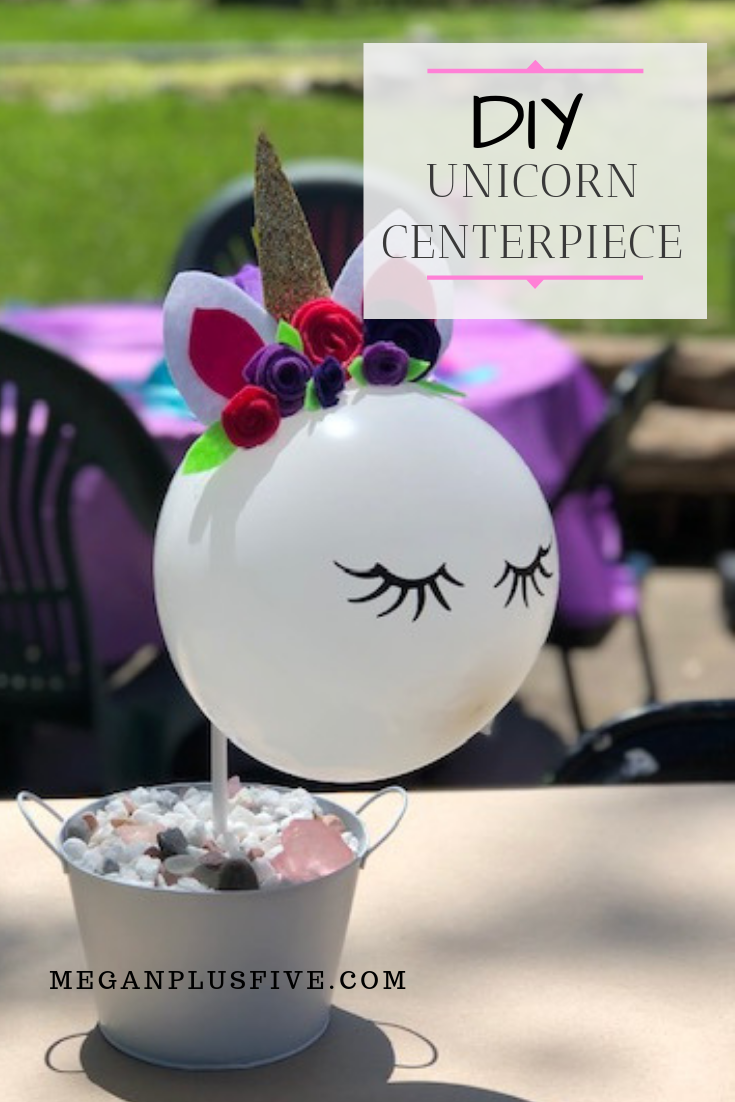
DIY Unicorn birthday party centerpiece

DIY Unicorn Centerpiece, how to make your own easy to follow tutorial

Our third daughter had her 8th birthday party recently and had her big heart set on a unicorn theme. I had $50 to make it happen {decorations, cake, games, and invites} and I wasn’t about to disappoint her so I set out on Pinterest to find all the things I could for a DIY unicorn party. Here’s the pin that inspired this centerpiece. Super adorable right?! But I wanted hers to look a little different, a little more whimsical and I wanted to spend the least amount possible. Which meant I needed to shop my craft stash before getting started.

Here’s what you’ll need to create you own at unicorn centerpiece

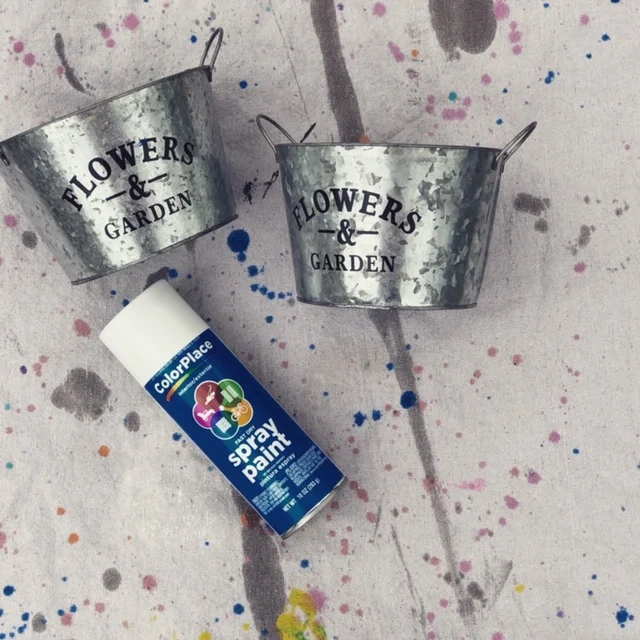
First spay paint your buckets and dowel rods with white spray paint. Let dry completely.

DIY unicorn birthday party centerpiece

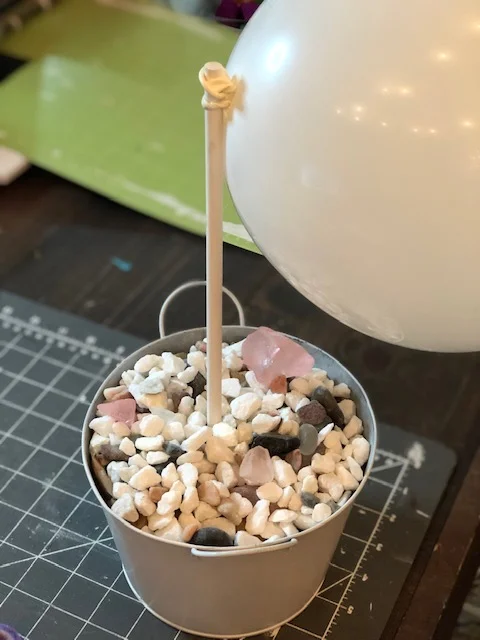
Fill the bottom third of your bucket with crumpled up paper, leaving space in the very center to place the dowel rod. Place the dowel rod inside and fill the rest in with your rocks. I just used what we had on hand that was left over from previous crafts.

Next, blow your balloon up but not all the way. You want to try to get as round of a shape for it as possible. Then tie it around your dowel rod.

DIY unicorn birthday party centerpiece

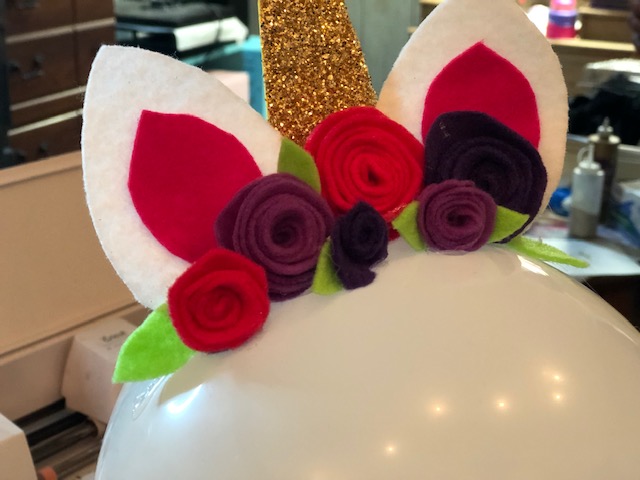
I free hand cut the ears, flowers, and horn. Not pictured, I cut the horn out of cardstock, glued glitter to the entire thing, and let it dry prior to this next step. Using your LOW TEMP glue gun glue them to your balloon. Place the glue on the felt first, wait a couple seconds, then place on your balloon. It’s important you use a low temp glue gun as a hot temp will likely pop your balloon.

DIY unicorn birthday party centerpiece

If you’d rather use paper flowers this DIY PAPER FLOWER TUTORIAL might help you. They aren’t the exact same style of flower as the ones pictured in this tutorial but they are super adorable and you just might like them better.

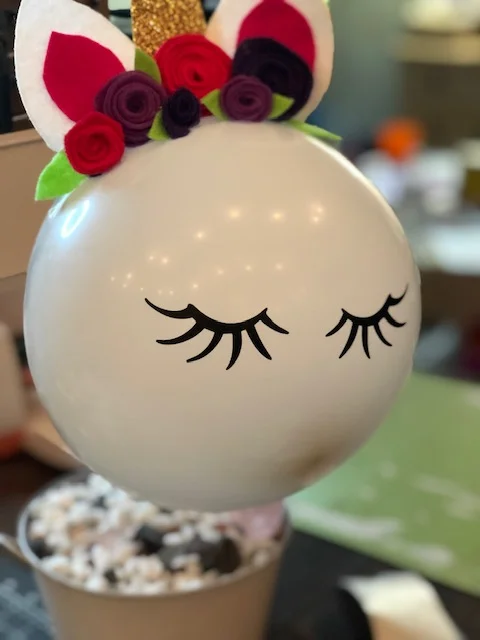
I cut out the vinyl eyes using my Cricut but you can free hand these with a sharpie.

DIY unicorn birthday party centerpiece

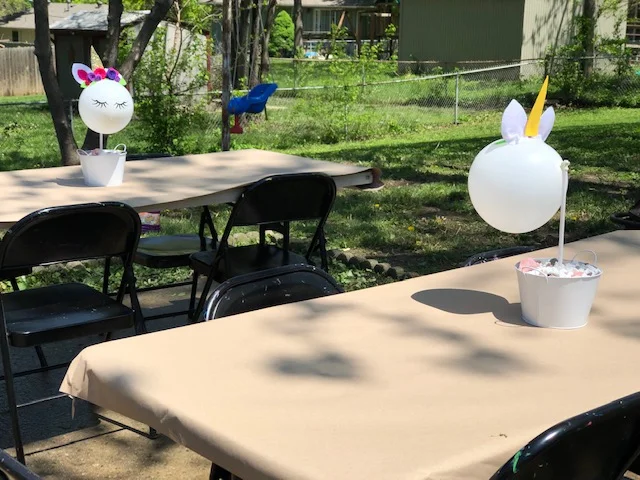
And that’s it! Our birthday girl was completely happy and loved all her unicorn decorations but these were her favorite! She so wished she could have kept them forever but sadly they deflated {and honestly I’m totally ok with that because the birthday girl would never toss anything if we didn’t make her}.

DIY Unicorn birthday party centerpiece

I hope this inspires you to make your own perfect unicorn decorations.

Check out the UNICORN TASSLE GARLAND I made to go along with her theme.


10 fun crafts for preteens...from a preteen

10 fun crafts for preteens, by a preteen

FUN CRAFTS YOUR PRETEEN & TEENS WILL LOVE

I don’t know about you but our three older girls love Pinterest. They always ask to pin on there and honestly I don’t mind because it gives me a little insight into what they are into. What sparks their interest. And I love to see the varied levels of interest from each daughter. Some days they are all about pinning slime recipes and others they are decorating their dream house lol! But I especially love it because it helps me to see what craft projects they might be into so I can buy supplies when I see it go on sale.

So I thought I’d share on here 10 crafty projects that PRETEENS are into, from a preteen’s point of view. These are all projects they have either done and LOVED or projects they’ve seen on Pinterest that they have pinned…more than once {this happens a lot with these three}.

Affiliate Disclosure. Some of the links on this website are affiliate links, which means that I may earn a small commission if you click on the link or make a purchase using the link. If you make a purchase you will not be charged anything additional.

I think it’s important that I also share I have not collaborated in any way with the other crafty sites I’m sharing. These are all pins our preteens found on Pinterest and I want to give credit where credit is due. So please check them out. Just click on either the highlighted link or the pictures themselves and it will link back to their websites.

If your preteen / teen is into DIY lotions, bath bombs, lotions, lip balms, basically DIY SPA products for teens —-> click here.

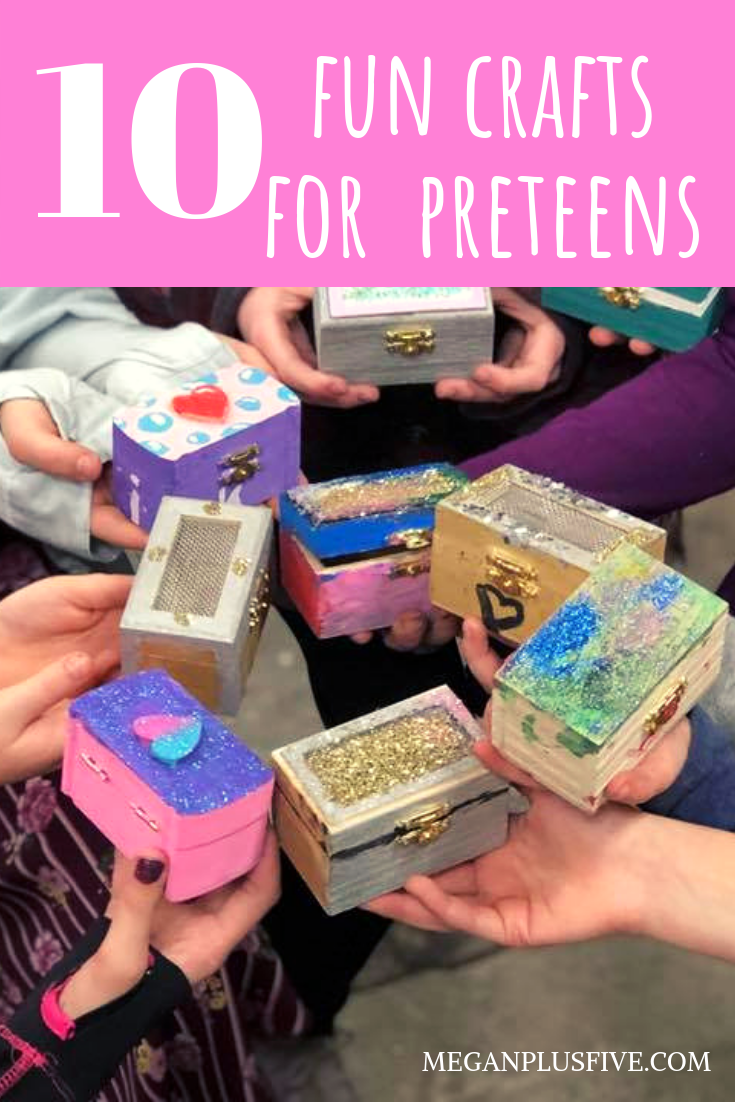
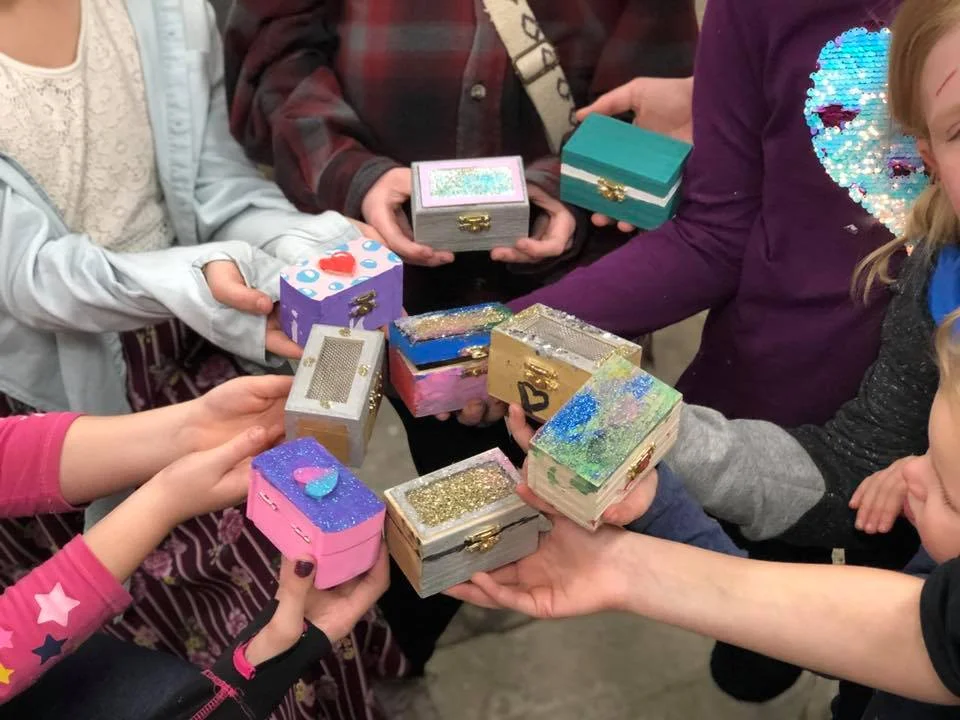
1.Treasure Boxes

First up are these wonderful little treasure chest boxes. We made these for our oldest daughter’s birthday party. She had a scavenger hunt themed party so we thought why not have the treasure be mini treasure boxes! The kids loved them, even the boys which totally surprised me. We don’t have boys so it’s always super difficult for me to plan things that are gender neutral like that.

10 fun crafts for preteens, from a preteen

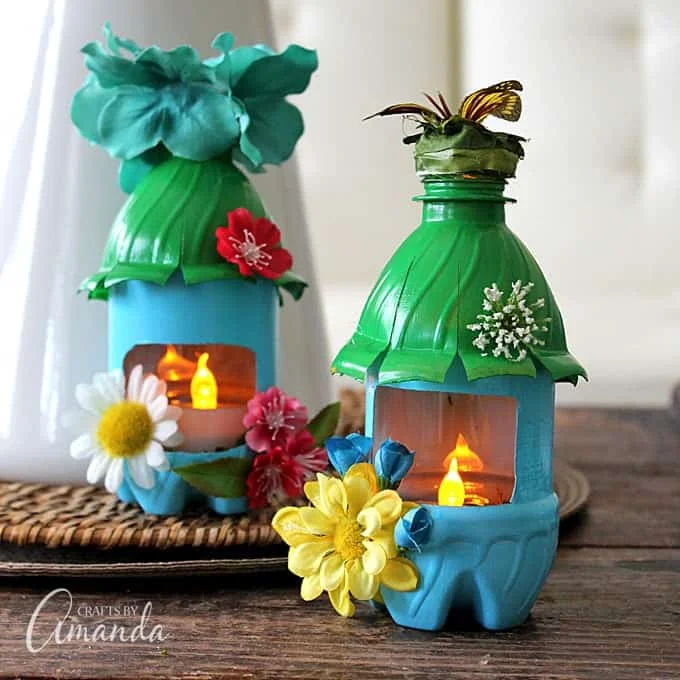
2. Fairy Houses

I don’t care how old you are fairies are fun! And these recycled fairy houses are sooooo adorable! Be sure to stop by Crafts By Amanda

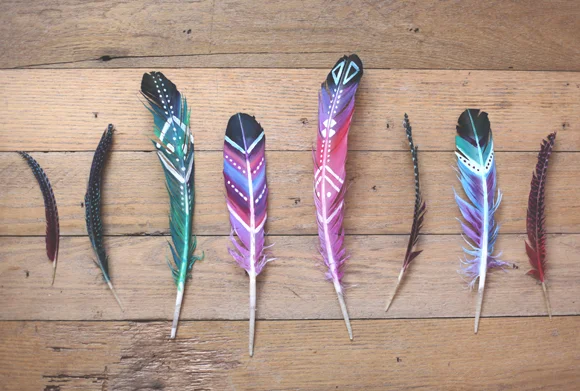
3. Painted Feathers

These are gorgeous! Preteens could do so much with these painted feathers and they would be so easy to make. Check out BLD 25 and the rest of their DIY projects.

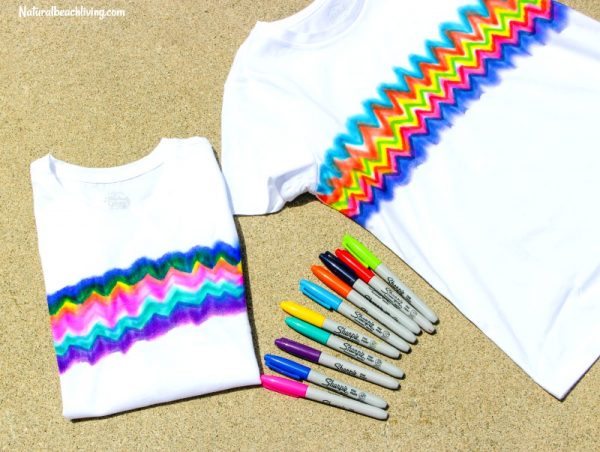
4. Sharpie Tie Dye

This looks like so much fun! Traditional tye dye can be messy but Natural Beach Living makes this craft look easy peasy!

5. Light Up Fairy Jar

I have watched LOTS of preteens make this craft and they love it so much! Fairies are so fun no matter your age! Our girls have made several of these over the years and each time they get more and more creative with it.

6. DIY Bath Bombs

So this has been on our older girl’s list of things to do for awhile and I’ll be honest I have no idea why we haven’t tried these yet. Chelsey from Buggy & Buddy has a great tutorial the girls and I will have to make over this summer!

7. Cracked Glass Jewelry

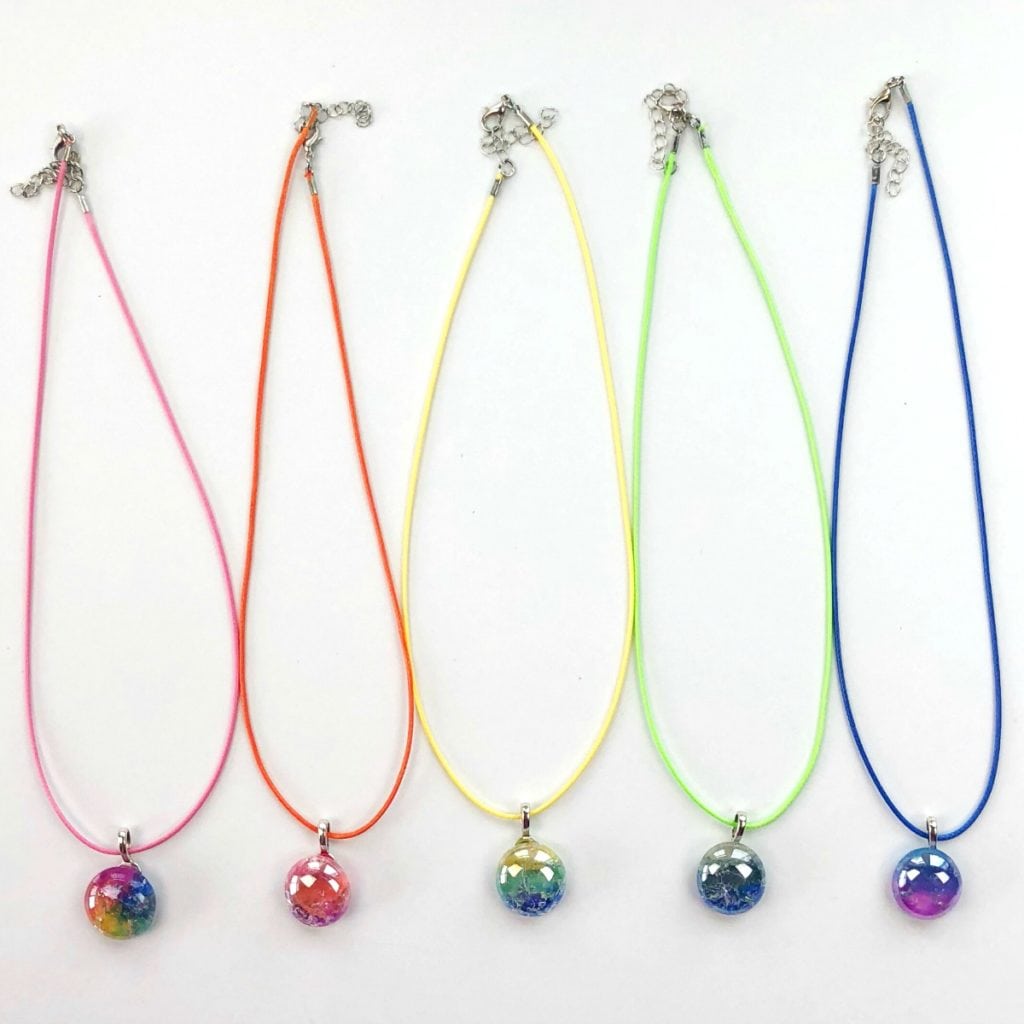
OMG this looks like a lot of fun! This project from Color Made Happy will require adult supervision but what a fun thing to make. I can’t wait to do this one with our girls.


8. DIY Constellation Jar : Glowing Science Fun

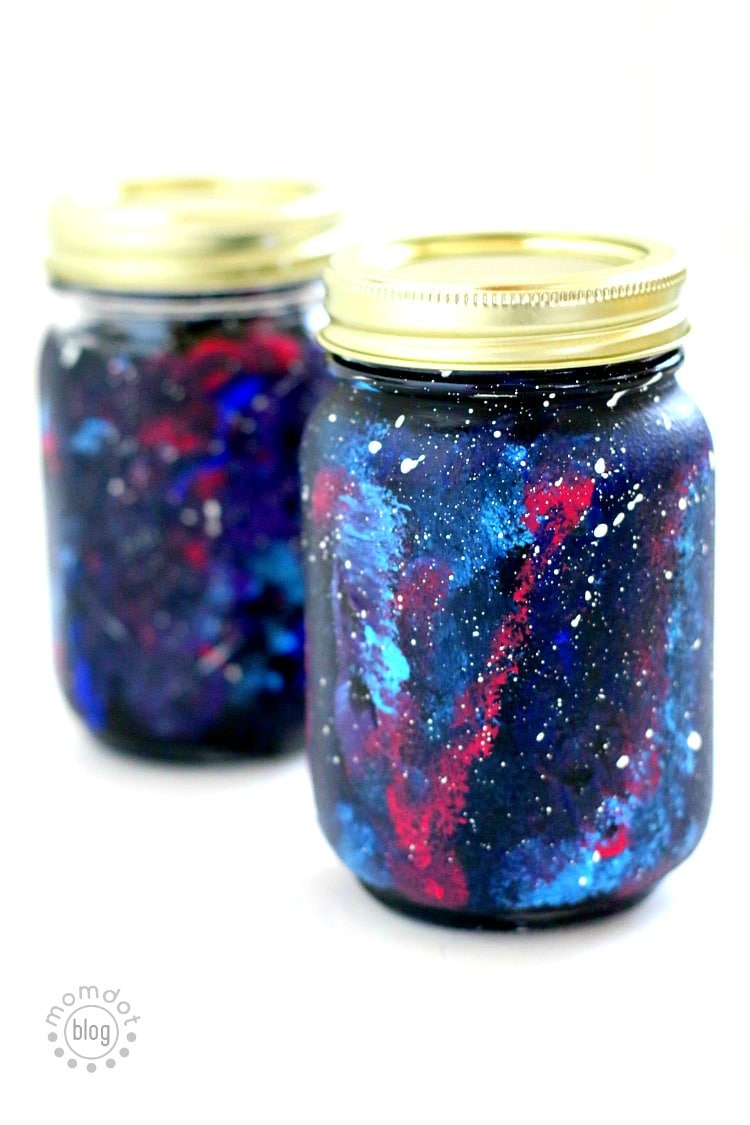
These look like a TON of fun! Your preteen could even upcycle an old sauce or pickle jar for this craft. Stephanie from Mom Dot did a great job with this creative project.

9. Polymer Clay Owl Necklace

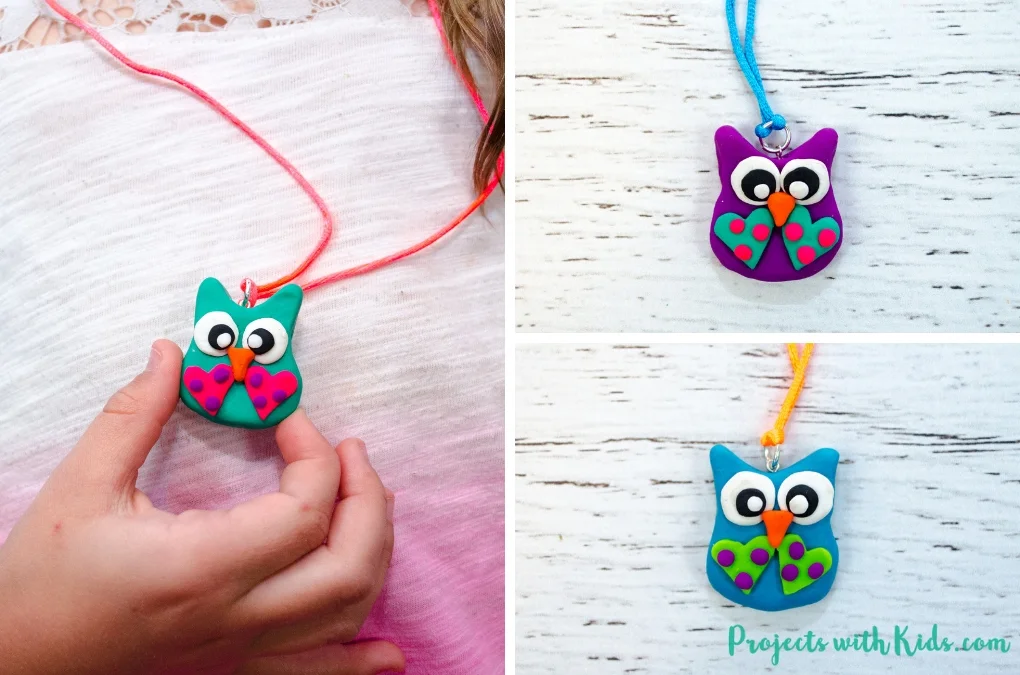
Our girls got a ton of clay for Christmas last year so they are pinning like crazy all the different things they can make out of it. Probably one of the best gifts we’ve ever given them lol! They stay busy for hours with this stuff! Check out Angela from Projects With Kids and her polymer clay necklace tutorial

10. Wall Mobile

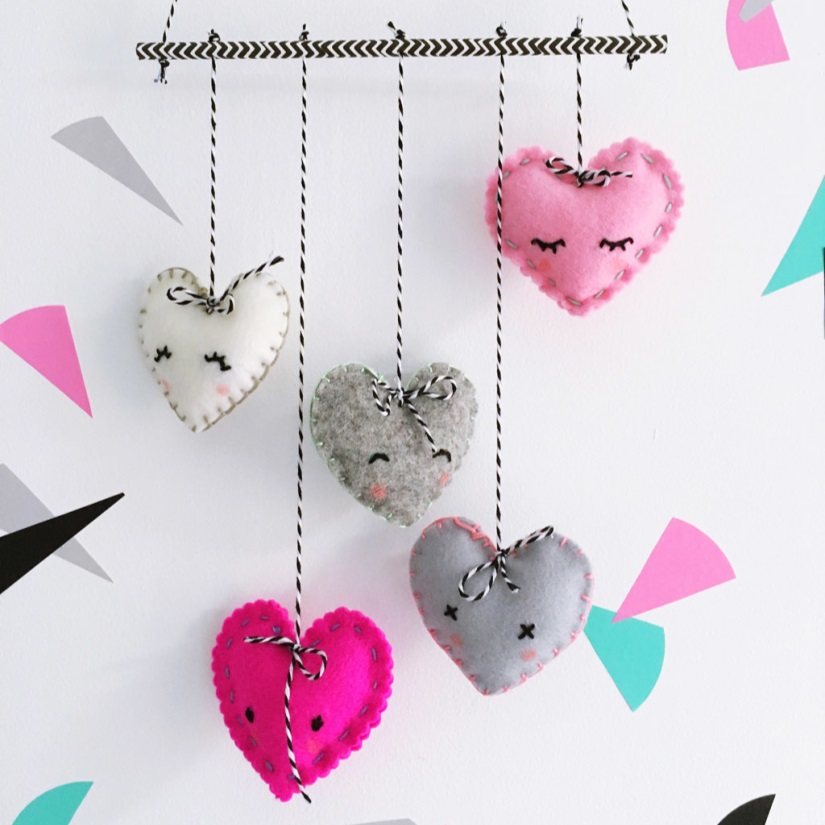
This is a must do craft for your tween. Especially if they are wanting to learn how to sew. I’ve taught all my older girls how to sew, the youngest will learn as soon as she’s ready, and they LOVE to explore what they can make with their learned skills. Sew Yeah has lots of great projects to check out including this heart wall mobile.

Be sure to check out all the amazing craft tutorials that our sweet girls found on Pinterest. I’d love to hear from you. What crafts does your preteen like?

Here are more kid themed crafts your kiddos may enjoy

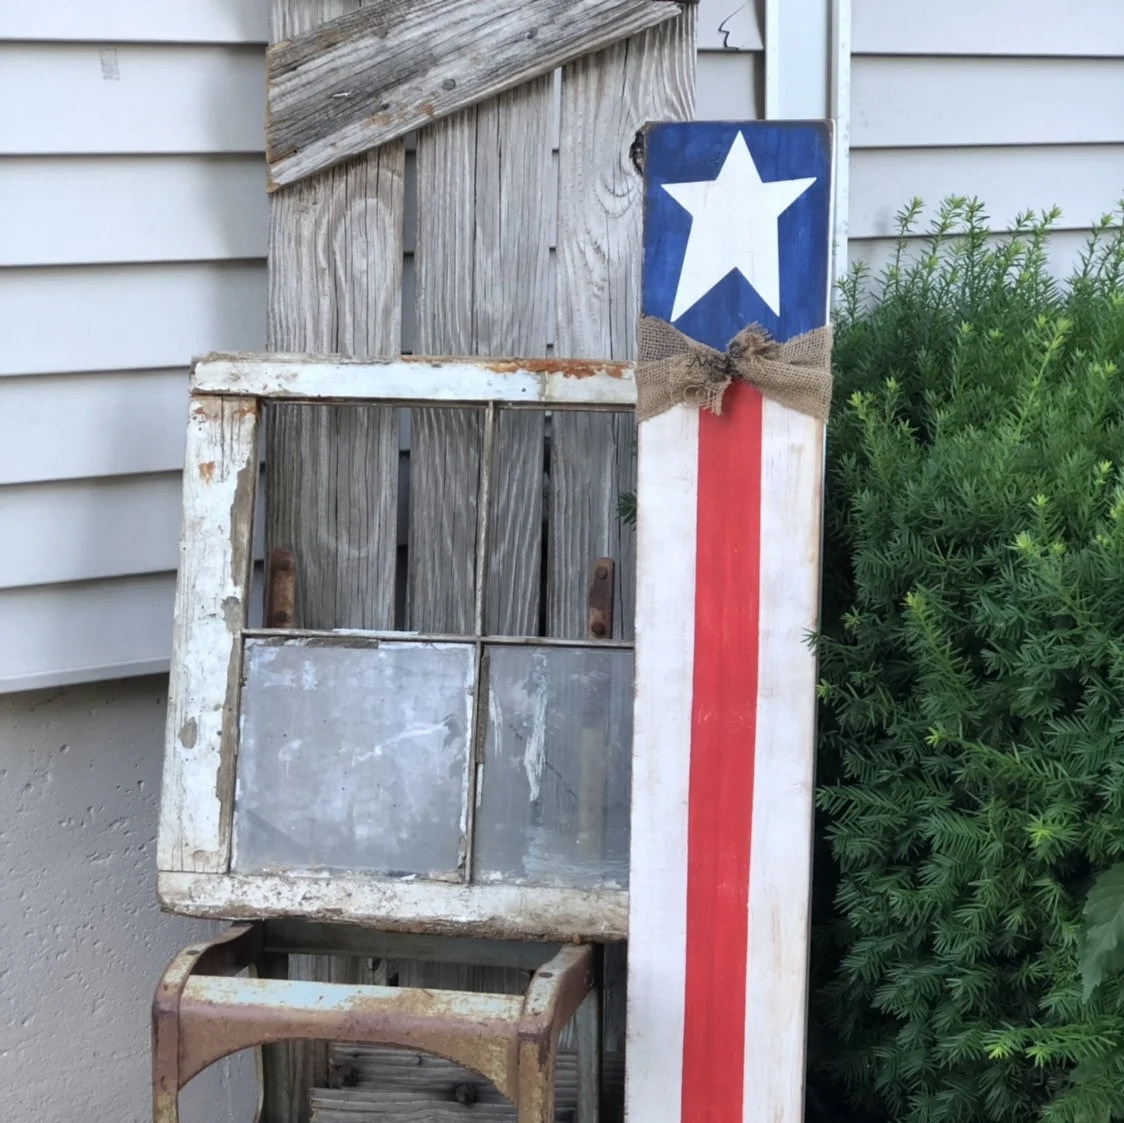
How to make an American Flag leaning porch sign

How to make an American Flag porch sign DIY tutorial

I just can’t seem to get enough of the patriotic décor these days! It started a few months ago when I made these fun fireworks from a wood 4x4 . Then I added this old classic to the blog, a hanging wood flag made from 1x4’s {you can find this handmade piece in my Etsy shop that sells like crazy this time of year}. And I had to make a tutorial of a red, white, and blue rag wreath. I tell ya, I’ve been obsessed lately with making these tutorials! And I have another one ;)!!!

Affiliate Disclosure. Some of the links on this website are affiliate links, which means that I may earn a small commission if you click on the link or make a purchase using the link. If you make a purchase you will not be charged anything additional.

I had everything I needed on hand to make this but I’ve included the links where you can get some of these supplies. Yes, those are affiliate links but not to worry, you will not be charged anything extra if you make a purchase through them. They are just a way for this stay at home momma to help with the daily bills of raising our four little girls :)!

I promise this sign is SUPERRRRR easy!

Here’s what you’ll need

Handy tools


First you need to cut your board and give it a quick sanding with 120 grit sandpaper. I personally LOVE working with Ryobi Power Tools. For years I used my husband much more industrial strength tools {he works commercial construction so his tools need to be crazy powerful} till I found these little gems and I have no plans of ever letting these guys go!

Then you need to paint your ENTIRE board white. Do one very thin coat, once dry add a second coat.

How to make an American flag leaning porch sign, DIY tutorial

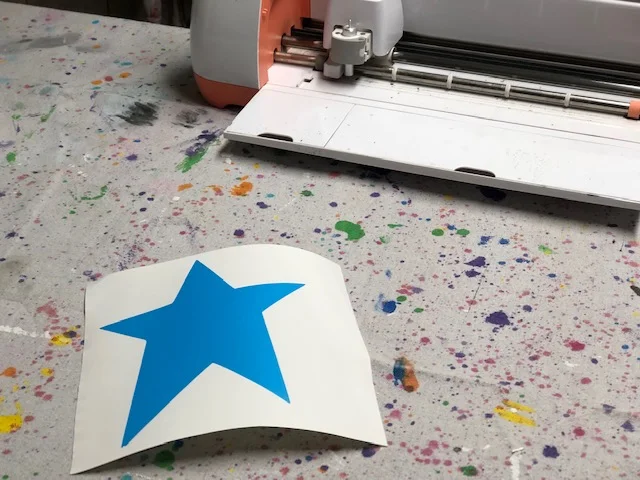
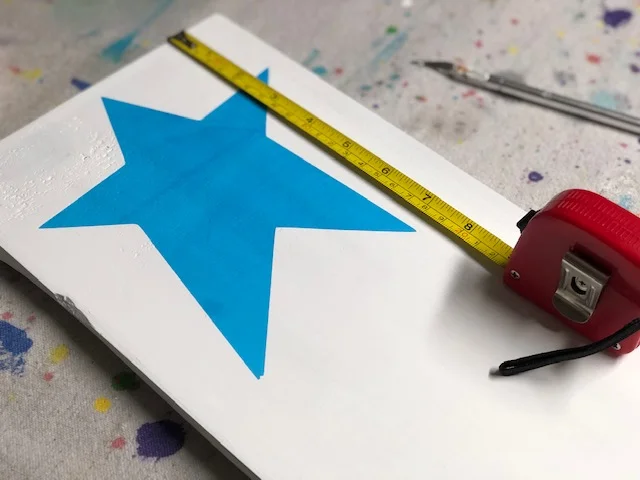
If you’re using a stencil cut it out while your board dries. I use my Cricut but you can use any vinyl cutting machine. The star I cut out was approx. 6” wide. If you don’t have access to one you can free hand your star. If going this route I recommend using a pencil when you do the outline.

American flag18.jpg

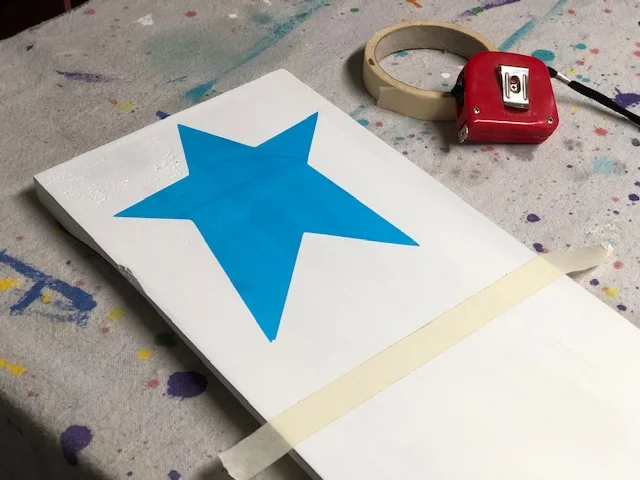
Apply your star stencil to your board. Then decide where you want your blue line to stop below it. Measure that distance and make a mark on each side. I made mine approx. 9” from the top.

How to make an American flag leaning porch sign, DIY tutorial

Now run a piece of tape from side to side where you made those marks. This will help to keep your line crisp.

How to make an American flag leaning porch sign, DIY tutorial

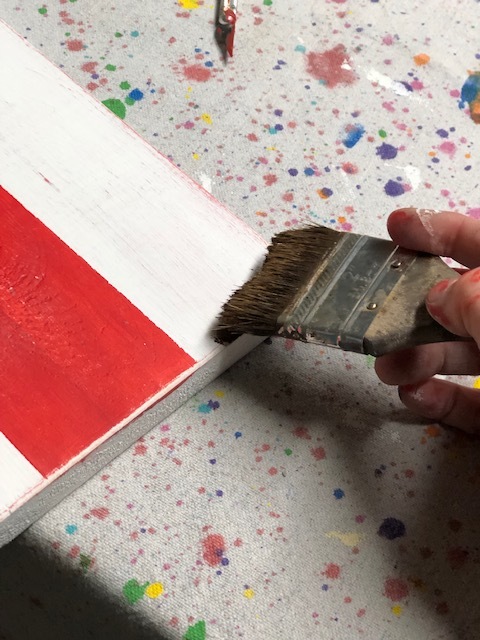
Paint the entire top area blue. I used a royal blue but any blue shade that you like will be perfect. I painted two coats of blue, allowing it to dry completely between coats.

How to make an American flag leaning porch sign, DIY tutorial

Remove the star and the tape.

How to make an American flag leaning porch sign, DIY tutorial

I at first planned to paint two stripes of white and two stripes of red going down my board…big mistake. It was not as cute so I had to repaint it. I had to paint the bottom part red, because it is far easier to cover white with red than to cover red with white.

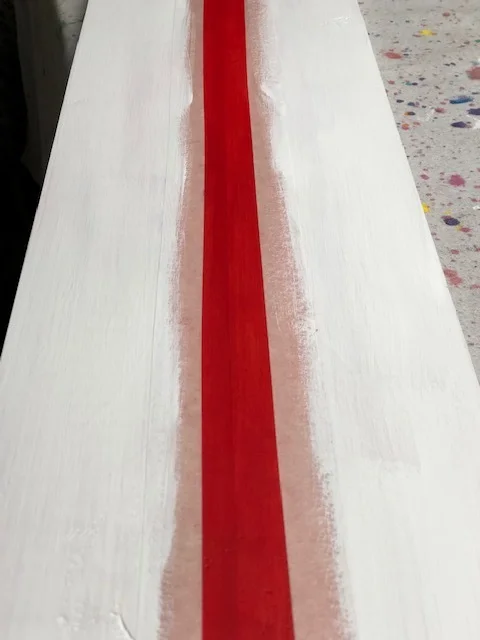
Using the same measuring technique as above but going vertically instead of horizontally, tape off the bottom so you have three equal stripes. If I wouldn’t have messed my stripes up from the beginning I would have taped them off the opposite from pictured below and painted inside the tape lines red. Instead I had to make more work for myself. I hope that makes sense. Just like with the blue, paint two coats and let dry between coats.

How to make an American flag leaning porch sign, DIY tutorial

Then peel off the tape. Go in with a small paint brush and fix any mistakes if necessary.

How to make an American flag leaning porch sign, DIY tutorial

Using your sander, sand around the edges, corners, and give the front a super quick once over. Then you’re ready to apply your wax. Check out my DIY mini wood pumpkin tutorial for a more in-depth how to on applying antiquing wax.

How to make an American flag leaning porch sign, DIY tutorial

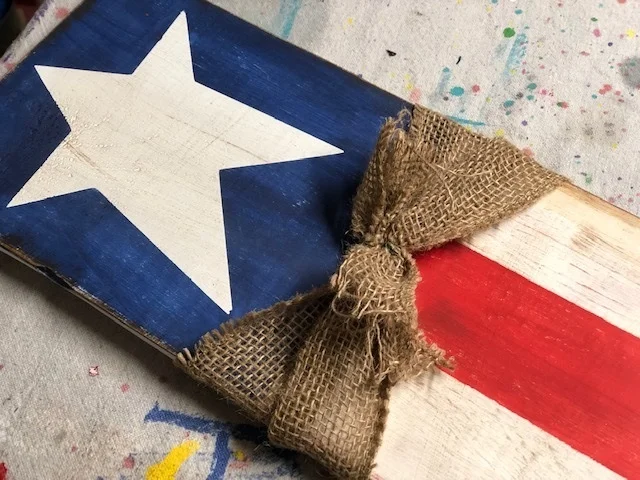
Add a piece of burlap. I tied mine off with a piece of floral wire but you can tie yours in a bow or a knot.

How to make an American flag leaning porch sign, DIY tutorial

I added a couple pieces of baling wire just to give it a little extra cuteness!

How to make an American Flag leaning porch sign, DIY tutorial

If you love this piece but don’t have the time to make it and NEED it in your life ;) you can purchase one personally made by me here ————> AMERICAN FLAG LEANING PORCH SIGN


How to make an easy burlap bow

How to make an easy burlap bow

Recently I made an ADORABLE red, white, and blue rag wreath. But I wanted it to look a little different from the spring rag wreath I made a few months ago. So I decided I was going to add a big burlap bow to the front of it. And omg it turned out so super cute!

Affiliate Disclosure. Some of the links on this website are affiliate links, which means that I may earn a small commission if you click on the link or make a purchase using the link. If you make a purchase you will not be charged anything additional.

I had everything I needed on hand to make this but I’ve included the links where you can get some of these supplies. Yes, those are affiliate links but not to worry, you will not be charged anything extra if you make a purchase through them. They are just a way for this stay at home momma to help with the daily bills of raising our four little girls :)!

Here’s what you’ll need

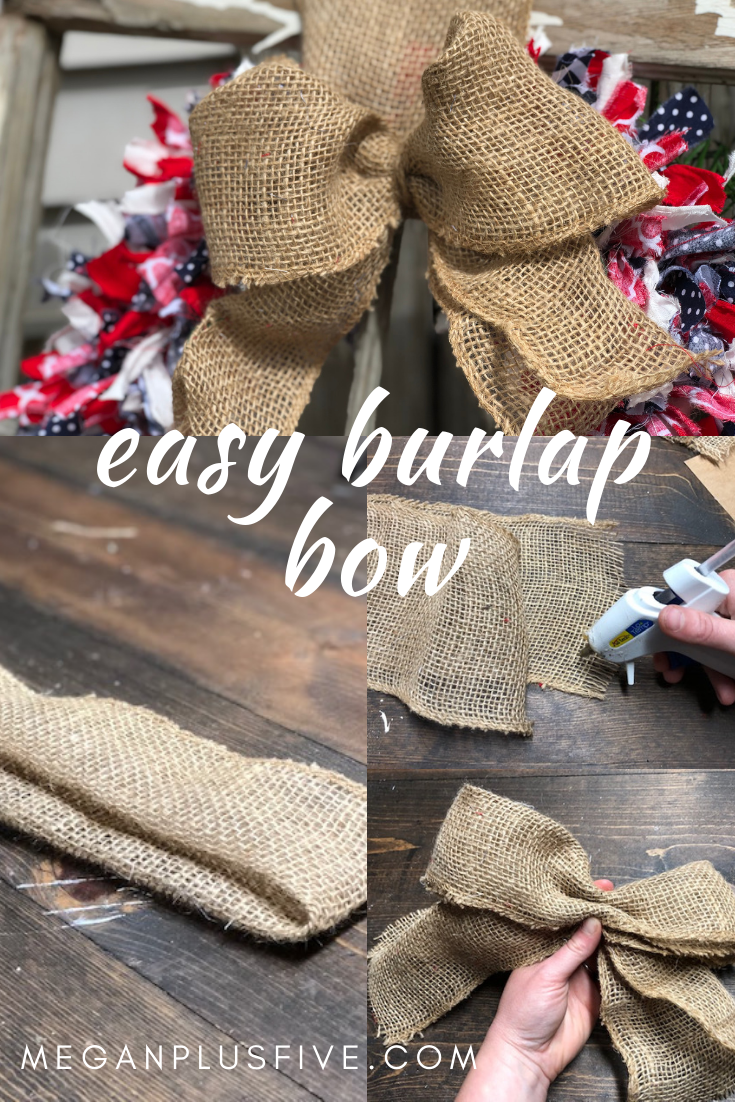
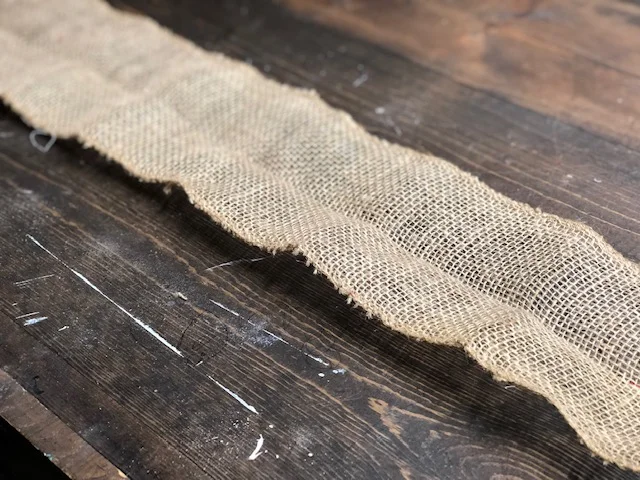
I had a roll of 5” wide burlap I picked up from my local Walmart last fall {burlap can be used for SOOOOO many projects so when it goes on sale at the end of a season stock up!}. I measured out approx. 28” in length to use for the bow portion of this.

How to make an easy burlap bow for your wreath

Then fold it in half width wise.

How to make an easy burlap bow for your wreath

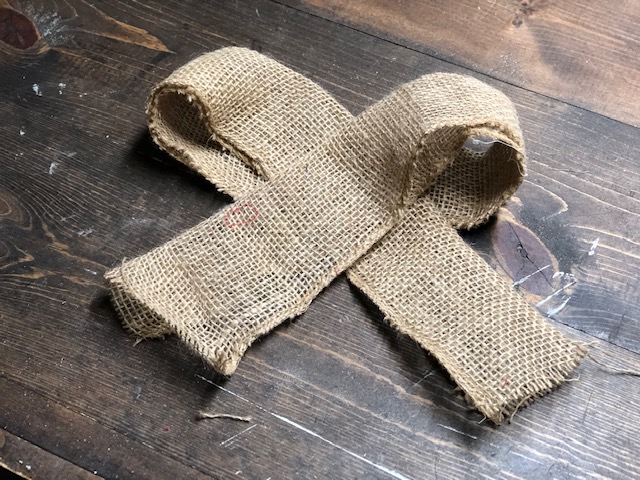
Then fold it in half length wise and be sure to leave a crease in the middle.

How to make an easy burlap bow for your wreath

Now unfold and loop each end to the other side so that it looks like the picture below. The crease you made in the step above will help as a guide to keep them even.

How to make an easy burlap bow for your wreath

Flip it upside down

How to make an easy burlap bow for your wreath

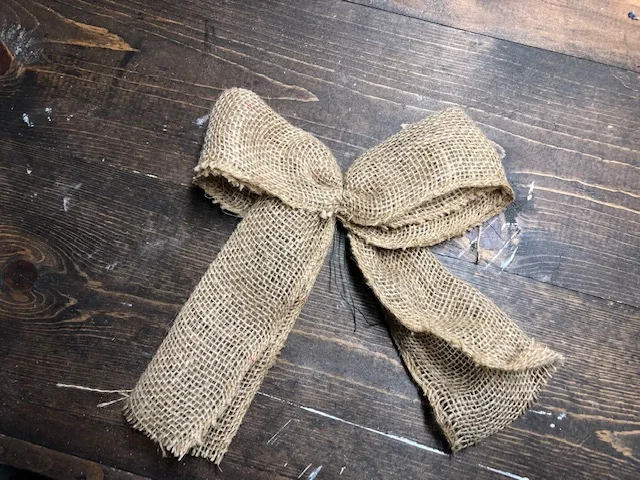
Pick it up and pinch the middle so it looks like the one below.

How to make an easy burlap bow for your wreath

Cut 6” piece of floral wire and wrap it around the center a couple times. You will have most of it left over and you will need this to attach it to the wreath form. Be sure you end on the back side of the bow. Take you jute/twine and wrap it a few times right over the wire to hide it then tie it off on the back and cut off the excess.

How to make an easy burlap bow for your wreath

This is what your bow should look like now.

How to make an easy burlap bow for your wreath

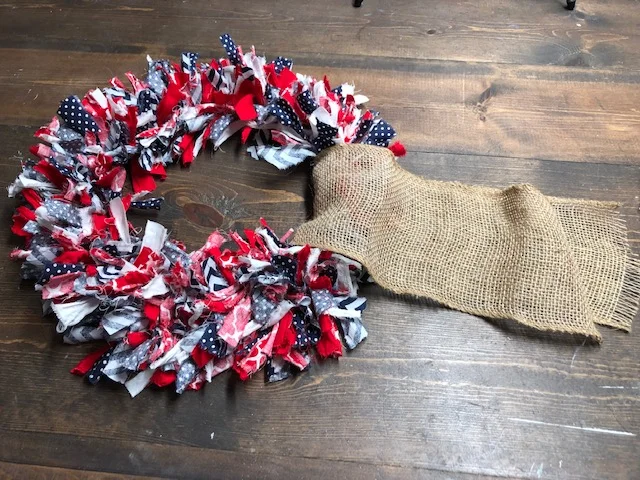
Set your bow aside and add a loop of burlap to your wreath. You can make this as long or short as you need.

How to make an easy burlap bow for your wreath

Glue the ends of your loop together. After this is dry you can move the seam to the back of the wreath to hide it.

How to make an easy burlap bow for your wreath

Then attach the bow to the wreath itself. put the wire that is sticking out of the back and feed it through the burlap loop, the rag wreath and twist the two floral wire ends together. Trim the ends of your bow so that they are even lengths. I also fluffed out the bow on mine so that it didn’t look so flat.

How to make an easy burlap bow for your wreath

What do you think? I personally LOVE the way it turned out and I can’t wait to make another rag wreath for the next season!


If you loved this tutorial check out some of my other tutorials I made using burlap and twine

DIY 4th of July rag wreath

DIY 4th of Julyl Rag Wreath, easy how to make your own

I love the shabby chic look for many reasons but mainly because that look is totally imperfect just like me. I’m a busy momma to four little girls so there’s no room in our beautiful chaos for absolute perfection.

Affiliate Disclosure. Some of the links on this website are affiliate links, which means that I may earn a small commission if you click on the link or make a purchase using the link. If you make a purchase you will not be charged anything additional.

I needed a new wreath for our front door for the 4th of July. I have been truly slacking in the red, white, and blue décor the last few years and really needed a spruce up. But I didn’t have the time to make anything big and wonderful and it’s not in our budget to make a ton of new decorations. So I decided on a RAG WREATH for our front door and I’m so glad I did! If you like this tutorial check out the DIY spring rag wreath I made.

save on Pinterest for later

DIY Fourth of July rag wreath

Here’s what you’ll need

  • 5 fat quarters of fabric, I found these at my local Walmart and even better I got a few of them in the clearance aisle!

  • wire wreath form, I found mine at Dollar Tree

  • scissors

If you love the big burlap bow go here ———-> to my HOW TO MAKE A BURLAP BOW tutorial.

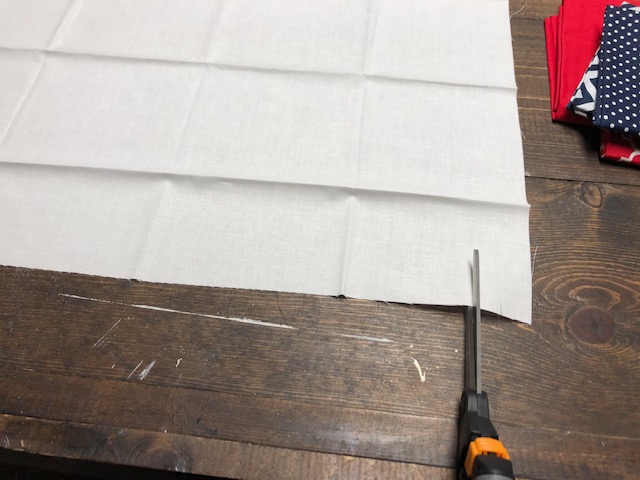
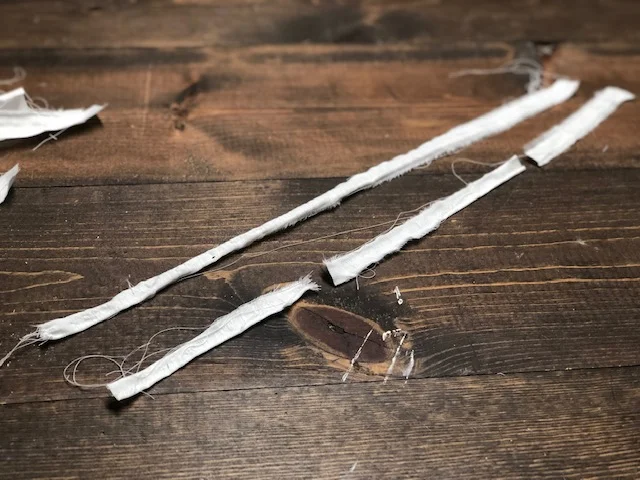
Working with one fat quarter at a time, unfold and don’t worry about the creases. You won’t be able to see these. Going along the bottom make a small cut every .75”-1”. If you want your tie pieces to be larger make your cuts farther apart.

DIY 4th of July rag wreath

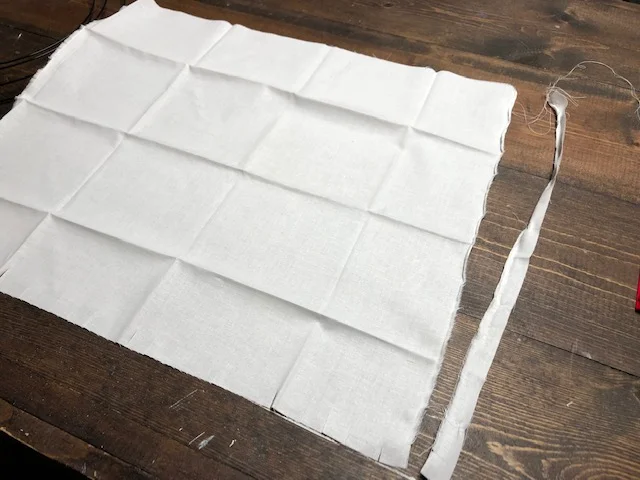
Now rip each of those cuts all the way to the other end using your hands, not your scissors. This will give your fabric a frayed looked.

DIY 4th of July rag wreath

After you have all your small cuts ripped cut each strip into 3rds like the picture below. Because I am a far cry from a perfectionist none of mine were the same size. If you like things a little more perfect than this you can measure these out.

Repeat these steps for ALL the fabric quarters.

DIY Fourth of July rag wreath

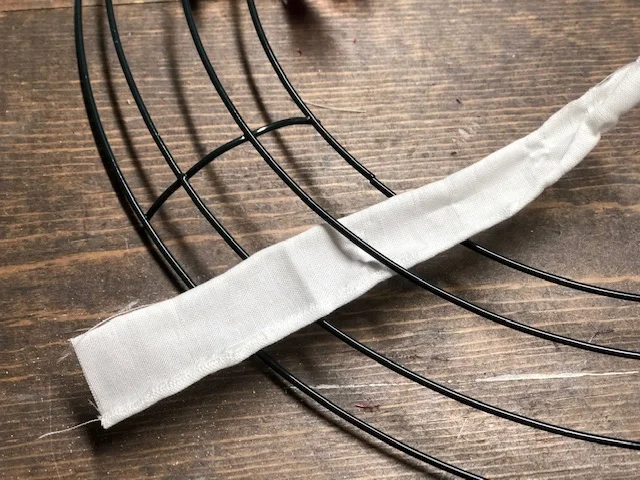
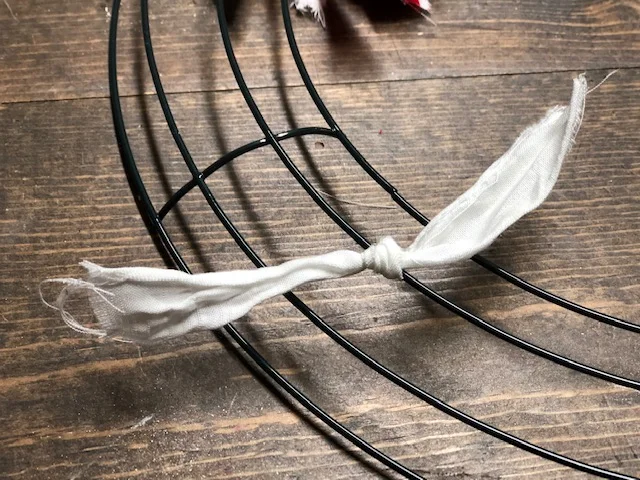
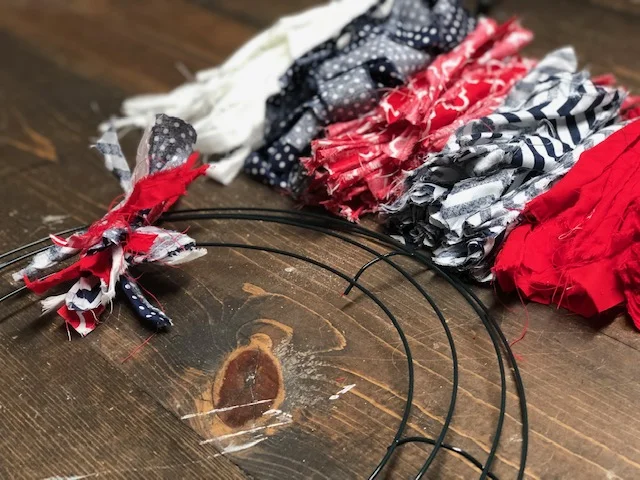
After you have all your pieces ripped and cut into thirds start tying them to your wire wreath form. To make sure I had enough fabric to cover the entire wire form I moved to the next section before it was full and did that for all the sections. Then I went around and filled in the blank spaces.

DIY 4th of July rag wreath

Be sure you are staggering out your fabric prints. You don’t want too many of the same print in one spot.

DIY 4th of July rag wreath

You can leave it plain and simple or tie a bow to it like the burlap bow I tied to this one.

DIY 4th of July rag wreath

What do you think? Super adorable and SUPER easy to DIY at home!


Check out these other 4th of July DIY crafts.

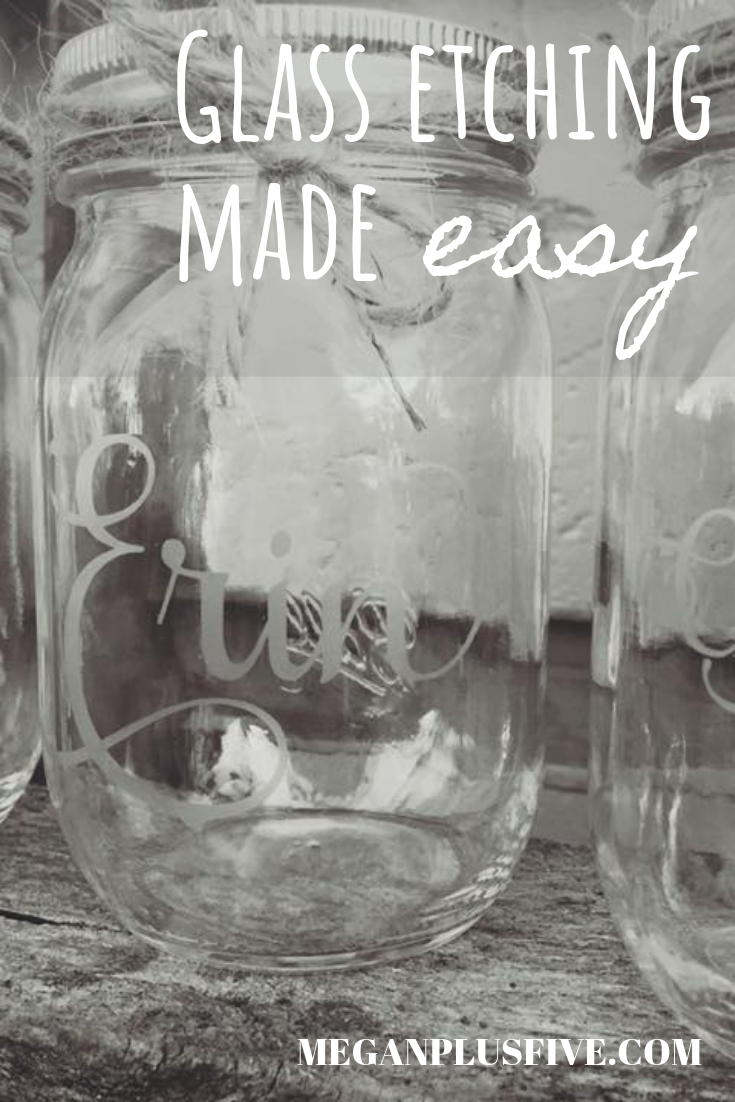
Glass etching the easy way

Learn how to etch glass the easy way

One of my most favorite gifts my husband and I received when we got married were a set of personalized glasses. Someone, whom I had never met because she was an old friend of my father in law’s, took the time to make such a meaningful gift for us. I thought she must have some fancy equipment to make such a fancy gift but I couldn’t have been more wrong.

A couple years we were married I got my very first Cricut. The ones that exclusively used the cartridges to cut {if they did hook up to a computer I had no idea because that was WELL before our computer owning days lol}. Those were the days…not really I’m super thankful for the ease of use the current Cricut system offers. Anyway over the years I have experimented like a mad women with all the things I can make using my wonderful cutting machine. And I was happy to learn of an amazing product I could buy that would chemically etch glass and do any design that I cut a stencil for! Heck yes!

I tried it out and I was amazed by it’s powers lol! It’s called AMOR ETCH. It’s a little pricey BUT it will last you forever. I have etched so many things since and I have to say they are one of my most favorite personalized gifts to make. A few things I’ve made with the etching cream are, wine glasses, mason jars, whisky glasses, glass picture frames, vases and I’m sure way more but I just can’t recall them all.


Be sure to follow the manufacturer’s instructions and always remember this is a chemical so always put safety first.

Here’s what you’ll need

Check out the Facebook live I did showing you step by step how to create your own glass etchings at home.


12 tips to make your trip to the zoo even better and stress free

12 tips for a stress free trip to the zoo

I love watching my girl’s faces light up when they see all the animals at the zoo. But to tell you the truth, I haven’t always loved actually going. I know all moms everywhere can relate. It can be so much work and STRESS to take your kids places like this by yourself. But it can be fun for you too you just have to change a few things up. For more fun stress free adventures with the kids check out my backyard camping tips.

Here are my top 12 tips to make your zoo trip even better.

  1. Go to the zoo when it’s not crazy hot. When I’m hot I get grumpy, which really just means that I’m not enjoyable to be around lol! So we always go on days when this crazy Midwest weather isn’t scorching.

  2. If you’re taking multiples have them wear the same color. I have four girls so I bought larger pink shirts from Walmart, so they could grow in to them each year, and those were our zoo shirts. This way it’s super easy to pick them out in the crowd.

  3. Take a backpack. this is a must! Anytime we are going to be out walking around for extended periods I ALWAYS wear my backpack. I’m not a fashion forward kind of girl so this does not intrude on my style one bit. Comfort over fashion, that’s how I roll lol!

  4. Don’t over pack. I know you’ll want to take everything but the kitchen sink but the truth is you don’t need everything. I used to be that mom and I learned that I don’t need to be prepared for EVERYTHING. The zoo is equipped with Band-Aids if one of my precious girls falls and skins her knee. So keep the load light and if you absolutely need something you didn’t pack it’s not the end of the world, the zoo will likely have what you need.

  5. Pack the essentials. I’m talking wet wipes, ibuprofen for both you and the kids, Benadryl for the kids {this is a must with us because we’ve been in situations where we needed it asap for a yellow jacket sting and now I don’t go on trips like this without it}. These items are small and will fit easily and weightlessly in your backpack. Trust me, these are items you don’t want to buy once you get there. Talk about a convenience fee.

  6. Pack a lunch. I don’t think we’ve ever bought lunch at the zoo. The prices there are crazy high so we pack one. If you choose to pack a lunch keep it simple. We usually take a sandwich, cut up veggies, chips, and something sweet for everyone. I’ve found if I keep my kids busy they don’t want to snack all day. So keep pointing out those animals and talking about them, they’ll likely not ask for a snack.

  7. Take refillable water bottles. We usually take two and I keep them in the side pockets of my backpack. Our zoo has water refill stations everywhere there is a bathroom so we usually refill every time we stop to use the facilities. And with four kids we stop often.

  8. Everyone NEEDS to wear comfortable walking shoes. We don’t ever wear sandals or flipflops, always tennis shoes because again, comfort over fashion ;)! Not having your kiddos complain that their feet are hurting from wearing uncomfortable shoes is a glorious thing! You might have to stand your ground before you leave the house but you’ll be SO thankful at the end of the day bc the jelly shoes little Susie wanted to wear won’t be giving her blisters today 🙌!

  9. Pack sunscreen. Our family is full of fair skinned faces so we apply this a lot throughout the day. If your sunscreen bottle is a little too big to carry around all day get a small travel sized shampoo bottle from the Dollar Tree and fill that with your sunscreen.

  10. Bug spray. If you live in an area with little flying evil blood suckers, in other words mosquitos, you will probably need this. Even on days when it’s not typical prime mosquito weather we’ve still encountered them at the zoo. I always take this just to be on the safe side. For some reason they REALLY love us.

  11. Take quarters, enough for all your kiddos, to feed the animals. Our zoo has several areas that kids can feed the animals and sure enough the times when I forget quarters the change machine is down. So take enough for each of your children to get their own to feed for the animals.

  12. Don’t feel like you have to see everything. The times when my girls and I have had the most fun at the zoo is when we go in without a plan. These are the days when I’m not stressing over making it in time for them to watch the birds get fed, or rushing through the animals so fast so we can see them all and we end up not really SEEING them because we rushed. Take your time and enjoy it. And if your kids want to stop and play let them play. Granted you’re there to see the animals but you’re also there to enjoy the day with your kids and if stopping for 20 minutes will make them happy, let them play.

As a mom of four this list has helped me tremendously enjoy our trips to the zoo. The important thing to remember is tip #12. It’s all about enjoying the day with those precious little souls.


DIY hanging wood flag

Do it yourself rustic American Flag, how to make a hanging American flag

I love patriotic décor. Not only because I truly love being an American but because it never goes out of season! You can leave it up year round and it looks perfectly beautiful and not at all out of place, unlike the wooden Santa I had hanging out in the living room five months after Christmas. Yes, that’s a true story! My grandma painted this amazing 5 ft tall Santa ages ago and I somehow overlooked him for months in our living room.

So unlike Mr. Claus, patriotic décor would not stick out like a sore thumb long after Independence Day has passed.

If you don’t have time to make your own be sure to stop by my Etsy shop and purchase your own handmade wood American Flag made by yours truly ;)

Affiliate Disclosure. Some of the links on this website are affiliate links, which means that I may earn a small commission if you click on the link or make a purchase using the link. If you make a purchase you will not be charged anything additional.

Ok, on to the tutorial.

Here’s what you’ll need

SUPPLIES

DIY hanging wood flag, how to make your own primitive American flag

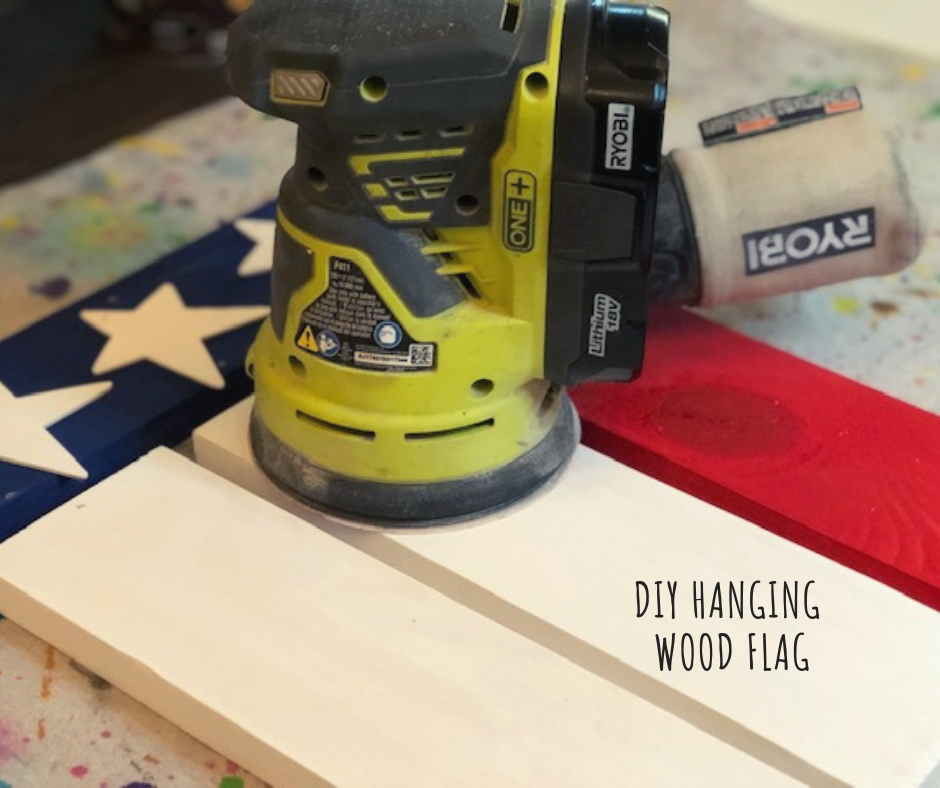
After you cut down your 1x4 into the correct sizes you need to give them a quick sanding. I use my Ryobi handheld cordless sander for this but you can use just sandpaper or a sanding block, although it will take a lot more work and more time. I purchased my sander fairy cheap at my local hardware store, one of the best $50 I’ve ever spent! After you have all the 1x4 pieces sanded give them a quick wipe down to get all the saw dust off.

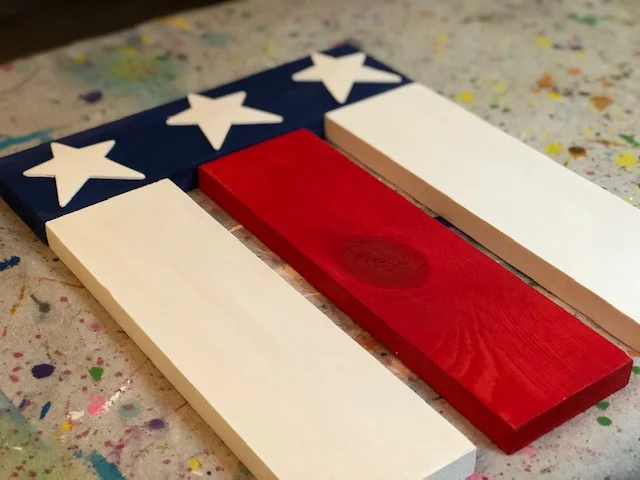
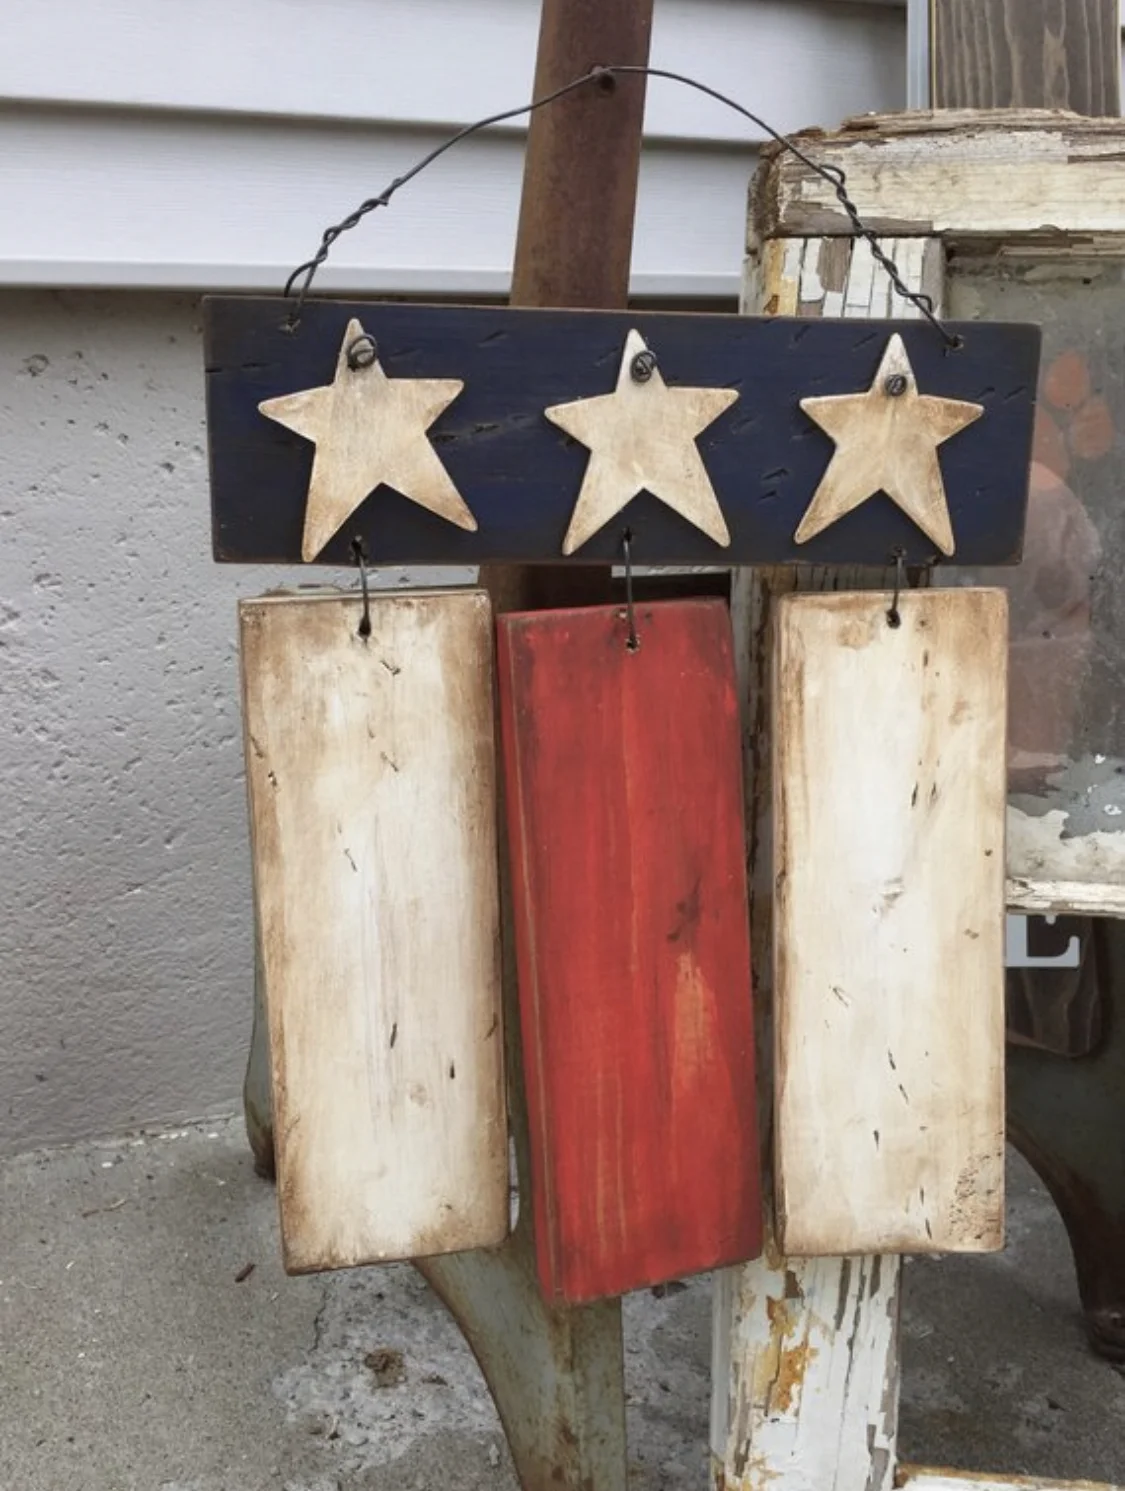
Next you need to paint all the wood pieces and the stars. I only did two coats on each piece. To get the look that I did on mine you will need to paint all three stars WHITE, 2 of the 1x4x12’s WHITE , 1 of the 1x4x12 RED, and the 1x4x13 BLUE. Let them dry COMPLETELY between coats.

DIY hanging wood flag, make your own American flag at easy with this tutorial

After everything is totally dry you need to mark your pieces where you will drill your holes. I am not a perfectionist so I just eyeball it. It’s rustic so it doesn’t have to be perfect anyway ;) I do this with a pen but if you’re worried about messing up you can use a pencil.

DIY hanging wood flag, how to make an American flag at home for your porch

Not counting the stars, your pieces should have a total of 11 markings, 3 on the top of the blue piece where you will attach the stars, 3 on the bottom of the blue piece where you will attach the hanging white and red pieces, 1 on the top right of the blue piece and 1 on the top left of the blue piece where you will attach the baler wire to hang for displaying, 1 in the top middle of each white piece, 1 in the top middle of the red piece. I don’t typically mark the stars because it’s not necessary, the hole goes in the top of the star.

DIY hanging wood flag, how to make your own American wood flag to hang on your front door

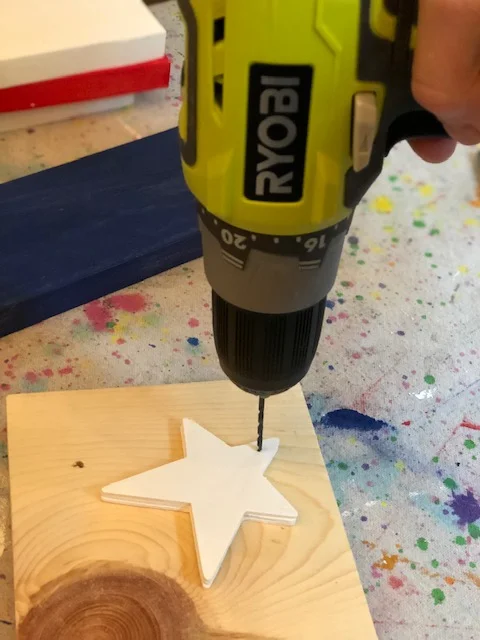
Now it’s time to drill. Your drill bit will vary depending on how thick your baler wire is. I always use a drill bit that is just a size above the wire size, that way the wire has room to move so that it’s not super tight. Be sure when you are drilling the holes in the stars you don’t get too close to the top. If you get too close you will crack the tip of the star and you won’t be able to use it. PRO TIP: place a flat discarded piece of wood under what you’re drilling into so you don’t drill into the table underneath.

DIY hangin wood flag, how to make your own at home

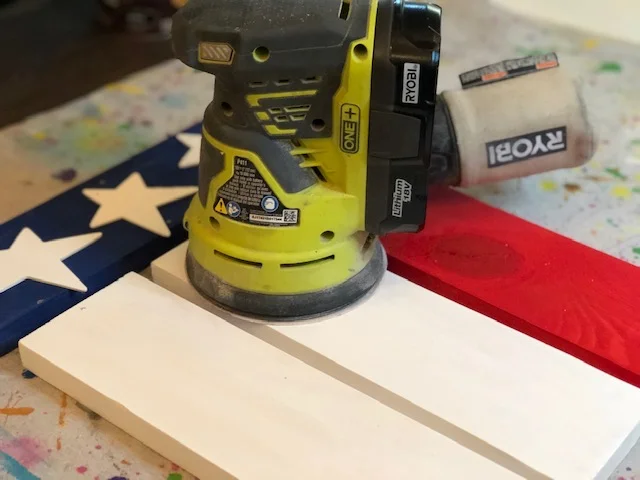
Now it’s time to distress. Using your Ryobi sander sand around the edges. Here’s a good example on how I do this in my Dr. Seuss keepsake craft. There are some good close ups on sanding just the edges and rounding the corners of the wood to give it a perfect rustic look.

DIY hanging wood flag, how to make your own American flag to display on your front porch

I only sand the 1x4 pieces. The stars are so small and fragile that yo don’t need to sand those, using the wax on them in the next step will work just fine.

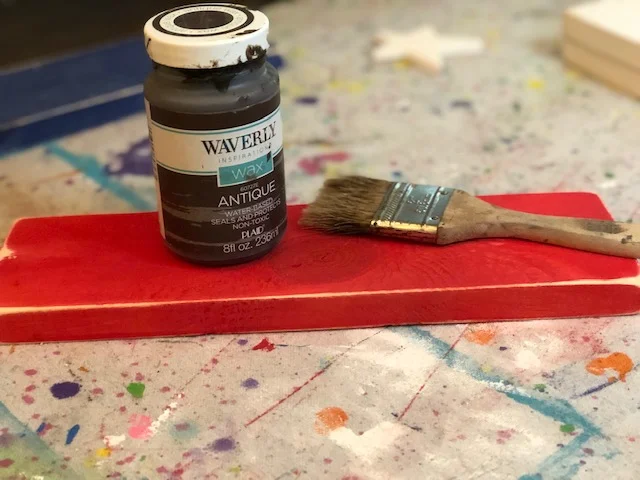
Apply wax around all the edges, corners, and give them a light coat down the center of each piece. Check out my DIY rustic wooden pumpkins post on a more detailed way to do this using your chip brush. I love pretty much any brand of antiquing wax, they all work great! PRO TIP: cut the bristles down on your chip brush. You get a better outcome when the bristles are shorter and stiffer.

DIY hanging wood flag, how to make your own American flag porch decor

You’re almost done! The next steps are just assembling your pieces together. You’ll need your baler wire and wire cutters for this.

DIY hanging wood flag, how to make your own patriotic porch decor

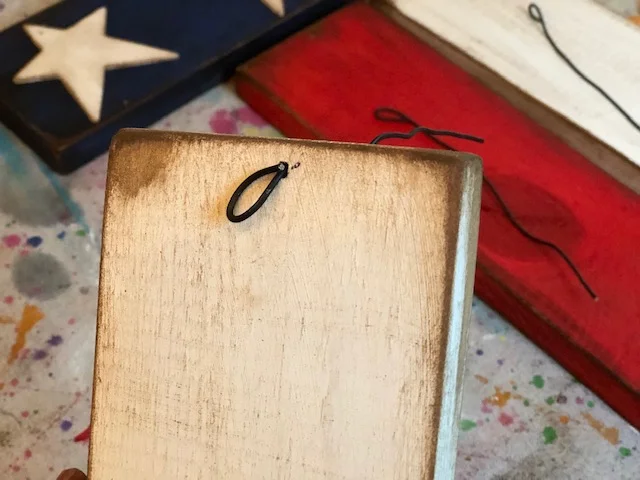
You’ll need 3 wire pieces cut to approx. 6”-7”. Cut your pieces short if you want less space from the blue piece to the hanging pieces, and longer if you want more space from the blue piece to the hanging pieces. Now make a loop with your plies on ONE end of each piece like pictured below.

DIY hanging wood flag, how to make your own American flag porch decor

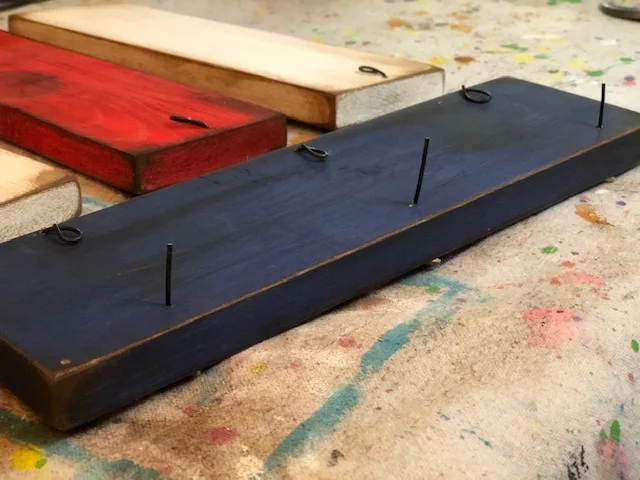
These loops will go on the BACK of each piece.

DIY hanging wood flag for the front door

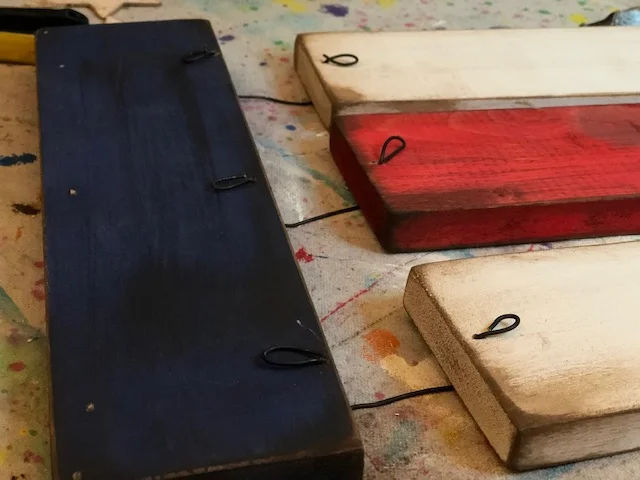
Then connect it to the blue piece and loop the end just like you did before. This is what the BACK of your flag should look like before you attach your stars.

DIY front door hanging wood American flag

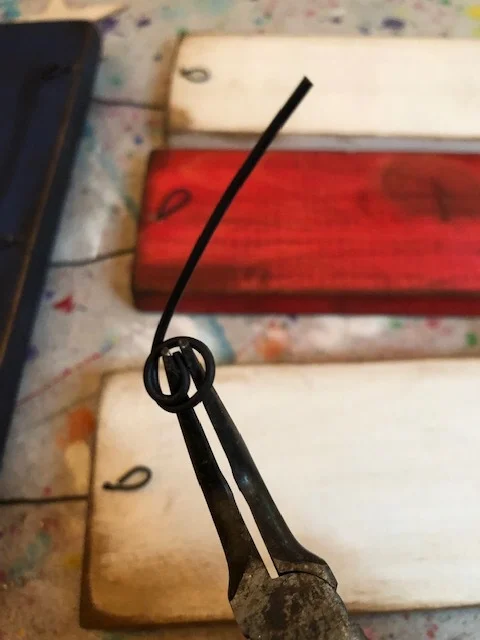
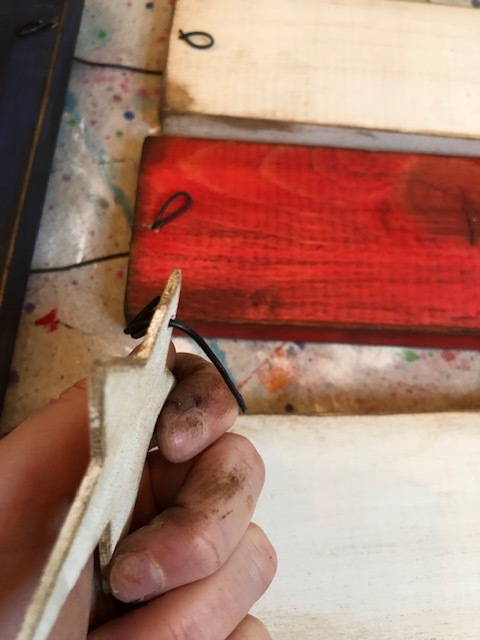
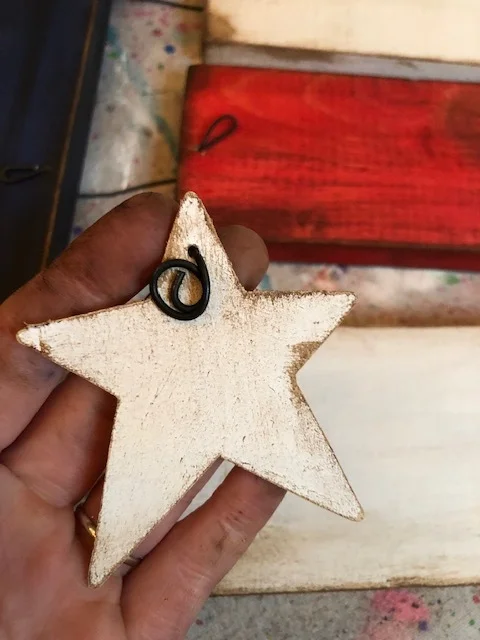
The star wire is slightly different. You’ll need a 3” piece for each star. One end you need to wrap a few times around your needle nose pliers. This doesn’t have to be perfect, mine never are. Leave the other end open.

DIY front door hanging American flag

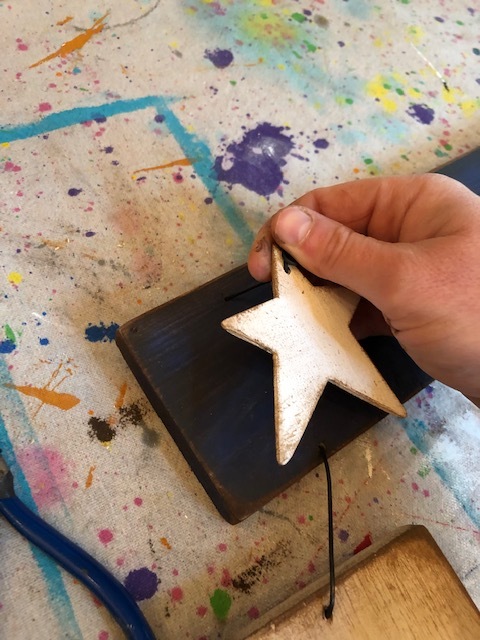
Then feed the straight end of the wire through the front of your star then through the front of the boar where you drilled a star hole.

DIY hanging wood flag for your front porch
DIY hanging wood flag

After you put your star wires through their holes on the blue wood you want to do the same thing and loop them on the back like you did with the other wires. Pictured below is BEFORE they are looped.

DIY hanging wood flag for your front porch

Add a piece of wire to hang at the top corner holes and you’re done! I know it seems like a lot of steps but it’s SUPER easy! I’d love to see pictures of your handmade patriotic decor, especially if you make this piece:)!!

IMG_4189.jpeg

Stress free backyard camping

Fun and stress free backyard camping

Affiliate Disclosure. Some of the links on this website are affiliate links, which means that I may earn a small commission if you click on the link or make a purchase using the link. If you make a purchase you will not be charged anything additional.

Camping is such a fun experience that every family should have at least once. Our family tries to go every year but this spring it has been a little difficult to plan a trip. With flooding, tornadoes, and the temperature not making up it’s mind if it wants to stay cold or move on to warmer weather…oh the good ole Midwest lol!

Since our girls have been asking for months to go on our camping trip we decided to bring the camping trip to us. And I have to say I can’t believe we haven’t done this sooner! The girls loved it because it was something new and we loved it because we didn’t have to pack half our house up for an over night trip. And a bonus because our toddler has been super cranky lately she spent a lot of the time watching Disney Junior, thank you home wifi {no judgements please, we all parent in different ways and if Disney Junior will keep her happy then so be it}.

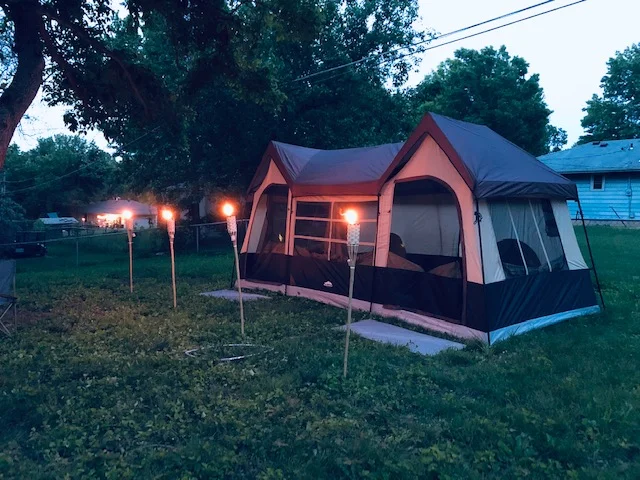
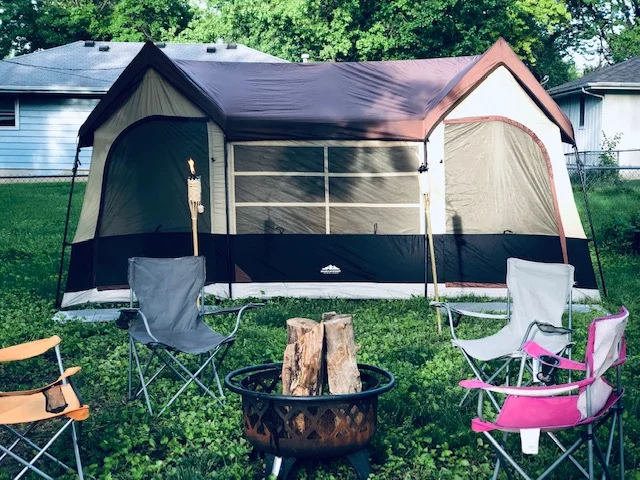
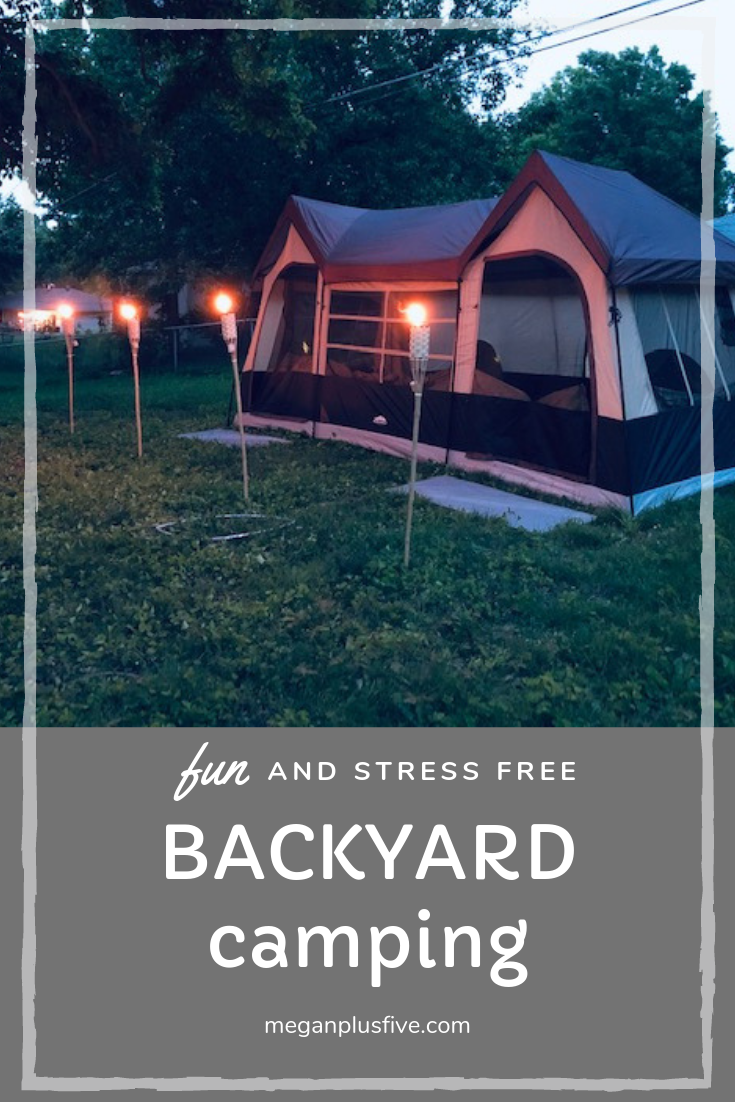
We wanted to keep our camping stress free so we didn’t plan any fun games or fancy Pinterest worthy foods. We put up our massive 10 person tent {we are a big family and this tent is sized perfectly for us}, added some tiki torches, moved the fire pit, and started the fun!

Stress free backyard camping

I guess you could say we got a tad bit fancy. My husband grilled up something different than the typical burgers and hotdogs that we would have had if we were camping on a campground. He is the grilling king and made us all the most delicious grilled chicken sandwiches.

My tips for stress free backyard camping

  • Keep it simple, don’t over plan.

  • Make sure you have all the pieces to your tent before you tell the kids. The last thing you want are sad little faces looking at you when you realize you don’t have everything there to put their tent up.

  • Let your kids dig and really explore the backyard. Our girls pretended they were lost in the wilderness and the tent was their new home.

  • Air mattresses, they may not be a must but I completely enjoy a good nights sleep even when I’m sleeping in a tent. These are the exact ones we use and trust me, if they can withstand our rowdy chaotic bunch they must be good!

  • Fresh batteries for all the things

  • Bug spray

  • Fire wood

  • Comfy clothes you can get messy for everyone

  • Let loose and have fun with your family.

Stree free backyard camping


And the best part…if you forget something it’s ok! Your home is just a few steps away. Our whole family, aside from our toddler, had a great time! Being a family of 6 with 3 of the 4 daughters within 4 years of one another, we tend to have bickering. I think because we were in our own element we didn’t have any of that, which also made it stress free!

I hope these tips help you to create your own stress free backyard camping with your own family.


Fresh strawberry shortcake recipe

Easy & simple strawberry pound cake, made with freshly pick strawberries

Fresh strawberries, they are way too good to pass up! That’s why every year we take our four daughters and do some berry picking of our own. If you’ve never been you have to add this to your bucket list! Here in the Midwest there are lots of family owned farms that are less than an hour from us so we have a lot to choose from {but our favorite is Fahrmeier’s Farms. We stumbled across them several years ago and have loved making memories there with our family ever since! If you don’t know of any local farms in your area doing a quick search on social media is a great way to find them.

Affiliate Disclosure. Some of the links on this website are affiliate links, which means that I may earn a small commission if you click on the link or make a purchase using the link. If you make a purchase you will not be charged anything additional.

Fresh strawberry shortcake recipe, Megan plus FIVE

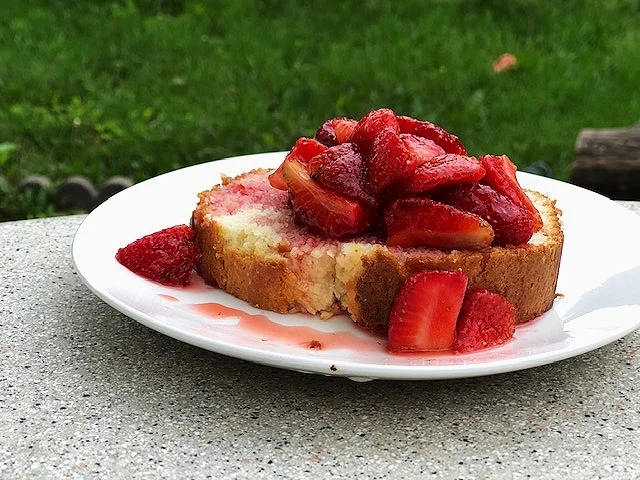
We always get home with way too many strawberries and we always make a big batch of strawberry shortcake. Although we don’t make a traditional shortcake, we serve our strawberries over a fresh loaf of pound cake. I promise, it’s even more delicious than the shortcake {or the angel food cake that my parents always served it over}.

For this recipe you’ll need

  • 8lbs of fresh just picked strawberries preferably handpicked at your local farm but if you can’t get fresh from the farm fresh strawberries from your local grocer will work too ;).

  • 1 1/2 cups of sugar

  • mixing bowl

  • big spoon

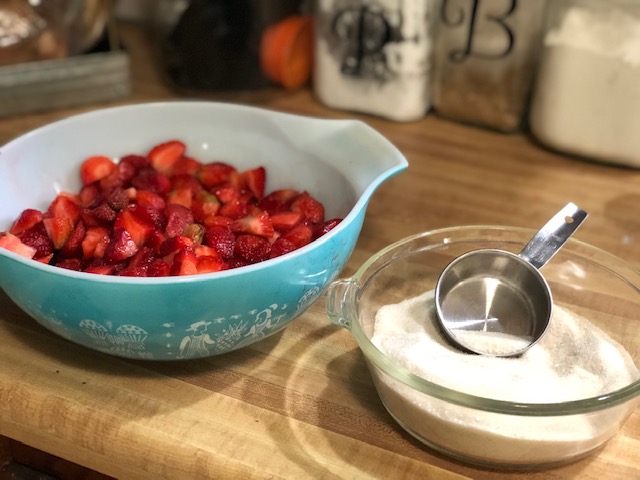
I promise this is sooooo super easy. Wash and slice each berry. If there are brown spots on them you can just cut them off and the rest of the berry should be just fine. As you cut, toss the berries in your mixing bowl. I’m not a perfectionist by any stretch of the imagination so I just cut them into bit sized pieces. I’m sure any foodie watching me slice these strawberries would probably fall down at the lack of keeping the pieces equal….but I’m a momma of 4 and I have better things to focus on than my strawberry pieces being equal lol!

Homemade Strawberry shortcake recipe, made with fresh strawberries

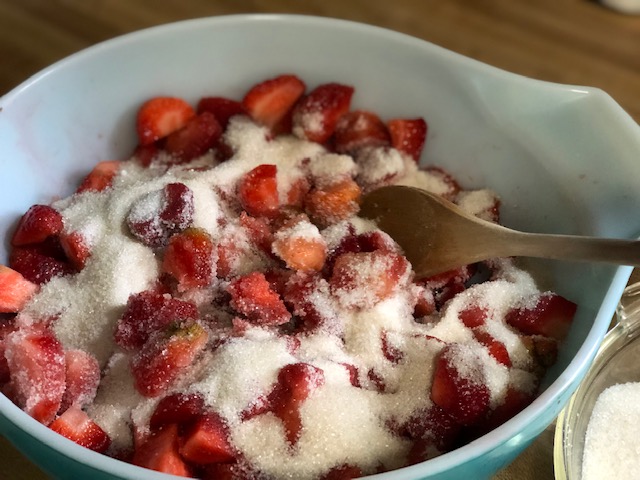
Add in your 1 1/2 cups of sugar. If you don’t want as much liquid, you can reduce the amount of sugar. We like ours to be super juicy so we can soak the leftover pound cake up in it. YUM! Cover and refrigerate for at least 2 hours.

Homemade strawberry shortcake recipe, made with fresh strawberries

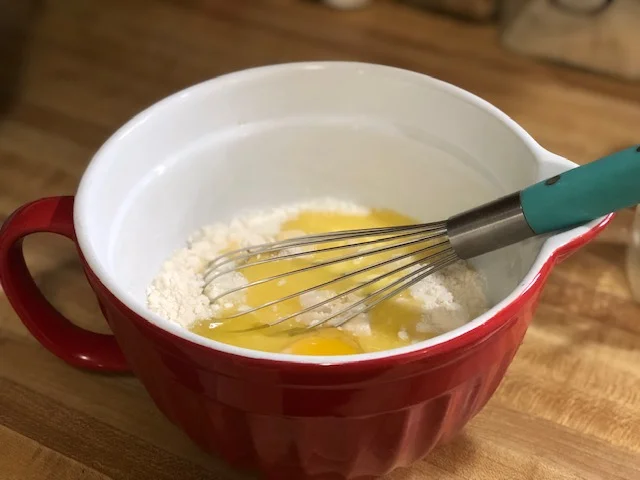
While your strawberry mixture is in the fridge you can make the pound cake. We don’t make this from scratch but we do prefer to make it versus buying a premade one. Premade ones at the bakery tend to be a bit pricey. We find our pound cake box mix at Aldi and it is super delicious!

Homemade strawberry shortcake recipe, made with fresh strawberries and pound cake

I don’t add anything extra to this recipe, just follow the instructions that come on the box.

Fresh strawberry shortcake recipe, pioneer women whisk

A little side note, if you’re like our family and go through whisks like crazy {idk why we are so hard on these wonderful gadgets} try The Pioneer Women balloon whisk. I’m super frugal but I was tired of buying a new whisk every few months because we use them so often in the kitchen and they just fall apart. So I spent a few more dollars and picked this one up and we love it! It’s super sturdy and you will thank yourself just like I did.

Fresh straweberry pound cake recipe, Aldi brand pound cake box

After your pound cake is completely cooled it should slip right out of the pan. We use glass bakeware for the majority of our baking needs vs metal.

Homemade strawberry shortcake recipe, made with pound cake

And that’s it. Super easy, the hardest part is having to wait till it’s done to eat it!


How to host an adult Pinterest party

How to host an adult Pinterst party

Hosting a PINTERST party is easier than you think!

Affiliate Disclosure. Some of the links on this website are affiliate links, which means that I may earn a small commission if you click on the link or make a purchase using the link. If you make a purchase you will not be charged anything additional.

1. Decided on your project

To make this super easy the host should pick this. If you’re having a hard time deciding check out my Pinterest boards for inspiration. Seasonal crafts are usually a big hit!

 
How to host a Pinterest party
 

2. Location

For most people their home works just fine for this type of party. If your house is a little too cozy you can always opt for the garage or backyard , if weather permits. If you plan to host a lot of friends for your craft party you can look into renting space at your local community center.

3. Invites

I wouldn’t go inviting everyone on my social media friends list but I would invite those that I actually enjoy spending time with. You can get super fancy and mail out invites or you can text, email, or do a Facebook invite. All are good options, personally I’m a texter so that’s the route I would go.

4. Getting crafting materials

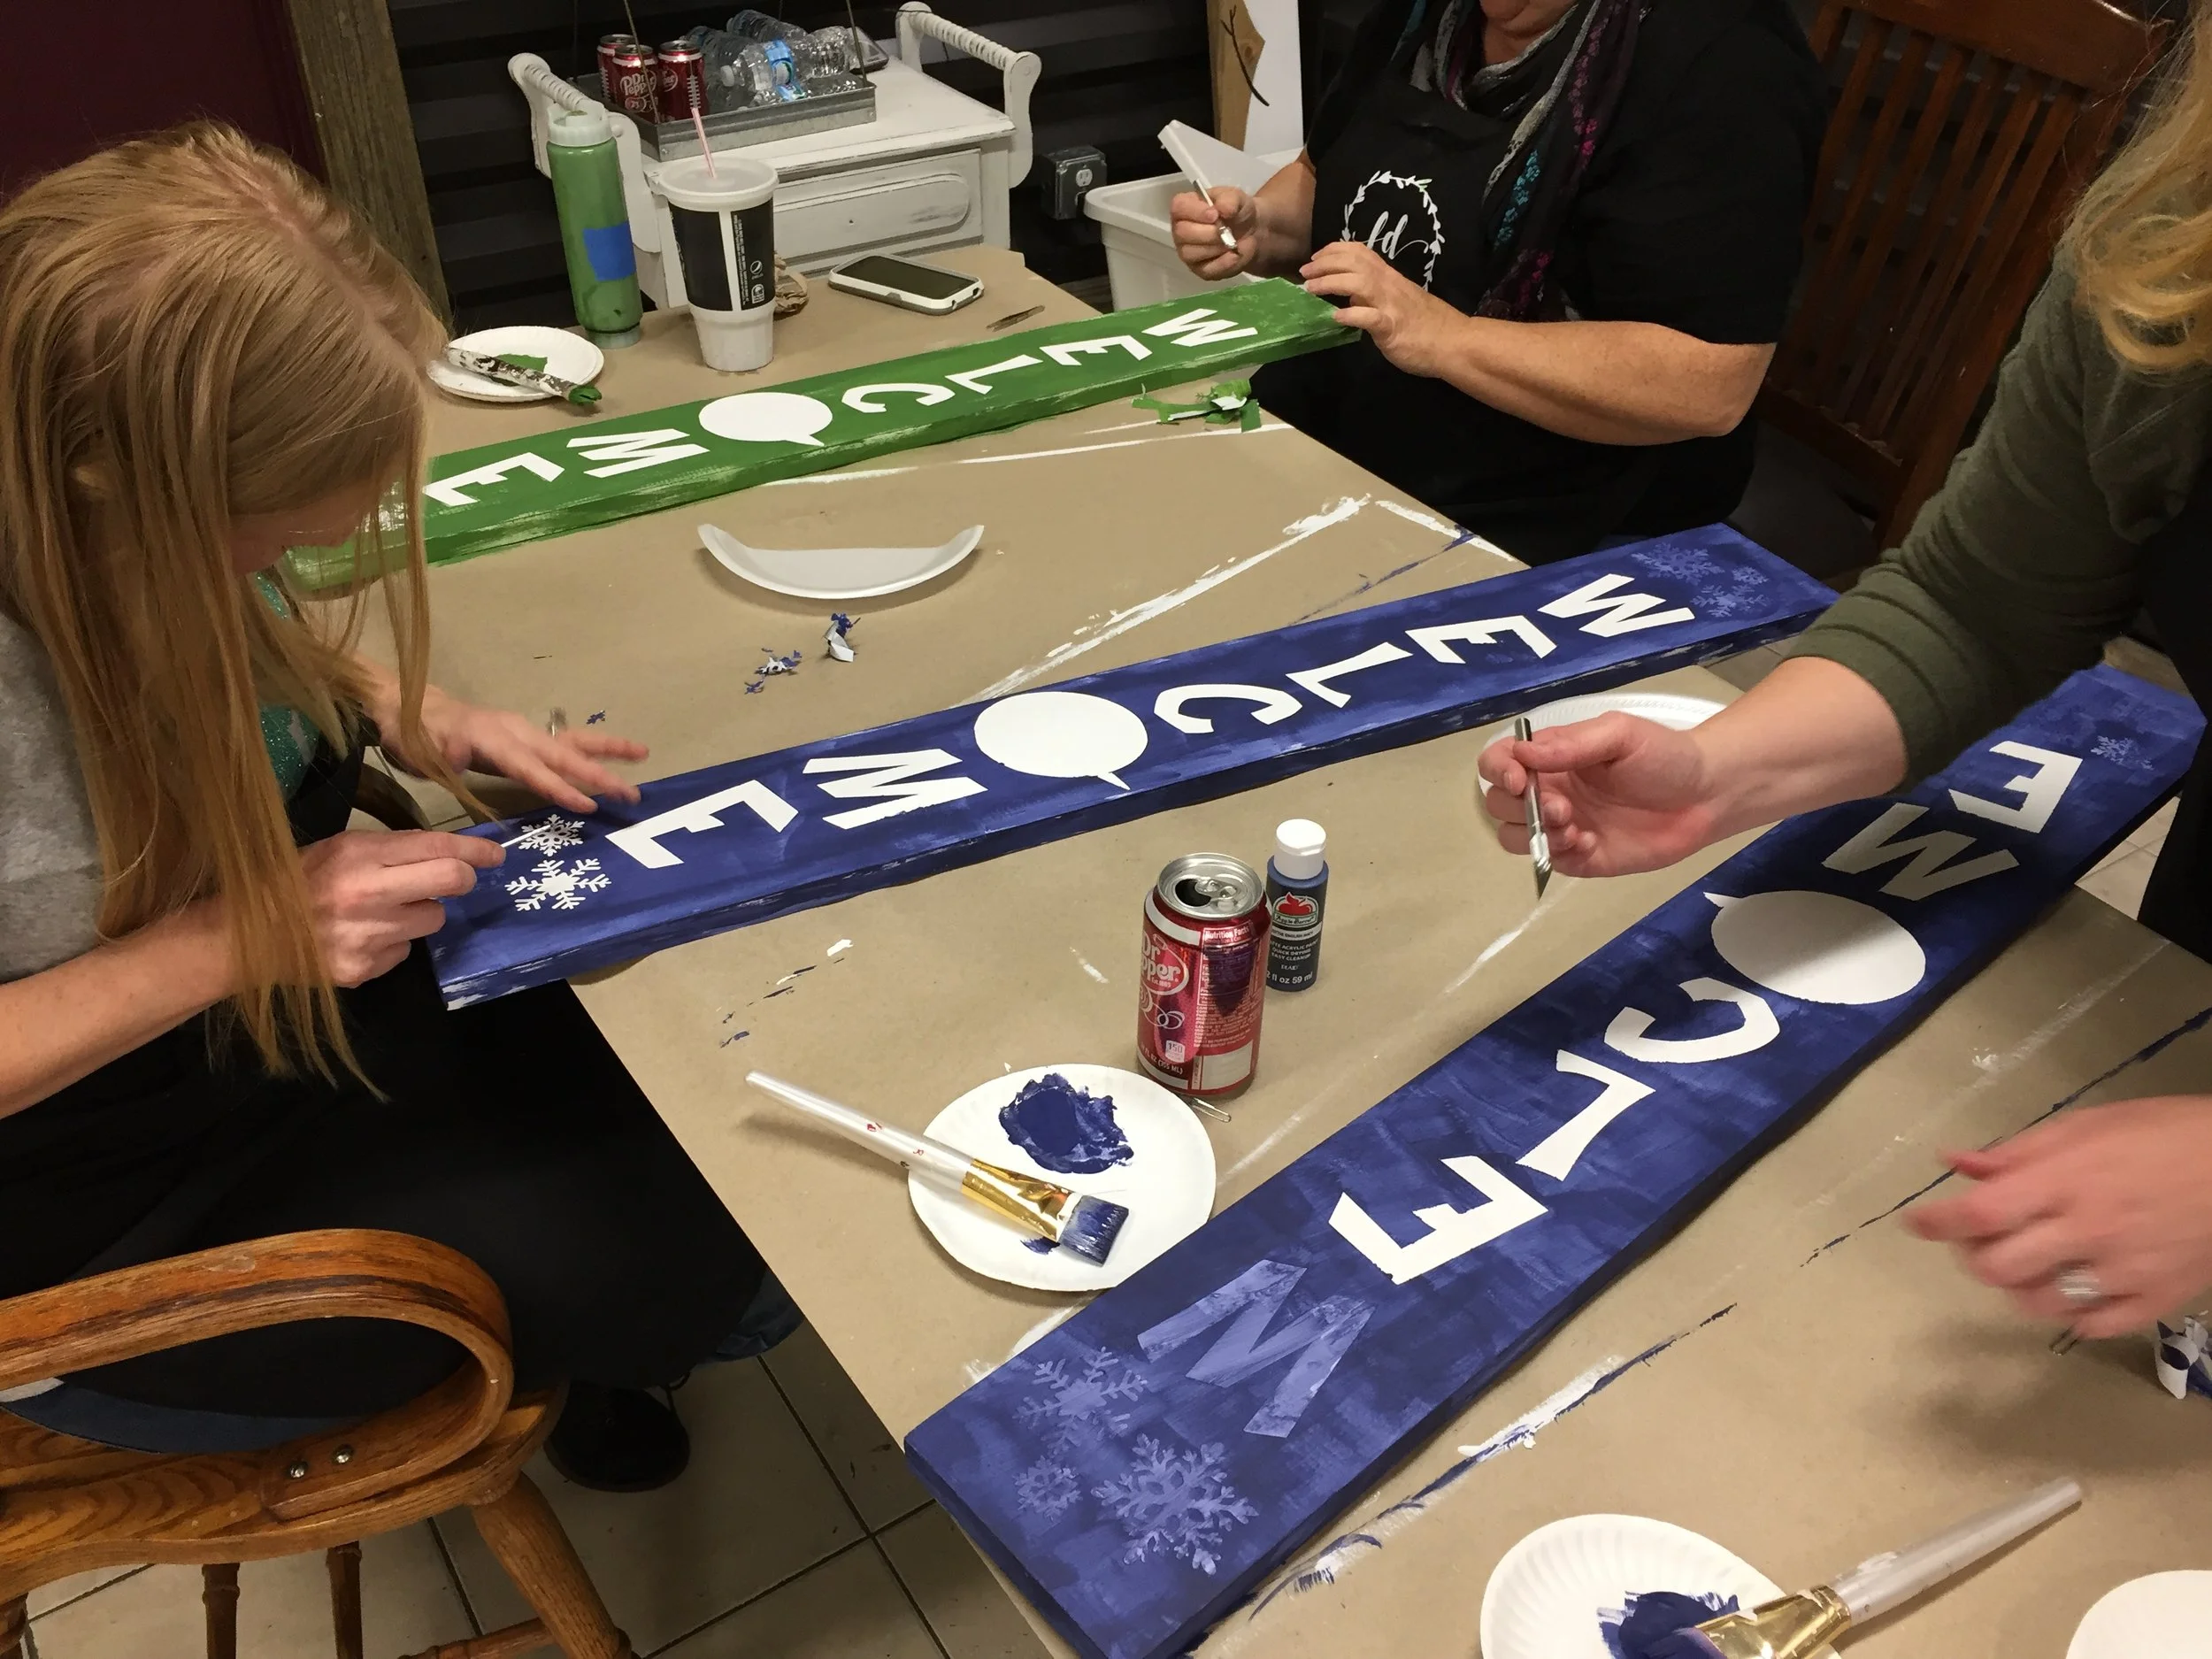
Instead of asking Susie to bring this and Sally to bring that I would opt to getting all the materials and splitting the cost between everyone. That way you know everything will be at the party and you don’t have to run to the store just when the party is getting started because Sally didn’t let you know that she couldn’t make it {and since she couldn't make it the materials she was supposed to bring doesn’t make it either}. Remember to include any brushes or paint trays {paper plates are great for this} that you might need. These are all items you’ll need to provide depending on the project you pick.

5. Costs

Add up all the materials you had to buy then divide that by the number of people, including yourself, that will be attending the party. That will give you the cost per person. It’s a good idea to make everyone pay BEFORE you host the party. You can do this a number of ways.

  • meet up with cash

  • mail a check

  • Paypal

  • Facebook pay

  • a number of other money accepting apps

6. Setting up

If not renting space you need to be sure you have enough seating for everyone. If you don’t have enough you can buy tables/chairs pretty inexpensively or you can always rent them from a local party rental company. I suggest using drop cloths for table covering as they are think and absorb spills but if it’s not in the budget plastic table coverings work well too. You might look into supplying aprons or ask your guests to bring their own. I am a very messy crafter and without an apron I wouldn’t have any clothes that aren't covered in paint. Here are the black aprons I use for my craft business. They have held up extremely well and nothing has yet to get through them.

7. Drinks

What’s a craft party without drinks? Ask everyone to bring in their favorite adult beverage. This will not only make for great conversations but this will ensure that everyone has a drink they like.

If you want to make your next party even easier try one of our craft kits or this paint party kit from Amazon.

Remember to have fun! Don’t go overboard on the details. I’ve found the less I stress about the small details of a party the more fun I have. So if you forget something it’s ok, it’s not the end of the world and it could just make your party even more fun and interesting with having to improvise a little.

How to host an Adutl Pinterest party

Starting a side hustle from home when you're a stay at home momma

SAHM side hustle, find the perfect one for you

SIDE HUSTLE I know so many mommas out there can relate to this. Whether you want to bring in a little income to make ends meet or you simply just want to feel apart of the work force again you are not alone.

Affiliate Disclosure. Some of the links on this website are affiliate links, which means that I may earn a small commission if you click on the link or make a purchase using the link. If you make a purchase you will not be charged anything additional.

Before I get too deep into this I want to clarify I LOVE being a SAHM {stay at home momma}. It fulfills me and makes me a better person. I have never resented the choice to stay home with our four girls and I know I never will but I also enjoy bringing in an income for our family and doing something that makes me feel like I’m apart of the workforce.

So you want to start a side hustle from the convenience of your home while still fully being a SAHM. How the heck do you do that in such a saturated online market space? I’m not going to tell you it’s easy but it IS easier than ever before to make money from home. Even just 11 years ago when we had our very first daughter there was no way we had the resources in our home for me to be in the online space. Heck, my husband and I didn’t even have fancy phones back then we still relied on our home phone to make calls. But now here we are in 2019 and I am not only doing a side hustle in the online space from home I am making a part time income that we use to pay actual bills every single month. As a mom of four this is SO fulfilling! I get to express my creativity, bring in money for our family, and live out my dreams.

I’m going to walk you through some things you should be doing if you too are a SAHM and want to start your own side hustle.

You need to decided what you love to do. Starting a side hustle doing something you love and enjoy will be far more successful than something you hate. For instance I love crafting! I’m pretty sure it runs through my blood stream so naturally I went that route. I don’t particularly love taking surveys or doing MLM {multi level marketing, think Mary Kay} although I have tried those types of things, they aren’t for me. If you don’t know what you love I suggest making a list of things you might be interested in. Start researching those topics, see if you can make a side hustle out of them first, then try your hand at whatever it is before you get too heavily deep into your hustle. Sometimes we find that we really like something on the surface but it isn’t till we get our hands in it we don’t actually LOVE doing it.

Research. Research. Research. I can’t tell you how many videos I watched, articles I read, and newsletters I subscribed to until I found the answers I was looking for. And I’m still learning every single day because the online space changes rapidly. I personally was looking into selling on Etsy but selling online was a bit foreign to me. I had never been a customer on Etsy before so I had no idea how that platform worked but I knew it would be a good starting off point for a handmade business from all the things I researched. I learned so much about things I didn’t even know I needed to know. If you do some research and want to open your own Etsy shop you can get 40 FREE listings. {that is an affiliate link where Etsy will give us both 40 listings for free when you open a shop}.

Block time out. This is a must and something I struggle with because I am a momma of four. I have learned over the years I NEED to do this. Multitasking in your business, for instance I would starting painting boards and while they were drying I would do house work. While this may seem logical it really wasn’t. I would move from one chore to the next because the housework needed to get done and before I knew it the day was over and school was letting out. Find a time that works for your family and schedule it. Remember though, you’re a momma so there will be times when your schedule gets all messed up and crazy, that’s life. Just go with it and if you try to make an effort to stick to your schedule the best you can and you will see bigger results in your side hustle.

Take it seriously. If you take your business seriously and don’t care what anyone outside of your immediate family {your husband and your kids} thinks your business will be successful. You can’t let anyone make you feel like what you are doing doesn’t matter or that you won’t go anywhere with it. That negativity is not welcome! If I listened to those vibes then I certainly wouldn’t be sitting here typing this for you to read.

Have a space to work. This is a must. It doesn’t have to be very big but you do need a space. When I first started selling online we were living in a TINY house with just 2 bedrooms for 6 people. Granted we could make that work because our girls were young, newborn-2nd grade, but we were still living on top of one another. I made my space behind our couch. I had a small 4’ table that I had set up that I only took down if we had company coming over for a party or holiday so we could make more room. Was it my dream space? Absolutely not. But it was a space where I could work on orders and I was grateful for that tiny little space.

Don’t give up. If you truly want to make your side hustle work you can’t give up the first time you fall. I have fallen many, MANY times but with each fall I learn something new that I can apply to my life and business. When I first started out we didn’t have internet in our house, no computer, no printer, so I would go to the library to print off my Etsy orders and shipping labels. Do you know how hard it is to take four kids to the library to try and work? But I didn’t give up, I pushed forward and I am SO glad I did. It wasn’t easy but I knew it could be done if I just kept trying day after day.

I hope these small tips help you on your path to finding that side hustle you’re looking for.



Easy iced coffee recipe

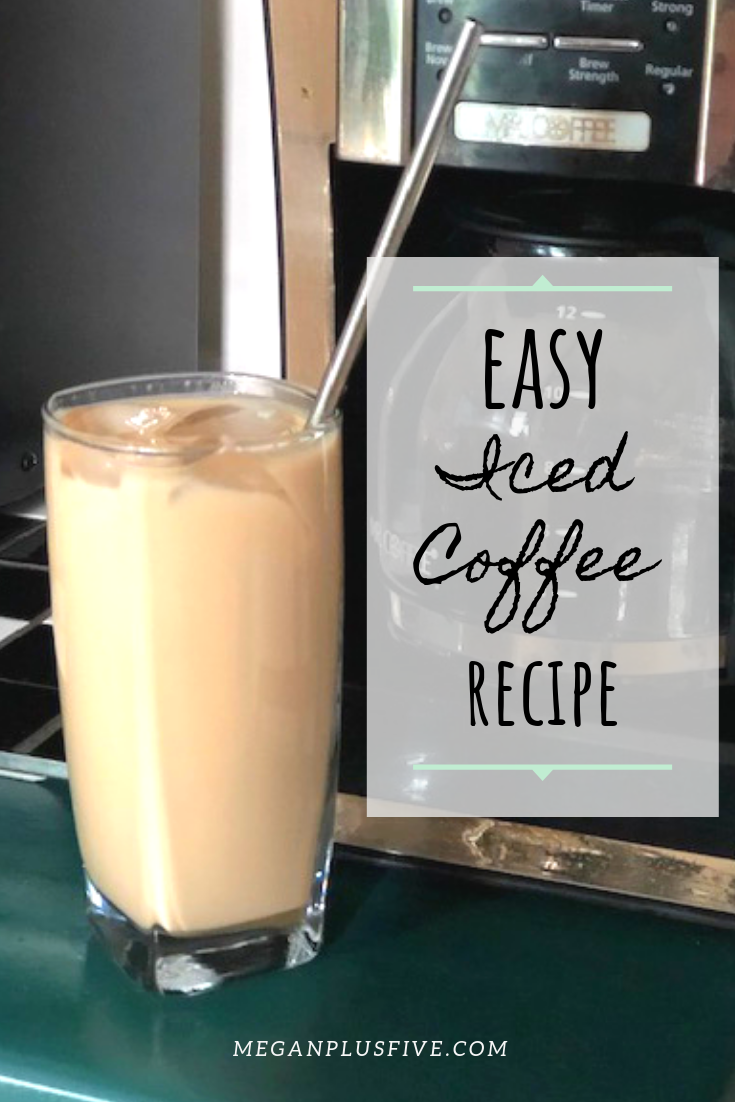
easy iced coffee recipe

Iced coffee…it’s a glorious drink! I didn’t discover coffee until AFTER I gave birth to three of my four daughters. I don’t know what rock I was living under but I never knew coffee could be delicious. I’ve found out that cold coffee, especially ice cold coffee is even more delicious than I could have imagined!

I’m not a huge fan of hot coffee though so most of the coffee I drink is either iced or room temp. Call me weird, that’s ok, but I like what I like.

After being so tired of the three older daughters always using up the regular coffee creamer in their milk I decided to just stop buying it and try my taste buds with half and half. I have to say I am SOOOOO glad I did! It is even better than any flavored creamer I’ve bought! Granted I add in a few things but even so it’s tasty!

Affiliate Disclosure. Some of the links on this website are affiliate links, which means that I may earn a small commission if you click on the link or make a purchase using the link. If you make a purchase you will not be charged anything additional.

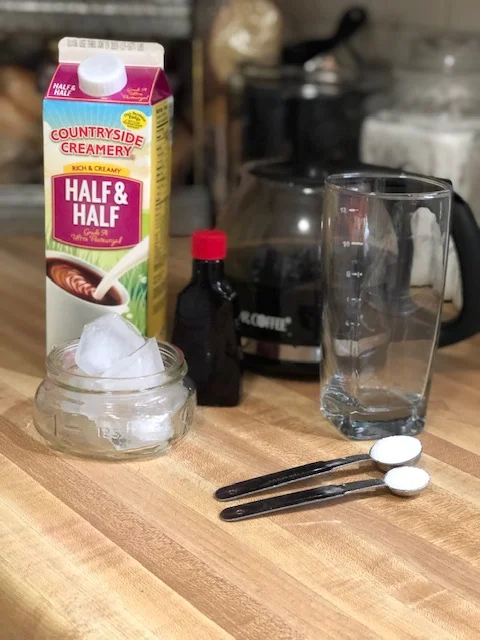
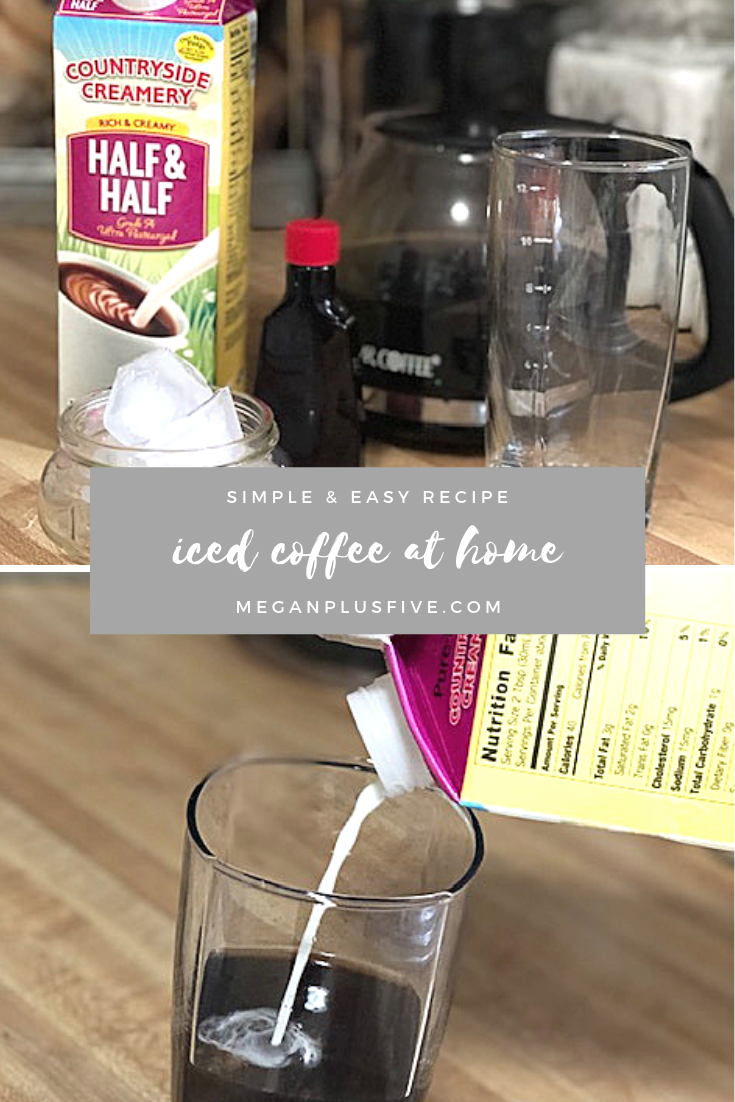
The recipe is so easy to make too. You can buy everything from Aldi for a fraction of what it would cost you at the big name grocery store. Here’s what you’ll need

  • brewed coffee at room temp

  • half and half

  • sugar

  • vanilla extract

  • ice

Easy iced coffee recipe at home

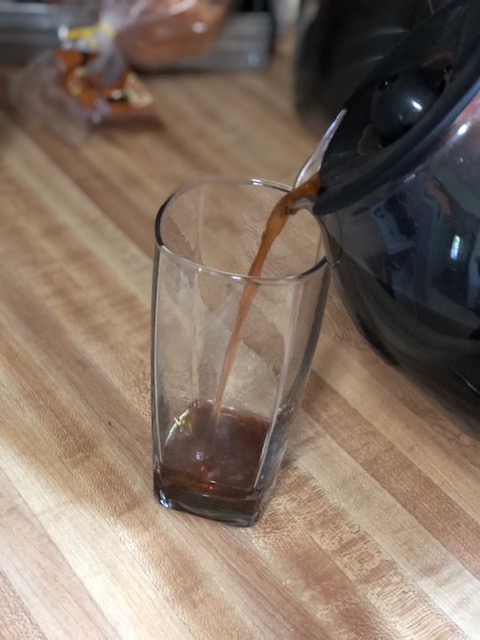
Everyone is different when it comes to taste but I like to have a ratio of coffee:half and half 3:5….yes maybe a little heavy on the half and half but what can I say I’m living it up ;)! First, pour your coffee into your glass.

Easy Iced Coffee Recipe

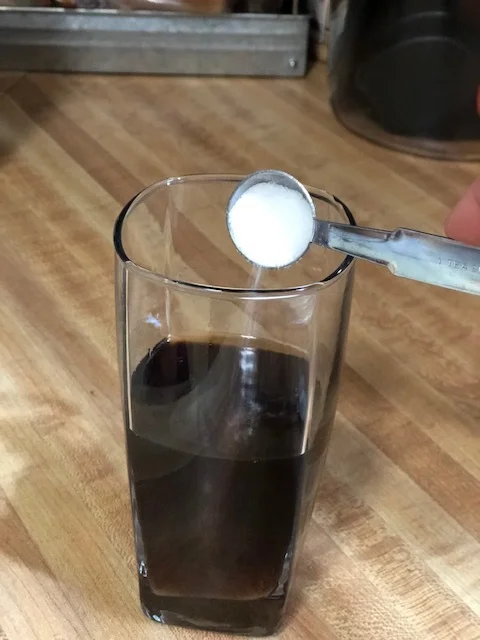
Then add in your sugar. I add 1.5 teaspoons to mine and it’s almost too sweet for me.

Easy Iced Coffee Recipe

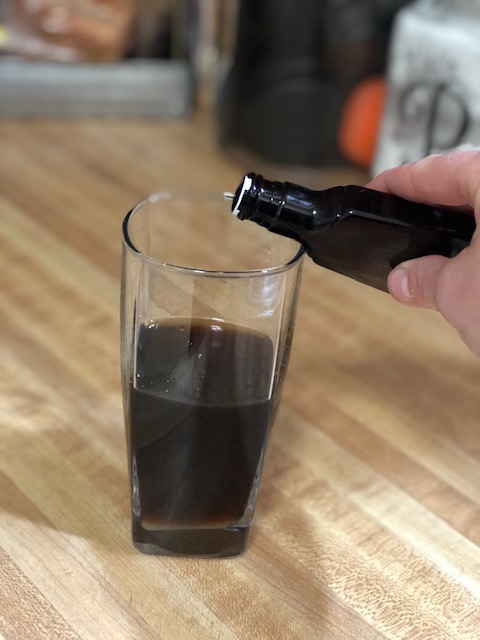
Don’t forget your vanilla. I usually eye ball this to be just a tiny bit but if you’re nervous you’ll pour too much use a measuring spoon. I don’t recommend putting in more than 1/2 teaspoon.

Easy iced coffee recipe


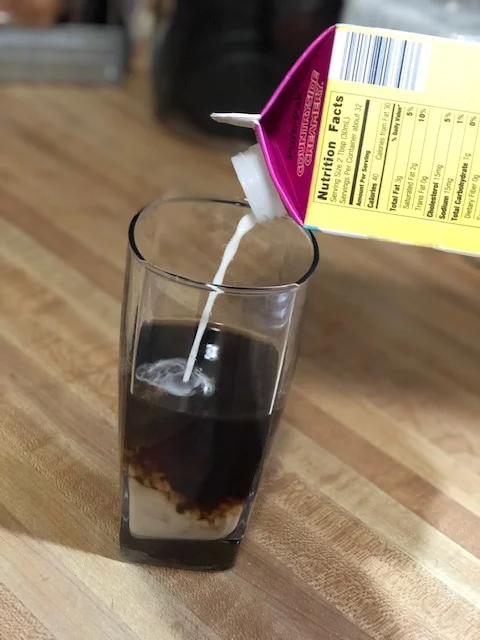
Then add in your half and half

Easy iced coffee recipe

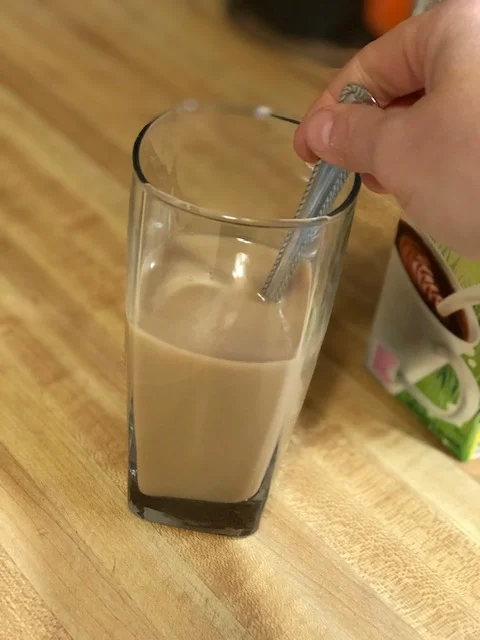
Give it a good stir.

Easy iced coffee recipe

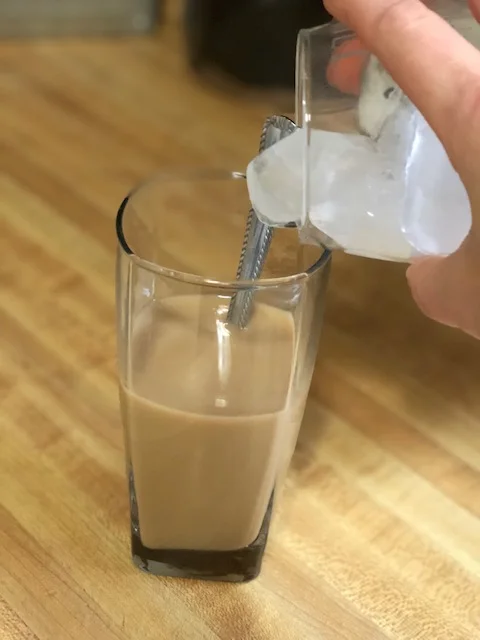
Add in some ice. I usually add a lot.

Easy iced coffee recipe

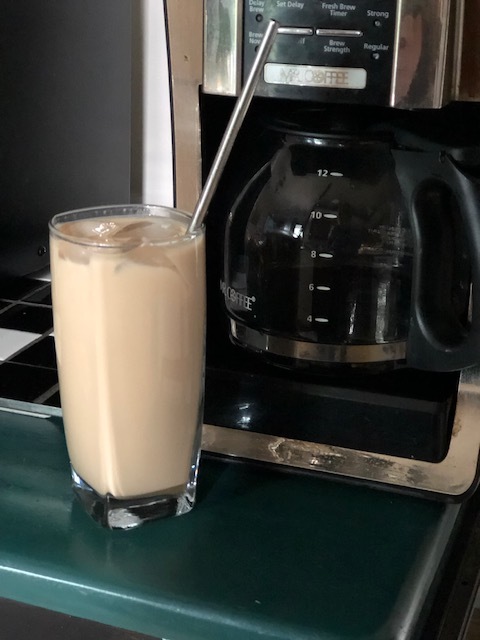
Then you’re done!

Easy iced coffee recipe

Such a simple and easy go to iced coffee recipe. No frills just the basics but it’s soooo good! I like to drink mine from my stainless steel straw. If you’ve never tried these you must! This is the only way I can get enough water every single day to stay hydrated.

I hope you enjoy this recipe!


iced coffee at home, easy recipe


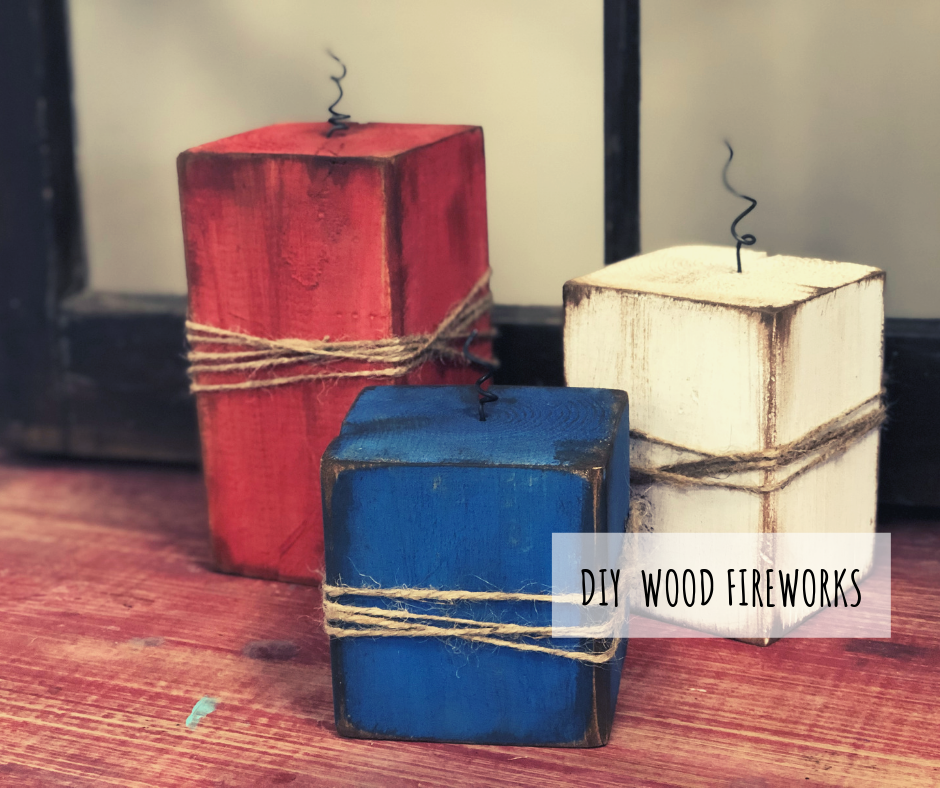
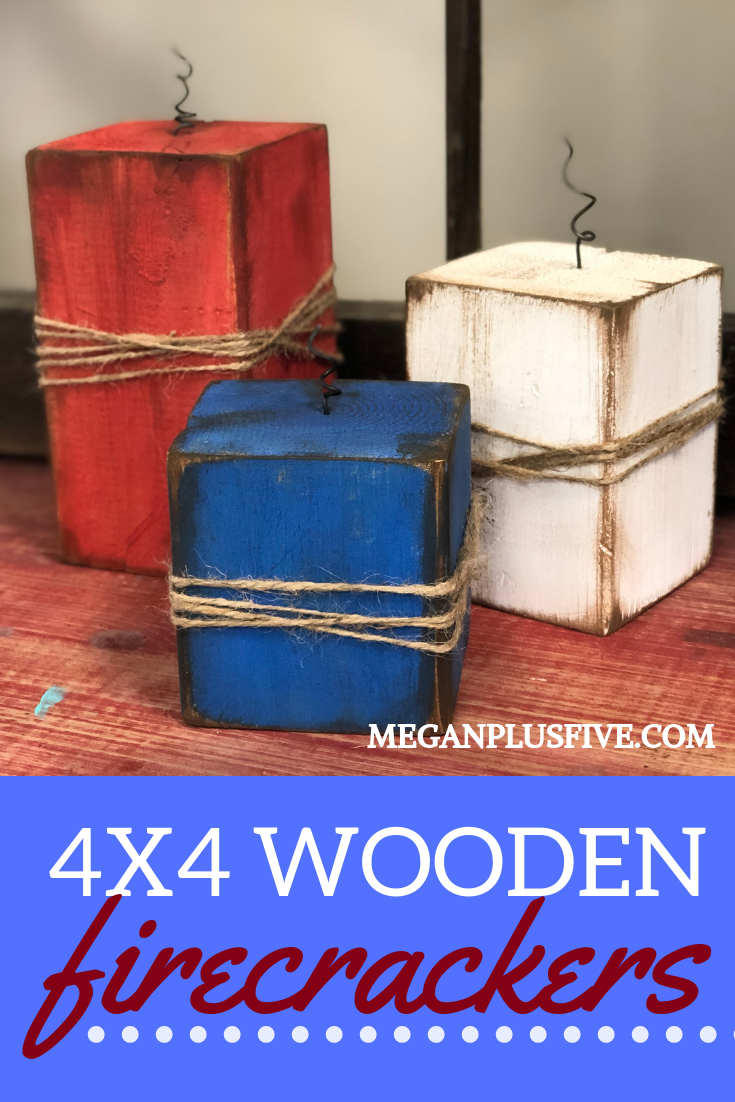
DIY 4X4 Wood Firecrackers

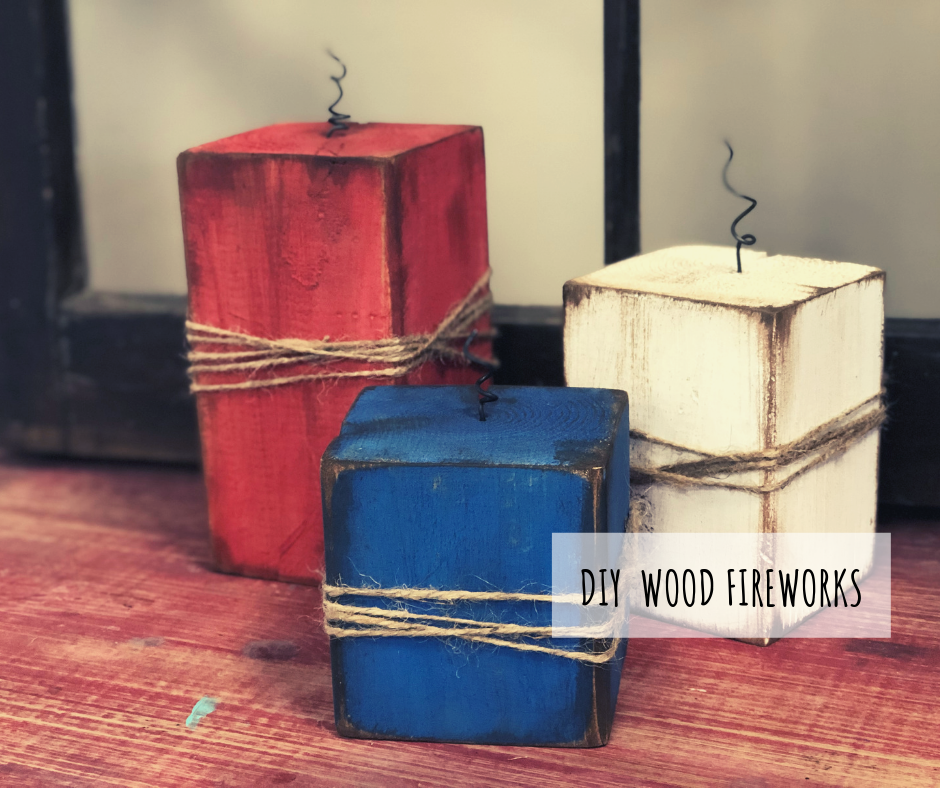
DIY 4x4 Wood Firecrackers, easy Fourth of July Craft to make at home

Affiliate Disclosure. Some of the links on this website are affiliate links, which means that I may earn a small commission if you click on the link or make a purchase using the link. If you make a purchase you will not be charged anything additional.

I am a sucker for a quick and easy simple crafts! These kind of projects give you an instant satisfactions because you don’t need to wait days for them to cure and you can even get the kiddos involved in the creative process because honestly there’s not a whole lot they can mess up with these little guys.

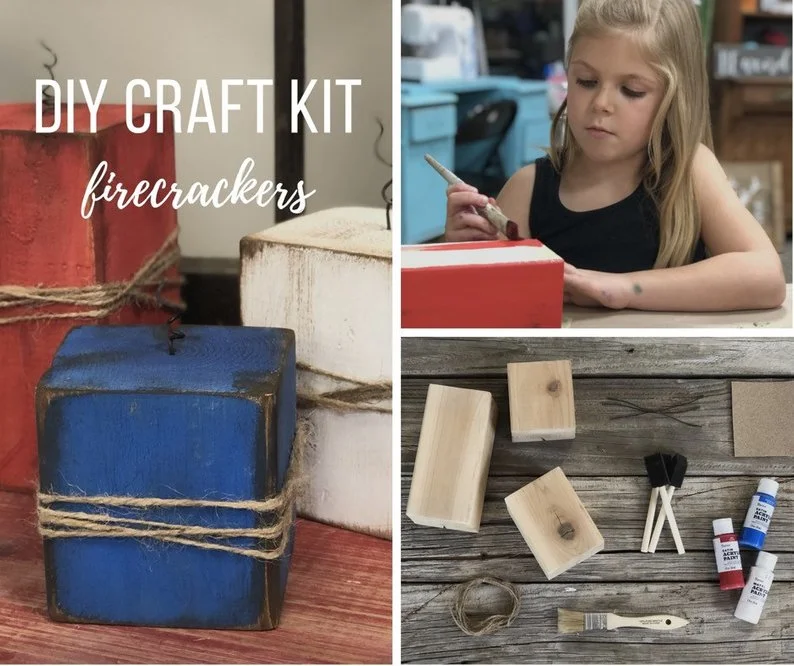
This project does require the use of some power tools but if you don’t have them handy you can purchase an easy craft kit from our studio. We do all the cutting, pre-sanding, drilling, and include all the materials PLUS printed of instructions on how to make them at home so you don’t have to come back to this page while your hands are covered in paint.

Here’s what you’ll need if you’re making yours totally from scratch…

DIY Wood Fireworks.png

If you prefer to order online I’ve attached Amazon links to most of the supplies above. You can purchase most of the supplies at your local Walmart and home improvement stores.

First you need to cut your 4x4 down to 4, 5.5, and 7 inch lengths. Some home improvement stores will do this for you but usually their blades are very dull and will splinter your wood badly. For this project the splinters would add a ton of character but I wouldn’t depend on this being an option for most of your other DIY projects.

DIY 4X4 Wood firecrackers

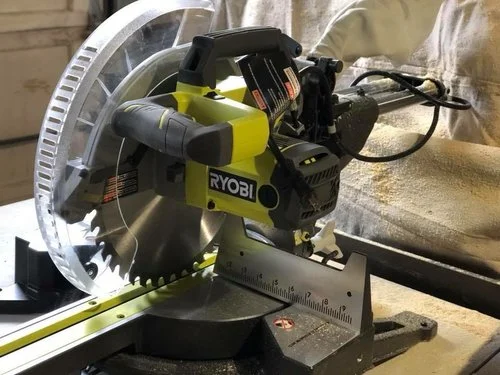
My husband got me my own saw last year and I am LOVING it! Granted it was more money than I wanted to spend but it has been one of the best investments we’ve made in our business. Ryobi makes a really great line of tools, especially if you’re just using them to make projects for your home or running your own creative craft business like I do. This particular saw is great because it is a slider. It can cut anything from 1/2” pieces all the way up to 12” wide {and probably a little wider but I only cut up to 12”}.

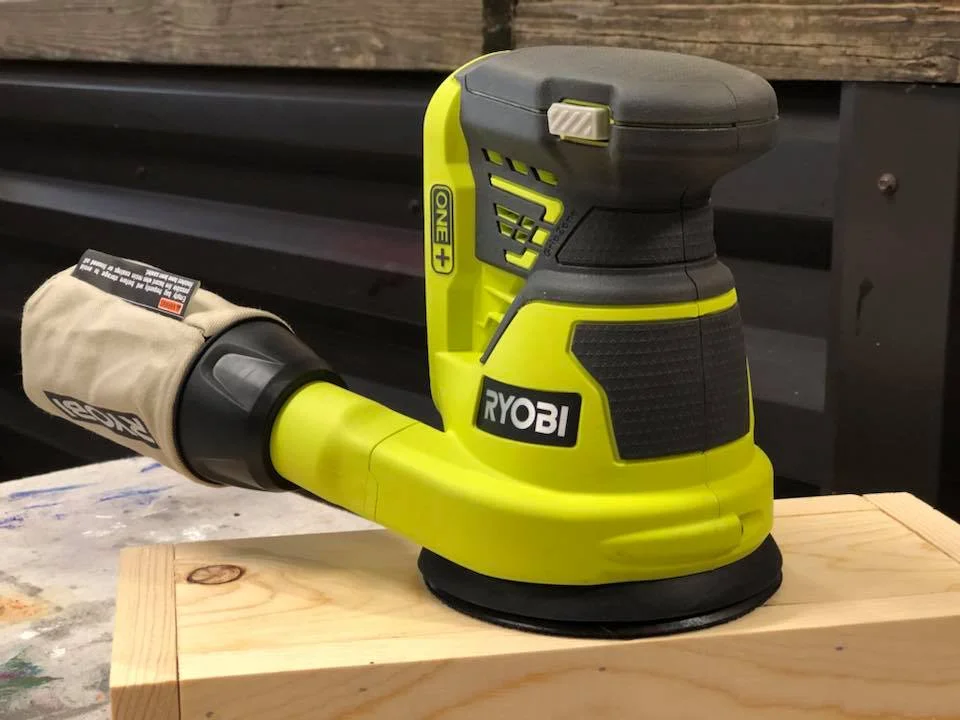
After your pieces are cut you need to give them a quick sanding. Again, I use my trusty Ryobi tools for the job. I typically use 120 grit sandpaper for most of my projects. This is a good in the middle grit. If you want to get crazy you can sand with all the way thru the different grits but I don’t usually do this…I’m a busy momma of four 120 works perfect, lol!

DIY 4X4 wood firecrackers

After you have your pieces sanded be sure to wipe off all the saw dust. You don’t want this on the wood when you start painting.

Depending on the size wire you get will depend on the size drill bit you’ll need. Drill a hole in just the top of each piece of wood. I drilled mine about 1/2” deep.

DIY 4x4 Wood Firecracker

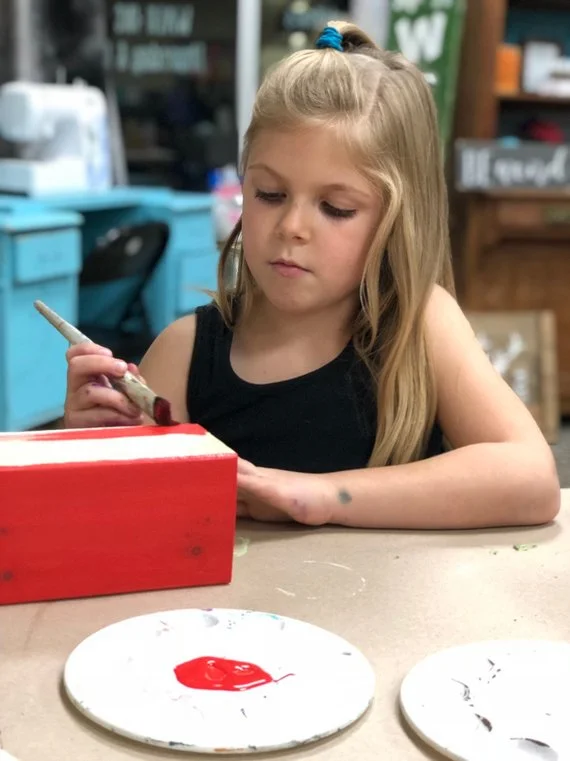
Paint each of your blocks a different color. You’ll need one red, one white, one blue. I did two coats on mine. This is a good time to get the kiddos involved. They really can’t mess these little guys up. Be sure to let the paint dry COMPLETELY between coats. If you don’t your paint will likely pull away from the wood as you apply it on top of wet paint.

After both coats are dried you want to give your blocks a light sanding. Focus on the edges and the corners.

DIY 4x4 wood firecrackers

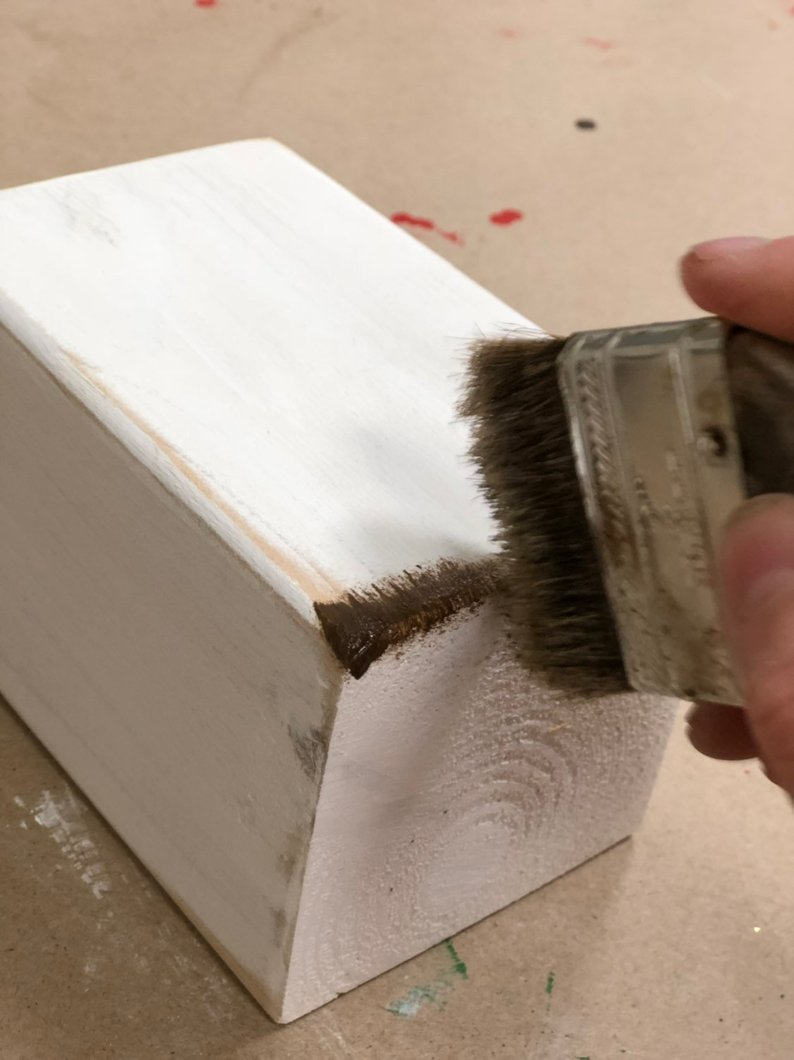
Using your chipbrush apply a light layer of the antiquing wax to the areas you sanded. You can do this as heavy or as light as you like. Remember a little bit goes a long way and you can always add more if you want to.

Now add a little hot glue to the end of the wire and quickly stick it down in the hole you drilled. Once they are dry and in place you can twist them if you’d like.

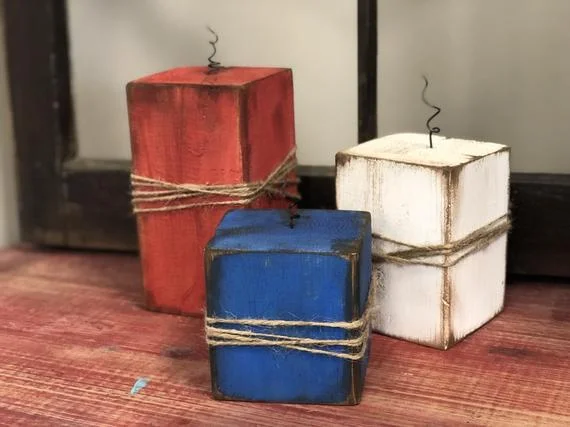
Wrap the middle of each wood block in twine and you’re done! Super easy!

DIY 4x4 Wood Firecracker craft

I hope you found this craft as fun as I did! Enjoy your Fourth of July!


How to make painted wood signs, all the tips and tricks the pro's won't tell you


Drinking enough water when you're a busy momma, the #1 tip that really works

Drinking enough water when you're a busy momma, the #1 tip that really works

Affiliate Disclosure. Some of the links on this website are affiliate links, which means that I may earn a small commission if you click on the link or make a purchase using the link. If you make a purchase you will not be charged anything additional.

I am going to be seriously honest, I don’t drink enough water every single day. Well, I used to not anyway. I’m willing to bet that there are a lot of mommas that feel the same way I used to. Something about knowing I HAD to drink 8 full glasses, 90 OUNCES of water every single day was intimidating {but give me 8 glasses of Dr. Pepper or iced coffee and that’s a whole different story}. I for real struggled to drink enough water most days and I was really feeling the side effects of it.
Some of my side effects were

  • skin was looking extra dry and wrinkly

  • hungry ALL the time

  • urine was dark in color

  • feeling super fatigued a lot

  • getting a lot of headaches

It wasn’t till I picked up a package of stainless steel straws and used them that I realized it was a mind of matter kind of thing to get myself to guzzle down at least 8 glasses every day. I had every intention of trying these fancy straws out the last two years and just never got around to it {busy mom brain}. One day I finally added them to my cart and I am KICKING myself for not doing it sooner!

Using the straw works because we tend to drink more when we use a straw. And using a stainless steel straw works even better because it is reusable. Just wash and dry when you’re done using it and it’s ready for water drinking the next day!

But I still wasn’t drinking enough water. I was drinking more, but not as much as I needed to be to get adequate hydration. I still felt an overall blah. So I pulled out my stainless steel tumbler to see if maybe that would help.

Drinking enough water when you're a busy momma, the #1 tip that really works

Holy cow it did! After about a week of drinking from my Ozark 30 oz tumbler I noticed a HUGE difference in the way I felt. For the first time in a very long time I felt truly hydrated! My skin felt amazing. It wasn’t itchy and scaly {even using coconut oil daily wasn’t combating this}. My hair didn’t feel as yuck as it had been. My mind was even clearer! I had a better focus and I actually had energy to get things done AND wake up early!! This is huge for me since I’m not a morning person at all.

This has worked so well for me that I picked up an Ozark 20 oz tumbler for each of my girls. They are loving them and I’m loving that they don’t get all the glasses in the cabinet dirty anymore.

I picked my tumblers up at my local Walmart but here are the links to purchase similar ones on Amazon Prime

Being a busy momma it is hard to be sure to do all the things but we really do need to put our health and our family’s health at the top of the to do list. Start with drinking enough water. I promise you will be a much more productive momma and you will love your hydrated self!

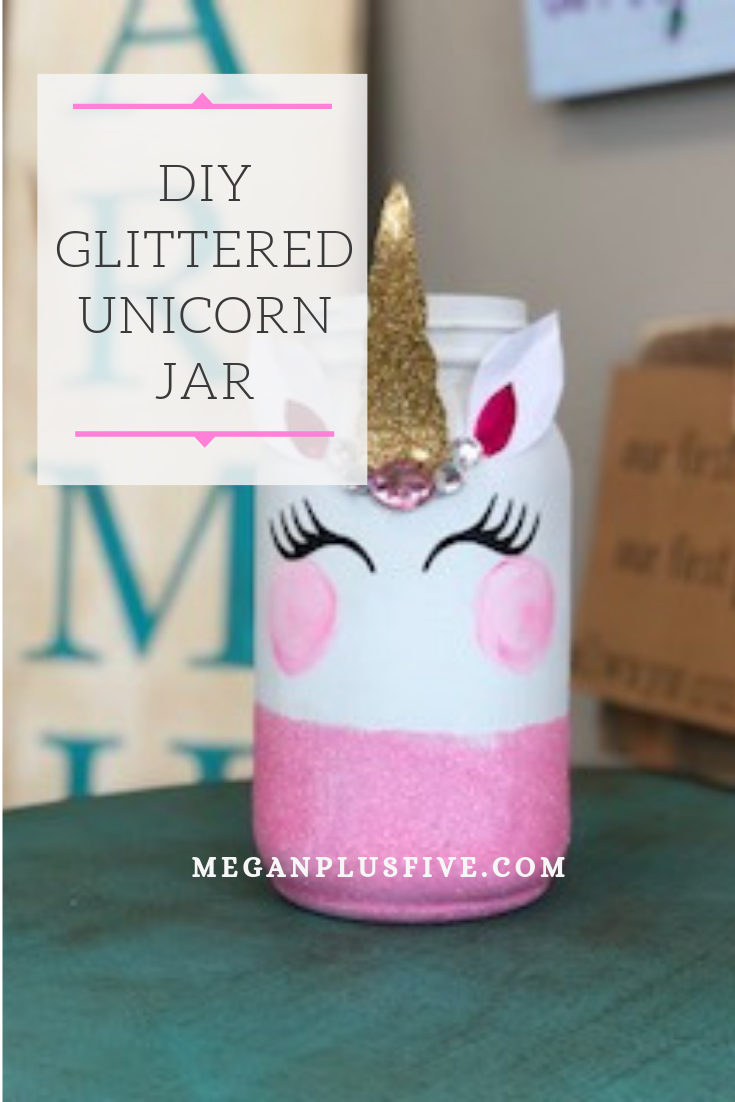
DIY Glittered Unicorn Jar

DIY Glittered Unicorn Jar

DIY UNICORN MASON JAR

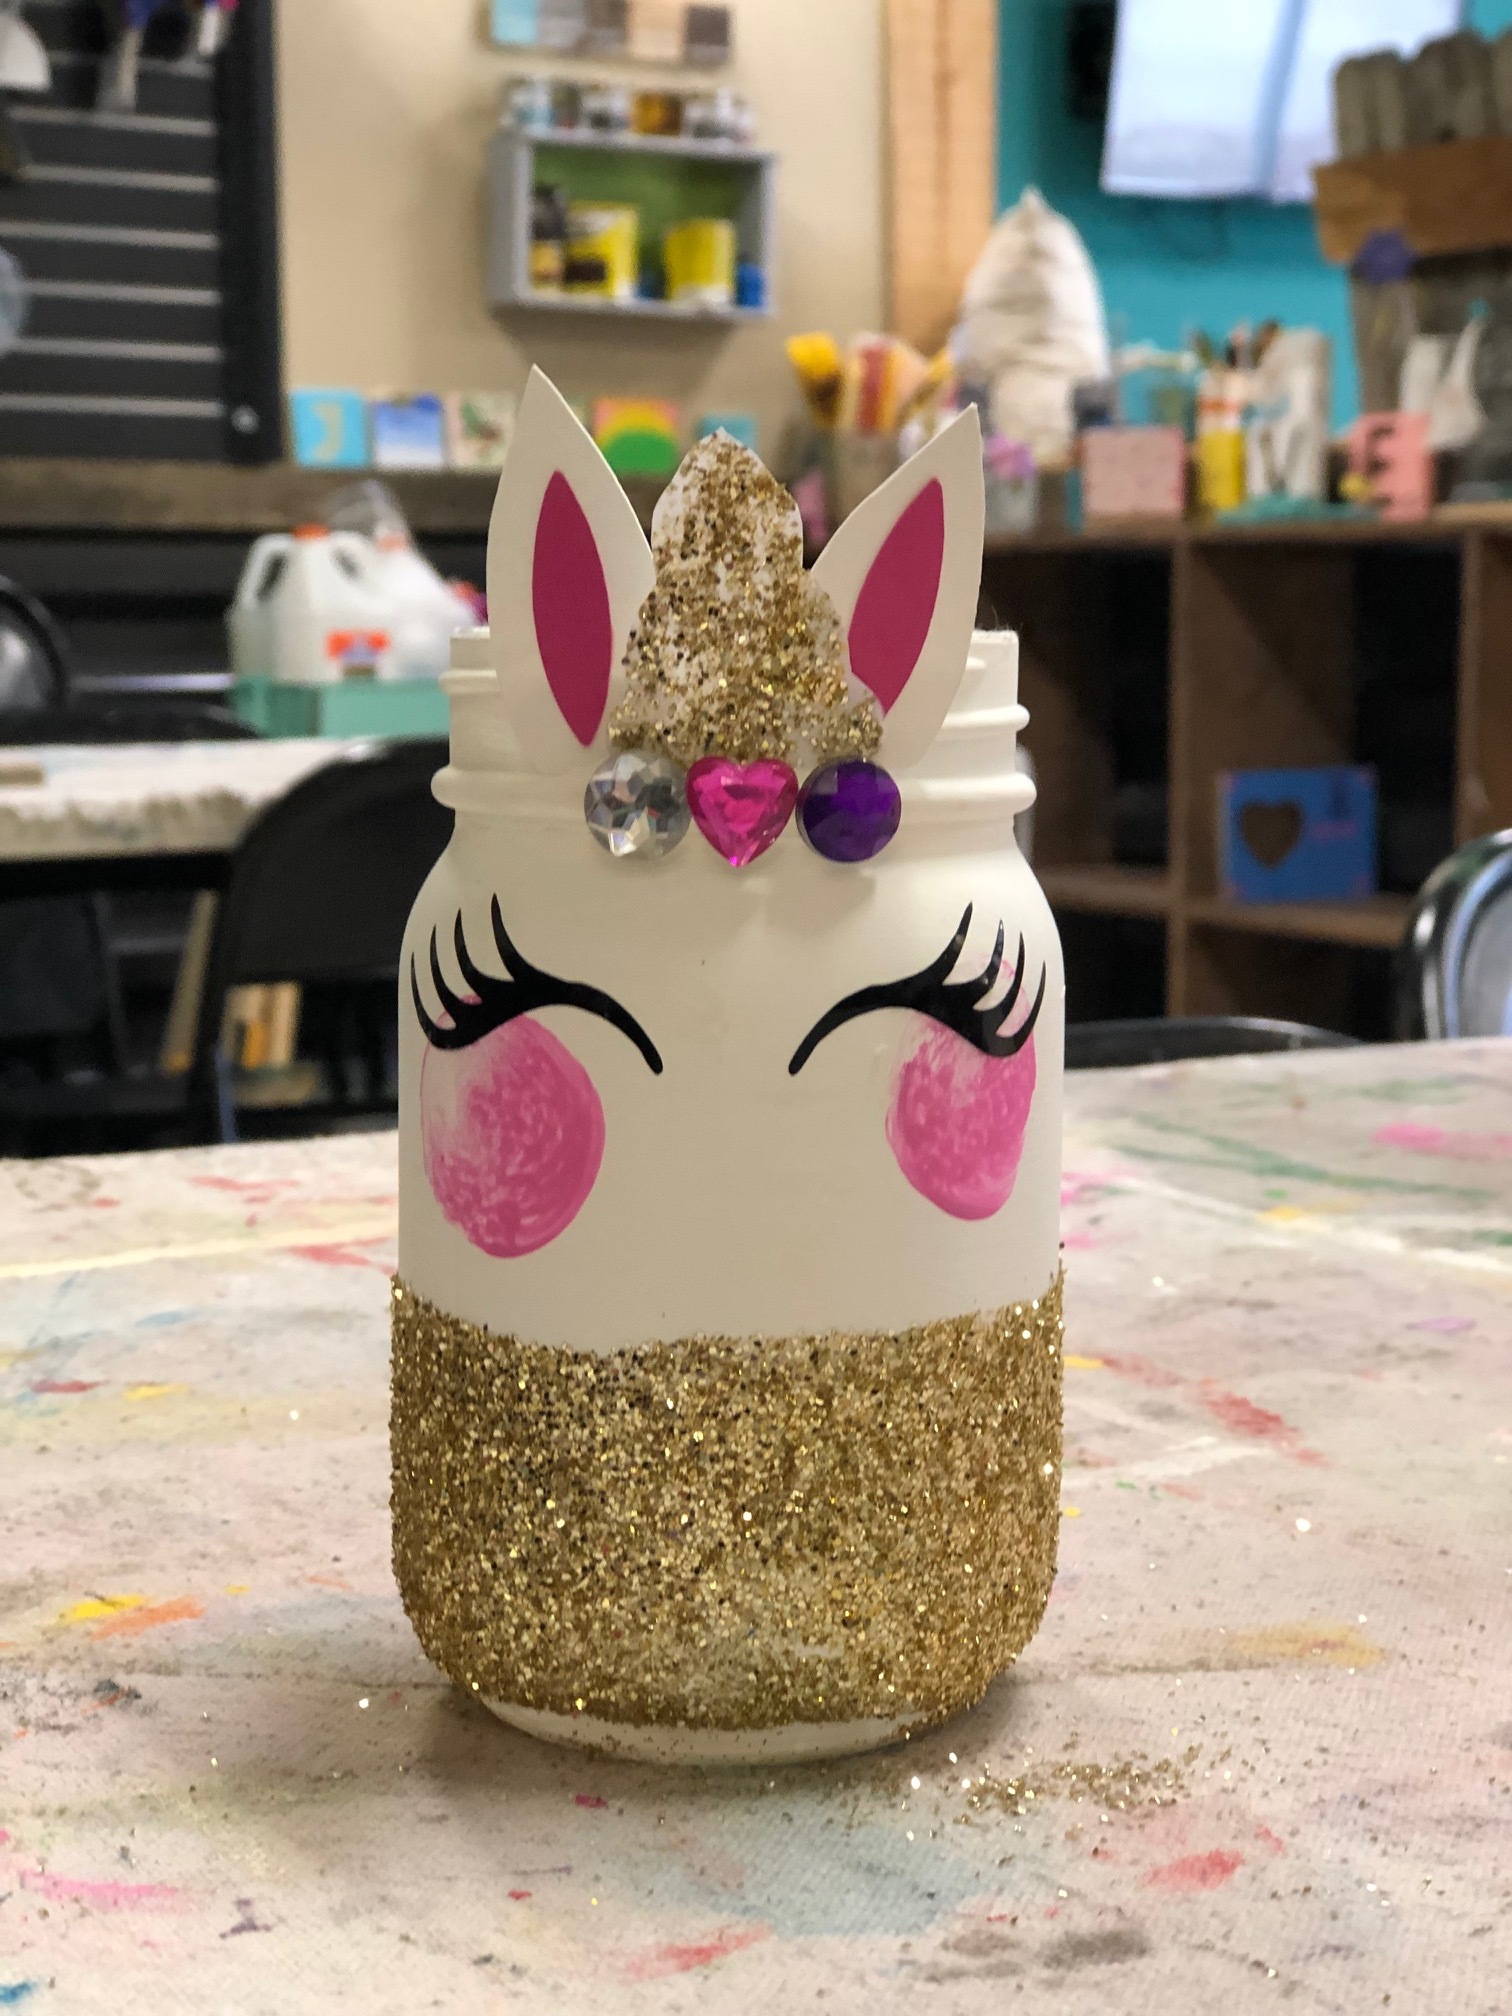
Looking for a fun UNICORN themed craft to do with your unicorn obsessed little one {or by yourself ;)}? These jars are such perfect little project! You can use them as a money bank, colored pencil holder, stick a battery operated candle inside to make a fun and unique night light or be like our girls and keep little trinkets you find inside your jar. Whatever you use it for it will be oh so cute!

Affiliate Disclosure. Some of the links on this website are affiliate links, which means that I may earn a small commission if you click on the link or make a purchase using the link. If you make a purchase you will not be charged anything additional.

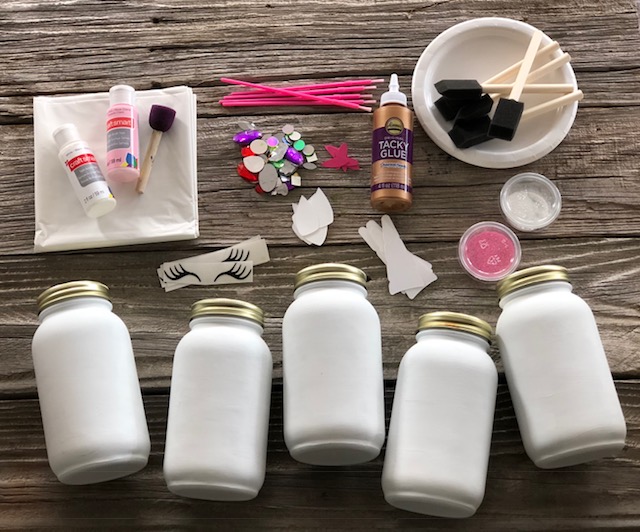
Here’s what you’ll need

Need a no stress craft kit for this project? You can purchase a UNICORN JAR CRAFT KIT in my shop. Everything you need to complete this project at home. It’s always an option to send this packaged as a gift. If you’re planning a birthday party here is my no stress UNICORN CRAFT PARTY IN A BOX.

unicorn jar kit.jpg

You want to start with a PRE PAINTED mason jar. I always use chalk paint to paint my jars. It goes on nice and even and has great coverage. You can use regular acrylic paint but you will not get the same coverage as the jar above. Your jar will need to cure for at least 24 hours prior. If it does not get proper curing time the paint can peel from the glass jar. I used both pint and quart sized mason jars for this project and they both turned out super cute! This is also a great way to use up an empty sauce or salsa jar from the kitchen.
I used my CRICUT CUTTING MACHINE to cut out all the facial features. I used cardstock for the ears and horn and black vinyl for the eyes. If you don’t have a cutting machine you can cut these by hand and draw/paint on the eyes.

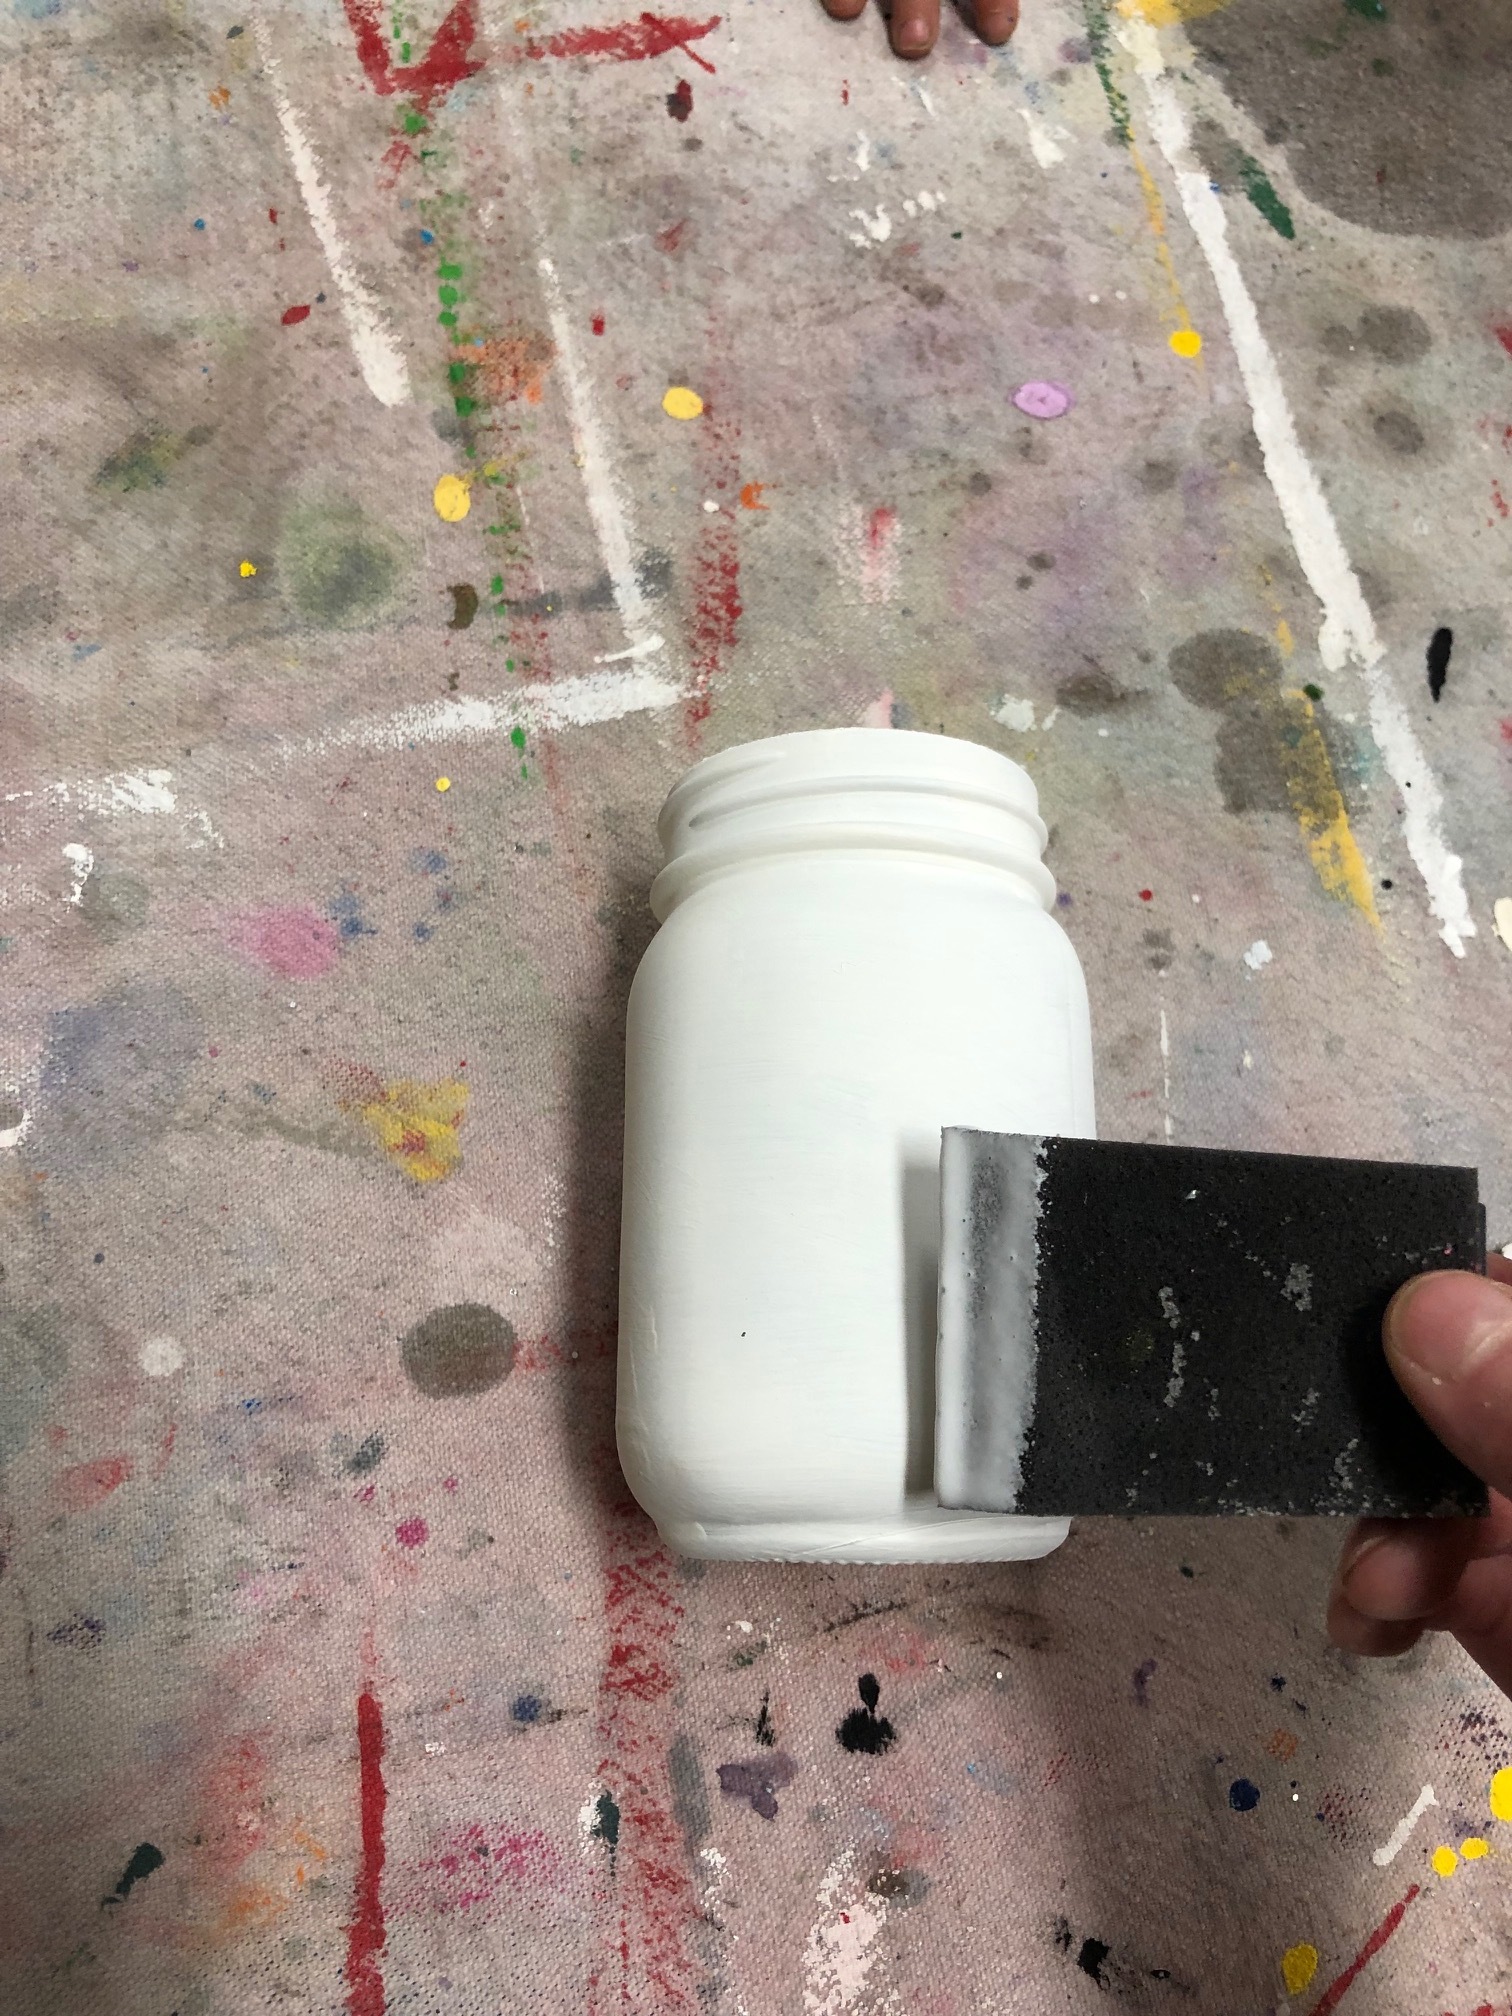
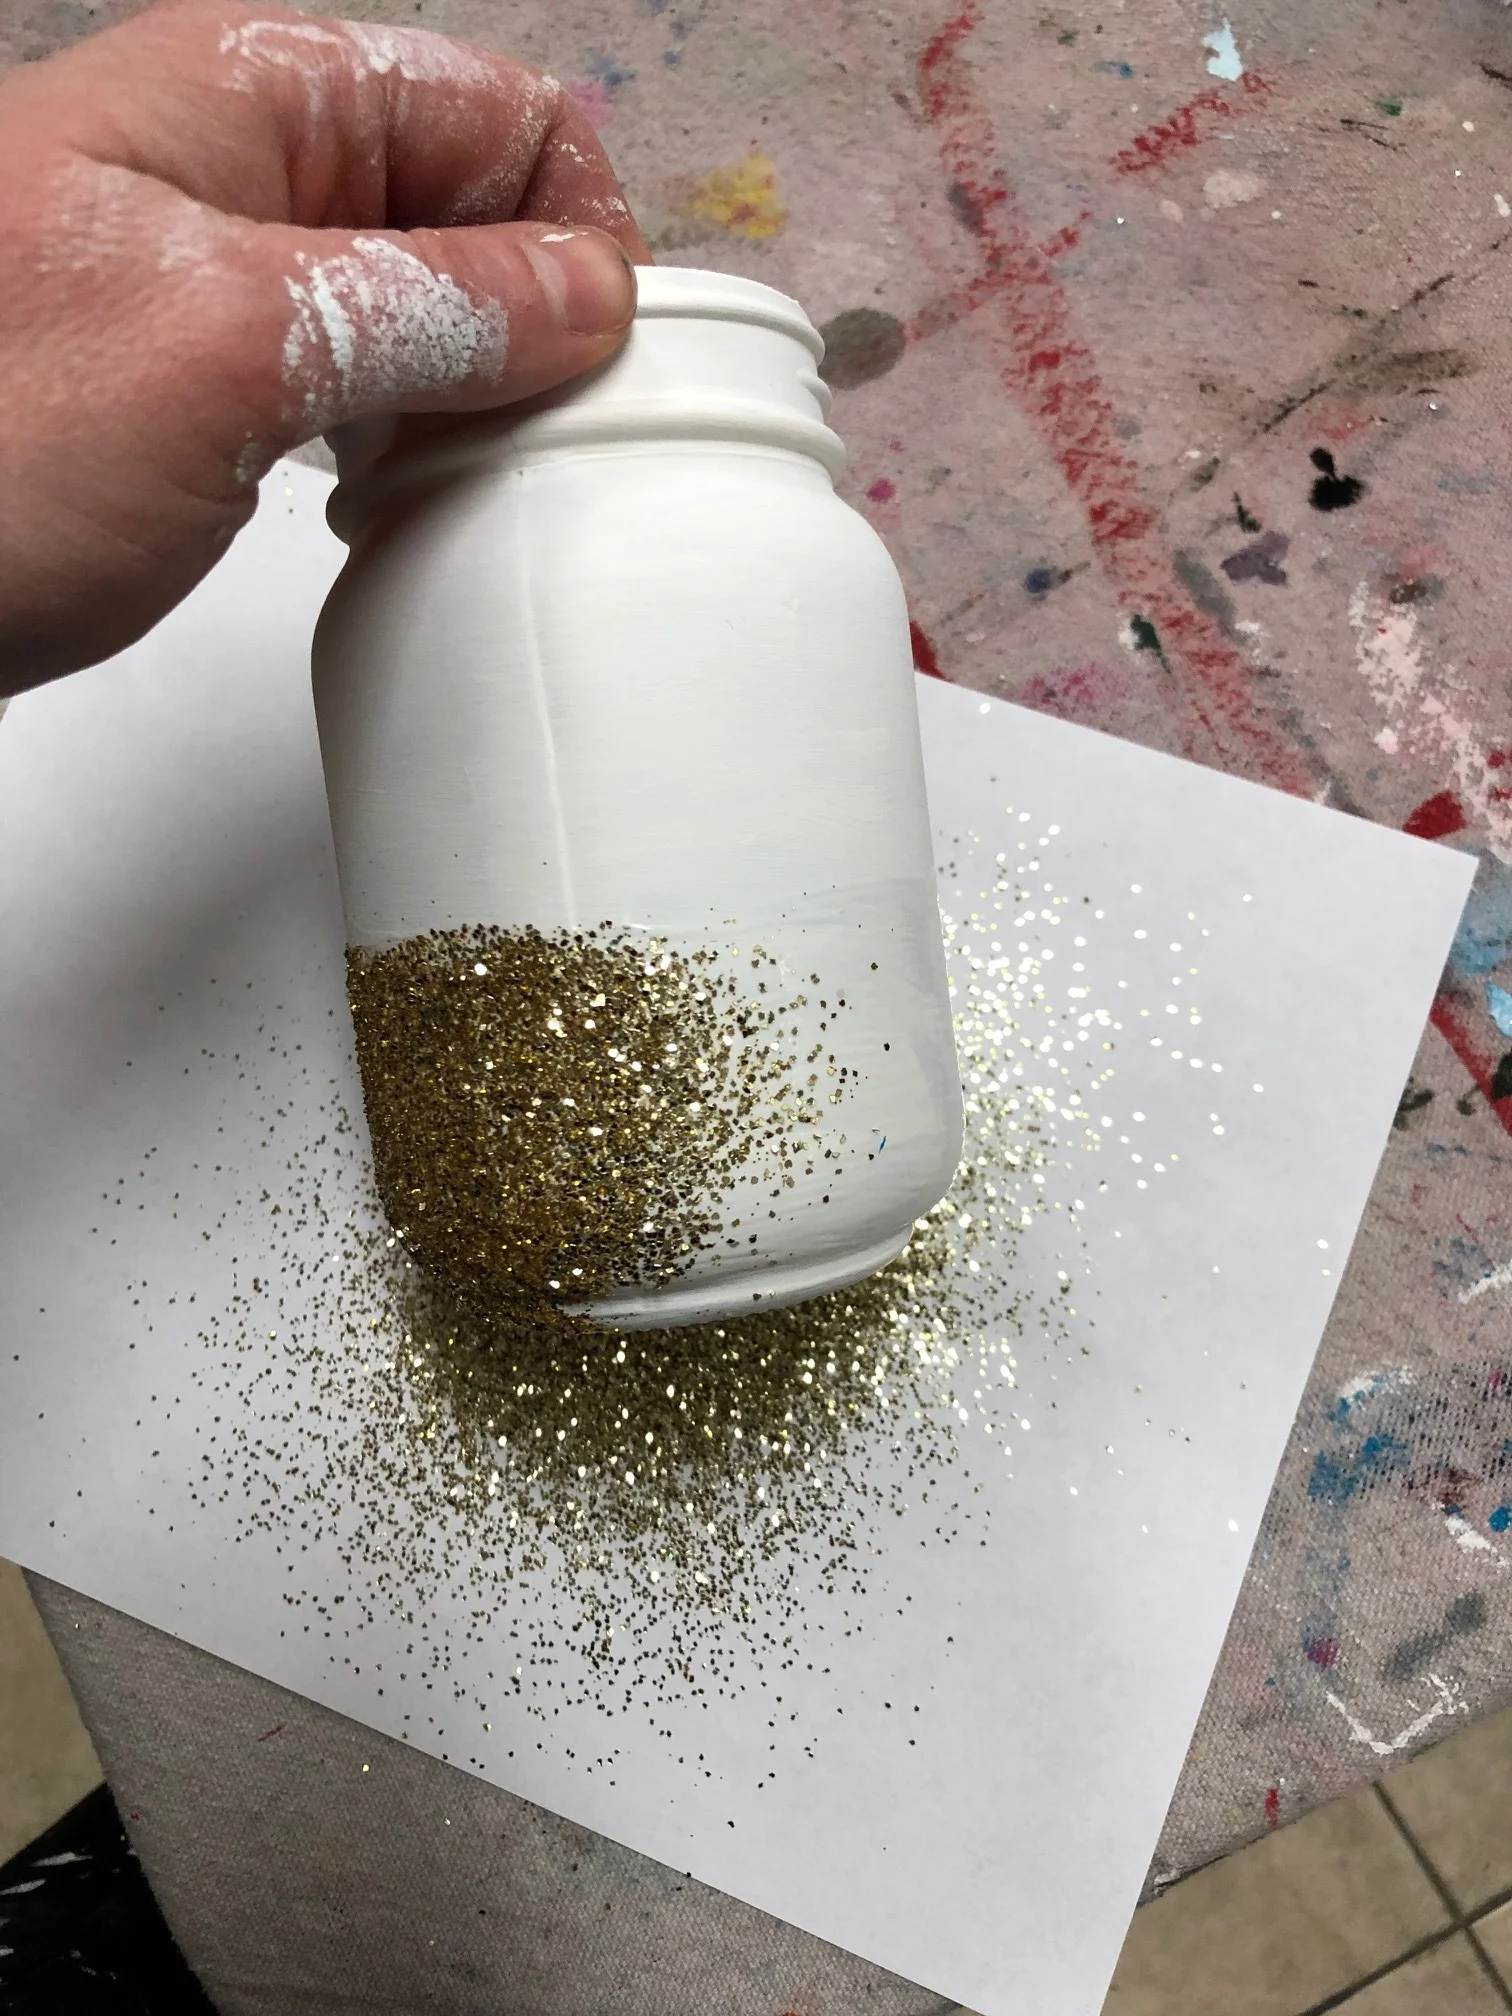
Paint a thick layer of mod podge on the bottom of your jar. A wide 3” sponge brush works great for this. You can use the width as a guide for how high up to go on the jar.

DIY glittered unicorn jar

Place a piece of paper under your jar and sprinkle it with glitter. The paper will catch a good amount of the glitter that doesn’t make it on the jar so you can reuse it. You’ll want to work quickly so your mod podge doesn’t dry before you get done glittering.

DIY glittered unicorn jar

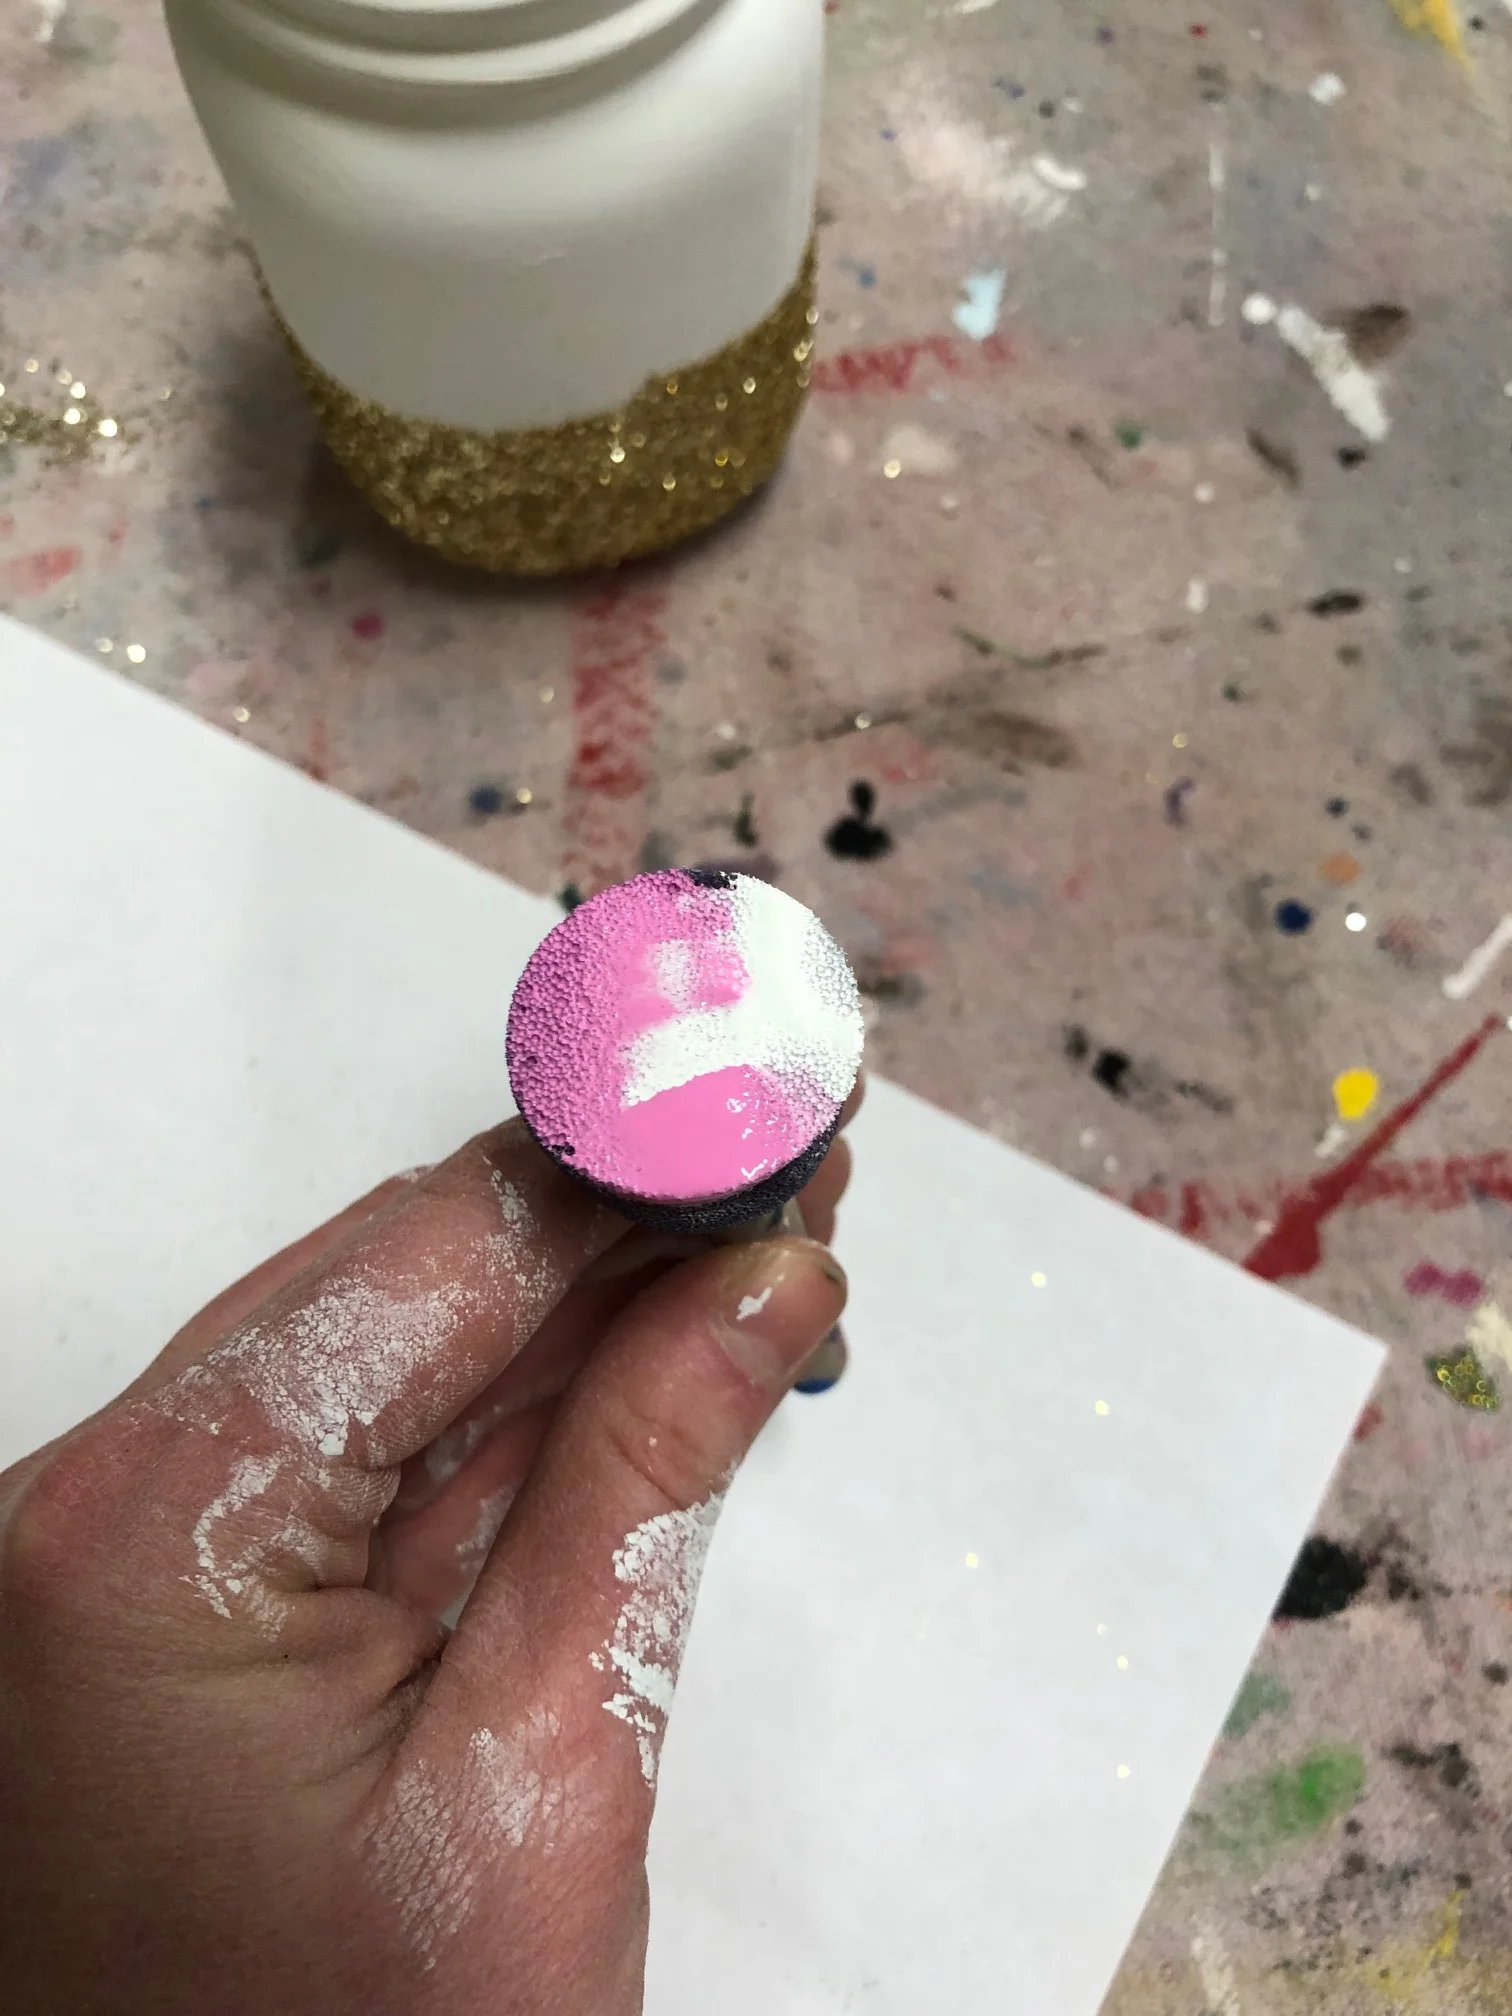
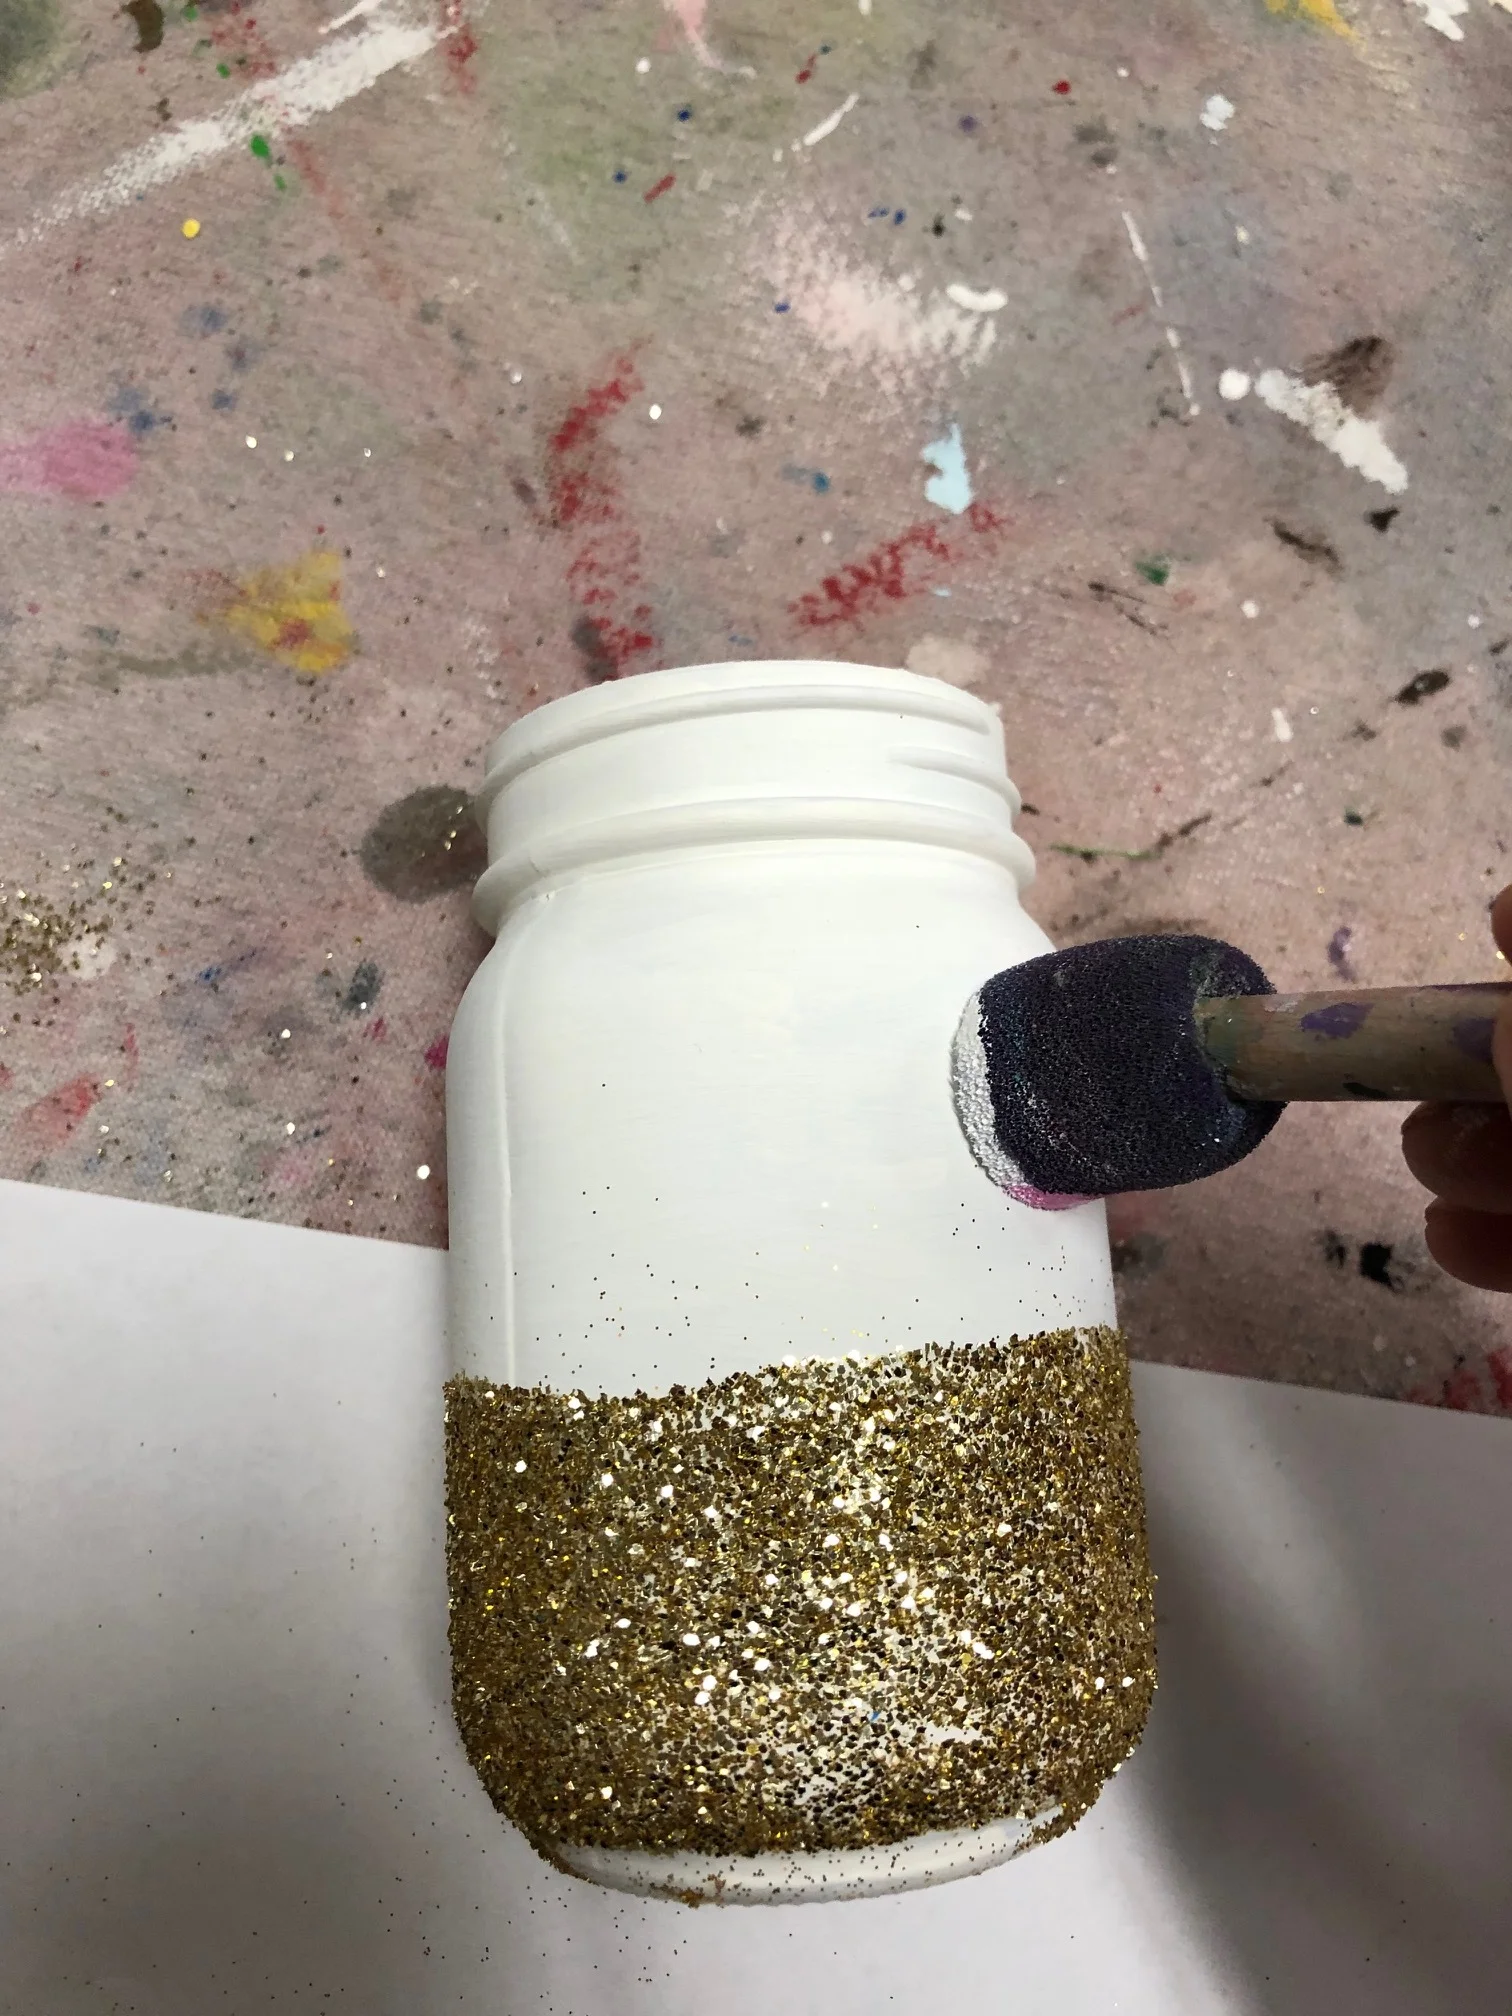
Once that is dry you will paint on the cheeks. Dip half of your round sponge brush into the pink paint and the other half into the white paint. When you apply the paint you will make a slight twist motion to get the swirly effect.

DIY glittered unicorn jar

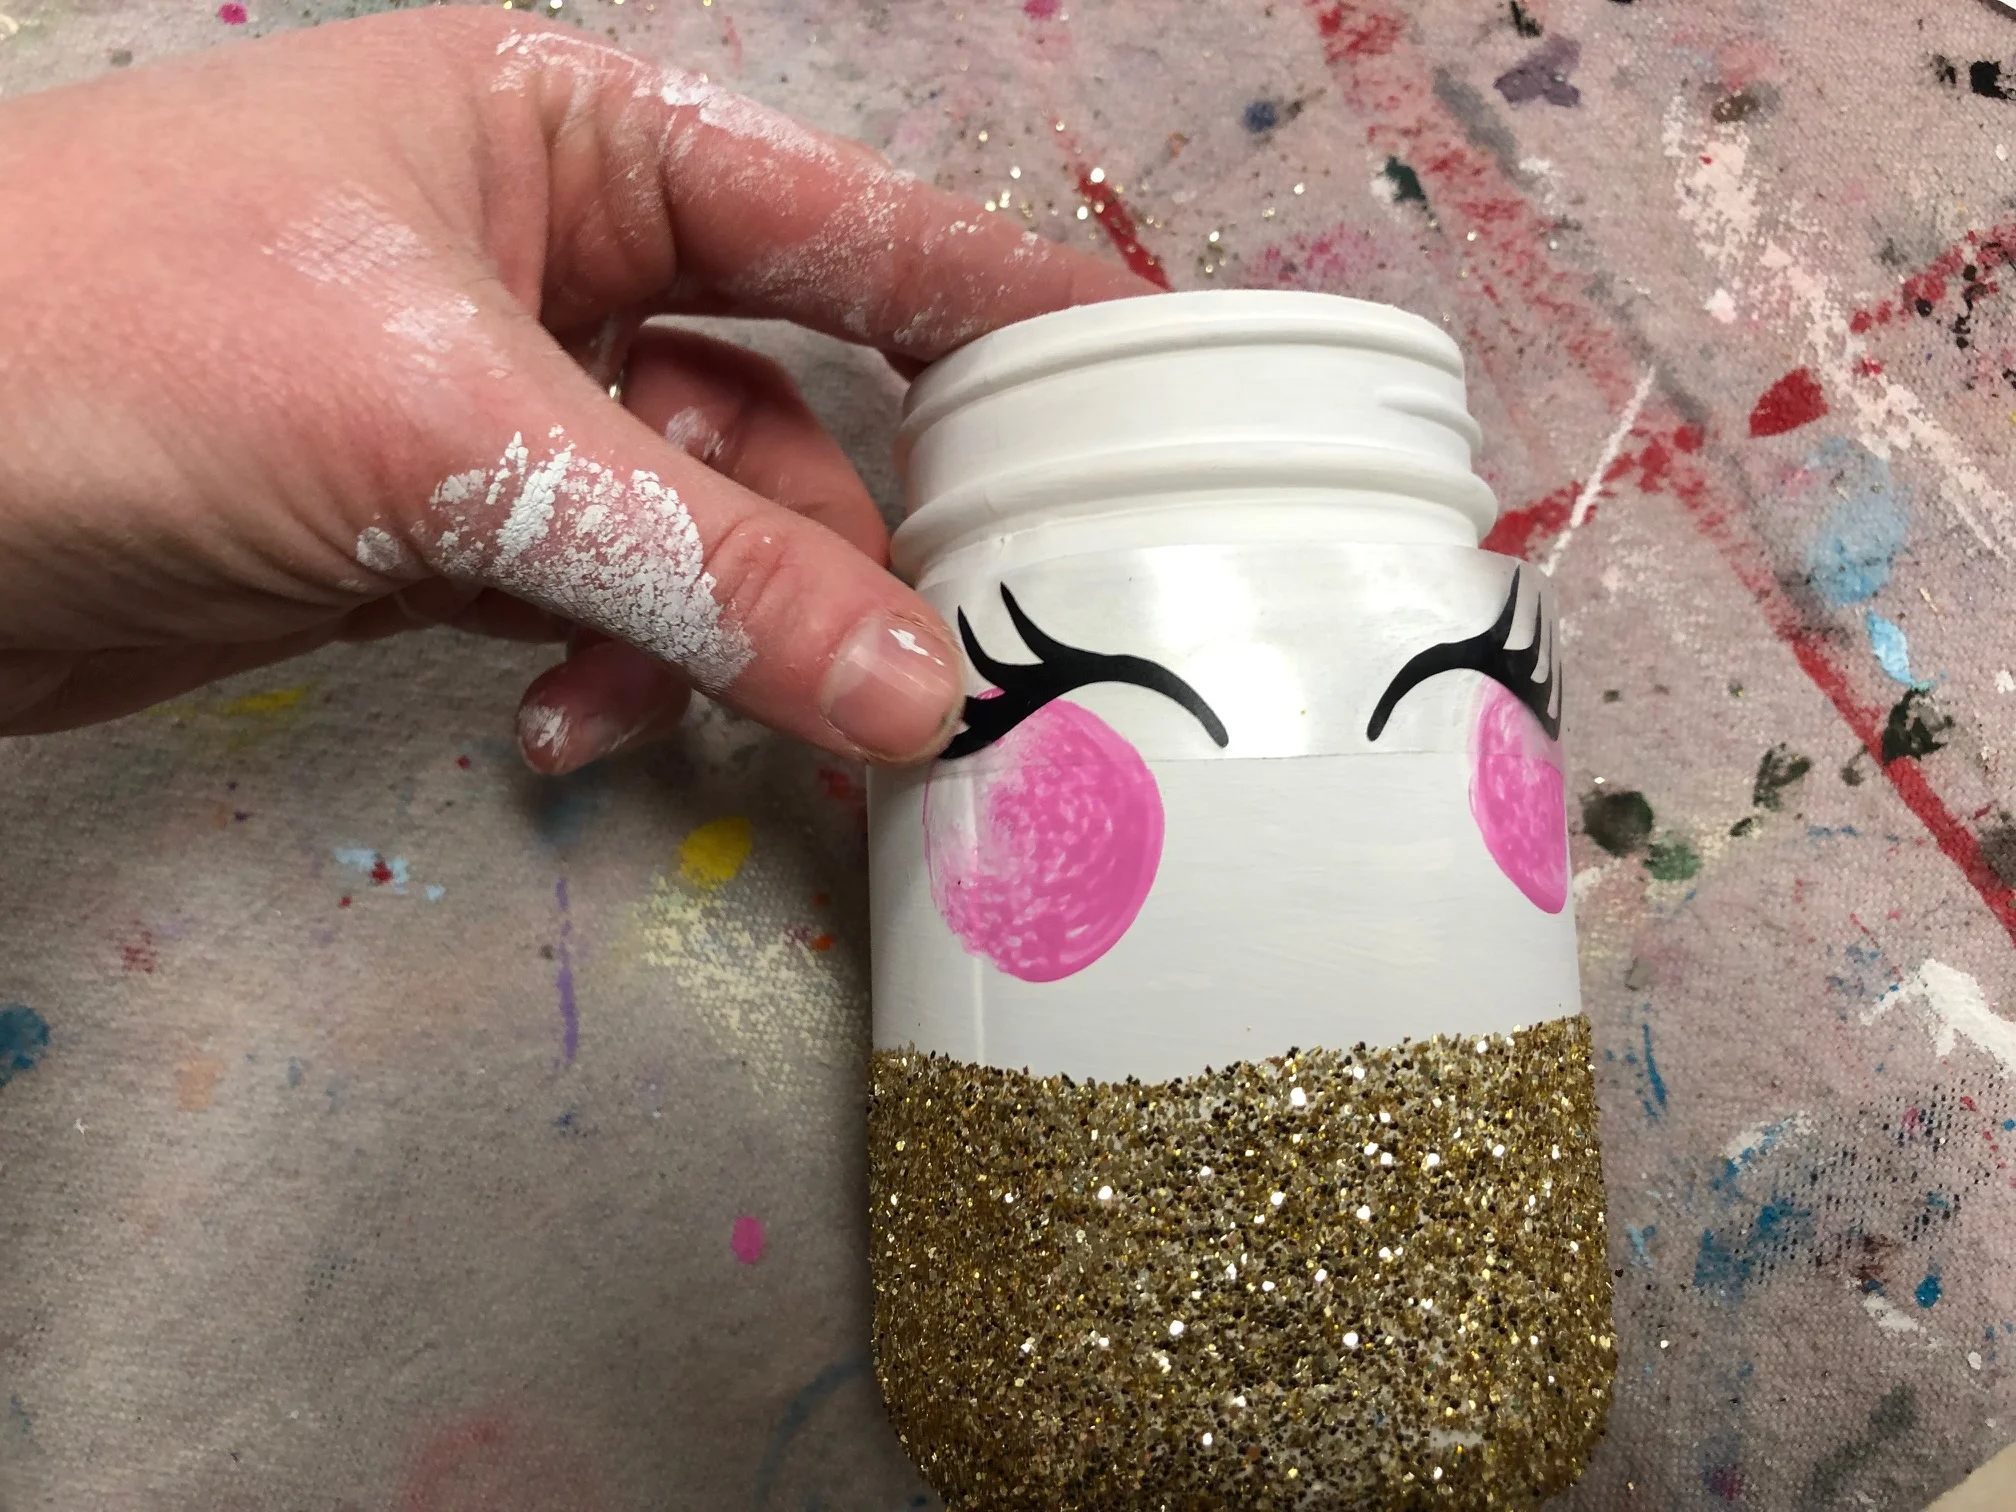
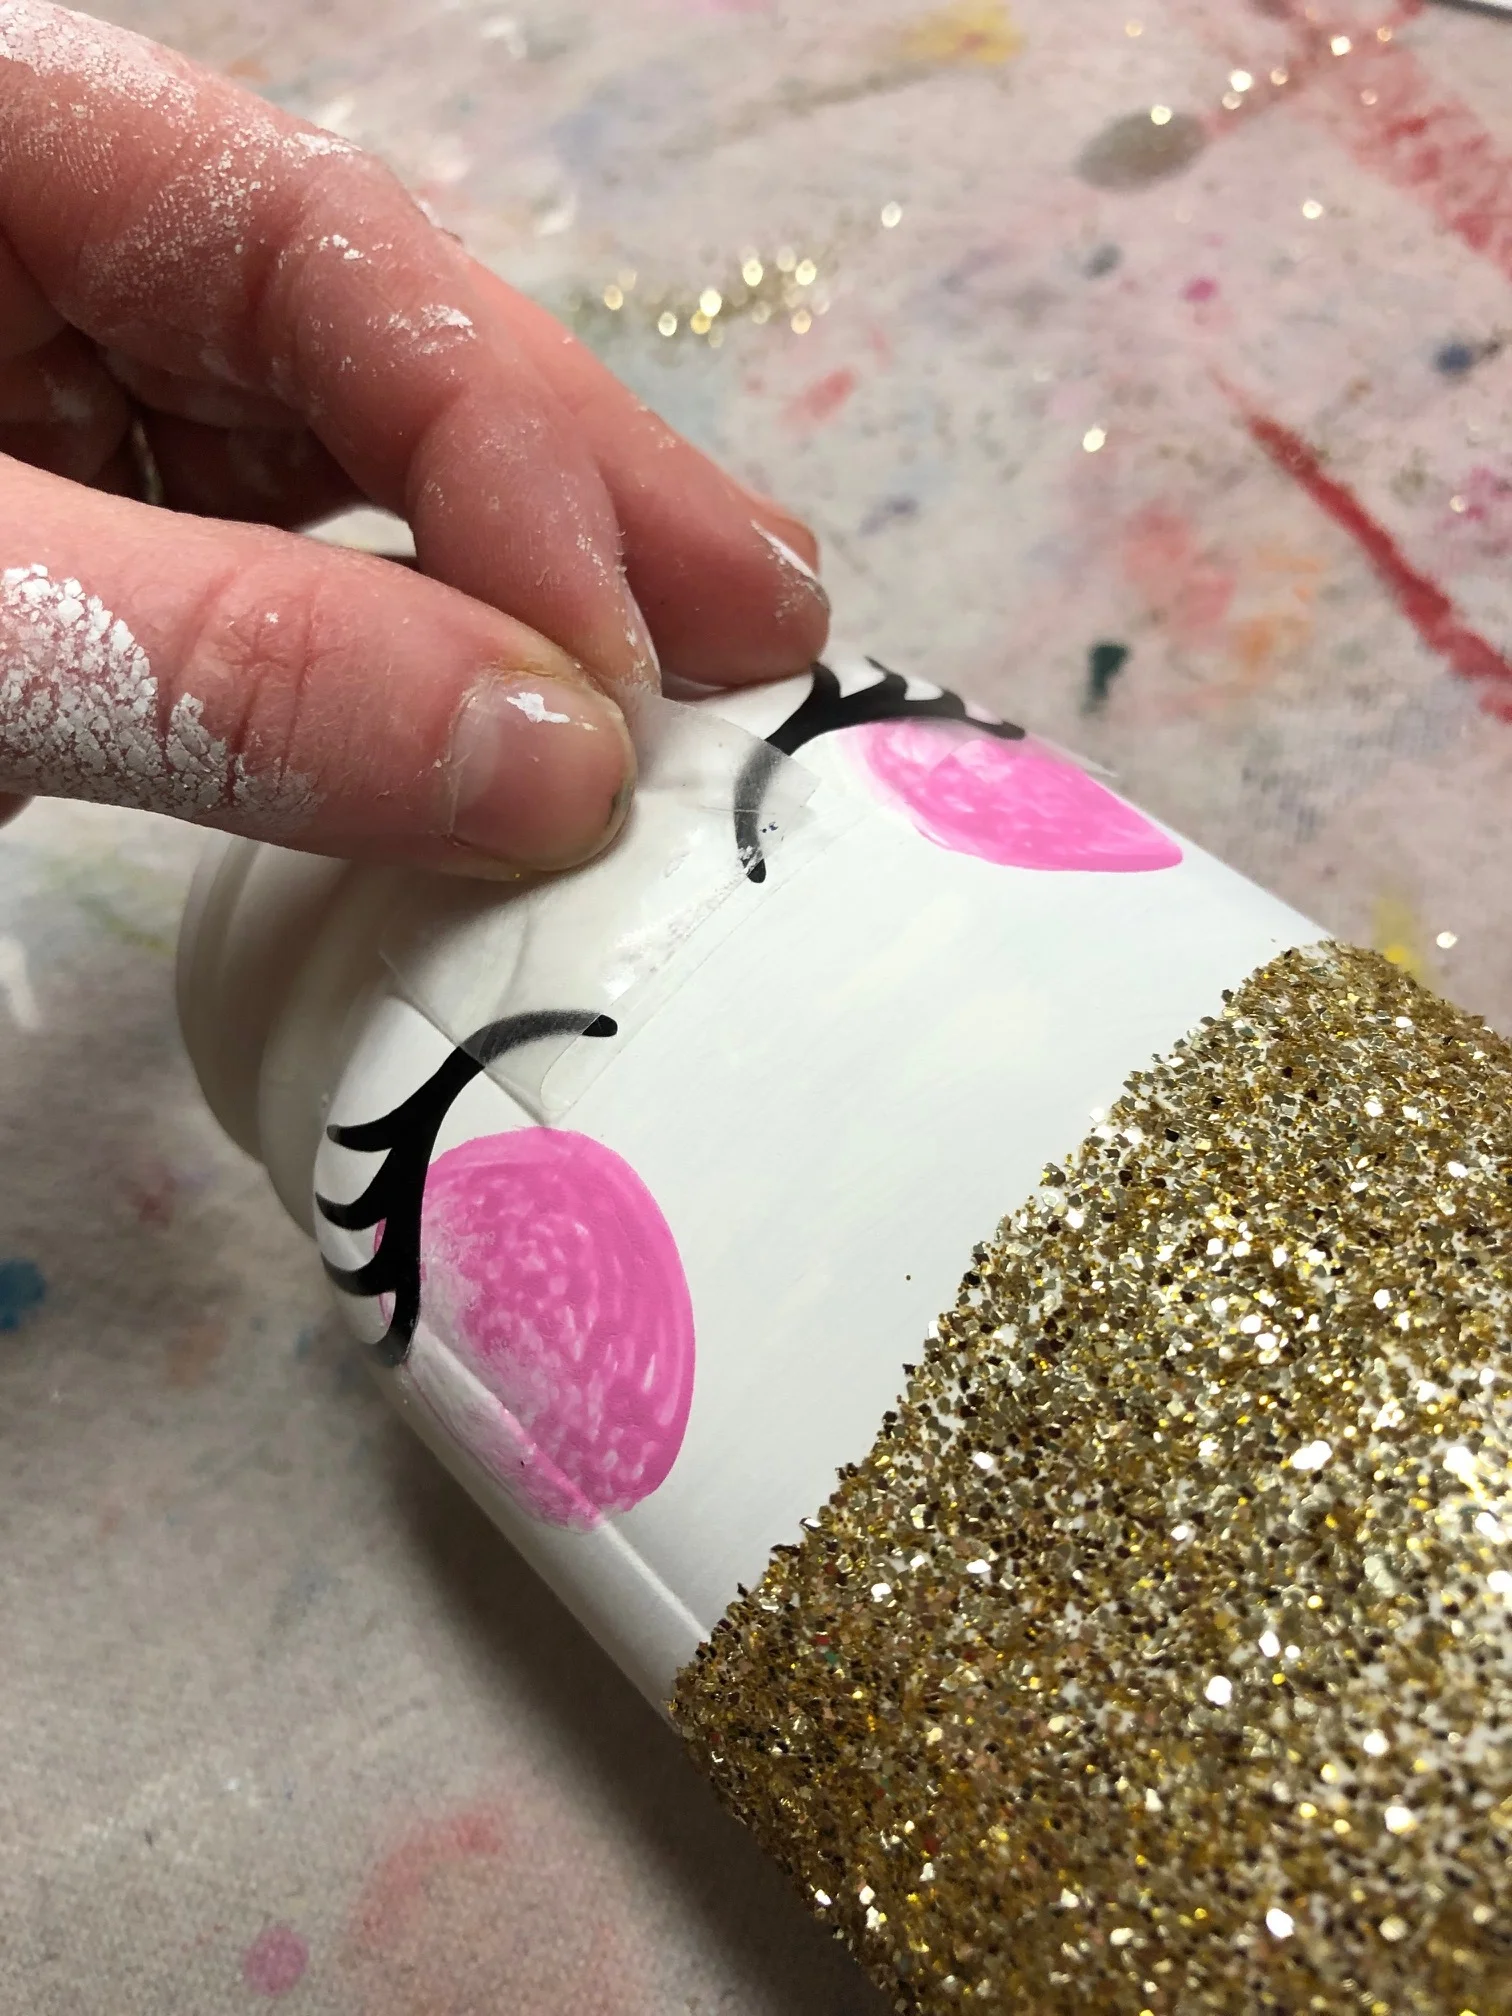
After you paint is COMPLETELY DRY you can add the eye decals. It is important you wait for these to dry as the vinyl will NOT  stick to wet paint. Remove the white paper backing first, the clear transfer tape and the eyes are attached. Then place it on your jar. Give it a good rub with your thumb or a plastic card then slowly remove the clear transfer tape off. This works great if you peel it at a very sharp angle like pictured.

DIY glittered unicorn jar

Glue the pink ear piece onto the middle of the white earpiece with your detail brush. Apply glitter to or paint the horn. Then attach the ears, horn and rhinestones above the eyes. You can apply these anywhere you see fit, have fun with it:)! A glue gun works best for this but you can use the tacky glue to attach these pieces to your jar

DIY glittered unicorn jar
DIY Glittered Unicorn Jar

I hope you love creating this craft as much as my girls and I did! Don’t be afraid to veer off this tutorial and really make it your own.

Check out more craft kid posts below

DIY Tassel Garland, make your own for just pennies each

DIY Tassel Garland, make your own for just pennies each

Affiliate Disclosure. Some of the links on this website are affiliate links, which means that I may earn a small commission if you click on the link or make a purchase using the link. If you make a purchase you will not be charged anything additional.

Raising kids is so hard sometimes. Nothing prepares you for having to console your child on days when they are feeling down about themselves. I think this is especially true for raising daughters. We have four little girls and life is a roller coaster of emotions with them some days. Recently we celebrated our third daughter’s birthday. We always celebrate before school lets out because she has a summer birthday.

We sent invites out two weeks in advance and this girl was SO excited to have all her school friends over for her unicorn themed birthday party. I’ll admit I’m a frugal person thru and thru. When I plan our girl’s parties my husband and I don’t spend an arm and a leg on the party. I try to keep it under $50 for the cake and decorations that way we still have room in our budget to gift them a decent gift that they’ve been wanting.

But this year I had to get super creative on my spending because I needed to throw her a fancy {as fancy as we get around here ;) } unicorn birthday party! It was just days before her party and she had only had one, yes ONE friend RSVP to her big day. Talk about tears falling and hearts breaking. I HAD to make up for the possibility that there be no one besides family at her party.

So I scoured all the pretty things on Pinterest and put together a few ideas of things to decorate her party with to make her feel extra special. Keeping it under $50 was a bit of a challenge but I was determined to make it work! Tassel Garland, among a few other DIY decorations, made the cut. These ended up costing than $4 to make two full strands of tassels PLUS extras to put around the unicorn centerpieces.

Thankfully two days before her party she had a couple more friends RSVP and she had a great party! They played some fun unicorn games, made tasty treats and loaded them down with EXTRA sprinkles, got to decorate their own cupcakes, and most of all the birthday girl felt so loved and special on her day!

After her party she got to hang the pretty garland in her room which made these tassel even better!

To make your own DIY tassel garland for your own special occasion…

Here’s what you’ll need

I was so surprised at how EASY these were to make! I was able to knock these out in no time. And our sweet girl LOVED them!

I’d love to hear your feedback below!

DIY Tassel Garland, make your own for just pennies each

How to lose the anxiety when it comes to talking to your spouse about money

money anxiety, how to overcome this and talk to yo0ur spouse about finances

I didn’t grow up poor, I grew up in a family that made poor financial decisions.

I grew up with a very anxiety ridden relationship with money. I watched month after month, year after year, of my parents constantly fighting about it. I honestly didn’t know that it was possible for a married couple to have a money talk without someone calling names, bringing up something totally unrelated to the conversation at hand, and the other one storming off fuming and screaming as they walked away. I thought this was normal and how all married couples “talked” about money.

I thought it was so normal that I never wanted to have money talks with my own husband. I wanted so badly to avoid a possible argument because I never wanted my own marriage to be like my parent’s. It sounds crazy, I know, but it’s a very real thing. Financial anxiety. There are women like me all over the world who struggle with financial anxiety. They are so overwhelmed with the thought of a possible argument that they never bring up the finances. Money is kind of a taboo topic in society anyway throw in your own emotional baggage you have with it and it’s something you really don’t want to talk about so you avoid it.

How did I finally get over this anxiety? I came across a book called The Total Money Makeover, by Dave Ramsey. It was just what I personally needed. If you are sensitive and don’t appreciate a blunt forward approach then this book might not be for your but it was just what I needed, and what millions of others needed too.

Reading this book I realized I don’t have to live in the shadow of my childhood feelings about money. I don’t have to carry that fear I had for so many years. I can let it all go. I can move forward and talk openly about finances with my husband without the worry that we might have an argument. I realized how my parents handled and dealt with their finances wasn’t normal. Yelling and name calling isn’t a normal way for adults to behave and deal with their problems.

The Total Money Makeover isn’t all about your feelings, or how to deal with anxiety at all. But by putting Dave’s teachings into play every single month I was able to slowly peel away the anxiety. I slowly got comfortable with each talk we had. You don’t have to live in fear of money conversations. My husband and I are proof that you can break the cycle of your upbringing.

Money Anxiety how to overcome this and talk to your spouse about finances

Here are some tips to help if you’re feeling like money anxiety is preventing you from talking openly about finances with your spouse

  • Breathe. This will help clear your head and calm your nerves. I do this all the time. I still struggle with social anxiety and sometimes it feels like my heart is going to beat right out of my chest. Sitting quietly and just breathing helps so much to calm myself down.

  • My husband and I rarely have an argument but not talking about things just to avoid an uncomfortable conversation about money can be just as worse as having an argument. Get uncomfortable and have the conversation. The more you do this the more comfortable the conversations will get.

  • Get organized with your bills. When I don’t write them down every single month I notice my anxiety starts to spark again. Keeping my brain on track and everything written down keeps me from worry. I use a simple monthly bill tracker that fits right in my planner that I love, you can get it FREE here.

  • Have a drink first. I don’t care how this sounds I enjoy having a glass of wine. It helps calm my nerves and helps me to relax. If a glass of wine does the same for you, cheers!

  • Talk about the details when the kids aren’t in the room. While I think it’s important for parents to teach their children about money and the proper way to use it, having your kids in the room while your trying to talk money one on one with your husband is just going to make that anxiety and tension go up. You aren’t totally focused on the conversation while sweet little Susie is spilling her drink on the floor and little Johnny is saying “mom, mom, mom” over and over again. I’ve been there and it skyrockets my stress levels. I prefer to talk about our finances while our kiddos are in bed, watching a movie, or playing in the backyard.

  • Lastly, take small steps to the money talks. Jumping full force will just set you up for failure. You need time to break down the anxiety barriers. Giving your mind room to process and day by day get over why you have your money anxiety. It’s not a race, it’s your life.