Grocery budgeting to feed your big family, how to master this so your fridge is never empty

grocery shopping on a budget, how to stretch your grocery list to last longer

Affiliate Disclosure. Some of the links on this website are affiliate links, which means that I may earn a small commission if you click on the link or make a purchase using the link. If you make a purchase you will not be charged anything additional.

It’s a no brainer that the more kids you have the more you’re going to have to spend at the grocery store. But that doesn’t mean you can only afford rice and beans. You just have to get a little creative with your shopping list and meals.

We have a relatively larger sized family, there are 6 of us. Granted our girls are young, elementary aged and younger so they don’t eat like teenage boys, but don’t underestimate these girls. They can put back some food. Especially our toddler. I honestly don’t know where she puts all that food.

As our family has grown over the years we’ve learned to get a little creative with our meals to really stretch the groceries every week. Some weeks are harder than others, especially in the winter months when everyone is working on packing on that thick winter coat and it seems like everyone is constantly hungry. But that’s a whole other post all together.

How do I feed our family of 6 for $400 a month? I don’t use coupons and I certainly don’t hop from store to store to chase down what’s on sale that week. BUDGETING and meal planning. I’ll admit before my creative business took off I absolutely was one of those coupon queens. I was really good at it, even teaching others how to do the same. But those days are long past me while I’m working on building my own crafty empire for our girls to carry on if they wish.

So back to business, if you’re disciplined you too can feed your family every month without going over budget.

Almost every single meal our family eats we get it from home. We don’t eat fast food a whole lot, we don’t dine at fancy restaurants {that’s not really our thing anyway}, and our girls don’t eat school lunches. We can pack a lunch for less than $1/day per person.

Our family spends $400 a month on groceries but it’s not the same amount every single week. Some weeks we might spend $140 while others we might only spend $50. Things like meat and cheese we buy in bulk so we don’t run out of those more expensive items as quickly.

Here are the same tips and strategies I use every month when I grocery shop.

  • The first thing I do each week is meal plan. You can create your own or use the same meal planner I use, it’s totally FREE. The way I plan my meals is I ask each family member something they would like to have for dinner. Most of the time it gets added to the menu but occasionally mom and dad X a suggested meal if it’s way out of budget, like steak, or if it’s something most everyone else is tired of having.

  • Buy selectively in bulk. We have a membership to our local SAMs Club but we are very selective about what we do and do not buy from there. Things we buy are some meats, lunch meat, sliced and shredded cheese and that’s pretty much it for food. Everything else is a little more expensive to buy at the bulk store.

  • Find a great discount store to shop at. The one we shop at weekly is Aldi. It has come a LONG way since the days when I was a kid. Most of them in our area have been given a big makeover so they are set up like a regular grocery store vs the old style layout they used to have.

  • Use cash when you go to the store. We are fans of the Dave Ramsey method of using cash and it truly works. We personally do not have any credit cards but even using a debit card we ALWAYS spend more than budgeted, so use cash and you will be forced to only spend what you have in your wallet.

  • Buy ingredients that you can use for more than one meal. Things like rice and potatoes can be used for lots and lots of different meals and they cost next to nothing. You can make anything from taco rice to rice pudding with a $2 bag of white rice. And with potatoes you can use them in several different dishes, shepherds pie, perogies, garlic potato wedges…mmmmmm!!! Just get creative with it.

  • Pack lunches. This is HUGE! Eating out adds up very quickly. That $5-$10 at lunch every single day can add up to $25-$50 a work week for just one person.

  • Try making your sweet treats. Most of the time buying them premade costs way more than if you made them yourself. Take muffins for example. Our family loves them so I will make several batches of different kinds at a time and it costs approx. $3 for several dozen muffins. If I were to buy 1 dozen muffins even at the discount store we shop at, their cost would be $4. CRAZY! Granted it’s more work but saving at least $8 to make them myself and they are probably one of the easiest baking things to make, sign me up! The same goes for brownies, cakes, cookies, and granola bars. These are all things you can make at home and costs significantly less to make vs to buy.

  • One thing that we bought a long time ago that truly helps us stay on budget is using a Food Saver . We use this every single month. From left over foods that would have gone had in the fridge to freezing the meats in bulk. This is an investment worth your hard earned money.

  • Last but not least buy in season. Produce prices change from season to season so those foods are typically next to nothing during the summer months. That’s when our family eats an abundance of the fresh stuff. Not that we don’t eat any in winter, but our dollar doesn’t go as far in the winter so we are extra selective about the produce we buy during the cold season.

I hope these tips help when you’re grocery shopping for your large family. I know without these tips our family would be WAY over budget every single month.
One fish two fish, perfect Dr. Seuss keepsake craft to make with your kids

One fish two fish, perfect Dr. Seuss keepsake craft to make with your kids

A person’s a person no matter how small

-Dr. Seuss

Our family loves Dr. Seuss so naturally every year on his birthday, March 2nd, we celebrate him in some way. Usually we read his books and make a fun snack or just for fun craft in honor of him.

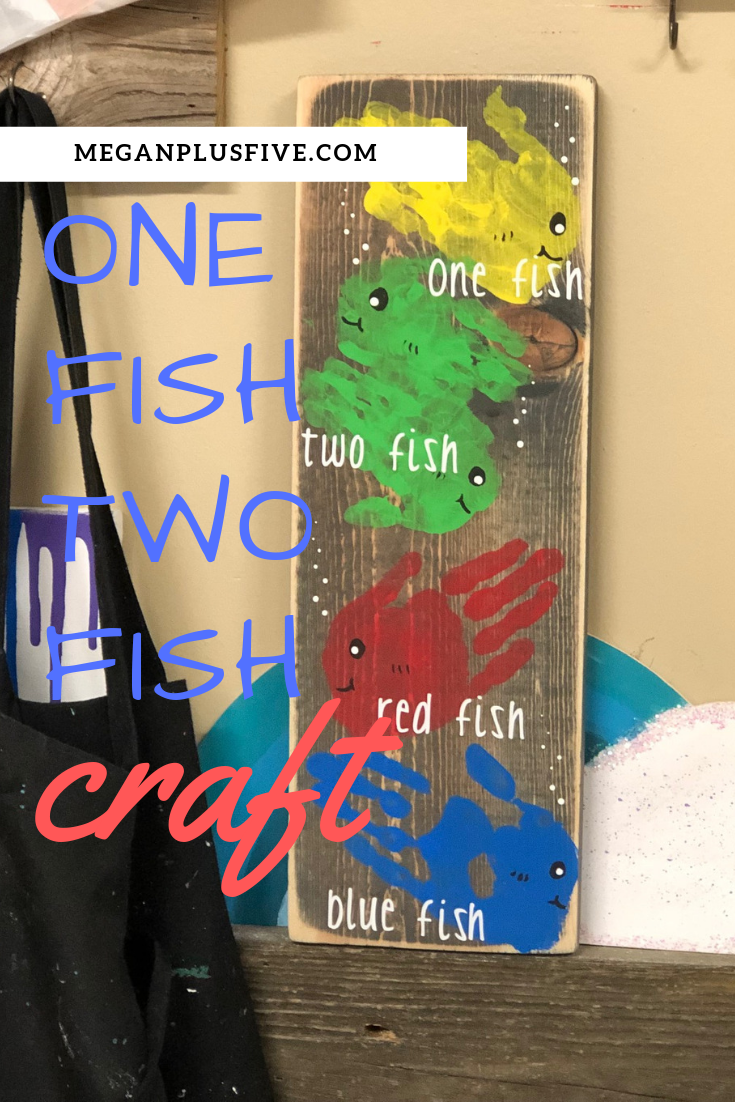
But this year we went a little extra with it. Our oldest daughter is getting older, about to hit middle school next year {I have no idea where that time went} so I know that the days of doing fun keepsake projects with her handprints are numbered. I fully took advantage of the opportunity to make this adorable ONE FISH TWO FISH craft with all four of my sweet daughters handprints.

Affiliate Disclosure. Some of the links on this website are affiliate links, which means that I may earn a small commission if you click on the link or make a purchase using the link. If you make a purchase you will not be charged anything additional.

Here’s how you can make your own at home

supplies you’ll need:

1. CUT OUT DECALS

Using my Cricut cutting machine I cut all the lettering out first. My projects usually go much smoother if I have all of the decals and accents cut out before I start staining and painting. If you don’t have a cutting machine you can always write the lettering with a chalk pen or permanent marker. My hand writing isn’t so neat but my Cricut does a great job ;)!

2. CUT & STAIN WOOD

One fish two fish, perfect Dr. Seuss keepsake craft to make with your kids

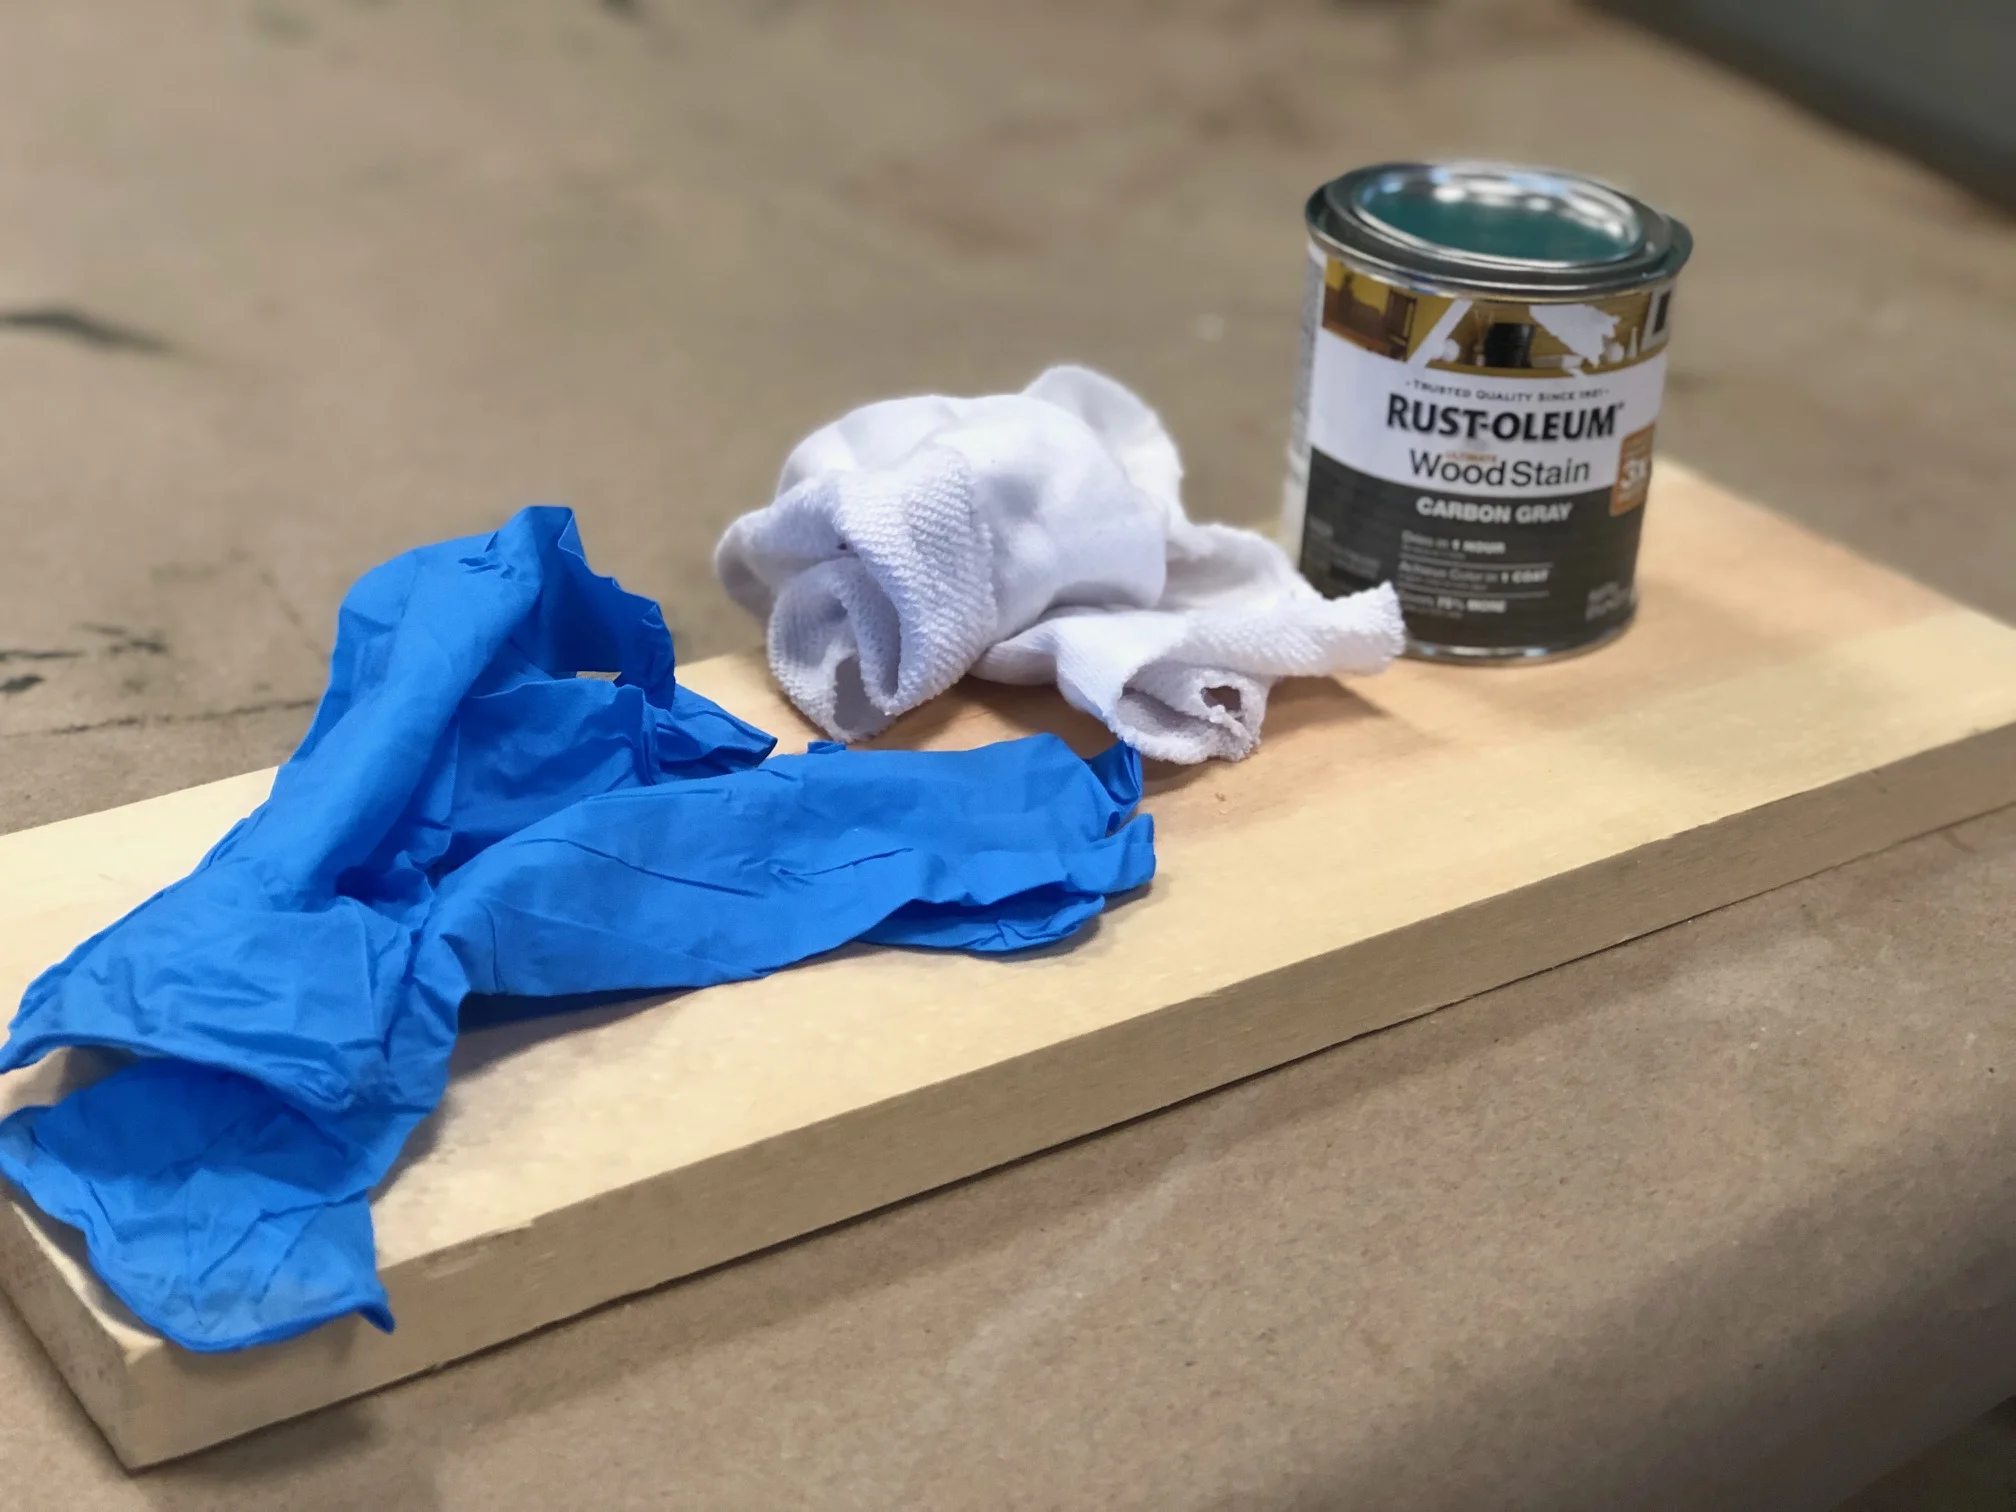
First give your board a light sanding, then stain. Be sure to watch my HOW TO STAIN WOOD video if you’ve never done this before. Let your board dry for 24 hours before the next step.

3. DISTRESS EDGES

One fish two fish, perfect Dr. Seuss keepsake craft to make with your kids

After your board has dried you’ll want to give it a quick sanding on all surfaces of the board. I always focus more on the edges and corners. Using a RYOBI cordless sander works great for this but you can use regular sandpaper if you need to. Wipe with a lint free cloth to get all the dust off, you don’t want this on there when you go to paint.

4. PAINT

One fish two fish, perfect Dr. Seuss keepsake craft to make with your kids

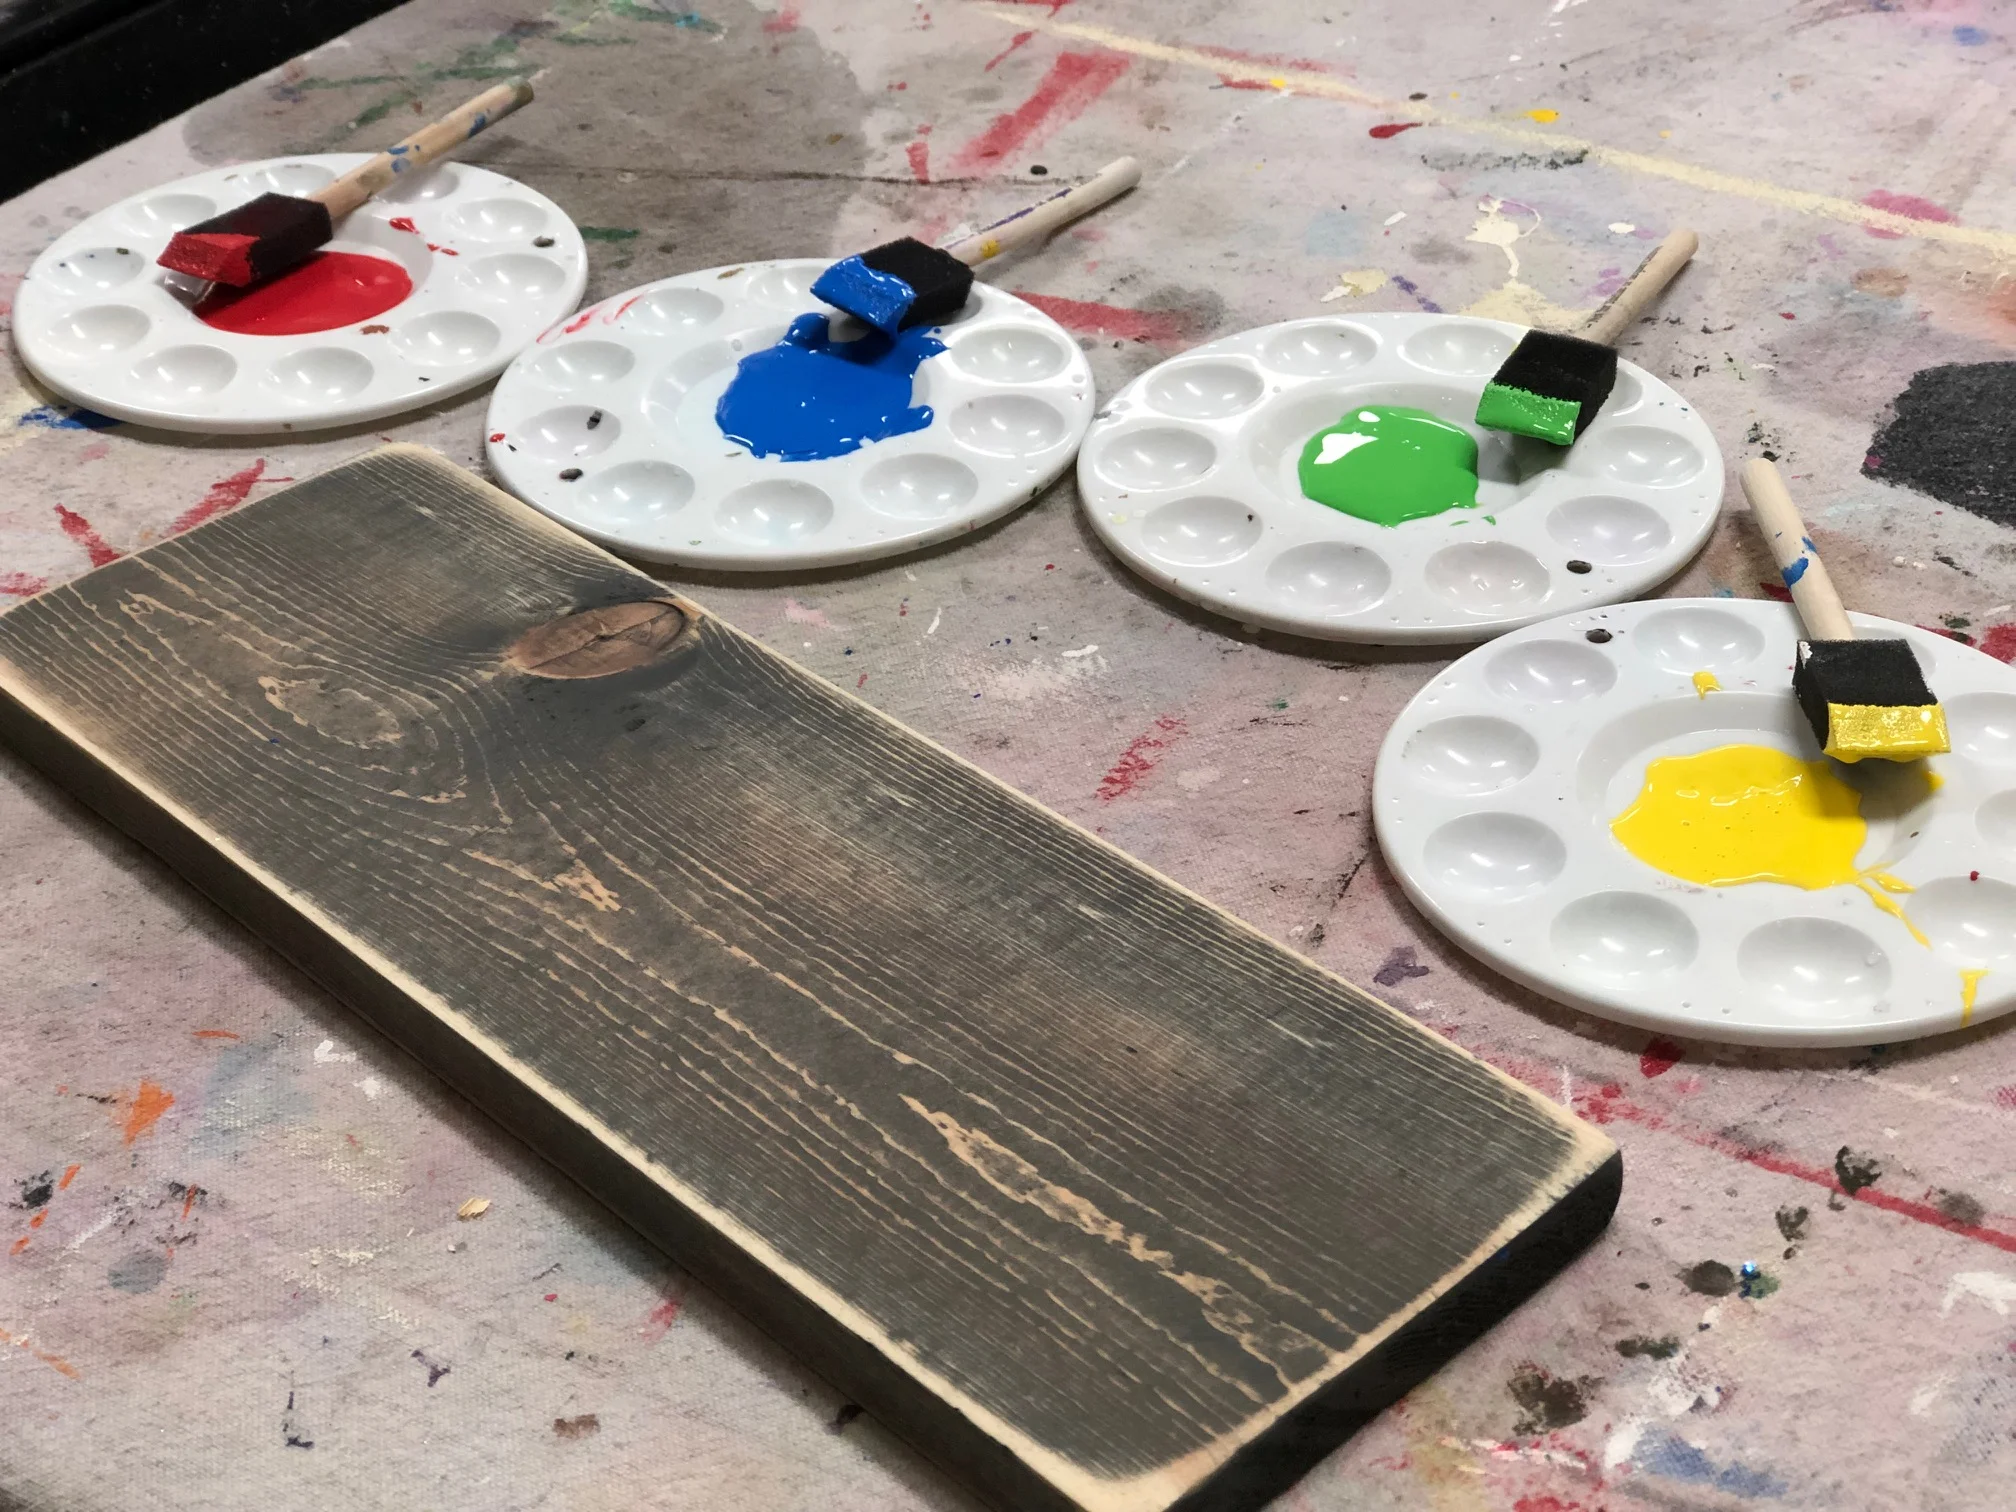
You’ll need RED, BLUE, GREEN, and YELLOW for this next step. I went ahead and made pencil marks for where I wanted the girl’s hands to hit. That way I could map out where they would be and I wouldn’t have either too much space or not enough space left.

One fish two fish, perfect Dr. Seuss keepsake craft to make with your kids

You’ll want to do one handprint at a time. Coat the hand in a fairly good amount of paint but not too much, you don’t want a glob of paint to be left on the board.

Gently guide their hands down on the board and press them lightly.

One fish two fish, perfect Dr. Seuss keepsake craft to make with your kids

Before you add any facial features/gills you want their handprints to totally dry. If you don’t let them dry you will smudge the colors together.

5. APPLY VINYL DECALS

One fish two fish, perfect Dr. Seuss keepsake craft to make with your kids

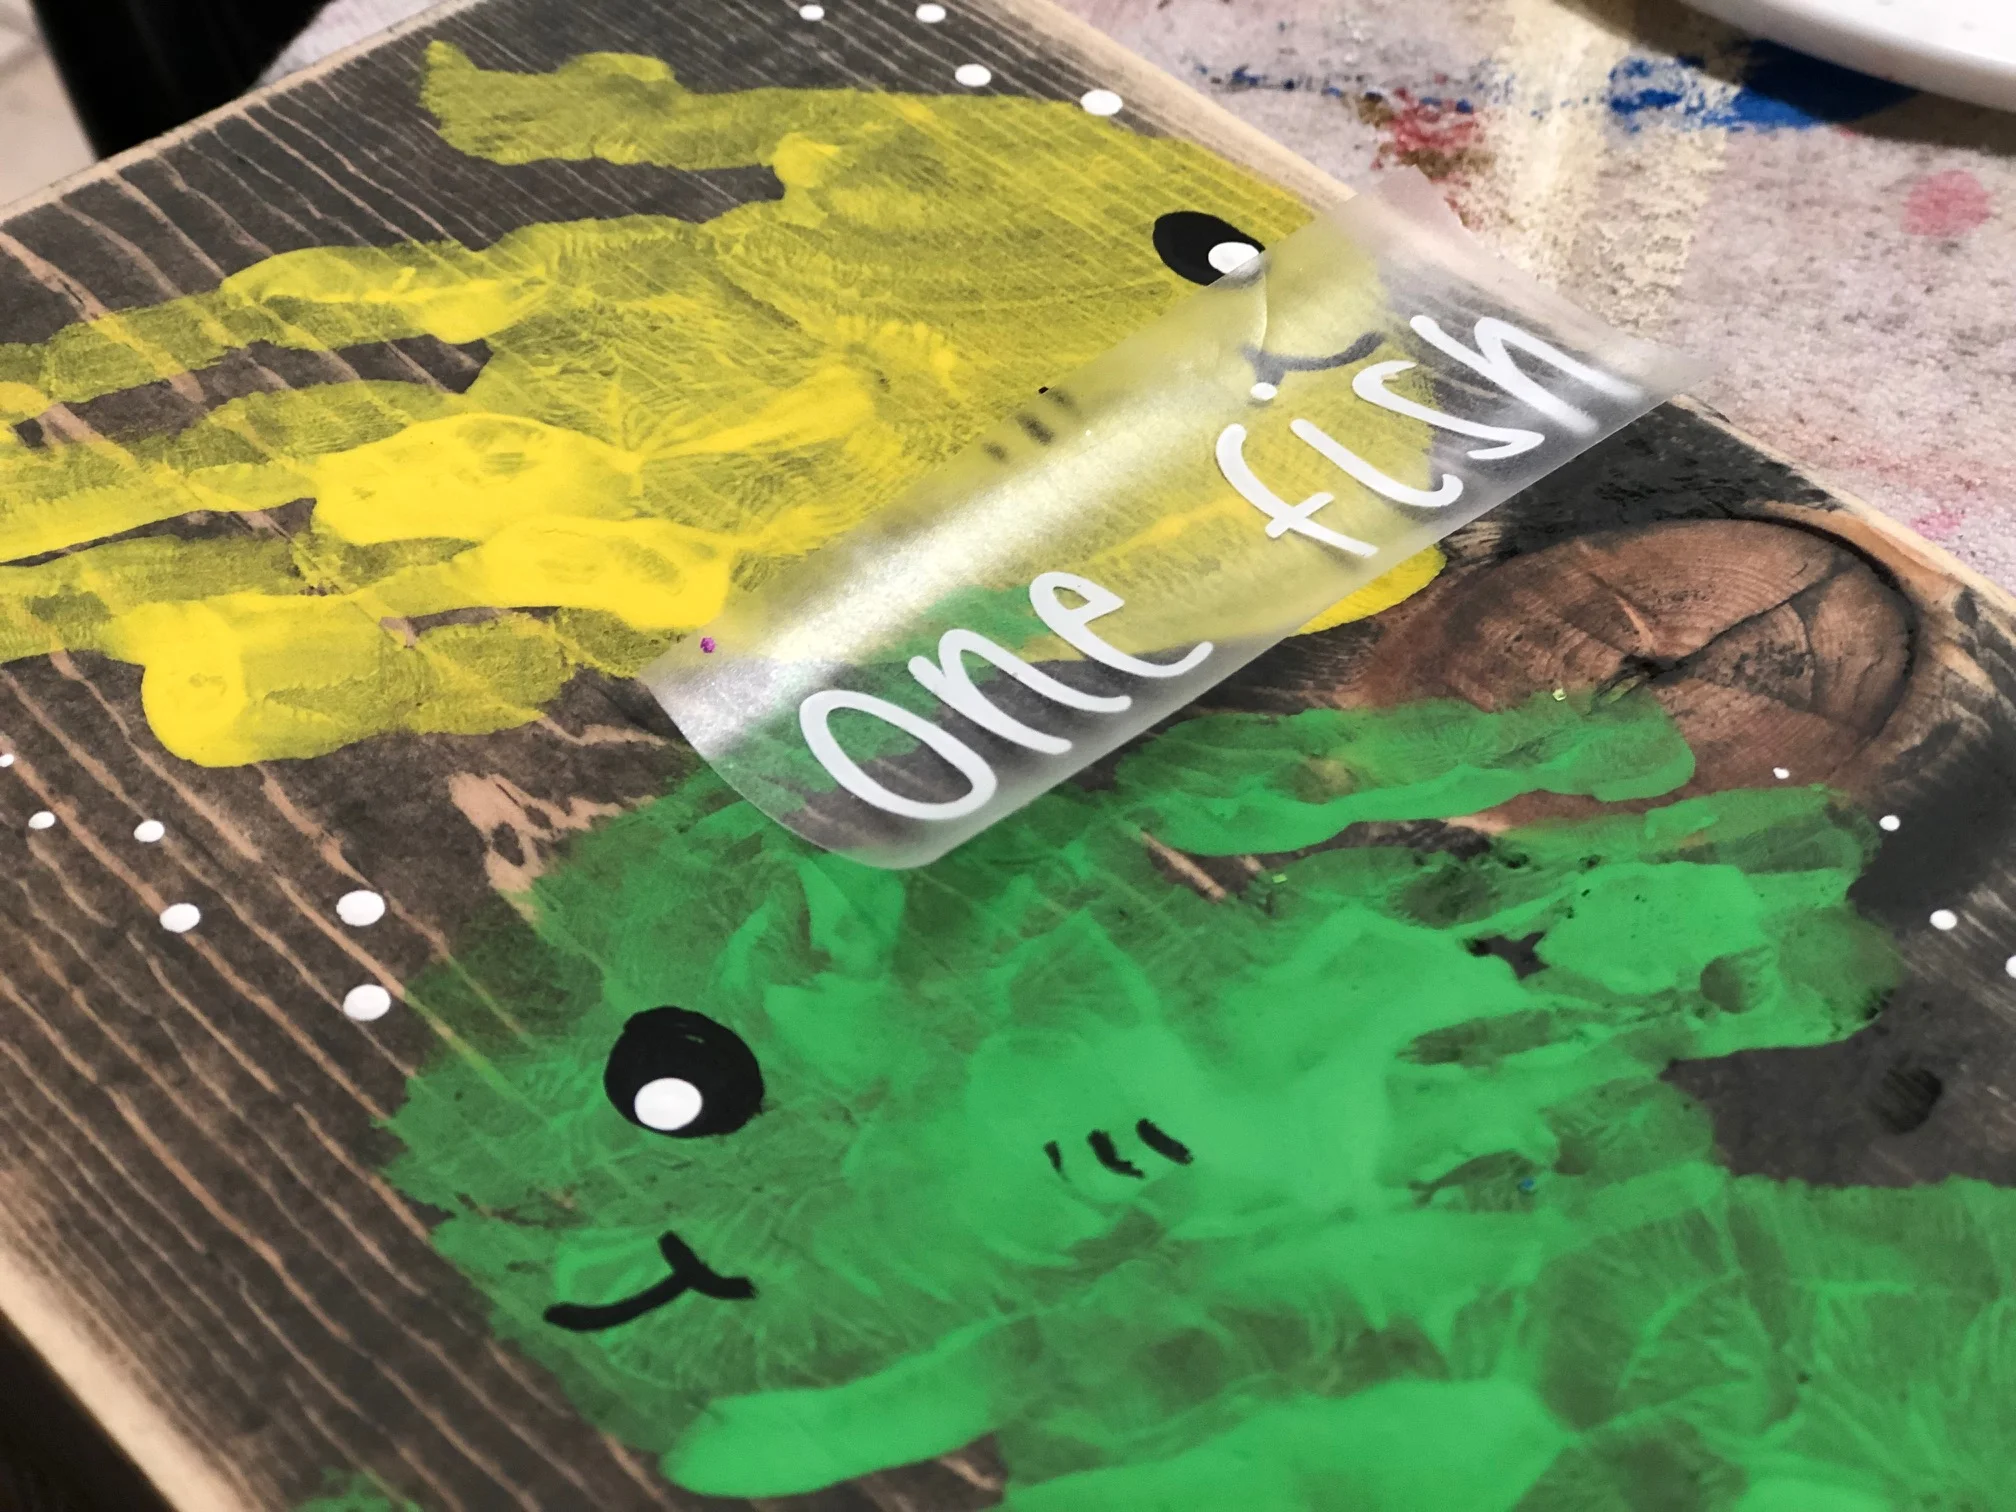
After all the paint is dry, totally 100% dry, add your vinyl decals. If your paint is not completely dry the vinyl will not stick to the board. I use a vinyl squeegee to help get the decals down really good. Then peel the transfer tape off.

Now it’s ready for you to hang and enjoy in your home.

One fish two fish, perfect Dr. Seuss keepsake craft to make with your kids

Click here for more crafty kid posts

Check out the latest posts on the blog

The hack you didn't know you needed for your crafty kids

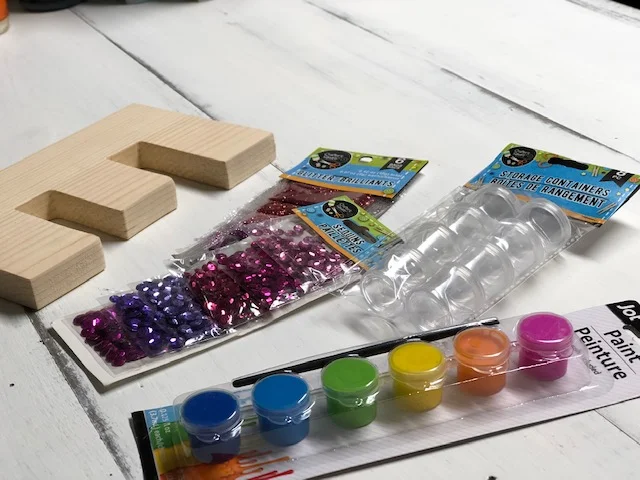
Crafting hack, simple storage to use while your kids craft

It’s not a secret I LOVE creating and letting my girls create. But one thing I don’t particularly love is when the craft supplies go everywhere. I think moms everywhere can agree. Something about knowing that all those rhinestones and beads and giant sequence that are all over the place just occupies your mind instead of focusing on your precious babes making masterpieces.

I need to clarify that I’m not a clean freak, not even in the slightest. After all I’m a mom of 4, three of which are within 4 years of one another…so yeah I’m totally not a clean freak. Now, I also don’t keep a dirty home. We call it lived in {can I get and AMEN?!}.

How to make painted wood signs, all the tips and tricks the pro's won't tell you

But going back to that first paragraph it makes for a much more enjoyable crafting experience when I’m not focused on the 8 million beads that just fell off the side of the table because the entire jar spilled. Ok, maybe 8 million is a little exaggeration but it’s pretty close ;).

And you know what, I’m not the only mom who feels this way. I’ve talked to countless moms this last year who all agree, they have a really hard time enjoying art at home with their kids because their brain will focus on the mess instead of their kids. It’s natural. As parents, we have so much on our plates the last thing we want to do is chase rolling tiny itty bitty beads all of the kitchen floor.

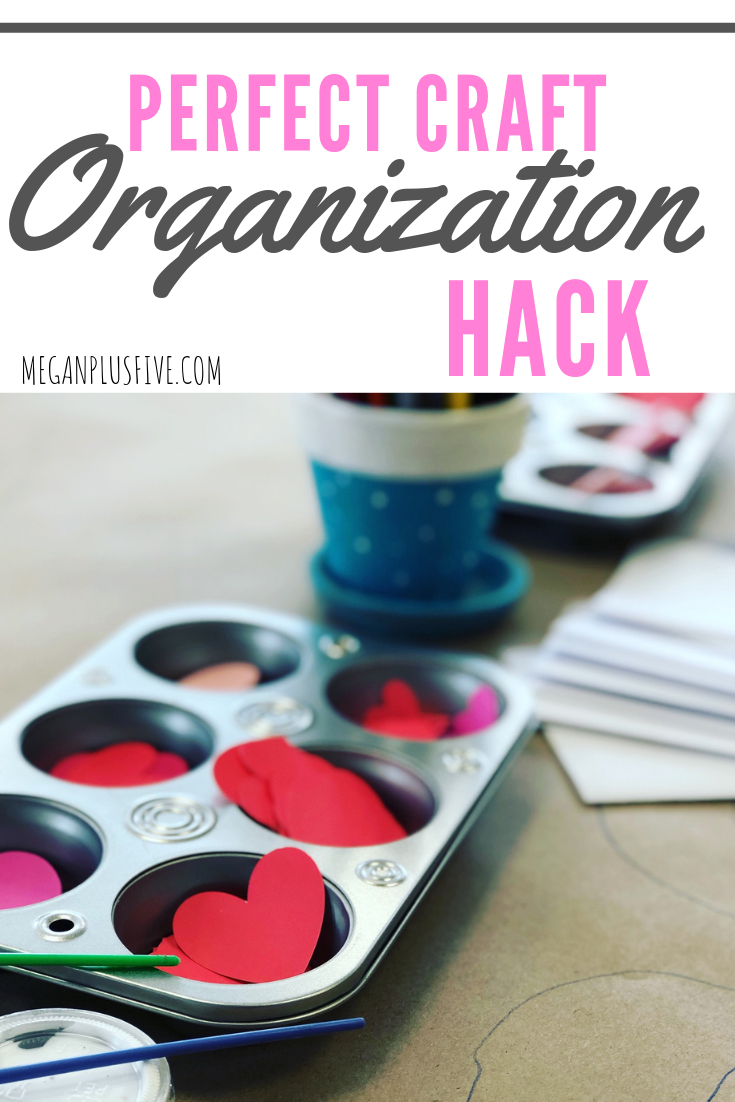
So here’s my craft hack that you NEED in your life when you create with your kids at home…are you ready? MUFFIN TINS! Yes, you read it right, muffin tins. I know it sounds so simple and maybe a little crazy that muffin tins can help you enjoy art time with your sweet kiddos but I’m telling you they are just the thing you need!

I was in Dollar Tree {my second favorite store on the planet} one day shopping for supplies for crafting event we were putting on and I was trying to find something that would hold all the little cut outs because I didn’t want to scatter them on the table but I also didn’t want to use bowls because they just take up way too much room. I walked down the kitchen aisle and there they were, almost like a ray from the heavens shined upon them, and it hit! Muffin tins are small enough they don’t take up all the space on the table, big enough to hold lots of supplies, and shallow enough that kids can easily get to the supplies without getting their little hands stuck or having to dump it all out.

The hack you didn't know you needed for your crafty kids

I can not tell you the number of parents that commented on how perfect the muffin tins worked.

These little guys are so cheap too! I picked ours up for $1 but I’m sure you can find some at local garage sales and thrift stores for next to nothing.

I’d love to hear your favorite at home crafting tips. Leave them in the comments below.

PERFECT CRAFT ORGNAIZATION HACK

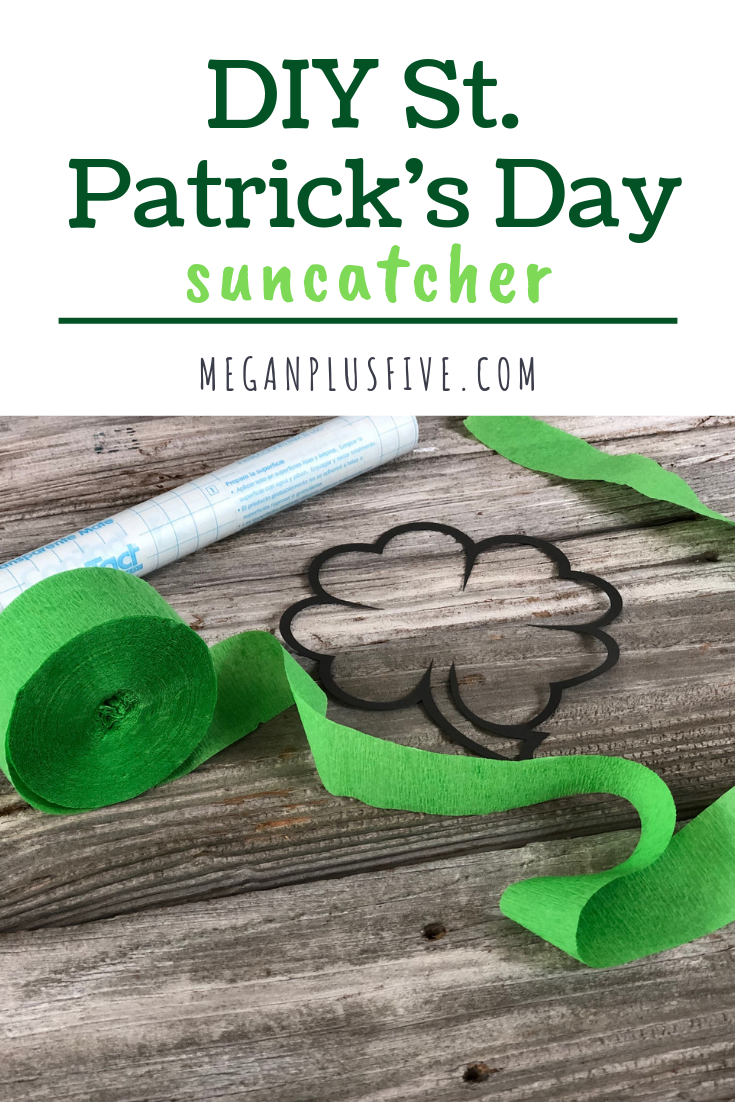
DIY St. Patrick's Day suncatcher, easy tutorial to make your own with your kiddos

DIY St. Patrick's Day suncatcher, easy tutorial to make your own with your kiddos

St. Patrick’s Day isn’t a super big deal around our house but we do enjoy the holiday. We always wear green and we try to make tasty green foods {that doesn’t always happen}. But this year we did get around to making some fun green crafts for the occasion!

Each week we host a toddler day in our CRAFT STUDIO called TOTS IN THE SHOP and I needed to plan for the events for the upcoming months. I try to coincide our weeks with the holidays when they come up and St. Patrick’s Day is coming up so I scoured Pinterest to see what I could find. I came across this adorable suncatcher by Julie from Director Jewels and I knew we had to make one too! I did change up ours a bit to make it easier/simpler for the tots to make.

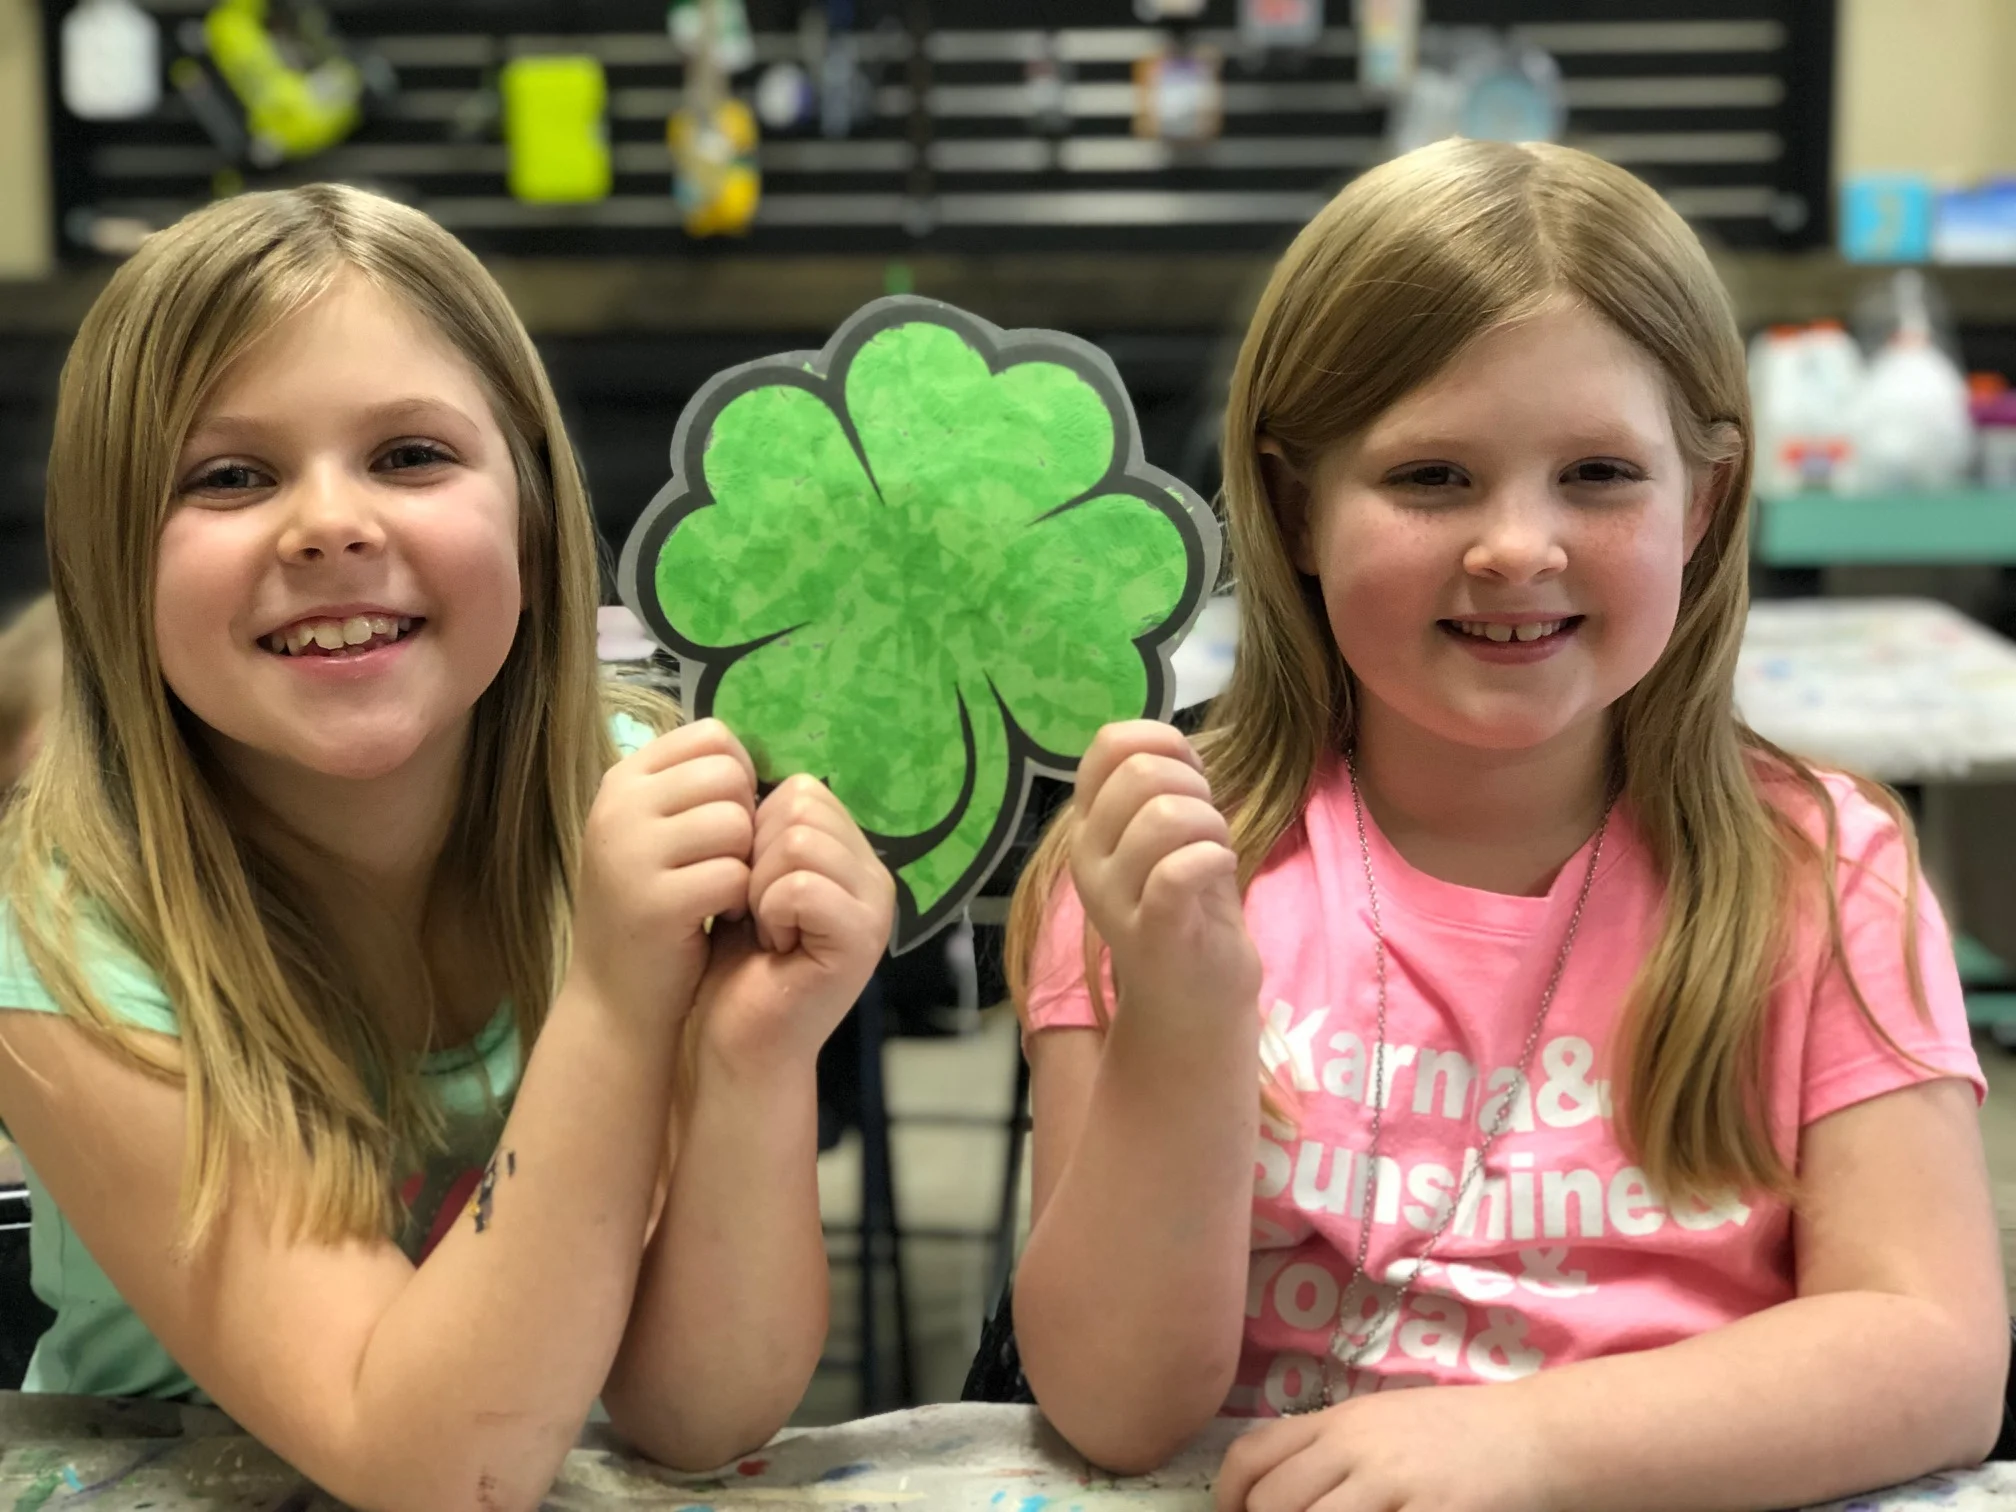
Before we host our workshops our four daughters and I create mockups for them. I have to say our girls LOVED making this one. I was actually pretty surprised though. I thought for sure the older girls would be too “grown up” for this one but they loved making it more than our three year old. Woohoo!

This craft was so super easy to make too. I didn’t really do much except show them how to do it and they took it from there.

DIY St. Patrick's Day suncatcher, easy tutorial to make your own with your kiddos

Here’s what you’ll need

  • contact paper

  • green crepe paper

  • a shamrock with a hollow middle {I cut mine out using my cricut}

  • scissors

I used my trusty Cricut to cut out my shamrock. I found the image in design space and adjusted it to be approx. 7” wide. You can always print your own and use scissors to cut out the middle. Julie has a printable linked on her website if you click her link above.

Then you need to measure out your contact paper. You want it to be larger than your shamrock.

DIY St. Patrick's Day suncatcher, easy tutorial to make your own with your kiddos

You’ll need to cut TWO pieces of contact paper that are larger than your shamrock.

DIY St. Patrick's Day suncatcher, easy tutorial to make your own with your kiddos

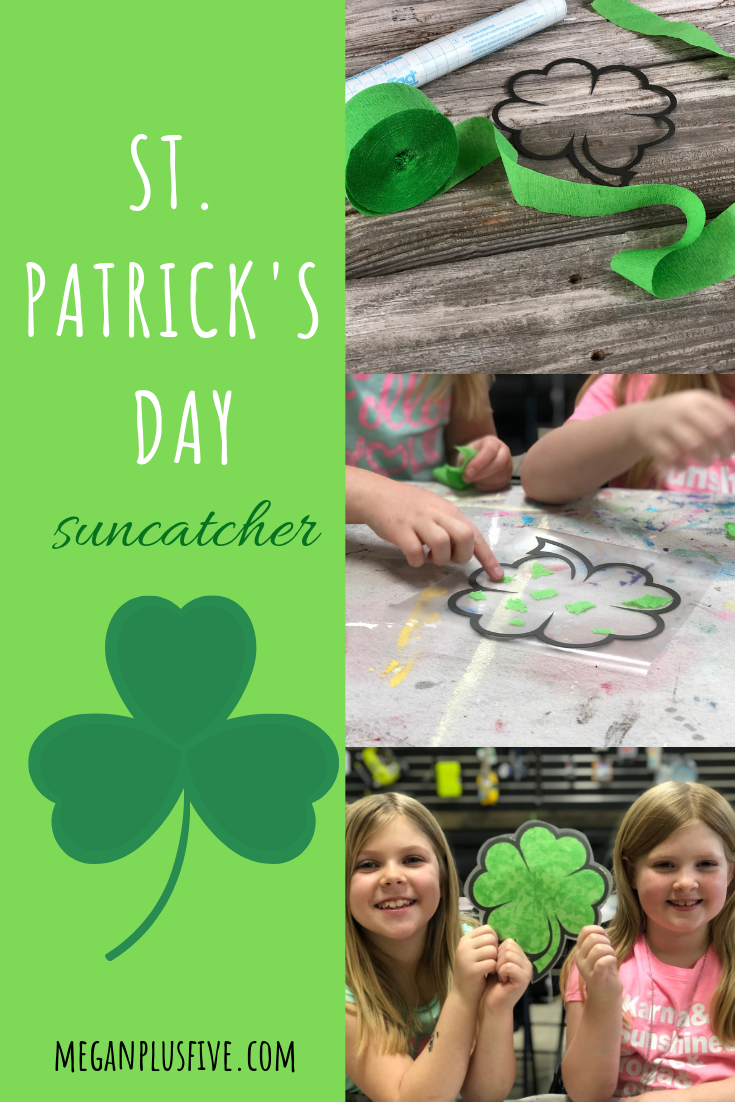
Remove the paper backing from your contact paper and place your shamrock in the middle. Then start tearing pieces of the crepe paper off and sticking them inside of the shamrock.

DIY St. Patrick's Day suncatcher, easy tutorial to make your own with your kiddos

Once your shamrock is covered remove the paper from the second piece of contact paper and lay it sticky side down onto the shamrock, essentially you are making a shamrock sandwich with the contact paper. Then trim off the extra leaving a 1/4 of and inch of contact paper all the way around the paper shamrock.

DIY St. Patrick's Day suncatcher, easy tutorial to make your own with your kiddos

And you’re done! SO EASY!!

St. Patrick's Day suncatcher, easy how to make this fun DIY

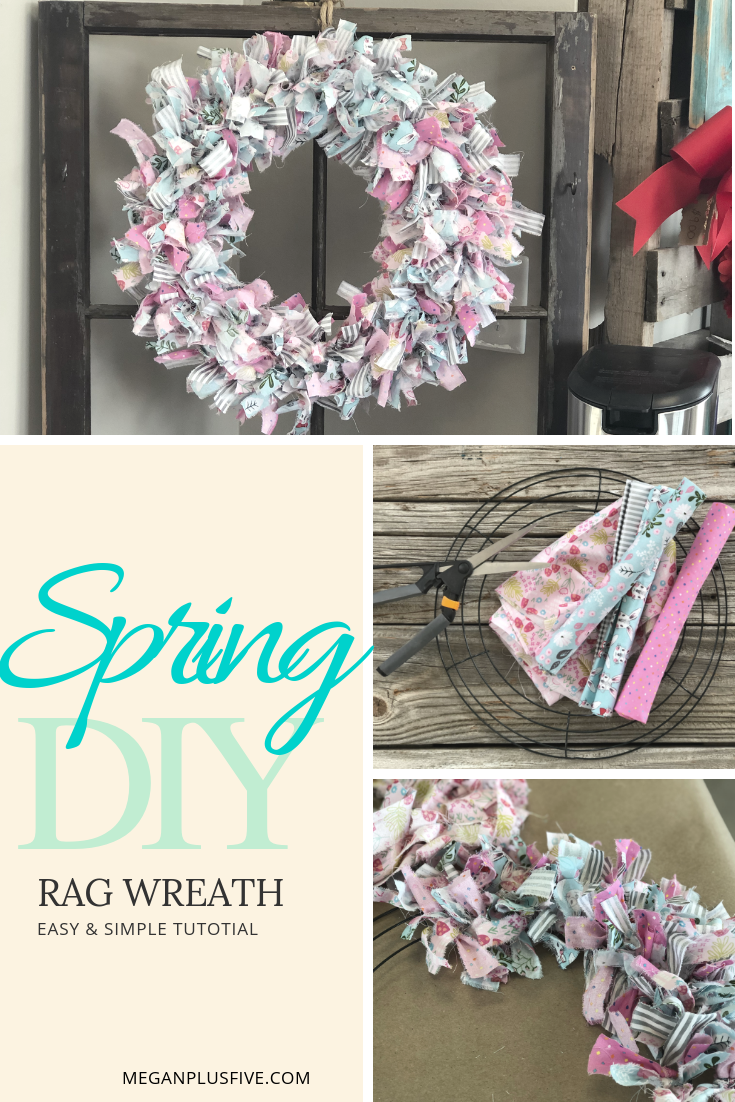
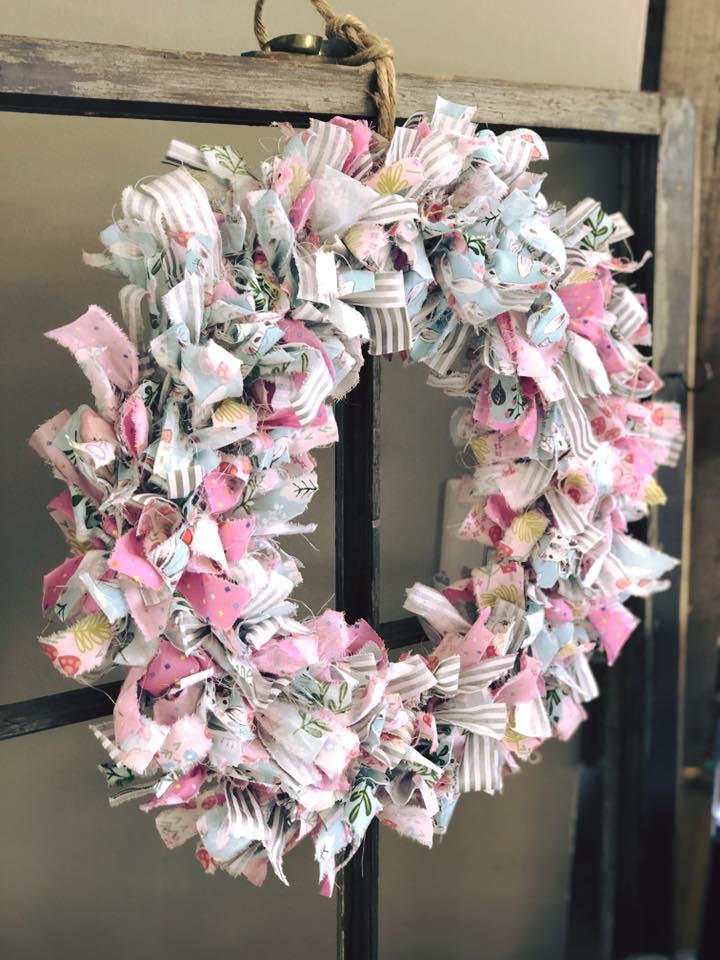
Super simple DIY, how to make a tied rag wreath for SPRING

Super simple DIY, how to make a tied rag wreath for SPRING

EASY SPRING RAG WREATH

All the perfect imperfections just get me every time. I’ve never been one to be too keen on things being perfect though, I am a mom of four after all. We have coloring on the wall, chipped dishes from the girls dropping them a little too hard into the sink, and don’t get me started on what the inside of our minivan looks like…so yeah, I LOVE imperfections.

This craft fits right into my love for imperfections. the unevenness, the frayed edges, the random fabric pattern, it’s a beautiful mess! And it is SO easy to make. You literally don’t have to have any “crafty” abilities to create this gorgeous wreath.

And did I mention it’s SUPER INEXPENSIVE to make? Yup! For less than $10 you can pick up everything you need to have a perfectly imperfect wreath for spring!

So let’s get started.

Want instant access to all of my FREE printables, templates, and patterns? Click here for my FREE RESOURCE LIBRARY

Super simple DIY, how to make a tied rag wreath for SPRING

Here’s what you'll need

  • a wire wreath form

  • 4 fat fabric quarters

  • scissors

  • something to hang it with. I used thick braided rope

And that’s it! I’m telling you this tutorial is sooooo simple!

Ok, let’s get started. First, using your scissors you need to cut slits every 3/4” on the widest side of your fabric. Then rip them off individually. I’ll post a video at the very end of this so you can watch how to do this.

After all your fabric is ripped into strips you need to cut each strip into thirds. You can do several strips at a time.

Super simple DIY, how to make a tied rag wreath for SPRING

Then start tying them using only one knot if you tie a double know the strips will be very short. You will use all the pieces of fabric from your 4 fat fabric quarters. I just grabbed whatever pieces and tied them on so.

This is so simple the kiddos can even help you make it. I know my girls LOVE helping me rip the strips.

Just keep tying and tying till you fill the whole ring up.

Super simple DIY, how to make a tied rag wreath for SPRING

When you have all your pieces tied on you can add something to hang it with. I added a cute piece of thick braided rope I had on hand.

I just LOVE the way this turned out! So gorgeous!

Check out the video tutorial I made during a FACEBOOK LIVE

5 super frugal ways to save money on beauty when you're broke

5 super frugal tips to save money on your beauty when you're broke

What do you do when you’re broke but you still need to get your hair done so you don’t look like you’re broke? You get resourceful and creative!

I have always been super frugal. Growing up in a house with 4 kids that were 5 years apart, and on one income, the budget was often tight. I was trained from a young age that if you want something bad enough that you can’t afford you make do with what you have and you put your brain to work.

Thankfully now we live in a time where the world is at our fingertips. How amazing is that?! If we ever want to know the answer to something all we have to do is literally pull a phone out and type. Pure bliss! We are in a time where it is easier than ever before to learn how to do something…if we want to do it bad enough that is.

Raising four little girls is expensive, like seriously expensive! From heath care to every day expenses, there’s not much room in our budget for unnecessary purchases. So we have to be selective on where our hard-earned money goes. Let me tell ya, it doesn’t go to my beauty fund lol! I know moms everywhere feel the same way.

Here are my 5 best frugal tips to saving money on all that beauty stuff…if you’re willing to do a little work.

5 super frugal tips to save money on your beauty when you're broke

-Don’t buy in to every single beauty trend that comes out.. This will save you SO much money if you don’t jump on board. Remember that what’s hot now won’t be in a few years.

- YOUTUBE is your BFF! Use your fancy phone to youtube how to do your own hair. I know this may seem extreme BUT if you don’t have anything too complex going on with your locks you can do it yourself. Before I had kiddos I was a licensed cosmetologist, but I watched my grandma work in the salon for YEARS growing up and I was doing my own hair long before I became licensed myself. If you go slow and don’t do anything too extreme you can get the job done. This works for anything you want to know how to do. You will have a little bit of an expense at first to buy the tools you’ll need but they will like cost WAY less than getting the actual service done.

-I know pedicures are God’s gift to your feet but they are often an unnecessary expense. You can spend $5 at your local Dollar Tree or Walmart and get everything you need to do your own at home. I promise it absolutely won’t feel as wonderful but you’ll also be saving $$.

-Try bartering if you have a specific beauty need that you just can’t spare. If there is something you are really good at that your hair dresser needs from you, swap. I would just be very careful to not let this ruin any kind of relationship that you have with one another. Trading dollar value for dollar value is a great way to do this type of exchange. If she charges $35 for a haircut and you charge $25 for {insert the awesome thing you have to barter with} you would pay the remaining $10 in cash plus the thing you are bartering with.

-Don’t pass up clearance makeup. I know you’re probably thinking ‘what the heck is wrong with this lady’ but remember…you’re broke lol! You don’t have $57 to spend on a tube of mascara. Honestly, I have spent that much on mascara before and it did just as good as the $4 Walmart special I have now.

There’s my most frugal tips I use to save money on beauty. It will take a little getting used to, especially if you’re brave enough to do you’re own hair, but you will be amazed at how much money you will save.

If you liked these money saving tips check out some more of my frugal tips


Have your own tips? I’d love to hear them, be sure to share them below!

Make your own Valentine's Day pallet sign, easy step by step tutorial

Make your own Valentine's Day pallet sign, easy step by step tutorial

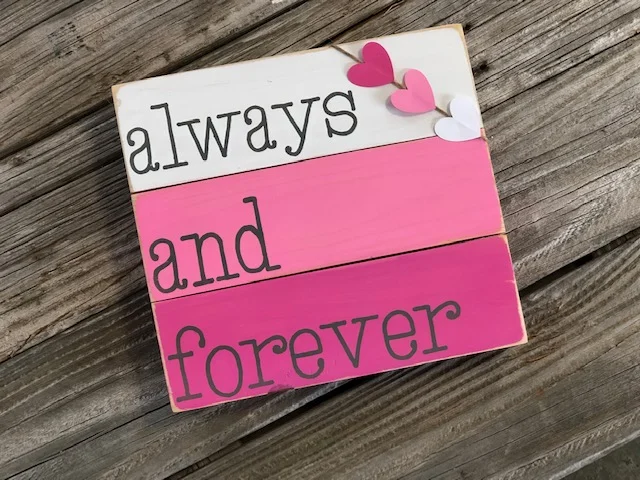
Oh Valentine’s Day…I LOVE all the colors of this beautiful holiday! And if you’re like me you’ll love this adorable craft to make too! Bringing in all the pinks, whites, and grays for this one. And who doesn’t love twine? I mean, if you don’t love twine then are you a true crafter?? This stuff is so sturdy, goes with pretty much anything, and let’s be honest for being string it’s pretty darn cute!

So let’s get started.

I know that sometimes you don’t have all the necessary tools to do all those amazing crafts on pinterest or maybe you just want to try it before you make that kind of financial commitment or maybe you just want a super easy craft night with the girls where there’s no prep work for you. Whatever it is I’ve put together easy peasy craft kits just for you. You can find this particular CRAFT KIT HERE.

Make your own Valentine's Day pallet sign, easy step by step tutorial

If you want to make yours from scratch here’s what you’ll need

  • 1x4x12 {times 3}

  • 1x2x6 {times 2}

  • wood glue

  • nails or brad nailer {I used my Ryobi brad nailer with}

  • stencils {I cut mine from my Cricut}

  • 1” cardstock hearts {I cut mine from my Cricut in dark pink, pink, white}

  • twine

  • tacky glue

  • cosmetic sponges

  • paint brushes or sponge brushes

  • sandpaper or sander {I used my Ryobi cordless sander 120 grit}

  • white, pink, dark pink, gray acrylic paint

  • staple gun

Make your own Valentine's Day pallet sign, easy step by step tutorial

The first thing I do on projects like these is cut everything I need from my Cricut.

Next you need to assemble your sign base together. Lay your boards down on a flat surface so that they are parallel to one another. Then you will take your 1x2x6 pieces and glue and nail them in place.

This is what you want the front of your board to look like once it’s put together.

Make your own Valentine's Day pallet sign, easy step by step tutorial

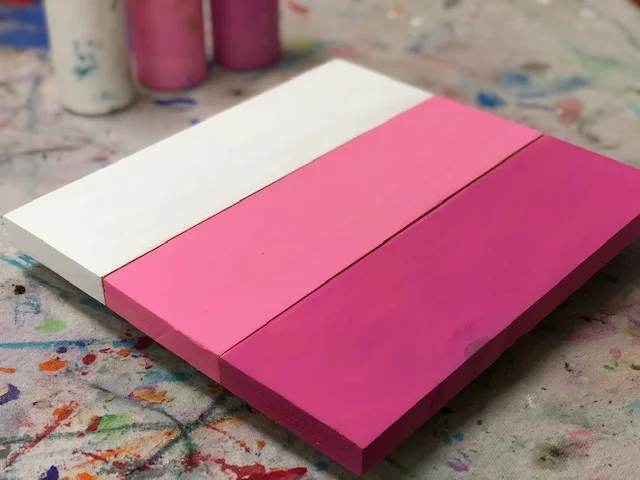
Next you want to paint each piece a different color. I painted the front and the sides, just not the back of this particular piece. I painted the top board white, the middle board light pink, and the bottom board dark pink.

Make your own Valentine's Day pallet sign, easy step by step tutorial
valentine's day sign2.jpgMake your own Valentine's Day pallet sign, easy step by step tutorial
Make your own Valentine's Day pallet sign, easy step by step tutorial

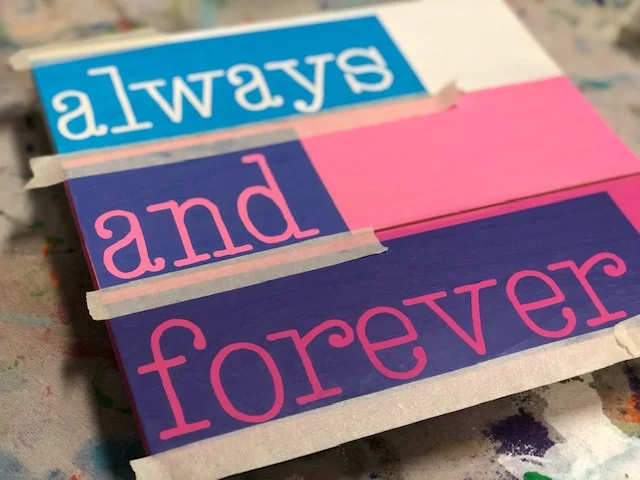
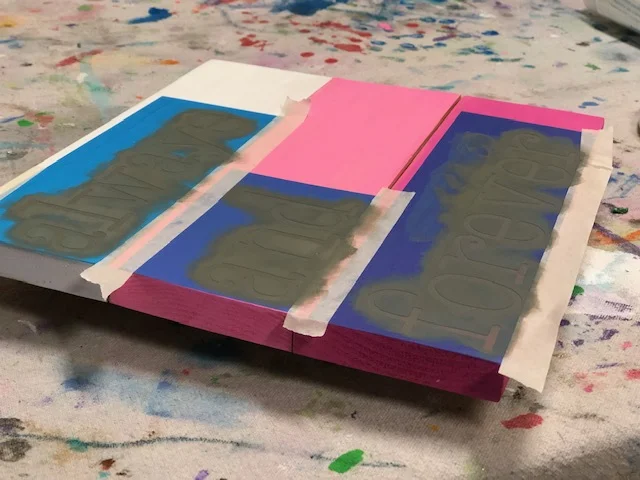
After your paint is totally dry you can apply your stencils. I recommend taping off the edges after you get your stencils down. I wanted mine lined on the left side but you can place yours anywhere on the base.

Make your own Valentine's Day pallet sign, easy step by step tutorial

Now it’s time to paint the lettering using your cosmetic sponge. First lightly dab the flat end of your sponge into the gray paint, you want VERY LITTLE paint on your sponge. If you get too much paint it will bleed under your stencil. Now dab your gray paint very lightly onto the letters.

valentine's day sign9.jpgMake your own Valentine's Day pallet sign, easy step by step tutorial

To achieve the darkness of the gray on mine I did two coats of gray paint. You want to be able to see through the first layer. Once the first layer is dry you can dab on a second layer of paint, still keep it very ligh

Make your own Valentine's Day pallet sign, easy step by step tutorial

This is what you want your first coat to look like. And below is what your stencils should look like after you get your second coat on.

Make your own Valentine's Day pallet sign, easy step by step tutorial

After you paint your second coat peel your stencil up and discard it.

Make+your+own+Valentine%27s+Day+pallet+sign%2C+easy+step+by+step+tutorial

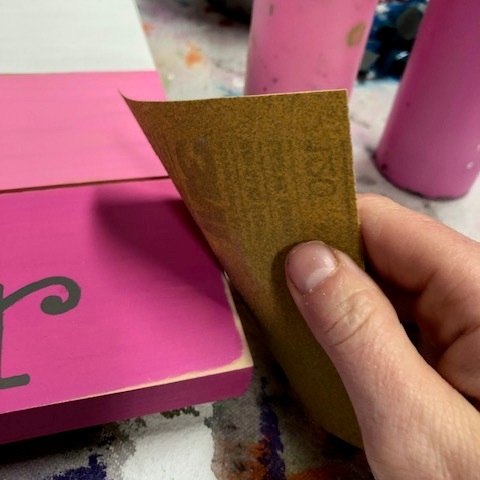
Distress your edges using sand paper or your palm sander. I used my Ryobi cordless sander for this step but I wanted to show how to use just a piece of sandpaper for this tutorial.

Make your own Valentine's Day pallet sign, easy step by step tutorial

Measure out a piece of twine and staple it to the back of your sign so it drapes over the opposite corner of your lettering, mine is on the right side. You’ll want to pull this so that there isn’t any slack.

Make your own Valentine's Day pallet sign, easy step by step tutorial

Now just glue your cardstock hearts to your twine and you’re done!

Make your own Valentine's Day pallet sign, easy step by step tutorial

FREE Printables to keep your monthly bills in order

FREE Printables to keep your monthly bills in order

I know I am super old school when I say that I keep a planner that I can actually hold. But you know what…I have no shame. I LOVE having a tangible planner that I can pull out of my bag and put a pen to. The truth is I tried to use those fancy techy ones and they just aren’t for me. I love to write {although my handwriting is terrible} and I love to flip through the pages and feel the impression of the ink on the paper. It's sort of humbling in its own way.

I love creating printables for my BIG Happy Planner. Before I stumbled across these wonderful life savers I used to make my own planners, but that’s a whole other blog post on its own.

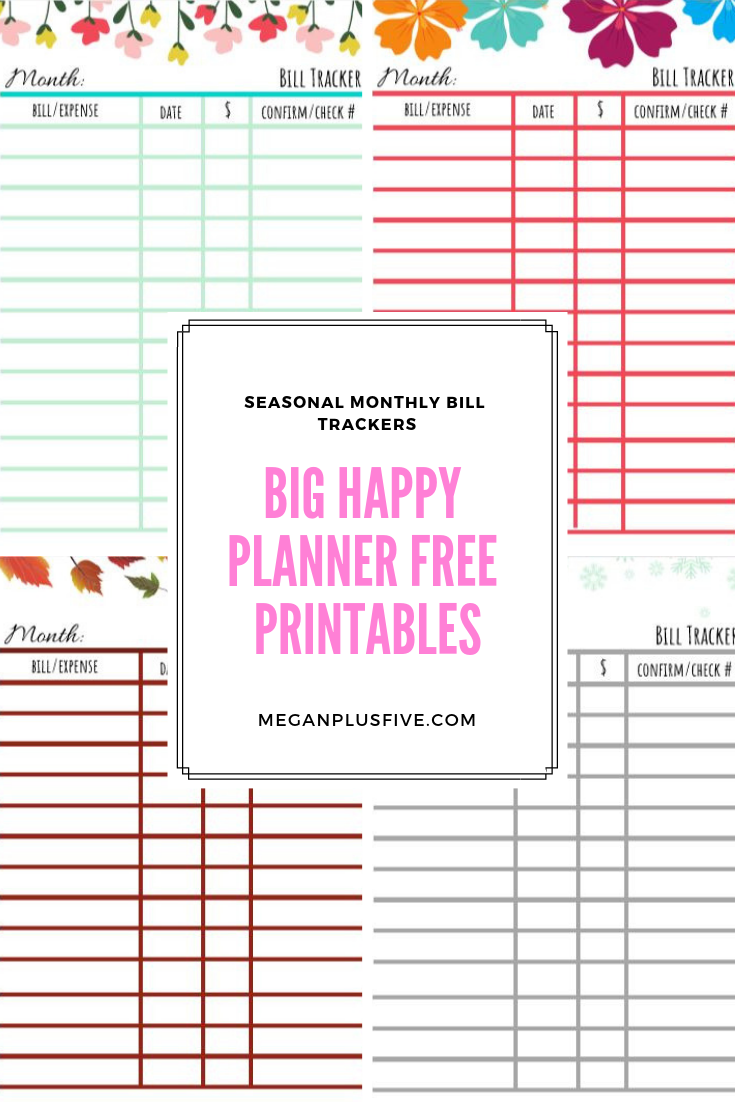
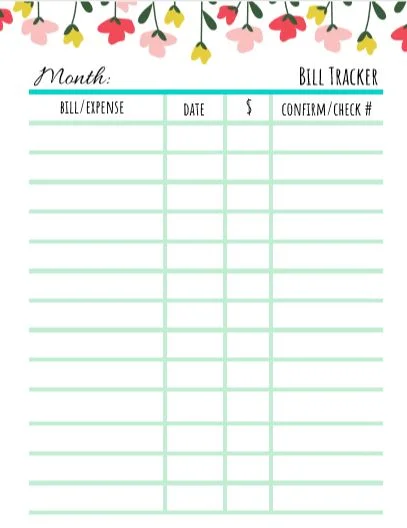
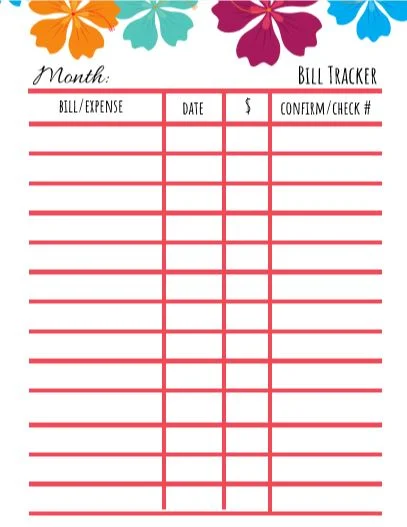
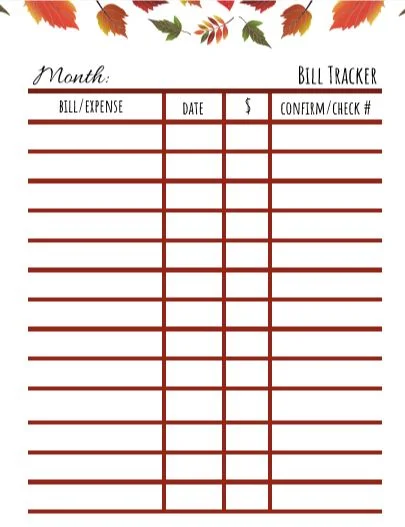
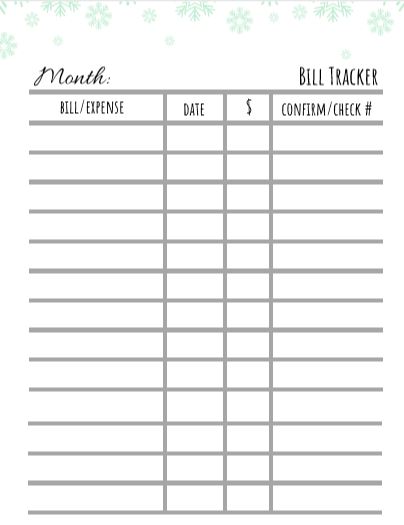
Life with kids can seriously leave you wondering what day it is most of the time. I don’t have enough brain space to remember which day I paid what bill {we don’t use auto draft for our own personal reasons} so I needed a page that I could keep track of all the bills we paid that month, the amount, and the confirmation/check number. I’ve been using a bill tracker similar to one like these for years and the months I don’t write everything down on them are the months my life just feels a little chaotic.

Making them colorful is also a must. There’s nothing more depressing than jotting down all the money you’ve paid on bills for the month on a black and white piece of paper. I HAVE to give my printables to life. I made one for each season, winter, spring, summer, fall. Print the number of printable you’ll need for each season. These are made to fit the BIG HAPPY PLANNER but you can adjust these sizes when you go to print for the size that’ll fit your needs.

I do hope you enjoy these monthly bill trackers as much as I do!

Let me know what you think by commenting below.

FREE Monthly Bill Tracker

Leave your info below so I know where to send your free printables

FREE Printables to keep your monthly bills in order

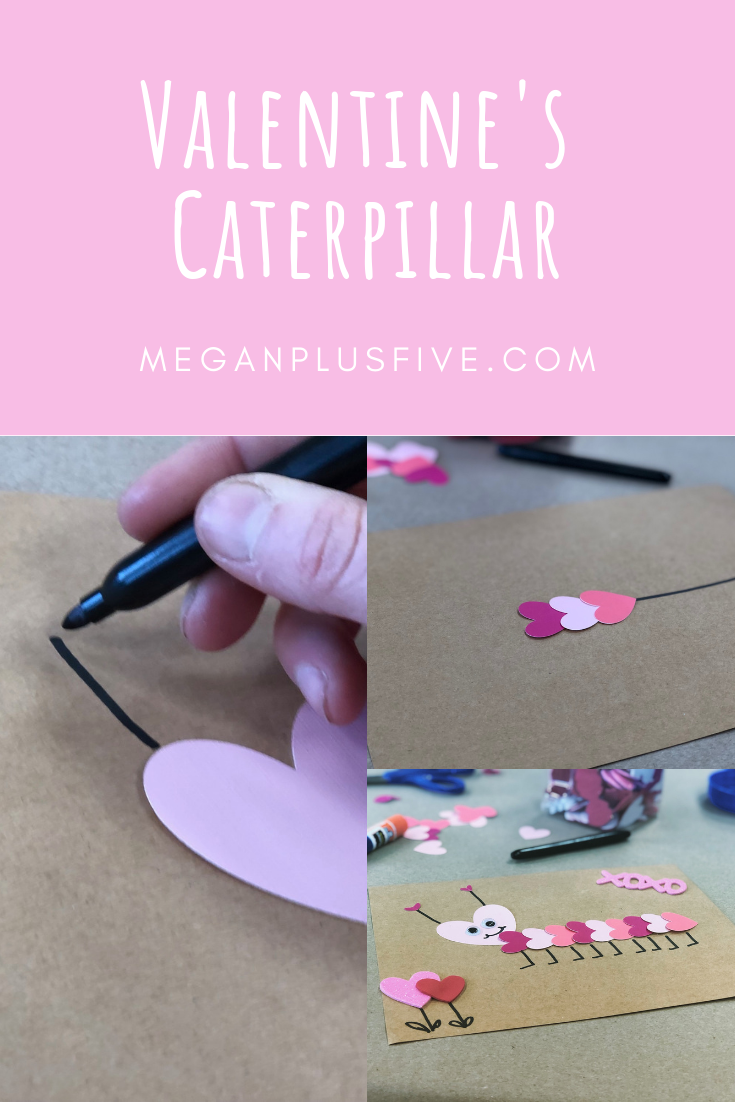
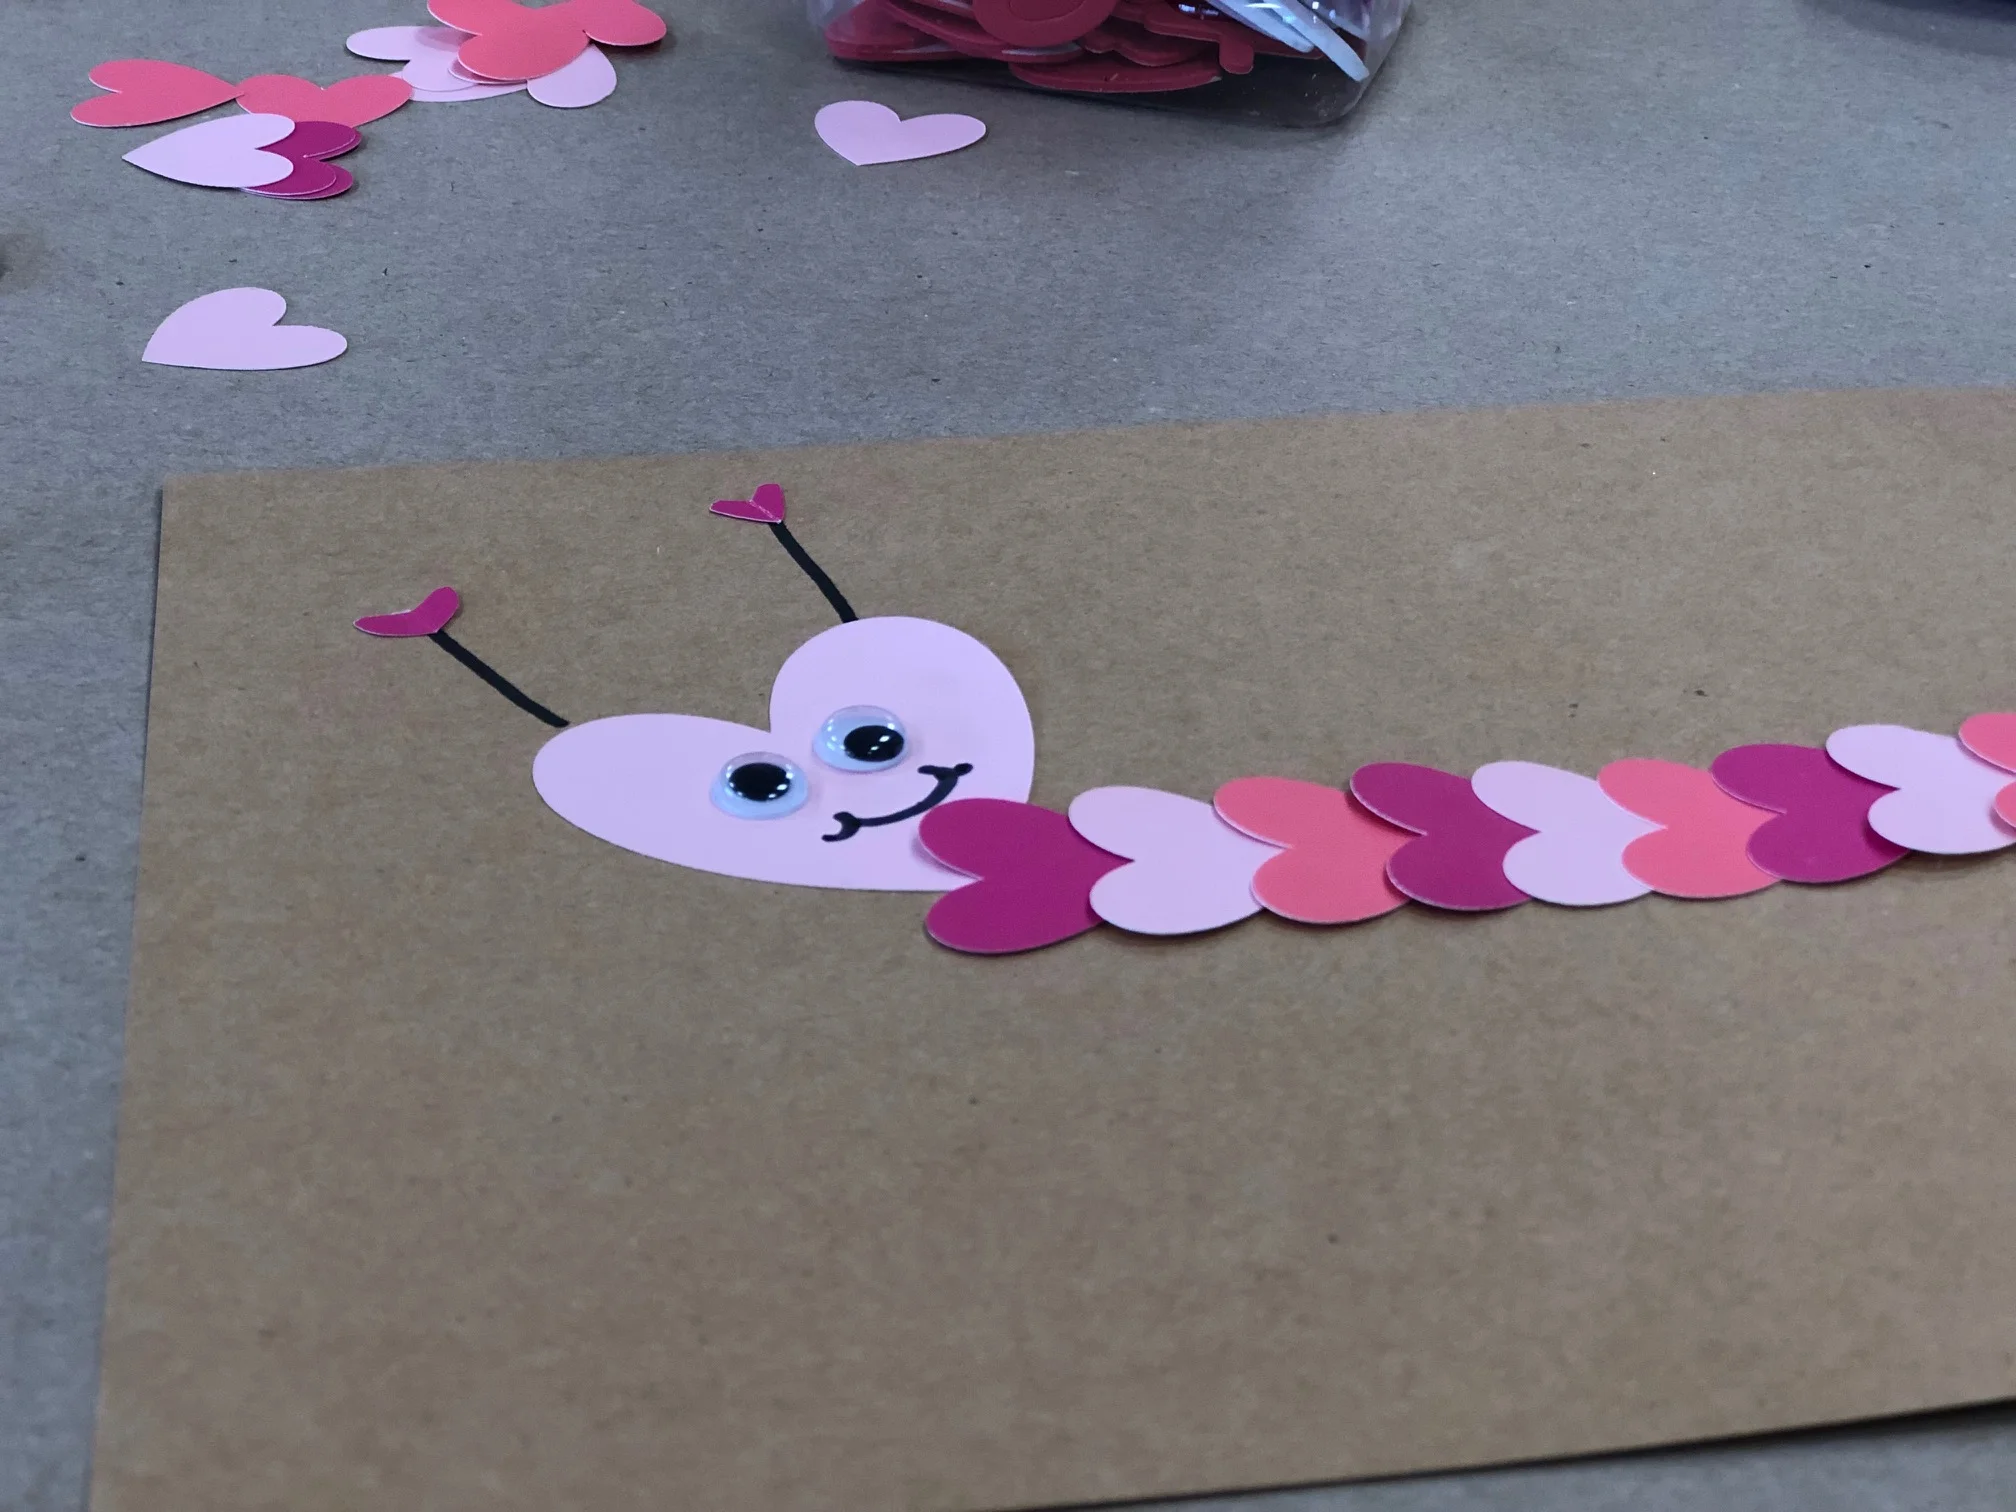
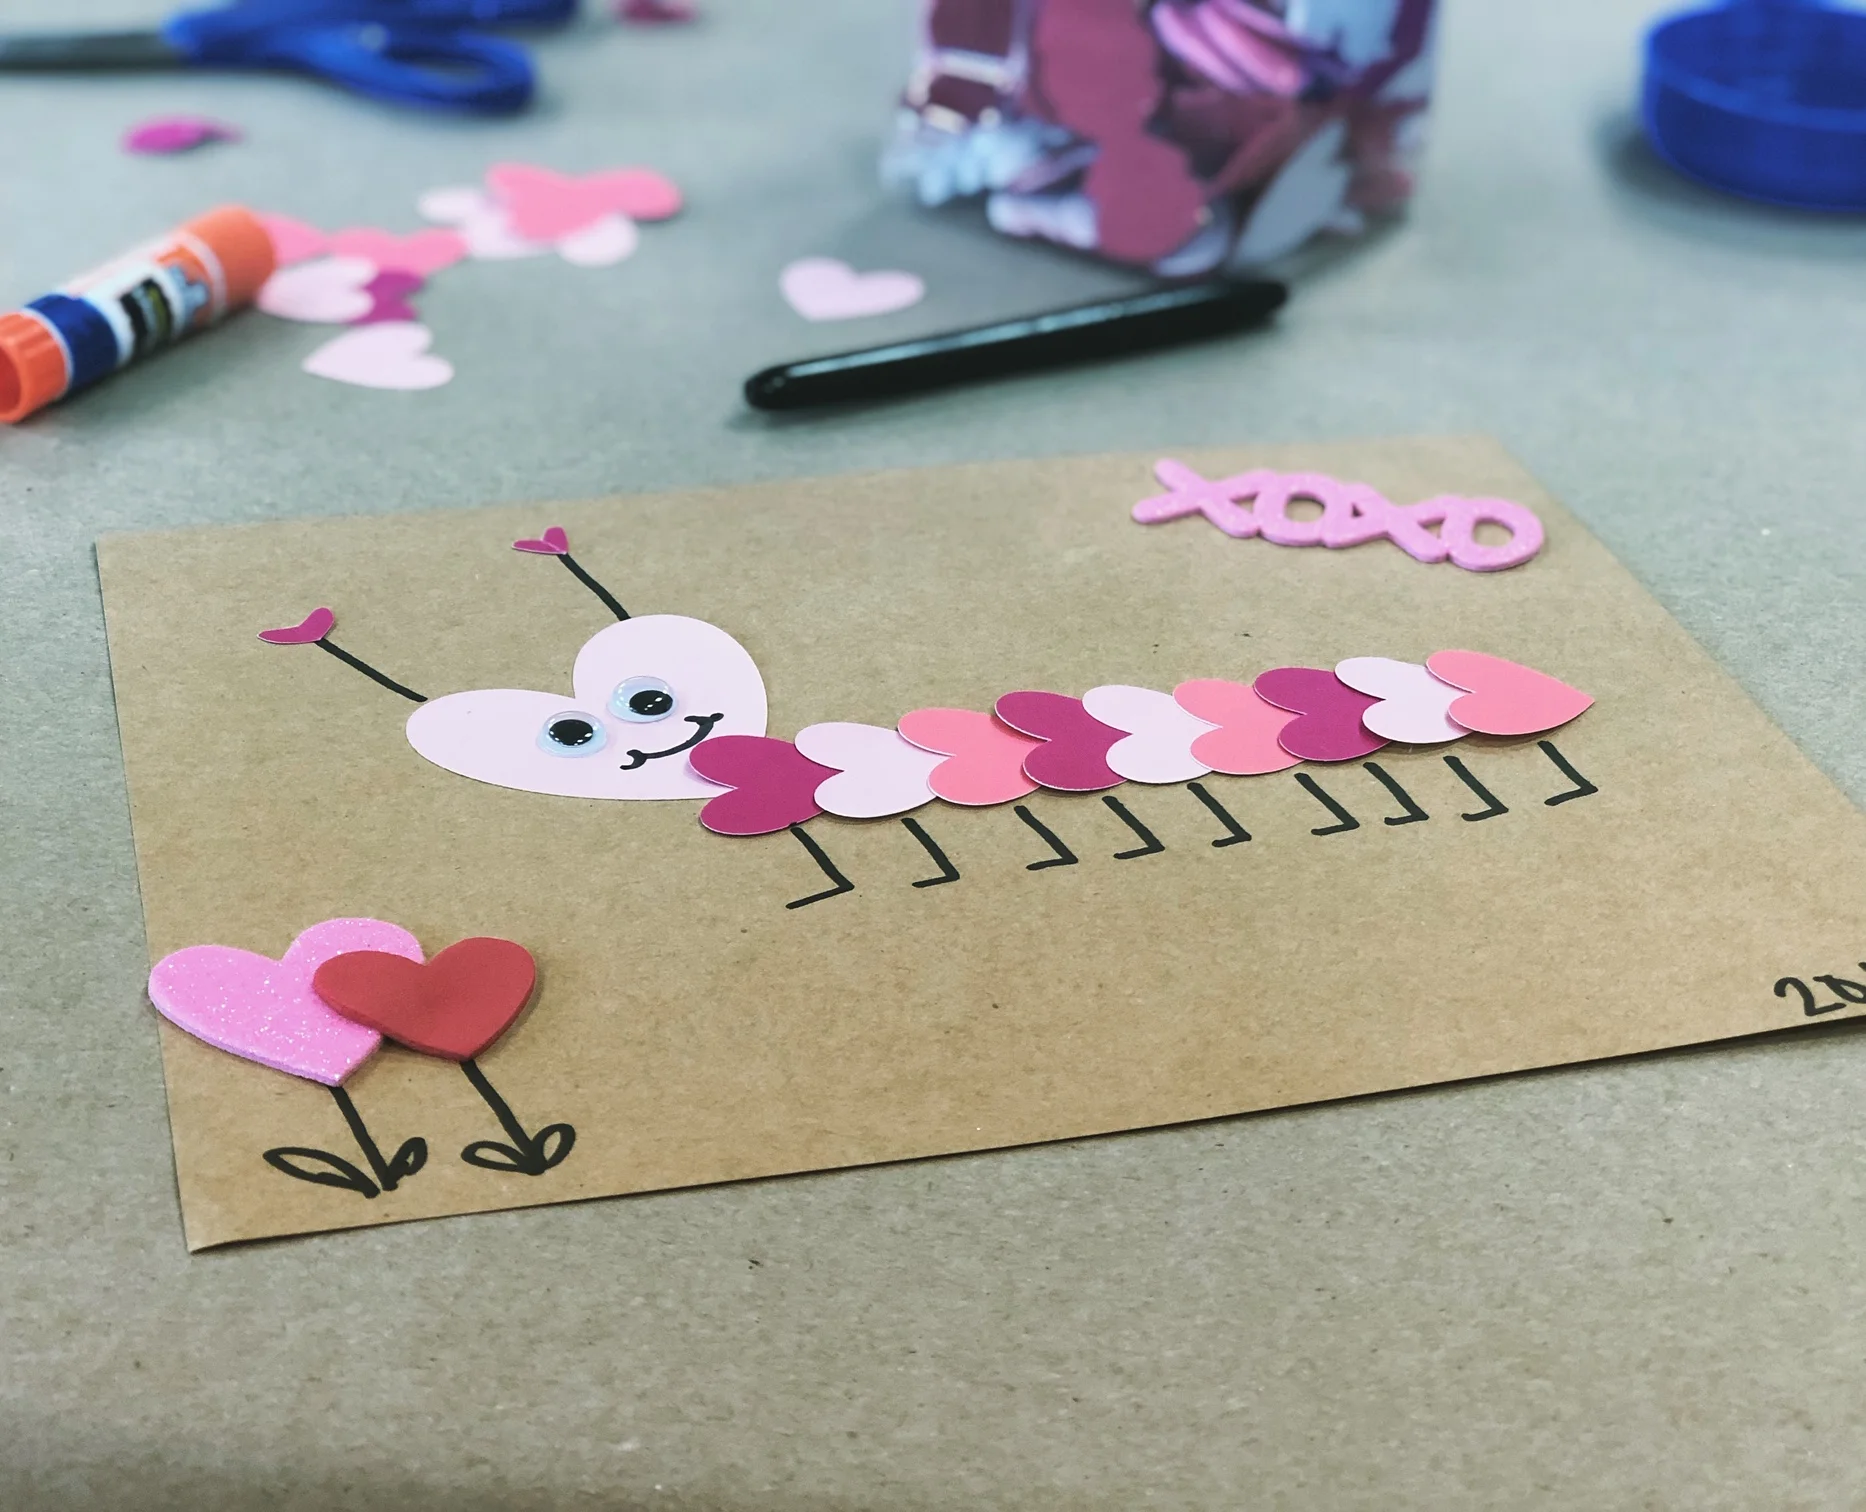
DIY Valentine's Caterpillar, easy simple step by step tutorial

DIY Valentine's Caterpillar, easy simple step by step tutorial

Quick and simple crafts…I love them! Especially when they are quick crafts for the kiddos. Let’s face it their attention span isn’t always the longest and usually half way through the craft they’ve already found something shiny to play with on the other side of the room.

This project won’t take up a ton of their time and will most definitely be a sweet keepsake for you for years to come.

Some links may contain affiliate content meaning if you click the link and make a purchase I will get a small commission from this, at no extra cost to you. Please know that I would never endorse anything I don’t believe in or use in my own life.

DIY Valentine's Caterpillar, easy simple step by step tutorial

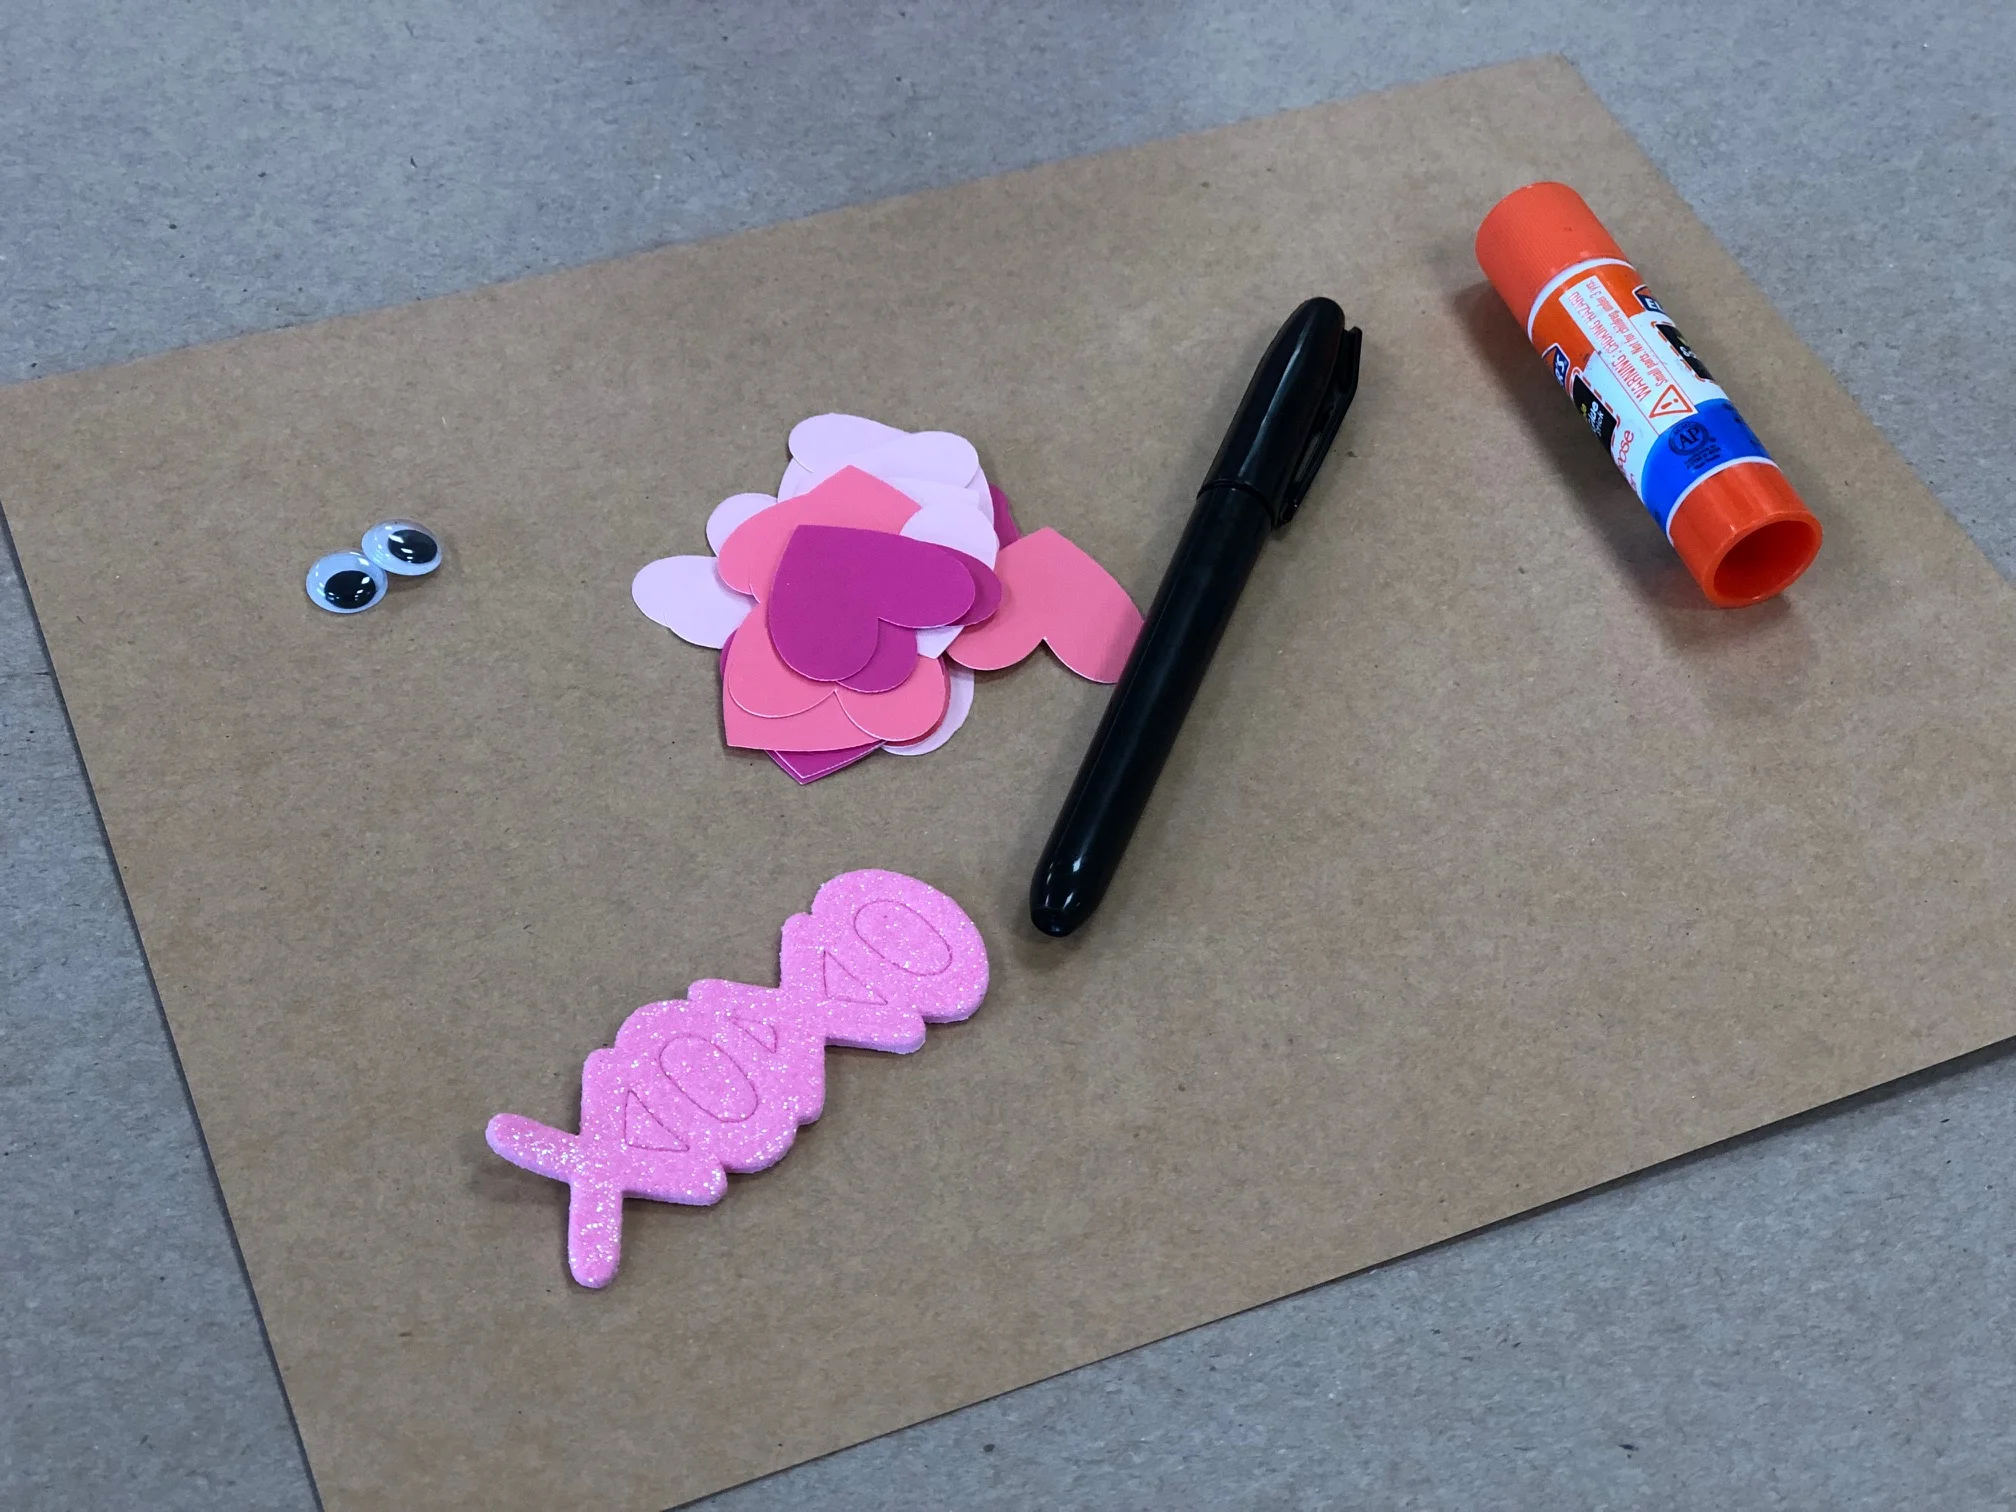
Here’s what you’ll need

  • piece of paper, we used cardstock

  • black marker

  • googly eyes

  • glue stick

  • valentine themed stickers

  • heart cut outs,. I used my Cricut to make ours but you can make your own by hand

DIY Valentine's Caterpillar, easy simple step by step tutorial

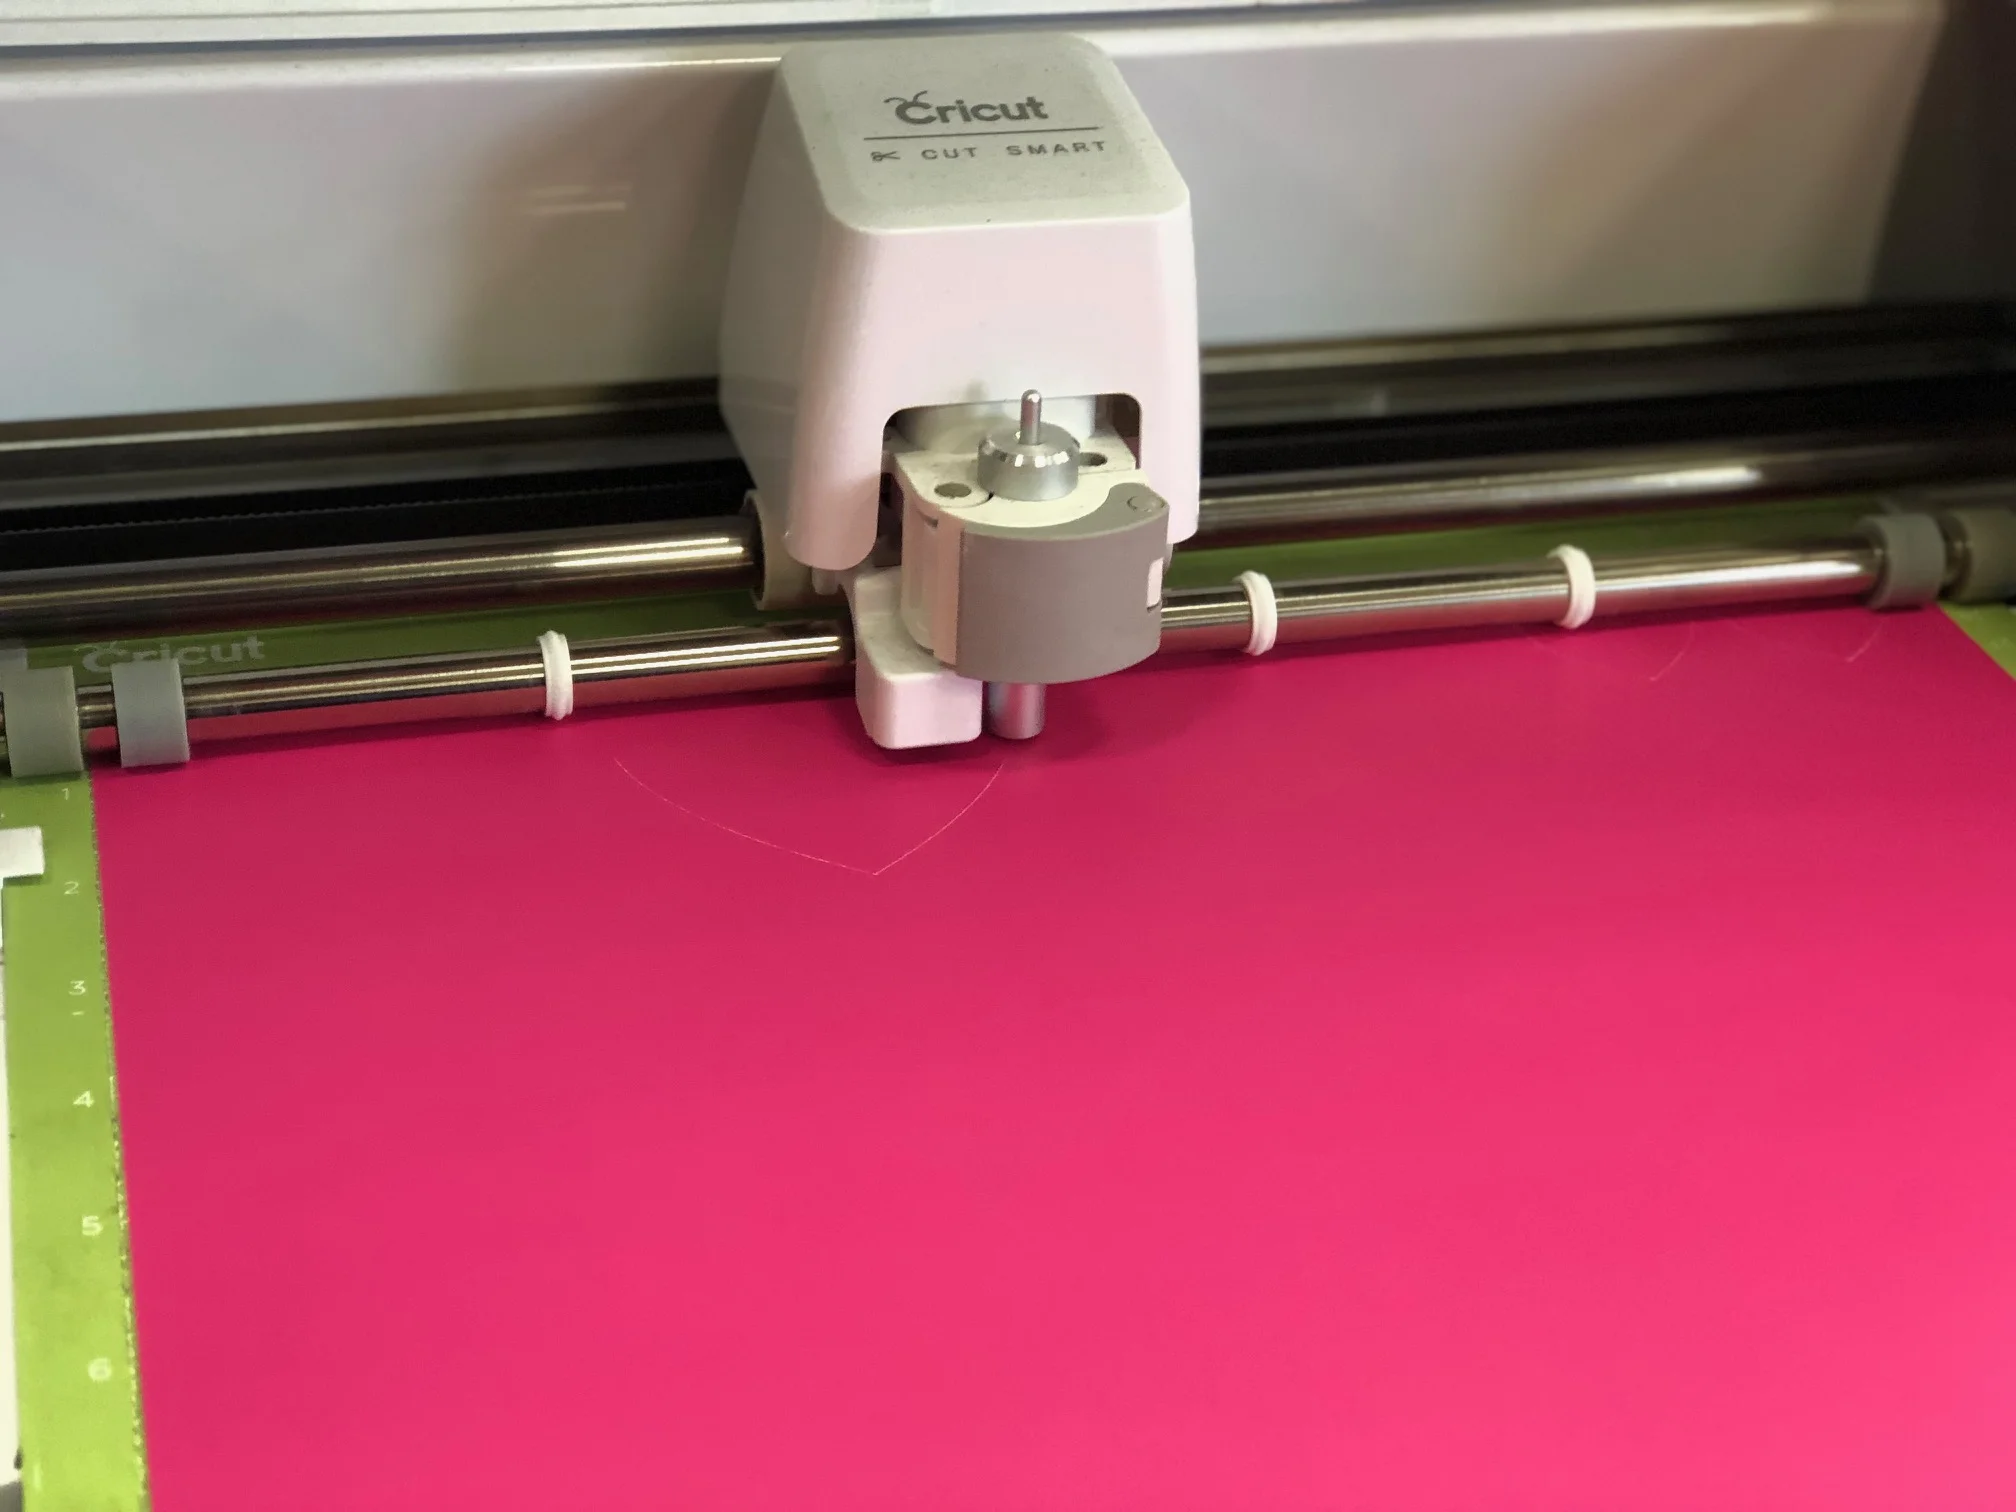
Start by cutting out your hearts. I used my Cricut Explore to do this task. I absolutely LOVE my Cricut machines, and have been using one for MANY years.

DIY Valentine's Caterpillar, easy simple step by step tutorial

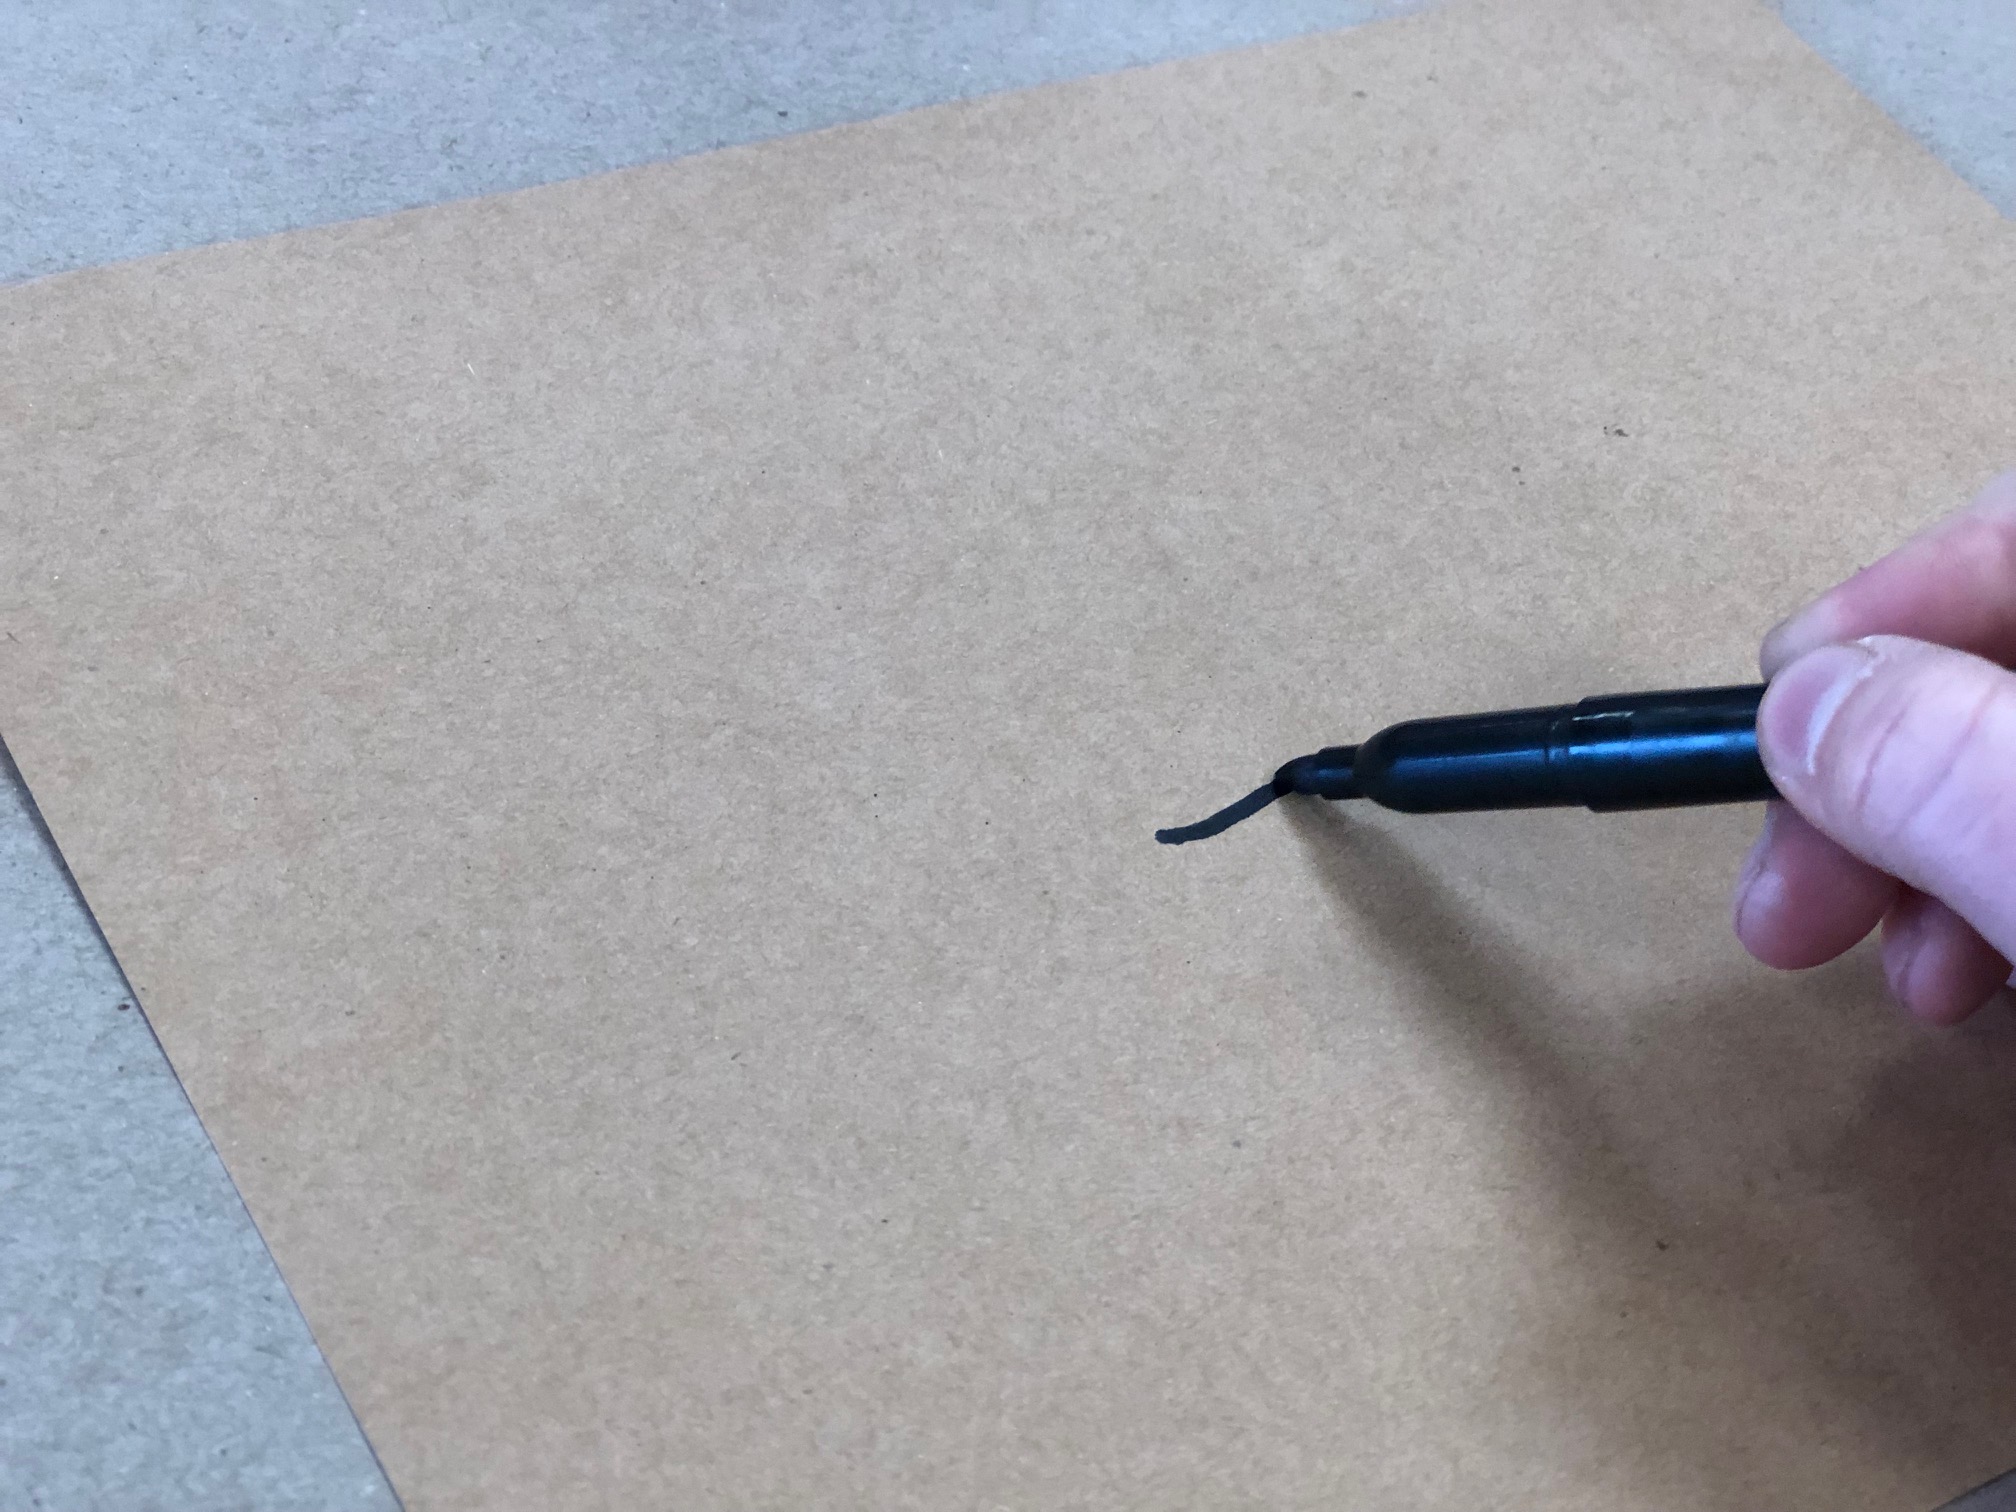
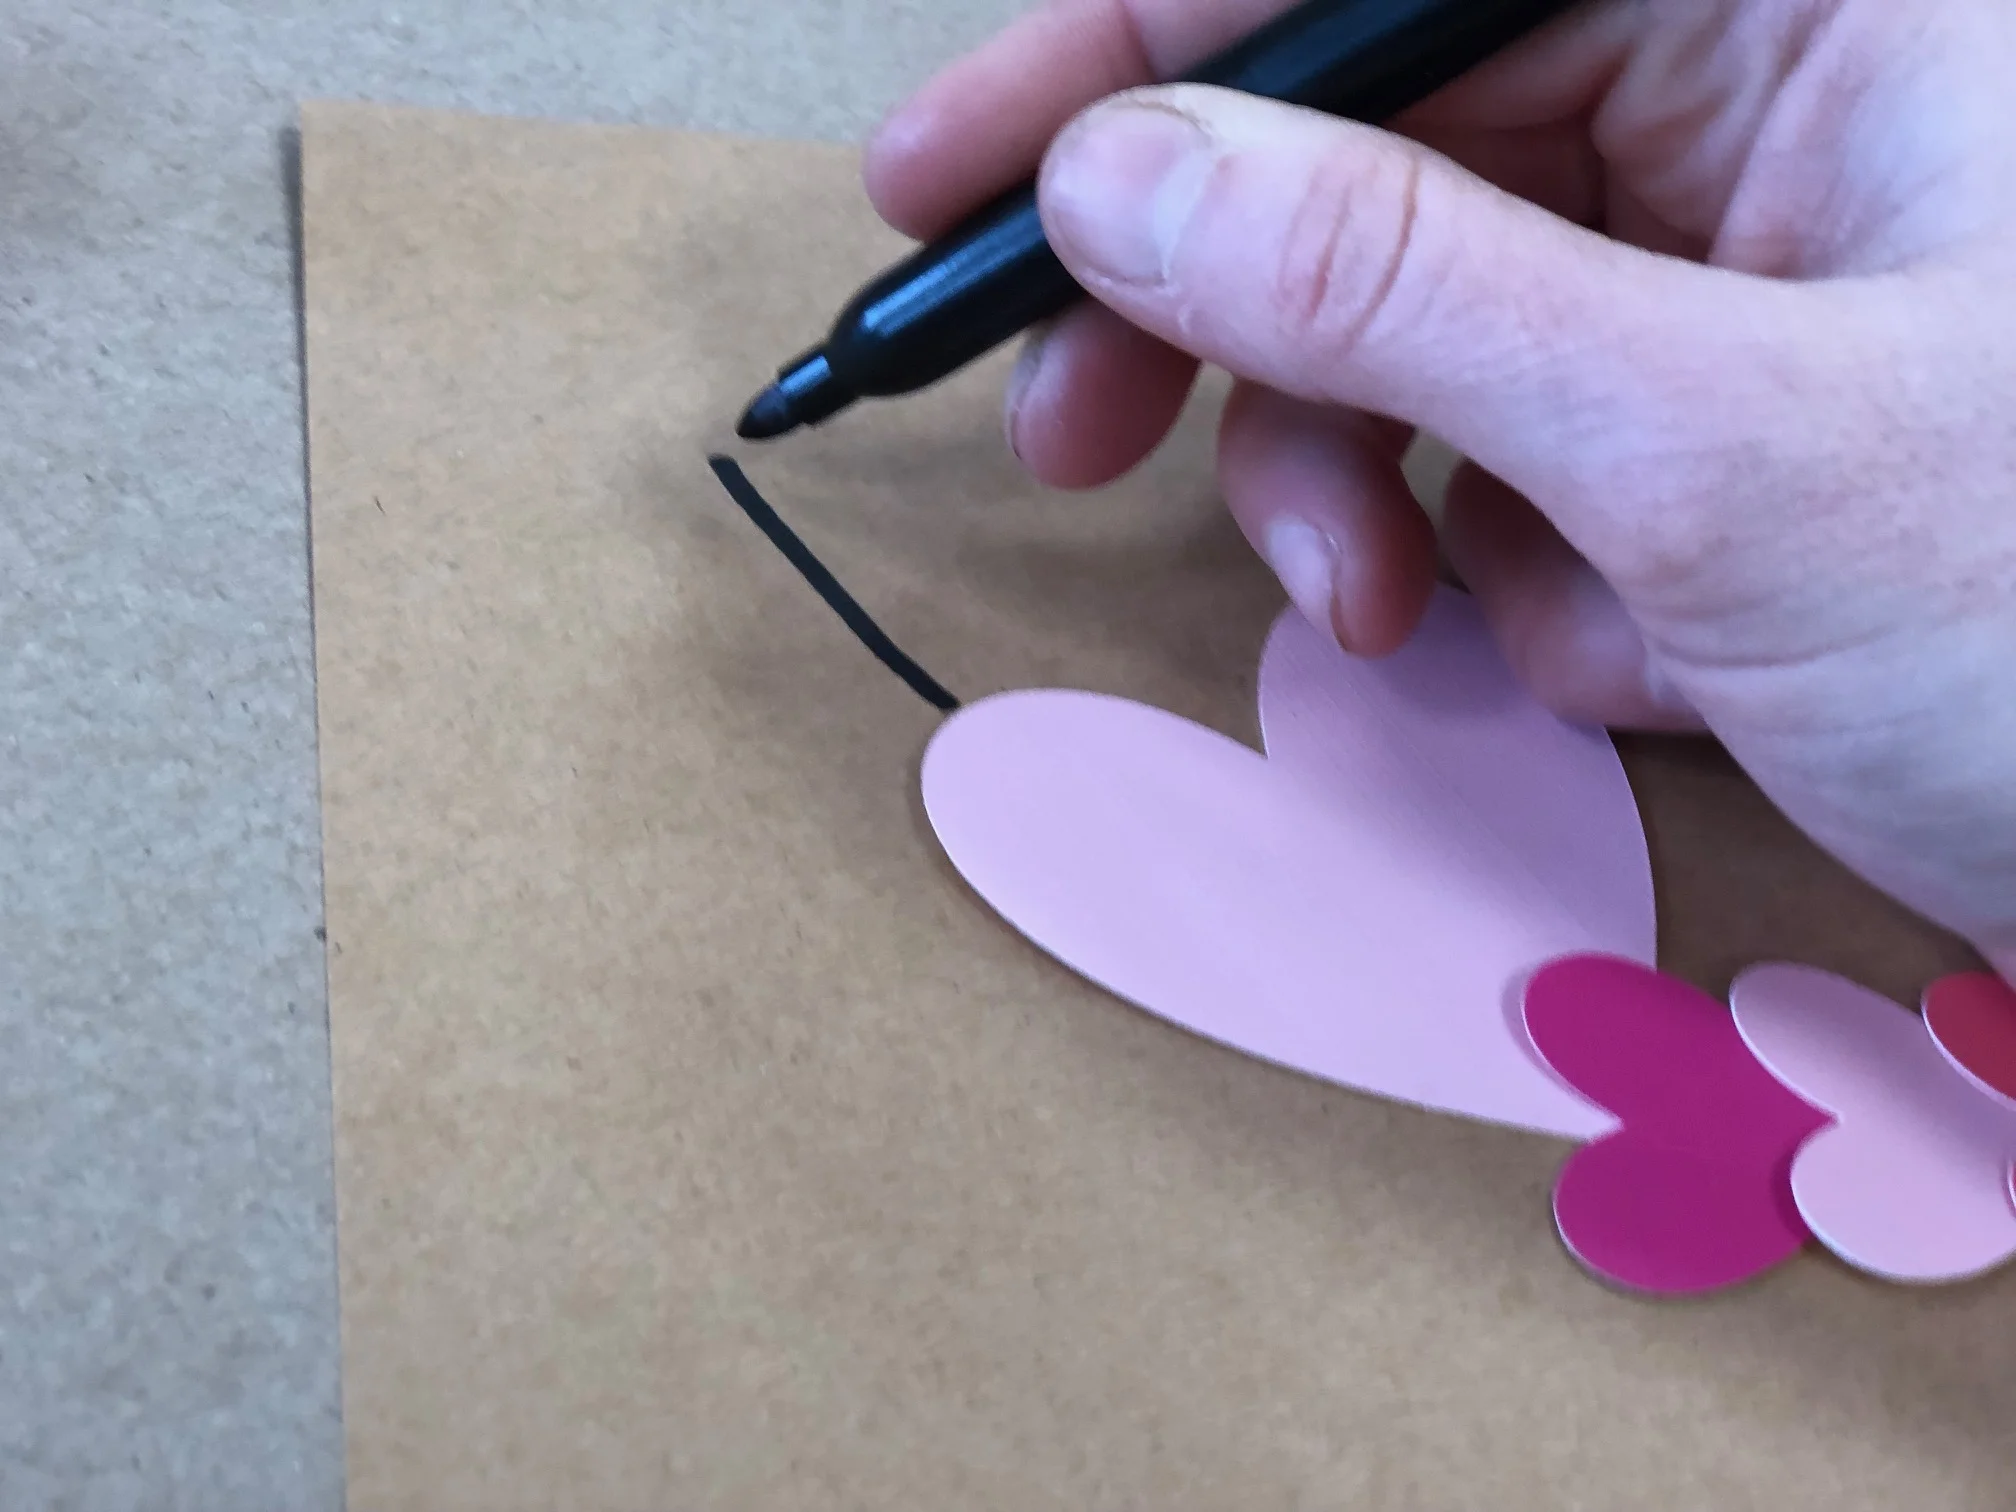
Next, using your marker, draw a line horizontally on your paper. I did this to keep the hearts straight on the paper.

DIY Valentine's Caterpillar, easy simple step by step tutorial

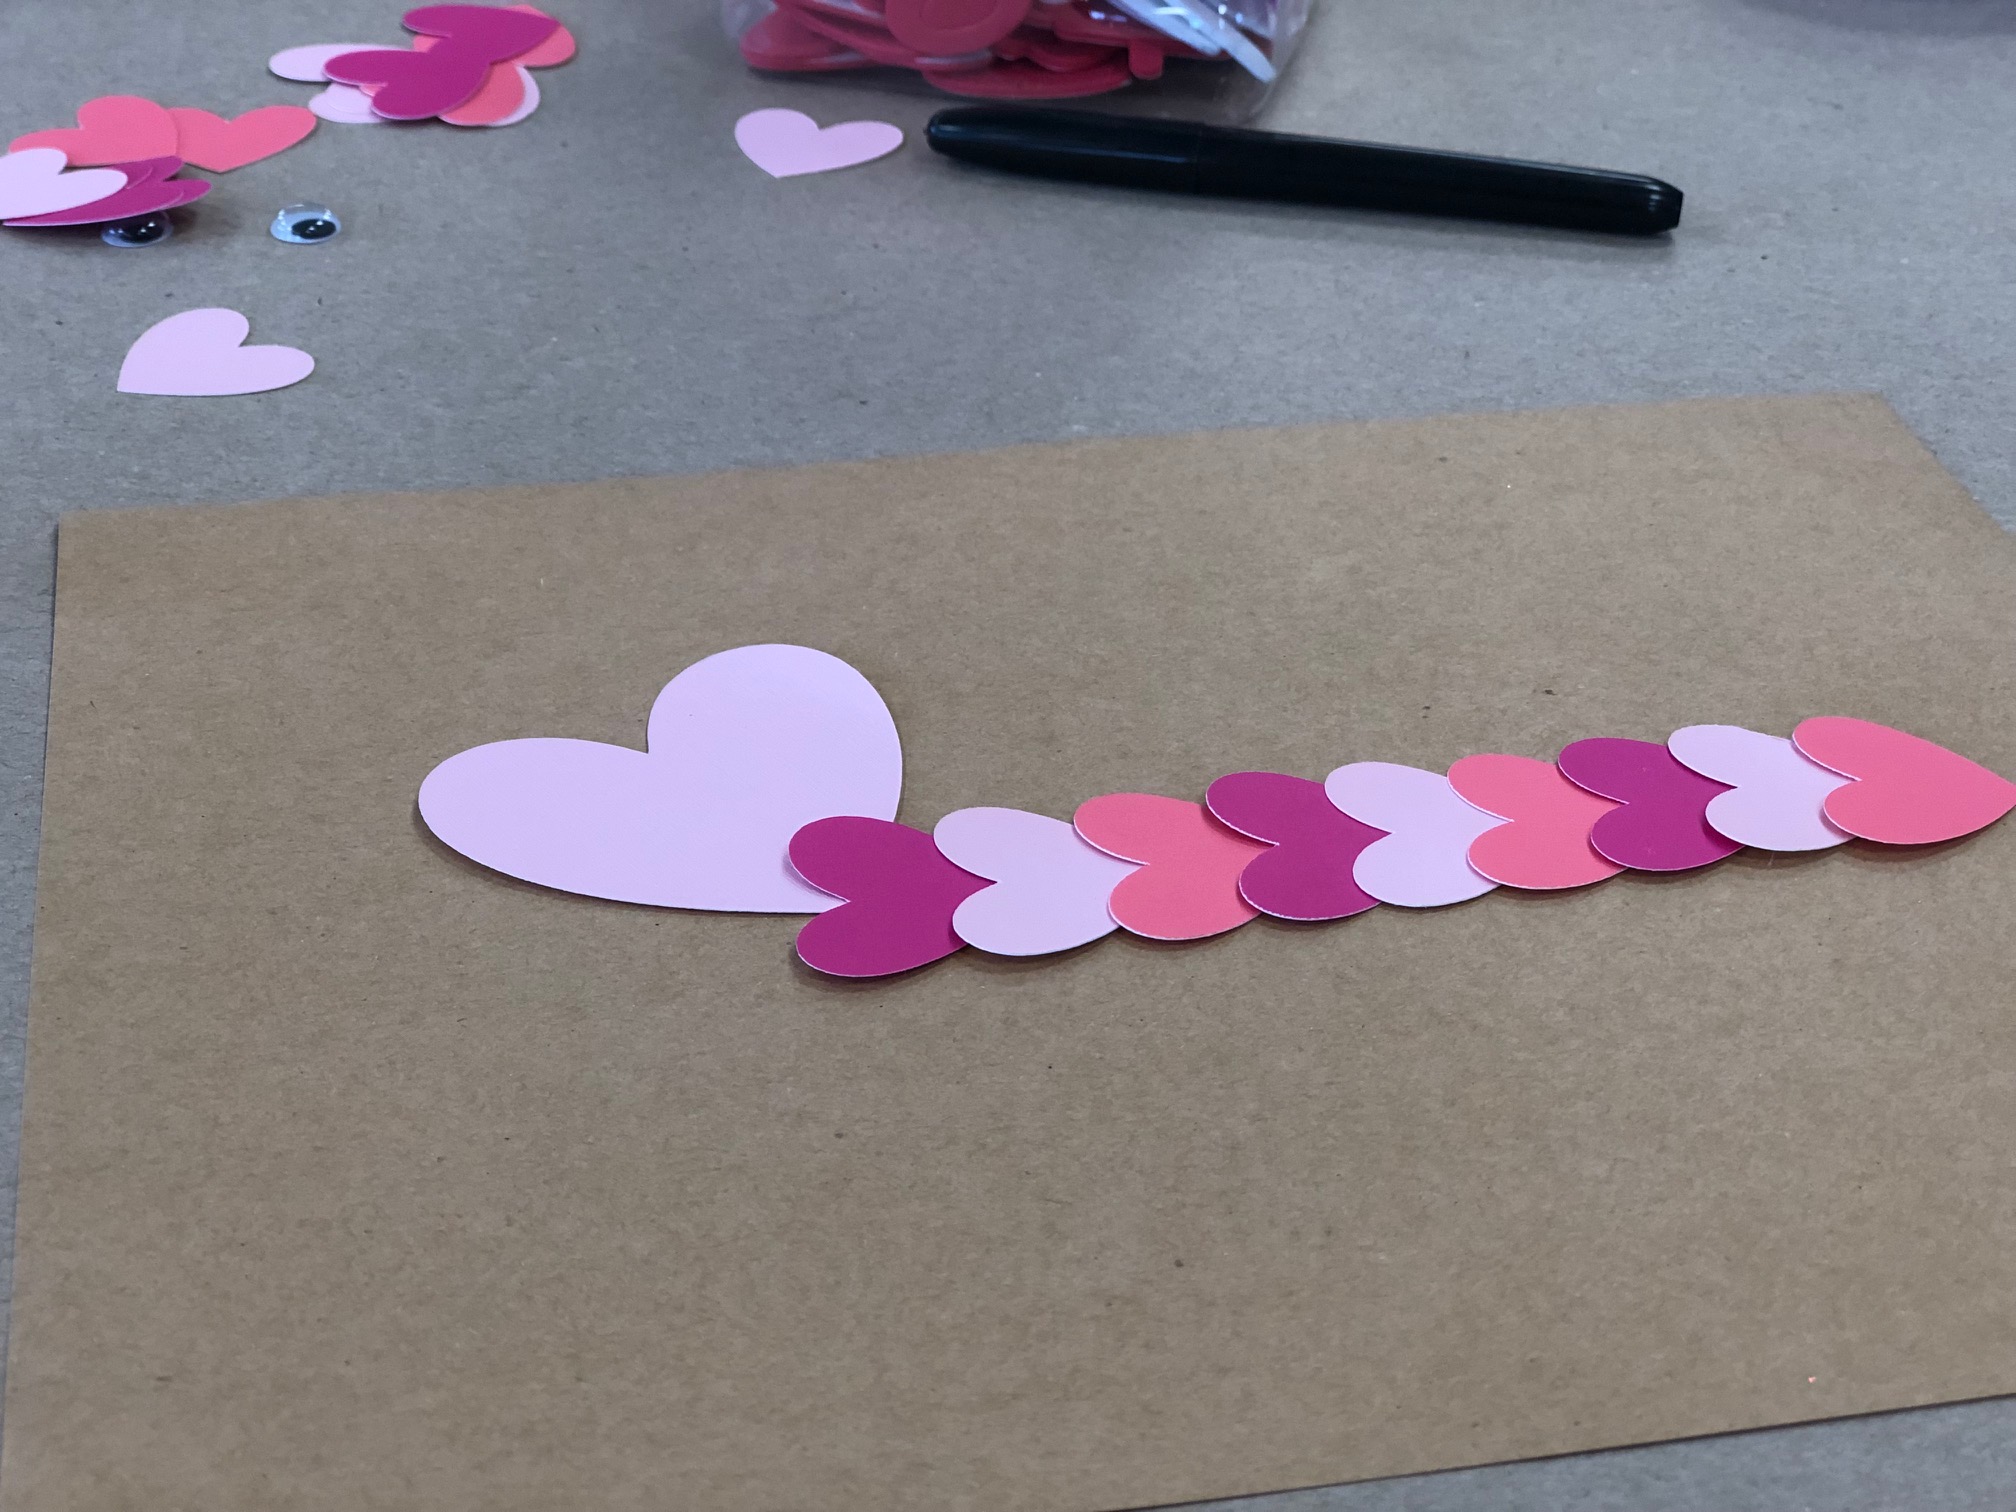
Starting on the left glue several hearts one after the other on to the paper till you’ve reached the end of your line.

DIY Valentine's Caterpillar, easy simple step by step tutorial

Using a slightly larger heart for the head of the caterpillar, glue that under the first heart on the left and slightly tilted like above.

DIY Valentine's Caterpillar, easy simple step by step tutorial

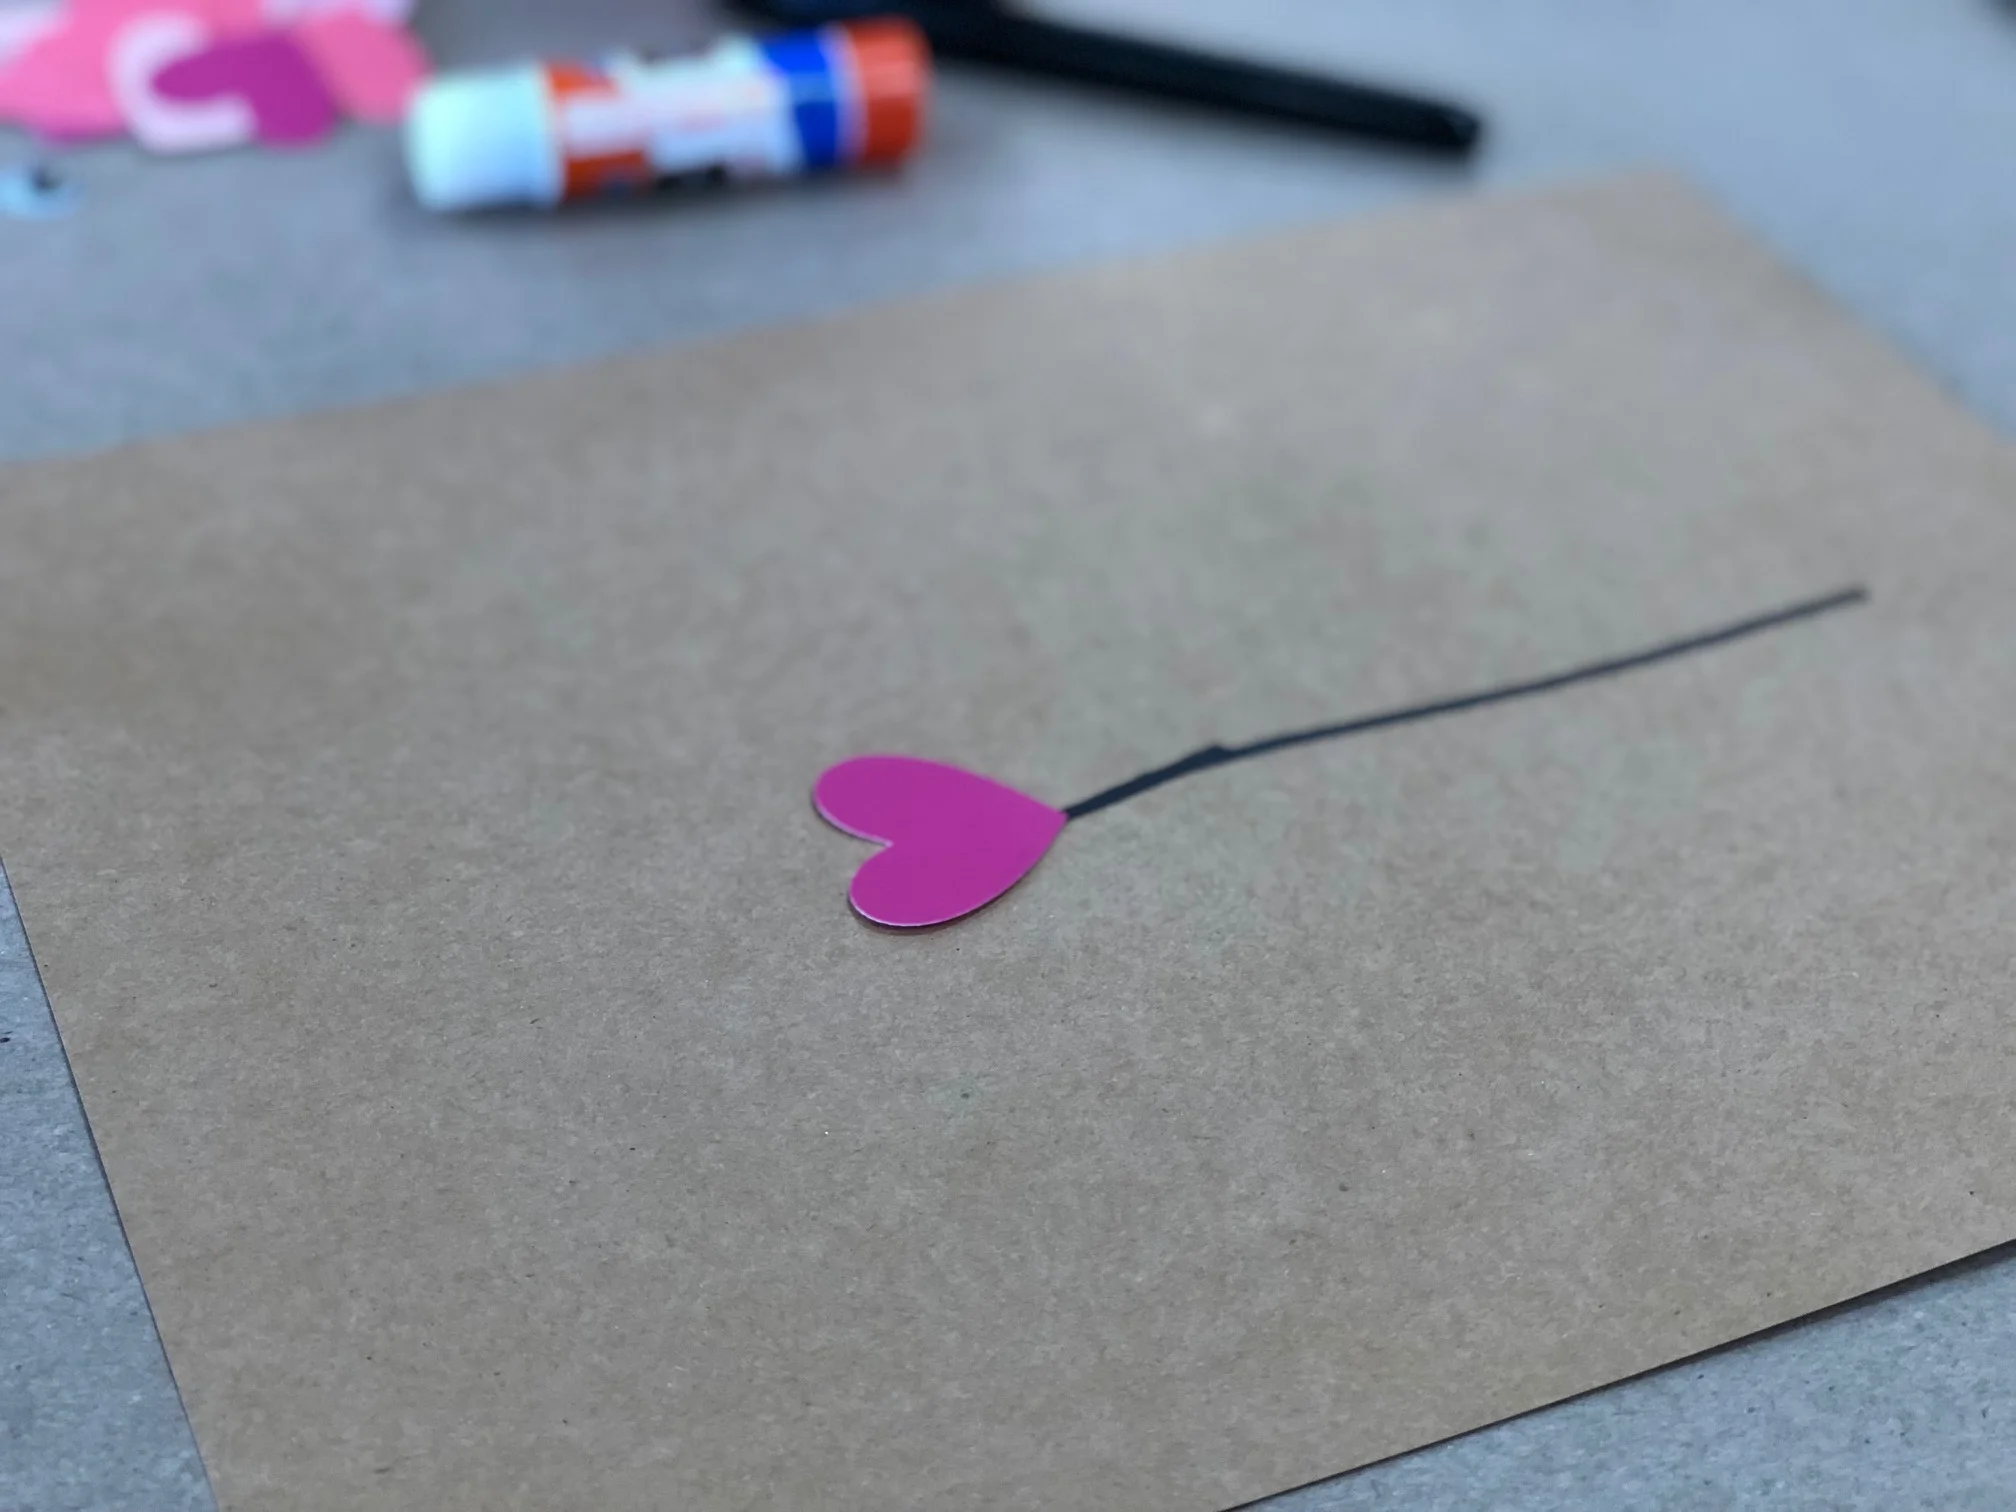
Draw two lines going out of the top for the antennas.

DIY Valentine's Caterpillar, easy simple step by step tutorial

Glue on the eyes then draw on the smile with the marker.

DIY Valentine's Caterpillar, easy simple step by step tutorial

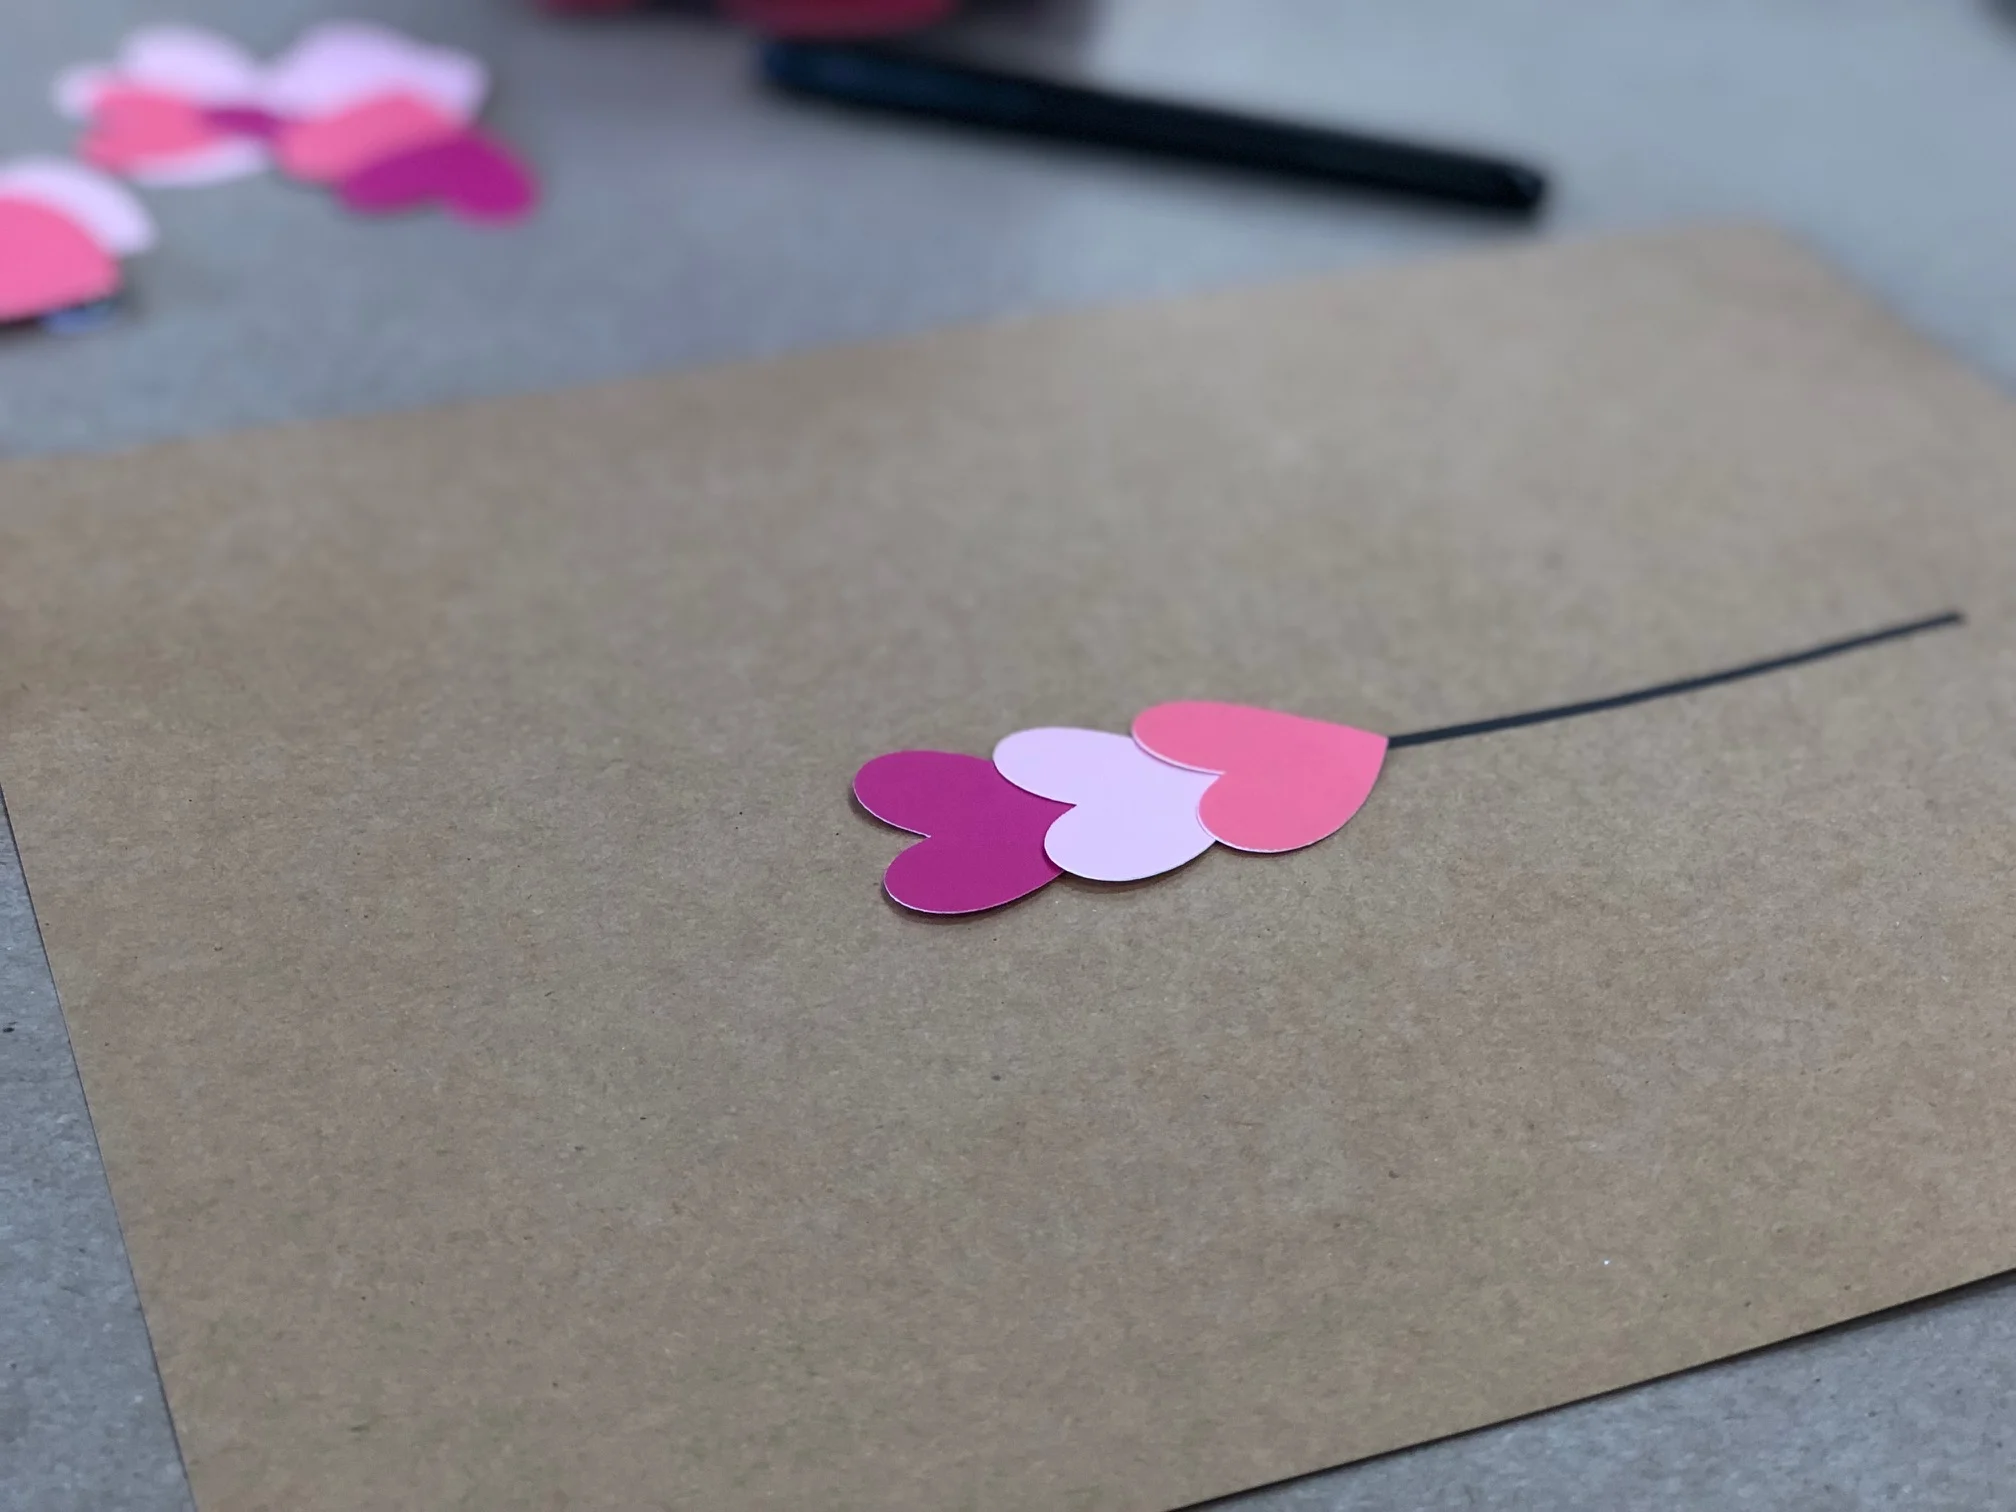
Add a couple tiny hearts {I cut these from larger ones} to the antennas, draw on some feet, and add any other little accents to your page and your done.

See I told you that would be sooooo super easy!! Your kiddos can even do this one all by themselves.

50 activities to do as a family that won't break the bank when you're on a budget

50 activities to do as a family that won't break the bank when you're on a budget

50 Budget friendly activities to do as a family, affordable family fun

Having a big family is expensive. From the cost of living to healthcare, it’s definitely not cheap. But having fun as a family doesn’t have to break the bank. There are so many free and inexpensive activities you can do and honestly some are way more fun than blowing a whole paycheck at the theme park.

Here’s my list of 50 fun things to do with your family if you’re on a budget.

  1. Park

  2. Library

  3. Walks around the neighborhood

  4. Free days at the zoo

  5. Local state conservation park

  6. Explore a small historic town nearby

  7. take a tour of the local fire or police station

  8. Bonfire

  9. Bike ride

  10. Visit a local farm

  11. Botanical garden

  12. Small local museum

  13. YMCA {this does require a membership but it’s super affordable and you’ll definitely get your monies worth}

  14. Skating rink

  15. Local pool

  16. Picnic

  17. Make a meal from scratch

  18. Do a family craft

  19. Play a game of cards

  20. Family yoga in the backyard

  21. Bird watching

  22. Go on a hike

  23. Clean up a local park or school yard

  24. Make a fort in the living room

  25. Camp in the backyard

  26. Stargaze

  27. Feed the ducks

  28. Play charades

  29. Play a game of kickball

  30. Roast marshmallows

  31. Jump in the leaves

  32. Find a local creek and look for arrowheads

  33. Make cards and deliver them to the local nursing home

  34. Find a dollar movie at the theatre

  35. Go to a local high school play

  36. Plan and make dinner all together

  37. Paint rocks and hide them around your town

  38. Visit a local flea market

  39. Make a family dream board

  40. Wash the family car together

  41. Have water balloon fight

  42. Go fishing

  43. Research your town’s history and then go out and see the sites

  44. Bird watching

  45. Visit a local spray park

  46. Make a bird feeder using recycled materials from home.

  47. Take goofing family pics at the park using your phone and a tripod

  48. Volunteer at the local pet shelter

  49. Find a local festival with free activities

  50. Have a karaoke night

I hope you get some fun ideas from this list and even add more of your own.


How to plan the PERFECT no stress art party for your crafty kiddo for less than $40

How to plan the PERFECT no stress art party for your crafty kiddo for less than $40

Has your kiddo been dreaming of that PERFECT art birthday party? Maybe they are like my older girls and have all of their out of budget party dreams pinned to Pinterest {yes, they really do this!}. After having 4 girls and LOTS of birthday parties I’ve learned a thing or two on how to pull off that perfect art party on a budget!

Disclosure: some of the links below are affiliate links, meaning, at no additional cost to you, I will earn a small commission if you click through and make a purchase.

Here’s the a little truth, kids just want to let loose and be kids. They don’t care about fancy decorations, perfectly spaced plates and napkins, banners hung at just the right height. Let’s be honest, that’s for the adults. The kids are there to hang with their friends, eat cake, and have loads of fun, but that’s a whole different blog post.

So how to you plan a kids painting birthday party under $40? Yes, you read that right…. just $40!

First you need to decided how many kids will be coming to your party. Usually I will have a few extra supplies in case a kiddo RSVP’s at the last minute or if one shows up and doesn’t RSVP at all. A typical party we host at our craft studio has about 6-8 kids. Our kids, they usually have about 20…gulp! I know that seems a little ridiculous but they have lots of cousins and I always invite the party goers siblings to stay because I’m a sucker for feelings and don’t want any kids to feel left out. Honestly this is easier for the parents that want to stay for the party anyway.

 
Art party on a budget. FREE printable how to plan a crafty art birthday party without breaking the bank

Snag your FREE checklist below


How to plan the PERFECT no stress art party for your crafty kiddo for less than $40

If you don’t have anything at home here’s everything you will need

Most of these supplies are disposable to make this EXTRA easy and stress free for you!

-8”x10” canvas these come in a pk of 12

- acrylic paint set of 12 2oz paints
- paint brushes these you can toss when the kiddos are done

-paper cups used for holding water to rinse paint brushes

-paper plates used to hold the paint, one for each kiddo

-plastic table covering this you can toss when you’re done


All of these items can be shipped right to your door with amazon prime*, I told you this would be stress free. No going to 5 different stores to track down all the supplies you need only to get home and realize you totally forgot something {I do this all the time!}. Then the day of the party you kick yourself because I never made it back to the store to get that forgotten item. All of this will cost you less than $40, not including taxes or any applicable shipping*

*based off of when this post was published

So how do you host an art party? First, I always tell the parents to put their kiddos in clothes they can get messy. There’s nothing scarier than a pissed off momma because her child got their new clothes ruined by non washable paint. So try to avoid that at all costs. Next, you want to have everything set up before the kids get there. This is so much easier than trying to pass out all the materials with 10 little helpers gathered around. That means, plastic table cloth down, water cups filled half way, canvases, paper plates, and a couple of brushes at each table setting. Let’s talk about paint…paint goes a LONG way, you’d be surprised at how much paint gets wasted at parties like these. Before the party I always squeeze a small amount of each color of paint that’s available onto each child’s paint plate. Trust me, you’ll thank me for this stress saving tip!

I try not to let the kids sit at the table where they will be painting until we are ready to paint. Unless you have some kiddos that are great at following directions I would have the kids avoid the paint table till you’re absolutely ready.

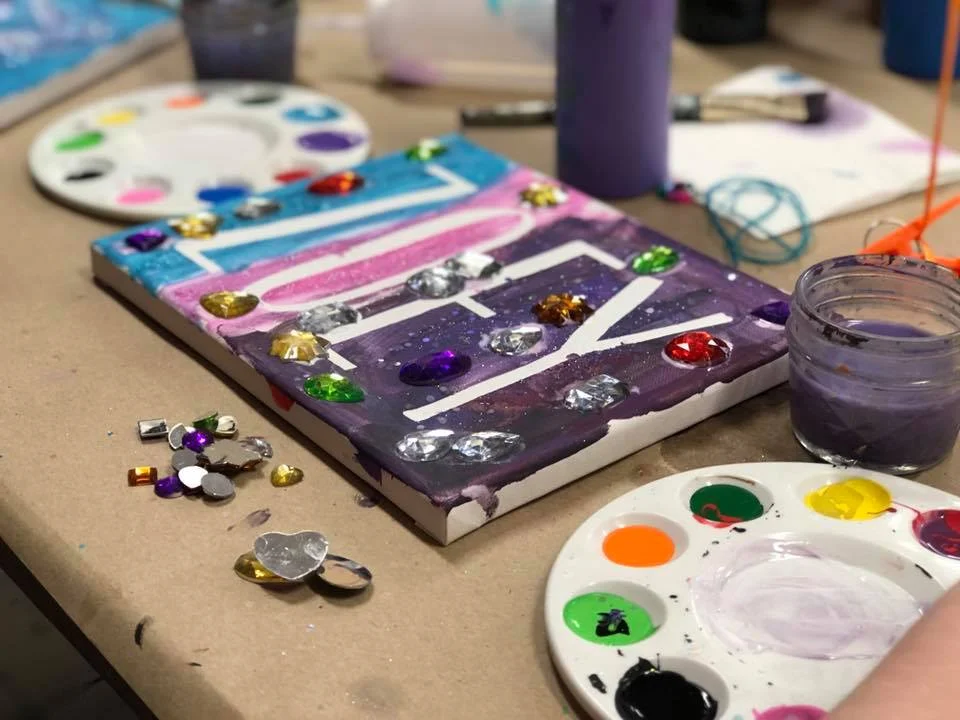
Now for the fun! Once all the party guests are ready let em loose on their canvases. In my experience kids have WAY more fun when they can paint their own thing using the colors they pick out. Usually that’s what we do. You can see the joy it brings them and their creativity coming to life the second that paint brush hits their canvas. And they all make something totally different and it makes my heart so happy! That individuality is so beautiful!

I promise your kiddo will be so happy creating beside all their friends they won’t even notice the fancy decorations aren’t there.

How to plan the PERFECT no stress art party for your crafty kiddo for less than $40

How to make your own CUSTOM canvas name art at home

How to make your own CUSTOM canvas name art at home

I love canvas art! There are so many different things you can create on these wonderful little blank pieces. The possibilities are endless with a blank canvas! You can free hand paint, make adorable handprint keepsakes, explore the fun of melting crayons and so much more! If you haven’t checked out our letter canvas art DIY you must after you read this tutorial.

Affiliate Disclosure. Some of the links on this website are affiliate links, which means that I may earn a small commission if you click on the link or make a purchase using the link. If you make a purchase you will not be charged anything additional.

How to make your own CUSTOM canvas name art at home

I’ve put together this CRAFT KIT to make this DIY so super easy for you. Everything you need in one little box shipped right to your door. You child’s name comes already attached and sealed to the canvas, which makes it even better! Get your personalized kit here. But if you want to go solo on this one here’s what you’ll need…

How to make your own CUSTOM canvas name art at home

The first steps aren’t pictured. First, cut your name in vinyl using your Cricut or other cutting machine. I always use oracal 651 but you can use any brand/strength. The color does not matter because you will be removing it once the painting is done. Now using transfer tape, attach your vinyl name to the canvas. This can be super tricky to get it to stick to the canvas so go slow when peeling the transfer tape off. After your vinyl name is attached and you are sure all the air bubbles are out of it you’ll want to seal it with SUPER THIN layer of MATTE finish mod podge. This is really easy. Just brush over the letters focusing on where the vinyl and the canvas meet. Essentially you are filling in any areas where paint might get in under the stencil with clear mod podge.

Check out the video below to see how to apply AND seal your canvas stencil ❤️.

After the mod podge is dry you can start painting away!!

How to make your own CUSTOM canvas name art at home

Be sure your kiddo is covering the entire area around the vinyl. If there are areas that don’t get painted the letter might not look like a letter when you are finished.

They can get super creative with it. I just LOVE how these turn out. All the kids do something different some do one solid color while others want the whole rainbow, then some make fun galaxy super gorgeous pieces and others use the shaped sponge brushes we have at the studio all over their canvas. The possibilities are endless.

How to make your own CUSTOM canvas name art at home

I recommend if your kiddo wants to add any glitter to their canvas to do so while their paint is still wet.

After they are done with their masterpiece you’ll peel the vinyl lettering up and toss it in the trash {this is why the color of the vinyl doesn’t matter ;) }. I use a sharp xacto knife to do this but a sewing pin works great too. Be careful not to drop it onto their freshly painted art work.

How to make your own CUSTOM canvas name art at home

You can add a ribbon on the back to make a fun hanger to hang it on the wall. We use our stapler for this {not a paper one but a home improvement one}. Your kiddo will admire this for years to come!

How to make your own CUSTOM canvas name art at home

I hope you enjoy this crafty tutorial and that it inspires you to create your own masterpieces and memories with your own kiddos.

Check out more craft kid posts below

Snowman snack, easy, simple and mess free

Snowman snack, easy, simple and mess free

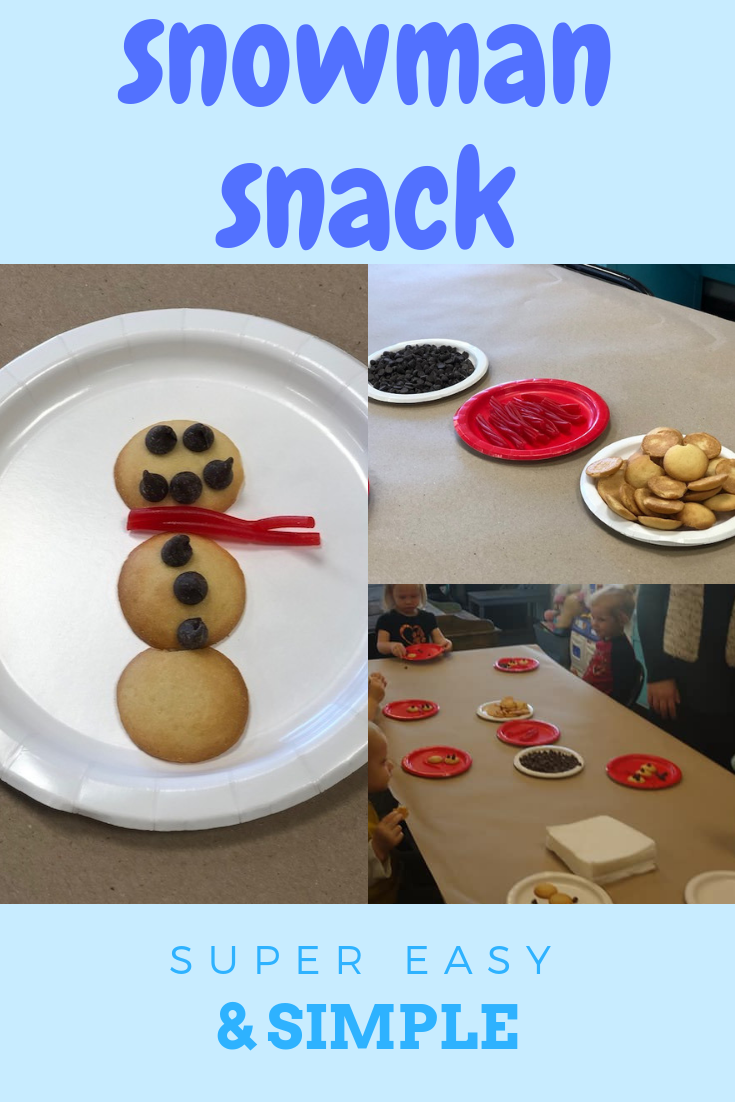
Here’s a fun snack for those little ones that LOVE fun foods! It’s SUPER easy, almost totally mess free {you might have some crumbs but that will pretty much be it}, very friendly on the wallet and honestly you probably already have these items on hand.

Snowman snack,  easy, simple & mess free

Here’s what you’ll need

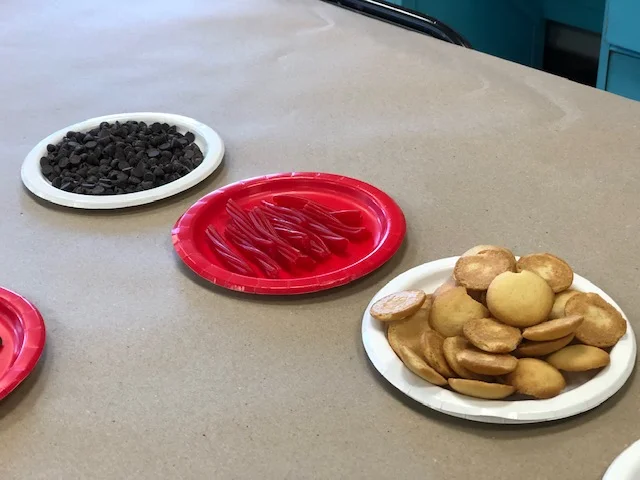
  • vanilla wafers

  • chocolate chips {we used regular ones but the mini’s would have been PERFECT for this snack}

  • twizzlers pull & peel

That’s it! There aren’t a whole lot of steps to this adorable little snack.

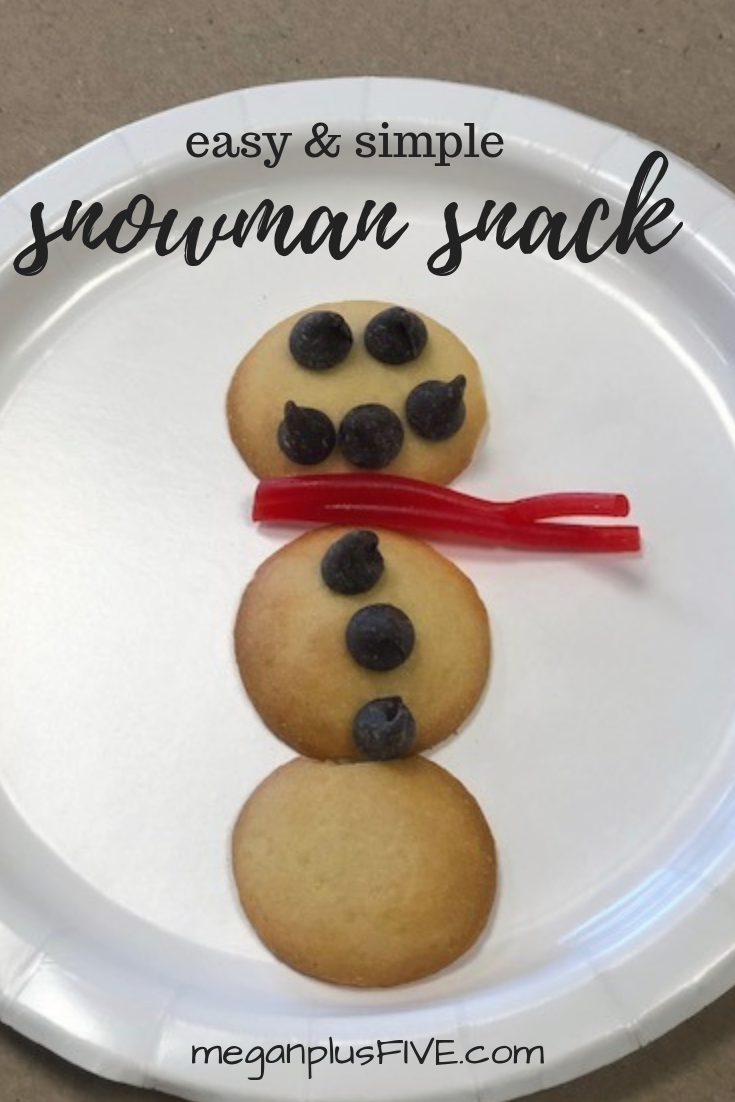
First, place three vanilla wafers in a line, like a snowman. Then use the chocolate chips to make a cute face. Last peel off a couple pieces of the twizzlers for a scarf. Put them in in between the first and second wafers and viola you have your very own snowman snack!

I told you it was super simple. Enjoy!

easy & simple snowman snack

How I survived 16 months breastfeeding our fourth {and last} baby

How I survived 16 months breastfeeding our fourth {and last} baby

I am not ashamed of saying I am PRO breastfeeding. Growing up I never saw anyone breastfeed. Honestly didn’t pay enough attention as a kid to ever notice any women ever doing it in public. My mom didn’t breastfeed, my grandma didn’t breastfeed her, and I never saw a family member do it either because it wasn’t done in our family, not publicly anyway. Yet, I always knew I would breastfeed my own children.

I didn’t have the best experience with breastfeeding our first two daughters. My only regret is not being informed with them. If I would have known what I knew with our youngest or had the resources I am certain we would have successfully nursed just as long.

I was able to breast feed our youngest two daughters for far longer than past the few weeks mark. They were healthy and I was so thankful I didn’t have to rely on any formula for them. Our third for 10 months and our fourth for 16 months…woohoo! So PROUD of those numbers!

Here are my tips for a long and successful breastfeeding journey.

-GOOD BREAST PUMP. It wasn’t till our 4th and last daughter that our insurance paid for this. A good pump has a pretty price tag on it and we couldn’t afford one with our older three so I just didn’t have one with them. If I did I probably could have exclusively breast fed them without the use of formula. However, I am SO thankful that we had formula as an option to keep our girls fed and healthy.

-BREASTFEEDING SUPPORT GROUPS I’m going to be honest when the lactation lady stopped by my room to talk to me after having our first daughter I was like “who is this weird hippie lady???” I’m just going to say it…I was a total idiot for having such a closed mind. Although I always knew I would breastfeed I had never heard of people that wanted to help other women breastfeed. I didn’t know that was a thing, like a real life thing. Fast forward to our third daughter, I was DESPERATE for help. I had thrush {which I’ll talk more on next} and I was willing to do anything to make it better. I was determined to make nursing work with our third, after failed attempts with our first and second. I called that “weird hippie lady” and she was an angel sent straight from heaven! After we had our fourth I went to every breast feeding support meet up I could. The ladies are wonderful, there is no judgement. You weigh your baby, eat tasty snacks and ask any questions that you might have. Our local meetings are ran by the LLL, La Leche League . They are THE BEST!

-THRUSH I mentioned this above and it is such a PAINFUL thing to have. I got thrush with both our third and fourth daughters. If you’ve never had thrush it feels like razor blades are coming out of your nipples. It hurts. And your poor baby’s mouth starts to turn white on the inside and I imagine it’s itchy for them too. The first time it happened I had no idea what was going on. I was scared and didn’t know what to do except call the doctor. Of course it was the weekend so I called the doctor on call at my OBGYN and he literally told me women can not get thrush through their nipples, it was made up. Yeah….so glad he was not my regular doctor. I called my regular doctor the next day and he wrote me prescription to take care of it. Unfortunately, it didn’t work. I was about to give up on the whole successful breastfeeding journey. As a last effort I called the “weird hippie lady” and thank goodness I did. She was so kind, so helpful, and KNEW exactly what I needed to do to make the thrush go away. She recommended I get Gentian Violet* to get rid of it. And holy crap it worked!! I told my grandma what she recommended and she knew what it was. She said they used that stuff often when she was growing up. I will warn you it is PURPLE. It will stain anything and everything it touches but that’s a small price to pay for it’s magical powers…it doesn’t really have magical powers but it’s pretty amazing stuff!

*this is not medical advice, please consult your medical professional before using any new product formedical purposes

-TWO SHIRT METHOD this is the way I nursed our 4th daughter in public most of the time. For the few short weeks I nursed our oldest two I ALWAYS used a thin blanket to cover. Let me tell ya, this was such a pain in the butt! The blanket would fall down then I would get all nervous, baby would unlatch and milk would drip everywhere…talk about a new mom’s worst nightmare! With our 3rd daughter I started to implement the two shirt method but still occasionally did the blanket thing. By the time our 4th daughter came along I said “screw it! If you don’t like it look away!” and I just did my thing. Honestly, in my opinion, you can’t see anything nursing this way. And if you do, you’ve probably seen more skin exposure on tv so what’s the big deal?

-NOT CARING this one is HUGE. When you push past the fears of “what if I offend someone”, “what if I make someone uncomfortable”, “what if…” and you just let it all go. Trust me you will have a much more pleasant breastfeeding experience if you just stop caring what others think.

-FAMILY SUPPORT I have been blessed to have a pretty amazing husband that FULLY supported my breastfeeding journey. His advice was always “if they don’t like it **** em” he has some pretty colorful language most of the time. But without his support there’s no way I would have been successful at breastfeeding our youngest two for as long as I did.

-PILLOWS you don’t need anything fancy but I do recommend using pillows for support, especially during the first few months, while you’re at home to nurse your baby. You will feel so much more relaxed and it will in turn give you more confidence as a breastfeeding momma.

-NURSING PADS in the beginning I used disposable ones, but those can get pretty pricey when you need to buy them every week. So I eventually made my own. They were thin, but discrete and did a great job. I don’t have a HOW-TO post to make your own but if you can sew it’s super simple. You can always buy some from a handmade seller on Etsy {CUTEANDFUNKY, MAMAMELONCA, PCFAO, I am not affiliated with any of these shops, nor am I getting a commission from them. I simply want to spread the love of handmade}

-FINDING YOUR RYTHM This is going to be different for everyone. I think what’s important is to just keep trying till you find your comfort zone. There is no shame in trial and error. If your new mom friend said a certain hold position worked for her and you try it and it sucks for you…that’s ok. That just means it didn’t work for you and you try something different.

I hope these non traditional breastfeeding tips help you on your breastfeeding journey. If you have questions ask them down below.

PINE CONE ART, easy and mess free. Make your own with these simple steps.

PINE CONE ART, easy and mess free. Make your own with these simple steps.

If your kids are anything like mine they are ALWAYS wanting to make something. They don’t care what it is they just NEED to create. Either in our craft studio or the kitchen they just have that itch to make all the things.

So, naturally, I am always trying to find ways to be resourceful. Reusing old items, things that we would normally recycle or toss out, or things we find in nature…like pine cones!

We gathered some pine cones and had a mission to use them to create a really cool piece of art.

PINE CONE ART, easy and mess free. Make your own with these simple steps.

Here’s what you’ll need

  • pine cones

  • box {we used an old usps box}

  • tape

  • cardstock {we used white but you can use whatever color you’d like}

  • acrylic paint


Start by taping a boarder around your paper. We only had 3/4” tape so that’s what we used.

This next step isn’t picture, now tape the piece of paper down to your box. We taped ours all the way around so that the pine cone didn’t get snagged on the paper if it wasn’t secured down all the way.

PINE CONE ART, easy and mess free. Make your own with these simple steps.

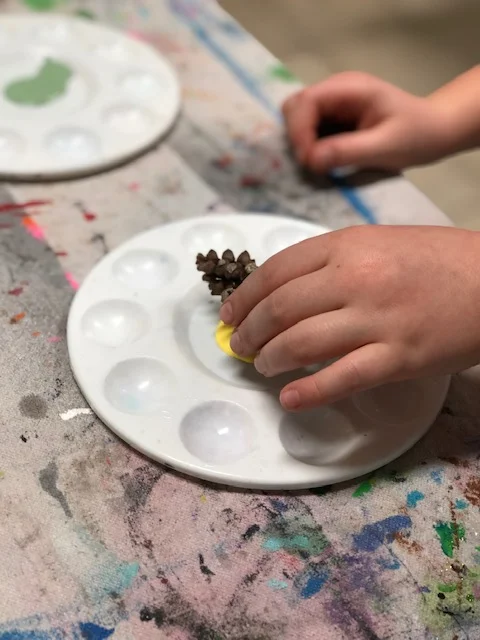
Now decide what colors you want your art to be. We used lighter colors but you can use any that you’d like. You want to put your paint on something you can easily dip a pine cone into. We used the middles of our paint trays.

PINE CONE ART, easy and mess free. Make your own with these simple steps.

Dip your pine cone into your paint. You can do one color or several at a time. At first we did just one at a time then she got brave and started dipping all the colors in different spots.

PINE CONE ART, easy and mess free. Make your own with these simple steps.

Now drop it in your box and SHAKE it up! Take care not to shake it too fast or rough because your pine cone will go flying…we may or may not know this first hand. Keep repeating this step till you’re satisfied with the coverage.

PINE CONE ART, easy and mess free. Make your own with these simple steps.

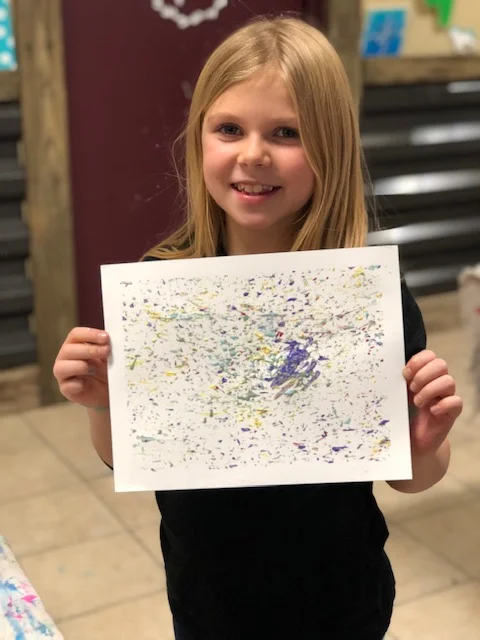
This is what ours looked like before we removed the paper from the box. All the mess contained inside the box…woohoo!!

PINE CONE ART, easy and mess free. Make your own with these simple steps.

We let our dry for a few minutes before we peeled the paper out of the box and peeled the tape away from the outside edges. She was VERY impressed at how clean the lines came out. I have to say I am too!

PINE CONE ART, easy and mess free. Make your own with these simple steps.

This is such an inexpensive {literally cost pennies to make} and one that doesn’t require a ton of prep or clean up. I hope you enjoy this craft with your kiddos as much as I did with our girls!

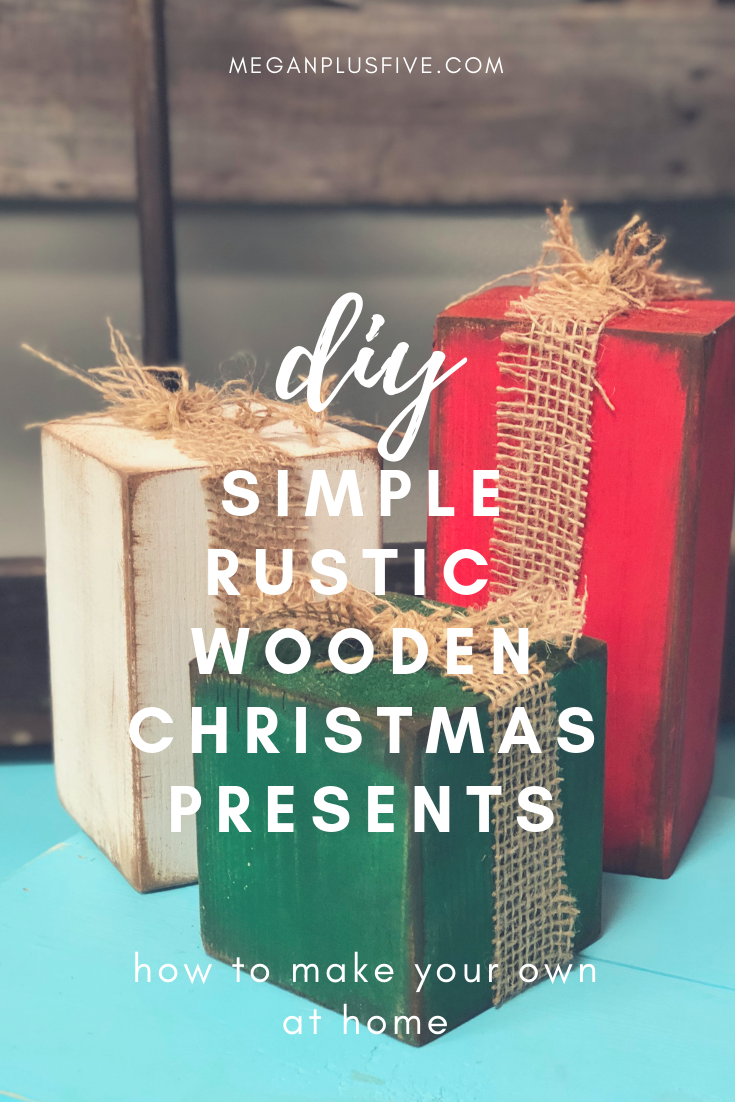
DIY simple rustic wooden Christmas presents, how to make your own

DIY simple rustic wooden Christmas presents, how to make your own

DIY FAUX WOOD CHRISTMAS PRESENTS

I’m a busy wife, momma, and business owner so naturally I LOVE a good craft that I can whip out really fast and that makes the heads turn. These little guys are just the perfect DIY for the job!

In our studio I try to reuse the same base sizes over and over again. This makes for a smooth operation. I try to create pieces from the basic bases we have on hand at the shop. When I stumbled across something similar on Pinterest I had to make my own version of these adorable faux presents.

I know not everyone has the resources or expensive tools to make all their crafty dreams happen so I’ve put together CRAFT KITS for our most popular DIY’s. You can pick up our FAUX PRESENT KIT HERE

DIY simple rustic wooden Christmas presents, how to make your own

If you wanna start from scratch here’s what you’ll need:

DIY simple rustic wooden Christmas presents, how to make your own

These are SO super simple, once you do one set you’ll be making them for everyone for Christmas! So let’s get started.

First, you want to be sure all your pieces are sanded to knock any splintery ends. If you purchased our CRAFT KIT you do not need to do this step as it’s already been done for you:)!

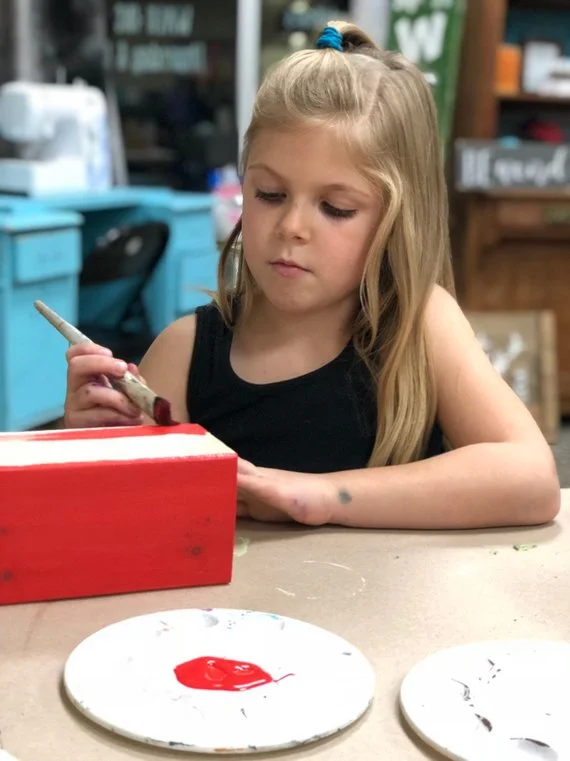
Next, you want to paint each block a different color. I did two coats on mine. Be sure you wait till the first coat is TOTALLY DRY before applying the second coat. If you don’t, applying wet paint on top of wet paint tends to pull up the layer underneath.

DIY simple rustic wooden Christmas presents, how to make your own

Can we just take a minute and adore this girl! Isn’t my little helper so stinking CUTE! She’s always up for being my little crafting model Ok, back to the tutorial…

Once your paint is dry and you are happy with the coverage you’ll need to sand on the edges and the corners of your blocks. Take your 120 grit sand paper and go over the areas that would be naturally worn. You don’t have to use 120, that’s just my go to grit. Any grit of sandpaper will work, just go slow at first to see how much pressure you need to apply. I used my RYOBI cordless sander for this step.

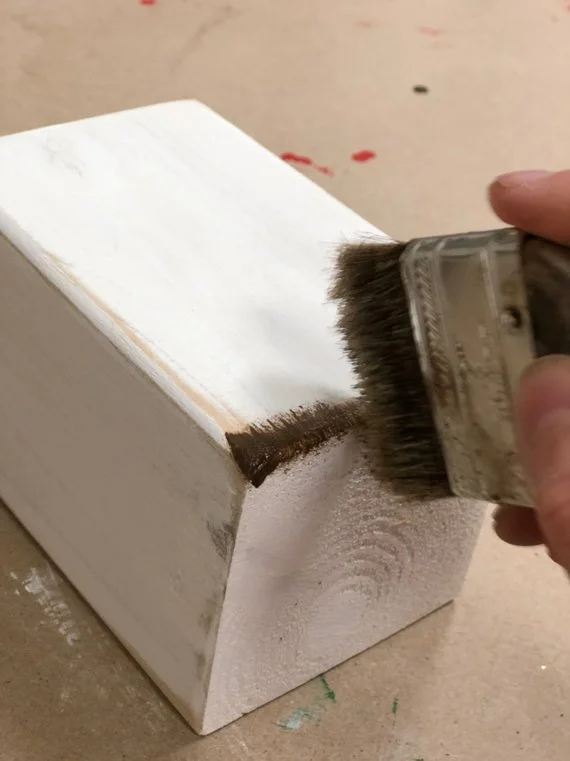
Next you want to apply the dark wax to your blocks. If you’ve never worked with dark wax before you might want to test it out on a piece of paper first. A little wax goes a long way.

Take your chip brush and barely dip your bristles in, dab off onto a piece of paper or paper towel. Just like you did when sanding, focus on applying the wax to the areas that would be naturally worn. You’ll want to apply to the corners, edges, then do a light quick swipe on all the sides. This will give it a real natural rustic finish. The wax gets into all those uneven areas, much like how dirt would, and make it look old.

faux wooden presents4.jpgDIY simple rustic wooden Christmas presents, how to make your own

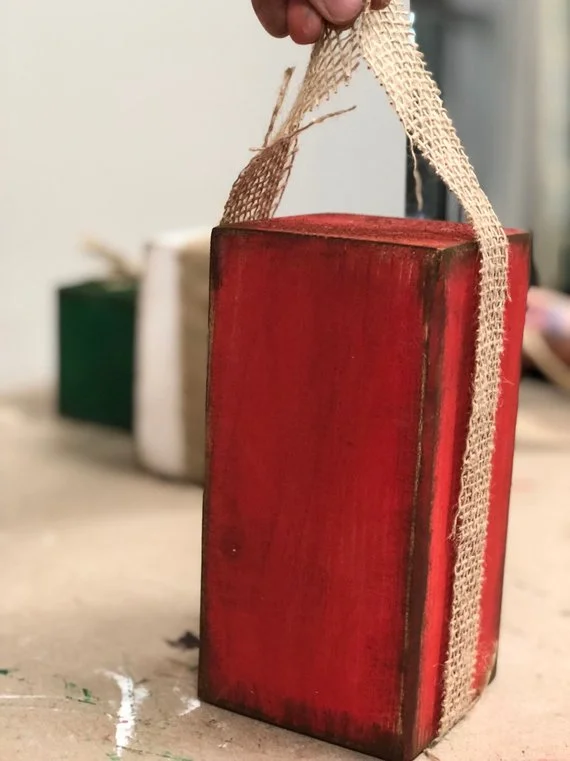
After you have your wax applied to all of your block the last step is to add your burlap “bow”. I picked up a roll of looser knit burlap at my local Walmart but any burlap will work. Fun fact, the looser the knit the easier it will unravel when cut. I cut my burlap into 2” wide strips and measured their length so they stuck up 3”-4” above the blocks like shown below. Now tie those two pieces in a knot. You’ll do the same on the last two blocks. And you’re done! Literally can’t get any easier.

DIY simple rustic wooden Christmas presents, how to make your own

Place them beside your tree, on your kitchen counter, or your mantle and admire them all Christmas season!

DIY simple rustic wooden Christmas presents, how to make your own

These little guys make such great gifts, a fun craft night with the family, or crack open a couple bottles of your fave wine with your fave girlfriends and make it a moms night in Pinterest party!

I hope you love this DIY! If you did I’d love to hear your feedback…even better, I’d LOVE to see pics of your finished faux presents.

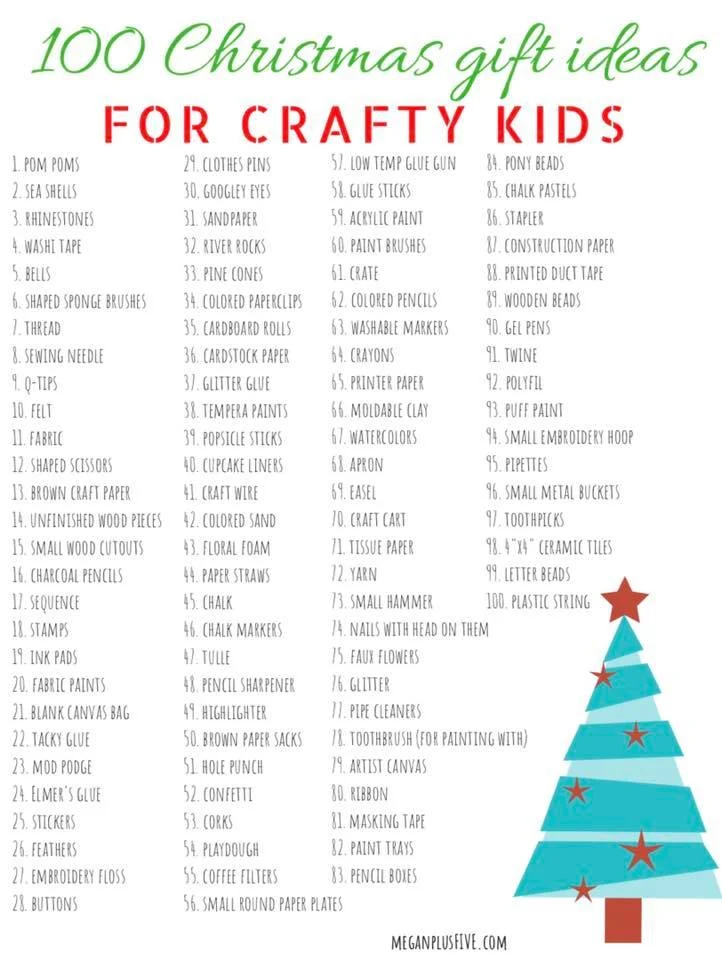
Christmas wish list, 100 gift ideas to get the CRAFT obsessed kid in your life

Christmas wish list, 100 gift ideas to get the CRAFT obsessed kid in your life

What do you give the craft obsessed kid? We have 3 crafty girls {the fourth one isn’t too far behind though} and own a family friendly CRAFT STUDIO so we have a pretty good idea of what kids LOVE to create with. Most kids love cutting, gluing, and adding as much paint to things as they can. They are just figuring out how to use different tools and exploring different colors, textures, and possibilities.

Did you know there are ALL kinds of different everyday items you can use to create with? Take a toothbrush for instance. This is one of those things we have in our studio that makes everyone say “ummmm do you brush your teeth here?” and the answer is always “no, we use it to paint”. A fun technique my grandma taught me when I was very young, to use a toothbrush to add little specs and small splatters of paint. It is the best tool for this so we keep several toothbrushes in shop just for this. I am so proud to pass down that little technique to so many.

Our older girls and I worked on this list just for you! They really enjoyed listing off all of their favorite supplies to create with. We hope you can use this to put together a really awesome CRAFT GIFT for your crafty kiddo! Let them explore. Let them make a mess. Let them be creative.

Christmas wish list, 100 gift ideas to get the CRAFT obsessed kid in your life

Our family trip to the pumpkin patch, 5 reasons why we support small local farms each and every fall

Our family trip to the pumpkin patch, 5 reasons why we support small local farms each and every fall

Here in the Midwest EVERYONE with kids visits the pumpkin patch every single fall. It’s like our own little way of officially welcoming in the fall season.

If you’ve never been to a pumpkin patch you are surely missing out. It’s a whole experience that you will look back on and remember fondly. And you’ll get some really great pictures because pumpkins make all fall pictures 100% better!

This year we visited a fairly new pumpkin patch, The Pumpkin Pad, and I have to say it was even better than we expected! This was their second year being open so we were expecting them to have a few activities for the kids but we were so wrong! They had an inflatable jumping pad, bounce house, super awesome round swings made from sturdy netting, tractor rides, giant slide, a huge corn pit to dig in, bean bag toss, a tall grass maze {which my husband and I weren’t totally accepting of but the girls LOVED it} and so much more! All for $10/person, they let our 2 yr old in for free and their pumpkins were SUPER AFFORDABLE…say what!

Here are my top 5 reasons why we choose to support a small local farm each year vs a big oversized money maker

1. Owning our own brick & mortar shop we know the importance of supporting small local business. We try to shop small as much and often as we can. At the end of the day I would rather our hard earned money go to supporting a family rather than some super rich person, whenever we can.

Our family trip to the pumpkin patch, 5 reasons why we support small local farms each and every fall

2. When you visit a big name patch, especially if you go on a weekend, it will likely be crowded. But at a small family owned pumpkin patch the people come in much lower numbers. You have room to roam and enjoy your time there without your anxiety going through the roof {or the clouds because you are outside ;) }

Our family trip to the pumpkin patch, 5 reasons why we support small local farms each and every fall

3. The prices are usually WAY more affordable overall. We have a bigger family so anytime we do anything like this it usually puts a small dent in the wallet. The small farm we visited this year had GREAT prices on their admission and their pumpkins! We were pleasantly surprised! Everyone got pumpkins, our two year old got a few, all for $20! We couldn’t have gone to Walmart and got everyone a pumpkin for that price.

Our family trip to the pumpkin patch, 5 reasons why we support small local farms each and every fall

4. They are usually a TRUE PUMPKIN PATCH! Meaning the pumpkins are still on the vine and you cut them off yourself. This is a fun experience for everyone. We’ve been to other big name patches with our girl’s school field trips that have already precut ALL the pumpkins and leave them in the fields or they don’t have the patch at all and have the pumpkins ready for “picking” on bales of straw all around the farm. There’s nothing wrong with either of those ways but we enjoy picking them straight off the vine.

We’ve found that the small farms are usually the true YOU PICK farm. Which for our family never gets old!

Our family trip to the pumpkin patch, 5 reasons why we support small local farms each and every fall

5. The owners put so much love and their own hard work into their farms! As soon as you walk up you are welcomed with a big smile from likely the owner of the farm. They are so proud of what they have created for your family to come and enjoy and make endless memories.

Our family trip to the pumpkin patch, 5 reasons why we support small local farms each and every fall

I hope this encourages you to support your own local farms. Knowing you are supporting another family is something so special! Each and every local farmer we’ve met has been genuinely kind and grateful to all in the community that supports their small business.

Apple Stamping, how to make a precious Autumn keepsake art project with your toddler

apple stamping, how to make a precious Autumn keepsake art project with your toddler

DIY keepsake apple stamping canvas art for your toddler

I LOVE fall! I love the colors, the smell, the oversized clothing to keep you warm on the cool Midwest days….I love it all.

This fall I took our four girls to a small off the beaten path apple orchard. Seriously these are the best kind of farms! The people are always so nice and the atmosphere is just so welcoming.

We had all these apples {literally 30lbs of apples, I know it sounds crazy but at $1/lb I thought if nothing else it was cheap educational entertainment for our girls} and I thought, why not do a fun little craft with them at our CRAFT STUDIO for our TOTS IN THE SHOP day. So we did! Boy did all the toddlers have the best time making a mess and painting with apples.

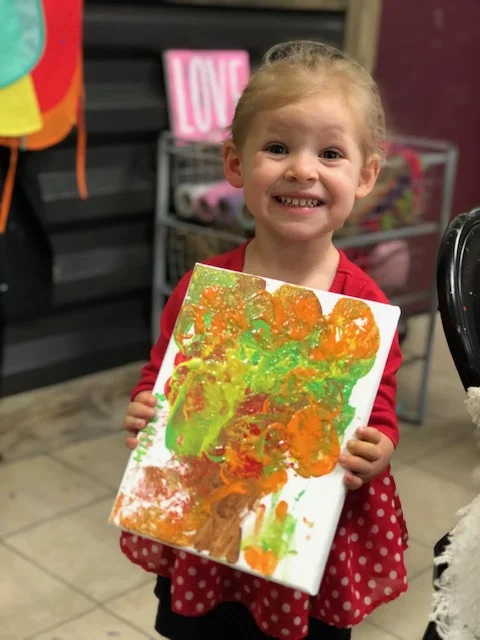
If your tot is anything like ours you’ll end up with a gorgeous blend of fall colors…but she had so much fun and that makes my heart happy!

Seriously, look how proud that girl is! Smiling from ear to ear with her artwork!

Affiliate Disclosure. Some of the links on this website are affiliate links, which means that I may earn a small commission if you click on the link or make a purchase using the link. If you make a purchase you will not be charged anything additional.

Here’s what you need to make your own at home


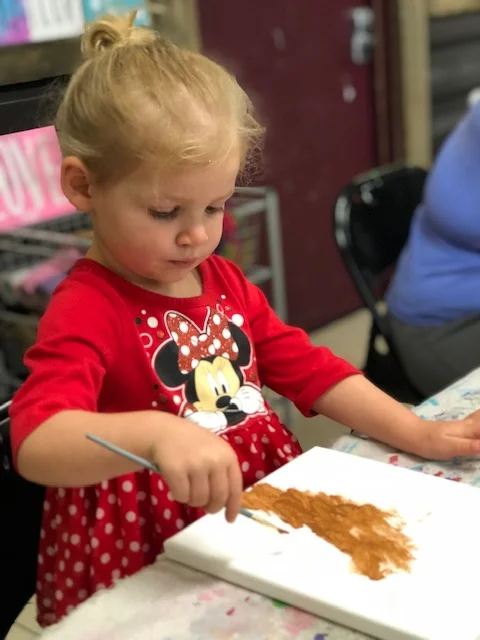
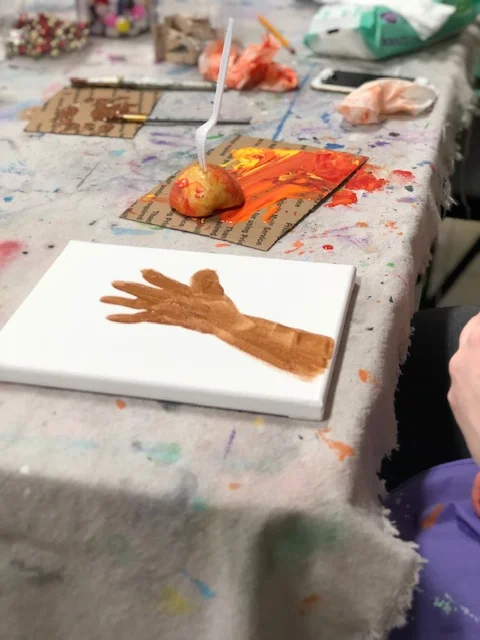
Start by tracing your toddler’s hand and the upper part of the forearm on the canvas with a pencil. Do this lightly so you can easily hide the pencil mark with your paint.

Apple Stamping, how to make a precious Autumn keepsake art project with your toddler

Next you want to paint the inside of where you traced with brown. This will be the trunk of your tree. Some moms in our class painted this for their tots but our sweet girl wanted to paint hers all by herself. I think she did a pretty great job {go Millie!}

Apple Stamping, how to make a precious Autumn keepsake art project with your toddler

Once the brown is dry you can start stamping away. We stuck forks in our apples so the kiddos could hold onto the apple a little better but you can just pick the apple up with your hand if you’d like.

We used discarded pieces of cardboard to squirt our paint on. Put some paint on there, dip the half apple in, smear it around a bit so it gets a good coat, then stamp it right on the canvas. This is going to be messy, embrace it! This is how your little one learns and explores.

Apple Stamping, how to make a precious Autumn keepsake art project with your toddler

Keep stamping till your tot is satisfied with their little work of art.

Apple Stamping, how to make a precious Autumn keepsake art project with your toddler

Be sure to check out more crafty kids projects below.

DIY 2x4 rustic wood pumpkin blocks

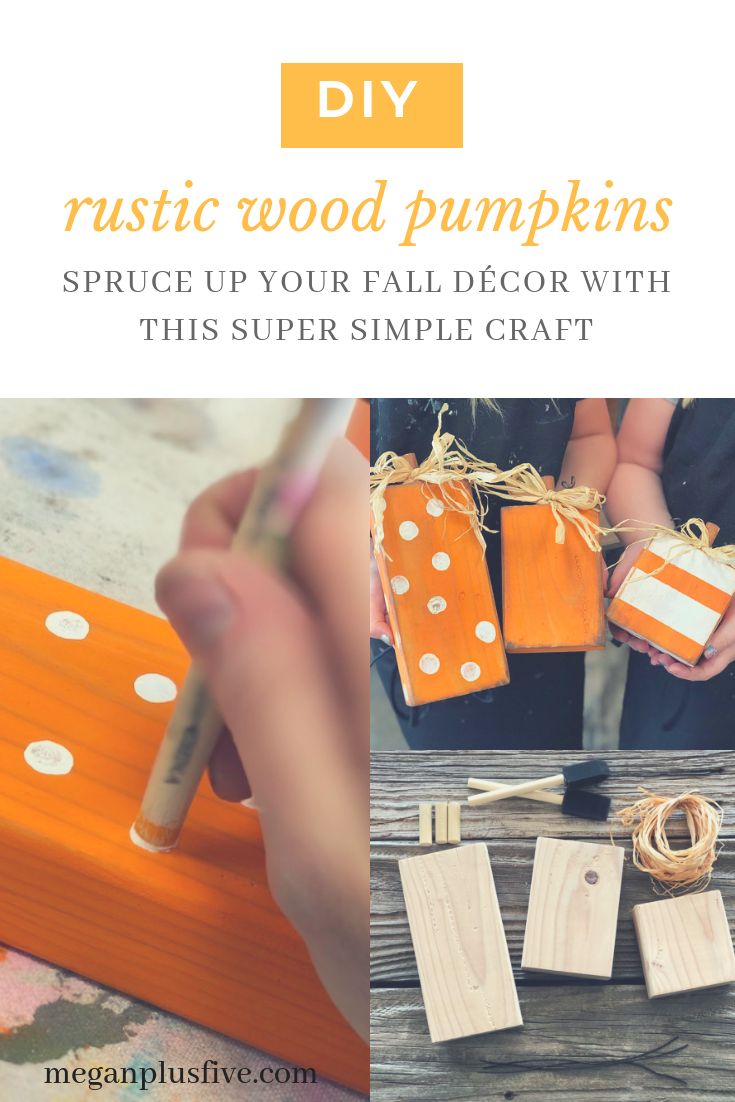
do it yourself rustic wood pumpkins, spruce up your fall décor with this super simple craft

DIY how to make 2x4 wood pumpkins

These little wooden pumpkins are just as cute as can be! I LOVE them! What I love even more is how effortless they are to create. You can knock a set out in less than an hour. Seriously, an hour of your time and you have some ridiculously cute mini pumpkins to add to your rustic fall décor!

These little guys are so simple you can even get the kiddos involved! Make a whole family craft night out of it, they will LOVE it and you’ll remember that night every year you put them out.

To make it even easier I’ve put together this DIY MINI PUMPKIN CRAFT KIT. Everything you need to make these at home delivered right to your door!

do it yourself rustic wood pumpkins, spruce up your fall décor with this super simple craft

If you don’t buy our easy peasy craft kit here’s what you’ll need…

Helpful tools


Check out this other fun fall craft, DIY mini mum planters for your front porch.


Let’s get started!

Step 1

Cut all the pieces for your pumpkins and stems {dowel rod}. After you do that give them a quick sanding to knock down all the pokey edges from being cut. Next drill a 1/2” hole in the top of each pumpkin {this will be where you put the stem dowel rod, you only need it about 1/2” deep}. Be sure to wipe off all the saw dust.

Now for the fun!

Paint all of your pumpkins your base color. For mine I painted all of the pumpkins orange. Be sure to apply a super thing coat, you should be able to see the wood grain through the paint. Once that dries apply a second coat, if desired wait for that coat to dry and apply a 3rd. I almost never do 3 coats.

do it yourself rustic wood pumpkins, spruce up your fall décor with this super simple craft

Step 2

Now for the accents{I used white for my accent color}!

For mine I left one pumpkin plain, added dots to one, and stripes to another.

The dots are SUPER EASY! Literally take the end of you sponge brush and dip it in the accent color. Then dot it on the pumpkin you want to have dots. You can practice on a scrap piece of paper before going full force on your pumpkin. I just randomly dot around till I’m happy with the look. I do this all the way around the pumpkin.

Add some stripes. Using your masking tape off the areas you want to KEEP your base color. I did two stripes of white on my pumpkins. Pro tip…to keep the paint bleed down, never brush your paint into the tape, always brush away. Brushing it to the tape will force the paint under the tape and cause your paint to bleed. You don’t need to wait for the paint to dry to peel off the tape.

do it yourself rustic wood pumpkins, spruce up your fall décor with this super simple craft

Step 3

Once your blocks are dry you can distress with sandpaper. Focus on the edges, corners, and do a light sanding to the face of the pumpkins. When you are done distressing with sandpaper, brush all the dust off with a cloth.

do it yourself rustic wood pumpkins, spruce up your fall décor with this super simple craft

Step 4

Give them a little more character with dark wax! I absolutely LOVE this stuff!

It takes VERY LITTLE WAX to achieve this look. Barely dip the very tip of the chip brush into the wax, and dab off onto a paper towel. If you get too much wax on your blocks they will look mudding instead of antiqued. Now brush the wax onto the corners and edges, dabbing to get more wax when you need more on your brush.

Then lightly brush over the face in both vertical and horizontal directions. This will give it an even more antiqued look.

do it yourself rustic wood pumpkins, spruce up your fall décor with this super simple craft

Step 5

Paint your stem, let it dry, and glue the stem in place with a good amount of glue. Let dry completely {f you have a glue gun you can use that for this step instead}.

After your glue has dried you are ready to adorn with the raffia and wire embellishments. To get the wire curled, simply wrap around the end of one of your sponge brushes.

Then take the wire and tie it around your stem.

do it yourself rustic wood pumpkins, spruce up your fall décor with this super simple craft

Step 6

Then gather a few strands of raffia and tie in a bow around the stem and wire. Trim if you desire.

do it yourself rustic wood pumpkins, spruce up your fall décor with this super simple craft

Check out more fall & Halloween posts below