Super FUN canvas art for kids, easy HOW TO create your own at home

Super FUN canvas art for kids, easy HOW TO create your own at home

A couple weeks ago we threw a birthday party for our 9 year old. We wanted to do something a little different than what we usually do in the shop for her special celebration. We were looking through pinterest to get some inspiration and came across these gorgeous mixed media canvas art pieces. She instantly loved them and wanted to make her own. The ones we found used fancy jewels…that’s not really our speed but we had rhinestones and buttons and knew the ones they would make would look just as amazing!


Affiliate Disclosure. Some of the links on this website are affiliate links, which means that I may earn a small commission if you click on the link or make a purchase using the link. If you make a purchase you will not be charged anything additional.

Super FUN canvas art for kids, easy HOW TO create your own at home

Mixed art kids canvas

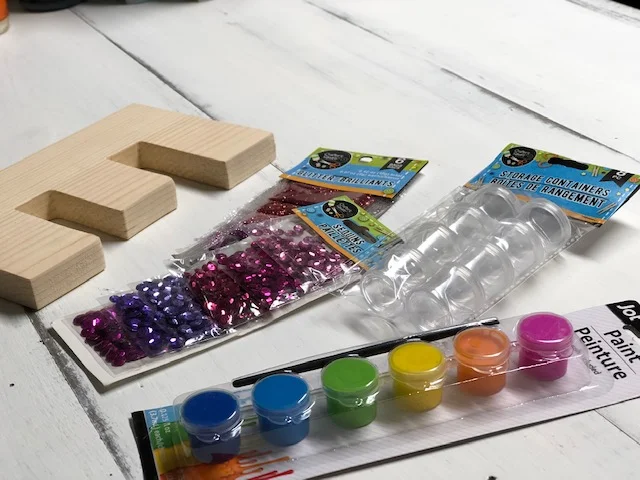
What you'll need


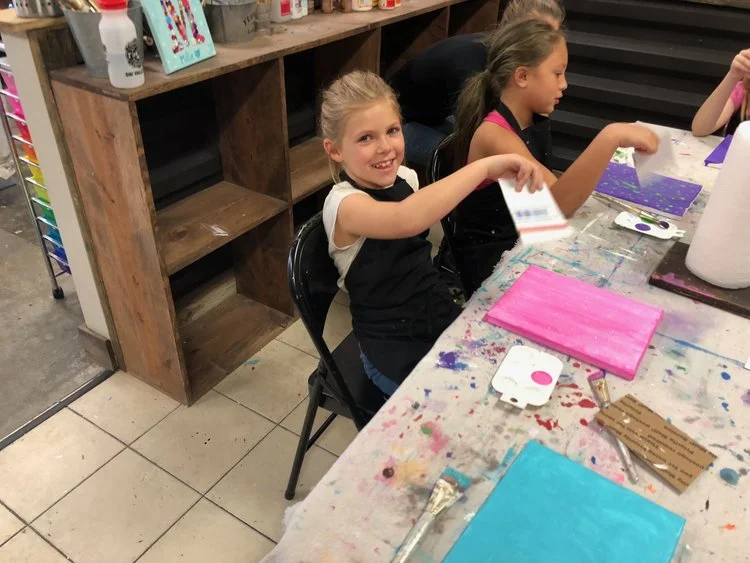
Start by painting your canvas, I recommend a solid color or super simple design {i.e. polk a dots, paint splatter effect…}this will make your letter pop even more if it has a less distracting background.
Super FUN canvas art for kids, easy HOW TO create your own at home

Once the background color is dry, using your pencil trace your letter on your canvas. If you don’t have a paper letter cutout you can freehand this step, it will make it even more unique!

Super FUN canvas art for kids, easy HOW TO create your own at home

Now paint your letter, it’s ok if your paint gets outside of your lines, it’s art after all! You’ll want to use a color that is different from your background color. White is a good one and will really make the buttons and rhinestones standout.

Super FUN canvas art for kids, easy HOW TO create your own at home.jpgSuper FUN canvas art for kids, easy HOW TO create your own at home

Now the REAL FUN begins! After your letter is dry you can start blinging it out with all those fun rhinestones and buttons! Working in small sections at a time start gluing all that bling on! Painting it on the canvas with a paint brush works great for this. Just paint the glue on where you want to glue something down, you’ll want to use a fairly good amount of glue so everything stays in place. We use several different types of glue and Tacky Glue is hands down the best for projects like these!

Super FUN canvas art for kids, easy HOW TO create your own at home

When your letter is totally covered in buttons and rhinestones you’ll want to sprinkle it with glitter. That will fill in all the little spaces in between perfectly! We used extra fine glitter for this step.

Super FUN canvas art for kids, easy HOW TO create your own at home

Check out more craft kid posts below

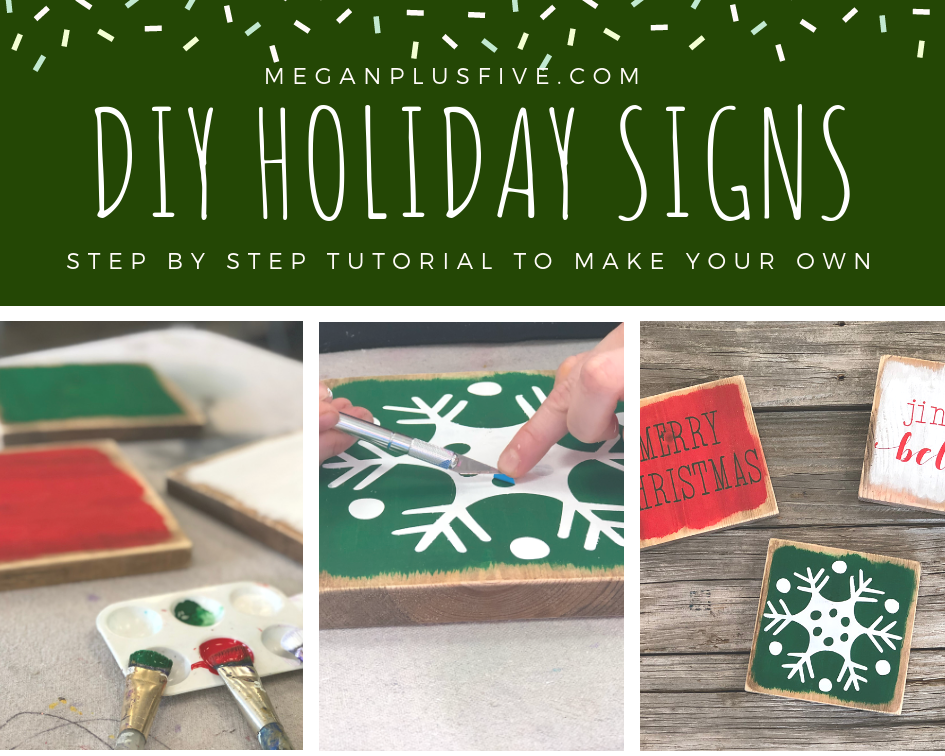
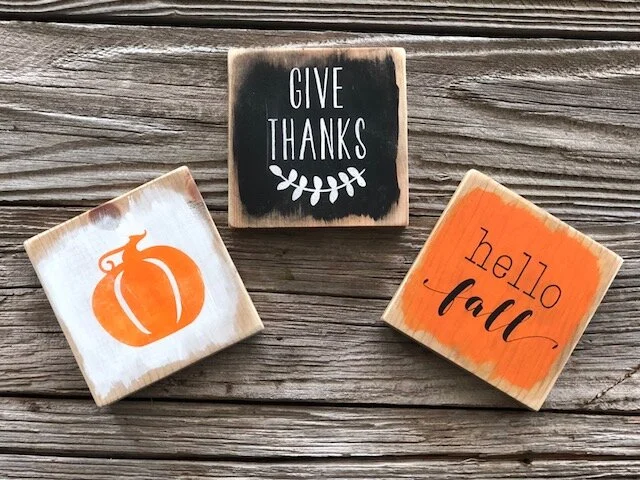
DIY mini stenciled Christmas signs

DIY Mini Wooden Winter Signs

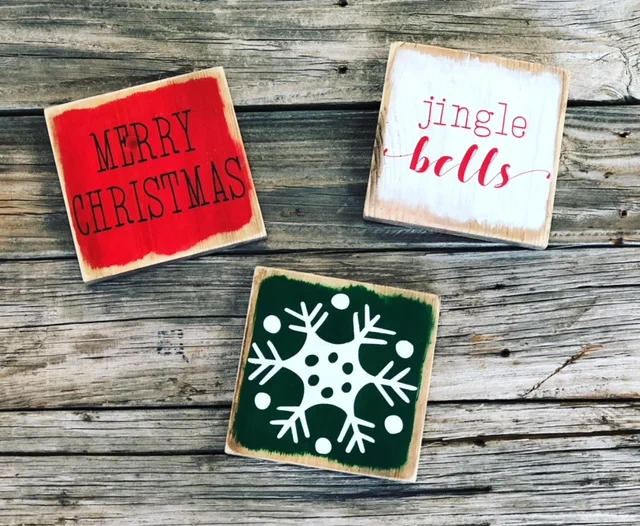
Painting & stenciling mini wood Christmas signs

Do you LOVE those little mini signs like I do? They are so perfect because they don’t take up a lot of space, you can store them easily when they aren’t in season, and they are SO simple to make yourself.

Affiliate Disclosure. Some of the links on this website are affiliate links, which means that I may earn a small commission if you click on the link or make a purchase using the link. If you make a purchase you will not be charged anything additional. This is just a way I can help add to our family finances to raise our four daughters. Please know I would never recommend a product or service I do not totally stand behind.

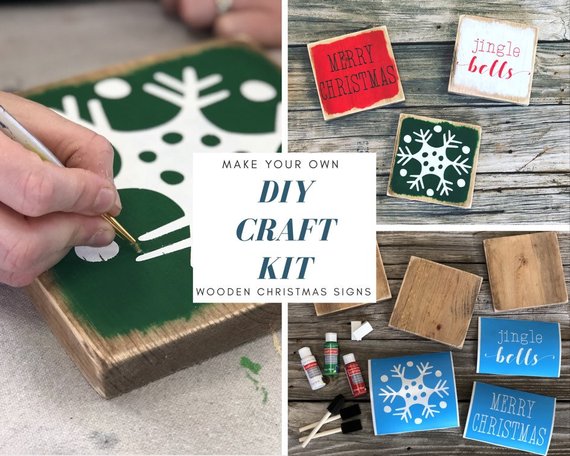
Here’s what you’ll need to make your own at home. To make it even easier we’ve put together a CRAFT kit that has everything you need for project here.

HOW TO STENCIL ON WOOD

winter craft kit.jpgDIY Mini Wooden Winter Signs

MAKE YOUR OWN MINI STENCILED WOOD CHRISTMAS SIGNS FOR YOUR RUSTIC HOME DECOR

You’ll need

3 - 5.5x5.5 wooden pieces {I got a 1x6 from the local hardware store}

stain, rags, and gloves {here’s what I used}

stencils {you can buy ours here, or make your own}

3 - brushes {you can use sponge brushes or here’s what I use}

white, red, & green acrylic paint {here’s what I used}

2 makeup sponges {you can pick them up at your local dollar store}

sander or 120 grit sandpaper

DIY Mini Wooden Winter Signs

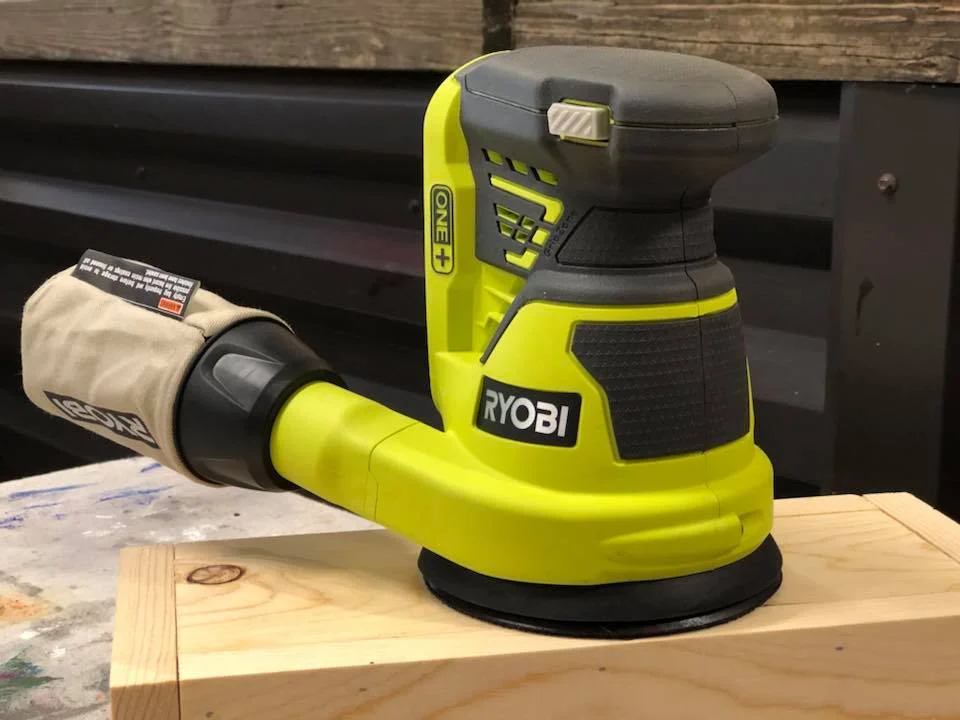
After you’ve cut and sanded your 5.5”x5.5” pieces stain them and let them dry for 24 hours. After they’ve dried sand around the edges, corners, and a light sanding on the front, be sure to wipe them down so you get all of the sawdust off of them. I LOVE my RYOBI CORDLESS SANDER , it is what I use for all of my wooden projects. But, if you don’t have a sander you can get the job done with 120 grit sand paper.

DIY Mini Wooden Winter Signs

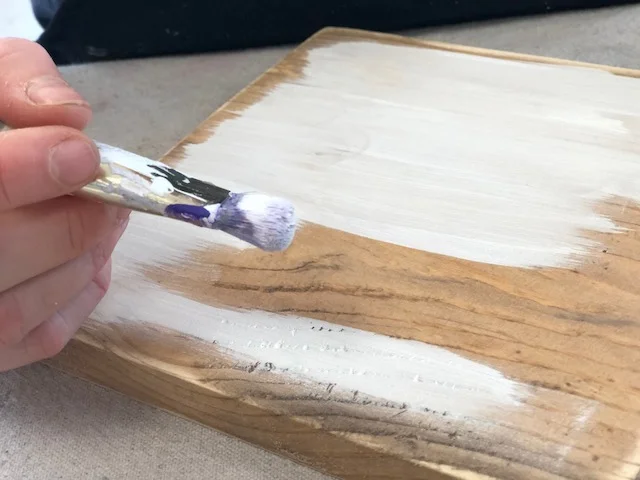
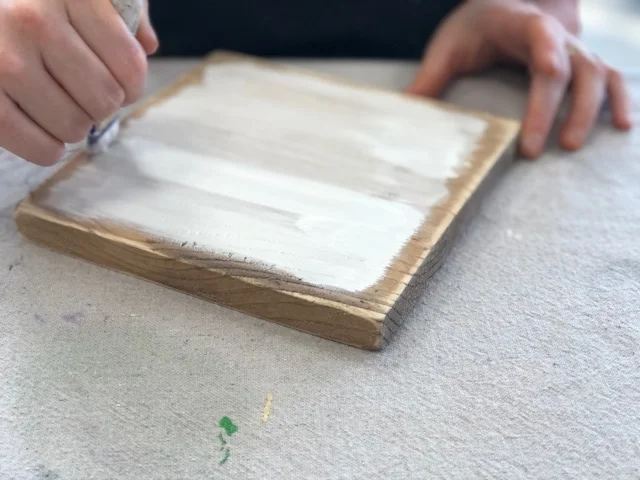
Now it’s time for the painting! You’ll paint each wooden sign a different background color. Start with a DRY brush and using a little bit of paint at a time apply a THIN coat of paint to one side of your board. Leave .25” border all the way around each piece. I don’t measure this, just eyeball it. This will give you that rustic uneven look.

DIY Mini Wooden Winter Signs

After your fist THIN coat is totally dry you can apply the second coat, be sure to apply using the same technique as you did with the first coat.

DIY Mini Wooden Winter Signs

Repeat this step for all 3 signs. Once they are all TOTALLY DRY you are ready for stenciling. They must be completely dry otherwise your stencil will not stick to the wood and it will be an ugly mess.

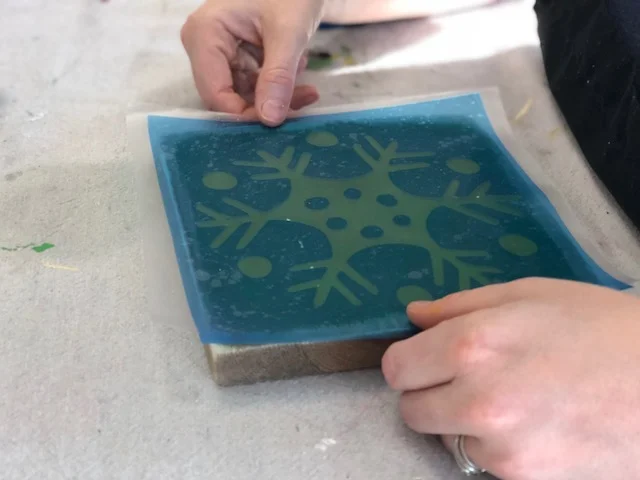
Start by removing the paper backing from your stencil. This works best if you use a vinyl applicator {here’s what I use} or you can use a stiff store rewards card, I don’t recommend using your bank card as it could break during the process.

If you’re using your own stencils you’ll need transfer tape to transfer your stencil onto the wood in one piece.

DIY Mini Wooden Winter Signs

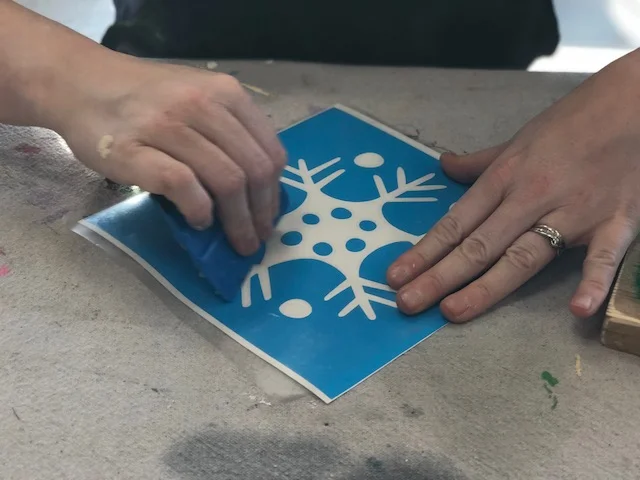
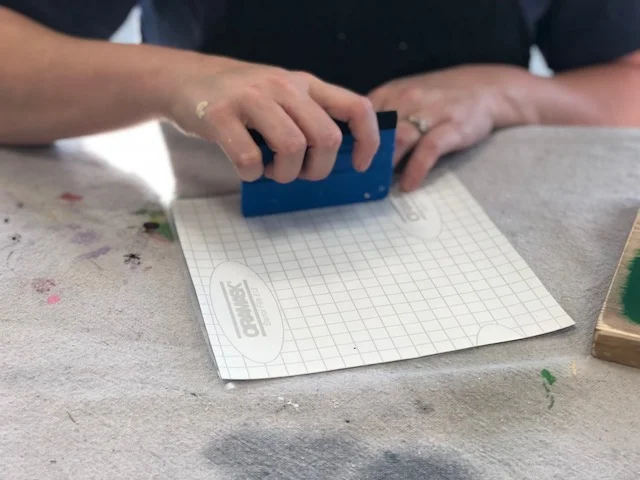
Start by rubbing the front of the stencil with your vinyl applicator. Be sure you move in one direction.

DIY Mini Wooden Winter Signs

Then flip it over and do the same to the back.

DIY Mini Wooden Winter Signs

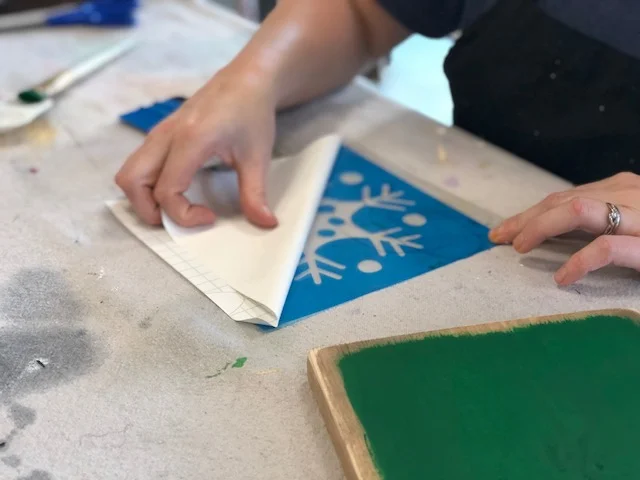
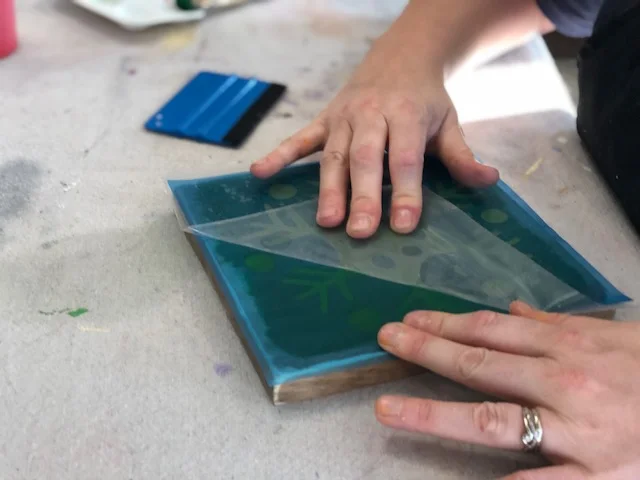
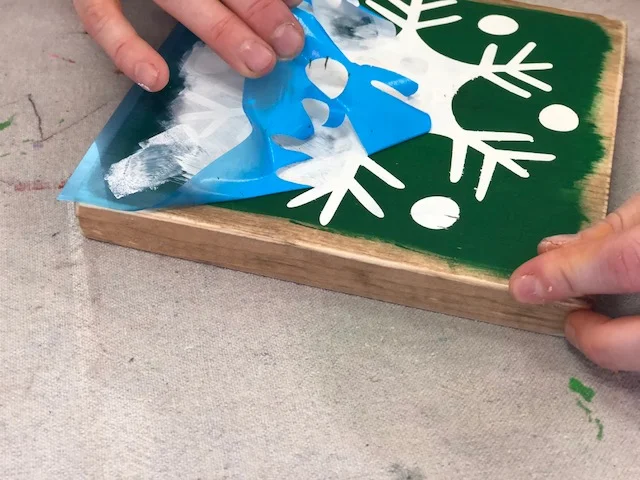
Now slowly peel the paper backing away from the stencil. This works best if you start at one corner and peel away at a sharp 90 degree angle. Go SLOW.

Before you start applying your stencils decided which stencil you will put on each board.

DIY Mini Wooden Winter Signs

First, you’ll want to place your stencil where you want it on your board. I wanted mine to all be centered so that’s what I did but you can place them anywhere on the board you’d like. I just recommend keeping the image within the painted part of the wood.

DIY Mini Wooden Winter Signs

Using your vinyl tool rub the stencil, using the same technique as before. Now SLOWLY peel the transfer tape {the clear sticky stuff} away from your stencil. I do this at a sharp angle and I will slowly roll it off of the stencil.

DIY Mini Wooden Winter Signs

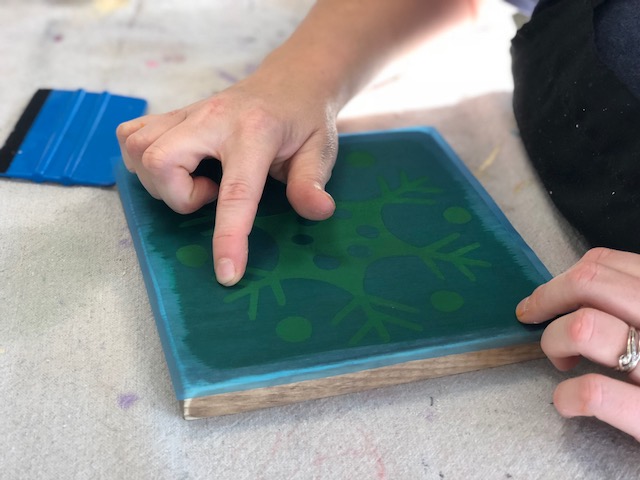
After you get the transfer tape off rub your finger along all the exposed stencil edges {anywhere there is wood showing thru}. this helps to get s good seal on your stencil.

Now you’re ready to start painting your stencil!

DIY Mini Wooden Winter Signs

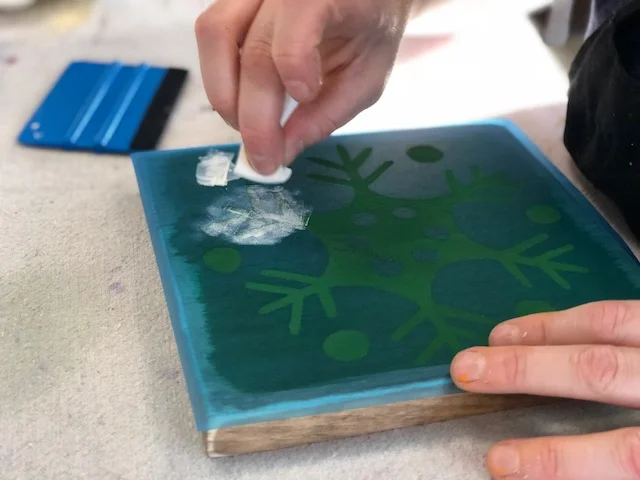
Use one end of your cosmetic sponge LIGHTLY dip it in the paint color you’d like your design. BE SURE TO USE VERY LITTLE PAINT, this is key to getting little to no paint bleed under your stencil. Dab the sponge on a paper towel a couple times then onto your stencil, do this till you have a very THIN even coat {you should be able to see thru the first coat}. LET DRY, repeat till you are happy with the coverage.

DIY Mini Wooden Winter Signs

Now peel up your stencil.

DIY Mini Wooden Winter Signs

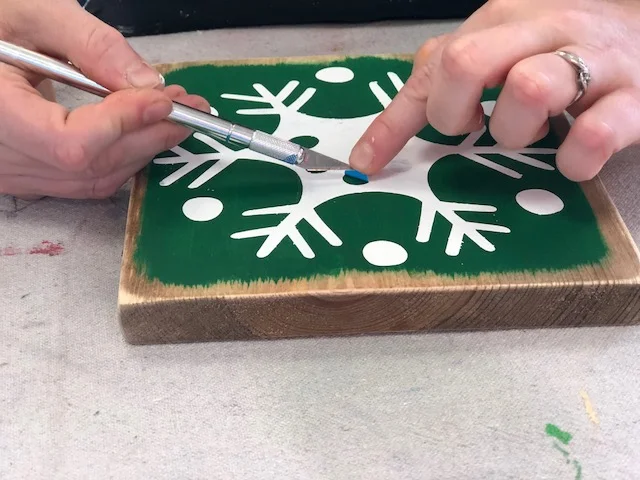
I use an xacto knife to get up all the little pieces. If you don’t have one of these a sewing pin/needle works great for this as well.

If you have any paint bleed just go over those with a small paint brush and your background color.

DIY Mini Wooden Winter Signs

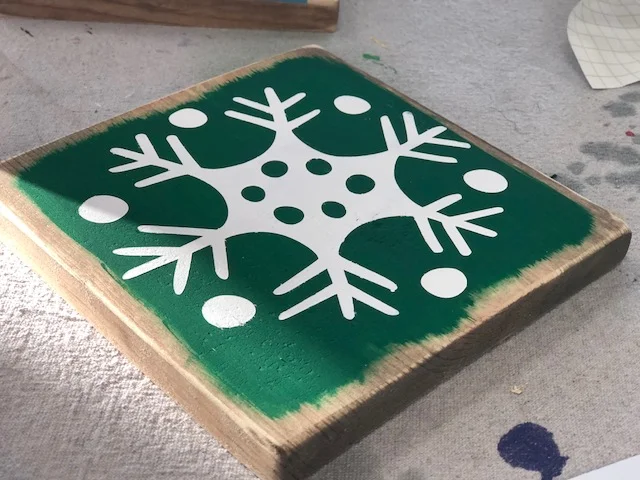
Now finish the other two and you're ready to put them up to enjoy this holiday season.

DIY Mini Wooden Winter Signs

Easy and adorable mini mum planters for less than $2, get the look with this tutorial

Easy and adorable mini mum planters for less than $2, get the look with this tutorial

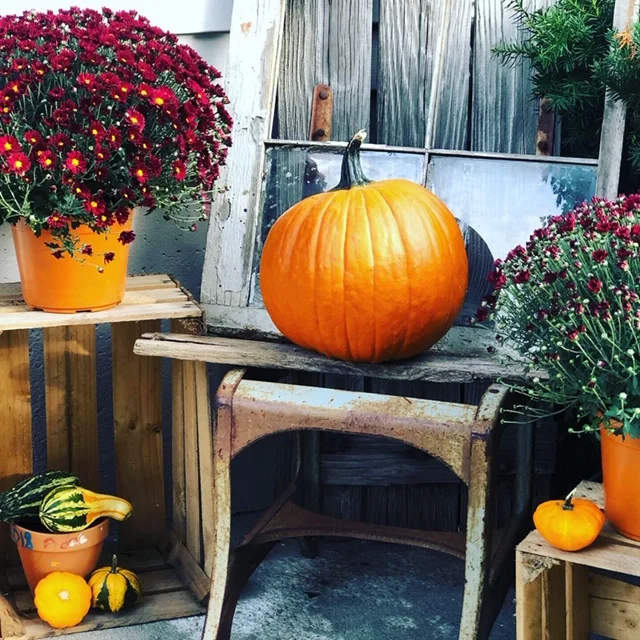
DIY cheap fall porch décor

I love finding new ways to decorate on the cheap! Having 4 kids…especially girls…is expensive. From clothes to medical expenses these girls can drain a wallet! So I get a little creative when it comes to buying decorations, especially if they are seasonal ones.

A few years ago I wanted to spruce up our front porch with some fall colored mums. I LOVE them, they scream FALL IS HERE! I was shopping around Walmart had the mums loaded in my basket and they come with the standard ugly stamped containers so I thought I’d pick up some inexpensive pots to put them in. Our porch decorating budget wasn’t a whole lot and I was already spending a big portion of it on the flowers. I found the pots and was floored at how expensive they were. They were twice as much as the flowers! Being raised to be super frugal by my mom and insanely CRAFTY grandma my wheels got to turning. I walked around the store looking for ideas of what I could stick these flowers in. Got to the Halloween aisle and BAM! There they were. Perfect round containers that looked like they were made to put those flowers in!!

This year I wanted to recreate those because they unfortunately didn’t last more than that season. I went to Walmart and the regular sized pumpkin buckets were no where to be found but they had mini ones which were the PERFECT size for the mini mum flowers…and a fraction of the cost! And did I mention they were MINI which automatically makes them even more adorable!

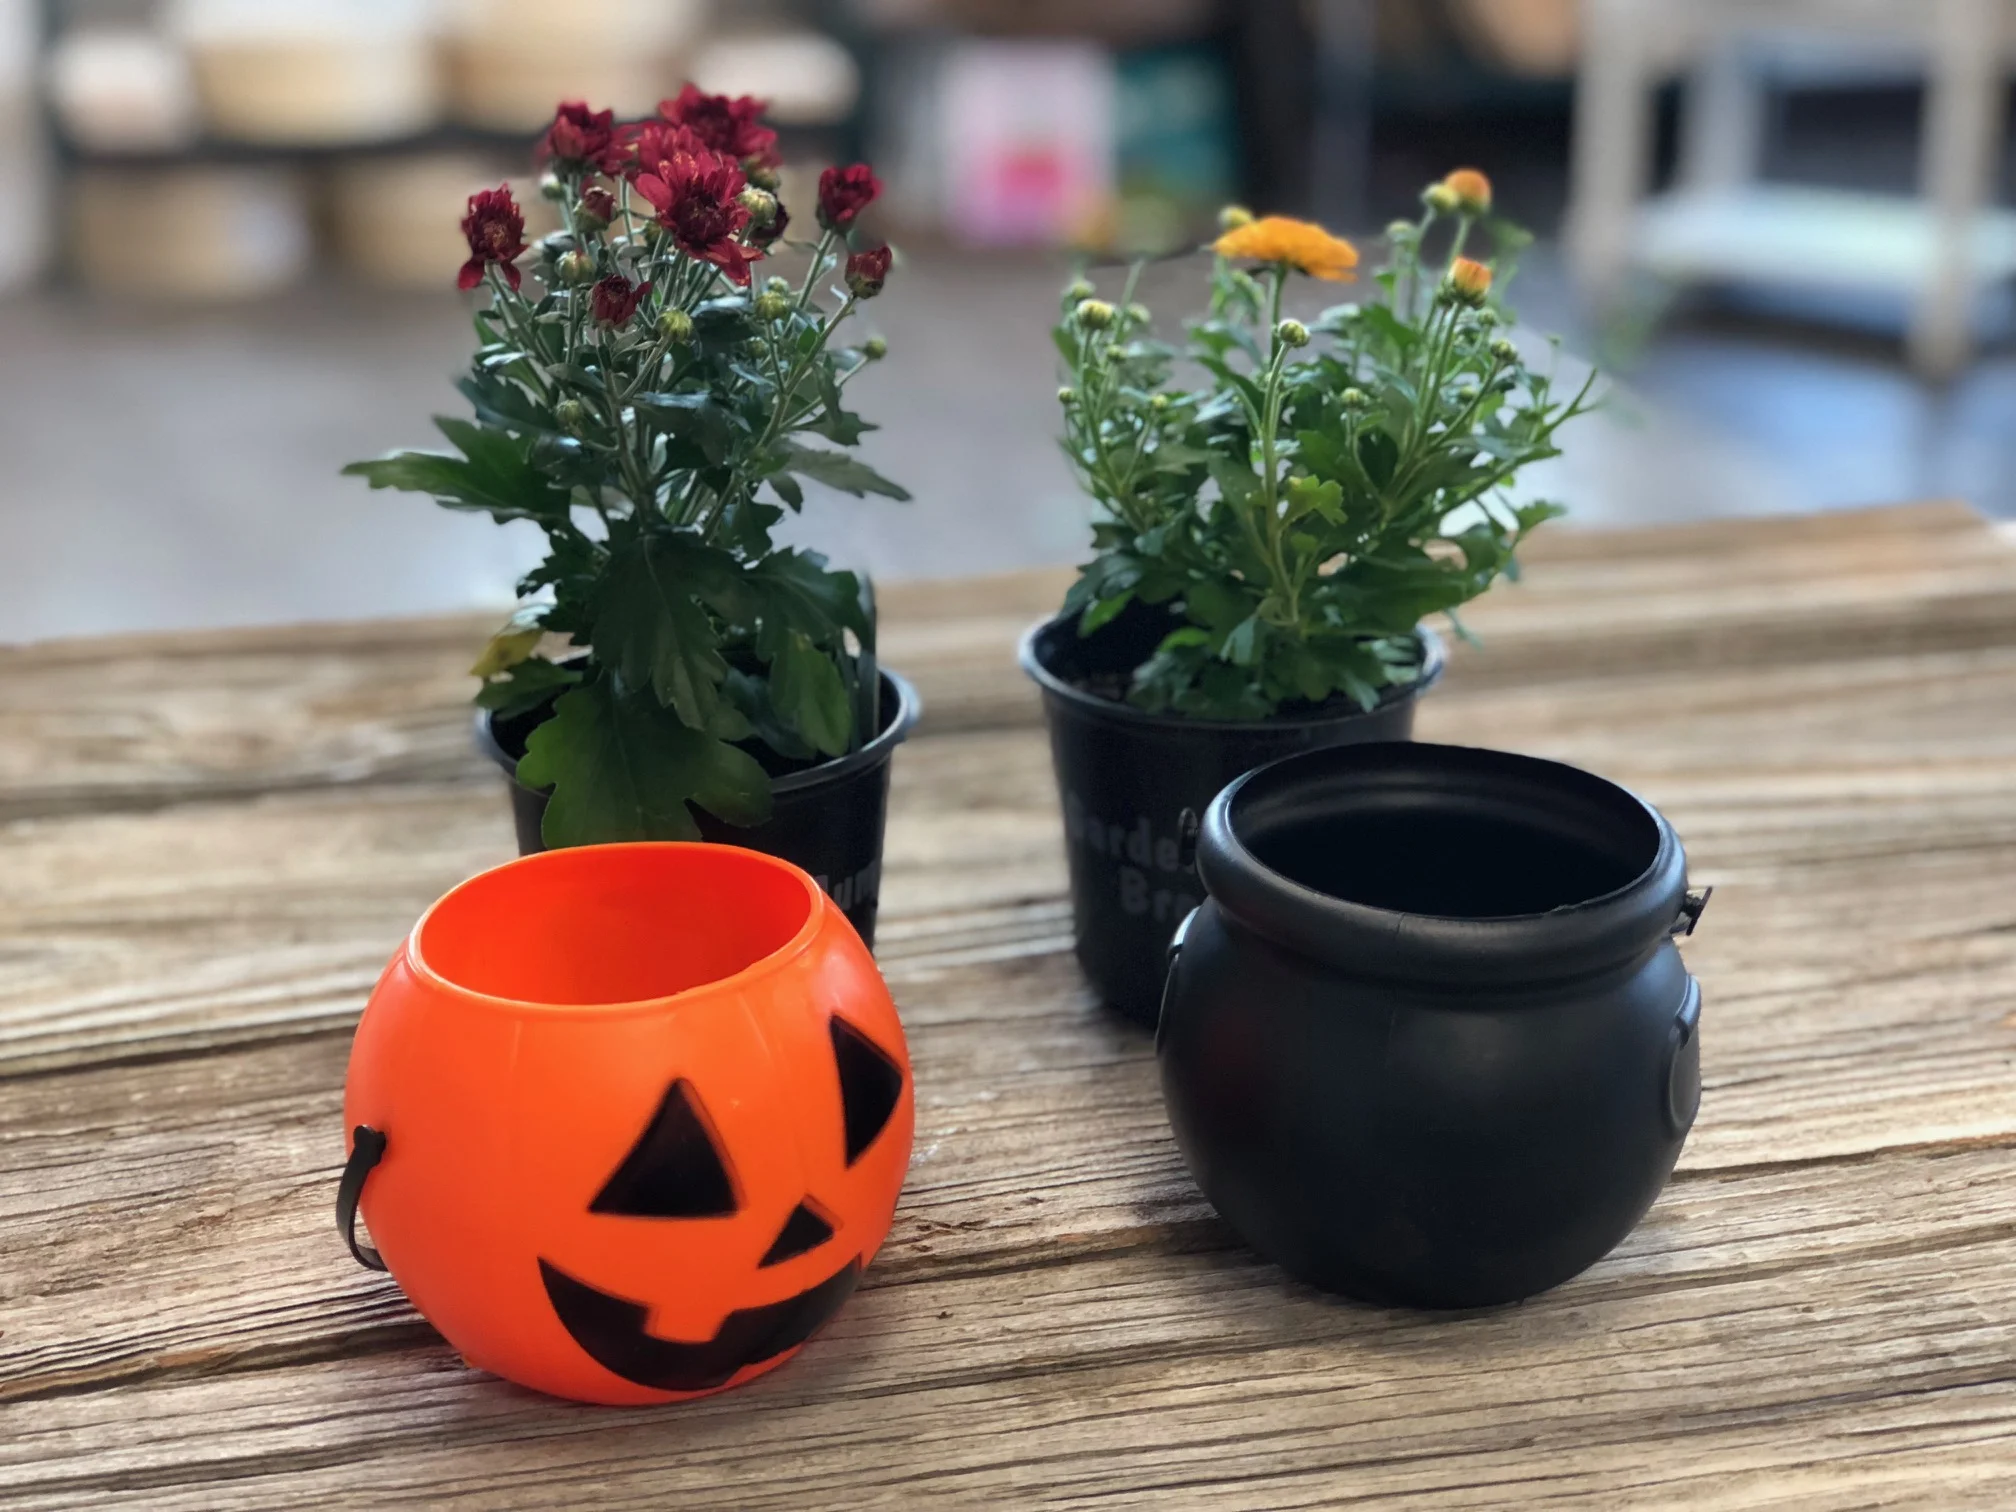
So I grabbed the mums, a mini pumpkin and a mini cauldron treat buckets and set back to our brick and mortar shop to make some cute planters!

Affiliate Disclosure. Some of the links on this website are affiliate links, which means that I may earn a small commission if you click on the link or make a purchase using the link. If you make a purchase you will not be charged anything additional. This is just a way I can help add to our family finances to raise our four daughters. Please know I would never recommend a product or service I do not totally stand behind.


Here’s what you’ll need

I picked everything up from my local Walmart.

2 mini MUM planted flowers, $.97 each {I picked mine up at our local Walmart, but they are not listed online

2 mini Halloween treat buckets $.74 each {I bought a pumpkin & cauldron}

scissors

It cost $1.71 {plus taxes} to make one flower pot. SUPER CHEAP for cute décor, and the kids will love them. I did mine by myself because my kiddos were at school, but you could totally make this a fun family thing and have everyone pot their own.

These are so super simple, literally 2 steps!

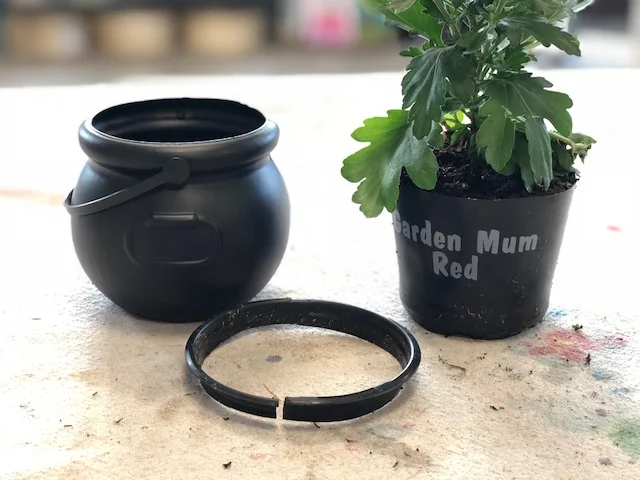
First you need to cut the top lip off of the pot the flowers are currently in. This can be hard to get the initial cut so I advise this step for adults.

Easy and adorable mini mum planters for less than $2, get the look with this tutorial

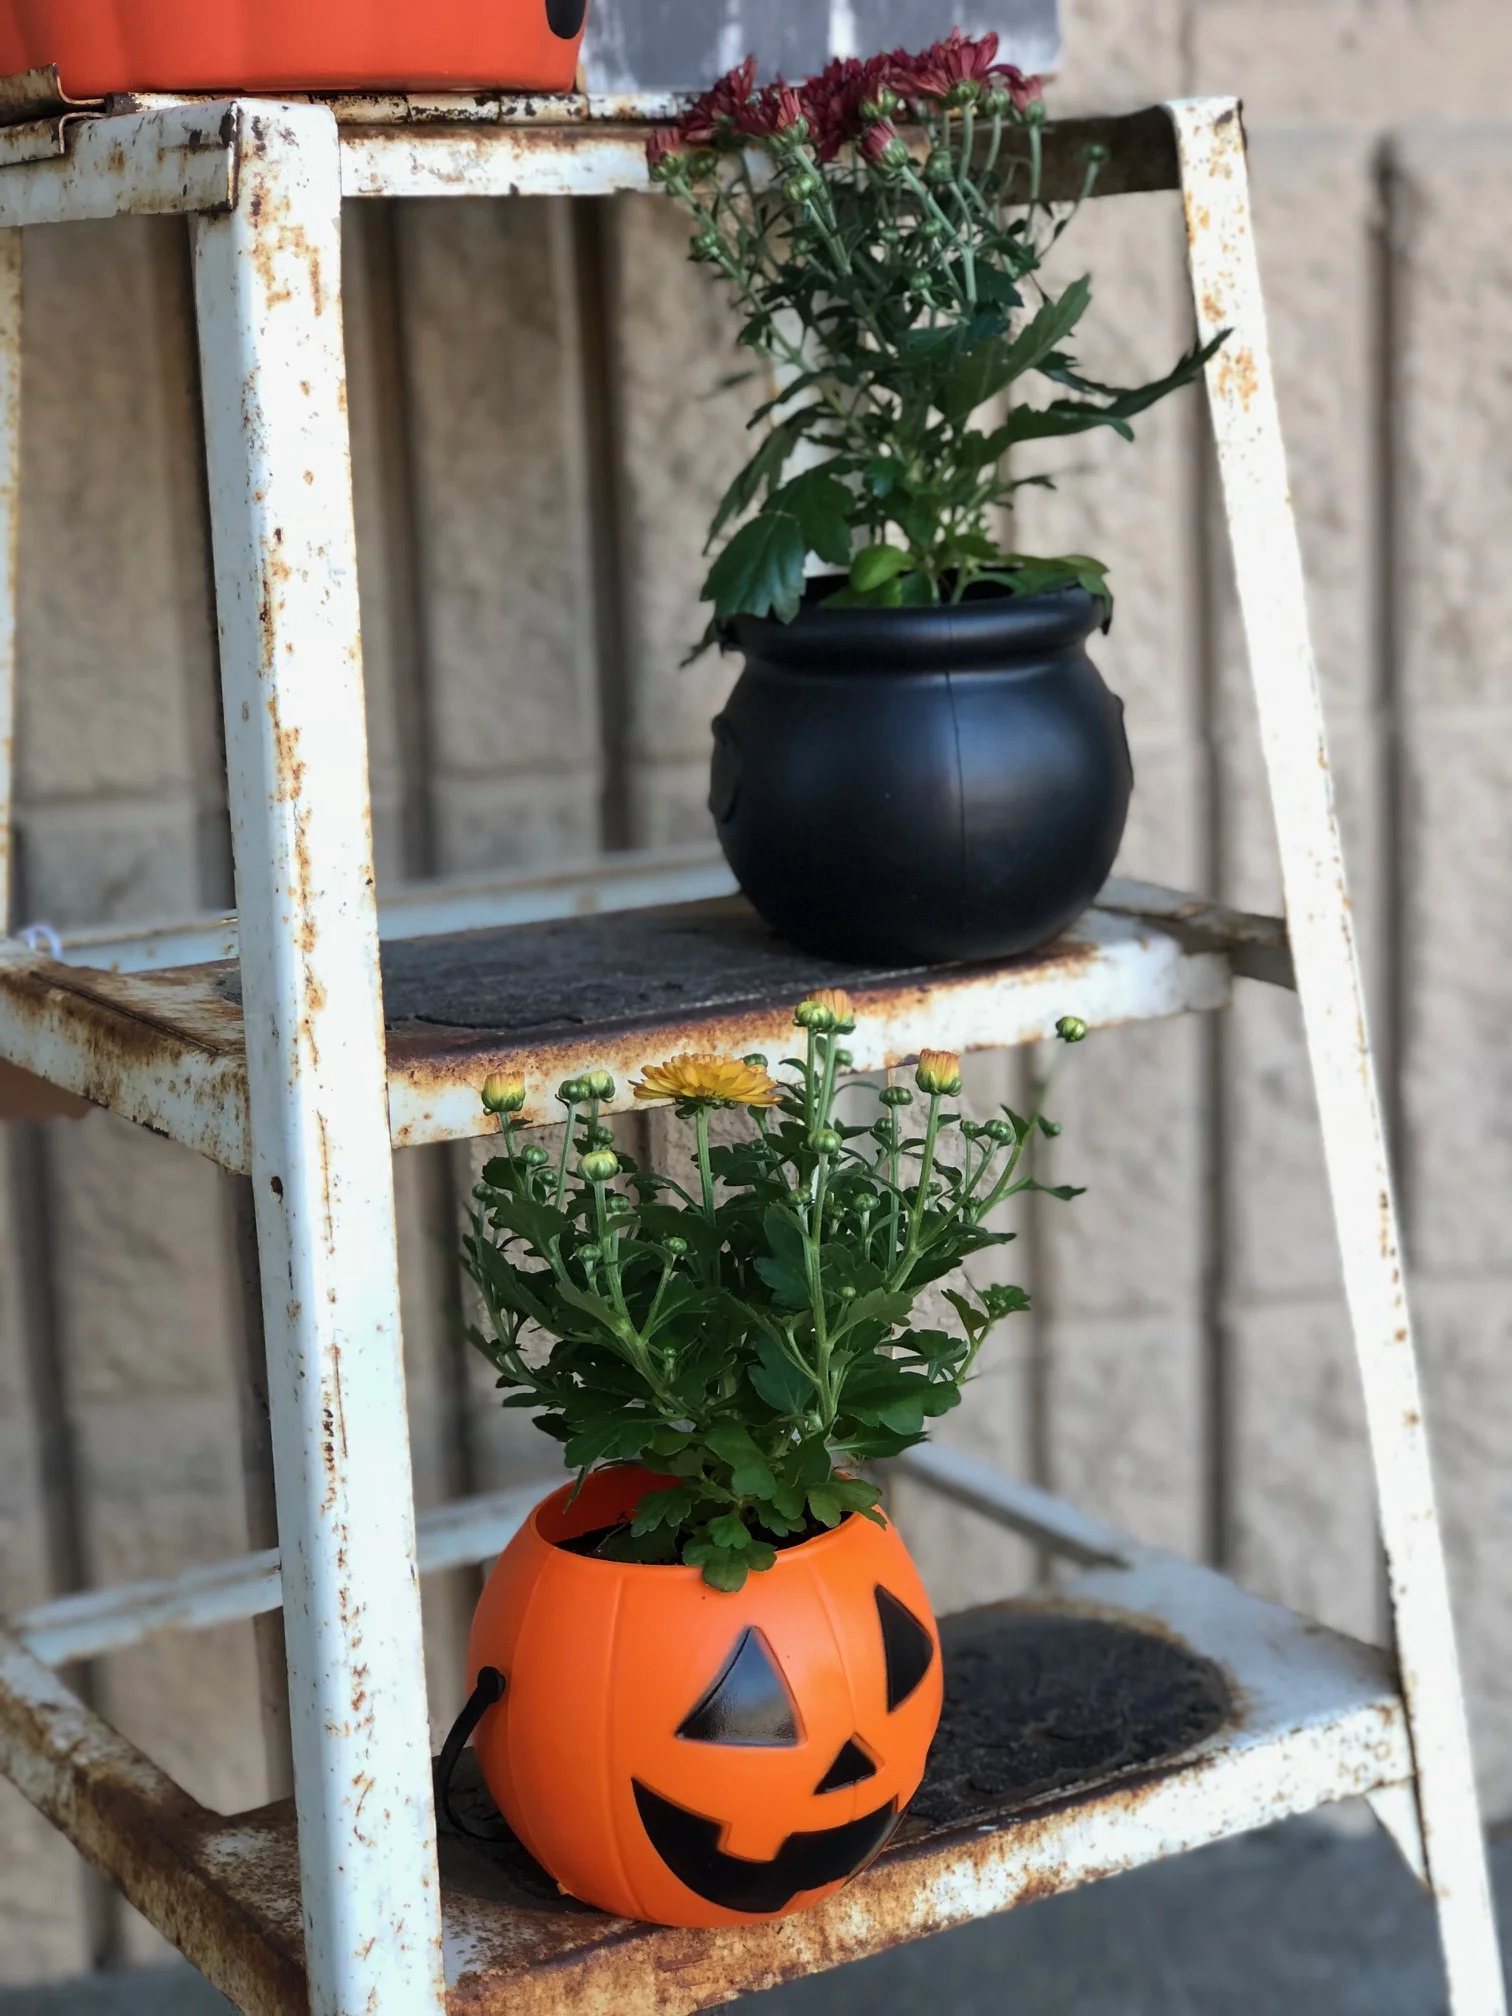
Now shove those babies in the treat bucket and you’re done! If yours are going to stay outside all the time you can drill 2 holes in the bottom to let them drain but I will be bringing mine in and out of our shop and I don’t want the water to drip everywhere so I will manually drain ours.

Easy and adorable mini mum planters for less than $2, get the look with this tutorial

I can’t wait for these to bloom and be even CUTER!

Check out more fall & Halloween themed posts below
How to start your stockpile and the top 3 reasons you NEED one if you have kids

How to start your stockpile and the top 3 reasons you NEED one if you have kids

What is a STOCKPILE and why do you need one if you have kids?

According to google, a stockpile is defined as "a large accumulated stock of goods or materials, especially one held in reserve for use at a time of shortage or other emergency." And they summed it up pretty good! I’m sure you’ve seen those shows of people hoarding YEARS worth of goods but that’s not what I’m talking about. I’m talking about stockpiling a small amount of goods so you are prepared when life happens. In our home we have one shelving unit and that’s it.

Ok, so how do you build a stockpile? The most popular way to build your stockpile quick and cheap is to coupon. But, if you're like me, you don't have time for that {couponing is GREAT but it's also super time consuming}. Before I was a mompreneur I was on of those  crazy couponers! I had a binder that was so organized I even amazed myself with my organization skills. I would spends hours each week sorting, clipping, searching the sale ads, and planning out my trips.  If I had the time I'd still be a couponing crazy but I don't, so instead I shop the sales and take advantage of our SAMs Club membership.

Building your stockpile without coupons can be done. It will take longer, but you can still build a great stockpile for your family. I highly recommend getting a membership to Sams Club. We have had ours for several years now. At first, I didn't think we would use it very often but we actually use it every single month. It's worth the small membership fee! They also let you share a membership with someone you know making it even cheaper for you! Sams is GREAT when it comes to running sales and their additional savings. This is when I stock up. Here's an example...we buy our dishwashing tabs from SAMs. They are usually around $10. A couple times throughout the year they will go on sale for $2-$3 off the regular price. When that happens I'll buy 2 or 3 instead of 1. Now we are set for dishwashing tabs for the next 6 months. I follow this same principle at the other stores I shop at. When I find something my family uses I will buy multiples at that low price.

If you keep that up, buying multiples of things when they are at a really low price, you will slowly build your stockpile up. Be sure to only buy things you will actually use. If your family doesn’t eat peanut butter but you find it on sale for .50 a jar you don’t need to buy it unless you plan on donating it. Also, if something will expire before you use it, it’s probably not a good idea to stockpile it.

So, now you know how to stockpile but why do you need to stockpile? My answer…because it's smart! Life is so unpredictable, chaotic, and full of surprises that you don't want to find yourself totally out of shampoo in the middle of your morning shower because your 7 year old used the last of it to give her baby dolls a bath the night before. Yes, that's a true story! This kind of stuff happens ALL THE TIME in our house and thank goodness we stockpile to make these wonderful little surprises no big deal. Here are my biggest reasons why WE stockpile in our home.

TOP 3 REASONS WHY TO STOCKPILE

1. My biggest reason is the reason why we started stockpiling...so you don't run out of something when you can't afford to replace it. Let's face it, having kids isn't always sunshine and rainbows. Unexpected things happen and you never know when you’re going to have a financial strain. This was a very real thing for us several years ago when my husband’s construction job had a bit of a slow month. We aren’t ones to borrow money when things get tough so we made it work with what we had. That’s when I started couponing and vowed we would keep a stockpile from that day forward. And we have we just go about stocking it a little different now that I’m not couponing anymore.

2. My second reason you should stockpile if you have kids is so you don’t have to make those unplanned trips to the store. Dragging our four girls through Walmart isn’t really my most favorite thing to do. Especially if it’s for one thing that we NEED like toilet paper or diapers. Usually when that happens everyone is grouchy, tired, and just done for the day. So it makes for a very unhappy trip for all.

3. Last but certainly not least, so you can help others in need. Countless times our stockpile has helped others when they’ve been without. We’ve been able to give to family, donate to a local crisis closet, and we even donated over $300 worth of items when a tornado hit our small town. All because we had a stockpile we could give back to so many. This is a great way to teach your children to share and give.

I hope this inspires you to build your own small stockpile for your family.

60 Minute SIMPLE Dinner Recipe

60 Minute SIMPLE Dinner Recipe

Regardless if you're a working mom or a SAHM, we can all agree being a mom keeps you insanely BUSY! We are always looking for new ways to save time and energy so we can focus that precious time on things that really matter in life, our memories with our family.

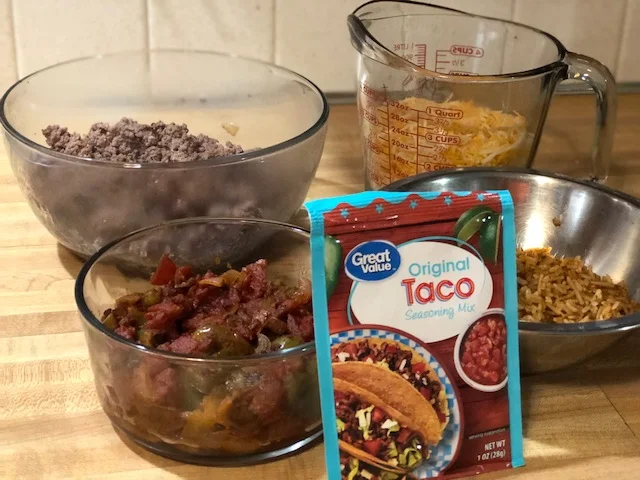
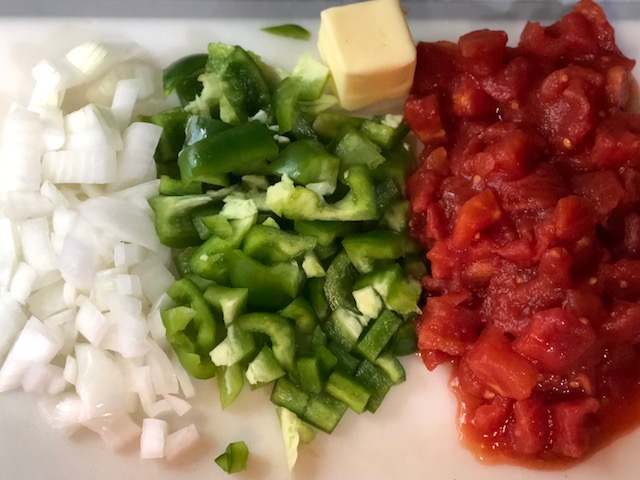
I'm sure this is called lots of other things but in our house we call it Mexican Bake! It's super easy to make, and if your kiddos love "Mexican" food they will LOVE this! We like to make ours with fresh onions, peppers, and tomatoes {although we didn't have a fresh tomato when I took the pics for this post, but usually we do}. You can make this in less than an hour and if your kiddos are school aged they can even help like our girls love to do. For the most part this is a one pan dish from start to finish.

Ingredients

Cooking

  • skillet {we recommend cast iron}

  • sauce pan {we recommend stainless steel}

  • cutting board

  • knife

  • wooden spoon

  • small mixing bowl

PREHEAT your oven to 450.

mexican bake.jpg

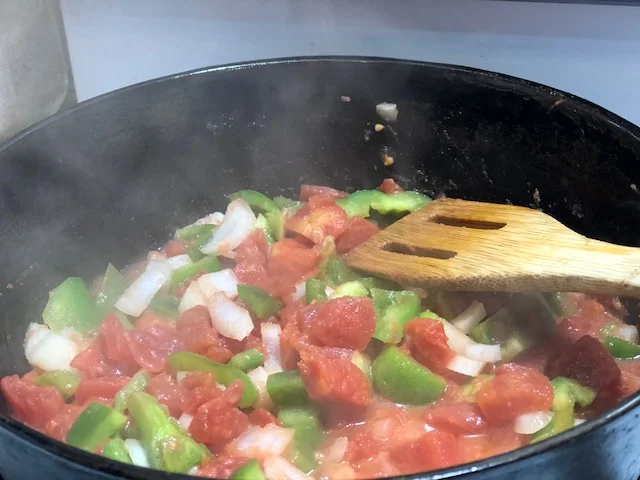
This recipe is SUPER quick and easy. You'll want to start by chopping the veggies, then set aside. Melt butter in the iron skillet. Once melted add the veggies and let them simmer. To speed this step up I will cook them on a slightly higher temp and add a little water so they don't burn, then  put a lid on it and cook till they are tender. 

60 Minute SIMPLE Dinner Recipe

Once that's done cooking remove from your skillet and set aside in a small mixing bowl.

To save time get the rice started while the veggies are cooking. Be sure to follow instructions on the back of the packet. 

60 Minute SIMPLE Dinner Recipe

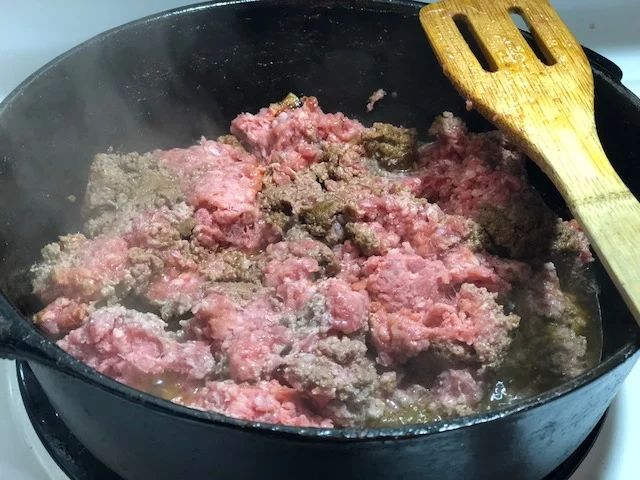
Add the hamburger to the skillet {do not wash in between, it isn't necessary}. Strain off any unwanted greese/fat {I strain ours into a discarded coffee container}. Once browned, leave the ground beef in the cast iron skillet, add in veggies and stir together. 

Mix in taco seasoning packet, follow instructions on the back of the packet.

Add in 2 cups of cheese and the rice. Don't over stir, just enough to blend them all together. Then sprinkle the rest of the cheese on top.

Place iron skillet in preheated oven. Bake for 10-15 minutes. Take out and let sit for 10 minutes or till desired cooling, ENJOY! {if you are NOT using a CAST IRON SKILLET DO NOT PLACE YOUR SKILLET IN THE OVEN. PLEASE PLACE IN A OVEN SAFE DISH, THEN PLACE IN OVEN}

We usually top ours with sour cream and salsa and serve with tortilla chips.

Super easy and inexpensive dinner to serve your family on those crazy busy nights.


60 Minute SIMPLE Dinner Recipe

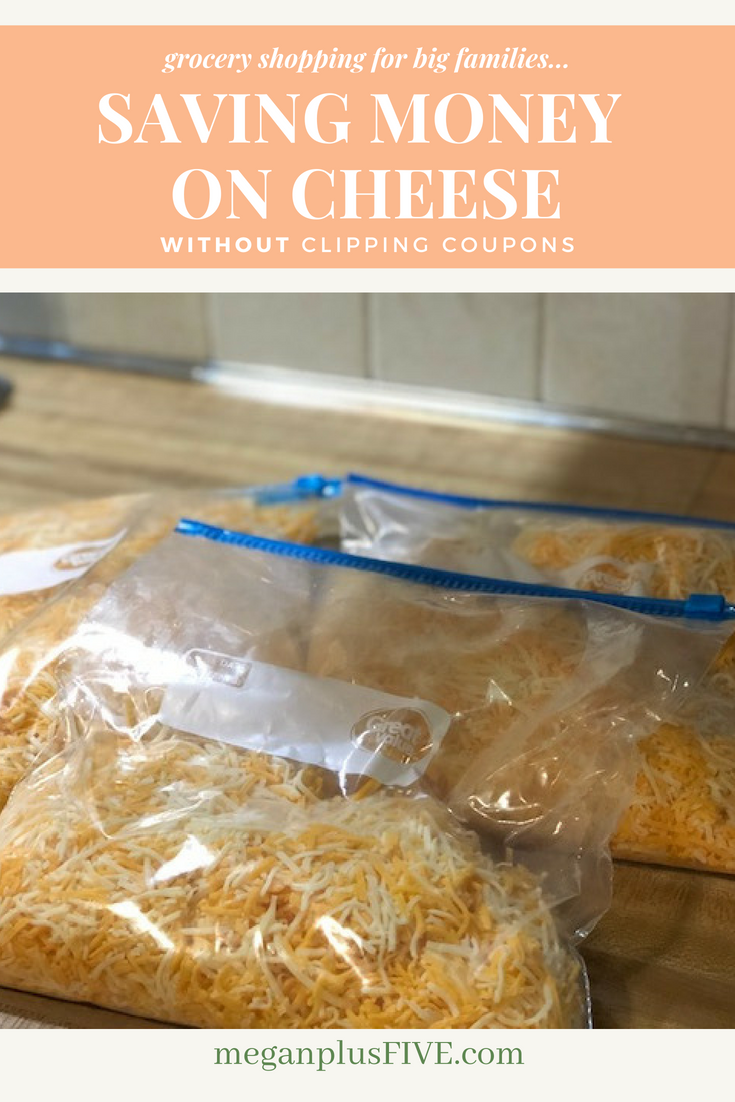
How to save money on cheese WITHOUT clipping coupons

How to save money on cheese WITHOUT clipping coupons

Whether you have a big family or prefer to buy in bulk this is a cheesy good deal you won't want to pass up! {I know that was a terrible intro but I couldn't resist!}

I used to be one of those crazy couponing ladies...the real deal! I had the binder. I had the coupons. I had my trips planned out. I even taught people how to coupon. And I loved it! But once our online business took off I didn't have the time to do it anymore. I didn't have time to bounce from store to store, scour the sale ads for the best deals, and mindlessly clip coupons. So I had to explore other money saving options. That's when I found SAMs club!

Back in my couponing days I would stock up on shredded cheese when it was $1/8oz bag, $.12/oz. I would buy enough to last us till it was it's season to go on sale again {yes, this is a real thing but I'll save that for another post}.  Now that I'm not couponing I still try to find the best deal but not nearly as good as the deals I used to score. I am excited to say have gotten pretty darn close to that stock up cheese price at SAMs and I don't have to spend HOURS searching for the deal! Everything is bulk buy there, which is great for big families like ours. We go through cheese like a bunch of crazy cheese obsessed people! But it's just SO darn delicious!

How to save money on cheese WITHOUT clipping coupons

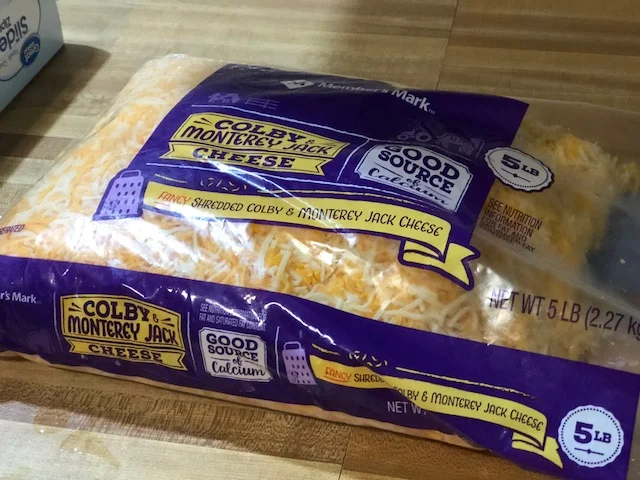
SAMs sells a giant 5 POUND bag of colby/jack shredded cheese for about $12/bag, $.15/oz...seriously affordable! The bag doesn't come with a fancy zipper but it does have a sticky tab you can use to close it. I've found that if you have kids this doesn't work so great. Someone will move things around in the fridge, the cheese will fall over and the next thing you know you're sweeping $10 worth of cheese into the trashcan. 

How to save money on cheese WITHOUT clipping coupons

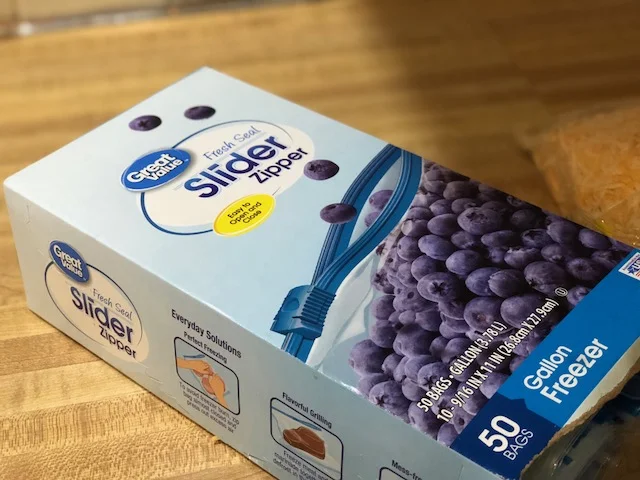
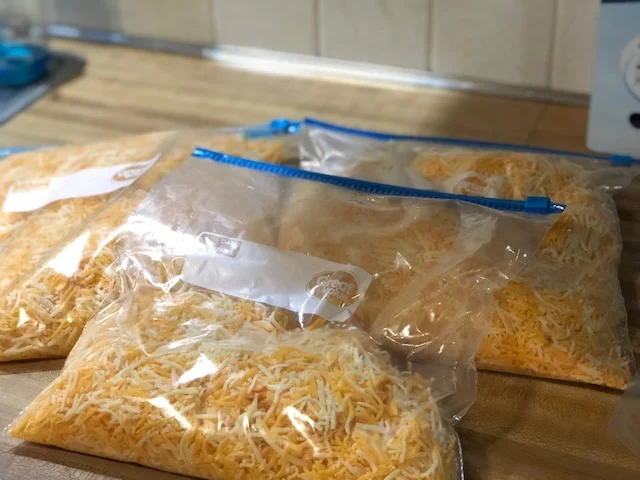
Here's what I do. I buy gallon sized zipper bags from Walmart and divided the cheese into 3 different bags. We typically will go through a bag before its expiration date so I don't usually bother with freezing it. But, if your family won't go through all 5lbs of cheese in that time, pop a couple bags in the freezer and pull them out when you need them. Shredded cheese is perfectly ok to freeze. However, you don't want to freeze sliced or block cheese, it will crumble once it's thawed.

How to save money on cheese WITHOUT clipping coupons

Then once you're done rebagging and storing you're done! Super easy and it's that price every single week! 

If you don't have a SAMs membership ask your family and friends if they do. I am sure you will find someone that would be willing to let you take a shopping trip with them. Then you'll see for yourself that getting one of your own is a GREAT investment for your family too.

DIY Light Up Fairy Jar

DIY glittery light up fairy jar. How to make your own fairy lantern from a mason jar and tissue paper. Easy craft tutorial.

How to make your own light up glittery fairy jar lantern

Making your own light up fairy jar is easier than you think. This has been a favorite craft kit in our Etsy shop and for good reason…it’s absolutely adorable! When we had our brick and mortar craft studio this was always a top choice for the kids to make too. There’s really not anything that can top a glowing fairy lantern that’s covered in glitter!

Affiliate Disclosure. Some of the links on this website are affiliate links, which means that I may earn a small commission if you click on the link or make a purchase using the link. If you make a purchase you will not be charged anything additional.

If you love this mason jar craft be sure to check out this adorable DIY UNICORN MASON JAR CRAFT TUTORIAL

Check out this similar MINI version of my DIY LIGHT UP FAIRY JAR…in CHRISTMAS ORNAMENT form. See the video below


If you love crafty video tutorials be sure to subscribe to my YouTube channel


Make your DIY LIGHT UP FAIRY JAR even easier and grab a —-> FAIRY JAR CRAFT KIT <——

I recommend using a LOW TEMP glue gun to attach all your floral accents. This will dry much quicker and be more stable than using the mod podge to glue. Pro tip: using a low temp glue gun is always best when the kiddos are involved. The temp is a lot lower than a high temp glue gun and if they come in contact with either the hot glue or the tip of the glue gun then their skin likely won’t blister. I let all three of my older girls use this type of glue gun all by themselves and although they’ve come in contact with either the glue or the gun they’ve never had a serious issue with them.

If you didn’t grab your own DIY FAIRY JAR CRAFT KIT you’ll need to first cut out your fairy. I used my CRICUT EXPLORE & CRICUT ACCESS for this step. Grab my fairy template from my FREE RESOURCE LIBRARY

Next apply your mod podge to the INSIDE of one side of your smooth mason jar. This is easier than applying the glue to the cardstock fairy then trying to place it inside of your jar.

Then place your fairy inside, be sure to position it so it's not crooked. Hold the fairy in place with the end of your brush for a few seconds until it’s set.

How to make a light up glittery fairy jar lantern. Use a smooth mason jar, glitter, and tea light to make your own light up fairy lantern. Add some floral accents and you have a perfect fairy jar night light for your fairy obsessed little girl.

If you didn’t grab a craft kit, cut your tissue paper down so it is slightly bigger than your jar. You are going to mod podge this to the OUTSIDE of your jar. I find it easier to glue one side at a time.

Apply a good layer of mod podge to one side of your jar, be sure to get good coverage. Place your tissue paper down and slowly pat it down to work out all the bubbles. If it rips, don't worry this won't be super noticeable as you will be covering the jar in glitter. You will do this all around the jar till it is totally wrapped in one layer of tissue paper

How to make a light up glittery fairy jar lantern. Use a smooth mason jar, glitter, and tea light to make your own light up fairy lantern. Add some floral accents and you have a perfect fairy jar night light for your fairy obsessed little girl.

After you’ve mod podged down your tissue paper trim away the excess where the lid will be screwed on. This makes it easier to get the lid off an on.

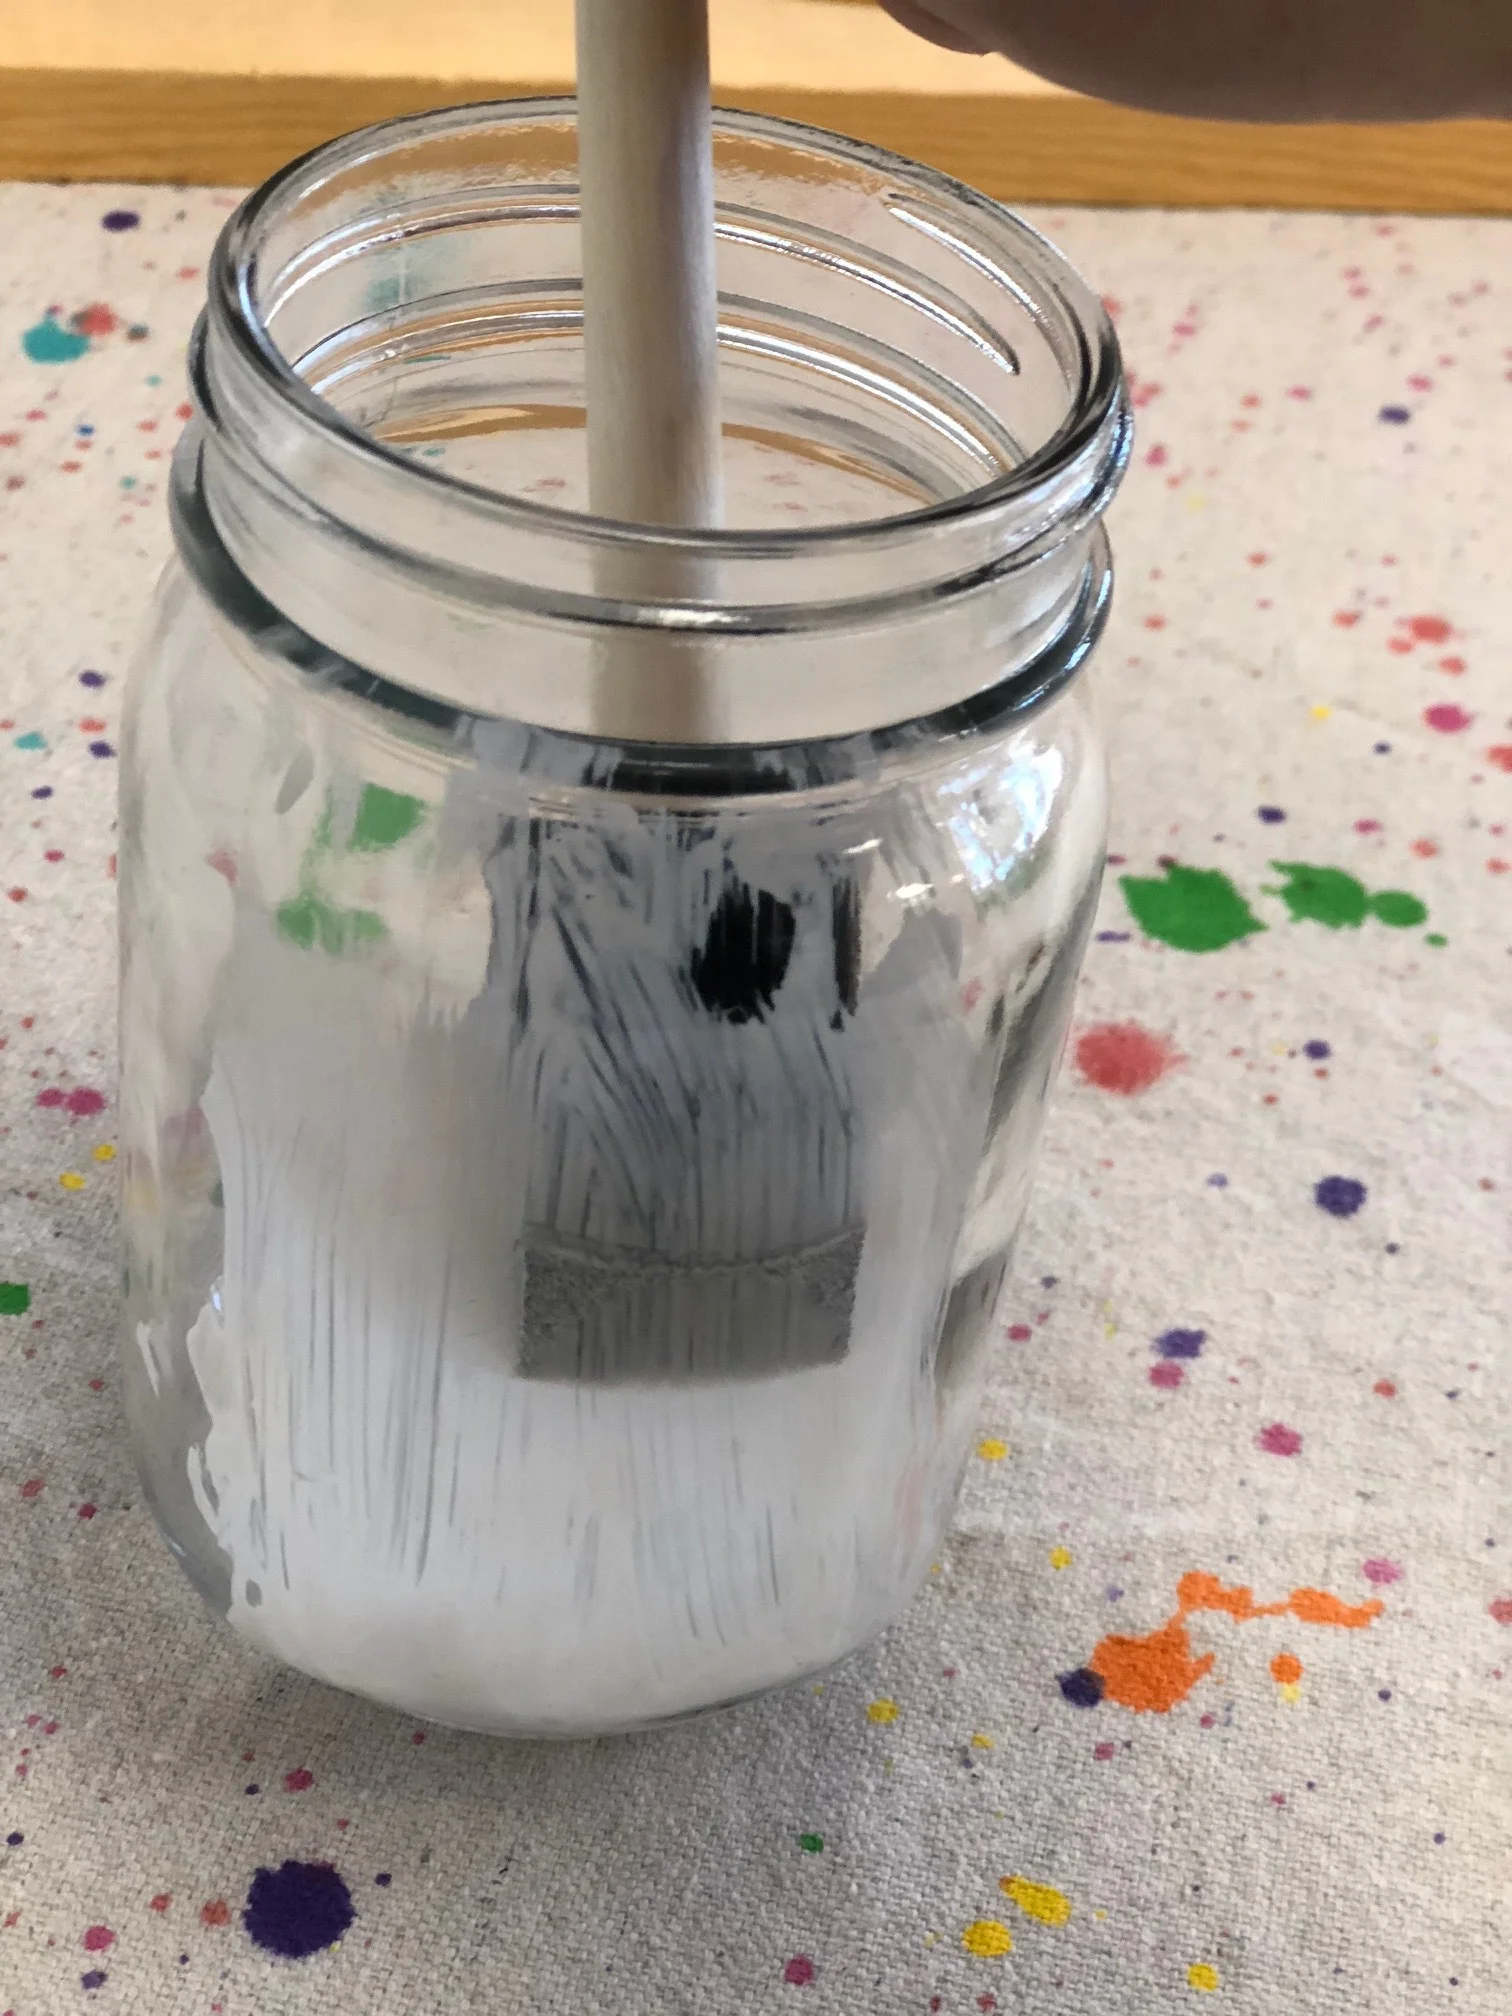
Apply a good layer of mod podge around the entire jar. Be sure it's a good layer so it doesn't dry by the time you get all the way around the jar.

How to make a light up glittery fairy jar lantern. Use a smooth mason jar, glitter, and tea light to make your own light up fairy lantern. Add some floral accents and you have a perfect fairy jar night light for your fairy obsessed little girl.

Sprinkle your white glitter all the way around your jar. I typically focus around the corners but there's no wrong way to do this step.

Once your done glittering the outside of your fairy jar turn it upside down on the table and let dry. You will want it completely dry before you start gluing all your accents on.

How to make a light up glittery fairy jar lantern. Use a smooth mason jar, glitter, and tea light to make your own light up fairy lantern. Add some floral accents and you have a perfect fairy jar night light for your fairy obsessed little girl.

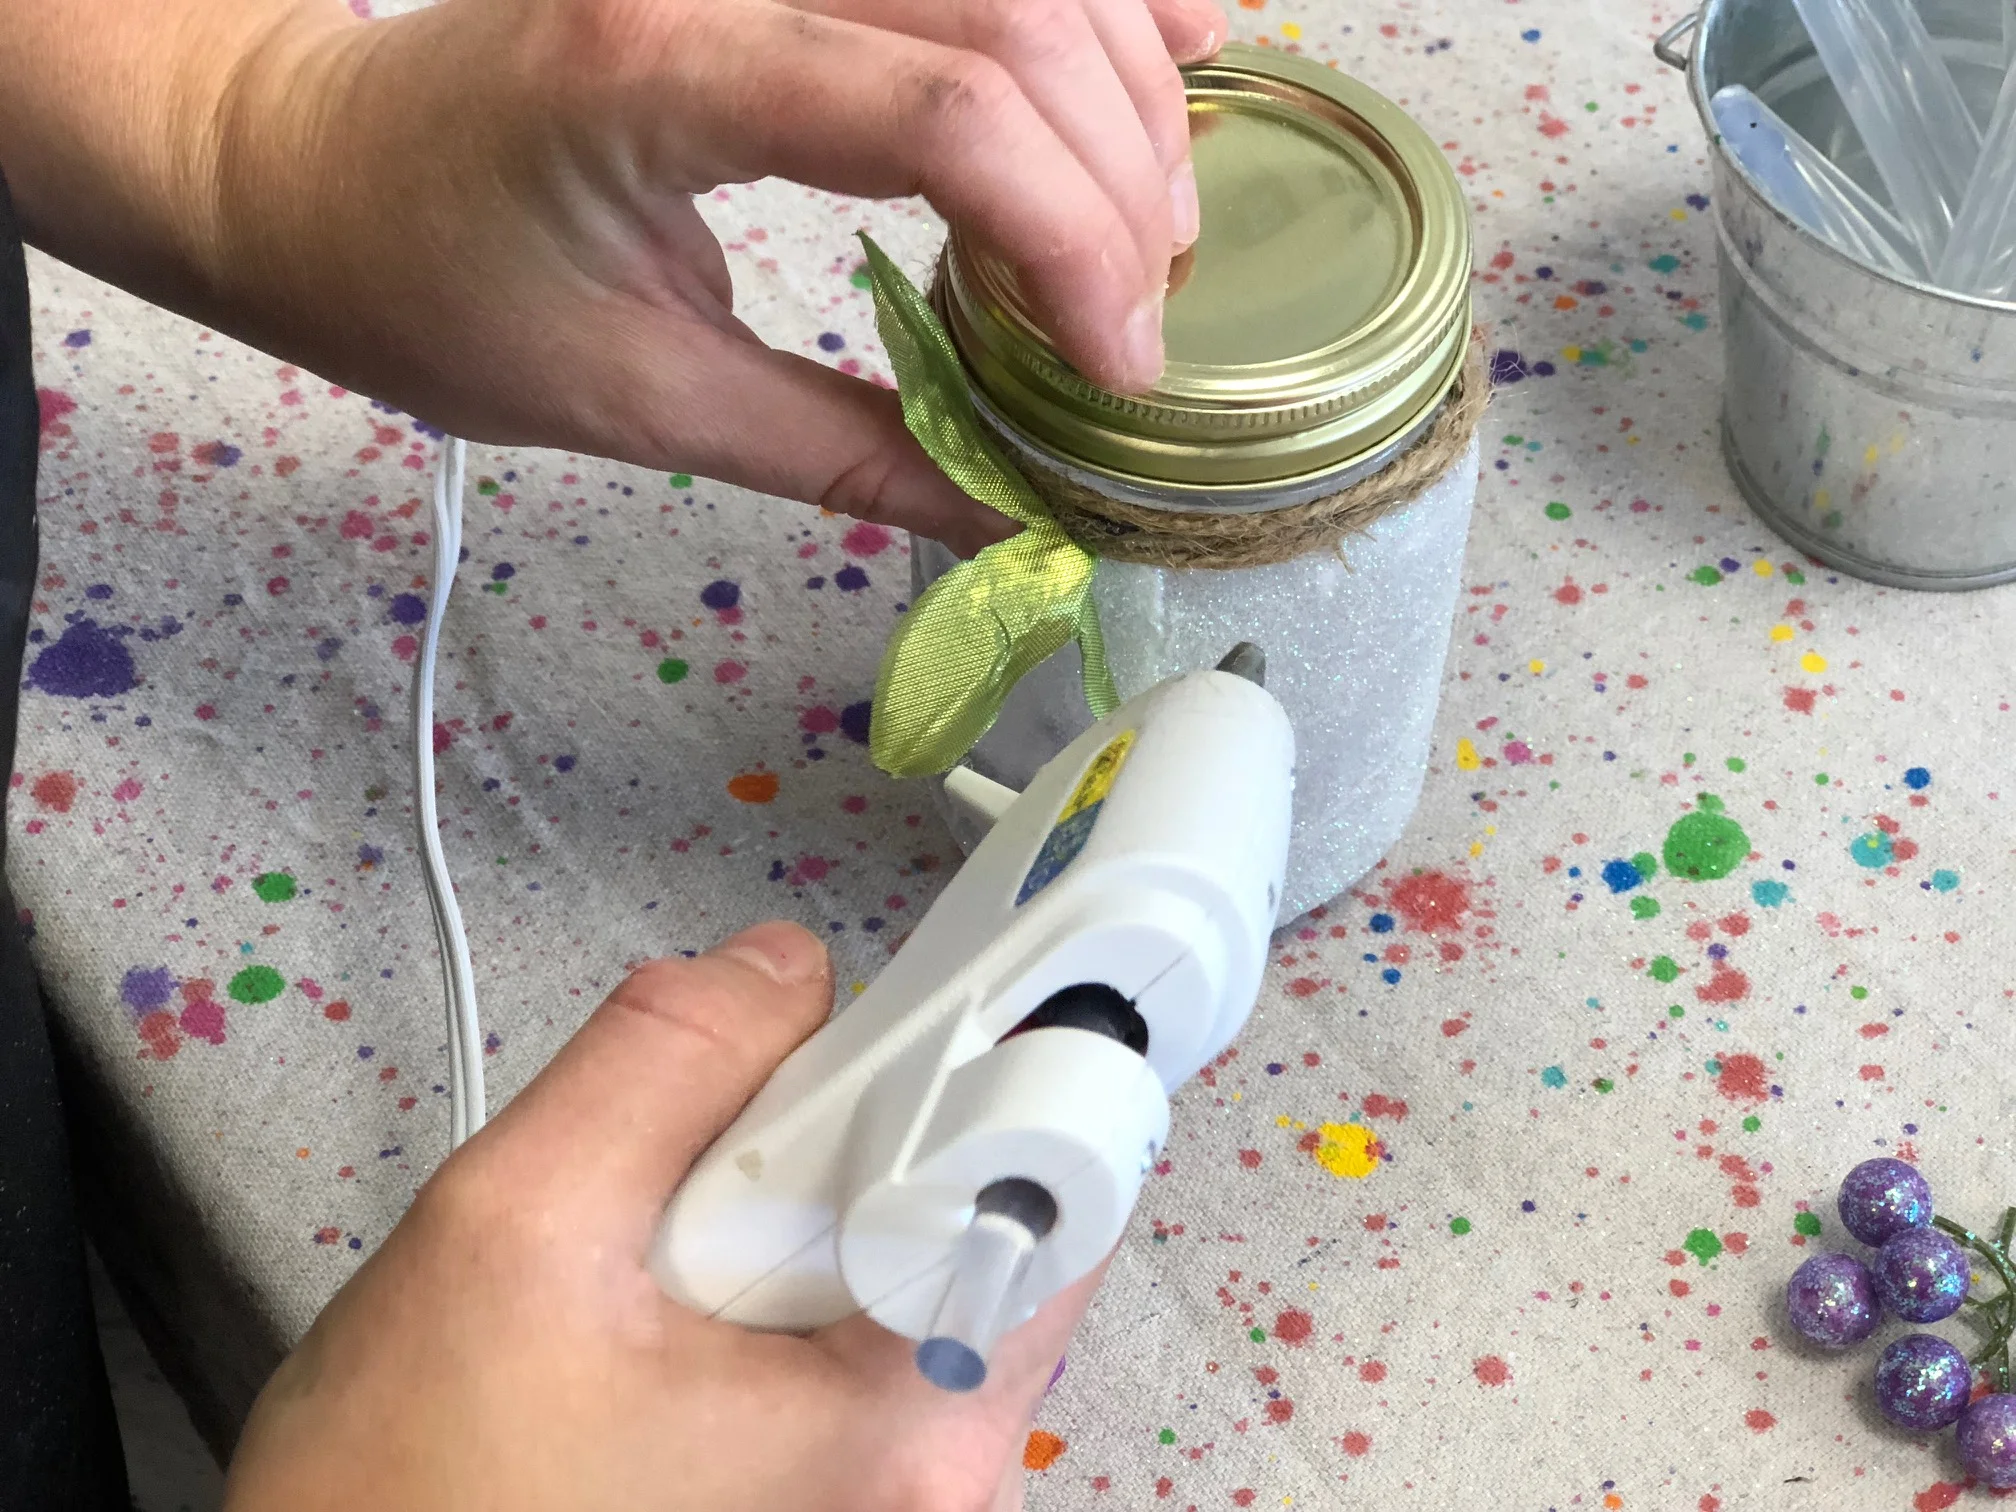
Accent time! A grown up will want to help with this part if a glue gun is involved. 

I recommend not hot gluing your twine OR your accents to the lid itself. Gluing it to the lid will make it difficult to get the lid on and off AND your accents are likely to fall off easily if glued directly to the lid. Instead, glue your twine just below the bottom lip at the top of your mason jar.

Using your hot glue gun glue one end of your twine down just below that bottom lip of the jar. Wrap the twine around a few times. Then glue the second end in place.

Now, glue your accents right onto the twine. It helps if you trim down the flower bases so that they can sit flat on the twine.

How to make a light up glittery fairy jar lantern. Use a smooth mason jar, glitter, and tea light to make your own light up fairy lantern. Add some floral accents and you have a perfect fairy jar night light for your fairy obsessed little girl.

Insert your tea light, turn off the lights and you're done! You've just created the cutest little fairy jar light!

Want instant access to my FREE RESOURCE LIBRARY? Fill out the boxes below and get the access code to use ALL of my freebies in my library.

DIY wall sconce using 1x4's

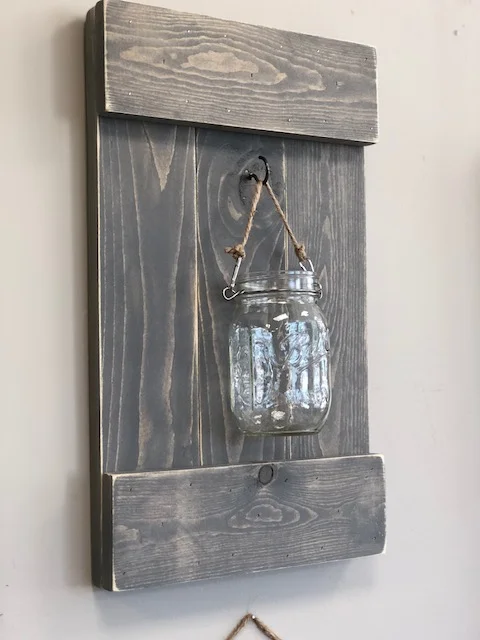
DIY wall sconce, how to make a pallet style hanging wall sconce from a 2x4 and mason jar
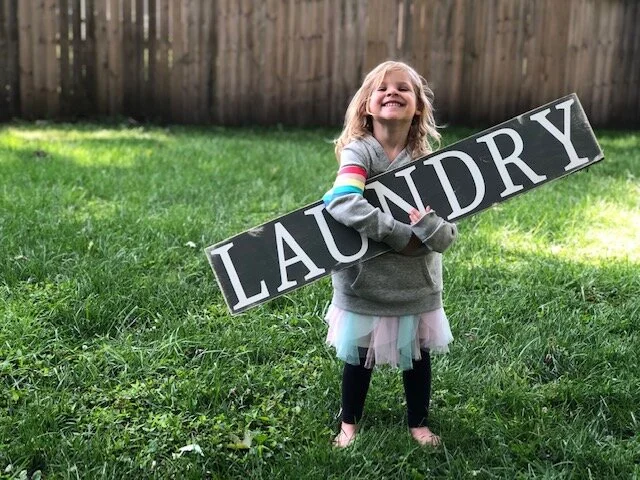
How to make a pallet style wall sconce

I've always had a LOVE for the farmhouse style...even before it was a thing...so I am so excited that others are appreciating the simple and rustic look!  I've never been one to got out and spend a ton of money to redecorate, I was raised to use what you have or get creative and make something from things you have on hand or need to buy little supplies for {which is what lit our flame for our business}. 

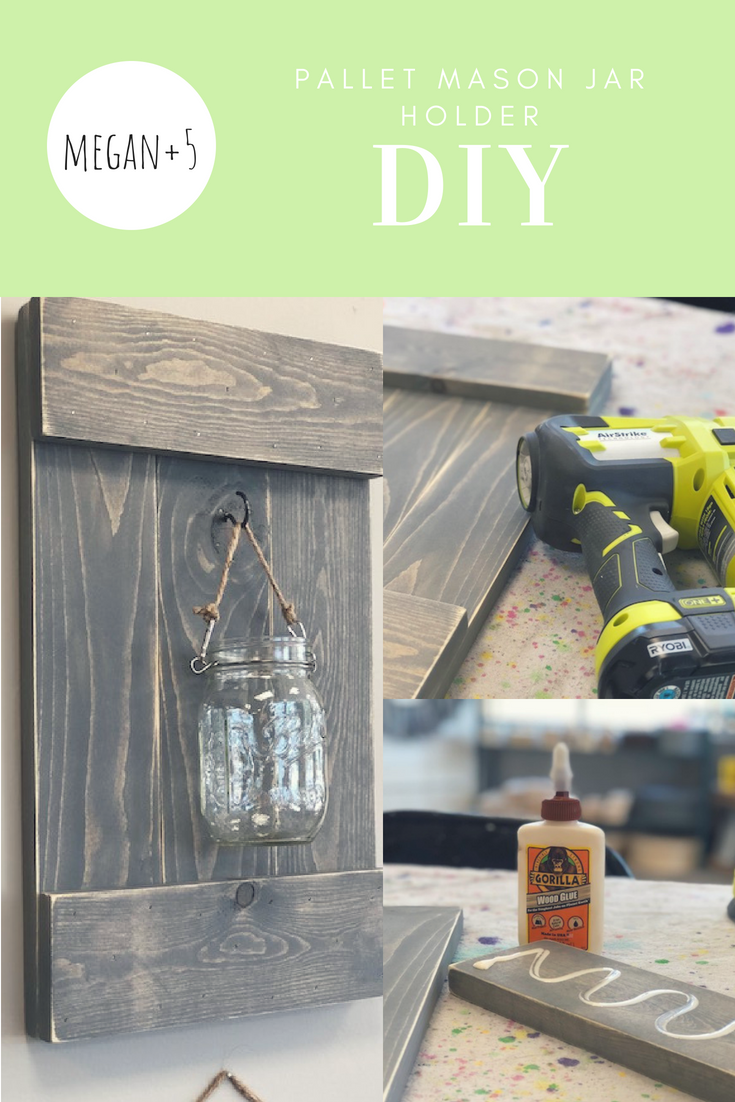
I've had my eye on these mason jar holders for awhile now...almost 2 years! And I finally made time to create my very own. I knew they would be super easy but seriously I am kicking myself for not making them sooner. One of the easiest and quickest DIY's I've done in awhile. In less than an hour you can have your own set of hanging pallet mason jar holders too!

Affiliate Disclosure. Some of the links on this website are affiliate links, which means that I may earn a small commission if you click on the link or make a purchase using the link. If you make a purchase you will not be charged anything additional. This is just a way I can help add to our family finances to raise our four daughters. Please know I would never recommend a product or service I do not totally stand behind.

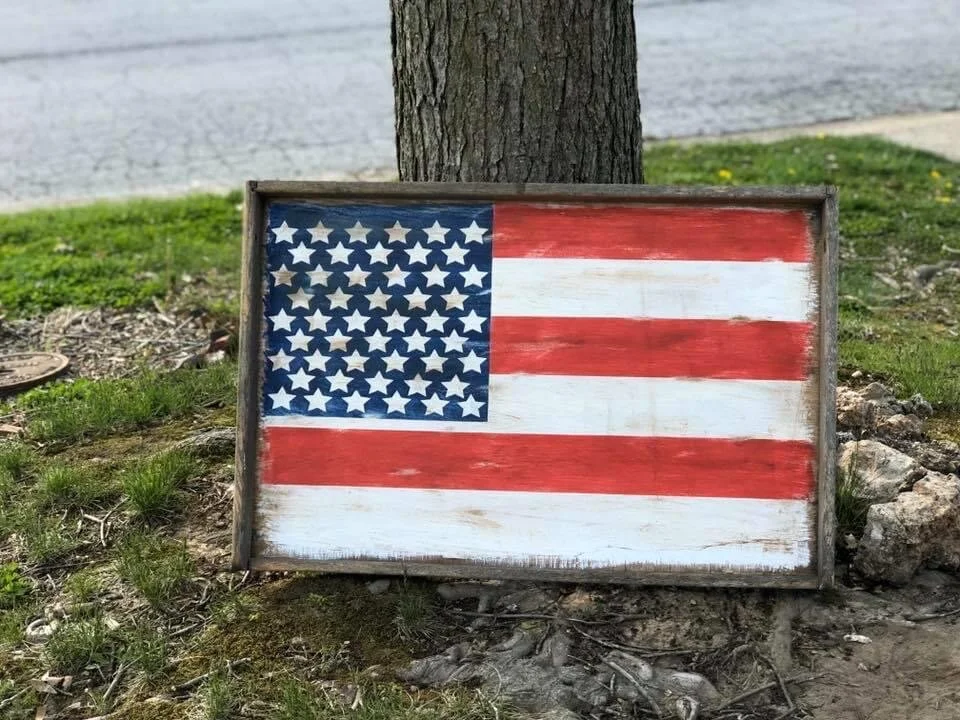
If you like this pallet style décor check out my hanging flag wall décor diy tutorial.

Materials you'll need to make 1 PALLET STYLE WALL SCONCE

DIY wall sconce, how to make a pallet style hanging wall sconce from a 2x4 and mason jar

STEP 1

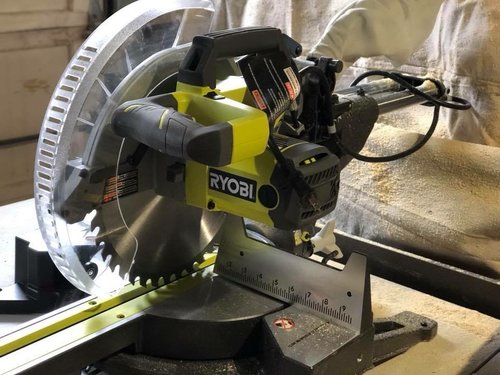
Cut your 1x4x8 into 5 pieces.

3- 1x4x18

2- 1x4x10.5

{If you're making a set you will need to cut double the pieces}

DIY wall sconce, how to make a pallet style hanging wall sconce from a 2x4 and mason jar

STEP 2

Give al the pieces a quick sanding to knock down all the unclean edges. This will make applying the stain MUCH easier.

DIY wall sconce, how to make a pallet style hanging wall sconce from a 2x4 and mason jar

STEP 3

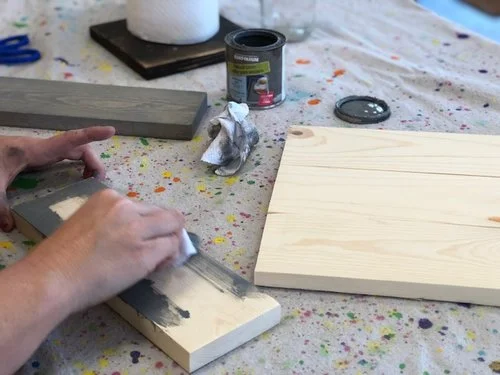
Stain your pieces. If you are painting them you can wait to do this till you have put your pieces together.

-I highly recommend Rustoleum stain especially this weathered gray I used on this piece.

DIY wall sconce, how to make a pallet style hanging wall sconce from a 2x4 and mason jar

STEP 4

I recommend sanding your pieces before you attach them together. You can use a sanding block or regular 120 grit sand paper but I prefer to use my Ryobi cordless sander. It's quick and does a GREAT job! Be sure to wipe your boards down with a lint free rag after sanding to get all the sawdust off.


DIY wall sconce, how to make a pallet style hanging wall sconce from a 2x4 and mason jar

STEP 5

Place your 18" pieces evenly in a row. Be sure you are happy with their placement.

DIY wall sconce, how to make a pallet style hanging wall sconce from a 2x4 and mason jar

STEP 6

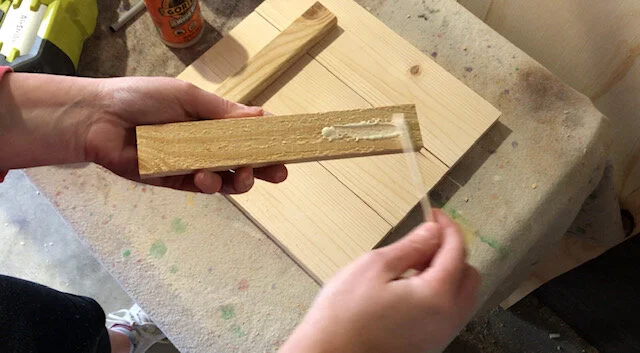
Once you have your boards laid out how you like them take the 10.5" boards and run a bead of Gorilla Wood Glue down one of the sides. You will place it glue side down onto your 18" boards width wide {so you will have a 10.5" board going along the top and another 10.5" board going along the bottom}.

DIY wall sconce, how to make a pallet style hanging wall sconce from a 2x4 and mason jar

STEP 7

Now you will use your Ryobi Brad Nailer to nail them in place. This will give them the stability to last for years to come

If you don't have a brad nailer you can use a hammer and nail. It won't be as quick but it will get the job done. 

DIY wall sconce, how to make a pallet style hanging wall sconce from a 2x4 and mason jar

STEP 8

 Add a cup hook to the top middle of your board. To make it easy you might want to drill a small pilot hole to get it started. Be sure it's under the 10.5" piece, hang your mason jar and you're done!

It may seem like a lot of steps but I assure you this is an EASY PEASY project to give your décor some sprucing up!


What are the best power tools for crafters?

Read about the power tools that are a crafter’s must have.

6 Easy ways to keep the kids busy in a hotel

6 Easy ways to keep the kids busy in a hotel

Over the years we have done a lot of traveling with our girls. Before our youngest was born we traveled so much that our older three had visited 22 different states in just a few short years! 

Prior to our most recent trip, one of our favorite states to visit was hands down Wisconsin! I know, it sounds crazy to be completely in awe of  Wisconsin...but it's absolutely GORGEOUS! Since our last trip I have to say Florida is in the running for the fave state {outside of Missouri of course ;)!}

We recently took a trip, a 22 hour road trip {that's a whole other post lol} to Florida. We loaded up our four girls plus our niece and hit the road for a little vacay...ok a long vacay, we took two whole weeks off! And boy did we LOVE every second of it! We didn't do the whole Disney thing,  instead we explored everything else Mid-Florida had to offer. We got to see and swim in some AMAZING beaches {if you're ever in Florida you HAVE to stop by Flagler Beach! You won't be disappointed!!}, explored the wildlife conservation areas, roamed with the dinosaurs {ok, not really but we did stop by a really cool dinosaur exhibit that the girls loved}, had a blast at SeaWorld Aquatic, and visited some pretty fun museums. 

Here are some tips and tricks to keeping your sanity in the hotel with the little ones...

SNACKS

Fed kids are happy kids. I know, it kinda goes against parent rules to let your kiddos snack often but when on vacation, those rules don't apply. Have fun, let loose, and let them eat the snacks:)! Trust me, you will thank yourself for this one.

6 easy way to keep the kids busy in a hotel

FORTS

Fort building is a MUST when you're in a hotel. Typically we bring our own blankets and pillows when staying in a hotel so there is an abundance of fort making things around the hotel room. Most hotels have little side tables, a chair or two, a night stand, and of course a bed. If you have kiddos you probably have two beds and the space between is a PERFECT space for fort building. Just lay a long blanket or sheet from one bed extending to the next and viola you have built the perfect cave for your kiddos to enjoy! Bring along flashlights and you will be mom of the year in their eyes. This is my absolute most favorite fun activity our girls do to keep themselves busy in a hotel...actually pretty much anywhere! They are fort building machines!

6 easy ways to keep the kids busy in a hotel

GAMES

Our girls love playing cards. Their favorites are rummy, solitaire, go fish, and trashcan. All can be played with a single regular deck of cards {you can pick up a two pack at the dollar store for a buck!}. If your kiddos aren't into cards or aren't old enough for cards there are lots of quieter board games out there. I suggest bringing games that have very little pieces. Here's a list of board games with few to little pieces.

  • Guess Who

  • Sorry

  • Yahtzee

  • Checkers

A list of non-board games you can play

  • Pictionary {we use small dry erase board for this}

  • charades

  • wall puppets with flashlights

  • hide and seek in the dark {this is one of our kiddos favorite games}

6 easy ways to keep the kids busy in a hotel

SWIMMING

Most hotels have swimming pools these day. While we were in Florida our girls practically lived in their swimsuits the whole two weeks! If we weren't at the beach or exploring the town we were in the pool. We bought some inexpensive pool noodles and floaties for the girls and it made swimming even better! Although wearing a swimsuit, and I'll be honest summer in general, isn't really my favorite thing, we had a lot of fun hanging out in the pool. Our oldest daughter mastered her swimming skills and the younger three got even more comfortable with water. By the end of our vacation they were little tadpoles!

6 easy ways to keep the kids busy in a hotel

OUTSIDE PLAY

If you are lucky enough to strike this hotel GOLD take advantage of it! Our hotel in Florida had an AMAZING grassy oasis that was perfect for the girls to run around and be kids. On nights we'd get back to the room too early for bed my husband and I would sit on the patio enjoying an adult beverage while the girls played and chased tiny lizards {surprisingly they caught several of those quick little guys}.

I will say this is very rare. Out of all the hotels we've stayed in this was one of the few that has had this outdoor area. 

6 easy ways to keep the kids busy in a hotel

ELECTRONICS

I know you are saying to yourself 'I don't want my kiddos mindlessly in front of the electronics' but like with everything, things are good in moderation. If it's been a crazy day and you really need some quiet time turn on the tv and let the kids enjoy a movie while you catch your breath. You'll be glad you did.

6 easy ways to keep the kids busy in a hotel