DIY repurpose an old drawer into an American Flag

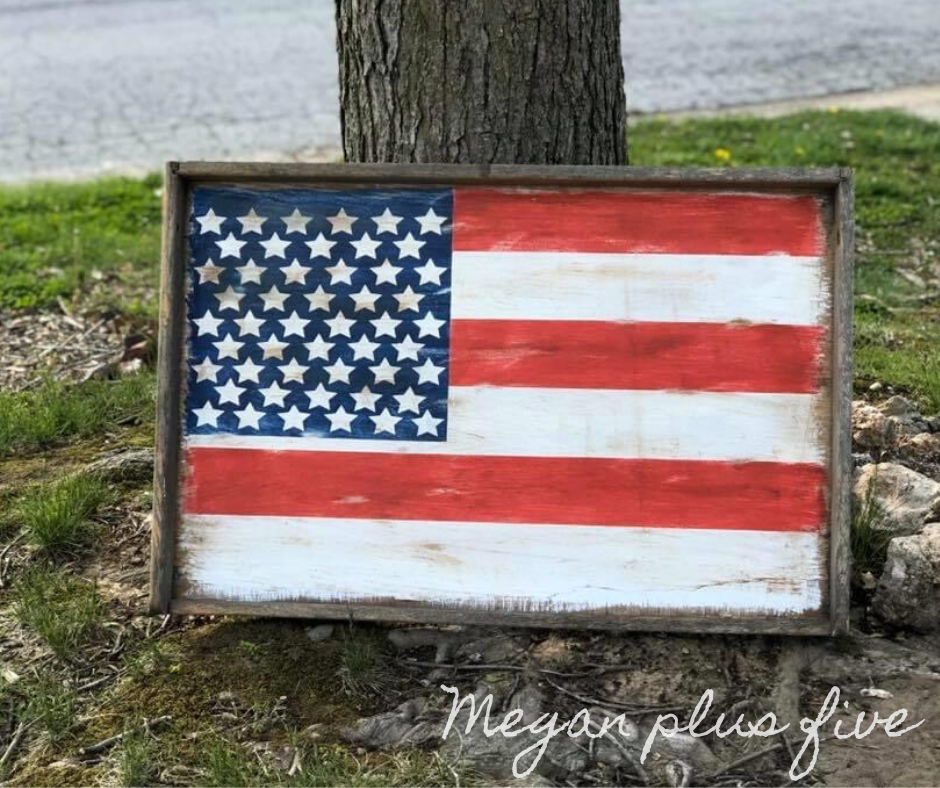
Turn an old drawer into a rustic Ameican flag. It doesn't take much to repurose a drawer that's been collecting dust. If you have some paint and a little creativity you can make your own farmhouse style old looking flag for your home decor.

HOW TO REPURPOSE AN OLD DRAWER INTO AN AMERICAN FLAG

Before you pass up on the dusty old drawer that’s sitting on the side of the road you might want to think of all the amazing things you could turn that in to. Years ago my father in law had a huge old drawer sitting under his carport just collecting dirt and debris. I loved it! Even covered in gross beat-up contact paper I could still see the it’s potential of being something beautiful He told me I could take it home and then it sat in the basement collecting even more dust for years. Finally I pulled it out from the depths of the basement over the weekend and told myself I WOULD transform this old drawer this week!

 Affiliate Disclosure. Some of the links on this website are affiliate links, which means that I may earn a small commission if you click on the link or make a purchase using the link. If you make a purchase you will not be charged anything additional.

I really wanted to paint something American on it and after going back and forth in my own head I decided a simple flag would be perfect for this old drawer. I had thought about stenciling a big US map on it or even some lettering but with everything I already have on my plate I decided I should just keep it simple. Besides I don’t have a ton of vinyl and transfer tape to spare since I’m running low and shipments are taking a little longer than normal at the moment. With a little painters tape and a bit of vinyl I was on my way to making a simple rustic American flag.

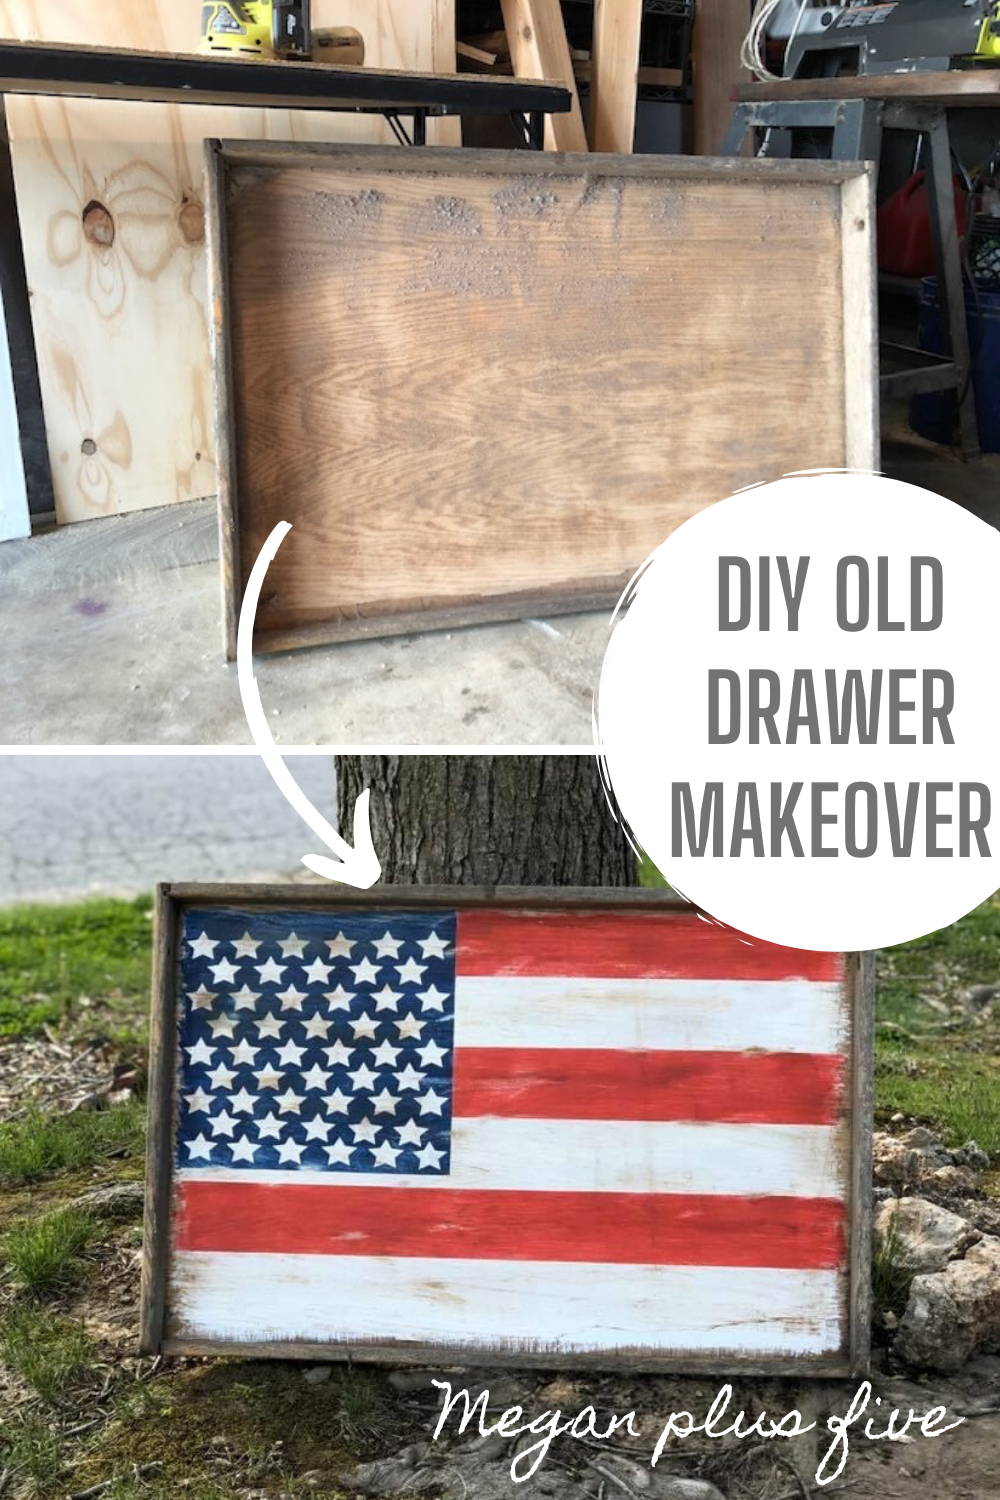
Here’s what the old drawer looked like before I gave it a full facelift.

Turn an old drawer into a rustic Ameican flag. It doesn't take much to repurose a drawer that's been collecting dust. If you have some paint and a little creativity you can make your own farmhouse style old looking flag for your home decor.

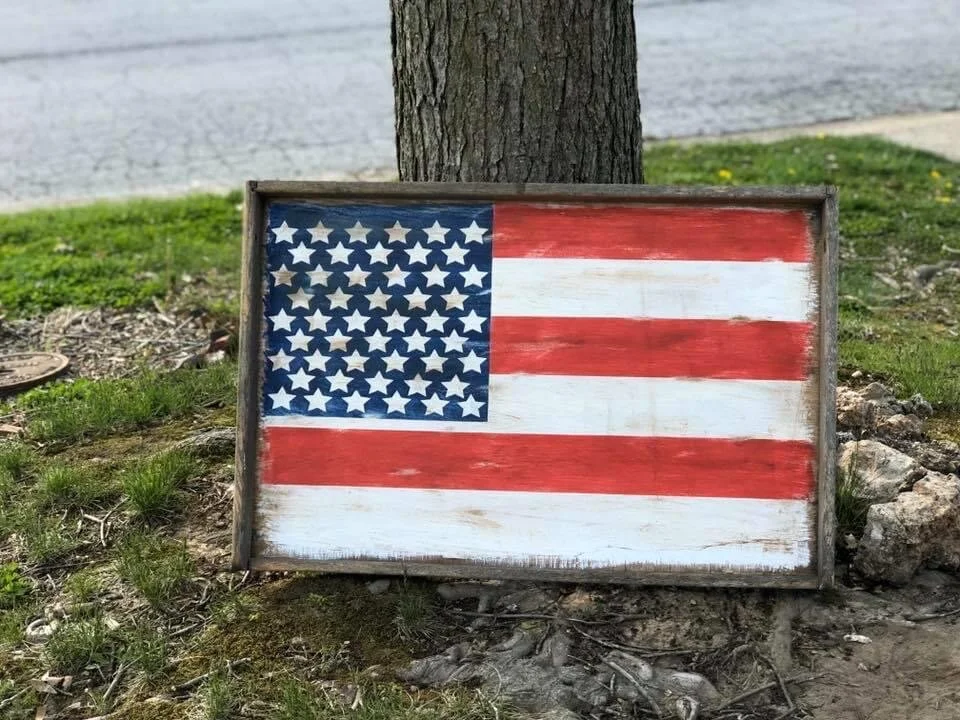
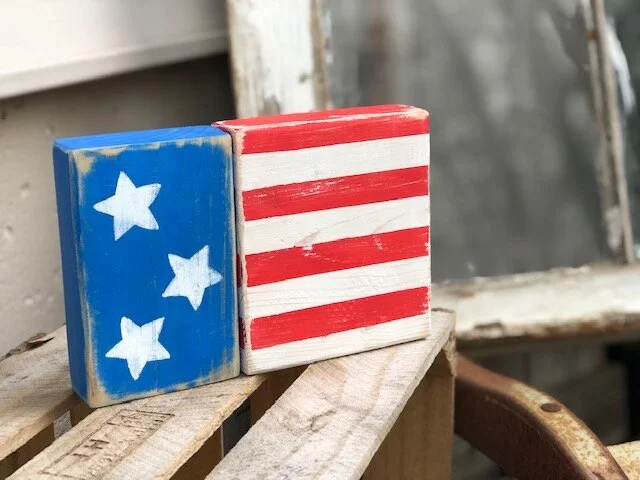
And this is what the old drawer looks like now. I definitely made a few mistakes but overall I’m loving how this rustic flag turned out.

How to repurpose an old dusty drawer into an American flag for your rustic style home decor. DIY farmhouse style 4th of July decor. Paint your own USA flag using your Cricut. Easy distressed wood flag, repuposed decoratoins.

If you are planning on doing a lot of stenciling on wood click here to read this post on how I save money on stenciling film.

How to make your own rustic flag

If you have an old drawer hanging around and collecting dust you can transform it into a rustic looking flag like I did with this one.

Here’s what you’ll need

Helpful tools

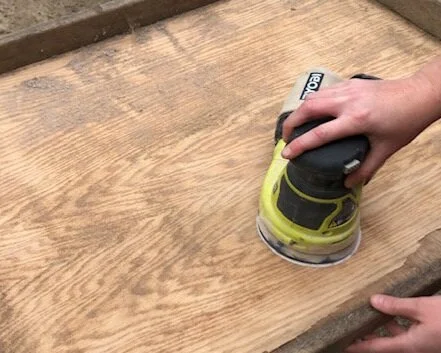
ONE-The first thing I had to do was sand it down. This drawer originally came with some gross contact paper attached to it. I had done the majority of taking all of that off when I first got the drawer. I removed the contact paper as much as I could then used the sander to help take off the rest. I started with 60 grit sandpaper on my handheld sander then worked my way up to 120 grit. the contact paper left behind some sticky residue but with a little elbow grease I was able to get all of it off. Then I used a lint free cloth and a vacuum to get off all the dust.
Turn an old drawer into a rustic Ameican flag. It doesn't take much to repurose a drawer that's been collecting dust. If you have some paint and a little creativity you can make your own farmhouse style old looking flag for your home decor.

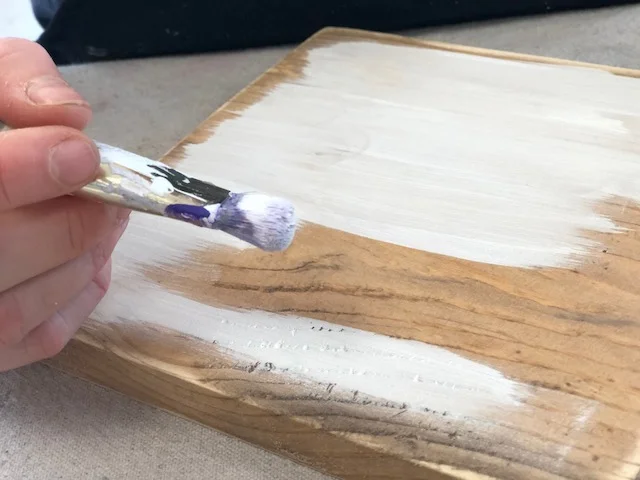
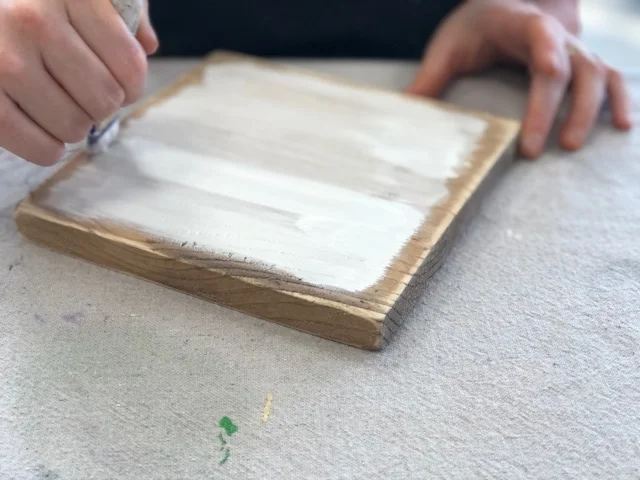
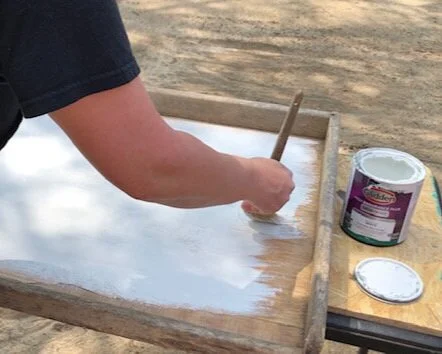
TWO- Using a dry brush I painted the inside of the drawer white. I used flat white indoor paint for this. When I brushed on the white base I made sure that all four sides didn’t get painted right up to the edge and I made the edges really uneven. I wanted it to look rough.
Turn an old drawer into a rustic Ameican flag. It doesn't take much to repurose a drawer that's been collecting dust. If you have some paint and a little creativity you can make your own farmhouse style old looking flag for your home decor.

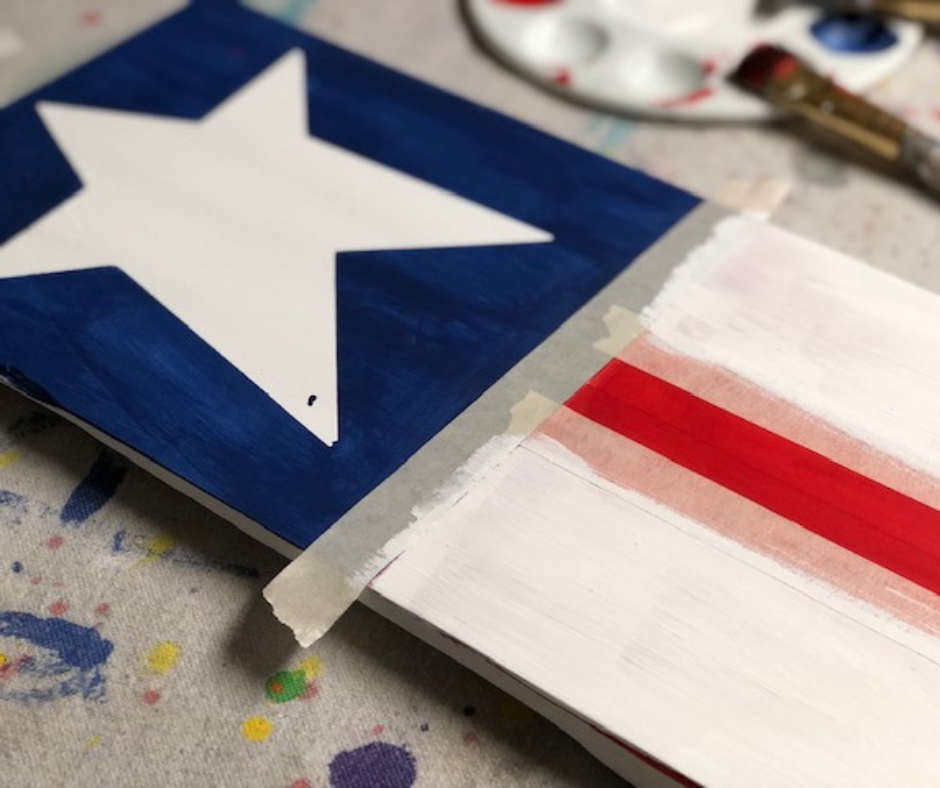
THREE- I measured out how big I wanted the blue area on my flag to be. I am not 100% happy with the size of this but it’s there to stay now lol! I taped that square off then started taping off my lines for my red and white stripes. I did this the same way I did this scrap wood 2x4 flag. I didn’t measure out my lines, mainly because I’m not a super precise person. I used the top edge of the drawer as my guide then taped off my stripes using wide painters tape. I did not make a true American flag though I only have 7 stripes total on mine.
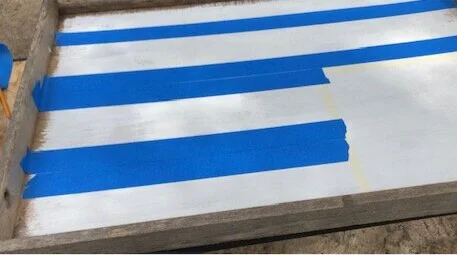
Turn an old drawer into a rustic Ameican flag. It doesn't take much to repurose a drawer that's been collecting dust. If you have some paint and a little creativity you can make your own farmhouse style old looking flag for your home decor.

FOUR- Once I had my stripes taped off I painted the exposed stripes red. Then let them dry and painted then with a second coat of red paint. I peeled my tape up while my paint was still wet.

Turn an old drawer into a rustic Ameican flag. It doesn't take much to repurose a drawer that's been collecting dust. If you have some paint and a little creativity you can make your own farmhouse style old looking flag for your home decor.

FIVE- I stenciled the 50 stars on this rustic flag but did it a little differently than a typical stencil. I did what’s called a reverse stencil on this just like I did with this 4th of July leaning porch sign . I used my Cricut and Cricut design space to cut out 50 stars. You can get my free Cricut cut file here. Since my stars were wider than 11.5” I had to cut them out on two separate pieces of stencil material. But it wasn’t bad at all to piece them together. I did have a big OOPS moment when I weeded away a star. Thank goodness for an honest husband who told me it looked good other than missing a star! I was able to paint in the missing star before I had applied the wax, praise the Lord!
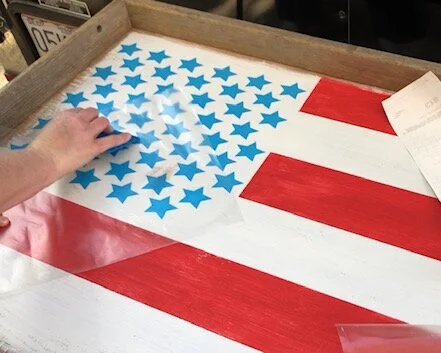
Turn an old drawer into a rustic Ameican flag. It doesn't take much to repurose a drawer that's been collecting dust. If you have some paint and a little creativity you can make your own farmhouse style old looking flag for your home decor.

SIX- Using transfer tape I applied the star stencils to my flag then taped off the stripes. To cut down on paint bleed I sealed them with a thin layer of white paint. After that was dry I painted that part of my flag blue, let dry, then painted another layer of blue. While the paint was still wet I peel up the star stencils and the tape. I did have a little paint bleed but nothing too serious. This is when I added the last star that I missed :/.
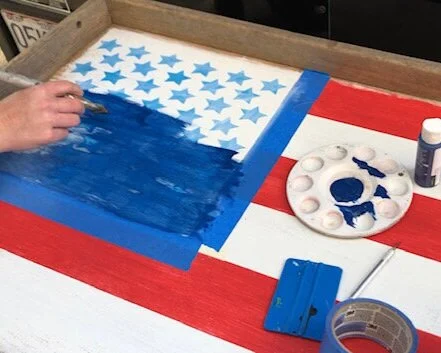
Turn an old drawer into a rustic Ameican flag. It doesn't take much to repurose a drawer that's been collecting dust. If you have some paint and a little creativity you can make your own farmhouse style old looking flag for your home decor.

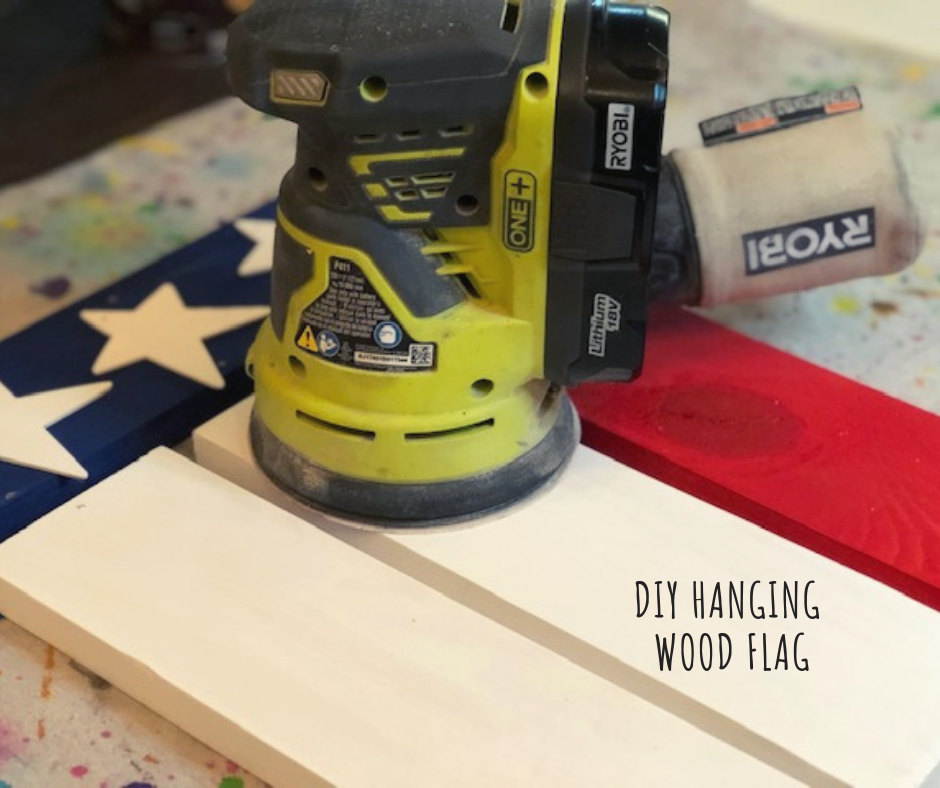
SEVEN- I used my Ryobi sander to distress my rustic drawer flag. I used 120 grit sandpaper and lightly went over the entire flag then focused on random areas here and there. After I was happy with the distressing I wiped the sawdust off with a lint free cloth.
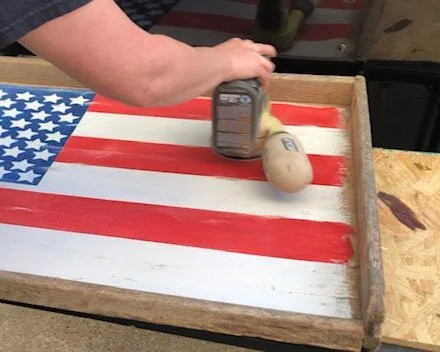
Turn an old drawer into a rustic Ameican flag. It doesn't take much to repurose a drawer that's been collecting dust. If you have some paint and a little creativity you can make your own farmhouse style old looking flag for your home decor.

EIGHT- If you’ve read any of my other tutorials you probably know LOVE my antiquing wax. I use it for so many of my craft projects and of course used it for this one too. I used a chip brush and lightly applied the dark wax to my flag. If you’ve never used this stuff before please be aware that a little goes a LONG way. I usually dab the end of my brush into the lid then dab off on a cloth. Since I didn’t have a cloth handy for this DIY I used my apron.

Turn an old drawer into a rustic Ameican flag. It doesn't take much to repurose a drawer that's been collecting dust. If you have some paint and a little creativity you can make your own farmhouse style old looking flag for your home decor.

I can’t wait to hang this rustic flag in our living room! We plan to keep it up year round and I know every time we look it we will think of fond memories of my father in la

I hope this post inspires you to give an old drawer a makeover! If you have any questions on this DIY or any of my other tutorials please feel free to ask away:)!

Happy Crafting!
Turn an old drawer into a rustic Ameican flag. It doesn't take much to repurose a drawer that's been collecting dust. If you have some paint and a little creativity you can make your own farmhouse style old looking flag for your home decor.

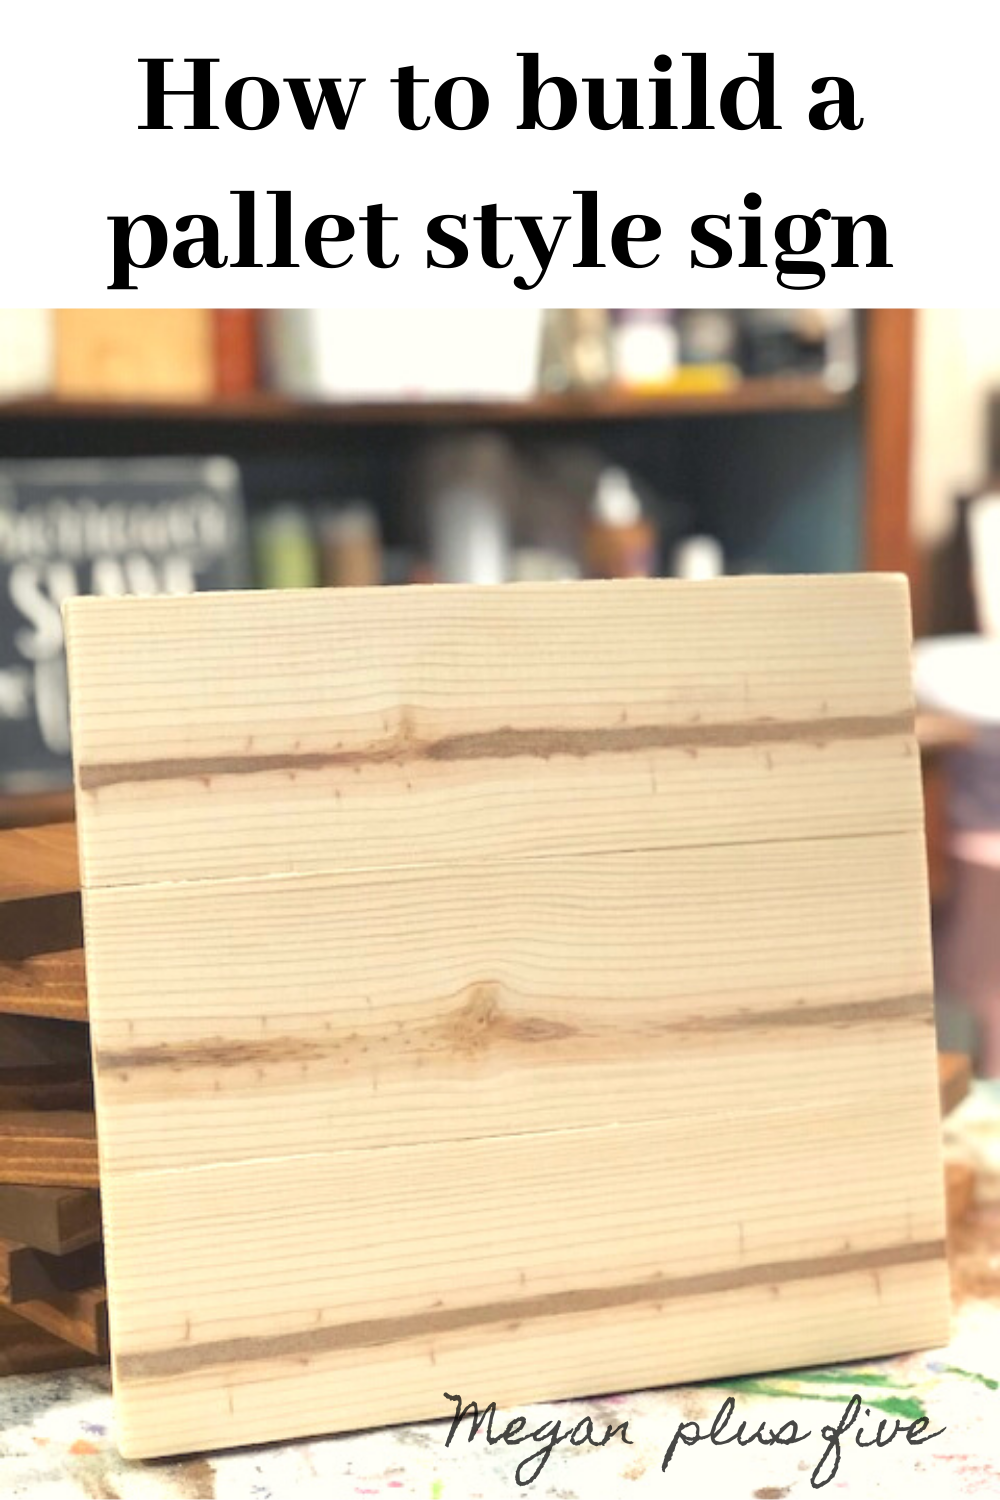
DIY how to build a pallet style wood sign

How to build a pallet style sign. Learn how to make your own wood sign bases and stop wasting money buying prebuilt ones at the craft store. DIY sign base.

We’ve all seen them, those gorgeous pallet style signs. The ones that are the spotlight of our rustic farmhouse dreams! Did you know there IS an easy way to make them? One that won’t break your back AND one that doesn’t break the bank. If you’ve been in any craft store in the last year you know what I’m talking about. Yes, prebuilt pallet signs are super convenient but they are expensive for what they are. Most are very thin and will break easily.

Affiliate Disclosure. Some of the links on this website are affiliate links, which means that I may earn a small commission if you click on the link or make a purchase using the link. If you make a purchase you will not be charged anything additional.

Don’t get me wrong I LOVE drooling up and down the aisles of Michael’s of all the different crafts I can create but I also know that I can make a pallet style sign for a fraction of the price that it would cost to buy one from there. Granted I would have to do the work BUT it is actually SUPER easy to make one of those pallet style signs at home. If you have the tools you can make your own pallet wood blanks too.

After you read this tutorial check out these 6 MUST HAVES FOR STENCILNG WOOD SIGNS

Here’s one that I made using old fence wood. While I LOVE the look of this one this rustic looking wood can be really hard to come by so I don’t get to make these beautiful ooking signs often.

Here’s another version of a pallet style sign. For this one I used new wood and stained it in weathered gray. Then I distressed the edges and corners to give it a little character.

 
How to build a pallet style sign from new wood. Make your own pallet sign. Build a rustic style pallet sign.
 

HOW TO BUILD YOUR OWN PALLET STYLE WOODEN SIGNS

HERE’S WHAT YOU’LL NEED:

CLICK HERE TO LEARN HOW TO ATTACH A SAWTOOTH HANGER TO YOUR WOODEN SIGNS & DECOR

ONE- Figure out what type of wood you are going to use. I recommend you don’t use anything thicker than 1”. Anything thicker will be very heavy. For this tutorial I am using a 1x4.

How to build a pallet style sign from new wood. Make your own pallet sign. Build a rustic style pallet sign.

TWO- Decide how big you would like your sign to be, width and length. Measure out your pieces and mark them.

THREE- Use your miter saw to cut the pieces to the width you would like. Don’t worry if they are a little off you can fix that once you have your pallet sign built.

FOUR- After you have your pieces cut lay them out fronts facing down. Wood will often have one side that’s “prettier” than the other so choose which side you want to put your design on and place that facing down on your workspace.

How to build a pallet style sign from new wood. Make your own pallet sign. Build a rustic style pallet sign.

FIVE- Cut down two pieces of skinnier wood that are shorter than the length of your pallet sign, these will be your support pieces to place on the backside of your sign so it stays together. If I’m making a smaller sign I will usually use yard stakes for this but you can use a 1x2 if making a large sign. I just eyeball how long I want it to be and cut two to that length.

How to build a pallet style sign from new wood. Make your own pallet sign. Build a rustic style pallet sign.

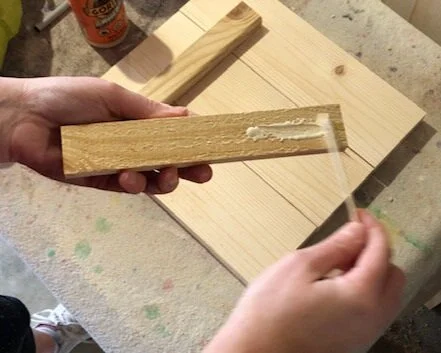
SIX- Put a little bit of wood glue on your support pieces then place them on the back side of your pallet, they will go in the opposite direction that your pallet boards are running. Use your nail gun to nail them in place. You can also use a hammer and nails it will just take a little bit longer.

How to build a pallet style sign from new wood. Make your own pallet sign. Build a rustic style pallet sign.

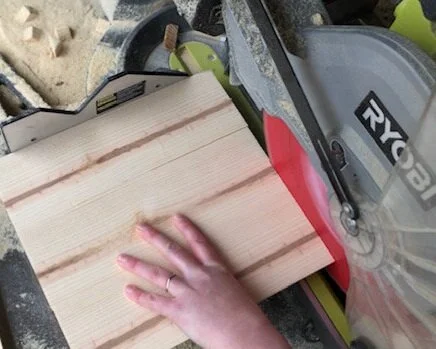
SEVEN- If your pieces are uneven and you want them to be perfectly square you can do that with your miter saw. My ends are ALWAYS a little uneven. So I take them to my miter saw, line the shortest one up with my laser on my saw and cut off the extra on both ends.

How to build a pallet style sign from new wood. Make your own pallet sign. Build a rustic style pallet sign.

EIGHT- Sand your new sign. I recommend an orbit sander and 120 grit sandpaper.

How to build a pallet style sign from new wood. Make your own pallet sign. Build a rustic style pallet sign.

I hope you find this tutorial helpful. As with all of my DIY crafts if you have any questions please feel free to ask away.

How to build a pallet style sign from new wood. Make your own pallet sign. Build a rustic style pallet sign.

If you want to hang your new beautiful handmade sign in your home read this easy and quick tutorial on how to attach a sawtooth hanger to wood signs.

Happy Crafting!

DIY mini Easter wooden tags

DIY mini wood tags for Easter. How to use your Cricut to make wood signs for Easter. Make your own farmhouse tray mini signs for spring.

MAKE YOUR OWN RUSTIC WOOD TAGS FOR EASTER

DIY mini wood tags for Easter. How to use your Cricut to make wood signs for Easter. Make your own farmhouse tray mini signs for spring.

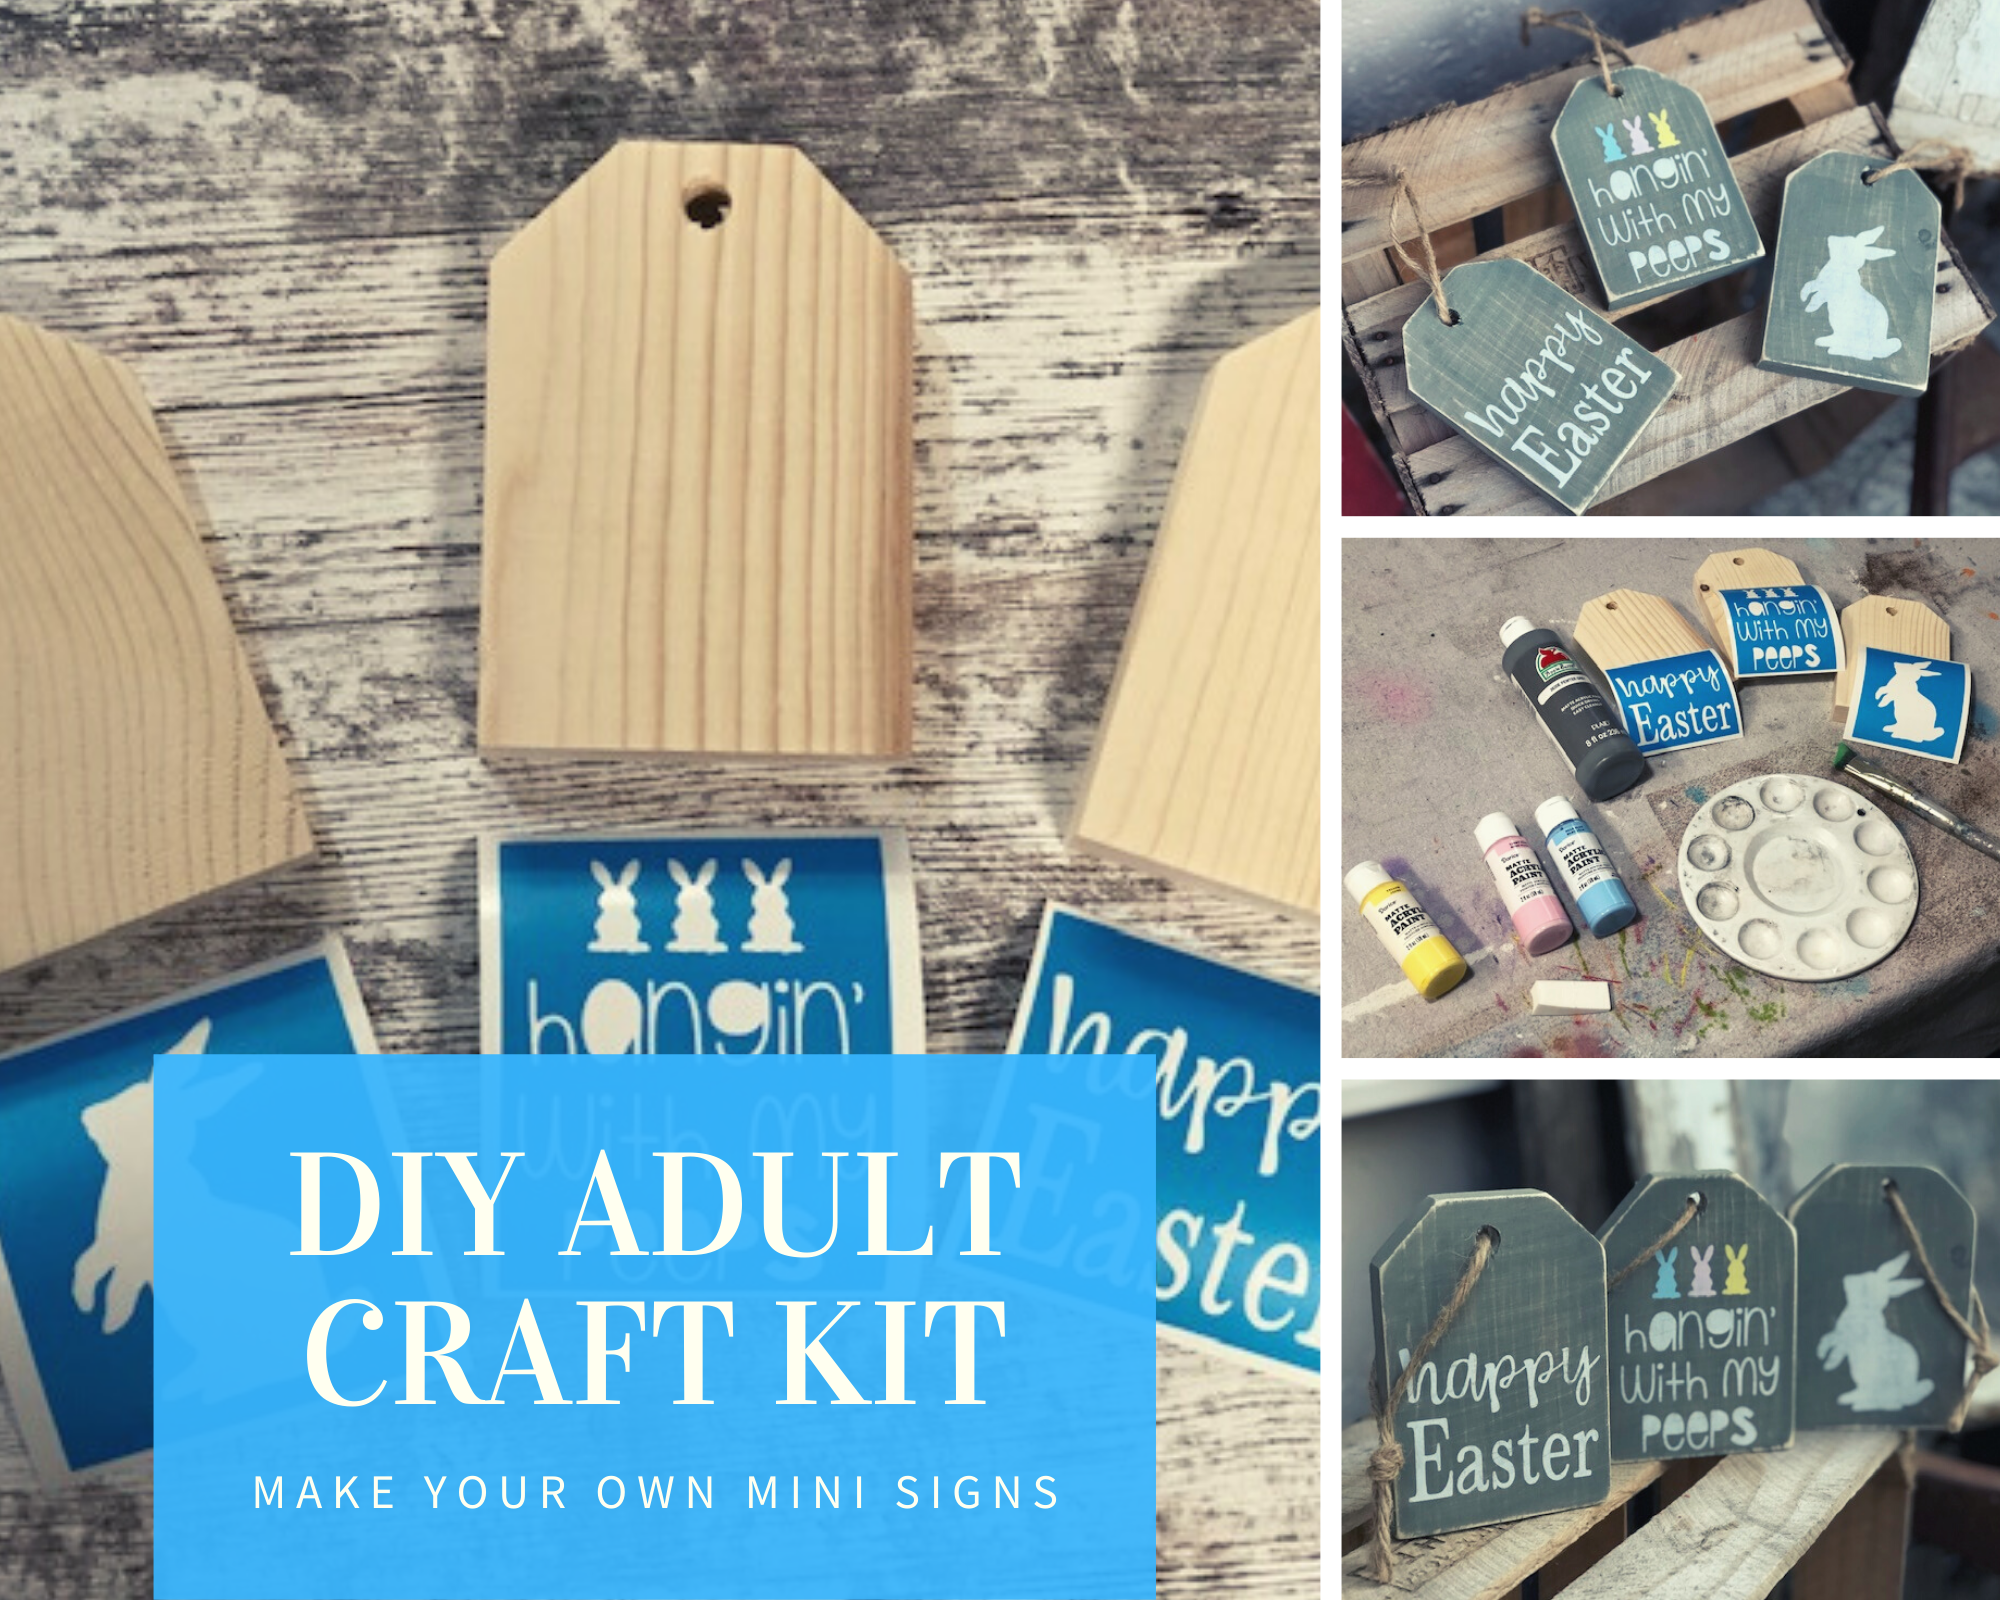
I can’t believe how popular these little wood tags for Easter are! I keep selling out of this spring DIY craft kit almost daily. Since the entire country is basically on lockdown this kit is giving people a much needed creative outlet. I am SO happy to be able to provide this joy to so many around our nation, especially at a time like this.

Affiliate Disclosure. Some of the links on this website are affiliate links, which means that I may earn a small commission if you click on the link or make a purchase using the link. If you make a purchase you will not be charged anything additional.

In this crafty tutorial I’m going to show you how to stencil these wood tags for Easter. If you’re wanting a tutorial on how to cut wood tags you’ll want to go here. I share the measurements, angles, and even the drill bit size to make the twine hole in the middle.

DIY RUSTIC WOOD TAGS FOR EASTER

Here’s what you’ll need


Other helpful tools I used

If you love these rustic wood spring tags be sure to check out this super easy Dollar Tree moss bunny craft.

Cutting your wood pieces

  1. First you want to cut out your wood tags. I used my Ryobi miter saw to do this. Cut a 1x4 in to 3 5” long pieces. On the top of each 5” piece measure in 1” and make a mark. Set your miter saw to 45 degrees, line it up with your 1” mark and cut. Flip your tag over and do the same to the other side. 

  2. Now drill a hole in the middle of the top of each piece. This is for your twine holder to go through.

  3. After you have that done give each piece a quick sanding. You don’t have to get crazy with this, it’s not a fine piece of furniture. I use 120 grit sandpaper for this and that’s it. Just enough to take off that shine it has when you get it from the lumberyard.

    WATCH THE VIDEO OF HOW I MADE THESE USING MY MITER SAW

Stencils

You can use any cutting machine to create your Easter themed stencils. I use my Cricut Explore to make all of mine. If you have and are using a Cricut you can get the HANGIN’ WITH MY PEEPS image to use here. You can use my FREE SVG’s for the bunny image & happy Easter cutting files here. I use Oramask stenciling film to make my stencils. While it is a little more expensive than other materials I have found it works the absolute best for stenciling.

Painting (the fun part!)

First a thin layer of gray paint on each wood tag. Be sure it is a thin layer, you will still be able to see the wood grain through the paint. After the first thin layer is dry you can paint a second thin layer. You don’t want more than two layers of base paint on your wooden tags, or any painted wood sign. Too much paint will cause issues when stenciling with base paint peel up, which can be impossible to fix sometimes and honestly it just plain sucks to have to go back and fix.

DIY mini wood tags for Easter. How to use your Cricut to make wood signs for Easter. Make your own farmhouse tray mini signs for spring. Fun rustic Easter and spring craft for adults.

2. After your base paint is completely dry you can apply your stencils to all three wood blanks. Apply your transfer tape to your stencils (if you bought my DIY CRAFT KIT this step has already been done for you). Peel the paper backing from your stencil/transfer tape. Go slow.  Place your stencils sticky side down on the front of your painted wood tag. The front is just whichever side you prefer best ;). Using your vinyl squeegee, if you don’t have one you can use a plastic store rewards card, and rub the stencil to that it adheres to the wood. Slowly peel the transfer tape away from the wood leaving your stencil attached to the wood. I find that it works best when I roll the transfer tape away, check out this DIY PAINTED WOOD SIGN TUTORIAL for  a closer look at how to do this.

3. Use masking tape to tape off the edges of your stencil so you don’t get paint on areas of the wood tags that you don’t want paint on.

DIY mini wood tags for Easter. How to use your Cricut to make wood signs for Easter. Make your own farmhouse tray mini signs for spring. Fun rustic Easter and spring craft for adults.

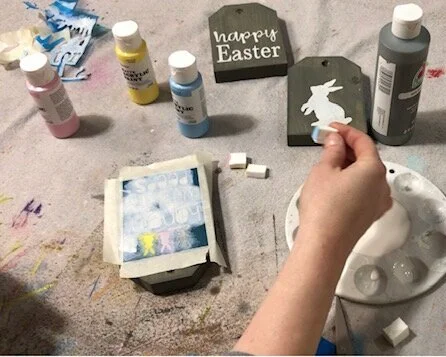
4. Using one end of one of the sponges dip it in the white paint. You need very little paint, the more paint you use the more paint bleed you will likely have. Dab your sponge onto the exposed areas of your stencil. The coverage should be VERY faint. Let that dry and repeat up to three times. You don’t want to apply more than three coats as this could cause issues with paint peel up where you just stenciled. If you want the cute little bunnies to be different colors paint them white first then finish them with two layers of your preferred paint color. I painted mine in pink, blue, and yellow. Giving them a white base first will allow the colors to really pop if you are painting on a dark base.

DIY mini wood tags for Easter. How to use your Cricut to make wood signs for Easter. Make your own farmhouse tray mini signs for spring. Fun rustic Easter and spring craft for adults.

5. Peel up your stencils and tape. Using an xacto knife helps to remove the middle piece of the stencils.

DIY mini wood tags for Easter. How to use your Cricut to make wood signs for Easter. Make your own farmhouse tray mini signs for spring. Fun rustic Easter and spring craft for adults.

Distressing

After your paint completely dries from stenciling you can start distressing your wood Easter tags. I LOVE this technique because it’s super easy and quick. Using sand paper or your sander give a quick sanding to the edges, corners, and lightly on the front of each wooden tag. Wipe off and dust.

DIY mini wood tags for Easter. How to use your Cricut to make wood signs for Easter. Make your own farmhouse tray mini signs for spring. Fun rustic Easter and spring craft for adults.

Adding twine

Probably the easiest step is adding the twine. Decide how long you would like your twine hangers to be. I think I measured mine at 12” or so. You’ll need 3 pieces, one for each wood tag. Feed one piece of twine through the hole in one of the wood tags then tie it in a knot.

DIY mini wood tags for Easter. How to use your Cricut to make wood signs for Easter. Make your own farmhouse tray mini signs for spring. Fun rustic Easter and spring craft for adults.

You’re ready to display your Easter wood tags in your home. I know it may seem like a lot of steps written out but really these are super easy and quick to DIY once you get going on them.

DIY mini wood tags for Easter. How to use your Cricut to make wood signs for Easter. Make your own farmhouse tray mini signs for spring. Fun rustic Easter and spring craft for adults.

Like with all of my DIY tutorials if you have any questions please reach out. Leave a comment below or send me a message on one of my social media pages. You can find my links at the top.

Happy Crafting!

6 MUST haves for stenciling your own painted wood signs

6 must haves for stenciling wooden signs. Sign painting tips for no paint bleed, no paint peel up, perfect crisp lines with stenciled wood signs.

Sign painting can be super frustrating when you’re first starting out. Seriously, I’ve been there. I’ve been in the place where you feel like you’ve done everything right only to have your paint bleed under your stencil. Or have your background paint color peel up when you peel your stencil off your wood base. IT SUCKS!

Thousands of painted signs later I feel like I’m somewhat of a pro ;) and I want to share my top 6 sign painting must haves with you.

Affiliate Disclosure. Some of the links on this website are affiliate links, which means that I may earn a small commission if you click on the link or make a purchase using the link. If you make a purchase you will not be charged anything additional. This is just a way I can help add to our family finances to raise our four daughters. Please know I would never recommend a product or service I do not totally stand behind.

CLICK HERE TO LEARN HOW TO ATTACH A SAWTOOTH HANGER TO YOU HANDMADE WOOD SIGNS

1. CUTTING MACHINE

I personally have always used a Cricut cutting machine. I have heard great things about other craft cutters but will probably be a Cricut girl for life. I find their software easy to use, even my preteen daughters can use it with ease. This is what I use to cut all of my stencils out with.

2. STENCIL FILM- ORAMASK STENCIL FILM

When I first started making signs I tried everything BUT stencil film because I was trying to save as much money as possible while learning what I thought would be just a hobby. What I didn’t realize was that I was actually WASTING money by not using the proper material made just for stenciling. So many projects and materials ruined. While shelf liner can work sometimes a lot of the time it didn’t work without error for me. I finally took my husband’s advice and bought the good stuff. Boy was he right about that, and I’m not afraid to admit he was right because buying oramask stencil film has made my business a success!

3. TRANSFER TAPE

I am in several craft groups online and read lots of posts about how others are having a difficult time getting their stencils to stay on their wood base. A lot of the time this can be fixed if you are using the right type of transfer tape. I have used MANY different types and now have my favorite go to’s. If you are using oramask stencil film you will need a MEDIUM TACK TRANSFER TAPE. If your transfer tape is too strong it won’t easily release the stencil film when you’re trying to apply it to your wood base. And if your transfer tape isn’t strong enough it will have a hard time picking the stencil film up off of its paper backing. Again, I used to use shelf liner, the clear kind for this, but it didn’t always want to work depending on the design I was doing. Granted I will still use this if I’m in a bind and run out of the good stuff, but that’s only if I’m desperate OR if I have an easy design I’m transferring.

4. XACTO KNIFE

I use an xacto knife several different times during my sign painting process. I use an xacto knife to weed my designs. I use it to remove pockets of air or to smooth out an unruly area in the stencil film. This is what I use to peel up my stencil after I am finished painting my design and to take out all the little middle pieces. And I use it to fix any oops spots once the stencil is removed. This little tool is SO HANDY and is really inexpensive.

5. VINYL SQUEEGEE

I tried to find other things at home that I could use instead of a true vinyl squeegee but none came close to using this. They actually aren’t very expensive at all. I have bucket full of these and I think they were worth every penny. They much thicker than any store rewards or a bank card could ever be. If you’ve ever used one of those you know that with use the right pressure they can and will break. Order a couple of vinyl squeegees and see the difference, they are a dream for stenciling wood signs!

And finally the most important must have for successful sign painting…

6. MOD PODGE

This will help you to create the signs of your dreams! Matte finish mod podge has been my saving grace when painting wood signs. I am a mom of 4 little girls, I don’t have time to cosmetic sponge layer after layer after layer onto the signs I make for my customers. While this technique works if you only had a handful of signs to make, this is not a practical or business savvy way to paint wood signs. Dabbing paint on like that takes FOR-EV-ER. Instead I use matte finish mod podge to seal my signs from paint bleed and I have not regretted it since!

I hope these tips help you with your sign painting adventure. If you have any questions please feel free to ask away. If you want to really deep dive into the world of sign painting click here.

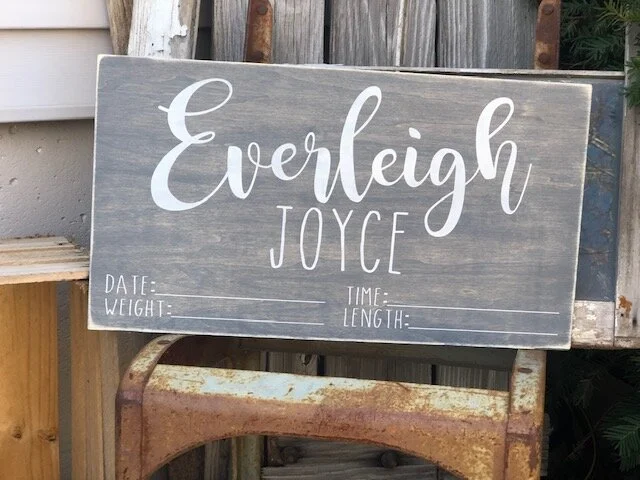
DIY painted baby name and stats sign

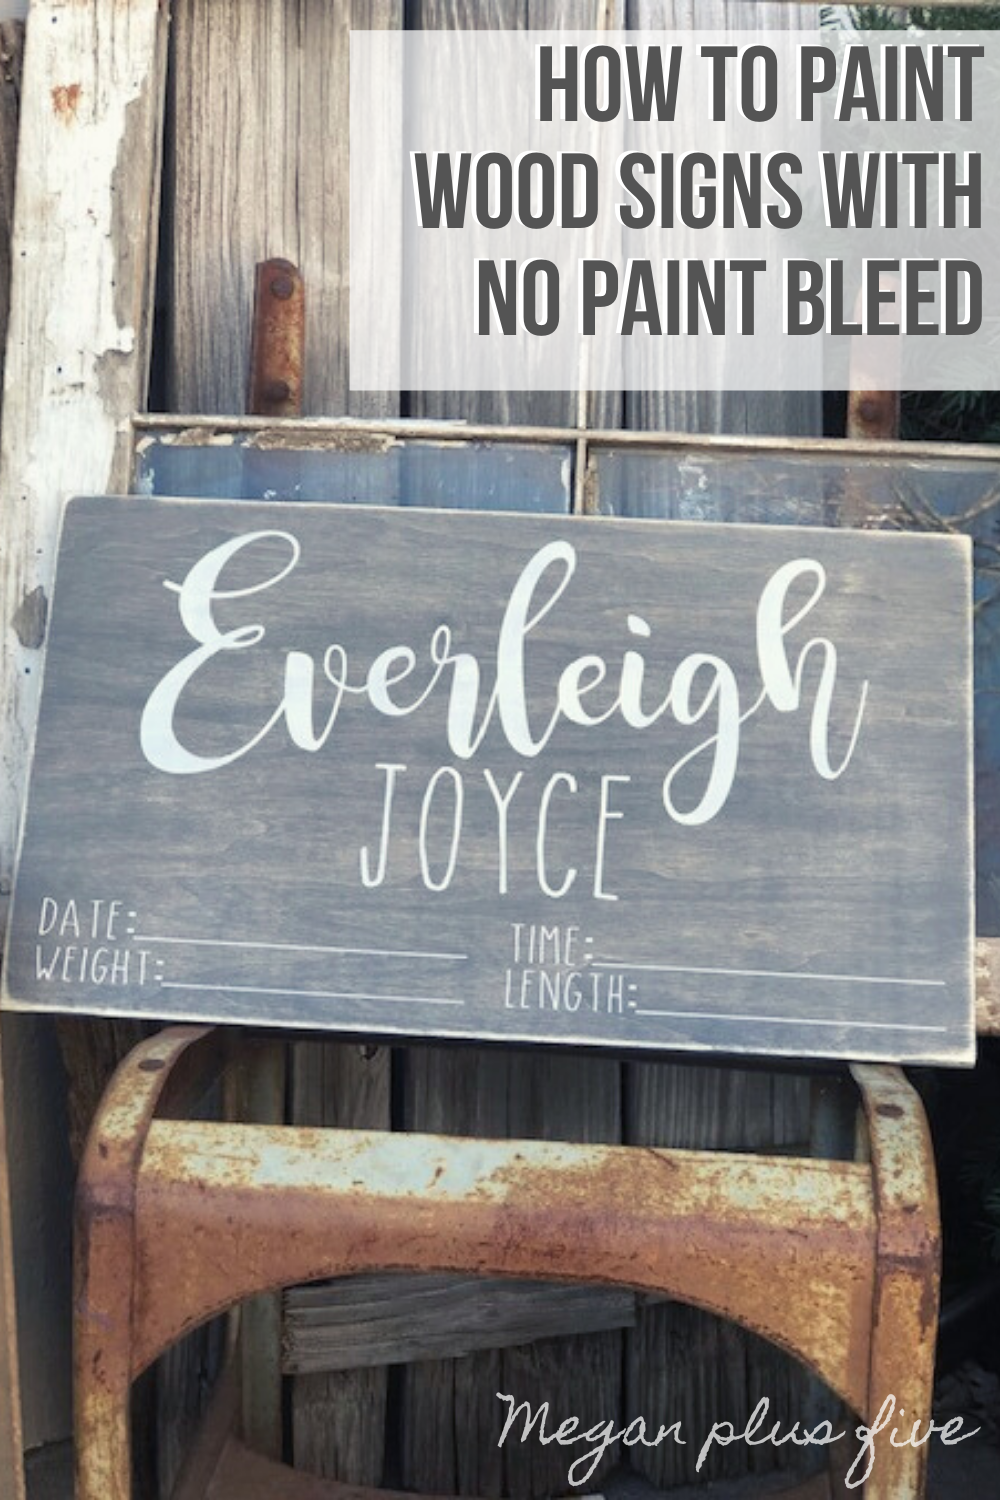
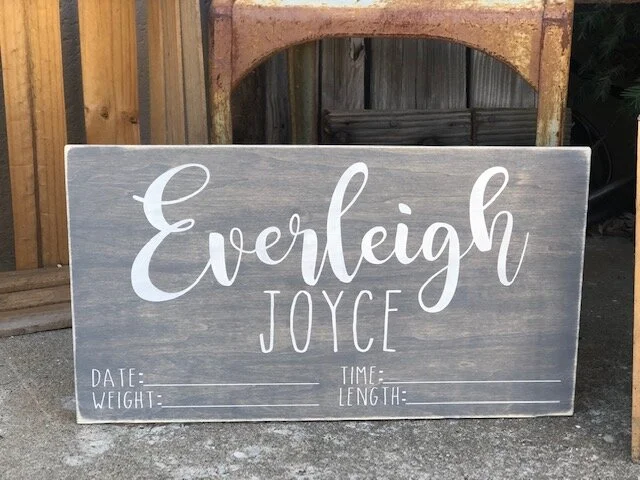
How to stencil a wood sign with NO paint bleed. Using mod podge to paint wooden signs is a good way to get perfectly crisp lines. Make your own personalized baby gift sign using your cricut. DIY baby stats sign.

DIY painted baby name sign with newborn stats

A couple weeks ago a sweet friend of mine from grade school messaged and asked me to help in creating a wreath she’s having made for her very first baby! Of course I said YES! I am just so happy for her as she’s waited a very long time to become a mom and was so honored she asked me to be apart of something she will be hanging in her precious daughter’s room. She sent me all the details she wanted for the sign part of the wreath and I recreated something similar personalized just for her little one.

Affiliate Disclosure. Some of the links on this website are affiliate links, which means that I may earn a small commission if you click on the link or make a purchase using the link. If you make a purchase you will not be charged anything additional. This is just a way I can help add to our family finances to raise our four daughters. Please know I would never recommend a product or service I do not totally stand behind.

I created my template in CRICUT DESIGN SPACE and of course used my Cricut to cut it out. By the way, I have an older style Cricut and still create AMAZING projects with it, although I’d love a Maker just to have one I don’t need one to make all the wonderful things I share on my crafty blog. I often see others get discouraged because they can’t afford the newest machine out there but you can find GREAT deals on older style machines and they do just as much as the newer models :)! If you’re just getting started using your Cricut read this list of 10 things you need to get you started on your Cricut crafting journey.

If you want a more in-depth teaching on SIGN PAINTING you need to get on my list for my DIY SIGN PAINTERS E-COURSE. Click here to get on the list so you’re first to know when it opens back up.

When you’re all finished up reading this tutorial and need help attaching hanging hardware be sure to read this post on how to easily and quickly attach a sawtooth hanger to wood signs

How to paint wood signs with no paint bleed

Here’s what you’ll need

Helpful tools

How to stencil wood signs without paint bleed. Make your own painted wood signs for baby. Personalized baby shower gift with baby's name and stats on it.

For this tutorial I’m focusing on the painting techniques of making a personalized baby sign. CLICK HERE for my tutorial on how to stain wood.

ONE- Start with a pre-stained wood base. See my video on how to stain wood click here. Be sure you are allowing your stained base to dry for at least 24 hours prior to stenciling on it. Stencils will not adhere to a base that isn’t fully dry.

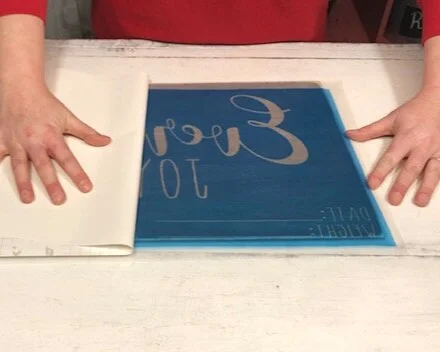
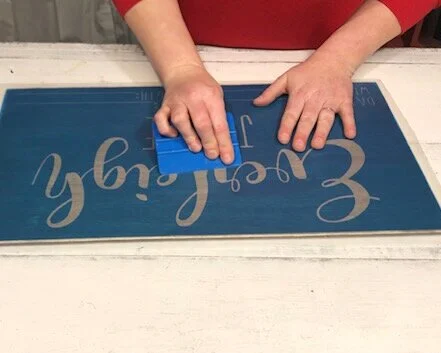
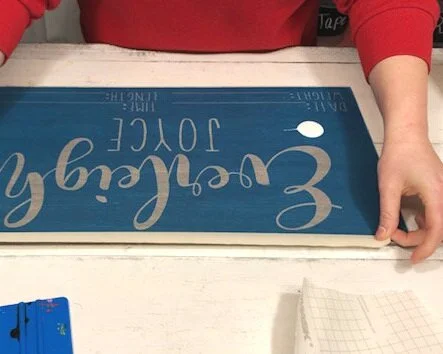
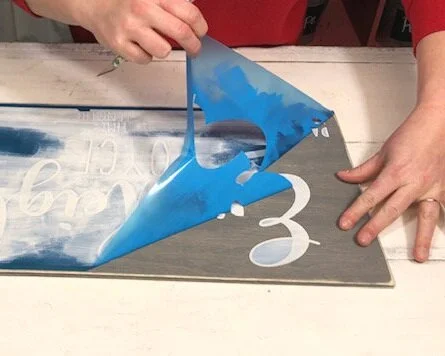
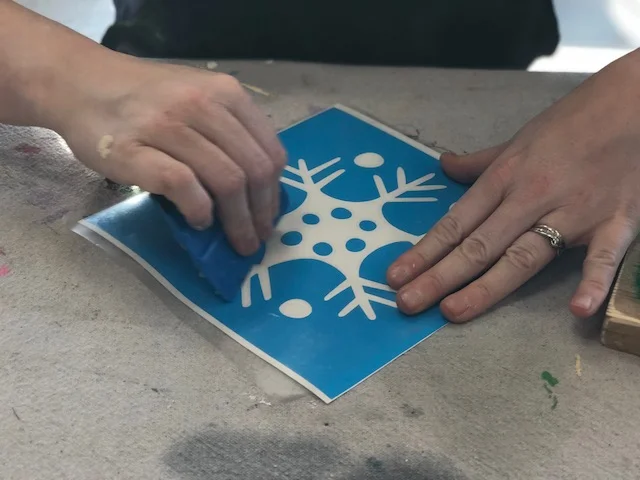
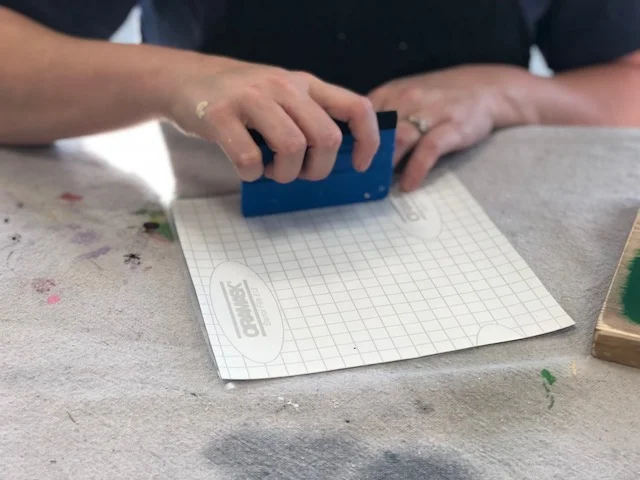
TWO- Apply your stencil. To do this you need transfer tape. Transfer tape allows us to take a stencil and apply it in one whole piece without a headache, we LOVE whoever invented this product! Place your transfer tape sticky side down onto your stencil. Gently push out any air bubbles on the front with your hands, then flip it ver and use your vinyl squeegee and rub the back of it. Slowly remove the paper backing leaving the stencil (blue part) and the clear transfer tape still intact.

How to stencil a wood sign with NO paint bleed. Using mod podge to paint wooden signs is a good way to get perfectly crisp lines. Make your own personalized baby gift sign using your cricut. DIY baby stats sign.

THREE- Flip your stencil over and position it on your wood base. Once you are happy with the placement working from the middle of the stencil out press it down with your hands. Then use your vinyl squeegee and do the same thing.

How to stencil a wood sign with NO paint bleed. Using mod podge to paint wooden signs is a good way to get perfectly crisp lines. Make your own personalized baby gift sign using your cricut. DIY baby stats sign.

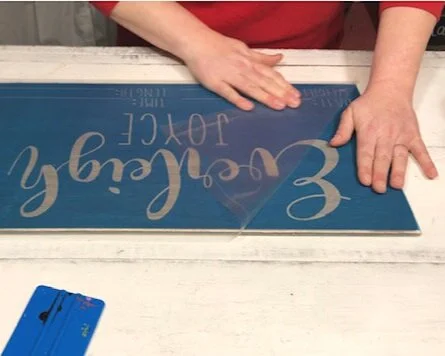
FOUR- After you’ve pressed down your stencil you can remove your transfer tape. I’ve found the easiest way to do this is to roll your transfer tape off of your stencil. Start from one corner and slowly roll is off. You can reuse your transfer tape over and over again. I like to place my used transfer tape back on the roll I cut it off of and use it for the next project.

How to stencil a wood sign with NO paint bleed. Using mod podge to paint wooden signs is a good way to get perfectly crisp lines. Make your own personalized baby gift sign using your cricut. DIY baby stats sign.

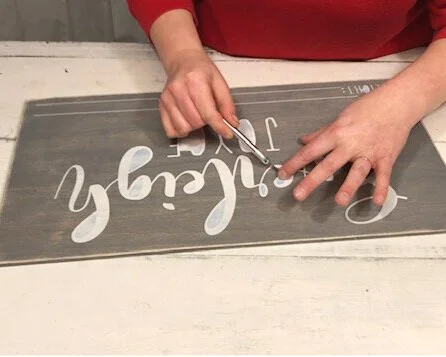
FIVE- If you have any gaps/air bubbles use an xacto knife to remove those. Use an xacto knife to make a small slit in the stencil film where the gap/air bubble is. This will make the stencil film lay flat.

How to stencil a wood sign with NO paint bleed. Using mod podge to paint wooden signs is a good way to get perfectly crisp lines. Make your own personalized baby gift sign using your cricut. DIY baby stats sign.

SIX- Tape off any area that you don’t want to get paint on, like the sides of your stencil. It is a lot easier to take the time to tape this off than it is to try to clean off paint where you don’t want it.

How to stencil a wood sign with NO paint bleed. Using mod podge to paint wooden signs is a good way to get perfectly crisp lines. Make your own personalized baby gift sign using your cricut. DIY baby stats sign.

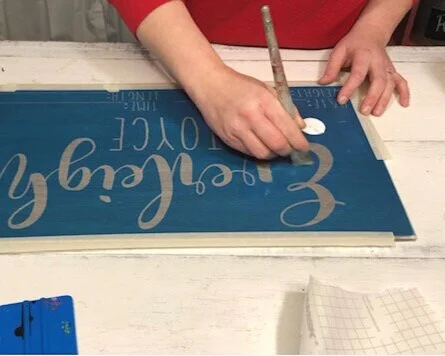
SEVEN- Using MATTE FINISH MOD PODGE seal your stencil. You do this by taking a DRY paint brush, dipping it into a little bit of the mod podge, and brushing it in all directions on the exposed areas of your stencil. Be sure you are painting on a VERY THIN LAYER of mod podge. This step is KEY to the no paint bleed painted sign. The mod podge is filling in all of those tiny air bubbles that you can’t see. Let this dry, usually this takes just a couple of minutes.

How to stencil a wood sign with NO paint bleed. Using mod podge to paint wooden signs is a good way to get perfectly crisp lines. Make your own personalized baby gift sign using your cricut. DIY baby stats sign.

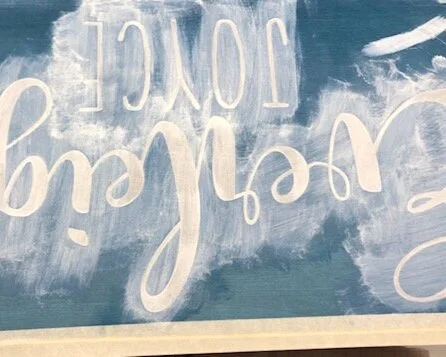
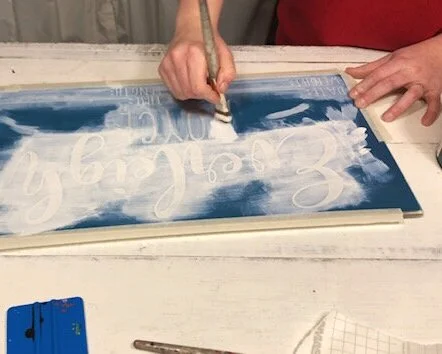
EIGHT- I highly recommend using either flat or eggshell finish for your paint. Gloss paint tends to pull up when you remove the stencil. Using a different DRY paint brush paint on your first THIN layer of paint. You want to see the base color/wood grain through the paint.

How to stencil a wood sign with NO paint bleed. Using mod podge to paint wooden signs is a good way to get perfectly crisp lines. Make your own personalized baby gift sign using your cricut. DIY baby stats sign.

NINE- After your first layer is completely dry you can paint on a second thin layer of paint. The first layer should dry VERY fast.

How to stencil a wood sign with NO paint bleed. Using mod podge to paint wooden signs is a good way to get perfectly crisp lines. Make your own personalized baby gift sign using your cricut. DIY baby stats sign.

TEN- After you’re done painting on the second layer of paint on your stencil you can immediately pull up your stencil. I prefer to do this step while the paint is still wet. Use an xacto knife to remove all the small stencil pieces.

How to stencil a wood sign with NO paint bleed. Using mod podge to paint wooden signs is a good way to get perfectly crisp lines. Make your own personalized baby gift sign using your cricut. DIY baby stats sign.

Let your sign dry then you’re ready to use it. I hope that you found this DIY SIGN PAINTING TUTORIAL helpful. If you did I’d LOVE to hear your feedback:)!! If you have any questions please feel free to ask.

How to stencil a wood sign with NO paint bleed. Using mod podge to paint wooden signs is a good way to get perfectly crisp lines. Make your own personalized baby gift sign using your cricut. DIY baby stats sign.

DIY easy wood tags using your miter saw

1x4 craft projects to make at home. How to make mini wood tags for tiered trays for that perfect farmhouse style. Easy wooden tags using your miter saw,

How to make farmhouse style wood tags using your miter saw

These little tags are SOOOOOO easy to make! If you can operate a miter saw then you can make these wood tags. They tie in perfectly with farmhouse décor and make adorable accent pieces to those tiered trays that are all over Pinterest. And you can make your own for a fraction of the cost! Even cheaper if you are using scrap wood like I like to do when I make little projects for my home.

Affiliate Disclosure. Some of the links on this website are affiliate links, which means that I may earn a small commission if you click on the link or make a purchase using the link. If you make a purchase you will not be charged anything additional.

This tutorial is quick. Like less than 2 minutes kind of quick if you watch the video tutorial over on my YouTube channel. Check it out below or keep scrolling for the written tutorial.

After you’re done reading this DIY go see what I did with these wood tags for St. Patrick’s Day

Here’s what you need to make your own rustic wood tags

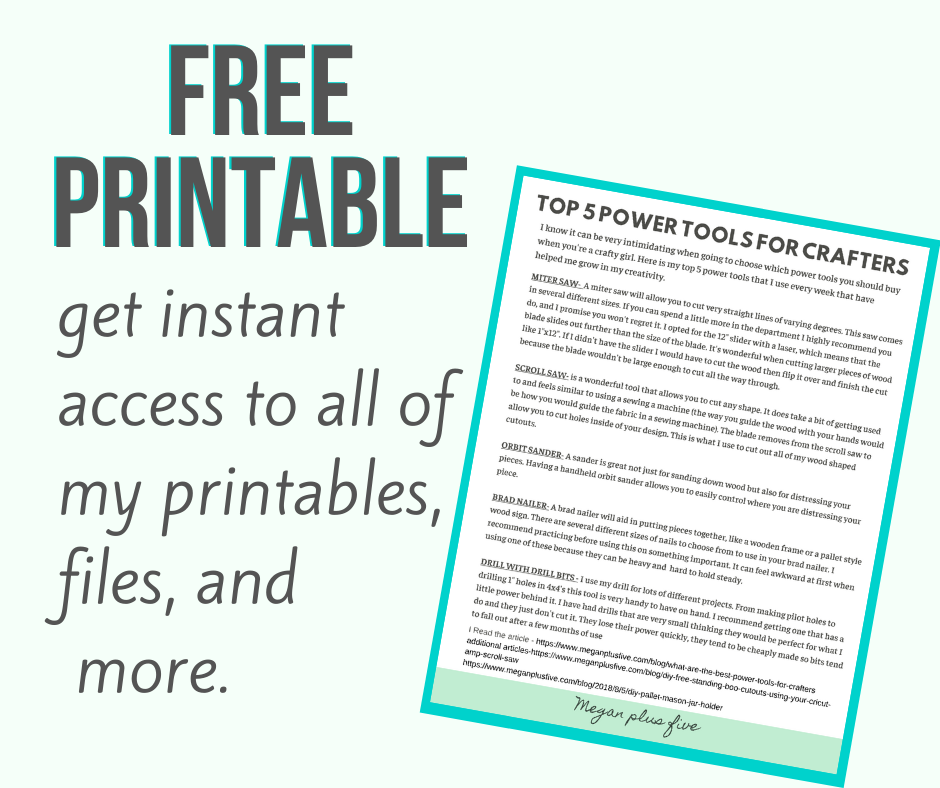
Can you tell I LOVE my Ryobi tools?! Seriously though, if you are having trouble deciding what kind of tools you need as a craft you need to read this post about POWER TOOLS FOR CRAFTERS. In it I cover the basics of what you need and explain a little about them.

Easy wood tags for your country chic decor

ONE-

The first thing you need to do is measure out your 1x4 and cut it at 5”. I just used my miter saw side ruler for this. I made mine in a set of 3 but you can make as many as you’d like.

1x4 craft projects to make at home. How to make mini wood tags for tiered trays for that perfect farmhouse style. Easy wooden tags using your miter saw,

TWO-

Swivel your miter saw so that it is set at 45 degrees. Be sure it locks in place, I extra lock mine in place using the manual lock on my saw.

1x4 craft projects to make at home. How to make mini wood tags for tiered trays for that perfect farmhouse style. Easy wooden tags using your miter saw,

THREE-

On the top right hand side of each tag measure in 1” and put a little mark. So that you don’t have to mess with moving your angle to cut on the other side flip your piece of wood over and make a mark 1” on the other side.

1x4 craft projects to make at home. How to make mini wood tags for tiered trays for that perfect farmhouse style. Easy wooden tags using your miter saw,

FOUR-

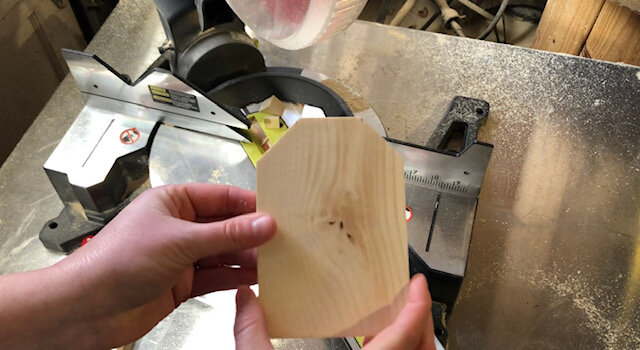
Line your laser up with that 1” dot you made and cut. If you don’t have a laser on your saw you can line your blade up while it’s not in motion. Side note…I’ve really glad I splurged for this fancier saw to make projects like this even easier. I almost didn’t get it just to save a few dollars but some things are worth every penny, just like this saw ;)!!

1x4 craft projects to make at home. How to make mini wood tags for tiered trays for that perfect farmhouse style. Easy wooden tags using your miter saw,

FIVE-

Flip your wood tag over and do the same thing to the other corner. Isn’t that so much easier than moving the degree of the blade?!

1x4 craft projects to make at home. How to make mini wood tags for tiered trays for that perfect farmhouse style. Easy wooden tags using your miter saw,

SIX-

To make a hole in the top for a piece of twine to go through you just need to drill a hole large enough for the size twine you’re using. I used a 5/8” drill bit to drill mine. I measured in 1.75” from one side, not where I cut the corner off because that would not give an accurate middle mark. Tip- place a scrap piece of wood under the wood that you’re drilling to save the surface underneath from getting damaged.

1x4 craft projects to make at home. How to make mini wood tags for tiered trays for that perfect farmhouse style. Easy wooden tags using your miter saw,

SEVEN-

Last, finish them off by giving them a quick sanding. I don’t ever get too crazy with this step on my projects. I typically just use 120 grit sandpaper all over and call it a day.

1x4 craft projects to make at home. How to make mini wood tags for tiered trays for that perfect farmhouse style. Easy wooden tags using your miter saw,

That’s it! SUPER EASY miter saw craft. As with all of my posts if you have any question please feel free to reach out and ask away.

1x4 craft projects to make at home. How to make mini wood tags for tiered trays for that perfect farmhouse style. Easy wooden tags using your miter saw,

DIY western themed party table sign

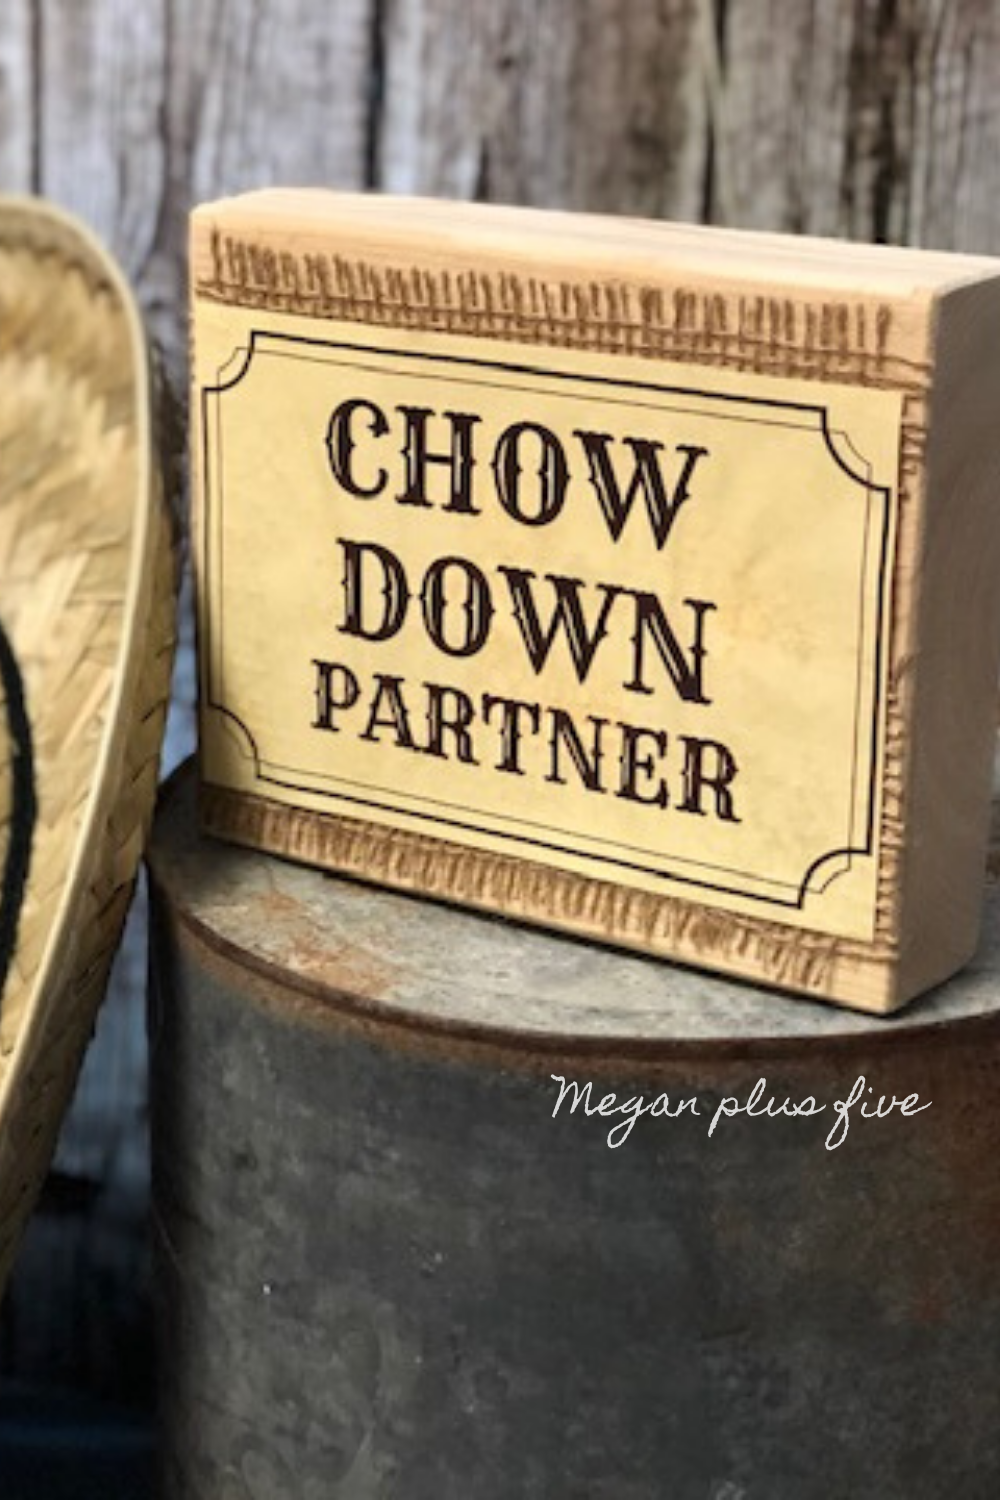
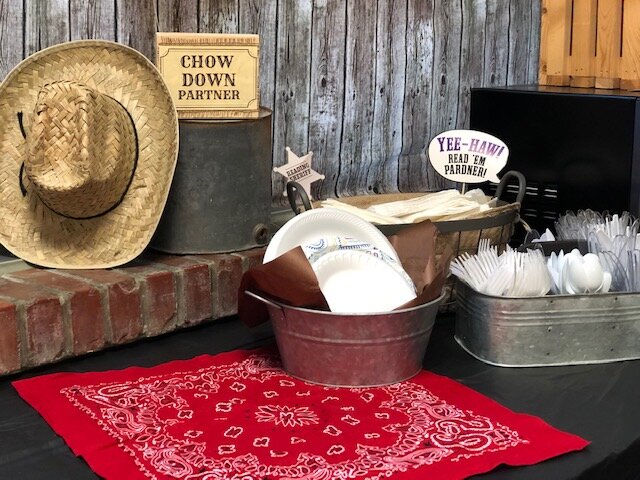
DIY western themed party table sign. Western signs for your wild west party. Chow down partner party decor easy wood sign

How to make a sign for your western themed party table

Teacher appreciation week is coming up for our elementary school and I was asked to help throw it all together. One of the things I was asked to help out with were signs for the food table to go with the wild west theme. Being a busy momma of 4 and a handmade small business owner I didn’t have a ton of time to devote to the signs. I thought about just printing something up and sticking them in inexpensive frames but I didn’t want to have to spend money on frames I wouldn’t use again. And I wanted them to look a little more rustic/handmade than what a picture frame would look like.

Affiliate Disclosure. Some of the links on this website are affiliate links, which means that I may earn a small commission if you click on the link or make a purchase using the link. If you make a purchase you will not be charged anything additional.

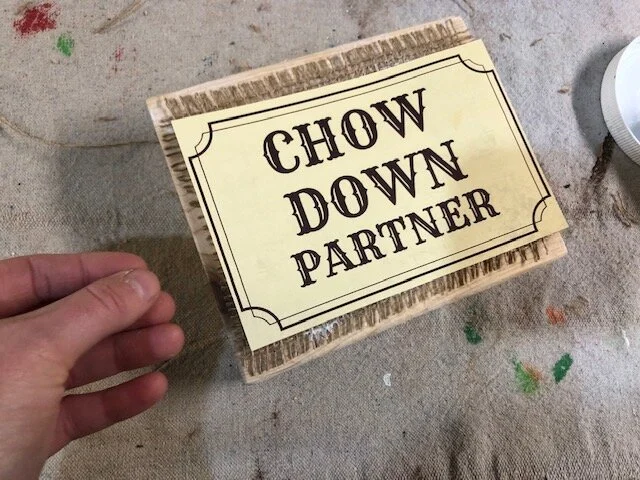
So I looked around my craft room and thought ‘why couldn’t I just glue the paper to a chunk of wood?’. And that’s exactly what I did! Gotta love Mod Podge! And of course burlap too!

You can use the printable I used for my project, it’s in my FREE RESOURCE LIBRARY click here to get the free printable

Wild  west themed party table sign DIY. How to put together a chow down partner sign for your western themed party.

DIY wild west sign for your party table

These table signs are SO easy to make!

Here’s what you’ll need

Helpful tools

ONE-

I printed off my printables, CHOW DOWN PARTNER, SNACK STAMPEDE, HAPPY TRAILS, and WATERING HOLE. Then I trimmed them down using my paper cutter. Even though these are not expensive at all it took me years to finally bite the bullet and buy one and I’m SO glad I did! I know it sounds silly but not having to stress about the lines being straight on things, especially on my orders, is priceless!

TWO-

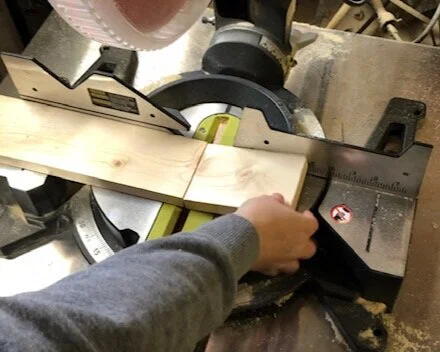
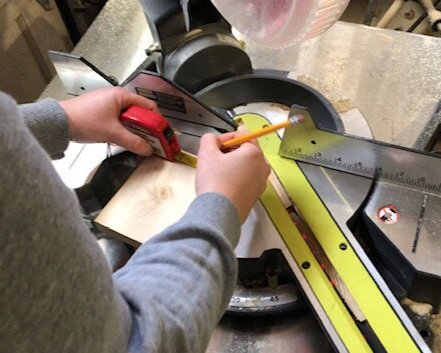
Cut down your 2x6 to fit your printable. I already had several sections of 2x6’s leftover from a loft bed project we made for the three oldest daughters. So I used my miter saw cut two of those pieces in half. That gave me 4 2x6 pieces.

Watering hole wild west table sign. DIY western party table decor. Free printable

THREE-

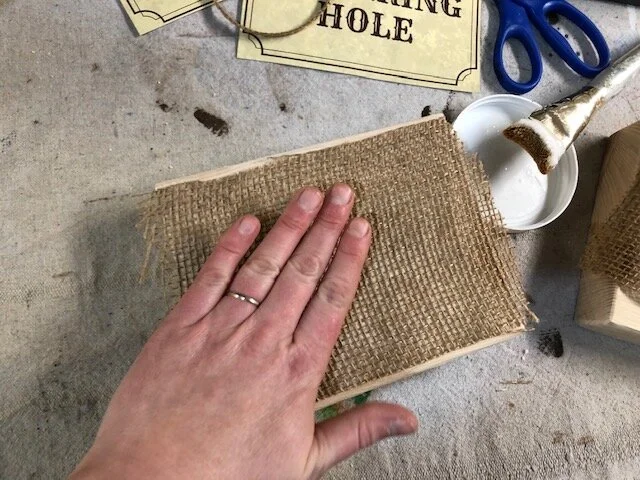
I wanted the background to have a little more to it than just the wood I added a piece of burlap to two of the signs and a piece of red duck cloth fabric to the other two western signs. I had all of these materials on hand, I didn’t need to go to the store and buy anything. That’s the great part of holding on to scrap pieces.

I used MATTE FINISH MOD PODGE to glue the burlap and fabric on to the wood chunks. Paint on a thick layer of the mod podge (if you’ve never used mod podge it’s basically just fancy glue that comes in lots of different finishes and purposes). Cut your fabric or burlap down to size and press it down on the mod podge covered front of your sign. Smooth out any air bubbles with your hand.

How to apply fabric and burlap to wood. Watering hole wild west table sign. DIY western party table decor. Free printable

FOUR-

I wanted the edges to be frayed a little so I trimmed down the fabric/burlap what hung over the edge then pulled out some of the treads on each end to fray them.

How to apply fabric and burlap to wood. Watering hole wild west table sign. How to fray fabric. DIY western party table decor. Free printable

FIVE-

Then I applied mod podge to top of the burlap/fabric and placed a printable down on it. On the first ones. the burlap ones, I applied mod podge all over where the printable would go, not even thinking that it was going to bubble the paper because that’s what glue does to paper. So the next two I just applied the mod podge to the ends of the paper and I like that look a lot better.

How to apply fabric and burlap to wood. Watering hole wild west table sign. DIY western party table decor. Free printable

SIX-

Let them dry and you’re ready to put them on display on your western themed party table.

How to apply fabric and burlap to wood. Watering hole wild west table sign. DIY western party table decor. Free printable

I hope you enjoyed this tutorial and it helps you DIY your own easy and quick signs. As with all of my posts if you have any questions please feel free to ask away.

Snack stampede, how to apply paper to wood. DIY western party table decor. mod podge on wooden sign for easy inexpensive sign making.

Want instant access to all of my free printables (like the one used in this post) files, and checklists? Fill in your info and I will send you will immediately get the password to all of my freebies.

DIY Dollar Tree St. Patrick's Day rag wreath

DIY Dollar Tree rag wreath for St. Patrick's Day. How to make an easy rag wreath using a Dollar Tree wire wreath form and scraps of fabric or fat quarters.

How to make a rag wreath using a Dollar Tree wire wreath form

I LOVE shopping at the Dollar Tree. When they put one in our small town my girls and I were EX-CI-TED! It’s not that we lived too far away from the next Dollar Tree but it is so nice to have one that is just a couple minutes away vs having to get on the highway and drive 25+ minutes, we are loving this convenience! I don’t buy everything from the Dollar Tree though, but there are several things I do prefer to pick up from here like wire wreath forms. Here’s my list of the top 15 craft supplies I buy from the Dollar Tree.

Affiliate Disclosure. Some of the links on this website are affiliate links, which means that I may earn a small commission if you click on the link or make a purchase using the link. If you make a purchase you will not be charged anything additional.

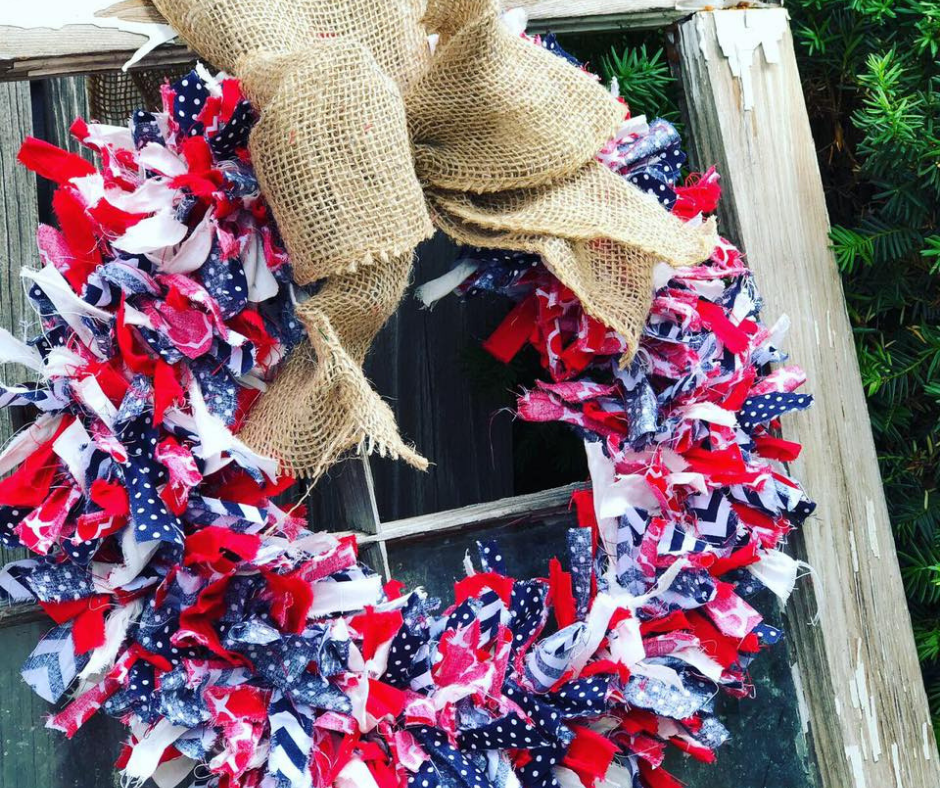
There are so many different types of wreaths you can make with the wire wreath forms but my absolute favorite are the rag wreaths. They are so beautifully imperfect and they tie in nicely with my rustic/inexpensive style lol! This is my third rag wreath I’ve posted here on my blog. My first one was this super country cottage chic spring wreath. I really wanted to put it up for Valentine’s day this year but decided against it since it has bunnies for one of the prints. My second rag wreath was this rustic but patriotic red, white, and blue one.

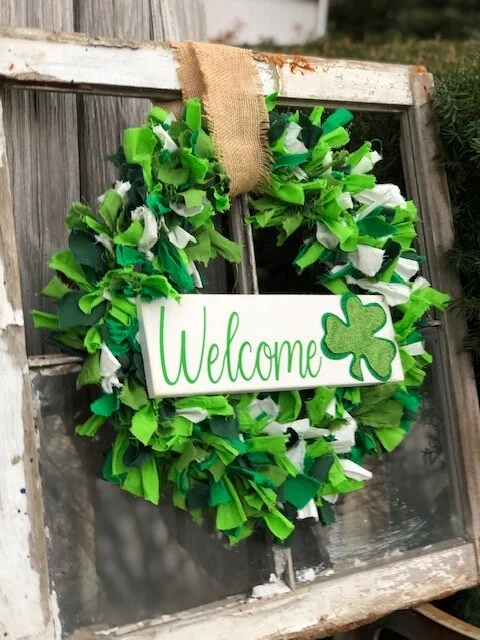
For my St. Patrick’s Day rag wreath, or tied fabric wreath as some call it, I wanted to add a little sign that said welcome. I admit I took the easy way out and didn’t stencil the sign, I made a vinyl decal instead. It is far easier to make these they just don’t last as long as the fully painted signs I create and ship world wide in my handmade business. Check out my handmade signs here. If you’ve been dreaming of making your own hand painted wooden signs but you keep running into problems my sign painters e-course is for you!

Check out the rag wreath video tutorial or keep scrolling for written/picture instructions.

Here’s what you’ll need to make your own St. Patrick’s Day rag wreath

Helpful tools

DIY Dollar Tree rag wreath for St. Patrick's Day. How to make an easy rag wreath using a Dollar Tree wire wreath form and scraps of fabric or fat quarters.

DIY rag wreath for ST. Patrick’s Day

One-

Unfold your fabric. Then about ever 1” or so cut a small slit on one side of the fabric. Now rip those 1” sections so that you have a bunch of strips of fabric. Repeat this step for all of your pieces of fabric. I’ve found fat quarters that you get from Walmart work really well for these wreaths.

DIY Dollar Tree rag wreath for St. Patrick's Day. How to make an easy rag wreath using a Dollar Tree wire wreath form and scraps of fabric or fat quarters.

Two-

Cut your ripped fabric strips into 3-4 inch pieces. These don’t have to be perfect, mine are never the exact same size.

DIY Dollar Tree rag wreath for St. Patrick's Day. How to make an easy rag wreath using a Dollar Tree wire wreath form and scraps of fabric or fat quarters.

Three-

Tie your pieces in a single knot onto your wire wreath form. This took me about 45 minutes to complete.

DIY Dollar Tree rag wreath for St. Patrick's Day. How to make an easy rag wreath using a Dollar Tree wire wreath form and scraps of fabric or fat quarters.

Four-

Once you have all of your fabric pieces tied onto your wire wreath form you flip your wreath over. Then push any long fabric pieces back on to the front.

DIY Dollar Tree rag wreath for St. Patrick's Day. How to make an easy rag wreath using a Dollar Tree wire wreath form and scraps of fabric or fat quarters.

Five-

Set your wreath to the side so you can start on your welcome sign that is going to attach to the front. I used a piece of scrap wood I had in the garage from a previous project. Paint the base white, I used two coats of paint to get a good coverage. Be sure you let both coats dry completely before moving on to step 6.

DIY Dollar Tree rag wreath for St. Patrick's Day. How to make an easy rag wreath using a Dollar Tree wire wreath form and scraps of fabric or fat quarters.

Six-

Instead of stenciling this sign I applied a vinyl decal. I used my Cricut to cut out my vinyl decal. You can get my WELCOME Cricut cut file here.

DIY Dollar Tree rag wreath for St. Patrick's Day. How to make an easy rag wreath using a Dollar Tree wire wreath form and scraps of fabric or fat quarters.

Seven-

I bought a package of foam green clovers at my local Dollar Tree last year and thought these would be super cute to add to one side of my welcome sign. They were the same size so I trimmed down the shamrock I wanted to place on the top so that you could see a little bit the bottom shamrock showing through the edge. I did this same technique on this Rae Dunn inspired fall burlap leaf garland. Then I glued the two together and glued them down to the end of the sign.

DIY Dollar Tree rag wreath for St. Patrick's Day. How to make an easy rag wreath using a Dollar Tree wire wreath form and scraps of fabric or fat quarters.

Eight-

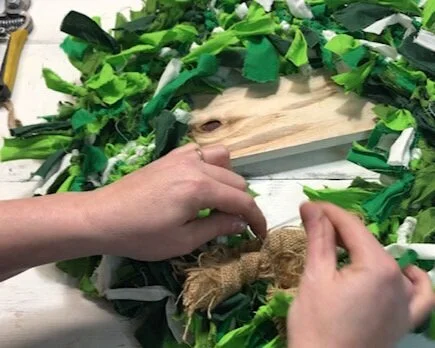
Attach your sign to your wreath. To do this I used a soft wire but I have no idea where I got it from. I would also recommend a floral wire for this step. I drilled holes in the top corners of my sign and used a small piece of wire to attach it to the wreath. Make a U shape to your wire, place one end of the wire in the hole of the sign and feed it to the back then twist the two ends together on the back side so you can’t see them once your wreath is hanging. Do this for both sides of your welcome sign to attach it to your wreath.

DIY Dollar Tree rag wreath for St. Patrick's Day. How to make an easy rag wreath using a Dollar Tree wire wreath form and scraps of fabric or fat quarters.

Nine-

I finished my wreath off with a 4” wide piece of burlap so I could hang it up. I didn’t really like the knot I made in the burlap so I wanted to hide it lol. I just took another piece of wire and secured the knot to the back of the wreath.

DIY Dollar Tree rag wreath for St. Patrick's Day. How to make an easy rag wreath using a Dollar Tree wire wreath form and scraps of fabric or fat quarters.

Now you're ready to hang your wreath for St. Patrick’s Day. I hope you enjoyed this crafty DIY. If you did and make your own St. Patty’s Day wreath I’d love to see pictures of it. As always with all of my tutorials, if you have any questions please don’t hesitate to ask:)!

DIY Dollar Tree rag wreath for St. Patrick's Day. How to make an easy rag wreath using a Dollar Tree wire wreath form and scraps of fabric or fat quarters.

Happy crafting!

Want instant access to my FREE RESOURCE LIBRARY? This is where I share my freebies of cut files, printables, checklists and more. Leave your info below and I will send you the password and link to get instant access into my library.

DIY mini St. Patrick's Day wood tags

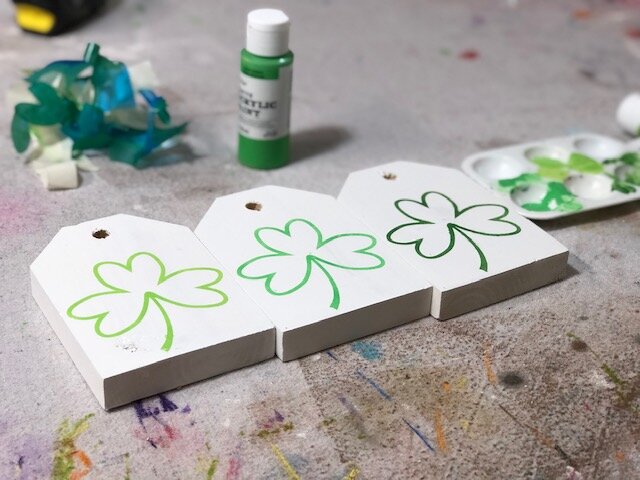
DIY St. Patrick's Day wood tags, how to paint mini wood signs. Using Ryobi tools and a Cricut  to create handmade wood signs

DIY MINI WOOD TAGS FOR ST. PATRICK’S DAY

If you’ve been reading my blog you might know that my four daughters have been asking me to decorate more for the holidays…including St. Patrick’s Day decorations. Yes, that is a holiday they think I should decorate for too lol! So they win. I’ve truly been making an effort to have a more festive home even though daughter #4 totally rearranges everything.

Affiliate Disclosure. Some of the links on this website are affiliate links, which means that I may earn a small commission if you click on the link or make a purchase using the link. If you make a purchase you will not be charged anything additional.

I have been eyeing these adorable mini wood tags on Pinterest for forever now. They are CUTE! They tie in with pretty much anything. You can add these wood tags to a wreath, to a welcome sign, on the mantle (I really wish we had one but I’ll just have to make a faux mantle one of these days) or my favorite- to a tiered tray. Those trays are seriously rustic home décor overload! I love them!! I need to add one to my coffee bar soon.

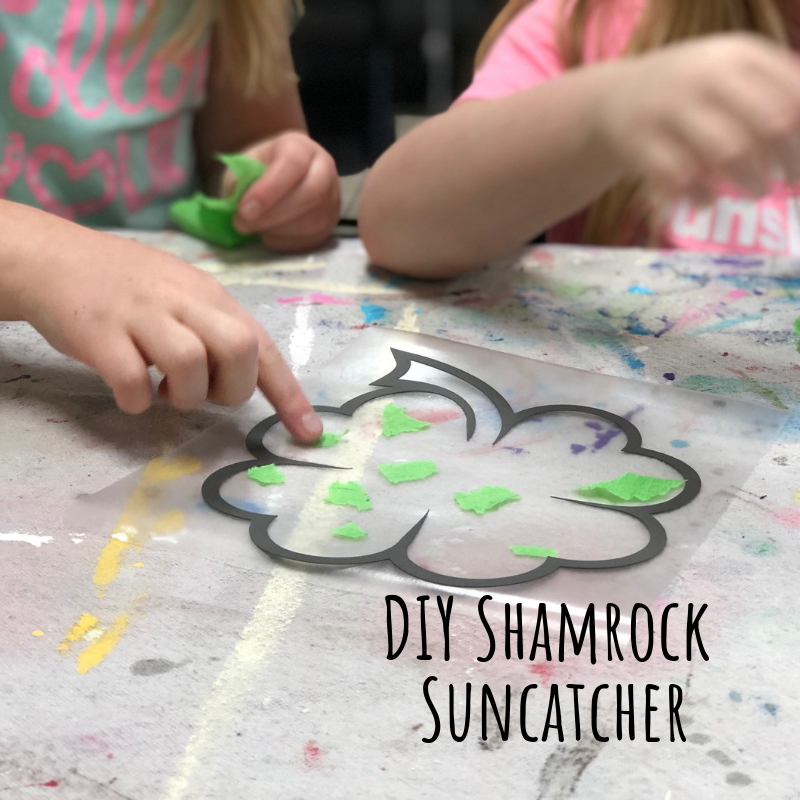
If you’re looking for fun green holiday themed to make with the kiddos try this easy St. Patrick’s Day suncatcher.

To make this completely from scratch at home you’ll need a few power tools. But, if you don’t have power tools to DIY this craft from start to finish you can grab a DIY CRAFT KIT here. I haven’t always been super comfortable using power tools, actually I was deathly afraid of them not too long ago. Now that I’m over my power tool phobia here’s what I recommend for DIY crafters.

DIY St. Patrick’s Day Wood Tags

Here’s what you’ll need

If you’d like the same file I used to create this set of 3 mini wood St. Patrick’s Day tags you can get my Cricut file here. It’s in my FREE resource library. It’s where I keep all of my FREEBIES like files, printables, patterns, and more. You’ll need the password because I like to keep it a little bit secret but no worries it’s super easy to get. Jut fill out the prompt and you'll get instant access.

DIY craft kit for adults. How to make mini wood tags for St. Patrick's Day using your Cricut. How to stenicil wood signs for spring.

Watch the video or keep scrolling for step by step written/photo instructions for these wood St. Patrick’s Day tags.

Cutting your wood pieces

  1. First you want to cut out your wood tags. I used my Ryobi miter saw to do this. Cut a 1x4 in to 3 5” long pieces. On the top of each 5” piece measure in 1” and make a mark. Set your miter saw to 45 degrees, line it up with your 1” mark and cut. Flip your tag over and do the same to the other side.

  2. Now drill a hole in the middle of the top of each piece. This is for your twine holder to go through.

  3. After you have that done give each piece a quick sanding. You don’t have to get crazy with this, it’s not a fine piece of furniture. I use 120 grit sandpaper for this and that’s it. Just enough to take off that shine it has when you get it from the lumberyard.

    WATCH THE VIDEO OF HOW I MADE THESE USING MY MITER SAW

Stencils

You can use any cutting machine to create your stencils. I use my Cricut Explore to make all of mine. If you use a Cricut you can get my cutting file here. I use Oramask stenciling film to make my stencils. While it is a little more expensive than other materials I have found it works the absolute best for stenciling.

Painting (the fun part!)

  1. First a thin layer of white paint on each wood tag. Be sure it is a thin layer, you will still be able to see the wood grain through the paint. After the first thin layer is dry you can paint a second thin layer. You don’t want more than two layer of base paint on your wooden tags, or any painted wood sign. Too much paint will cause issues when stenciling with base paint peel up, which can be impossible to fix sometimes and honestly it just plain sucks to have to go back and fix.

DIY craft kit for adults. How to make mini wood tags for St. Patrick's Day using your Cricut. How to stenicil wood signs for spring.

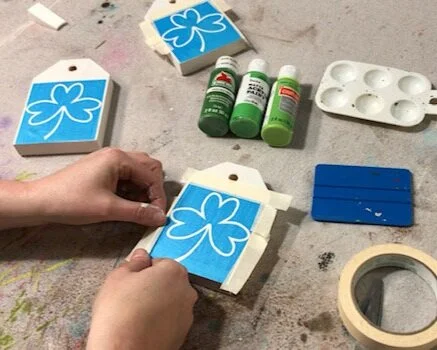
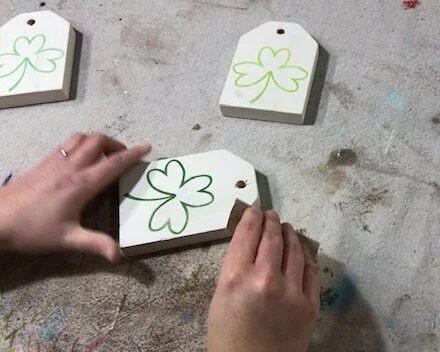
2. After your base paint is completely dry you can apply your stencils to all three wood blanks. Apply your transfer tape to your stencils (if you bought my DIY CRAFT KIT this step has already been done for you). Peel the paper backing from your stencil/transfer tape. Go slow. Place your stencils sticky side down on the front of your painted wood tag. The front is just whichever side you prefer best ;). Using your vinyl squeegee, if you don’t have one you can use a plastic store rewards card, and rub the stencil to that it adheres to the wood. Slowly peel the transfer tape away from the wood leaving your stencil attached to the wood. I find that it works best when I roll the transfer tape away, check out this DIY PAINTED WOOD SIGN TUTORIAL for a closer look at how to do this.

DIY craft kit for adults. How to make mini wood tags for St. Patrick's Day using your Cricut. How to stenicil wood signs for spring.

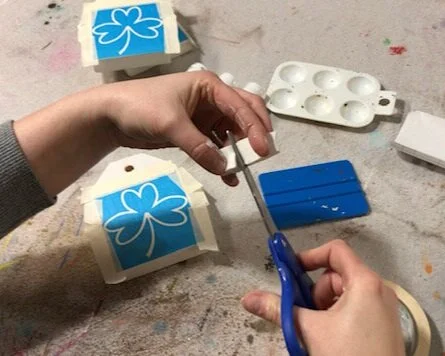
3. Use masking tape to tape off the edges of your stencil so you don’t get paint on areas of the wood tags that you don’t want paint on.

DIY craft kit for adults. How to make mini wood tags for St. Patrick's Day using your Cricut. How to stenicil wood signs for spring.


4. Cut your stenciling sponge in half so you can use it in all three paint colors without mixing the colors.

DIY craft kit for adults. How to make mini wood tags for St. Patrick's Day using your Cricut. How to stenicil wood signs for spring.

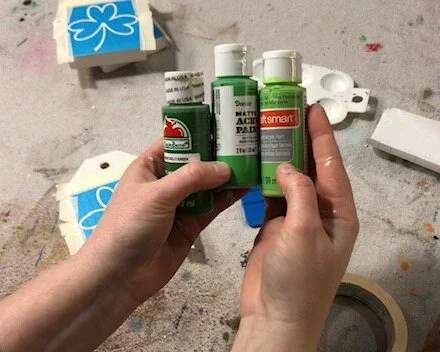
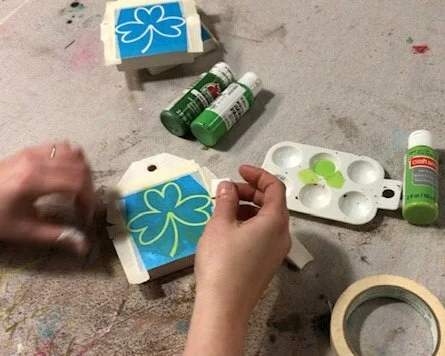
5. Using one end of one of the sponges dip it in the lightest color of green. You need very little paint, the more paint you use the more paint bleed you will likely have. Dab your sponge onto one of your wood blocks where the clover is exposed on the wood. The coverage should be VERY faint. Let that dry and repeat up to three times. You don’t want to apply more than three coats as this could cause issues with paint peel up where you just stenciled.

DIY craft kit for adults. How to make mini wood tags for St. Patrick's Day using your Cricut. How to stenicil wood signs for spring.

6. Peel up your stencil and tape. Using an xacto knife helps to remove the middle piece of the clover.

DIY craft kit for adults. How to make mini wood tags for St. Patrick's Day using your Cricut. How to stenicil wood signs for spring.

7. Repeat steps 5 & 6 for your other two wood tag bases.

8. Let them dry.

How to make mini wood tags for St. Patrick's Day. Easy tutorial to make mini wooden tags for spring using your Cricut.

Distressing

After your paint completely dries from stenciling you can start distressing your wood St. Patrick’s Day tags. I LOVE using antiquing wax for this process. Antiquing wax comes in a several different colors but my favorite its definitely the regular antiquing wax. Learn more about how to transform your DIY farmhouse style crafts with antiquing wax.

  1. Using sand paper or your sander give a quick sanding to the edges, corners, and lightly on the front of each wooden tag. Wipe off and dust.

DIY craft kit for adults. How to make mini wood tags for St. Patrick's Day using your Cricut. How to stenicil wood signs for spring. How to distress handpainted wood signs using sandpaper.

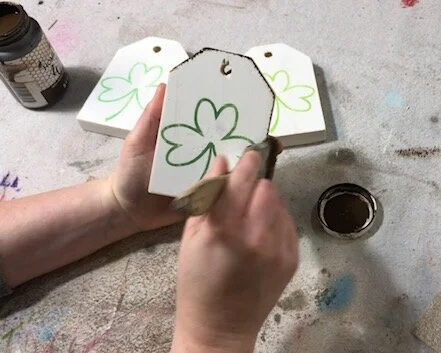
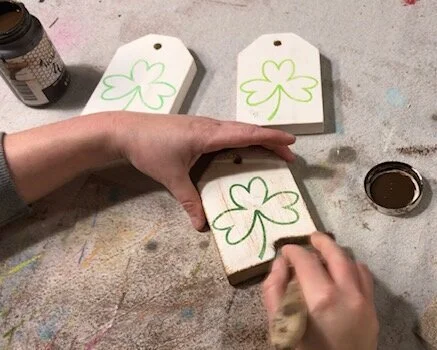
2. Take your chip brush and lightly dip it into your antiquing wax. Dab off the excess, a little wax goes a very long way. Much like you did with the sandpaper, focus on brushing the wax on the edges, corners, and lightly on the front of your wooden tags.

DIY craft kit for adults. How to make mini wood tags for St. Patrick's Day using your Cricut. How to stenicil wood signs for spring. How to apply antiquing wax to wood.

Adding twine

Probably the easiest step is adding the twine. Decide how long you would like your twine hangers to be. I think I measured mine at 12” or so. You’ll need 3 pieces, one for each wood tag. Feed one piece of twine through the hole in one of the wood tags then tie it in a knot.

DIY craft kit for adults. How to make mini wood tags for St. Patrick's Day using your Cricut. How to stenicil wood signs for spring.

You’re ready to display your St. Patrick’s Day wood tags in your home. I know it may seem like a lot of steps written out but really these are super easy and quick to DIY once you get going on them.

Like with all of my DIY tutorials if you have any questions please reach out. Leave a comment below or send me a message on one of my social media pages. You can find my links at the top.

Happy Crafting!

Do you love freebies? Don’t forget to check out my FREE RESOURCE LIBRARY. It’s where I keep all of my FREE printables, files, and more. Go here to get instant access to my library

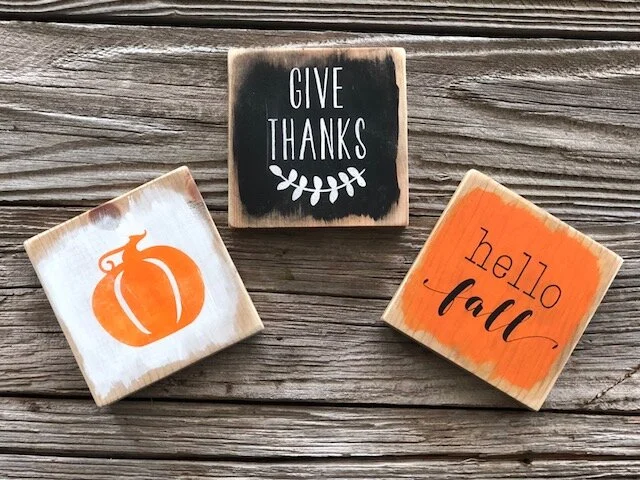
DIY stenciled rustic fall signs

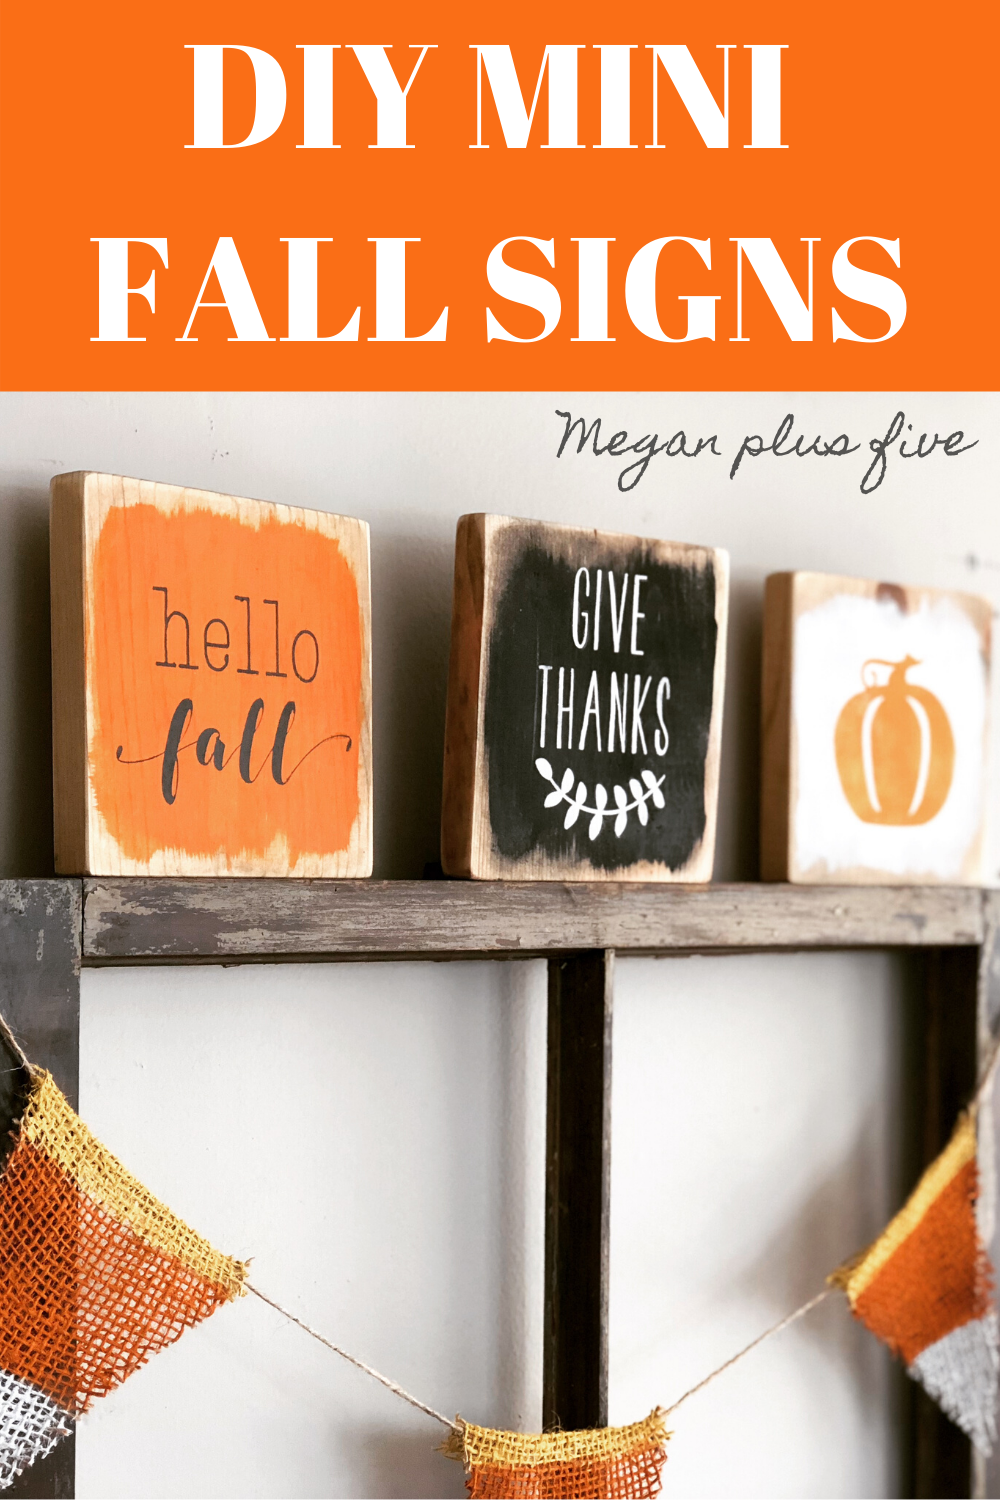
DIY painted fall signs. How to make your own farmhouse style signs for your fall themed decor. These painted tiny signs are so perfect for coffee bars, tierd trays and mantles. This trio of hello fall, give thanks, and a pumpkin are hand painted in …

DIY painted fall signs. How to make your own farmhouse style signs for your fall themed decor. These painted tiny signs are so perfect for coffee bars, tiered trays and mantles. This trio of hello fall, give thanks, and a pumpkin are hand painted in orange, black and white, the classic fall colors. This tutorial will take you step by step on how to make your own stenciled wooden signs at home.

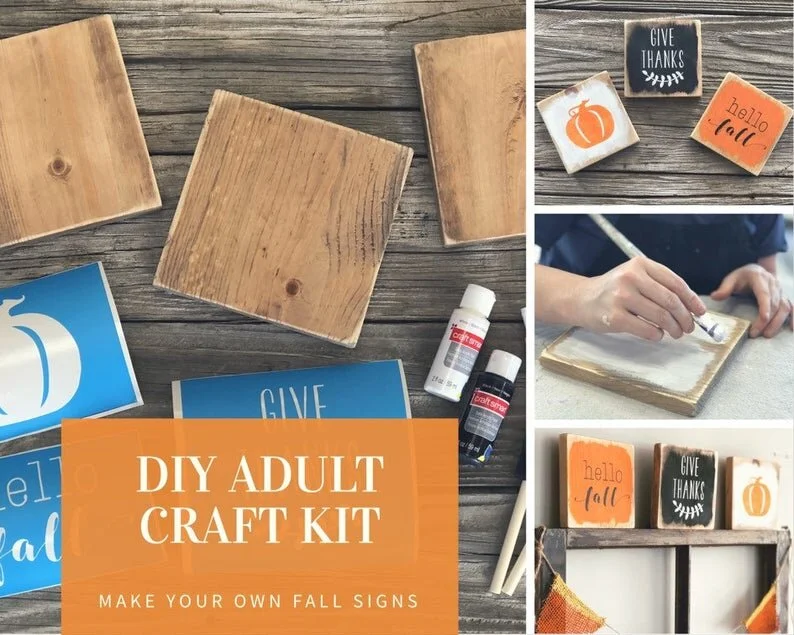
Don’t you just love painted mini signs?! HELLO FALL, GIVE THANKS, and a picture of a PUMPKIN just scream I LOVE FALL! I placed mine on a rustic old window frame that has candy corn burlap draped across it and OMG it looks adorable! These mini signs are also perfect for tiered trays and coffee bars. How cute would these be paired with some wood bead garland painted in fall colors?

Affiliate Disclosure. Some of the links on this website are affiliate links, which means that I may earn a small commission if you click on the link or make a purchase using the link. If you make a purchase you will not be charged anything additional.

If you plan to hang these mini fall wood signs be sure to check out my post on how to quickly and easily attach a sawtooth hanger to wooden signs.

How to make painted wood signs for fall

Here’s what you’ll need

Helpful tools

If you don’t have all the tools to completely make this fall craft from scratch you can order a DIY craft kit here. It comes with everything you need to make these wood signs at home.

ONE- the first thing you need to do is cut your wood into squares. I used a 1”x6” piece of pine, the actual size is 5.5” so I cut them into 5.5'“x5.5” squares. After you’ve cut and sanded your 5.5”x5.5” wood pieces stain them and let them dry for 24 hours. After they’ve dried sand around the edges, corners, and a light sanding on the front, be sure to wipe them down so you get all of the sawdust off of them. I LOVE my RYOBI CORDLESS SANDER , it is what I use for all of my wooden projects. But, if you don’t have a sander you can get the job done with 120 grit sand paper.

TWO- Cut your stencils out. If you want to use an SVG similar the ones in this tutorial you can go here to grab your SVG files. I’ve found that using true stencil film works best for stenciling wood signs. I highly recommend cutting the designs out on Oramask stencil film. I used a Cricut Explore to cut the files for this fall craft. I weeded them with an xacto knife once they were done cutting.

THREE- Now you can start painting! You want to paint each sign a different color. Start by painting a thin layer of paint on the front of each sign. You want to leave a small border around the edge. This should look kinda rough and uneven, it will give it lots of character when finished this way. Wait for the first layer to dry completely then paint a second THIN layer on top of that. I don’t recommend painting more than two layers of base paint. the more layers you have the more problems you will run into when peeling up your stencil.
DIY Mini Wooden Winter Signs

Repeat this step for all 3 signs. Once they are all TOTALLY DRY you are ready for stenciling. They must be completely dry otherwise your stencil will not stick to the wood and it will be an ugly mess.

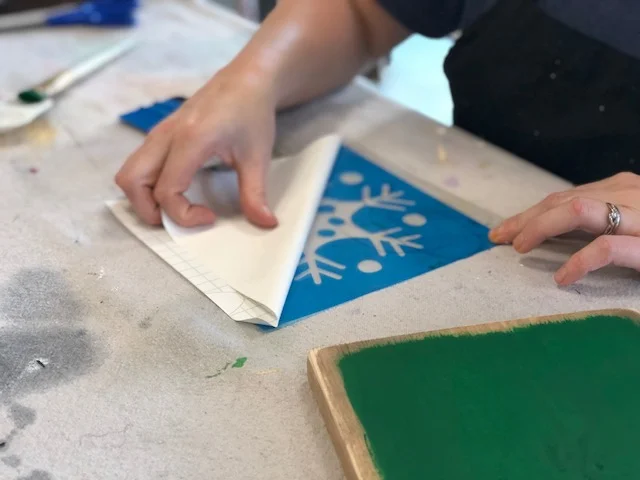
I don’t have pictures of how to do the next steps on the fall mini signs BUT I am sharing pictures of a similar craft that I made for winter themed signs. You can read the full winter themed tutorial here. Both sign trios have the same steps, the only differences are the stencils and paint colors, everything else is the same :)!

FOUR- Start by removing the paper backing from your stencil. This works best if you use a vinyl applicator {here’s what I use} or you can use a stiff store rewards card, I don’t recommend using your bank card as it could break during the process.

If you’re using your own stencils you’ll need transfer tape to transfer your stencil onto the wood in one piece.

DIY Mini Wooden Winter Signs

Start by rubbing the front of the stencil with your vinyl applicator. Be sure you move in one direction.

DIY Mini Wooden Winter Signs

Then flip it over and do the same to the back.

DIY Mini Wooden Winter Signs

Now slowly peel the paper backing away from the stencil. This works best if you start at one corner and peel away at a sharp 90 degree angle. Go SLOW.

Before you start applying your stencils decided which stencil you will put on each board.

DIY Mini Wooden Winter Signs

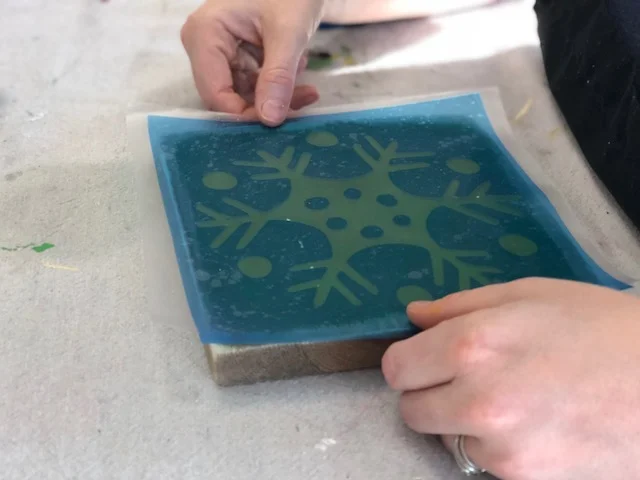
First, you’ll want to place your stencil where you want it on your board. I wanted mine to all be centered so that’s what I did but you can place them anywhere on the board you’d like. I just recommend keeping the image within the painted part of the wood.

DIY Mini Wooden Winter Signs

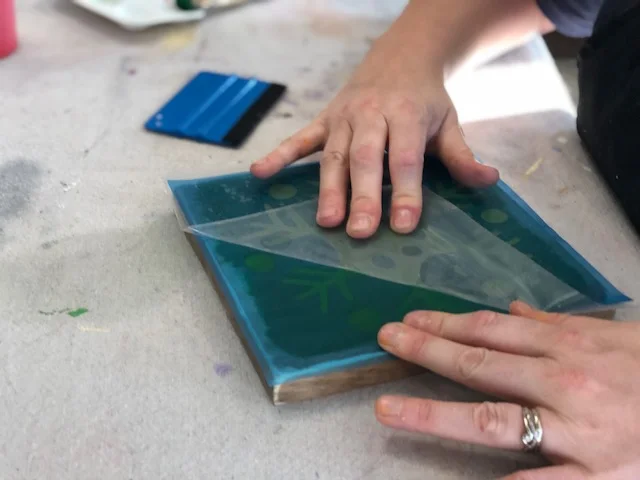
Using your vinyl tool rub the stencil, using the same technique as before. Now SLOWLY peel the transfer tape {the clear sticky stuff} away from your stencil. I do this at a sharp angle and I will slowly roll it off of the stencil.

DIY Mini Wooden Winter Signs

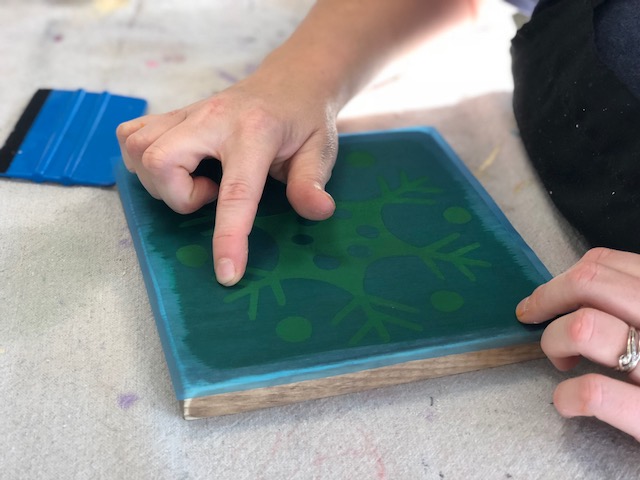
After you get the transfer tape off rub your finger along all the exposed stencil edges {anywhere there is wood showing thru}. this helps to get s good seal on your stencil.

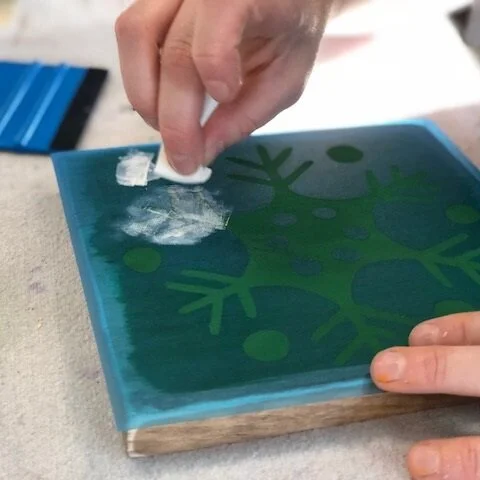
FIVE- Now you’re ready to start painting your stencil! Use one end of your cosmetic sponge LIGHTLY dip it in the paint color you’d like your design. BE SURE TO USE VERY LITTLE PAINT, this is key to getting little to no paint bleed under your stencil. Dab the sponge on a paper towel a couple times then onto your stencil, do this till you have a very THIN even coat {you should be able to see thru the first coat}. LET DRY, repeat till you are happy with the coverage.

DIY Mini Wooden Winter Signs

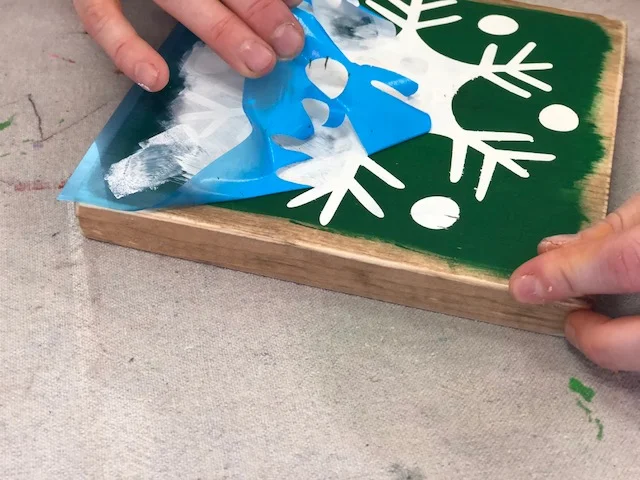
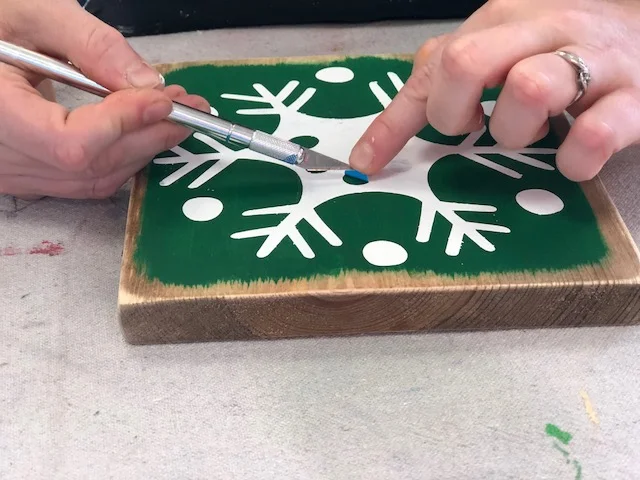
SIX- After you’re finished sponging the stencil you can peel it up immediately. I know all tutorials can vary with peeling the stencil up while the paint is still wet or waiting for it to dry. I have had the best luck peeling the stencil while the paint is still wet. Use an xacto knife or sewing pin to aid in this step.

DIY Mini Wooden Winter Signs

As with all of my DIY tutorials if you have any questions please ask in the comments below:)

DIY painted fall signs. How to make your own farmhouse style signs for your fall themed decor. These painted tiny signs are so perfect for coffee bars, tiered trays and mantles. This trio of hello fall, give thanks, and a pumpkin are hand painted in…

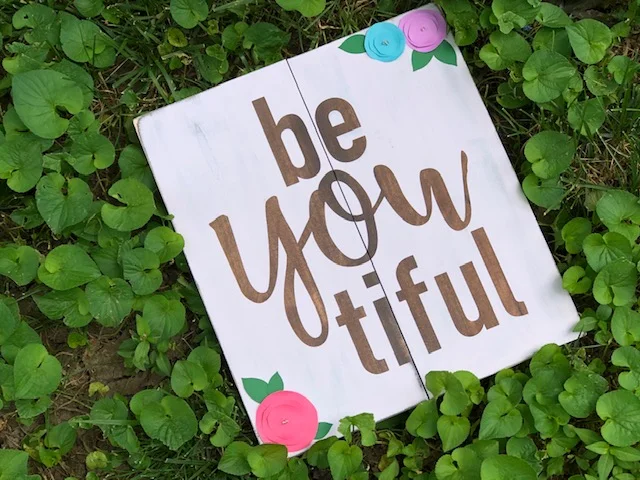
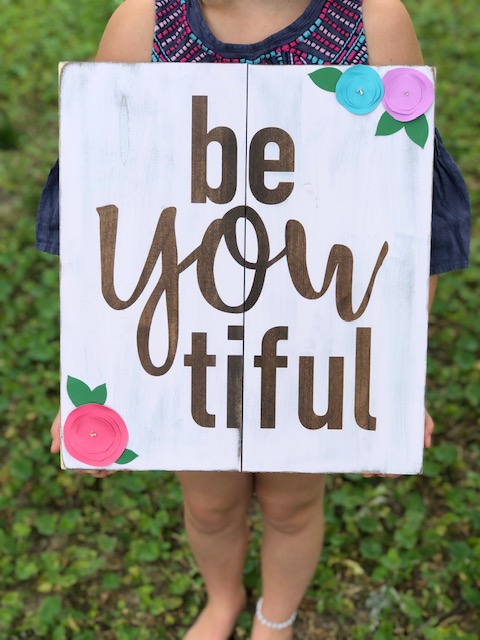
DIY stenciled beYOUtiful pallet style wood sign

DIY beYOUtiful pallet style wood sign

HOW TO REVERSE STENCIL A WOOD SIGN

Being a mom of four little girls isn’t always easy. It’s definitely not constant tea parties and princess power all day every day like some think. It’s a ball of emotions, an unspoken comparison of one another, living in a world that constantly judges them for not being identical. People think that because you have a sister you should be so much alike. Your looks, your personality, the way you learn. That couldn’t be farther from the truth. But honestly our girls have shed some tears over this and it breaks my heart. I try to remind them daily that they are unique and one of a kind amazing humans. One way I try to promote self positivity with our girls is through our home décor.

I had this quote “ be YOU tiful” on our wall right by our front door for years. It was just a quick decal I made up using removable vinyl and after I put it up I was instantly under impressed by it. But I left it up because I wanted our girls to see that message every day when they walked out the door. To remind them that they are them, there is no one else in the world that could ever take their place. That God put them here to be them. Three years passed and I decided it needed to come down and I was going to make a much prettier version, a happier version, one that they will look at and rays of beauty will flow from it.

Click this link to buy your own handmade beYOUtiful sign on my Etsy shop

beYOUtiful wood sign, how to make your own painted pallet sign

Affiliate Disclosure. Some of the links on this website are affiliate links, which means that I may earn a small commission if you click on the link or make a purchase using the link. If you make a purchase you will not be charged anything additional.

I had everything I needed on hand to make this but I’ve included the links where you can get some of these supplies. Yes, those are affiliate links but not to worry, you will not be charged anything extra if you make a purchase through them. They are just a way for this stay at home momma to help with the daily bills of raising our four little girls :)!

Here’s what you’ll need


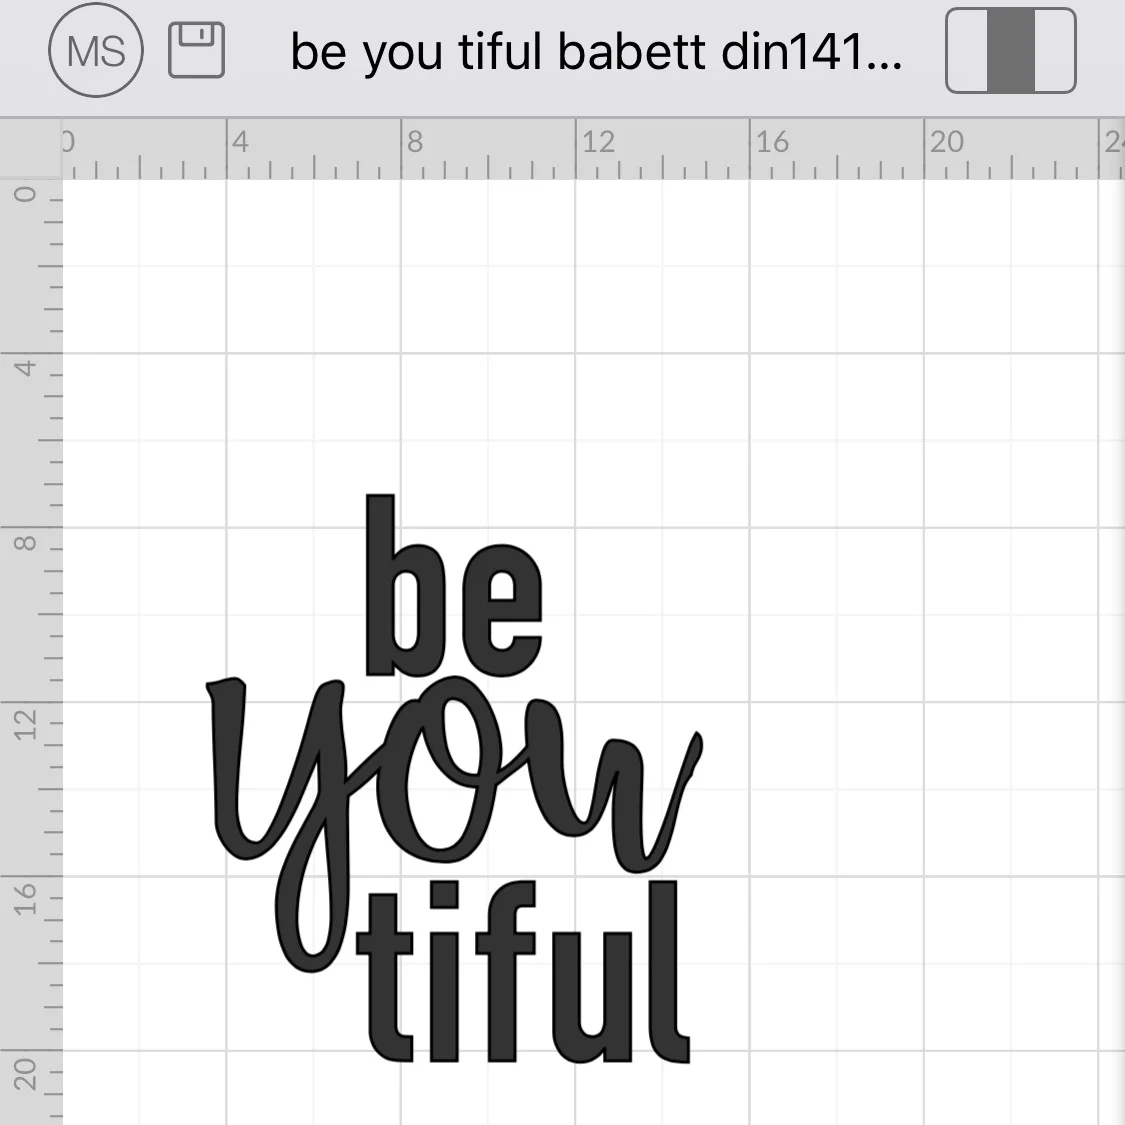
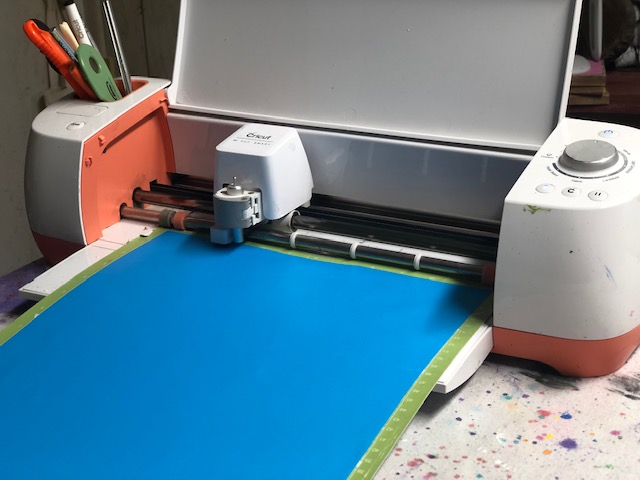
First you want to come up with your design. I use Cricut Design Space for this. My computer wasn’t cooperating so I opened the saved file from the app on my phone and blue toothed my machine and phone together so I could cut it wirelessly {technology has come a long way since growing up in the 80’s and 90’s!}.

Fun note, I actually made this design for our third daughter’s talent show outfit. She was singing Scars to Your Beautiful by Alessia Cara which is an amazing song that tells girls to love all their flaws and imperfections, those are apart of their own beautiful.

beYOUtiful+cricut+design+space

If you’re thinking about getting a Cricut I recommend the Explore, click this link to read more about CRICUT EXPLORE AIR 2 {the difference between the explore and the air is that the explore does not have bluetooth built in so you have to buy this bluetooth cricut adapter, but the air’s have bluetooth already built in so you don’t have to purchase anything extra for it.} but any cutting machine you have that you’re comfortable using will work.

DIY beYOUtiful pallet style wood sign

Follow this link to my YouTube channel for tips on how to stain a wood sign

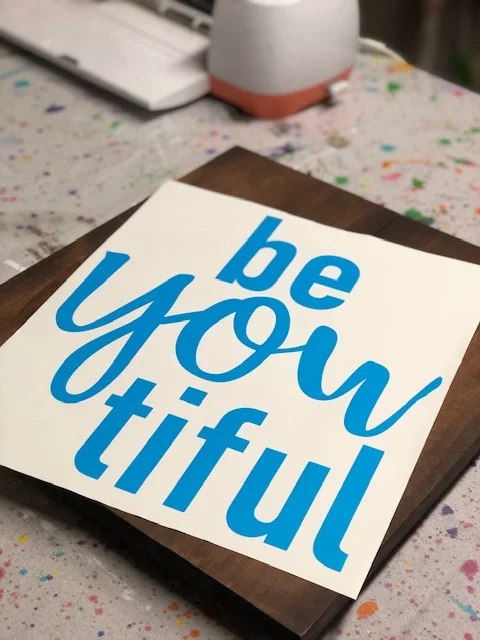
Apply your stencil to a dry prestained board.

DIY beYOUtiful pallet style wood sign

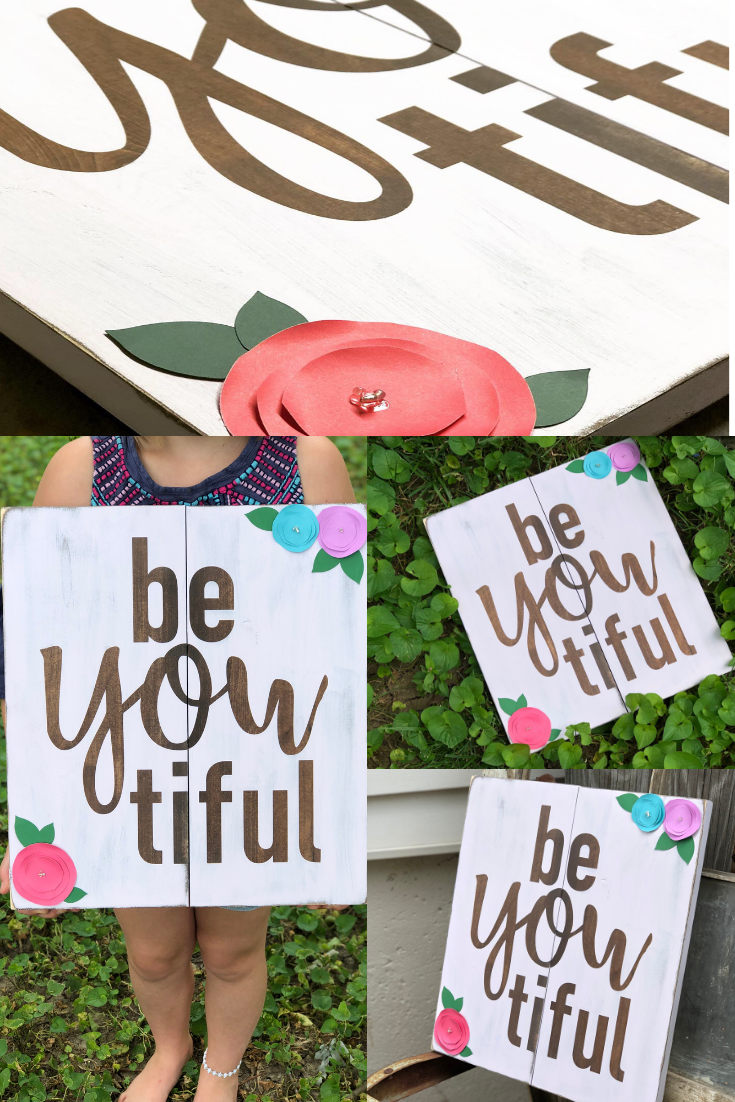
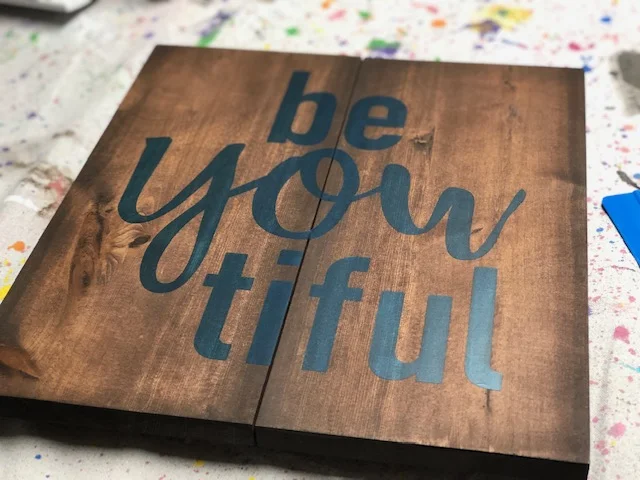
Then paint your board with whatever color you’d like. I wanted a big contrast between the stained wood and the paint color so that the stain would really pop. So I used LILAC colored paint. It’s not too pink/purple but it’s not white, our walls are white so I didn’t want to hang a white sign on the white wall. This color is perfectly shabby chic! See my YouTube video for a full tutorial on how to do this, how to stencil a stained wood sign.

After I stenciled my board and it was totally dry I added these adorable hand cut paper flowers. These little guys are so super easy to make! See my how to make hand cut paper flower tutorial for a step by step guide.

How to make paper flowers to add to a rustic sign
DIY beYOUtiful pallet style wood sign with paper flowers
How to make painted wood signs, all the tips and tricks the pro's won't tell you

If you’ve been wanting to learn even more pro tips on how to make and paint wood signs be sure to get on my waiting list for my Learn How to Paint Wood Signs, all the tips the pro’s won’t tell you.


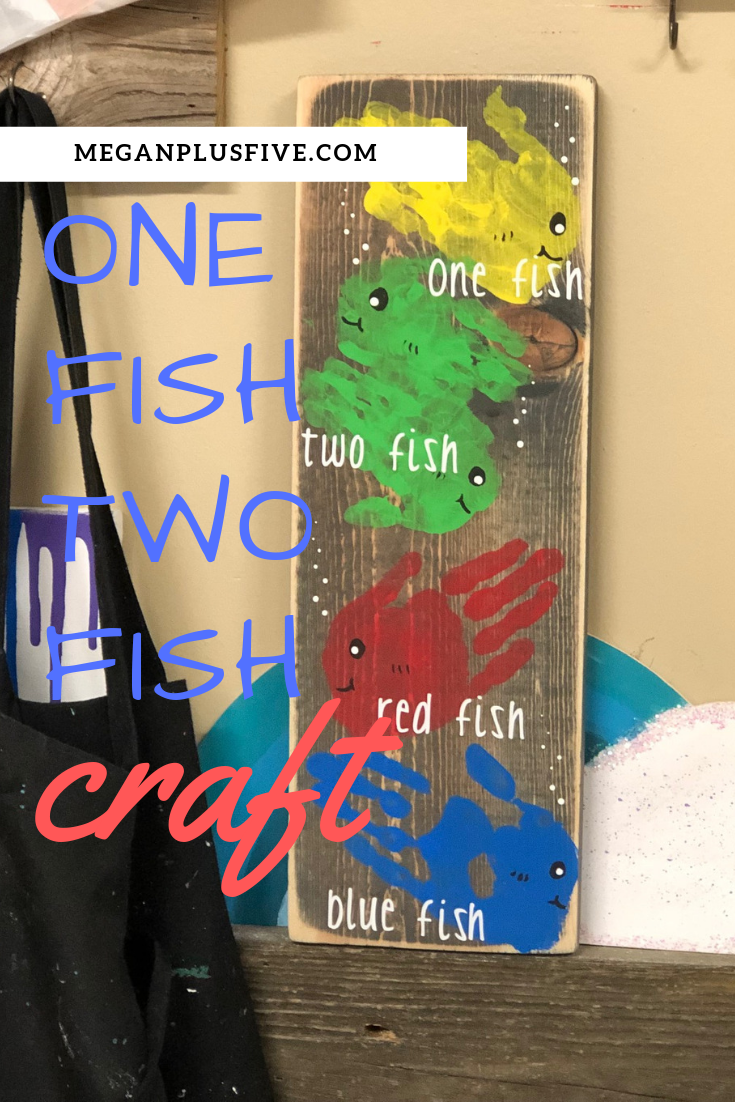
One fish two fish, perfect Dr. Seuss keepsake craft to make with your kids

One fish two fish, perfect Dr. Seuss keepsake craft to make with your kids

A person’s a person no matter how small

-Dr. Seuss

Our family loves Dr. Seuss so naturally every year on his birthday, March 2nd, we celebrate him in some way. Usually we read his books and make a fun snack or just for fun craft in honor of him.

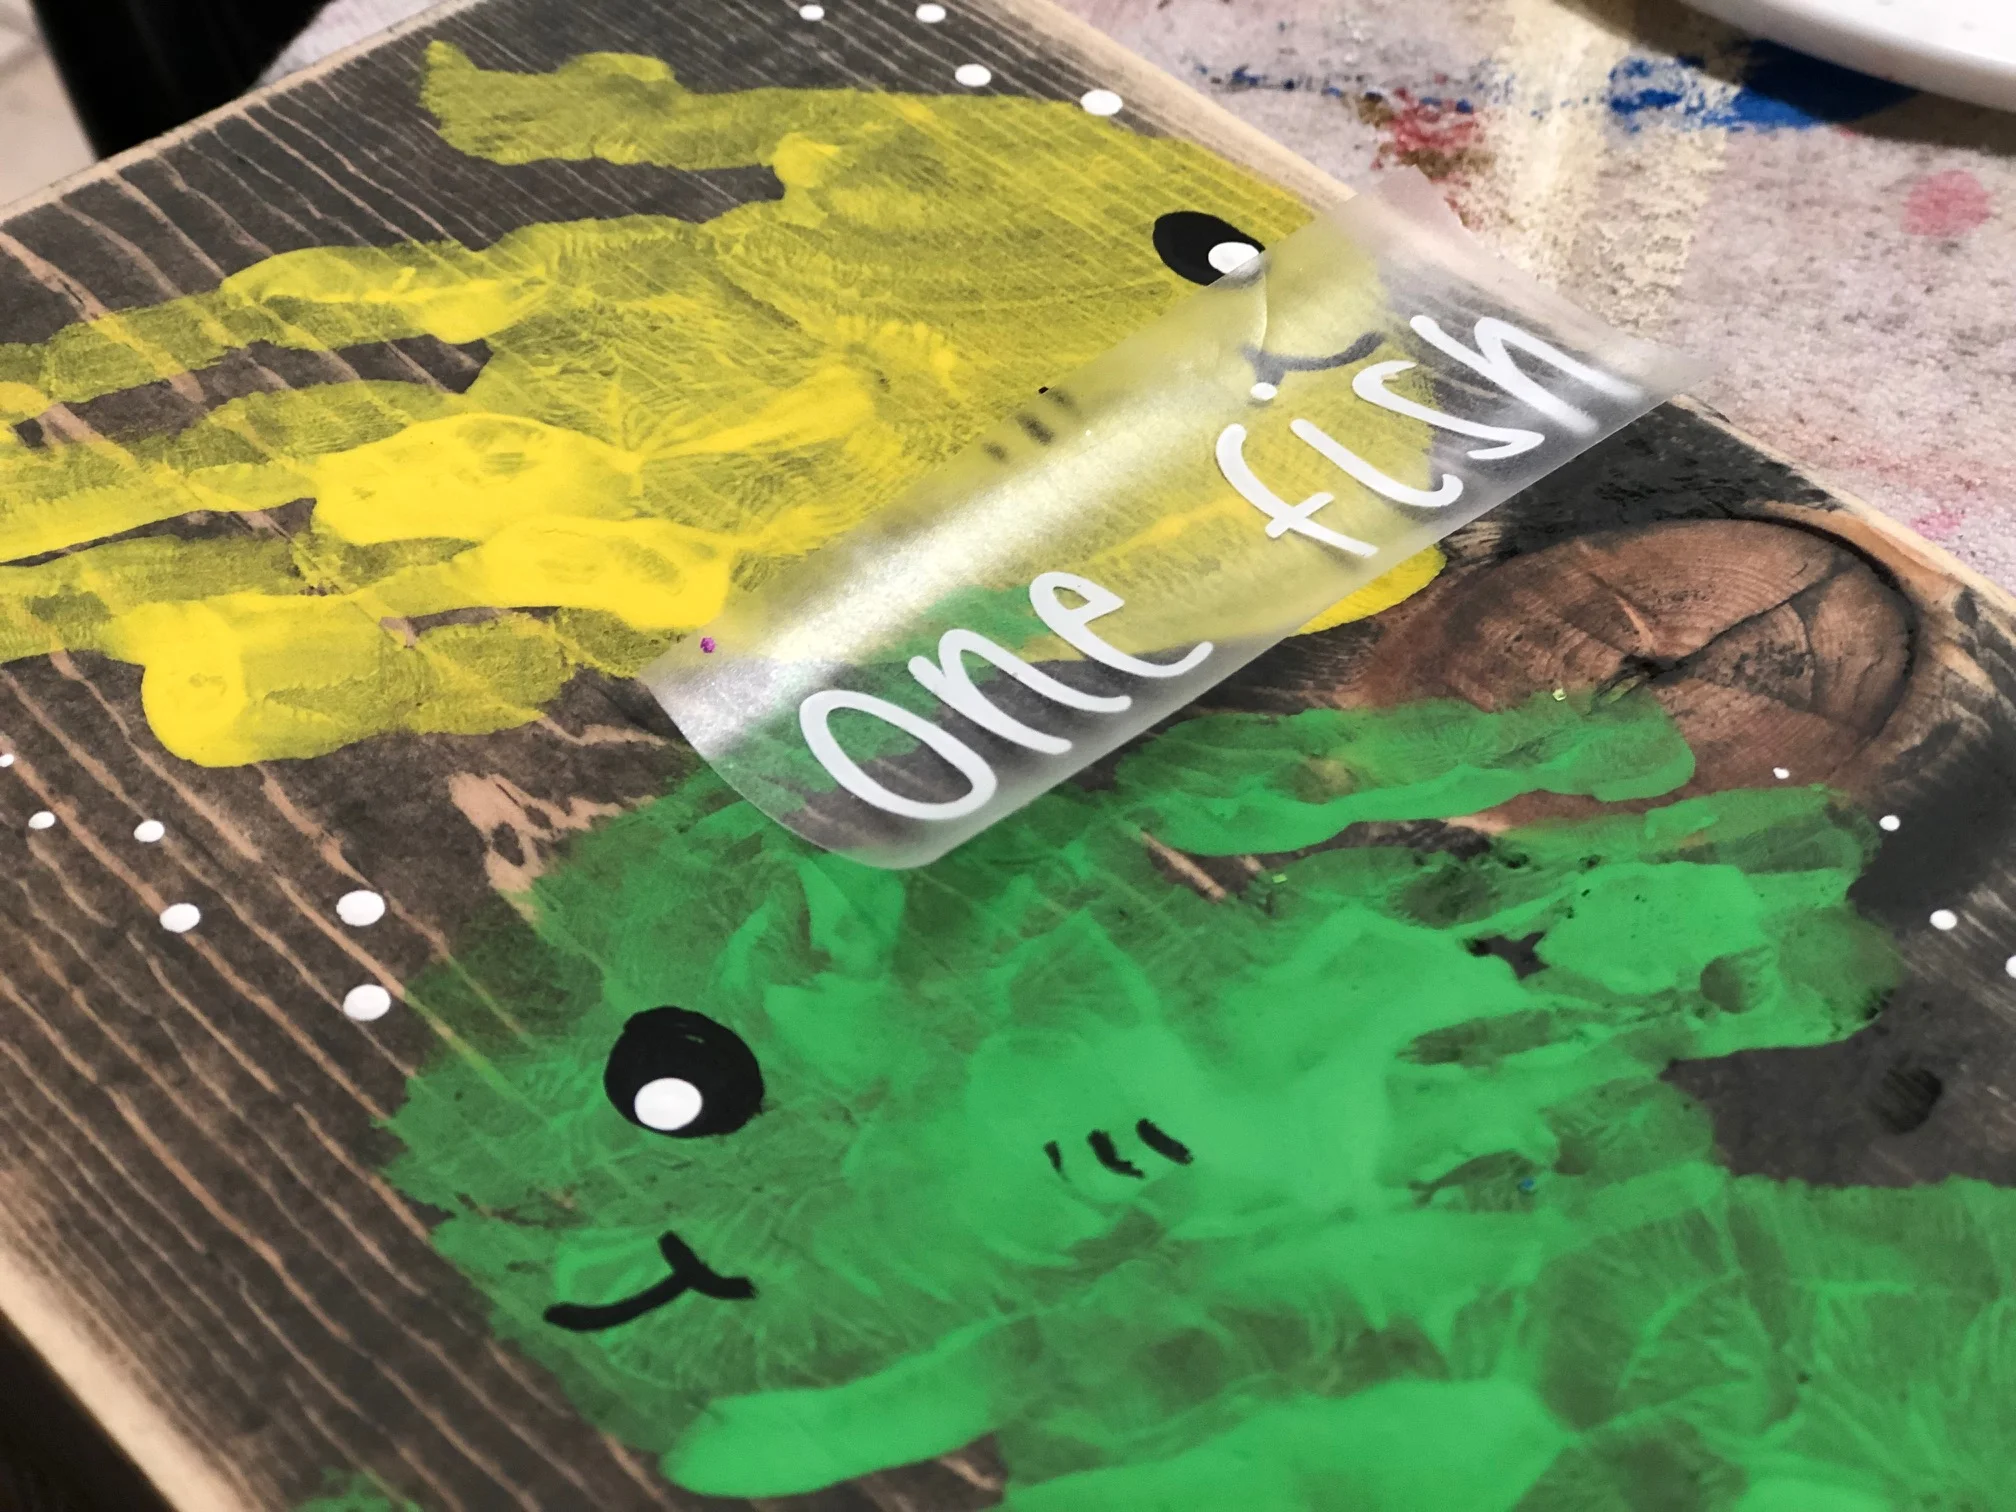
But this year we went a little extra with it. Our oldest daughter is getting older, about to hit middle school next year {I have no idea where that time went} so I know that the days of doing fun keepsake projects with her handprints are numbered. I fully took advantage of the opportunity to make this adorable ONE FISH TWO FISH craft with all four of my sweet daughters handprints.

Affiliate Disclosure. Some of the links on this website are affiliate links, which means that I may earn a small commission if you click on the link or make a purchase using the link. If you make a purchase you will not be charged anything additional.

Here’s how you can make your own at home

supplies you’ll need:

1. CUT OUT DECALS

Using my Cricut cutting machine I cut all the lettering out first. My projects usually go much smoother if I have all of the decals and accents cut out before I start staining and painting. If you don’t have a cutting machine you can always write the lettering with a chalk pen or permanent marker. My hand writing isn’t so neat but my Cricut does a great job ;)!

2. CUT & STAIN WOOD

One fish two fish, perfect Dr. Seuss keepsake craft to make with your kids

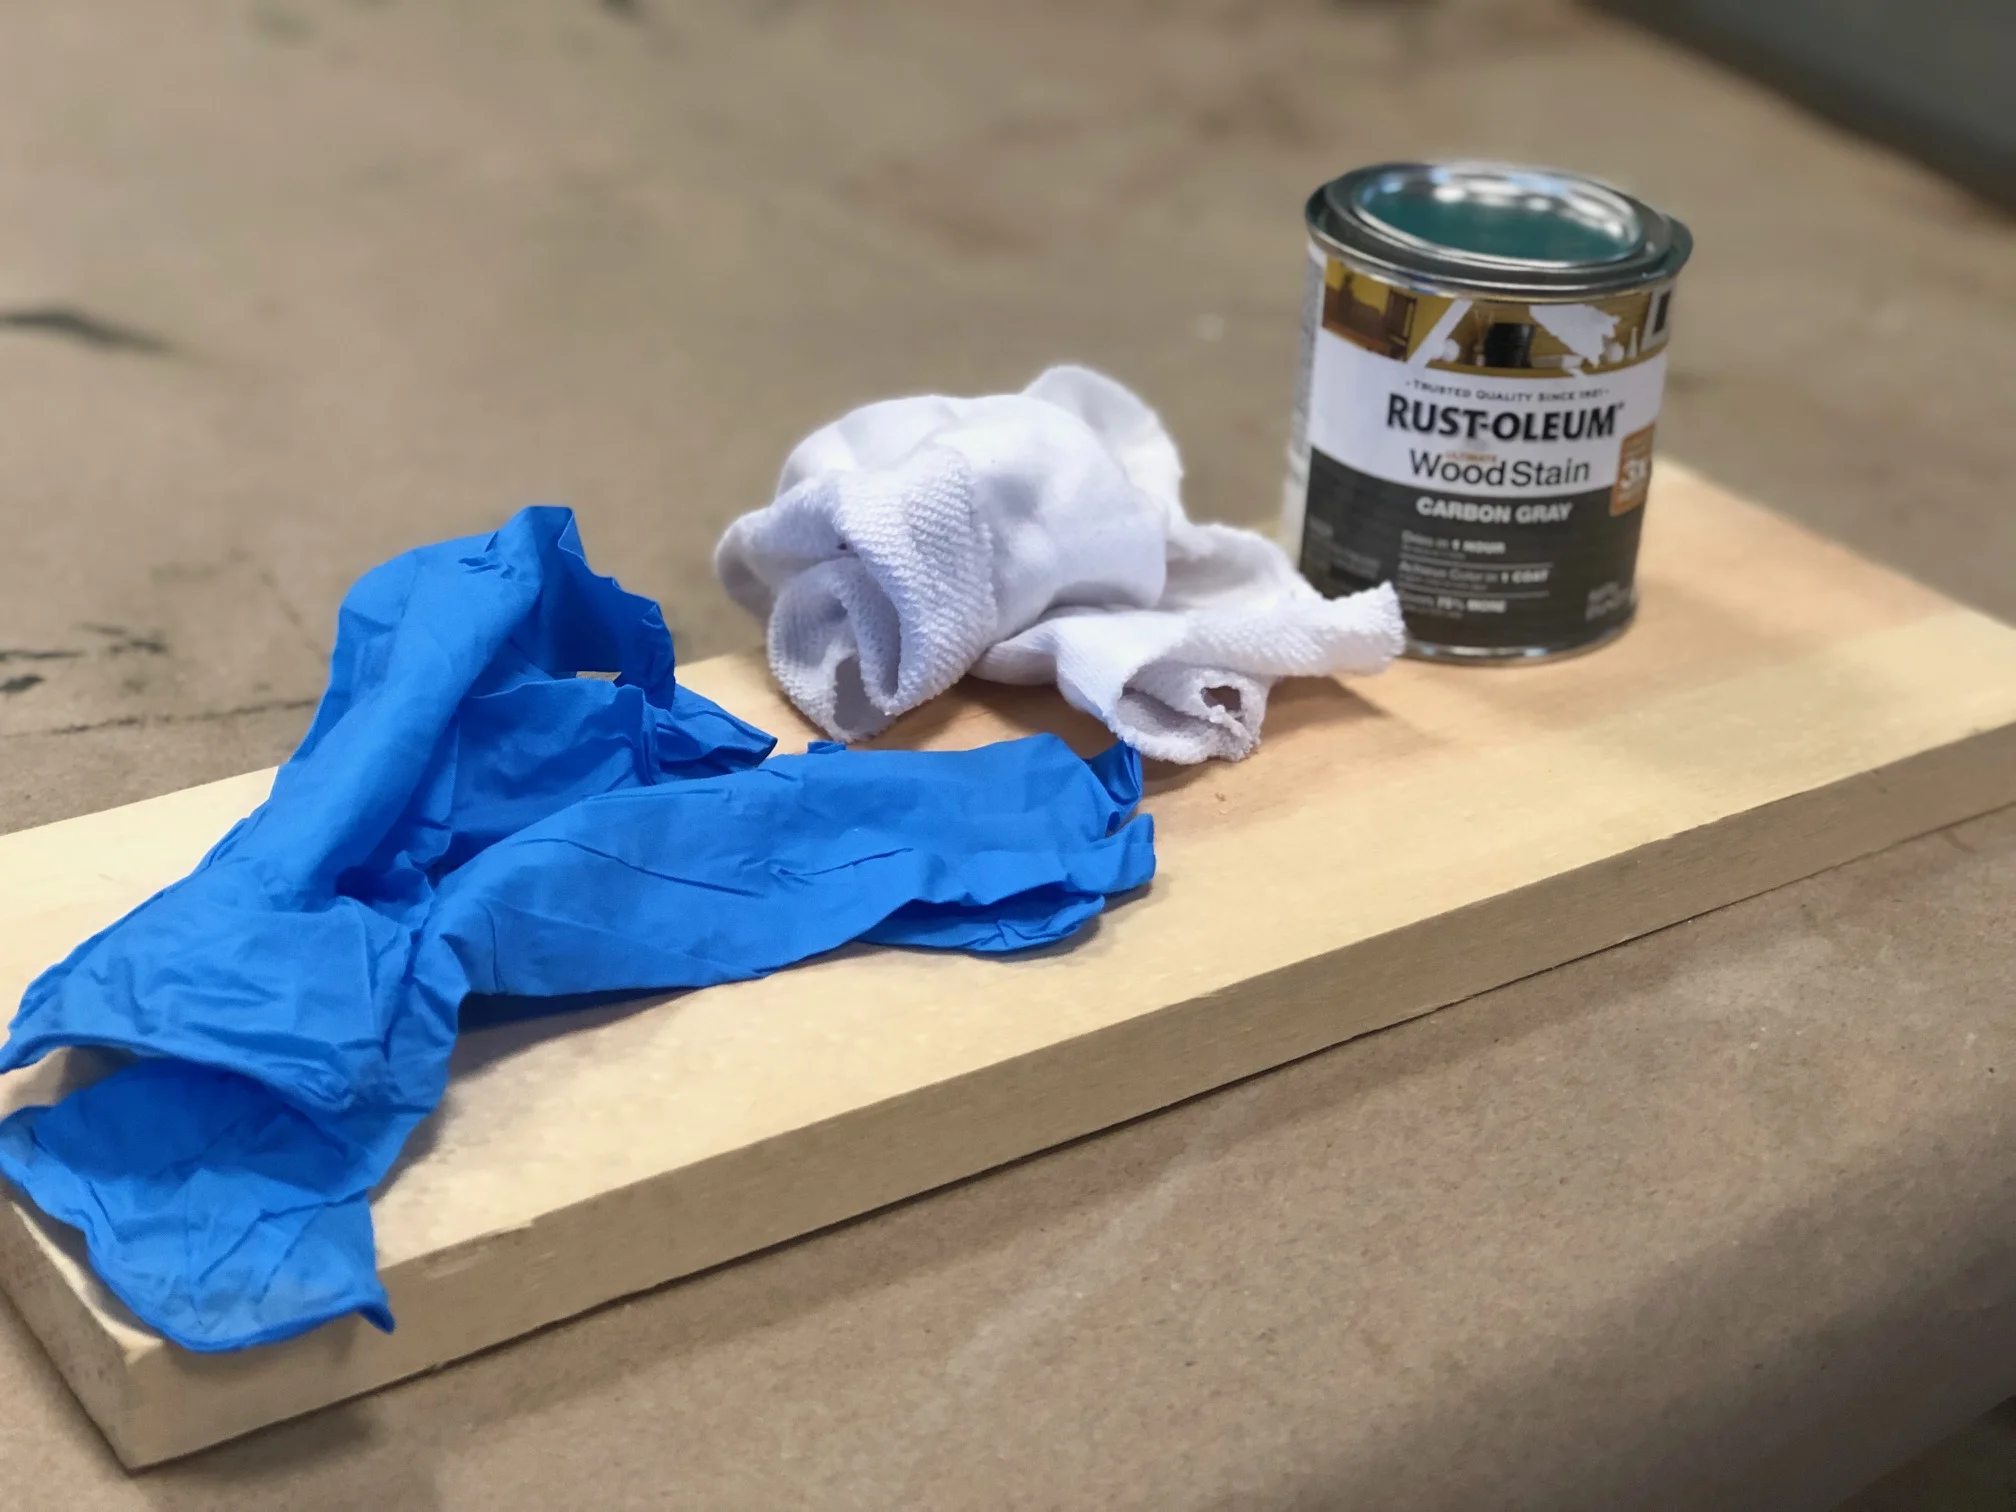
First give your board a light sanding, then stain. Be sure to watch my HOW TO STAIN WOOD video if you’ve never done this before. Let your board dry for 24 hours before the next step.

3. DISTRESS EDGES

One fish two fish, perfect Dr. Seuss keepsake craft to make with your kids

After your board has dried you’ll want to give it a quick sanding on all surfaces of the board. I always focus more on the edges and corners. Using a RYOBI cordless sander works great for this but you can use regular sandpaper if you need to. Wipe with a lint free cloth to get all the dust off, you don’t want this on there when you go to paint.

4. PAINT

One fish two fish, perfect Dr. Seuss keepsake craft to make with your kids

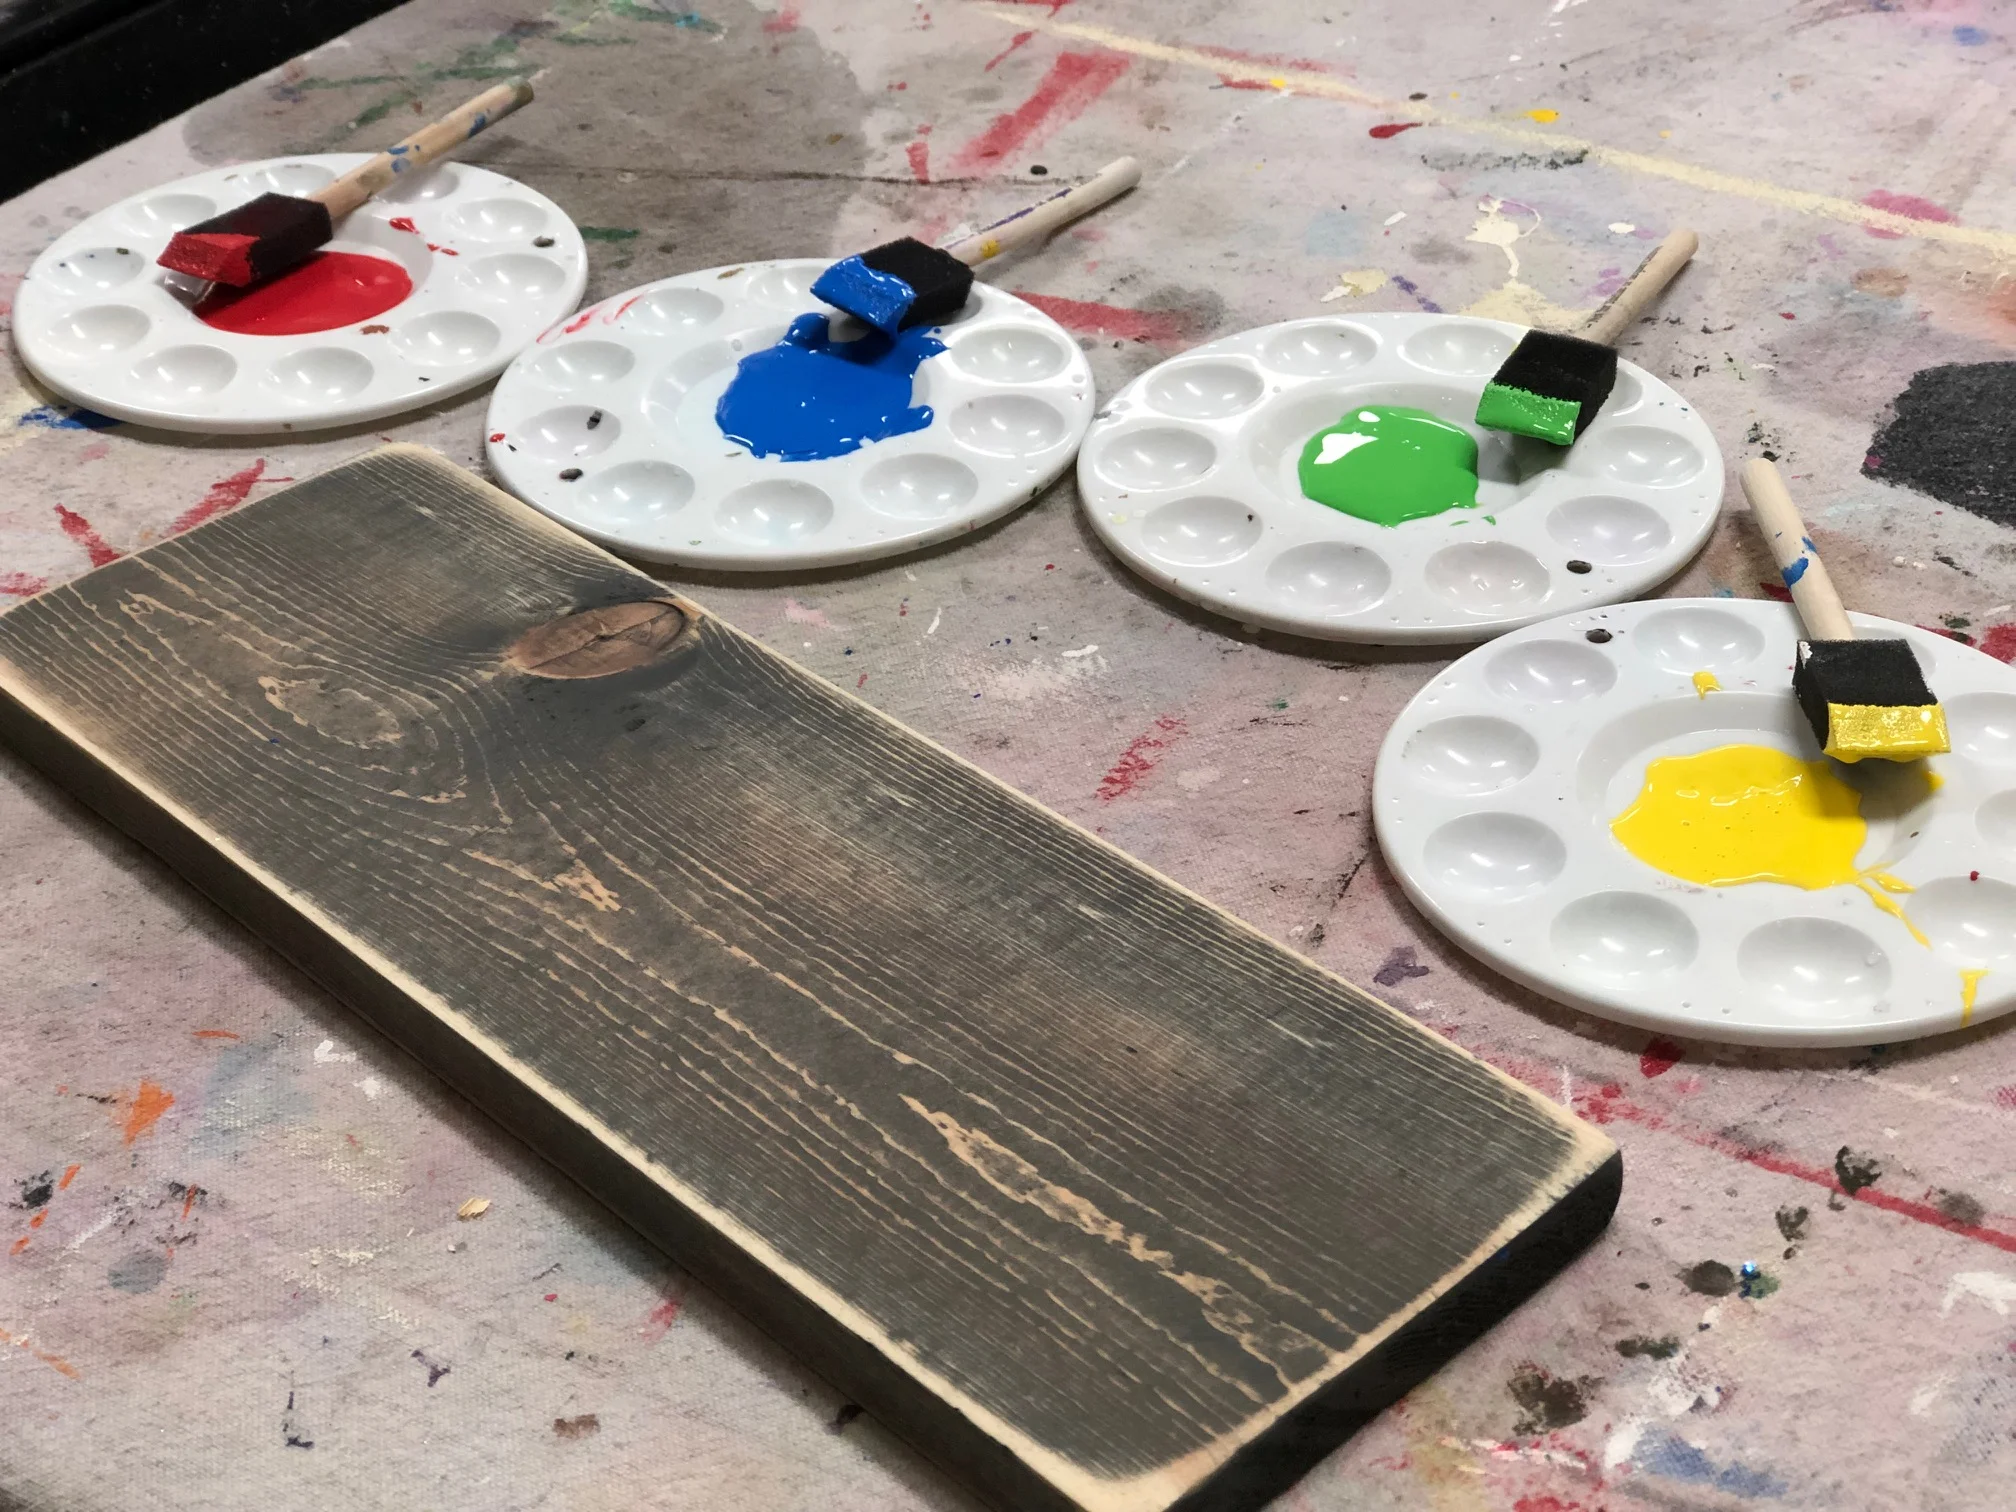
You’ll need RED, BLUE, GREEN, and YELLOW for this next step. I went ahead and made pencil marks for where I wanted the girl’s hands to hit. That way I could map out where they would be and I wouldn’t have either too much space or not enough space left.

One fish two fish, perfect Dr. Seuss keepsake craft to make with your kids

You’ll want to do one handprint at a time. Coat the hand in a fairly good amount of paint but not too much, you don’t want a glob of paint to be left on the board.

Gently guide their hands down on the board and press them lightly.

One fish two fish, perfect Dr. Seuss keepsake craft to make with your kids

Before you add any facial features/gills you want their handprints to totally dry. If you don’t let them dry you will smudge the colors together.

5. APPLY VINYL DECALS

One fish two fish, perfect Dr. Seuss keepsake craft to make with your kids

After all the paint is dry, totally 100% dry, add your vinyl decals. If your paint is not completely dry the vinyl will not stick to the board. I use a vinyl squeegee to help get the decals down really good. Then peel the transfer tape off.

Now it’s ready for you to hang and enjoy in your home.

One fish two fish, perfect Dr. Seuss keepsake craft to make with your kids

Click here for more crafty kid posts

Check out the latest posts on the blog

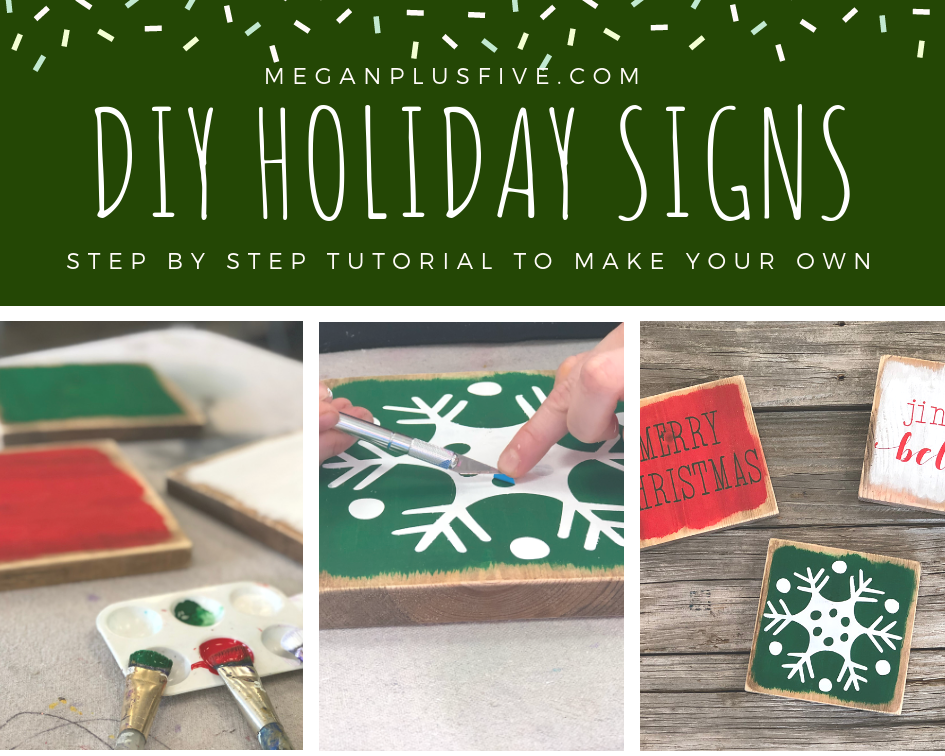
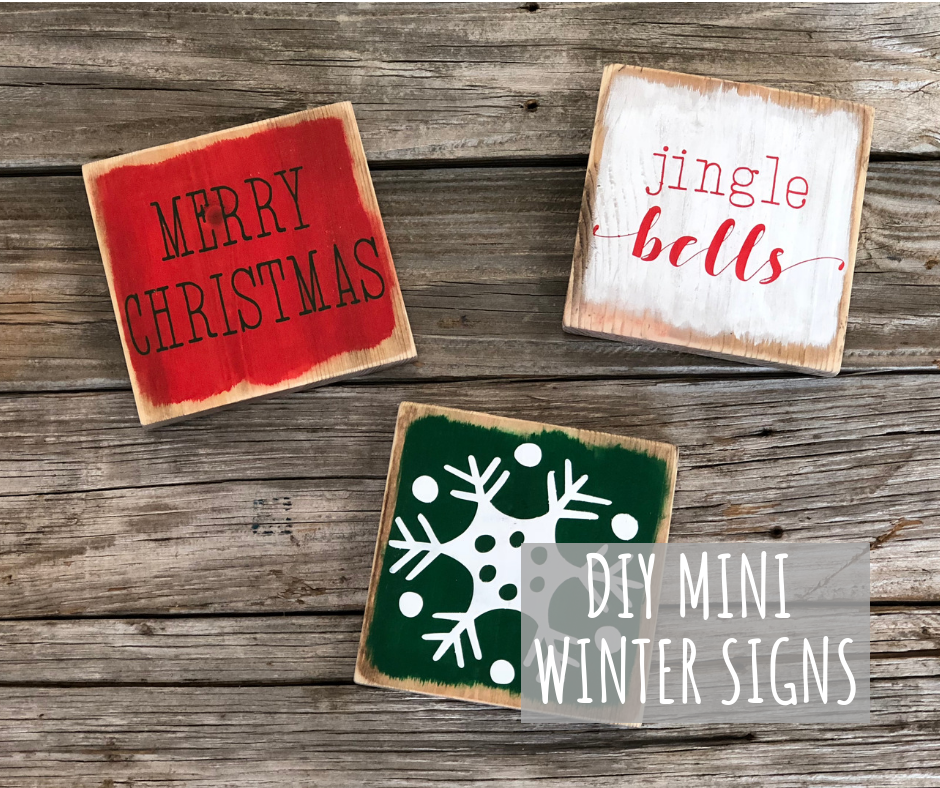
DIY mini stenciled Christmas signs

DIY Mini Wooden Winter Signs

Painting & stenciling mini wood Christmas signs

Do you LOVE those little mini signs like I do? They are so perfect because they don’t take up a lot of space, you can store them easily when they aren’t in season, and they are SO simple to make yourself.

Affiliate Disclosure. Some of the links on this website are affiliate links, which means that I may earn a small commission if you click on the link or make a purchase using the link. If you make a purchase you will not be charged anything additional. This is just a way I can help add to our family finances to raise our four daughters. Please know I would never recommend a product or service I do not totally stand behind.

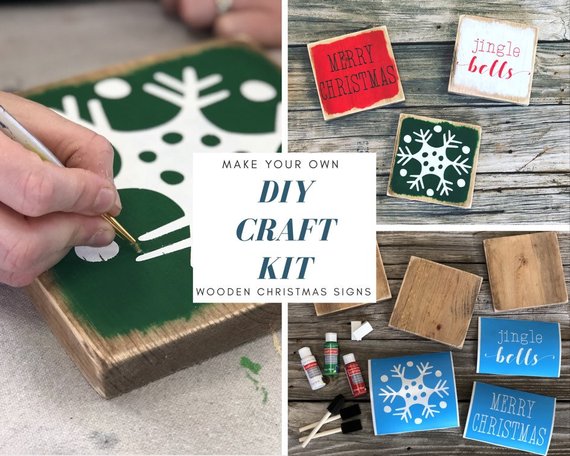
Here’s what you’ll need to make your own at home. To make it even easier we’ve put together a CRAFT kit that has everything you need for project here.

HOW TO STENCIL ON WOOD

winter craft kit.jpgDIY Mini Wooden Winter Signs

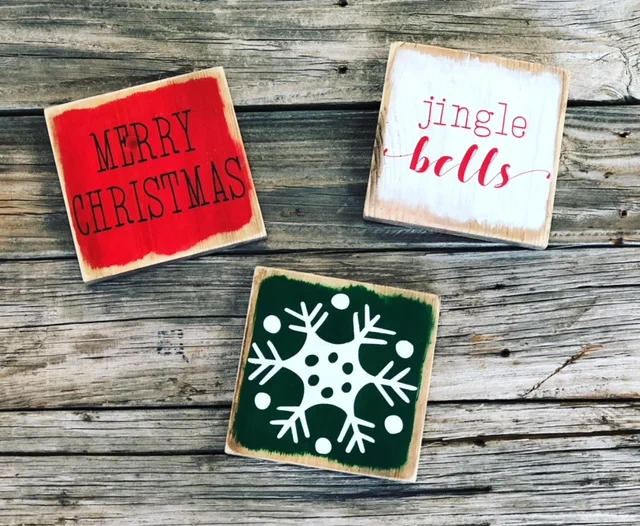
MAKE YOUR OWN MINI STENCILED WOOD CHRISTMAS SIGNS FOR YOUR RUSTIC HOME DECOR

You’ll need

3 - 5.5x5.5 wooden pieces {I got a 1x6 from the local hardware store}

stain, rags, and gloves {here’s what I used}

stencils {you can buy ours here, or make your own}

3 - brushes {you can use sponge brushes or here’s what I use}

white, red, & green acrylic paint {here’s what I used}

2 makeup sponges {you can pick them up at your local dollar store}

sander or 120 grit sandpaper

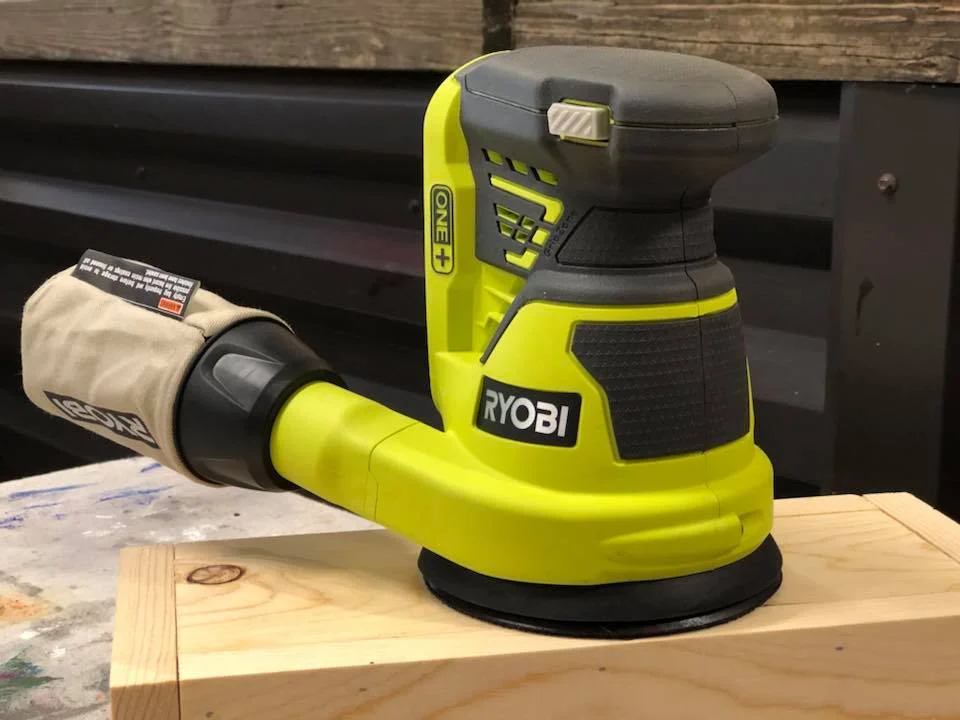
DIY Mini Wooden Winter Signs

After you’ve cut and sanded your 5.5”x5.5” pieces stain them and let them dry for 24 hours. After they’ve dried sand around the edges, corners, and a light sanding on the front, be sure to wipe them down so you get all of the sawdust off of them. I LOVE my RYOBI CORDLESS SANDER , it is what I use for all of my wooden projects. But, if you don’t have a sander you can get the job done with 120 grit sand paper.

DIY Mini Wooden Winter Signs

Now it’s time for the painting! You’ll paint each wooden sign a different background color. Start with a DRY brush and using a little bit of paint at a time apply a THIN coat of paint to one side of your board. Leave .25” border all the way around each piece. I don’t measure this, just eyeball it. This will give you that rustic uneven look.

DIY Mini Wooden Winter Signs

After your fist THIN coat is totally dry you can apply the second coat, be sure to apply using the same technique as you did with the first coat.

DIY Mini Wooden Winter Signs

Repeat this step for all 3 signs. Once they are all TOTALLY DRY you are ready for stenciling. They must be completely dry otherwise your stencil will not stick to the wood and it will be an ugly mess.

Start by removing the paper backing from your stencil. This works best if you use a vinyl applicator {here’s what I use} or you can use a stiff store rewards card, I don’t recommend using your bank card as it could break during the process.

If you’re using your own stencils you’ll need transfer tape to transfer your stencil onto the wood in one piece.

DIY Mini Wooden Winter Signs

Start by rubbing the front of the stencil with your vinyl applicator. Be sure you move in one direction.

DIY Mini Wooden Winter Signs

Then flip it over and do the same to the back.

DIY Mini Wooden Winter Signs

Now slowly peel the paper backing away from the stencil. This works best if you start at one corner and peel away at a sharp 90 degree angle. Go SLOW.

Before you start applying your stencils decided which stencil you will put on each board.

DIY Mini Wooden Winter Signs

First, you’ll want to place your stencil where you want it on your board. I wanted mine to all be centered so that’s what I did but you can place them anywhere on the board you’d like. I just recommend keeping the image within the painted part of the wood.

DIY Mini Wooden Winter Signs

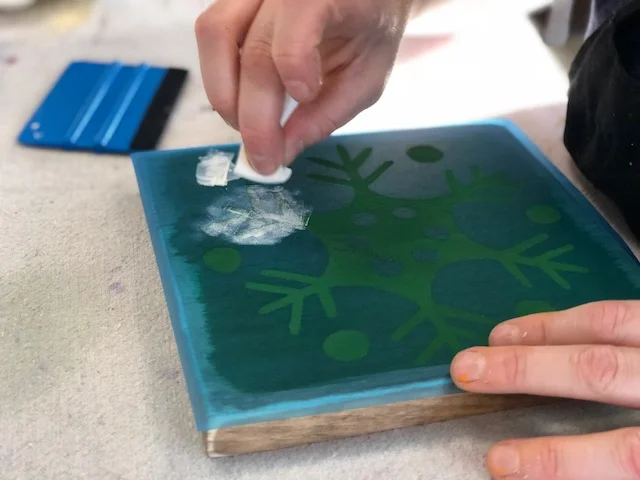
Using your vinyl tool rub the stencil, using the same technique as before. Now SLOWLY peel the transfer tape {the clear sticky stuff} away from your stencil. I do this at a sharp angle and I will slowly roll it off of the stencil.

DIY Mini Wooden Winter Signs

After you get the transfer tape off rub your finger along all the exposed stencil edges {anywhere there is wood showing thru}. this helps to get s good seal on your stencil.

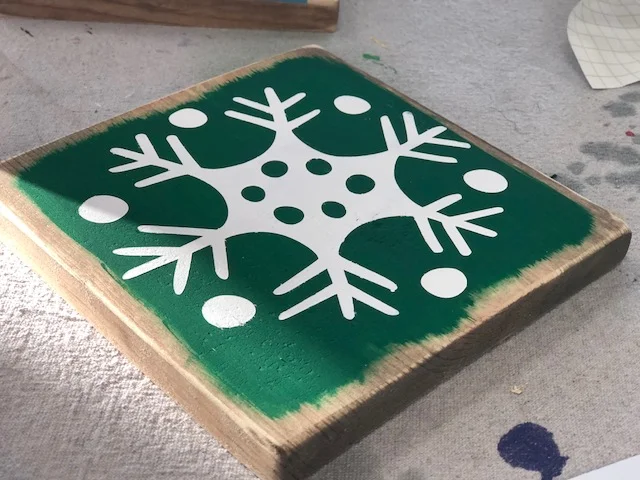
Now you’re ready to start painting your stencil!
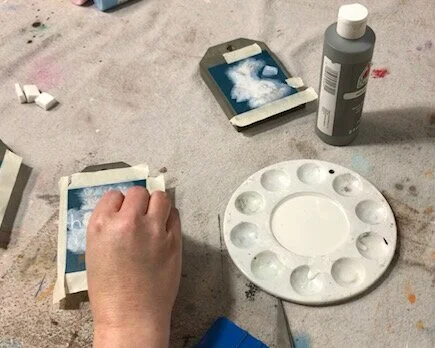
DIY Mini Wooden Winter Signs

Use one end of your cosmetic sponge LIGHTLY dip it in the paint color you’d like your design. BE SURE TO USE VERY LITTLE PAINT, this is key to getting little to no paint bleed under your stencil. Dab the sponge on a paper towel a couple times then onto your stencil, do this till you have a very THIN even coat {you should be able to see thru the first coat}. LET DRY, repeat till you are happy with the coverage.

DIY Mini Wooden Winter Signs

Now peel up your stencil.

DIY Mini Wooden Winter Signs

I use an xacto knife to get up all the little pieces. If you don’t have one of these a sewing pin/needle works great for this as well.

If you have any paint bleed just go over those with a small paint brush and your background color.

DIY Mini Wooden Winter Signs

Now finish the other two and you're ready to put them up to enjoy this holiday season.

DIY Mini Wooden Winter Signs