DIY rusty pumpkin from mason jar rings

DIY RUSTY MASON JAR RING PUMPKIN, how turn your unwanted mason jar lids and turn them into a rustic pumpkin for fall

How to make a rusty pumpkin from a mason jar lid

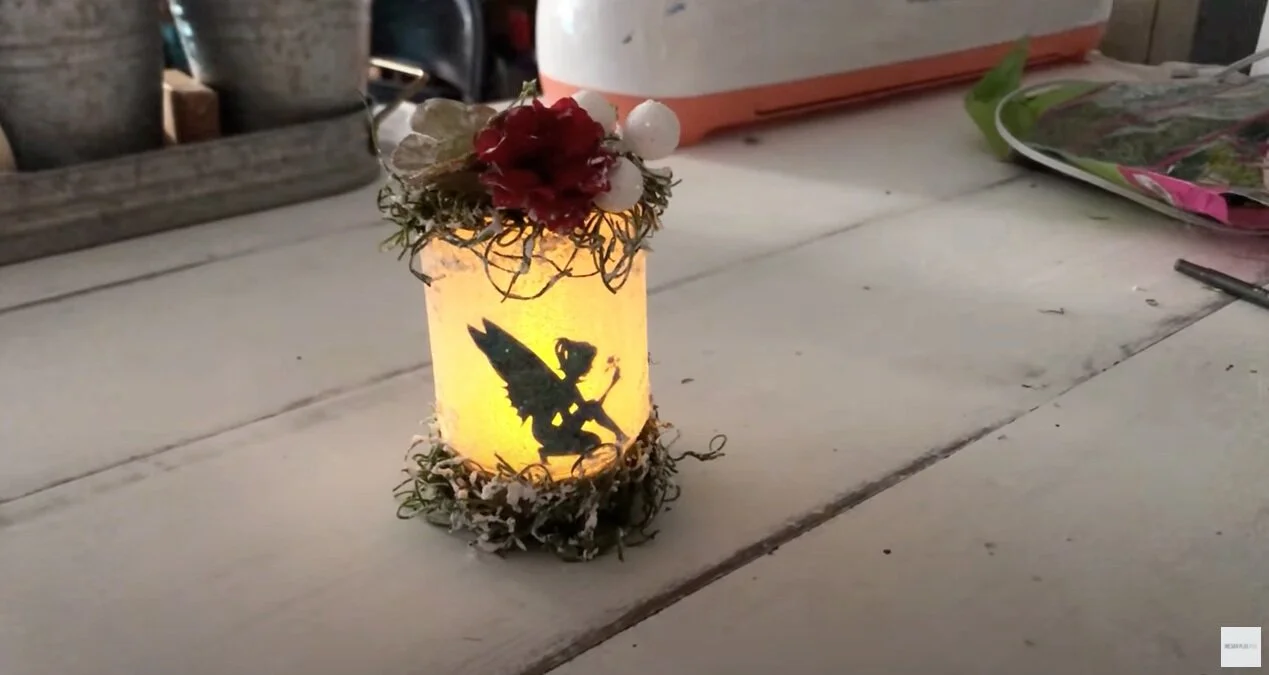
I’ll admit I have an obsession with MASON JARS!! Seriously though, who doesn’t in the days of rustic décor? But our family doesn’t just do crafts with them like this DIY LIGHT UP FAIRY JAR. Or these adorable DIY GLASS ETCHED MASON JARS. Other than storing food our family actually uses them as our drinking glasses. They are just so darn versatile! You can even buy these plastic mason jar lids so you don’t have to hassle with the two pieces that traditionally comes with mason jars.

Affiliate Disclosure. Some of the links on this website are affiliate links, which means that I may earn a small commission if you click on the link or make a purchase using the link. If you make a purchase you will not be charged anything additional.

Ok, so enough about how much I LOVE and use mason jars lol! Let’s get to the rusty mason jar lid pumpkin tutorial. These rusty pumpkins will tie in perfectly with your rustic décor. You can place these on the table as a centerpiece, on a mantle, sit them on a deep shelf, you could even put them on your front porch with the rest of your gorgeous fall decorations.

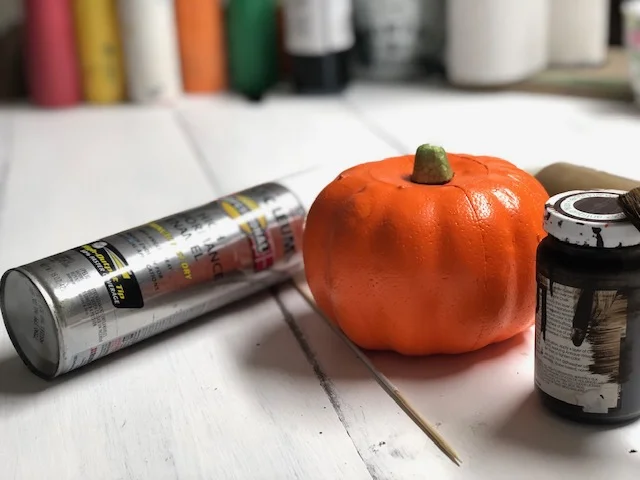
Here’s what you’ll need

DIY rusty pumpkin from a mason jar lid. How to make your own fall decor for your rustic farmhouse decorations.

If you aren’t in the reading mood skip to the bottom to catch the full rusty pumpkin video tutorial.
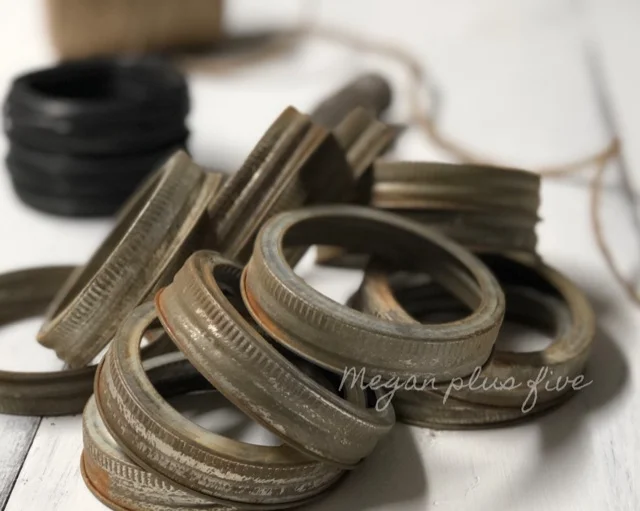
DIY+rusty+pumpkin+from+mason+jar+rings.+How+to+make+your+own+rustic+tin+pumpkin+for+your+farmhouse%2C+country+chic%2C+fall+decorations.jpg

You’re probably wondering…how do I make my canning jar lids rusty? I don’t have a tutorial up just yet for how to make your mason jar rings rusty. But don’t worry I’m working on it and it is SUPER easy! You basically just soak them in a mixture of vinegar and salt for a week or so. Take them out when you're satisfied with the rustiness. Rinse them off. And let them air dry. That’s it!

You can make yours as full as you like but I don’t like that super uniformed look that most mason jar ring pumpkins have. I use a few less rings than a lot of the other tutorials call for but the others are still gorgeous 😍. For mine, I used 12 rings but you can use more if you like that look better :)!


First, string your rusty mason jar lids on a piece of twine. Be sure they are all facing the same direction
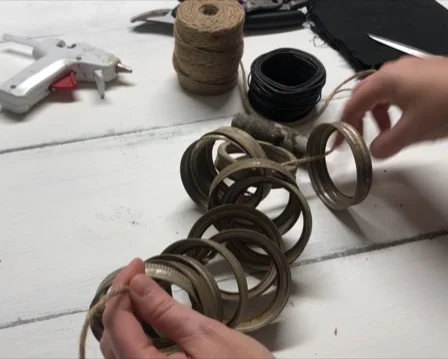
DIY rusty pumpkin from a mason jar lid. How to make your own fall decorations for your farmhouse and country chic home decor.

Next, make your mason jar rings curve into a circle and place the stick in the center. Then move your rings around so that they form the circle shape of the pumpkin. Tie the twine in a few knots. Remove the stick. Move the rings around to where you like them.

DIY rusty pumpkin from a mason jar ring. How to make your own farmhouse and country chic decorations for fall.

Once you have your lids where you want them place a ring of hot glue around the base of your stick and place your stick back in the center of the lids.

DIY rusty pumpkin from mason jar rings. How to make your own farmhouse and country chic decorations for fall

Then cut a piece of your wire, fold it in half and use your pliers to twist the ends. Place some hot glue on the curved end of the wire and then stick it in where your stick is.

DIY rusty pumpkin from mason jar rings. How to make your own farmhouse and country chic decorations for fall

Turn your pumpkin upside down and add more hot glue around where the stick is. This will give it more stability.

DIY rusty pumpkin from mason jar rings. How to make your own farmhouse and country chic decorations for fall

Cut a circle out of either fabric or felt and glue it to the bottom. This will give it a more finished look.

DIY rusty pumpkin from mason jar rings. How to make your own farmhouse and country chic decorations for fall

Now you’re ready to display your perfectly rusty mason jar ring/lid pumpkin!
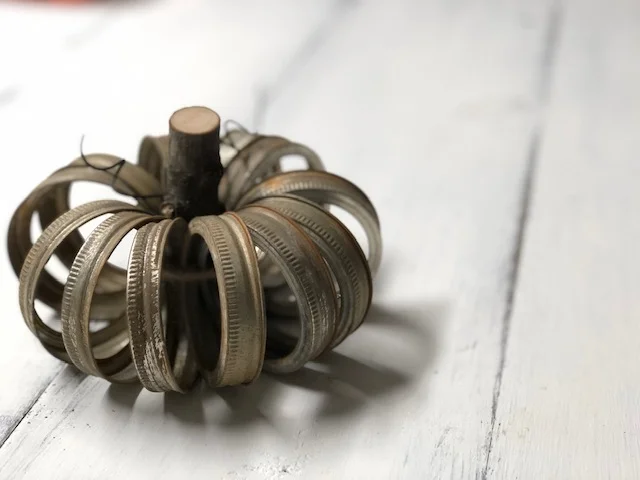
DIY rusty pumpkin from mason jar rings. How to make your own farmhouse and country chic decorations for fall

Check out the video tutorial below

Check out these other pumpkin themed crafts

Easy scrap wood pumpkins using a RYOBI scroll saw

DIY scrap wood pumpkins using your ryobi scroll saw.png

How to cut out pumpkins from scrap pieces using your RYOBI scroll saw

Are you like me and have a TON of scrap wood on the wood pile? I seriously have a hard time tossing perfectly good scrap pieces. You just never know when a piece will come in handy. But I also know my crafty business is hitting it’s busiest season of the year and there’s no way I can hang on to all of those scrap pieces if I want a functioning wood working space. So I needed to find something to do with them.

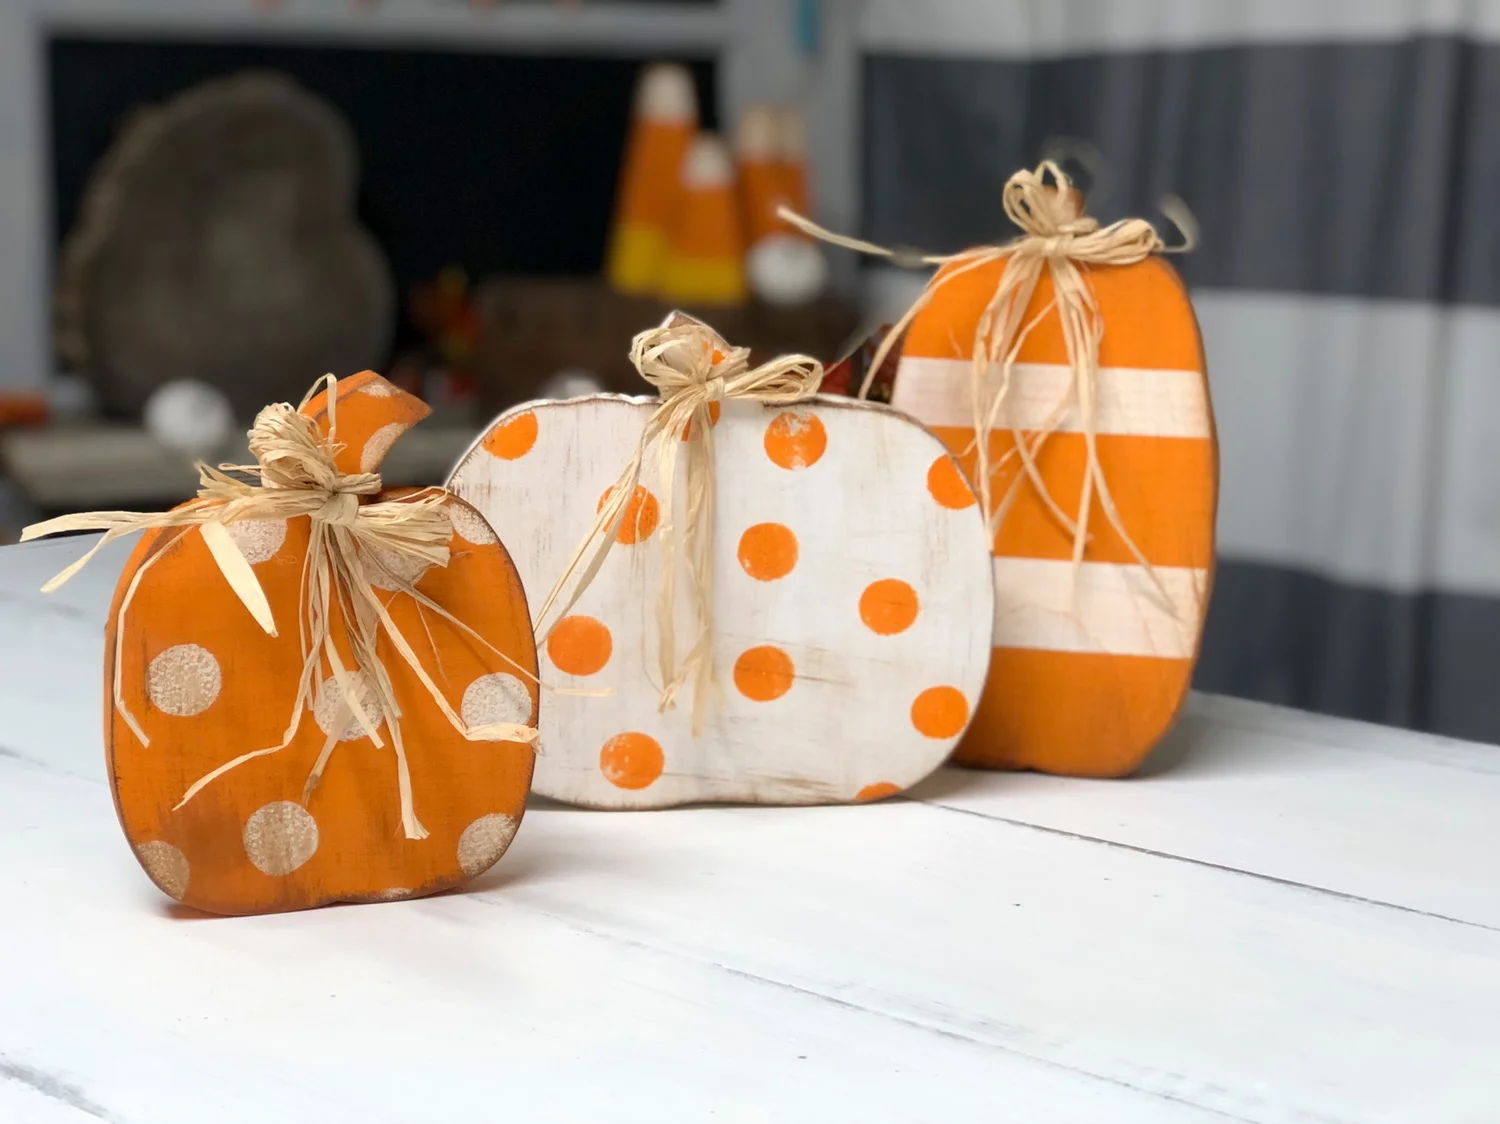
I decided to make these adorable free standing wood pumpkin cutouts. They turned out even cuter than I imagined they would! So much that I added them to my DIY CRAFT KITS and they have been selling like crazy!

Affiliate Disclosure. Some of the links on this website are affiliate links, which means that I may earn a small commission if you click on the link or make a purchase using the link. If you make a purchase you will not be charged anything additional.

How to use your Cricut and Ryobi scroll saw to make free standing wood pumpkins

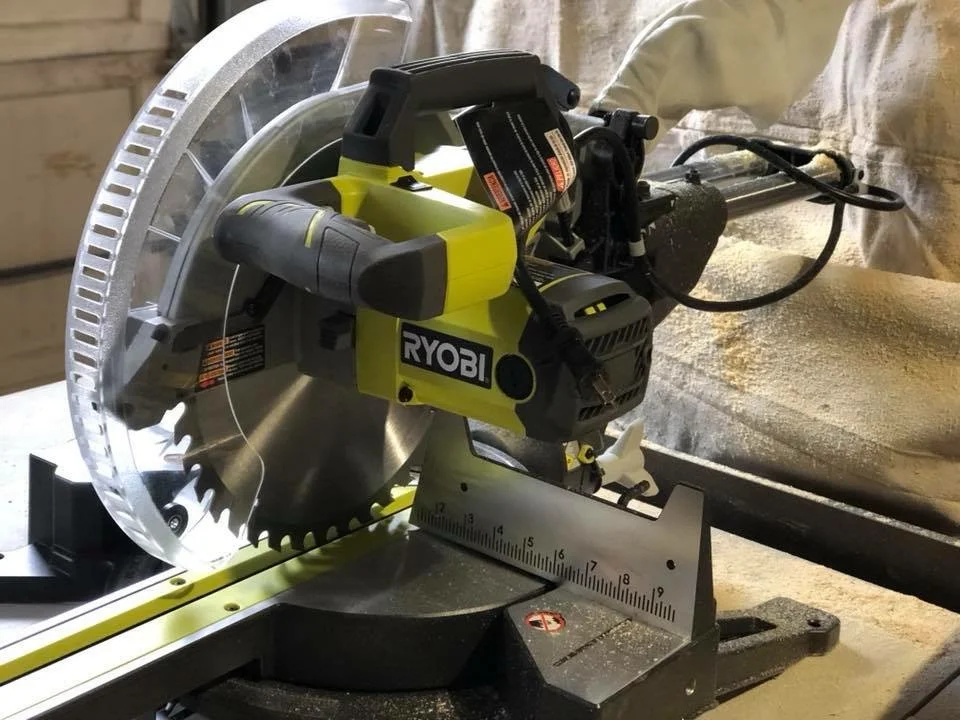
Here’s what you need

If you’re not in the reading mood skip to the bottom to catch the video tutorial ;)


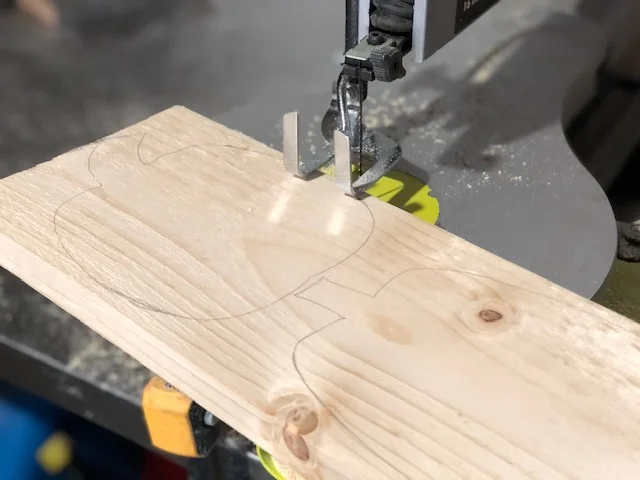
First you want to cut out your pumpkins on cardstock. You can free hand them on your scrap wood pieces but honestly getting the sides even isn’t really a strong suit of mine lol. I used some scrap pieces of cardstock I had on hand to cut these out on.

After you cut your templates out trace them on your scrap pieces.

Easy scrap wood pumpkins using your Ryobi scroll saw. How to cut out pumpkin cutouts for your fall decor using your scroll saw.

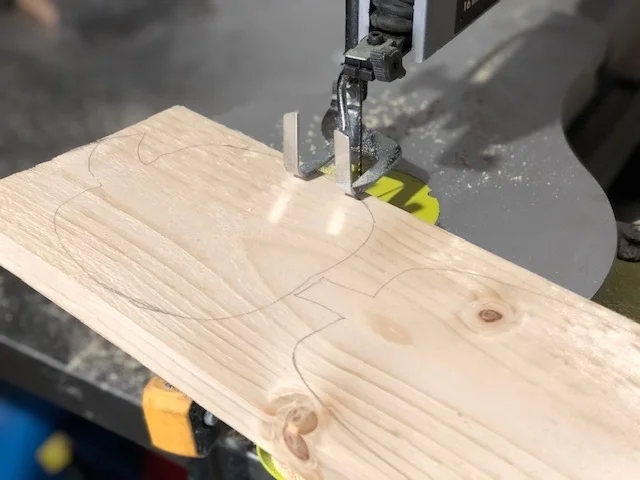
Next, making sure you are following the manufactures instructions, cut out the pumpkins you just traced using your scroll saw. If you’ve never used a scroll saw before this is a pretty easy project to start get some practice with. It’s a lot like using a sew machine. Just remember to go slow and the more you do it the better you will get at it.

Easy scrap wood pumpkins using your Ryobi scroll saw. How to cut out pumpkin cutouts for your fall decor using your scroll saw.

After you have your scrap pumpkins cut out you’ll want to give them a light sanding. Try not to sand the bottoms too much as you don’t want the surface to get uneven so they won’t be able to stand.

Easy scrap wood pumpkins using your Ryobi scroll saw. How to cut out pumpkin cutouts for your fall decor using your scroll saw.

After you have them sanded you can stain, paint, or decorate them however you want to match them to your décor.

These little guys are perfect for

  • your own décor

  • gift giving

  • Thanksgiving Day hostess present

  • ladies craft night

  • mom and me craft {my four daughters and I painted these on a facebook live and they turned out adorable!}

  • so much more

The possibilities are endless on how you can decorate these hand cut wood pumpkins.

Check out the VIDEO tutorial below.

Don’t forget to visit my YouTube channel and subscribe there so you never miss when I upload a new one.

Confused about what power tools to buy to make even more amazing crafts? This is a must read especially if you’re planning on starting a new business adventure with your handmade crafts click here ——-> WHAT ARE THE BEST POWER TOOLS FOR CRAFTERS?

DIY CRAFT KIT how to paint your standing wood pumpkin cutouts

DIY CRAFT KIT how to paint your standing wood pumpkin cut outs. This craft is perfect for you to DIY for your rustic fall decor.

DIY how to paint your free standing wood pumpkin cut outs

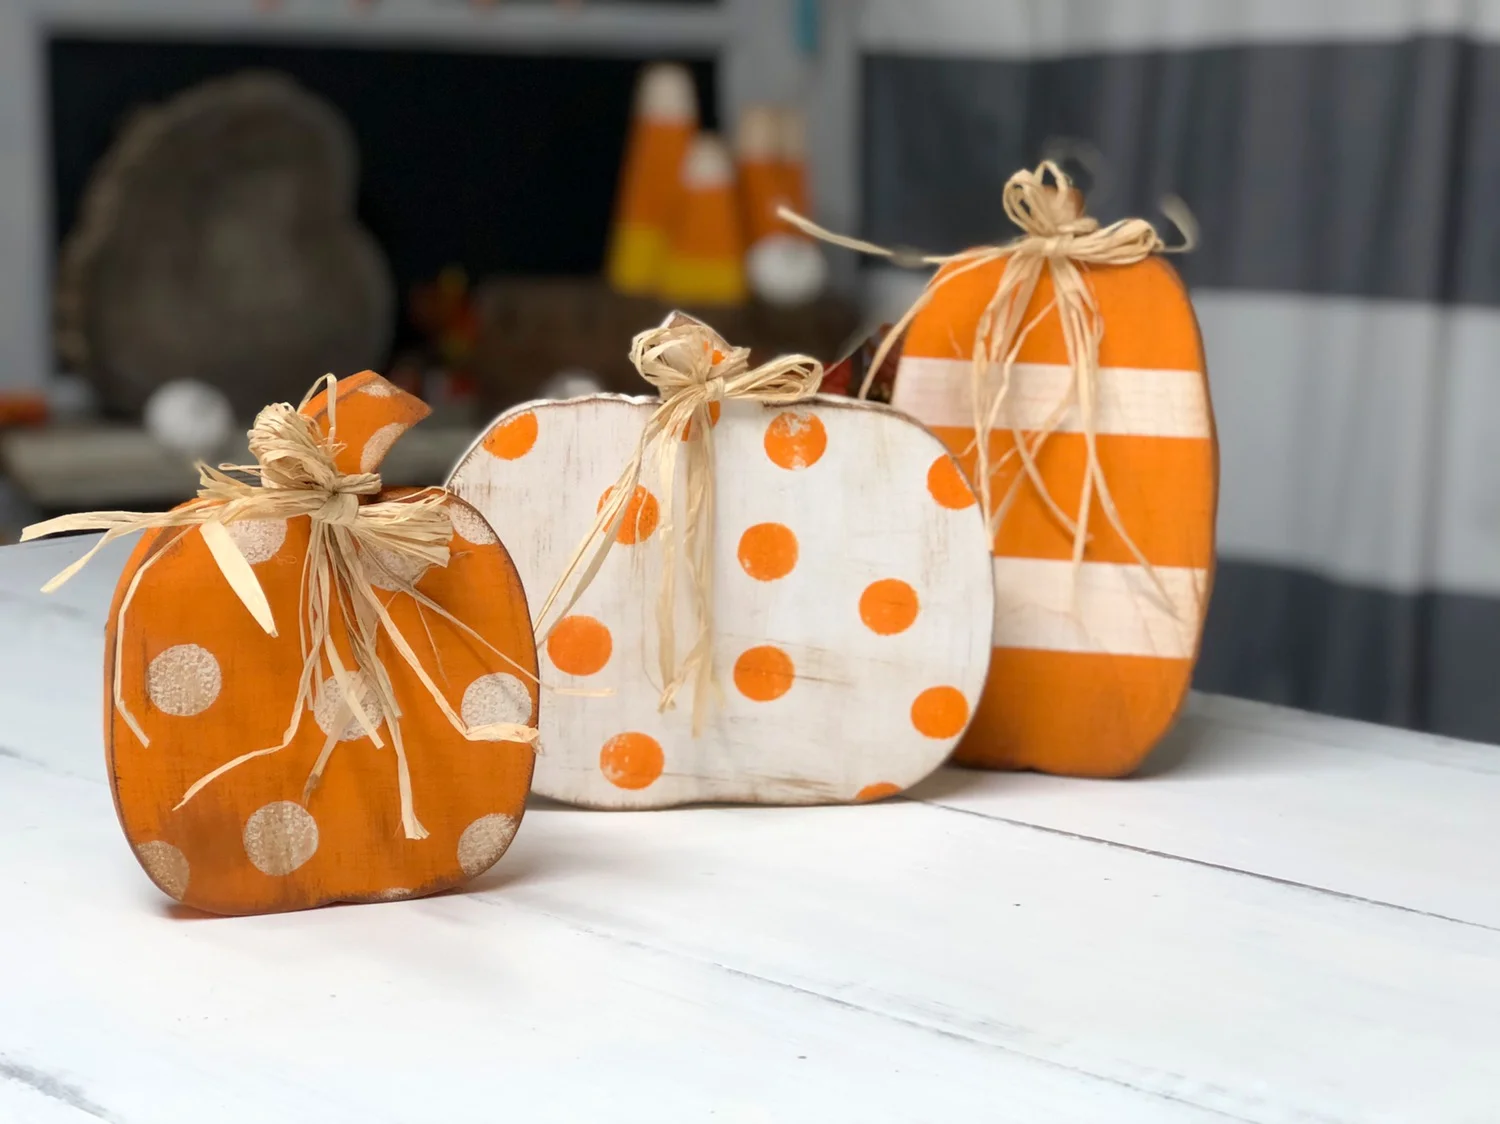
I’m LOVING these little wood pumpkin cutouts! Seriously, what’s not to love?! The polk-a-dots? The stripes? The raffia? Yup! I love everything about these handmade pumpkins. And I know yours will turn out just as adorable as these guys.

If you haven’t ordered your DIY PUMPKIN CUTOUT CRAFT KIT be sure to grab yours so you can get started on your fall décor.

Affiliate Disclosure. Some of the links on this website are affiliate links, which means that I may earn a small commission if you click on the link or make a purchase using the link. If you make a purchase you will not be charged anything additional.

CHOOSE YOUR CRAFT KIT

BASIC KIT:
3 wood cutouts

PREMIUM KIT:
3 wood cutouts
2 oz orange acrylic paint
2 oz white acrylic paint
2 foam brushes
1 round foam brush
raffia
sandpaper

Please feel free to message me if you have any questions once your kit arrives. I want your DIY projects to turn out AMAZING and will help you in any way I can to make that happen. If you order from the website shoot me an email BUT if you ordered from my handmade ETSY shop please message me on there. In order to keep in compliance with Etsy all convos must be kept on their platform.

If you want to skip the written tutorial and get right to the video tutorial shoot to the bottom of this page and you’ll find my youtube thumbnail for the DIY wood pumpkin cutout craft tutorial.

How to paint wood pumpkin cutouts. This easy DIY kit has everything you need to DIY this sweet and simple rustic  fall decor.

First you want to paint your wood pumpkin bases. I chose to paint the tallest and shortest pumpkins orange and the medium sized pumpkin white. Paint a THIN layer on all sides of each pumpkin. Once the fronts are dry you can paint a second THIN layer to get more coverage.

How to paint wood pumpkin cutouts. This easy DIY kit has everything you need to DIY this sweet and simple rustic  fall decor.

Next, after your base coat is completely dry, using your round sponge brush make polk a dots on your pumpkins. If using the same round brush to make the different colored dots do NOT rinse. You don’t want all that water in your foam round brush. Just dab it off onto a paper towel until all the paint is gone then you can use it in the second color.

TIP: to avoid a messy blog don’t push your round brush all the way down onto your wood pumpkin. Instead, lightly dab, even using a slight twisting motion works MUCH better to achieve a non-blobby polk a dot ;)!

How to paint wood pumpkin cutouts. This easy DIY kit has everything you need to DIY this sweet and simple rustic  fall decor. How to paint polk a dots on pumpkins

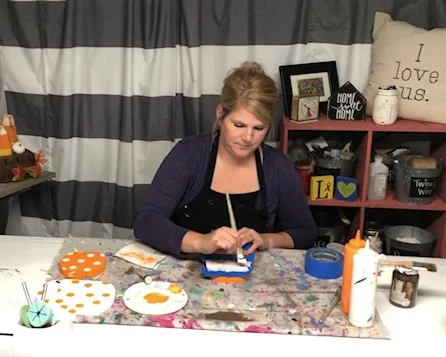
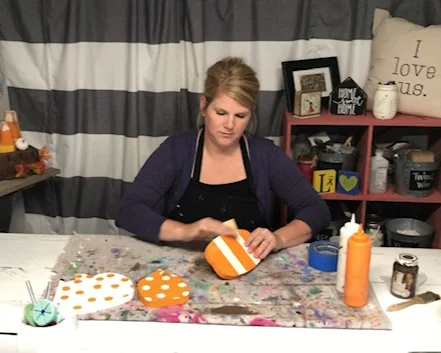
Now for the striped pumpkin. I used wide painter’s tape to achieve this look. Tape off the bottom, lining it up with the bottom of the pumpkin { you can get out a ruler if you want this to be exact but honestly just eye balling it works great too}. Then I placed a piece close to the top, but not all the way at the top. I wanted a little of the stem to be white. Then I place another piece in between those two pieces.

Paint the areas that are not taped off. Paint two THIN layers, allowing them to dry in between coats.

TIP: to avoid paint bleed brush with the tape not into the tape.

How to paint wood pumpkin cutouts. This easy DIY kit has everything you need to DIY this sweet and simple rustic  fall decor.
How to paint wood pumpkin cutouts. This easy DIY kit has everything you need to DIY this sweet and simple rustic  fall decor. How to paint stripes on pumpkins.

Let all three pumpkins dry. Now’s a perfect time for a glass of wine!

After they are dry you can start distressing them. A good rule to remember when distressing is that you want to distress where things would naturally be worn. Around edges, corners, and lightly on the fronts. Use your sand paper and distress along the edges and lightly pass it along the front {I also lightly distress the back to keep the look cohesive}. Wipe the sawdust off with a lint free cloth.

How to paint wood pumpkin cutouts. This easy DIY kit has everything you need to DIY this sweet and simple rustic  fall decor. How to distress wood pumpkins.

Applying the antiquing wax really gives these little guys life! Take your chip brush and lightly dip just the tip of it into the wax, then brush off most of it onto a paper towel. You do this so you do not end up with way too much wax on your project. It is far easier to apply more than it is to remove it from your project. You want to apply the wax the same way you sanded your pumpkins. Focus on the edges and lightly brush on the front/back.

TIP: trimming down your chip brush will give you better control over the bristles and will prevent them from making your wax so wispy when you apply it to your pumpkins.

How to paint wood pumpkin cutouts. This easy DIY kit has everything you need to DIY this sweet and simple rustic  fall decor. How to apply antiquing wax to wood pumpkins.

Tie a couple stands of raffia around the stems and you’re done! Trim the ends if needed. Since raffia tends to come in long strands you’ll want to cut the strands in half, and even in thirds in some cases. Then tie in a bow around the wood stem.

How to paint wood pumpkin cutouts. This easy DIY kit has everything you need to DIY this sweet and simple rustic  fall decor. How to add raffia to your wood pumpkins.

And you’re done! If you loved this tutorial please let me know in the comments. If you’re on social media don’t forget to follow me there FACEBOOK, INSTAGRAM, PINTEREST, YOUTUBE

Pin the image below for later ;)

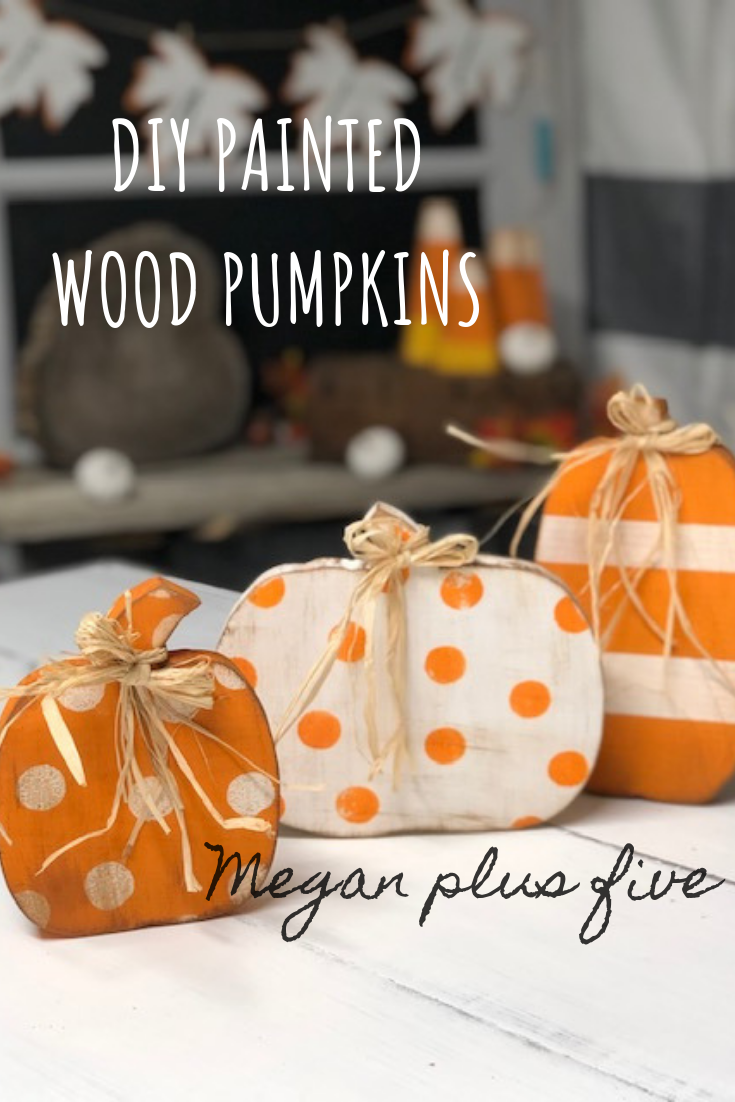
How to paint wood pumpkins for your rustic decor. Distressing and applying wax to make them even more adorable. Add some stripes and polk-a-dots too to give them a modern twist.

Watch the full video tutorial below

Check out my other crafty fall tutorials

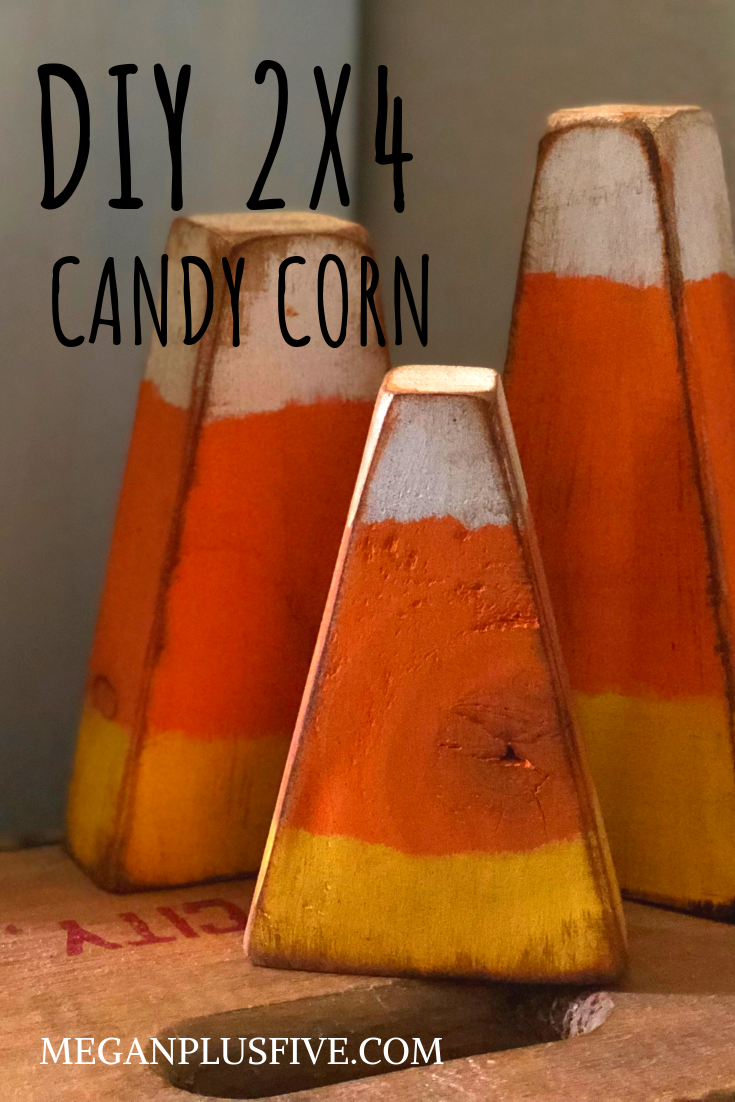
DIY how to make 2x4 wood candy corn

DIY 2x4 candy corn, how to make easy primitive fall decor

DIY EASY 2x4 primitive wood candy corn

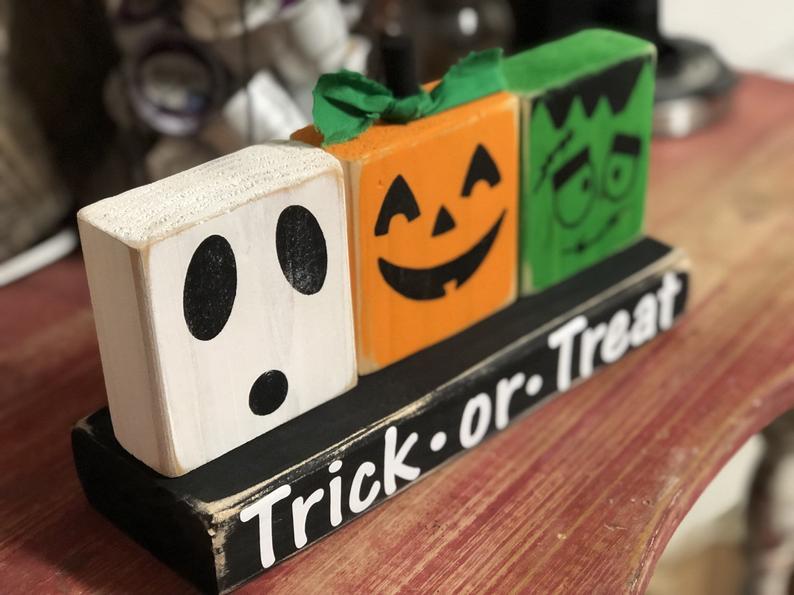
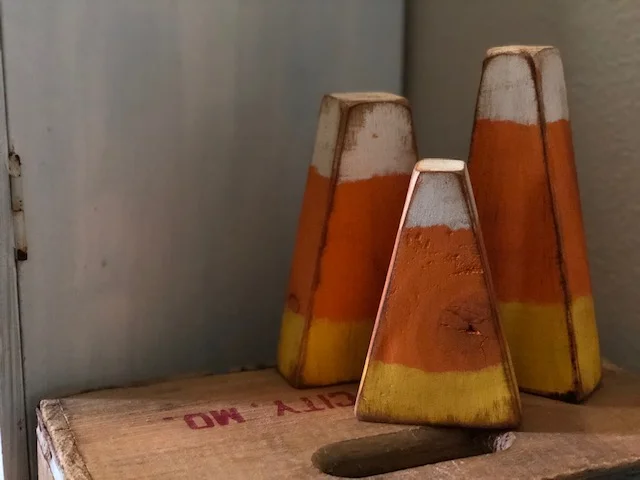
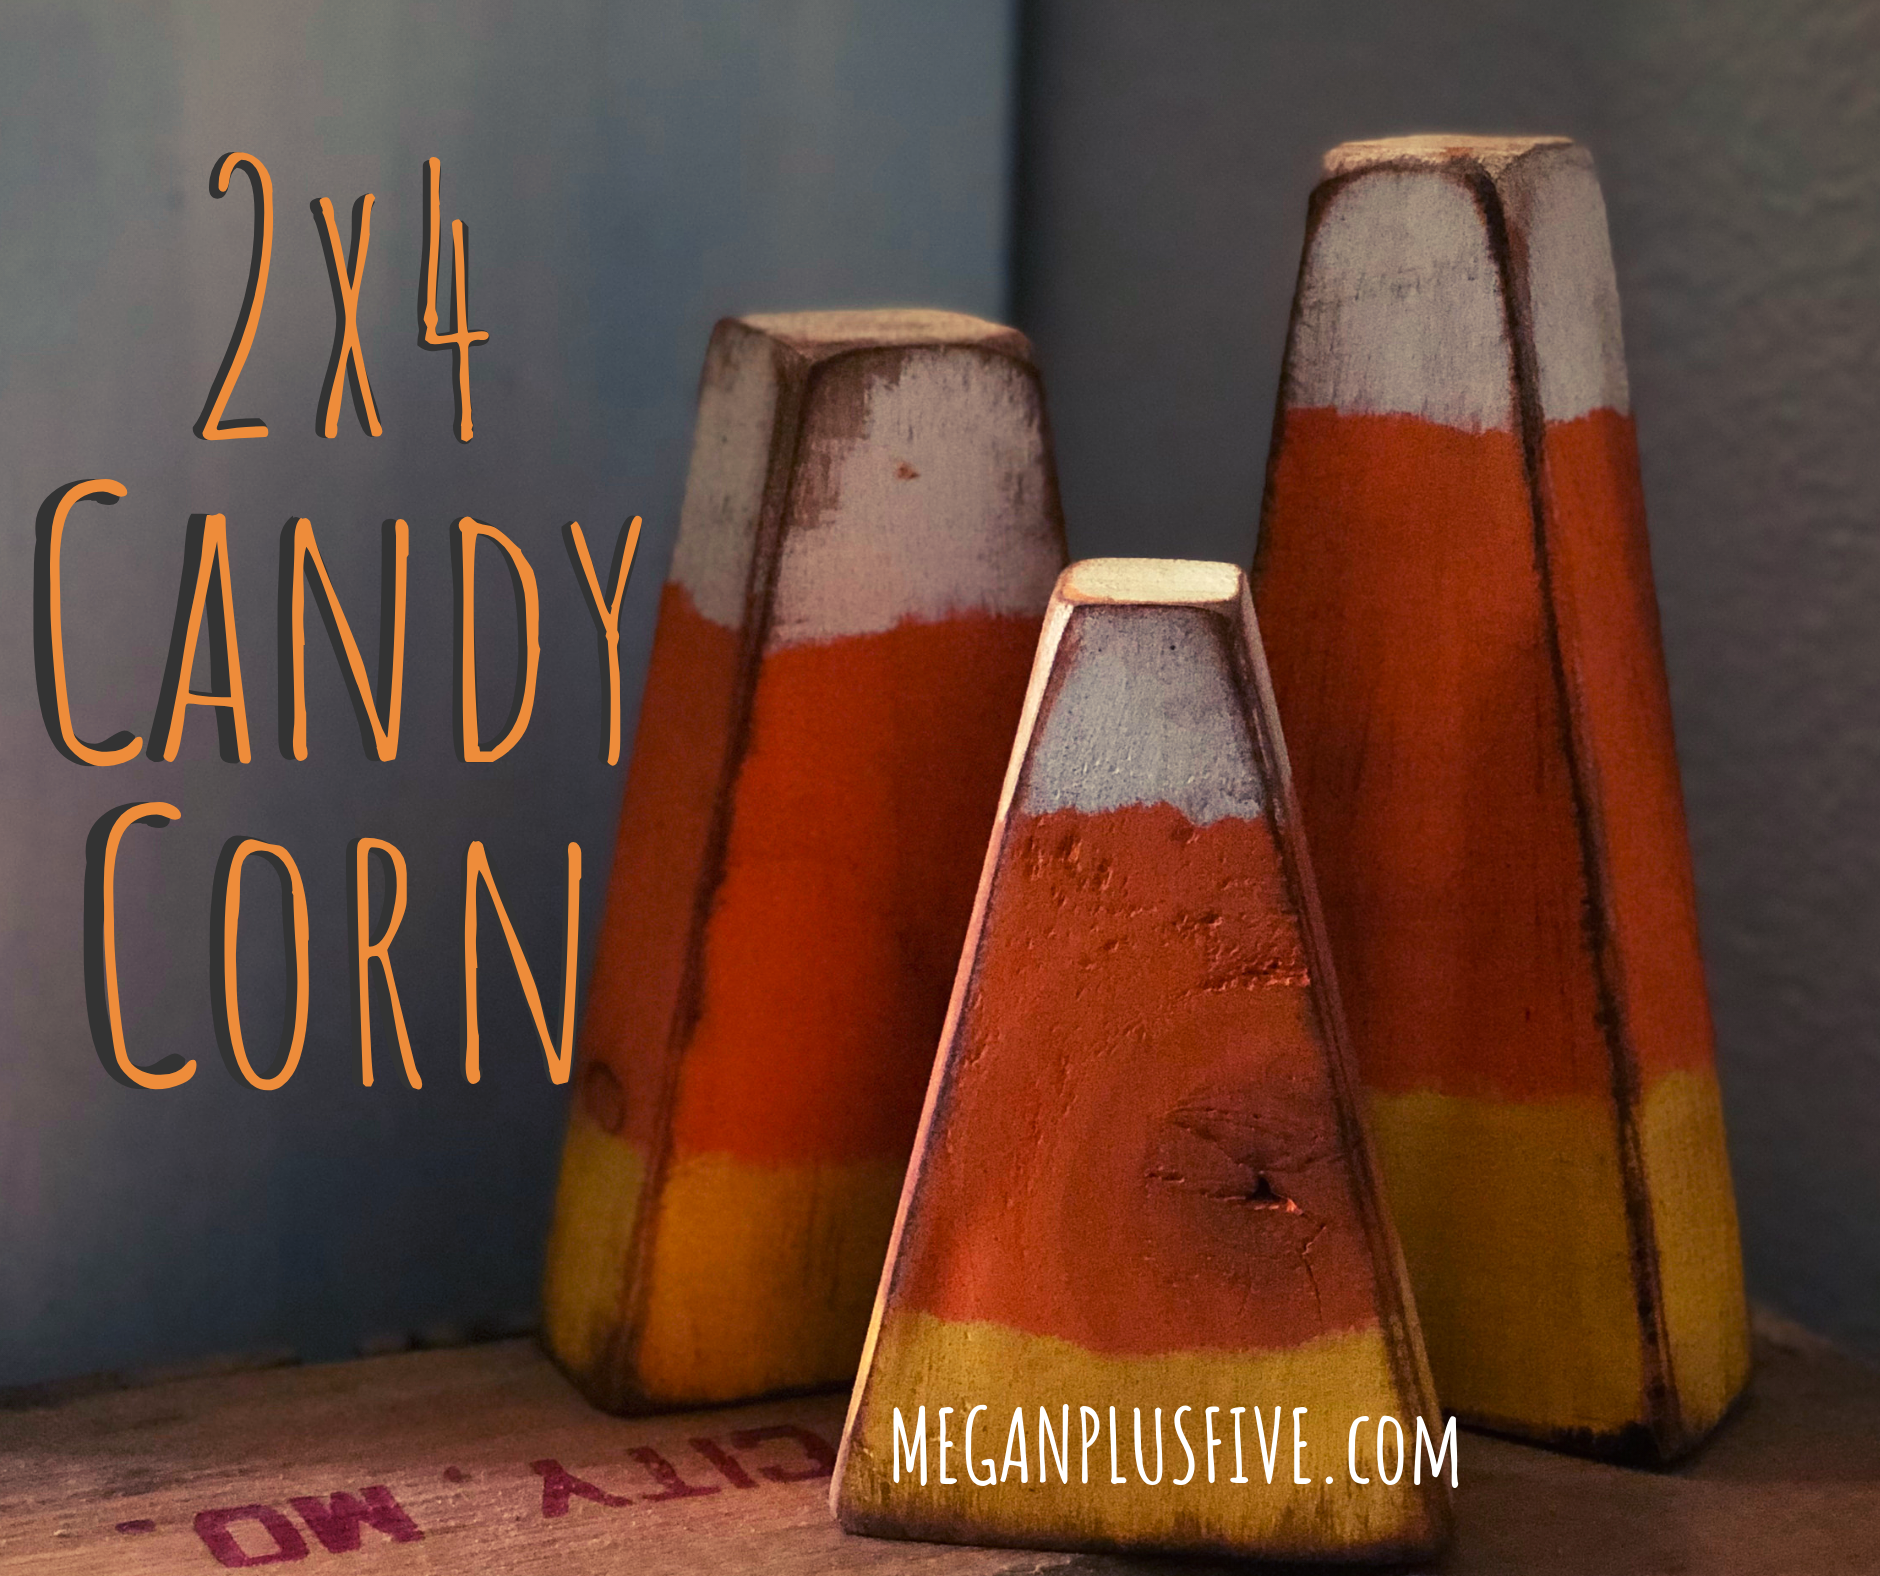
DIY primitive candy corn, aren’t they soooo cute?! The last couple of years have been a little busier than normal at our house and I haven’t been decorating for the holidays like I normally do. So this summer I decided I’m going to make time to get back into the festive decorating. And with that I need to make lots of new pieces to decorate the seasons with. Including these adorable wood candy corn. Check out this fun TRICK OR TREAT shelf sitter set I made a few weeks ago.

I’ve had these on my craft to do list for a looooong time and just hadn’t made time to make myself a set. And now I do! I LOVE them! They turned out even better than I thought they were going to! And I can keep them up for the entire fall season.

DIY easy primitive wood 2x4 candy corn for your fall decorations

How to make your own set of primitive candy corn from a 2x4

And it was super easy to DIY. I was a bit nervous cutting the angles but I think they turned out so great!

If you don’t have the space or tools to DIY this from start to finish you can get one of my easy CANDY CORN CRAFT KIT. Everything you need to make these at home is included in your own candy corn craft kit.

Don’t have all the tools needed to complete this craft? Snag one of my easy DIY craft kit from my Etsy shop. Click CANDY CORN CRAFT KIT to get yours. Want to send it as a gift? During checkout mark that you would like to send it as a gift, leave their address and a sweet note to them and we’ll take care of the rest.

Affiliate Disclosure. Some of the links on this website are affiliate links, which means that I may earn a small commission if you click on the link or make a purchase using the link. If you make a purchase you will not be charged anything additional.

If you want to make them from scratch here’s what you’ll need

First cut your pieces into 4”, 5.5”, & 7” lengths. The angles I cut: 4”= 15°, 5.5”= 10°, 7”=10°. After you cut them give them a quick sanding. You don’t want to sand them super smooth as this will take away so much of the wood’s natural character. Be sure to wipe away the sawdust with a lint free cloth after you sand your candy corn.

DIY candy corn decorations. How this mom made her own from a scrap 2x4

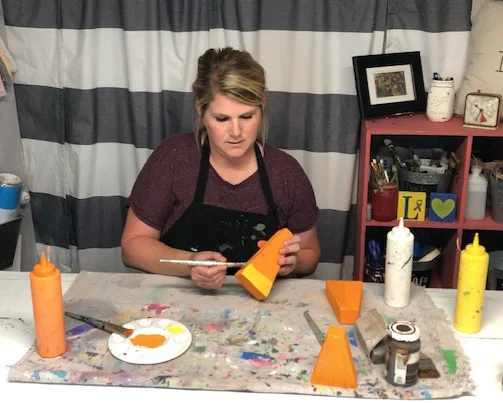
Now paint all three with a thin coat of orange paint.

DIY candy corn decorations. How this mom made her own from a scrap 2x4

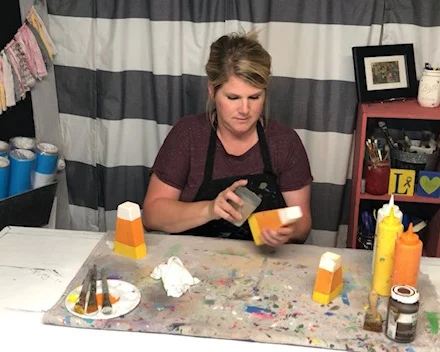
After the orange paint dries paint the bottoms yellow. You will likely need 2 coats for this. Let the first coat dry completely before applying the second coat.

DIY candy corn decorations. How this mom made her own from a scrap 2x4

Now, paint the tops white. Again, you'll need to paint two coats making sure your let the first coat dry completely before applying the second coat of white paint.

DIY candy corn decorations. How this mom made her own from a scrap 2x4

Once all of your candy corn are completely dry you can start distressing them with your 120 grit sand paper. Focus on the edges, corners, and lightly sand the fronts and sides. Then wipe the dust away with your lint free cloth.

DIY candy corn decorations. How this mom made her own from a scrap 2x4

Now you can apply your antiquing wax. A little bit of wax goes a VERY long way. Just like when sanding, you want to focus more on the edges and corners and give a light swipe with your chip brush on the fronts and sides. TIP: if you trim your chip brush down a little you will get a more stiff brush that you can better control your wax with.

DIY candy corn decorations. How this mom made her own from a scrap 2x4

If you don’t like the look of the antiquing wax you can opt for a clear wax. I LOVE antiquing wax and use it on TONS of my projects it highlights so much of the wood’s character. You can see the difference it makes. Check out my DIY American Flag tutorial where I use this same dark wax.

DIY candy corn decorations. How this mom made her own from a scrap 2x4

Now you’re ready to display them! I am soooo happy with the way these little 2x4 candy corns turned out {I think that’s the plural from lol}! I have a few more DIY fall projects yet to tackle before the season arrives so be sure to check back for more tutorials to make your own decorations for the upcoming season.

DIY candy corn decorations. How this mom made her own from a scrap 2x4

Catch the video tutorial below. If you LOVE it I would very much love if you would subscribe to my YouTube channel where I share all of my crafty video tutorials.


DIY clearance shoes, how to paint them for fall

how to paint on clearance shoes to make them look wow

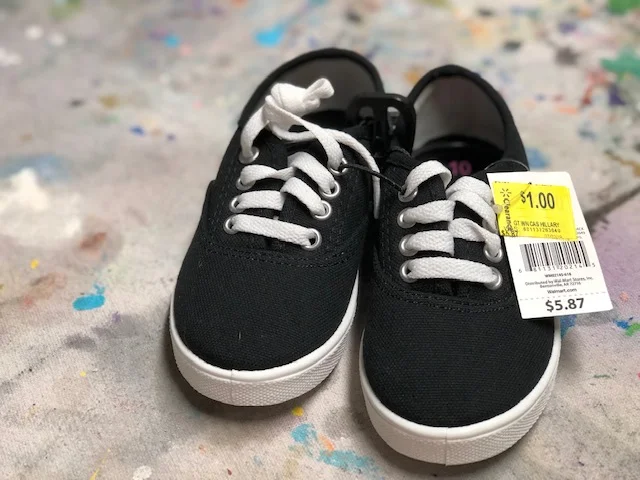
I LOVE the frugal life. So when my friends tagged me in a post about our local Walmart putting select kids clothes and shoes on the $1 clearance rack I couldn’t get there fast enough! Thank you sweet friends btw! Boy did we find some good deals! Including these adorable little black shoes for my 3 year old daughter.

I had never painted on shoes before but I was up for the challenge. Such a perfect blank canvas and even if I mess them up they were only a DOLLAR so it’s totally ok and I wouldn’t feel one bit bad lol.

Affiliate Disclosure. Some of the links on this website are affiliate links, which means that I may earn a small commission if you click on the link or make a purchase using the link. If you make a purchase you will not be charged anything additional.

DIY clearance shoes makeover. How to paint on canvas shoes.

I’m sure I didn’t use the right kind of paint {I used straight acrylic paint, not watered down} but that’s ok. My daughter won’t be wearing them very long, she’s three after all lol so she’ll outgrow them in no time.

Here’s what I used

Pin me for later

DIY painted shoes. From $1 rack to ADORABLE

How to paint on canvas shoes for fall

1. REMOVE THE LACES before you start painting so you don’t get paint all over them.

2. THEME unless you are just going to let the creative juices flow as you go along it is best if you have a plan prior to painting on your canvas shoes. I had an idea right before I started painting and I ended up changing it up as I went because I wasn’t totally loving the way it looked. I painted more on the back and sides and moved the bows and added the front dots after I filmed this tutorial. I LOVE the way they turned out and more importantly my toddler does too!

3. PAINTING TIPS

  • if you are painting on black shoes it is best to paint a base layer of white then once that’s dry paint the actual color you want. So on mine I wanted the backs orange, I painted them white first then after they dried I painted them orange. This will help your colors to not be dark and diluted.

  • use a variety of brush sizes to fit your painting needs

  • don’t use too much paint. Paint in thin layers and if doing more than one layer only paint over dry paint.

  • paint pens are your friends <3 ! I used paint pens to add the lines on the candy corn and pumpkin after painting them their main colors.

  • use both end of your paint brush. I used the non brush end of my brush to make the small dots on the front of the shoes. This was the perfect size for these cute little dots.

4. ADDING ACCENTS if you add any accents E6000 works great to have a long lasting hold. I’ll warn ya though, it doesn’t dry fast at all.

5. LACES I opted for a more untraditional lace for these shoes but you can keep the original laces in. I thought they would be too white for this pair so I traded them out for 2 thin pieces of ribbon in orange and black on each shoe. They actually hold up pretty well too! And this type of ribbon is really inexpensive so it wouldn’t cost much to replace if I need to.

Didn’t these clearance shoes turn out sooooo adorable?!!! I wasn’t sure how I’d like that they don’t match on the fronts but I actually do love it. It screams “I don’t have perfection issues” lol!!!

DIY how to paint Walmart clearance shoes to give them an upgrade

I hope you find this tutorial helpful for your shoe painting adventure! I’d love to see how yours turn out! Share a pic in the comments.

Check out the video tutorial below

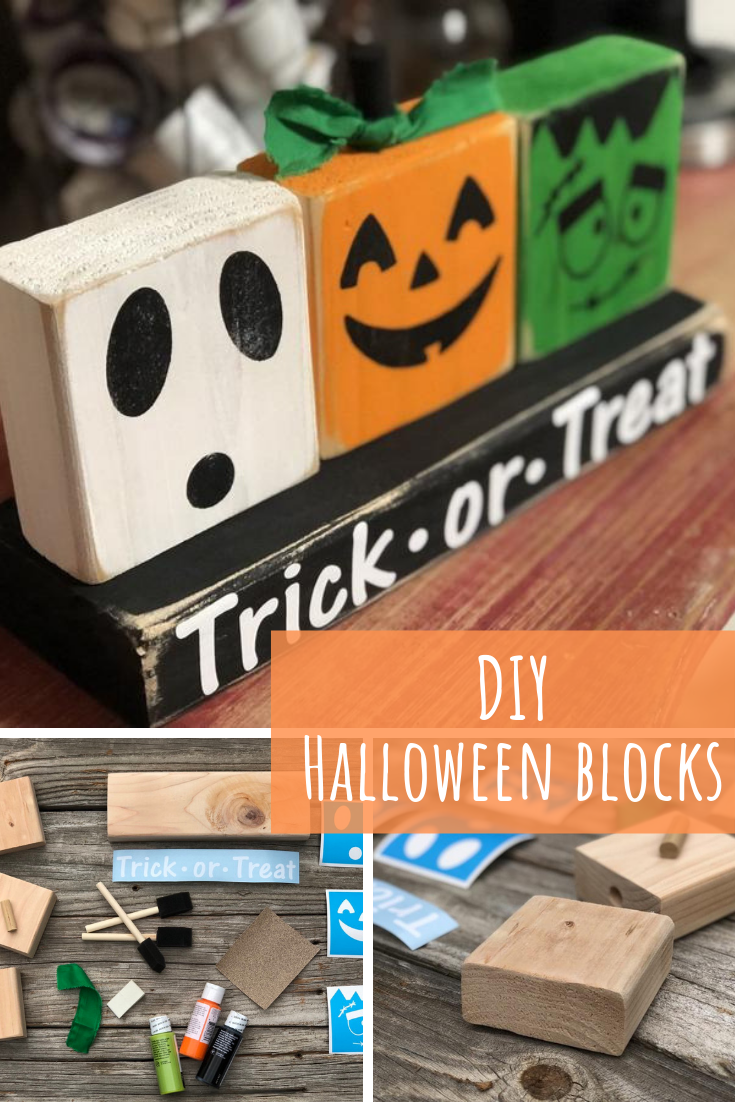
DIY 2x4 painted Halloween blocks

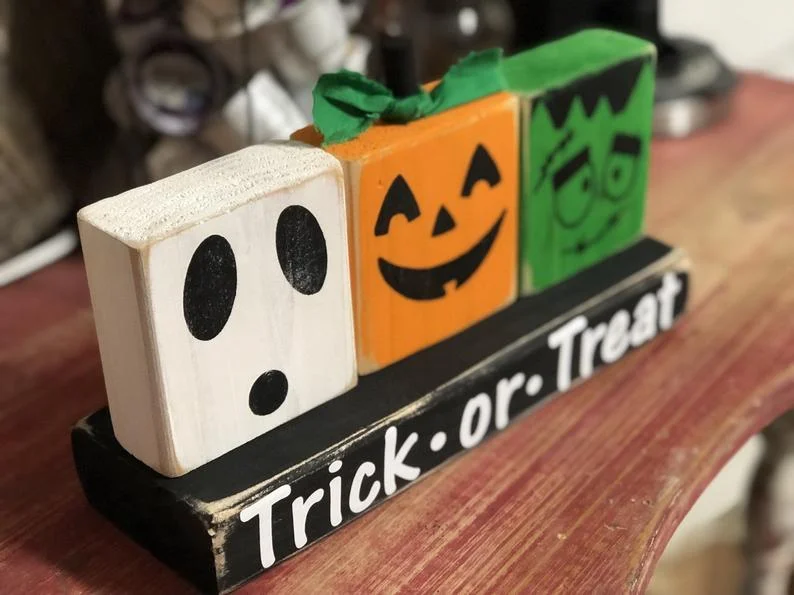
DIY Halloween shelt sitter 2x4 craft. How to make Halloween Decor, ghost, pumpkin, Frankenstein trick or treat craft

Easy Halloween Craft for Adults

Oh my goodness! I can’t believe it’s already time to start thinking about Halloween! Last year I was so crazy busy I didn’t hardly have time to decorate our home for fall let alone get new craft kits put together and listed in our Etsy shop. So this year I’m getting a super early start on all my DIY Halloween décor. And I’ve started with this super cute 2x4 craft.

Already know you want this? Skip this article and get your DIY HALLOWEEN CRAFT KIT

Cute Halloween shelf sitter DIY craft kit for adults

I try to keep my craft kits pretty simple and easy to DIY and this one is no exception. This craft really takes me back to my childhood watching my grandma make all her primitive décor. She could free hand ANYTHING and it always looked amazing. But not to worry because with this craft kit you won’t have to free hand a single thing and your craft will turn out just as AMAZING!

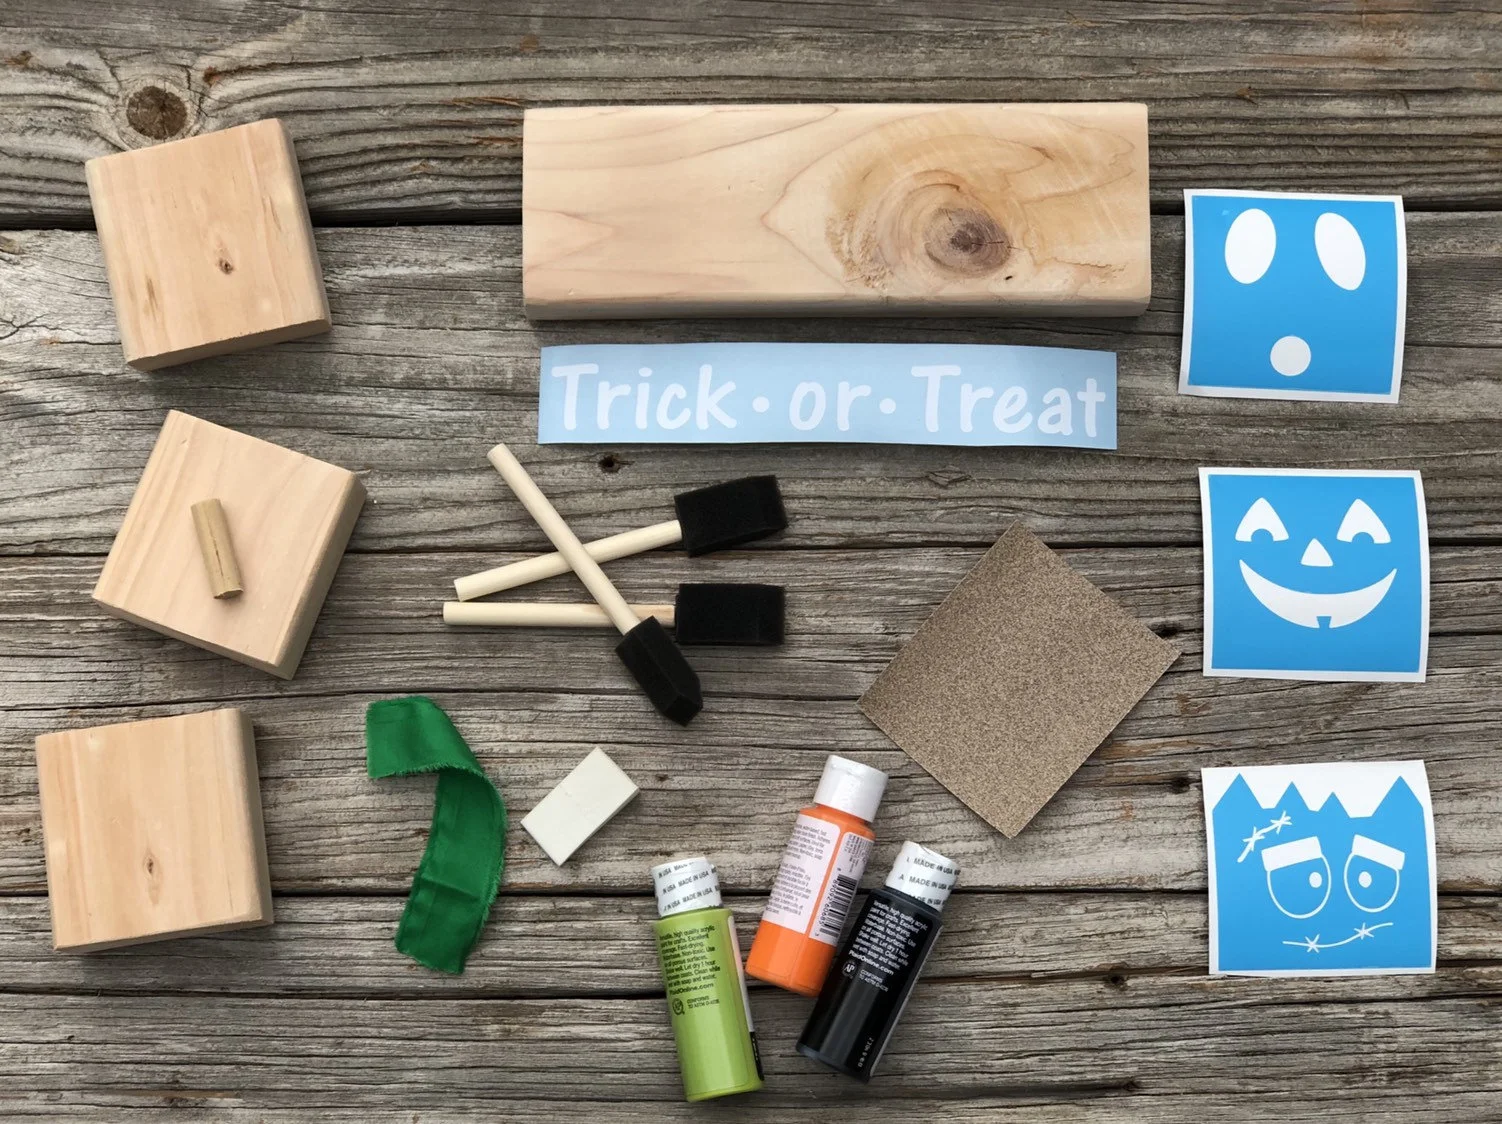
So, what comes in this Halloween craft kit?

DIY Halloween craft kit for adults. How to make 2x4 crafts for Halloween
BASIC KIT includes
• 3 - 3.5x3.5x1.5 pre-sanded blank wood pieces
• 1 - 10.5x3.5x1.5 pre-sanded blank wood piece
• 3 stencils: ghost, pumpkin, frankenstein {no transfer tape attached as these are little detail and do not require it to transfer on to wood}
•wood stem
•fabric piece {color will vary}
•professional quality vinyl decal: Trick •or• Treat
•detailed instructions PLUS a video link for video instructions on our DIY website.

PREMIUM KIT includes
•basic kit
• acrylic paints: black, white, orange, green
•sandpaper
•3 sponge brushes
•stenciling sponge


Grab your girlfriends, some wine and catch up while each making your own set of these adorable ghosts, pumpkins, and Frankensteins.

Already have the paint/brushes and just need the wood and stencils? Perfect! You get to choose the type of kit you receive, pick from basic or premium. No matter which kit you choose it will come with printed picture instructions and a video link, in case you need a little more visual {which is totally the kind of learner I am!}.

Click the link ——> DIY HALLOWEEN CRAFT KIT to snag your craft kit before the holiday season so you are just as prepared as I am this year.

If you love more traditional Halloween décor check out these super cute DIY wood pumpkins

DIY 2x4 glittered pumpkins

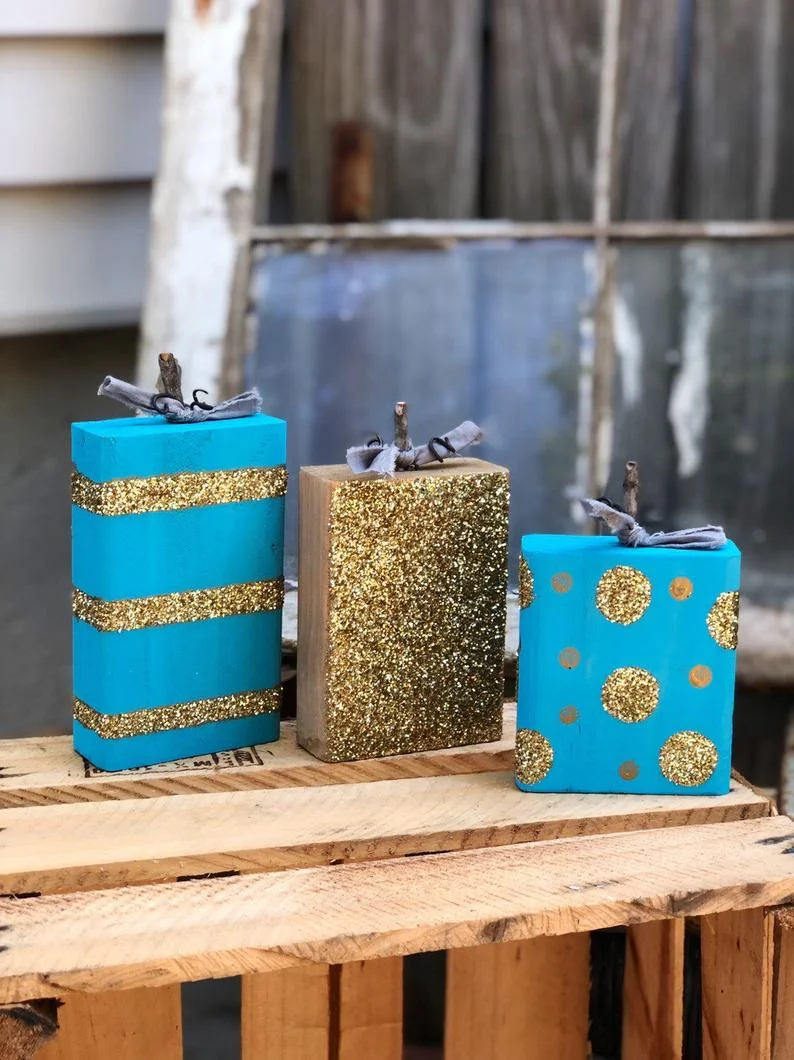
DIY glitter pumpkins. How to make your own nontraditional pumpkins for fall.

How to make 2x4 glitter pumpkins

These 2x4 pumpkins are one of the easiest fall crafts you can make yourself. If the glitter and sea blue isn’t really your thing you can make these more traditional rustic orange and white pumpkins I posted last year. But I really wanted to make a set of nontraditional glittery pumpkins, well because why not? I love rustic décor but I also LOVE glitter! So I went for it and I’m so glad I did because they turned out soooo super cute!

Affiliate Disclosure. Some of the links on this website are affiliate links, which means that I may earn a small commission if you click on the link or make a purchase using the link. If you make a purchase you will not be charged anything additional. This is just a way I can help add to our family finances to raise our four daughters. Please know I would never recommend a product or service I do not totally stand behind.

You’ll need a few power tools for this DIY craft and I recommend hands down using Ryobi power tools, you can read my article on what power tools does a crafter need?

No matter what style of decorating you have these pumpkins are really fun to make and if they don’t fit in with your décor you can always gift them to a loved one.

Don’t have time to DIY them but NEED them in your life? You can buy a set of these glittery pumpkins in our Etsy shop.

Here’s what you’ll need

DIY 2x4 glittered pumpkins how to make untraditional pumpkins for fall

So, how do you make these gorgeous nontraditional fall glitter pumpkins?

First you need to cut your 2x4 into 3 pieces. You’ll need a 7”, 5.5”, and a 4”. These are the sizes I used and they seem to be the perfect size. Give them a quick sanding to knock down the rough edges. I used my Ryobi Cordless Sander for this but you can use a piece of 120 grit sand paper.

Next you need to drill a hole for your stems. I matched my stick up to a drill bit that was about the same size. Drill a hole in the middle of each top of your pumpkins.

DIY 2x4 glittered pumpkins. How to make a nontraditional set of pumpkins for fall.

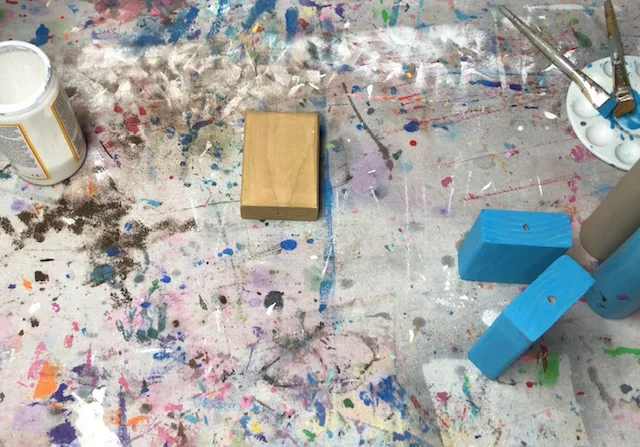
Then paint each pumpkin. I painted the largest and smallest blue and the middle sized one gold. Be sure to let them dry COMPLETELY between coats.

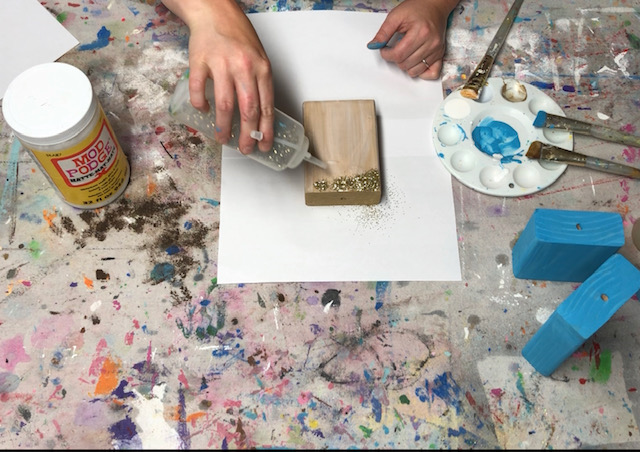
Once your gold pumpkin is dry add a layer of Mod Podge to the front of it, be sure you get an even coat. Then add glitter right on top of that. I place paper under my projects when using glitter to catch the excess that doesn’t stick. Then I empty it back into the glitter container.

DIY 2X4 gliltter pumpkins. How to make nontraditional pumpkins for fall.

Using the round sponge brush add some circles to the smallest block. I used both ends of the brush to add two different sizes of circles.

DIY 2x4 glitter pumpkins. How to make nontraditional pumpkins for fall.

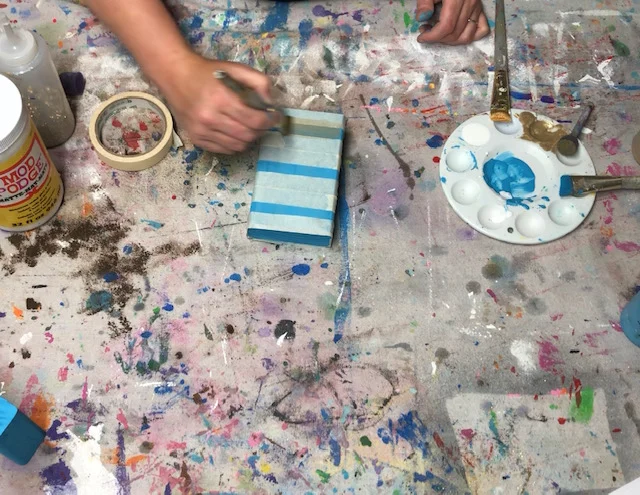
Tape off the largest pumpkin so it has 3 stripes. Paint a thin layer of gold, let dry.

DIY 2x4 glitter pumpkins. How to make nontraditional pumpmkins for fall.

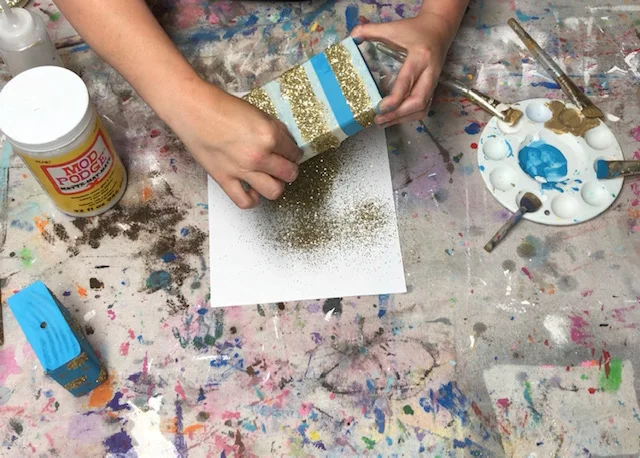
Add a layer of Mod Podge to the large circles then add glitter. Add a layer of Mod Podge to the gold stripes, add glitter, then peel the tape off carefully.

DIY 2x4 glitter pumpkins. How to make nontraditional pumpmkins for fall.

Add a dab of glue inside the hole you drilled then place the stick inside. Doing it this way will give your stick more stability.

DIY 2x4 glitter pumpkins. How to make nontraditional pumpmkins for fall.

Add a piece of rustic wire and a scrap piece of fabric and you’re done. Super easy!

DIY 2x4 glitter pumpkins. How to make nontraditional pumpmkins for fall.

Click below for the full video on how to make your own nontraditional glitter 2x4 pumpkins

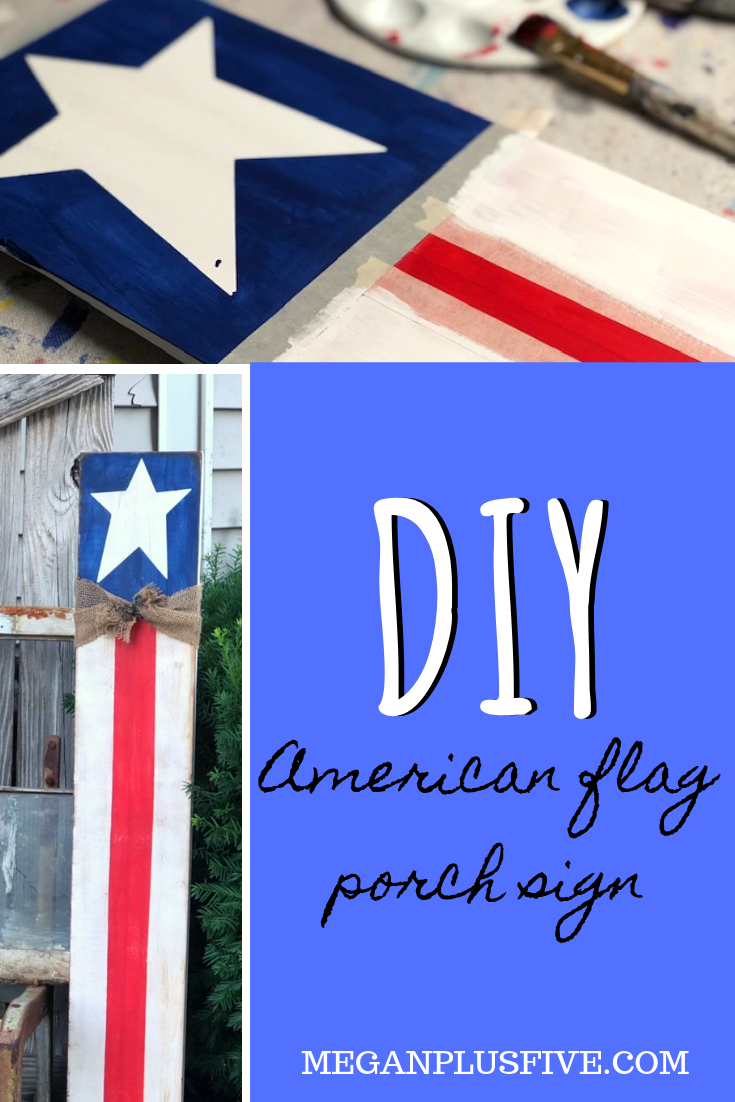
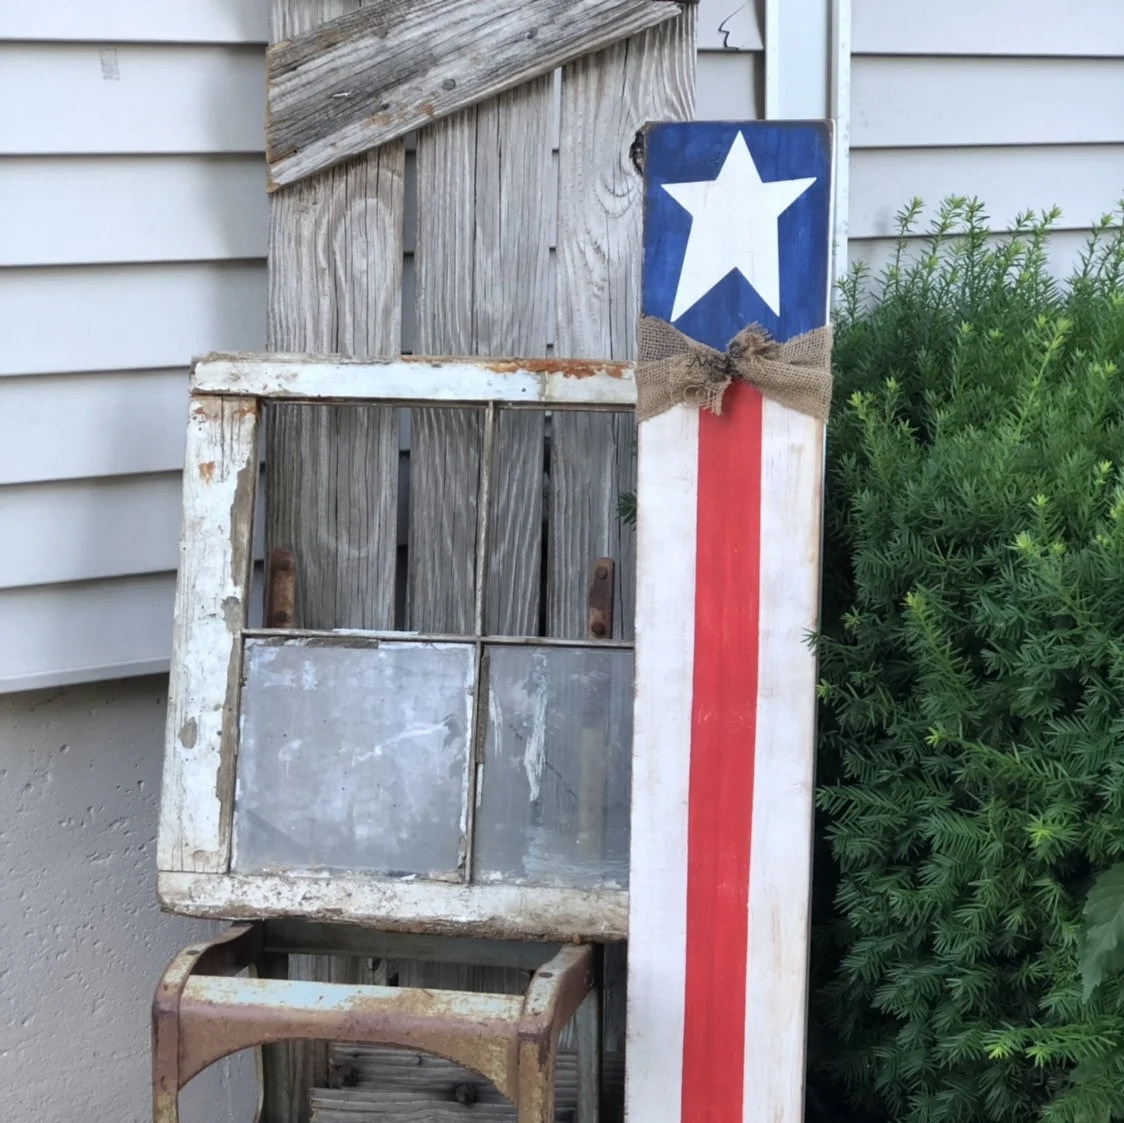
How to make an American Flag leaning porch sign

How to make an American Flag porch sign DIY tutorial

I just can’t seem to get enough of the patriotic décor these days! It started a few months ago when I made these fun fireworks from a wood 4x4 . Then I added this old classic to the blog, a hanging wood flag made from 1x4’s {you can find this handmade piece in my Etsy shop that sells like crazy this time of year}. And I had to make a tutorial of a red, white, and blue rag wreath. I tell ya, I’ve been obsessed lately with making these tutorials! And I have another one ;)!!!

Affiliate Disclosure. Some of the links on this website are affiliate links, which means that I may earn a small commission if you click on the link or make a purchase using the link. If you make a purchase you will not be charged anything additional.

I had everything I needed on hand to make this but I’ve included the links where you can get some of these supplies. Yes, those are affiliate links but not to worry, you will not be charged anything extra if you make a purchase through them. They are just a way for this stay at home momma to help with the daily bills of raising our four little girls :)!

I promise this sign is SUPERRRRR easy!

Here’s what you’ll need

Handy tools


First you need to cut your board and give it a quick sanding with 120 grit sandpaper. I personally LOVE working with Ryobi Power Tools. For years I used my husband much more industrial strength tools {he works commercial construction so his tools need to be crazy powerful} till I found these little gems and I have no plans of ever letting these guys go!

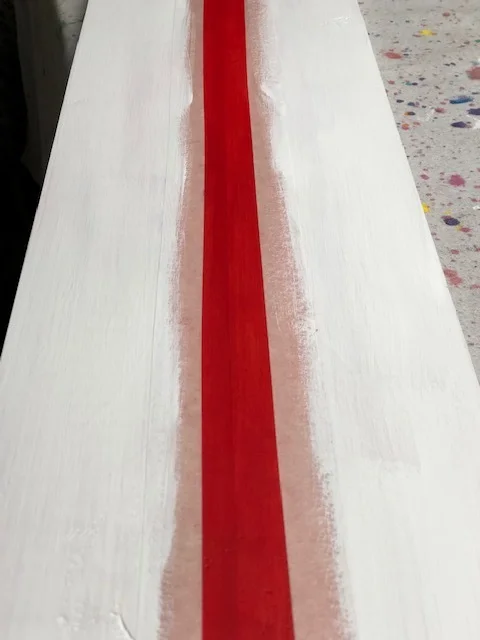
Then you need to paint your ENTIRE board white. Do one very thin coat, once dry add a second coat.

How to make an American flag leaning porch sign, DIY tutorial

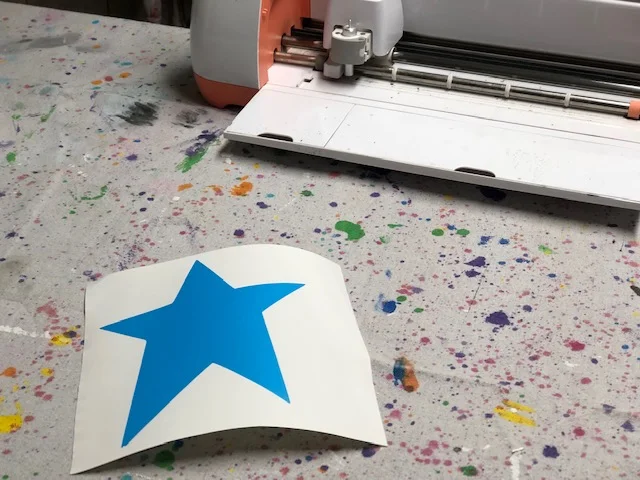
If you’re using a stencil cut it out while your board dries. I use my Cricut but you can use any vinyl cutting machine. The star I cut out was approx. 6” wide. If you don’t have access to one you can free hand your star. If going this route I recommend using a pencil when you do the outline.

American flag18.jpg

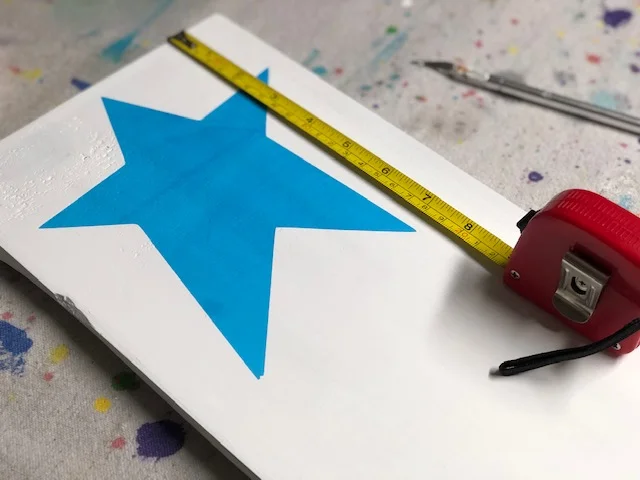
Apply your star stencil to your board. Then decide where you want your blue line to stop below it. Measure that distance and make a mark on each side. I made mine approx. 9” from the top.

How to make an American flag leaning porch sign, DIY tutorial

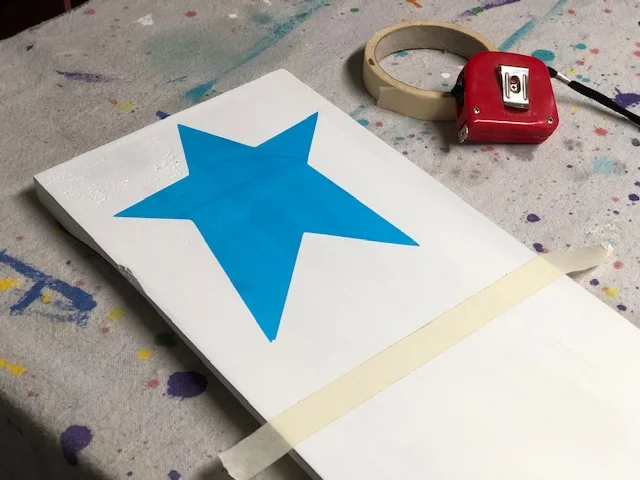
Now run a piece of tape from side to side where you made those marks. This will help to keep your line crisp.

How to make an American flag leaning porch sign, DIY tutorial

Paint the entire top area blue. I used a royal blue but any blue shade that you like will be perfect. I painted two coats of blue, allowing it to dry completely between coats.

How to make an American flag leaning porch sign, DIY tutorial

Remove the star and the tape.

How to make an American flag leaning porch sign, DIY tutorial

I at first planned to paint two stripes of white and two stripes of red going down my board…big mistake. It was not as cute so I had to repaint it. I had to paint the bottom part red, because it is far easier to cover white with red than to cover red with white.

Using the same measuring technique as above but going vertically instead of horizontally, tape off the bottom so you have three equal stripes. If I wouldn’t have messed my stripes up from the beginning I would have taped them off the opposite from pictured below and painted inside the tape lines red. Instead I had to make more work for myself. I hope that makes sense. Just like with the blue, paint two coats and let dry between coats.

How to make an American flag leaning porch sign, DIY tutorial

Then peel off the tape. Go in with a small paint brush and fix any mistakes if necessary.

How to make an American flag leaning porch sign, DIY tutorial

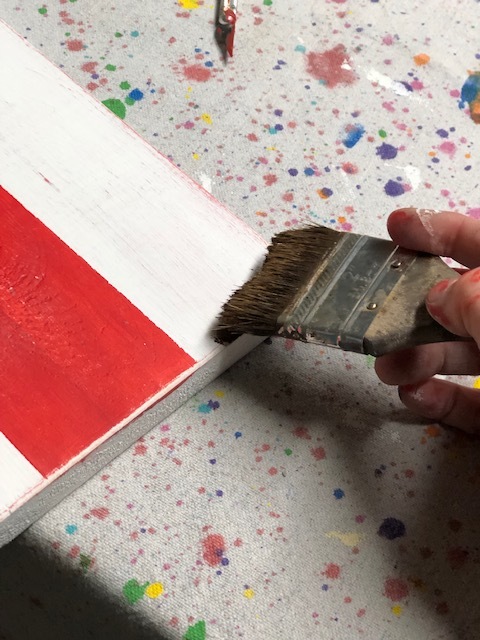
Using your sander, sand around the edges, corners, and give the front a super quick once over. Then you’re ready to apply your wax. Check out my DIY mini wood pumpkin tutorial for a more in-depth how to on applying antiquing wax.

How to make an American flag leaning porch sign, DIY tutorial

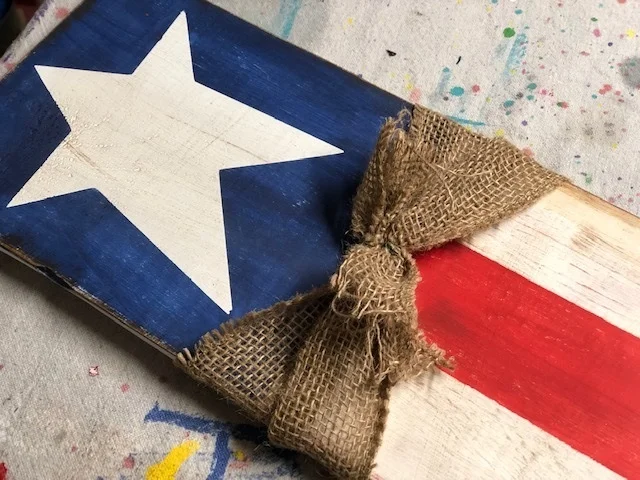
Add a piece of burlap. I tied mine off with a piece of floral wire but you can tie yours in a bow or a knot.

How to make an American flag leaning porch sign, DIY tutorial

I added a couple pieces of baling wire just to give it a little extra cuteness!

How to make an American Flag leaning porch sign, DIY tutorial

If you love this piece but don’t have the time to make it and NEED it in your life ;) you can purchase one personally made by me here ————> AMERICAN FLAG LEANING PORCH SIGN


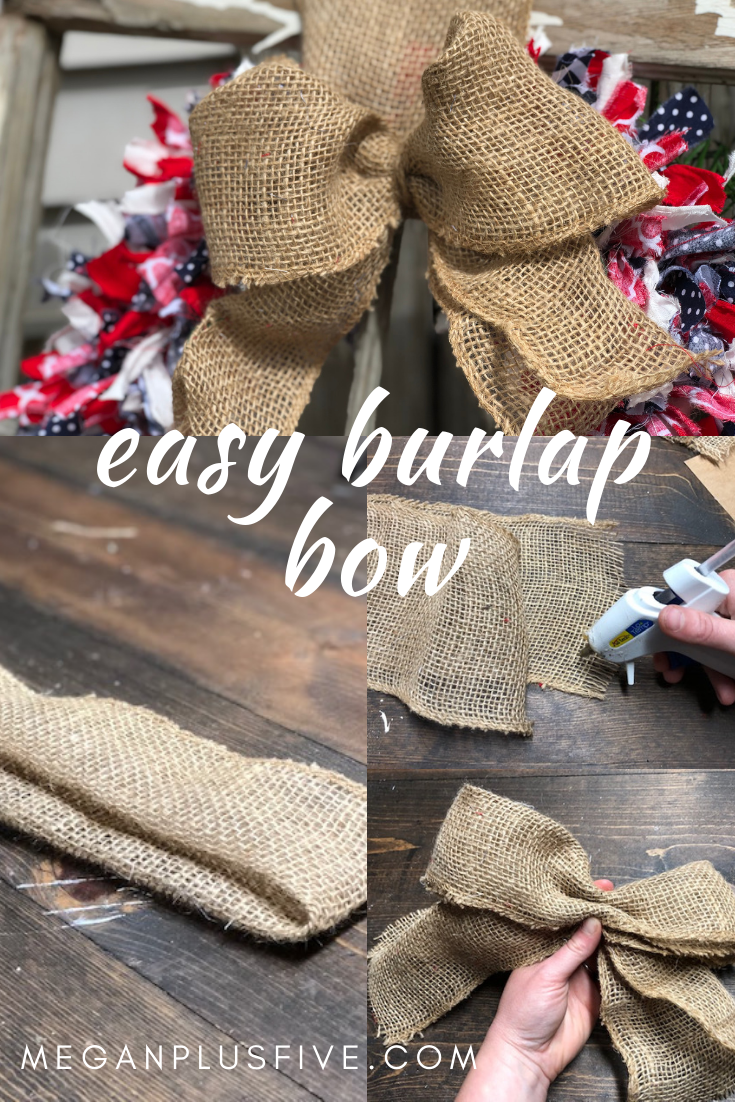
How to make an easy burlap bow

How to make an easy burlap bow

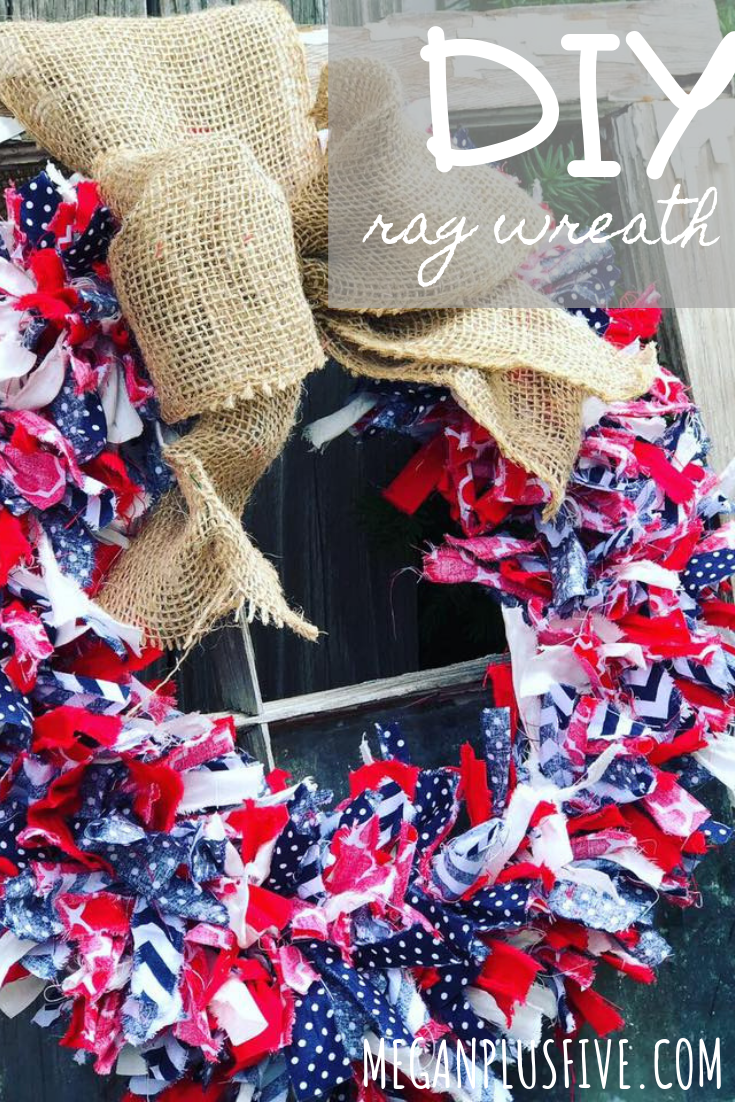
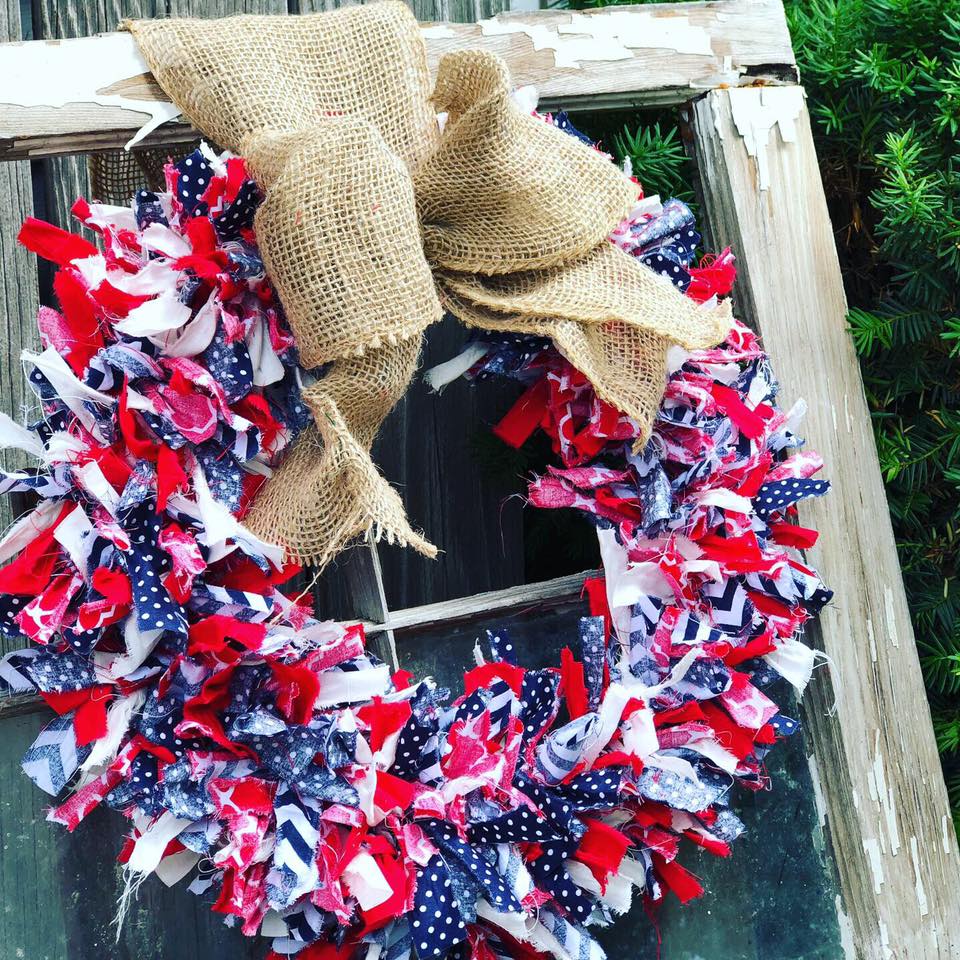
Recently I made an ADORABLE red, white, and blue rag wreath. But I wanted it to look a little different from the spring rag wreath I made a few months ago. So I decided I was going to add a big burlap bow to the front of it. And omg it turned out so super cute!

Affiliate Disclosure. Some of the links on this website are affiliate links, which means that I may earn a small commission if you click on the link or make a purchase using the link. If you make a purchase you will not be charged anything additional.

I had everything I needed on hand to make this but I’ve included the links where you can get some of these supplies. Yes, those are affiliate links but not to worry, you will not be charged anything extra if you make a purchase through them. They are just a way for this stay at home momma to help with the daily bills of raising our four little girls :)!

Here’s what you’ll need

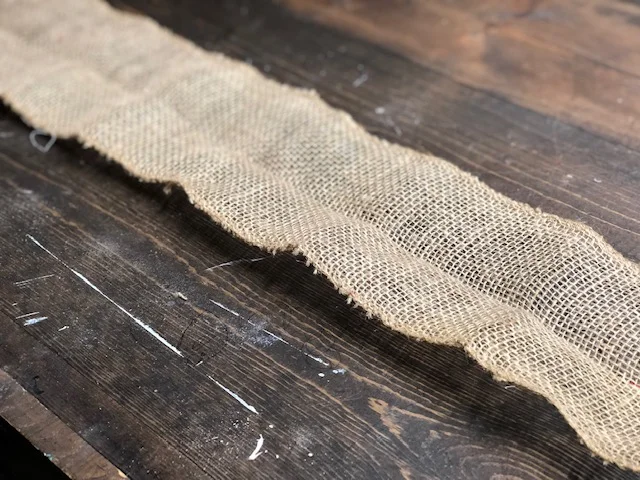
I had a roll of 5” wide burlap I picked up from my local Walmart last fall {burlap can be used for SOOOOO many projects so when it goes on sale at the end of a season stock up!}. I measured out approx. 28” in length to use for the bow portion of this.

How to make an easy burlap bow for your wreath

Then fold it in half width wise.

How to make an easy burlap bow for your wreath

Then fold it in half length wise and be sure to leave a crease in the middle.

How to make an easy burlap bow for your wreath

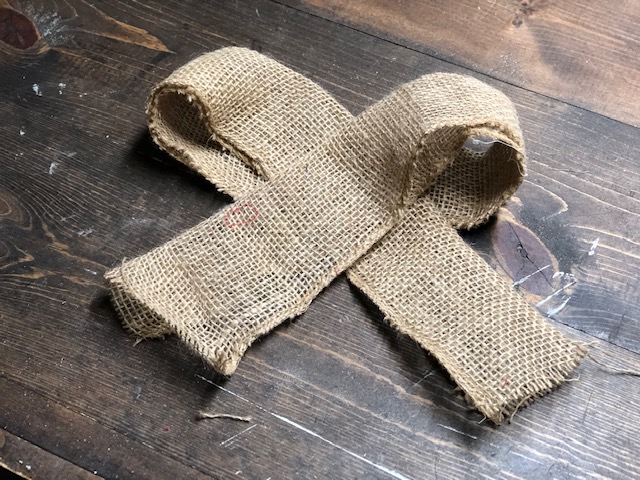
Now unfold and loop each end to the other side so that it looks like the picture below. The crease you made in the step above will help as a guide to keep them even.

How to make an easy burlap bow for your wreath

Flip it upside down

How to make an easy burlap bow for your wreath

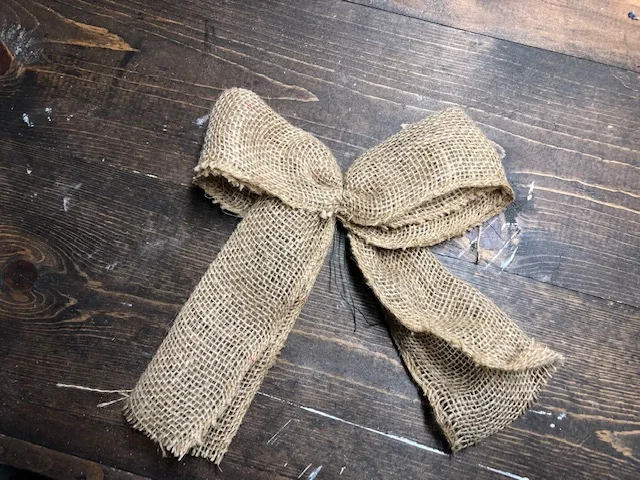
Pick it up and pinch the middle so it looks like the one below.

How to make an easy burlap bow for your wreath

Cut 6” piece of floral wire and wrap it around the center a couple times. You will have most of it left over and you will need this to attach it to the wreath form. Be sure you end on the back side of the bow. Take you jute/twine and wrap it a few times right over the wire to hide it then tie it off on the back and cut off the excess.

How to make an easy burlap bow for your wreath

This is what your bow should look like now.

How to make an easy burlap bow for your wreath

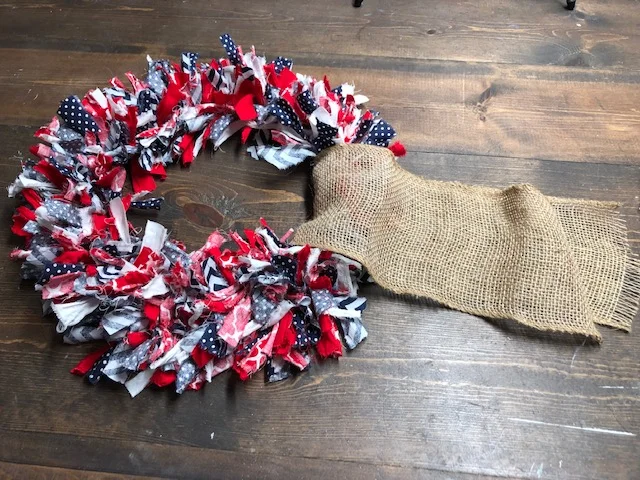
Set your bow aside and add a loop of burlap to your wreath. You can make this as long or short as you need.

How to make an easy burlap bow for your wreath

Glue the ends of your loop together. After this is dry you can move the seam to the back of the wreath to hide it.

How to make an easy burlap bow for your wreath

Then attach the bow to the wreath itself. put the wire that is sticking out of the back and feed it through the burlap loop, the rag wreath and twist the two floral wire ends together. Trim the ends of your bow so that they are even lengths. I also fluffed out the bow on mine so that it didn’t look so flat.

How to make an easy burlap bow for your wreath

What do you think? I personally LOVE the way it turned out and I can’t wait to make another rag wreath for the next season!


If you loved this tutorial check out some of my other tutorials I made using burlap and twine

DIY 4th of July rag wreath

DIY 4th of Julyl Rag Wreath, easy how to make your own

I love the shabby chic look for many reasons but mainly because that look is totally imperfect just like me. I’m a busy momma to four little girls so there’s no room in our beautiful chaos for absolute perfection.

Affiliate Disclosure. Some of the links on this website are affiliate links, which means that I may earn a small commission if you click on the link or make a purchase using the link. If you make a purchase you will not be charged anything additional.

I needed a new wreath for our front door for the 4th of July. I have been truly slacking in the red, white, and blue décor the last few years and really needed a spruce up. But I didn’t have the time to make anything big and wonderful and it’s not in our budget to make a ton of new decorations. So I decided on a RAG WREATH for our front door and I’m so glad I did! If you like this tutorial check out the DIY spring rag wreath I made.

save on Pinterest for later

DIY Fourth of July rag wreath

Here’s what you’ll need

  • 5 fat quarters of fabric, I found these at my local Walmart and even better I got a few of them in the clearance aisle!

  • wire wreath form, I found mine at Dollar Tree

  • scissors

If you love the big burlap bow go here ———-> to my HOW TO MAKE A BURLAP BOW tutorial.

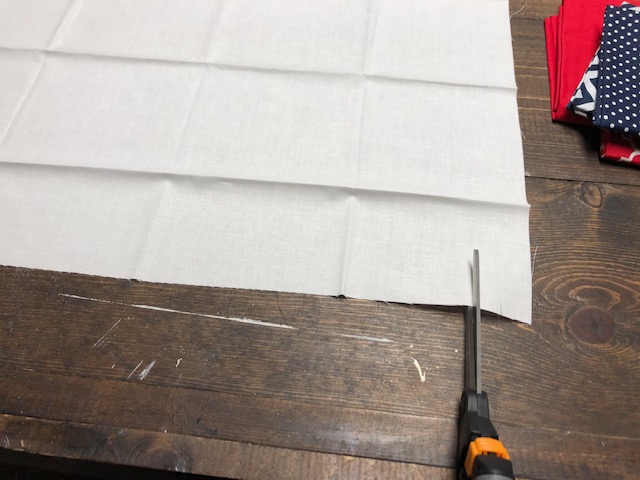
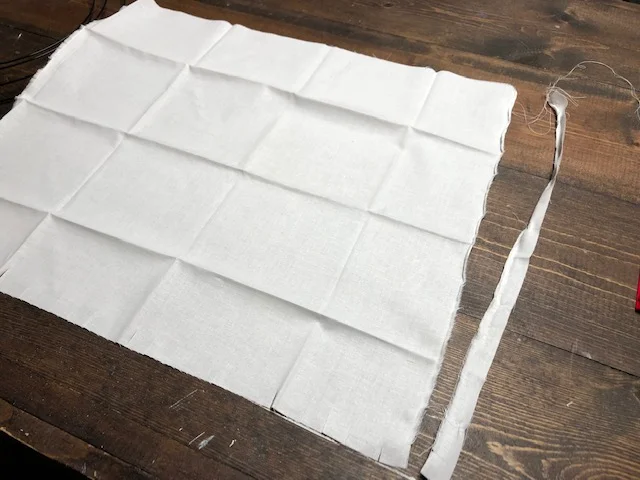
Working with one fat quarter at a time, unfold and don’t worry about the creases. You won’t be able to see these. Going along the bottom make a small cut every .75”-1”. If you want your tie pieces to be larger make your cuts farther apart.

DIY 4th of July rag wreath

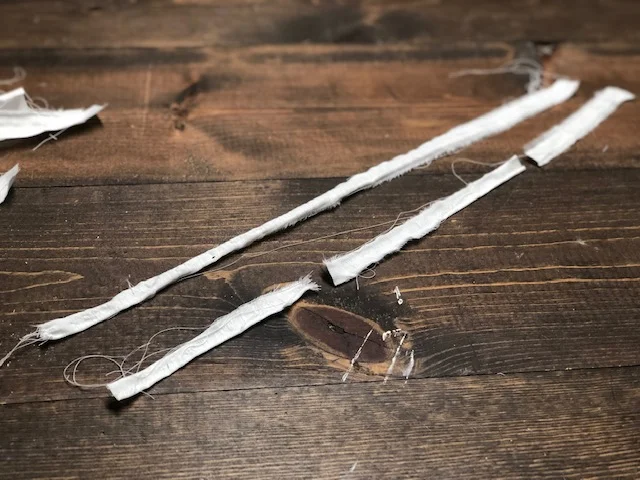
Now rip each of those cuts all the way to the other end using your hands, not your scissors. This will give your fabric a frayed looked.

DIY 4th of July rag wreath

After you have all your small cuts ripped cut each strip into 3rds like the picture below. Because I am a far cry from a perfectionist none of mine were the same size. If you like things a little more perfect than this you can measure these out.

Repeat these steps for ALL the fabric quarters.

DIY Fourth of July rag wreath

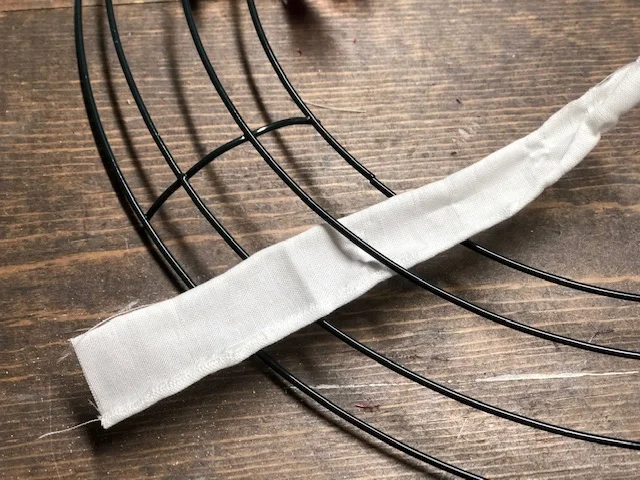
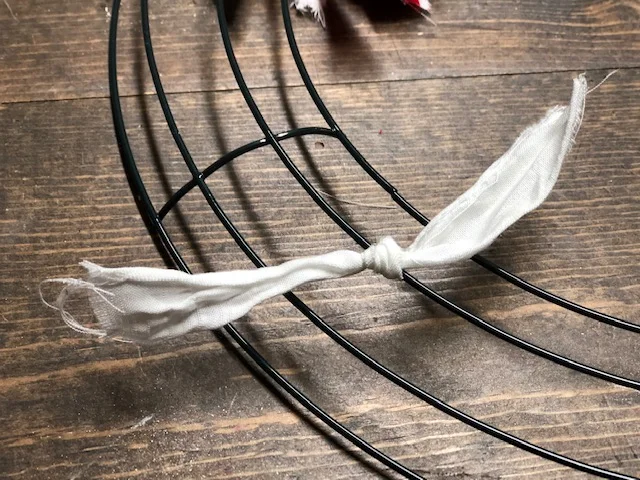
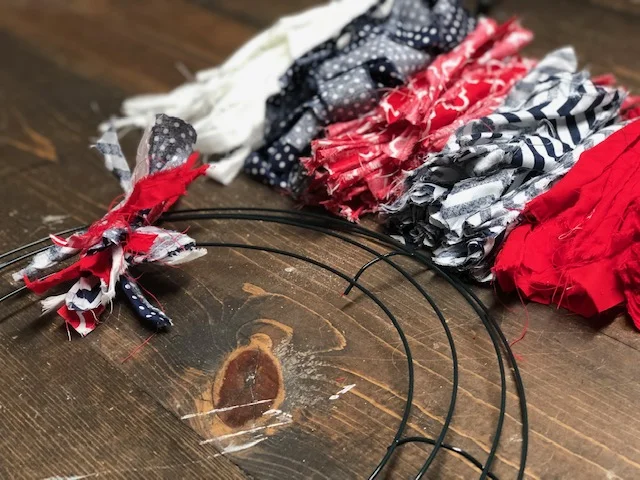
After you have all your pieces ripped and cut into thirds start tying them to your wire wreath form. To make sure I had enough fabric to cover the entire wire form I moved to the next section before it was full and did that for all the sections. Then I went around and filled in the blank spaces.

DIY 4th of July rag wreath

Be sure you are staggering out your fabric prints. You don’t want too many of the same print in one spot.

DIY 4th of July rag wreath

You can leave it plain and simple or tie a bow to it like the burlap bow I tied to this one.

DIY 4th of July rag wreath

What do you think? Super adorable and SUPER easy to DIY at home!


Check out these other 4th of July DIY crafts.

DIY hanging wood flag

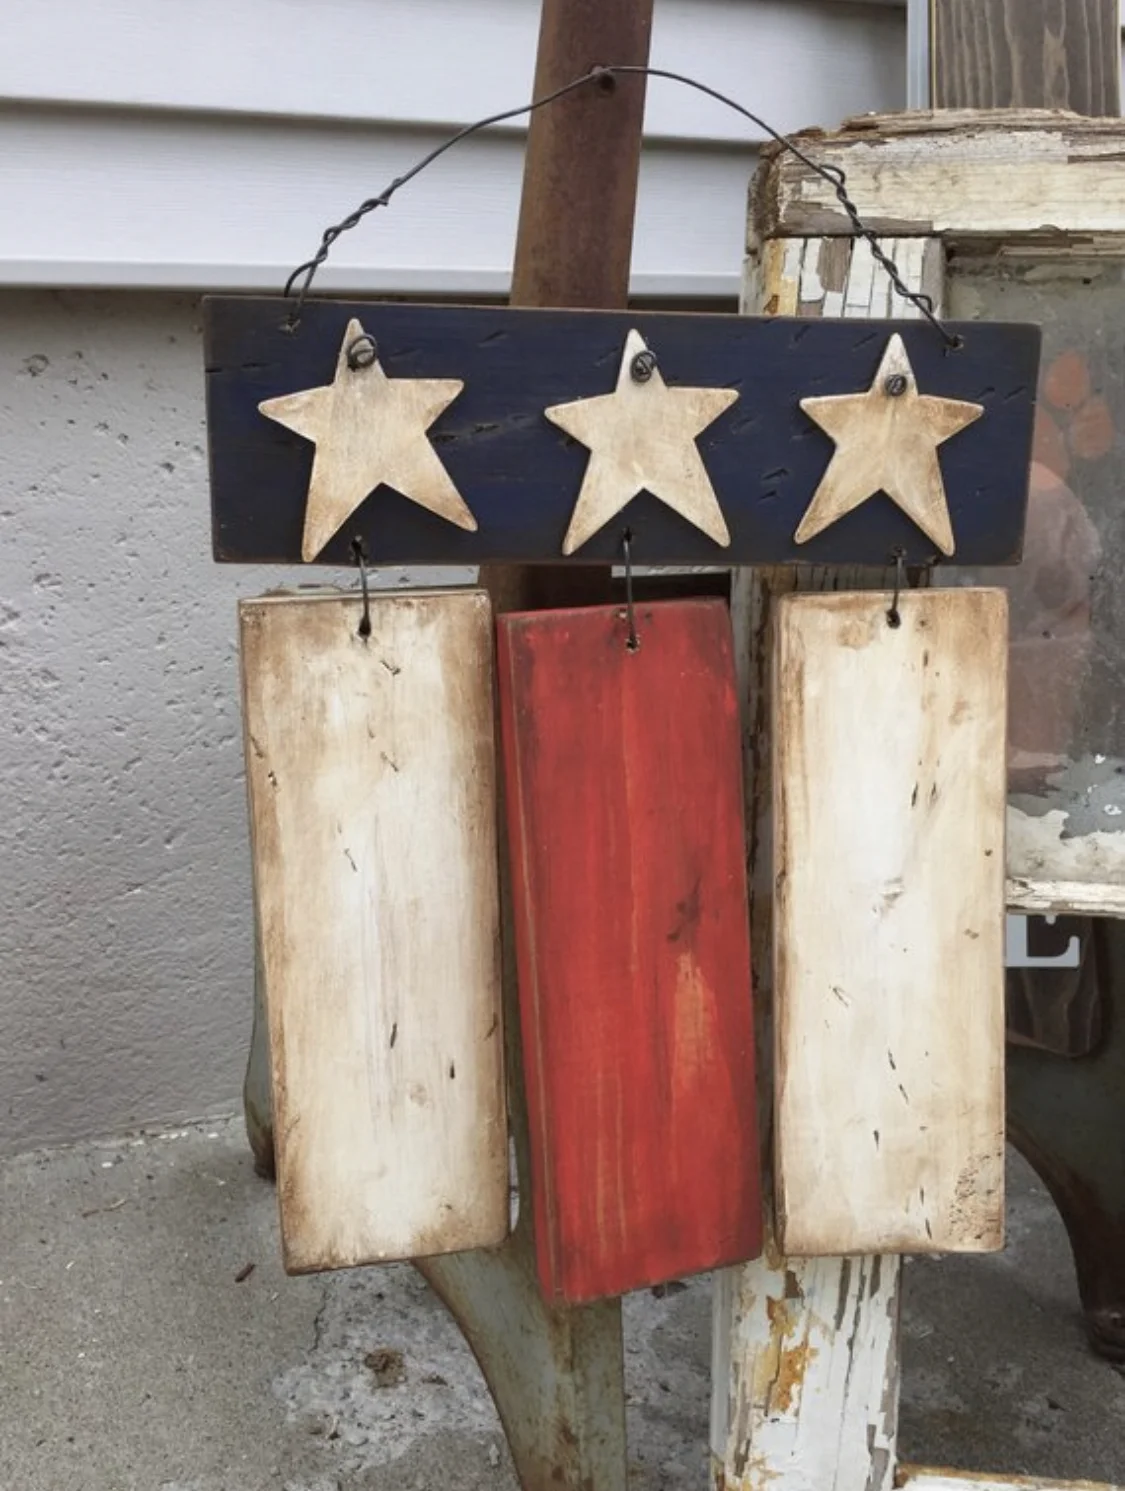
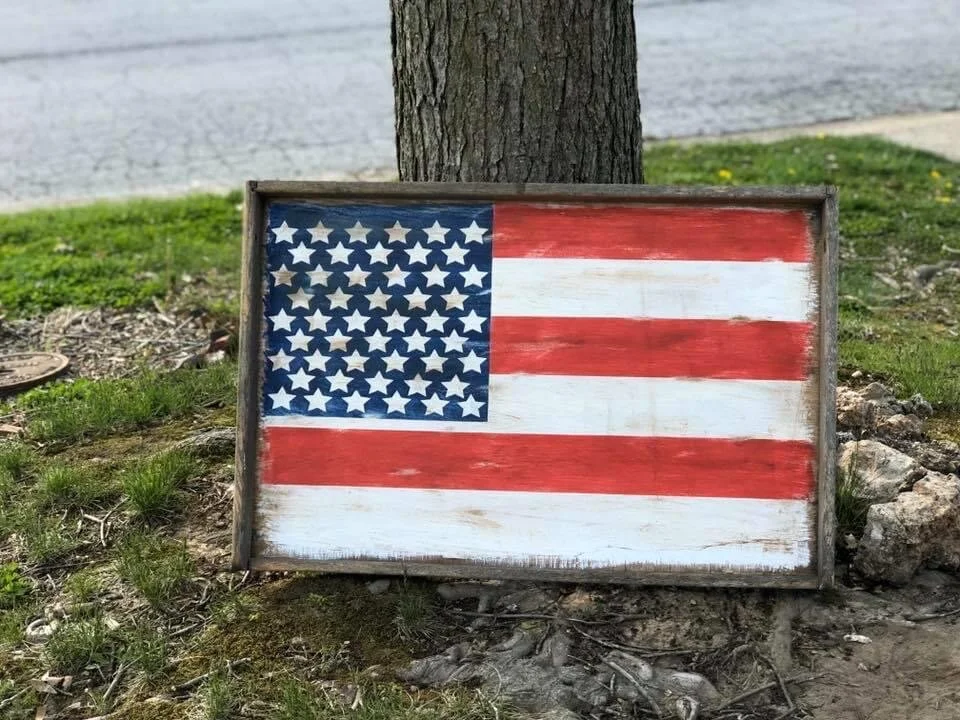
Do it yourself rustic American Flag, how to make a hanging American flag

I love patriotic décor. Not only because I truly love being an American but because it never goes out of season! You can leave it up year round and it looks perfectly beautiful and not at all out of place, unlike the wooden Santa I had hanging out in the living room five months after Christmas. Yes, that’s a true story! My grandma painted this amazing 5 ft tall Santa ages ago and I somehow overlooked him for months in our living room.

So unlike Mr. Claus, patriotic décor would not stick out like a sore thumb long after Independence Day has passed.

If you don’t have time to make your own be sure to stop by my Etsy shop and purchase your own handmade wood American Flag made by yours truly ;)

Affiliate Disclosure. Some of the links on this website are affiliate links, which means that I may earn a small commission if you click on the link or make a purchase using the link. If you make a purchase you will not be charged anything additional.

Ok, on to the tutorial.

Here’s what you’ll need

SUPPLIES

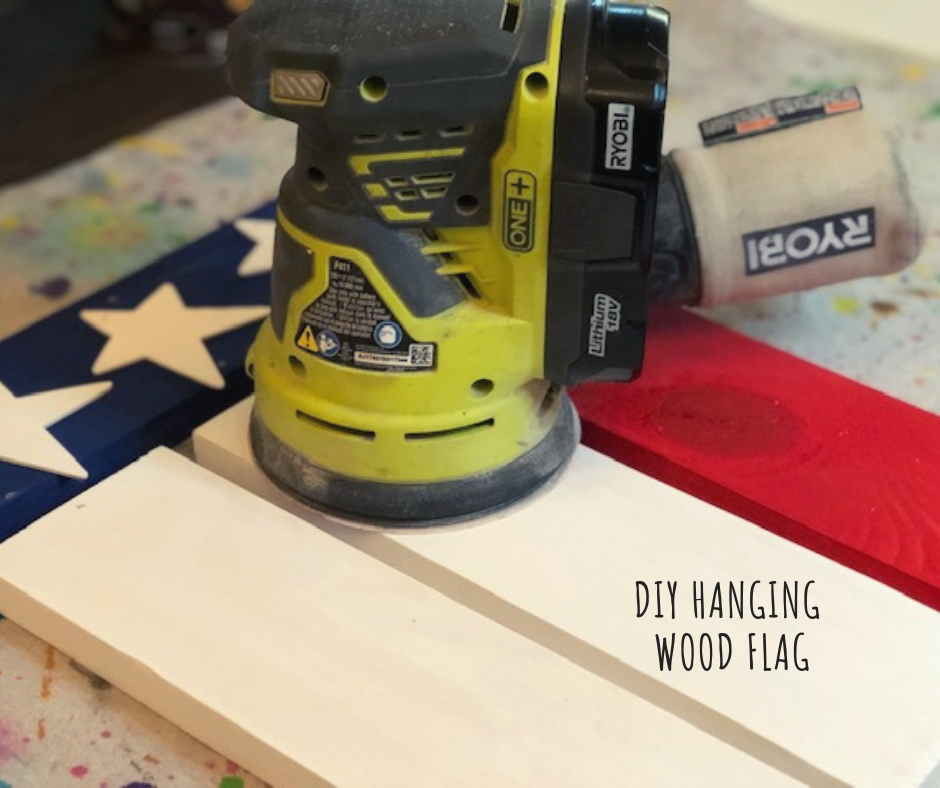
DIY hanging wood flag, how to make your own primitive American flag

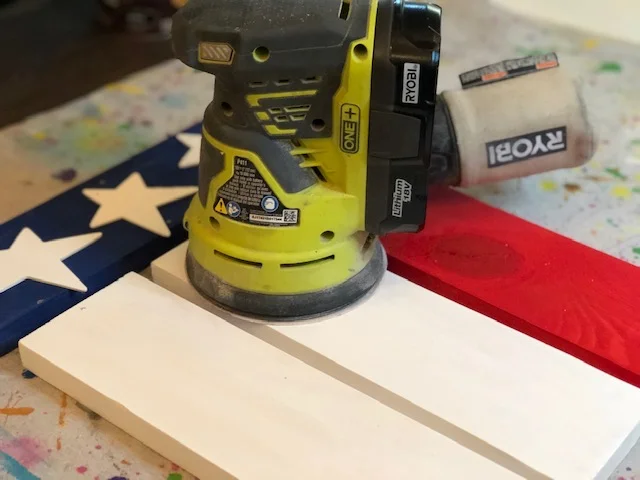
After you cut down your 1x4 into the correct sizes you need to give them a quick sanding. I use my Ryobi handheld cordless sander for this but you can use just sandpaper or a sanding block, although it will take a lot more work and more time. I purchased my sander fairy cheap at my local hardware store, one of the best $50 I’ve ever spent! After you have all the 1x4 pieces sanded give them a quick wipe down to get all the saw dust off.

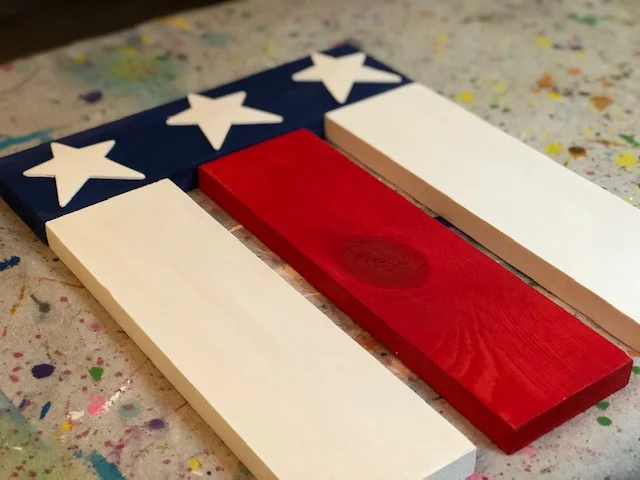
Next you need to paint all the wood pieces and the stars. I only did two coats on each piece. To get the look that I did on mine you will need to paint all three stars WHITE, 2 of the 1x4x12’s WHITE , 1 of the 1x4x12 RED, and the 1x4x13 BLUE. Let them dry COMPLETELY between coats.

DIY hanging wood flag, make your own American flag at easy with this tutorial

After everything is totally dry you need to mark your pieces where you will drill your holes. I am not a perfectionist so I just eyeball it. It’s rustic so it doesn’t have to be perfect anyway ;) I do this with a pen but if you’re worried about messing up you can use a pencil.

DIY hanging wood flag, how to make an American flag at home for your porch

Not counting the stars, your pieces should have a total of 11 markings, 3 on the top of the blue piece where you will attach the stars, 3 on the bottom of the blue piece where you will attach the hanging white and red pieces, 1 on the top right of the blue piece and 1 on the top left of the blue piece where you will attach the baler wire to hang for displaying, 1 in the top middle of each white piece, 1 in the top middle of the red piece. I don’t typically mark the stars because it’s not necessary, the hole goes in the top of the star.

DIY hanging wood flag, how to make your own American wood flag to hang on your front door

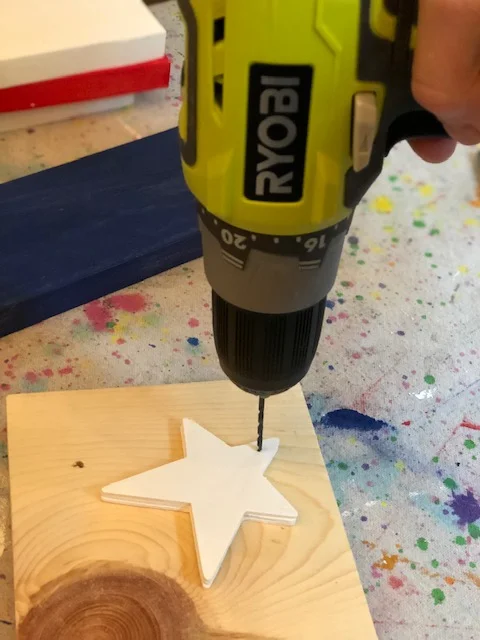
Now it’s time to drill. Your drill bit will vary depending on how thick your baler wire is. I always use a drill bit that is just a size above the wire size, that way the wire has room to move so that it’s not super tight. Be sure when you are drilling the holes in the stars you don’t get too close to the top. If you get too close you will crack the tip of the star and you won’t be able to use it. PRO TIP: place a flat discarded piece of wood under what you’re drilling into so you don’t drill into the table underneath.

DIY hangin wood flag, how to make your own at home

Now it’s time to distress. Using your Ryobi sander sand around the edges. Here’s a good example on how I do this in my Dr. Seuss keepsake craft. There are some good close ups on sanding just the edges and rounding the corners of the wood to give it a perfect rustic look.

DIY hanging wood flag, how to make your own American flag to display on your front porch

I only sand the 1x4 pieces. The stars are so small and fragile that yo don’t need to sand those, using the wax on them in the next step will work just fine.

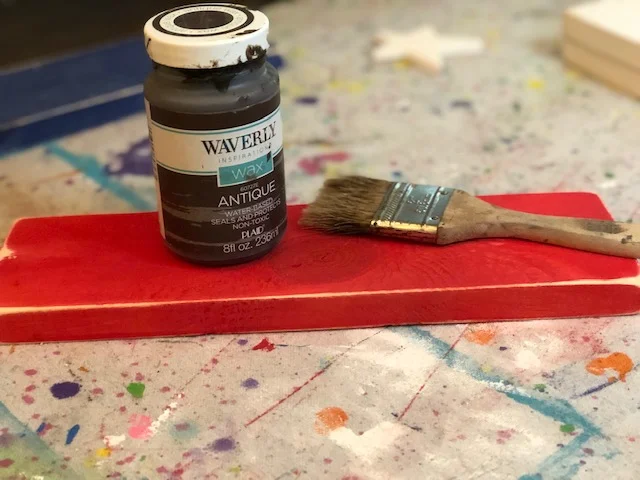
Apply wax around all the edges, corners, and give them a light coat down the center of each piece. Check out my DIY rustic wooden pumpkins post on a more detailed way to do this using your chip brush. I love pretty much any brand of antiquing wax, they all work great! PRO TIP: cut the bristles down on your chip brush. You get a better outcome when the bristles are shorter and stiffer.

DIY hanging wood flag, how to make your own American flag porch decor

You’re almost done! The next steps are just assembling your pieces together. You’ll need your baler wire and wire cutters for this.

DIY hanging wood flag, how to make your own patriotic porch decor

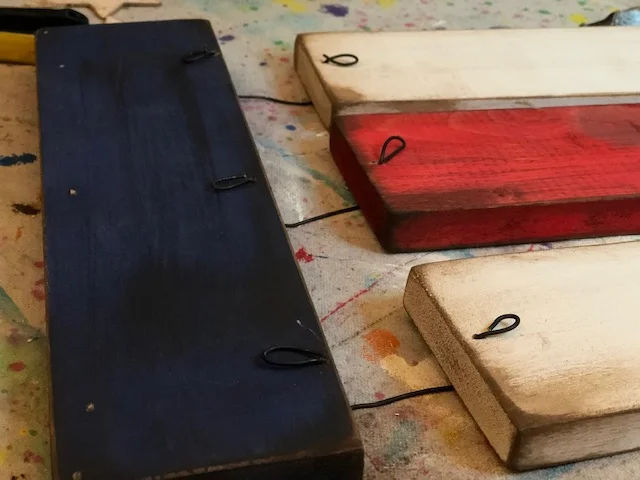
You’ll need 3 wire pieces cut to approx. 6”-7”. Cut your pieces short if you want less space from the blue piece to the hanging pieces, and longer if you want more space from the blue piece to the hanging pieces. Now make a loop with your plies on ONE end of each piece like pictured below.

DIY hanging wood flag, how to make your own American flag porch decor

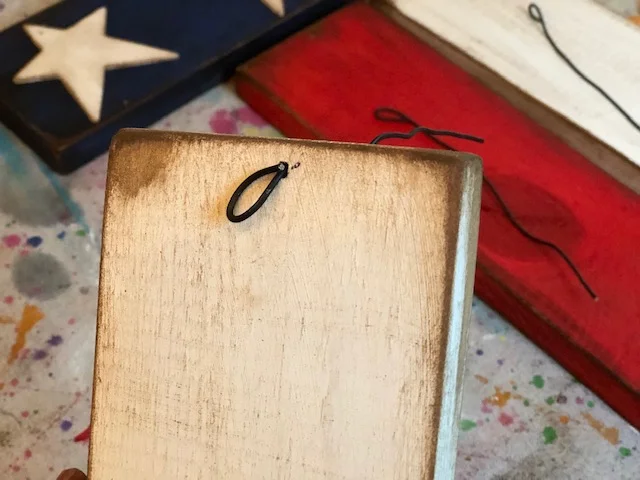
These loops will go on the BACK of each piece.

DIY hanging wood flag for the front door

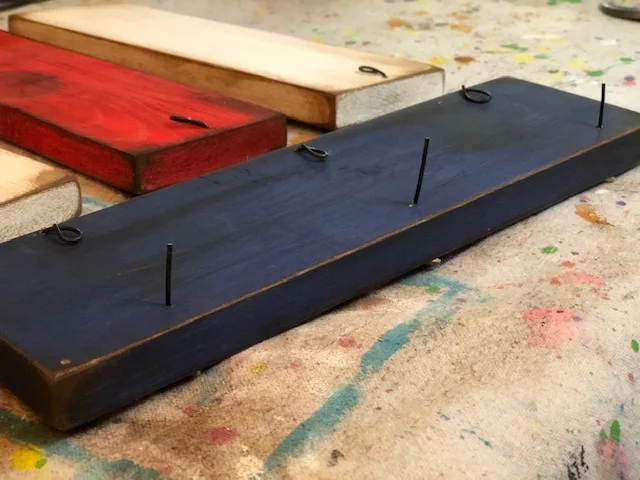
Then connect it to the blue piece and loop the end just like you did before. This is what the BACK of your flag should look like before you attach your stars.

DIY front door hanging wood American flag

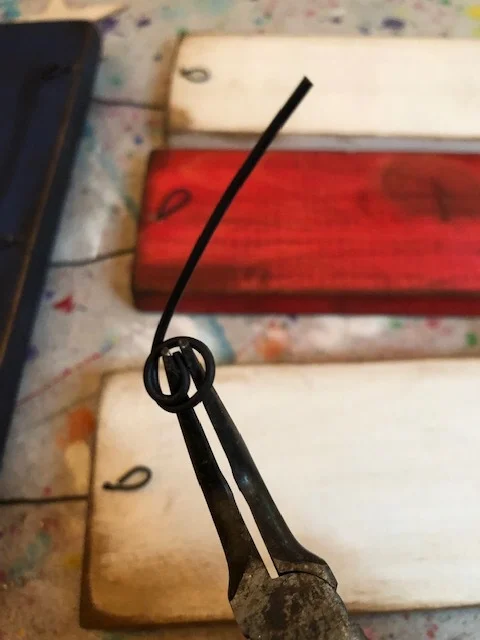
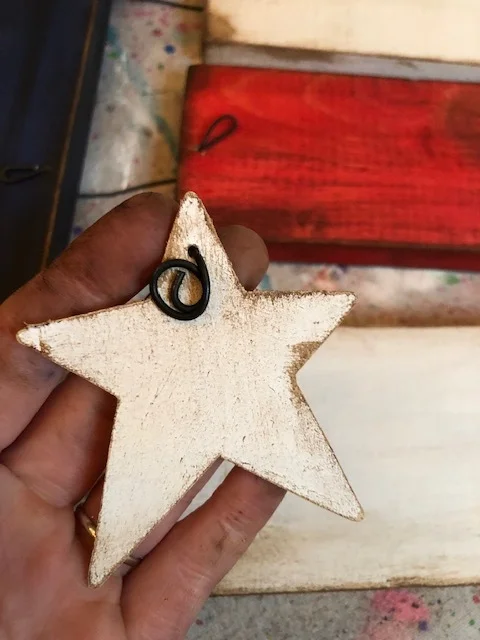
The star wire is slightly different. You’ll need a 3” piece for each star. One end you need to wrap a few times around your needle nose pliers. This doesn’t have to be perfect, mine never are. Leave the other end open.

DIY front door hanging American flag

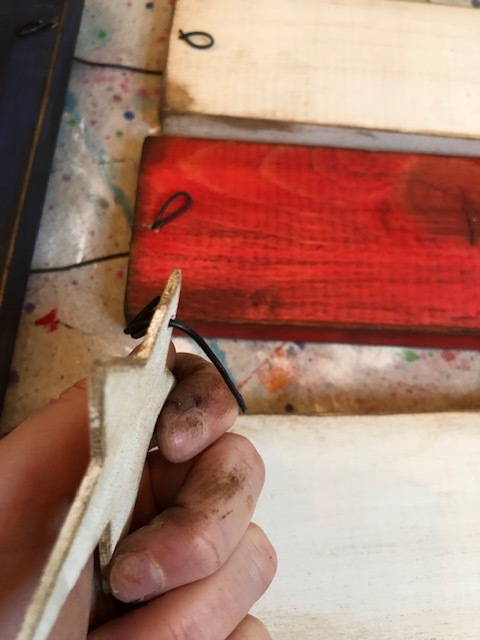
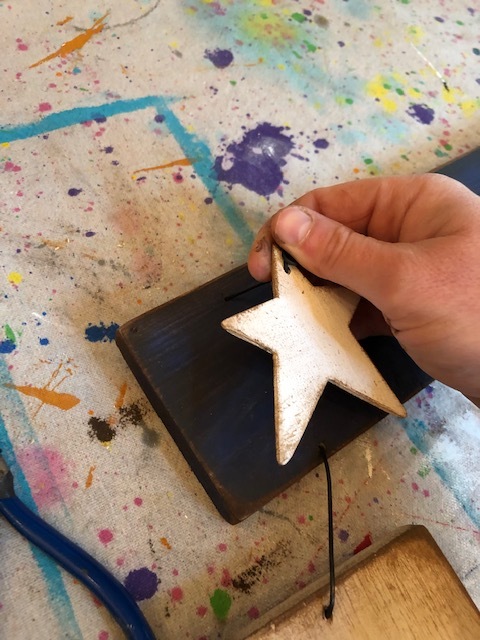
Then feed the straight end of the wire through the front of your star then through the front of the boar where you drilled a star hole.

DIY hanging wood flag for your front porch
DIY hanging wood flag

After you put your star wires through their holes on the blue wood you want to do the same thing and loop them on the back like you did with the other wires. Pictured below is BEFORE they are looped.

DIY hanging wood flag for your front porch

Add a piece of wire to hang at the top corner holes and you’re done! I know it seems like a lot of steps but it’s SUPER easy! I’d love to see pictures of your handmade patriotic decor, especially if you make this piece:)!!

IMG_4189.jpeg

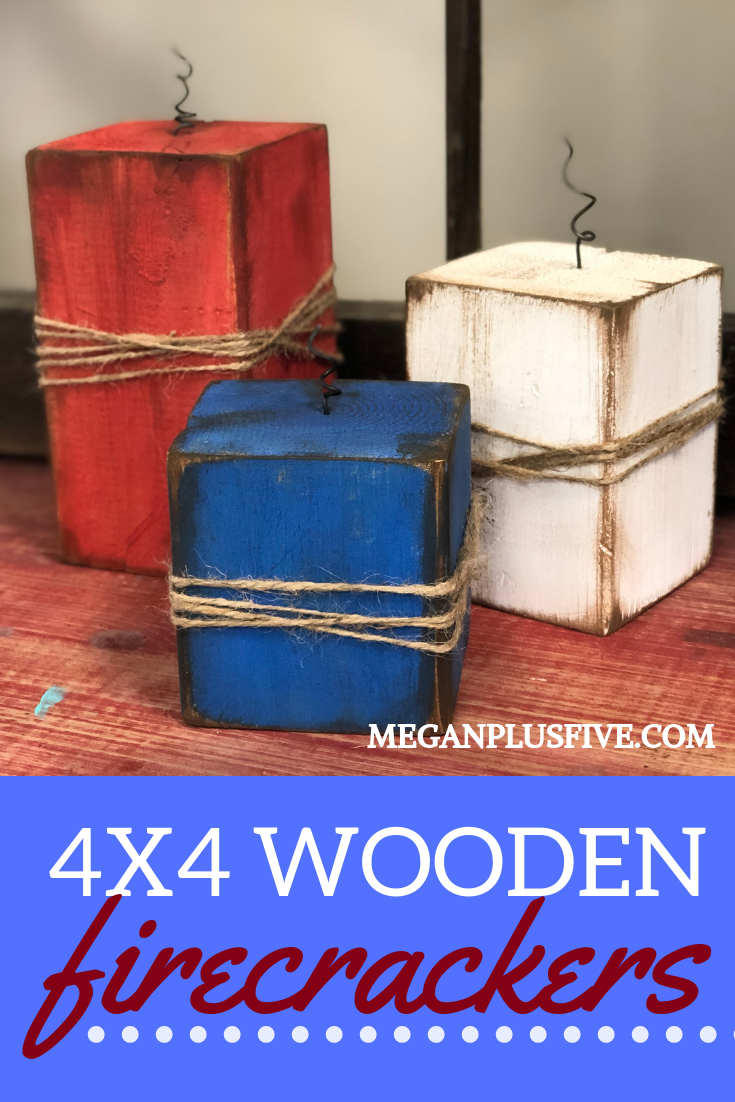
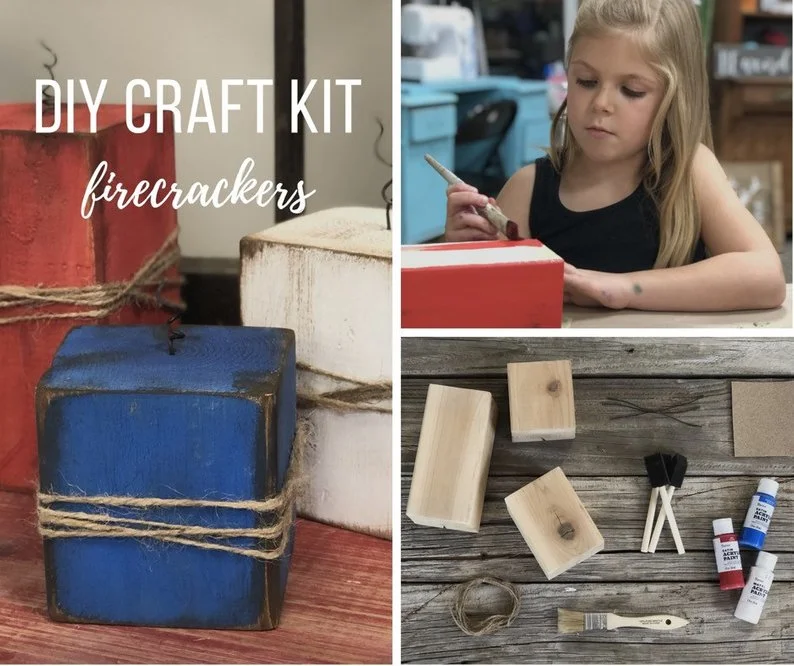
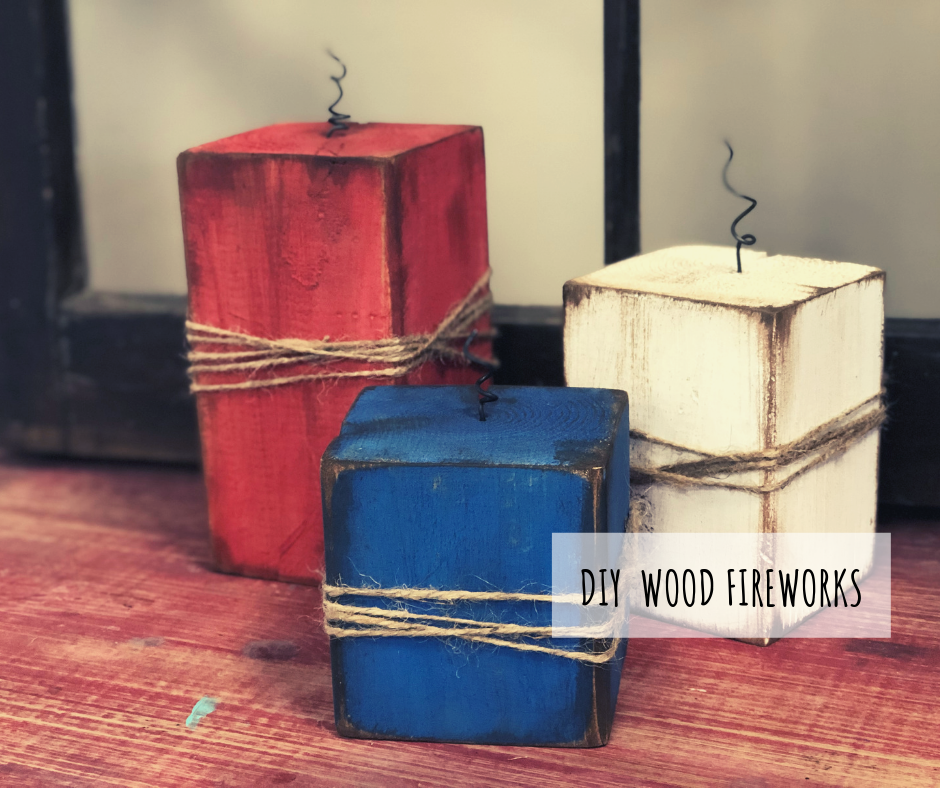
DIY 4X4 Wood Firecrackers

DIY 4x4 Wood Firecrackers, easy Fourth of July Craft to make at home

Affiliate Disclosure. Some of the links on this website are affiliate links, which means that I may earn a small commission if you click on the link or make a purchase using the link. If you make a purchase you will not be charged anything additional.

I am a sucker for a quick and easy simple crafts! These kind of projects give you an instant satisfactions because you don’t need to wait days for them to cure and you can even get the kiddos involved in the creative process because honestly there’s not a whole lot they can mess up with these little guys.

This project does require the use of some power tools but if you don’t have them handy you can purchase an easy craft kit from our studio. We do all the cutting, pre-sanding, drilling, and include all the materials PLUS printed of instructions on how to make them at home so you don’t have to come back to this page while your hands are covered in paint.

Here’s what you’ll need if you’re making yours totally from scratch…

DIY Wood Fireworks.png

If you prefer to order online I’ve attached Amazon links to most of the supplies above. You can purchase most of the supplies at your local Walmart and home improvement stores.

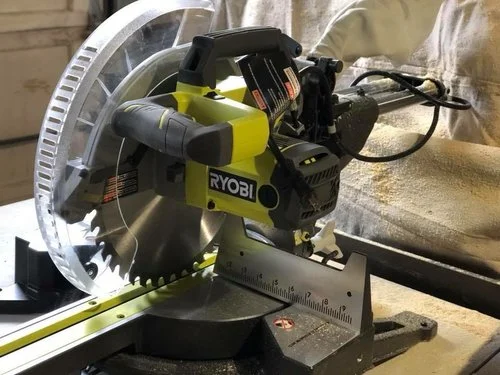
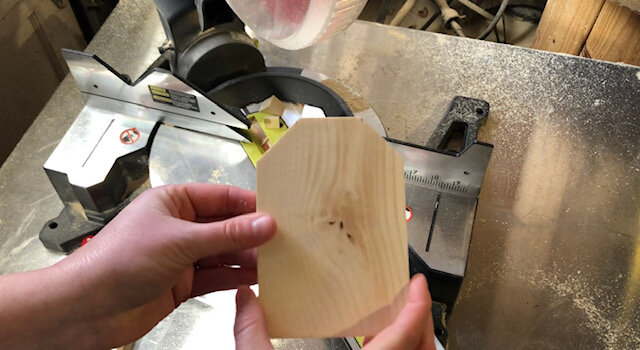
First you need to cut your 4x4 down to 4, 5.5, and 7 inch lengths. Some home improvement stores will do this for you but usually their blades are very dull and will splinter your wood badly. For this project the splinters would add a ton of character but I wouldn’t depend on this being an option for most of your other DIY projects.

DIY 4X4 Wood firecrackers

My husband got me my own saw last year and I am LOVING it! Granted it was more money than I wanted to spend but it has been one of the best investments we’ve made in our business. Ryobi makes a really great line of tools, especially if you’re just using them to make projects for your home or running your own creative craft business like I do. This particular saw is great because it is a slider. It can cut anything from 1/2” pieces all the way up to 12” wide {and probably a little wider but I only cut up to 12”}.

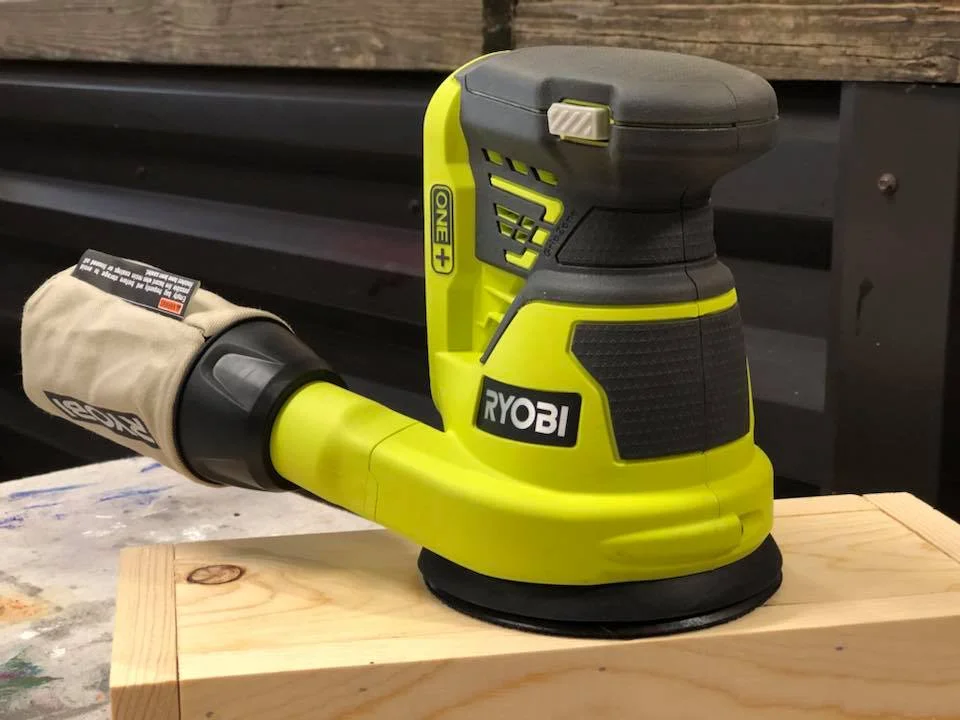
After your pieces are cut you need to give them a quick sanding. Again, I use my trusty Ryobi tools for the job. I typically use 120 grit sandpaper for most of my projects. This is a good in the middle grit. If you want to get crazy you can sand with all the way thru the different grits but I don’t usually do this…I’m a busy momma of four 120 works perfect, lol!

DIY 4X4 wood firecrackers

After you have your pieces sanded be sure to wipe off all the saw dust. You don’t want this on the wood when you start painting.

Depending on the size wire you get will depend on the size drill bit you’ll need. Drill a hole in just the top of each piece of wood. I drilled mine about 1/2” deep.

DIY 4x4 Wood Firecracker

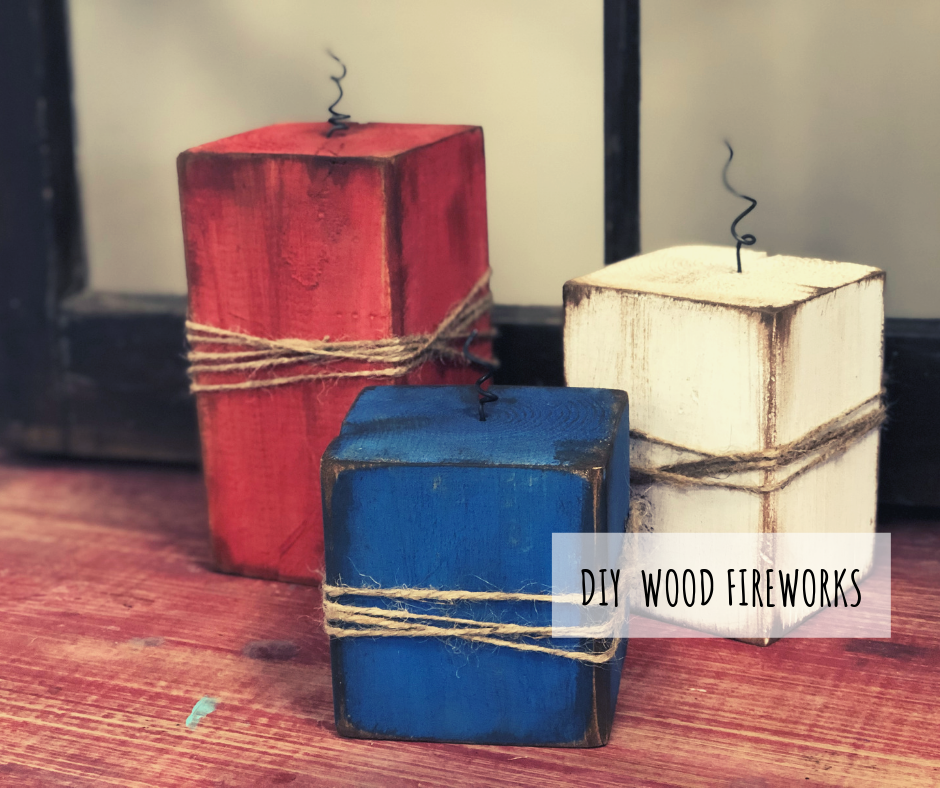
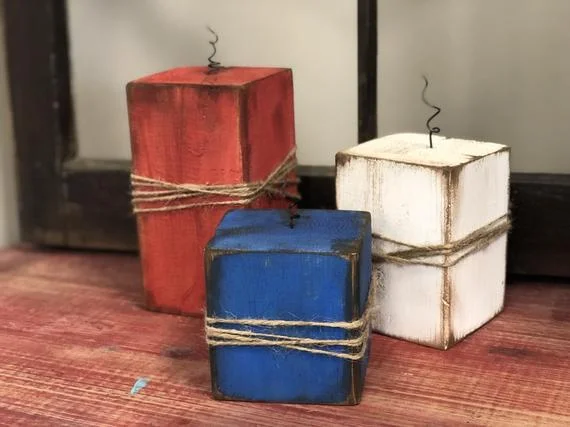
Paint each of your blocks a different color. You’ll need one red, one white, one blue. I did two coats on mine. This is a good time to get the kiddos involved. They really can’t mess these little guys up. Be sure to let the paint dry COMPLETELY between coats. If you don’t your paint will likely pull away from the wood as you apply it on top of wet paint.

After both coats are dried you want to give your blocks a light sanding. Focus on the edges and the corners.

DIY 4x4 wood firecrackers

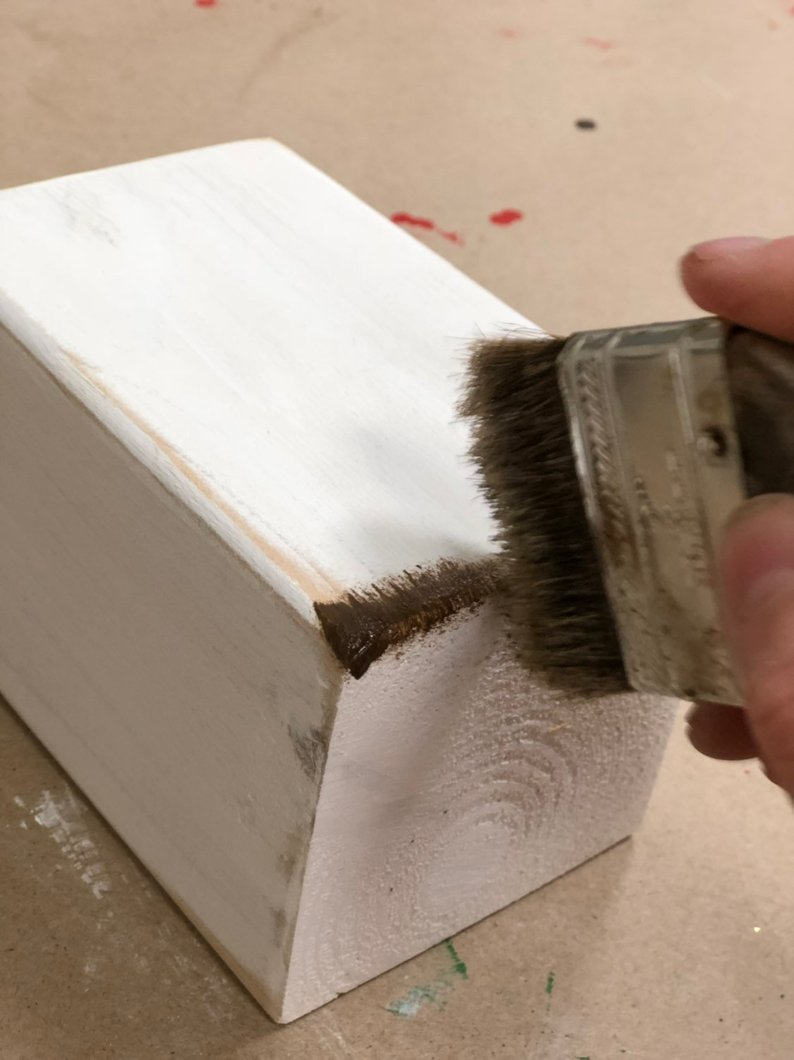
Using your chipbrush apply a light layer of the antiquing wax to the areas you sanded. You can do this as heavy or as light as you like. Remember a little bit goes a long way and you can always add more if you want to.

Now add a little hot glue to the end of the wire and quickly stick it down in the hole you drilled. Once they are dry and in place you can twist them if you’d like.

Wrap the middle of each wood block in twine and you’re done! Super easy!

DIY 4x4 Wood Firecracker craft

I hope you found this craft as fun as I did! Enjoy your Fourth of July!


How to make painted wood signs, all the tips and tricks the pro's won't tell you


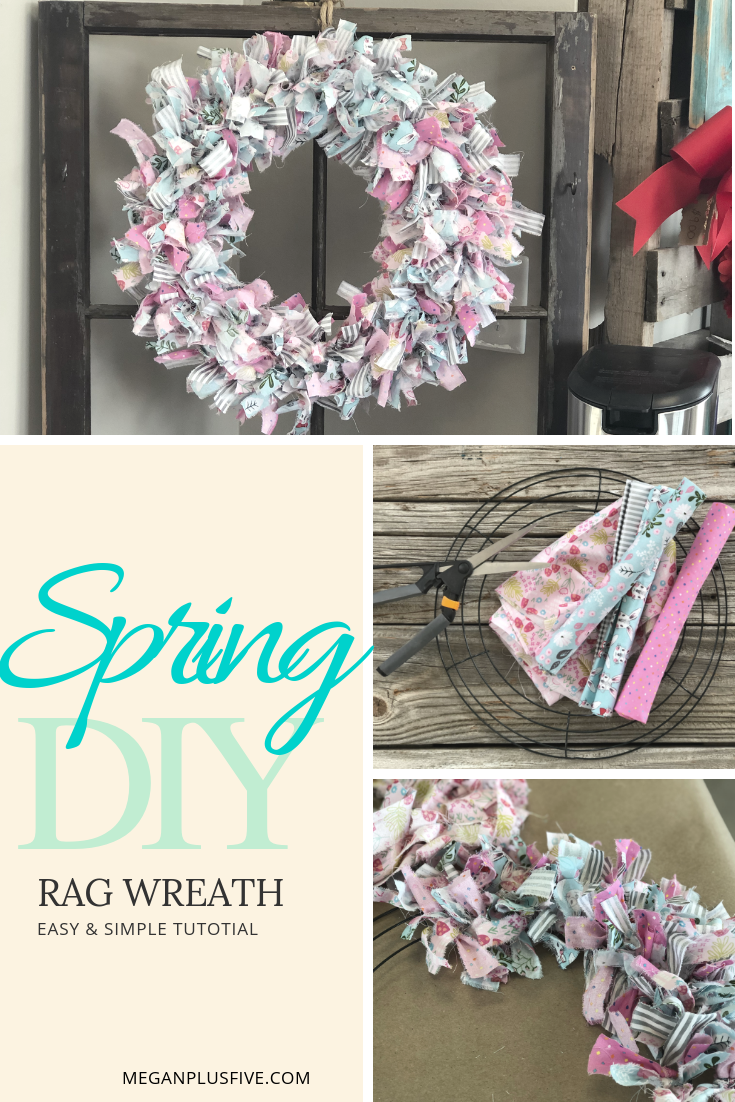
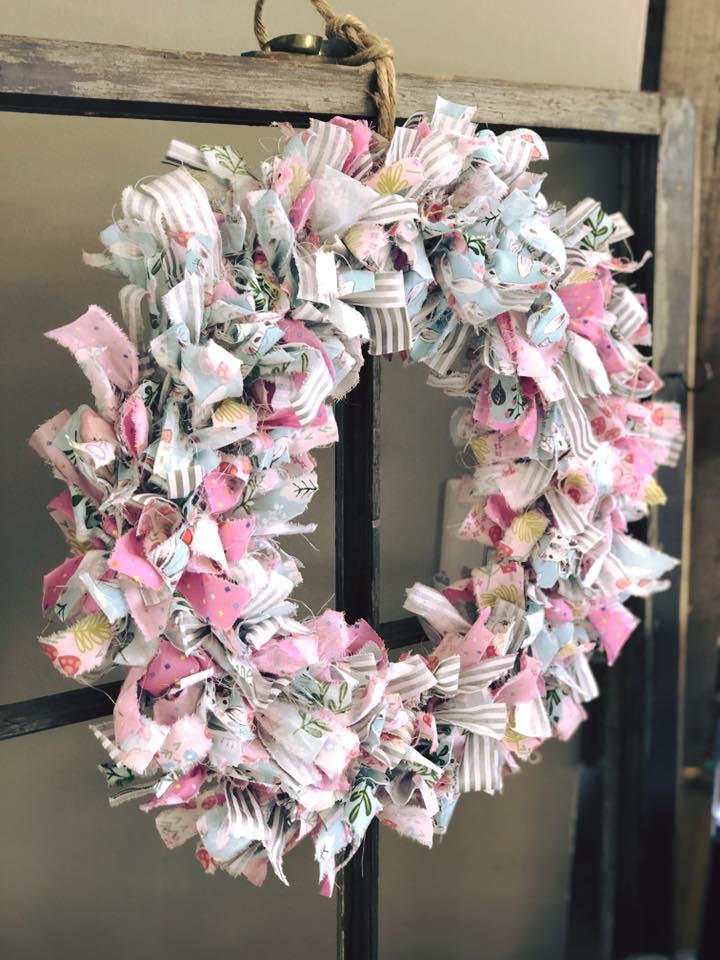
Super simple DIY, how to make a tied rag wreath for SPRING

Super simple DIY, how to make a tied rag wreath for SPRING

EASY SPRING RAG WREATH

All the perfect imperfections just get me every time. I’ve never been one to be too keen on things being perfect though, I am a mom of four after all. We have coloring on the wall, chipped dishes from the girls dropping them a little too hard into the sink, and don’t get me started on what the inside of our minivan looks like…so yeah, I LOVE imperfections.

This craft fits right into my love for imperfections. the unevenness, the frayed edges, the random fabric pattern, it’s a beautiful mess! And it is SO easy to make. You literally don’t have to have any “crafty” abilities to create this gorgeous wreath.

And did I mention it’s SUPER INEXPENSIVE to make? Yup! For less than $10 you can pick up everything you need to have a perfectly imperfect wreath for spring!

So let’s get started.

Want instant access to all of my FREE printables, templates, and patterns? Click here for my FREE RESOURCE LIBRARY

Super simple DIY, how to make a tied rag wreath for SPRING

Here’s what you'll need

  • a wire wreath form

  • 4 fat fabric quarters

  • scissors

  • something to hang it with. I used thick braided rope

And that’s it! I’m telling you this tutorial is sooooo simple!

Ok, let’s get started. First, using your scissors you need to cut slits every 3/4” on the widest side of your fabric. Then rip them off individually. I’ll post a video at the very end of this so you can watch how to do this.

After all your fabric is ripped into strips you need to cut each strip into thirds. You can do several strips at a time.

Super simple DIY, how to make a tied rag wreath for SPRING

Then start tying them using only one knot if you tie a double know the strips will be very short. You will use all the pieces of fabric from your 4 fat fabric quarters. I just grabbed whatever pieces and tied them on so.

This is so simple the kiddos can even help you make it. I know my girls LOVE helping me rip the strips.

Just keep tying and tying till you fill the whole ring up.

Super simple DIY, how to make a tied rag wreath for SPRING

When you have all your pieces tied on you can add something to hang it with. I added a cute piece of thick braided rope I had on hand.

I just LOVE the way this turned out! So gorgeous!

Check out the video tutorial I made during a FACEBOOK LIVE

Make your own Valentine's Day pallet sign, easy step by step tutorial

Make your own Valentine's Day pallet sign, easy step by step tutorial

Oh Valentine’s Day…I LOVE all the colors of this beautiful holiday! And if you’re like me you’ll love this adorable craft to make too! Bringing in all the pinks, whites, and grays for this one. And who doesn’t love twine? I mean, if you don’t love twine then are you a true crafter?? This stuff is so sturdy, goes with pretty much anything, and let’s be honest for being string it’s pretty darn cute!

So let’s get started.

I know that sometimes you don’t have all the necessary tools to do all those amazing crafts on pinterest or maybe you just want to try it before you make that kind of financial commitment or maybe you just want a super easy craft night with the girls where there’s no prep work for you. Whatever it is I’ve put together easy peasy craft kits just for you. You can find this particular CRAFT KIT HERE.
Make your own Valentine's Day pallet sign, easy step by step tutorial

If you want to make yours from scratch here’s what you’ll need

  • 1x4x12 {times 3}

  • 1x2x6 {times 2}

  • wood glue

  • nails or brad nailer {I used my Ryobi brad nailer with}

  • stencils {I cut mine from my Cricut}

  • 1” cardstock hearts {I cut mine from my Cricut in dark pink, pink, white}
  • twine

  • tacky glue

  • cosmetic sponges
  • paint brushes or sponge brushes

  • sandpaper or sander {I used my Ryobi cordless sander 120 grit}

  • white, pink, dark pink, gray acrylic paint

  • staple gun

Make your own Valentine's Day pallet sign, easy step by step tutorial

The first thing I do on projects like these is cut everything I need from my Cricut.

Next you need to assemble your sign base together. Lay your boards down on a flat surface so that they are parallel to one another. Then you will take your 1x2x6 pieces and glue and nail them in place.

This is what you want the front of your board to look like once it’s put together.

Make your own Valentine's Day pallet sign, easy step by step tutorial

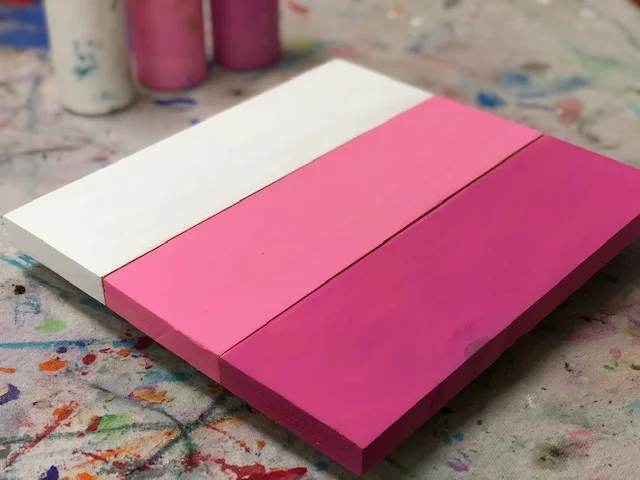
Next you want to paint each piece a different color. I painted the front and the sides, just not the back of this particular piece. I painted the top board white, the middle board light pink, and the bottom board dark pink.

Make your own Valentine's Day pallet sign, easy step by step tutorial
valentine's day sign2.jpgMake your own Valentine's Day pallet sign, easy step by step tutorial
Make your own Valentine's Day pallet sign, easy step by step tutorial

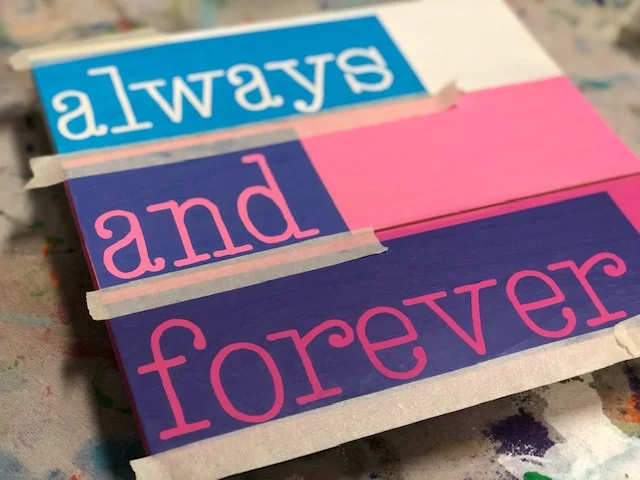
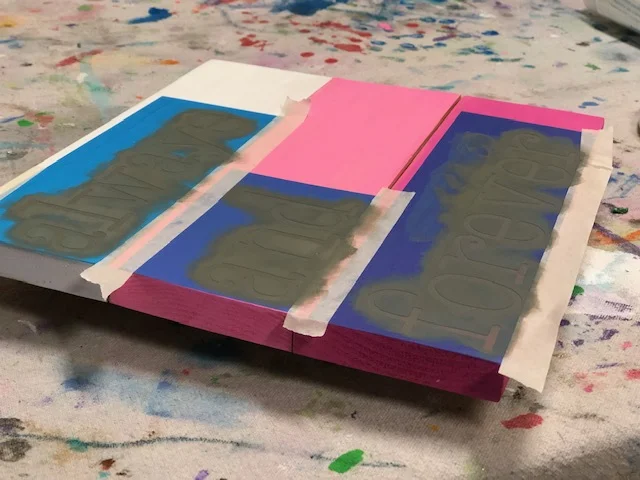
After your paint is totally dry you can apply your stencils. I recommend taping off the edges after you get your stencils down. I wanted mine lined on the left side but you can place yours anywhere on the base.

Make your own Valentine's Day pallet sign, easy step by step tutorial

Now it’s time to paint the lettering using your cosmetic sponge. First lightly dab the flat end of your sponge into the gray paint, you want VERY LITTLE paint on your sponge. If you get too much paint it will bleed under your stencil. Now dab your gray paint very lightly onto the letters.

valentine's day sign9.jpgMake your own Valentine's Day pallet sign, easy step by step tutorial

To achieve the darkness of the gray on mine I did two coats of gray paint. You want to be able to see through the first layer. Once the first layer is dry you can dab on a second layer of paint, still keep it very ligh

Make your own Valentine's Day pallet sign, easy step by step tutorial

This is what you want your first coat to look like. And below is what your stencils should look like after you get your second coat on.

Make your own Valentine's Day pallet sign, easy step by step tutorial

After you paint your second coat peel your stencil up and discard it.

Make+your+own+Valentine%27s+Day+pallet+sign%2C+easy+step+by+step+tutorial

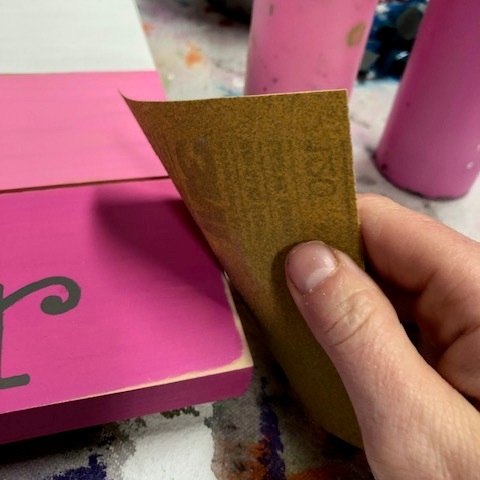
Distress your edges using sand paper or your palm sander. I used my Ryobi cordless sander for this step but I wanted to show how to use just a piece of sandpaper for this tutorial.

Make your own Valentine's Day pallet sign, easy step by step tutorial

Measure out a piece of twine and staple it to the back of your sign so it drapes over the opposite corner of your lettering, mine is on the right side. You’ll want to pull this so that there isn’t any slack.

Make your own Valentine's Day pallet sign, easy step by step tutorial

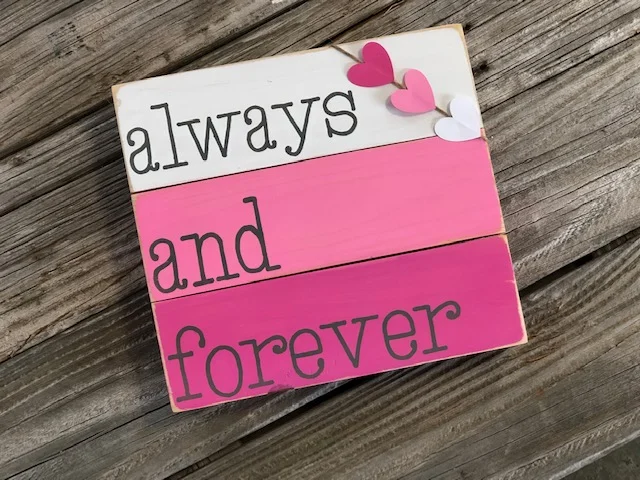
Now just glue your cardstock hearts to your twine and you’re done!

Make your own Valentine's Day pallet sign, easy step by step tutorial

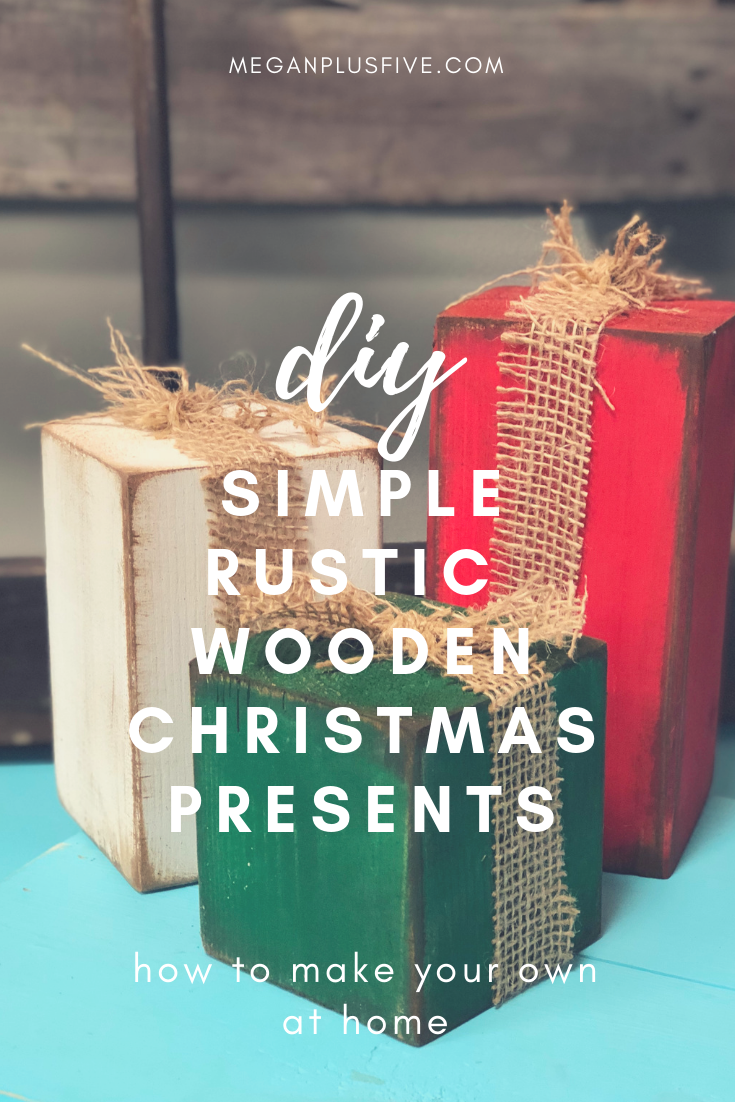
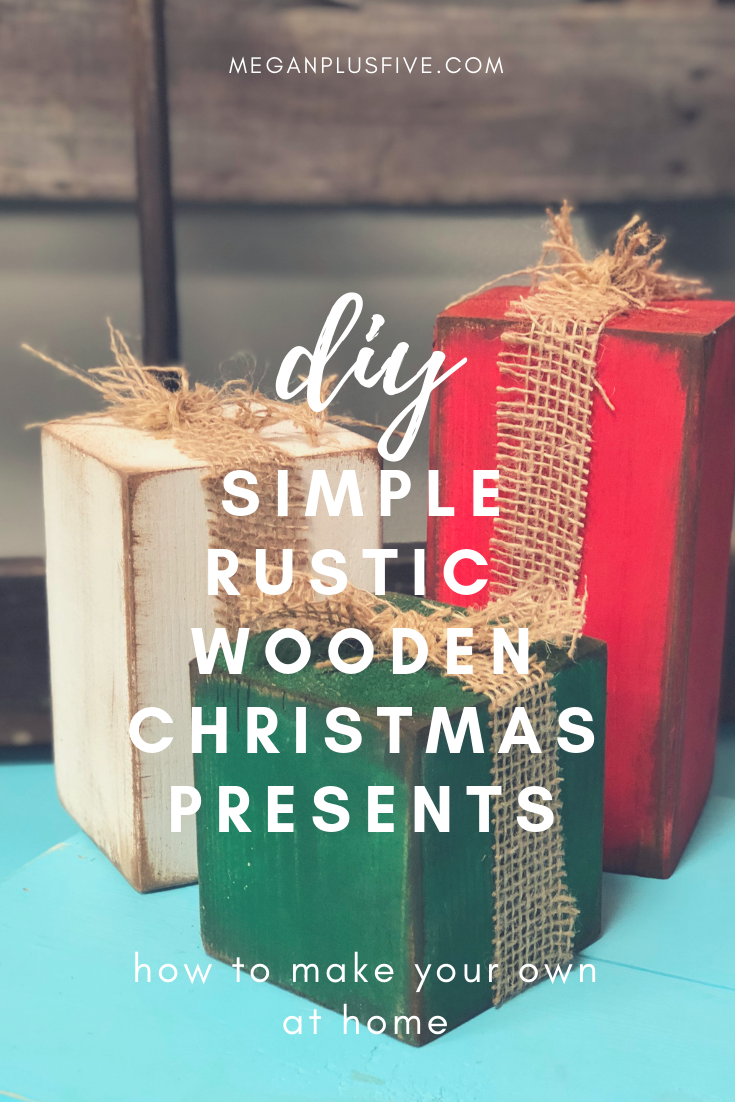
DIY simple rustic wooden Christmas presents, how to make your own

DIY simple rustic wooden Christmas presents, how to make your own

DIY FAUX WOOD CHRISTMAS PRESENTS

I’m a busy wife, momma, and business owner so naturally I LOVE a good craft that I can whip out really fast and that makes the heads turn. These little guys are just the perfect DIY for the job!

In our studio I try to reuse the same base sizes over and over again. This makes for a smooth operation. I try to create pieces from the basic bases we have on hand at the shop. When I stumbled across something similar on Pinterest I had to make my own version of these adorable faux presents.

I know not everyone has the resources or expensive tools to make all their crafty dreams happen so I’ve put together CRAFT KITS for our most popular DIY’s. You can pick up our FAUX PRESENT KIT HERE

DIY simple rustic wooden Christmas presents, how to make your own

If you wanna start from scratch here’s what you’ll need:

DIY simple rustic wooden Christmas presents, how to make your own

These are SO super simple, once you do one set you’ll be making them for everyone for Christmas! So let’s get started.

First, you want to be sure all your pieces are sanded to knock any splintery ends. If you purchased our CRAFT KIT you do not need to do this step as it’s already been done for you:)!

Next, you want to paint each block a different color. I did two coats on mine. Be sure you wait till the first coat is TOTALLY DRY before applying the second coat. If you don’t, applying wet paint on top of wet paint tends to pull up the layer underneath.

DIY simple rustic wooden Christmas presents, how to make your own

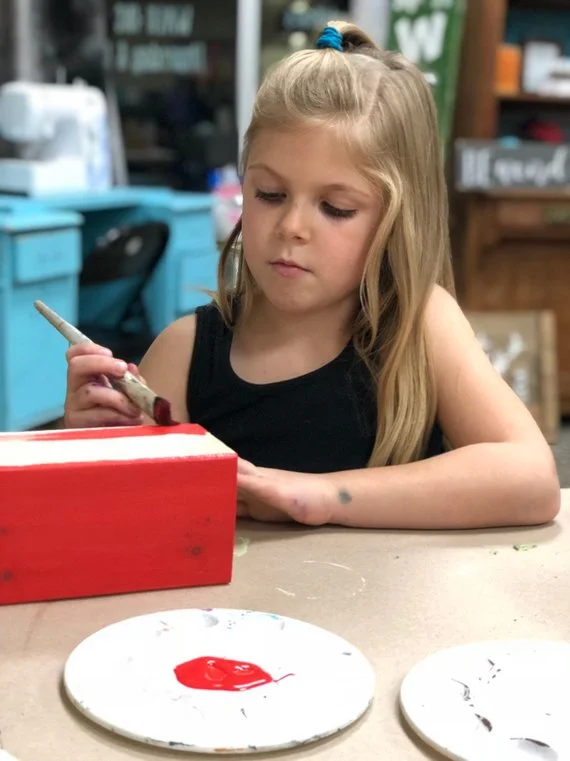
Can we just take a minute and adore this girl! Isn’t my little helper so stinking CUTE! She’s always up for being my little crafting model Ok, back to the tutorial…

Once your paint is dry and you are happy with the coverage you’ll need to sand on the edges and the corners of your blocks. Take your 120 grit sand paper and go over the areas that would be naturally worn. You don’t have to use 120, that’s just my go to grit. Any grit of sandpaper will work, just go slow at first to see how much pressure you need to apply. I used my RYOBI cordless sander for this step.

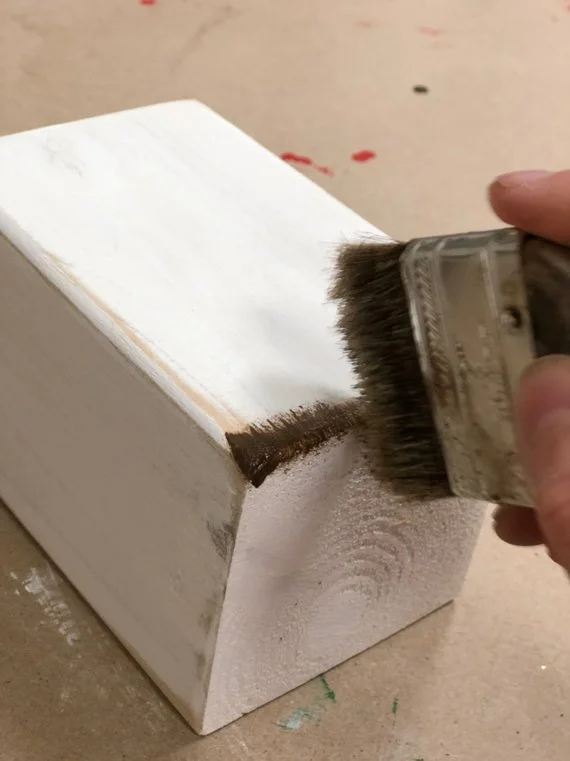
Next you want to apply the dark wax to your blocks. If you’ve never worked with dark wax before you might want to test it out on a piece of paper first. A little wax goes a long way.

Take your chip brush and barely dip your bristles in, dab off onto a piece of paper or paper towel. Just like you did when sanding, focus on applying the wax to the areas that would be naturally worn. You’ll want to apply to the corners, edges, then do a light quick swipe on all the sides. This will give it a real natural rustic finish. The wax gets into all those uneven areas, much like how dirt would, and make it look old.

faux wooden presents4.jpgDIY simple rustic wooden Christmas presents, how to make your own

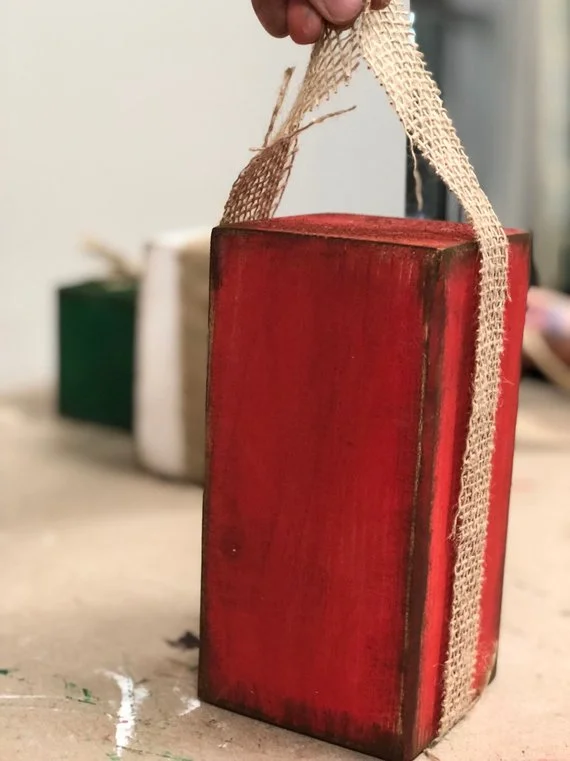
After you have your wax applied to all of your block the last step is to add your burlap “bow”. I picked up a roll of looser knit burlap at my local Walmart but any burlap will work. Fun fact, the looser the knit the easier it will unravel when cut. I cut my burlap into 2” wide strips and measured their length so they stuck up 3”-4” above the blocks like shown below. Now tie those two pieces in a knot. You’ll do the same on the last two blocks. And you’re done! Literally can’t get any easier.

DIY simple rustic wooden Christmas presents, how to make your own

Place them beside your tree, on your kitchen counter, or your mantle and admire them all Christmas season!

DIY simple rustic wooden Christmas presents, how to make your own

These little guys make such great gifts, a fun craft night with the family, or crack open a couple bottles of your fave wine with your fave girlfriends and make it a moms night in Pinterest party!

I hope you love this DIY! If you did I’d love to hear your feedback…even better, I’d LOVE to see pics of your finished faux presents.

DIY 2x4 rustic wood pumpkin blocks

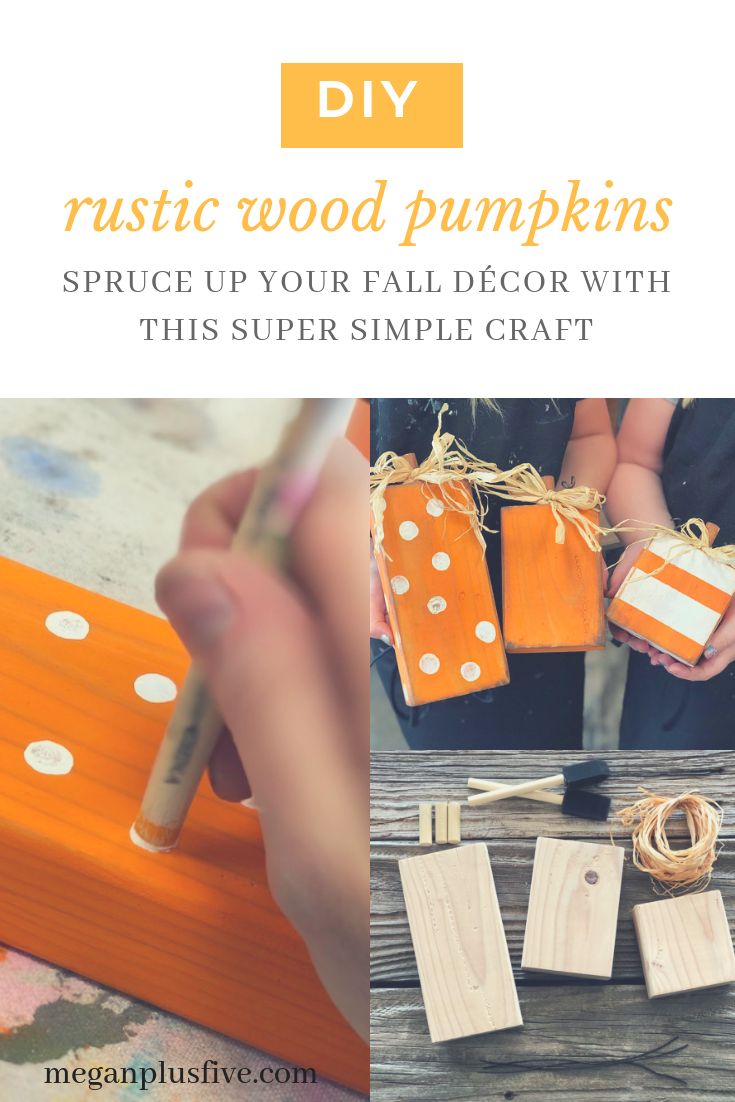
do it yourself rustic wood pumpkins, spruce up your fall décor with this super simple craft

DIY how to make 2x4 wood pumpkins

These little wooden pumpkins are just as cute as can be! I LOVE them! What I love even more is how effortless they are to create. You can knock a set out in less than an hour. Seriously, an hour of your time and you have some ridiculously cute mini pumpkins to add to your rustic fall décor!

These little guys are so simple you can even get the kiddos involved! Make a whole family craft night out of it, they will LOVE it and you’ll remember that night every year you put them out.

To make it even easier I’ve put together this DIY MINI PUMPKIN CRAFT KIT. Everything you need to make these at home delivered right to your door!

do it yourself rustic wood pumpkins, spruce up your fall décor with this super simple craft

If you don’t buy our easy peasy craft kit here’s what you’ll need…

Helpful tools


Check out this other fun fall craft, DIY mini mum planters for your front porch.


Let’s get started!

Step 1

Cut all the pieces for your pumpkins and stems {dowel rod}. After you do that give them a quick sanding to knock down all the pokey edges from being cut. Next drill a 1/2” hole in the top of each pumpkin {this will be where you put the stem dowel rod, you only need it about 1/2” deep}. Be sure to wipe off all the saw dust.

Now for the fun!

Paint all of your pumpkins your base color. For mine I painted all of the pumpkins orange. Be sure to apply a super thing coat, you should be able to see the wood grain through the paint. Once that dries apply a second coat, if desired wait for that coat to dry and apply a 3rd. I almost never do 3 coats.

do it yourself rustic wood pumpkins, spruce up your fall décor with this super simple craft

Step 2

Now for the accents{I used white for my accent color}!

For mine I left one pumpkin plain, added dots to one, and stripes to another.

The dots are SUPER EASY! Literally take the end of you sponge brush and dip it in the accent color. Then dot it on the pumpkin you want to have dots. You can practice on a scrap piece of paper before going full force on your pumpkin. I just randomly dot around till I’m happy with the look. I do this all the way around the pumpkin.

Add some stripes. Using your masking tape off the areas you want to KEEP your base color. I did two stripes of white on my pumpkins. Pro tip…to keep the paint bleed down, never brush your paint into the tape, always brush away. Brushing it to the tape will force the paint under the tape and cause your paint to bleed. You don’t need to wait for the paint to dry to peel off the tape.

do it yourself rustic wood pumpkins, spruce up your fall décor with this super simple craft

Step 3

Once your blocks are dry you can distress with sandpaper. Focus on the edges, corners, and do a light sanding to the face of the pumpkins. When you are done distressing with sandpaper, brush all the dust off with a cloth.

do it yourself rustic wood pumpkins, spruce up your fall décor with this super simple craft

Step 4

Give them a little more character with dark wax! I absolutely LOVE this stuff!

It takes VERY LITTLE WAX to achieve this look. Barely dip the very tip of the chip brush into the wax, and dab off onto a paper towel. If you get too much wax on your blocks they will look mudding instead of antiqued. Now brush the wax onto the corners and edges, dabbing to get more wax when you need more on your brush.

Then lightly brush over the face in both vertical and horizontal directions. This will give it an even more antiqued look.

do it yourself rustic wood pumpkins, spruce up your fall décor with this super simple craft

Step 5

Paint your stem, let it dry, and glue the stem in place with a good amount of glue. Let dry completely {f you have a glue gun you can use that for this step instead}.

After your glue has dried you are ready to adorn with the raffia and wire embellishments. To get the wire curled, simply wrap around the end of one of your sponge brushes.

Then take the wire and tie it around your stem.

do it yourself rustic wood pumpkins, spruce up your fall décor with this super simple craft

Step 6

Then gather a few strands of raffia and tie in a bow around the stem and wire. Trim if you desire.

do it yourself rustic wood pumpkins, spruce up your fall décor with this super simple craft

Check out more fall & Halloween posts below

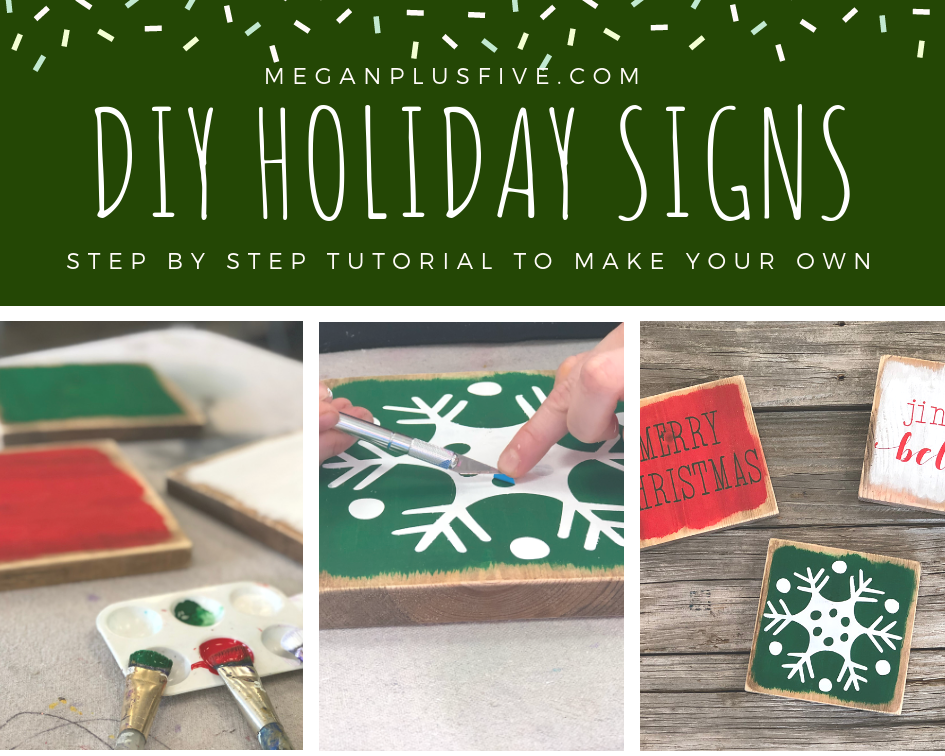
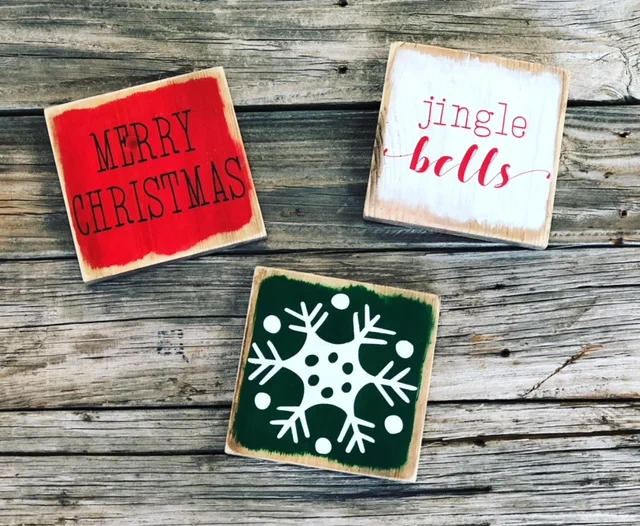
DIY mini stenciled Christmas signs

DIY Mini Wooden Winter Signs

Painting & stenciling mini wood Christmas signs

Do you LOVE those little mini signs like I do? They are so perfect because they don’t take up a lot of space, you can store them easily when they aren’t in season, and they are SO simple to make yourself.

Affiliate Disclosure. Some of the links on this website are affiliate links, which means that I may earn a small commission if you click on the link or make a purchase using the link. If you make a purchase you will not be charged anything additional. This is just a way I can help add to our family finances to raise our four daughters. Please know I would never recommend a product or service I do not totally stand behind.

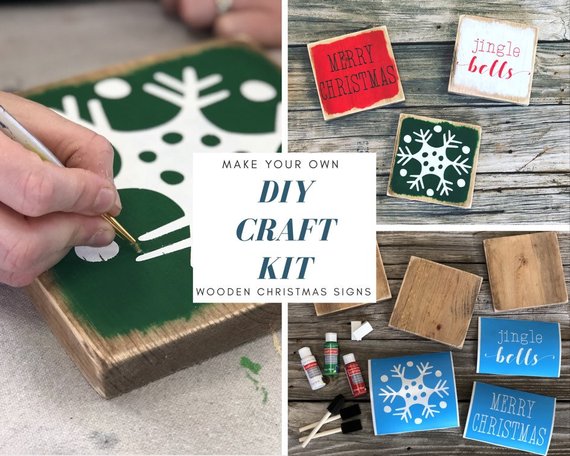
Here’s what you’ll need to make your own at home. To make it even easier we’ve put together a CRAFT kit that has everything you need for project here.

HOW TO STENCIL ON WOOD

winter craft kit.jpgDIY Mini Wooden Winter Signs

MAKE YOUR OWN MINI STENCILED WOOD CHRISTMAS SIGNS FOR YOUR RUSTIC HOME DECOR

You’ll need

3 - 5.5x5.5 wooden pieces {I got a 1x6 from the local hardware store}

stain, rags, and gloves {here’s what I used}

stencils {you can buy ours here, or make your own}

3 - brushes {you can use sponge brushes or here’s what I use}

white, red, & green acrylic paint {here’s what I used}

2 makeup sponges {you can pick them up at your local dollar store}

sander or 120 grit sandpaper

DIY Mini Wooden Winter Signs

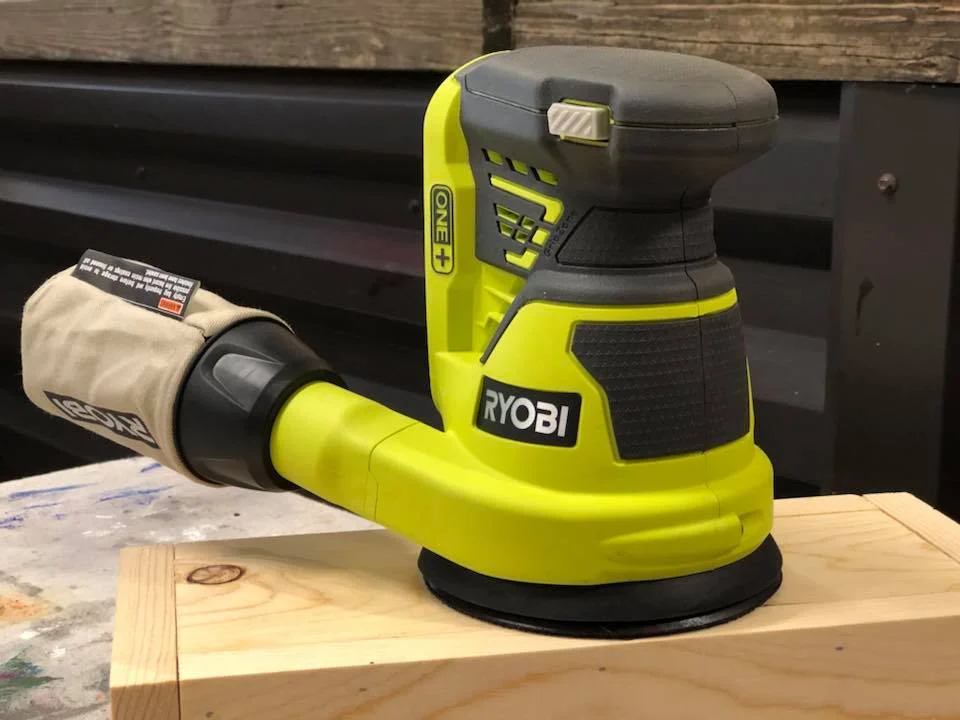
After you’ve cut and sanded your 5.5”x5.5” pieces stain them and let them dry for 24 hours. After they’ve dried sand around the edges, corners, and a light sanding on the front, be sure to wipe them down so you get all of the sawdust off of them. I LOVE my RYOBI CORDLESS SANDER , it is what I use for all of my wooden projects. But, if you don’t have a sander you can get the job done with 120 grit sand paper.

DIY Mini Wooden Winter Signs

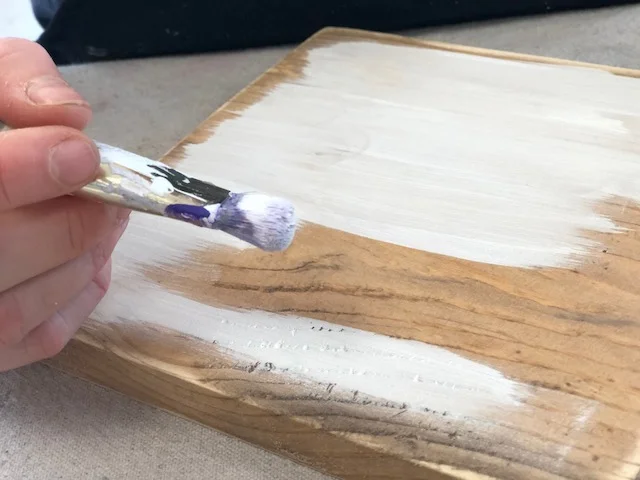
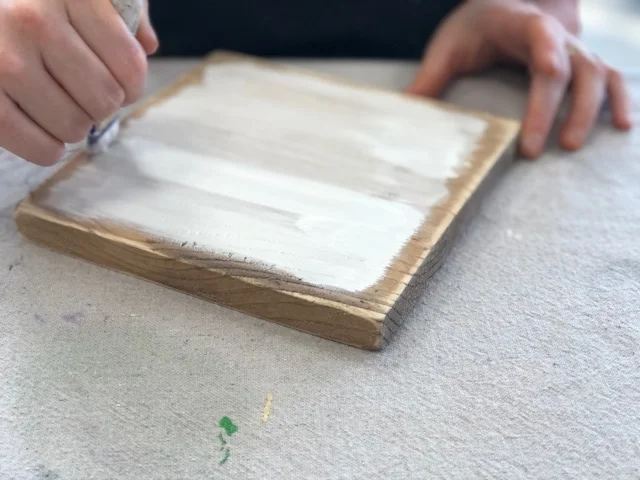
Now it’s time for the painting! You’ll paint each wooden sign a different background color. Start with a DRY brush and using a little bit of paint at a time apply a THIN coat of paint to one side of your board. Leave .25” border all the way around each piece. I don’t measure this, just eyeball it. This will give you that rustic uneven look.

DIY Mini Wooden Winter Signs

After your fist THIN coat is totally dry you can apply the second coat, be sure to apply using the same technique as you did with the first coat.

DIY Mini Wooden Winter Signs

Repeat this step for all 3 signs. Once they are all TOTALLY DRY you are ready for stenciling. They must be completely dry otherwise your stencil will not stick to the wood and it will be an ugly mess.

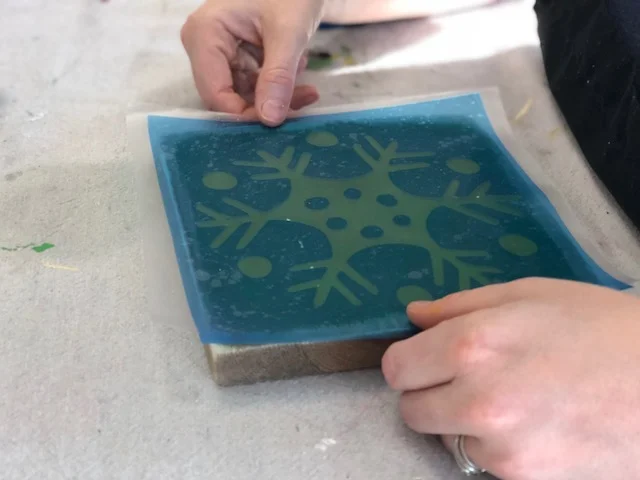
Start by removing the paper backing from your stencil. This works best if you use a vinyl applicator {here’s what I use} or you can use a stiff store rewards card, I don’t recommend using your bank card as it could break during the process.

If you’re using your own stencils you’ll need transfer tape to transfer your stencil onto the wood in one piece.

DIY Mini Wooden Winter Signs

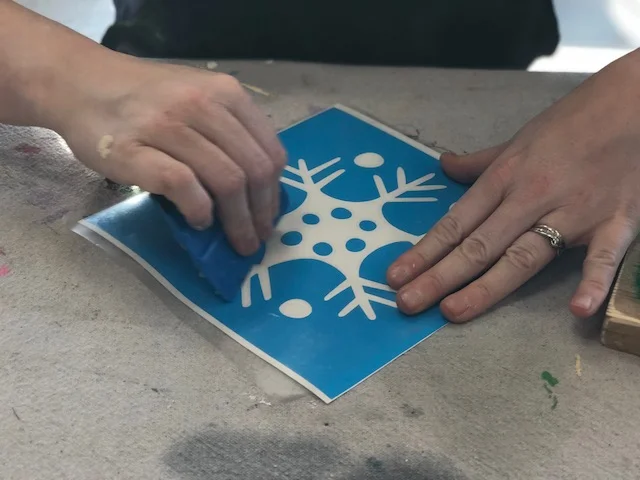
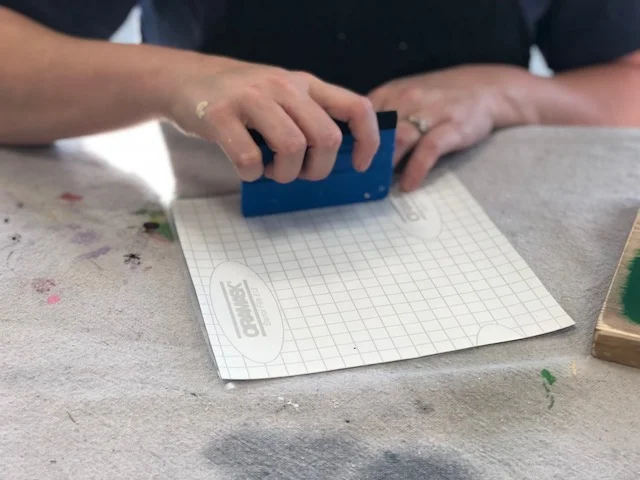
Start by rubbing the front of the stencil with your vinyl applicator. Be sure you move in one direction.

DIY Mini Wooden Winter Signs

Then flip it over and do the same to the back.

DIY Mini Wooden Winter Signs

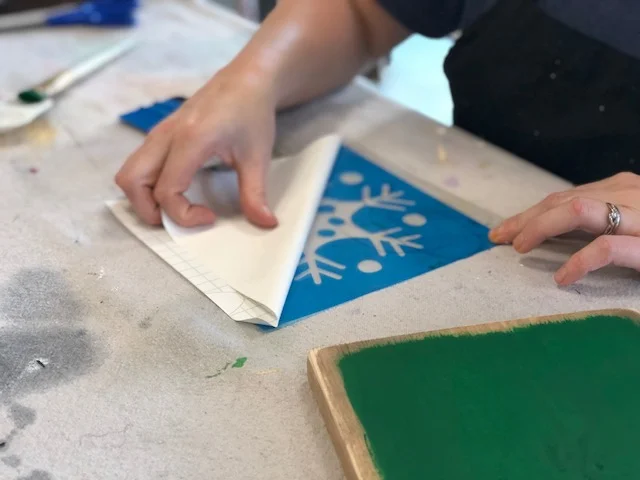
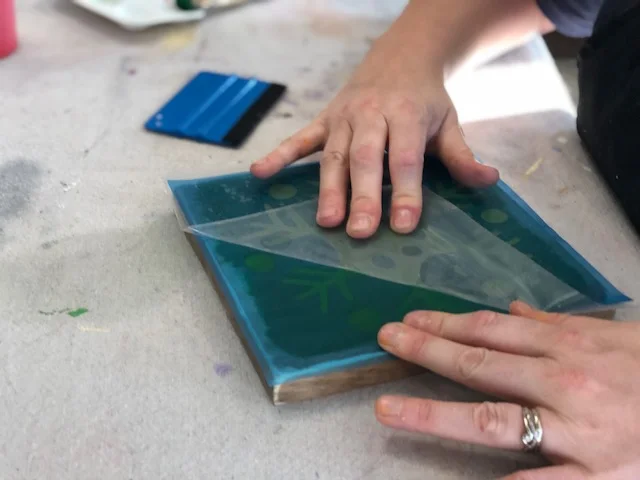
Now slowly peel the paper backing away from the stencil. This works best if you start at one corner and peel away at a sharp 90 degree angle. Go SLOW.

Before you start applying your stencils decided which stencil you will put on each board.

DIY Mini Wooden Winter Signs

First, you’ll want to place your stencil where you want it on your board. I wanted mine to all be centered so that’s what I did but you can place them anywhere on the board you’d like. I just recommend keeping the image within the painted part of the wood.

DIY Mini Wooden Winter Signs

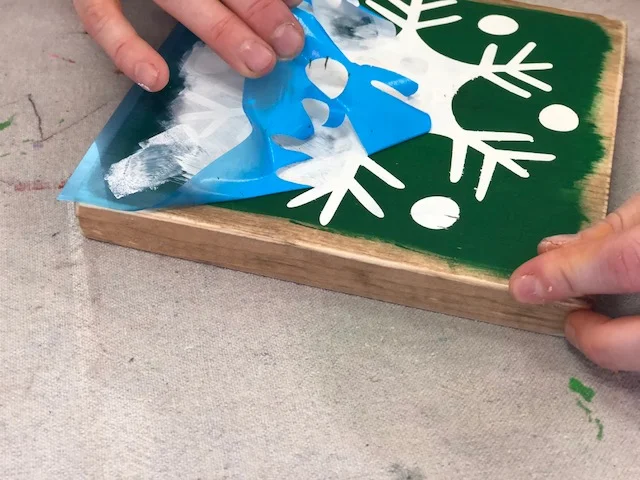
Using your vinyl tool rub the stencil, using the same technique as before. Now SLOWLY peel the transfer tape {the clear sticky stuff} away from your stencil. I do this at a sharp angle and I will slowly roll it off of the stencil.

DIY Mini Wooden Winter Signs

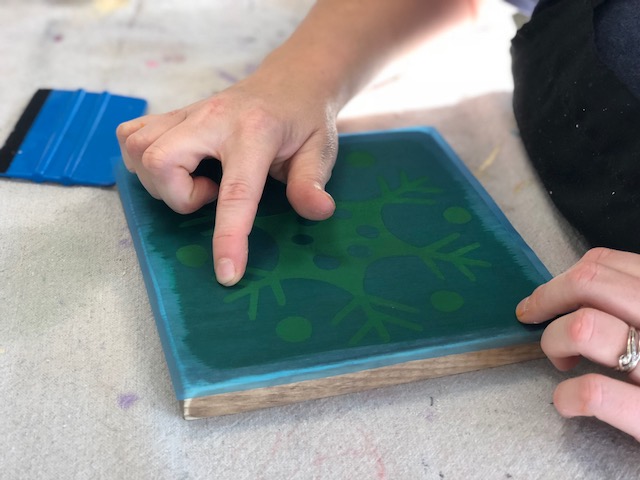
After you get the transfer tape off rub your finger along all the exposed stencil edges {anywhere there is wood showing thru}. this helps to get s good seal on your stencil.

Now you’re ready to start painting your stencil!

DIY Mini Wooden Winter Signs

Use one end of your cosmetic sponge LIGHTLY dip it in the paint color you’d like your design. BE SURE TO USE VERY LITTLE PAINT, this is key to getting little to no paint bleed under your stencil. Dab the sponge on a paper towel a couple times then onto your stencil, do this till you have a very THIN even coat {you should be able to see thru the first coat}. LET DRY, repeat till you are happy with the coverage.

DIY Mini Wooden Winter Signs

Now peel up your stencil.

DIY Mini Wooden Winter Signs

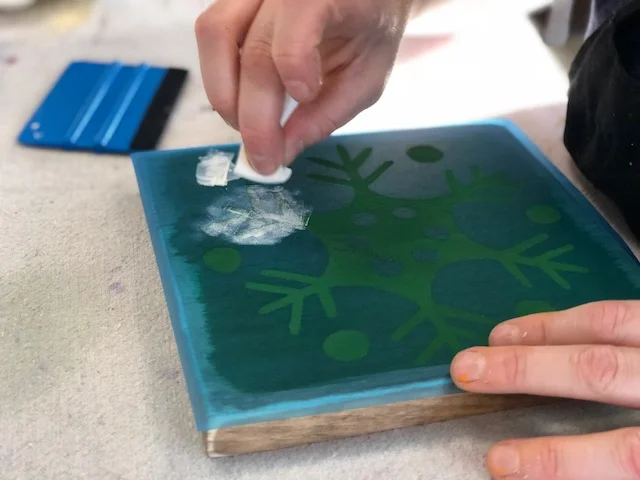
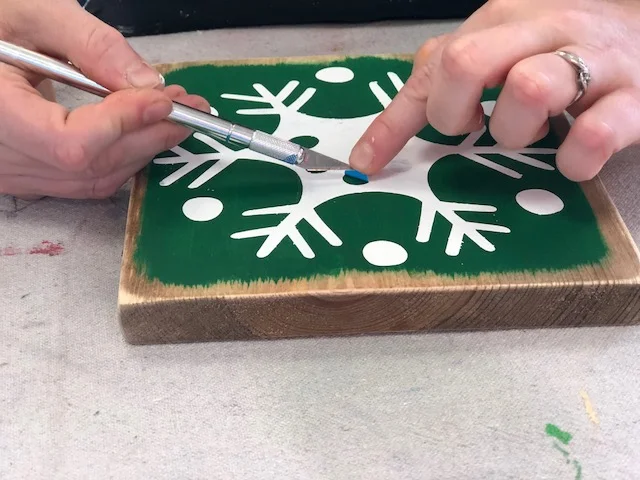
I use an xacto knife to get up all the little pieces. If you don’t have one of these a sewing pin/needle works great for this as well.

If you have any paint bleed just go over those with a small paint brush and your background color.

DIY Mini Wooden Winter Signs

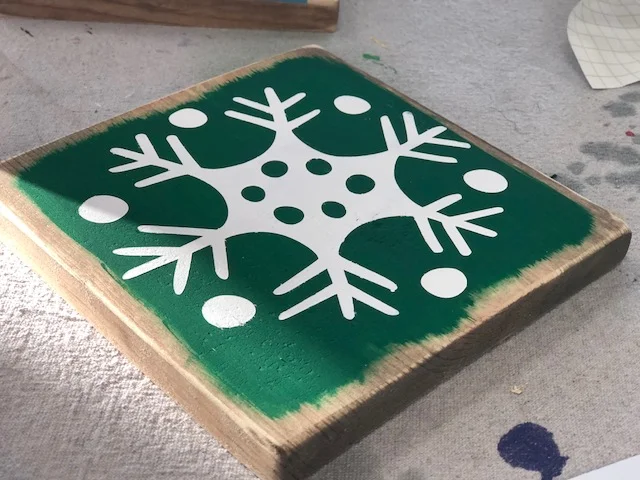
Now finish the other two and you're ready to put them up to enjoy this holiday season.

DIY Mini Wooden Winter Signs

Easy and adorable mini mum planters for less than $2, get the look with this tutorial

Easy and adorable mini mum planters for less than $2, get the look with this tutorial

DIY cheap fall porch décor

I love finding new ways to decorate on the cheap! Having 4 kids…especially girls…is expensive. From clothes to medical expenses these girls can drain a wallet! So I get a little creative when it comes to buying decorations, especially if they are seasonal ones.

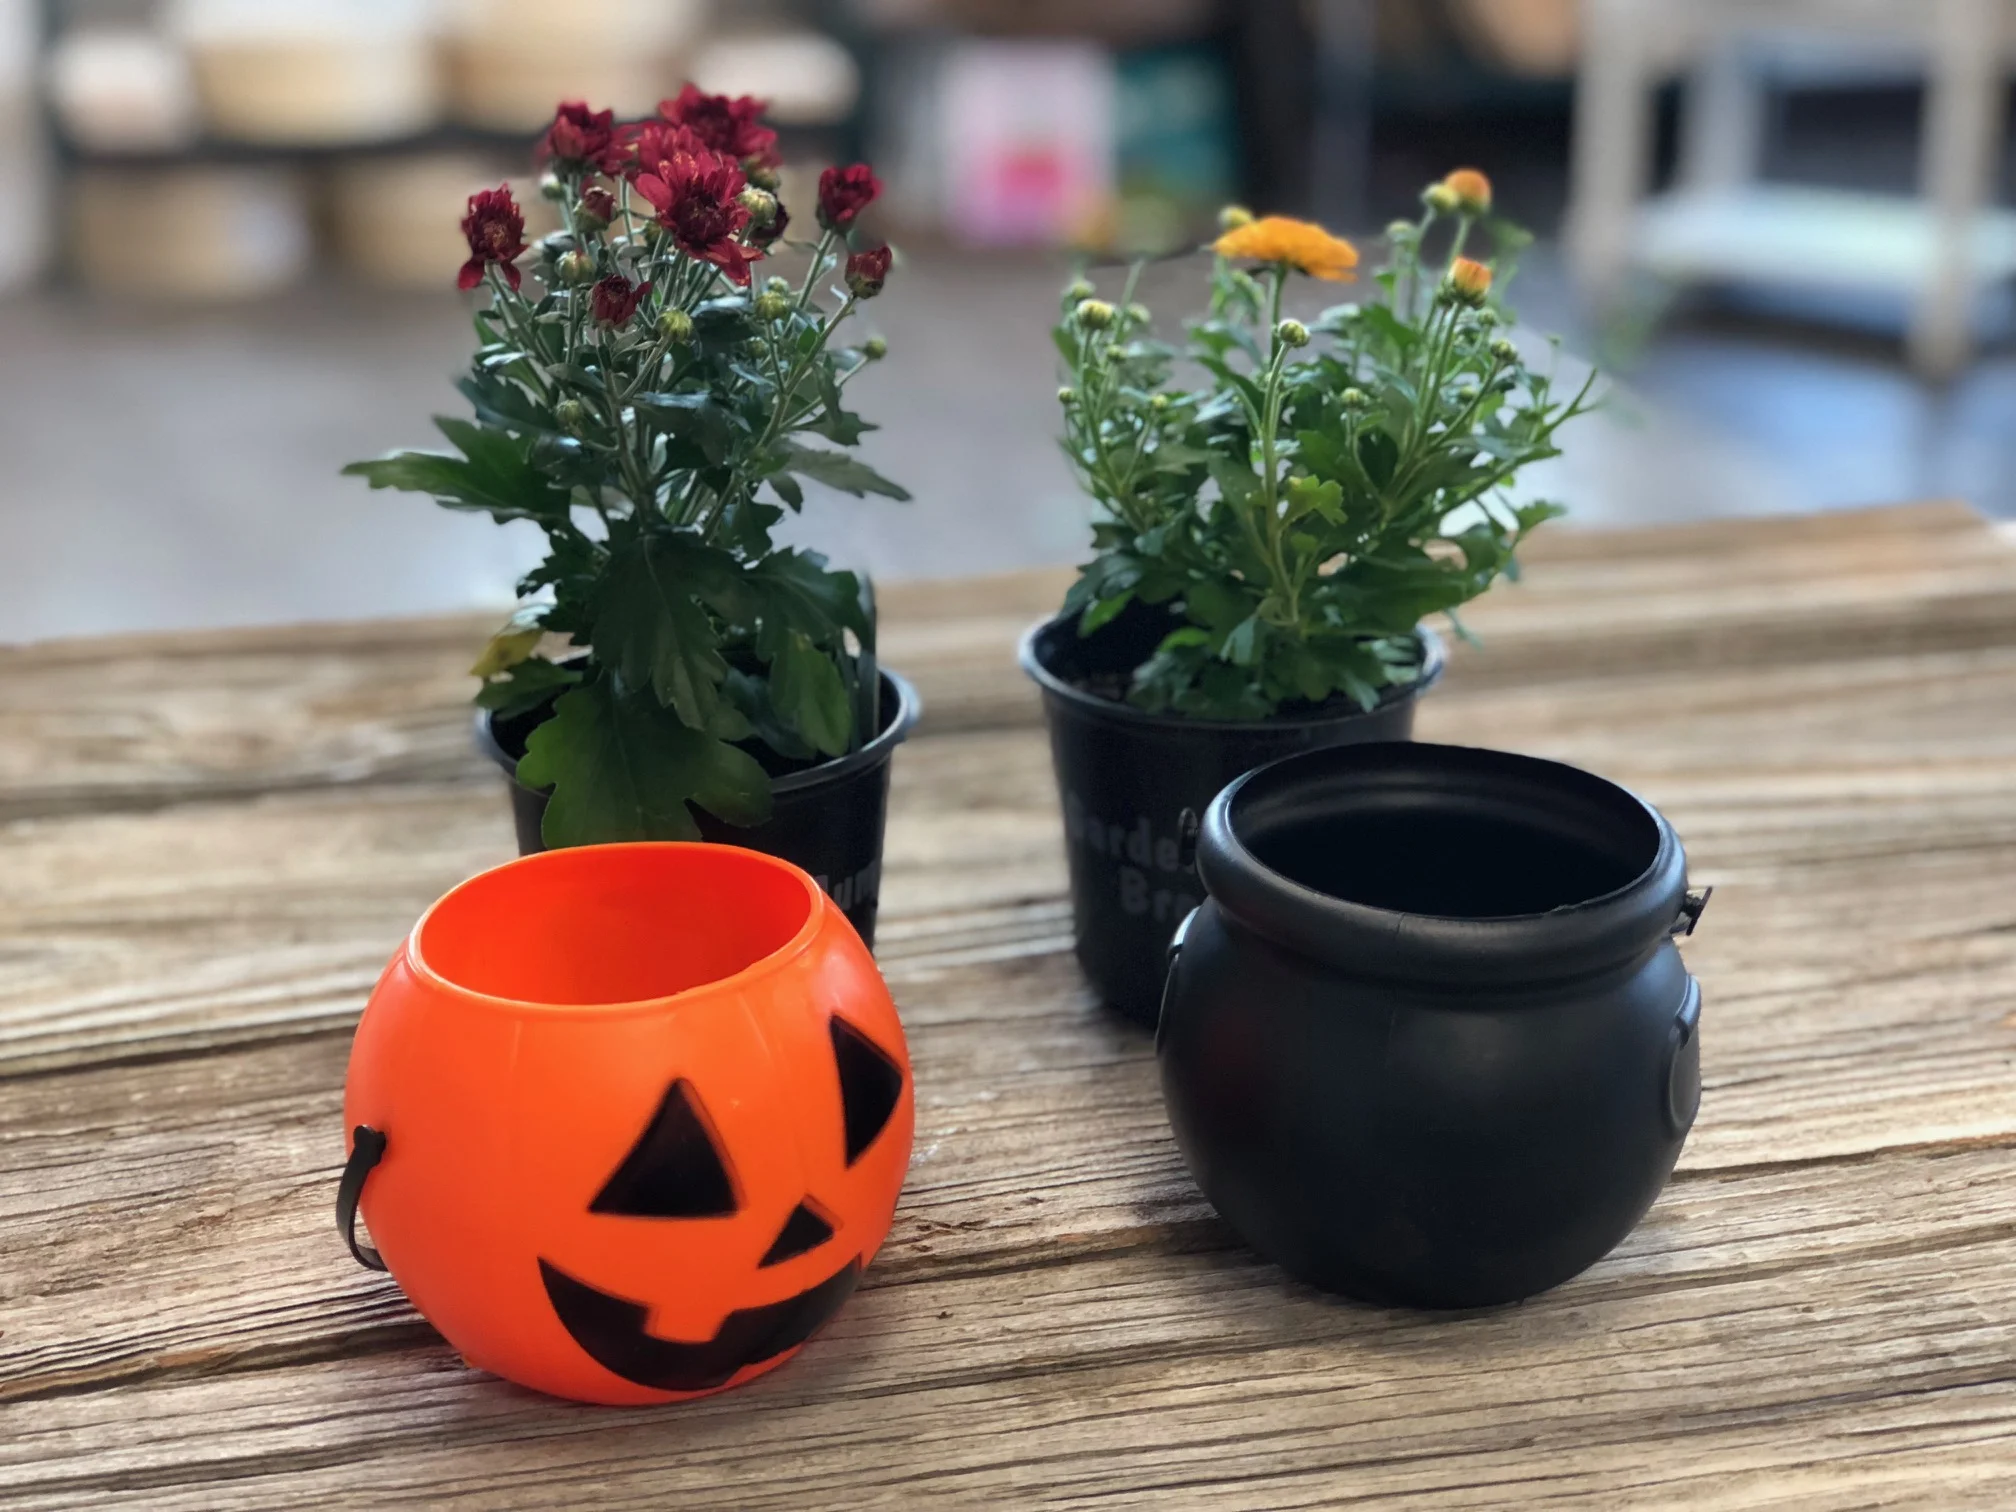
A few years ago I wanted to spruce up our front porch with some fall colored mums. I LOVE them, they scream FALL IS HERE! I was shopping around Walmart had the mums loaded in my basket and they come with the standard ugly stamped containers so I thought I’d pick up some inexpensive pots to put them in. Our porch decorating budget wasn’t a whole lot and I was already spending a big portion of it on the flowers. I found the pots and was floored at how expensive they were. They were twice as much as the flowers! Being raised to be super frugal by my mom and insanely CRAFTY grandma my wheels got to turning. I walked around the store looking for ideas of what I could stick these flowers in. Got to the Halloween aisle and BAM! There they were. Perfect round containers that looked like they were made to put those flowers in!!

This year I wanted to recreate those because they unfortunately didn’t last more than that season. I went to Walmart and the regular sized pumpkin buckets were no where to be found but they had mini ones which were the PERFECT size for the mini mum flowers…and a fraction of the cost! And did I mention they were MINI which automatically makes them even more adorable!

So I grabbed the mums, a mini pumpkin and a mini cauldron treat buckets and set back to our brick and mortar shop to make some cute planters!

Affiliate Disclosure. Some of the links on this website are affiliate links, which means that I may earn a small commission if you click on the link or make a purchase using the link. If you make a purchase you will not be charged anything additional. This is just a way I can help add to our family finances to raise our four daughters. Please know I would never recommend a product or service I do not totally stand behind.


Here’s what you’ll need

I picked everything up from my local Walmart.

2 mini MUM planted flowers, $.97 each {I picked mine up at our local Walmart, but they are not listed online

2 mini Halloween treat buckets $.74 each {I bought a pumpkin & cauldron}

scissors

It cost $1.71 {plus taxes} to make one flower pot. SUPER CHEAP for cute décor, and the kids will love them. I did mine by myself because my kiddos were at school, but you could totally make this a fun family thing and have everyone pot their own.

These are so super simple, literally 2 steps!

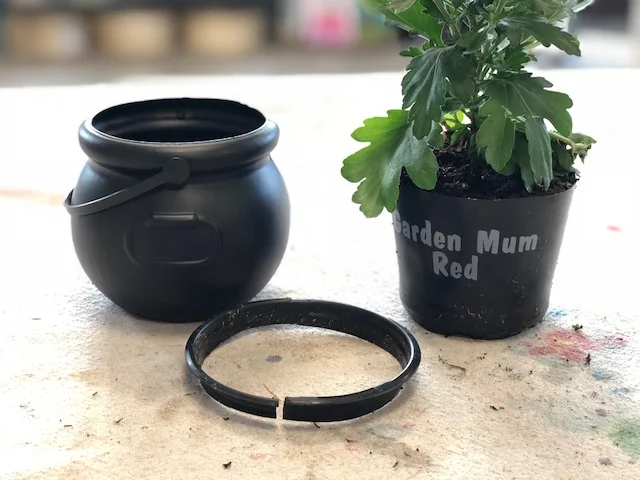
First you need to cut the top lip off of the pot the flowers are currently in. This can be hard to get the initial cut so I advise this step for adults.

Easy and adorable mini mum planters for less than $2, get the look with this tutorial

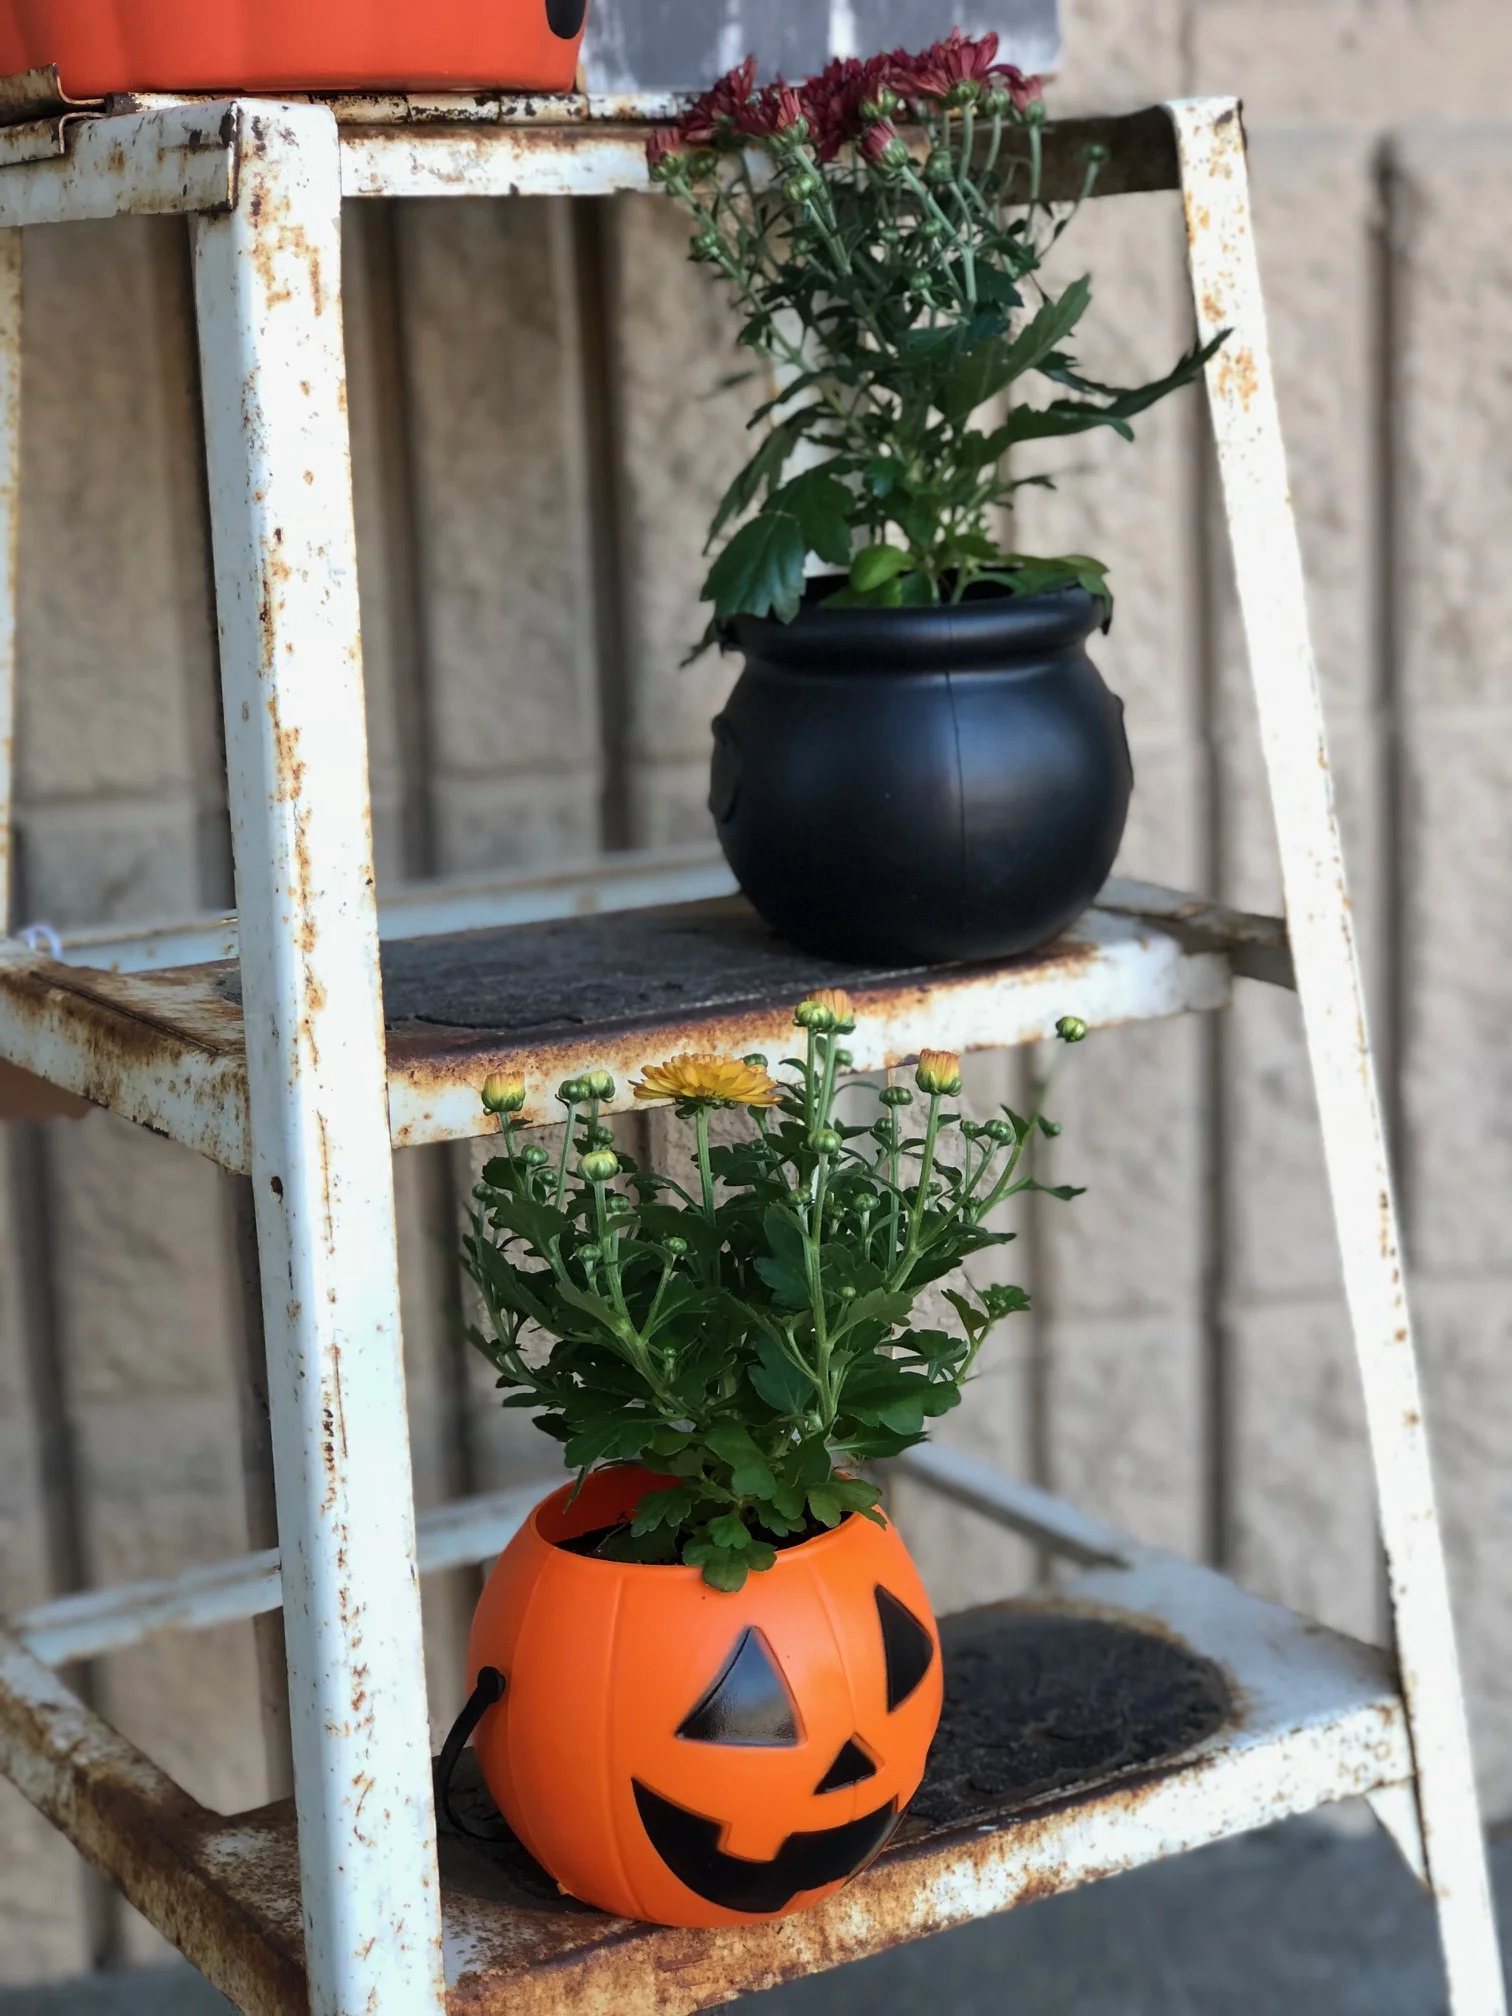
Now shove those babies in the treat bucket and you’re done! If yours are going to stay outside all the time you can drill 2 holes in the bottom to let them drain but I will be bringing mine in and out of our shop and I don’t want the water to drip everywhere so I will manually drain ours.

Easy and adorable mini mum planters for less than $2, get the look with this tutorial

I can’t wait for these to bloom and be even CUTER!

Check out more fall & Halloween themed posts below