DIY faux leather hair bows using your Cricut

DIY faux leather hairbow using your Cricut. Free valentine printable for hairhows. Use your Cricut cutting machine to make adorable hair bows for your girls.

How to make FAUX LEATHER BOWS for Valentine’s Day

For Valentine’s Day this year I thought it would be so cute if daughter #4 and her BFF had matching hairbows. And I thought it would be even more adorable if there was a little bow themed Valentine’s Day card to go with them! I looked a little on Pinterest for a cute little printable to download and didn’t have much luck. So, I went ahead and made my own and I’m sharing the download with you! Click here to get the instant access to my Valentine’s Day Printable.

Affiliate Disclosure. Some of the links on this website are affiliate links, which means that I may earn a small commission if you click on the link or make a purchase using the link. If you make a purchase you will not be charged anything additional.

You can get the FREE VALENTINE’S DAY PRINTABLE HERE. It is in my FREE RESOURCE LIBRARY along with all of my other freebies. Just enter your info and you’ll get the password immediately for instant access!

I’ve left the bottom blank so your sweet kiddo can write their own name in the space to the right of the little pink heart.

After you make these cute little faux leather hairbows check out this fun VALENTINE’S DAY CRAFT to make with your little one. DIY VALENTINE CATERPILLAR
How to use Cricut explore to create faux leather hair bows. Making hairbows with Cricut cutting machine in design space.

USE YOUR CRICUT TO MAKE FAUX LEATHER VALENTINE’S HAIR BOWS

Here’s what you’ll need

You will also need

  • CRICUT DESIGN SPACE

  • CRICUT ACCESS ( this isn’t a must but if you have a Cricut Access membership the template I’m using is included. Otherwise you can purchase a file to use or create your own)

CRICUT USER TIP- if you have Cricut Access you get 10% off in their SHOP NOW section AND you also get FREE US SHIPPING! I’ve found that it is actually much cheaper to purchase directly from Cricut than to buy off of Amazon or in the craft stores (which is usually the most expensive option).

Before giving these as Valentine’s Day gifts you will need to let the glue cure on them for 24 hours. E6000 takes a VERY long time to dry and it need to dry undisturbed. I’ve made the mistake of being impatient and not letting the bow fully dry and my hairbow completely fell apart :(!! Don’t be like me lol!

  1. CUT OUT YOUR TEMPLATE

Grab the link to the template here

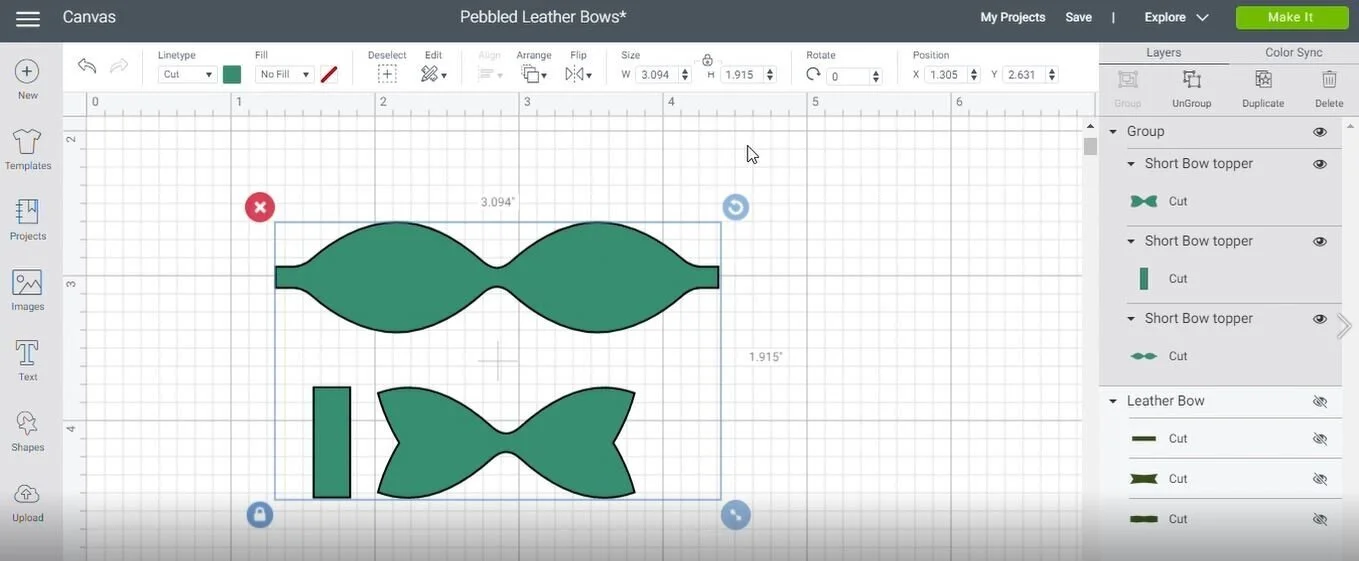
Open Cricut design space and go to Cricut’s ready to make projects.In the search bar type in PEBBLED and a project called PEBBLED LEATHER BOW should pull up. Click that project then click CUSTOMIZE. You will want to resize this so that it will be larger.

 
How to use Cricut explore to create faux leather hair bows. Making hairbows with Cricut cutting machine in design space.
 

Once your project is open you want to GROUP the 3 pieces together. This will take the guess work out of resizing each piece. The piece that looks like an actual bow you want to resize that to 3.5”. You will have to do this manually so be sure your gridlines are on to make this easier.
 
How to use Cricut explore to create faux leather hair bows. Making hairbows with Cricut cutting machine in design space.
 

If you want to cut the pieces out on to different colors of faux leather be sure to make them different colors in design space so they will automatically be positioned onto different mats.

Now click make it. Check that the MIRROR is turned ON. Then click CONTINUE. If you are using an older machine like the EXPLORE be sure you are using a DEEP CUT BLADE and the DEEP CUT BLADE HOUSING. You will want your machine to be set to CUSTOMIZED and I’ve had good luck with the FAUX LEATHER setting.

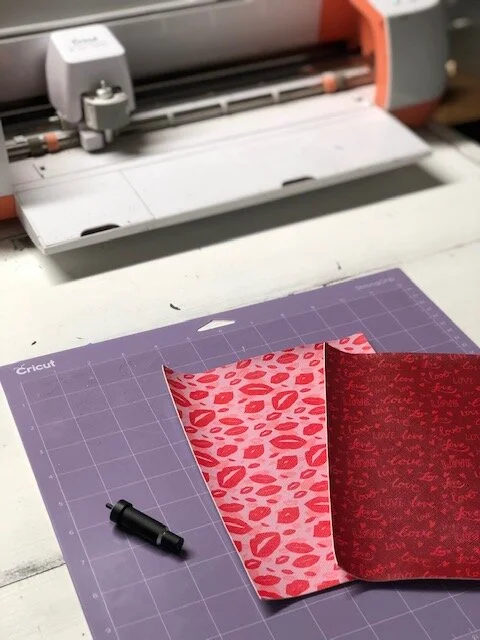
Because this is heavier material you will want to use Cricut’s PURPLE MAT. This is their strong hold mat. Place your faux leather PRINT SIDE DOWN. Load your mat into your machine and hit GO. If you need to you can adjust the cutting pressure of your machine if you need a little more/little less pressure.

How to use Cricut explore to create faux leather hair bows. Making hairbows with Cricut cutting machine in design space.

2. ASSEMBLE YOUR BOW PIECES

Now you can assemble your cute little hair bow! First, plug in your glue gun. This glue WON’T hold your bow together but we are using this to temporarily hold the pieces together because E6000 is kind of messy and a pain in the butt to work with sometimes and it can be super slippery so your bow pieces will want to slide everywhere. So by using the hot glue gun we can tack the pieces in place then go back and add the E600 to permanently hold the bow together.

How to use Cricut explore to create faux leather hair bows. Making hairbows with Cricut cutting machine in design space.

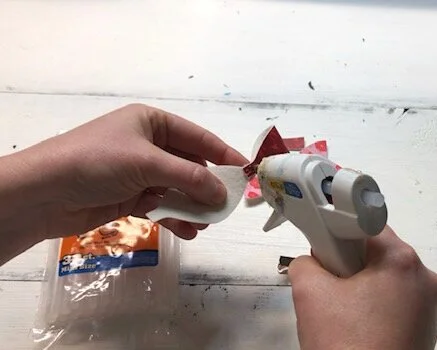
Once your hot glue gun has heated up you want to glue the piece together that looks like a pair of glasses. Just a dab of hot glue will be fine, just enough to hold it in place.
How to use Cricut explore to create faux leather hair bows. Making hairbows with Cricut cutting machine in design space.

Then place the bow on top of bottom piece using hot glue between the pieces to hold it in place.

How to use Cricut explore to create faux leather hair bows. Making hairbows with Cricut cutting machine in design space.

Next glue the clip onto the back side of the bottom piece. Now you will take the last piece to the bow and wrap it around the bow and clip. First, open the clip and be sure to keep it open while doing this step. Add a small amount of hot glue to the center of the clip, place one end of the rectangle piece where the glue is and wrap it around the bow and glue it in place with E6000 when you come to the end. It is much easier to show you how to do this step than to explain it lol!

How to use Cricut explore to create faux leather hair bows. Making hairbows with Cricut cutting machine in design space.

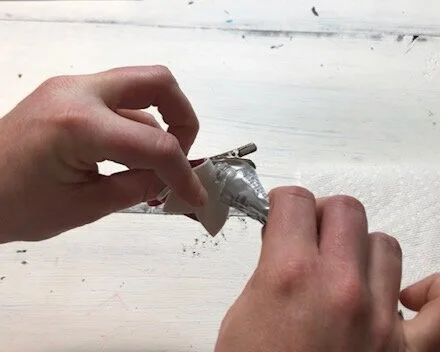
The hot glue is a temporary hold. It will not last, no matter what type of hot glue you use (trust me I’ve tried lol!!). To get a permanent hold go back and add E6000 to the areas you used hot glue. Obviously you won’ be able to get to every little area but you’ll be able to get close enough for a permanent hold. I will warn you E6000 is SUPER MESSY and has a weird smell. If it helps to keep the mess down use a toothpick to get the glue where you need it to go.
valentine+bow8.jpg

3. LET IT DRY

I know it’s really hard to walk away from a project and let it dry but these will take a long time to dry because of the E6000. They need about 24 hours of drying time.

4. ADD THE BOWS TO YOUR PRINTABLE VALENTINES

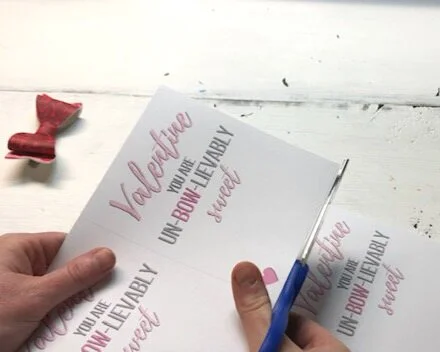
Download the FREE VALENTINE PRINTABLE. Print it out on cardstock. I chose white cardstock but you can print it on any color of cardstock paper you’d like. Cut the printable on the gray lines that are going down the middle of both sides of the printable.
How to use Cricut explore to create faux leather hair bows. Making hairbows with Cricut cutting machine in design space.

I’ve left the bottom area of each valentine blank so your little one can add their own name. Now would be a great time to let them sign the cards. My sweet girl had the best time writing her name. We’ve been working on that lately so this was a perfect opportunity for her to show off her newly learned skills! Look how adorable she is!!

How to use Cricut explore to create faux leather hair bows. Making hairbows with Cricut cutting machine in design space.

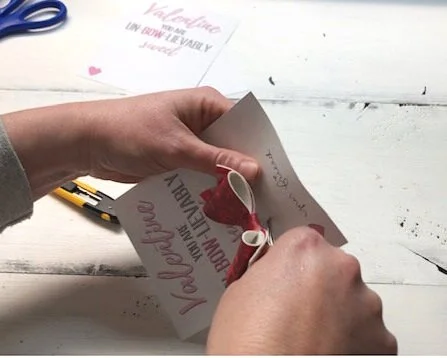
After your faux leather hairbows have dried you can attach them to your valentines. I recommend cutting a small slit just below the letter S in sweet. I cut mine halfway between the word sweet and the heart (you can use a small box cutter like I did or an xacto knife would work great too). Then slip the bottom part of the clip through to the back of the valentine, leaving the bow part on top.

How to use Cricut explore to create faux leather hair bows. Making hairbows with Cricut cutting machine in design space.

Your valentines are ready to hand out. I hope you enjoyed this tutorial and as always if you have any questions please feel free to reach out and ask

How to use your Cricut to make faux leather hairbows. Valentine's bow tutorial with a free printable.


DIY painted wood funny cactus signs

DIY painted wood sign tutorial. How to stencil and paint mini wood signs. Funny cactus signs to make.

DIY PAINTED MINI CACTUS WOOD SIGNS

I don’t know about you but my family has a good sense of humor. So, naturally these signs were a hit around our house! How can you not laugh at a painted wood sign that reads “don’t be a prick” with a picture of a cactus?! Or “free hugs” lol!!

Affiliate Disclosure. Some of the links on this website are affiliate links, which means that I may earn a small commission if you click on the link or make a purchase using the link. If you make a purchase you will not be charged anything additional. This is just a way I can help add to our family finances to raise our four daughters. Please know I would never recommend a product or service I do not totally stand behind

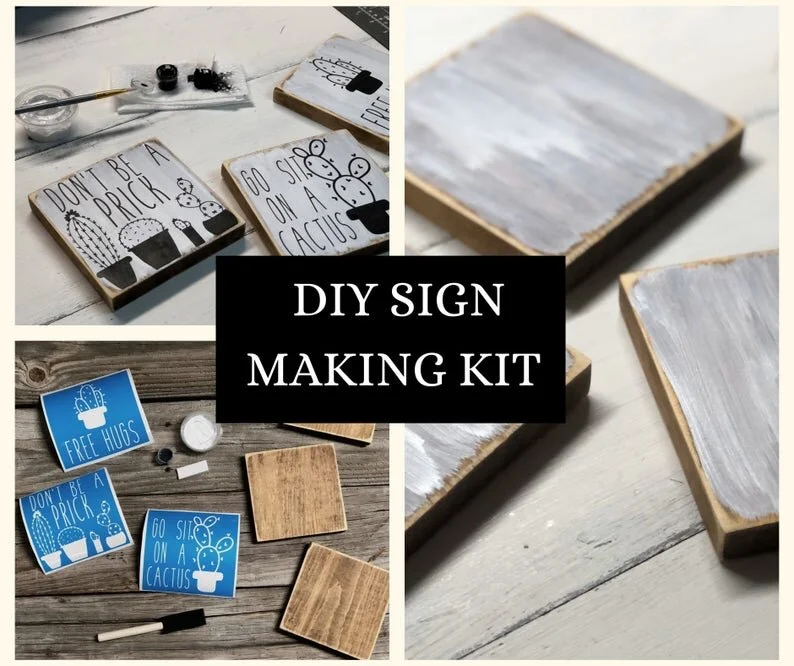
They were such a hit that I added them to my online shop, funny painted cactus signs. If you don’t have time to DIY this hilarious set of 3 mini wooden signs you can buy a premade set here —-> I NEED FUNNY CACTUS SIGNS.

If you plan to hang your newly painted wood signs check out this quick and easy tutorial for attaching sawtooth hangers to signs

If you purchase the DIY craft kit from my handmade online shop here’s what’s inlcuded

  • 3 precut, lightly sanded, stained, distressed wood 5.5”x5.5” wood bases

  • 3 stencils with transfer tape applied - go sit on a cactus, don’t be a prick, free hugs

  • 1 sponge brush

  • 1 stenciling sponge

  • white & black acrylic paints

  • printed instructions


If you are struggling with your sign painting adventure I would LOVE to teach you all in-depth steps I use in my own business. when I first started out I had issues with paint bleed, paint peeling up, sticky residue getting left behind but by doing a TON of trail and error, and thousands of hand painted signs later I have perfected my sign painting skills and want to teach you all the things I didn’t when I first started out.


If you didn’t snag up a DIY CRAFT KIT here’s what you’ll need

Helpful tools I used to make my set

If you’re starting from scratch you’ll want to cut, sand, and stain your wood pieces at least 24 hrs prior to painting them, if you are going to be staining them first. Stain needs to fully dry before painting any project.

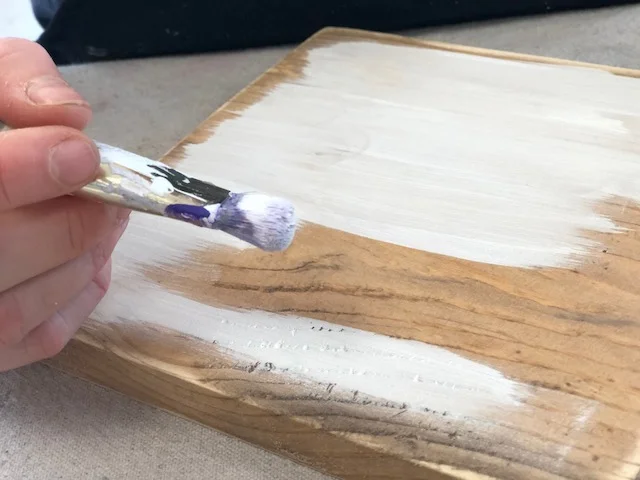
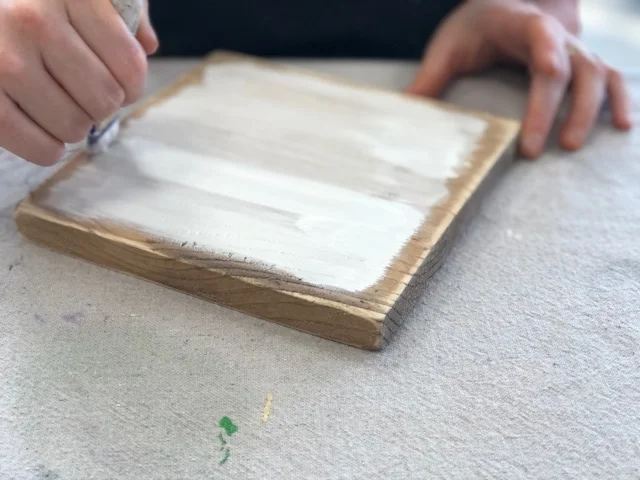
Once your wood pieces are dry you can start painting them. Start with a DRY brush and using a little bit of paint at a time, apply a THIN layer of paint to one side of your board. Leave a small border all the way around each wood base. I don’t measure this, just eyeball it. This will give you that rustic uneven look. Do this with each wooden base. You do not need to paint any of the other sides, just one side per base.

After your fist THIN coat is totally dry you can apply the second coat, be sure to apply using the same technique as you did with the first coat.

DIY mini wood sign tutorial. How to make hand painted wood signs with stencils, funny cactus signs, Don't be a prick, go sit on a cactus, free hugs cactus decor

Once they are all TOTALLY DRY you are ready for stenciling. They must be completely dry otherwise your stencil will not stick to the wood and it will be an ugly mess.

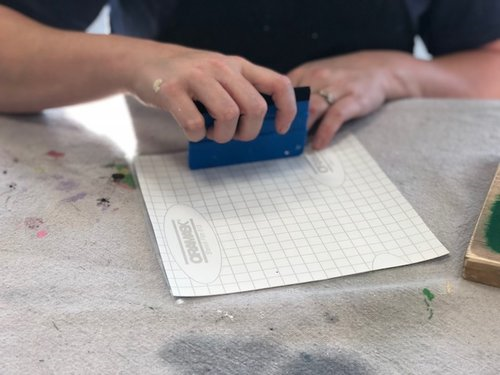
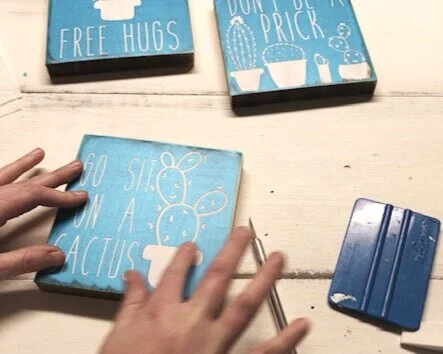
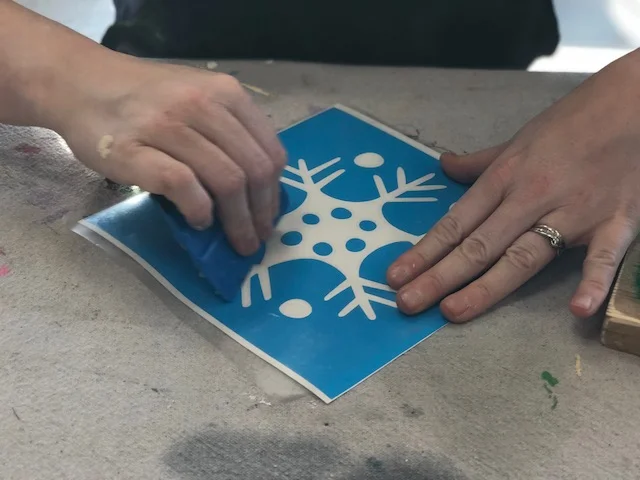
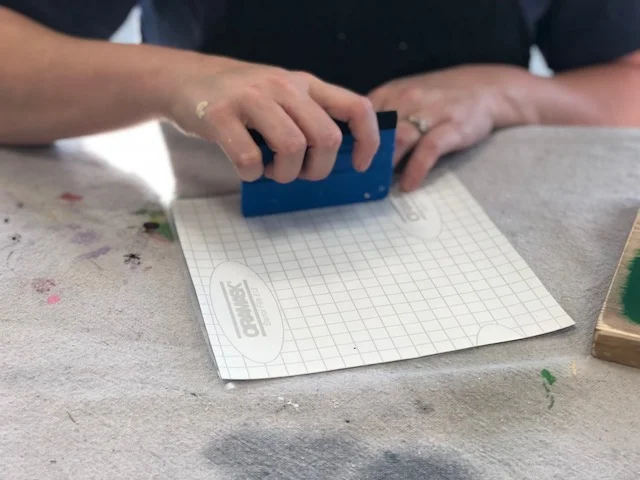
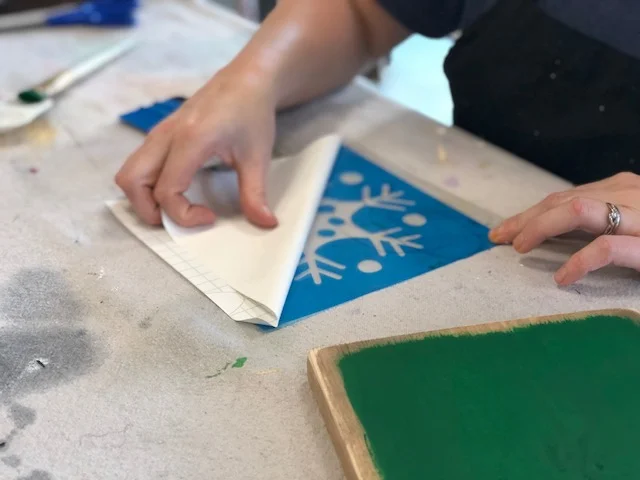
Start by removing the paper backing from your stencil. This works best if you use a vinyl applicator, or you can use a stiff store rewards card,  I don’t recommend using your bank card as it could break during the process.

Rub the front of the stencil

Rub the front of the stencil

Flip it over and do the same on the back

Flip it over and do the same on the back

Now slowly peel the paper backing away from the stencil. This works best if you start at one corner and peel away at a sharp 90 degree angle. Go SLOW.

Now slowly peel the paper backing away from the stencil. This works best if you start at one corner and peel away at a sharp 90 degree angle. Go SLOW.

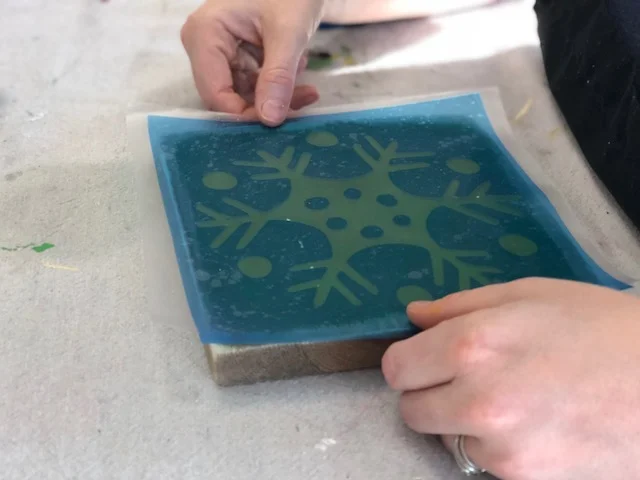
First, you’ll want to place your stencil where you want it on your board. I wanted mine to all be centered so that’s what I did but you can place them anywhere on the board you’d like. I just recommend keeping the image within the painted part of the wood.

DIY mini wood sign tutorial. How to make hand painted wood signs with stencils, funny cactus signs, Don't be a prick, go sit on a cactus, free hugs cactus decor

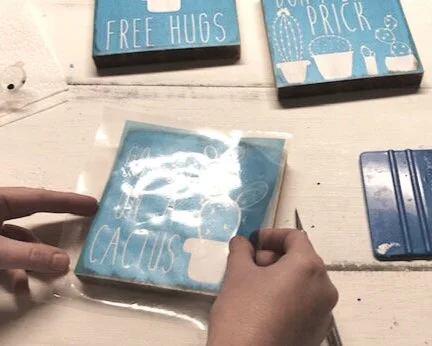
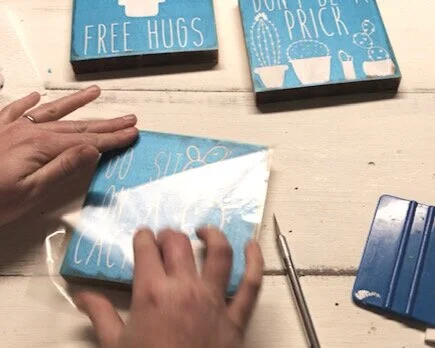
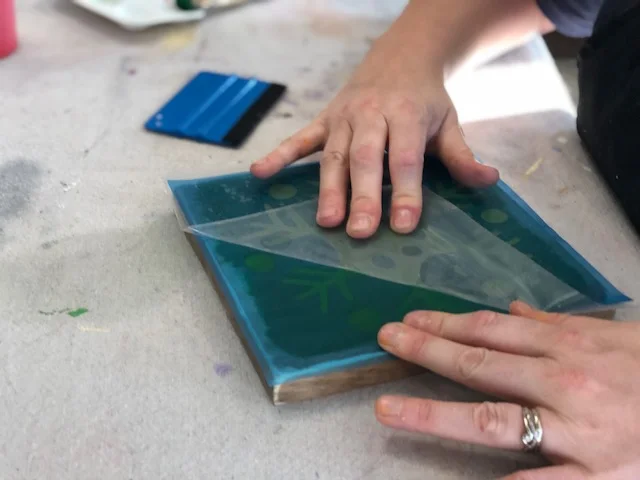
Using your vinyl tool rub the stencil, using the same technique as before. Now SLOWLY peel the transfer tape {the clear sticky stuff} away from your stencil. I do this at a sharp angle and I will slowly roll it off of the stencil.

DIY mini wood sign tutorial. How to make hand painted wood signs with stencils, funny cactus signs, Don't be a prick, go sit on a cactus, free hugs cactus decor

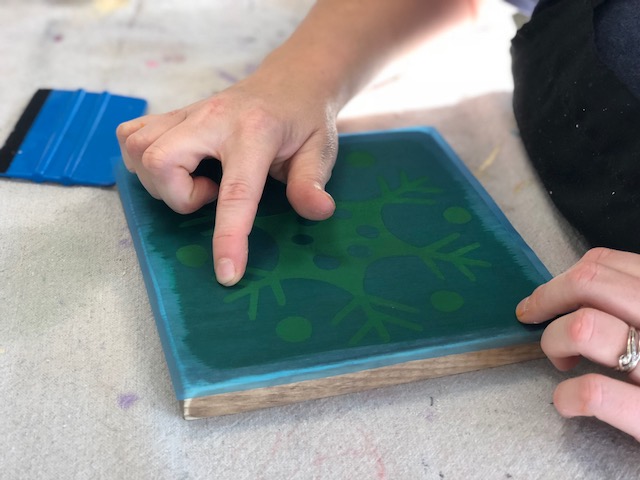
After you get the transfer tape off rub your finger along all the exposed stencil edges {anywhere there is wood showing thru}. this helps to get a good seal on your stencil.

mini+cactus+sign4.jpgDIY mini wood sign tutorial. How to make hand painted wood signs with stencils, funny cactus signs, Don't be a prick, go sit on a cactus, free hugs cactus decor

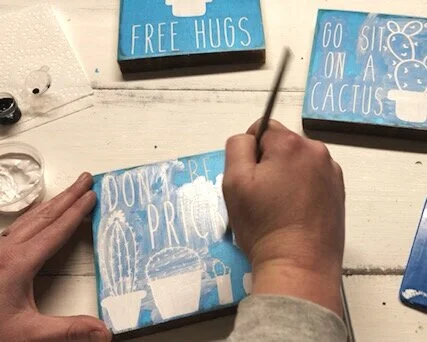
To help prevent paint bleed you can take the white paint, the base color, and lightly go over the exposed areas of your stencil. This will help to fill in tiny air bubbles that you may have missed in the previous step. You want this to be a very LIGHT LAYER of paint, you barely want to see it on your stencil.

To help prevent paint bleed you can take the white paint, the base color, and lightly go over the exposed areas of your stencil. This will help to fill in tiny air bubbles that you may have missed in the previous step. You want this to be a very LIG…

Use one end of your cosmetic sponge LIGHTLY dip it in the black paint. BE SURE TO USE VERY LITTLE PAINT, this is key to getting little to no paint bleed under your stencil. Dab the sponge on a paper towel a couple times then onto your stencil, do this till you have a very THIN even coat {you should be able to see thru the first coat}. LET DRY, repeat till you are happy with the coverage.

DIY mini wood sign tutorial. How to make hand painted wood signs with stencils, funny cactus signs, Don't be a prick, go sit on a cactus, free hugs cactus decor

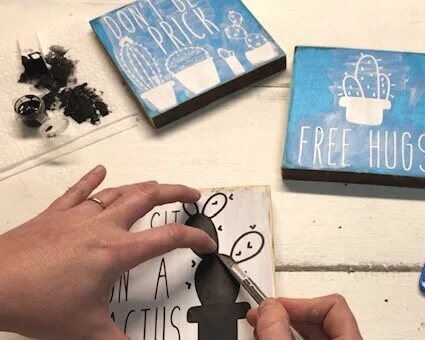
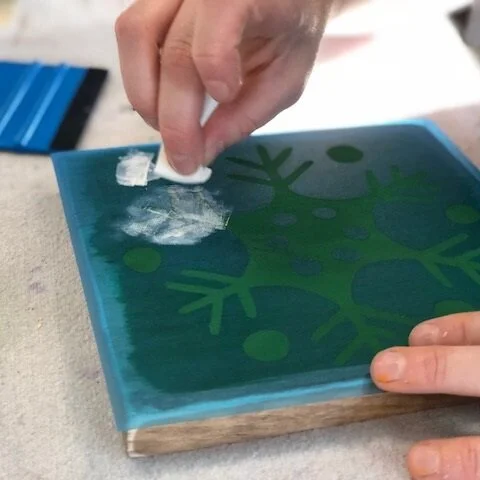
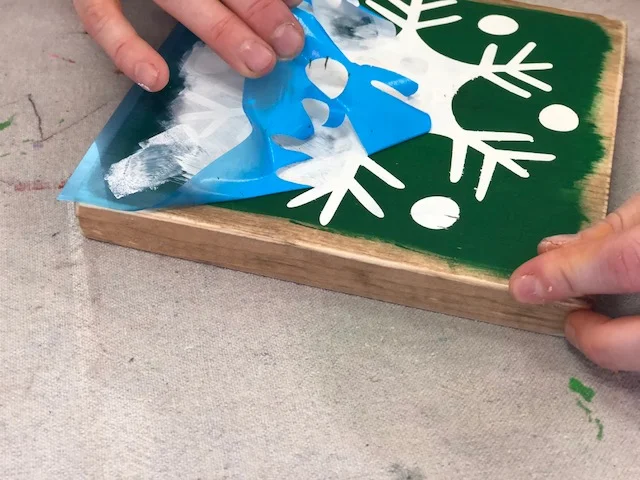
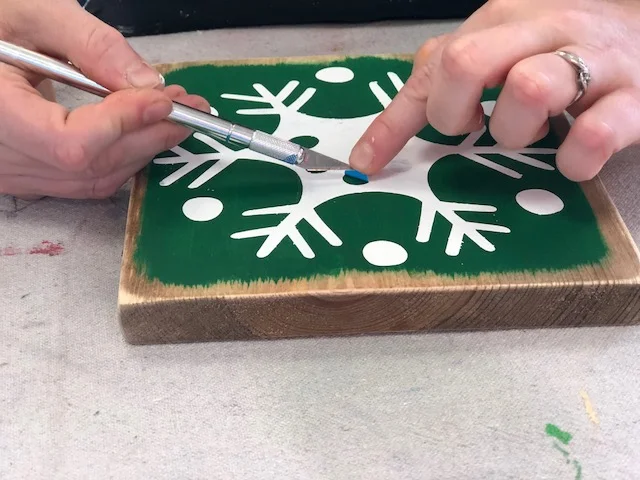
Now peel up your stencil. I use an xacto knife to get up all the little pieces. If you don’t have one of these a sewing pin/needle works great for this as well. If you have any paint bleed just go over those with a small paint brush and your background color.

DIY mini wood sign tutorial. How to make hand painted wood signs with stencils, funny cactus signs, Don't be a prick, go sit on a cactus, free hugs cactus decor
cactus sigDIY mini wood sign tutorial. How to make hand painted wood signs with stencils, funny cactus signs, Don't be a prick, go sit on a cactus, free hugs cactus decorn3.jpg

Please feel free to message me if you have any questions once your kit arrives. I want your DIY projects to turn out AMAZING and will help you in any way I can to make that happen. If you ordered from the website shoot me an email BUT if you ordered from my ETSY shop please message me on there. In order to keep in compliance with Etsy all convos must be kept on their platform

DIY personalized mason jar lid ornament using buffalo plaid - DAY 3

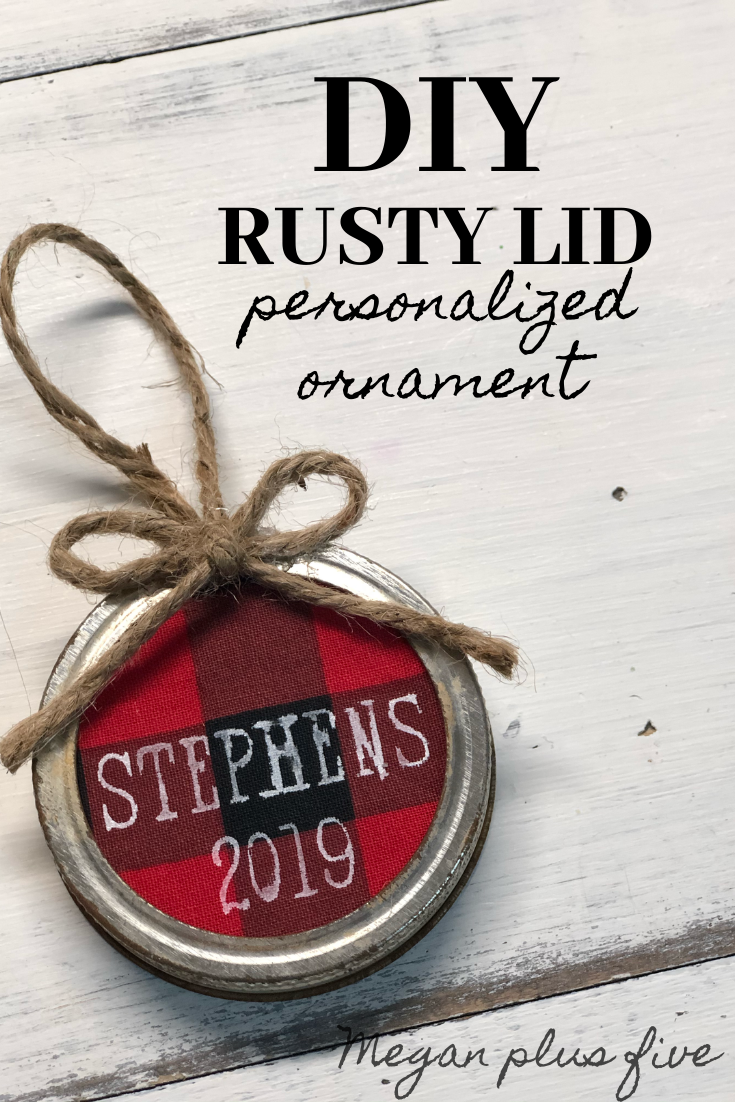
DIY Rusty Lid Personalized Ornament. How to make a Christmas ornament from an old canning jar lid. Using buffalo plaid to make a rustic Christmas tree ornament

DIY rusty canning jar lid ornament, personalized on buffalo plaid

Day 3 of DIY Christmas Ornaments

Day 3 of my 30 days of DIY Christmas ornaments…PERSONALIZED RUSTY MASON JAR LID ORNAMENT. I don’t know about you but I have a HUGE abundance of old mason jar lids. I save them from the hand painted mason jars I create and ship out in my Etsy shop. Here’s a tutorial I made for this adorable snowman painted mason jar set that is super popular in my shop.

Affiliate Disclosure. Some of the links on this website are affiliate links, which means that I may earn a small commission if you click on the link or make a purchase using the link. If you make a purchase you will not be charged anything additional. This is just a way I can help add to our family finances to raise our four daughters. Please know I would never recommend a product or service I do not totally stand behind.

—-> Check out other DIY mason jar crafts <—-

Here is day 1 of the 30 days of DIY Christmas ornaments - DIY SCRAP FABRIC CHRISTMAS TREE

I really enjoyed making this personalized ornament for my family Christmas tree. So much so that I am going to make these as gifts for loved ones and teachers/school staff gifts! There were so easy and actually super quick to make.

If you’re a seasoned crafter you probably have everything you need to make this DIY mason jar lid ornament. But if not I will leave links to everything you’ll need to create your own canning lid Christmas ornament.

mason jar lid ornament2.DIY Rusty Lid Personalized Ornament. How to make a Christmas ornament from an old canning jar lid. Using buffalo plaid to make a rustic Christmas tree ornamentjpg

Here’s what you’ll need

Check out the video tutorial from my YouTube channel or keep scrolling to read the written tutorial

First you want to create your stencil on your Cricut Design Space. I used the font HAND TYPEWRITER because I really like how this one looks. I use it often for different DIY craft projects I make. I made a circle that is the same size as the mason jar lid I used, 2.5”. Then I typed out my text, on two separate lines and I made my BOLD TYPE. Welded them together. I made it 2” wide. Then positioned it on the circle I offset it slightly so that there was more room on the top potion, then aligned the circle and text so they would align HORIZONTALLY. Then used the SLICE button to slice the font out of the circle. And sent it to my mat to cut.

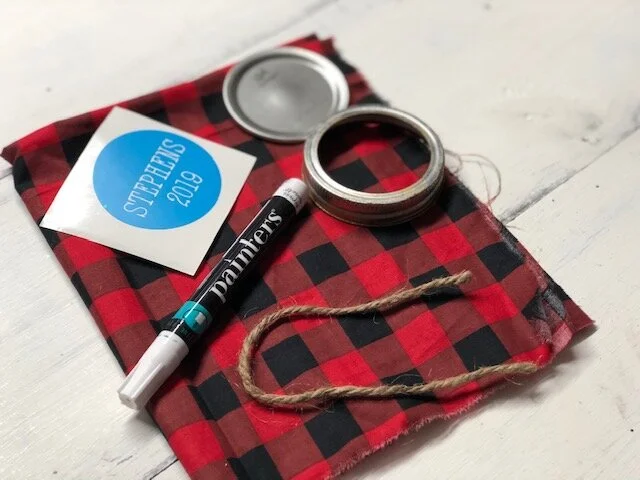
I cut it out on STENCIL FILM. I know I totally could have used HTV but I wanted to try something a little different. Something a little easier, something that hasn’t been done a ton. That’s why I chose to use a paint pen/marker vs regular paint or HTV.

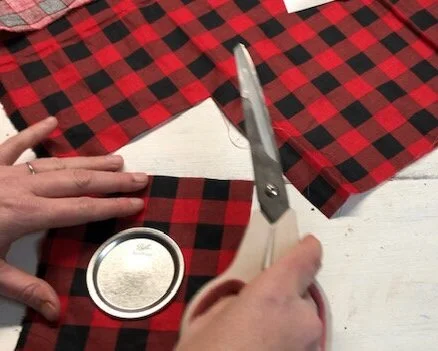
Then cut a square out of your fabric. I am using red buffalo plaid that I picked up from Walmart. It was in their fat quarters seasonal section. You want to cut your square larger than your lid. I cut mine a couple inches larger.

DIY personalized  mason jar lid ornament using buffalo plaid. How to make Christmas ornaments out of rusty canning jar lids and your Cricut

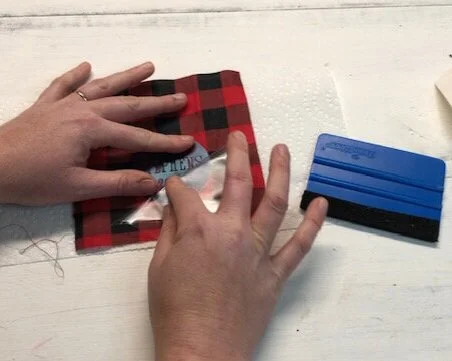
Then transfer your stencil onto your fabric. I used contact paper to transfer mine but you can use whatever material works best for you. After you place your stencil where you are happiest with it remove the transfer tape then pat the stencil down with your hand to make sure there are not any air bubbles.

DIY personalized  mason jar lid ornament using buffalo plaid. How to make Christmas ornaments out of rusty canning jar lids and your Cricut


Now use your paint marker to “trace” the areas that are exposed inside the stencil. Be sure not to press too firmly as the more pressure you apply the more likely you’ll have paint bleed. If you make a mistake no worries, you can fix it later :)!!

TIP: place a paper towel under your fabric to catch any paint that might bleed through

DIY personalized  mason jar lid ornament using buffalo plaid. How to make Christmas ornaments out of rusty canning jar lids and your Cricut

After you have your stencil all painted in you can remove it. It should release easily from the fabric. I used an xacto knife to take out the middle pieces. It does a great job at lifting them up with the sharp point.

DIY personalized  mason jar lid ornament using buffalo plaid. How to make Christmas ornaments out of rusty canning jar lids and your Cricut

Take your marker and fill in any areas that didn’t get good coverage. This does not have to look perfect. I actually LOVE that mine came out super imperfect. It gives it so much character and a more handmade Christmas ornament look and feel to it.

DIY personalized  mason jar lid ornament using buffalo plaid. How to make Christmas ornaments out of rusty canning jar lids and your Cricut

Place your fabric over the metal mason jar lid then place both inside the mason jar ring. You can gently pull the fabric to center it where you want it on the mason jar ornament.

DIY personalized  mason jar lid ornament using buffalo plaid. How to make Christmas ornaments out of rusty canning jar lids and your Cricut

Once you have the fabric where you want it glue it in place on the backside using your hot glue gun. You’ll want to glue fairly close to where the lid, fabric, and ring meet. This will give it a more secure hold. Glue all the way around the ring.

DIY personalized  mason jar lid ornament using buffalo plaid. How to make Christmas ornaments out of rusty canning jar lids and your Cricut

After the glue is dry trim away any fabric that hangs over the ring. Be sure not to trim it too closely to the lid part of your mason jar lid ornament. If you trim it too closely then the fabric won’t have enough of a “seam allowance” and your fabric will likely slip thru to the front of the ornament.

DIY personalized  mason jar lid ornament using buffalo plaid. How to make Christmas ornaments out of rusty canning jar lids and your Cricut

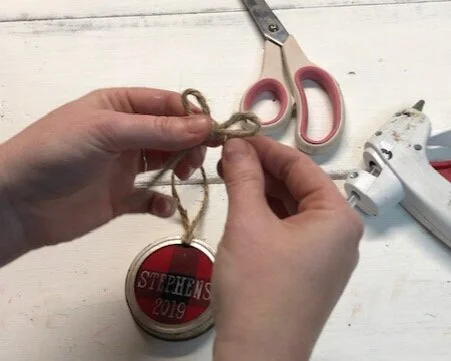
Add a twine hanger. I glued a piece of twine to the middle spot on the front of the ring then looped it to the back and hot glued it there as well. If I wanted a super strong hold I would have used my drill and drilled a small hole on the top and fed my twine thru there. But for not the hot glued hanger will work.

DIY personalized  mason jar lid ornament using buffalo plaid. How to make Christmas ornaments out of rusty canning jar lids and your Cricut

Then add a cute little twine bow. I glued mine on top of the twine I glued to the front to hide that and it worked great. Adding a simple twine bow really adds a little more rustic touch to the ornament too!

DIY personalized  mason jar lid ornament using buffalo plaid. How to make Christmas ornaments out of rusty canning jar lids and your Cricut

Once your hot glue is dry you’re ready to hang your mason jar ornament on your tree! I hope you enjoyed this tutorial and that it inspires you to create your own DIY ornaments and so much more <3 !

DIY personalized  mason jar lid ornament using buffalo plaid. How to make Christmas ornaments out of rusty canning jar lids and your Cricut

Check out more Christmas posts below

DIY stenciled rustic fall signs

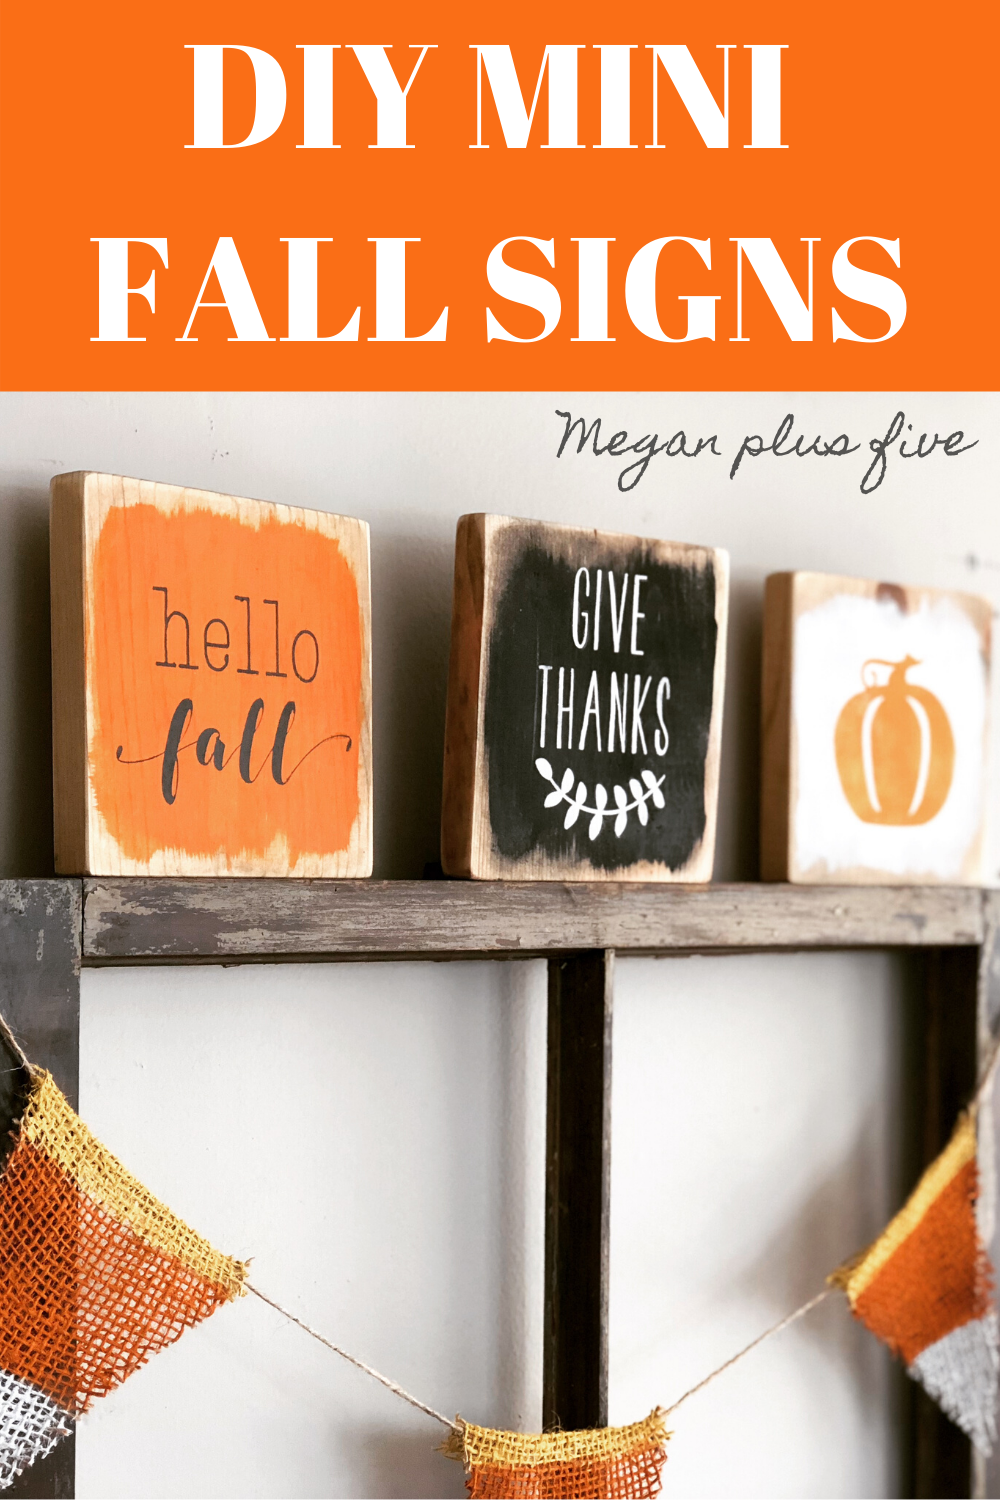
DIY painted fall signs. How to make your own farmhouse style signs for your fall themed decor. These painted tiny signs are so perfect for coffee bars, tierd trays and mantles. This trio of hello fall, give thanks, and a pumpkin are hand painted in …

DIY painted fall signs. How to make your own farmhouse style signs for your fall themed decor. These painted tiny signs are so perfect for coffee bars, tiered trays and mantles. This trio of hello fall, give thanks, and a pumpkin are hand painted in orange, black and white, the classic fall colors. This tutorial will take you step by step on how to make your own stenciled wooden signs at home.

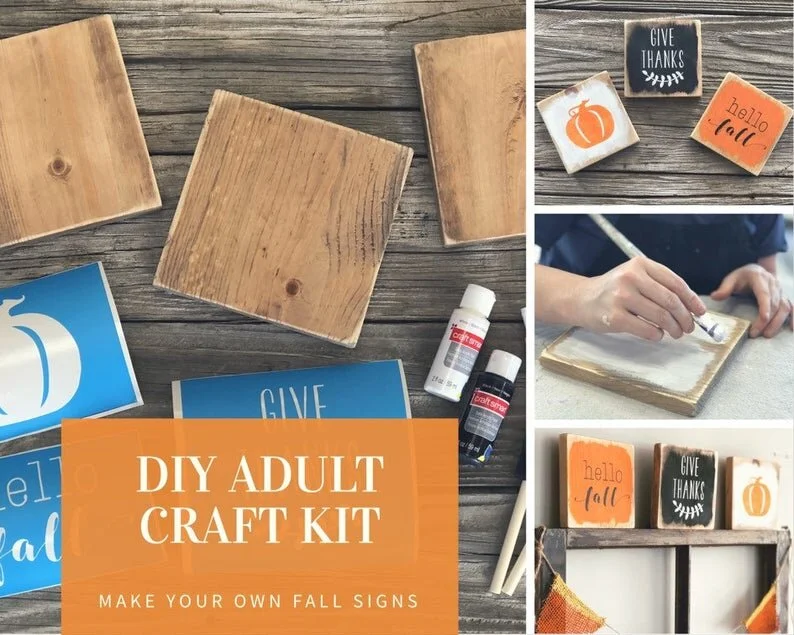
Don’t you just love painted mini signs?! HELLO FALL, GIVE THANKS, and a picture of a PUMPKIN just scream I LOVE FALL! I placed mine on a rustic old window frame that has candy corn burlap draped across it and OMG it looks adorable! These mini signs are also perfect for tiered trays and coffee bars. How cute would these be paired with some wood bead garland painted in fall colors?

Affiliate Disclosure. Some of the links on this website are affiliate links, which means that I may earn a small commission if you click on the link or make a purchase using the link. If you make a purchase you will not be charged anything additional.

If you plan to hang these mini fall wood signs be sure to check out my post on how to quickly and easily attach a sawtooth hanger to wooden signs.

How to make painted wood signs for fall

Here’s what you’ll need

Helpful tools

If you don’t have all the tools to completely make this fall craft from scratch you can order a DIY craft kit here. It comes with everything you need to make these wood signs at home.

ONE- the first thing you need to do is cut your wood into squares. I used a 1”x6” piece of pine, the actual size is 5.5” so I cut them into 5.5'“x5.5” squares. After you’ve cut and sanded your 5.5”x5.5” wood pieces stain them and let them dry for 24 hours. After they’ve dried sand around the edges, corners, and a light sanding on the front, be sure to wipe them down so you get all of the sawdust off of them. I LOVE my RYOBI CORDLESS SANDER , it is what I use for all of my wooden projects. But, if you don’t have a sander you can get the job done with 120 grit sand paper.

TWO- Cut your stencils out. If you want to use an SVG similar the ones in this tutorial you can go here to grab your SVG files. I’ve found that using true stencil film works best for stenciling wood signs. I highly recommend cutting the designs out on Oramask stencil film. I used a Cricut Explore to cut the files for this fall craft. I weeded them with an xacto knife once they were done cutting.

THREE- Now you can start painting! You want to paint each sign a different color. Start by painting a thin layer of paint on the front of each sign. You want to leave a small border around the edge. This should look kinda rough and uneven, it will give it lots of character when finished this way. Wait for the first layer to dry completely then paint a second THIN layer on top of that. I don’t recommend painting more than two layers of base paint. the more layers you have the more problems you will run into when peeling up your stencil.

DIY Mini Wooden Winter Signs

Repeat this step for all 3 signs. Once they are all TOTALLY DRY you are ready for stenciling. They must be completely dry otherwise your stencil will not stick to the wood and it will be an ugly mess.

I don’t have pictures of how to do the next steps on the fall mini signs BUT I am sharing pictures of a similar craft that I made for winter themed signs. You can read the full winter themed tutorial here. Both sign trios have the same steps, the only differences are the stencils and paint colors, everything else is the same :)!

FOUR- Start by removing the paper backing from your stencil. This works best if you use a vinyl applicator {here’s what I use} or you can use a stiff store rewards card, I don’t recommend using your bank card as it could break during the process.

If you’re using your own stencils you’ll need transfer tape to transfer your stencil onto the wood in one piece.

DIY Mini Wooden Winter Signs

Start by rubbing the front of the stencil with your vinyl applicator. Be sure you move in one direction.

DIY Mini Wooden Winter Signs

Then flip it over and do the same to the back.

DIY Mini Wooden Winter Signs

Now slowly peel the paper backing away from the stencil. This works best if you start at one corner and peel away at a sharp 90 degree angle. Go SLOW.

Before you start applying your stencils decided which stencil you will put on each board.

DIY Mini Wooden Winter Signs

First, you’ll want to place your stencil where you want it on your board. I wanted mine to all be centered so that’s what I did but you can place them anywhere on the board you’d like. I just recommend keeping the image within the painted part of the wood.

DIY Mini Wooden Winter Signs

Using your vinyl tool rub the stencil, using the same technique as before. Now SLOWLY peel the transfer tape {the clear sticky stuff} away from your stencil. I do this at a sharp angle and I will slowly roll it off of the stencil.

DIY Mini Wooden Winter Signs

After you get the transfer tape off rub your finger along all the exposed stencil edges {anywhere there is wood showing thru}. this helps to get s good seal on your stencil.

FIVE- Now you’re ready to start painting your stencil! Use one end of your cosmetic sponge LIGHTLY dip it in the paint color you’d like your design. BE SURE TO USE VERY LITTLE PAINT, this is key to getting little to no paint bleed under your stencil. Dab the sponge on a paper towel a couple times then onto your stencil, do this till you have a very THIN even coat {you should be able to see thru the first coat}. LET DRY, repeat till you are happy with the coverage.

DIY Mini Wooden Winter Signs

SIX- After you’re finished sponging the stencil you can peel it up immediately. I know all tutorials can vary with peeling the stencil up while the paint is still wet or waiting for it to dry. I have had the best luck peeling the stencil while the paint is still wet. Use an xacto knife or sewing pin to aid in this step.

DIY Mini Wooden Winter Signs

As with all of my DIY tutorials if you have any questions please ask in the comments below:)

DIY painted fall signs. How to make your own farmhouse style signs for your fall themed decor. These painted tiny signs are so perfect for coffee bars, tiered trays and mantles. This trio of hello fall, give thanks, and a pumpkin are hand painted in…

DIY free standing BOO cutouts using your Cricut & scroll saw

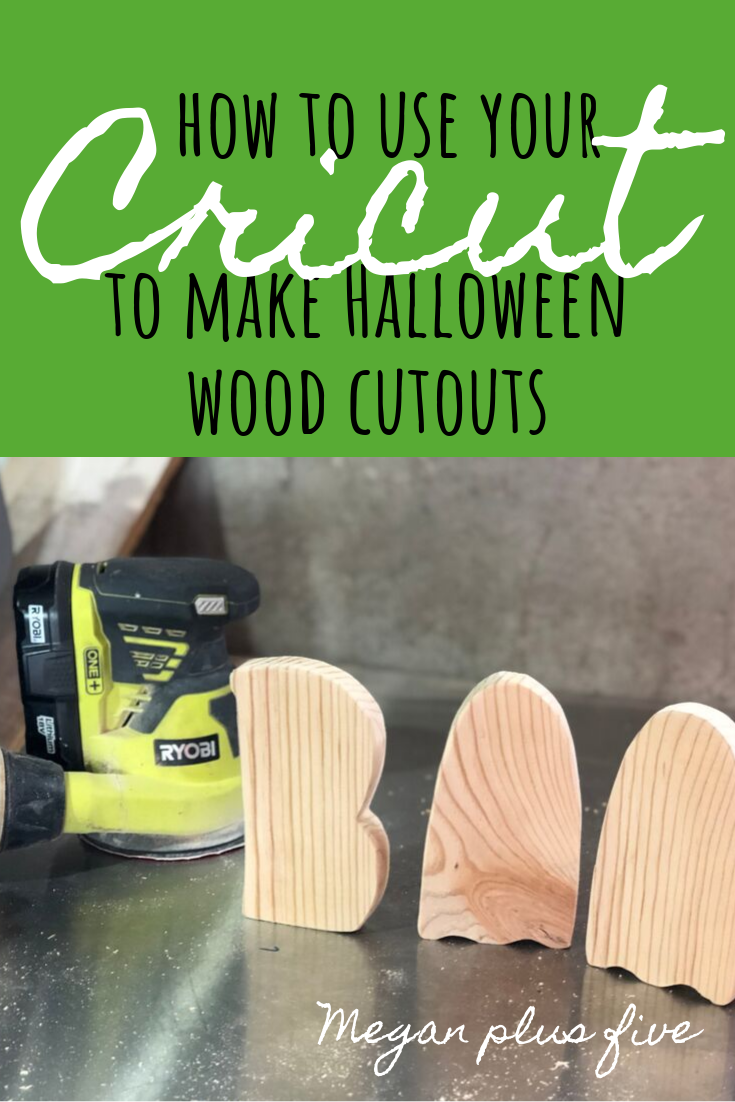
How to use your Cricut to make halloween wood cutouts.

DIY- use your CRICUT to make BOO wood cutouts for Halloween

I don’t have the latest fancy Cricut Maker, but that doesn’t mean I still can’t create AMAZING projects with my older model, CRICUT EXPLORE. Especially when use it with my Ryobi scroll saw…pure magic happens! Ok, obviously not real magic but the projects you can create with this combo is everything to write home about!

Affiliate Disclosure. Some of the links on this website are affiliate links, which means that I may earn a small commission if you click on the link or make a purchase using the link. If you make a purchase you will not be charged anything additional.

I wanted to add another DIY craft kit to my crafty line up for my online business and thought these BOO cutouts would fit in perfectly with the craft kits I already offer.

If you don’t have the tools to make your own BOO cutouts grab your own

—-> BOO DIY CRAFT KIT <——

After you read this tutorial check out how I finished my own BOO WOOD CUTOUTS

Here’s what you’ll need to cut out your own Halloween BOO wood letters

Don’t feel like reading the tutorial? Catch the video below or click here for the DIY BOO cutouts tutorial using your Cricut & scroll saw


Join the crafty community. Get exclusive offers, content, and more


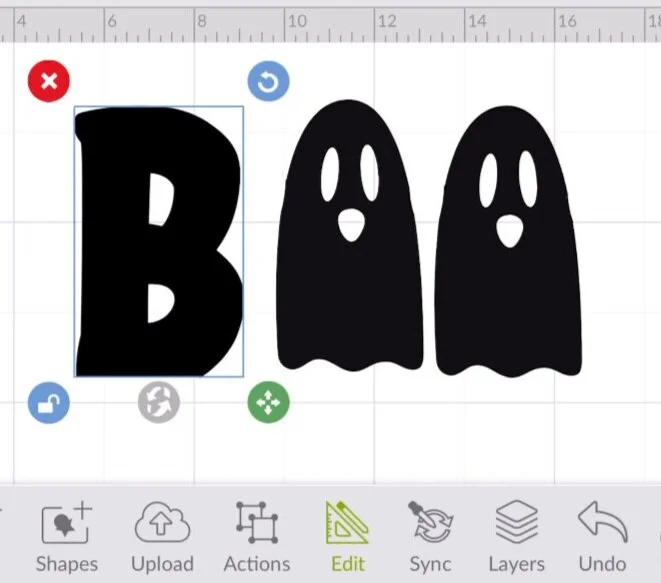
First, design your BOO in Cricut Design Space. I used the font beefcake for the letter “B”. I used a ghost image in DS {design space} that is included in my Cricut Access monthly subscription plan. It had arms but I took those away using the slice function. I resized them too fit the piece of wood I was using so mine are 6”x3.25”.

DIY free standing BOO cutouts using your Cricut & scroll saw. DIY craft kit for adutls for fall and Halloween.  How to make free stnading wood cutouts using your cricut.

Next, cut them out on cardstock. I used some scrap cardstock that I had leftover from a previous DIY project. After I started cutting them I realized that I really didn’t need to cut out two ghosts. So really you just need 1 letter B and 1 ghost. Don’t toss the middles of the ghost or B, you’ll need those for later when you paint them.

DIY free standing BOO cutouts using your Cricut & scroll saw

Now trace around your cutouts using a pencil onto your wood. I have TONS of scrap wood so I used a scrap piece that I had on hand. I used a 1” pine board that you can find at most home improvement stores. Check out the DIY SCRAP WOOD PUMPKINS I made using this same method. They turned out SO CUTE!!

You don’t need to trace around the middle cutouts because we won’t be cutting those pieces out. Remember to trace around your ghost twice ;)

DIY free standing BOO cutouts using your Cricut & scroll saw

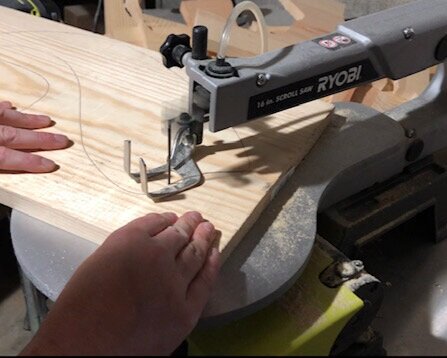
After you have your Cricut cutouts traced it’s time to cut them out using your Ryobi scroll saw. If you don’t have a scroll saw you can use a band saw and maybe even a jigsaw but I’ve had great luck with cutting things out on my scroll saw so for now that’s what I’m sticking with.

DIY free standing BOO cutouts using your Cricut & scroll saw

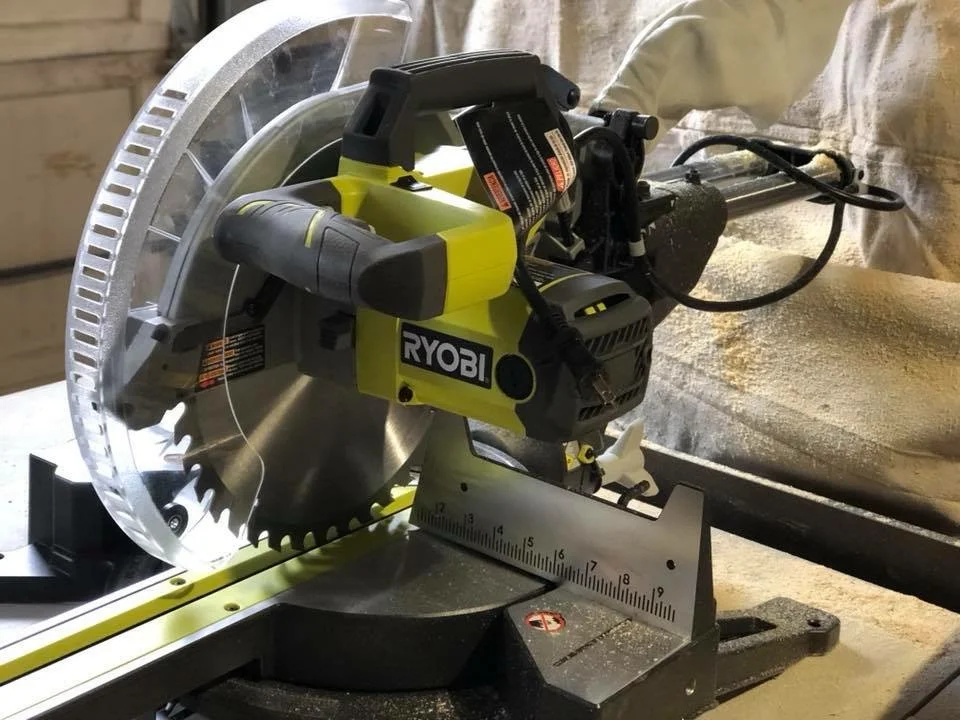
Once you have them all cut out you’ll want them to be able to stand on their own. I used my miter saw to do this. My miter has a laser on it making it SUPER easy to line things up and to show me exactly how much I’m taking off. By cutting a sliver off the bottom with your miter saw you get a nice straight base so your projects are able to stand freely on their own.

SIDE NOTE: if you’re thinking about investing in a set of your own power tools you’ll want to read this WHAT ARE THE BEST POWER TOOLS FOR CRAFTERS. It wasn’t that long ago when I had some serious anxiety about using power tools so I wrote a little about that and why I’ve chosen the tools I have for my crafty projects and business.

DIY free standing BOO cutouts using your Cricut & scroll saw

Then just give them a quick sanding and you’re ready to paint them. I always use a 120 grit sandpaper and most of the time I don’t sand my projects to a super smooth finish. A little bit of bumps and divots just add to the rustic look ;)!!

DIY free standing BOO cutouts using your Cricut & scroll saw

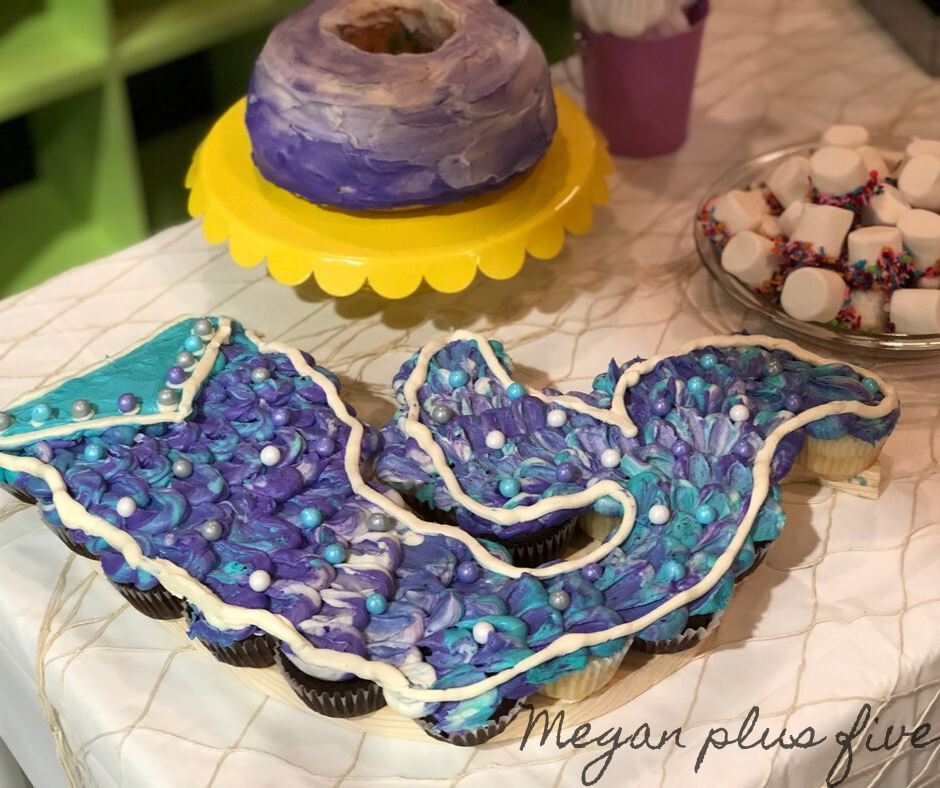
There are so many projects you can do when you start pairing your tools together. Like this DIY MERMAID CUPCAKE STAND I made for my daughter’s birthday party this year. And a bonus is that she has a pretty awesome new room decoration she was able to decoration then hang in her bedroom after the party was over.

Check out the DIY BOO cutouts using your Cricut & scroll saw video tutorial below

COMING SOON…a complete guide to paint wood signs without the stress and headache of trial and error. Click here for more info

DIY make a wood CUPCAKE base using your Cricut

Use your cricut to make a wood base for your pull apart cupcakes. See how this mom made a pull apart mermaid tail cake from cupcakes. She used her Cricut and Cricut design space to make her template then cut it out using her Ryobi scroll saw.

Use your Cricut & scroll saw to make a wooden cupcake base in the shape of a mermaid tail

I love throwing birthday parties for my four daughters. I love the excitement in their eyes when they see all the work and thought that’s been put into THEIR big day! I love sitting with them and planning out the details. And when the oldest three were much younger I LOVED making their cakes. As the years have passed though, I found my self getting busier and busier and it was just easier for me to run to Sams club and grab a cake from there.

Affiliate Disclosure. Some of the links on this website are affiliate links, which means that I may earn a small commission if you click on the link or make a purchase using the link. If you make a purchase you will not be charged anything additional.

But this year when the second oldest was planning her birthday she asked if I would make her cake. I felt so honored. Really? She didn’t want a store bought cake but one that momma made! Seriously bring on the happy tears!

She had been pinning on Pinterest for a couple of months and decided she wanted a MERMAID cake! As soon as she said those words I knew what I was going to do to make that happen… MERMAID PULL APART CUPCAKES! So much easier than an actual cake and less mess on the day of the party. Years and years ago I did a similar one for the oldest daughter when she turned 4. I made pull apart cupcakes in the shape of a 4 and it was ADORABLE and SOOOOOOO easy!

Thank goodness for tools like Cricut and Ryobi, if I didn’t have those then her cake might have turned out a little….less than edible looking lol!

If you want more little girl birthday party inspiration be sure to check out these ADORABLE UNICRON party centerpieces I made using my Cricut too!

Don’t feel like reading the full tutorial? Skip to the bottom to catch the video or go here ——-> MERMAID TAIL CUPCAKE BASE on my YouTube channel

How to make a wood base for pull apart mermaid cupcakes

Use your cricut to make a wood base for your pull apart cupcakes. See how this mom made a pull apart mermaid tail cake from cupcakes. She used her Cricut and Cricut design space to make her template then cut it out using her Ryobi scroll saw.

Here’s what you’ll need

First select your design in CRICUT DESIGN SPACE. If you are like me and create a ton of projects each monthly I highly recommend signing up for CRICUT ACCESS. You will have access to thousands of images, fonts, and projects for a small monthly fee…and it’s SO worth it!

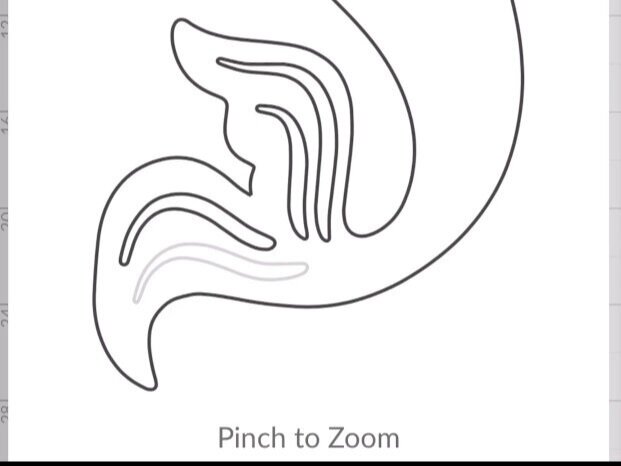
Here’s the mermaid tail I chose in Cricut Access. I just simply searched MERMAID TAIL and chose one that I liked.

Use your cricut to make a wood base for your pull apart cupcakes. See how this mom made a pull apart mermaid tail cake from cupcakes. She used her Cricut and Cricut design space to make her template then cut it out using her Ryobi scroll saw.

I chose the pink one on the bottom row. I really like that this one had some movement in it. But I didn’t really like the white spaces on the mermaid tail. So after I added it to my canvas I used the CONTOUR function to hide those white spaces. I also adjusted the size of the mermaid tail so that it was 11.45” wide. I left the size lock on so that it would adjust the height for me so that everything would be proportionate.

Use your cricut to make a wood base for your pull apart cupcakes. See how this mom made a pull apart mermaid tail cake from cupcakes. She used her Cricut and Cricut design space to make her template then cut it out using her Ryobi scroll saw.

Since I was using cardstock for my stencil and I didn’t have a piece big enough I butted two pieces together and taped the seam so that it would be like one big piece. Feed your mat through your Cricut machine and press GO when the button starts to flash.

Use your cricut to make a wood base for your pull apart cupcakes. See how this mom made a pull apart mermaid tail cake from cupcakes. She used her Cricut and Cricut design space to make her template then cut it out using her Ryobi scroll saw.

I used a piece of scrap 1x12 to make my mermaid tail cupcake base out of. I had some plywood which probably would have worked just as good {and would have been cheaper to use} but I knew I most likely wouldn’t use this again and I wanted my daughter to be able to use it to hang in her room after her party.

Trace your mermaid tail cardstock stencil out on your piece of wood.

Use your cricut to make a wood base for your pull apart cupcakes. See how this mom made a pull apart mermaid tail cake from cupcakes. She used her Cricut and Cricut design space to make her template then cut it out using her Ryobi scroll saw.

Then cut the mermaid tail out using your Ryobi scroll saw. You can use a band saw, and even a jig saw for this step if you don’t have a scroll saw.

Use your cricut to make a wood base for your pull apart cupcakes. See how this mom made a pull apart mermaid tail cake from cupcakes. She used her Cricut and Cricut design space to make her template then cut it out using her Ryobi scroll saw.

Then you want to smooth it out using your Ryobi sander. I used 120 grit sand paper on mine. I also slightly rounded some of the edges so that it wasn’t so pokey.

Use your cricut to make a wood base for your pull apart cupcakes. See how this mom made a pull apart mermaid tail cake from cupcakes. She used her Cricut and Cricut design space to make her template then cut it out using her Ryobi scroll saw.

Add your cupcakes and decorate. I just slapped a little bit of frosting on the bottom of each cupcake to stick them to the board.

Use your cricut to make a wood base for your pull apart cupcakes. See how this mom made a pull apart mermaid tail cake from cupcakes. She used her Cricut and Cricut design space to make her template then cut it out using her Ryobi scroll saw.

. I used a combination of purple, teal, and white for the frosting colors and I didn’t even use any fancy piping tips {I was a little pressed for time lol}. For under $10 I was able to make the cake of her mermaid themed birthday dreams!

. I used a combination of purple, teal, and white for the frosting colors and I didn’t even use any fancy piping tips {I was a little pressed for time lol}. For under $10 I was able to make the cake of her mermaid themed birthday dreams!

Watch the video tutorial below on how to make your own MERMAID TAIL CUPCAKE BASE

DIY school spirit pallet style porch sign

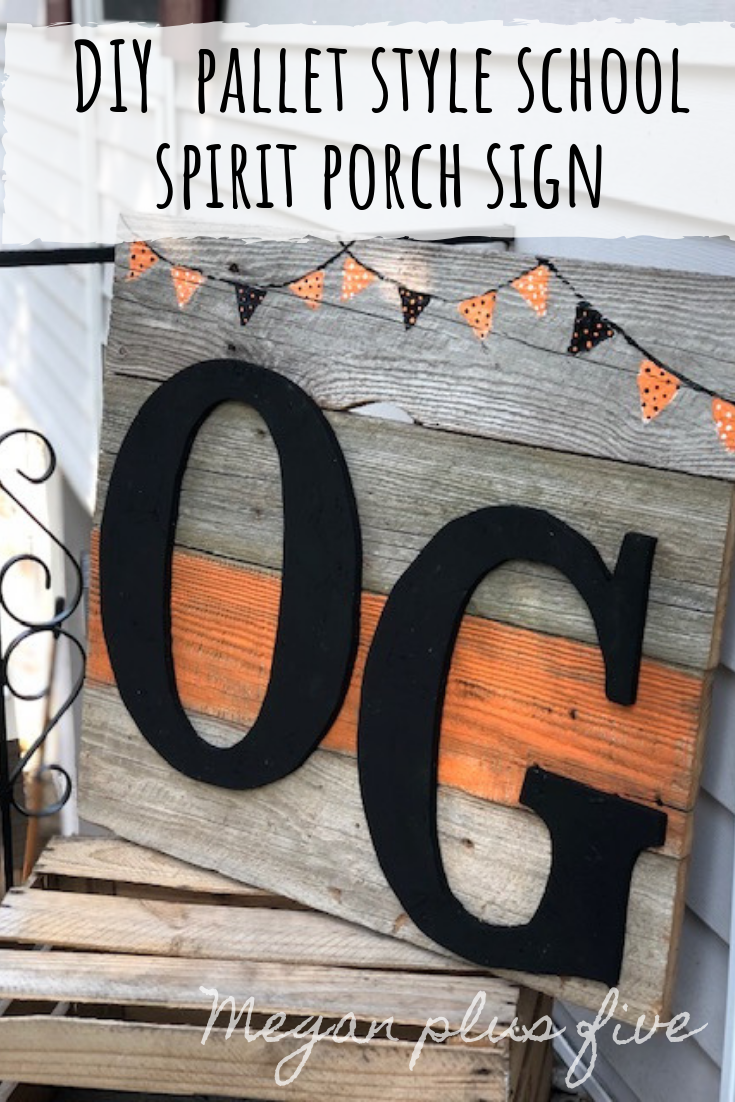
DIY school spirit pallet style porch sign. How to make your own personalized repurposed wooden sign to show your small town pride.

DIY porch sign to show off your school spirit

It was an absolute PERFECT day in our small town today that I took a couple hours to make something for my own front porch. I could just feel the fall weather coming in and that reminded me that I needed to decorate for the upcoming season. Which totally meant that I NEEDED to make a new sign lol! Every year I try to incorporate a school spirit pieces on our porch, really it only makes sense because our school colors are ORANGE & BLACK but truly I do it because my husband and I absolutely adore the schools where we live.

The teachers are amazing, the staff in general is amazing, they take such great care of our girls while they are there for 8 hours a day. We can’t say enough nice things about our small town schools! So we show off our school spirit every fall blended into our fall décor.

I wanted a bigger sign than what I usually put out. The old one is a small 40”x5.5” leaning sign that honestly I’m tired of looking at lol! So today was the day for a new one! I had a pretty general idea of what I was going to do but I didn’t know it was going to turn out even more perfect than I planned!

Affiliate Disclosure. Some of the links on this website are affiliate links, which means that I may earn a small commission if you click on the link or make a purchase using the link. If you make a purchase you will not be charged anything additional. This is just a way I can help add to our family finances to raise our four daughters. Please know I would never recommend a product or service I do not totally stand behind.

Here’s what you need to make your own school spirit rustic porch sign

First

You need to decide how large you want your sign, mine is approx. 24”x 22”. Then decide how large you want your lettering to be. I wanted my letters to take up a big portion of the base so I made my lettering roughly 11.5” wide and 14” tall each.

Measure out your wood base pieces and cut them to size using your miter saw. Then cut two pieces of your 1x2 a little shorter than the height of your sign. These are the pieces you’ll use to attach your pallet sign together. Place the pieces that you’ll be using for your sign face down on a flat surface. Then place your 1x2’s on it so it looks like the picture below.

DIY school spirit pallet style porch sign. How to make your own rustic style repurposed wood sign for your porch.

Second

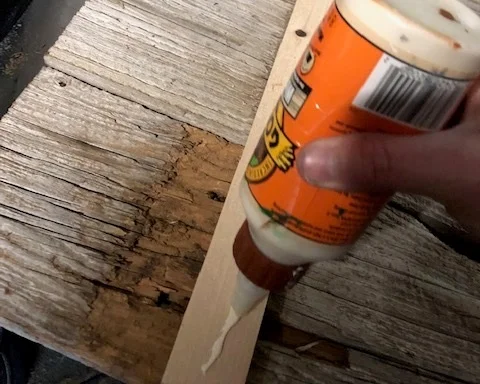
Use wood glue {I use gorilla wood glue} to glue the 1x2’s in place, then use your brad nailer to nail them down.

DIY school spirit pallet style porch sign. How to make your own rustic style repurposed wood sign for your porch.

Third

Cut your letters out on cardstock using your Cricut.. The cardstock I had on hand wasn’t long enough so I butted two pieces together and taped the seam and it worked perfectly!

DIY school spirit pallet style porch sign. How to make your own rustic style repurposed wood sign for your porch.

Fourth

Trace the letters onto your OSB. You can use pine for this but I chose OSB because we had this leftover from building TRIPLE LOFT BEDS for our older three girls…and yes, they came out AMAZING! I still have yet to write the tutorial for their U-shaped lofts but I promise, I will have it written before the end of the month ;)!

After you have them traced, cut them out using your scroll saw. Then give them a good sanding just on the front and around the edges. You won’t see the back so don’t worry about sanding that.

DIY school spirit pallet style porch sign. How to make your own rustic style repurposed wood sign for your porch.

Fifth

Paint your letters. I chose to paint mine all black but you can get as creative with this as you’d like.

DIY school spirit pallet style porch sign. How to make your own rustic style repurposed wood sign for your porch.

I wanted to add a pop of color to my sign so I painted just one of the boards orange, just lightly brushed over it so it was medium coverage.

DIY school spirit pallet style porch sign. How to make your own rustic style repurposed wood sign for your porch.

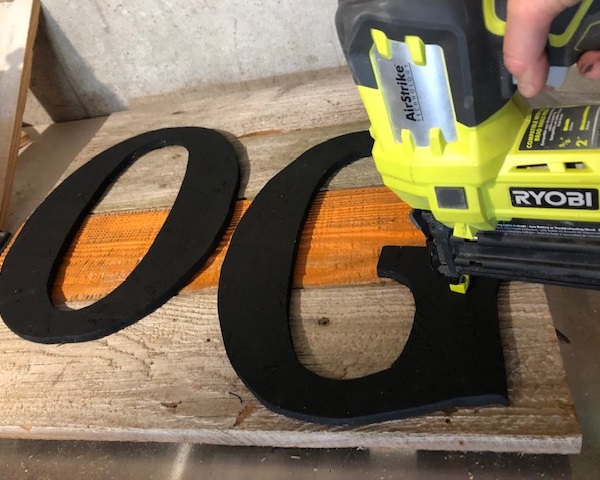
Now add your letters to your sign. I didn’t align mine because I like the offset look. I didn’t bother gluing these down I just popped a few brad nails in each letter using my brad nailer.

DIY school spirit pallet style porch sign. How to make your own rustic style repurposed wood sign for your porch.

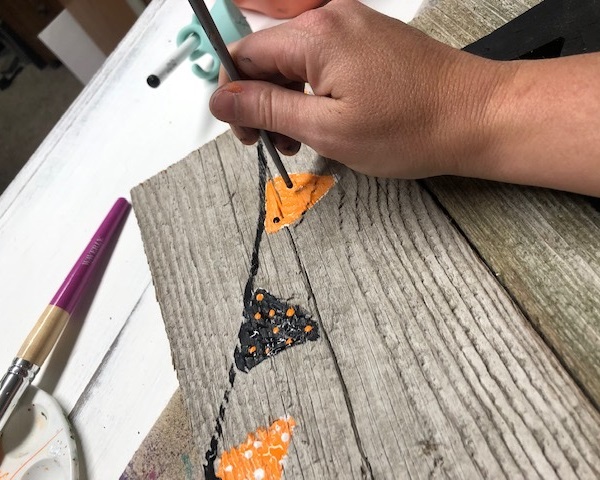
Now for the fun part! I love making these adorable free hand painted garland. I wanted the color to pop so I painted the triangles white, then once those dried I painted over them with the colors I wanted them to be. At first I wasn’t going to paint any of the triangles black but once I started painting over the white with orange I decided to break it up a little with every third triangle painted black. Then I used the end of my paint brush to add polk-a-dots to them. So CUTE!

DIY school spirit pallet style porch sign. How to make your own rustic style repurposed wood sign for your porch.

I just LOVE this rustic porch sign and it will tie in PERFECTLY with the rest of my fall décor.

I hope this inspires you to show off your own school or town spirit where you live. Let me know what you think below.

DIY school spirit pallet style porch sign. How to make your own rustic style repurposed wood sign for your porch.

Click on the pic below to PIN for later

DIY pallet porch sign. How to make a simple and rustic sign for your front porch using barnwood.

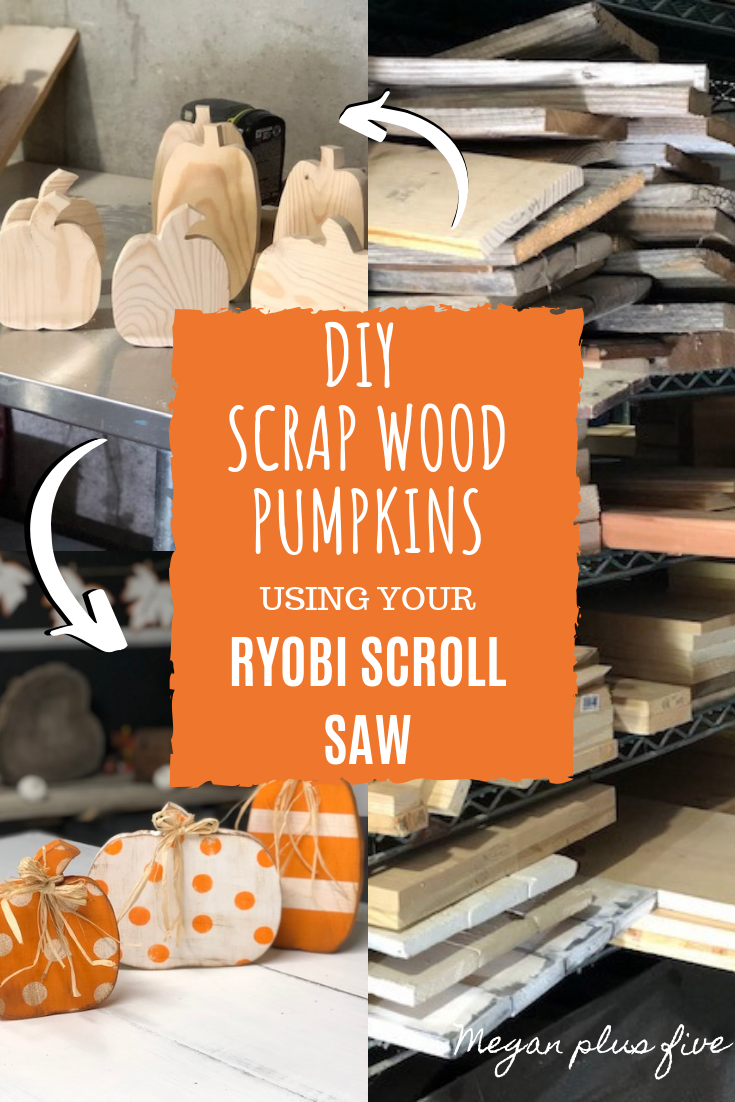
Easy scrap wood pumpkins using a RYOBI scroll saw

DIY scrap wood pumpkins using your ryobi scroll saw.png

How to cut out pumpkins from scrap pieces using your RYOBI scroll saw

Are you like me and have a TON of scrap wood on the wood pile? I seriously have a hard time tossing perfectly good scrap pieces. You just never know when a piece will come in handy. But I also know my crafty business is hitting it’s busiest season of the year and there’s no way I can hang on to all of those scrap pieces if I want a functioning wood working space. So I needed to find something to do with them.

I decided to make these adorable free standing wood pumpkin cutouts. They turned out even cuter than I imagined they would! So much that I added them to my DIY CRAFT KITS and they have been selling like crazy!

Affiliate Disclosure. Some of the links on this website are affiliate links, which means that I may earn a small commission if you click on the link or make a purchase using the link. If you make a purchase you will not be charged anything additional.

How to use your Cricut and Ryobi scroll saw to make free standing wood pumpkins

Here’s what you need

If you’re not in the reading mood skip to the bottom to catch the video tutorial ;)


First you want to cut out your pumpkins on cardstock. You can free hand them on your scrap wood pieces but honestly getting the sides even isn’t really a strong suit of mine lol. I used some scrap pieces of cardstock I had on hand to cut these out on.

After you cut your templates out trace them on your scrap pieces.

Easy scrap wood pumpkins using your Ryobi scroll saw. How to cut out pumpkin cutouts for your fall decor using your scroll saw.

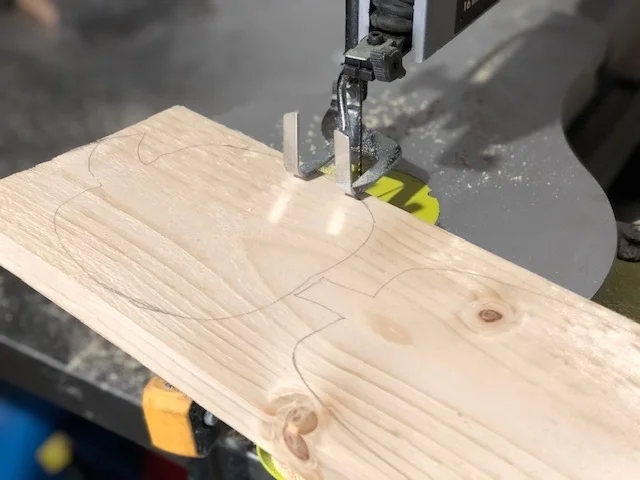
Next, making sure you are following the manufactures instructions, cut out the pumpkins you just traced using your scroll saw. If you’ve never used a scroll saw before this is a pretty easy project to start get some practice with. It’s a lot like using a sew machine. Just remember to go slow and the more you do it the better you will get at it.

Easy scrap wood pumpkins using your Ryobi scroll saw. How to cut out pumpkin cutouts for your fall decor using your scroll saw.

After you have your scrap pumpkins cut out you’ll want to give them a light sanding. Try not to sand the bottoms too much as you don’t want the surface to get uneven so they won’t be able to stand.

Easy scrap wood pumpkins using your Ryobi scroll saw. How to cut out pumpkin cutouts for your fall decor using your scroll saw.

After you have them sanded you can stain, paint, or decorate them however you want to match them to your décor.

These little guys are perfect for

  • your own décor

  • gift giving

  • Thanksgiving Day hostess present

  • ladies craft night

  • mom and me craft {my four daughters and I painted these on a facebook live and they turned out adorable!}

  • so much more

The possibilities are endless on how you can decorate these hand cut wood pumpkins.

Check out the VIDEO tutorial below.

Don’t forget to visit my YouTube channel and subscribe there so you never miss when I upload a new one.

Confused about what power tools to buy to make even more amazing crafts? This is a must read especially if you’re planning on starting a new business adventure with your handmade crafts click here ——-> WHAT ARE THE BEST POWER TOOLS FOR CRAFTERS?

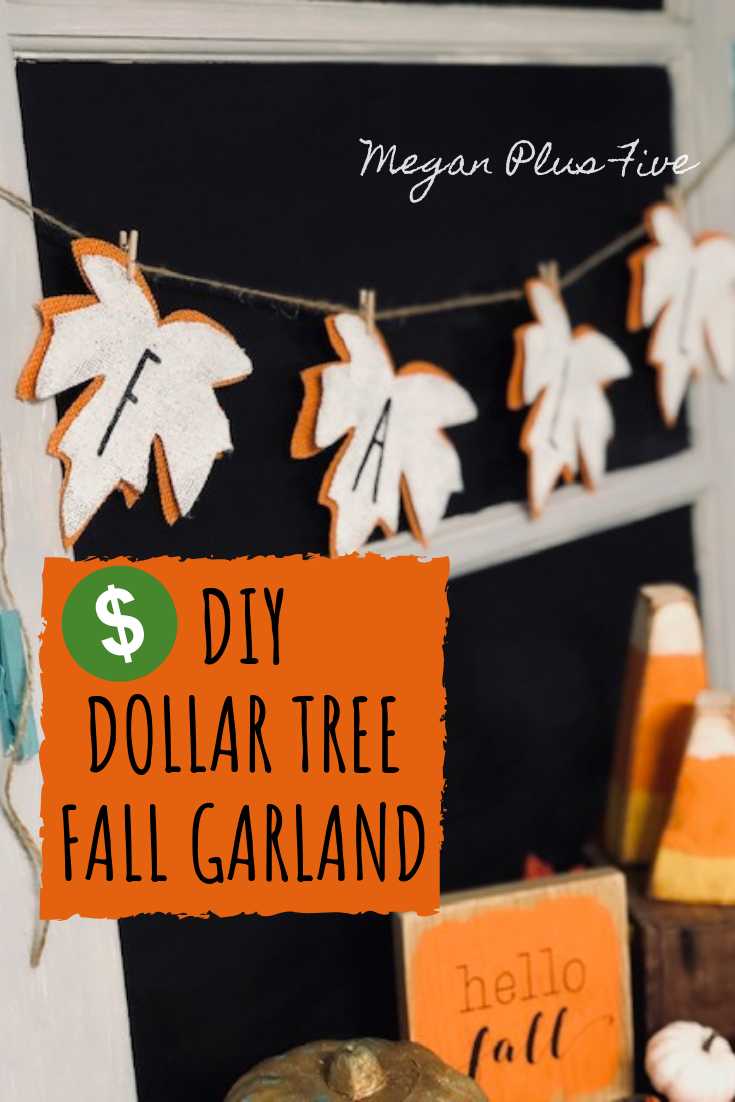
DIY Dollar Tree fall leaf garland

DIY Dollar Tree Fall Garland, easy craft tutorial to make your own rustic decor for the holidays

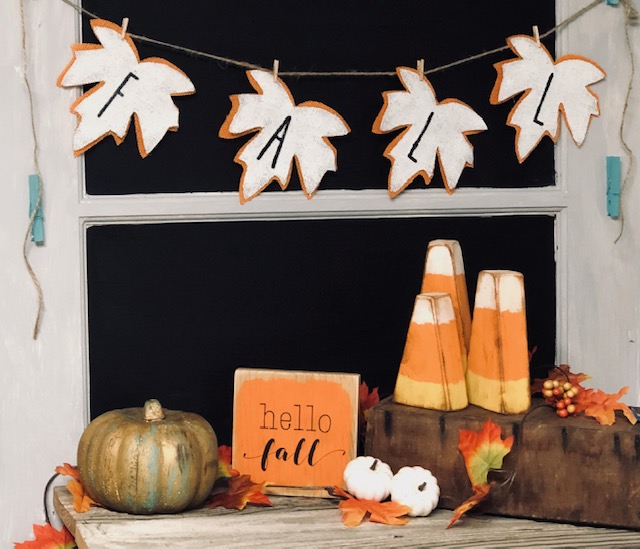
I just can’t get enough of fall décor! Especially when it literally costs me less than $3 to DIY! My four daughters and I went to the Dollar Tree last week to pick up some things for the oldest daughter’s friend for her birthday {see the fun dollar tree inspired birthday gift we made for her } and of course they had some of their Halloween and fall things out. So naturally we HAD to buy a few things to make some DIY rustic décor and a fun Halloween wreath that I can’t wait to start on. I’ve been on a DIY frenzy trying to get all my fall décor made before school starts back up. The last couple of years have had me so busy I didn’t decorate much for fall…or Christmas for that matter {aside from the traditional tree and stockings}. So this year I am making it my mission to bring the holiday explosion to our home, and I’m doing it the frugal way.

Affiliate Disclosure. Some of the links on this website are affiliate links, which means that I may earn a small commission if you click on the link or make a purchase using the link. If you make a purchase you will not be charged anything additional.

How to make your own Dollar Tree Rae Dunn inspired fall burlap garland

How to make your own Rae Dunn inspired fall burlap garland

Here’s what you need to make your own FALL burlap garland

How to make your on Rae Dunn INSPIRED fall garland from the Dollar Tree

Cut out your stencils. I used a skinny type font and my Cricut Design Space. I made them 2.5” tall and cut them out of cardstock. Before cutting them out I made a line in the “A” so that the middle would stay attached while stenciling and I just free hand painted that small part in once I was done.

Remove the wire “stems” from the burlap leaves. For me, the brown ones peeled away super easy but the orange ones didn’t want to come off without taking the burlap with it. So, I used wire cutters on the orange ones.

Because these Dollar Tree burlap leaves are the exact same size you will want to trim up the brown ones so that you have and orange border going around them once you are finished. Just take a small amount off the edge, following the shape of the leaf.

How to make Rae Dunn inspired fall garland on a budget, from the Dollar Tree

Paint the brown burlap leaves white, even the back. The medium sized brush works great for this step. Let dry.

How to make Rae Dunn inspired fall garland on a budget, from the Dollar Tree

After the white paint is dry you can stencil on your FALL letters. I just held my in place and used a pouncing motion like I did on this stenciled canvas tote bag. Take care not to get outside the cardstock lines. If you need to you can use painter’s tape to tape the stencil off so you won’t have any bleed lines {just don’t press the tape down too much so it doesn’t mess up the work you’ve already done ;) }

How to make Rae Dunn inspired fall garland on a budget, from the Dollar Tree

Once your stenciled area is dry you can glue the white burlap leaves onto the orange burlap leaves. I only applied glue to the center of the white leaves. I didn’t want them to be completely glued down all the way around.

How to make your own Rae Dunn inspired Fall garland from the dollar tree

Measure out how long you need your burlap to be then add a few inches so you can loop the ends to hang. Attach your leaves with the mini clothes pins, or you can hot glue the burlap leaves directly on the twine.

How to make your own Rae Dunn inspired burlap leaf garland using items from the Dollar Tree

Then you’re all done! SOOO super easy! And it was super inexpensive! Pair this with these rustic candy corns made from a 2x4 or this DOLLAR TREE painted pumpkin DIY makeover.

How to make your own rustic Rae Dunn inspired fall garland on a budget

Check out the full video tutorial to these Rae Dunn inspired DIY burlap Dollar Tree FALL garland

Need more crafty fall ideas? Click here ——> for more DIY Halloween & fall decor


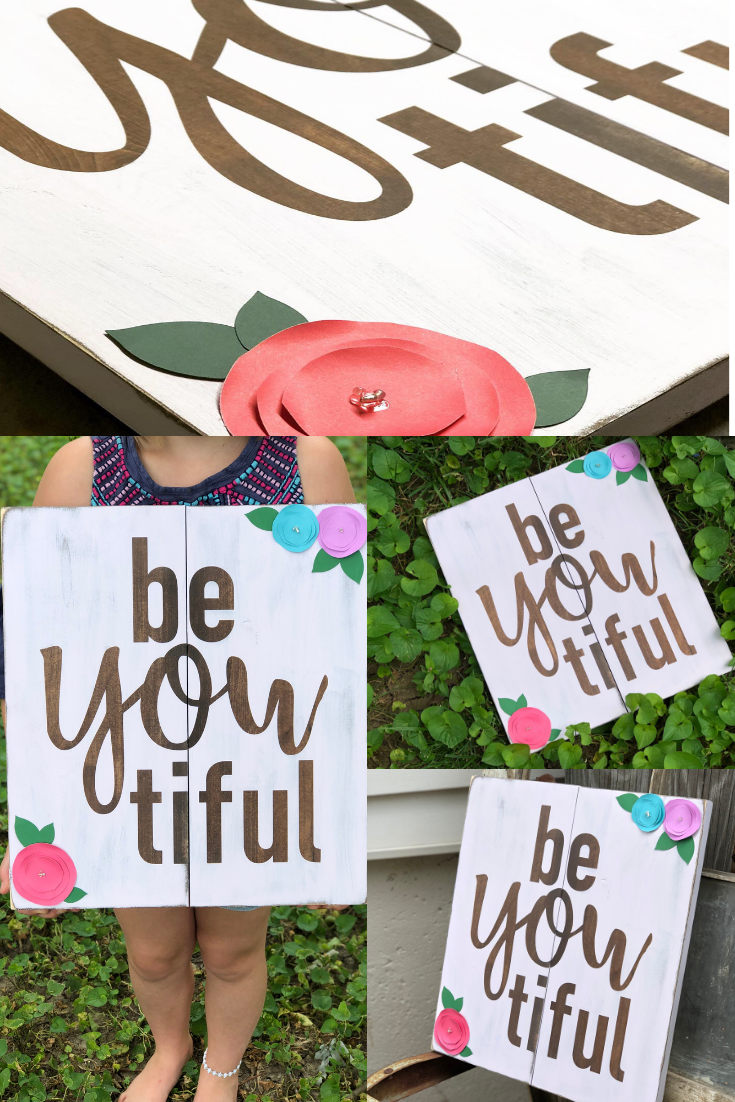
DIY stenciled beYOUtiful pallet style wood sign

DIY beYOUtiful pallet style wood sign

HOW TO REVERSE STENCIL A WOOD SIGN

Being a mom of four little girls isn’t always easy. It’s definitely not constant tea parties and princess power all day every day like some think. It’s a ball of emotions, an unspoken comparison of one another, living in a world that constantly judges them for not being identical. People think that because you have a sister you should be so much alike. Your looks, your personality, the way you learn. That couldn’t be farther from the truth. But honestly our girls have shed some tears over this and it breaks my heart. I try to remind them daily that they are unique and one of a kind amazing humans. One way I try to promote self positivity with our girls is through our home décor.

I had this quote “ be YOU tiful” on our wall right by our front door for years. It was just a quick decal I made up using removable vinyl and after I put it up I was instantly under impressed by it. But I left it up because I wanted our girls to see that message every day when they walked out the door. To remind them that they are them, there is no one else in the world that could ever take their place. That God put them here to be them. Three years passed and I decided it needed to come down and I was going to make a much prettier version, a happier version, one that they will look at and rays of beauty will flow from it.

Click this link to buy your own handmade beYOUtiful sign on my Etsy shop

beYOUtiful wood sign, how to make your own painted pallet sign

Affiliate Disclosure. Some of the links on this website are affiliate links, which means that I may earn a small commission if you click on the link or make a purchase using the link. If you make a purchase you will not be charged anything additional.

I had everything I needed on hand to make this but I’ve included the links where you can get some of these supplies. Yes, those are affiliate links but not to worry, you will not be charged anything extra if you make a purchase through them. They are just a way for this stay at home momma to help with the daily bills of raising our four little girls :)!

Here’s what you’ll need


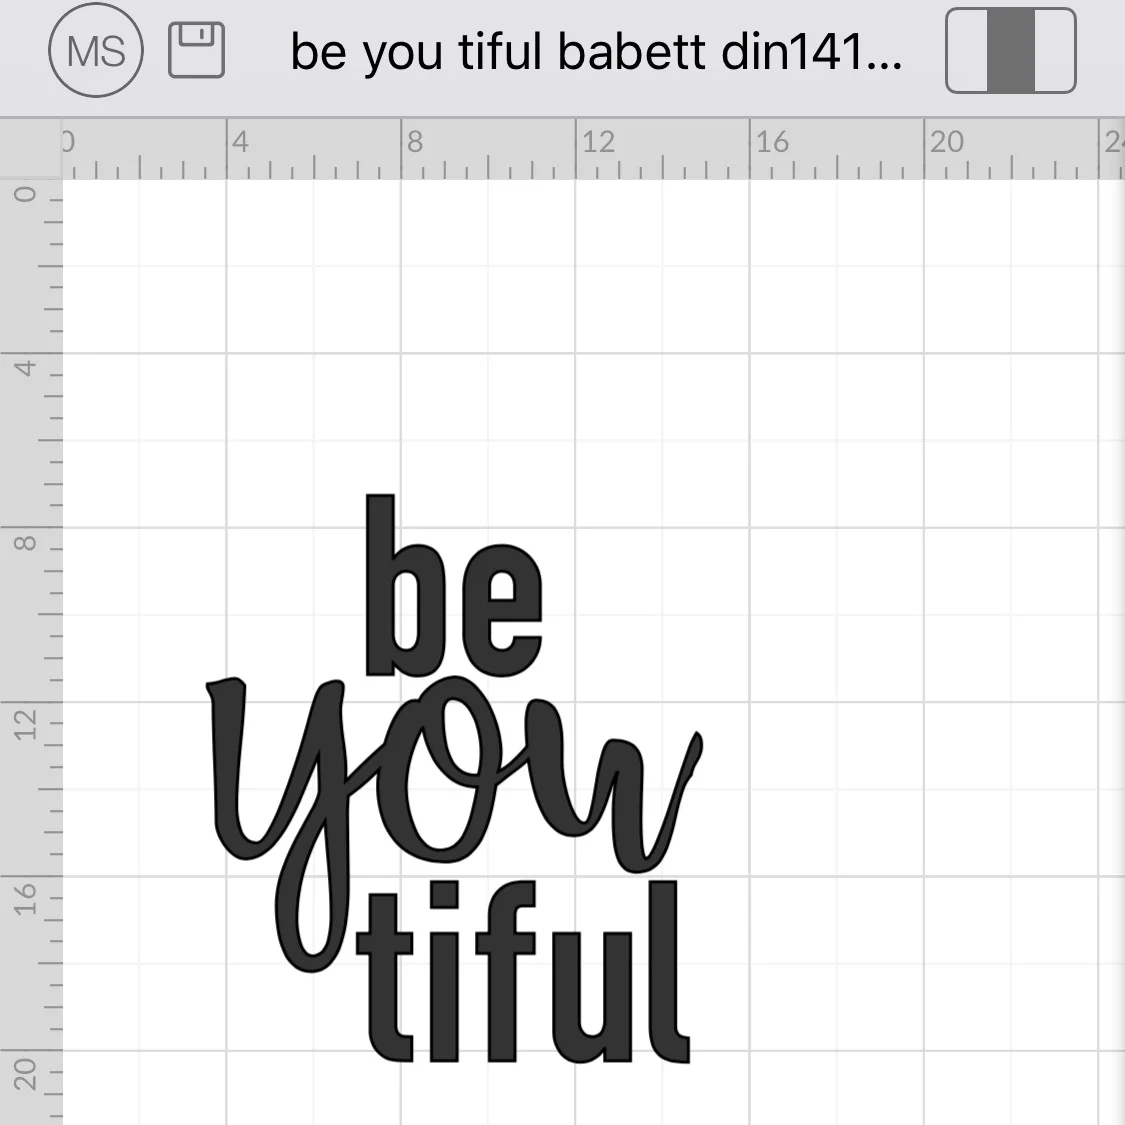
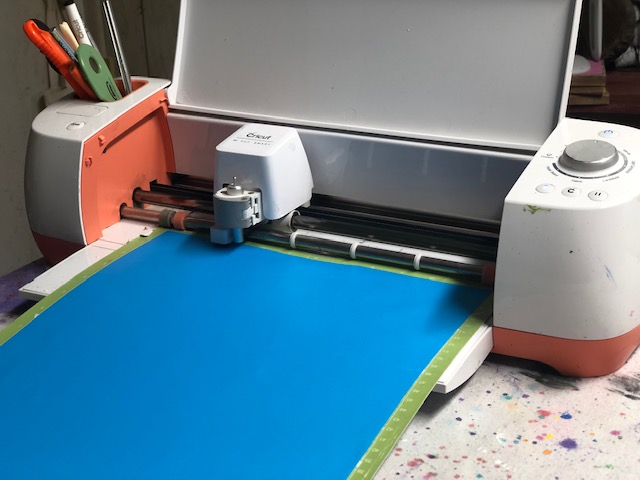
First you want to come up with your design. I use Cricut Design Space for this. My computer wasn’t cooperating so I opened the saved file from the app on my phone and blue toothed my machine and phone together so I could cut it wirelessly {technology has come a long way since growing up in the 80’s and 90’s!}.

Fun note, I actually made this design for our third daughter’s talent show outfit. She was singing Scars to Your Beautiful by Alessia Cara which is an amazing song that tells girls to love all their flaws and imperfections, those are apart of their own beautiful.

beYOUtiful+cricut+design+space

If you’re thinking about getting a Cricut I recommend the Explore, click this link to read more about CRICUT EXPLORE AIR 2 {the difference between the explore and the air is that the explore does not have bluetooth built in so you have to buy this bluetooth cricut adapter, but the air’s have bluetooth already built in so you don’t have to purchase anything extra for it.} but any cutting machine you have that you’re comfortable using will work.

DIY beYOUtiful pallet style wood sign

Follow this link to my YouTube channel for tips on how to stain a wood sign

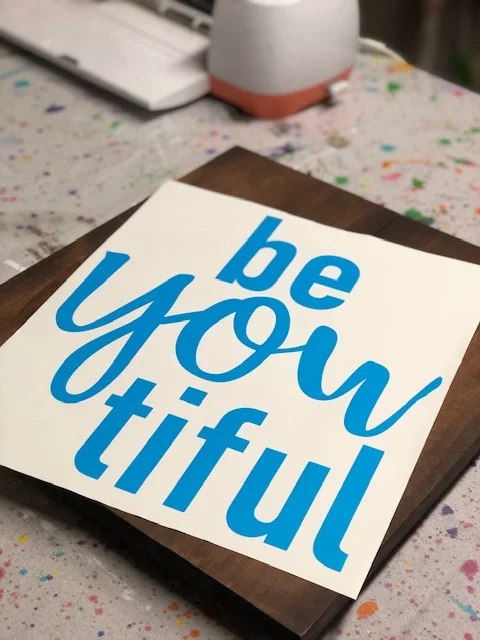
Apply your stencil to a dry prestained board.

DIY beYOUtiful pallet style wood sign

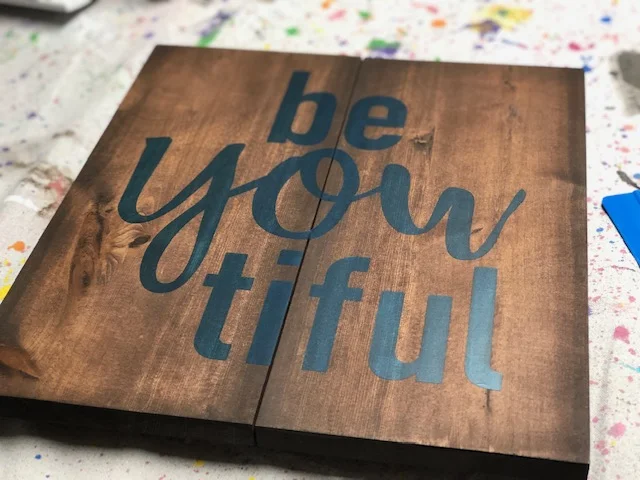
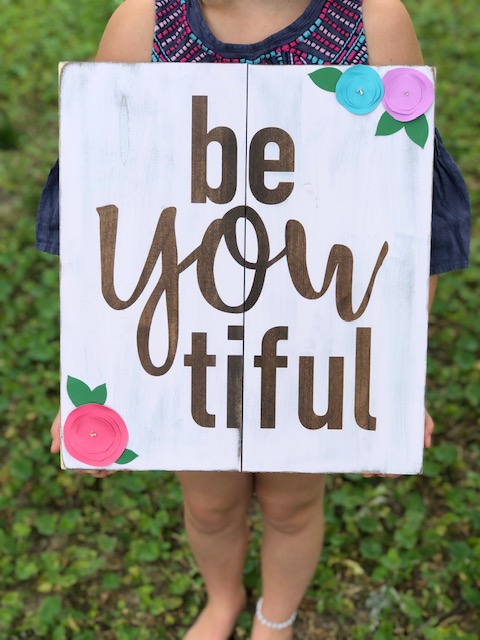
Then paint your board with whatever color you’d like. I wanted a big contrast between the stained wood and the paint color so that the stain would really pop. So I used LILAC colored paint. It’s not too pink/purple but it’s not white, our walls are white so I didn’t want to hang a white sign on the white wall. This color is perfectly shabby chic! See my YouTube video for a full tutorial on how to do this, how to stencil a stained wood sign.

After I stenciled my board and it was totally dry I added these adorable hand cut paper flowers. These little guys are so super easy to make! See my how to make hand cut paper flower tutorial for a step by step guide.

How to make paper flowers to add to a rustic sign
DIY beYOUtiful pallet style wood sign with paper flowers
How to make painted wood signs, all the tips and tricks the pro's won't tell you

If you’ve been wanting to learn even more pro tips on how to make and paint wood signs be sure to get on my waiting list for my Learn How to Paint Wood Signs, all the tips the pro’s won’t tell you.


DIY Light Up Fairy Jar

DIY glittery light up fairy jar. How to make your own fairy lantern from a mason jar and tissue paper. Easy craft tutorial.

How to make your own light up glittery fairy jar lantern

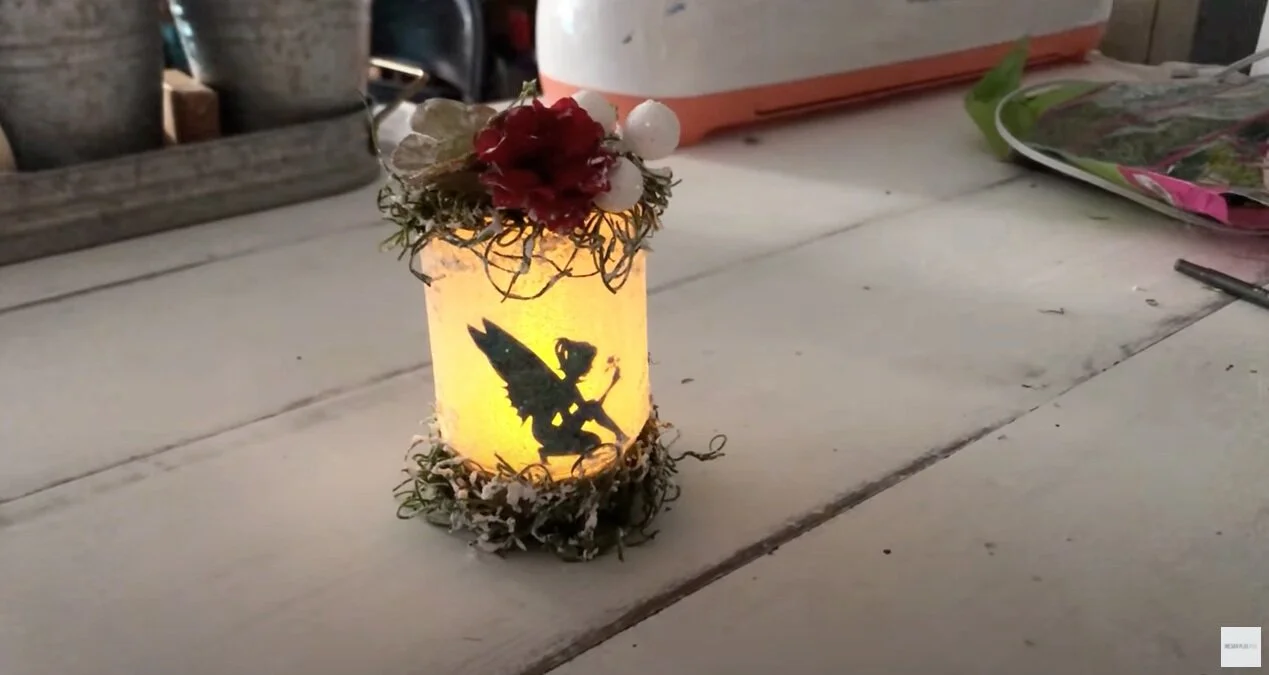
Making your own light up fairy jar is easier than you think. This has been a favorite craft kit in our Etsy shop and for good reason…it’s absolutely adorable! When we had our brick and mortar craft studio this was always a top choice for the kids to make too. There’s really not anything that can top a glowing fairy lantern that’s covered in glitter!

Affiliate Disclosure. Some of the links on this website are affiliate links, which means that I may earn a small commission if you click on the link or make a purchase using the link. If you make a purchase you will not be charged anything additional.

If you love this mason jar craft be sure to check out this adorable DIY UNICORN MASON JAR CRAFT TUTORIAL

Check out this similar MINI version of my DIY LIGHT UP FAIRY JAR…in CHRISTMAS ORNAMENT form. See the video below


If you love crafty video tutorials be sure to subscribe to my YouTube channel


Make your DIY LIGHT UP FAIRY JAR even easier and grab a —-> FAIRY JAR CRAFT KIT <——

I recommend using a LOW TEMP glue gun to attach all your floral accents. This will dry much quicker and be more stable than using the mod podge to glue. Pro tip: using a low temp glue gun is always best when the kiddos are involved. The temp is a lot lower than a high temp glue gun and if they come in contact with either the hot glue or the tip of the glue gun then their skin likely won’t blister. I let all three of my older girls use this type of glue gun all by themselves and although they’ve come in contact with either the glue or the gun they’ve never had a serious issue with them.

If you didn’t grab your own DIY FAIRY JAR CRAFT KIT you’ll need to first cut out your fairy. I used my CRICUT EXPLORE & CRICUT ACCESS for this step. Grab my fairy template from my FREE RESOURCE LIBRARY

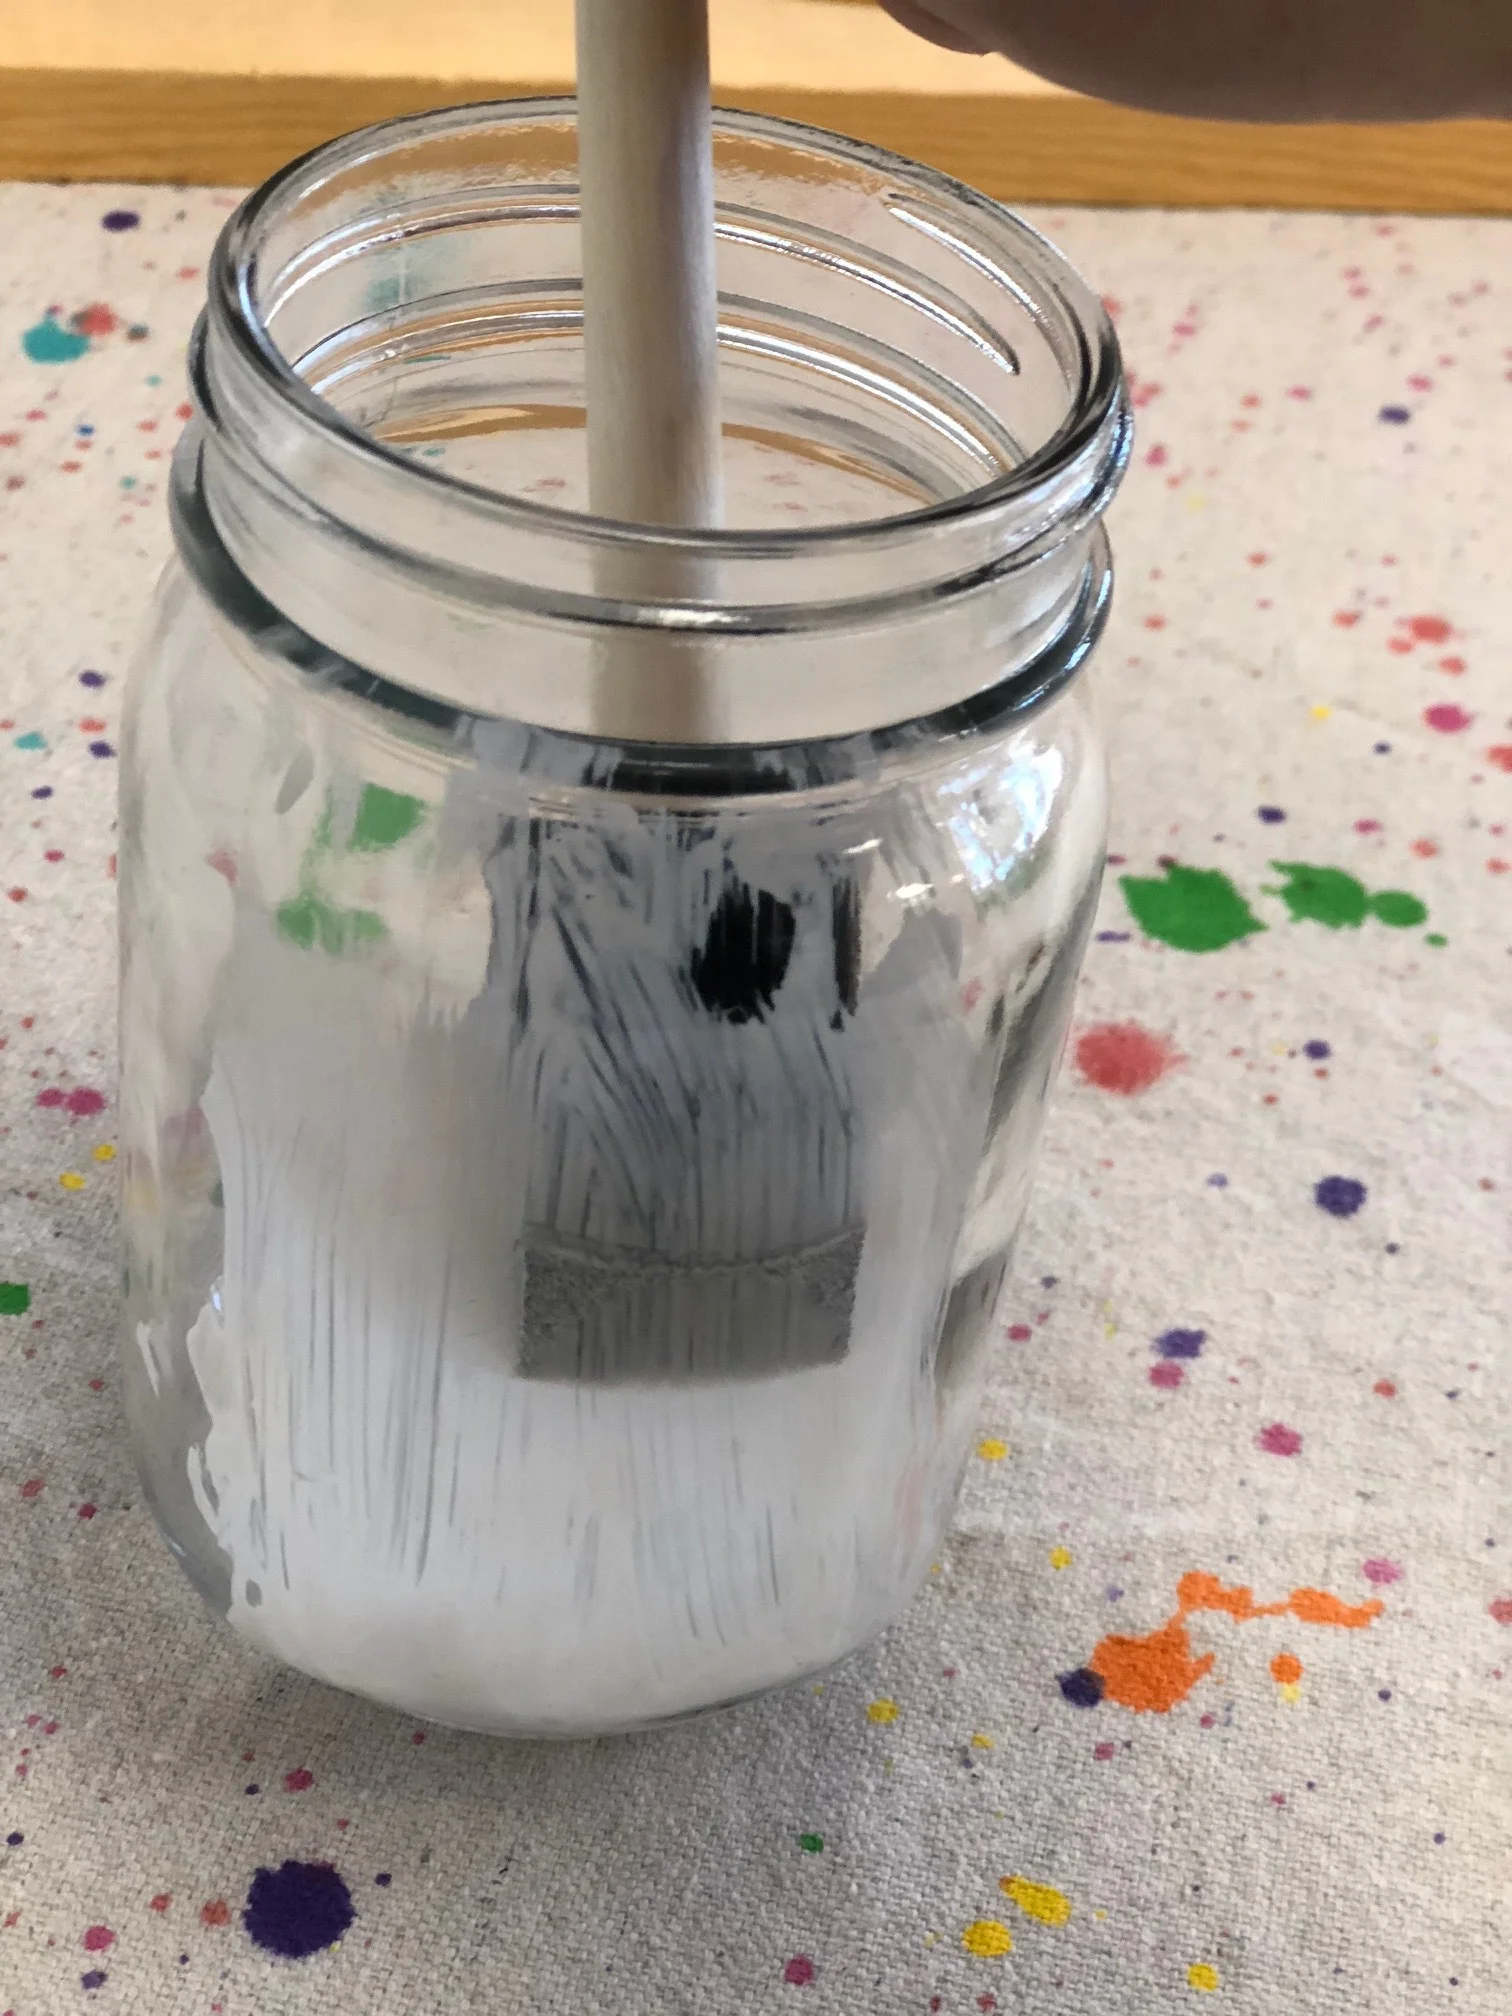
Next apply your mod podge to the INSIDE of one side of your smooth mason jar. This is easier than applying the glue to the cardstock fairy then trying to place it inside of your jar.

Then place your fairy inside, be sure to position it so it's not crooked. Hold the fairy in place with the end of your brush for a few seconds until it’s set.

How to make a light up glittery fairy jar lantern. Use a smooth mason jar, glitter, and tea light to make your own light up fairy lantern. Add some floral accents and you have a perfect fairy jar night light for your fairy obsessed little girl.

If you didn’t grab a craft kit, cut your tissue paper down so it is slightly bigger than your jar. You are going to mod podge this to the OUTSIDE of your jar. I find it easier to glue one side at a time.

Apply a good layer of mod podge to one side of your jar, be sure to get good coverage. Place your tissue paper down and slowly pat it down to work out all the bubbles. If it rips, don't worry this won't be super noticeable as you will be covering the jar in glitter. You will do this all around the jar till it is totally wrapped in one layer of tissue paper

How to make a light up glittery fairy jar lantern. Use a smooth mason jar, glitter, and tea light to make your own light up fairy lantern. Add some floral accents and you have a perfect fairy jar night light for your fairy obsessed little girl.

After you’ve mod podged down your tissue paper trim away the excess where the lid will be screwed on. This makes it easier to get the lid off an on.

Apply a good layer of mod podge around the entire jar. Be sure it's a good layer so it doesn't dry by the time you get all the way around the jar.

How to make a light up glittery fairy jar lantern. Use a smooth mason jar, glitter, and tea light to make your own light up fairy lantern. Add some floral accents and you have a perfect fairy jar night light for your fairy obsessed little girl.

Sprinkle your white glitter all the way around your jar. I typically focus around the corners but there's no wrong way to do this step.

Once your done glittering the outside of your fairy jar turn it upside down on the table and let dry. You will want it completely dry before you start gluing all your accents on.

How to make a light up glittery fairy jar lantern. Use a smooth mason jar, glitter, and tea light to make your own light up fairy lantern. Add some floral accents and you have a perfect fairy jar night light for your fairy obsessed little girl.

Accent time! A grown up will want to help with this part if a glue gun is involved. 

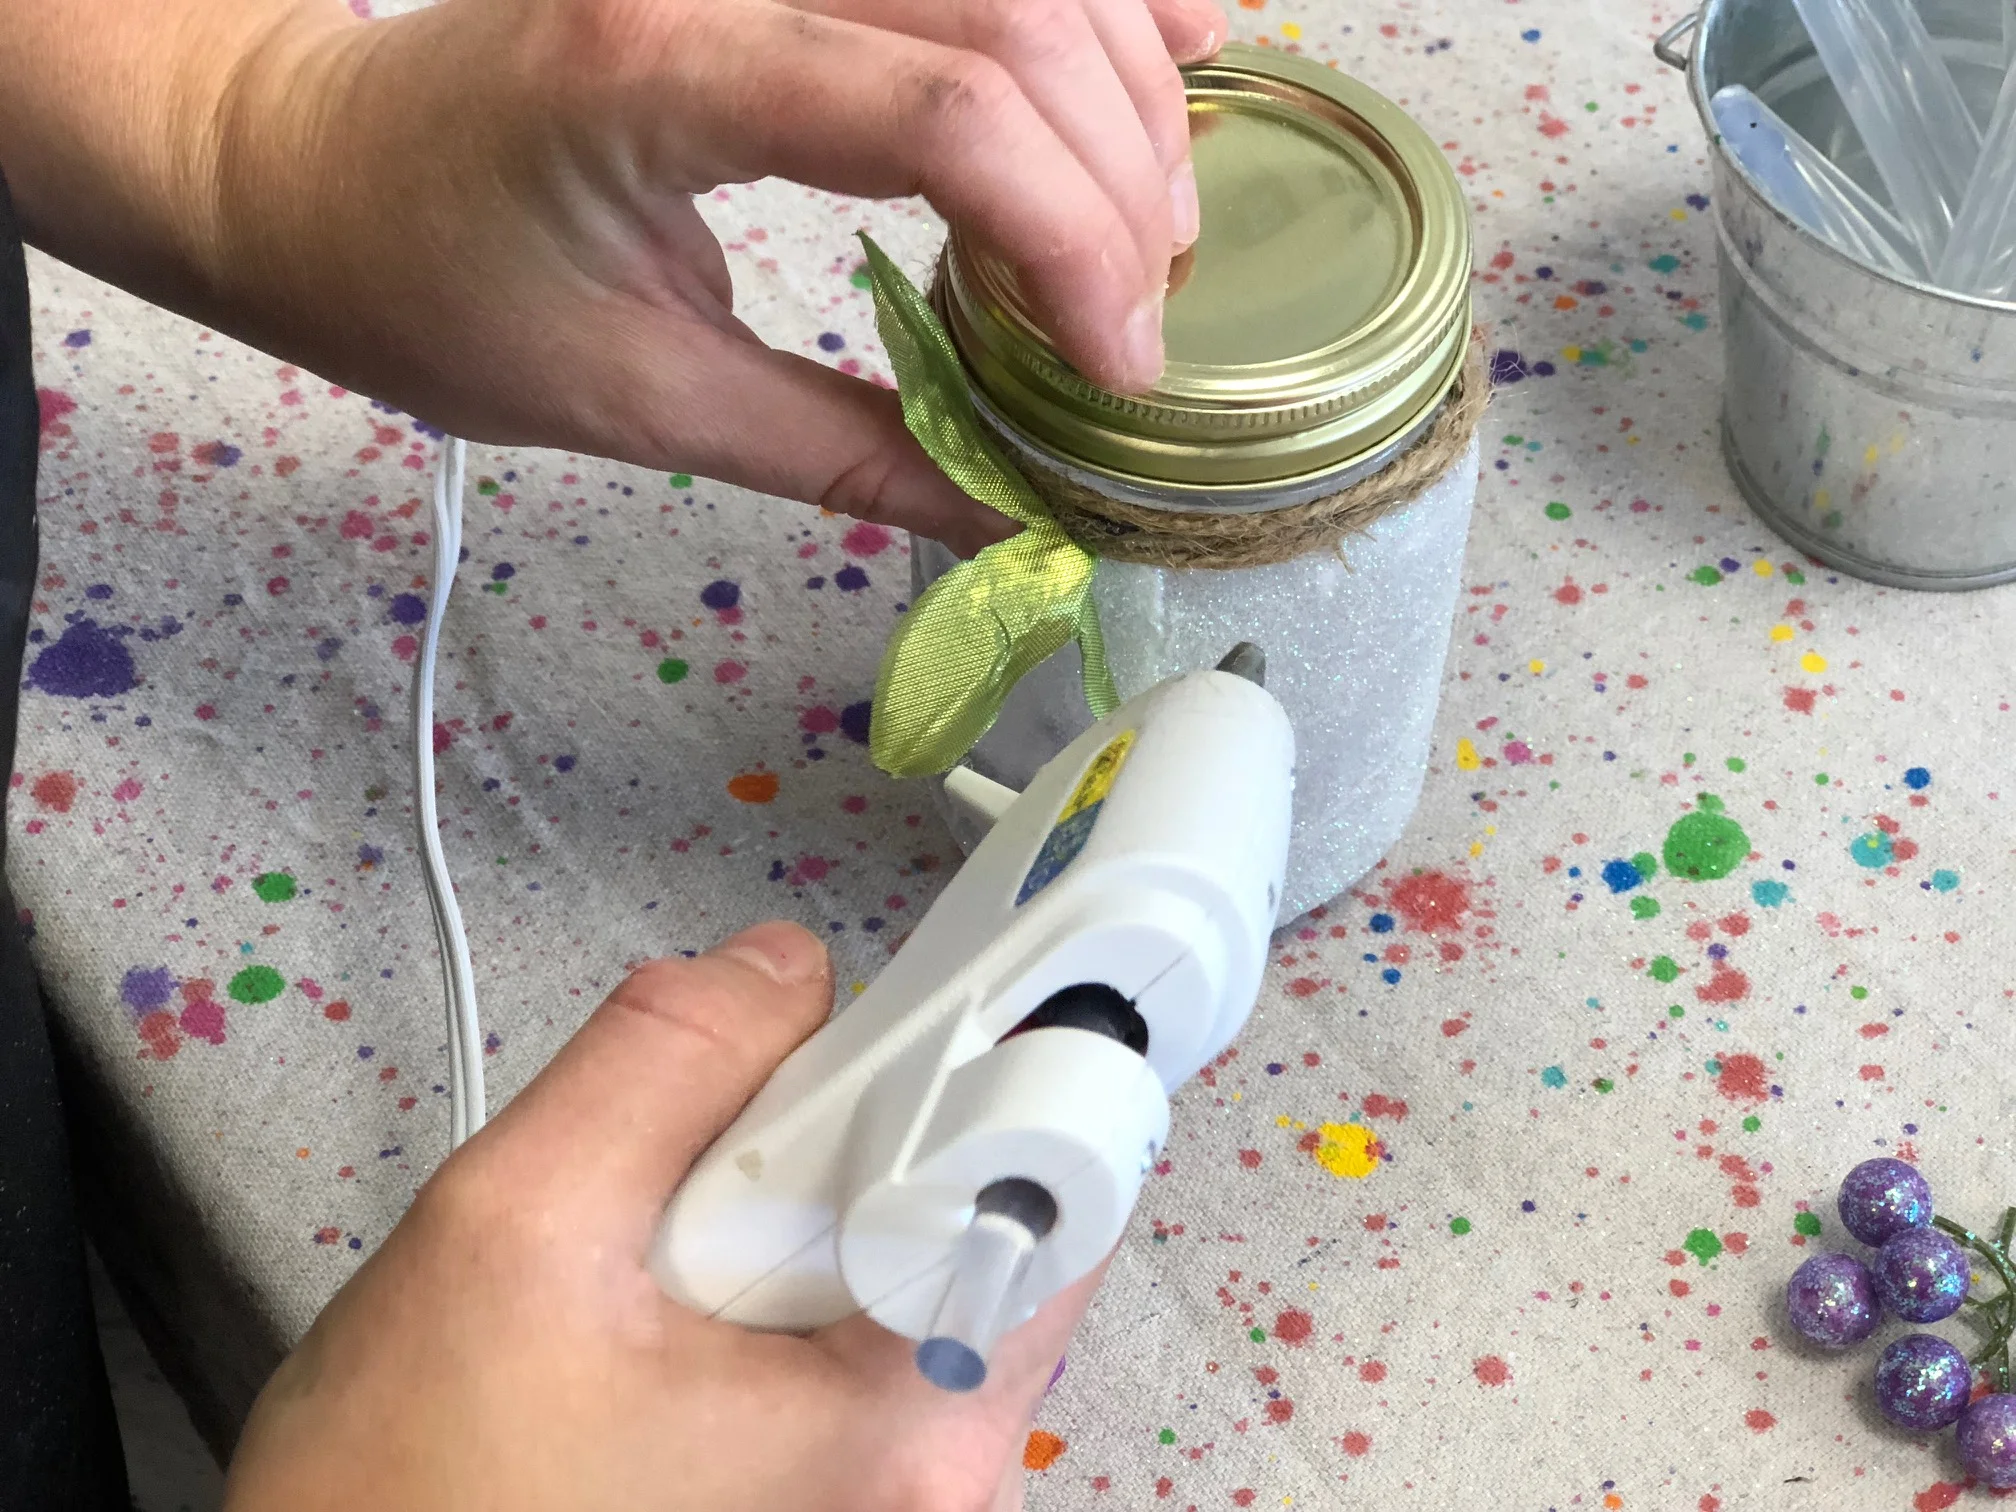
I recommend not hot gluing your twine OR your accents to the lid itself. Gluing it to the lid will make it difficult to get the lid on and off AND your accents are likely to fall off easily if glued directly to the lid. Instead, glue your twine just below the bottom lip at the top of your mason jar.

Using your hot glue gun glue one end of your twine down just below that bottom lip of the jar. Wrap the twine around a few times. Then glue the second end in place.

Now, glue your accents right onto the twine. It helps if you trim down the flower bases so that they can sit flat on the twine.

How to make a light up glittery fairy jar lantern. Use a smooth mason jar, glitter, and tea light to make your own light up fairy lantern. Add some floral accents and you have a perfect fairy jar night light for your fairy obsessed little girl.

Insert your tea light, turn off the lights and you're done! You've just created the cutest little fairy jar light!

Want instant access to my FREE RESOURCE LIBRARY? Fill out the boxes below and get the access code to use ALL of my freebies in my library.