DIY how to make 2x4 wood candy corn

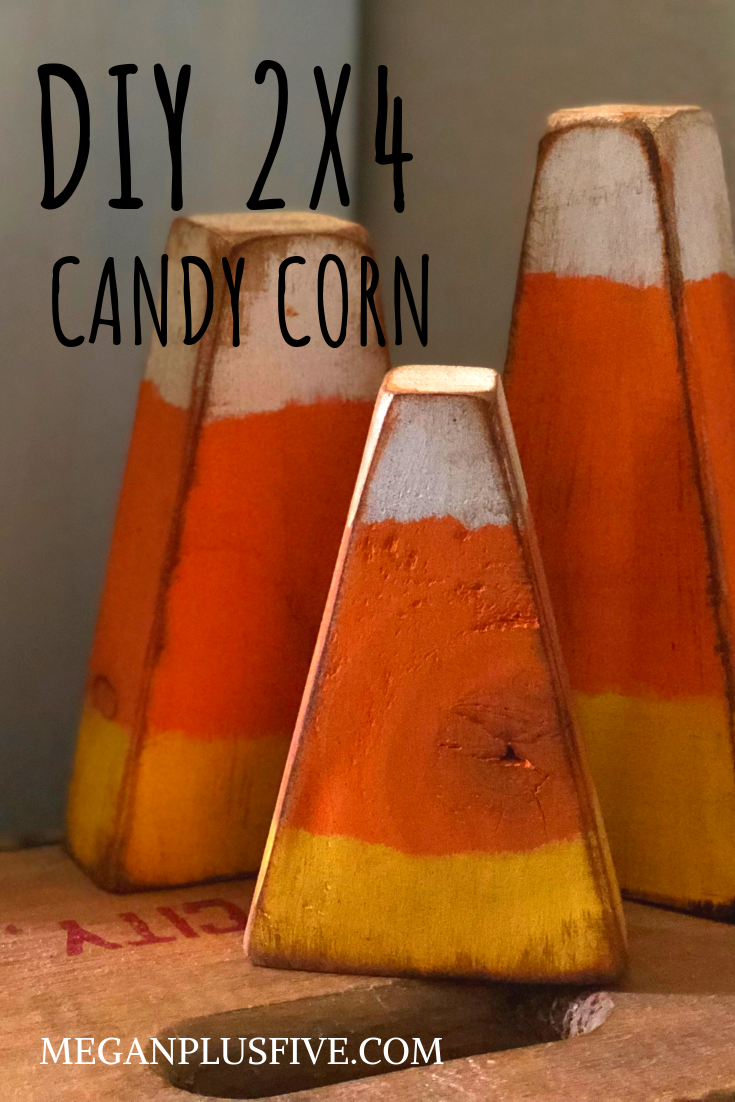
DIY 2x4 candy corn, how to make easy primitive fall decor

DIY EASY 2x4 primitive wood candy corn

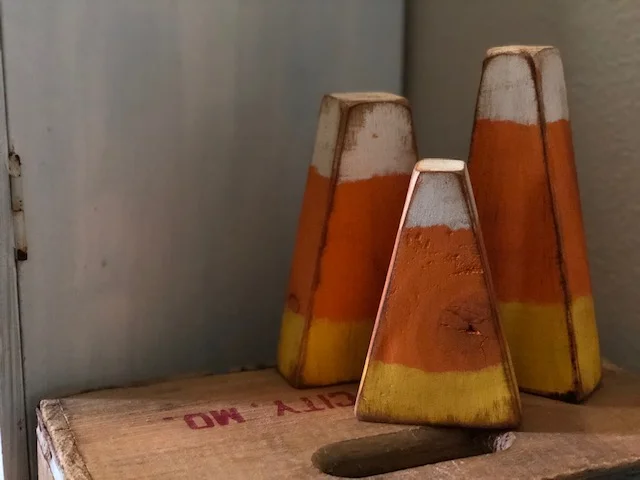
DIY primitive candy corn, aren’t they soooo cute?! The last couple of years have been a little busier than normal at our house and I haven’t been decorating for the holidays like I normally do. So this summer I decided I’m going to make time to get back into the festive decorating. And with that I need to make lots of new pieces to decorate the seasons with. Including these adorable wood candy corn. Check out this fun TRICK OR TREAT shelf sitter set I made a few weeks ago.

I’ve had these on my craft to do list for a looooong time and just hadn’t made time to make myself a set. And now I do! I LOVE them! They turned out even better than I thought they were going to! And I can keep them up for the entire fall season.
DIY easy primitive wood 2x4 candy corn for your fall decorations

How to make your own set of primitive candy corn from a 2x4

And it was super easy to DIY. I was a bit nervous cutting the angles but I think they turned out so great!

If you don’t have the space or tools to DIY this from start to finish you can get one of my easy CANDY CORN CRAFT KIT. Everything you need to make these at home is included in your own candy corn craft kit.

Don’t have all the tools needed to complete this craft? Snag one of my easy DIY craft kit from my Etsy shop. Click CANDY CORN CRAFT KIT to get yours. Want to send it as a gift? During checkout mark that you would like to send it as a gift, leave their address and a sweet note to them and we’ll take care of the rest.

Affiliate Disclosure. Some of the links on this website are affiliate links, which means that I may earn a small commission if you click on the link or make a purchase using the link. If you make a purchase you will not be charged anything additional.

If you want to make them from scratch here’s what you’ll need

First cut your pieces into 4”, 5.5”, & 7” lengths. The angles I cut: 4”= 15°, 5.5”= 10°, 7”=10°. After you cut them give them a quick sanding. You don’t want to sand them super smooth as this will take away so much of the wood’s natural character. Be sure to wipe away the sawdust with a lint free cloth after you sand your candy corn.

DIY candy corn decorations. How this mom made her own from a scrap 2x4

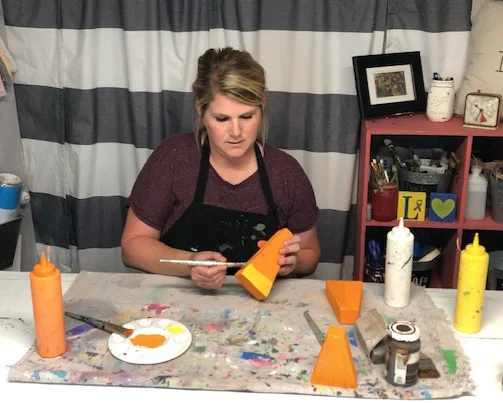
Now paint all three with a thin coat of orange paint.

DIY candy corn decorations. How this mom made her own from a scrap 2x4

After the orange paint dries paint the bottoms yellow. You will likely need 2 coats for this. Let the first coat dry completely before applying the second coat.
DIY candy corn decorations. How this mom made her own from a scrap 2x4

Now, paint the tops white. Again, you'll need to paint two coats making sure your let the first coat dry completely before applying the second coat of white paint.

DIY candy corn decorations. How this mom made her own from a scrap 2x4

Once all of your candy corn are completely dry you can start distressing them with your 120 grit sand paper. Focus on the edges, corners, and lightly sand the fronts and sides. Then wipe the dust away with your lint free cloth.
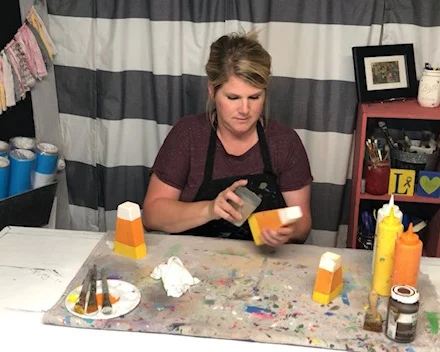
DIY candy corn decorations. How this mom made her own from a scrap 2x4

Now you can apply your antiquing wax. A little bit of wax goes a VERY long way. Just like when sanding, you want to focus more on the edges and corners and give a light swipe with your chip brush on the fronts and sides. TIP: if you trim your chip brush down a little you will get a more stiff brush that you can better control your wax with.

DIY candy corn decorations. How this mom made her own from a scrap 2x4

If you don’t like the look of the antiquing wax you can opt for a clear wax. I LOVE antiquing wax and use it on TONS of my projects it highlights so much of the wood’s character. You can see the difference it makes. Check out my DIY American Flag tutorial where I use this same dark wax.

DIY candy corn decorations. How this mom made her own from a scrap 2x4

Now you’re ready to display them! I am soooo happy with the way these little 2x4 candy corns turned out {I think that’s the plural from lol}! I have a few more DIY fall projects yet to tackle before the season arrives so be sure to check back for more tutorials to make your own decorations for the upcoming season.
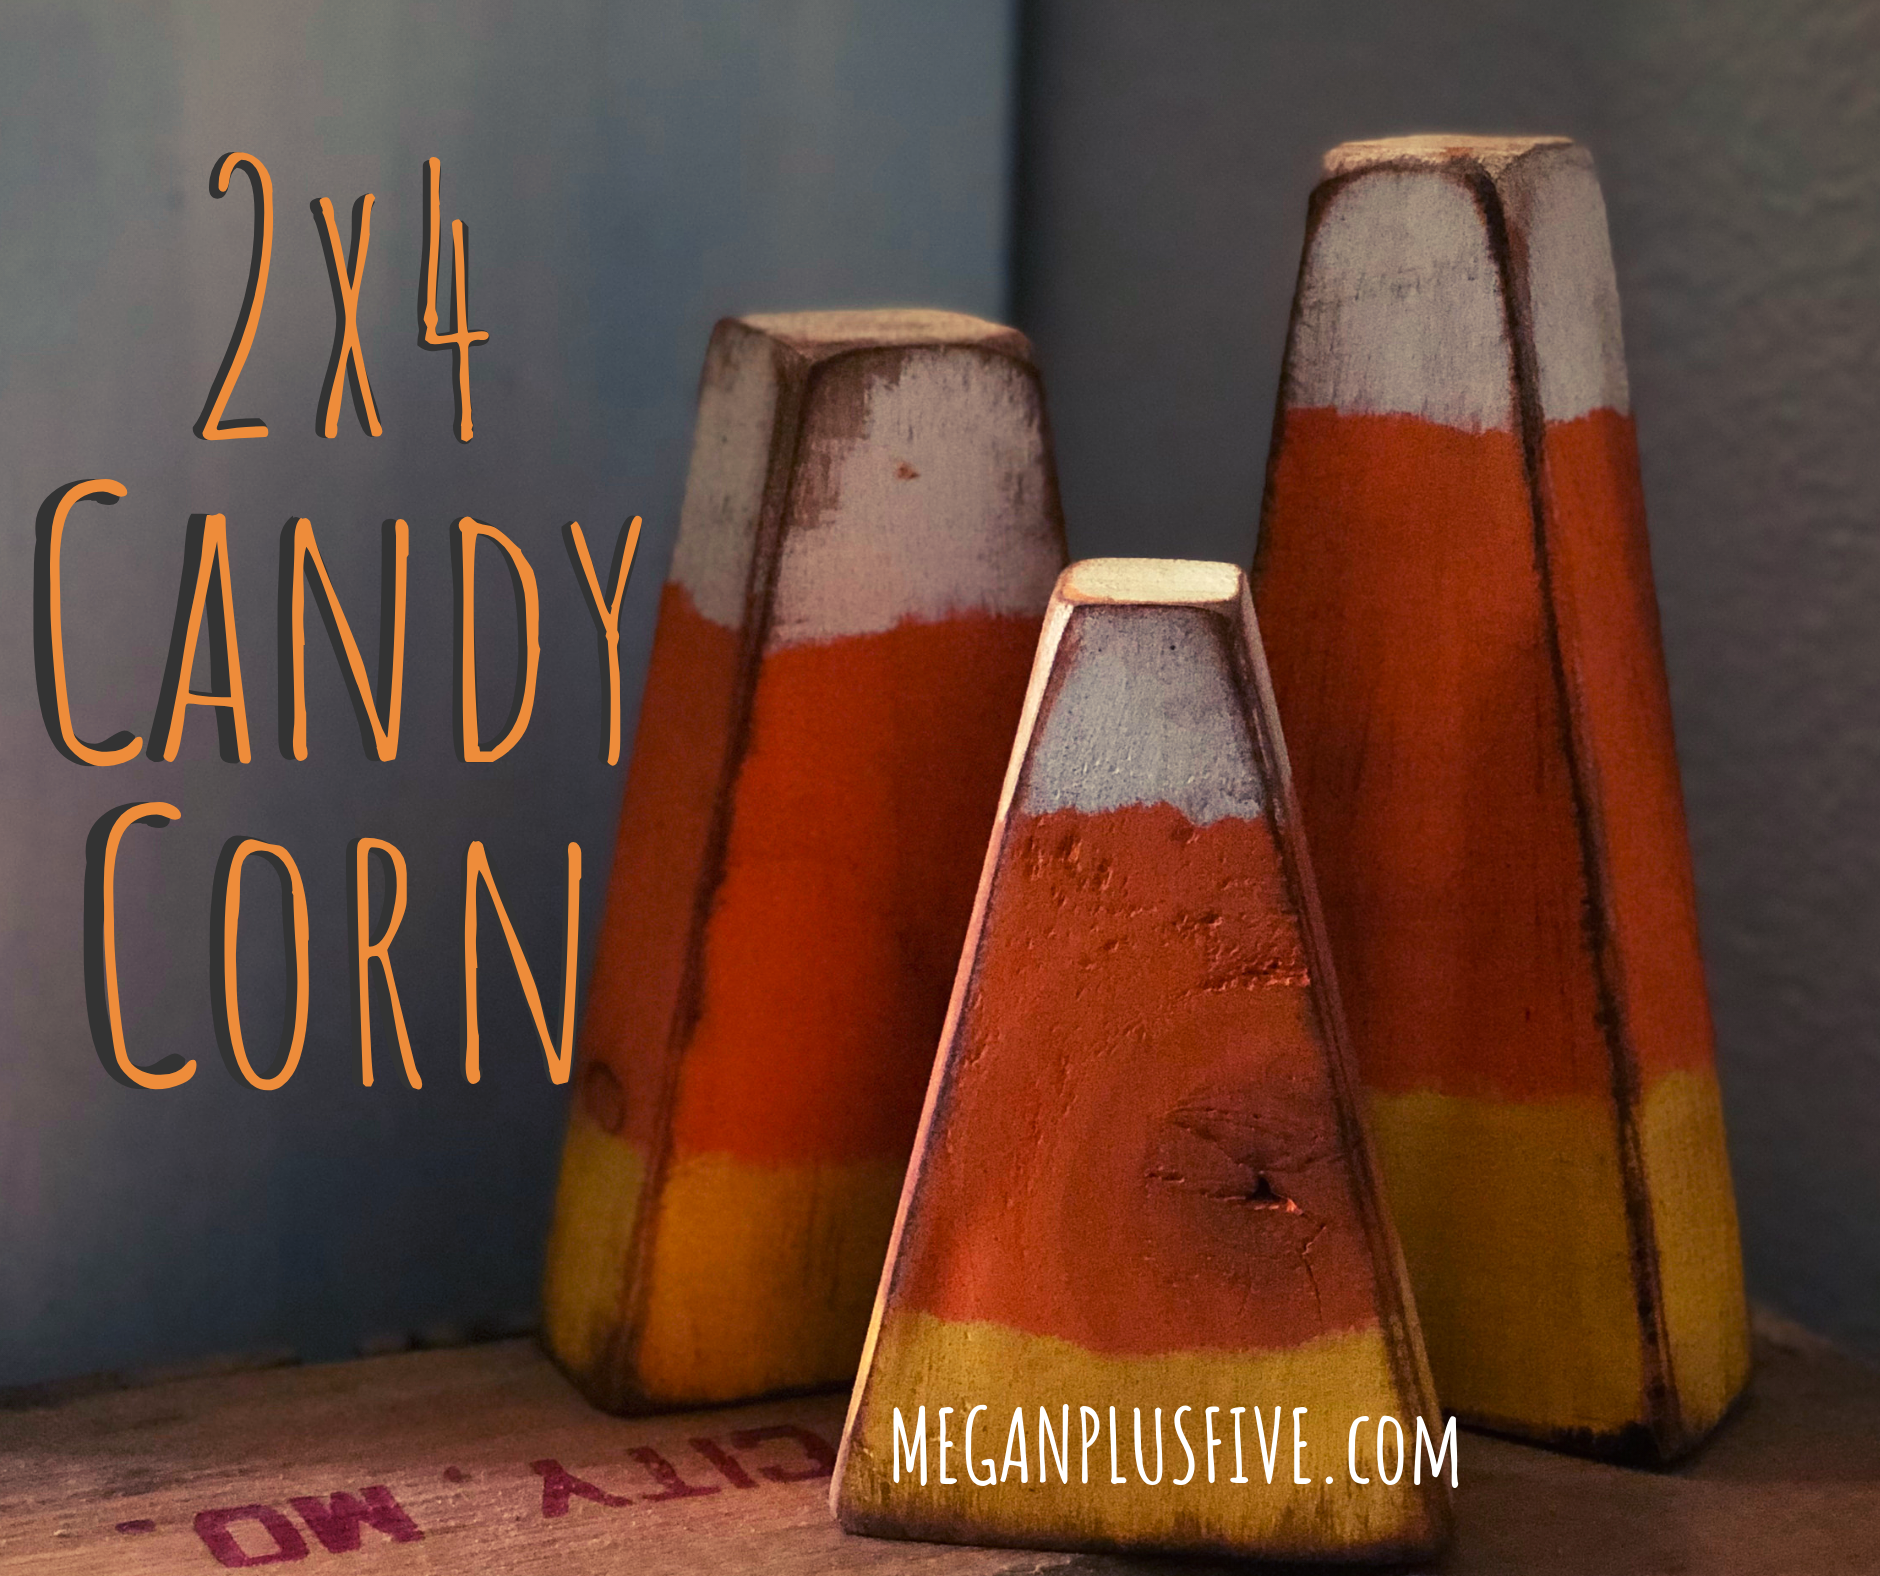
DIY candy corn decorations. How this mom made her own from a scrap 2x4

Catch the video tutorial below. If you LOVE it I would very much love if you would subscribe to my YouTube channel where I share all of my crafty video tutorials.

DIY clearance shoes, how to paint them for fall

how to paint on clearance shoes to make them look wow

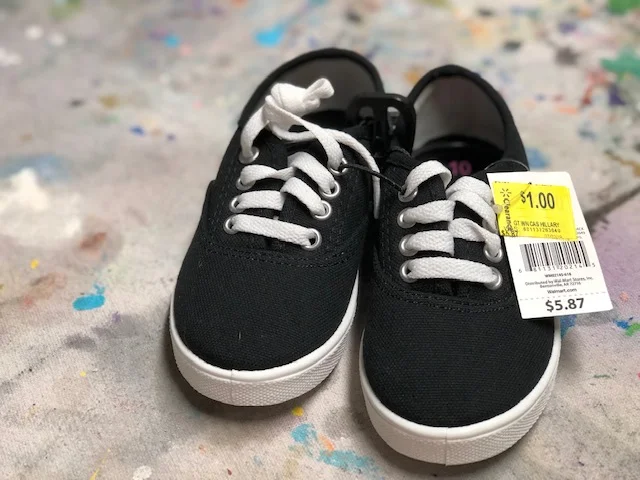
I LOVE the frugal life. So when my friends tagged me in a post about our local Walmart putting select kids clothes and shoes on the $1 clearance rack I couldn’t get there fast enough! Thank you sweet friends btw! Boy did we find some good deals! Including these adorable little black shoes for my 3 year old daughter.

I had never painted on shoes before but I was up for the challenge. Such a perfect blank canvas and even if I mess them up they were only a DOLLAR so it’s totally ok and I wouldn’t feel one bit bad lol.

Affiliate Disclosure. Some of the links on this website are affiliate links, which means that I may earn a small commission if you click on the link or make a purchase using the link. If you make a purchase you will not be charged anything additional.

DIY clearance shoes makeover. How to paint on canvas shoes.

I’m sure I didn’t use the right kind of paint {I used straight acrylic paint, not watered down} but that’s ok. My daughter won’t be wearing them very long, she’s three after all lol so she’ll outgrow them in no time.

Here’s what I used

Pin me for later

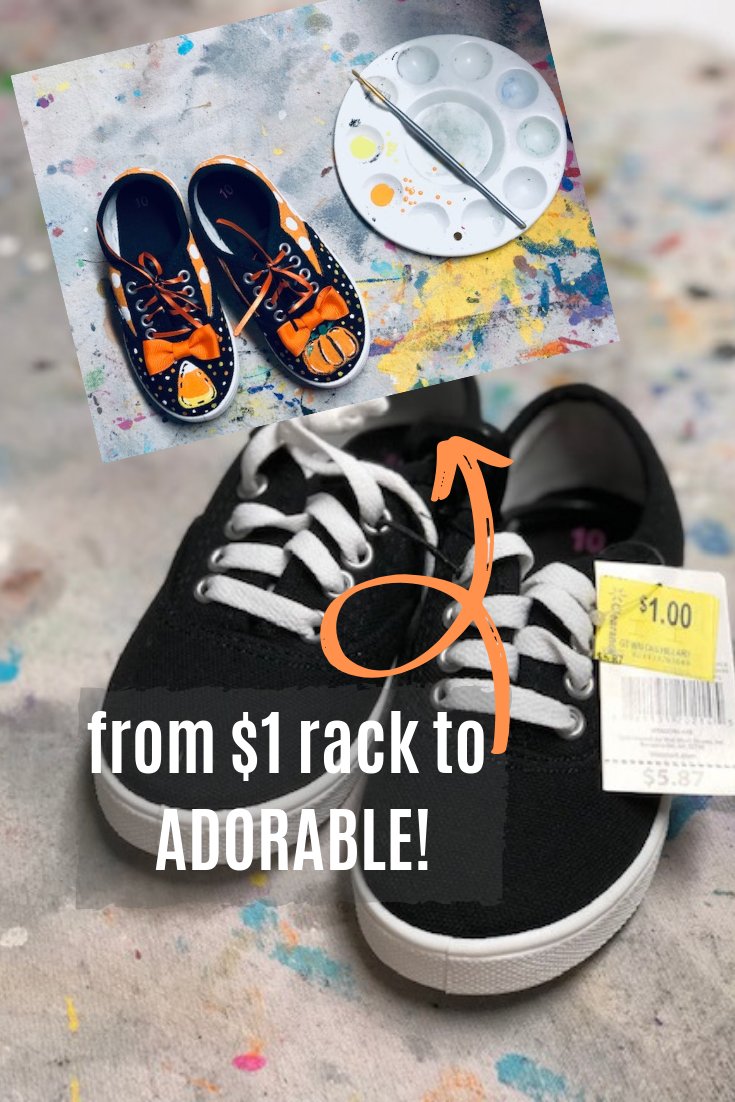
DIY painted shoes. From $1 rack to ADORABLE

How to paint on canvas shoes for fall

1. REMOVE THE LACES before you start painting so you don’t get paint all over them.

2. THEME unless you are just going to let the creative juices flow as you go along it is best if you have a plan prior to painting on your canvas shoes. I had an idea right before I started painting and I ended up changing it up as I went because I wasn’t totally loving the way it looked. I painted more on the back and sides and moved the bows and added the front dots after I filmed this tutorial. I LOVE the way they turned out and more importantly my toddler does too!

3. PAINTING TIPS

  • if you are painting on black shoes it is best to paint a base layer of white then once that’s dry paint the actual color you want. So on mine I wanted the backs orange, I painted them white first then after they dried I painted them orange. This will help your colors to not be dark and diluted.

  • use a variety of brush sizes to fit your painting needs

  • don’t use too much paint. Paint in thin layers and if doing more than one layer only paint over dry paint.

  • paint pens are your friends <3 ! I used paint pens to add the lines on the candy corn and pumpkin after painting them their main colors.

  • use both end of your paint brush. I used the non brush end of my brush to make the small dots on the front of the shoes. This was the perfect size for these cute little dots.

4. ADDING ACCENTS if you add any accents E6000 works great to have a long lasting hold. I’ll warn ya though, it doesn’t dry fast at all.

5. LACES I opted for a more untraditional lace for these shoes but you can keep the original laces in. I thought they would be too white for this pair so I traded them out for 2 thin pieces of ribbon in orange and black on each shoe. They actually hold up pretty well too! And this type of ribbon is really inexpensive so it wouldn’t cost much to replace if I need to.

Didn’t these clearance shoes turn out sooooo adorable?!!! I wasn’t sure how I’d like that they don’t match on the fronts but I actually do love it. It screams “I don’t have perfection issues” lol!!!

DIY how to paint Walmart clearance shoes to give them an upgrade

I hope you find this tutorial helpful for your shoe painting adventure! I’d love to see how yours turn out! Share a pic in the comments.

Check out the video tutorial below

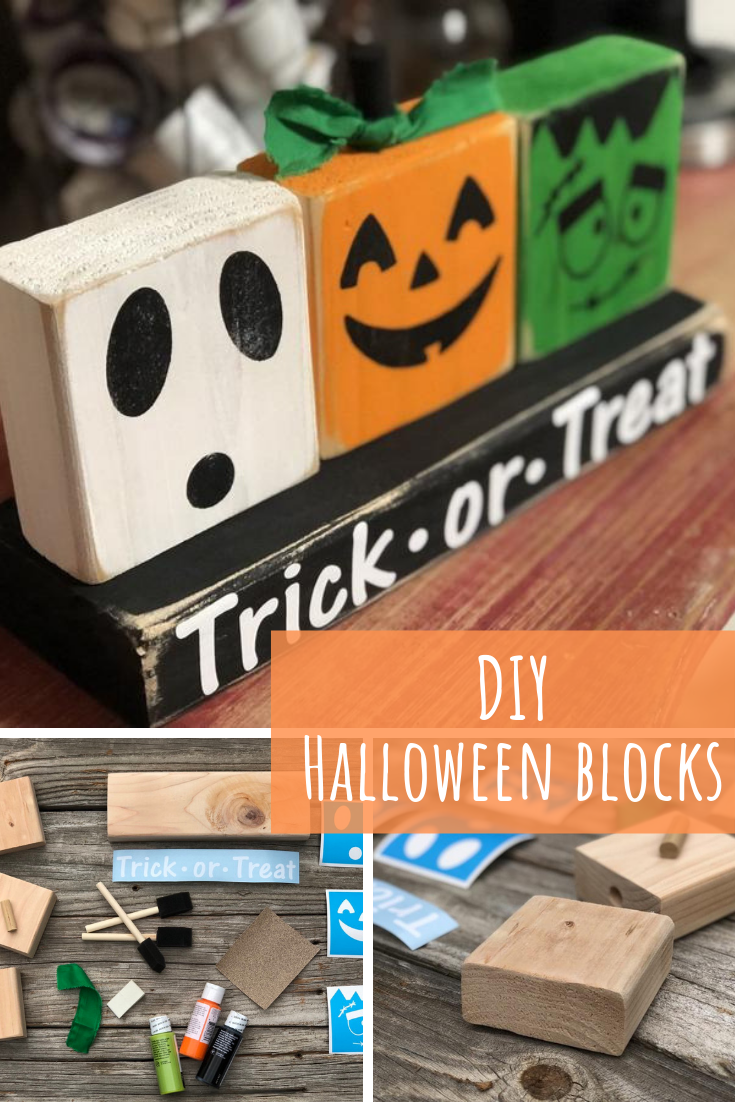
DIY 2x4 painted Halloween blocks

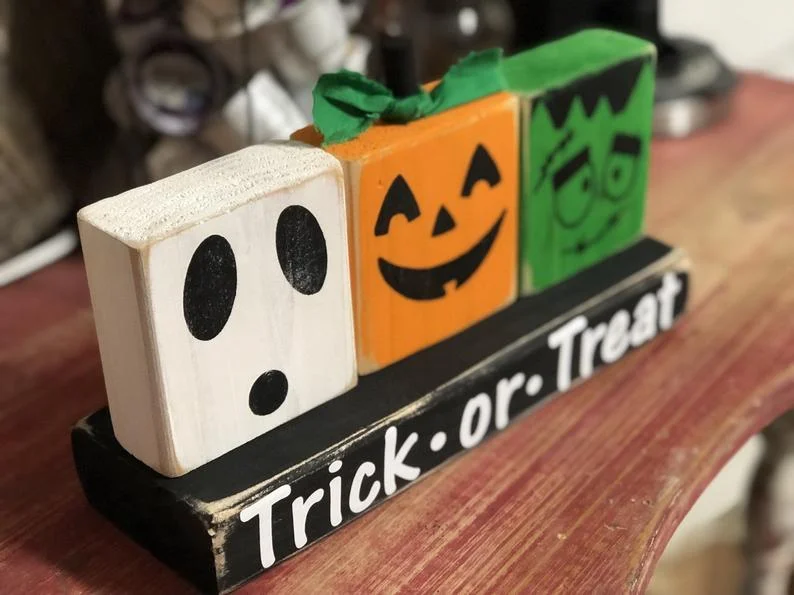
DIY Halloween shelt sitter 2x4 craft. How to make Halloween Decor, ghost, pumpkin, Frankenstein trick or treat craft

Easy Halloween Craft for Adults

Oh my goodness! I can’t believe it’s already time to start thinking about Halloween! Last year I was so crazy busy I didn’t hardly have time to decorate our home for fall let alone get new craft kits put together and listed in our Etsy shop. So this year I’m getting a super early start on all my DIY Halloween décor. And I’ve started with this super cute 2x4 craft.

Already know you want this? Skip this article and get your DIY HALLOWEEN CRAFT KIT

Cute Halloween shelf sitter DIY craft kit for adults

I try to keep my craft kits pretty simple and easy to DIY and this one is no exception. This craft really takes me back to my childhood watching my grandma make all her primitive décor. She could free hand ANYTHING and it always looked amazing. But not to worry because with this craft kit you won’t have to free hand a single thing and your craft will turn out just as AMAZING!

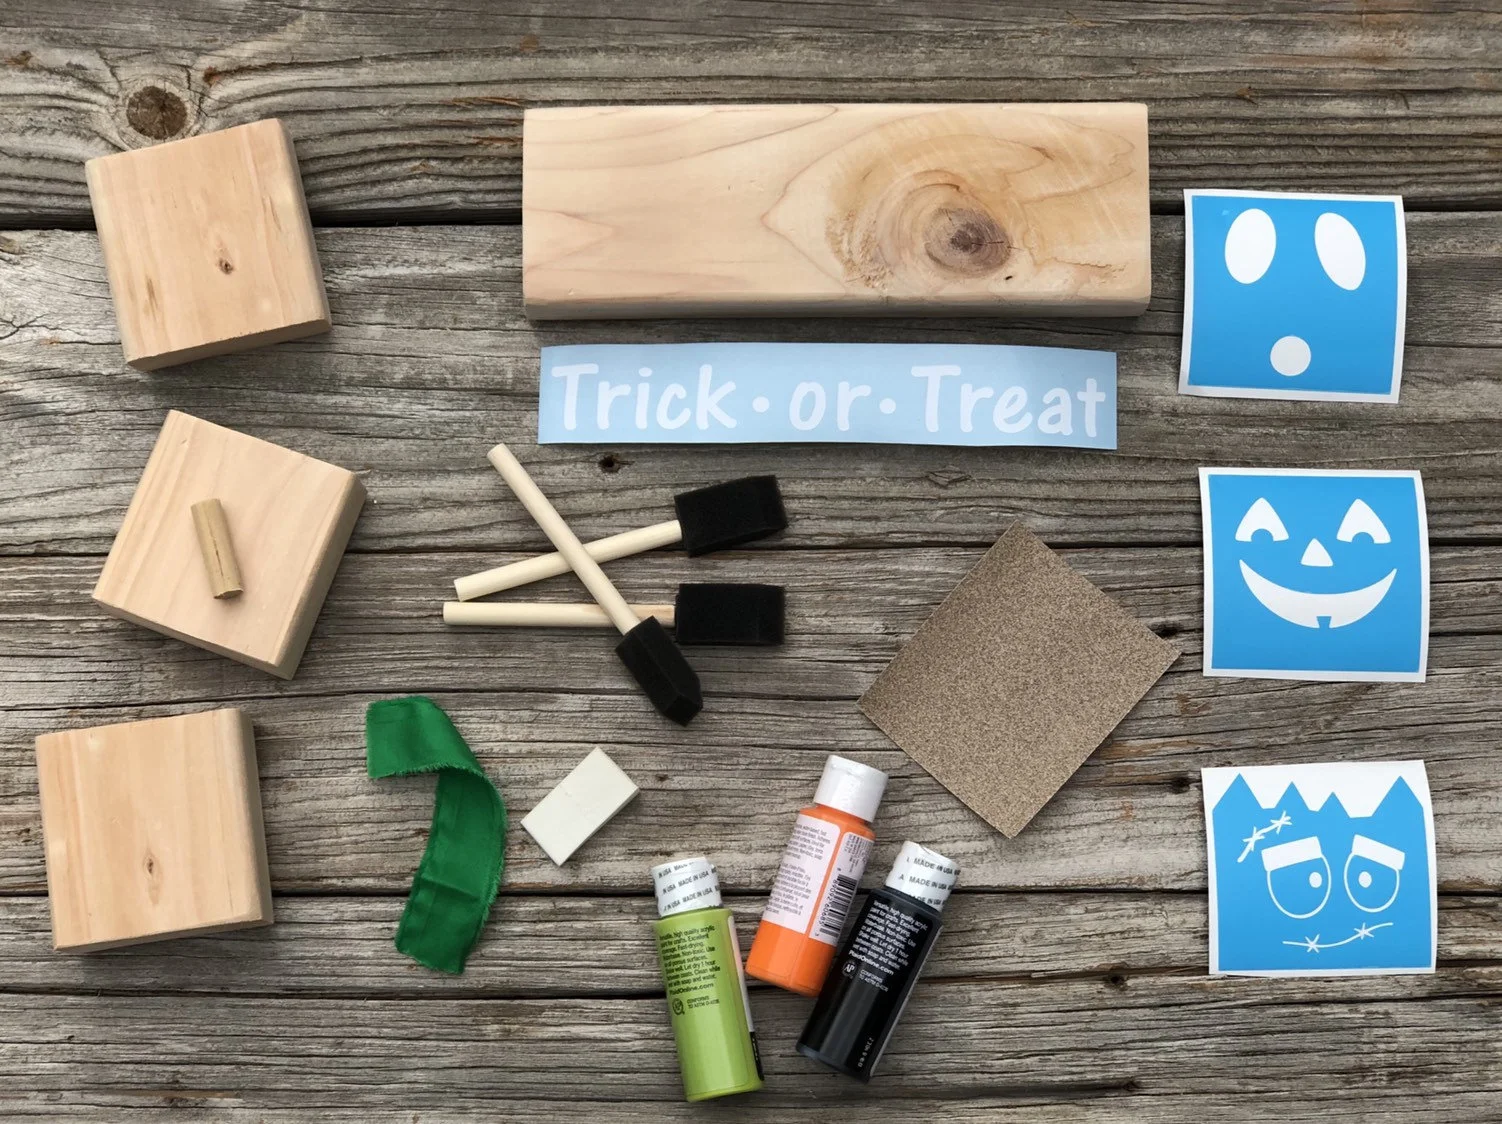
So, what comes in this Halloween craft kit?

DIY Halloween craft kit for adults. How to make 2x4 crafts for Halloween

BASIC KIT includes
• 3 - 3.5x3.5x1.5 pre-sanded blank wood pieces
• 1 - 10.5x3.5x1.5 pre-sanded blank wood piece
• 3 stencils: ghost, pumpkin, frankenstein {no transfer tape attached as these are little detail and do not require it to transfer on to wood}
•wood stem
•fabric piece {color will vary}
•professional quality vinyl decal: Trick •or• Treat
•detailed instructions PLUS a video link for video instructions on our DIY website.

PREMIUM KIT includes
•basic kit
• acrylic paints: black, white, orange, green
•sandpaper
•3 sponge brushes
•stenciling sponge


Grab your girlfriends, some wine and catch up while each making your own set of these adorable ghosts, pumpkins, and Frankensteins.

Already have the paint/brushes and just need the wood and stencils? Perfect! You get to choose the type of kit you receive, pick from basic or premium. No matter which kit you choose it will come with printed picture instructions and a video link, in case you need a little more visual {which is totally the kind of learner I am!}.

Click the link ——> DIY HALLOWEEN CRAFT KIT to snag your craft kit before the holiday season so you are just as prepared as I am this year.

If you love more traditional Halloween décor check out these super cute DIY wood pumpkins

DIY 2x4 glittered pumpkins

DIY glitter pumpkins. How to make your own nontraditional pumpkins for fall.

How to make 2x4 glitter pumpkins

These 2x4 pumpkins are one of the easiest fall crafts you can make yourself. If the glitter and sea blue isn’t really your thing you can make these more traditional rustic orange and white pumpkins I posted last year. But I really wanted to make a set of nontraditional glittery pumpkins, well because why not? I love rustic décor but I also LOVE glitter! So I went for it and I’m so glad I did because they turned out soooo super cute!

Affiliate Disclosure. Some of the links on this website are affiliate links, which means that I may earn a small commission if you click on the link or make a purchase using the link. If you make a purchase you will not be charged anything additional. This is just a way I can help add to our family finances to raise our four daughters. Please know I would never recommend a product or service I do not totally stand behind.

You’ll need a few power tools for this DIY craft and I recommend hands down using Ryobi power tools, you can read my article on what power tools does a crafter need?

No matter what style of decorating you have these pumpkins are really fun to make and if they don’t fit in with your décor you can always gift them to a loved one.

Don’t have time to DIY them but NEED them in your life? You can buy a set of these glittery pumpkins in our Etsy shop.

Here’s what you’ll need

DIY 2x4 glittered pumpkins how to make untraditional pumpkins for fall

So, how do you make these gorgeous nontraditional fall glitter pumpkins?

First you need to cut your 2x4 into 3 pieces. You’ll need a 7”, 5.5”, and a 4”. These are the sizes I used and they seem to be the perfect size. Give them a quick sanding to knock down the rough edges. I used my Ryobi Cordless Sander for this but you can use a piece of 120 grit sand paper.

Next you need to drill a hole for your stems. I matched my stick up to a drill bit that was about the same size. Drill a hole in the middle of each top of your pumpkins.

DIY 2x4 glittered pumpkins. How to make a nontraditional set of pumpkins for fall.

Then paint each pumpkin. I painted the largest and smallest blue and the middle sized one gold. Be sure to let them dry COMPLETELY between coats.

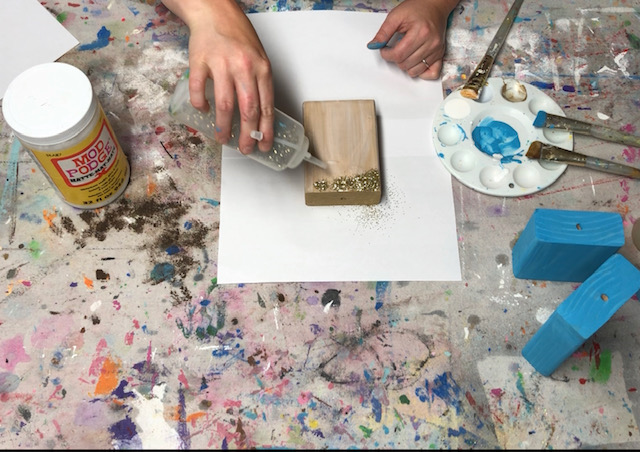
Once your gold pumpkin is dry add a layer of Mod Podge to the front of it, be sure you get an even coat. Then add glitter right on top of that. I place paper under my projects when using glitter to catch the excess that doesn’t stick. Then I empty it back into the glitter container.

DIY 2X4 gliltter pumpkins. How to make nontraditional pumpkins for fall.

Using the round sponge brush add some circles to the smallest block. I used both ends of the brush to add two different sizes of circles.

DIY 2x4 glitter pumpkins. How to make nontraditional pumpkins for fall.

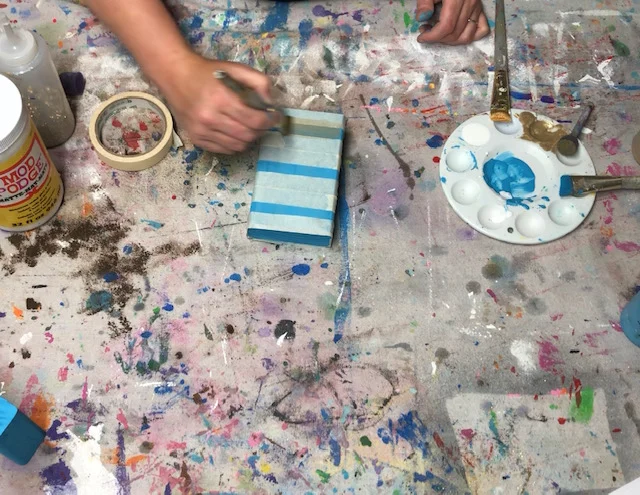
Tape off the largest pumpkin so it has 3 stripes. Paint a thin layer of gold, let dry.

DIY 2x4 glitter pumpkins. How to make nontraditional pumpmkins for fall.

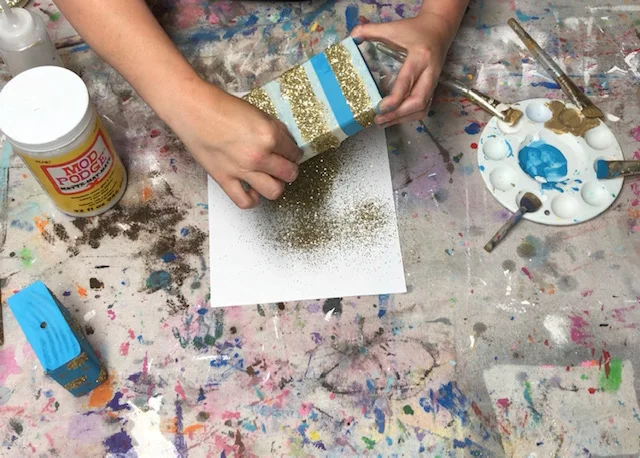
Add a layer of Mod Podge to the large circles then add glitter. Add a layer of Mod Podge to the gold stripes, add glitter, then peel the tape off carefully.

DIY 2x4 glitter pumpkins. How to make nontraditional pumpmkins for fall.

Add a dab of glue inside the hole you drilled then place the stick inside. Doing it this way will give your stick more stability.

DIY 2x4 glitter pumpkins. How to make nontraditional pumpmkins for fall.

Add a piece of rustic wire and a scrap piece of fabric and you’re done. Super easy!

DIY 2x4 glitter pumpkins. How to make nontraditional pumpmkins for fall.

Click below for the full video on how to make your own nontraditional glitter 2x4 pumpkins

Easy pine cone door hanger DIY

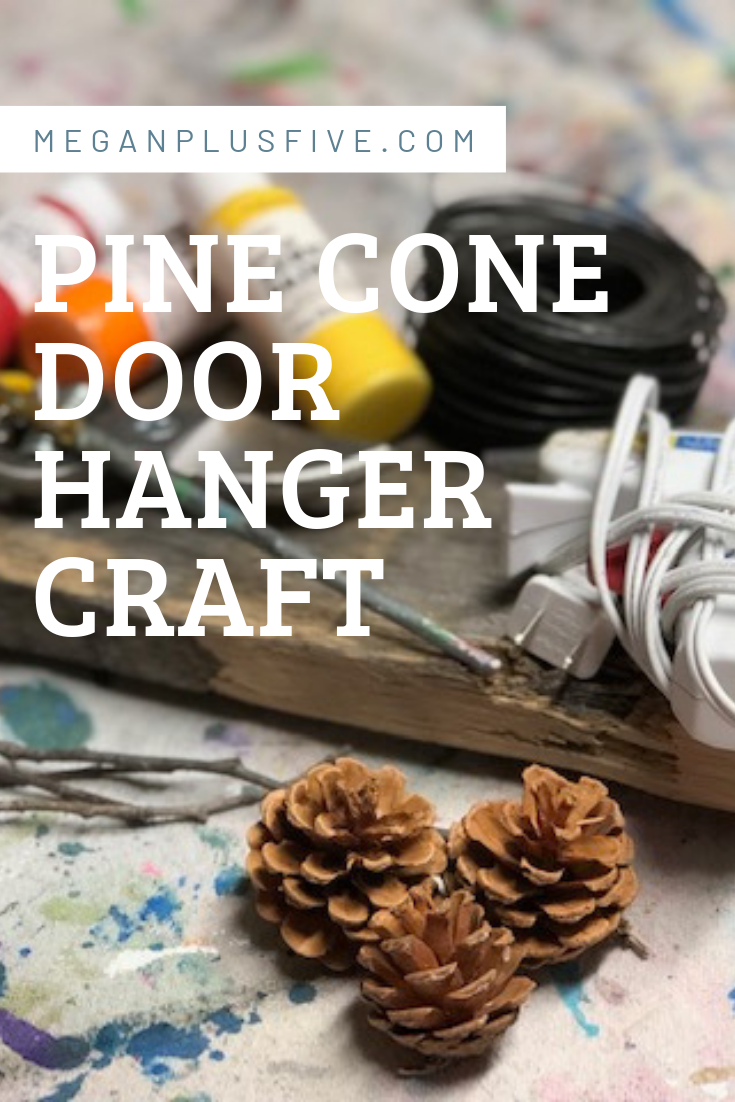
PINE CONE DOOR HANGER CRAFT

How to make an easy pine cone door hanger

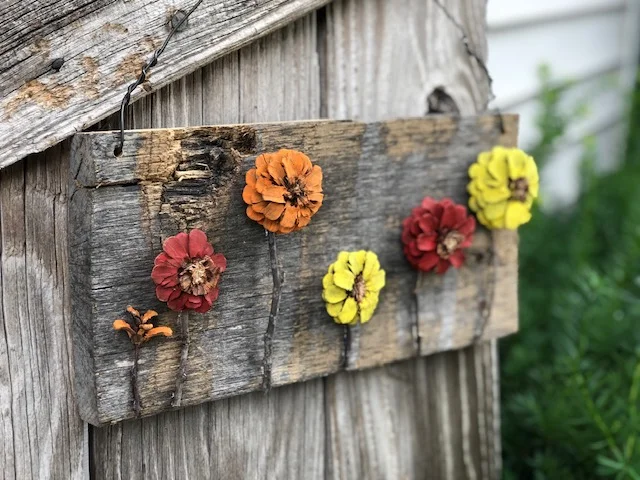
There are so many pine cone crafts I want to try but I thought I would try these adorable pine cone flowers first. I was really surprised at how easy they were to make myself and I plan to make SO many more!

If you’re looking for a more kid friendly project be sure to check out mess free pine cone art using a box. This was a favorite with our girls, and me too because it was literally mess free!

Here in the Midwest we have an abundant supply of pine cones so I didn’t have to search too far to find these little guys. I had great luck at my local park but here are some other places you can find pine cones *remember to always ask permission prior to collecting any pine cones

  • family

  • friends

  • local nature park {although ours doesn’t allow this yours might}

  • neighbors

  • shopping malls that have pine trees in the landscaping

After you’ve collected your pine cones you’ll want to make sure they aren’t covered in gross stuff, honestly I just wouldn’t pick up the ones that need super cleaned anyway lol! Leave those for the critters. I personally didn’t clean any of the pine cones we collected because they were in pretty good shape but if your pine cones have visible dirt or anything it’s a good idea to clean them prior to use.

Affiliate Disclosure. Some of the links on this website are affiliate links, which means that I may earn a small commission if you click on the link or make a purchase using the link. If you make a purchase you will not be charged anything additional.

Easy pine cone door hanger DIY

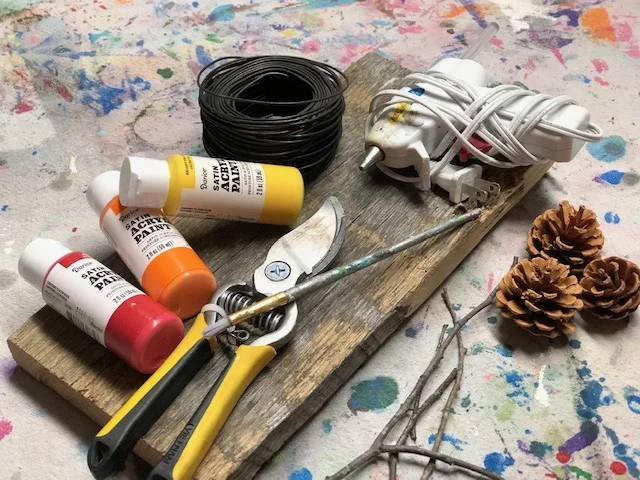
Here’s what you’ll need

Helpful tools

How to make flowers from pine cones

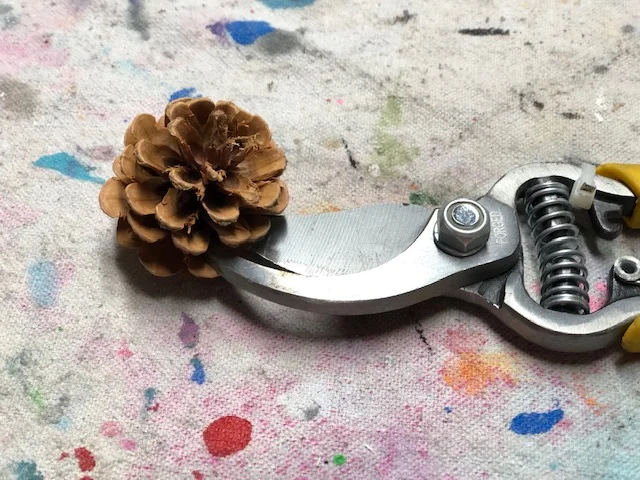
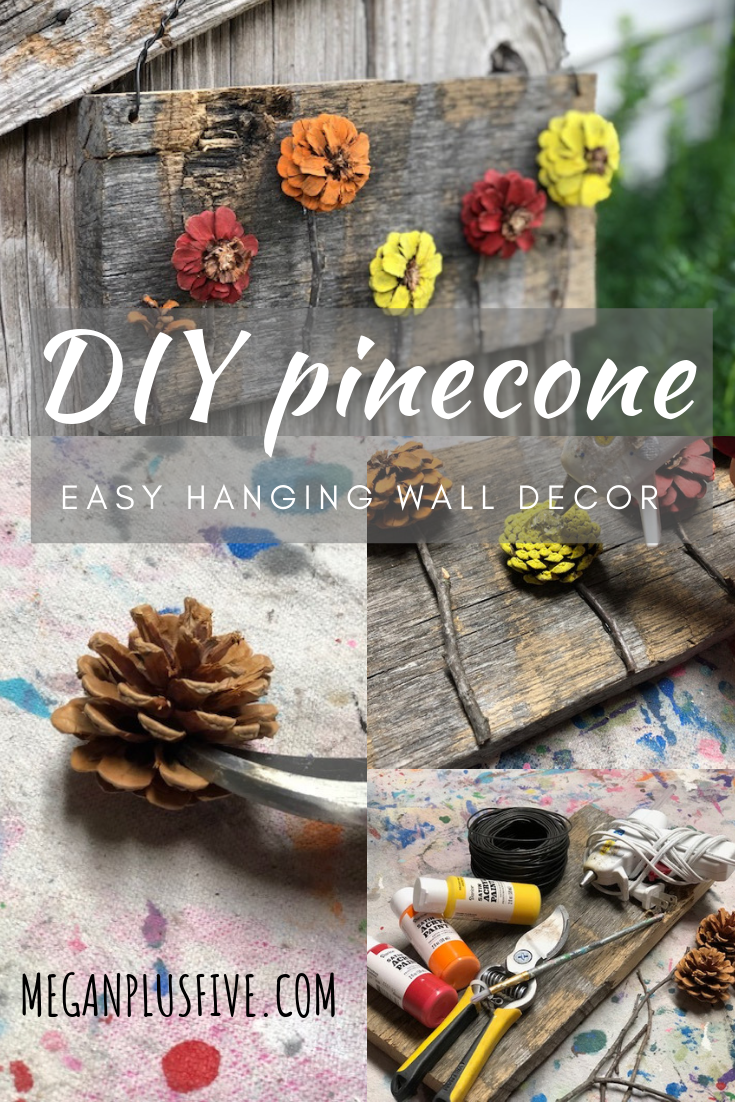
First you need to break apart your pine cones. This is a little harder than it looks and takes a lot of patients. Using your wire cutting slowing wedge them into the pinecone where you want it to break apart then use those muscles to cut. You might have to do this a few times before it comes completely apart.

easy pine cone door hanger

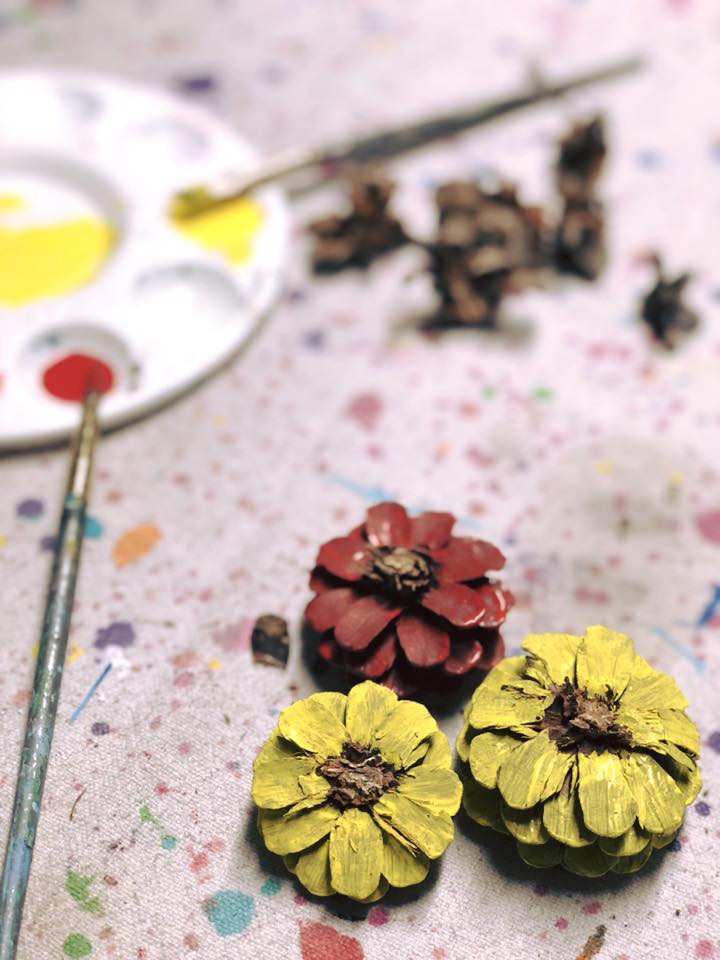
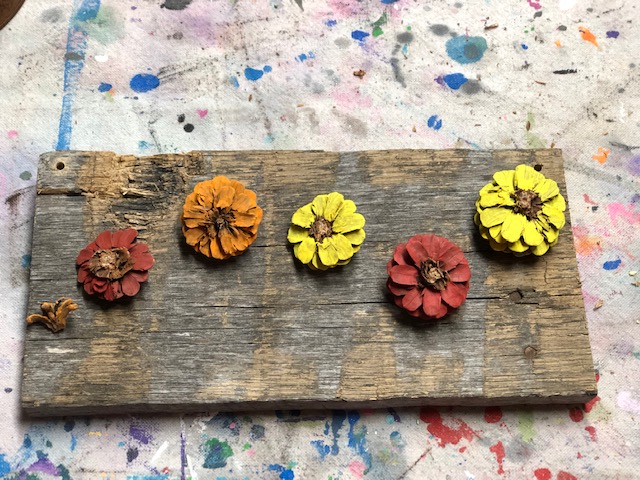
Now paint them. I just used a small paint brush and carefully painted all around the pine cone EXCEPT the middle. Leaving the middles unpainted they will look like adorable little flowers! I chose to paint mine in fall colors, red, yellow, and orange, but you can use whatever colors you’d like. I even painted the bottom as you’ll be able to see that once it’s glued down because it’s curved. I just did one coat on mine but if you don’t like the coverage of one coat on your pine cones you can give yours two coats.

Easy pine cone door hanger DIY

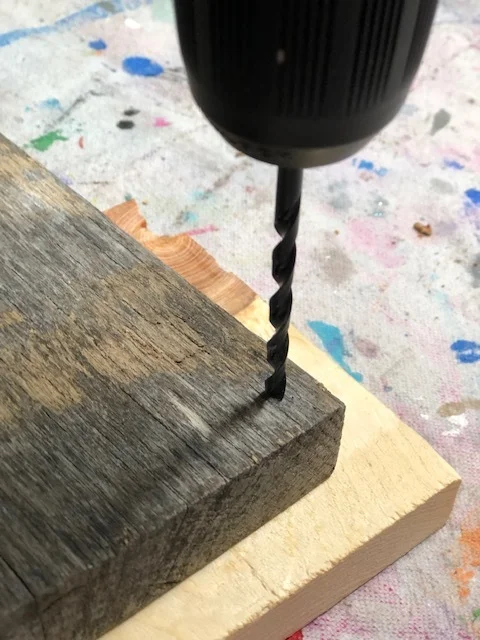
I used an old piece of wood for my base but you can use any wood base you’d like. Because I wanted to hang mine I went ahead and drilled the holes using my Ryobi drill, for the wire to go through before I started gluing the pine cones and sticks down.

easy pine cone door hanger DIY

While my glue gun was warming up I laid out the painted pine cone flowers where I wanted them to go. See how gorgeous this old piece of wood is! It even still has the nails in it, see them on the right. Granted it’s a little warped but it’s perfect for a scrappy craft like this.

Easy pine cone door hanger DIY

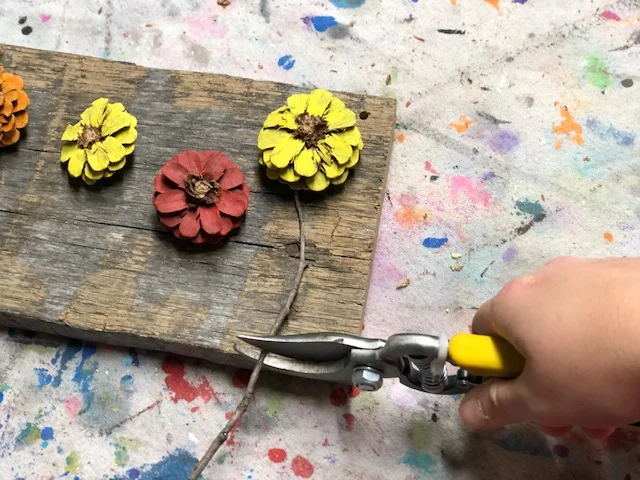
Then I used my wire cutters to cut the sticks down to size for the stems. I just eyeballed this, it doesn’t have to be exact. The sticks I used were pretty thin. You could also use some of the discarded pine cone pieces and make green leaves to glue by the stems. That would have made this project even better!

easy pine cone door handger DIY

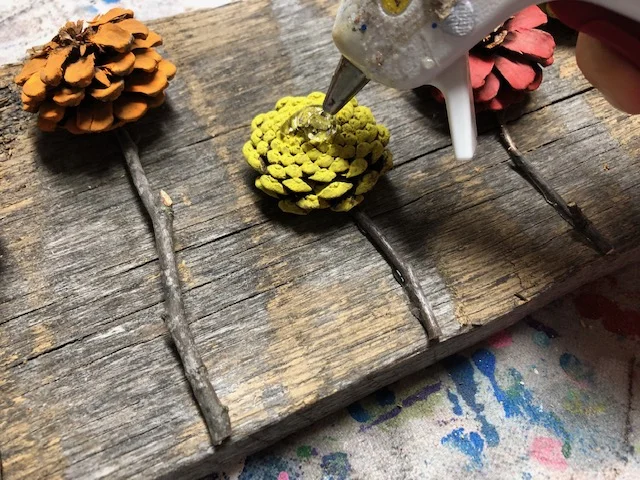
Then start hot gluing down all the pieces. I put a fairly good amount on the pine cones because they were heavier than the sticks and I didn’t want them falling off as soon as I hung the door hanger up. You’ll want this to totally dry before hanging just incase the glue underneath isn’t all the way dry you don’t want it to start slipping and your pine cone fall off.

easy pine cone door hanger

Add your wire and you’re done. One of the easiest craft projects and you probably didn’t have to spend a penny!

Easy pine cone door hanger DIY

Pin this for later

easy pine cone door hanger, flower pine cones

Apple Stamping, how to make a precious Autumn keepsake art project with your toddler

apple stamping, how to make a precious Autumn keepsake art project with your toddler

DIY keepsake apple stamping canvas art for your toddler

I LOVE fall! I love the colors, the smell, the oversized clothing to keep you warm on the cool Midwest days….I love it all.

This fall I took our four girls to a small off the beaten path apple orchard. Seriously these are the best kind of farms! The people are always so nice and the atmosphere is just so welcoming.

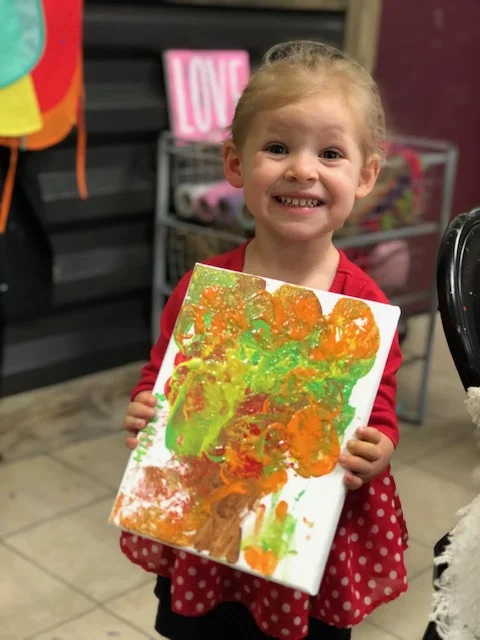
We had all these apples {literally 30lbs of apples, I know it sounds crazy but at $1/lb I thought if nothing else it was cheap educational entertainment for our girls} and I thought, why not do a fun little craft with them at our CRAFT STUDIO for our TOTS IN THE SHOP day. So we did! Boy did all the toddlers have the best time making a mess and painting with apples.

If your tot is anything like ours you’ll end up with a gorgeous blend of fall colors…but she had so much fun and that makes my heart happy!

Seriously, look how proud that girl is! Smiling from ear to ear with her artwork!

Affiliate Disclosure. Some of the links on this website are affiliate links, which means that I may earn a small commission if you click on the link or make a purchase using the link. If you make a purchase you will not be charged anything additional.

Here’s what you need to make your own at home


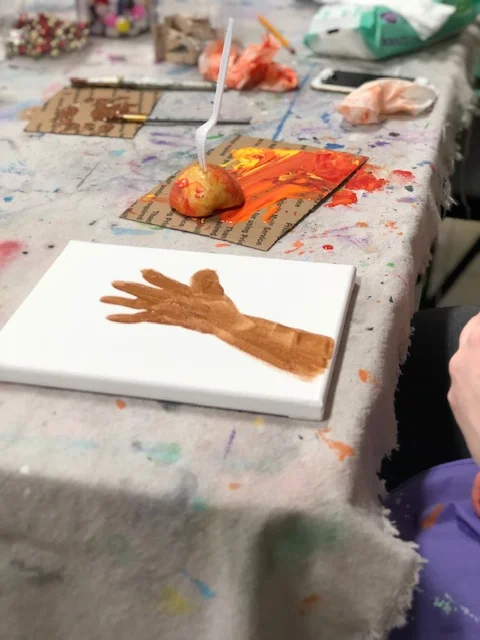
Start by tracing your toddler’s hand and the upper part of the forearm on the canvas with a pencil. Do this lightly so you can easily hide the pencil mark with your paint.

Apple Stamping, how to make a precious Autumn keepsake art project with your toddler

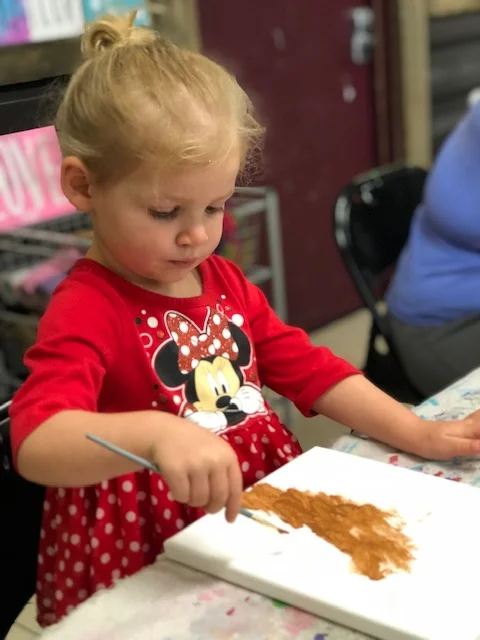
Next you want to paint the inside of where you traced with brown. This will be the trunk of your tree. Some moms in our class painted this for their tots but our sweet girl wanted to paint hers all by herself. I think she did a pretty great job {go Millie!}

Apple Stamping, how to make a precious Autumn keepsake art project with your toddler

Once the brown is dry you can start stamping away. We stuck forks in our apples so the kiddos could hold onto the apple a little better but you can just pick the apple up with your hand if you’d like.

We used discarded pieces of cardboard to squirt our paint on. Put some paint on there, dip the half apple in, smear it around a bit so it gets a good coat, then stamp it right on the canvas. This is going to be messy, embrace it! This is how your little one learns and explores.

Apple Stamping, how to make a precious Autumn keepsake art project with your toddler

Keep stamping till your tot is satisfied with their little work of art.

Apple Stamping, how to make a precious Autumn keepsake art project with your toddler

Be sure to check out more crafty kids projects below.

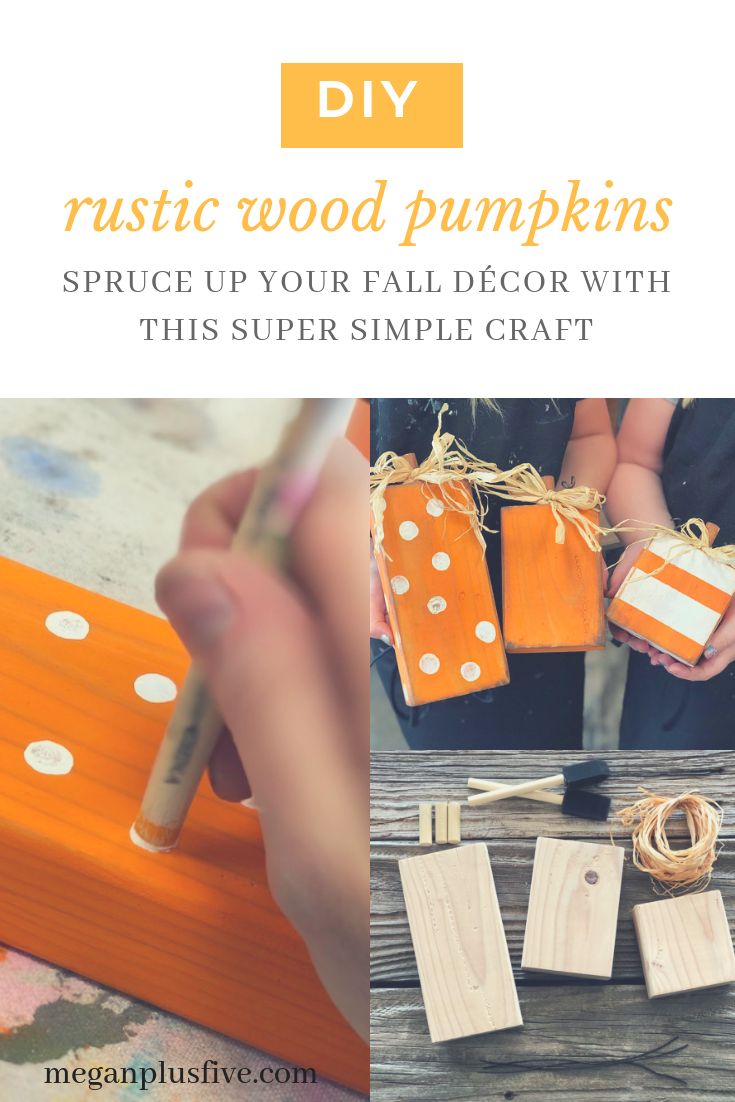
DIY 2x4 rustic wood pumpkin blocks

do it yourself rustic wood pumpkins, spruce up your fall décor with this super simple craft

DIY how to make 2x4 wood pumpkins

These little wooden pumpkins are just as cute as can be! I LOVE them! What I love even more is how effortless they are to create. You can knock a set out in less than an hour. Seriously, an hour of your time and you have some ridiculously cute mini pumpkins to add to your rustic fall décor!

These little guys are so simple you can even get the kiddos involved! Make a whole family craft night out of it, they will LOVE it and you’ll remember that night every year you put them out.

To make it even easier I’ve put together this DIY MINI PUMPKIN CRAFT KIT. Everything you need to make these at home delivered right to your door!

do it yourself rustic wood pumpkins, spruce up your fall décor with this super simple craft

If you don’t buy our easy peasy craft kit here’s what you’ll need…

Helpful tools


Check out this other fun fall craft, DIY mini mum planters for your front porch.


Let’s get started!

Step 1

Cut all the pieces for your pumpkins and stems {dowel rod}. After you do that give them a quick sanding to knock down all the pokey edges from being cut. Next drill a 1/2” hole in the top of each pumpkin {this will be where you put the stem dowel rod, you only need it about 1/2” deep}. Be sure to wipe off all the saw dust.

Now for the fun!

Paint all of your pumpkins your base color. For mine I painted all of the pumpkins orange. Be sure to apply a super thing coat, you should be able to see the wood grain through the paint. Once that dries apply a second coat, if desired wait for that coat to dry and apply a 3rd. I almost never do 3 coats.

do it yourself rustic wood pumpkins, spruce up your fall décor with this super simple craft

Step 2

Now for the accents{I used white for my accent color}!

For mine I left one pumpkin plain, added dots to one, and stripes to another.

The dots are SUPER EASY! Literally take the end of you sponge brush and dip it in the accent color. Then dot it on the pumpkin you want to have dots. You can practice on a scrap piece of paper before going full force on your pumpkin. I just randomly dot around till I’m happy with the look. I do this all the way around the pumpkin.

Add some stripes. Using your masking tape off the areas you want to KEEP your base color. I did two stripes of white on my pumpkins. Pro tip…to keep the paint bleed down, never brush your paint into the tape, always brush away. Brushing it to the tape will force the paint under the tape and cause your paint to bleed. You don’t need to wait for the paint to dry to peel off the tape.

do it yourself rustic wood pumpkins, spruce up your fall décor with this super simple craft

Step 3

Once your blocks are dry you can distress with sandpaper. Focus on the edges, corners, and do a light sanding to the face of the pumpkins. When you are done distressing with sandpaper, brush all the dust off with a cloth.

do it yourself rustic wood pumpkins, spruce up your fall décor with this super simple craft

Step 4

Give them a little more character with dark wax! I absolutely LOVE this stuff!

It takes VERY LITTLE WAX to achieve this look. Barely dip the very tip of the chip brush into the wax, and dab off onto a paper towel. If you get too much wax on your blocks they will look mudding instead of antiqued. Now brush the wax onto the corners and edges, dabbing to get more wax when you need more on your brush.

Then lightly brush over the face in both vertical and horizontal directions. This will give it an even more antiqued look.

do it yourself rustic wood pumpkins, spruce up your fall décor with this super simple craft

Step 5

Paint your stem, let it dry, and glue the stem in place with a good amount of glue. Let dry completely {f you have a glue gun you can use that for this step instead}.

After your glue has dried you are ready to adorn with the raffia and wire embellishments. To get the wire curled, simply wrap around the end of one of your sponge brushes.

Then take the wire and tie it around your stem.

do it yourself rustic wood pumpkins, spruce up your fall décor with this super simple craft

Step 6

Then gather a few strands of raffia and tie in a bow around the stem and wire. Trim if you desire.

do it yourself rustic wood pumpkins, spruce up your fall décor with this super simple craft

Check out more fall & Halloween posts below

Easy and adorable mini mum planters for less than $2, get the look with this tutorial

Easy and adorable mini mum planters for less than $2, get the look with this tutorial

DIY cheap fall porch décor

I love finding new ways to decorate on the cheap! Having 4 kids…especially girls…is expensive. From clothes to medical expenses these girls can drain a wallet! So I get a little creative when it comes to buying decorations, especially if they are seasonal ones.

A few years ago I wanted to spruce up our front porch with some fall colored mums. I LOVE them, they scream FALL IS HERE! I was shopping around Walmart had the mums loaded in my basket and they come with the standard ugly stamped containers so I thought I’d pick up some inexpensive pots to put them in. Our porch decorating budget wasn’t a whole lot and I was already spending a big portion of it on the flowers. I found the pots and was floored at how expensive they were. They were twice as much as the flowers! Being raised to be super frugal by my mom and insanely CRAFTY grandma my wheels got to turning. I walked around the store looking for ideas of what I could stick these flowers in. Got to the Halloween aisle and BAM! There they were. Perfect round containers that looked like they were made to put those flowers in!!

This year I wanted to recreate those because they unfortunately didn’t last more than that season. I went to Walmart and the regular sized pumpkin buckets were no where to be found but they had mini ones which were the PERFECT size for the mini mum flowers…and a fraction of the cost! And did I mention they were MINI which automatically makes them even more adorable!

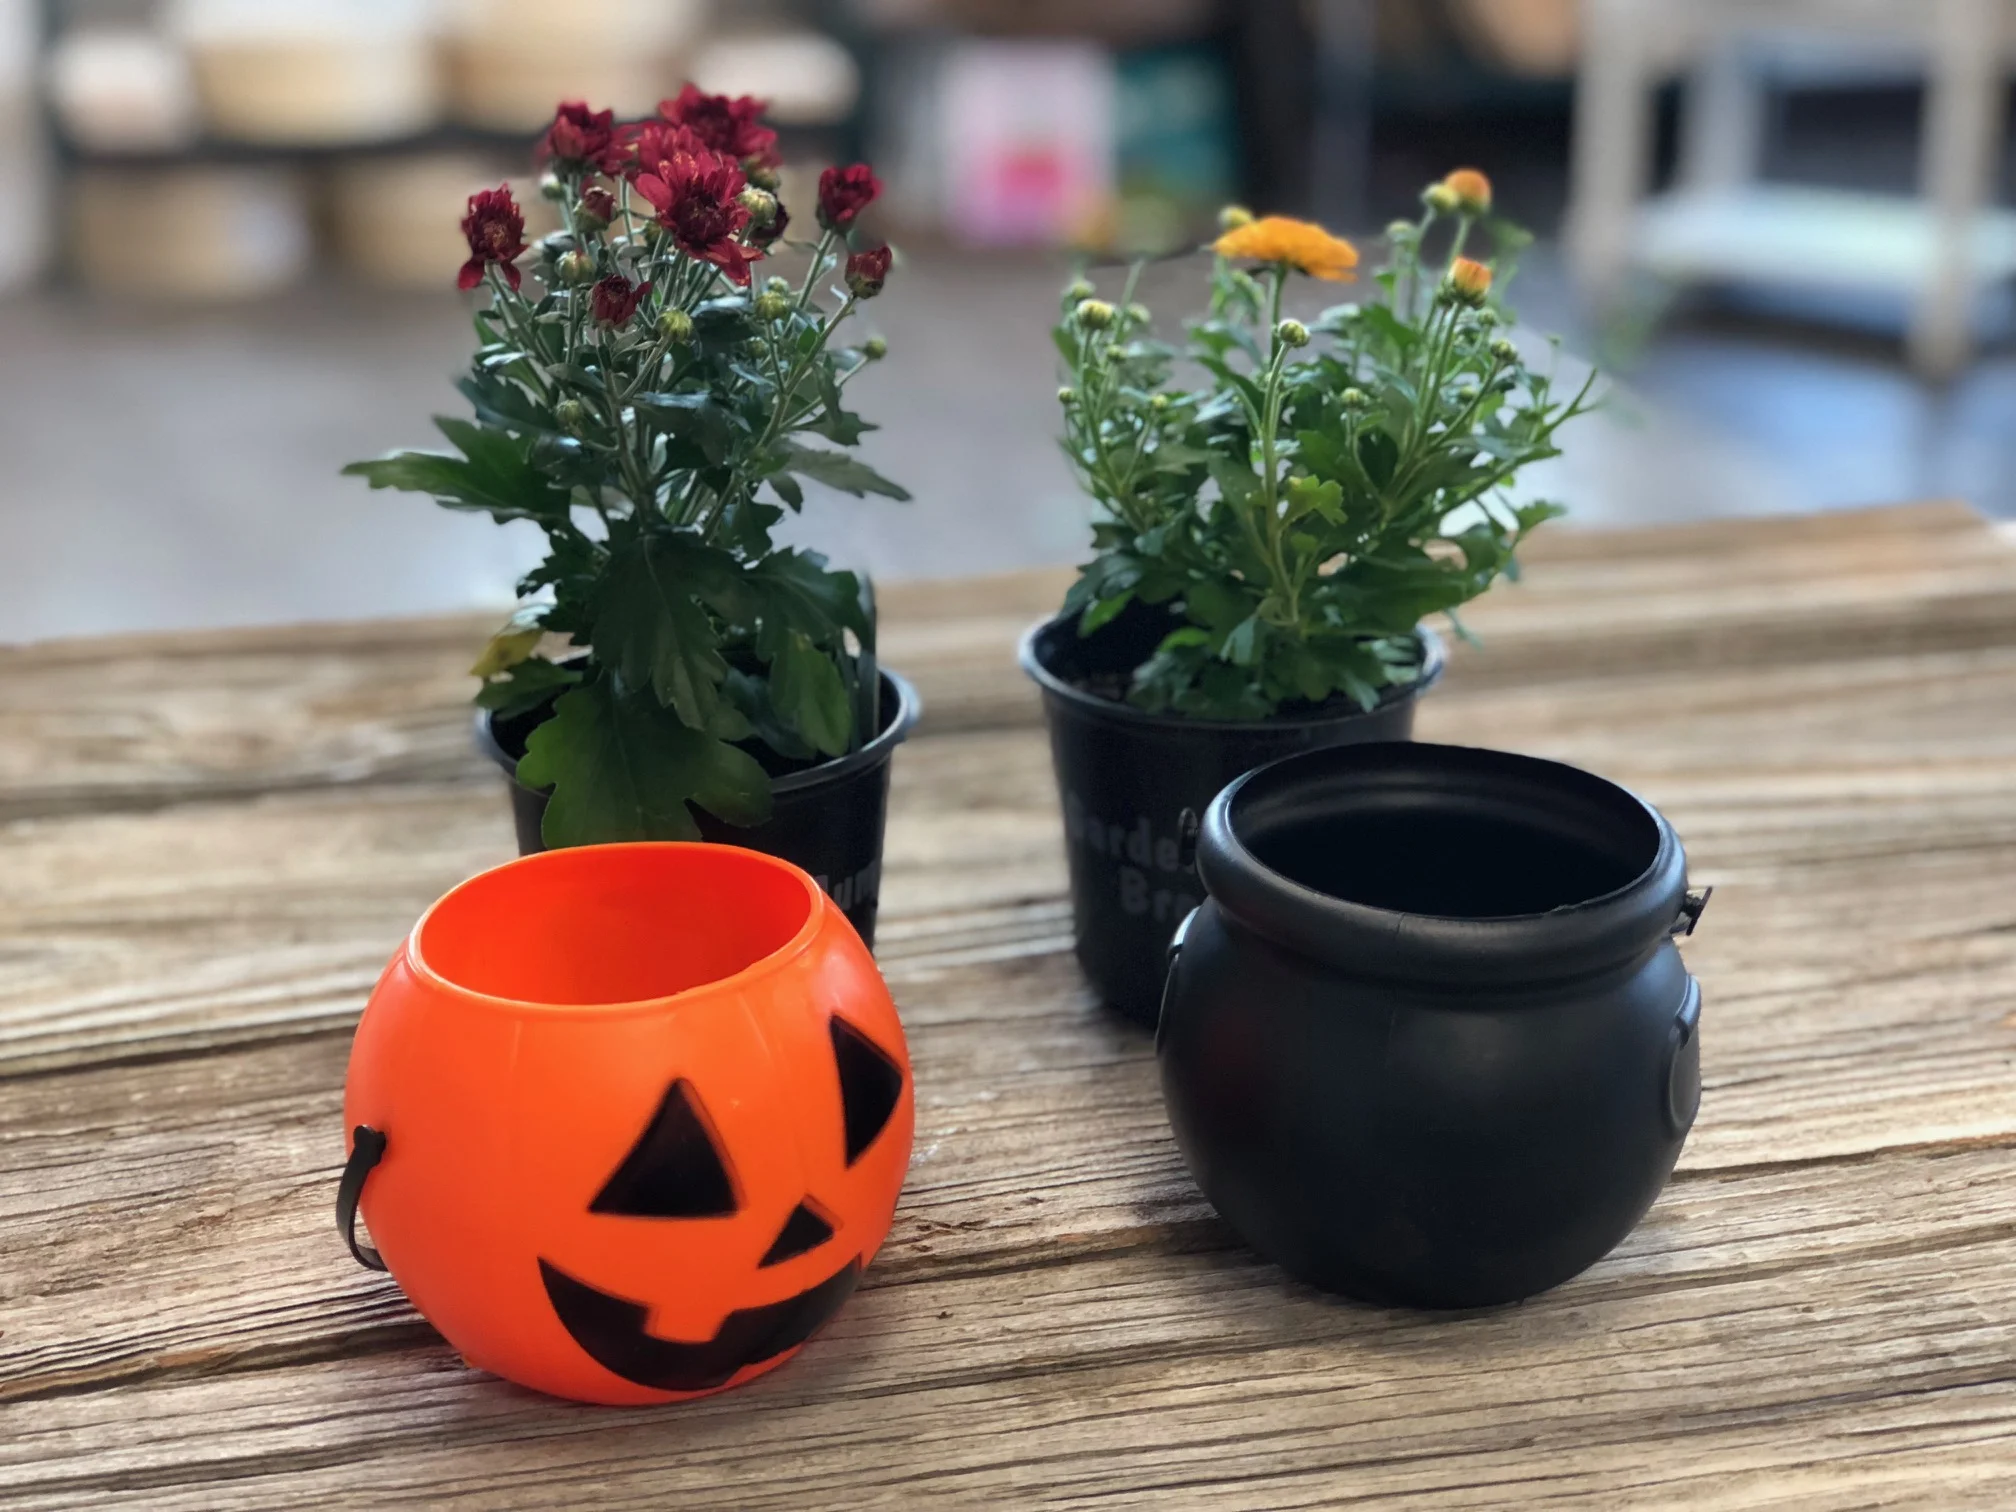
So I grabbed the mums, a mini pumpkin and a mini cauldron treat buckets and set back to our brick and mortar shop to make some cute planters!

Affiliate Disclosure. Some of the links on this website are affiliate links, which means that I may earn a small commission if you click on the link or make a purchase using the link. If you make a purchase you will not be charged anything additional. This is just a way I can help add to our family finances to raise our four daughters. Please know I would never recommend a product or service I do not totally stand behind.


Here’s what you’ll need

I picked everything up from my local Walmart.

2 mini MUM planted flowers, $.97 each {I picked mine up at our local Walmart, but they are not listed online

2 mini Halloween treat buckets $.74 each {I bought a pumpkin & cauldron}

scissors

It cost $1.71 {plus taxes} to make one flower pot. SUPER CHEAP for cute décor, and the kids will love them. I did mine by myself because my kiddos were at school, but you could totally make this a fun family thing and have everyone pot their own.

These are so super simple, literally 2 steps!

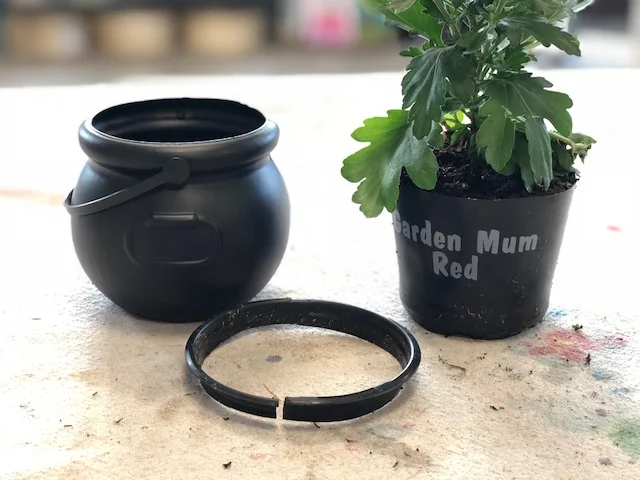
First you need to cut the top lip off of the pot the flowers are currently in. This can be hard to get the initial cut so I advise this step for adults.

Easy and adorable mini mum planters for less than $2, get the look with this tutorial

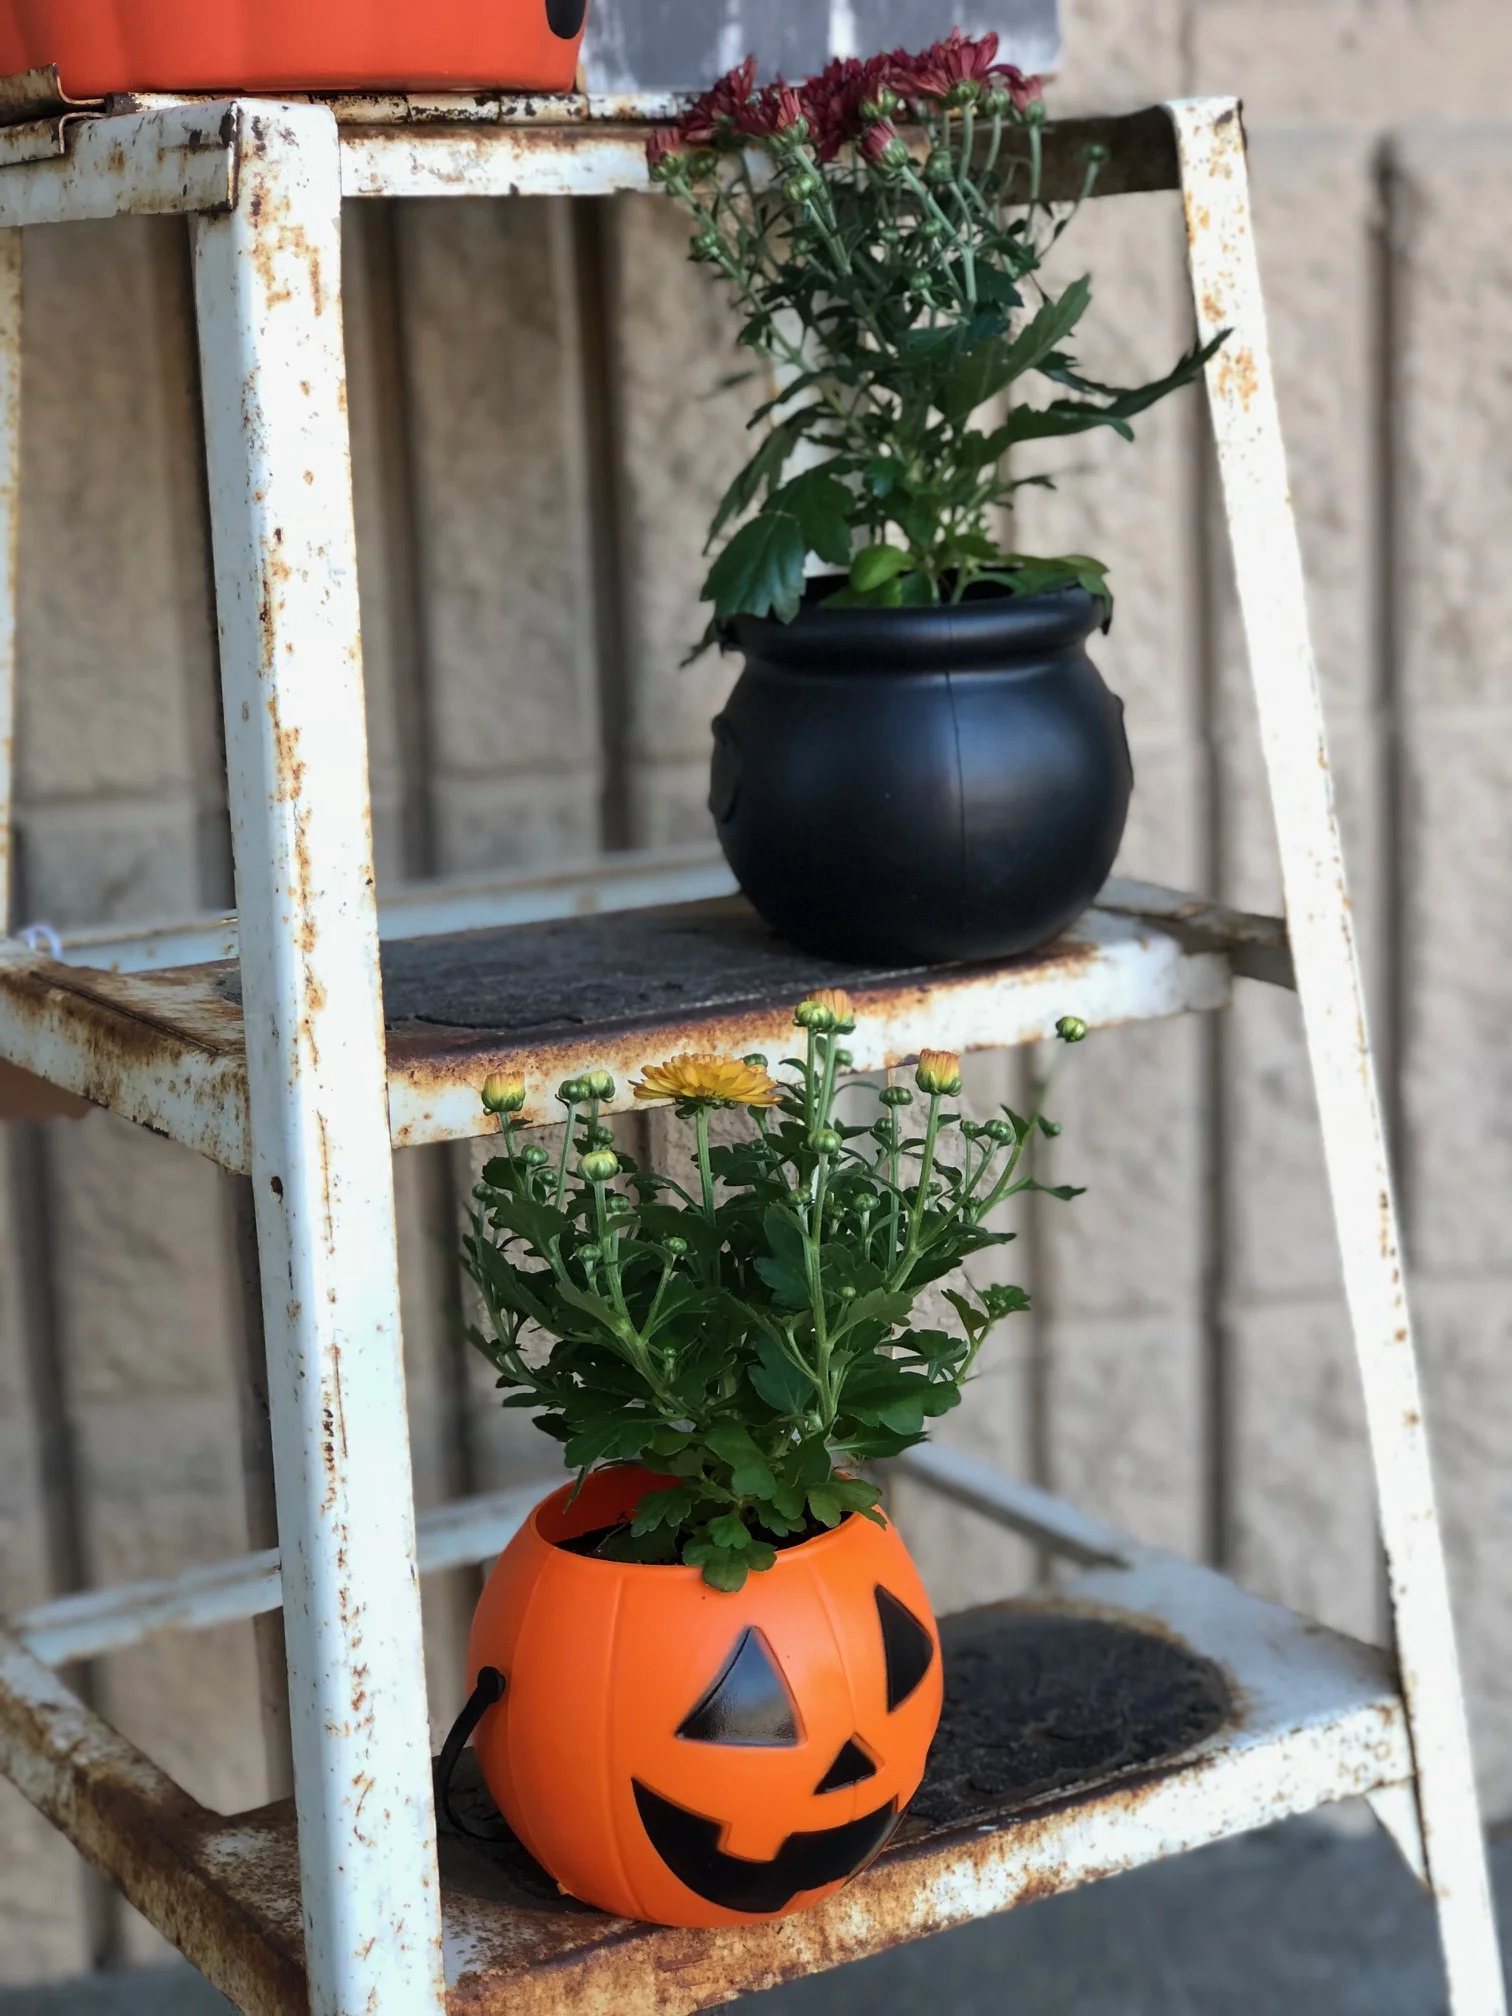
Now shove those babies in the treat bucket and you’re done! If yours are going to stay outside all the time you can drill 2 holes in the bottom to let them drain but I will be bringing mine in and out of our shop and I don’t want the water to drip everywhere so I will manually drain ours.

Easy and adorable mini mum planters for less than $2, get the look with this tutorial

I can’t wait for these to bloom and be even CUTER!

Check out more fall & Halloween themed posts below