Drinking enough water when you're a busy momma, the #1 tip that really works

Drinking enough water when you're a busy momma, the #1 tip that really works

Affiliate Disclosure. Some of the links on this website are affiliate links, which means that I may earn a small commission if you click on the link or make a purchase using the link. If you make a purchase you will not be charged anything additional.

I am going to be seriously honest, I don’t drink enough water every single day. Well, I used to not anyway. I’m willing to bet that there are a lot of mommas that feel the same way I used to. Something about knowing I HAD to drink 8 full glasses, 90 OUNCES of water every single day was intimidating {but give me 8 glasses of Dr. Pepper or iced coffee and that’s a whole different story}. I for real struggled to drink enough water most days and I was really feeling the side effects of it.

Some of my side effects were

  • skin was looking extra dry and wrinkly

  • hungry ALL the time

  • urine was dark in color

  • feeling super fatigued a lot

  • getting a lot of headaches

It wasn’t till I picked up a package of stainless steel straws and used them that I realized it was a mind of matter kind of thing to get myself to guzzle down at least 8 glasses every day. I had every intention of trying these fancy straws out the last two years and just never got around to it {busy mom brain}. One day I finally added them to my cart and I am KICKING myself for not doing it sooner!

Using the straw works because we tend to drink more when we use a straw. And using a stainless steel straw works even better because it is reusable. Just wash and dry when you’re done using it and it’s ready for water drinking the next day!

But I still wasn’t drinking enough water. I was drinking more, but not as much as I needed to be to get adequate hydration. I still felt an overall blah. So I pulled out my stainless steel tumbler to see if maybe that would help.

Drinking enough water when you're a busy momma, the #1 tip that really works

Holy cow it did! After about a week of drinking from my Ozark 30 oz tumbler I noticed a HUGE difference in the way I felt. For the first time in a very long time I felt truly hydrated! My skin felt amazing. It wasn’t itchy and scaly {even using coconut oil daily wasn’t combating this}. My hair didn’t feel as yuck as it had been. My mind was even clearer! I had a better focus and I actually had energy to get things done AND wake up early!! This is huge for me since I’m not a morning person at all.

This has worked so well for me that I picked up an Ozark 20 oz tumbler for each of my girls. They are loving them and I’m loving that they don’t get all the glasses in the cabinet dirty anymore.

I picked my tumblers up at my local Walmart but here are the links to purchase similar ones on Amazon Prime

Being a busy momma it is hard to be sure to do all the things but we really do need to put our health and our family’s health at the top of the to do list. Start with drinking enough water. I promise you will be a much more productive momma and you will love your hydrated self!

How to lose the anxiety when it comes to talking to your spouse about money

money anxiety, how to overcome this and talk to yo0ur spouse about finances

I didn’t grow up poor, I grew up in a family that made poor financial decisions.

I grew up with a very anxiety ridden relationship with money. I watched month after month, year after year, of my parents constantly fighting about it. I honestly didn’t know that it was possible for a married couple to have a money talk without someone calling names, bringing up something totally unrelated to the conversation at hand, and the other one storming off fuming and screaming as they walked away. I thought this was normal and how all married couples “talked” about money.

I thought it was so normal that I never wanted to have money talks with my own husband. I wanted so badly to avoid a possible argument because I never wanted my own marriage to be like my parent’s. It sounds crazy, I know, but it’s a very real thing. Financial anxiety. There are women like me all over the world who struggle with financial anxiety. They are so overwhelmed with the thought of a possible argument that they never bring up the finances. Money is kind of a taboo topic in society anyway throw in your own emotional baggage you have with it and it’s something you really don’t want to talk about so you avoid it.

How did I finally get over this anxiety? I came across a book called The Total Money Makeover, by Dave Ramsey. It was just what I personally needed. If you are sensitive and don’t appreciate a blunt forward approach then this book might not be for your but it was just what I needed, and what millions of others needed too.

Reading this book I realized I don’t have to live in the shadow of my childhood feelings about money. I don’t have to carry that fear I had for so many years. I can let it all go. I can move forward and talk openly about finances with my husband without the worry that we might have an argument. I realized how my parents handled and dealt with their finances wasn’t normal. Yelling and name calling isn’t a normal way for adults to behave and deal with their problems.

The Total Money Makeover isn’t all about your feelings, or how to deal with anxiety at all. But by putting Dave’s teachings into play every single month I was able to slowly peel away the anxiety. I slowly got comfortable with each talk we had. You don’t have to live in fear of money conversations. My husband and I are proof that you can break the cycle of your upbringing.

Money Anxiety how to overcome this and talk to your spouse about finances

Here are some tips to help if you’re feeling like money anxiety is preventing you from talking openly about finances with your spouse

  • Breathe. This will help clear your head and calm your nerves. I do this all the time. I still struggle with social anxiety and sometimes it feels like my heart is going to beat right out of my chest. Sitting quietly and just breathing helps so much to calm myself down.

  • My husband and I rarely have an argument but not talking about things just to avoid an uncomfortable conversation about money can be just as worse as having an argument. Get uncomfortable and have the conversation. The more you do this the more comfortable the conversations will get.

  • Get organized with your bills. When I don’t write them down every single month I notice my anxiety starts to spark again. Keeping my brain on track and everything written down keeps me from worry. I use a simple monthly bill tracker that fits right in my planner that I love, you can get it FREE here.

  • Have a drink first. I don’t care how this sounds I enjoy having a glass of wine. It helps calm my nerves and helps me to relax. If a glass of wine does the same for you, cheers!

  • Talk about the details when the kids aren’t in the room. While I think it’s important for parents to teach their children about money and the proper way to use it, having your kids in the room while your trying to talk money one on one with your husband is just going to make that anxiety and tension go up. You aren’t totally focused on the conversation while sweet little Susie is spilling her drink on the floor and little Johnny is saying “mom, mom, mom” over and over again. I’ve been there and it skyrockets my stress levels. I prefer to talk about our finances while our kiddos are in bed, watching a movie, or playing in the backyard.

  • Lastly, take small steps to the money talks. Jumping full force will just set you up for failure. You need time to break down the anxiety barriers. Giving your mind room to process and day by day get over why you have your money anxiety. It’s not a race, it’s your life.

Grocery budgeting to feed your big family, how to master this so your fridge is never empty

grocery shopping on a budget, how to stretch your grocery list to last longer

Affiliate Disclosure. Some of the links on this website are affiliate links, which means that I may earn a small commission if you click on the link or make a purchase using the link. If you make a purchase you will not be charged anything additional.

It’s a no brainer that the more kids you have the more you’re going to have to spend at the grocery store. But that doesn’t mean you can only afford rice and beans. You just have to get a little creative with your shopping list and meals.

We have a relatively larger sized family, there are 6 of us. Granted our girls are young, elementary aged and younger so they don’t eat like teenage boys, but don’t underestimate these girls. They can put back some food. Especially our toddler. I honestly don’t know where she puts all that food.

As our family has grown over the years we’ve learned to get a little creative with our meals to really stretch the groceries every week. Some weeks are harder than others, especially in the winter months when everyone is working on packing on that thick winter coat and it seems like everyone is constantly hungry. But that’s a whole other post all together.

How do I feed our family of 6 for $400 a month? I don’t use coupons and I certainly don’t hop from store to store to chase down what’s on sale that week. BUDGETING and meal planning. I’ll admit before my creative business took off I absolutely was one of those coupon queens. I was really good at it, even teaching others how to do the same. But those days are long past me while I’m working on building my own crafty empire for our girls to carry on if they wish.

So back to business, if you’re disciplined you too can feed your family every month without going over budget.

Almost every single meal our family eats we get it from home. We don’t eat fast food a whole lot, we don’t dine at fancy restaurants {that’s not really our thing anyway}, and our girls don’t eat school lunches. We can pack a lunch for less than $1/day per person.

Our family spends $400 a month on groceries but it’s not the same amount every single week. Some weeks we might spend $140 while others we might only spend $50. Things like meat and cheese we buy in bulk so we don’t run out of those more expensive items as quickly.

Here are the same tips and strategies I use every month when I grocery shop.

  • The first thing I do each week is meal plan. You can create your own or use the same meal planner I use, it’s totally FREE. The way I plan my meals is I ask each family member something they would like to have for dinner. Most of the time it gets added to the menu but occasionally mom and dad X a suggested meal if it’s way out of budget, like steak, or if it’s something most everyone else is tired of having.

  • Buy selectively in bulk. We have a membership to our local SAMs Club but we are very selective about what we do and do not buy from there. Things we buy are some meats, lunch meat, sliced and shredded cheese and that’s pretty much it for food. Everything else is a little more expensive to buy at the bulk store.

  • Find a great discount store to shop at. The one we shop at weekly is Aldi. It has come a LONG way since the days when I was a kid. Most of them in our area have been given a big makeover so they are set up like a regular grocery store vs the old style layout they used to have.

  • Use cash when you go to the store. We are fans of the Dave Ramsey method of using cash and it truly works. We personally do not have any credit cards but even using a debit card we ALWAYS spend more than budgeted, so use cash and you will be forced to only spend what you have in your wallet.

  • Buy ingredients that you can use for more than one meal. Things like rice and potatoes can be used for lots and lots of different meals and they cost next to nothing. You can make anything from taco rice to rice pudding with a $2 bag of white rice. And with potatoes you can use them in several different dishes, shepherds pie, perogies, garlic potato wedges…mmmmmm!!! Just get creative with it.

  • Pack lunches. This is HUGE! Eating out adds up very quickly. That $5-$10 at lunch every single day can add up to $25-$50 a work week for just one person.

  • Try making your sweet treats. Most of the time buying them premade costs way more than if you made them yourself. Take muffins for example. Our family loves them so I will make several batches of different kinds at a time and it costs approx. $3 for several dozen muffins. If I were to buy 1 dozen muffins even at the discount store we shop at, their cost would be $4. CRAZY! Granted it’s more work but saving at least $8 to make them myself and they are probably one of the easiest baking things to make, sign me up! The same goes for brownies, cakes, cookies, and granola bars. These are all things you can make at home and costs significantly less to make vs to buy.

  • One thing that we bought a long time ago that truly helps us stay on budget is using a Food Saver . We use this every single month. From left over foods that would have gone had in the fridge to freezing the meats in bulk. This is an investment worth your hard earned money.

  • Last but not least buy in season. Produce prices change from season to season so those foods are typically next to nothing during the summer months. That’s when our family eats an abundance of the fresh stuff. Not that we don’t eat any in winter, but our dollar doesn’t go as far in the winter so we are extra selective about the produce we buy during the cold season.

I hope these tips help when you’re grocery shopping for your large family. I know without these tips our family would be WAY over budget every single month.

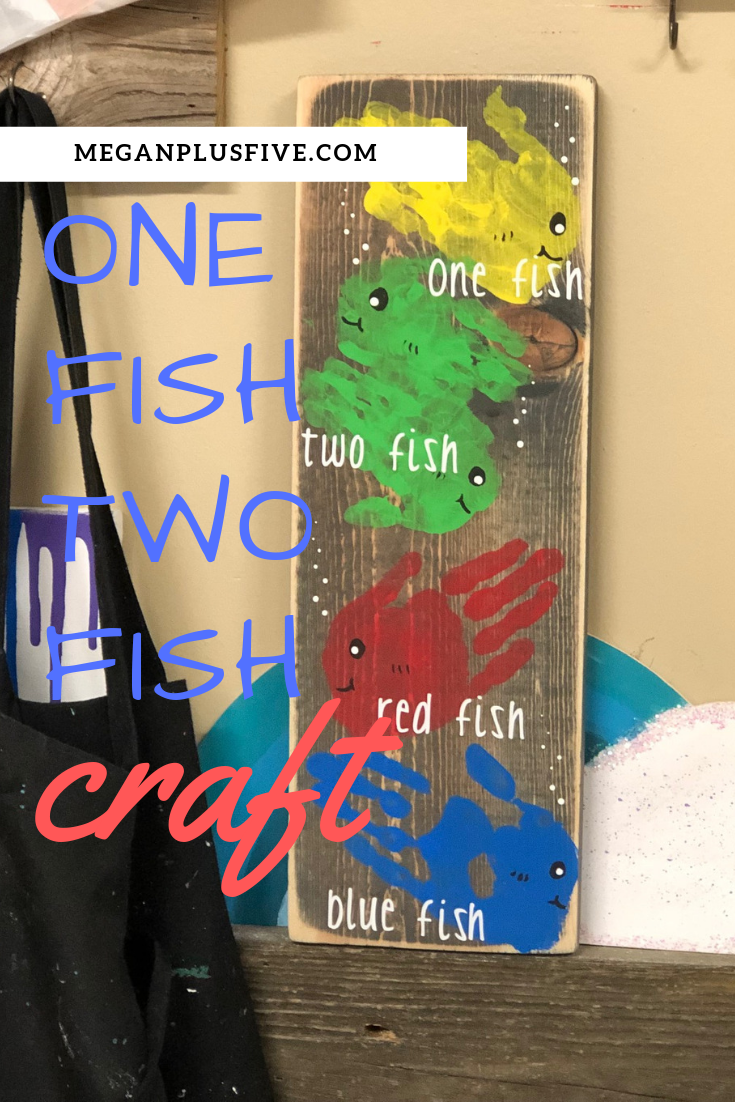
One fish two fish, perfect Dr. Seuss keepsake craft to make with your kids

One fish two fish, perfect Dr. Seuss keepsake craft to make with your kids

A person’s a person no matter how small

-Dr. Seuss

Our family loves Dr. Seuss so naturally every year on his birthday, March 2nd, we celebrate him in some way. Usually we read his books and make a fun snack or just for fun craft in honor of him.

But this year we went a little extra with it. Our oldest daughter is getting older, about to hit middle school next year {I have no idea where that time went} so I know that the days of doing fun keepsake projects with her handprints are numbered. I fully took advantage of the opportunity to make this adorable ONE FISH TWO FISH craft with all four of my sweet daughters handprints.

Affiliate Disclosure. Some of the links on this website are affiliate links, which means that I may earn a small commission if you click on the link or make a purchase using the link. If you make a purchase you will not be charged anything additional.

Here’s how you can make your own at home

supplies you’ll need:

1. CUT OUT DECALS

Using my Cricut cutting machine I cut all the lettering out first. My projects usually go much smoother if I have all of the decals and accents cut out before I start staining and painting. If you don’t have a cutting machine you can always write the lettering with a chalk pen or permanent marker. My hand writing isn’t so neat but my Cricut does a great job ;)!

2. CUT & STAIN WOOD

One fish two fish, perfect Dr. Seuss keepsake craft to make with your kids

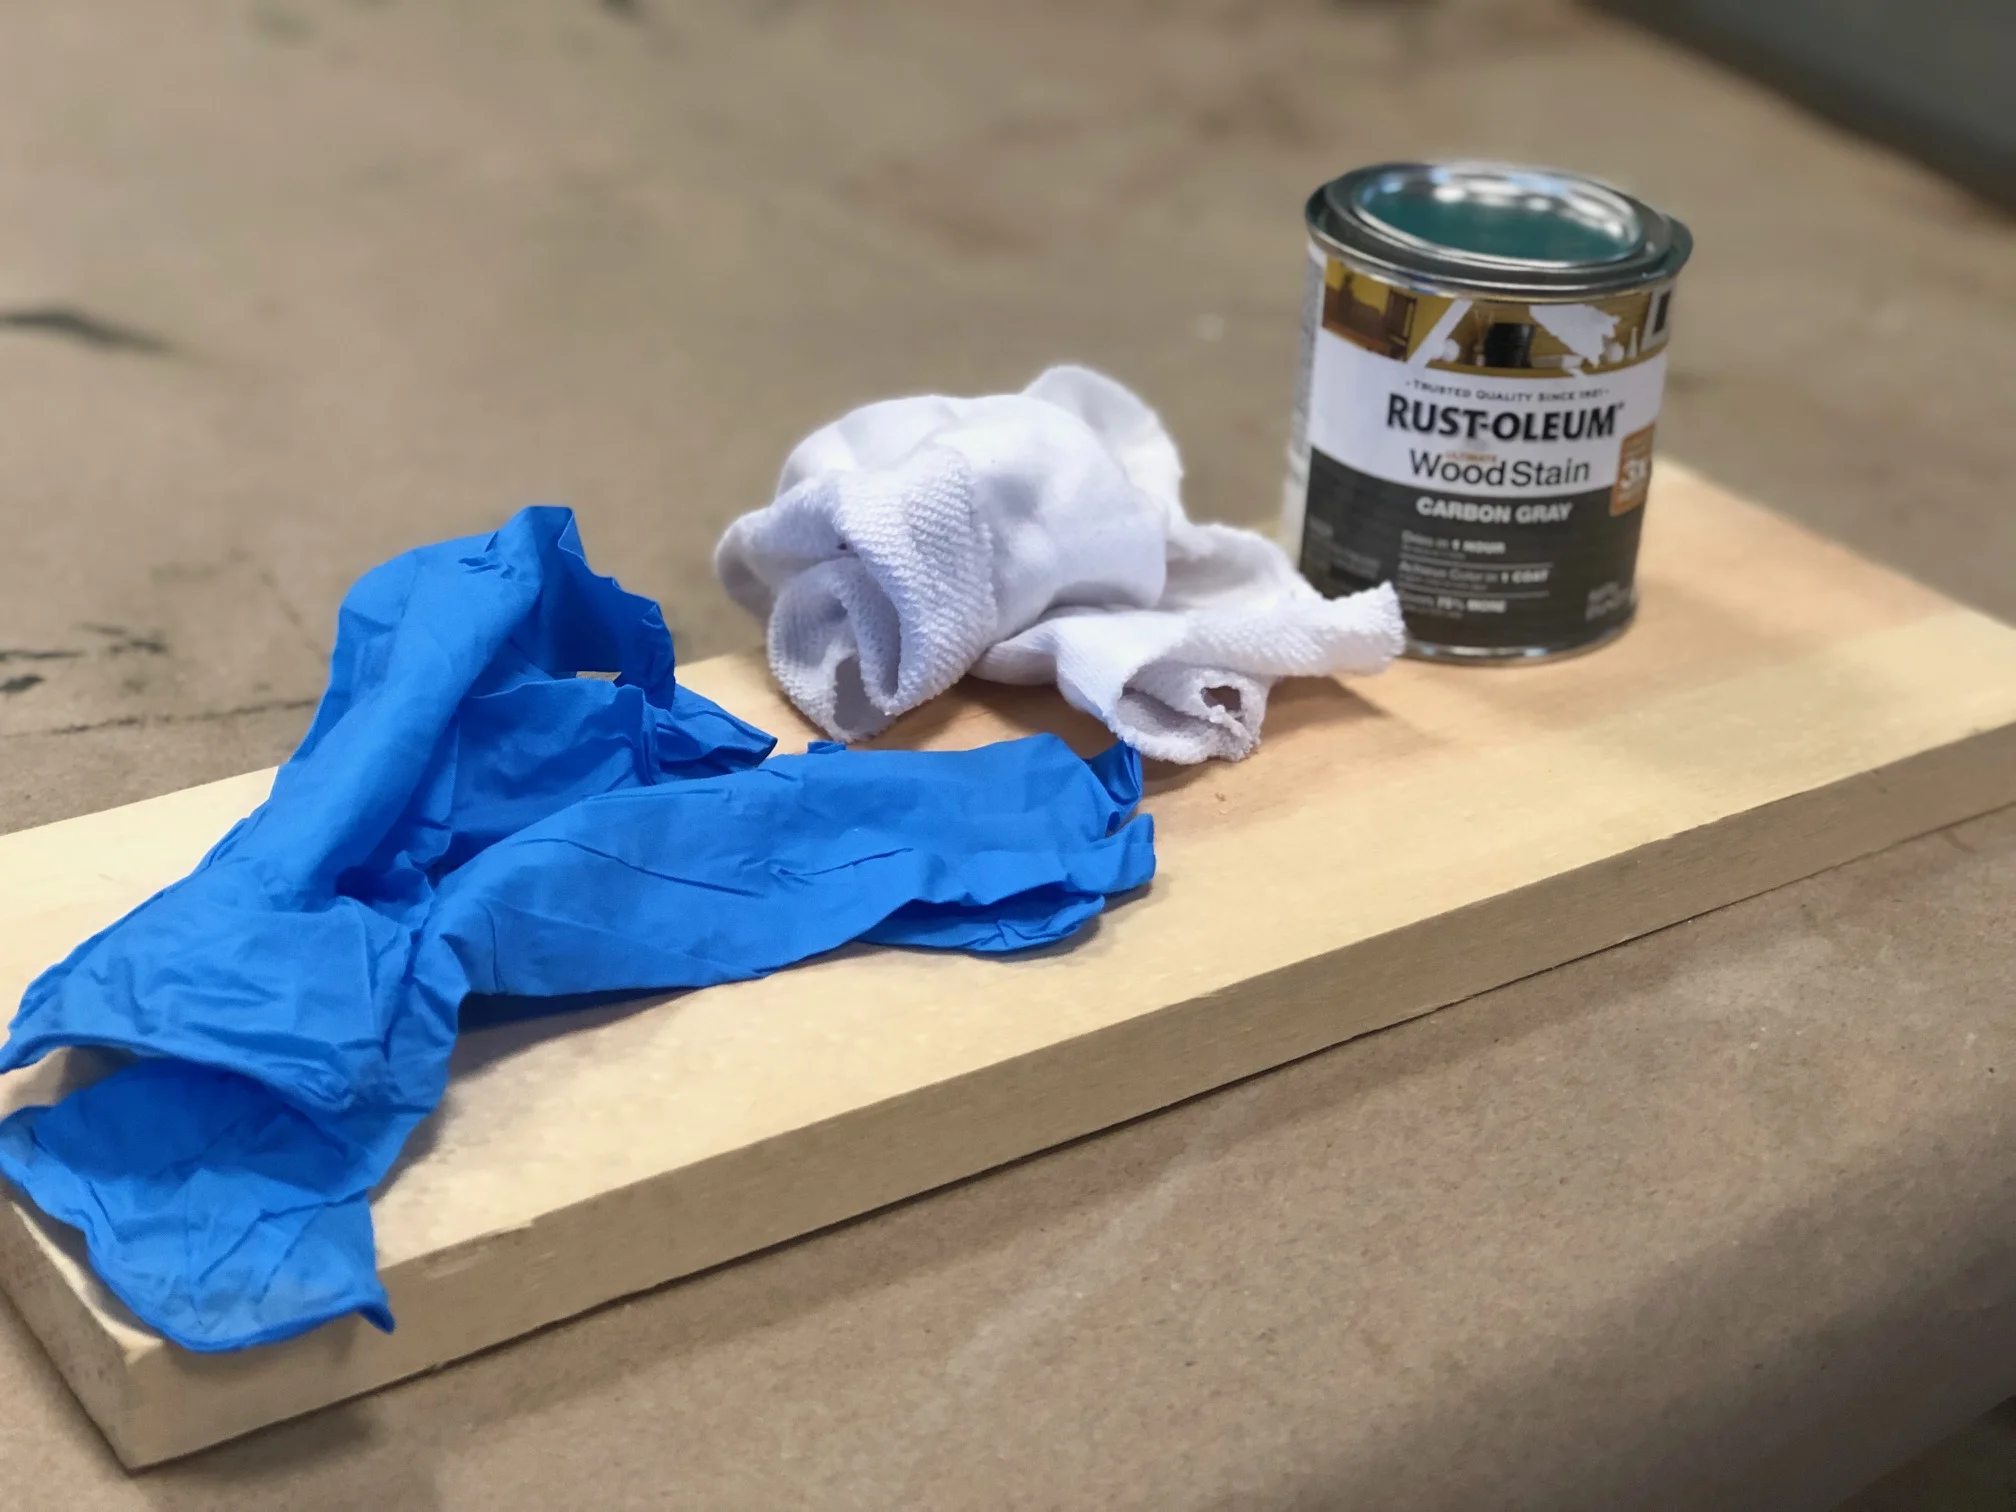
First give your board a light sanding, then stain. Be sure to watch my HOW TO STAIN WOOD video if you’ve never done this before. Let your board dry for 24 hours before the next step.

3. DISTRESS EDGES

One fish two fish, perfect Dr. Seuss keepsake craft to make with your kids

After your board has dried you’ll want to give it a quick sanding on all surfaces of the board. I always focus more on the edges and corners. Using a RYOBI cordless sander works great for this but you can use regular sandpaper if you need to. Wipe with a lint free cloth to get all the dust off, you don’t want this on there when you go to paint.

4. PAINT

One fish two fish, perfect Dr. Seuss keepsake craft to make with your kids

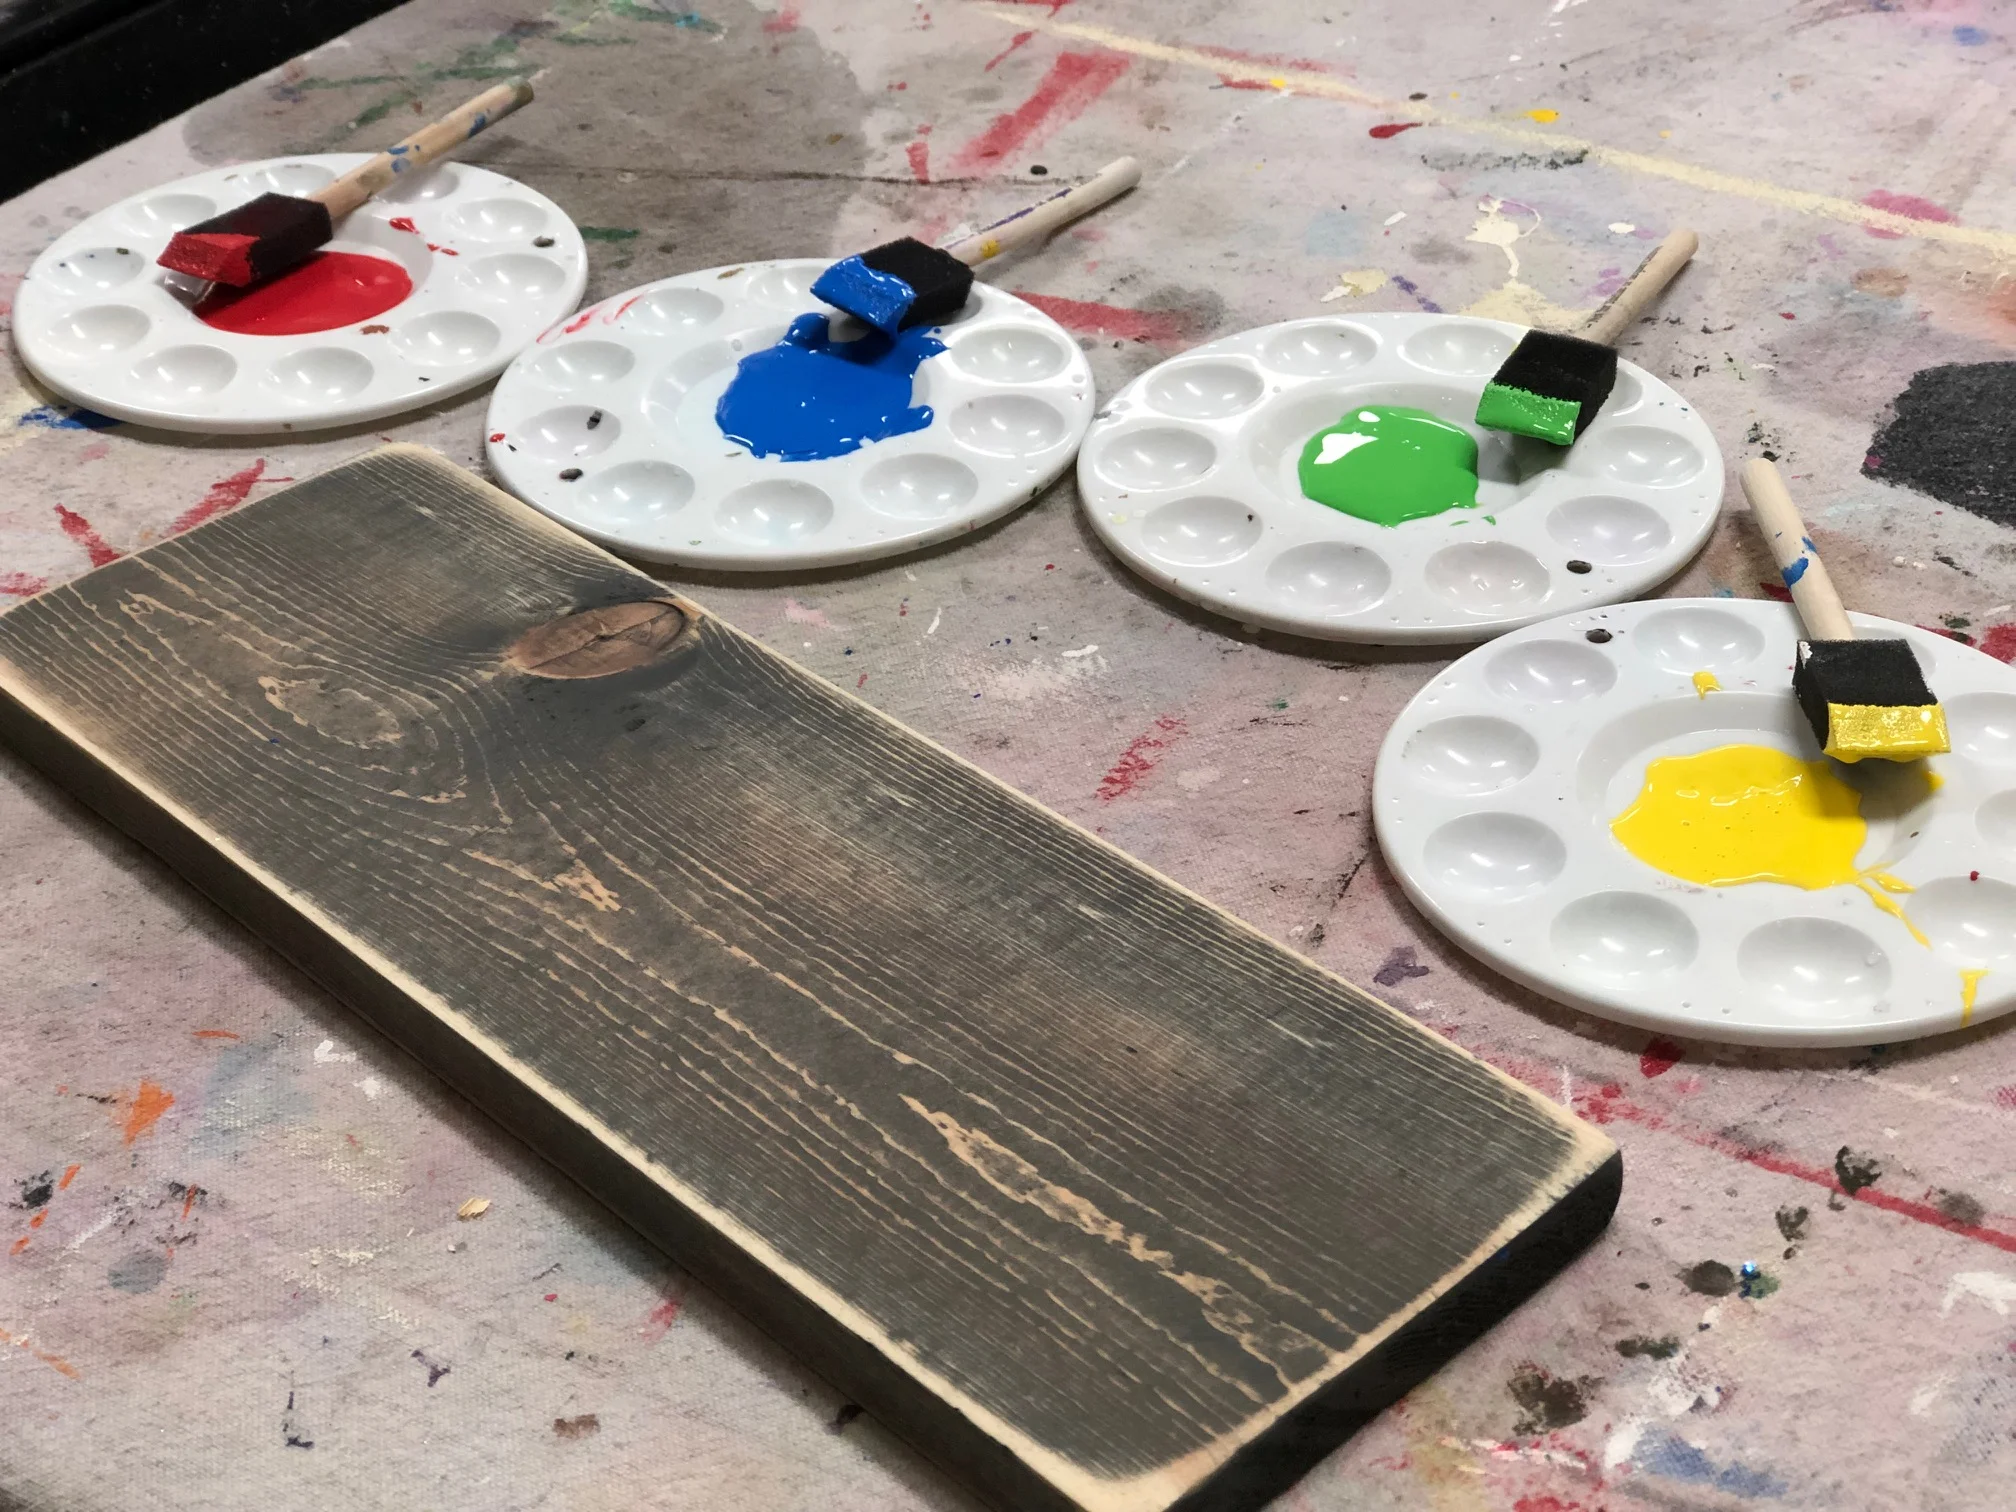
You’ll need RED, BLUE, GREEN, and YELLOW for this next step. I went ahead and made pencil marks for where I wanted the girl’s hands to hit. That way I could map out where they would be and I wouldn’t have either too much space or not enough space left.

One fish two fish, perfect Dr. Seuss keepsake craft to make with your kids

You’ll want to do one handprint at a time. Coat the hand in a fairly good amount of paint but not too much, you don’t want a glob of paint to be left on the board.

Gently guide their hands down on the board and press them lightly.

One fish two fish, perfect Dr. Seuss keepsake craft to make with your kids

Before you add any facial features/gills you want their handprints to totally dry. If you don’t let them dry you will smudge the colors together.

5. APPLY VINYL DECALS

One fish two fish, perfect Dr. Seuss keepsake craft to make with your kids

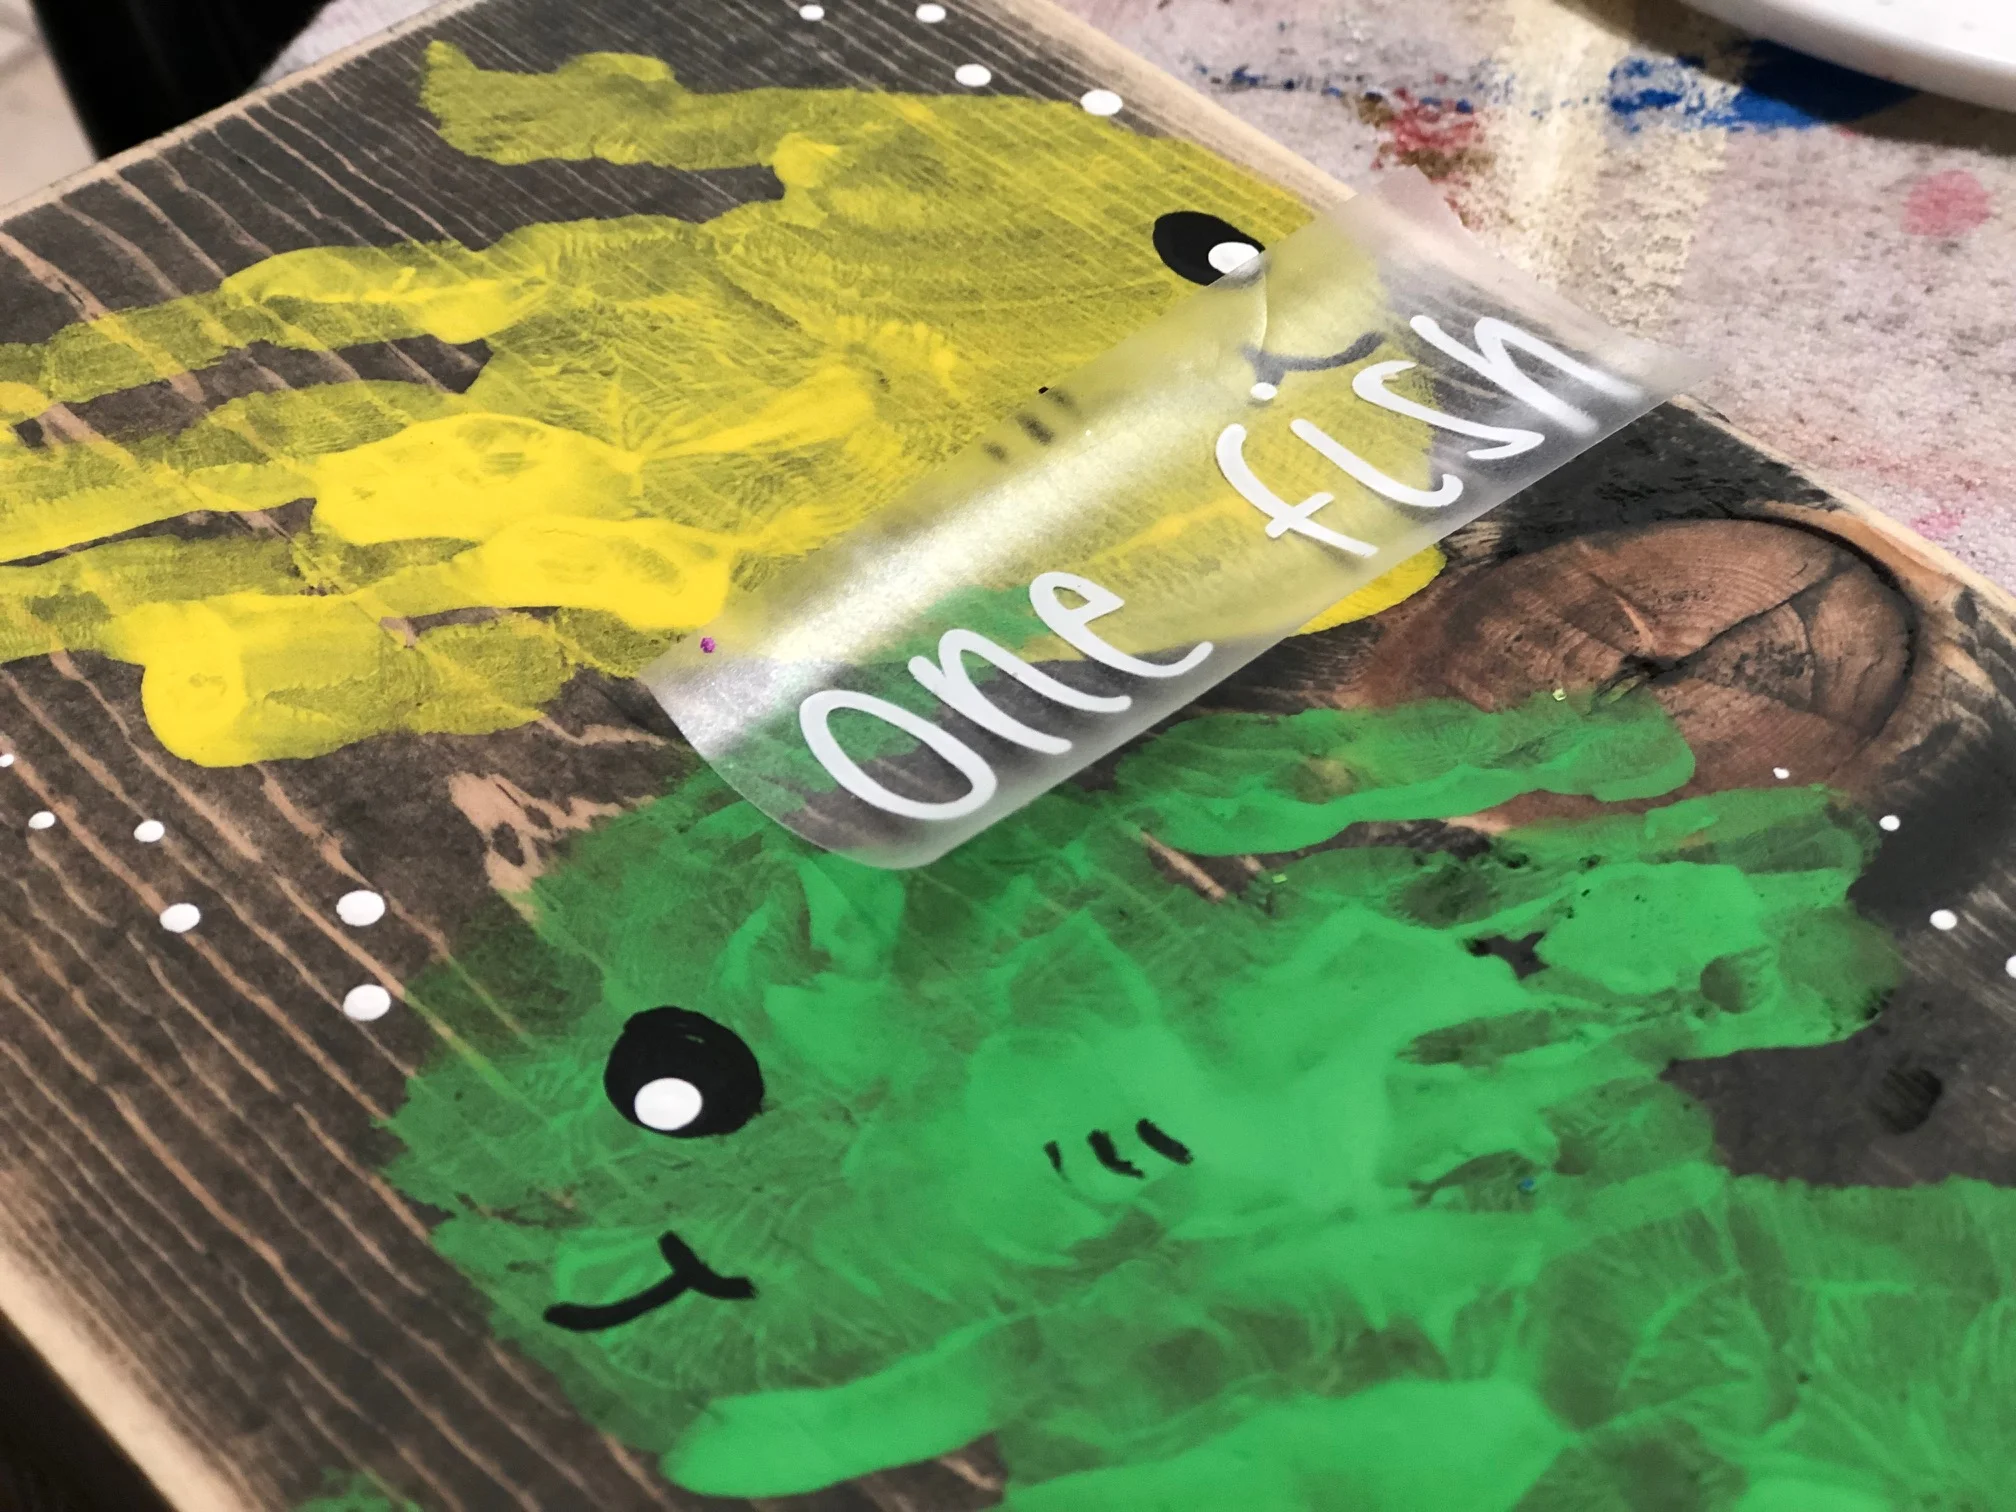
After all the paint is dry, totally 100% dry, add your vinyl decals. If your paint is not completely dry the vinyl will not stick to the board. I use a vinyl squeegee to help get the decals down really good. Then peel the transfer tape off.

Now it’s ready for you to hang and enjoy in your home.

One fish two fish, perfect Dr. Seuss keepsake craft to make with your kids

Click here for more crafty kid posts

Check out the latest posts on the blog

The hack you didn't know you needed for your crafty kids

Crafting hack, simple storage to use while your kids craft

It’s not a secret I LOVE creating and letting my girls create. But one thing I don’t particularly love is when the craft supplies go everywhere. I think moms everywhere can agree. Something about knowing that all those rhinestones and beads and giant sequence that are all over the place just occupies your mind instead of focusing on your precious babes making masterpieces.

I need to clarify that I’m not a clean freak, not even in the slightest. After all I’m a mom of 4, three of which are within 4 years of one another…so yeah I’m totally not a clean freak. Now, I also don’t keep a dirty home. We call it lived in {can I get and AMEN?!}.

How to make painted wood signs, all the tips and tricks the pro's won't tell you

But going back to that first paragraph it makes for a much more enjoyable crafting experience when I’m not focused on the 8 million beads that just fell off the side of the table because the entire jar spilled. Ok, maybe 8 million is a little exaggeration but it’s pretty close ;).

And you know what, I’m not the only mom who feels this way. I’ve talked to countless moms this last year who all agree, they have a really hard time enjoying art at home with their kids because their brain will focus on the mess instead of their kids. It’s natural. As parents, we have so much on our plates the last thing we want to do is chase rolling tiny itty bitty beads all of the kitchen floor.

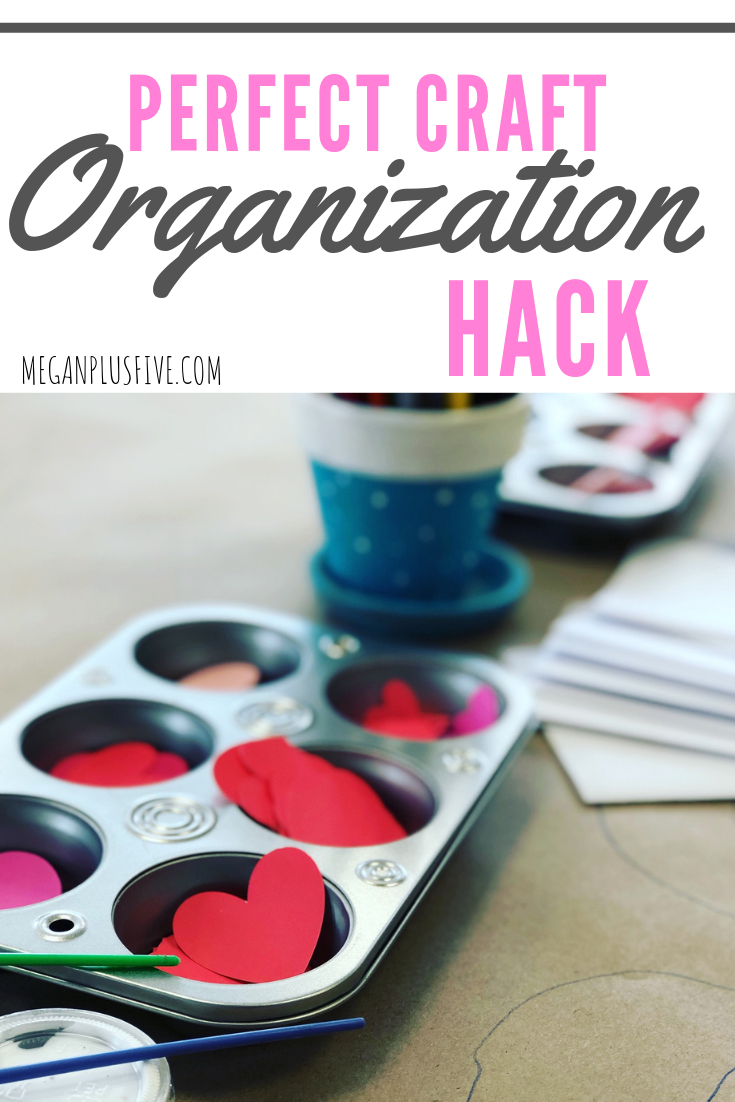
So here’s my craft hack that you NEED in your life when you create with your kids at home…are you ready? MUFFIN TINS! Yes, you read it right, muffin tins. I know it sounds so simple and maybe a little crazy that muffin tins can help you enjoy art time with your sweet kiddos but I’m telling you they are just the thing you need!

I was in Dollar Tree {my second favorite store on the planet} one day shopping for supplies for crafting event we were putting on and I was trying to find something that would hold all the little cut outs because I didn’t want to scatter them on the table but I also didn’t want to use bowls because they just take up way too much room. I walked down the kitchen aisle and there they were, almost like a ray from the heavens shined upon them, and it hit! Muffin tins are small enough they don’t take up all the space on the table, big enough to hold lots of supplies, and shallow enough that kids can easily get to the supplies without getting their little hands stuck or having to dump it all out.

The hack you didn't know you needed for your crafty kids

I can not tell you the number of parents that commented on how perfect the muffin tins worked.

These little guys are so cheap too! I picked ours up for $1 but I’m sure you can find some at local garage sales and thrift stores for next to nothing.

I’d love to hear your favorite at home crafting tips. Leave them in the comments below.

PERFECT CRAFT ORGNAIZATION HACK

5 super frugal ways to save money on beauty when you're broke

5 super frugal tips to save money on your beauty when you're broke

What do you do when you’re broke but you still need to get your hair done so you don’t look like you’re broke? You get resourceful and creative!

I have always been super frugal. Growing up in a house with 4 kids that were 5 years apart, and on one income, the budget was often tight. I was trained from a young age that if you want something bad enough that you can’t afford you make do with what you have and you put your brain to work.

Thankfully now we live in a time where the world is at our fingertips. How amazing is that?! If we ever want to know the answer to something all we have to do is literally pull a phone out and type. Pure bliss! We are in a time where it is easier than ever before to learn how to do something…if we want to do it bad enough that is.

Raising four little girls is expensive, like seriously expensive! From heath care to every day expenses, there’s not much room in our budget for unnecessary purchases. So we have to be selective on where our hard-earned money goes. Let me tell ya, it doesn’t go to my beauty fund lol! I know moms everywhere feel the same way.

Here are my 5 best frugal tips to saving money on all that beauty stuff…if you’re willing to do a little work.

5 super frugal tips to save money on your beauty when you're broke

-Don’t buy in to every single beauty trend that comes out.. This will save you SO much money if you don’t jump on board. Remember that what’s hot now won’t be in a few years.

- YOUTUBE is your BFF! Use your fancy phone to youtube how to do your own hair. I know this may seem extreme BUT if you don’t have anything too complex going on with your locks you can do it yourself. Before I had kiddos I was a licensed cosmetologist, but I watched my grandma work in the salon for YEARS growing up and I was doing my own hair long before I became licensed myself. If you go slow and don’t do anything too extreme you can get the job done. This works for anything you want to know how to do. You will have a little bit of an expense at first to buy the tools you’ll need but they will like cost WAY less than getting the actual service done.

-I know pedicures are God’s gift to your feet but they are often an unnecessary expense. You can spend $5 at your local Dollar Tree or Walmart and get everything you need to do your own at home. I promise it absolutely won’t feel as wonderful but you’ll also be saving $$.

-Try bartering if you have a specific beauty need that you just can’t spare. If there is something you are really good at that your hair dresser needs from you, swap. I would just be very careful to not let this ruin any kind of relationship that you have with one another. Trading dollar value for dollar value is a great way to do this type of exchange. If she charges $35 for a haircut and you charge $25 for {insert the awesome thing you have to barter with} you would pay the remaining $10 in cash plus the thing you are bartering with.

-Don’t pass up clearance makeup. I know you’re probably thinking ‘what the heck is wrong with this lady’ but remember…you’re broke lol! You don’t have $57 to spend on a tube of mascara. Honestly, I have spent that much on mascara before and it did just as good as the $4 Walmart special I have now.

There’s my most frugal tips I use to save money on beauty. It will take a little getting used to, especially if you’re brave enough to do you’re own hair, but you will be amazed at how much money you will save.

If you liked these money saving tips check out some more of my frugal tips


Have your own tips? I’d love to hear them, be sure to share them below!

FREE Printables to keep your monthly bills in order

FREE Printables to keep your monthly bills in order

I know I am super old school when I say that I keep a planner that I can actually hold. But you know what…I have no shame. I LOVE having a tangible planner that I can pull out of my bag and put a pen to. The truth is I tried to use those fancy techy ones and they just aren’t for me. I love to write {although my handwriting is terrible} and I love to flip through the pages and feel the impression of the ink on the paper. It's sort of humbling in its own way.

I love creating printables for my BIG Happy Planner. Before I stumbled across these wonderful life savers I used to make my own planners, but that’s a whole other blog post on its own.

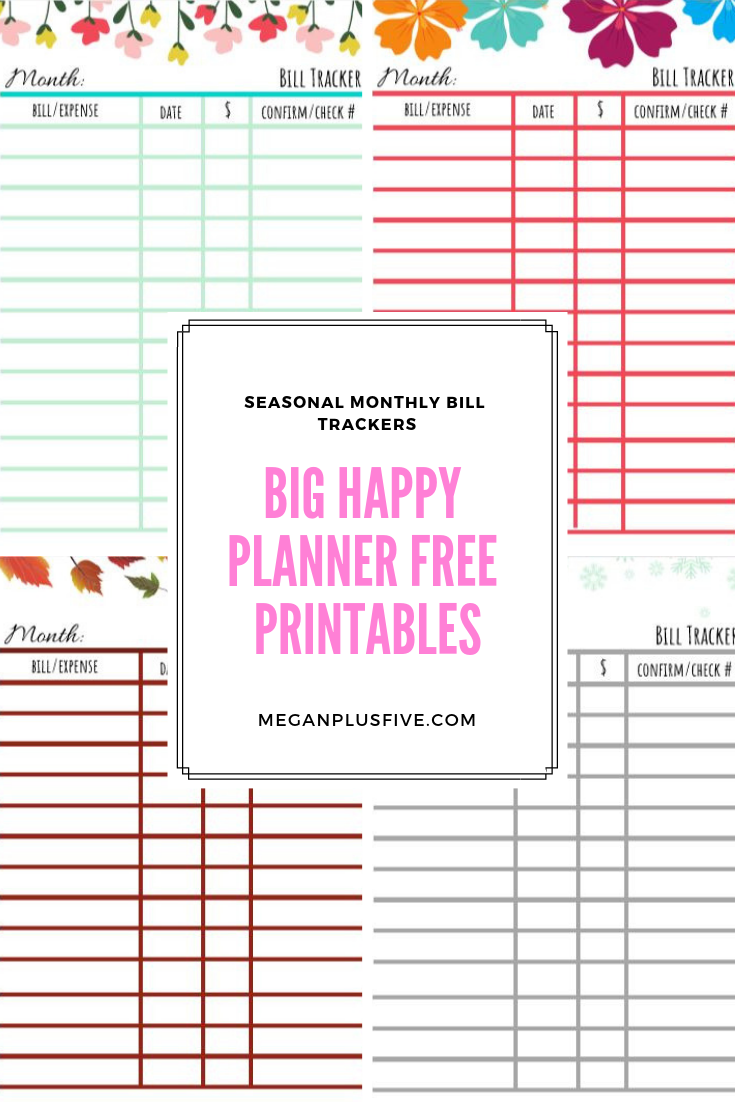
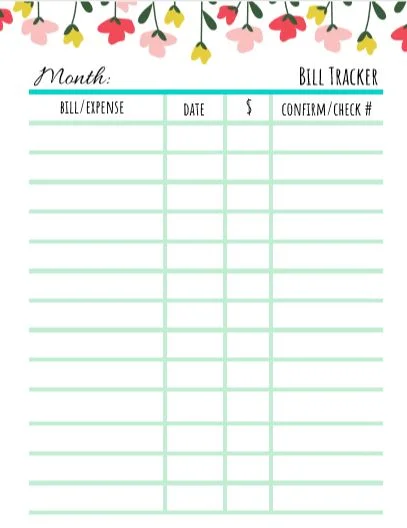
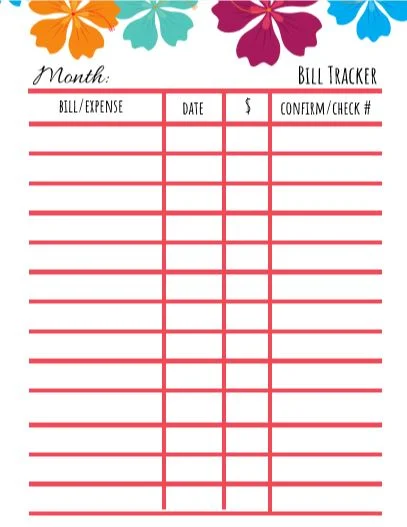
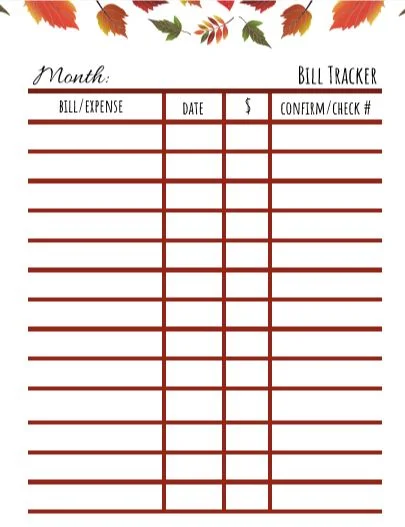
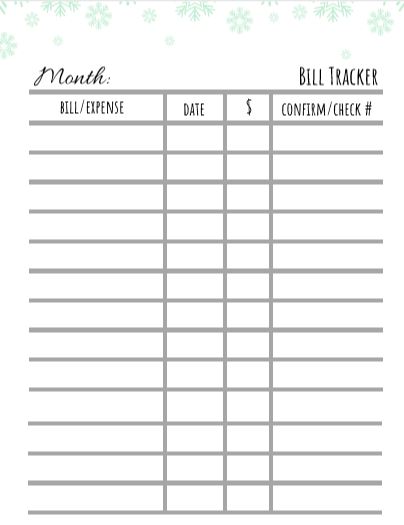
Life with kids can seriously leave you wondering what day it is most of the time. I don’t have enough brain space to remember which day I paid what bill {we don’t use auto draft for our own personal reasons} so I needed a page that I could keep track of all the bills we paid that month, the amount, and the confirmation/check number. I’ve been using a bill tracker similar to one like these for years and the months I don’t write everything down on them are the months my life just feels a little chaotic.

Making them colorful is also a must. There’s nothing more depressing than jotting down all the money you’ve paid on bills for the month on a black and white piece of paper. I HAVE to give my printables to life. I made one for each season, winter, spring, summer, fall. Print the number of printable you’ll need for each season. These are made to fit the BIG HAPPY PLANNER but you can adjust these sizes when you go to print for the size that’ll fit your needs.

I do hope you enjoy these monthly bill trackers as much as I do!

Let me know what you think by commenting below.

FREE Monthly Bill Tracker

Leave your info below so I know where to send your free printables

FREE Printables to keep your monthly bills in order

50 activities to do as a family that won't break the bank when you're on a budget

50 activities to do as a family that won't break the bank when you're on a budget

50 Budget friendly activities to do as a family, affordable family fun

Having a big family is expensive. From the cost of living to healthcare, it’s definitely not cheap. But having fun as a family doesn’t have to break the bank. There are so many free and inexpensive activities you can do and honestly some are way more fun than blowing a whole paycheck at the theme park.

Here’s my list of 50 fun things to do with your family if you’re on a budget.

  1. Park

  2. Library

  3. Walks around the neighborhood

  4. Free days at the zoo

  5. Local state conservation park

  6. Explore a small historic town nearby

  7. take a tour of the local fire or police station

  8. Bonfire

  9. Bike ride

  10. Visit a local farm

  11. Botanical garden

  12. Small local museum

  13. YMCA {this does require a membership but it’s super affordable and you’ll definitely get your monies worth}

  14. Skating rink

  15. Local pool

  16. Picnic

  17. Make a meal from scratch

  18. Do a family craft

  19. Play a game of cards

  20. Family yoga in the backyard

  21. Bird watching

  22. Go on a hike

  23. Clean up a local park or school yard

  24. Make a fort in the living room

  25. Camp in the backyard

  26. Stargaze

  27. Feed the ducks

  28. Play charades

  29. Play a game of kickball

  30. Roast marshmallows

  31. Jump in the leaves

  32. Find a local creek and look for arrowheads

  33. Make cards and deliver them to the local nursing home

  34. Find a dollar movie at the theatre

  35. Go to a local high school play

  36. Plan and make dinner all together

  37. Paint rocks and hide them around your town

  38. Visit a local flea market

  39. Make a family dream board

  40. Wash the family car together

  41. Have water balloon fight

  42. Go fishing

  43. Research your town’s history and then go out and see the sites

  44. Bird watching

  45. Visit a local spray park

  46. Make a bird feeder using recycled materials from home.

  47. Take goofing family pics at the park using your phone and a tripod

  48. Volunteer at the local pet shelter

  49. Find a local festival with free activities

  50. Have a karaoke night

I hope you get some fun ideas from this list and even add more of your own.


How to plan the PERFECT no stress art party for your crafty kiddo for less than $40

How to plan the PERFECT no stress art party for your crafty kiddo for less than $40

Has your kiddo been dreaming of that PERFECT art birthday party? Maybe they are like my older girls and have all of their out of budget party dreams pinned to Pinterest {yes, they really do this!}. After having 4 girls and LOTS of birthday parties I’ve learned a thing or two on how to pull off that perfect art party on a budget!

Disclosure: some of the links below are affiliate links, meaning, at no additional cost to you, I will earn a small commission if you click through and make a purchase.

Here’s the a little truth, kids just want to let loose and be kids. They don’t care about fancy decorations, perfectly spaced plates and napkins, banners hung at just the right height. Let’s be honest, that’s for the adults. The kids are there to hang with their friends, eat cake, and have loads of fun, but that’s a whole different blog post.

So how to you plan a kids painting birthday party under $40? Yes, you read that right…. just $40!

First you need to decided how many kids will be coming to your party. Usually I will have a few extra supplies in case a kiddo RSVP’s at the last minute or if one shows up and doesn’t RSVP at all. A typical party we host at our craft studio has about 6-8 kids. Our kids, they usually have about 20…gulp! I know that seems a little ridiculous but they have lots of cousins and I always invite the party goers siblings to stay because I’m a sucker for feelings and don’t want any kids to feel left out. Honestly this is easier for the parents that want to stay for the party anyway.

 
Art party on a budget. FREE printable how to plan a crafty art birthday party without breaking the bank

Snag your FREE checklist below


How to plan the PERFECT no stress art party for your crafty kiddo for less than $40

If you don’t have anything at home here’s everything you will need

Most of these supplies are disposable to make this EXTRA easy and stress free for you!

-8”x10” canvas these come in a pk of 12

- acrylic paint set of 12 2oz paints
- paint brushes these you can toss when the kiddos are done

-paper cups used for holding water to rinse paint brushes

-paper plates used to hold the paint, one for each kiddo

-plastic table covering this you can toss when you’re done


All of these items can be shipped right to your door with amazon prime*, I told you this would be stress free. No going to 5 different stores to track down all the supplies you need only to get home and realize you totally forgot something {I do this all the time!}. Then the day of the party you kick yourself because I never made it back to the store to get that forgotten item. All of this will cost you less than $40, not including taxes or any applicable shipping*

*based off of when this post was published

So how do you host an art party? First, I always tell the parents to put their kiddos in clothes they can get messy. There’s nothing scarier than a pissed off momma because her child got their new clothes ruined by non washable paint. So try to avoid that at all costs. Next, you want to have everything set up before the kids get there. This is so much easier than trying to pass out all the materials with 10 little helpers gathered around. That means, plastic table cloth down, water cups filled half way, canvases, paper plates, and a couple of brushes at each table setting. Let’s talk about paint…paint goes a LONG way, you’d be surprised at how much paint gets wasted at parties like these. Before the party I always squeeze a small amount of each color of paint that’s available onto each child’s paint plate. Trust me, you’ll thank me for this stress saving tip!

I try not to let the kids sit at the table where they will be painting until we are ready to paint. Unless you have some kiddos that are great at following directions I would have the kids avoid the paint table till you’re absolutely ready.

Now for the fun! Once all the party guests are ready let em loose on their canvases. In my experience kids have WAY more fun when they can paint their own thing using the colors they pick out. Usually that’s what we do. You can see the joy it brings them and their creativity coming to life the second that paint brush hits their canvas. And they all make something totally different and it makes my heart so happy! That individuality is so beautiful!

I promise your kiddo will be so happy creating beside all their friends they won’t even notice the fancy decorations aren’t there.

How to plan the PERFECT no stress art party for your crafty kiddo for less than $40

How I survived 16 months breastfeeding our fourth {and last} baby

How I survived 16 months breastfeeding our fourth {and last} baby

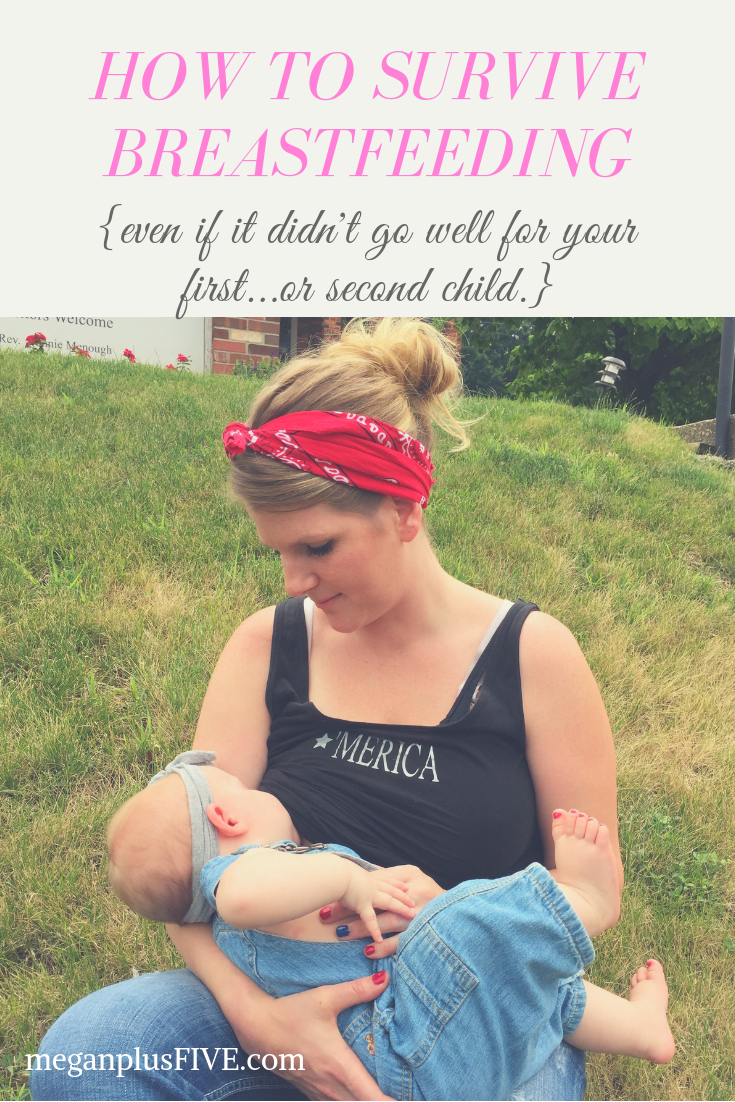
I am not ashamed of saying I am PRO breastfeeding. Growing up I never saw anyone breastfeed. Honestly didn’t pay enough attention as a kid to ever notice any women ever doing it in public. My mom didn’t breastfeed, my grandma didn’t breastfeed her, and I never saw a family member do it either because it wasn’t done in our family, not publicly anyway. Yet, I always knew I would breastfeed my own children.

I didn’t have the best experience with breastfeeding our first two daughters. My only regret is not being informed with them. If I would have known what I knew with our youngest or had the resources I am certain we would have successfully nursed just as long.

I was able to breast feed our youngest two daughters for far longer than past the few weeks mark. They were healthy and I was so thankful I didn’t have to rely on any formula for them. Our third for 10 months and our fourth for 16 months…woohoo! So PROUD of those numbers!

Here are my tips for a long and successful breastfeeding journey.

-GOOD BREAST PUMP. It wasn’t till our 4th and last daughter that our insurance paid for this. A good pump has a pretty price tag on it and we couldn’t afford one with our older three so I just didn’t have one with them. If I did I probably could have exclusively breast fed them without the use of formula. However, I am SO thankful that we had formula as an option to keep our girls fed and healthy.

-BREASTFEEDING SUPPORT GROUPS I’m going to be honest when the lactation lady stopped by my room to talk to me after having our first daughter I was like “who is this weird hippie lady???” I’m just going to say it…I was a total idiot for having such a closed mind. Although I always knew I would breastfeed I had never heard of people that wanted to help other women breastfeed. I didn’t know that was a thing, like a real life thing. Fast forward to our third daughter, I was DESPERATE for help. I had thrush {which I’ll talk more on next} and I was willing to do anything to make it better. I was determined to make nursing work with our third, after failed attempts with our first and second. I called that “weird hippie lady” and she was an angel sent straight from heaven! After we had our fourth I went to every breast feeding support meet up I could. The ladies are wonderful, there is no judgement. You weigh your baby, eat tasty snacks and ask any questions that you might have. Our local meetings are ran by the LLL, La Leche League . They are THE BEST!

-THRUSH I mentioned this above and it is such a PAINFUL thing to have. I got thrush with both our third and fourth daughters. If you’ve never had thrush it feels like razor blades are coming out of your nipples. It hurts. And your poor baby’s mouth starts to turn white on the inside and I imagine it’s itchy for them too. The first time it happened I had no idea what was going on. I was scared and didn’t know what to do except call the doctor. Of course it was the weekend so I called the doctor on call at my OBGYN and he literally told me women can not get thrush through their nipples, it was made up. Yeah….so glad he was not my regular doctor. I called my regular doctor the next day and he wrote me prescription to take care of it. Unfortunately, it didn’t work. I was about to give up on the whole successful breastfeeding journey. As a last effort I called the “weird hippie lady” and thank goodness I did. She was so kind, so helpful, and KNEW exactly what I needed to do to make the thrush go away. She recommended I get Gentian Violet* to get rid of it. And holy crap it worked!! I told my grandma what she recommended and she knew what it was. She said they used that stuff often when she was growing up. I will warn you it is PURPLE. It will stain anything and everything it touches but that’s a small price to pay for it’s magical powers…it doesn’t really have magical powers but it’s pretty amazing stuff!

*this is not medical advice, please consult your medical professional before using any new product formedical purposes

-TWO SHIRT METHOD this is the way I nursed our 4th daughter in public most of the time. For the few short weeks I nursed our oldest two I ALWAYS used a thin blanket to cover. Let me tell ya, this was such a pain in the butt! The blanket would fall down then I would get all nervous, baby would unlatch and milk would drip everywhere…talk about a new mom’s worst nightmare! With our 3rd daughter I started to implement the two shirt method but still occasionally did the blanket thing. By the time our 4th daughter came along I said “screw it! If you don’t like it look away!” and I just did my thing. Honestly, in my opinion, you can’t see anything nursing this way. And if you do, you’ve probably seen more skin exposure on tv so what’s the big deal?

-NOT CARING this one is HUGE. When you push past the fears of “what if I offend someone”, “what if I make someone uncomfortable”, “what if…” and you just let it all go. Trust me you will have a much more pleasant breastfeeding experience if you just stop caring what others think.

-FAMILY SUPPORT I have been blessed to have a pretty amazing husband that FULLY supported my breastfeeding journey. His advice was always “if they don’t like it **** em” he has some pretty colorful language most of the time. But without his support there’s no way I would have been successful at breastfeeding our youngest two for as long as I did.

-PILLOWS you don’t need anything fancy but I do recommend using pillows for support, especially during the first few months, while you’re at home to nurse your baby. You will feel so much more relaxed and it will in turn give you more confidence as a breastfeeding momma.

-NURSING PADS in the beginning I used disposable ones, but those can get pretty pricey when you need to buy them every week. So I eventually made my own. They were thin, but discrete and did a great job. I don’t have a HOW-TO post to make your own but if you can sew it’s super simple. You can always buy some from a handmade seller on Etsy {CUTEANDFUNKY, MAMAMELONCA, PCFAO, I am not affiliated with any of these shops, nor am I getting a commission from them. I simply want to spread the love of handmade}

-FINDING YOUR RYTHM This is going to be different for everyone. I think what’s important is to just keep trying till you find your comfort zone. There is no shame in trial and error. If your new mom friend said a certain hold position worked for her and you try it and it sucks for you…that’s ok. That just means it didn’t work for you and you try something different.

I hope these non traditional breastfeeding tips help you on your breastfeeding journey. If you have questions ask them down below.

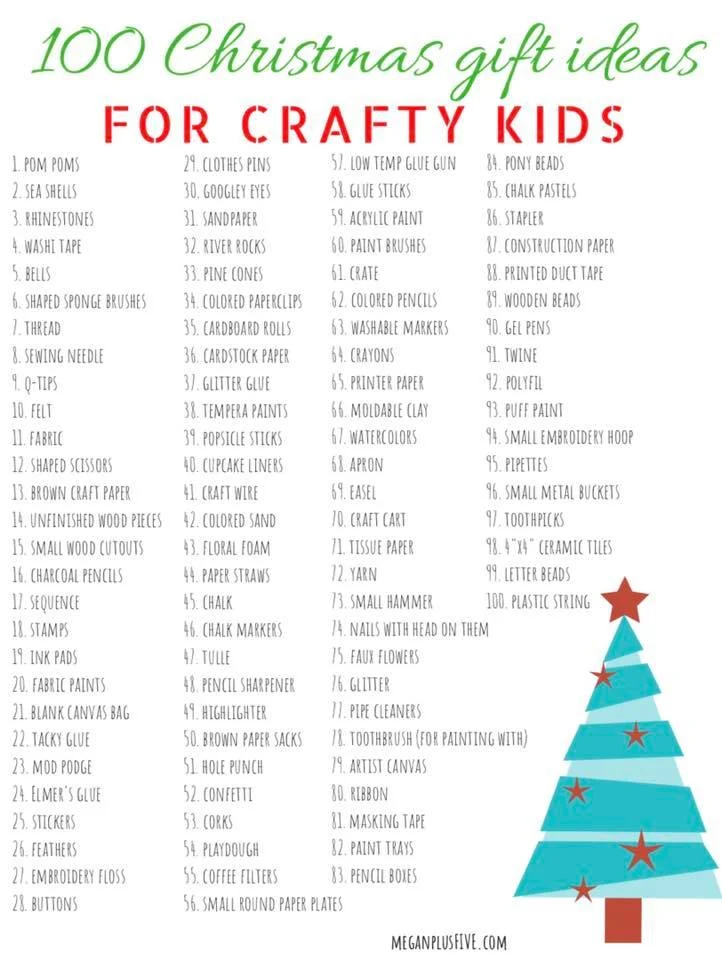
Christmas wish list, 100 gift ideas to get the CRAFT obsessed kid in your life

Christmas wish list, 100 gift ideas to get the CRAFT obsessed kid in your life

What do you give the craft obsessed kid? We have 3 crafty girls {the fourth one isn’t too far behind though} and own a family friendly CRAFT STUDIO so we have a pretty good idea of what kids LOVE to create with. Most kids love cutting, gluing, and adding as much paint to things as they can. They are just figuring out how to use different tools and exploring different colors, textures, and possibilities.

Did you know there are ALL kinds of different everyday items you can use to create with? Take a toothbrush for instance. This is one of those things we have in our studio that makes everyone say “ummmm do you brush your teeth here?” and the answer is always “no, we use it to paint”. A fun technique my grandma taught me when I was very young, to use a toothbrush to add little specs and small splatters of paint. It is the best tool for this so we keep several toothbrushes in shop just for this. I am so proud to pass down that little technique to so many.

Our older girls and I worked on this list just for you! They really enjoyed listing off all of their favorite supplies to create with. We hope you can use this to put together a really awesome CRAFT GIFT for your crafty kiddo! Let them explore. Let them make a mess. Let them be creative.

Christmas wish list, 100 gift ideas to get the CRAFT obsessed kid in your life

Our family trip to the pumpkin patch, 5 reasons why we support small local farms each and every fall

Our family trip to the pumpkin patch, 5 reasons why we support small local farms each and every fall

Here in the Midwest EVERYONE with kids visits the pumpkin patch every single fall. It’s like our own little way of officially welcoming in the fall season.

If you’ve never been to a pumpkin patch you are surely missing out. It’s a whole experience that you will look back on and remember fondly. And you’ll get some really great pictures because pumpkins make all fall pictures 100% better!

This year we visited a fairly new pumpkin patch, The Pumpkin Pad, and I have to say it was even better than we expected! This was their second year being open so we were expecting them to have a few activities for the kids but we were so wrong! They had an inflatable jumping pad, bounce house, super awesome round swings made from sturdy netting, tractor rides, giant slide, a huge corn pit to dig in, bean bag toss, a tall grass maze {which my husband and I weren’t totally accepting of but the girls LOVED it} and so much more! All for $10/person, they let our 2 yr old in for free and their pumpkins were SUPER AFFORDABLE…say what!

Here are my top 5 reasons why we choose to support a small local farm each year vs a big oversized money maker

1. Owning our own brick & mortar shop we know the importance of supporting small local business. We try to shop small as much and often as we can. At the end of the day I would rather our hard earned money go to supporting a family rather than some super rich person, whenever we can.

Our family trip to the pumpkin patch, 5 reasons why we support small local farms each and every fall

2. When you visit a big name patch, especially if you go on a weekend, it will likely be crowded. But at a small family owned pumpkin patch the people come in much lower numbers. You have room to roam and enjoy your time there without your anxiety going through the roof {or the clouds because you are outside ;) }

Our family trip to the pumpkin patch, 5 reasons why we support small local farms each and every fall

3. The prices are usually WAY more affordable overall. We have a bigger family so anytime we do anything like this it usually puts a small dent in the wallet. The small farm we visited this year had GREAT prices on their admission and their pumpkins! We were pleasantly surprised! Everyone got pumpkins, our two year old got a few, all for $20! We couldn’t have gone to Walmart and got everyone a pumpkin for that price.

Our family trip to the pumpkin patch, 5 reasons why we support small local farms each and every fall

4. They are usually a TRUE PUMPKIN PATCH! Meaning the pumpkins are still on the vine and you cut them off yourself. This is a fun experience for everyone. We’ve been to other big name patches with our girl’s school field trips that have already precut ALL the pumpkins and leave them in the fields or they don’t have the patch at all and have the pumpkins ready for “picking” on bales of straw all around the farm. There’s nothing wrong with either of those ways but we enjoy picking them straight off the vine.

We’ve found that the small farms are usually the true YOU PICK farm. Which for our family never gets old!

Our family trip to the pumpkin patch, 5 reasons why we support small local farms each and every fall

5. The owners put so much love and their own hard work into their farms! As soon as you walk up you are welcomed with a big smile from likely the owner of the farm. They are so proud of what they have created for your family to come and enjoy and make endless memories.

Our family trip to the pumpkin patch, 5 reasons why we support small local farms each and every fall

I hope this encourages you to support your own local farms. Knowing you are supporting another family is something so special! Each and every local farmer we’ve met has been genuinely kind and grateful to all in the community that supports their small business.

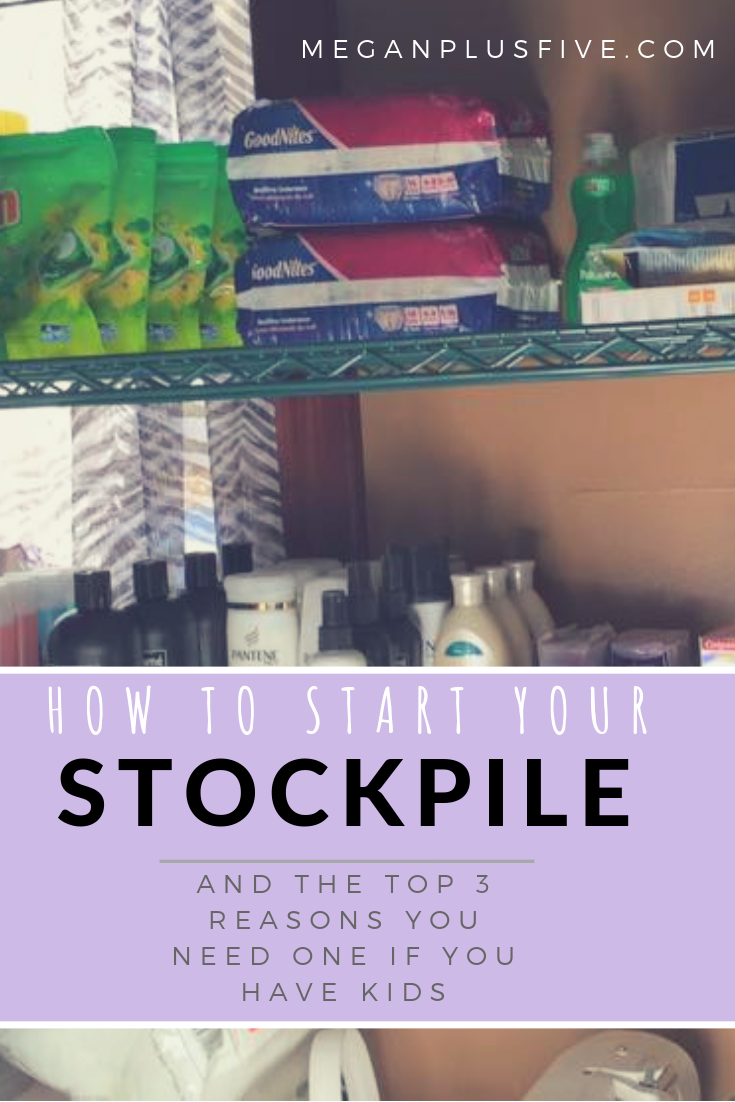
How to start your stockpile and the top 3 reasons you NEED one if you have kids

How to start your stockpile and the top 3 reasons you NEED one if you have kids

What is a STOCKPILE and why do you need one if you have kids?

According to google, a stockpile is defined as "a large accumulated stock of goods or materials, especially one held in reserve for use at a time of shortage or other emergency." And they summed it up pretty good! I’m sure you’ve seen those shows of people hoarding YEARS worth of goods but that’s not what I’m talking about. I’m talking about stockpiling a small amount of goods so you are prepared when life happens. In our home we have one shelving unit and that’s it.

Ok, so how do you build a stockpile? The most popular way to build your stockpile quick and cheap is to coupon. But, if you're like me, you don't have time for that {couponing is GREAT but it's also super time consuming}. Before I was a mompreneur I was on of those  crazy couponers! I had a binder that was so organized I even amazed myself with my organization skills. I would spends hours each week sorting, clipping, searching the sale ads, and planning out my trips.  If I had the time I'd still be a couponing crazy but I don't, so instead I shop the sales and take advantage of our SAMs Club membership.

Building your stockpile without coupons can be done. It will take longer, but you can still build a great stockpile for your family. I highly recommend getting a membership to Sams Club. We have had ours for several years now. At first, I didn't think we would use it very often but we actually use it every single month. It's worth the small membership fee! They also let you share a membership with someone you know making it even cheaper for you! Sams is GREAT when it comes to running sales and their additional savings. This is when I stock up. Here's an example...we buy our dishwashing tabs from SAMs. They are usually around $10. A couple times throughout the year they will go on sale for $2-$3 off the regular price. When that happens I'll buy 2 or 3 instead of 1. Now we are set for dishwashing tabs for the next 6 months. I follow this same principle at the other stores I shop at. When I find something my family uses I will buy multiples at that low price.

If you keep that up, buying multiples of things when they are at a really low price, you will slowly build your stockpile up. Be sure to only buy things you will actually use. If your family doesn’t eat peanut butter but you find it on sale for .50 a jar you don’t need to buy it unless you plan on donating it. Also, if something will expire before you use it, it’s probably not a good idea to stockpile it.

So, now you know how to stockpile but why do you need to stockpile? My answer…because it's smart! Life is so unpredictable, chaotic, and full of surprises that you don't want to find yourself totally out of shampoo in the middle of your morning shower because your 7 year old used the last of it to give her baby dolls a bath the night before. Yes, that's a true story! This kind of stuff happens ALL THE TIME in our house and thank goodness we stockpile to make these wonderful little surprises no big deal. Here are my biggest reasons why WE stockpile in our home.

TOP 3 REASONS WHY TO STOCKPILE

1. My biggest reason is the reason why we started stockpiling...so you don't run out of something when you can't afford to replace it. Let's face it, having kids isn't always sunshine and rainbows. Unexpected things happen and you never know when you’re going to have a financial strain. This was a very real thing for us several years ago when my husband’s construction job had a bit of a slow month. We aren’t ones to borrow money when things get tough so we made it work with what we had. That’s when I started couponing and vowed we would keep a stockpile from that day forward. And we have we just go about stocking it a little different now that I’m not couponing anymore.

2. My second reason you should stockpile if you have kids is so you don’t have to make those unplanned trips to the store. Dragging our four girls through Walmart isn’t really my most favorite thing to do. Especially if it’s for one thing that we NEED like toilet paper or diapers. Usually when that happens everyone is grouchy, tired, and just done for the day. So it makes for a very unhappy trip for all.

3. Last but certainly not least, so you can help others in need. Countless times our stockpile has helped others when they’ve been without. We’ve been able to give to family, donate to a local crisis closet, and we even donated over $300 worth of items when a tornado hit our small town. All because we had a stockpile we could give back to so many. This is a great way to teach your children to share and give.

I hope this inspires you to build your own small stockpile for your family.

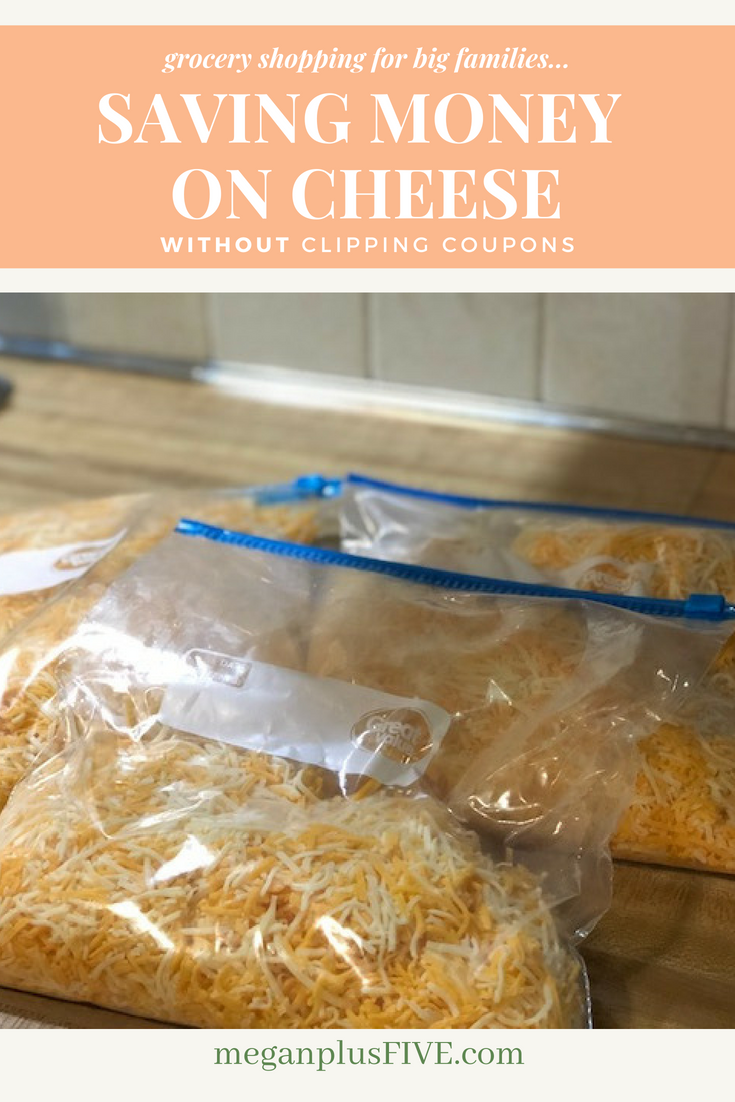
How to save money on cheese WITHOUT clipping coupons

How to save money on cheese WITHOUT clipping coupons

Whether you have a big family or prefer to buy in bulk this is a cheesy good deal you won't want to pass up! {I know that was a terrible intro but I couldn't resist!}

I used to be one of those crazy couponing ladies...the real deal! I had the binder. I had the coupons. I had my trips planned out. I even taught people how to coupon. And I loved it! But once our online business took off I didn't have the time to do it anymore. I didn't have time to bounce from store to store, scour the sale ads for the best deals, and mindlessly clip coupons. So I had to explore other money saving options. That's when I found SAMs club!

Back in my couponing days I would stock up on shredded cheese when it was $1/8oz bag, $.12/oz. I would buy enough to last us till it was it's season to go on sale again {yes, this is a real thing but I'll save that for another post}.  Now that I'm not couponing I still try to find the best deal but not nearly as good as the deals I used to score. I am excited to say have gotten pretty darn close to that stock up cheese price at SAMs and I don't have to spend HOURS searching for the deal! Everything is bulk buy there, which is great for big families like ours. We go through cheese like a bunch of crazy cheese obsessed people! But it's just SO darn delicious!

How to save money on cheese WITHOUT clipping coupons

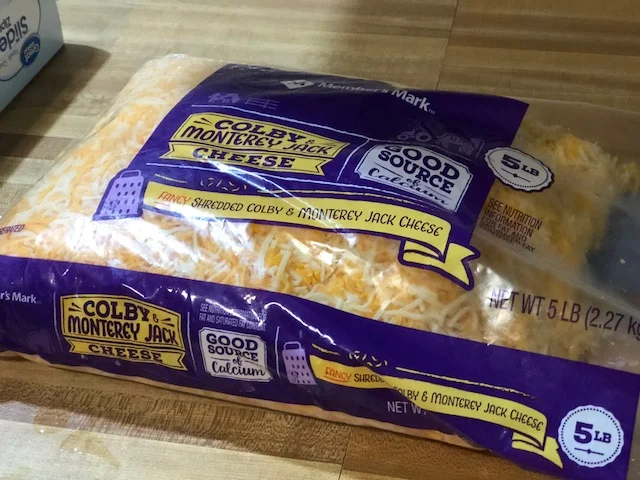
SAMs sells a giant 5 POUND bag of colby/jack shredded cheese for about $12/bag, $.15/oz...seriously affordable! The bag doesn't come with a fancy zipper but it does have a sticky tab you can use to close it. I've found that if you have kids this doesn't work so great. Someone will move things around in the fridge, the cheese will fall over and the next thing you know you're sweeping $10 worth of cheese into the trashcan. 

How to save money on cheese WITHOUT clipping coupons

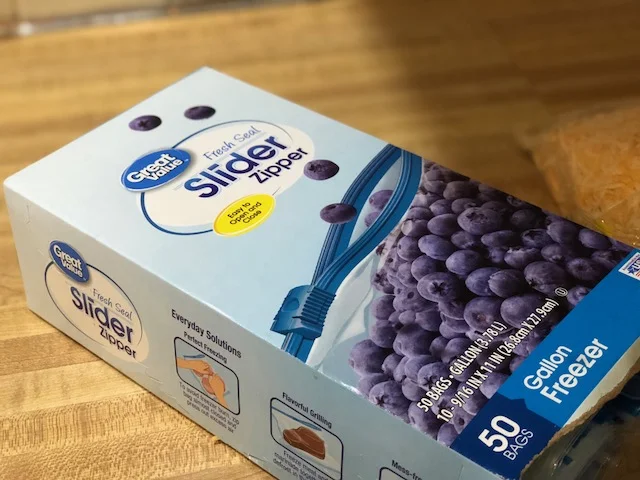
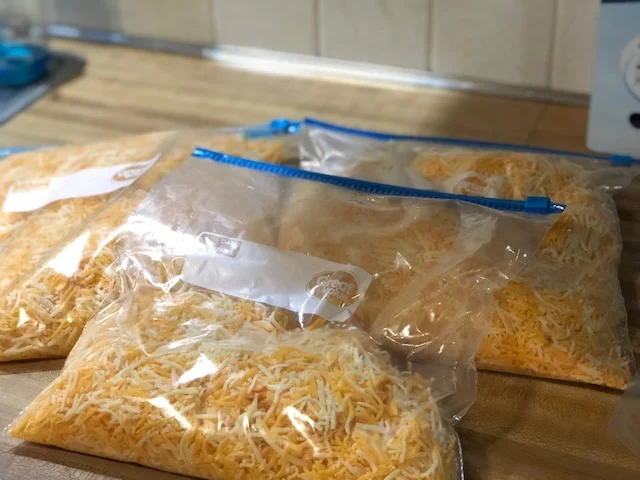
Here's what I do. I buy gallon sized zipper bags from Walmart and divided the cheese into 3 different bags. We typically will go through a bag before its expiration date so I don't usually bother with freezing it. But, if your family won't go through all 5lbs of cheese in that time, pop a couple bags in the freezer and pull them out when you need them. Shredded cheese is perfectly ok to freeze. However, you don't want to freeze sliced or block cheese, it will crumble once it's thawed.

How to save money on cheese WITHOUT clipping coupons

Then once you're done rebagging and storing you're done! Super easy and it's that price every single week! 

If you don't have a SAMs membership ask your family and friends if they do. I am sure you will find someone that would be willing to let you take a shopping trip with them. Then you'll see for yourself that getting one of your own is a GREAT investment for your family too.

6 Easy ways to keep the kids busy in a hotel

6 Easy ways to keep the kids busy in a hotel

Over the years we have done a lot of traveling with our girls. Before our youngest was born we traveled so much that our older three had visited 22 different states in just a few short years! 

Prior to our most recent trip, one of our favorite states to visit was hands down Wisconsin! I know, it sounds crazy to be completely in awe of  Wisconsin...but it's absolutely GORGEOUS! Since our last trip I have to say Florida is in the running for the fave state {outside of Missouri of course ;)!}

We recently took a trip, a 22 hour road trip {that's a whole other post lol} to Florida. We loaded up our four girls plus our niece and hit the road for a little vacay...ok a long vacay, we took two whole weeks off! And boy did we LOVE every second of it! We didn't do the whole Disney thing,  instead we explored everything else Mid-Florida had to offer. We got to see and swim in some AMAZING beaches {if you're ever in Florida you HAVE to stop by Flagler Beach! You won't be disappointed!!}, explored the wildlife conservation areas, roamed with the dinosaurs {ok, not really but we did stop by a really cool dinosaur exhibit that the girls loved}, had a blast at SeaWorld Aquatic, and visited some pretty fun museums. 

Here are some tips and tricks to keeping your sanity in the hotel with the little ones...

SNACKS

Fed kids are happy kids. I know, it kinda goes against parent rules to let your kiddos snack often but when on vacation, those rules don't apply. Have fun, let loose, and let them eat the snacks:)! Trust me, you will thank yourself for this one.

6 easy way to keep the kids busy in a hotel

FORTS

Fort building is a MUST when you're in a hotel. Typically we bring our own blankets and pillows when staying in a hotel so there is an abundance of fort making things around the hotel room. Most hotels have little side tables, a chair or two, a night stand, and of course a bed. If you have kiddos you probably have two beds and the space between is a PERFECT space for fort building. Just lay a long blanket or sheet from one bed extending to the next and viola you have built the perfect cave for your kiddos to enjoy! Bring along flashlights and you will be mom of the year in their eyes. This is my absolute most favorite fun activity our girls do to keep themselves busy in a hotel...actually pretty much anywhere! They are fort building machines!

6 easy ways to keep the kids busy in a hotel

GAMES

Our girls love playing cards. Their favorites are rummy, solitaire, go fish, and trashcan. All can be played with a single regular deck of cards {you can pick up a two pack at the dollar store for a buck!}. If your kiddos aren't into cards or aren't old enough for cards there are lots of quieter board games out there. I suggest bringing games that have very little pieces. Here's a list of board games with few to little pieces.

  • Guess Who

  • Sorry

  • Yahtzee

  • Checkers

A list of non-board games you can play

  • Pictionary {we use small dry erase board for this}

  • charades

  • wall puppets with flashlights

  • hide and seek in the dark {this is one of our kiddos favorite games}

6 easy ways to keep the kids busy in a hotel

SWIMMING

Most hotels have swimming pools these day. While we were in Florida our girls practically lived in their swimsuits the whole two weeks! If we weren't at the beach or exploring the town we were in the pool. We bought some inexpensive pool noodles and floaties for the girls and it made swimming even better! Although wearing a swimsuit, and I'll be honest summer in general, isn't really my favorite thing, we had a lot of fun hanging out in the pool. Our oldest daughter mastered her swimming skills and the younger three got even more comfortable with water. By the end of our vacation they were little tadpoles!

6 easy ways to keep the kids busy in a hotel

OUTSIDE PLAY

If you are lucky enough to strike this hotel GOLD take advantage of it! Our hotel in Florida had an AMAZING grassy oasis that was perfect for the girls to run around and be kids. On nights we'd get back to the room too early for bed my husband and I would sit on the patio enjoying an adult beverage while the girls played and chased tiny lizards {surprisingly they caught several of those quick little guys}.

I will say this is very rare. Out of all the hotels we've stayed in this was one of the few that has had this outdoor area. 

6 easy ways to keep the kids busy in a hotel

ELECTRONICS

I know you are saying to yourself 'I don't want my kiddos mindlessly in front of the electronics' but like with everything, things are good in moderation. If it's been a crazy day and you really need some quiet time turn on the tv and let the kids enjoy a movie while you catch your breath. You'll be glad you did.

6 easy ways to keep the kids busy in a hotel